
#статьи
-
0
Python — самый популярный язык программирования, на котором разрабатывают ИИ, игры и сложные системы. Разбираемся с его установкой.
Иллюстрация: Skillbox Media

Любитель научной фантастики и технологического прогресса. Хорошо сочетает в себе заумного технаря и утончённого гуманитария. Пишет про IT и радуется этому.
Python — это высокоуровневый язык программирования общего назначения с минималистичным и простым в освоении синтаксисом. Он был создан под влиянием языка ABC, который изначально задумывался как обучающий и над которым ранее работал автор Python Гвидо ван Россум.
К сожалению, не все ОС содержат Python по умолчанию. В таких случаях, чтобы начать программировать на языке, его придётся установить. В этой статье мы расскажем, как это сделать.
Гайд по установке Python:
- Какую версию выбрать
- Как установить
- Как начать работать
- Как подключить к VS Code
Вообще, для решения простых задач или знакомства с языком хватит и онлайн-интерпретатора. Это сервис, который позволяет писать и запускать код прямо в браузере, ничего не скачивая. Самые популярные онлайн-интерпретаторы — Replit, Programiz и Online Python.
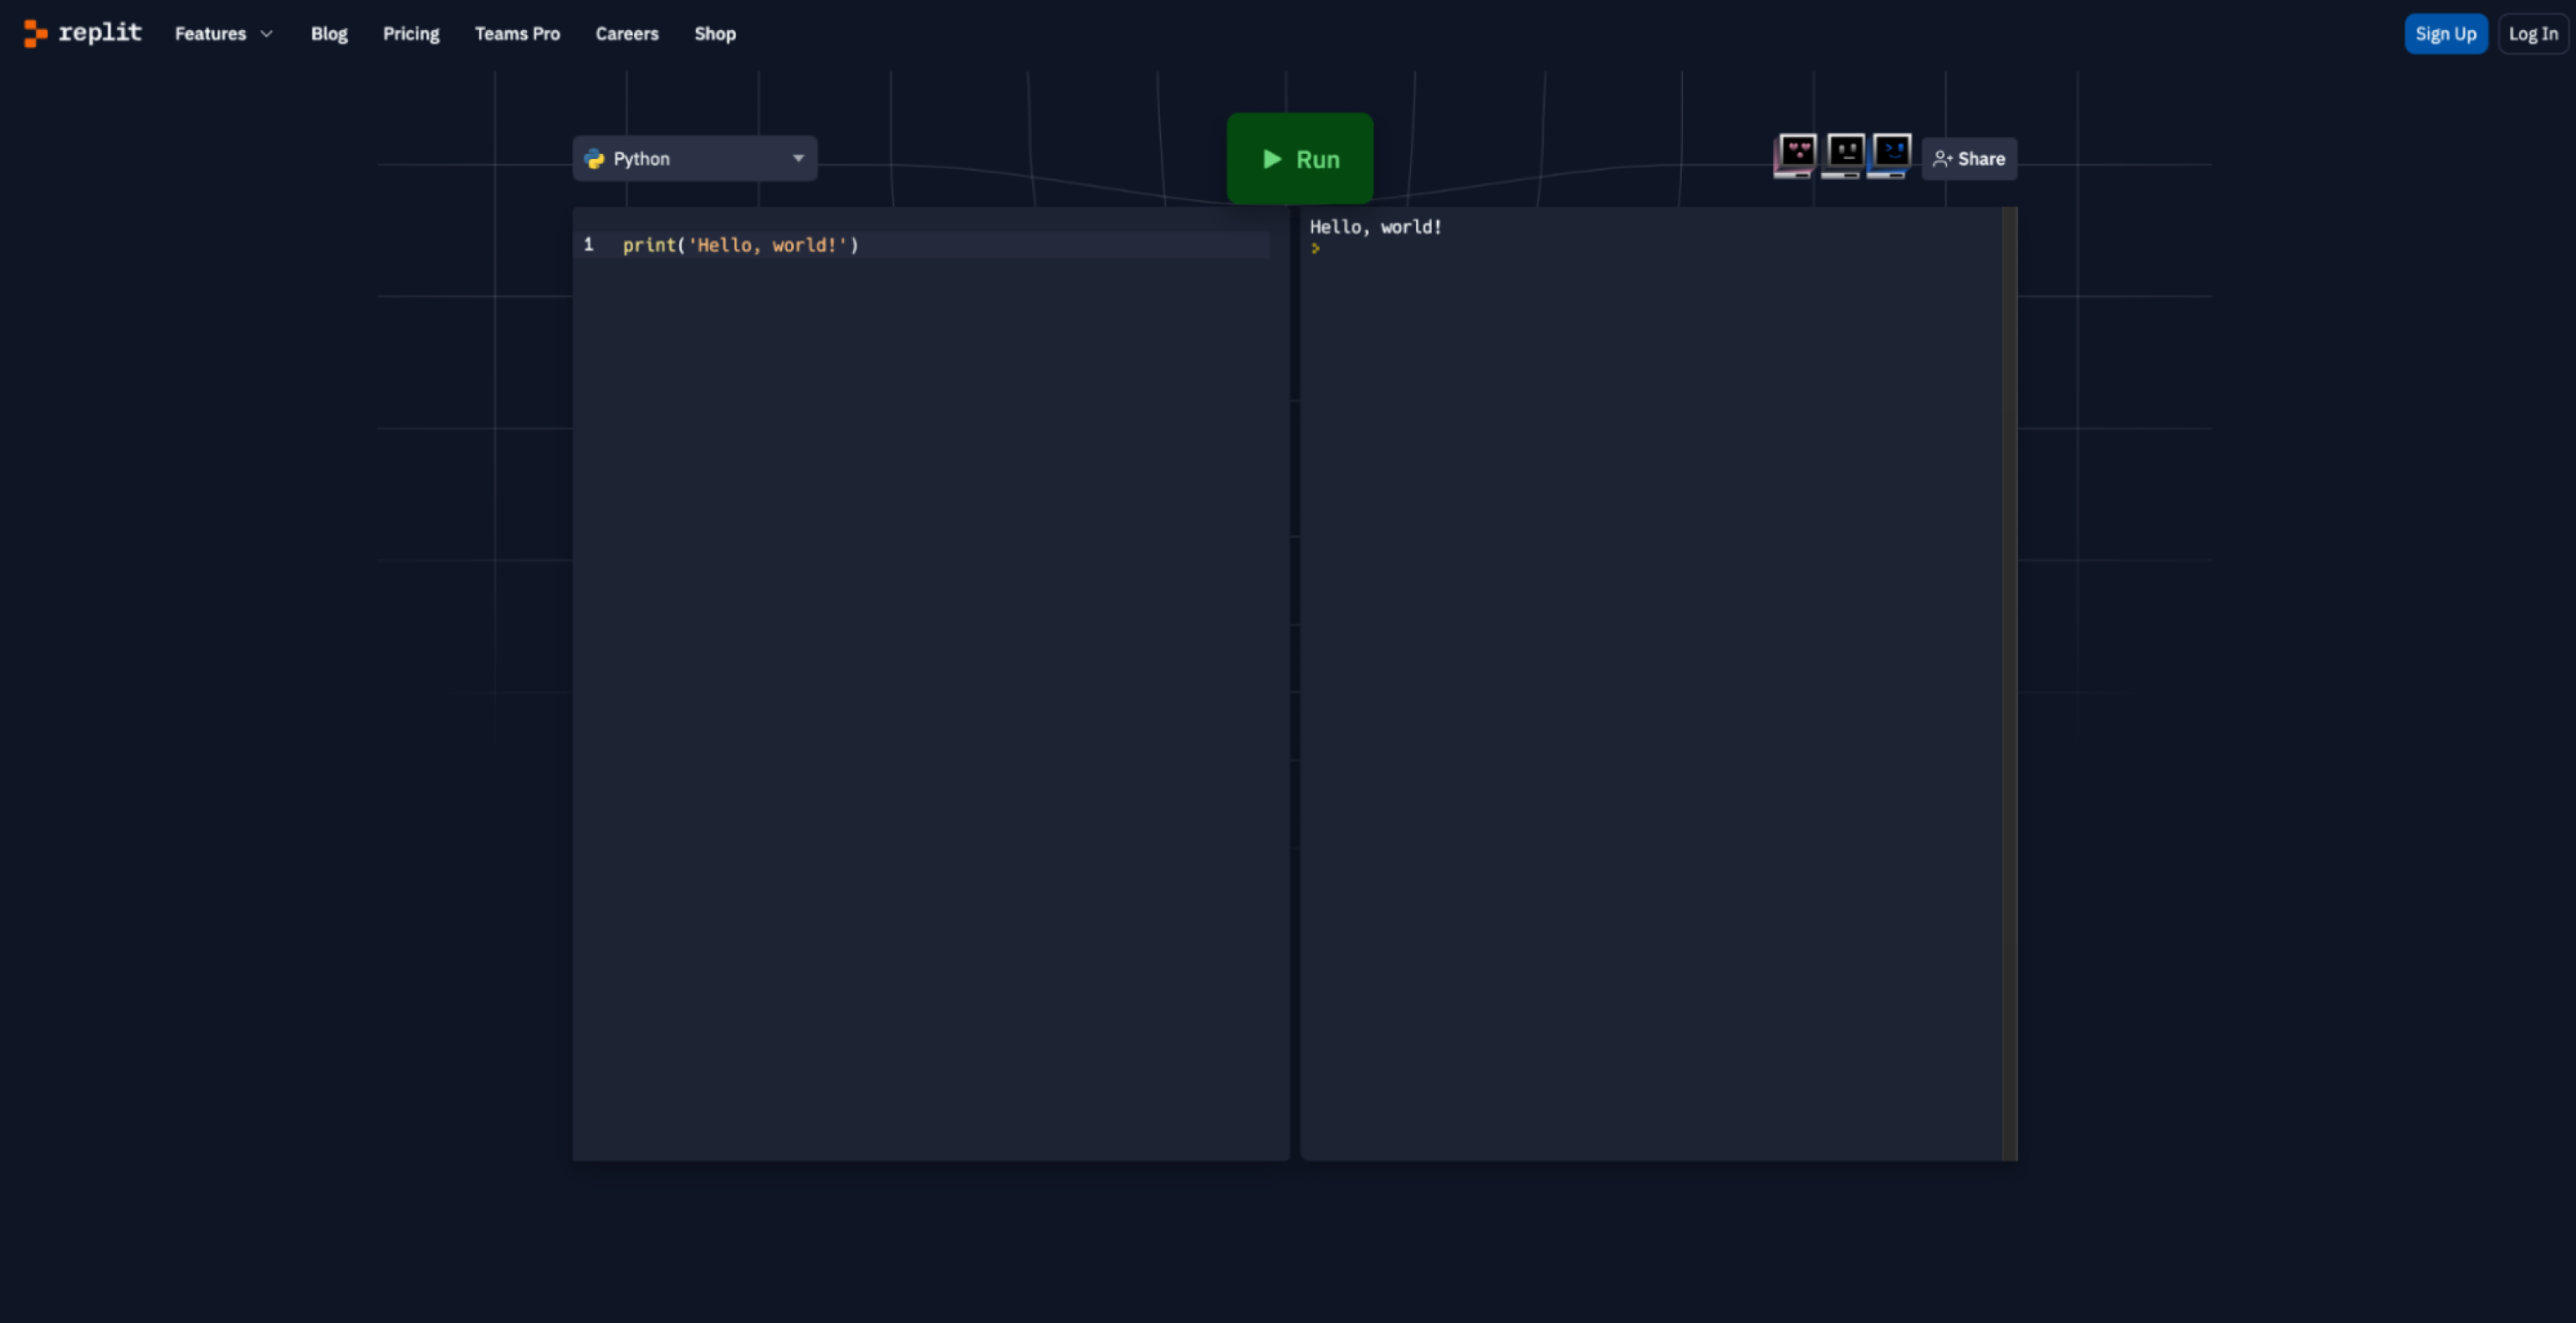
Скриншот: Skillbox Media
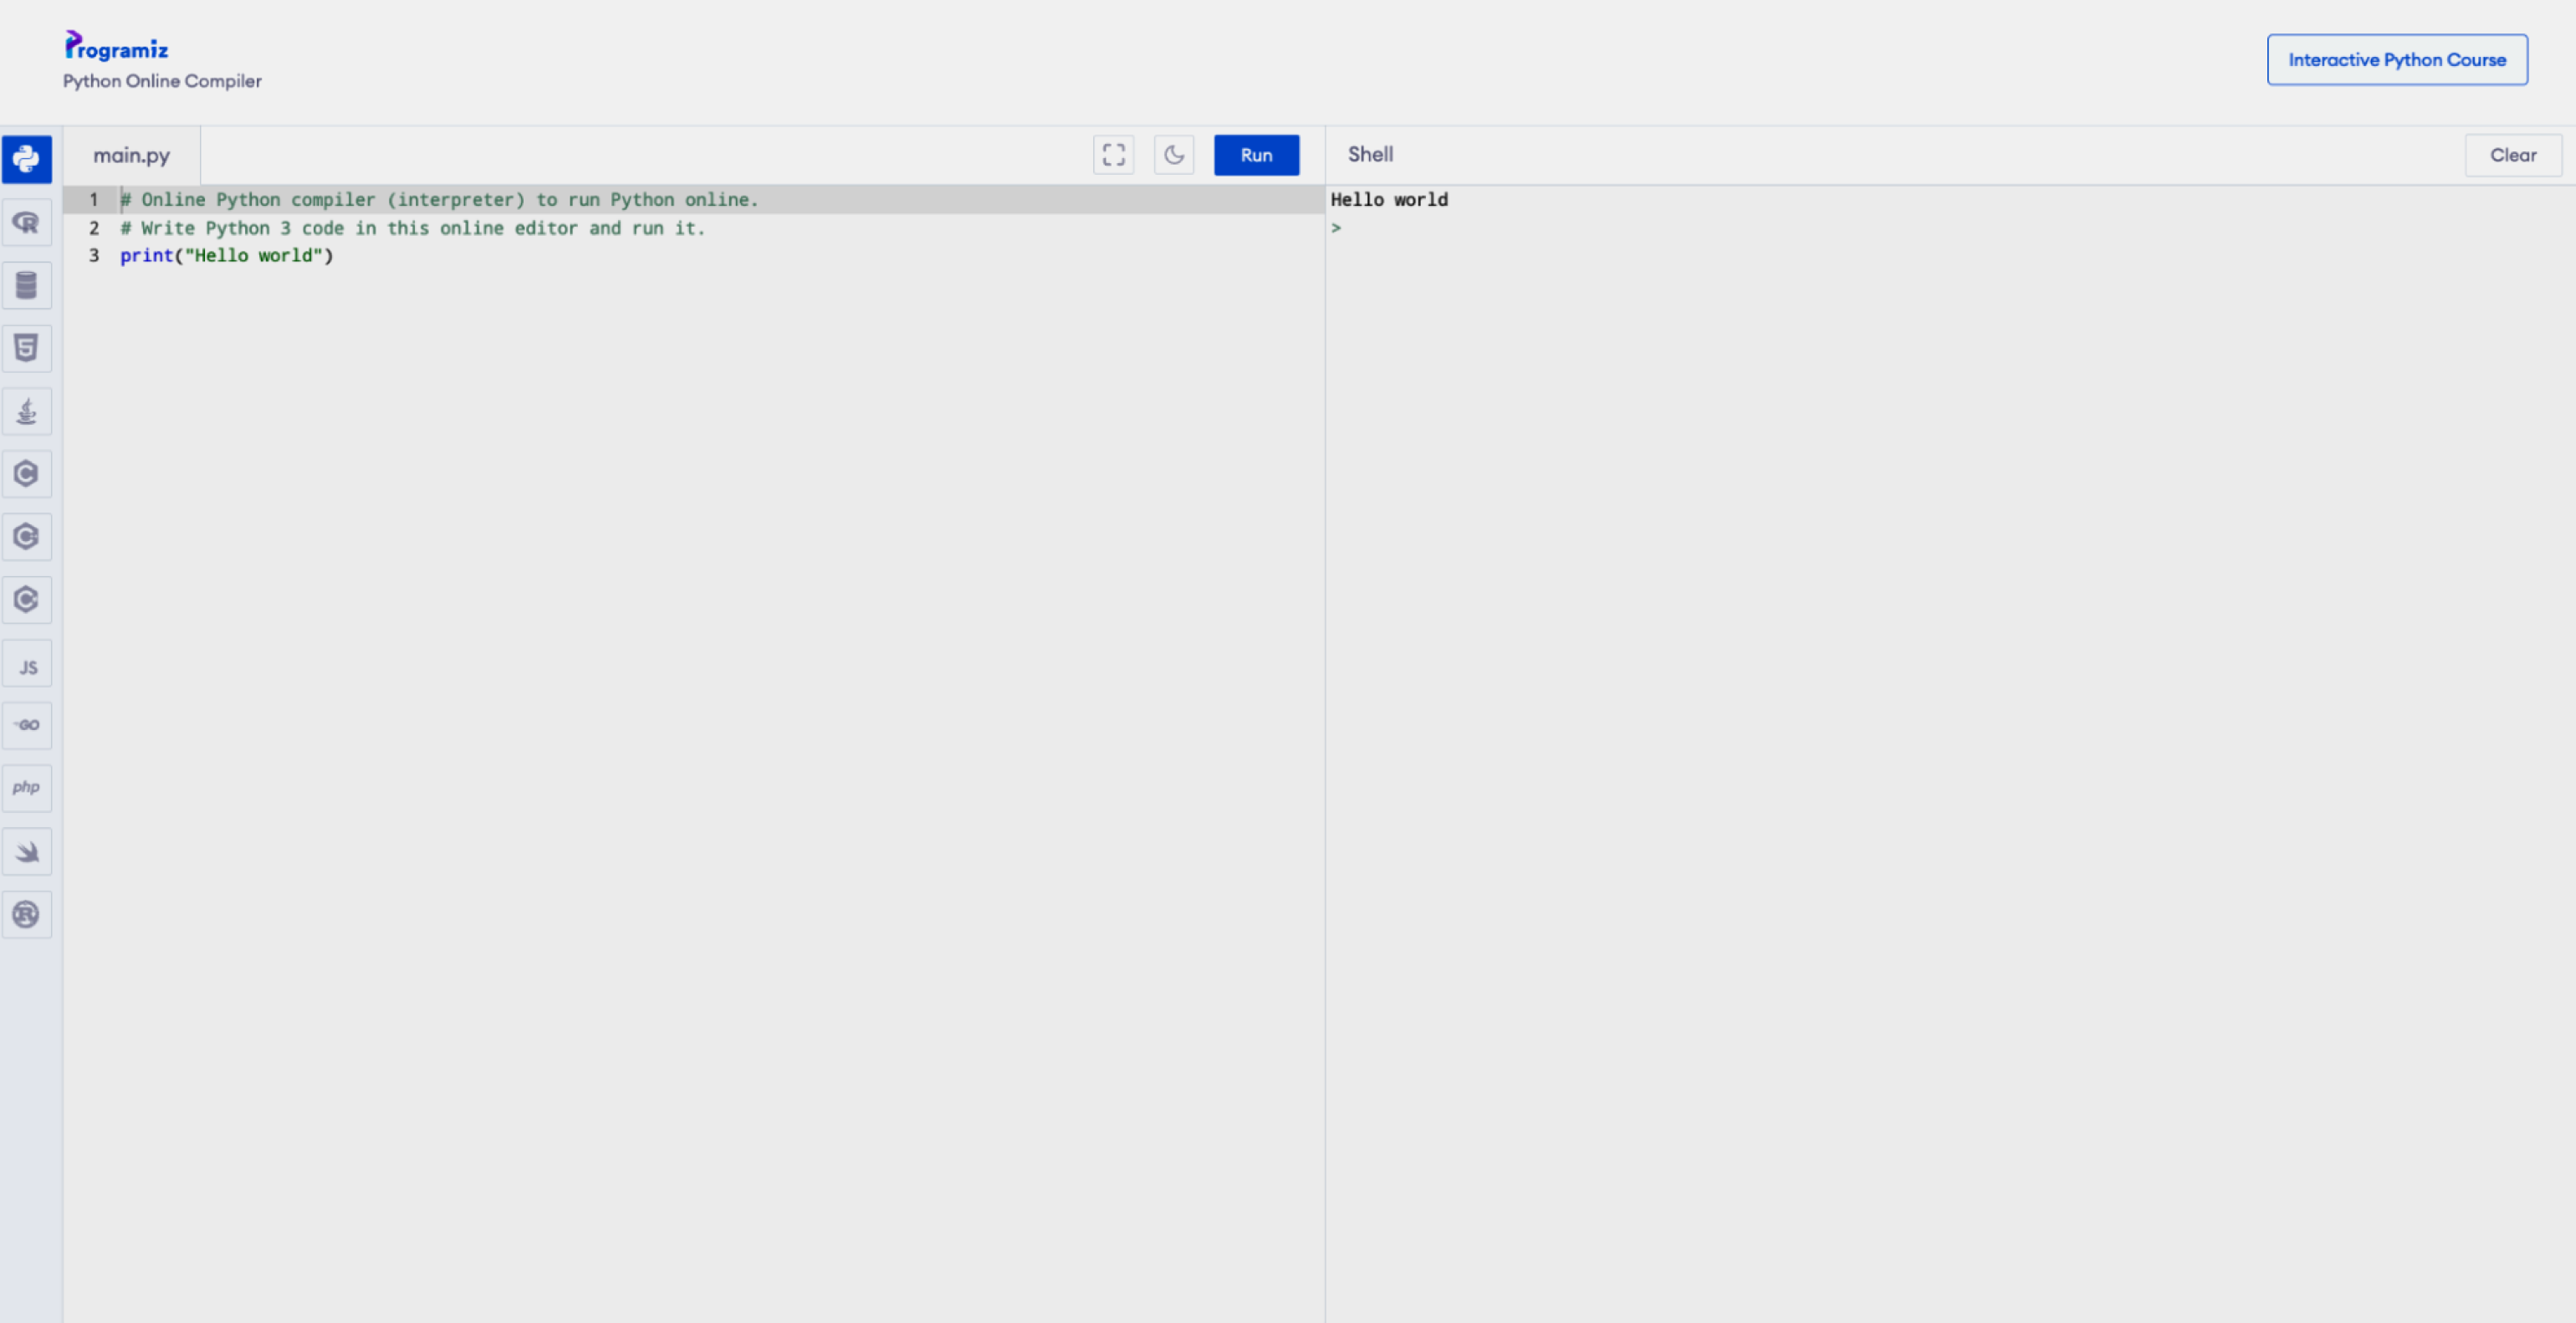
Скриншот: Skillbox Media
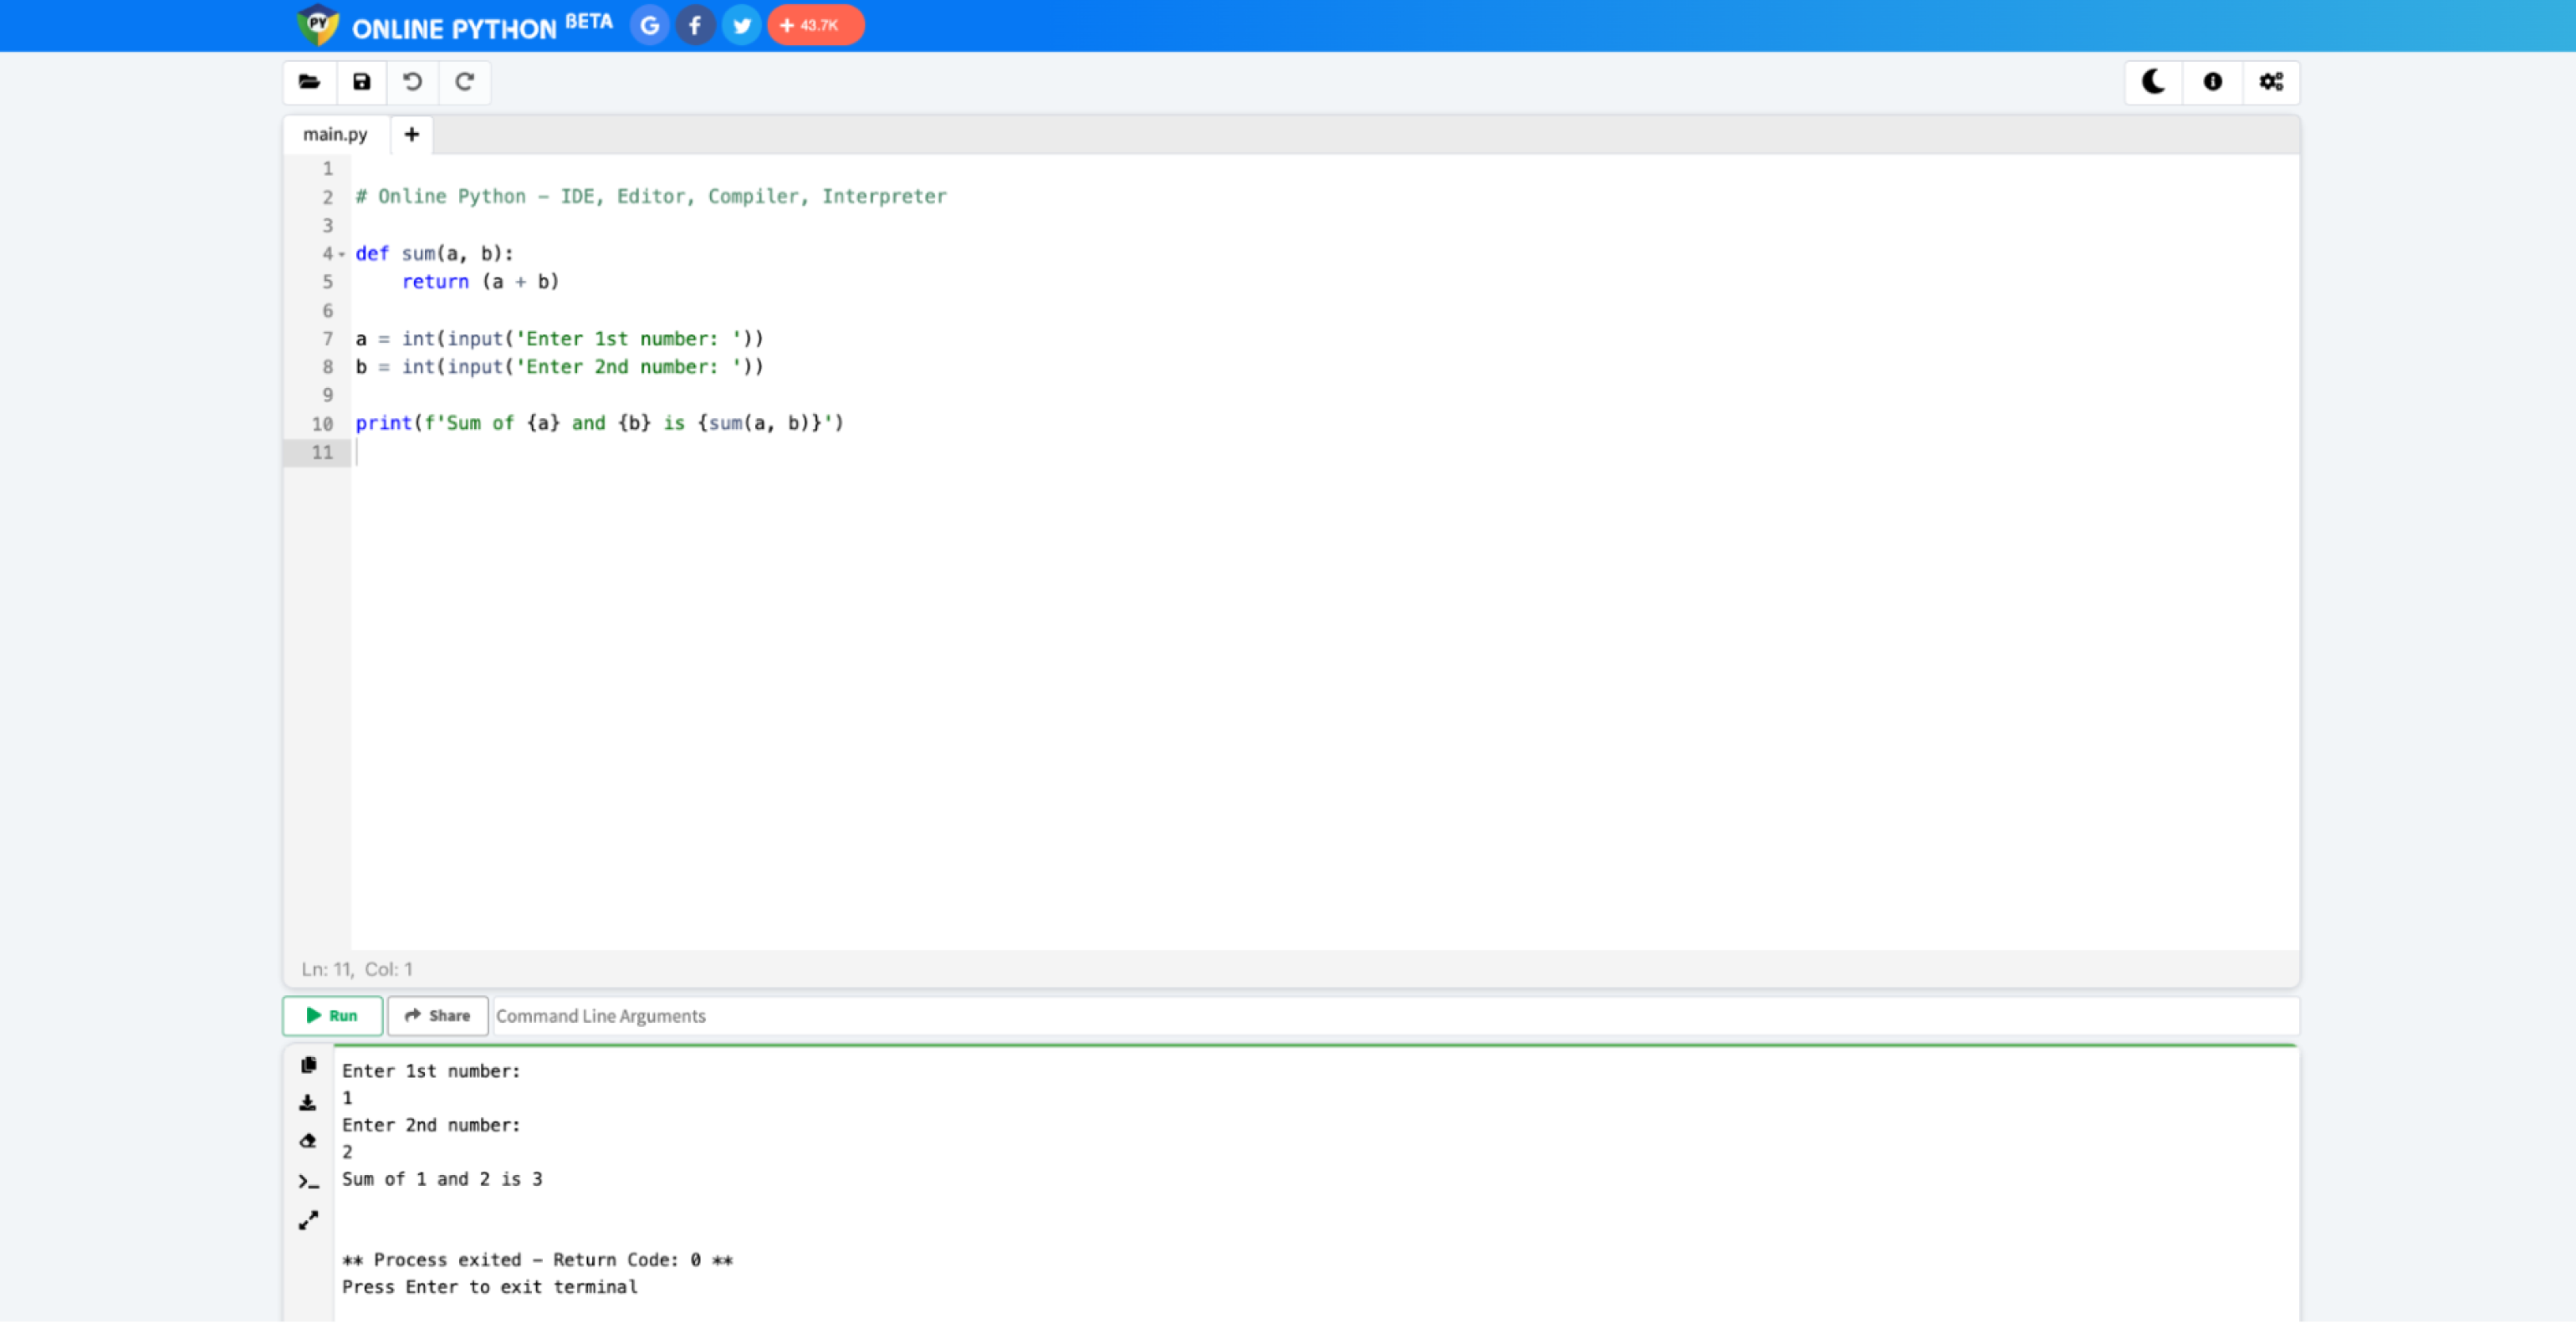
Скриншот: Skillbox Media
Это хороший инструмент, но только для написания простых программ. Там сложно тестировать приложения, полноценно работать с файлами и использовать продвинутые возможности языка.
Для полноценной разработки всё-таки нужно будет установить Python на компьютер. Но, поверьте, оно того стоит: вы сможете легко подключать сторонние библиотеки, использовать утилиты и создавать сложные проекты.
Выбор версии языка — тоже важный этап. Очевидно, что в новых версиях больше интересных фишек и, как правило, меньше багов — поэтому для собственных проектов лучше скачивать самый свежий дистрибутив. На момент написания статьи это Python 3.11.2.
Однако для поддержки старых проектов, которые не могут переехать на Python 3, придётся скачивать Python 2 и разбираться в различиях версий. Поэтому даже в 2023 году в вакансиях среди требований можно найти «уверенное знание Python 2.7».
В состав базовой версии Python входят следующие компоненты:
- IDLE — простая среда разработки Python-программ;
- документация — инструкция по использованию Python;
- стандартная библиотека — набор функций, которые упрощают работу с числами, файлами, API сторонних сервисов и так далее;
- пакетный менеджер PIP — утилита для скачивания и установки библиотек, фреймворков и других пакетов, расширяющих функциональность Python;
- стандартный набор тестов — чтобы проверять надёжность программы;
- Python Launcher — приложение для запуска программ с расширением .py.
Этого набора вполне хватит, чтобы начать изучение языка и писать простые программы.
Вы читаете эту статью, потому что хотите освоить «змеиный» язык? Присмотритесь к этому курсу Skillbox — он подойдёт тем, кто хочет начать работать с Python программирования с нуля.
Перед установкой убедитесь, что ваш компьютер удовлетворяет системным требованиям:
- 64- или 32-разрядный процессор на архитектуре Intel или AMD;
- 2 ГБ оперативной памяти, желательно 4 ГБ;
- 5 ГБ свободного места в памяти компьютера;
- версия операционной системы: не ниже Windows 7, macOS X 10.11, Red Hat Enterprise Linux 6/7.
Дистрибутивы Python есть для всех популярных операционных систем, они перечислены на официальном сайте python.org. По большому счёту, не так важно, какую конкретно версию Python вы скачаете, — главное, чтобы её номер начинался с цифры 3.
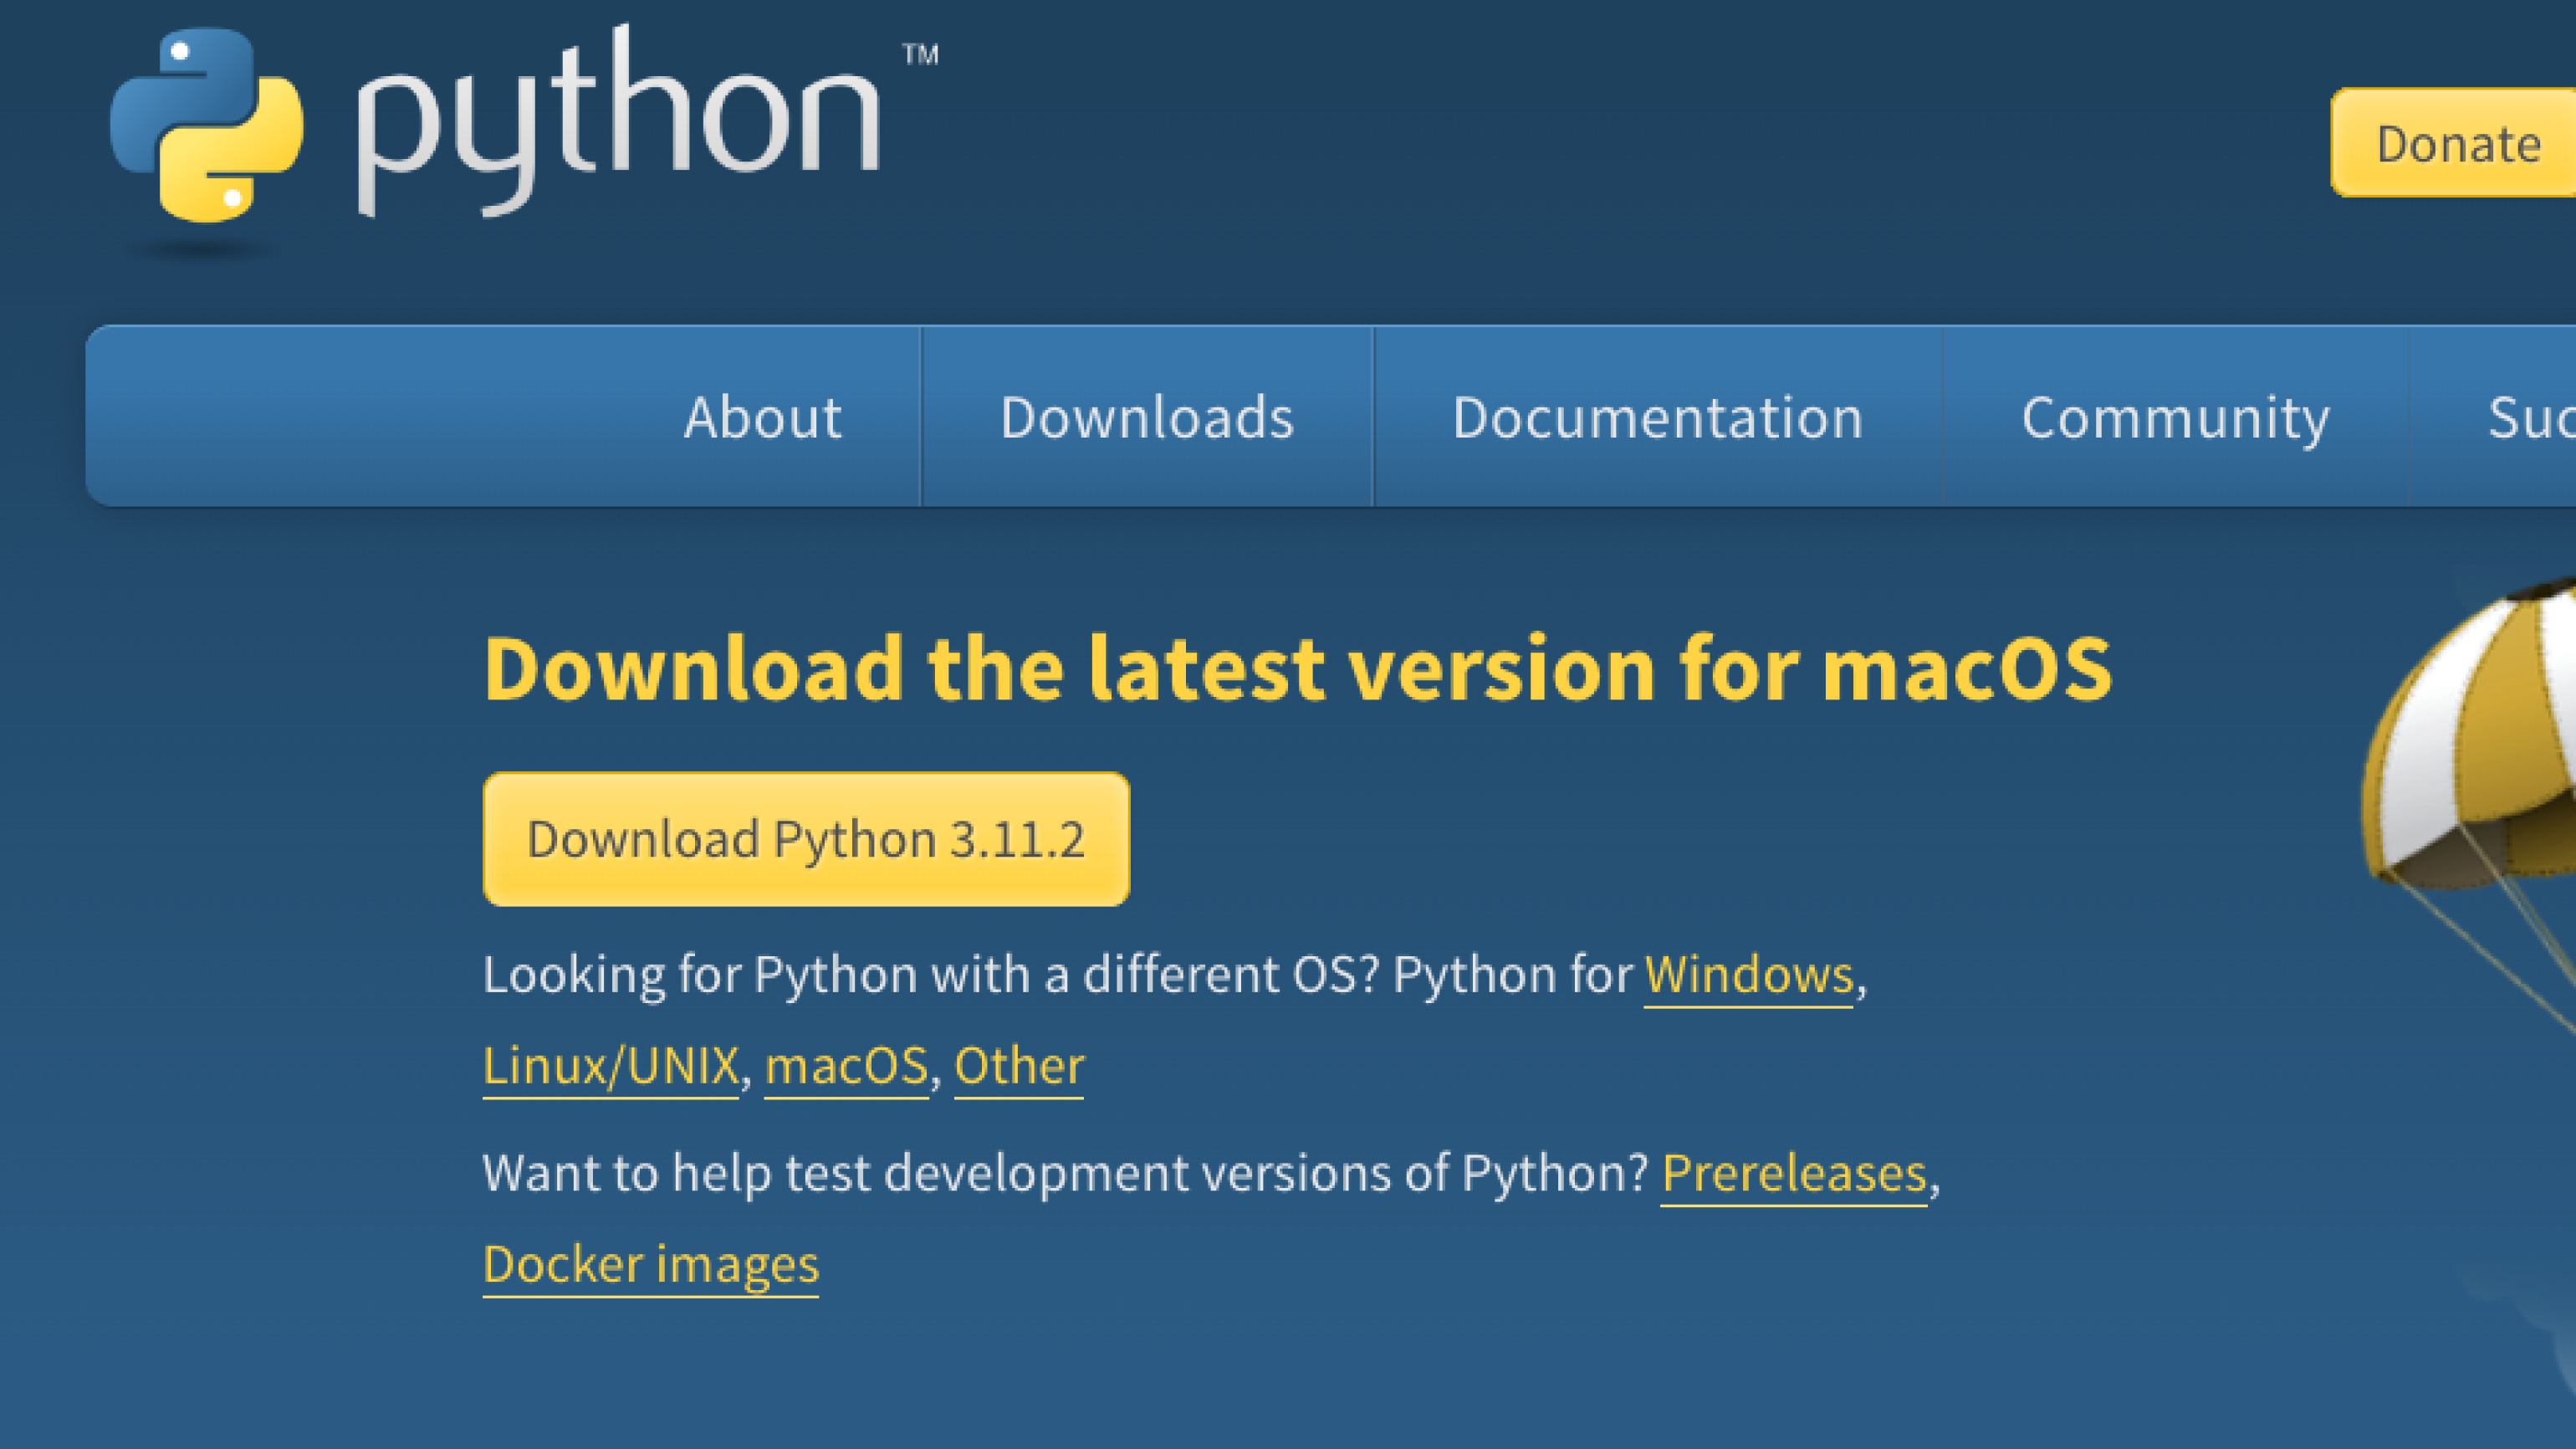
Скачайте установочный файл, нажав на жёлтую кнопку Download Python, и запустите его.
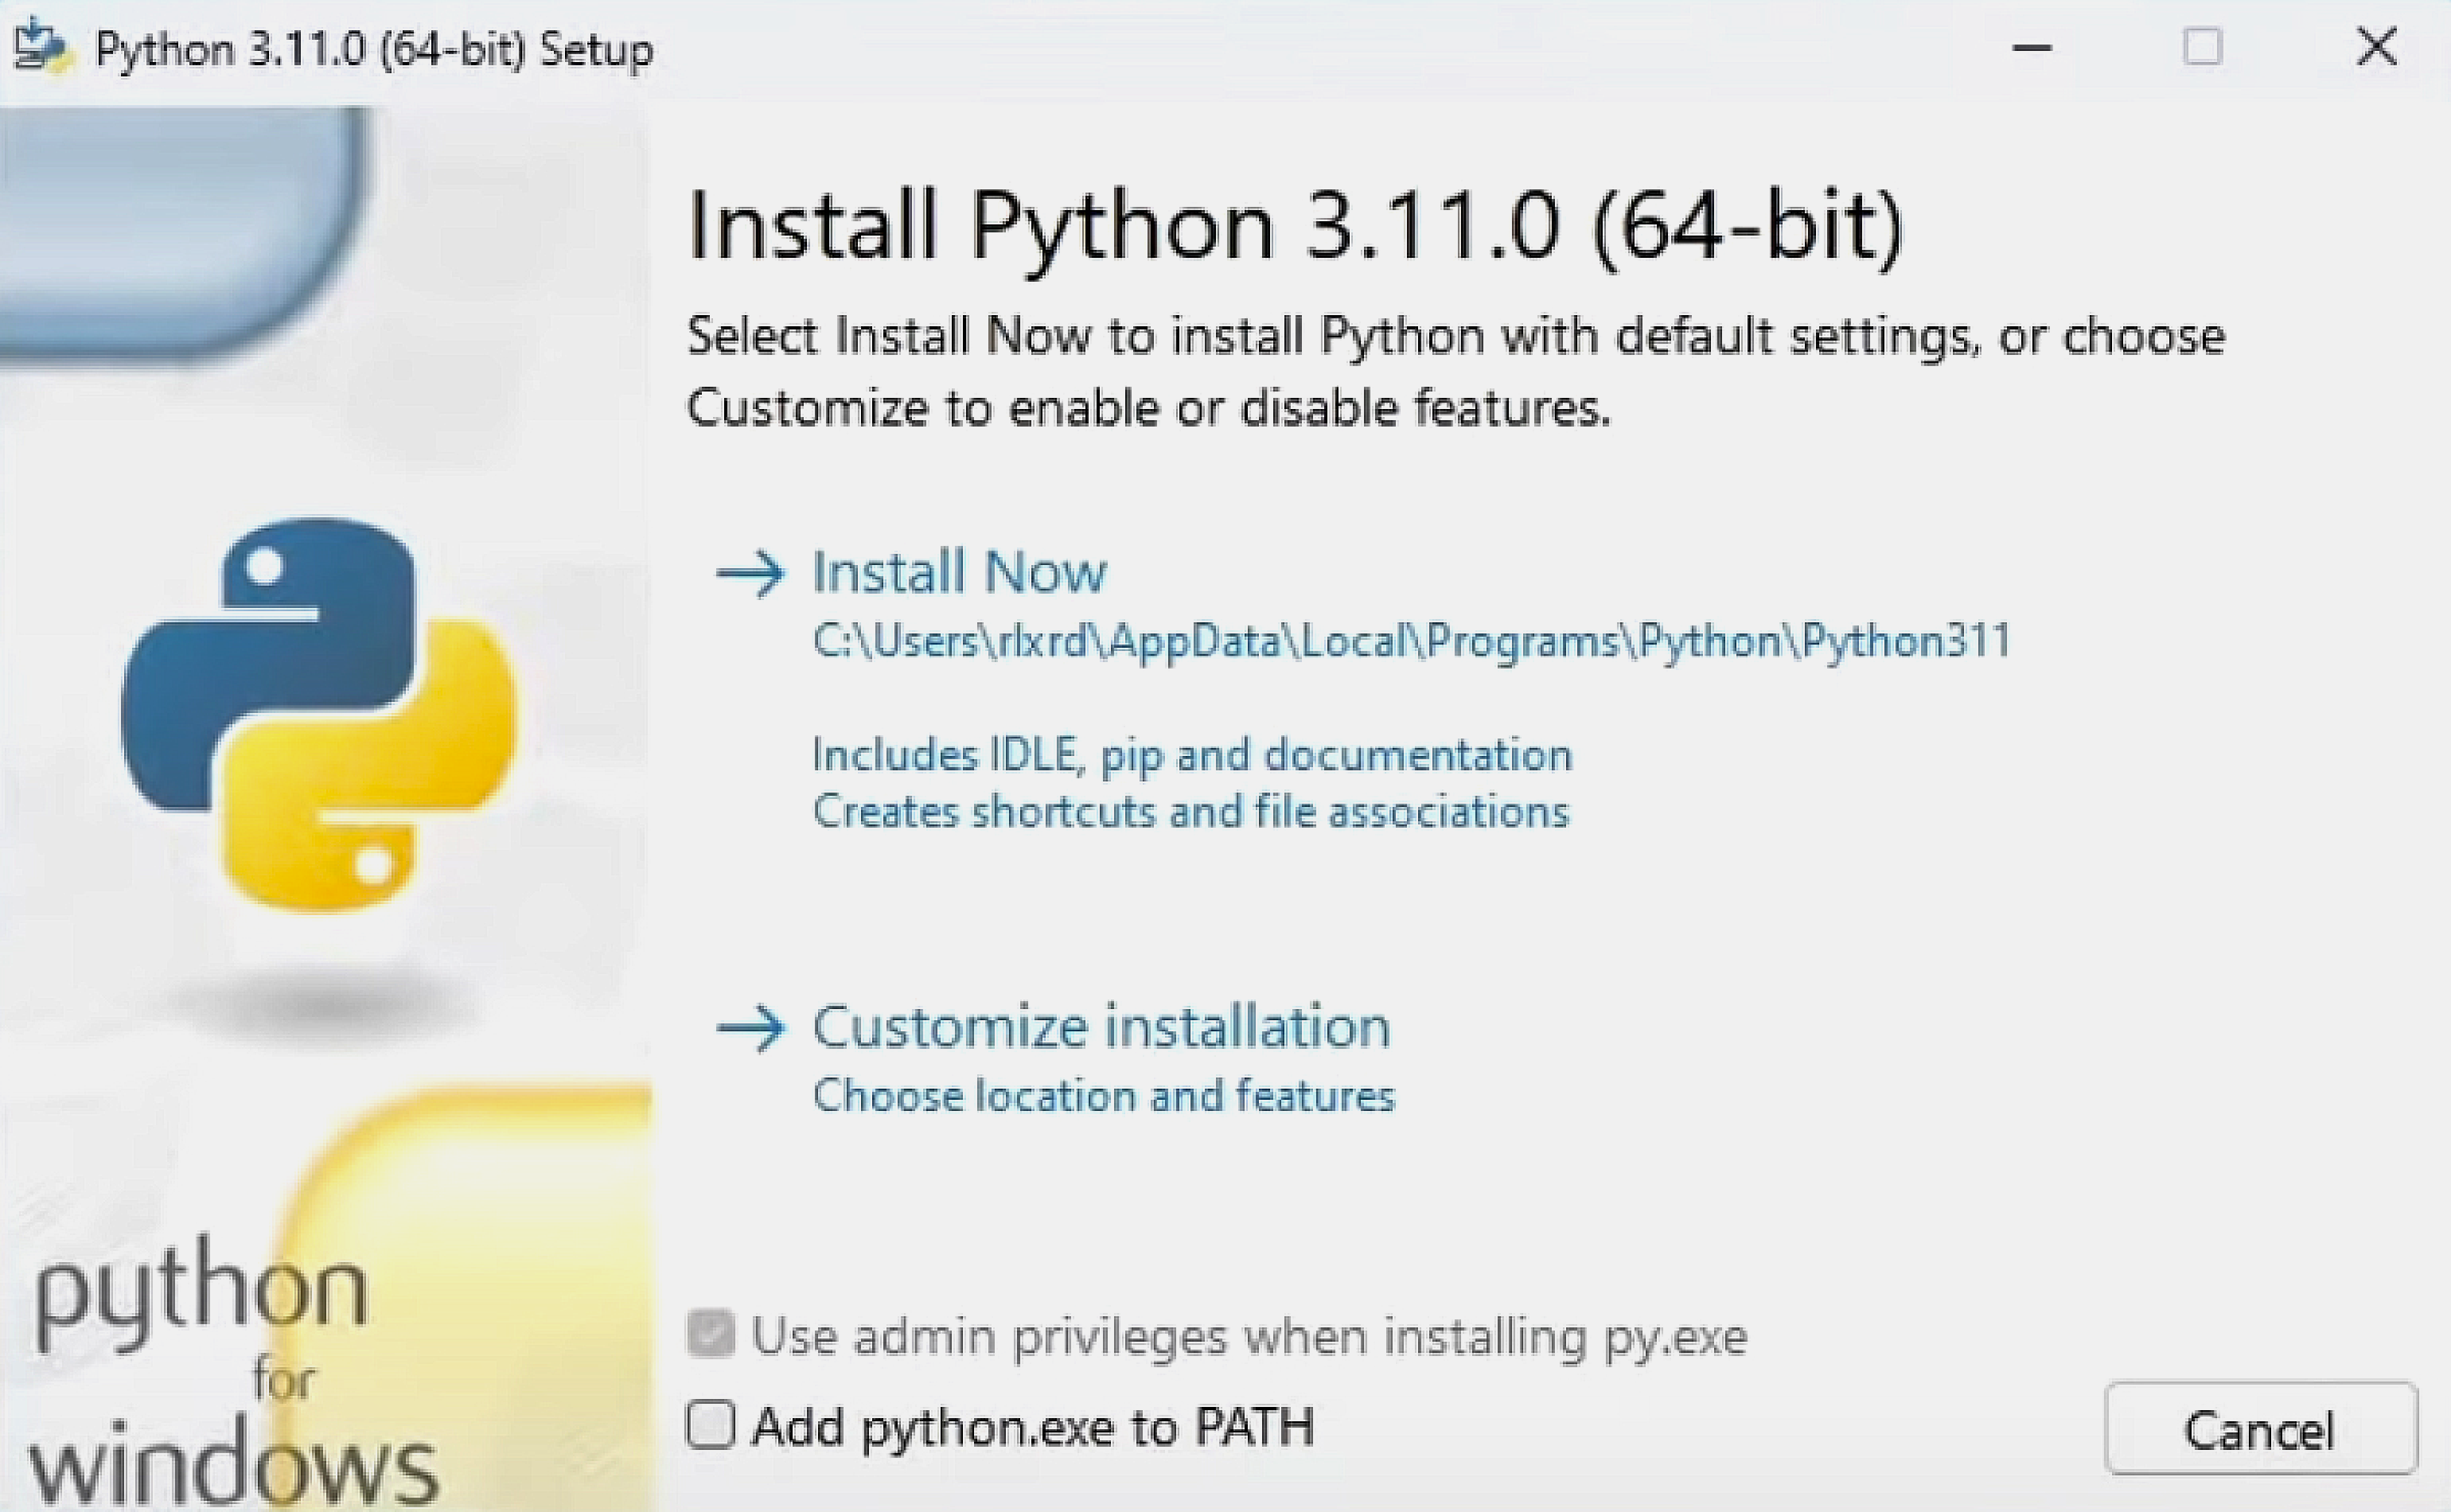
Выберите путь установки и поставьте обе галочки: во втором пункте мы указываем, что нужно добавить Python в переменную окружения PATH — это позволит вызывать его из любой директории. Затем выбираем «Установка для всех пользователей» (Install for all users), нажимаем Install Now и разрешаем приложению вносить изменения:
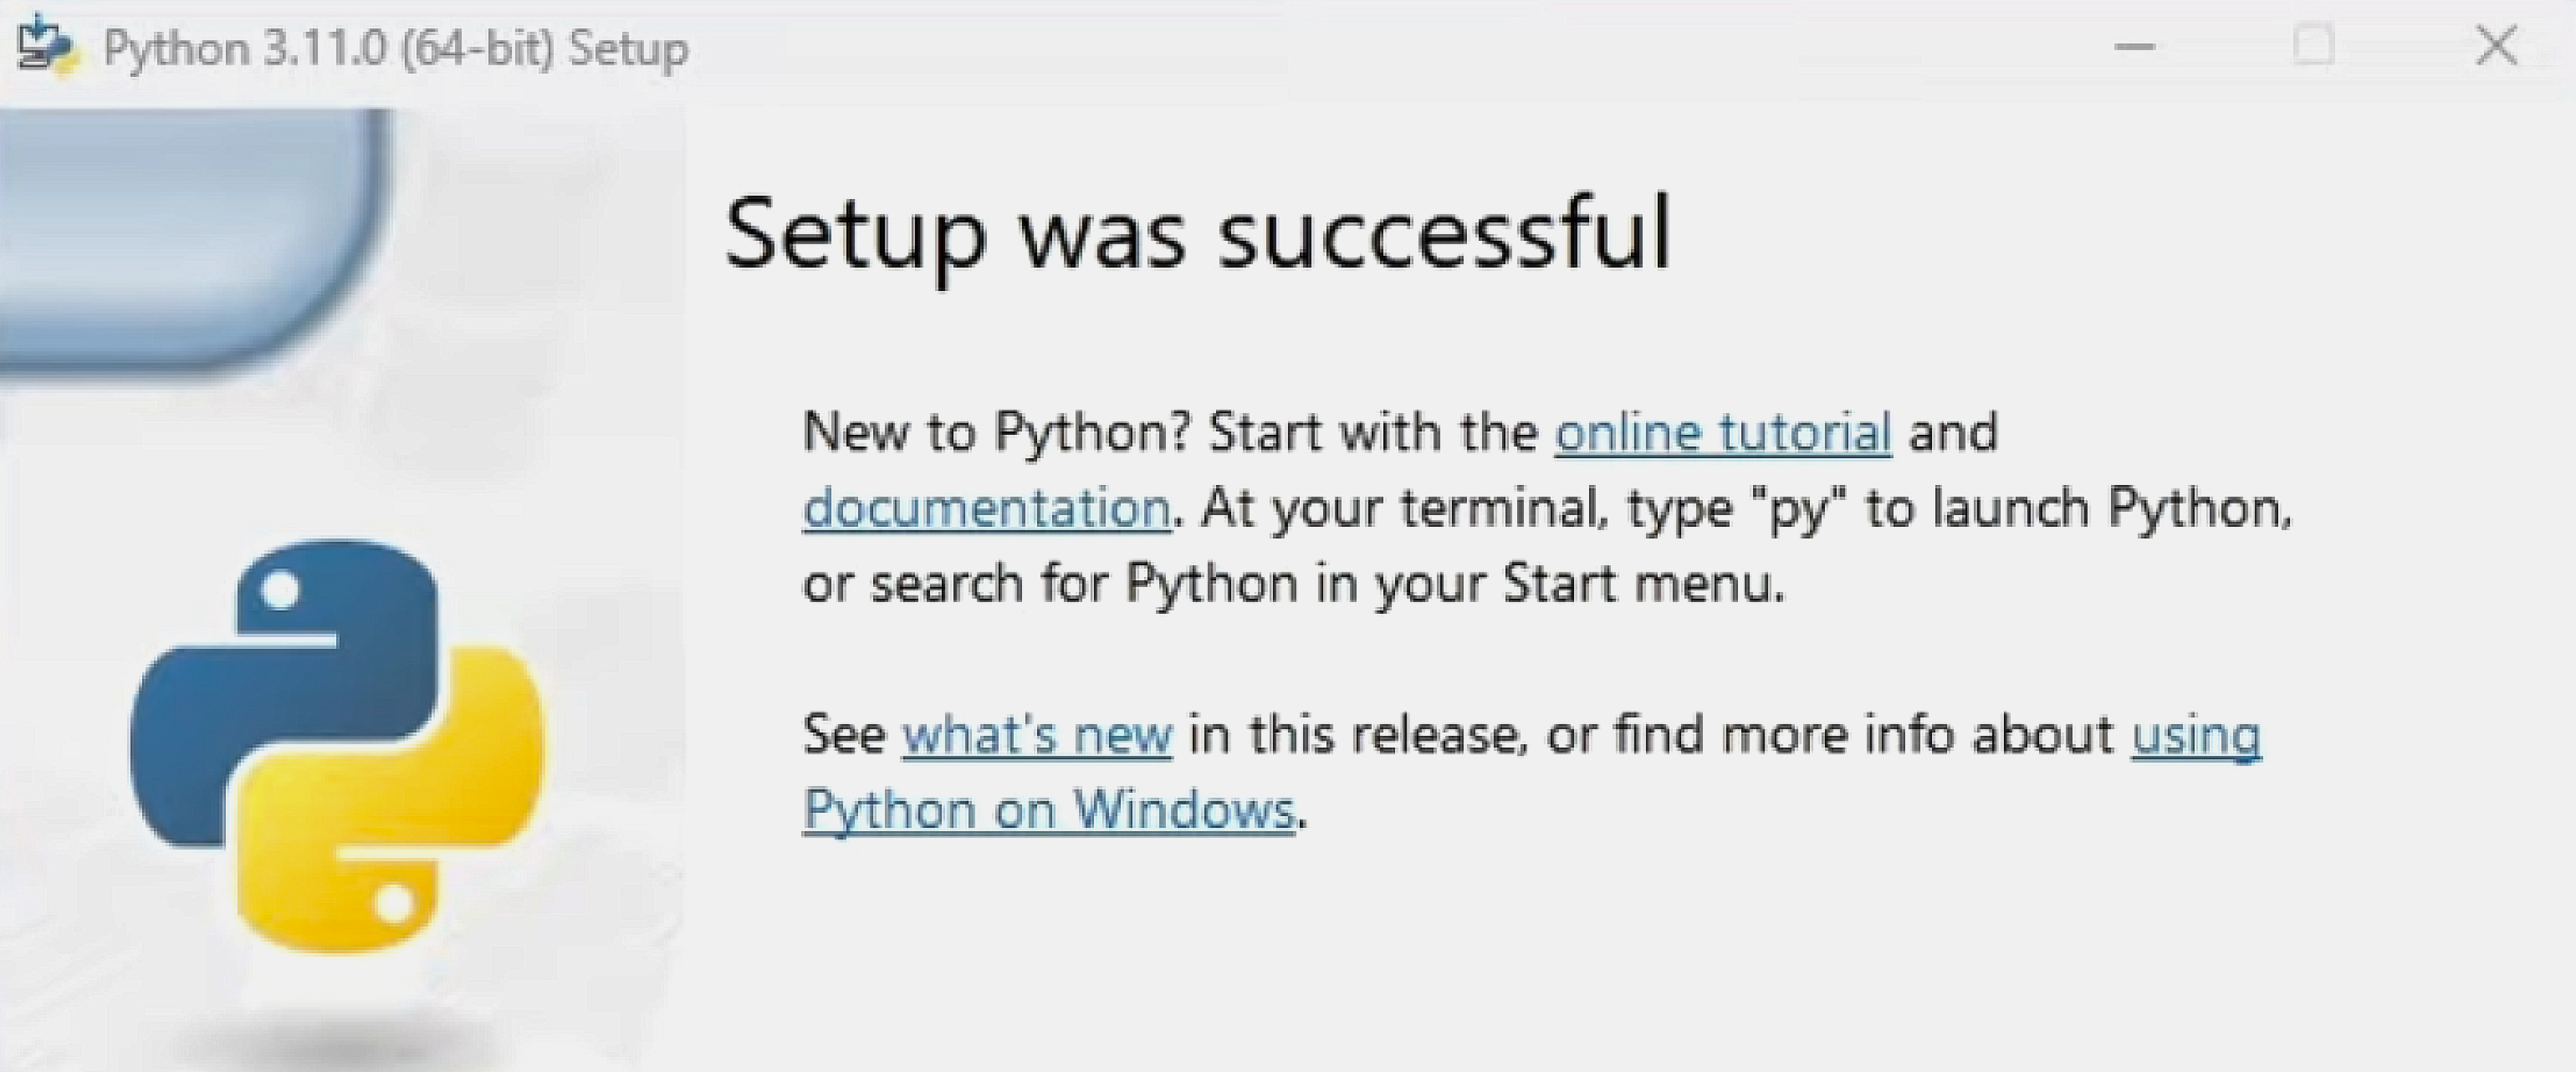
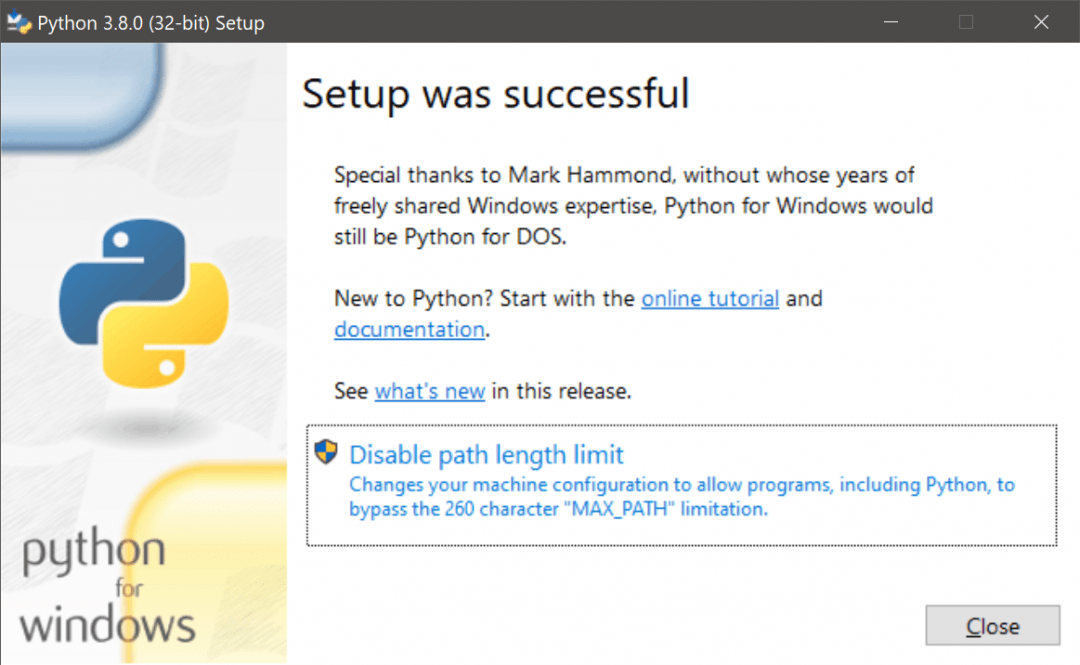
Когда всё установится, вы увидите окно завершения инсталляции:
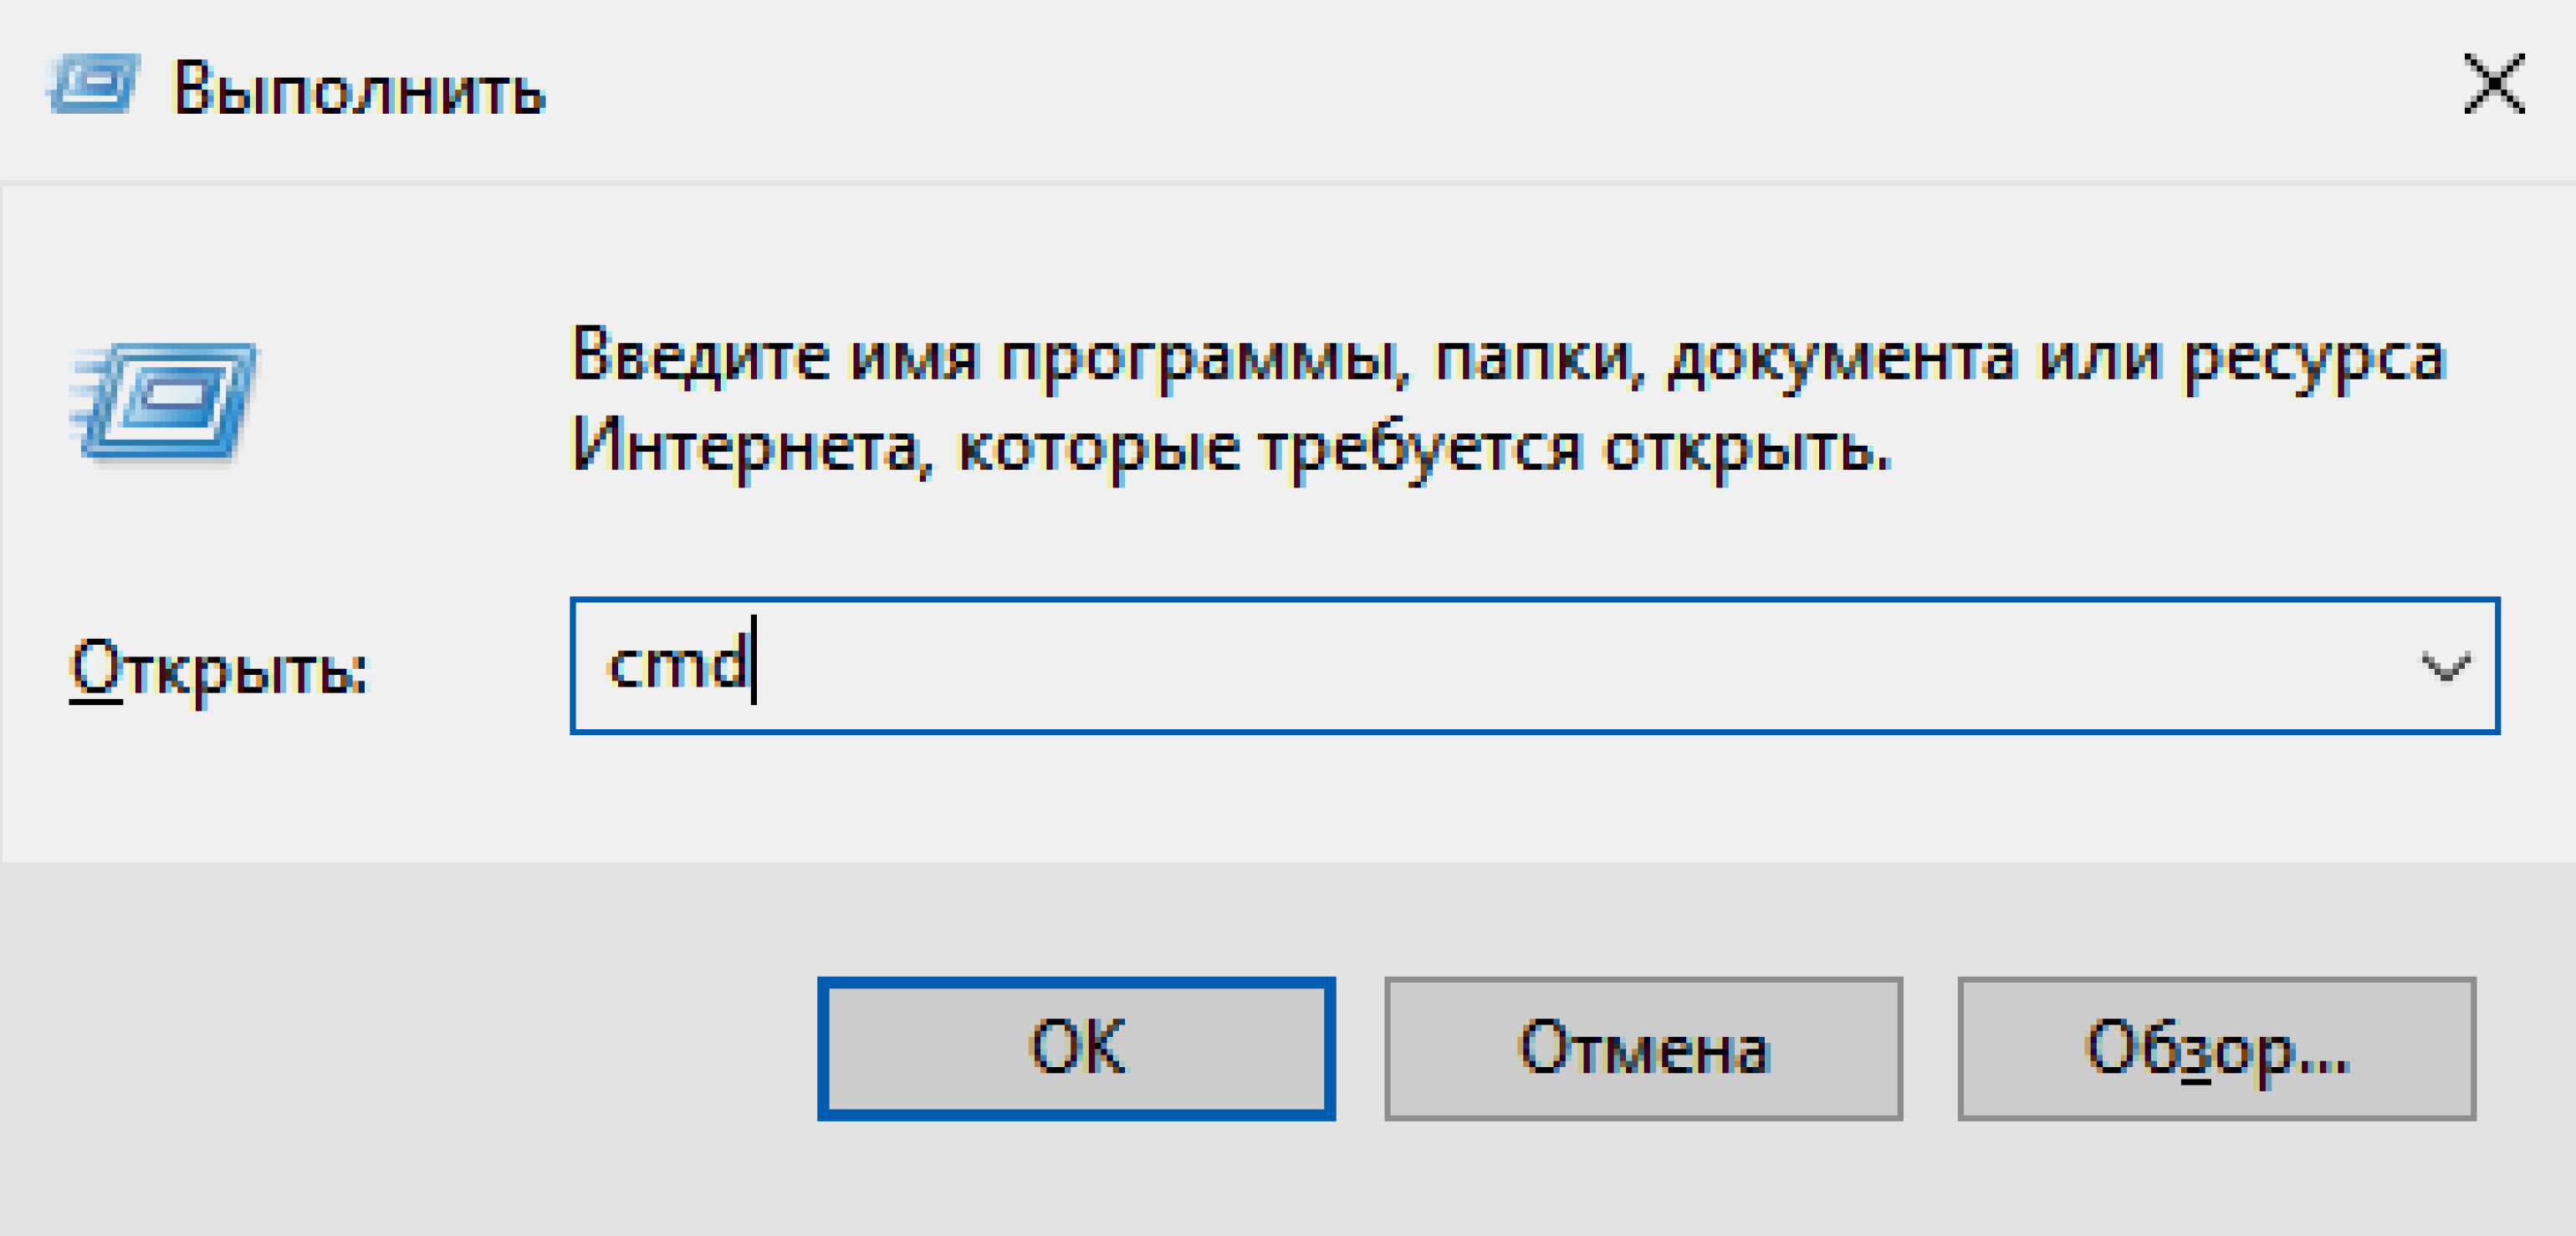
Теперь проверим, что Python действительно установлен. Для этого откроем окно «Выполнить» сочетанием клавиш Win + R и введём cmd:
Откроется командная строка. Введите в ней команду py или python, чтобы запустить интерпретатор. На экране появится примерно такое сообщение:
Microsoft Windows [Version 10.0.19043.1889]
(c) Корпорация Майкрософт (Microsoft Corporation). Все права защищены.

C:\Users\User>py
Python 3.11.2 (tags/v3.11.2:9c7b4bd, Feb 2 2023, 18:38:48) [MSC v.1932 64 bit (AMD64)] on win 32
Type "help", "copyright", "credits" or "license" for more information.
>>>
Оно означает, что Python установлен на ваш компьютер и работает.
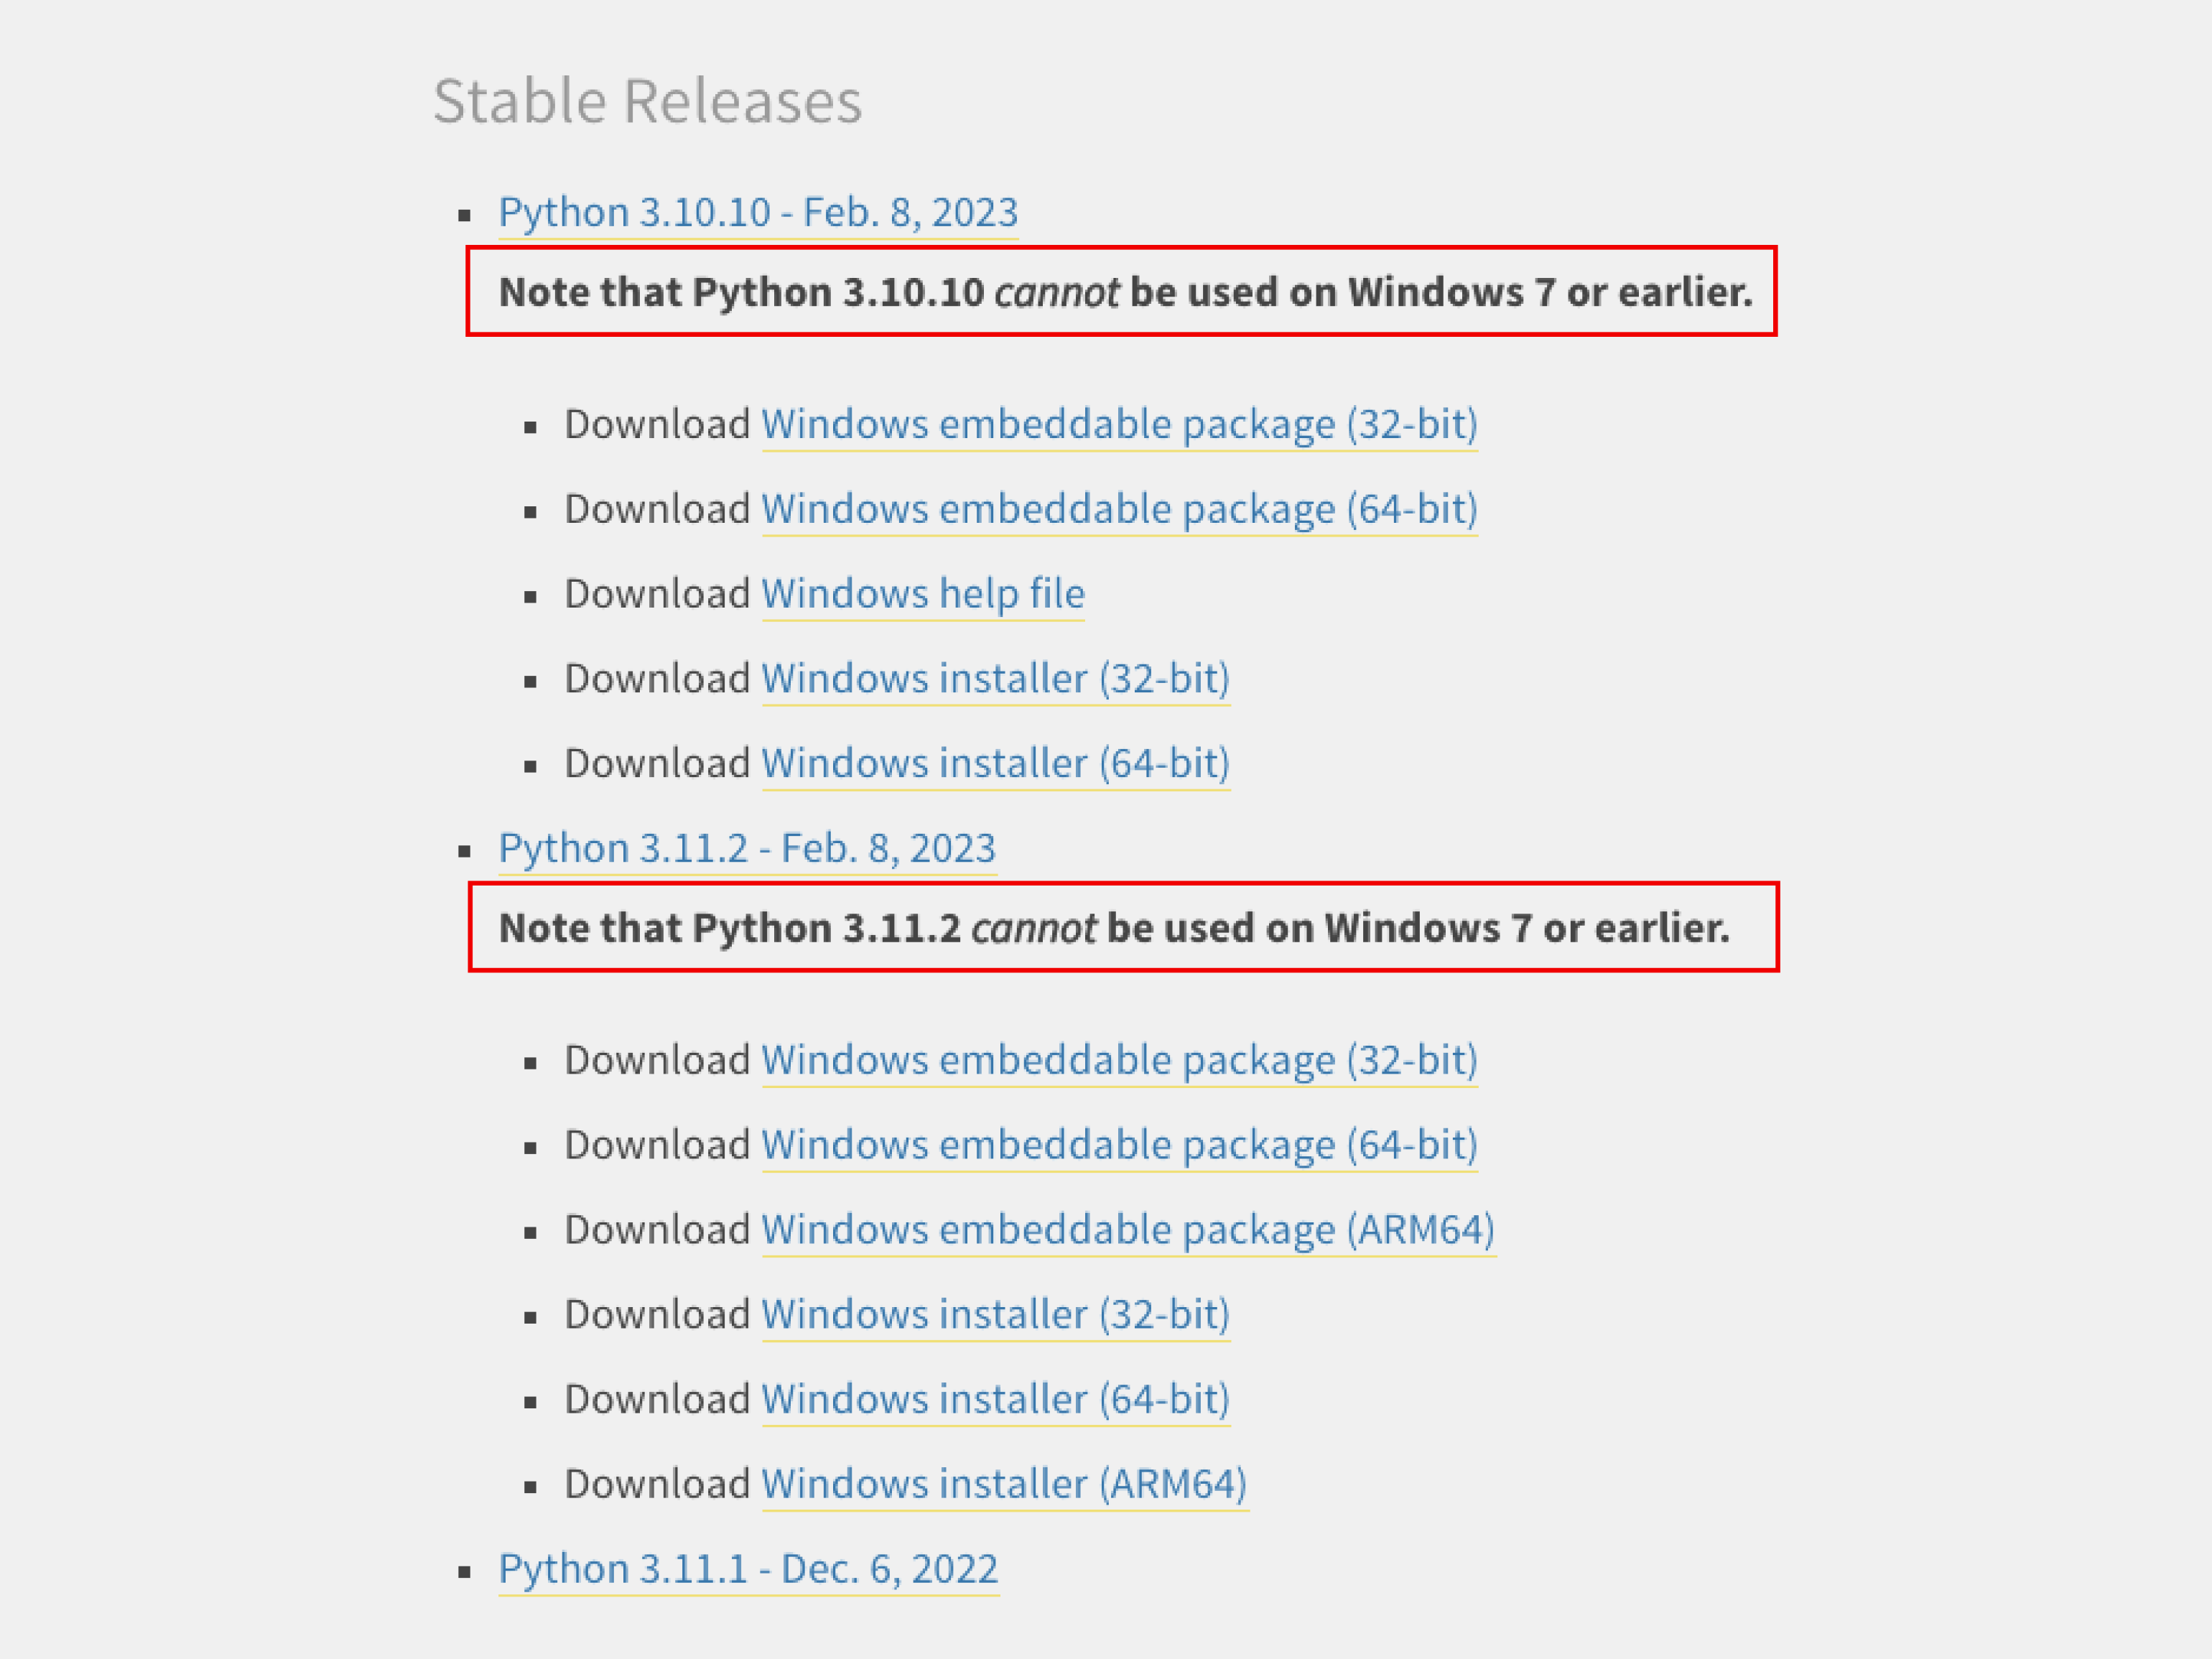
Если у вас более ранняя версия Windows, процесс установки Python ничем не отличается, кроме того, что некоторые версии языка не поддерживаются на старых операционных системах. Узнать, подходит ли версия Python вашей ОС, можно в примечаниях на странице скачивания:
Скриншот: Skillbox Media
Python входит в состав большинства дистрибутивов Linux. Чтобы это проверить, введите в терминале следующую команду:
$ python3 --version
В окне должен появиться номер версии языка. Если этого не произошло, нужно установить Python с помощью пакетного менеджера.
В Ubuntu 16.10 это делается так:
$ sudo apt-get update
$ sudo apt-get install python3.6
Утилита попросит вас ввести пароль и после ввода начнёт установку.
Однако, если вы хотите поставить более свежую версию Python, для установки нужно использовать репозиторий deadsnakes PPA:
$ sudo apt-get install software-properties-common
$ sudo add-apt-repository ppa:deadsnakes/ppa
$ sudo apt-get update
$ sudo apt-get install python3.8
В Fedora Linux процесс установки похожий, но используется другая команда:
$ sudo dnf install python3.9
Ещё можно самостоятельно собрать Python из исходников, которые лежат на сайте Python. Но это очень сложный и мучительный процесс, поэтому останавливаться на нём мы не будем.
С давних времён MacBook и iMac выпускались с предустановленным Python 2.7. Правда, начиная с версии 12.3 разработчики «яблочной» ОС отказались от этой традиции.
Чтобы проверить, установлен ли Python, откройте командную строку и введите следующую команду:
python --version
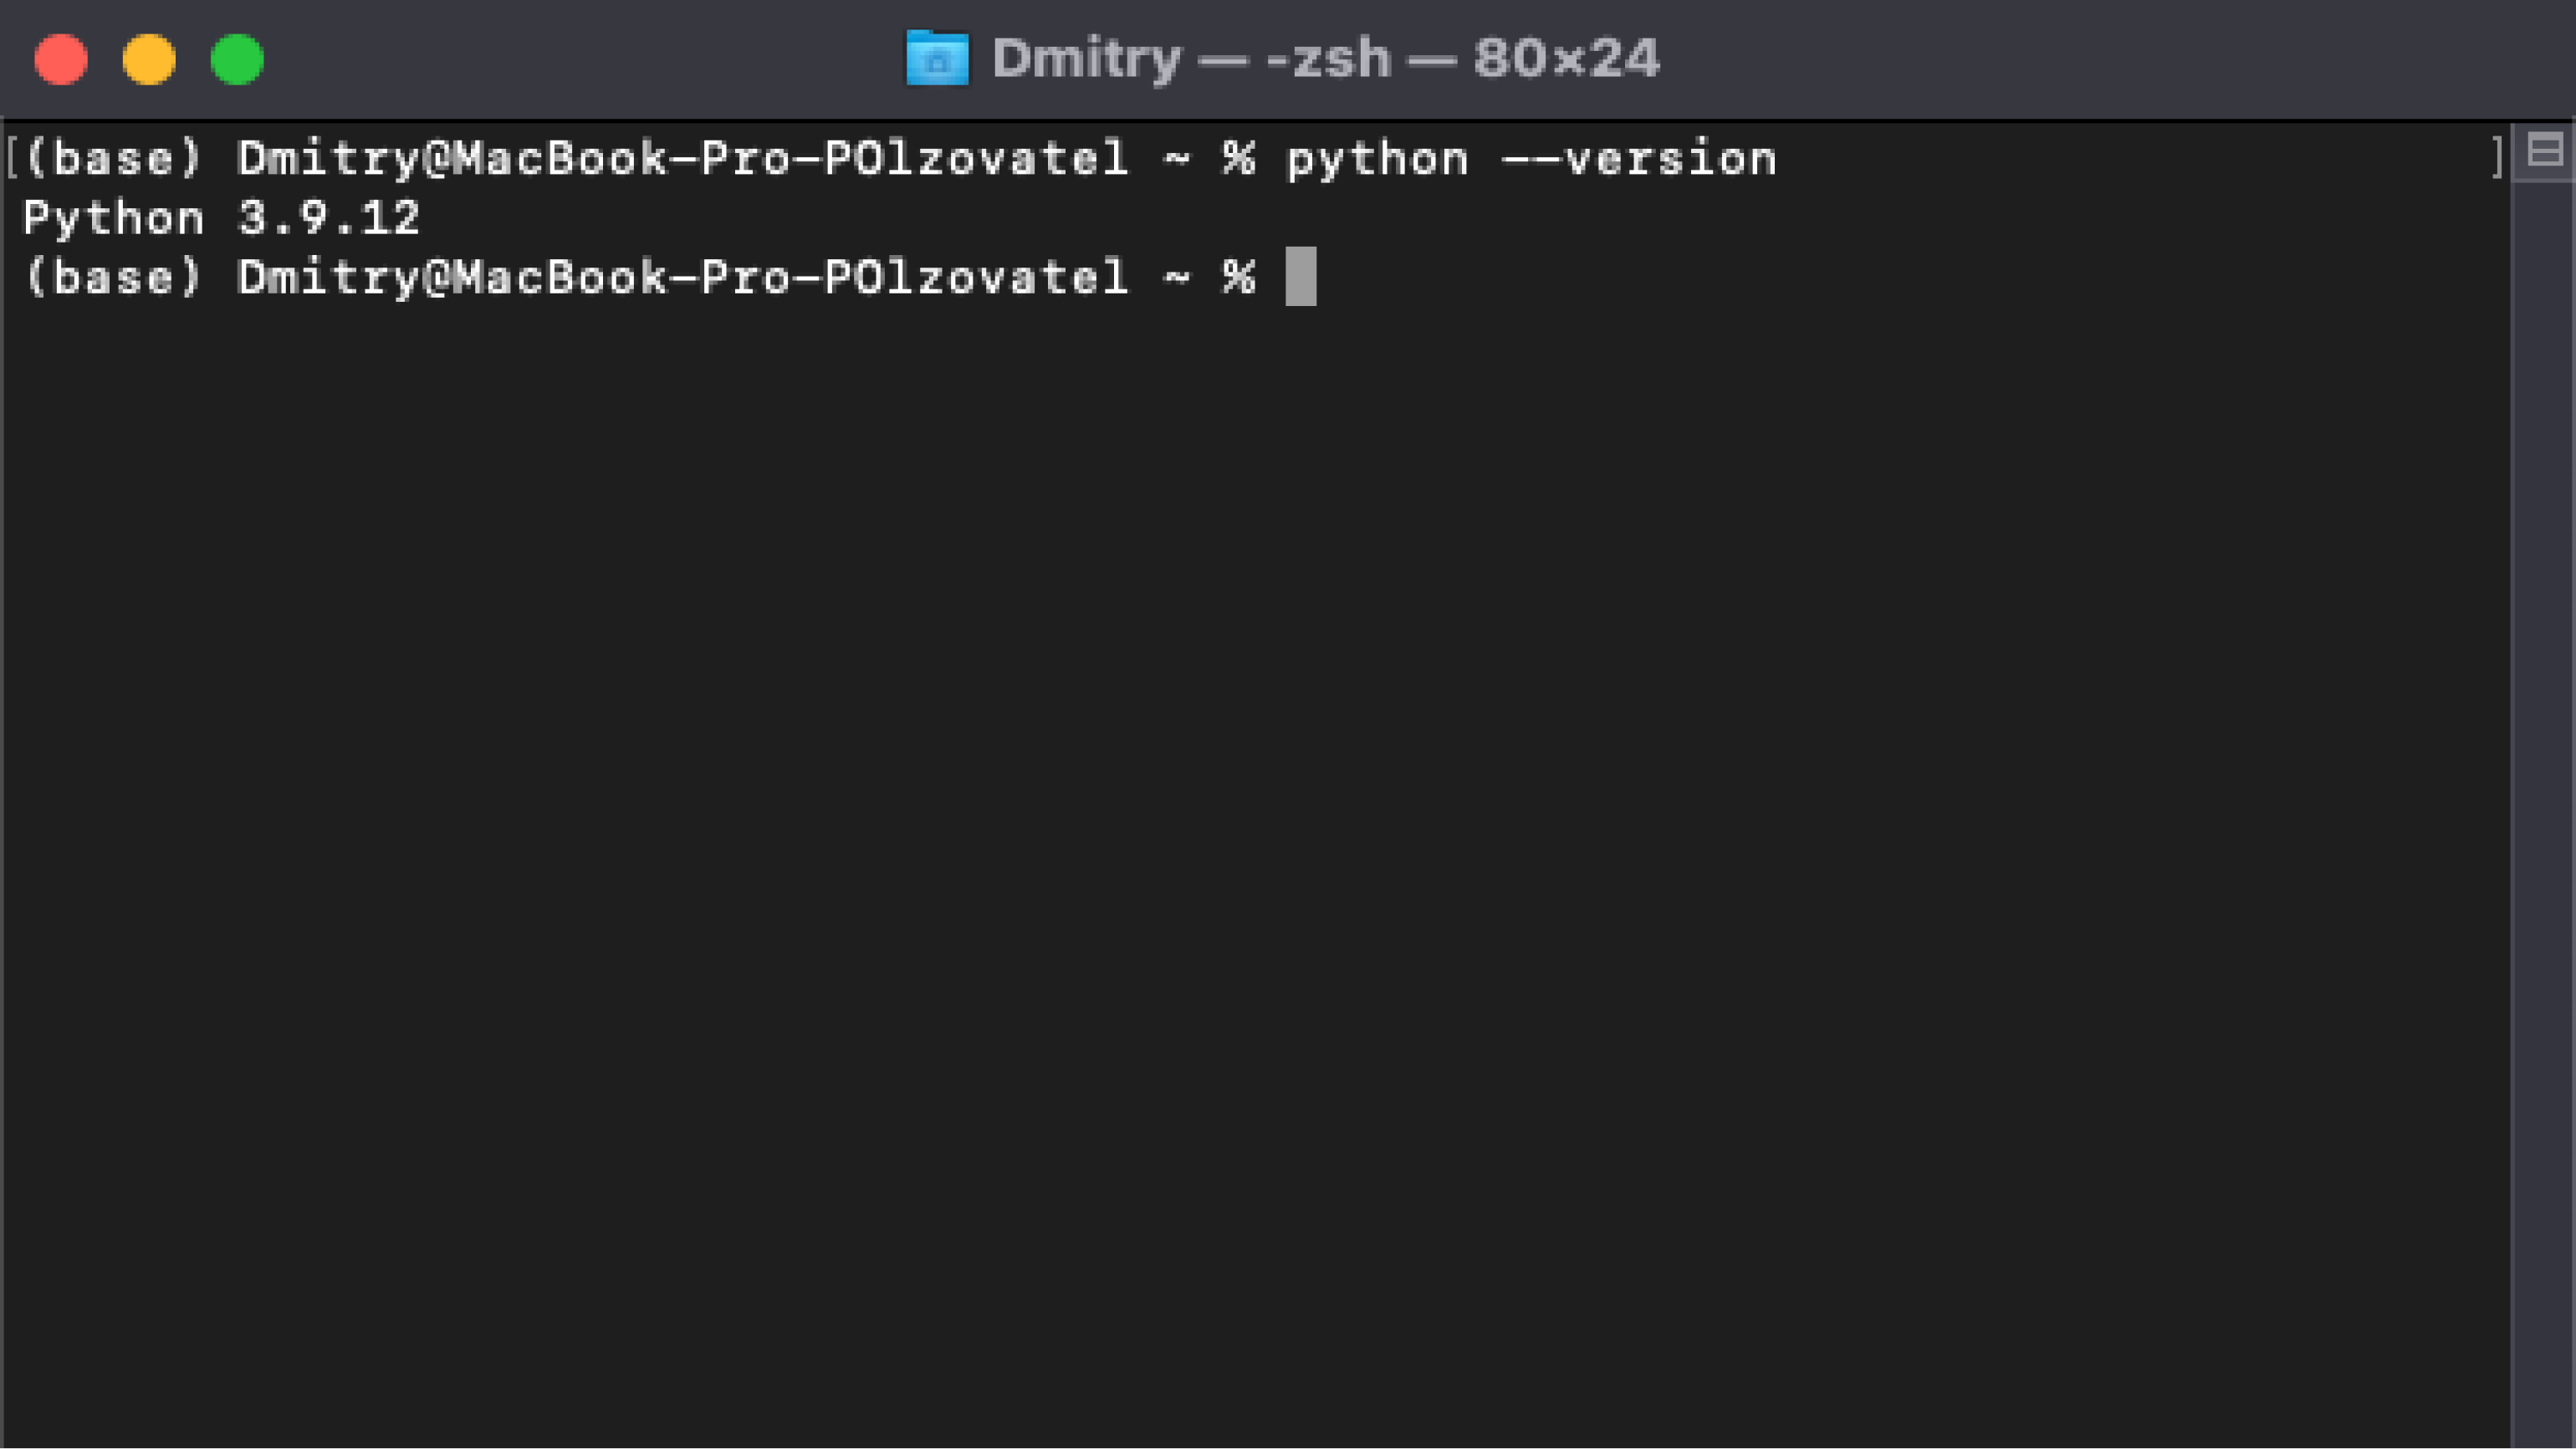
Скриншот: Skillbox Media
В любом случае лучше установить последнюю версию Python — найти её можно на официальном сайте.
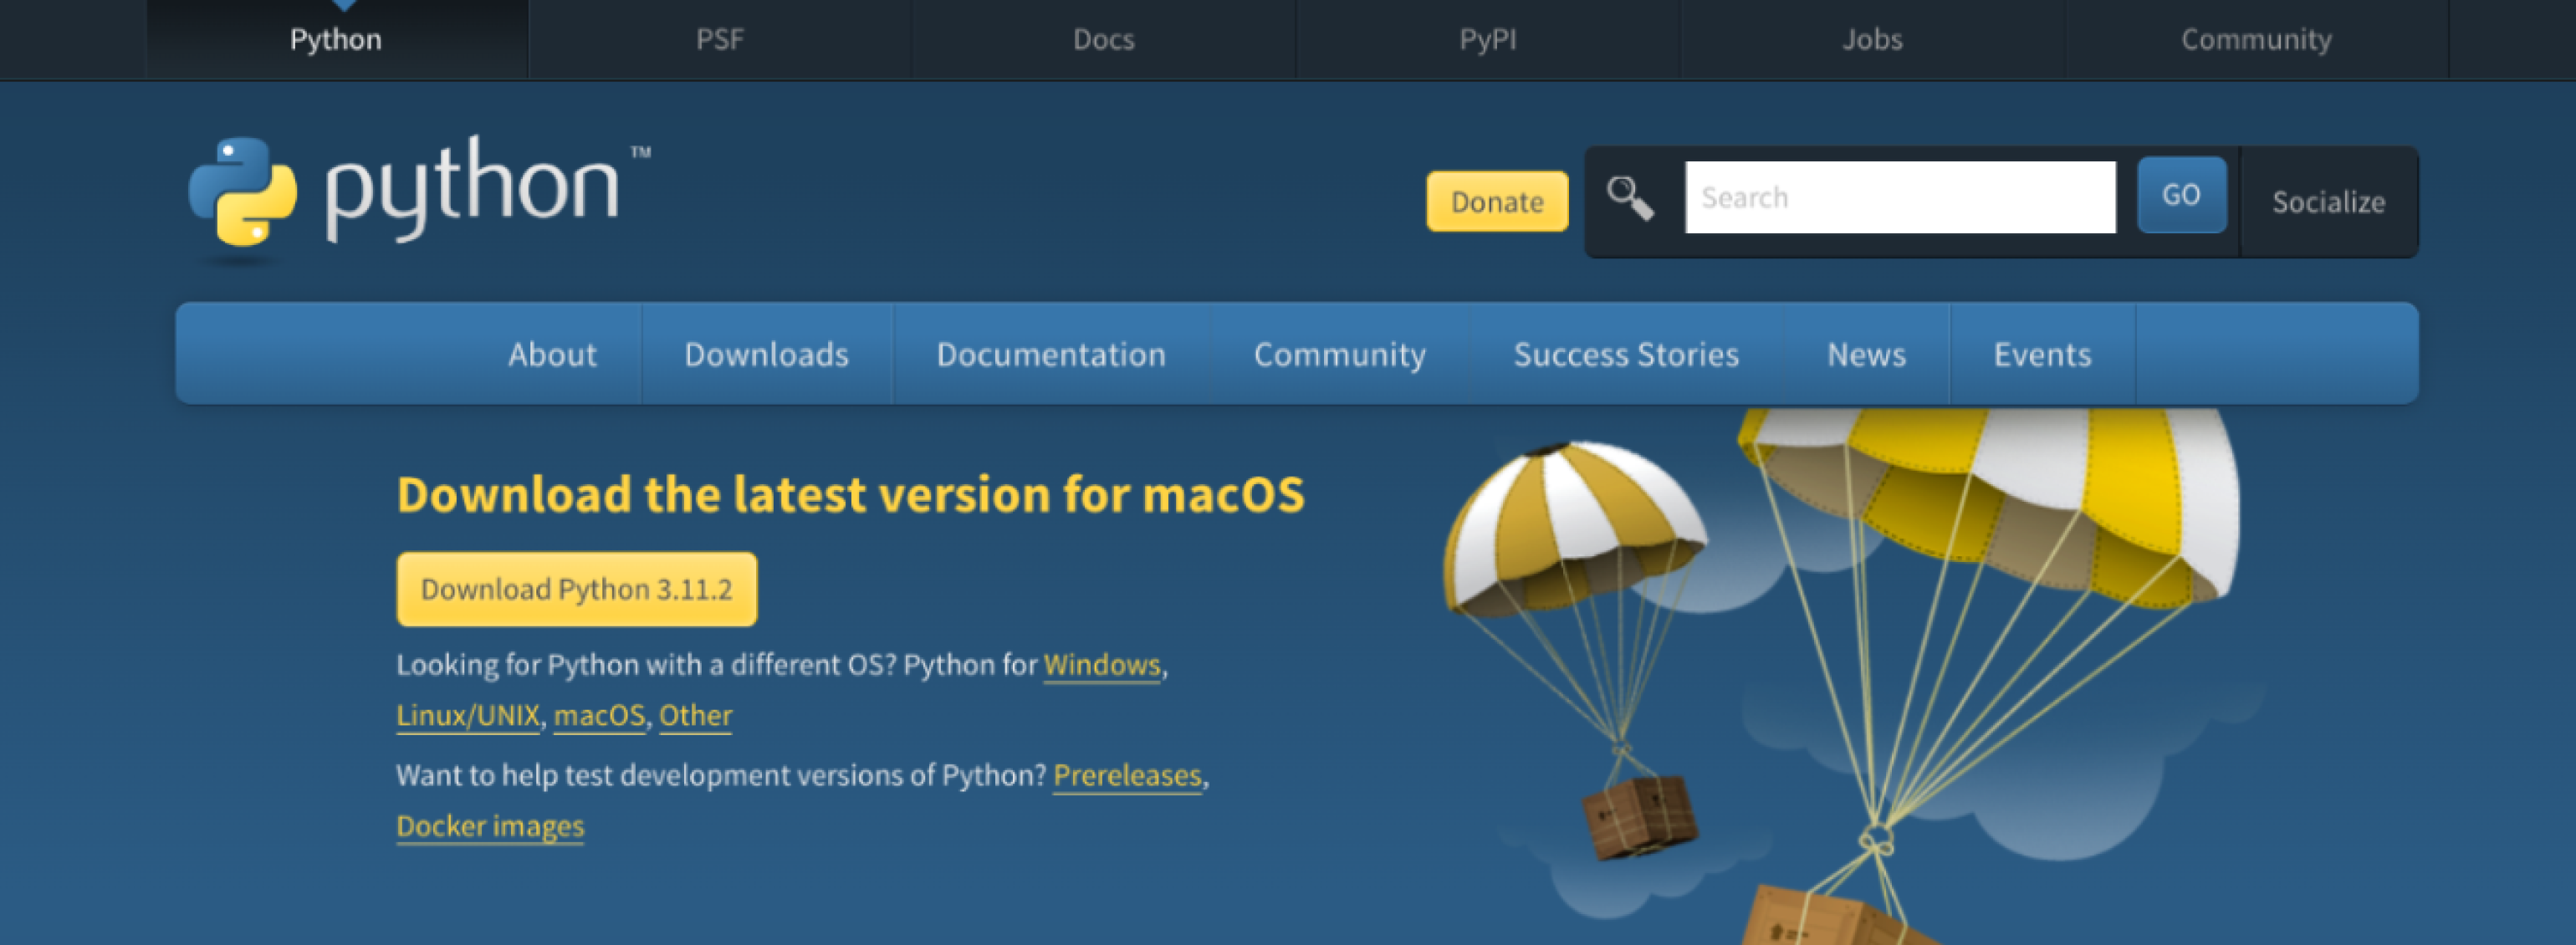
Скриншот: Python Software Foundation / Skillbox Media
Нажмите жёлтую кнопку Download Python 3.11.2, и пакет начнёт скачиваться:

Когда загрузка завершится, откройте его:
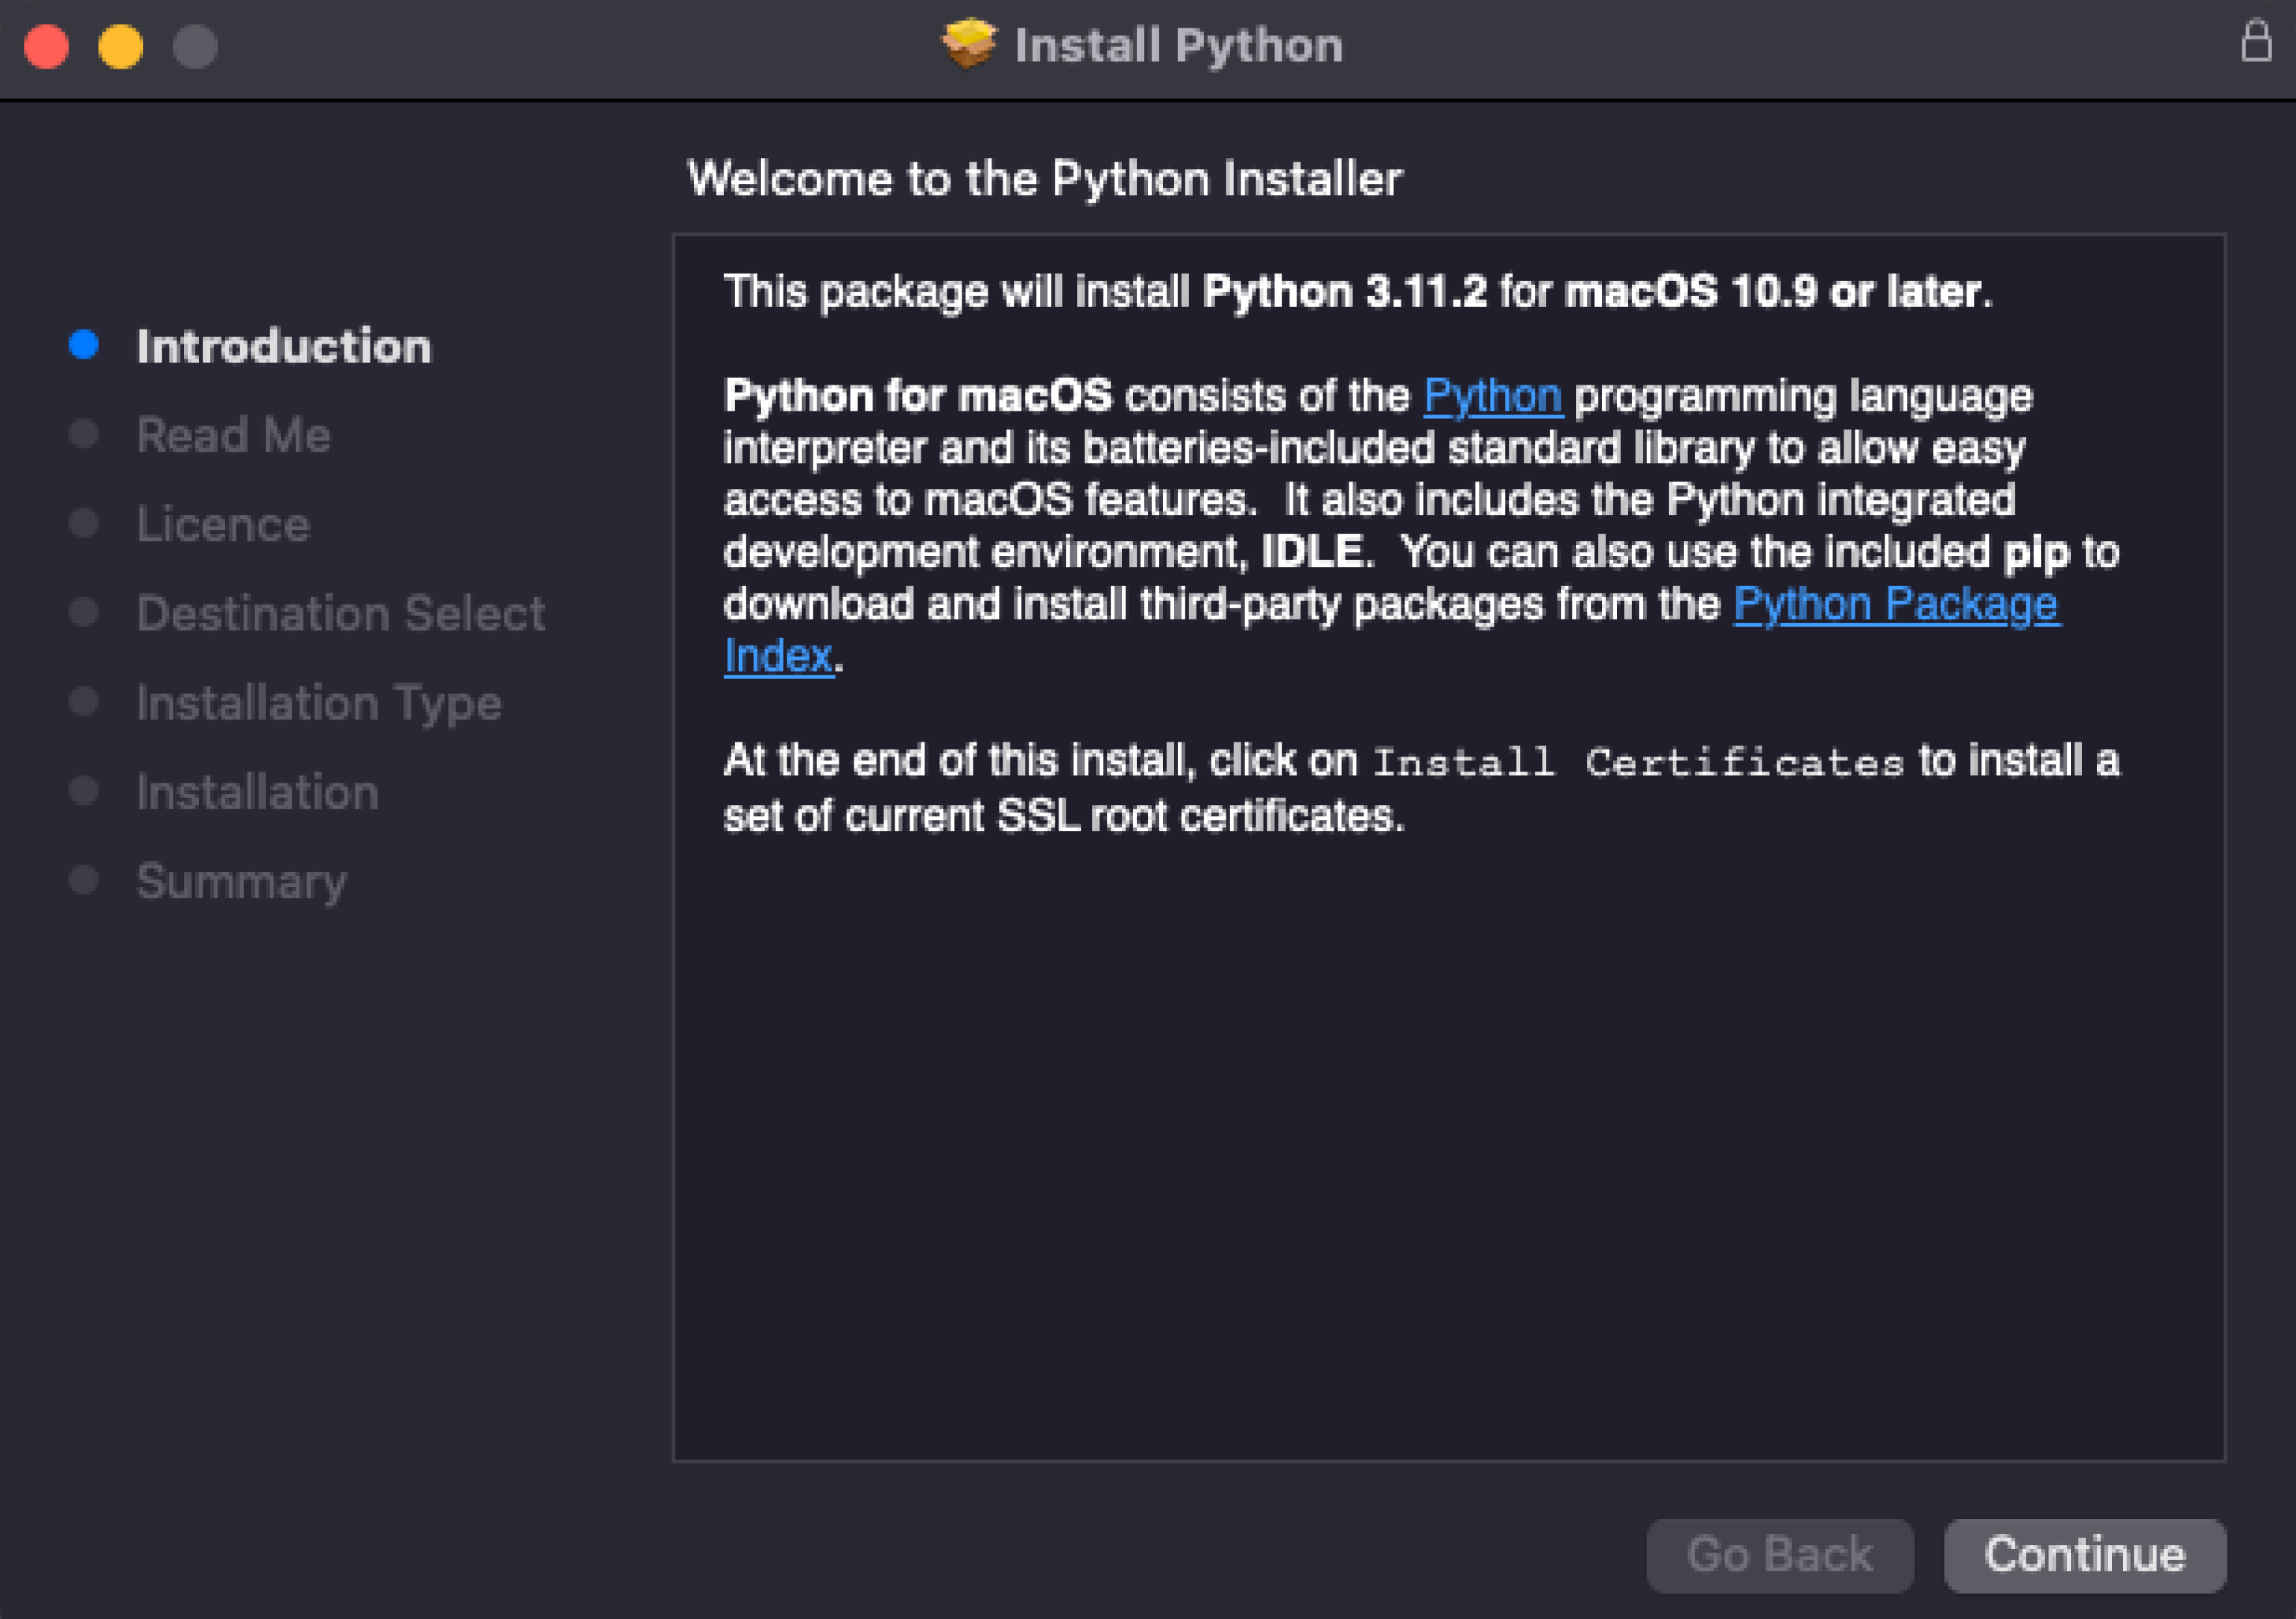
Согласитесь со всеми пунктами и переходите к установке. Вас попросят ввести пароль, а после — начнётся установка, по окончании которой вы увидите такое окно:
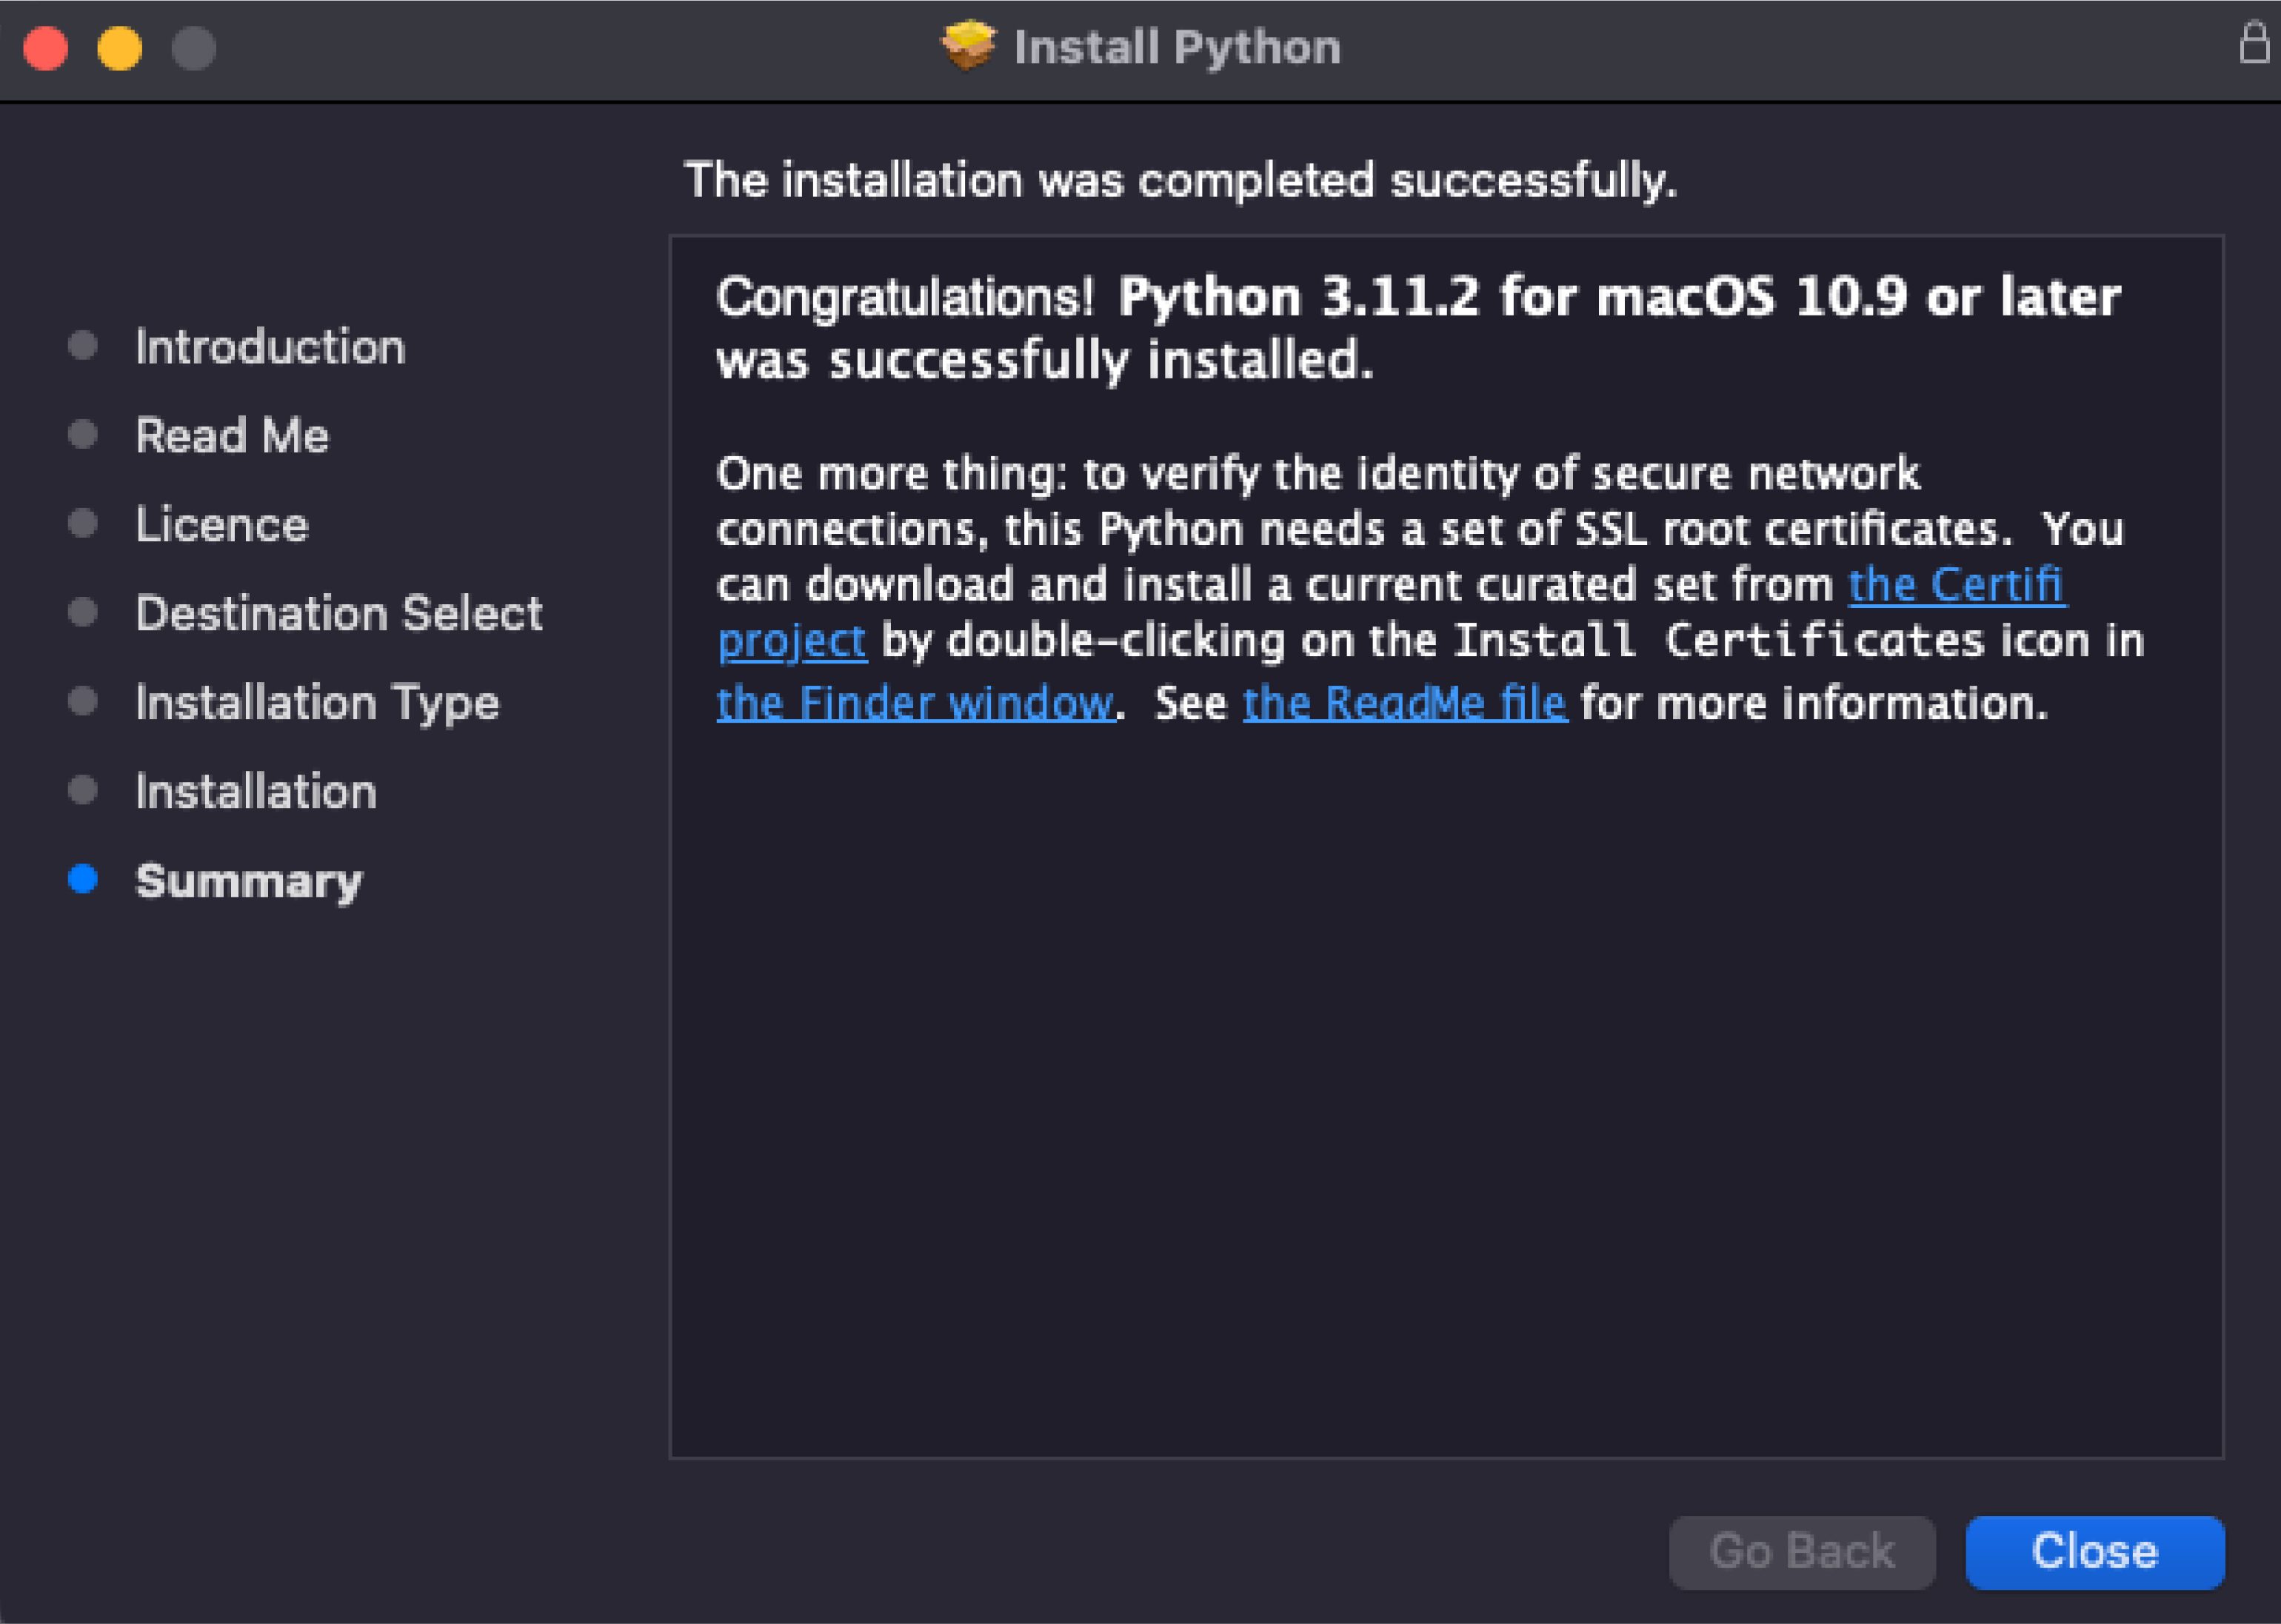
Нажмите Close и откройте терминал, чтобы проверить версию Python:
python --version
Должно быть выведено сообщение Python 3.11.2.
Дата-сайентисты используют свои библиотеки для работы — например, NumPy и Pandas. Их можно устанавливать по отдельности, а можно скачать готовую сборку со всеми библиотеками.
Самый популярный способ — использовать дистрибутив Anaconda. Он бесплатный и легко устанавливаемый, а также доступен для всех операционных систем. Мы покажем, как установить его на macOS.
Нажмите на кнопку Download, чтобы начать скачивание:
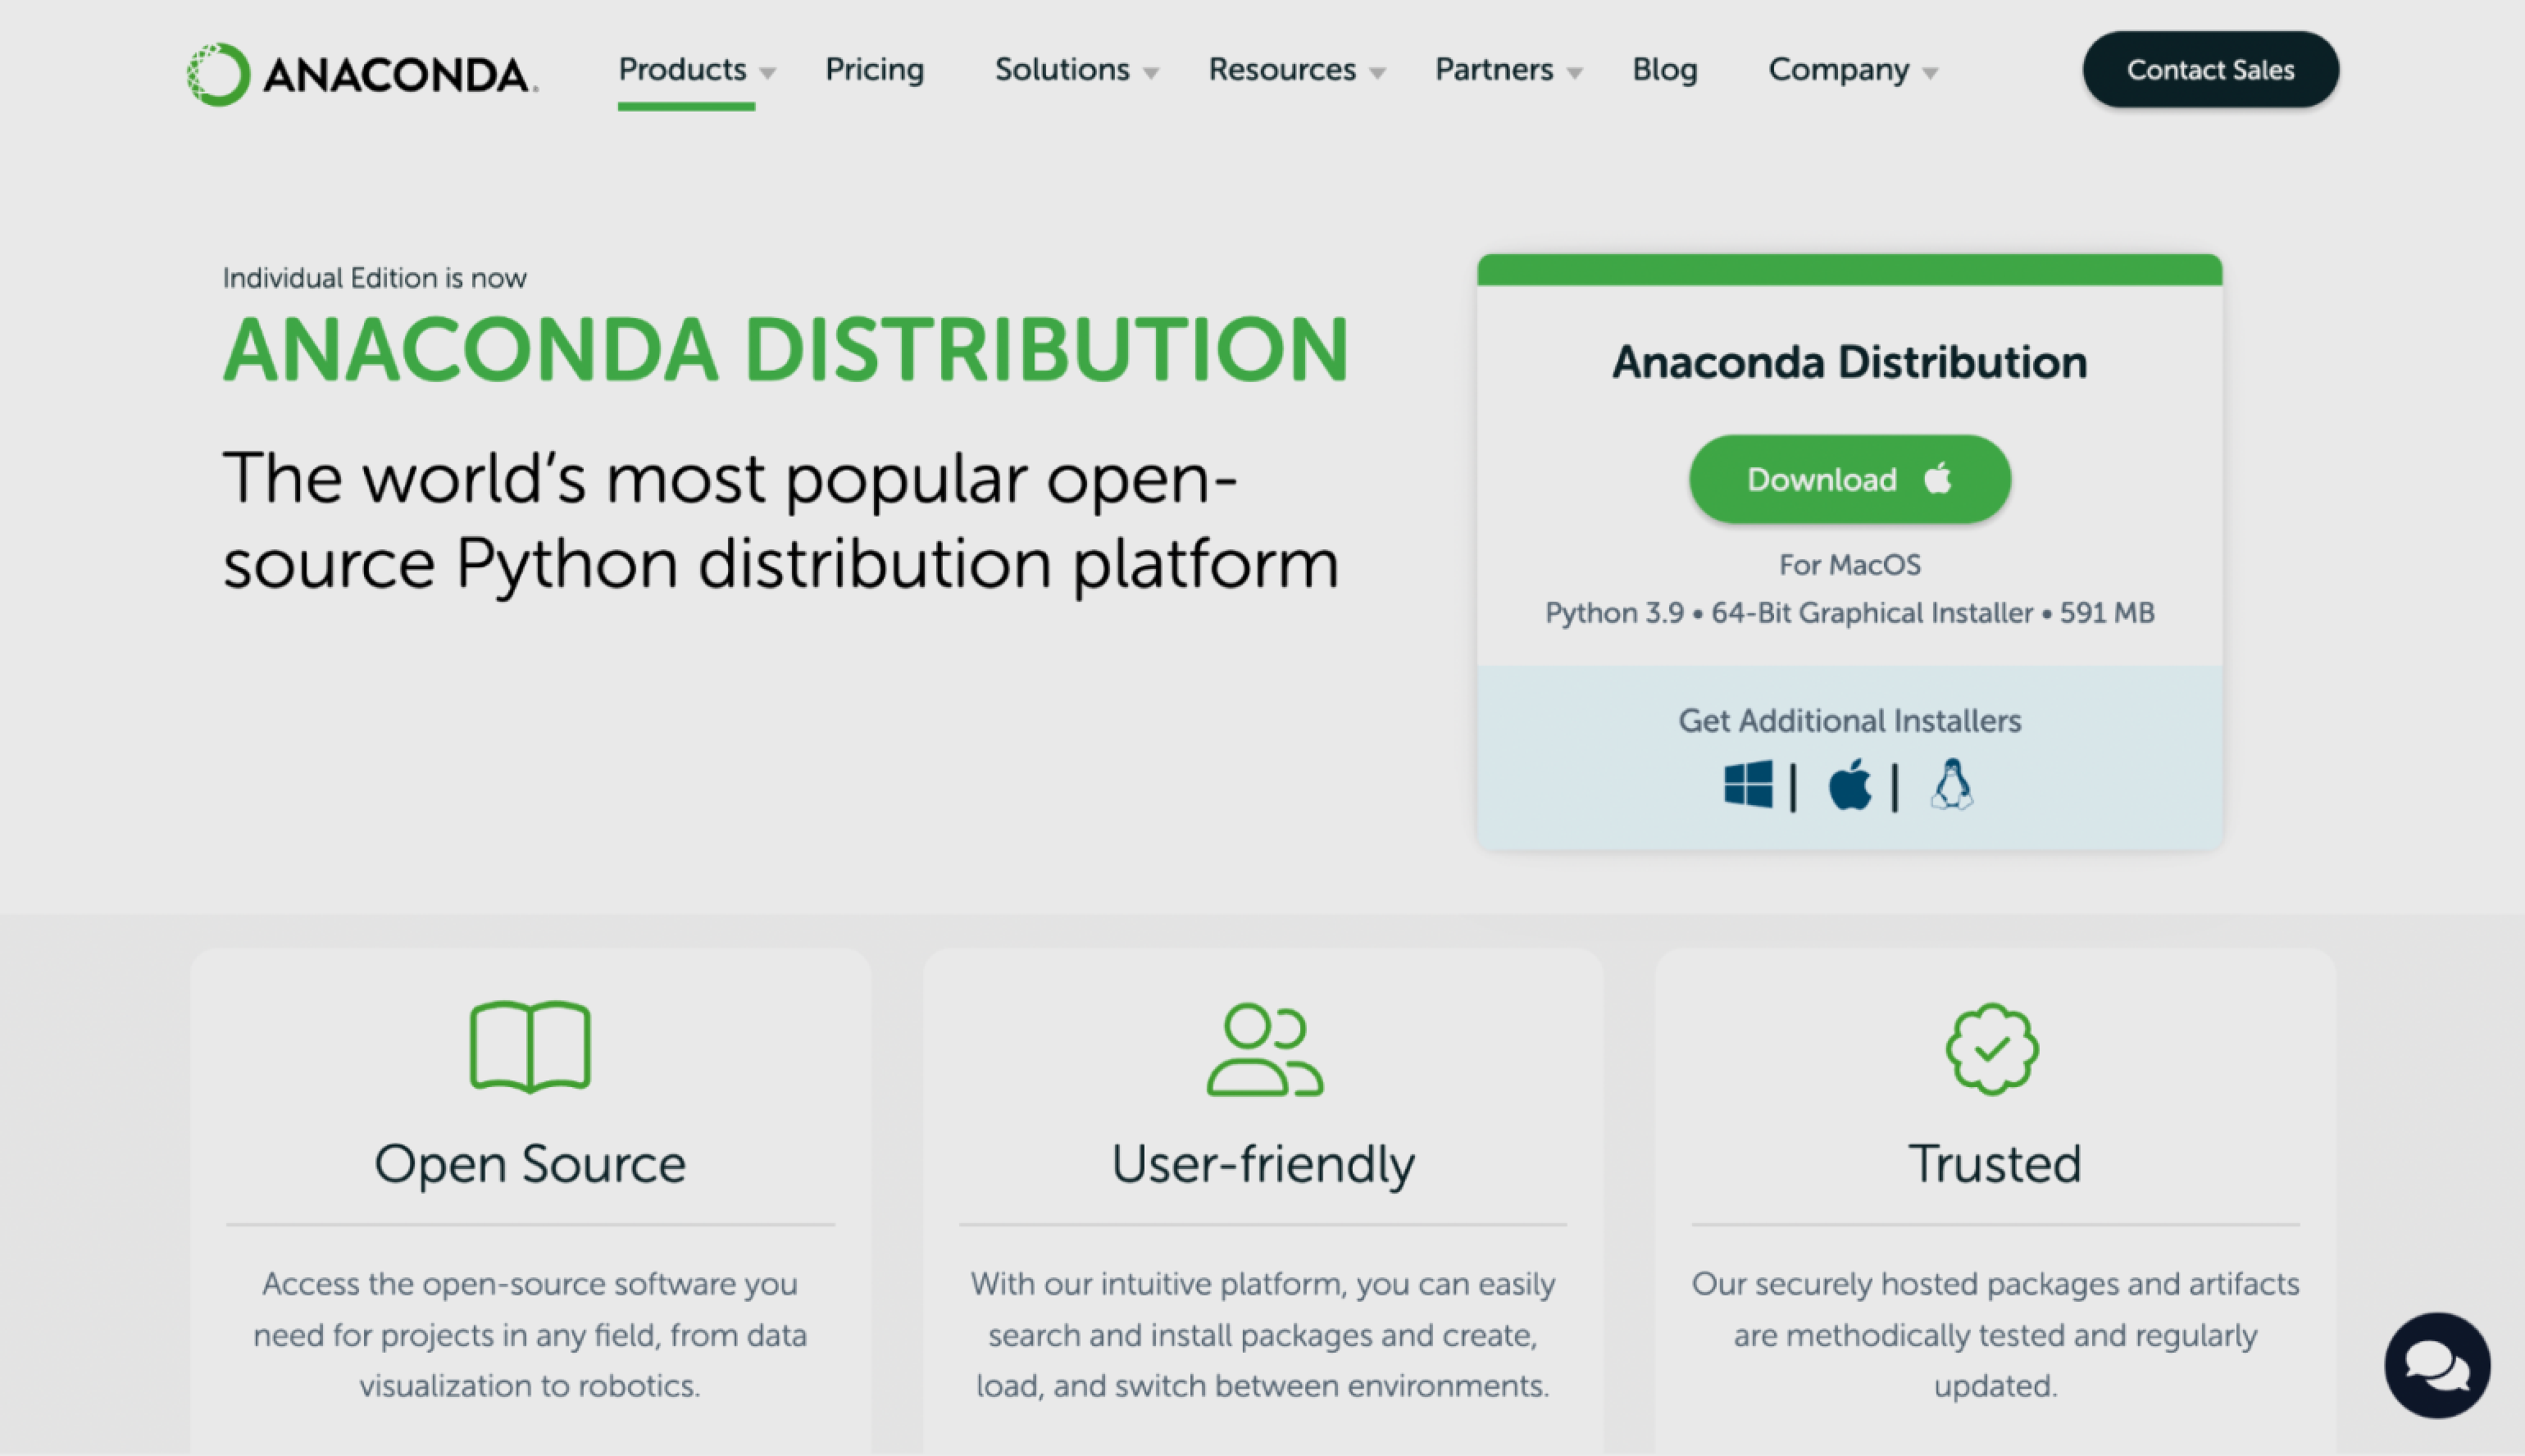
Скриншот: Anaconda Inc. / Skillbox Media
Затем откройте установщик, согласитесь со всеми пунктами и выберите место для установки.

Скриншот: Skillbox Media
Чтобы убедиться, что Python установлен, откройте консоль и введите команду python3 — должен запуститься интерпретатор Python, в котором можно писать код. Выглядит это примерно так:
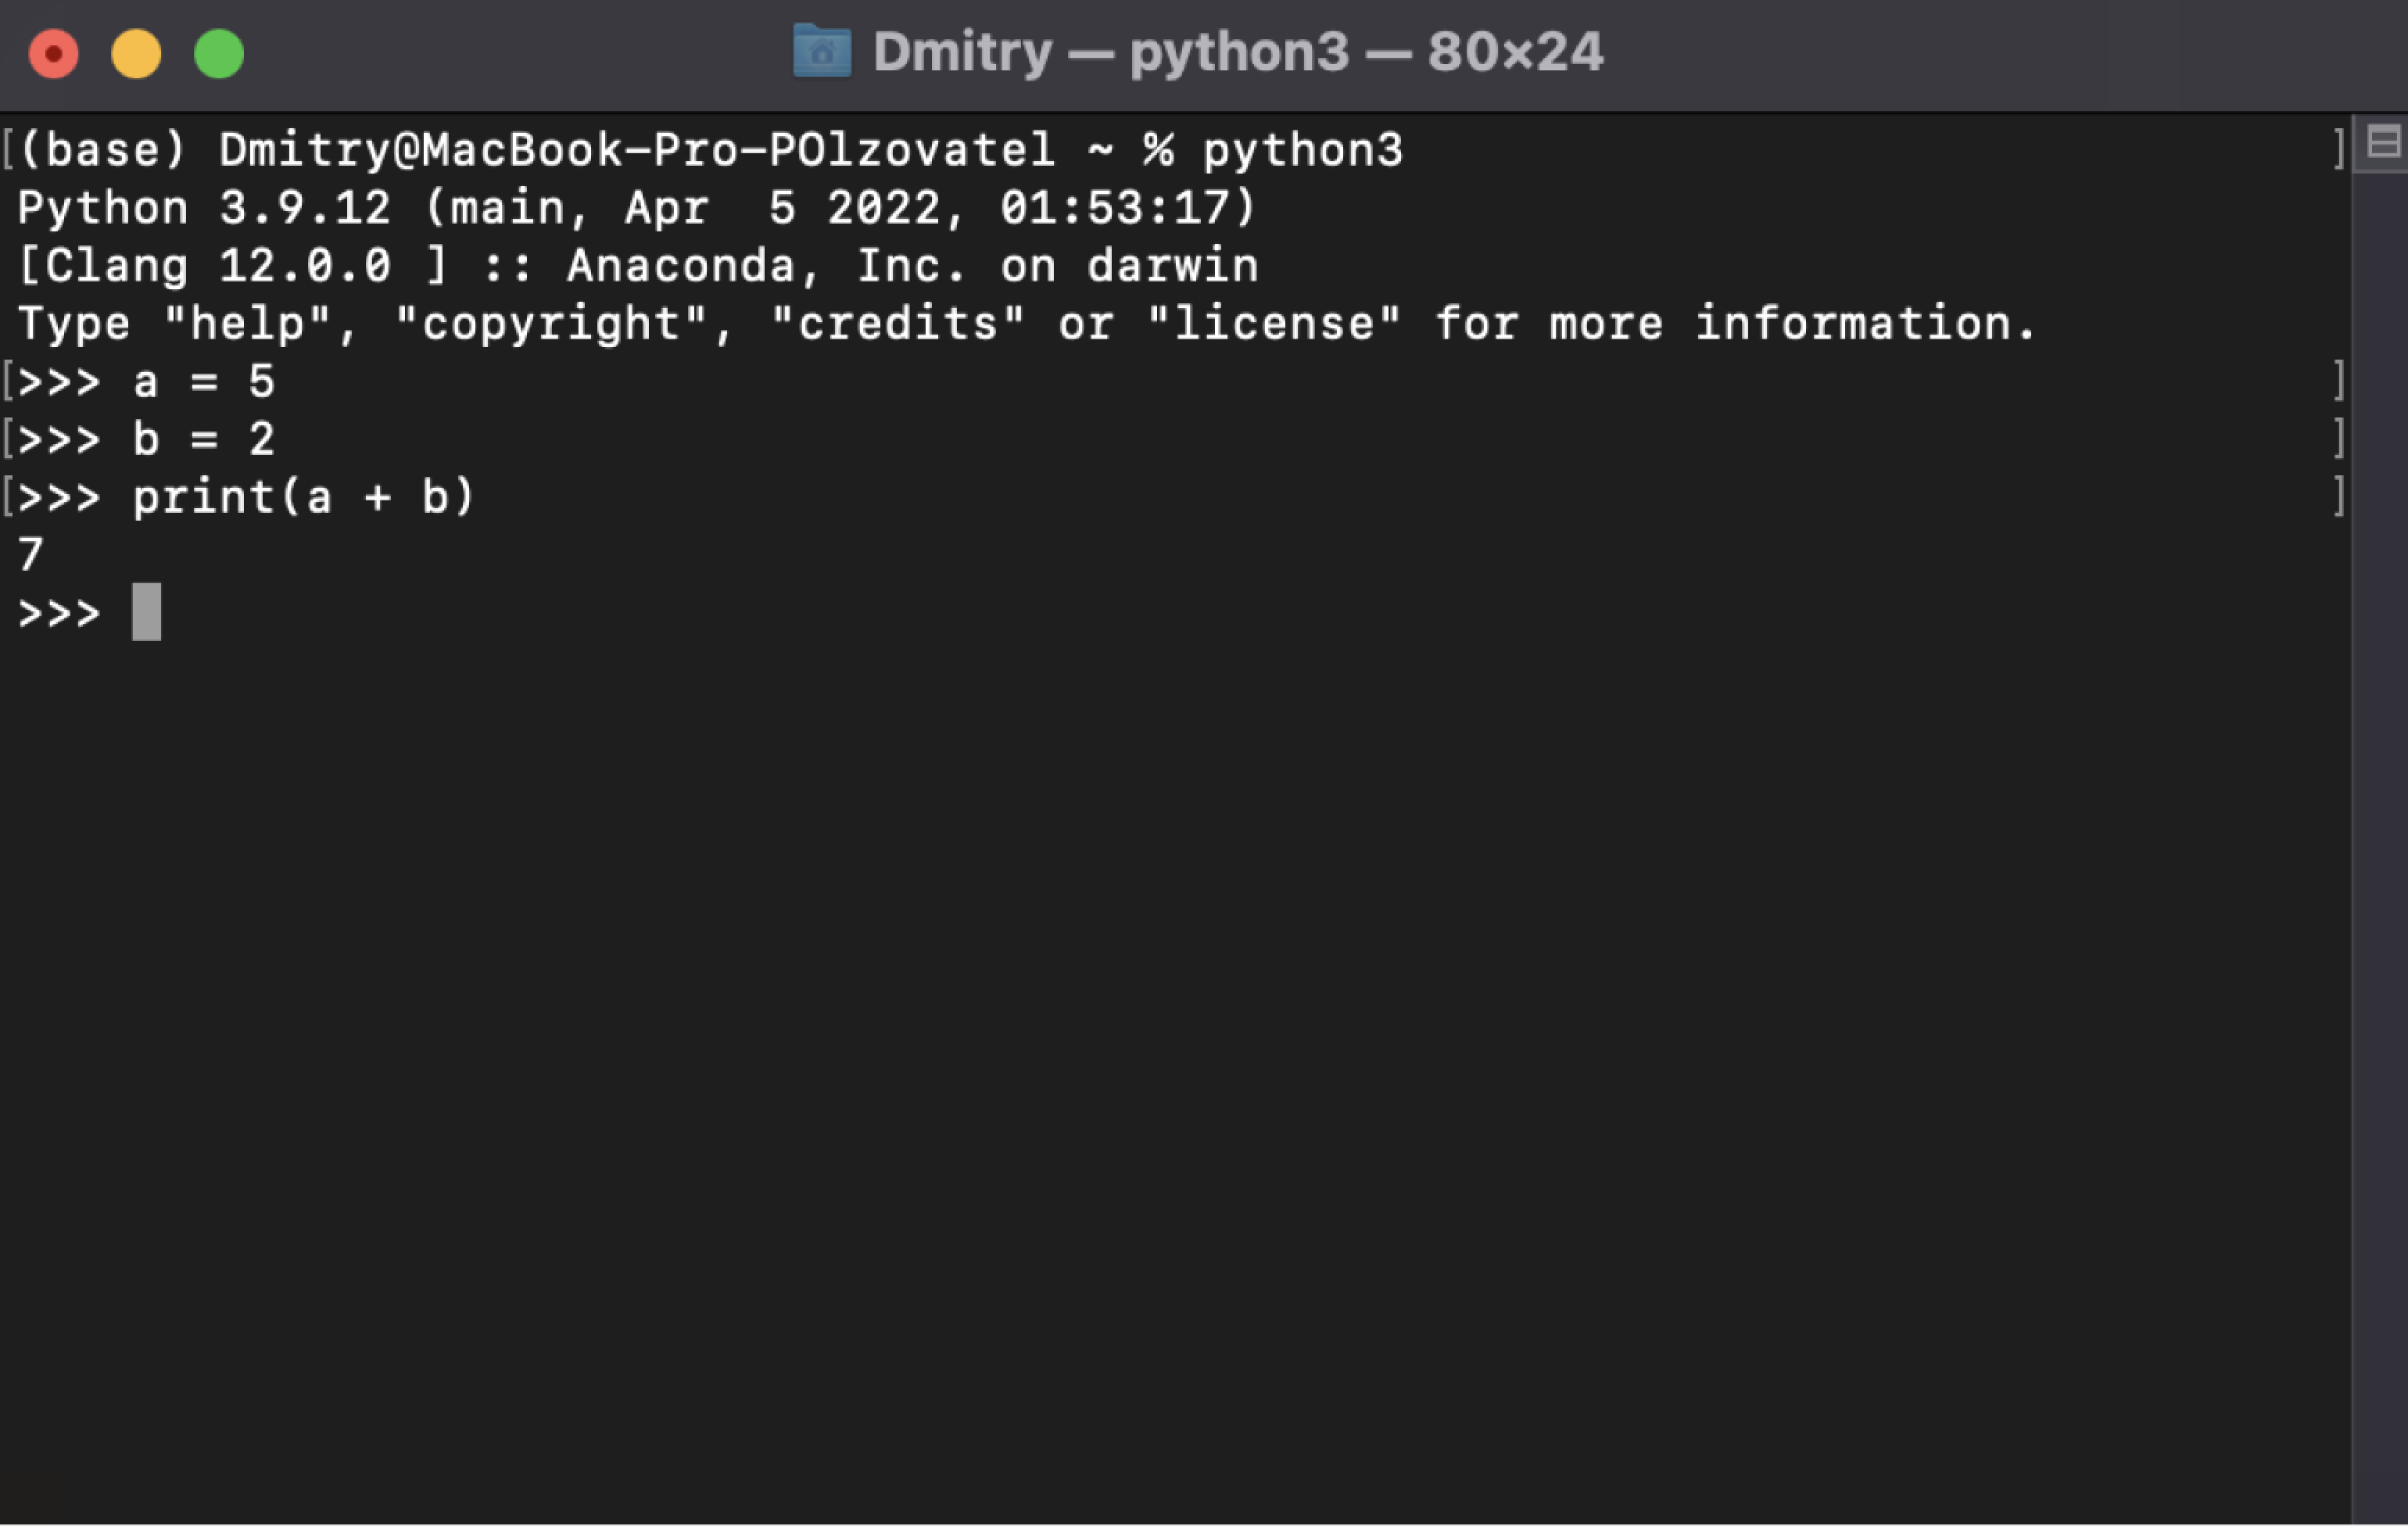
Скриншот: Skillbox Media
Теперь, чтобы использовать одну из библиотек для data science, нужно всего лишь импортировать её в Python-файле:
import numpy
А чтобы проверить, работает ли библиотека, достаточно запустить файл, в котором вы её подключили. Если библиотека не подключилась, то интерпретатор выдаст сообщение об ошибке.
После того как мы установили Python, пора написать пару строк кода. Вы можете использовать любую IDE (в том числе IDLE), редактор кода или даже «Блокнот».
Создадим файл program.py на рабочем столе. В нём мы вызовем всего одну функцию, которая выведет на экран текстовое сообщение:
print("Привет, мир!")
Запустим программу командой py или python в командной строке, прописав полный путь до файла program.py. Например, если он лежит на рабочем столе, запустить его можно так:
Microsoft Windows [Version 10.0.19043.1889]
(c) Корпорация Майкрософт (Microsoft Corporation). Все права защищены.

C:\Users\User>py C:\Users\User\Desktop\program.py
Привет, мир!
Мы передали код интерпретатору, который обработал его и вывел сообщение на экран. Всё получилось!
VS Code — это удобный редактор кода, который поддерживает десятки языков программирования и плагинов. По популярности VS Code сильно опережает аналоги, поэтому будет полезно разобраться, как установить Python туда.
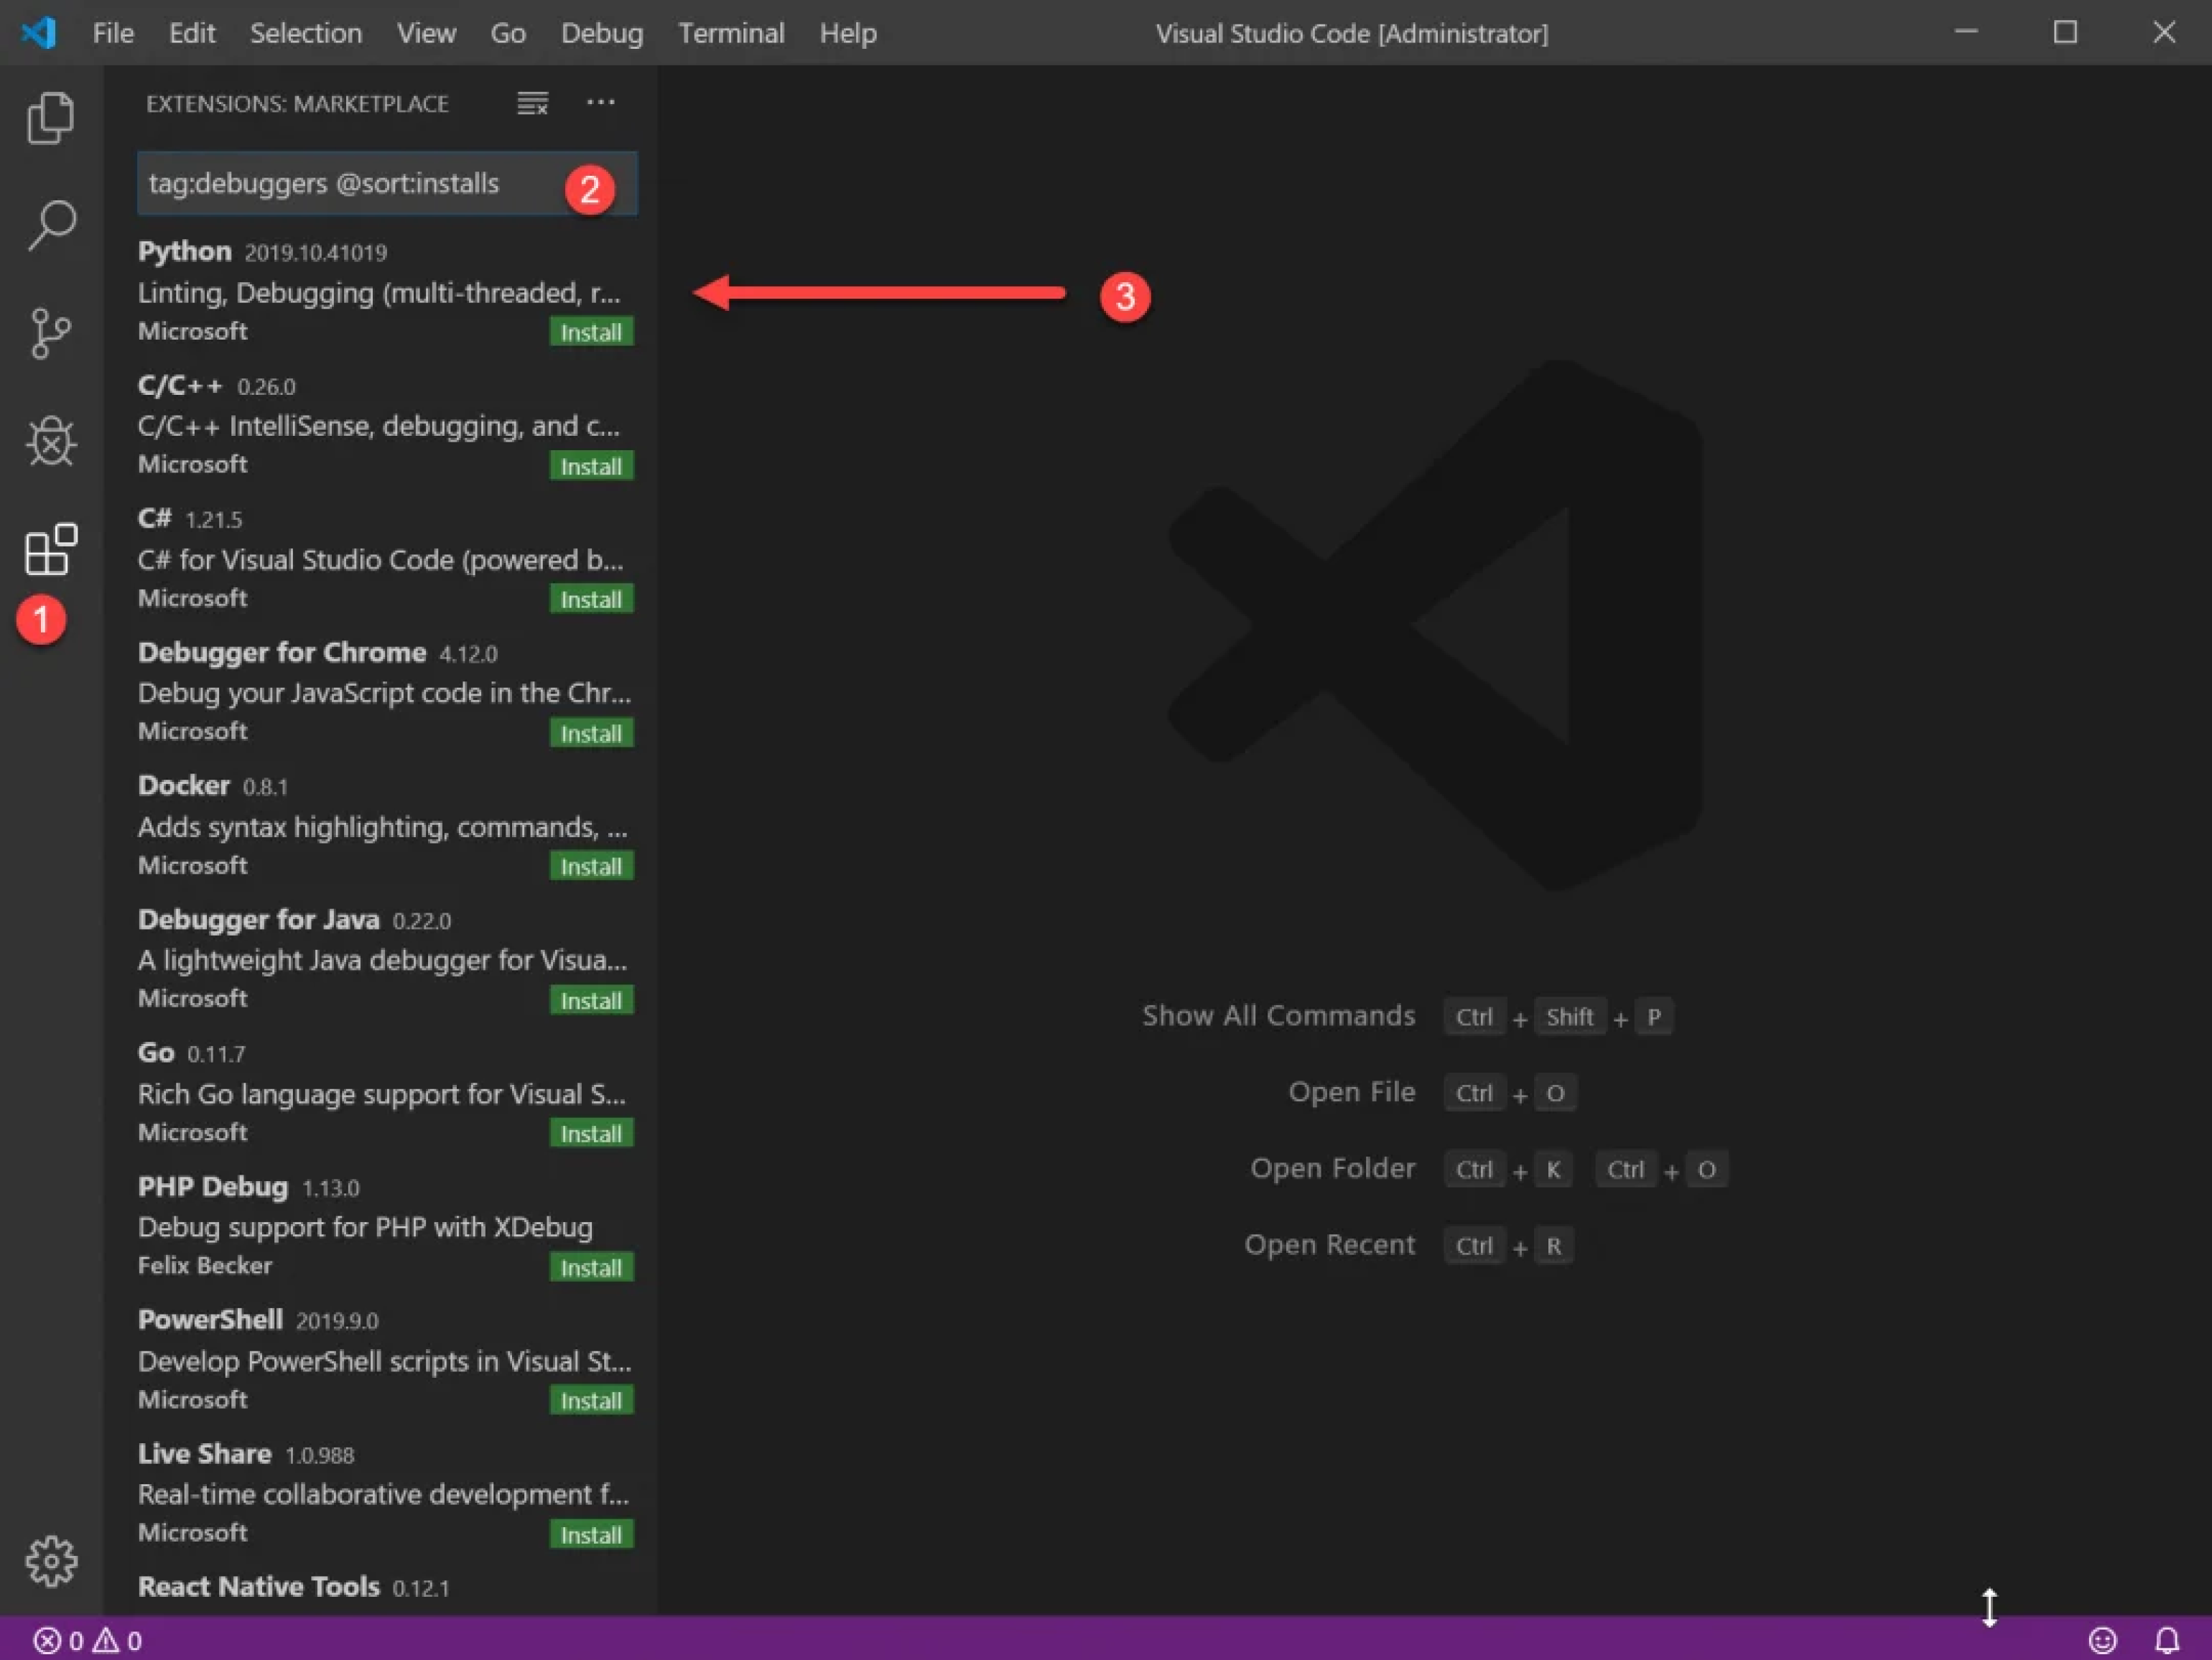
Сначала нужно найти плагин для языка. Откройте вкладку Extensions («Расширения») и введите в поиске следующую строку:
tag:debuggers @sort:installs
В появившемся списке найдите Python и нажмите Install.
Теперь нужно включить подсветку кода. Для этого установите плагин MagicPython — найти его можно в том же поиске, введя команду ext: py3. Чтобы всё заработало, перезапустите VS Code и создайте файл с расширением .py. Когда редактор спросит, на каком языке вы собираетесь программировать, — выберите Python. Готово!
В Skillbox есть полноценный курс по Python. Опытные менторы помогут освоить язык быстро и на реальных задачах. Это обучение с упором на практику и помощью в трудоустройстве, без расписаний и жёстких дедлайнов.
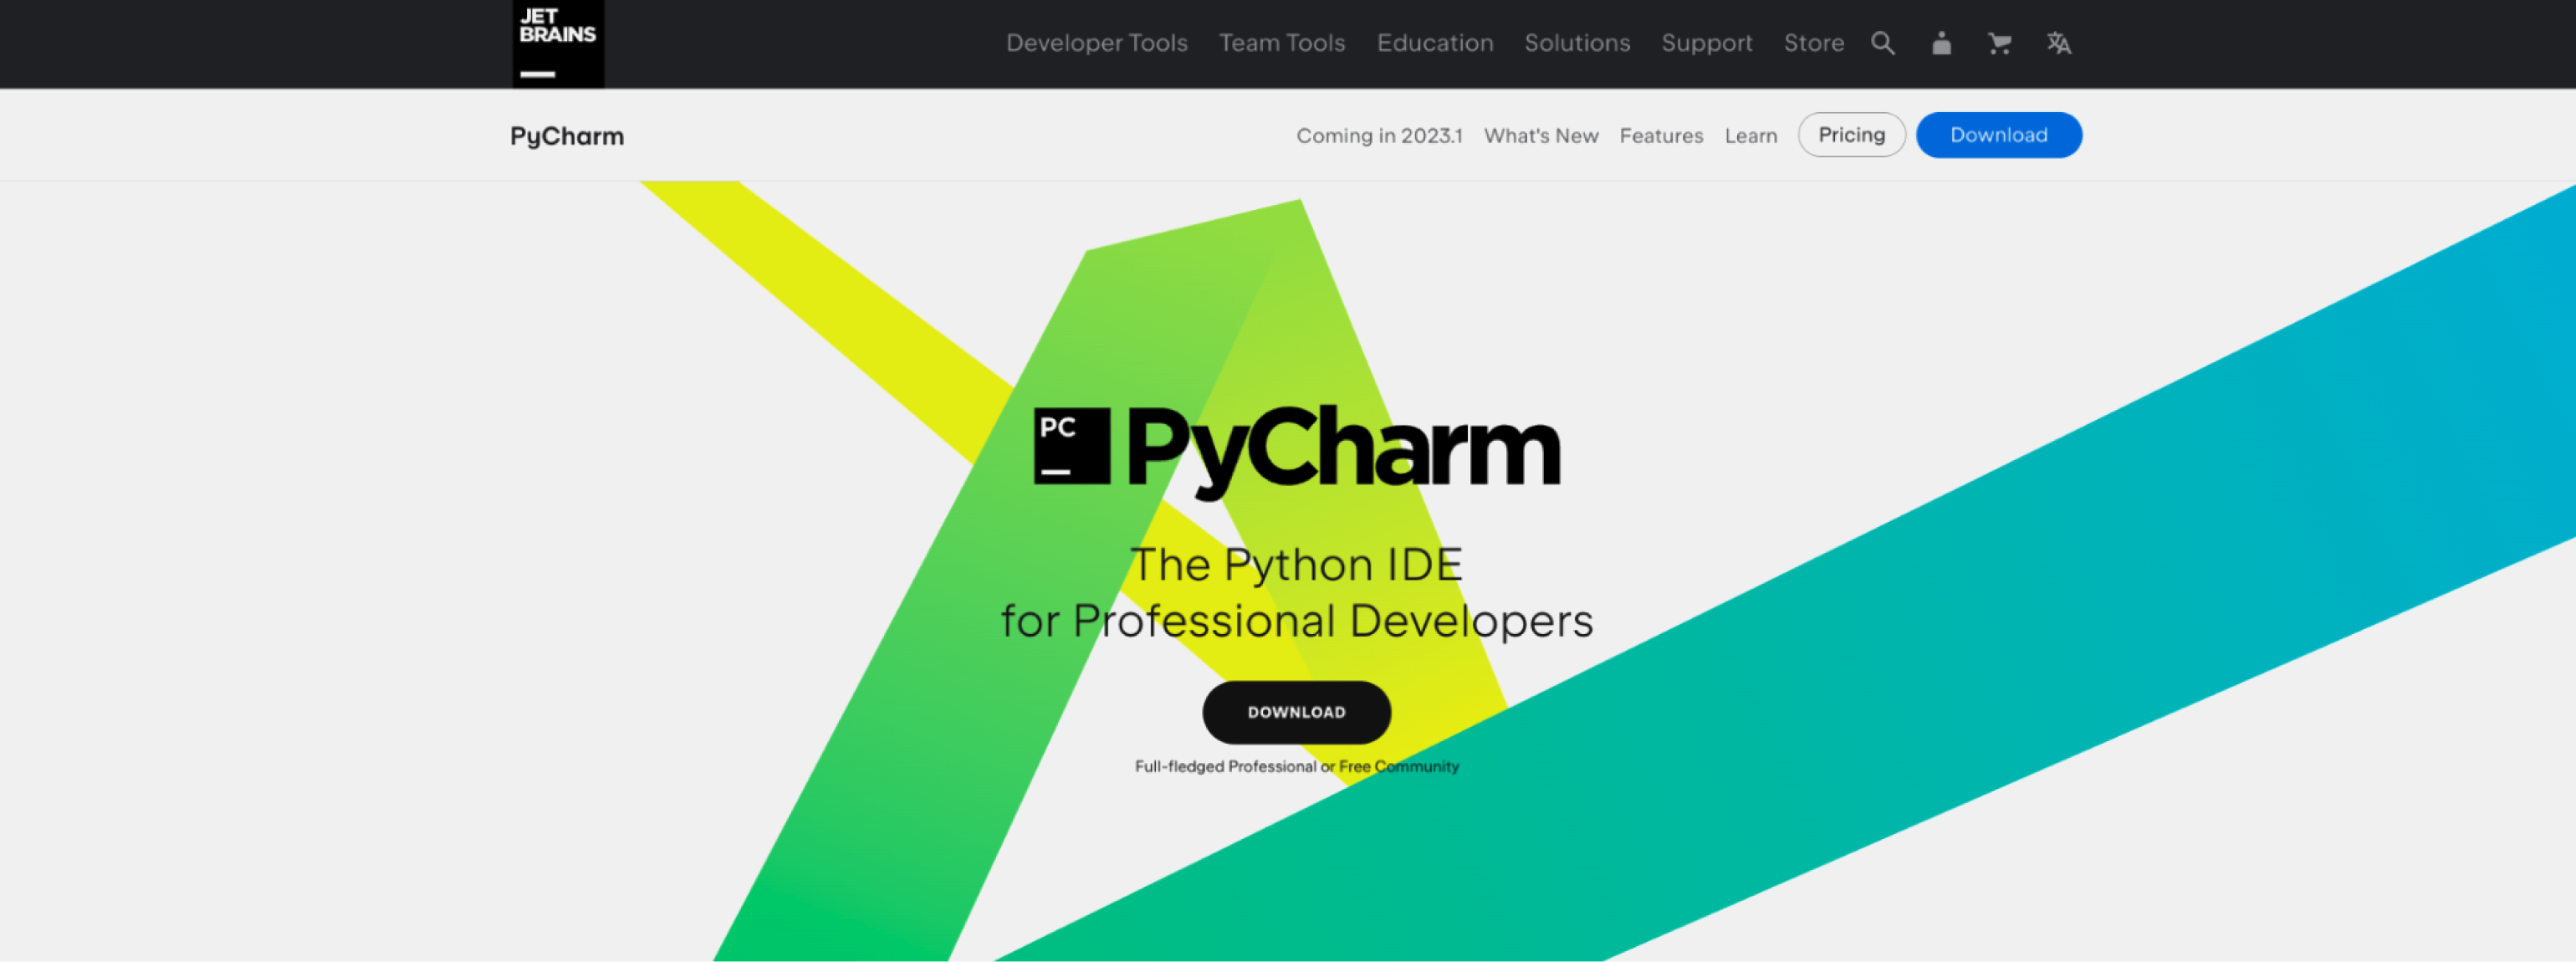
Хоть VS Code является самым популярным редактором кода, многие программисты предпочитают специализированные IDE, заточенные именно под разработку на Python. Абсолютный фаворит здесь — PyCharm, в состав которой уже входит Python.
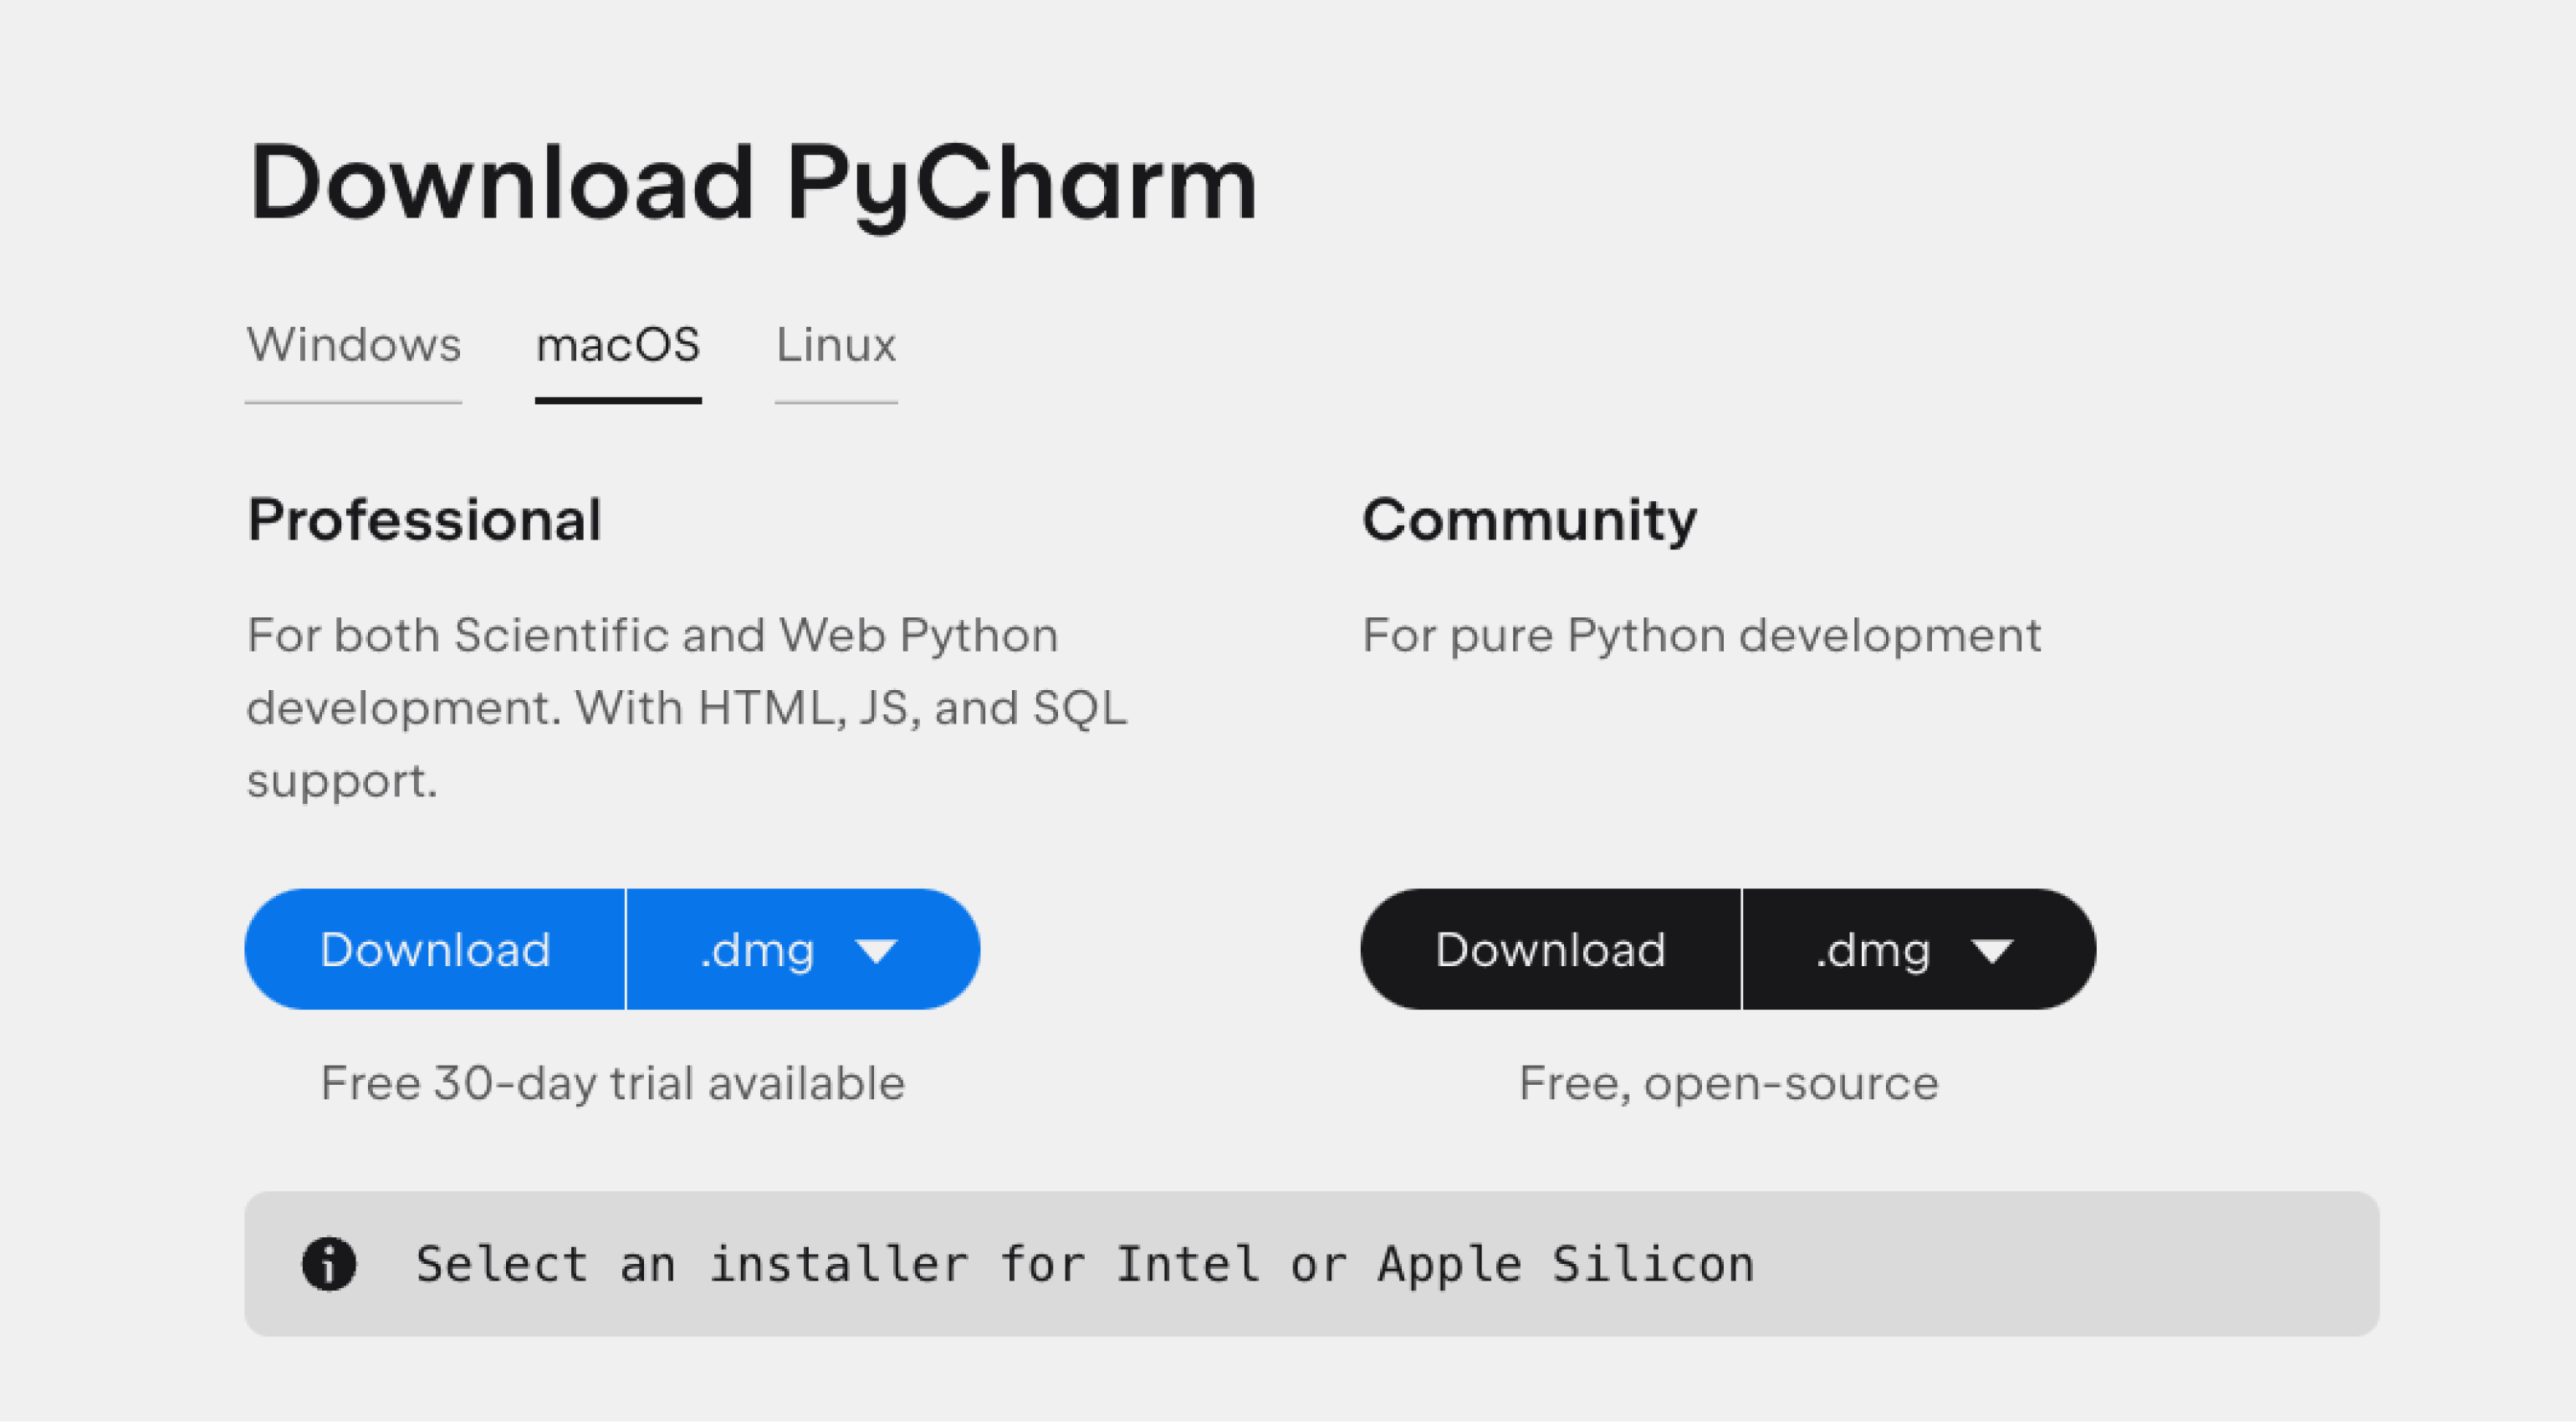
Чтобы установить PyCharm, зайдите на сайт JetBrains и нажмите кнопку Download:
Вам предложат выбрать операционную систему и версию среды разработки: Professional и Community. Community — это бесплатная версия, в которой отсутствует поддержка некоторых функций и фреймворков, например Django. Но на первых порах её вполне хватит, поэтому выбираем её:
Дальше начнётся загрузка файла. Ждём, а затем открываем его:
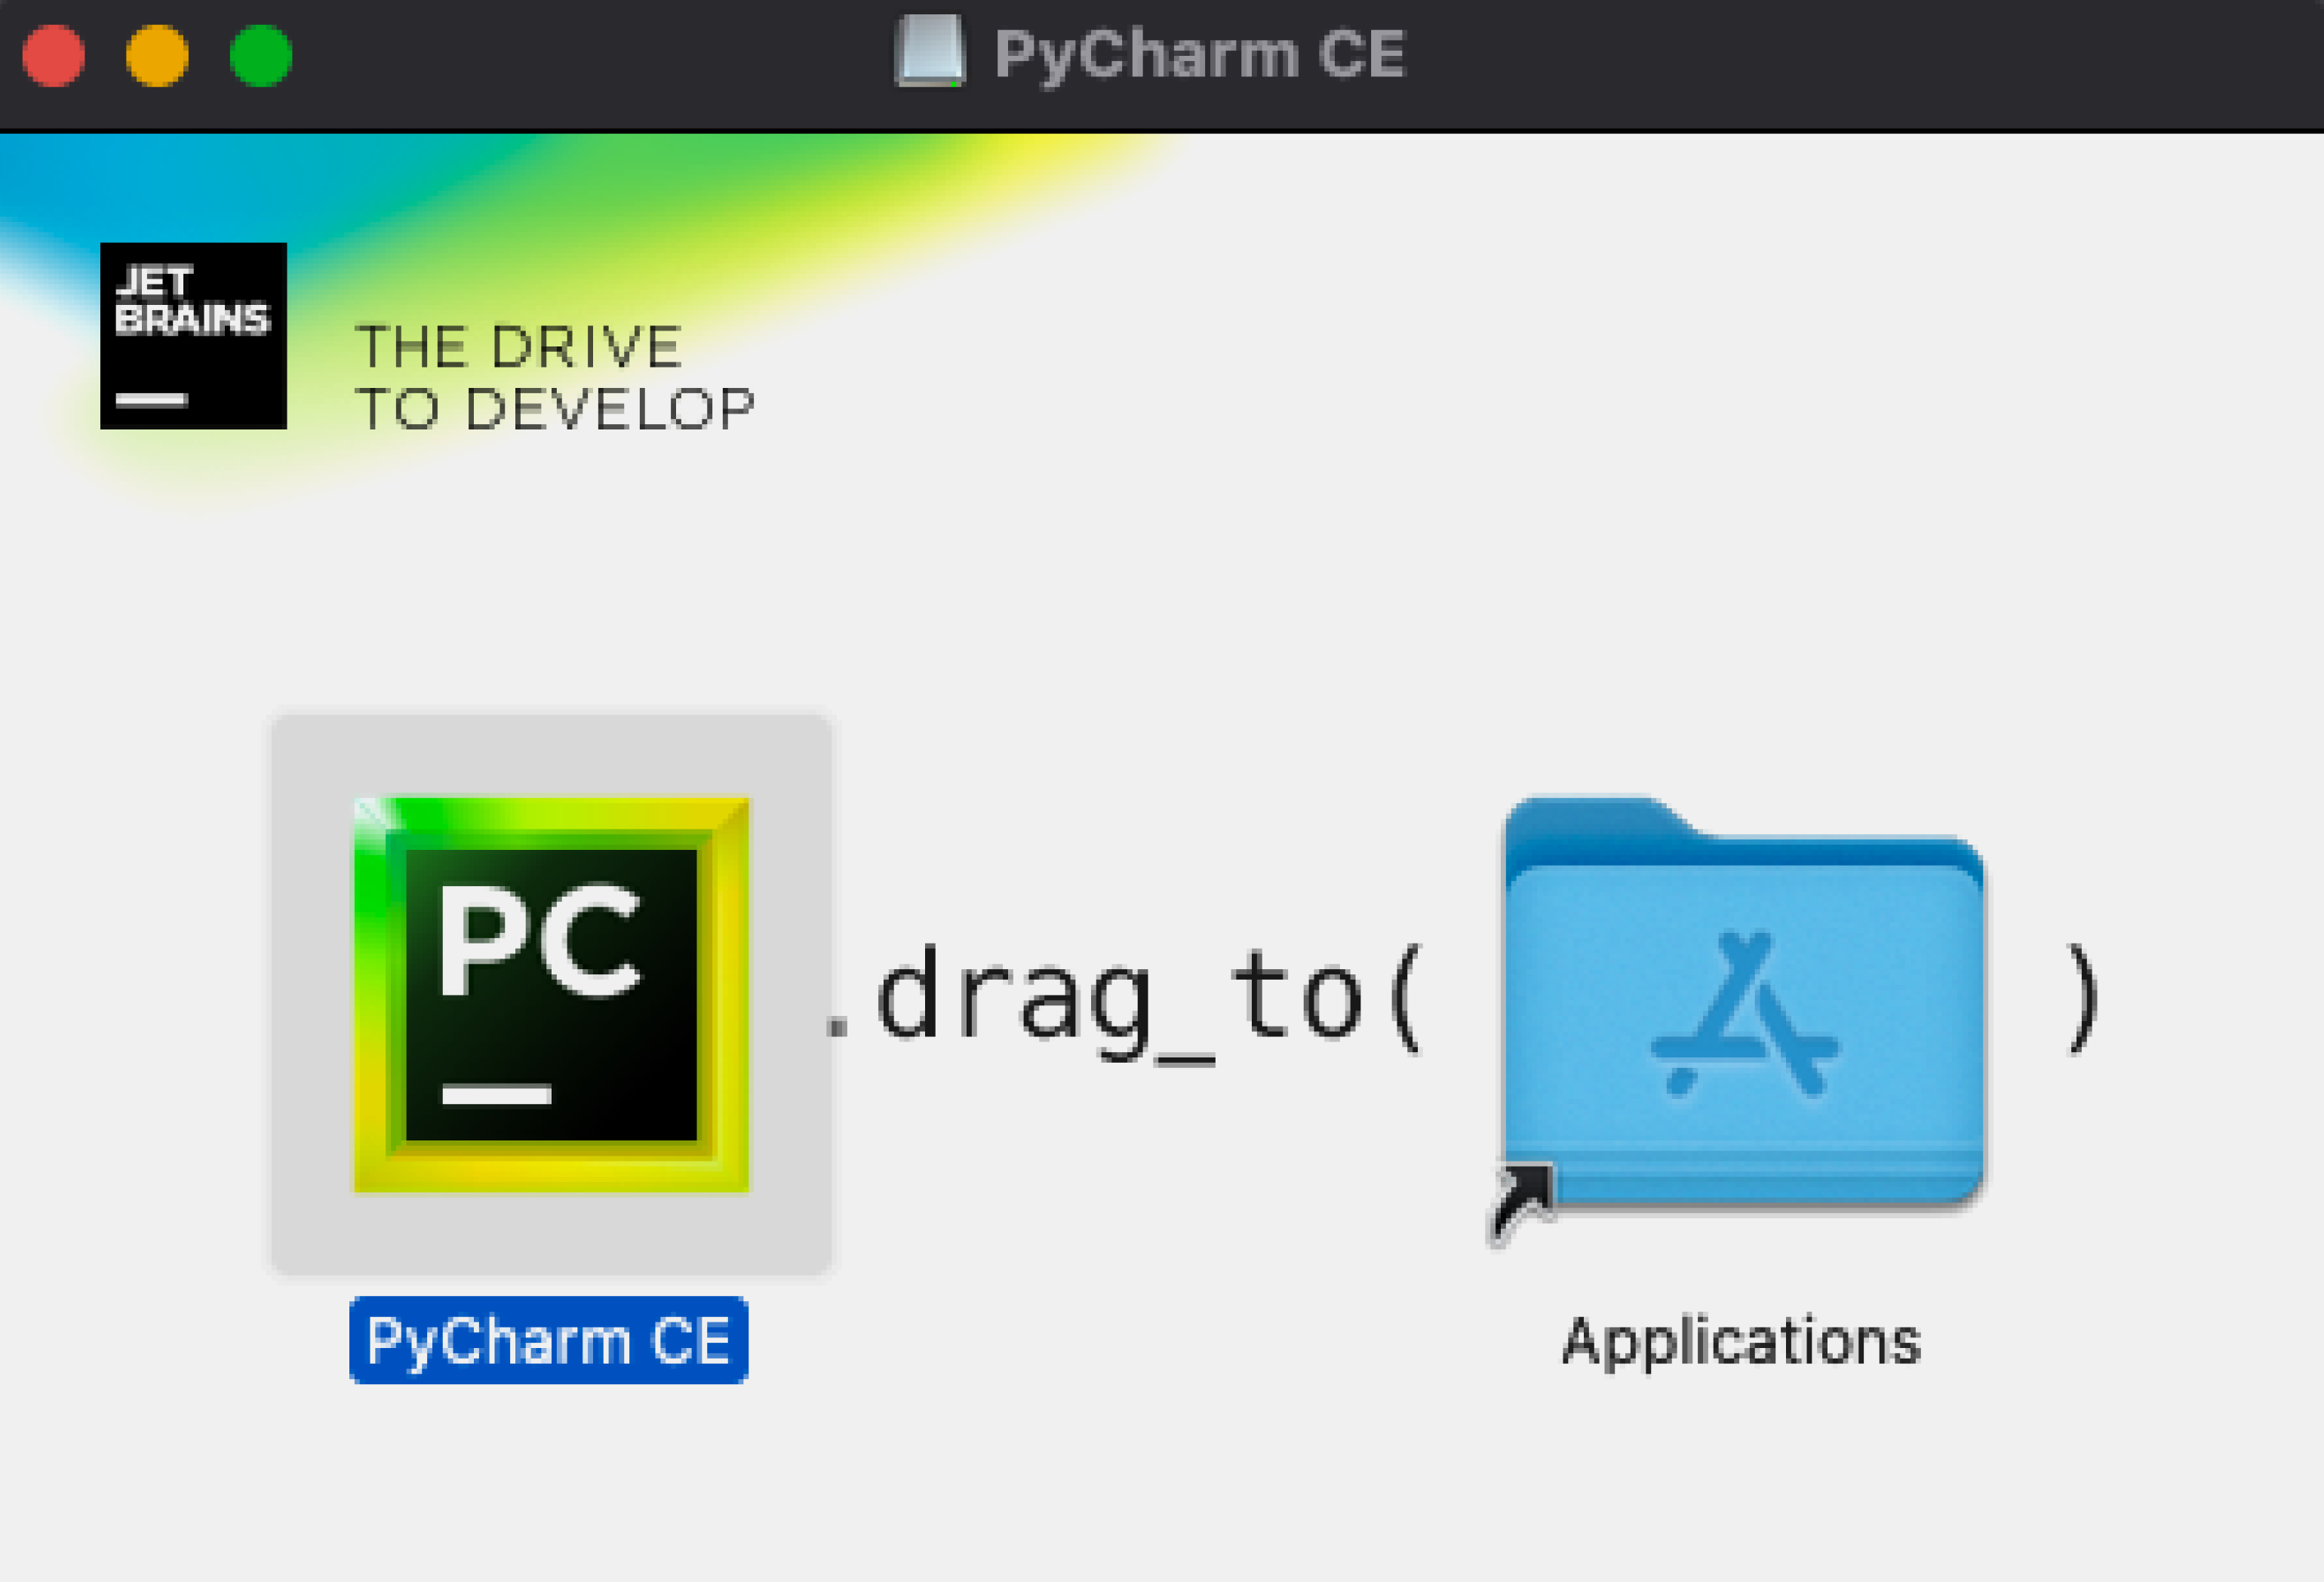
Перетаскиваем в папку Applications — готово.
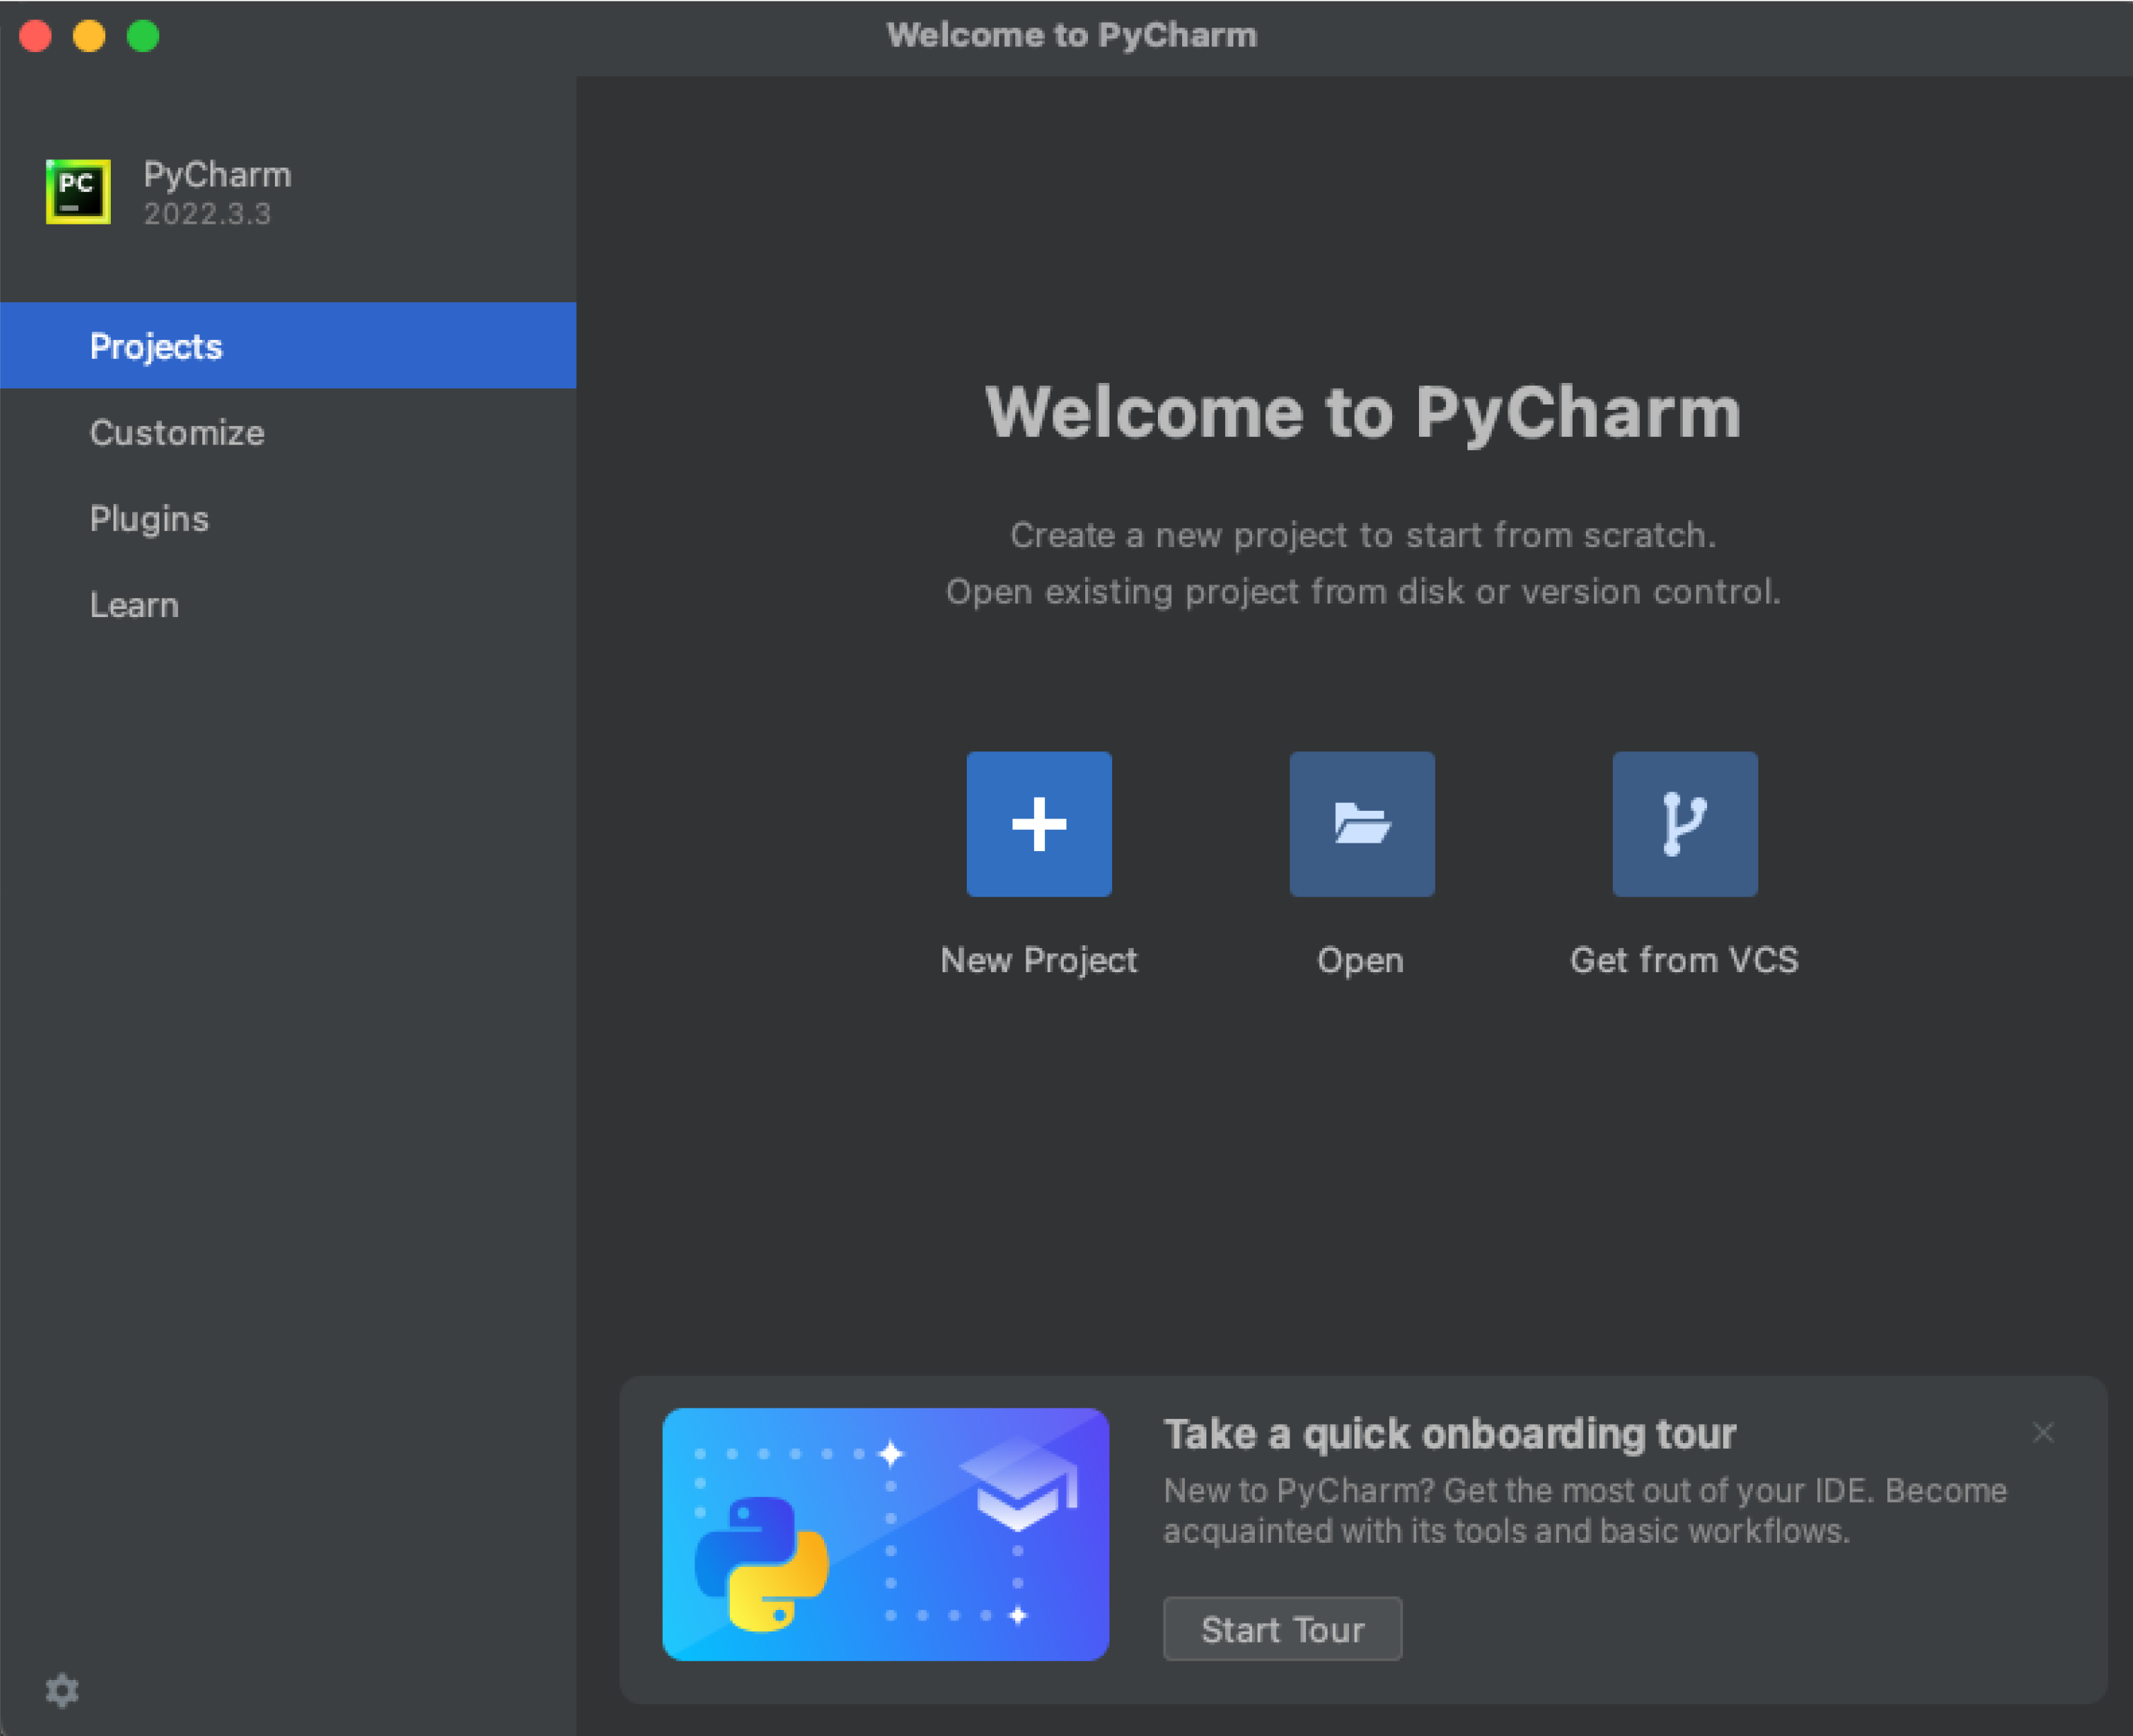
PyCharm установлена, можно создавать проекты и начинать программировать.
Вместо компилятора/интерпретатора CPython иногда используют альтернативные, написанные на других языках и лучше стыкующиеся с другими технологиями. Например, Jython и виртуальную машину JVM (для платформы Java). Или IronPython, написанный полностью на C# и предназначенный для .NET.

Бесплатный курс: «Быстрый старт в Python»
Начать учиться
Python is a high-level general-purpose programming language known for its simplicity, readability, and versatility. Python is used in web development, data science, artificial intelligence, and automation tasks. Python works with PIP, a package installer for managing external libraries and dependencies required in applications depending on your project needs.
This article explains how to install Python and Pip on Windows. You will install Python and manage multiple versions using graphical and terminal-based methods. In addition, you will create isolated development virtual environments to install specific libraries with Pip depending on your project needs.
Prerequisites
Before you begin, you need to:
- Have access to a Windows workstation as a user with Administrator privileges.
Install Python on Windows
You can install Python on Windows through multiple methods, including graphical and CLI steps. You can use the Windows store on desktop workstations, the Chocolatey package manager, or download the latest .exe Python package for Windows. Follow the steps below to install Python on Windows using any of the supported methods.
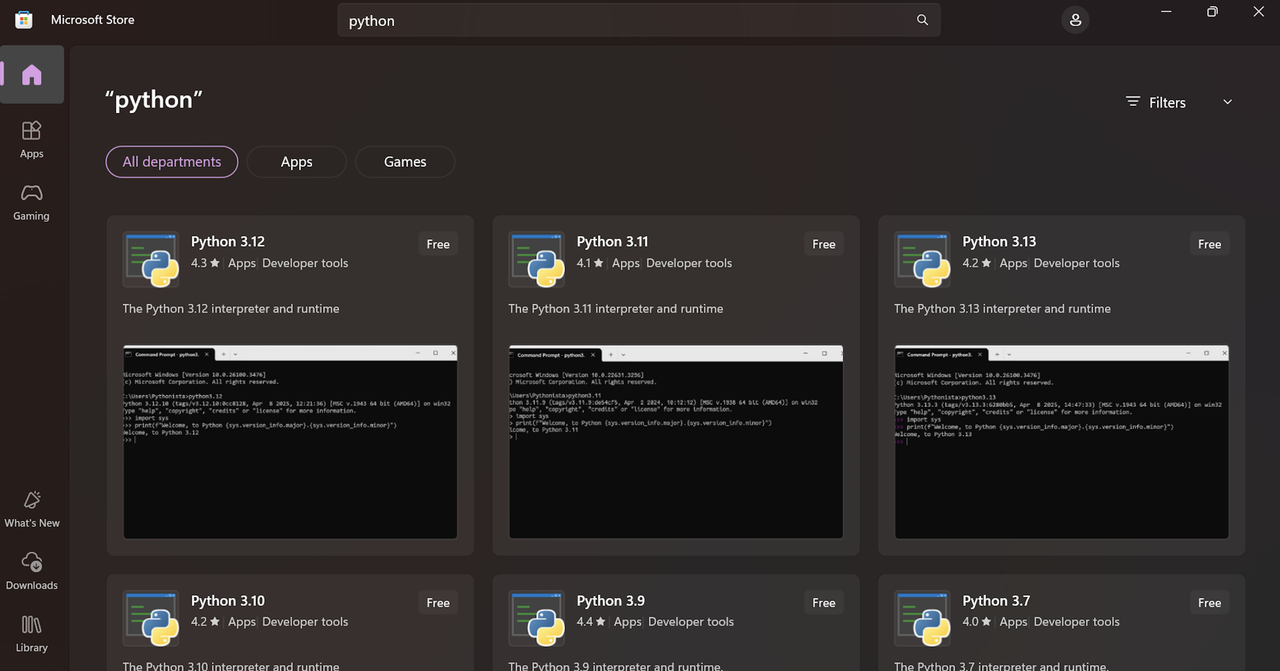
Install Python Using the Microsoft Store
Microsoft Store is the default source for installing Python on Windows desktop workstations. Running python in a Powershell window opens the store to install Python. Follow the steps below to install Python using the Microsoft Store.
-
Open the Windows start menu, search for Microsoft Store and click Open to launch the store.
-
Enter
pythonin the search bar and press ENTER. -
Select your desired Python version published by the Python Software Foundation.

-
Click Get to download and install the Python.
-
Verify that the installation is successful.
-
Open the Windows start menu, search for Command Prompt and click Open to launch a new terminal window.
-
Verify the installed Python version on your Windows workstation.
Your output should be similar to the one below:
Python 3.13.3

Install Python Using Chocolatey (choco)
Chocolatey is an open-source package manager for Windows that simplifies software installations and configuration. Installing Python with Chocolatey ensures that all configuration tasks, such as setting system environment PATH variables, are handled automatically. Follow the steps below to install Python using Chocolatey on Windows.
-
Open the Windows start menu, search for PowerShell, right click on Windows PowerShell, and select Run as administrator.
-
Verify the installed Chocolatey version.
Your output should be similar to the one below:
2.4.3-
Run the following command to install Chocolatey if it’s not available on your system.
pwsh
> Set-ExecutionPolicy Bypass -Scope Process -Force; [System.Net.ServicePointManager]::SecurityProtocol = [System.Net.ServicePointManager] ::SecurityProtocol -bor 3072; iex ((New-Object System.Net.WebClient).DownloadString('https://community.chocolatey.org/install.ps1'))
Close and reopen Windows PowerShell when the installation is successful to apply the system-wide changes.
-
Import the Chocolatey PowerShell module into the active session.
pwsh
> Import-Module $env:ChocolateyInstall\helpers\chocolateyProfile.psm1
-
-
List all available Python versions in the Chocolatey package sources.
pwsh
> choco list python --all
-
Install the latest available Python version.
pwsh
> choco install python -y
-
Run the following command to install a specific Python version such as
3.12.x.pwsh
> choco install python312 -y
-
-
Refresh the system environment variables.
-
Verify the installed Python version.
Your output should be similar to the one below:
Python 3.13.3 -
Verify the installed Pip version.
Your output should be similar to the one below:
pip 25.0.1 from C:\Python313\Lib\site-packages\pip (python 3.13) -
Open the Python shell.
Verify that your prompt changes to the Python shell similar to the one below.
Python 3.13.3 (tags/v3.13.3:6280bb5, Apr 8 2025, 14:47:33) [MSC v.1943 64 bit (AMD64)] on win32 Type "help", "copyright", "credits" or "license" for more information. >>> -
Print a message using Python and verify that the installation is successful.
python
>>> print("Greetings from Vultr")
Output:
Greetings from Vultr -
Exit the Python shell.
Install Python on Windows Using a Python Installer
You can install Python on Windows using a .exe Python Installer package downloaded from the official website with a graphical installation window. Follow the steps below to check your system architecture, download the correct Python installer, and install Python on Windows.
-
Open the Windows start menu, search and open Windows PowerShell.
-
Run the following command to display the system type.
pwsh
> (systeminfo | Select-String "System Type").ToString().Split(":")[1].Trim()
Your output should be similar to the one below:
x64-based PCThe Windows OS type is 64-bit based on the above
x64-based PCoutput, allowing you to install 64-bit applications on the workstation. -
Open your web browser and
-
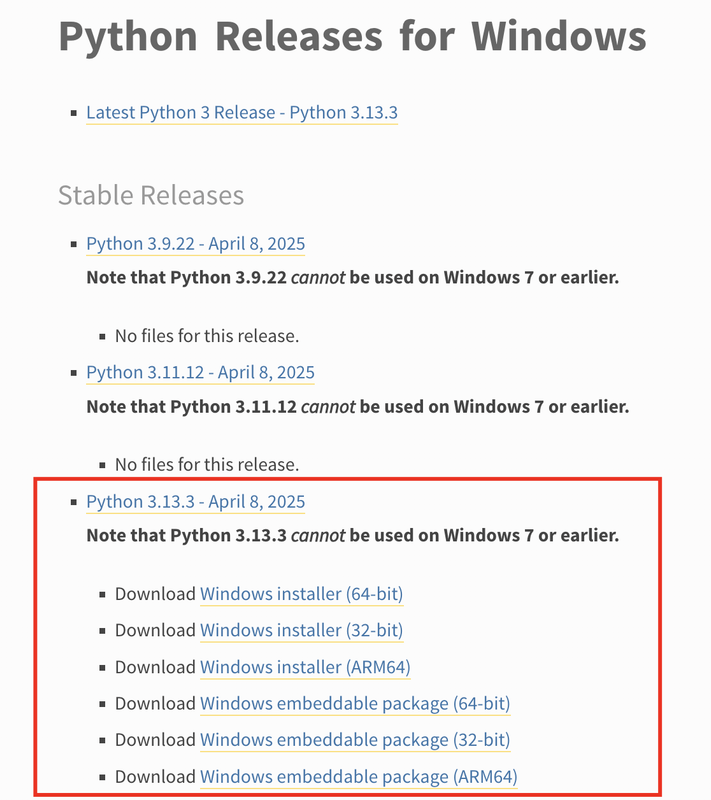
Visit the official Python releases page for Windows.
-
Verify the latest release (based on the date) within the Stable Releases section and click your target Python version.
-
Navigate to the Files section and click the installer type that matches your Windows system architecture, such as
Windows installer (64-bit). -
Verify that the
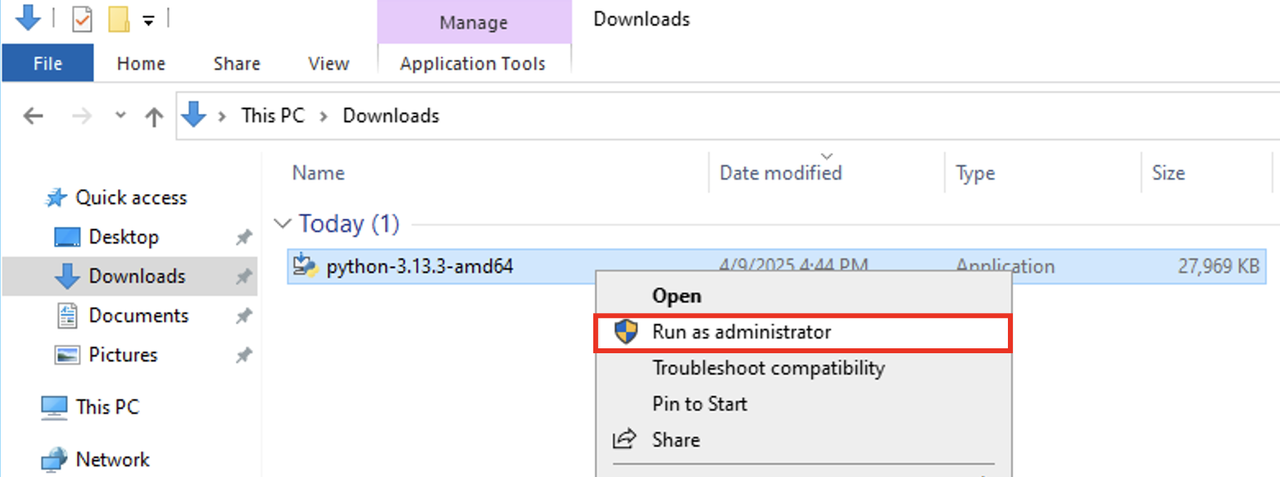
.exePython installer download is successful and locate it in your Downloads folder. -
Press Win + E to open File Explorer, then navigate to your Downloads folder.
-
Run the downloaded
.exePython installer, such as python-3.13.3-amd64 as an administrator. -
Right-click the file and select Run as administrator to launch the installer with elevated privileges.
-
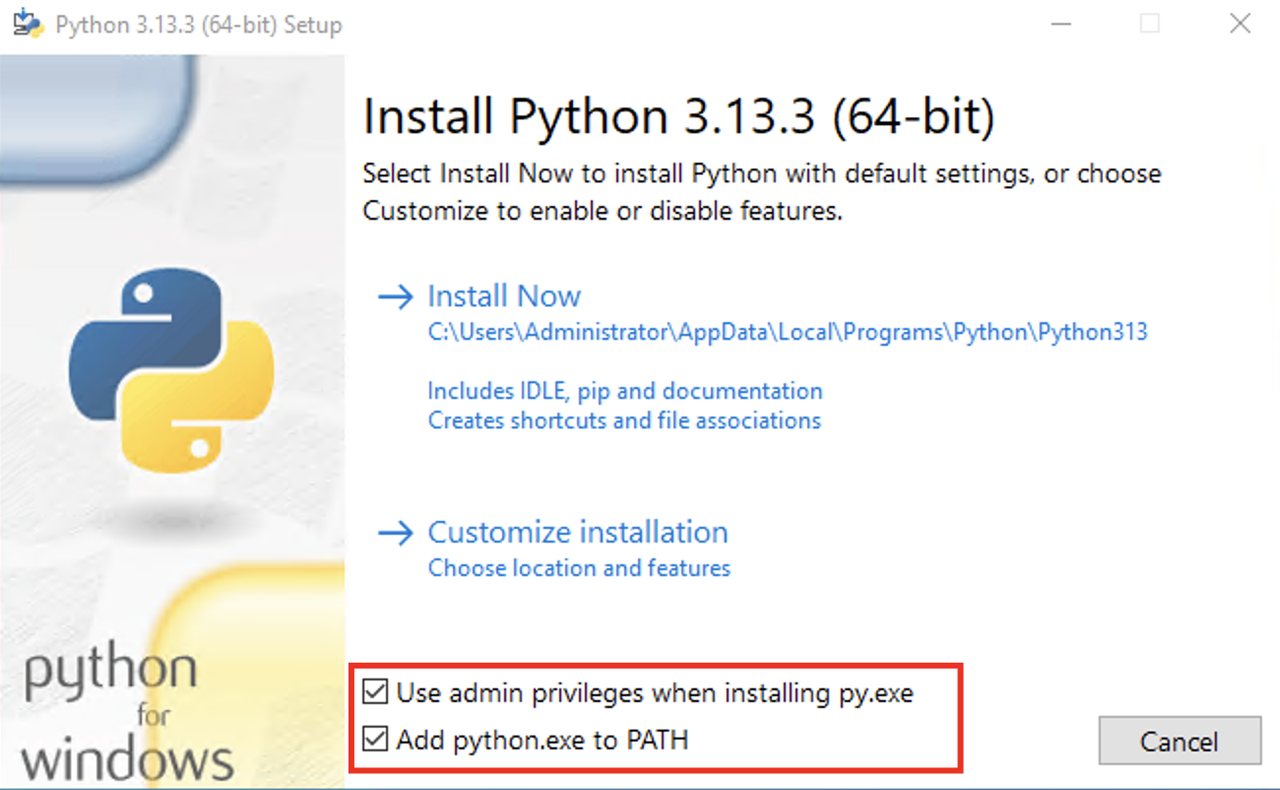
Check the
Use admin privileges when installing py.exeandAdd python.exe to PATHoptions in the Install Python window.
-
Click Install Now to install Python with the recommended settings and packages, or click Customize installation to set custom values.
-
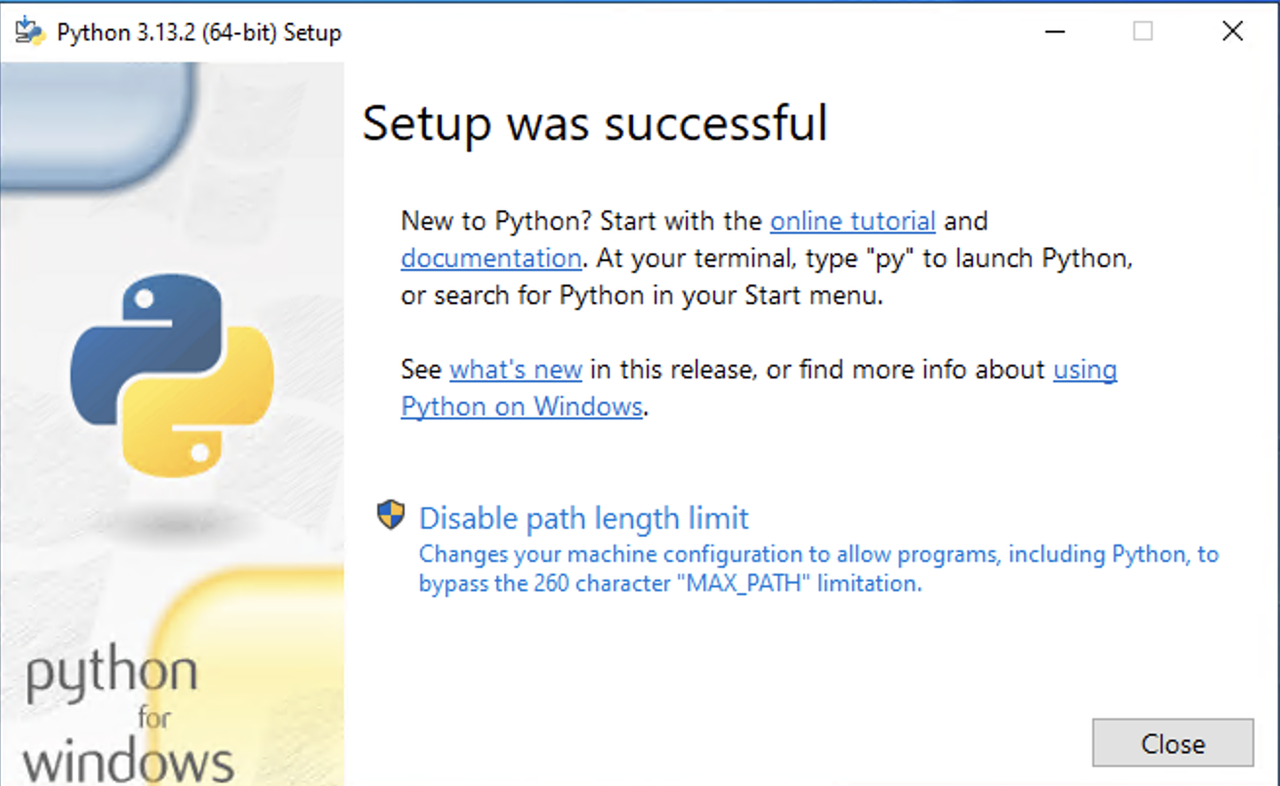
Monitor the installation process and verify that a
Setup was successfulpage displays in the installer.
-
Open the Windows start menu, search and open Command Prompt.
-
Verify the installed Python version.
Your output should be similar to the one below:
Python 3.13.3
Install and Manage Multiple Python Versions
You can install multiple Python versions on Windows, allowing you to run different projects on your workstation. Multiple Python versions enable you to work on different projects that require specific Python versions. You can install multiple Python versions with all supported methods, including Chocolatey, Windows Store, or the Python installer package. Follow the steps below to install and manage multiple Python versions using Chocolatey on your Windows workstation.
-
Run Windows PowerShell as an administrator.
-
Install Python 3.12 (if it’s not already installed).
pwsh
> choco install python312 -y
-
Install additional versions by changing the version suffix in the package name. For example, install
Python 3.11.pwsh
> choco install python311 -y
Repeat the above installation steps for every version you’d like to install on your Windows workstation.
Manage Installed Python Versions Using Python Version Launcher
Windows includes the Python Launcher (py) application, which allows you to manage and invoke multiple installed Python versions from the command line. Managing Python versions is useful when working with multiple projects that require different Python versions.
-
Open a new Windows PowerShell session.
-
List all installed Python versions.
Your output should be similar to the one below:
-V:3.13 * Python 3.13 (64-bit) -V:3.12 Python 3.12 (64-bit) -V:3.11 Python 3.11 (64-bit) -
Run a specific Python version, such as
3.13, using thepylauncher to open the Python shell. Replace3.13with the target Python version you’d like to access. -
Run a script with a specific Python version. For example, run the
hello.pyscript with Python 3.12.pwsh
> py -3.12 /path/to/your/python/script.py
-
Check the active Python version.
Your output should be similar to the one below:
Python 3.13.3-
Open the
py.inifile and change the Python defaults option to change the default version on Windows.pwsh
> %USERPROFILE%\AppData\Local\py.ini
-
How to Use Python on Windows
You can use Python on Windows after installing it using any supported method. Running Python programs and commands requires Windows PowerShell or an IDE such as IDLE or VSCode that supports the Python language. You can also run Python directly using the Windows Command Prompt or PowerShell. Follow the steps below to use Python on Windows.
Use Python with the Windows PowerShell
-
Open the Windows Powershell.
-
Verify the active Python version.
-
Enter
pythonto open the Python shell. -
Print a
Greetings from Vultrmessage using Python.python
>>> print("Greetings from Vultr")
Output:
Greetings from Vultr -
Exit the Python shell.
-
Create a test
hello.pyscript to verify that Python has access to the system directories.pwsh
> "print('Greetings from Vultr!')" > hello.py
-
Execute the file using Python.
Using IDLE — Python’s Integrated Development Environment
Python includes IDLE (Integrated Development and Learning Environment), a built-in graphical application for running Python code. You can use IDLE to access the Python shell and run multiple commands or execute application files. Follow the steps below to open and use IDLE in Windows.
-
Open the Windows start menu, search for IDLE and open it.
-
Verify that IDLE opens with a default Python shell. Run the following command to print a message using Python.
python
>>> print("Greetings from Vultr")
Output:
Greetings from Vultr -
Click File and select New File to create a new Python script.
-
Enter your Python code.
-
Press Ctrl + S to save the file with a
.pyextension. -
Press F5 to execute the Python script.
Create and Manage Virtual Environments Using Python in Windows
Python virtual environments allow you to manage dependencies for individual projects. This prevents version conflicts between packages required by different applications. Follow the steps below to install the virtualenv module, create and manage virtual environments using Python.
-
Check the default Python version.
Your output should be similar to the one below:
Python 3.13.3 -
Install the
virtualenvmodule usingpipfor the default Python version.pwsh
> python -m pip install virtualenv
-
Specify a Python version, such as
python3.12to install thevirtualenvmodule.pwsh
> python3.12 -m pip install virtualenv
-
-
Create a new
venvvirtual environment using the default Python version. Replacevenvwith your desired virtual environment name.pwsh
> python -m virtualenv venv
-
Activate the
venvvirtual environment.-
Verify that your terminal prompt changes to the
venvvirtual environment.pwsh
(venv) PS C:\path\to\your\project>
-
-
Use Pip to install a package such as
requestsin the virtual environment. -
List all installed packages in the virtual environment.
Your output should be similar to the one below:
Package Version ------------------ --------- certifi 2025.1.31 charset-normalizer 3.4.1 idna 3.10 pip 25.0.1 requests 2.32.3 urllib3 2.3.0 -
Deactivate the virtual environment.
Upgrade Pip on Windows
Python’s package manager, Pip, is typically included when you install Python through Chocolatey or the official installer. You may need to install or upgrade Pip manually when managing multiple Python versions. Follow the steps below to verify the installed Pip version and upgrade it on your Windows workstation.
-
Verify the installed Pip version.
Your output should be similar to the one below:
pip 24.3.1 from C:\Python313\Lib\site-packages\pip (python 3.13) -
Upgrade Pip.
pwsh
> python -m pip install --upgrade pip
-
Verify the upgraded Pip version.
Your output should be similar to the one below:
pip 25.0.1 from C:\Python313\Lib\site-packages\pip (python 3.13)
Conclusion
You have installed Python and pip on Windows using terminal and graphical-based methods. You can use Python in existing applications, create virtual environments and set up new Python applications with compatible tools, including IDEs and the Windows PowerShell. Visit the Python documentation for more information and configuration options.
This tutorial shows how to run Python on Windows, focusing on web data extraction. It covers workspace setup, Python installation, configuring Visual Studio Code, and preparing web scraping code to extract product data from an e-commerce site.
Prepare your development workspace
A development workspace is the foundation of a coding environment. Let’s organize development files.
Project-based directory structure:
C:\Users\YourName\Projects\
    │── python_projects\
    │   │── project1\
    │   │── project2\
    └── venv\
To create this structure, open Command Prompt (cmd.exe) and execute:
mkdir C:\Users\%USERNAME%\Projects\python_projects
cd C:\Users\%USERNAME%\Projects\python_projects
Install Python
-
Go to the official website and download the latest stable release.
-
During installation, ensure to check Add Python to PATH. To verify installation, open Command Prompt and type:
python --version

# Expected output with a version number:
Python 3.X.X
Verify package management functionality via Command Prompt:
pip --version

# Expected output:
pip 25.X.X from C:\Users\...\pip (python 3.X)
Install Visual Studio Code
In simple terms, VS Code is a text editor for source code. It’s considered to be among the best integrated development environments (IDEs). IDEs are helpful for debugging, syntax error highlighting, running code, and many other ease-of-use functions.
-
Download VS Code.
-
Install Python extension:
-
Open VS Code
-
Press Ctrl+Shift+X
-
Search for Python
-
Install Microsoft’s Python extension
3. Configure Python interpreter:
-
Press Ctrl+Shift+P
-
Select Python: Select Interpreter
-
Choose your Python installation
4. Configure VS Code for Python development:
// settings.json
{
    "python.defaultInterpreterPath": "C:\\Users\\YourName\\Projects\\python_projects\\venv\\Scripts\\python.exe",
    "python.formatting.provider": "black",
    "editor.formatOnSave": true
}
Web scraping code example
Before running Python scripts, install the required packages. Requests for HTTP operations and Beautiful Soup for HTML parsing.
pip install requests beautifulsoup4The following Python code uses freshly installed requests, Beautiful Soup libraries, and a built-in csv module.
Here’s an example of web scraping from a mock e-commerce marketplace, extracting product titles and prices.
# Import required libraries
import requests                # For making web requests
from bs4 import BeautifulSoup  # For parsing HTML
import csv                     # For saving data

def scrape_products():
    """
    Scrapes product information from a web page and saves to CSV.
    """
    # Step 1: Get the web page
    url = 'https://sandbox.oxylabs.io/products/category/pc'
    webpage = requests.get(url)

    # Step 2: Parse HTML content
    soup = BeautifulSoup(webpage.text, 'html.parser')

    # Step 3: Find all products
    products = soup.find_all('div', class_='product-card')

    # Step 4: Save data to CSV file
    with open('products.csv', 'w', newline='') as file:
        writer = csv.writer(file)

        # Write header row
        writer.writerow(['Product Name', 'Price'])

        # Write product data
        for product in products:
            # Get product details
            name = product.find('h4').text.strip()
            price = product.find(class_='price-wrapper').text.strip()

            # Save to CSV
            writer.writerow([name, price])

    print("Check products.csv for the results.")

# Run the scraper
scrape_products()
This Python code exercises several basics:
-
HTTP GET request
-
HTML parsing
-
CSV data writing
The code creates a CSV file containing product information in your working directory. Each row contains a product title and its corresponding price.
For optimal performance in real-world scenarios, the Python code could, at the very least, include:
-
User-Agent headers to identify as an actual browser
-
Error handling for network and parsing issues
-
Retry logic or timeout configurations
-
Proxy support to avoid blocks
NOTE: It’s not the best idea to set up proxies on Windows through system settings, as the web scraper acts as a browser. The Python requests code should integrate proxies directly.
Prebuilt scrapers
Prebuilt web scraper APIs automate and handle processes in web data collection architectures. Coding is reduced to a minimum as you can formulate a desirable task request without worrying about scripting complex processes.
Up-to-date scraper APIs handle complex JavaScript execution and dynamic content loading, rendering modern web applications with high accuracy.
The key pros of scraper APIs are saving time and reducing engineering resources.
Infrastructure management
-
Elimination of server maintenance overhead
-
Built-in handling of IP rotation and proxy management
-
Automatic scaling based on throughput requirements
Reliability engineering
-
Uptime management (typically 99.9%+)
-
Built-in retry mechanisms for failed requests
-
Automatic handling of CAPTCHAs and anti-bot measures
Data quality assurance
-
Structured output formats (JSON, CSV)
-
Consistent parsing of dynamic JavaScript content
-
Built-in error handling and reporting mechanisms
Oxylabs Web Scraper API
Claim a 1-week free trial and automate scraping with maintenance-free infrastructure.
- 5K requests for FREE
- No credit card is required
Wrap up
Python is arguably the simplest way to collect publicly available web data. With simple Python code, you can send an HTTP request, extract data, and structure it to make sense of HTML. It’s straightforward when targeting simple websites.
However, collecting large amounts of data from challenging targets, such as the most popular e-commerce websites, is increasingly difficult. You have to juggle many variables (proxies, headless browsers, JavaScript rendering, HTTP headers, retries) to obtain any kind of data before even considering bulk extraction at regular intervals.
For answers to Python topics, check top Python web scraping questions, such as how to send POST using Python requests.
Learn how Python compares to other programming languages in web scraping:
-
JavaScript vs Python
-
Go vs Python
Frequently asked questions
How do I run a Python program on Windows?
Install Python:
-
Download the official Python installer from python.org
-
Run the installer with Add Python to PATH enabled
Run a Python code using one of the following:
-
Command line (Command Prompt or PowerShell)
-
Integrated development environment (IDE)
-
Using IDLE (Python’s built-in editor)
How do I run Python from the command line?
To run a Python code on Windows, open Command Prompt (cmd.exe), navigate to your program’s directory using the cd command, type python filename.py, and press Enter.
Make sure Python installed and was added to your system’s PATH environment variable first.
cd C:\Users\YourName\Projects
python_file.py
If it doesn’t work, ensure Python is installed and added to your system’s PATH environment variable. You can verify the installation by running:
python --version
How to run Python output in cmd?
To run Python output in Command Prompt on Windows:
-
Open Command Prompt (cmd.exe)
-
Navigate to your Python file’s directory using: cd path\to\directory
-
Run the Python file with: python filename.py
cd C:\Users\YourName\Documents
python_fle.py
NOTE: Ensure Python is added to your system’s PATH environment variable.
How to run the first Python program?
The simplest way to run your first program:
-
Download Python from python.org and install it (check Add Python to PATH during installation).
-
Open Notepad, write your Python code, and save it with a .py file extension.
-
Open a Command Prompt (cmd).
-
Navigate to your file’s location using the cd command.
-
Run your program by typing python your_file.py.
About the author

Augustas Pelakauskas
Senior Technical Copywriter
Augustas Pelakauskas was a Senior Technical Copywriter at Oxylabs. Coming from an artistic background, he is deeply invested in various creative ventures — the most recent being writing. After testing his abilities in freelance journalism, he transitioned to tech content creation. When at ease, he enjoys the sunny outdoors and active recreation. As it turns out, his bicycle is his fourth-best friend.
All information on Oxylabs Blog is provided on an «as is» basis and for informational purposes only. We make no representation and disclaim all liability with respect to your use of any information contained on Oxylabs Blog or any third-party websites that may be linked therein. Before engaging in scraping activities of any kind you should consult your legal advisors and carefully read the particular website’s terms of service or receive a scraping license.
Related articles

How to Run a Python Script
Learn how to run a Python script using a command line interface, integrated development environment, and interactive mode.
Augustas Pelakauskas
2025-02-06


ISO/IEC 27001:2017 certified products:
Scale up your business with Oxylabs®
Forget about complex web scraping processes
Choose Oxylabs’ advanced web intelligence collection solutions to gather real-time public data hassle-free.
Last Updated :
18 Apr, 2025
Python is a high-level programming language that has become increasingly popular due to its simplicity, versatility, and extensive range of applications. The process of How to install Python in Windows, operating system is relatively easy and involves a few uncomplicated steps.
This article aims to take you through the process of downloading and installing Python on your Windows computer. To Install Python on Linux or Mac visit the below link:
- Install Python on Linux
- Install Python on Mac
How to Install Python in Windows?
We have provided step-by-step instructions to guide you and ensure a successful installation. Whether you are new to programming or have some experience, mastering how to install Python on Windows will enable you to utilize this potent language and uncover its full range of potential applications.
To download Python on your system, you can use the following steps
Step 1: Select Version to Install Python
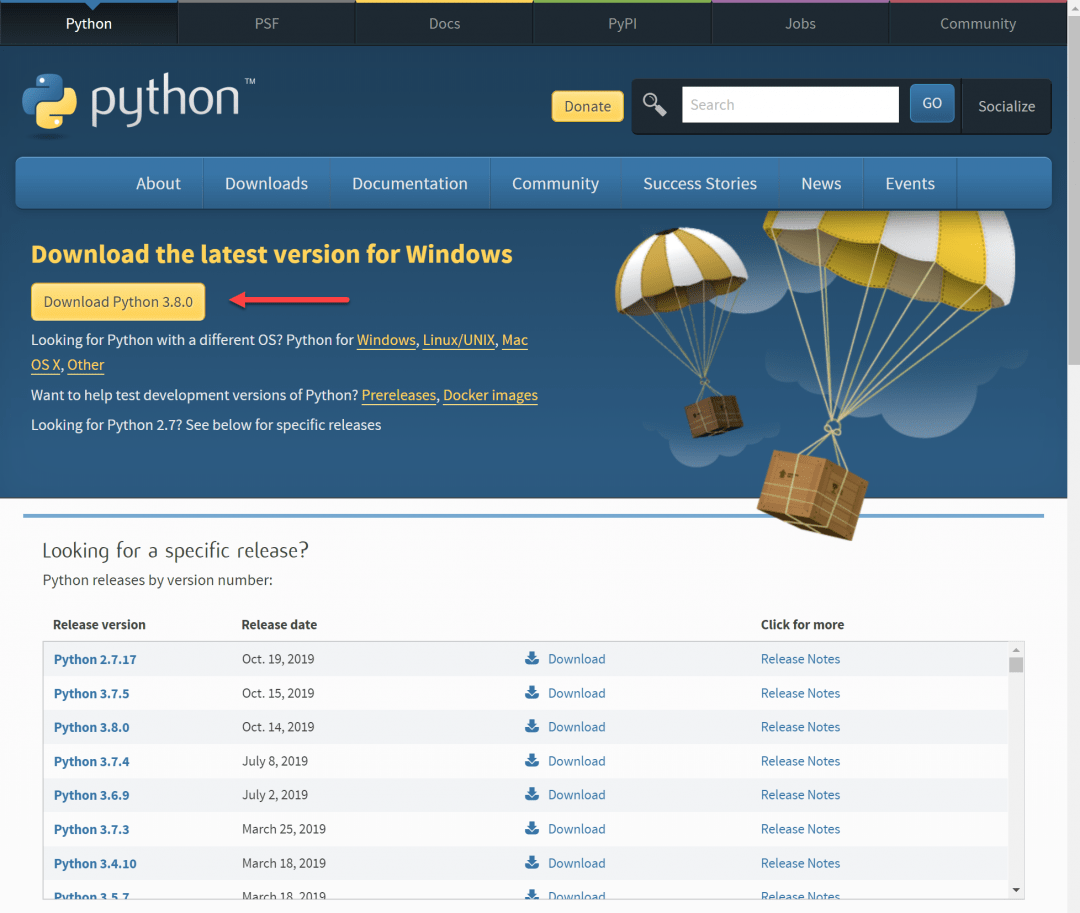
Visit the official page for Python https://www.python.org/downloads/ on the Windows operating system. Locate a reliable version of Python 3, preferably version 3.10.11, which was used in testing this tutorial. Choose the correct link for your device from the options provided: either Windows installer (64-bit) or Windows installer (32-bit) and proceed to download the executable file.

Python Homepage
Step 2: Downloading the Python Installer
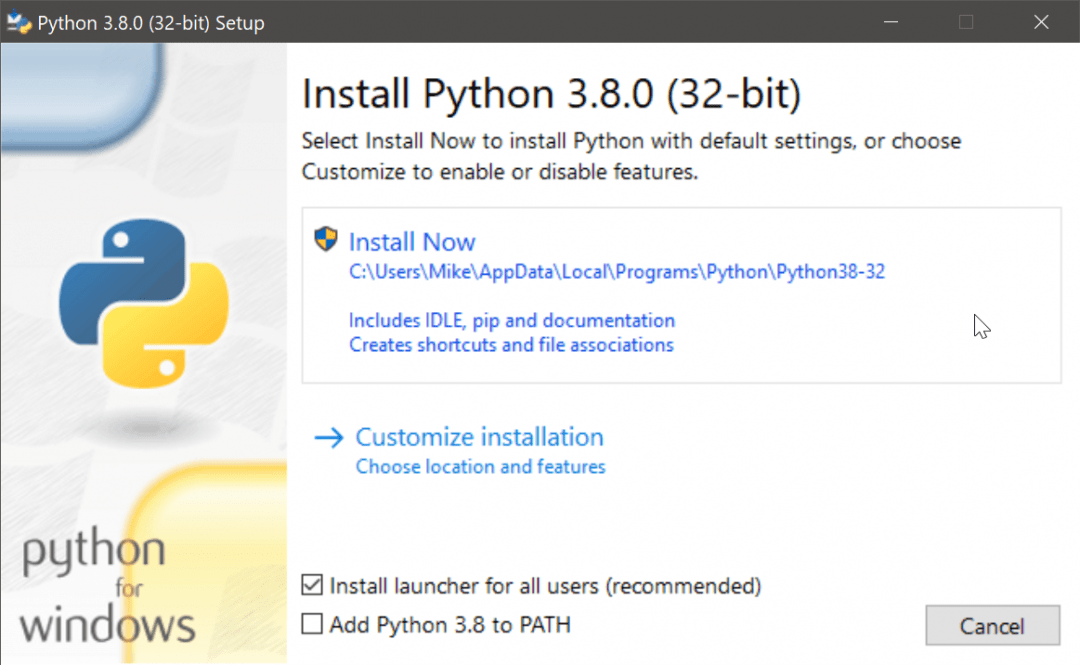
Once you have downloaded the installer, open the .exe file, such as python-3.10.11-amd64.exe, by double-clicking it to launch the Python installer. Choose the option to Install the launcher for all users by checking the corresponding checkbox, so that all users of the computer can access the Python launcher application.Enable users to run Python from the command line by checking the Add python.exe to PATH checkbox.

Python Installer
After Clicking the Install Now Button the setup will start installing Python on your Windows system. You will see a window like this.

Python Setup
Step 3: Running the Executable Installer
After completing the setup. Python will be installed on your Windows system. You will see a successful message.
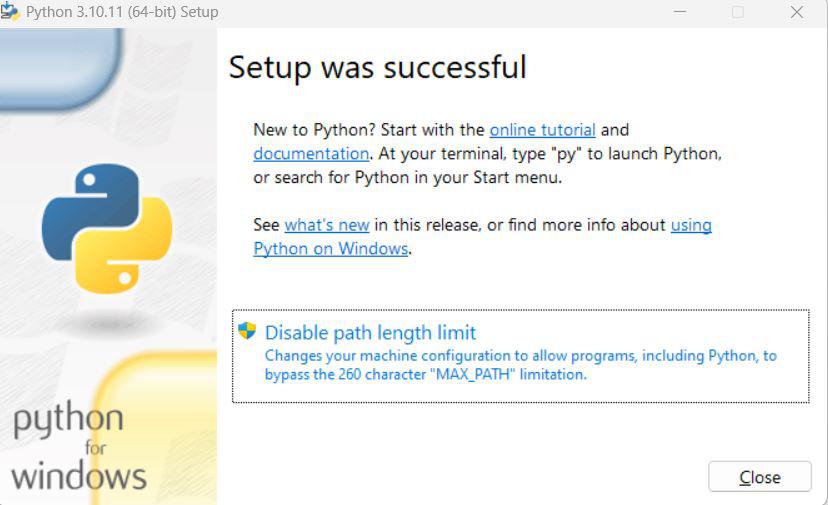
Python Successfully installed
Step 4: Verify the Python Installation in Windows
Close the window after successful installation of Python. You can check if the installation of Python was successful by using either the command line or the Integrated Development Environment (IDLE), which you may have installed. To access the command line, click on the Start menu and type “cmd” in the search bar. Then click on Command Prompt.
python --version

Python version
You can also check the version of Python by opening the IDLE application. Go to Start and enter IDLE in the search bar and then click the IDLE app, for example, IDLE (Python 3.10.11 64-bit). If you can see the Python IDLE window then you are successfully able to download and installed Python on Windows.

Python IDLE
Getting Started with Python
Python is a lot easier to code and learn. Python programs can be written on any plain text editor like Notepad, notepad++, or anything of that sort. One can also use an Online IDE to run Python code or can even install one on their system to make it more feasible to write these codes because IDEs provide a lot of features like an intuitive code editor, debugger, compiler, etc. To begin with, writing Python Codes and performing various intriguing and useful operations, one must have Python installed on their System.
You can refer to this article to learn more about Python – Python Tutorial
Это занимает всего 10 минут.

Обновлено 16.07.2024
medium
Если нужно быстро протестировать что-то простое на Python, можно использовать онлайн-компиляторы, но для полноценной работы их недостаточно. Чтобы использовать всю мощь Python, нужно установить его на свой компьютер, и тогда можно подключать к нему любые библиотеки и писать код любой сложности.
В этой статье покажем, как установить Python под Windows и как с ним работать. Для MacOS всё почти то же самое, а если у вас Linux, то вы лучше нас знаете, как это сделать.
Если вы только начинаете знакомиться с языком программирования Python, посмотрите наш мастрид — в нём мы собрали самое важное и интересное для старта.
Скачивание и установка
Для начала нам нужно скачать установщик с официального сайта — python.org. Если качать Python с других сайтов, можно подцепить вирус или троян. Скачивайте программы только с официальных сайтов.
Несмотря на то, что Python 3 вышел в 2008 году, многие до сих пор спорят о том, какую версию лучше использовать — вторую или третью. Мы за прогресс, поэтому качаем Python 3, но вы можете выбрать любую другую.
На главной странице сразу видим большую жёлтую кнопку, на которой написано «Download Python». Нажимаем, сохраняем и запускаем файл. Он весит около 25 мегабайт.
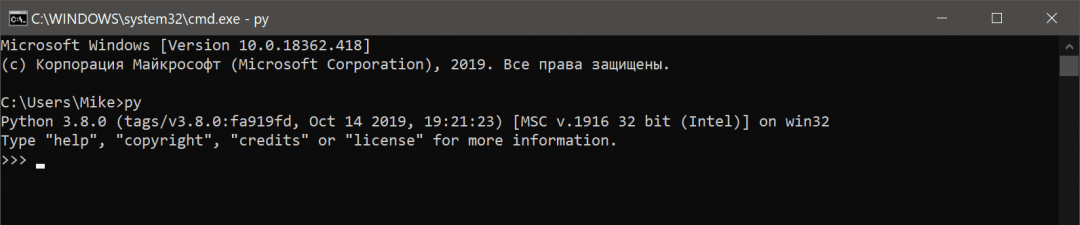
Когда установка закончится, нужно проверить, что всё было сделано правильно. Для этого в командной строке наберите py (латиницей) или python и нажмите клавишу ввода. Если всё хорошо, в ответ Python вам напишет номер своей версии и сборки и предложит несколько команд для знакомства с собой:
Запуск программ
Пока наш Python может работать только через командную строку — какие команды введёте, те он и выполнит. Многим разработчикам это нравится, но для старта это неудобно. Например, чтобы запустить программу, нужно написать в командной строке так:
py полное_имя_файла
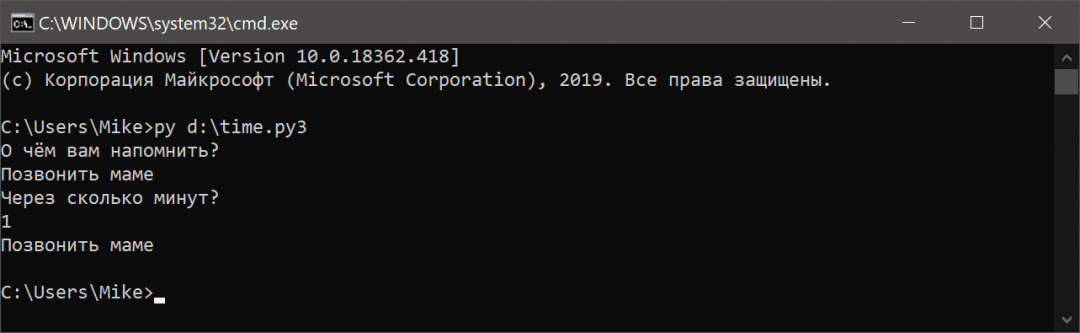
Полное имя означает, что нужно написать не только название файла, но и диск с папкой, где он находится. Чтобы было понятнее, давайте возьмём наш код из статьи про таймер на Python и сохраним его в файле time.py3 на диске D. Py3 означает, что внутри этого файла будет код на Python3. Можно просто назвать файл python.py, без тройки, но для некоторых моментов это может быть важно.
Теперь, чтобы запустить наш код, напишем в командной строке:
py D:\time.py3
Результат работы — выполненный алгоритм:
Вам может быть интересно:
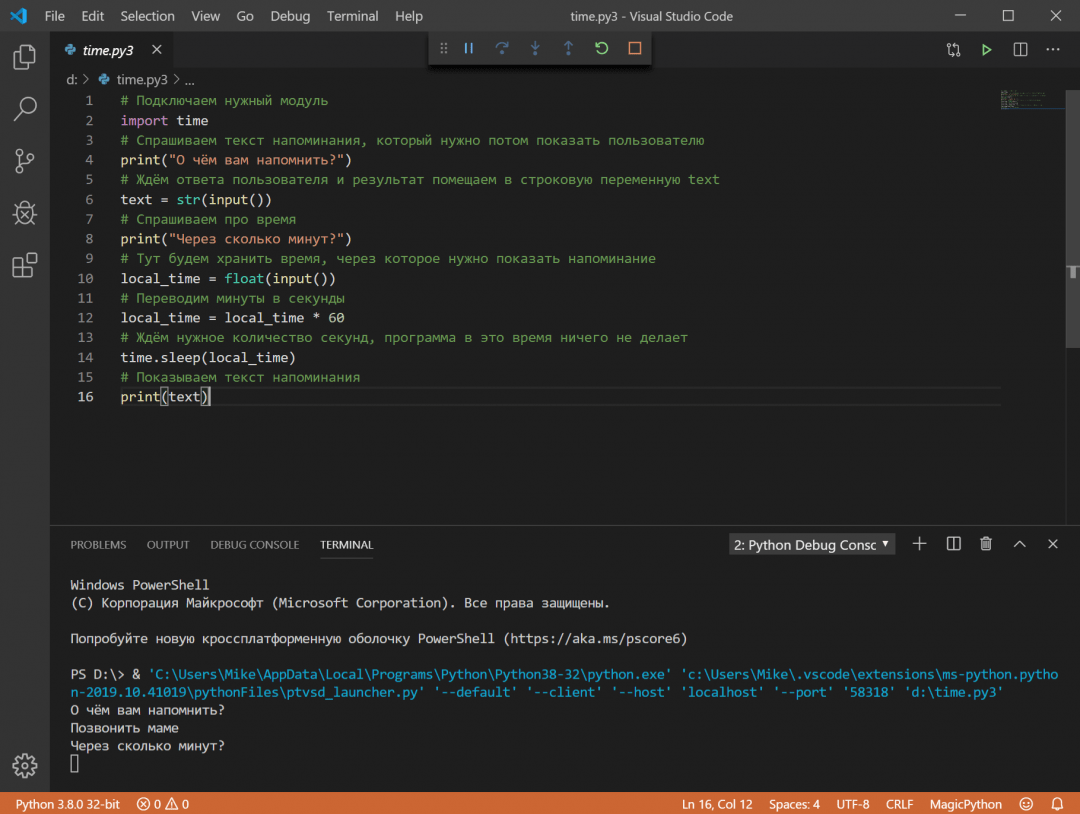
Подключаем VS Code
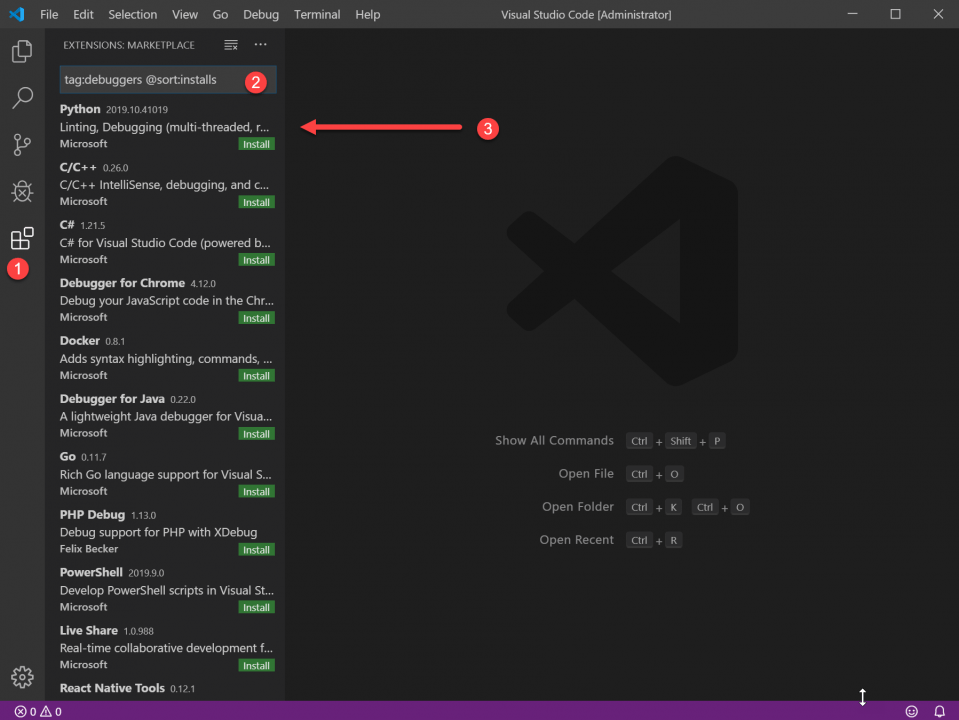
Мы уже рассказывали об этом редакторе кода — он быстрый, бесплатный и есть много плагинов. Чтобы работать с Python-файлами было проще, научим VS Code понимать и запускать их. Для этого нам нужно найти и установить специальный плагин для этого языка. Открываем вкладку Расширения (Extensions) и пишем такое:
tag:debuggers @sort:installs
В результатах поиска находим Python и нажимаем Install:
Затем то же самое делаем для подсветки синтаксиса: пишем в Расширениях команду ext:py3 и устанавливаем плагин MagicPython. После этого перезапускаем VS Code, открываем наш файл и нажимаем F5. Когда выпадающее окошко спросит, с чем будем работать — выбираем Python. В итоге мы получаем редактор кода с нужной нам подсветкой синтаксиса и результатом работы в том же окне. Красота!
Вёрстка:
Маша Климентьева