
Applies ToWindows 11 Windows 10
If you’ve recently installed a Windows Update and the update is causing your device to have errors or other issues, uninstall the update to try to resolve the issue.
Uninstall an update from Settings
-
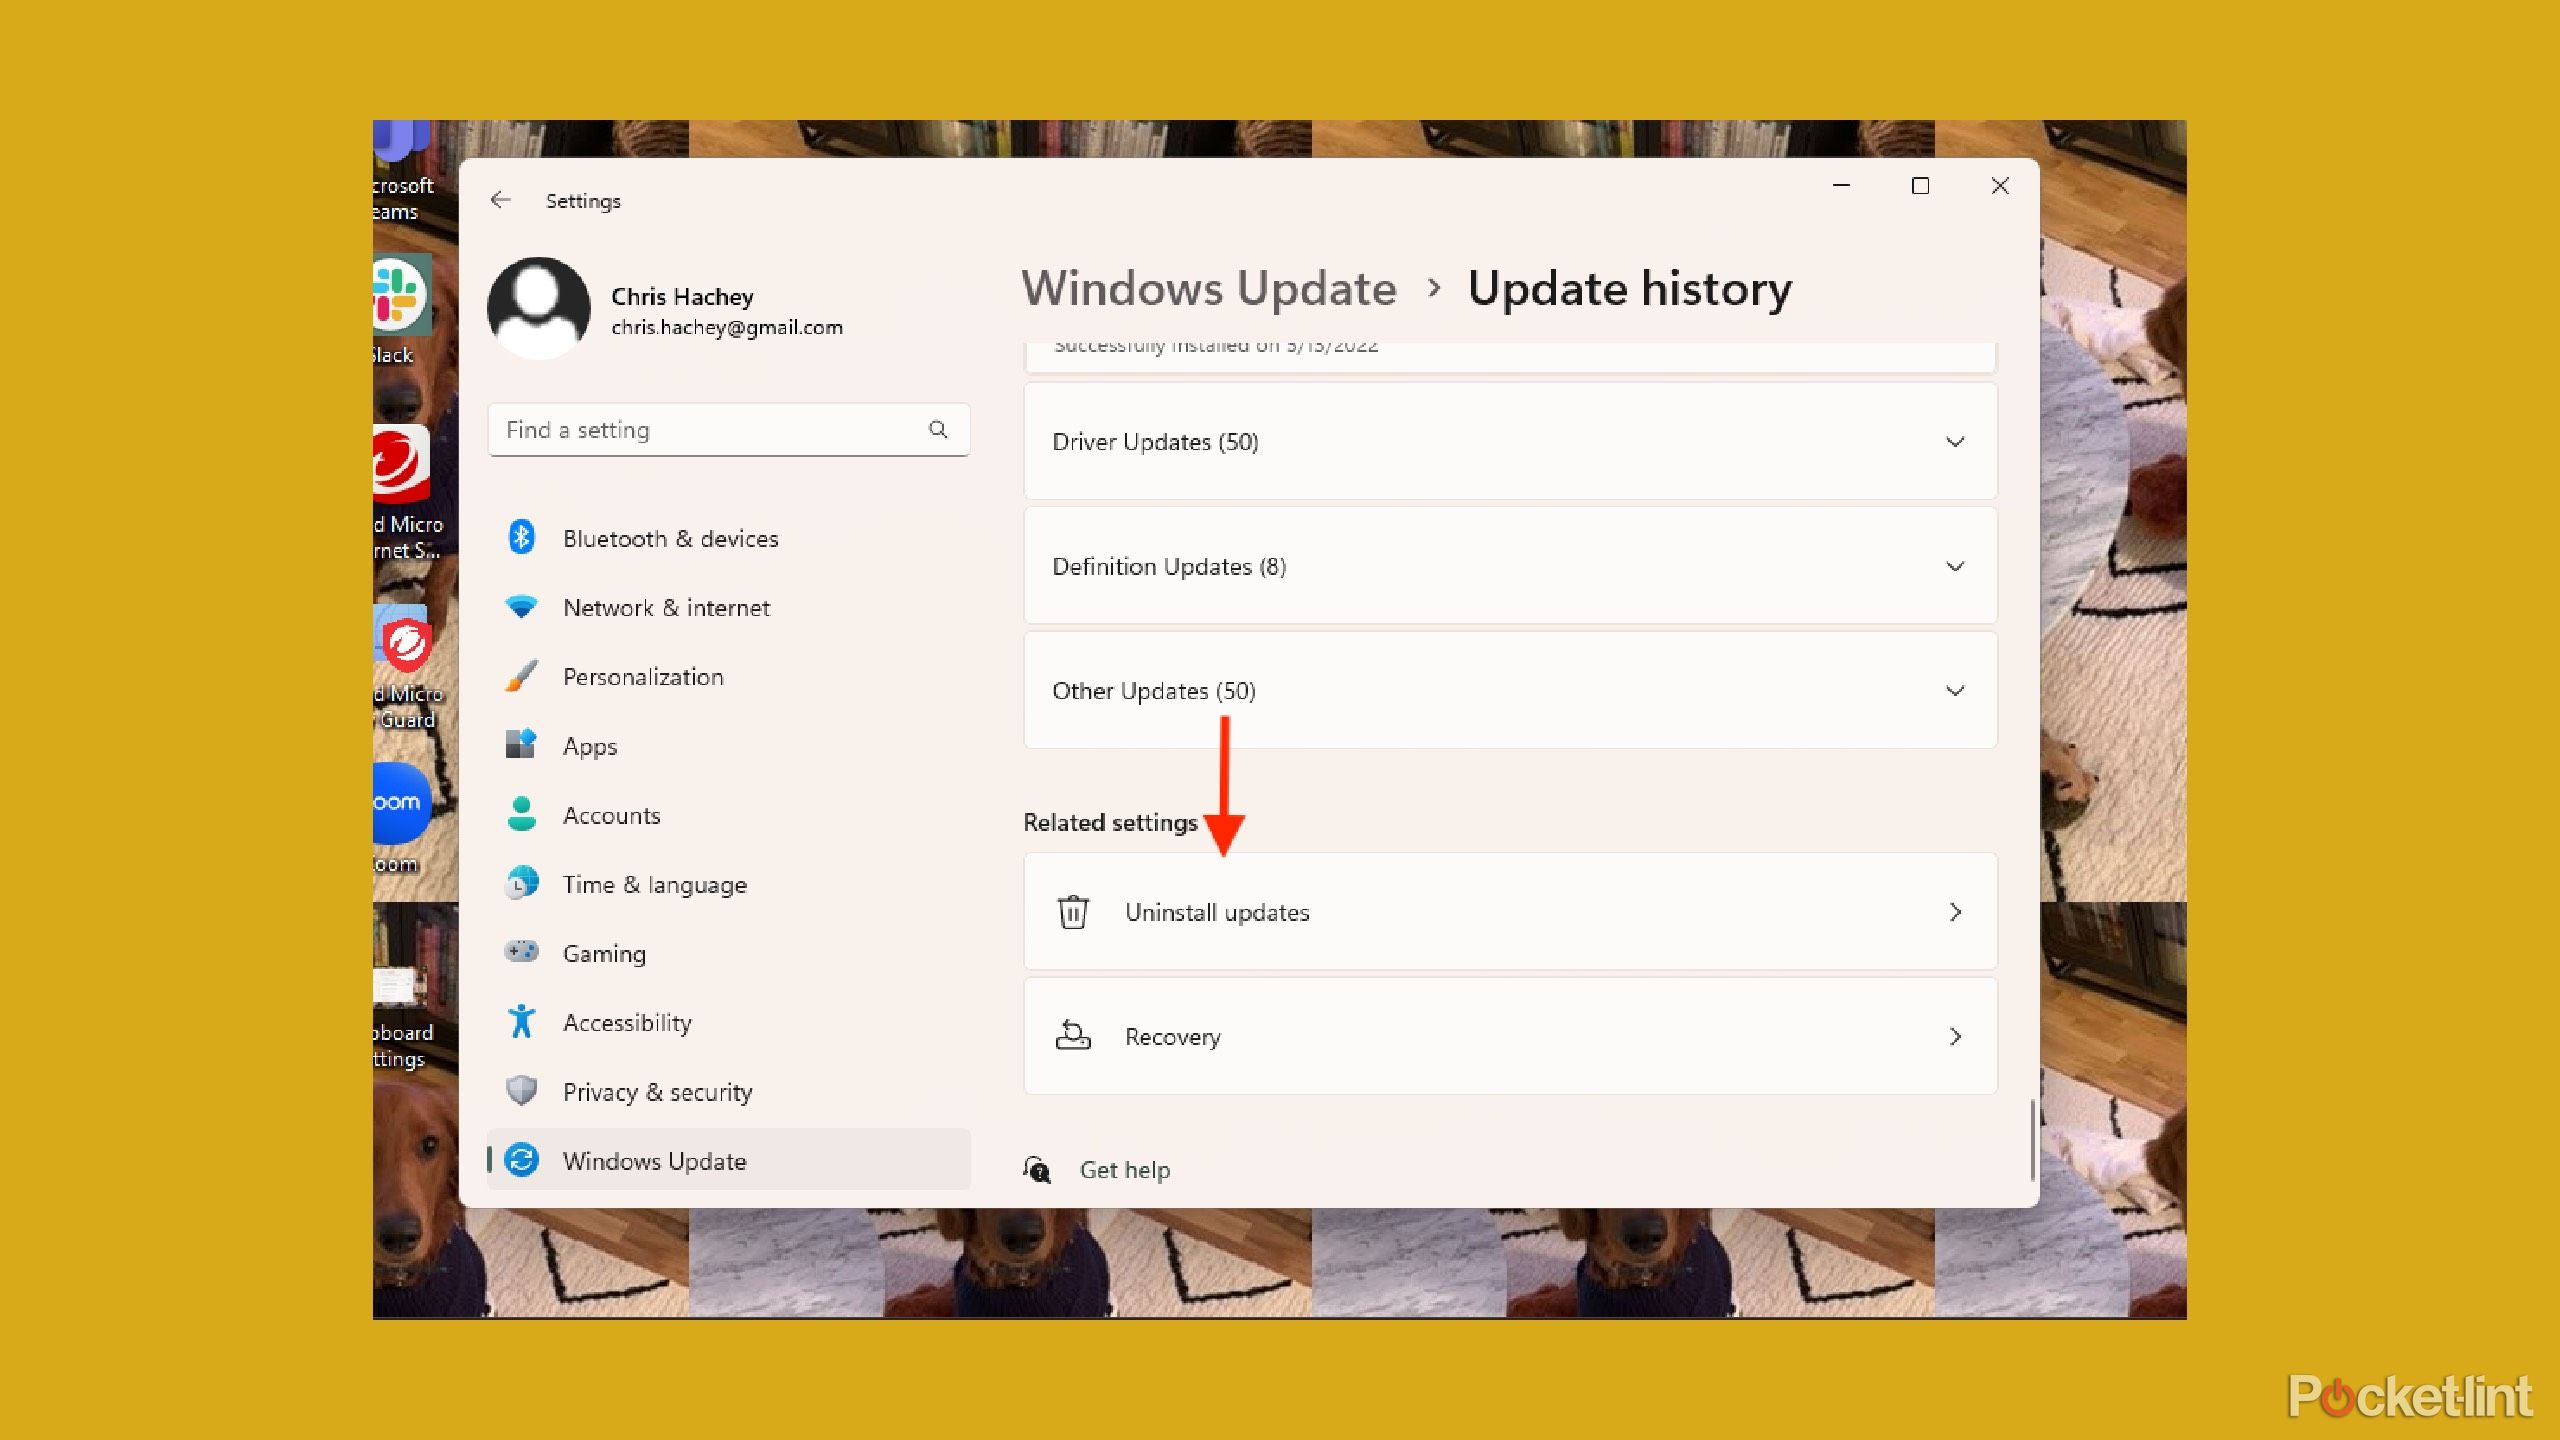
Select Start > Settings > Windows Update . Under Related settings, select Update history> Uninstall updates or use the following shortcut:View update history
Note: In Windows 10, you can access from Update & Security > Windows Update > View your update history > Uninstall updates
-
From the list, select update you want to remove, and then select Uninstall.
Note: Some updates cannot be uninstalled.
Uninstall an update from Windows RE
If you can’t access Windows and you want to uninstall an update, you can do so from Windows RE. Here are the steps:
-
Access the Windows Recovery Environment.
-
Once in Windows RE, select Troubleshoot > Advanced options > Uninstall Updates.
-
Select either Uninstall latest quality update or Uninstall latest quality update.
Need more help?
Want more options?
Explore subscription benefits, browse training courses, learn how to secure your device, and more.
Если после установки обновлений Windows на компьютере наблюдаются проблемы или ошибки, допустимо удалить конкретное обновление или все последние установленные обновления, чтобы попытаться устранить проблему. Рассмотрим, как удалить установленные обновления в Windows из командной строки или PowerShell.
Удалить обновление из командной строки Windows
Для вывода списка обновлений из командной строки можно использовать команду:
wmic qfe list brief /format:table

Вывод команды содержит номера обновлений (KB, HotFixID) и дату установки. Для удаления определенного обновления, скопируйте его ID и выполните команду:
wusa /uninstall /kb:5048667
Подтвердите удаление обновления.
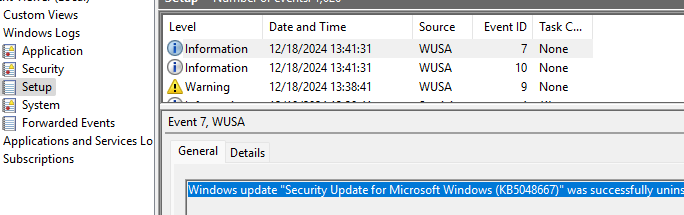
В случае успешного удаления обновления в журнале Setup в Event Viewer появится событие от WUSA с EventID 7 и описанием:
Windows update "Security Update for Microsoft Windows (KB5048667)" was successfully uninstalled. (Command line: ""C:\Windows\system32\wusa.exe" /uninstall /kb:5048667")
Чтобы Windows не пыталась повторно установить удаленное обновление, можно поставить обновления на паузу на срок до 35 дней.
В предыдущих версиях Windows команду wusa можно было использовать для удаления обновлений в фоновом (тихом режиме) без подтверждения и с отложенной перезагрузкой. Использовалась такая команда:
wusa.exe /uninstall /KB:5048161 /norestart /quiet
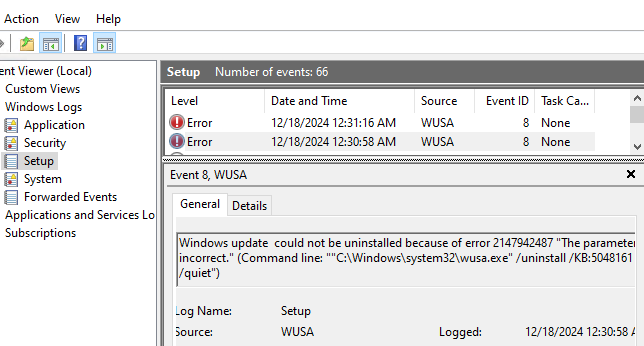
Однако фоновый режим удаления обновлений был отключен начиная с Windows 10 1507. Теперь команда wusa.exe игнорирует параметр
/quiet
. При этом в журнале событий появляется ошибка Event ID 8:
Windows update could not be uninstalled because of error 2147942487 "The parameter is incorrect." (Command line: ""C:\Windows\system32\wusa.exe" /uninstall /KB:5048161 /norestart /quiet")
PowerShell: удаление установленных обновлений
Для более гибкого удаления обновлений можно использовать PowerShell. Следующие команды выведут список установленных обновлений Windows, отсортированных начиная с последних.
Get-CimInstance -ClassName Win32_QuickFixEngineering| select HotFixID, InstalledOn | sort InstalledOn -Descending
Или
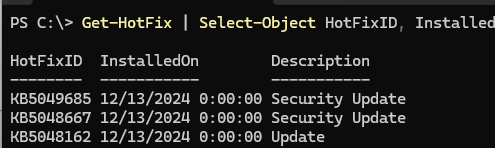
Get-HotFix | Select-Object HotFixID, InstalledOn, Description| sort InstalledOn -Desc
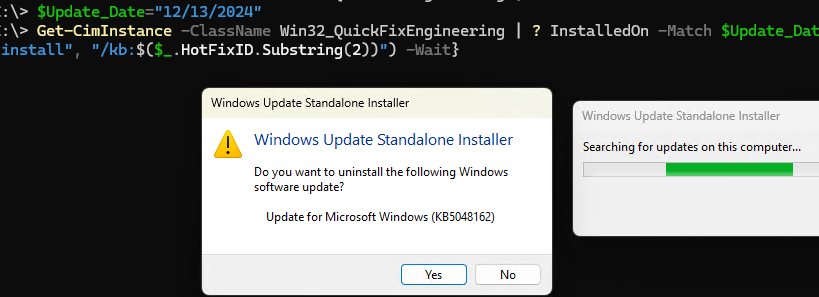
С помощью следующих команд можно удалить все обновления Windows, установленные в определенную дату:
$Update_Date="12/13/2024"
Get-CimInstance -ClassName Win32_QuickFixEngineering | ? InstalledOn -Match $Update_Date | %{start "wusa.exe" @("/uninstall", "/kb:$($_.HotFixID.Substring(2))") -Wait}
Также для удаления обновлений можно исопльзовать PowerShell модуль PSWindowsUpdate. Установите модуль на компьютер:
Install-Module -Name PSWindowsUpdate
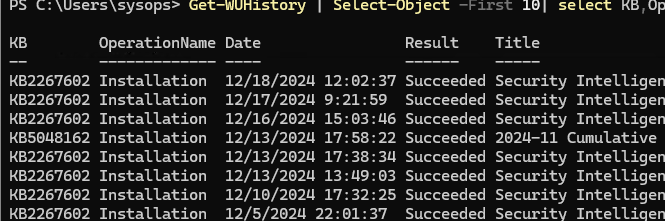
Выведите список 10 последних установленных обновлений:
Get-WUHistory | Select-Object -First 10| select KB,OperationName,Date,Result,title|ft
Чтобы удалить обновление, укажите его номер в команде (в этом примере используется тихий режим с подавлением запроса на подтверждение удаления):
Remove-WindowsUpdate -KBArticleID KB5048667 -Confirm:$false -Verbose

Если команда Remove-WindowsUpdate вернет код
-2145124318
, это означает что такое обновление удалить нельзя.
Чтобы предотвратить автоматическую установку этого обновления, нужно скрыть его от службы Windows Update:
Hide-WindowsUpdate -KBArticleID KB5048667
Если нужно удалить обновление с удаленного компьютера, можно использовать:
- Утилиту PSExec:
psexec \\192.168.158.100 -u root -s cmd.exe /c "dism /online /remove-package /packagename:Package_for_DotNetRollup_481~31bf3856ad364e35~amd64~~10.0.9290.1 /quiet /norestart" - Или PowerShell Remoting:
Invoke-Command -ComputerName 192.168.158.100 -ScriptBlock { Remove-WindowsUpdate -UpdateID KB5048161 -Force -Confirm:$false }
Удаление обновлений из образа Windows (DISM, Remove-WindowsPackage)
При удалении некоторых обновлений может появится ошибка:
Windows Update Standalone Installer
Servicing Stack 10.0.26100.2592 is required by your computer and cannot be uninstalled.
Дело в том, что это обновление служебного стека (Servicing Stack Update, SSU). Microsoft указывает, что обновления SSU нельзя удалить после установки, т.к. это критический компонент системы, без которого вы не сможете установить последующие кумулятивные обновления (Latest Cumulative Update, LCU)
Однако есть обходной способ, позволяющий удалить LCU после установки Servicing Stack Update.
Способ потенциально опасный, которые может привести вашу Windows в неработоспособное состояние. Поэтому используйте его на свой страх и риск, понимая последствия.
Выведите список установленных компонентов обновлений в образе Windows:
Get-WindowsPackage -Online | where ReleaseType -like "*Update*"|ft
Чтобы удалить пакет обновления из образа, скопируйте его имя и выполните команду:
Remove-WindowsPackage -Online -NoRestart -PackageName Package_for_RollupFix~31bf3856ad364e35~amd64~~26100.2314.1.10

We all prefer to keep our Windows operating system updated. But sometimes, some Windows Updates may make your PC go crazy. Maybe your Windows computer has gone in an endless loop! In this post, we will see how to remove or uninstall Windows Updates and troubleshoot & fix problems caused by them in Windows 11/10/8/7 using Settings, Command Prompt, PowerShell, or Recovery Environment.
If you find yourself in one of these situations while dealing with Windows Updates, then try some of the solutions provided here. These are some of the most common solutions to the most common problems. In some cases, you may have to enter the Safe Mode to be able to carry out the suggestions.
Updates are meant to enhance the security of your computer; it’s best not to remove an update unless you’re certain that it is causing a problem. Take these steps to be certain you want to remove an update:
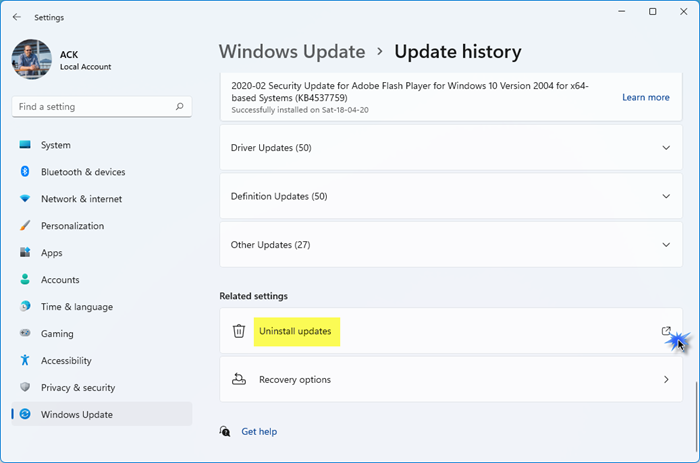
To uninstall Windows Updates in Windows 11, do the following:
- From the Start or WinX Menu, open Windows 11 Settings
- Click on Windows Update on the left side
- Click on Update History
- Now scroll down till you see Uninstall updates under Related settings
- Click on the button on the right side
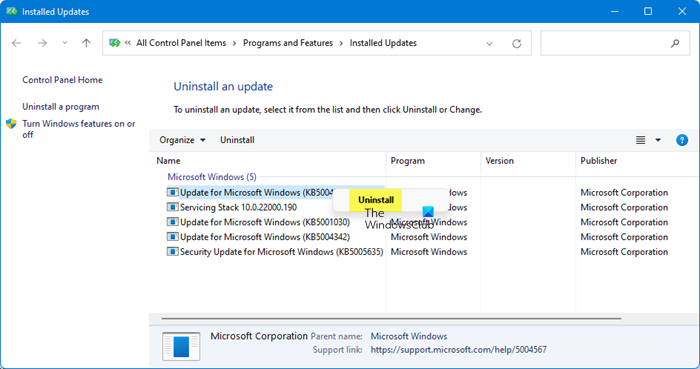
- The Installed Updates Control Panel applet will open
- Right-click on the Update and select Uninstall.
Uninstall Windows Updates in Windows 10
To remove a particular Windows Update in Windows 10, open Settings > Update and Security > Windows Update > View update history and then click on Uninstall Updates.

This will open a window showing the list of all the installed updates on your computer. Then, you can select the update you want to uninstall and click on the Uninstall button on the lower right corner of the window.
It is important to mention that if you have used the Disk Cleanup Tool to delete the Windows Update Cleanup option, then you might not be able to uninstall the Update.
In Windows 7, click Start and then click All Programs and select Windows Update from the list of programs.
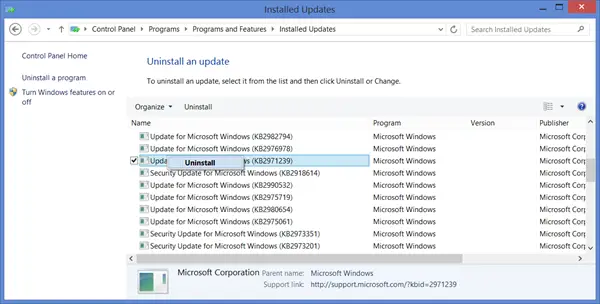
In Windows 8, open the WinX menu and click open Control Panel. Now open the Windows Update applet.
From the View update history, select the update that you want to remove, and note down its KB number. I suggest you go here first as it offers some description too.
Now open the Program and Features applet of the Control Panel, and from the left side click on View Installed Updates. Right-click on the Update you wish to uninstall and click on Uninstall. The update will get installed. You may be required to reboot your computer.
Related: How to uninstall the latest Quality Update or Feature Update.
Uninstall Windows Updates from Command Prompt
Run the following command to see the Windows Update History:
wmic qfe list brief /format:table
To uninstall Windows Updates using the command line, open an elevated command prompt window, type the following, and hit Enter:
wusa /uninstall /kb:1234567
Here 1234567 should be the number of the Update you wish to uninstall. Here we are using the built-in WUSA or Windows Update Standalone Installer tool.
Uninstall Windows Updates using PowerShell
The first step is to launch PowerShell using administrator rights. Click on the Windows Search icon and type ‘powershell’. Windows PowerShell will show up as the best match in search results. On the right side under the Windows PowerShell app, click on the Run as Administrator option.
A User Account Control prompt will appear. Click on the Yes button in the UAC prompt to launch PowerShell.
Next, we have to list all updates installed on your system

In the PowerShell window, execute the following command:
get-hotfix
The above command will list all Windows updates installed on your system. The list will show the following columns:
- Description: The type of update (security update/ update).
- HotFixID: The KB Number of the update.
- InstalledBy: The user account through which the update was installed.
- InstalledOn: Date on which the update was installed.
Note down the HotfixID for the update you want to remove

Recall the time when you start getting issues on your system. Some updates may have been installed around the same time. When you identify the problematic update, note down its HotFixID.
Now we will uninstall the update using Windows Update Standalone Installer

Execute the following command in the PowerShell window:
wusa /uninstall /kb:[updateID]
Replace [updateID] with the HotFixID you’ve noted.
The above command will use Windows Update Standalone Installer (Wusa.exe) to uninstall the required update.
A confirmation popup will appear for uninstalling the update. Click on the Yes button in the popup to confirm your action. The update will be uninstalled within a few seconds. On the next screen, click on the Restart Now button. Your PC will reboot to apply changes to the OS.
Note: Certain Windows updates can’t be uninstalled using PowerShell, since these updates are crucial for your system. For example, Servicing Stack Updates are required for the installation of future quality updates and feature updates. So they can’t be uninstalled using PowerShell.
Uninstall Windows Updates via Advanced Startup Options screen
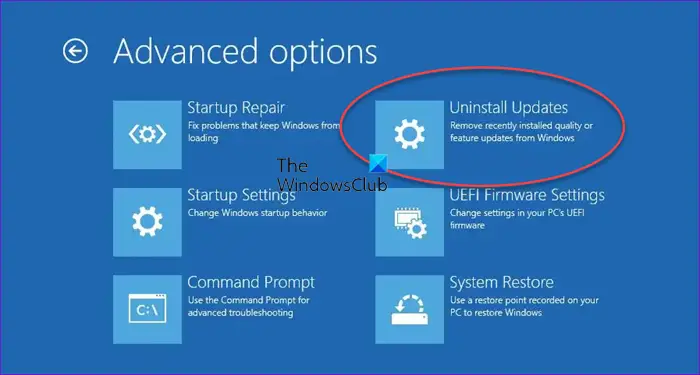
You can also uninstall Windows Updates via the Advanced Startup Options screen in Windows 11 or Windows 10.
Open the Advanced Startup Options screen > Troubleshoot > Advanced options > Uninstall Updates.
Read: How to delete Downloaded, Failed & Pending Windows Updates.
How do I force uninstall a Windows update?
Click on the Start button icon and select Settings. Go to Windows Update > Update history. Scroll down to the Related settings section and click on Uninstall updates. Locate the update you want to uninstall. Click on the Uninstall option next to the update. Alternatively, use the command line options as discussed in this post.
Read Next: An error has occurred, Not all of the updates were successfully uninstalled.
Read: Show or Hide Updates Tool will block unwanted Windows Updates.
Windows Update General Troubleshooting Tips
1. A recently installed update is causing the problem:
If you are sure enough that a recently installed update is causing the problem then only try these steps, or before uninstalling it, try to find information about any problems that have occurred on the computer by checking for a solution. If no solutions are available, check the Windows Update history to learn more about recently installed updates.
- Click Start and then click All Programs and select Windows Update from the list of programs.
- In the left pane, click View update history.
- To view more information about an update, double-click it.
2. You are not able to remove an update:
You may face this error because you might be connected to a network where Group Policy manages updates. These network-wide settings can prevent you from removing an update. In other cases, you might not be able to remove an update because it applies to a security-related area of the operating system. If you think an update that you can’t remove is causing problems, contact the system administrator of your organization.
3. A removed update is getting reinstalled automatically:
Your computer is probably connected to a network where Group Policy settings determine which updates must be installed on each computer. These network-wide settings can reinstall any required updates that you’ve removed.
You might also have Windows set to automatically install updates, which is the recommended setting for your computer. If you don’t want Windows to install an update, you need to hide it.
- Click Start and then click All Programs and select Windows Update from the list of programs.
- In the left pane, click Check for updates.
- When Windows finds updates for your computer, do one of the following:
- Click on important updates links if you have important updates to hide.
- Click on optional updates links if you have optional updates to hide.
- Right-click the update you don’t want to install, and then click Hide update. The next time you check for updates, the update won’t be automatically selected or installed.

The same steps are also applied if you want to stops Windows Updates from offering an update that you don’t want to install like Language packs.
4. Your Device or Hardware is not working after updating its device drivers from Windows Update:
You might need to revert to a previous version of the driver for that device. Check the manufacturer’s website for a more recent driver version, or remove the driver and restart your computer.
5. No Uninstall option?
This post shows how to uninstall Windows Updates marked as Permanent without Uninstall option.
6. Cannot boot to Desktop
If you cannot normally to your desktop, press the F5 key while restarting your PC to boot to the blue Advanced Startup Options screen or boot into safe mode. Once here, you can use the command line to uninstall the problematic update.
I hope this helps!
Read next: Troubleshoot Windows Update problems.
Take a step back and uninstall that pesky Windows 10/11 update that’s causing you issues
Sign in to your Pocket-lint account
Summary
- There are two types of Windows updates: quality and feature.
- Uninstalling updates on Windows 11 is simpler than on Windows 10.
- Rolling back a feature update on Windows 10 is possible within 10 days.
Sometimes, change can be a bad thing. You may not like the new version of a
phone
or
tablet
after you upgrade and realize you miss the previous iteration. Buyer’s remorse is a real issue, but that doesn’t always mean that change should scare you.
Changes to your computer can be a huge plus. For instance, adding a new monitor can significantly improve your work setup, or you might consider upgrading your laptop’s storage for better performance. These are both possible and honestly probable for many people, but
updating the software
on your computer is an unavoidable part of your daily life, whether you think about it or not.

Related
7 tools to make your Windows desktop look awesome
Tired of a boring taskbar and standard wallpapers? These seven apps will revamp your desktop and make it look amazing.
No matter the operating system, manufacturers recommend updates that provide bug fixes, security patches, and more. But updates can also throw your routine for a loop — if you are used to how your computer runs, you may not like the changes that an update brings. For Windows users, there are ways to take the update off your computer. Here’s how.
Windows 11 Pro
Windows 11 Pro is an operating system for business owners. It is packed with features.
There are two kinds of Windows updates
They are often big ones and more minor ones
Anyone with a Windows PC knows it often flags updates and tells you it’s time to install them upon shutdown or restart. Windows has two different kinds of updates that it provides to users: quality updates and feature updates. You get more quality updates than feature updates per year, and for good reason.
Quality updates are monthly updates provided by Microsoft that deliver bug fixes, performance improvements, security patches, and more. They’re typically the ones highlighted by the two curved arrows that come together to form a circle, which alerts you that an update can be installed. These are the kinds that take up minimal data storage, and you may not even notice the differences after they are installed.
Feature updates are different. Rolled out biannually, these pack new features and essentially upgrade your entire operating system. You’re basically rewriting the operating system and installing a new version of it. These aren’t as critical to install immediately, and you can choose when you want to update them (this is similar to a new version of iOS if you are an iPhone user).

Related
How to uninstall an update on Windows 11
It’s much simpler than Windows 10
Microsoft made a lot of changes to its operating system when it created Windows 11. It’s markedly different from Windows 10, but many machines still run on it. If you have automatic updates turned on for Windows 11, you might not even realize an update is happening until you see the spinning circle with arrows, which indicates the update is currently downloading.
You can stop Windows from automatically installing a new update by choosing Pause updates in Settings.
But, if you don’t love some of the features of a quality or feature update, you can simply roll them back. This may be because Windows hasn’t quite figured out a bug fix for something in the newest update, and you realize it is making your computer run slower. It could also be because it’s a feature you don’t want turned on. Whatever the case is, it’s simple to uninstall an update in Windows 11.
- Go to Settings.
- Scroll down to the bottom and click on Windows Updates.
- Scroll down to Update History and click.
- Here will be a list of recent updates that your computer has made, both quality and feature. Click Uninstall updates at the bottom.
- A list of possible updates you can uninstall will populate. Choose the one or ones that you want to uninstall and click Uninstall.
- After a few minutes, the installation will be deleted. Restart your computer, and the update will be gone.
It’s important to remember that future updates by Windows could reinstall the feature or features that you weren’t crazy about. This can become a bit time-consuming, but it’s important to read up on what the updates are doing before you install them.
Related
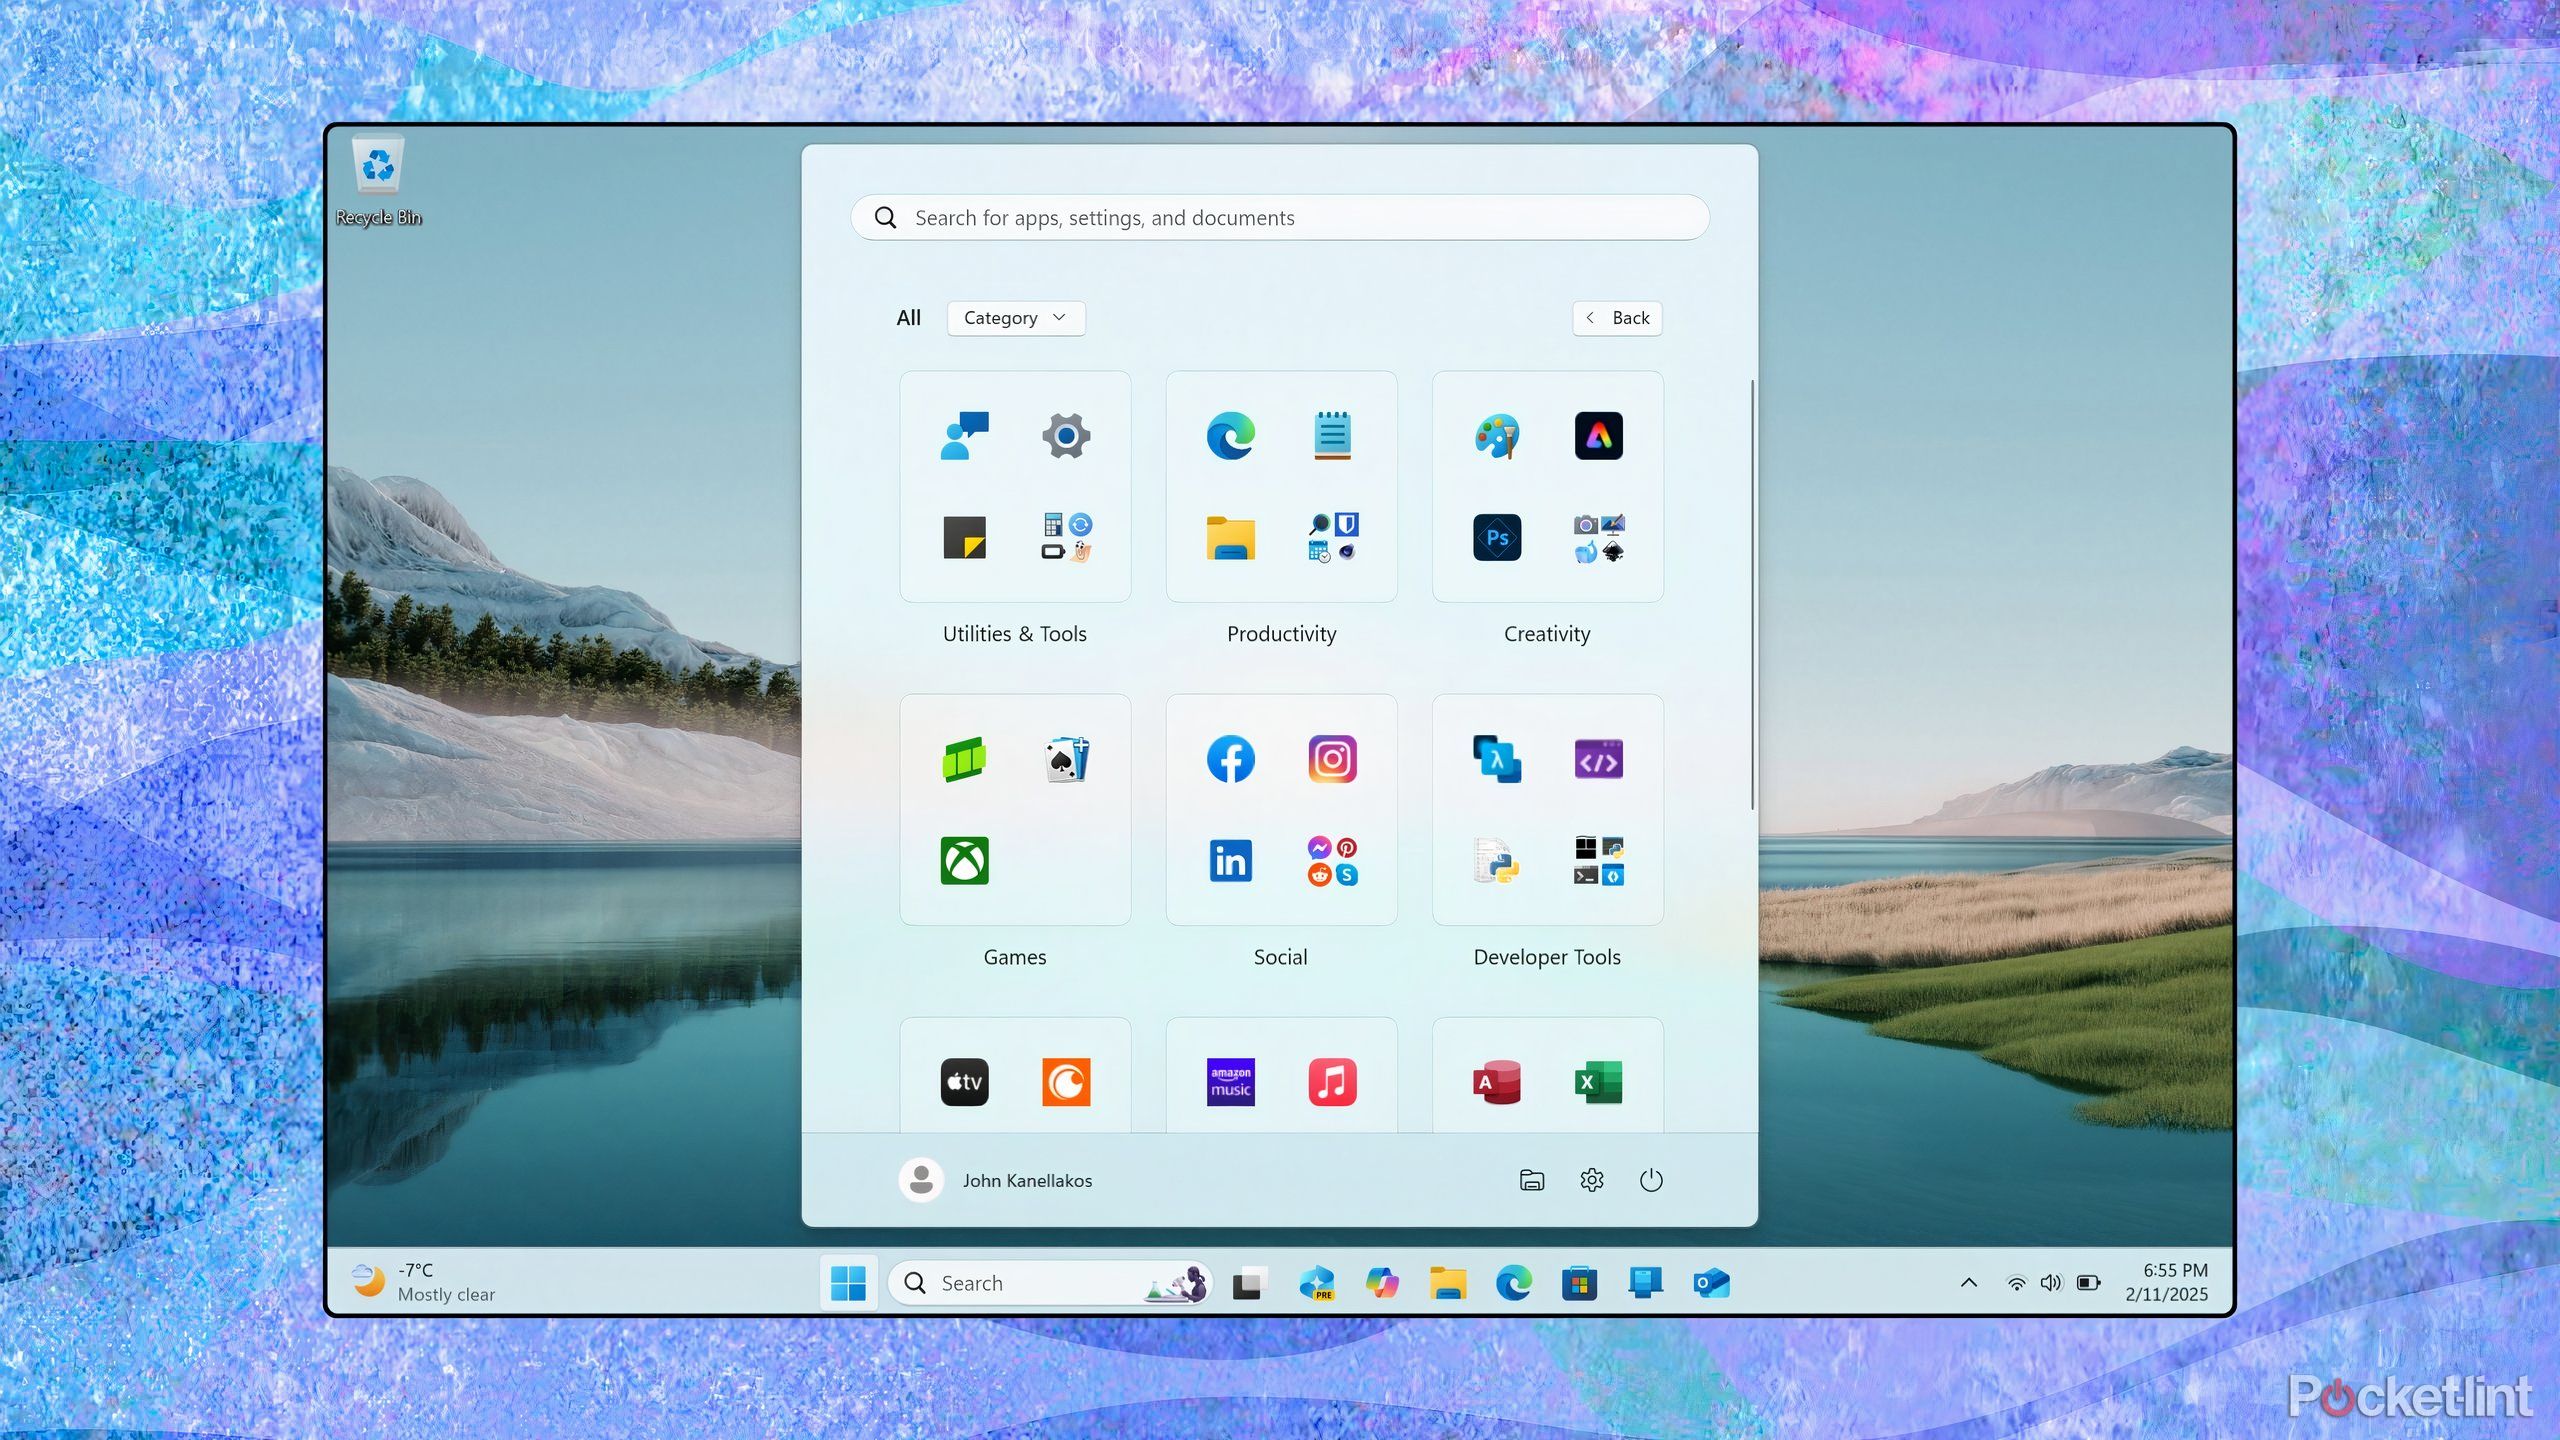
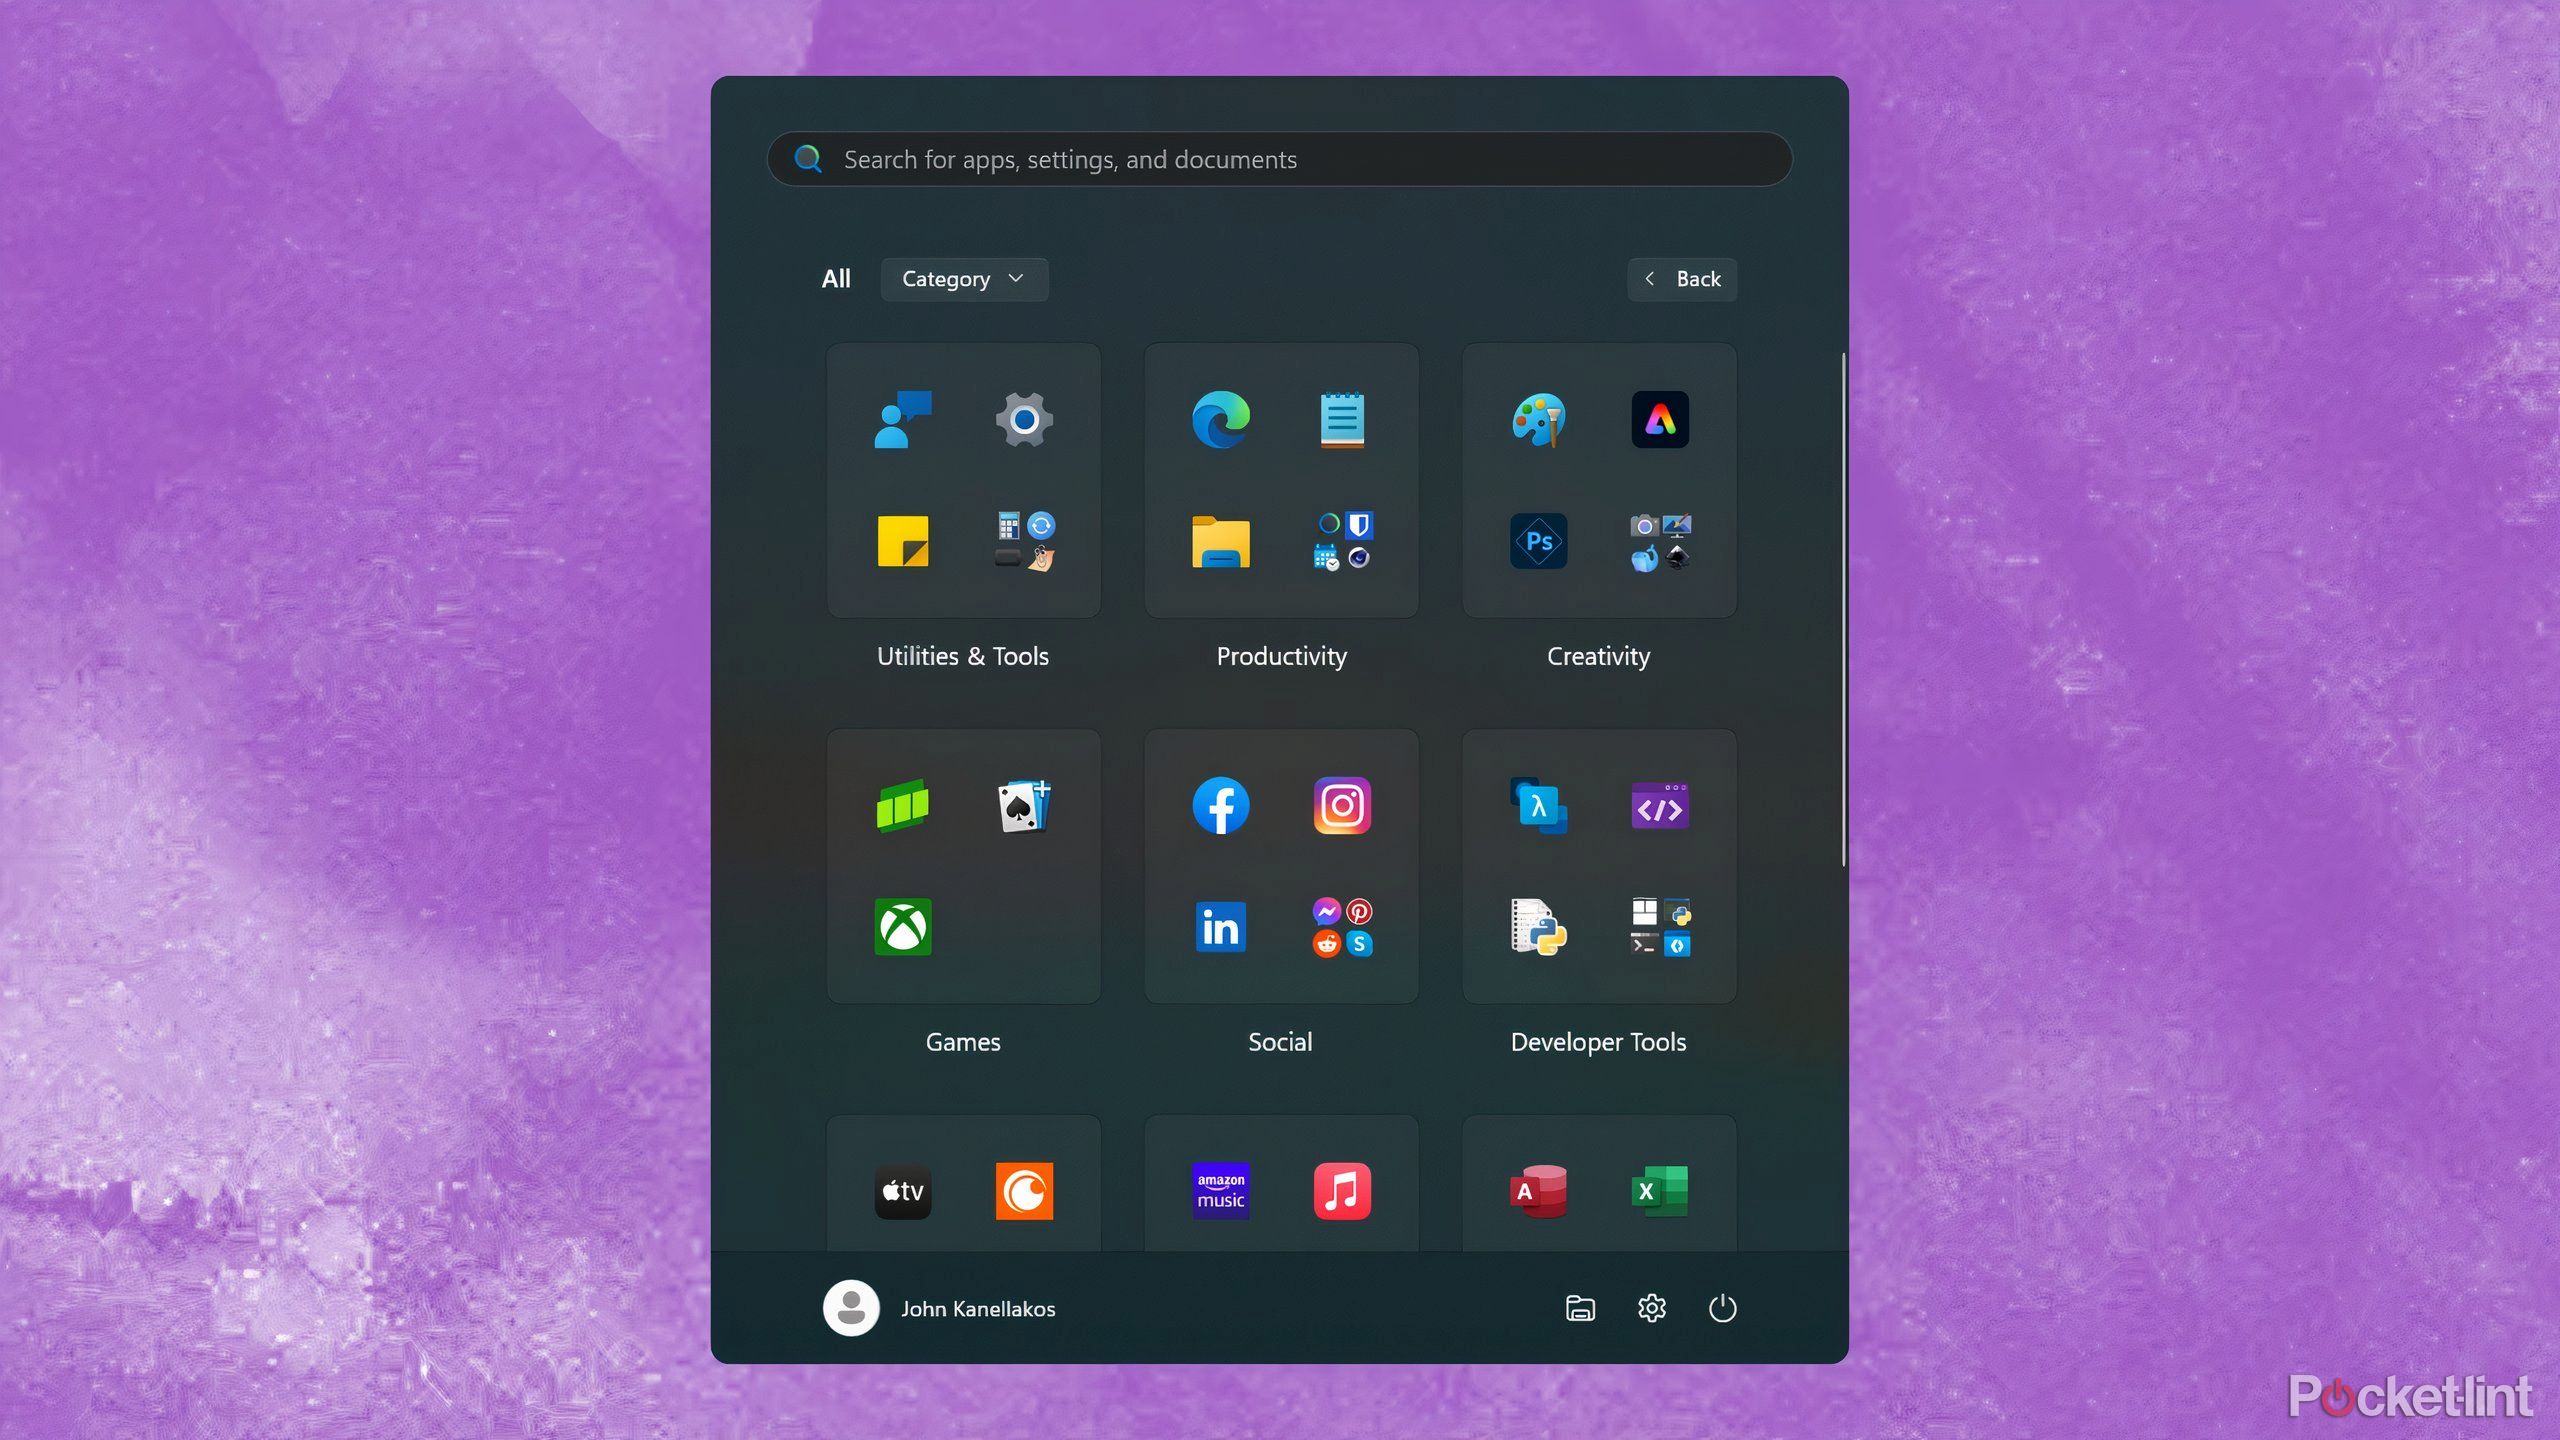
Windows 11 is copying one of the iPhone’s best features
Microsoft is gearing up to release a new iPhone-inspired Start Menu feature that makes app organization a breeze on Windows 11.
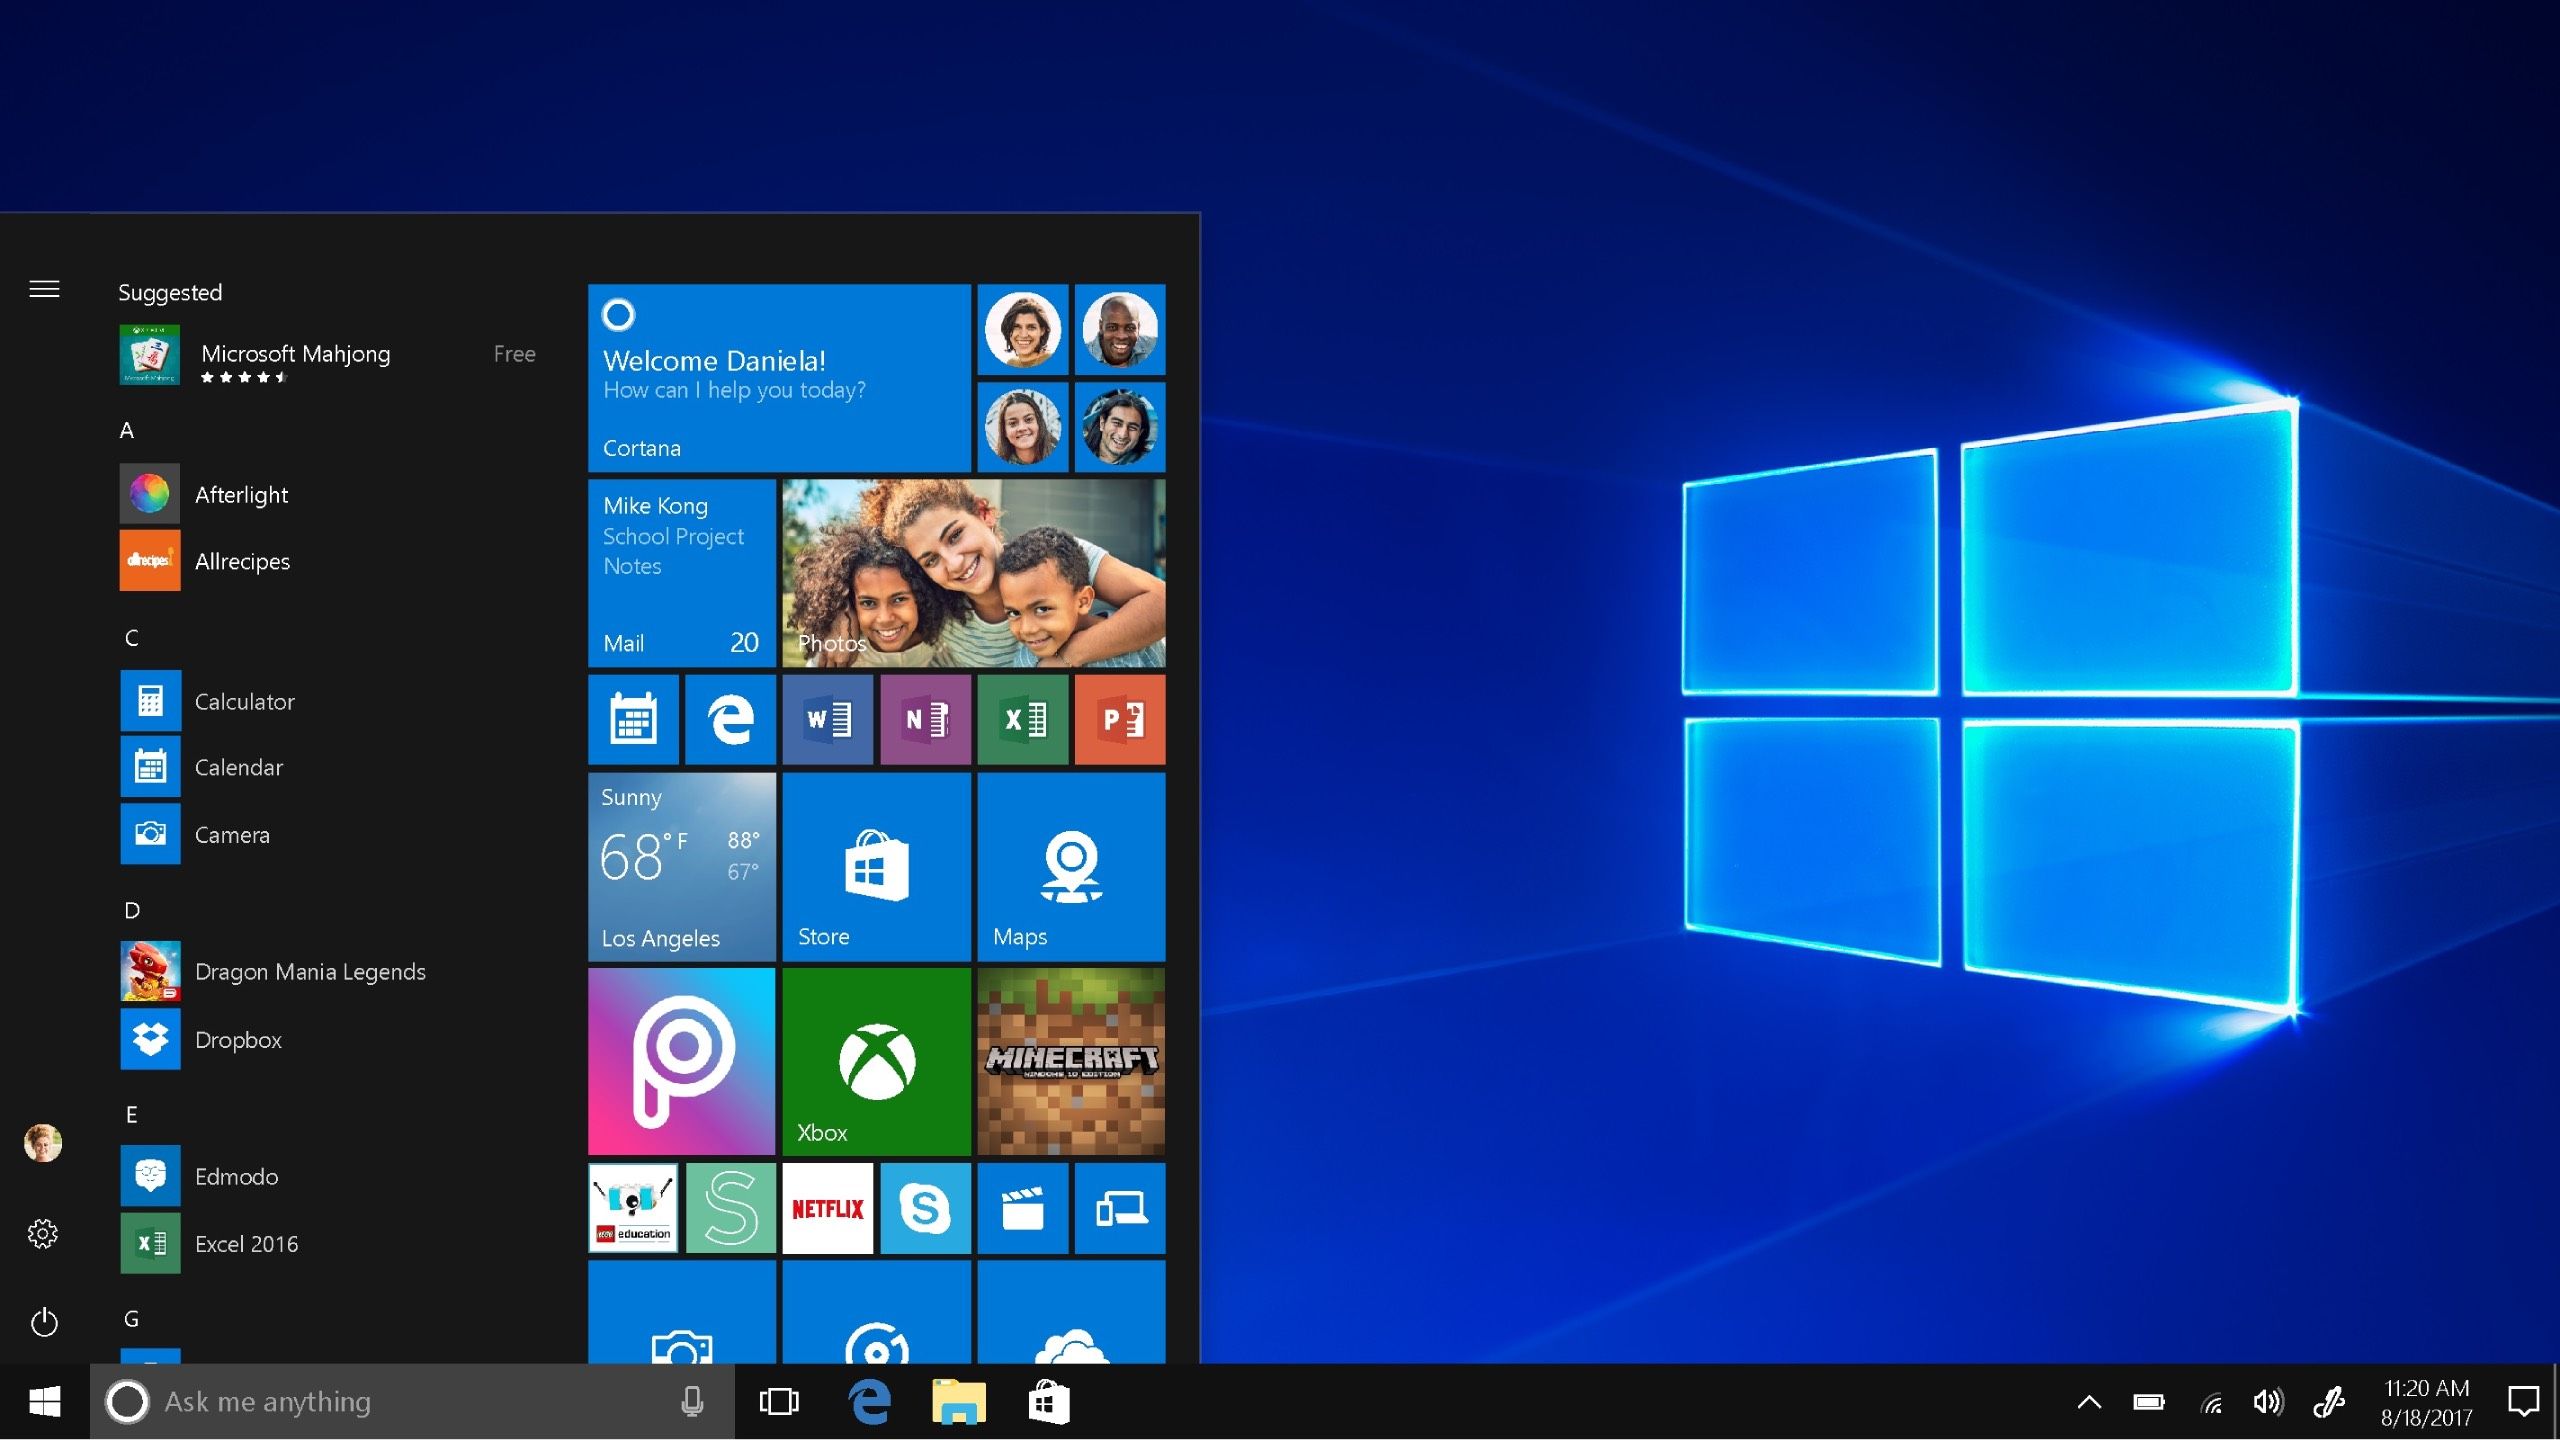
How to uninstall an update in Windows 10
It’s smart to do it in Safe Mode
Windows
If you have a computer with Windows 10 on it, the process for uninstalling a quality update is a little more intensive. It’s still doable, especially if you’re really frustrated with the changes to your computer. It’s smart to do it in Safe Mode, though, as you’ll be able to focus on the essential drivers of the machine, rather than deal with every file on it. To boot up in Safe Mode, hold down Shift as you’re restarting your computer, and it will start in Safe Mode.
From there:
- Go to Settings.
- Click on Updates + Security.
- Click on Windows Updates.
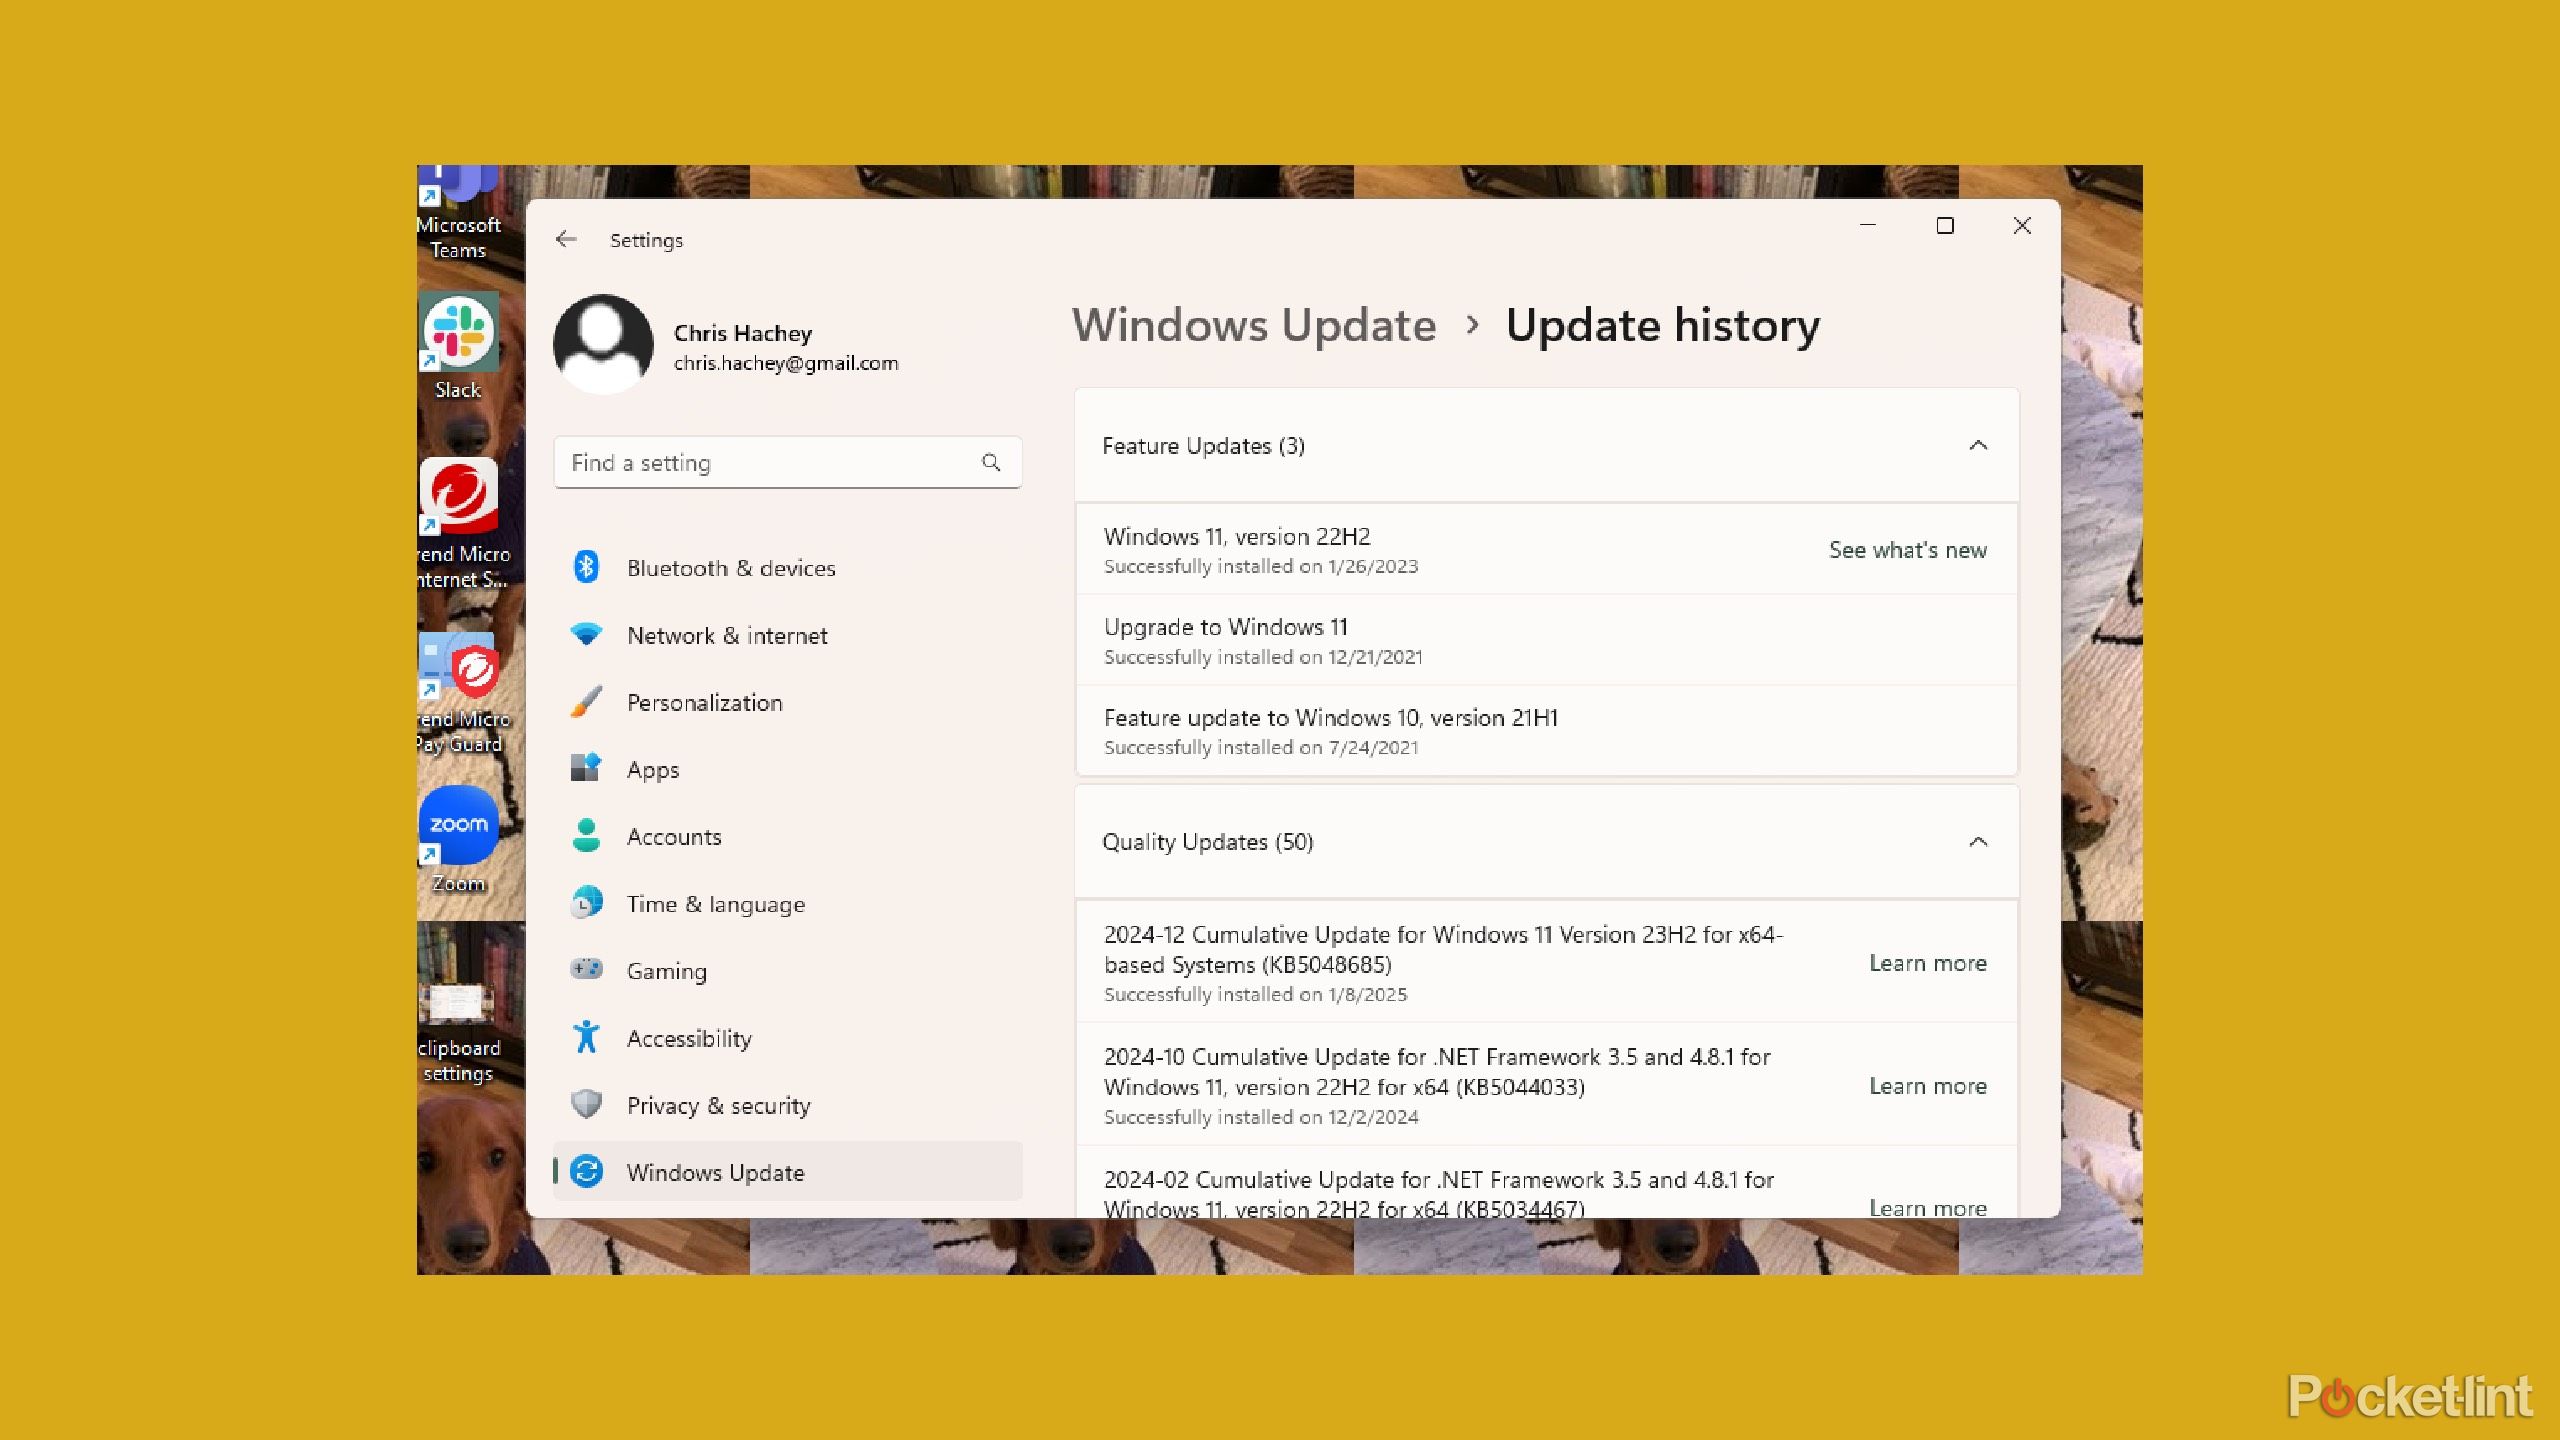
- Click on View Update History.
- Similar to Windows 11, it will list all the recent updates your computer has installed. There are helpful links that provide you with what the update actually did. Note the date of the update and click Uninstall Updates at the top.
- The Control Panel will open and give you the list of the updates again. Click on the individual update and click Uninstall at the top of the list.
Related
Whatever the case is, it’s simple to uninstall an update in Windows 11.
There are cases where the Uninstall button at the top will not appear — this is for updates that Windows doesn’t allow you to uninstall. For features updates, you will need to roll back an entire version of Windows 10.
- Go to Settings.
- Click on Updates + Security.
- Click on Recovery.
- Near the bottom is Go Back to the Previous Version of Windows 10. Click Get Started.
If Get Started doesn’t appear, it’s because it’s past the 10-day window that Windows allows you to roll back a features update. Unfortunately, that means that the version is on your computer for good.
Introduction
Welcome to our guide on how to uninstall Windows updates. As a Windows user, you may encounter situations where you need to remove an installed update. This could be due to compatibility issues, performance problems, or simply the need to free up disk space. Uninstalling Windows updates can be a useful troubleshooting step or a way to revert back to a previous state.
Windows updates are essential for keeping your system secure and up to date with the latest features and improvements. However, there are instances when a particular update can cause more harm than good. It could result in software conflicts, system crashes, or even compatibility issues with certain applications or hardware.
In this guide, we will explore various methods to uninstall Windows updates, depending on your specific situation. Whether you prefer using the Control Panel, Command Prompt, Windows Update Troubleshooter, System Restore, or PowerShell, we’ve got you covered.
Before we proceed, it’s important to note that uninstalling Windows updates should be done with caution. Removing a critical update or a security patch can potentially leave your system vulnerable to threats.
It’s also worth mentioning that once an update is uninstalled, you may need to reinstall it if it’s deemed necessary or beneficial in the future. So, let’s dive in and explore the different methods you can use to uninstall Windows updates and restore your system to a stable state.
Why would you want to uninstall Windows updates?
Windows updates are designed to improve the functionality, security, and stability of your operating system. However, there are instances when you may want to uninstall a Windows update. Let’s explore some common scenarios where you might consider removing an installed update.
Compatibility issues: Sometimes, a Windows update can cause compatibility problems with certain software applications or hardware devices. This can result in unpredictable behavior, errors, or even system crashes. Uninstalling the problematic update can help restore compatibility and resolve any issues caused by the update.
Performance problems: In rare cases, a Windows update can negatively impact system performance. This might manifest as slow boot times, sluggish response, or increased resource usage. If you notice a significant decline in performance after installing a specific update, removing that update might help improve your system’s performance.
Software conflicts: Windows updates can sometimes conflict with other installed software, especially if you have specialized or older programs. These conflicts can lead to errors, crashes, or malfunctioning applications. By uninstalling the conflicting update, you can eliminate the compatibility issues and restore proper functionality to your programs.
Unwanted changes: Windows updates often introduce changes to the user interface, features, or settings. While these changes are typically intended to enhance the user experience, they may not always align with your preferences. If you find that a specific update has made unwanted changes to your system, uninstalling it can revert your system back to its previous state.
Freeing up disk space: Over time, Windows updates accumulate and take up valuable disk space. If you are running low on storage or prefer to maintain a lean system, uninstalling unnecessary updates can help free up disk space and improve the overall performance of your computer.
Remember, uninstalling Windows updates should only be considered as a troubleshooting step or solution to specific issues. It’s generally recommended to keep your system up to date with the latest patches and security fixes to ensure optimal performance and protection.
In the following sections, we’ll explore different methods to uninstall Windows updates, allowing you to effectively manage and troubleshoot your system.+
Method 1: Using the Control Panel
One of the easiest ways to uninstall Windows updates is by using the Control Panel. Here’s how you can do it:
- Open the Control Panel by searching for it in the Start menu or pressing the Windows key + R, then typing ‘control’ and hitting Enter.
- In the Control Panel, navigate to the ‘Programs’ or ‘Programs and Features’ section.
- Click on ‘View installed updates’ on the left-hand side of the window. This will display a list of all the installed updates on your system.
- Scroll through the list to find the specific update you want to remove. You can sort the updates by date or name to make it easier to locate the one you need.
- Once you’ve found the update, right-click on it and select ‘Uninstall’.
- Follow the on-screen prompts to complete the uninstallation process. You may be asked to restart your computer after the update has been removed.
It’s important to note that not all updates can be uninstalled using the Control Panel. Some critical security updates or system files may not appear in the list of installed updates. In such cases, you’ll need to use an alternative method to uninstall the update.
Uninstalling updates using the Control Panel is a straightforward method suitable for most users. However, if you prefer using command-line tools or need more advanced options, continue reading to learn about other uninstallation methods.
Method 2: Using the Command Prompt
If you’re comfortable using the command line, you can uninstall Windows updates using the Command Prompt. Here’s how:
- Open the Command Prompt as an administrator. To do this, right-click on the Start menu, select ‘Command Prompt (Admin)’ or ‘Windows PowerShell (Admin)’.
- Type the following command to list all the installed updates:
wmic qfe list brief /format:table - Press Enter to execute the command. This will display a table containing the details of all the installed updates on your system.
- Scroll through the list and locate the update you want to uninstall. Note down the ‘HotFixID’ or ‘UpdateID’ associated with the update.
- To uninstall the specific update, type the command:
wusa /uninstall /kb:[HotFixID]orwusa /uninstall /kb:[UpdateID]. Replace [HotFixID]/[UpdateID] with the ID of the update you want to remove. - Press Enter to execute the command. Follow the on-screen prompts to complete the uninstallation process. You may need to restart your computer after the update has been uninstalled.
Using the Command Prompt provides you with more control and flexibility when uninstalling Windows updates. It’s especially handy if you know the specific update ID or if the update doesn’t appear in the Control Panel’s list of installed updates.
Keep in mind that the Command Prompt method requires administrative privileges. Make sure to run the Command Prompt as an administrator to perform the uninstallation successfully.
Now that you know how to uninstall Windows updates using the Command Prompt, let’s explore another method using the Windows Update Troubleshooter.
Method 3: Using Windows Update Troubleshooter
If you’re encountering issues with Windows updates, you can try using the built-in Windows Update Troubleshooter to diagnose and resolve the problem. In some cases, this troubleshooter may automatically uninstall problematic updates. Here’s how you can use it:
- Open the Settings app by clicking on the Start menu and selecting the gear icon, or by pressing the Windows key + I.
- In the Settings app, click on ‘Update & Security’.
- On the left-hand side of the window, click on ‘Troubleshoot’.
- Scroll down and locate ‘Windows Update’ in the list of troubleshooters. Click on it.
- Click on the ‘Run the troubleshooter’ button. Windows will now scan for any issues related to Windows Update.
- If the troubleshooter detects any problems, it will provide you with a list of possible fixes. Follow the on-screen instructions to apply the recommended solutions.
During the troubleshooting process, Windows may automatically detect and uninstall any problematic updates that are causing issues on your system. This can help resolve your update-related problems without the need for manual intervention.
Using the Windows Update Troubleshooter is a quick and convenient method to diagnose and automatically resolve common update issues. It’s recommended to run this troubleshooter before attempting manual uninstallation methods.
Now that you’re familiar with using the Windows Update Troubleshooter, let’s explore another method known as System Restore.
Method 4: System Restore
If you’re unable to uninstall a Windows update using the previous methods or if your system is experiencing major issues after an update, you can try using System Restore. This feature allows you to revert your computer back to a previous state, effectively removing any recently installed updates. Here’s how you can use System Restore:
- Open the Start menu and search for ‘System Restore’. Click on the ‘Create a restore point’ or ‘System Restore’ option that appears.
- In the System Properties window, click on the ‘System Restore…’ button. This will launch the System Restore wizard.
- Select the option to ‘Choose a different restore point’ and click ‘Next’.
- You will see a list of available restore points. Each restore point represents a specific system state at a particular date and time. Choose a restore point that was created prior to the installation of the problematic update.
- Click on ‘Next’, then review the restore point details. Make sure you understand that System Restore will uninstall updates and potentially remove recently installed software.
- Click on ‘Finish’ to begin the restoration process. Your computer will restart and the selected restore point will be applied.
System Restore will roll back your system to a previous configuration, effectively uninstalling any updates or changes that occurred after the selected restore point. Keep in mind that System Restore does not affect your personal files, but it may remove third-party software installed since the restore point was created.
System Restore is a powerful tool that can help you undo updates and resolve issues caused by them. However, it’s important to remember that it only affects system files and settings, not your personal data. Regularly creating restore points can serve as a safety net, allowing you to easily revert back to a stable system state if needed.
Now that you’re familiar with using System Restore, let’s explore another method using PowerShell to uninstall Windows updates.
Method 5: Uninstall Windows Updates using PowerShell
If you prefer a more advanced and script-based approach, you can use PowerShell to uninstall Windows updates. PowerShell is a powerful command-line tool that provides extensive control over your system. Here’s how to use PowerShell to uninstall updates:
- Open PowerShell as an administrator. To do this, right-click on the Start menu, select ‘Windows PowerShell (Admin)’ or ‘Windows PowerShell (Admin)’.
- Once PowerShell is open, you can list installed updates by running the command:
Get-WmiObject -Class 'Win32_QuickFixEngineering' - This command will display a list of all installed updates on your system, along with their properties.
- Scroll through the list and identify the update you want to uninstall based on the information provided.
- To uninstall a specific update, use the following command:
wusa /uninstall /kb:[KBNumber], replacing [KBNumber] with the KB number of the update you want to remove. - Execute the command by pressing Enter. Follow any on-screen prompts to complete the uninstallation process. You may need to restart your computer after the update has been uninstalled.
Using PowerShell to uninstall updates gives you fine-grained control over the process and allows for automation if needed. It is particularly useful when dealing with multiple updates or when scripting is required for repeatability.
Remember, PowerShell is a powerful tool, so be cautious when executing commands. Make sure you understand the specific update you want to uninstall and double-check the command syntax before executing it.
Now that you’ve learned how to uninstall Windows updates using PowerShell, you have a range of methods to choose from. Consider your specific needs and preferences to determine which method is most suitable for you.
In the next section, we’ll summarize the methods we covered and provide some final thoughts on uninstalling Windows updates.
Conclusion
Uninstalling Windows updates can be a useful solution when you encounter compatibility issues, performance problems, software conflicts, or unwanted changes on your system. Depending on your comfort level and specific requirements, you have several methods at your disposal.
If you prefer a user-friendly approach, using the Control Panel allows you to easily uninstall updates through a straightforward interface. The Command Prompt is a powerful tool for more advanced users who prefer a command-line interface. Windows Update Troubleshooter can automatically detect and resolve update-related issues, including uninstalling problematic updates. System Restore offers a comprehensive solution by allowing you to roll back your system to a previous state, effectively removing installed updates. Lastly, PowerShell provides advanced control and scripting capabilities for those who are comfortable with command-line tools.
When uninstalling Windows updates, it’s essential to exercise caution and consider the potential impact on your system. Critical updates and security patches should generally not be uninstalled, as they play a crucial role in keeping your system secure and up to date. Before proceeding with any method, it’s recommended to create a backup or restore point to ensure you have a safety net in case anything goes wrong.
Remember, finding the right balance between maintaining a stable system and addressing any issues caused by updates is key. Regularly reviewing and managing your installed updates can help keep your system running smoothly and ensure that you’re utilizing the latest features and security enhancements.
We hope this guide has provided you with the necessary information to uninstall Windows updates effectively. Choose the method that suits your needs, and don’t hesitate to reach out to Microsoft support or online forums if you require further assistance.
Now, go ahead and take control of your Windows updates, ensuring a stable and optimized computing experience!