
How to Completely Delete MySQL From Windows? All Versions
Approved By
Anuraag Singh
Published On
May 8th, 2025
Reading Time
4 Minutes Reading
Summary: Whenever we are managing MySQL on our Windows system, it’s essential for optimal performance. As, it can especially affect your system when the upgrade and reinstallation process is required. So, this guide will explain to you how to uninstall MySQL from Windows 10 or 11 completely using various manual solutions and expert approaches. Also, if you are looking to remove other applications, you can read this manual guide on how to uninstall Google Chrome.
Reasons to Remove MySQL From Windows System
There are several findings as to why we need to uninstall MySQL from Windows system. Let’s cover these points.
- You can install a newer version without any software issues.
- It can fix your corrupted file installation problem and delete any incomplete or pending one.
- By uninstalling, it made it easier to switch to a different database system without any trouble.
- Removing the software or resources which are not used from a long way can boost the overall performance of your systems.
How to Uninstall MySQL From Windows 11 or 10 Using Manual Methods
Let me tell you if you want to remove MySQL from Windows. Then, it is way simple to do it. Just follow these steps carefully with images provided for clarity purposes.
Step 1. Firstly, open Windows Settings via the gear icon in the Start menu or by pressing Win + I.

Step 2. In the settings Window, you need to go to Apps and use the search bar to find “MySQL“.


Step 3. Then, locate MySQL-related programs (e.g., MySQL Server, Workbench, Connector, Shell) and uninstall them.

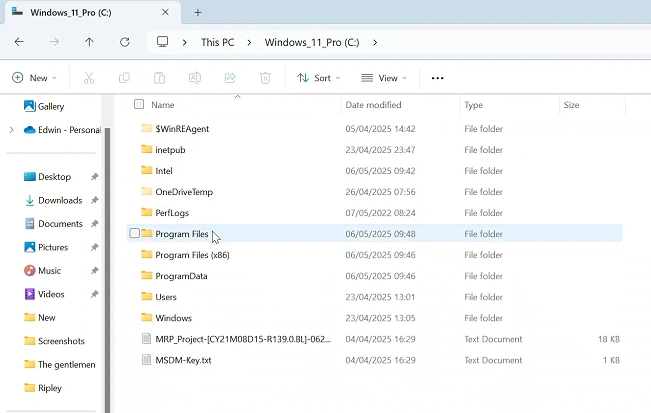
Step 4. After the process of uninstallation is done, delete the MySQL folder in C:\Program Files.


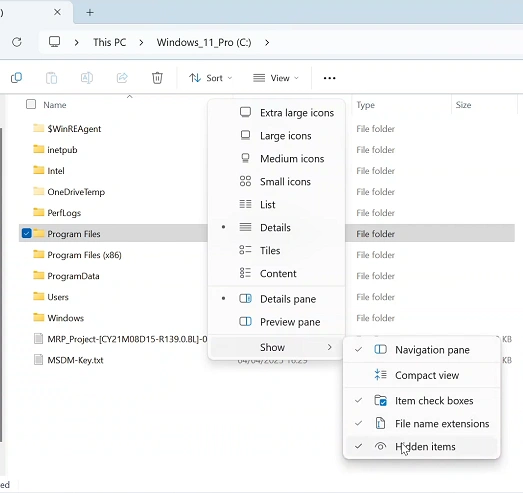
Step 5. If the folder is hidden, go to the View tab, tick Hidden items checkbox.

Step 6. At last, open the command prompt to verify the uninstallation process if an error appears, and the process is completed.

Note: Type MySQL – -version command in cmd to check that your MySQL file is completely deleted from your system or not.
How to Completely Delete MySQL From Windows? One Click Fully Wipe
If you want to uninstall MySQL from Windows, following the manual solution often comes with some drawbacks and human errors and chances of having residual files after the process which can have the risk of security and takes extra space. To avoid this, you can use SysTools Certified Wiping Software for complete removal and thorough deletion of configuration files, databases, and logs.
Simple Steps to Uninstall MySQL From Windows – Automated Tool
Follow this quick steps mentioned below to completely delete MySQL files from your system. To free up your space and have a smooth operation throughout your work.
Step 1. Open SysTools Data Wipe from the Start menu by right-clicking.

Step 2. Next, click “Select File” or “Select Folder” as per your comfort.

Step 3. Select the folder to wipe. Generally found at C:\ProgramData\MySQL\MySQL Server <version>\Data\ and click Next to scan.

Step 4. Choose a wiping method.

Step 5. Click Wipe to begin the process.

Step 6. Now, view the wiped file/folder details on the screen.

Step 7. Lastly, you can analyze the data that is wiped by the following report.

Final Verdict
In this write up, we have understood the reasons and how to uninstall MySQL from Windows 10/11 using a manual & professional method. Following these steps will completely remove MySQL and its leftover files. If you plan to reinstall MySQL, it will ensure no conflicting files remain for a smooth setup. This will help prevent errors and improve system performance.
By Mohit Jha
With 5+ years of experience, Mohit is a Microsoft Certified expert known for his cloud migration, cyber security, and digital forensics expertise. He specializes in Microsoft 365, Exchange Server, and Azure AD migration, ensuring seamless transitions for organizations worldwide. His multifaceted role as a meticulous tech writer, diligent researcher, and astute editor underscores his commitment to delivering cutting-edge digital forensics and cloud migration strategies.
View all of Mohit Jha’s posts.
Home » KB » Databases » MySQL » How to Uninstall MySQL in Linux, Windows, and macOS
MySQL is an open-source relational database management system (RDBMS) available on Linux, Solaris, macOS, Windows, and FreeBSD. Sometimes, uninstalling the software and a fresh installation is the best solution for resolving bugs, or for fixing compatibility purposes.
In this tutorial, you will learn how to uninstall MySQL on Linux, Windows, and macOS.
Prerequisites
- MySQL installed on Linux, Windows, or macOS system.
- A user account with administrator privileges.
How to Uninstall MySQL {on Linux, Windows, and macOS}?
Depending on the operating system, the process of uninstalling MySQL is different. The sections below show how to uninstall MySQL on Linux, Windows, and macOS, and delete all the associated data.
Uninstall MySQL on Linux
Uninstall MySQL from Linux using the distribution’s default package manager, and the rm command to delete the leftover data. In this tutorial, we will work on Ubuntu, but the instructions for other distros are provided as well.
Follow the steps below:
1. Open a terminal window (Ctrl + Alt + T) and stop the MySQL service and all the related processes. Run the following commands:
sudo service mysql stop
sudo killall -KILL mysql mysqld_safe mysqld
3. Depending on the Linux distribution and package manager you are using, run one of the following commands to uninstall MySQL:
- CentOS, Rocky Linux, and RedHat:
sudo yum remove mysql-client mysql-server -y- Ubuntu and Debian:
sudo apt remove mysql-client mysql-server -y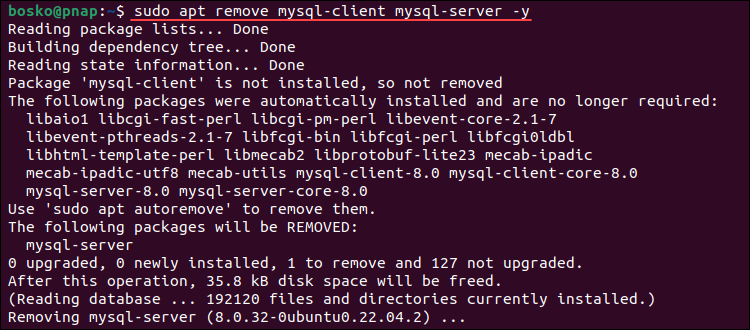
Run autoremove and autoclean to remove unnecessary packages and clean up the package cache:
sudo apt autoremove -y
sudo apt autoclean -y- Fedora:
sudo dnf remove mysql-client mysql-server -y4. After uninstalling MySQL, the next step is to remove residual data. If you still need the data, make a backup before removing it, or rename the directory.
Rename the /var/lib/mysql directory to keep the data if you ever need it again in the future:
sudo mv /var/lib/mysql /var/lib/mysql_directory_backupAlternatively, remove MySQL-related directories by running:
sudo rm -rf /etc/apparmor.d/abstractions/mysql /etc/apparmor.d/cache/usr.sbin.mysqld /etc/mysql /var/lib/mysql /var/log/mysql* /var/log/upstart/mysql.log* /var/run/mysqld5. Remove the mysql user and delete the mysql group, if it exists. Run:
sudo deluser --remove-home mysql
sudo delgroup mysql
After completing the steps above, you have successfully uninstalled MySQL from your Linux system.
Uninstall MySQL on Windows
Follow the steps below to uninstall MySQL from a Windows operating system:
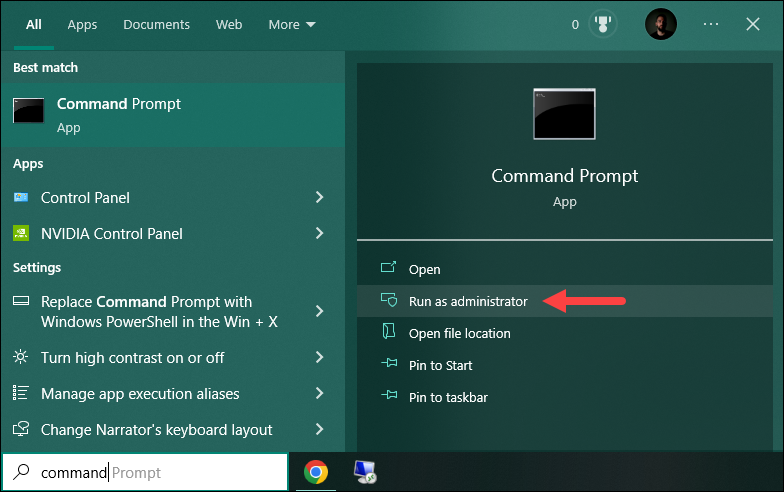
1. Press the Windows key and search for command prompt. Run the app as administrator.
2. Stop the running MySQL server before uninstalling it. The easiest way to stop it is by using the mysqladmin command which was installed automatically during the MySQL installation. In the command prompt, navigate to the bin folder of the MySQL installation directory. For example, the default path is:
cd C:\Program Files\MySQL\MySQL Server 8.0\bin
After navigating into that path, stop the running server by executing:
mysqladmin -u root -p shutdownThe command asks you for the password and shuts down the running server after confirming it.
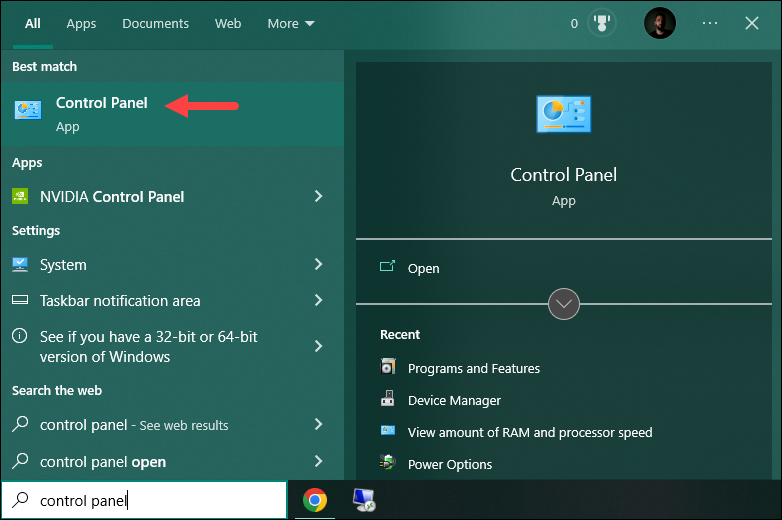
3. Next, open the Control Panel. Press the Windows key and search for control panel. Press Enter to open the app.
4. Open Programs and Features. In the list of installed programs, locate MySQL and all related programs. Click each one individually and select the Uninstall option.
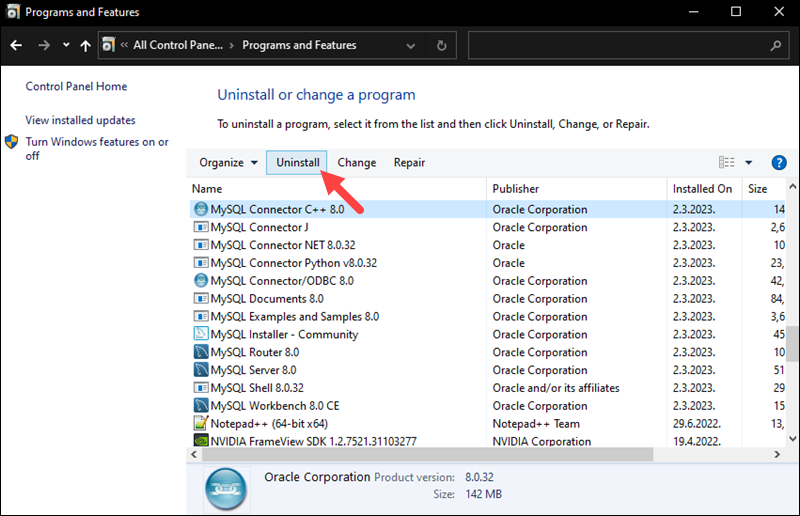
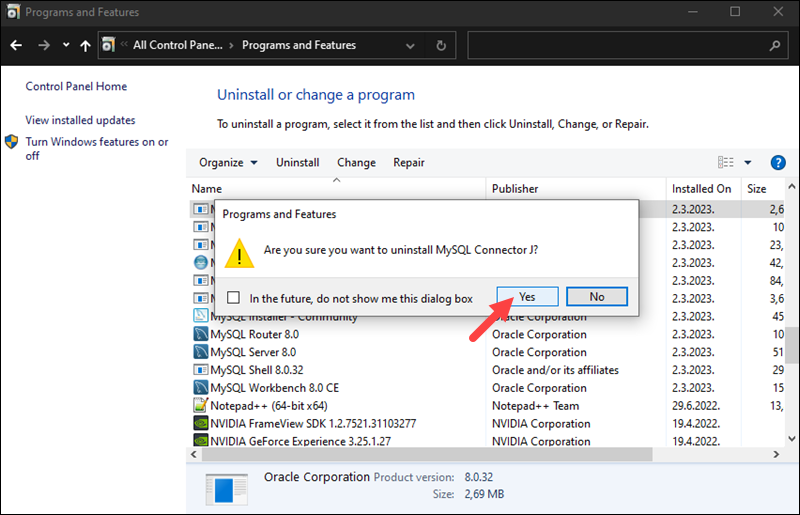
Click Yes for each prompt and wait for the wizard to finish.
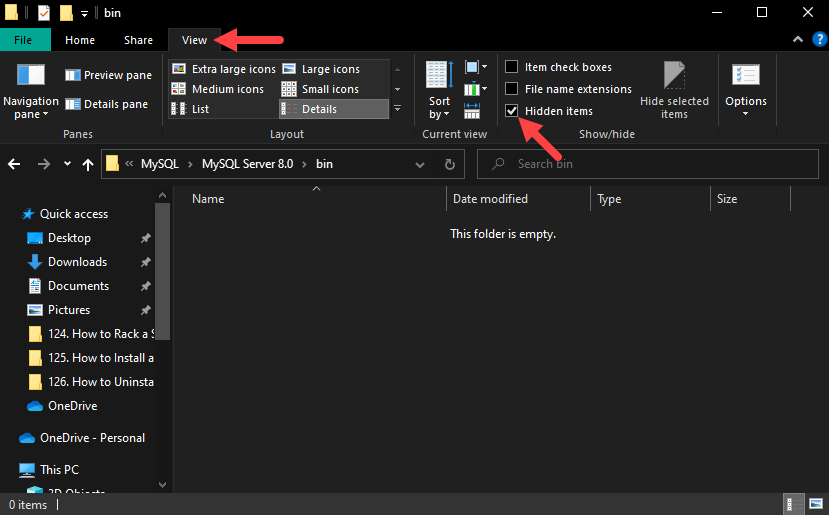
5. After uninstalling all MySQL components, delete the remaining data directories. Since one of the directories is hidden, make sure to enable the Hidden items option in folder settings.
To do so, open any folder using File Explorer, click the View tab, and check the Hidden items option:
Important: If there is critical data that you may still need, make sure to backup MySQL databases before deleting them.
The directories that you need to remove are:
- C:\Program Files\MySQL
- C:\Program Files (x86)\MySQL
- C:\ProgramData\MySQL
- C:\Users\[YourUsername]\AppData\Roaming\MySQL
6. After you uninstall all the components and delete the remaining directories, restart the computer for the changes to take effect.
Uninstall MySQL on macOS
Follow the steps below to uninstall MySQL on a macOS system:
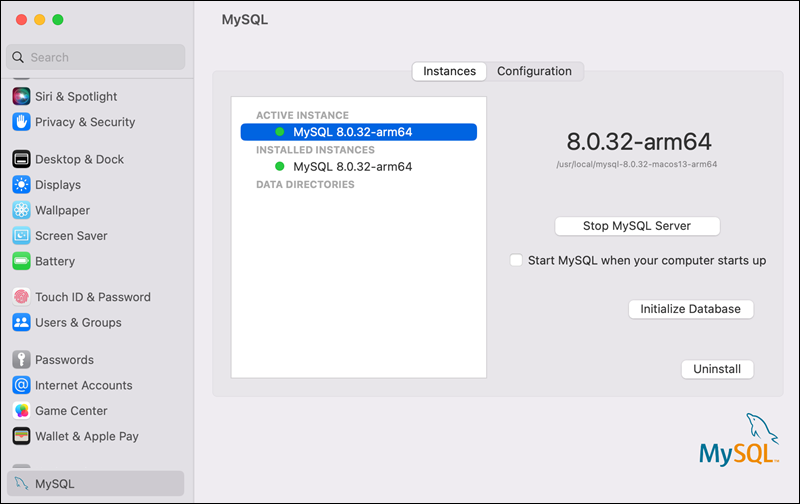
1. Go to System Settings and click MySQL. Click the Uninstall button to remove MySQL from the system.
2. Click the Launchpad icon in the Dock and type Terminal in the search field. Click Terminal to open a new terminal window.
3. Deleting MySQL removes all its databases. If you have critical data stored in MySQL, make sure to back up your files first.
Use mysqldump to back up your databases to a text file. Run the following command:
./mysqldump -u root -p --all-databases > mysqlbackup.sqlThe output is redirected to the mysqlbackup.sql file.
4. Check for running MySQL processes by running the following command:
ps -ax | grep mysql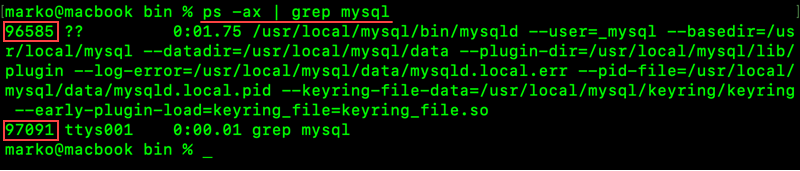
Terminate the running processes using the following syntax:
kill [process_id]For example, to kill the ttys001 process from the image above, run:
kill 970915. Remove the default MySQL directory and all the leftover directories and files. Run these commands:
sudo rm /usr/local/mysql
sudo rm -rf /usr/local/mysql
sudo rm -rf /usr/local/var/mysql
sudo rm -rf /Library/StartupItems/MySQLCOM
sudo rm -rf /Library/PreferencePanes/MySQL*
sudo rm -rf /Library/Receipts/mysql*
sudo rm -rf /private/var/db/receipts/*mysql*
Removing all the directories is important especially if you want to install an older MySQL version on Mac.
6. Use a text editor to open the /etc/hostconfig file and remove the following line:
MYSQLCOM=-YES-Note: Some versions of macOS don’t have the /etc/hostconfig file, so skip this step if the file doesn’t exist on your system.
After following the steps above, you have successfully uninstalled MySQL from your macOS system and cleaned up unnecessary files.
Conclusion
This tutorial showed how to uninstall MySQL from Linux, Windows, and macOS operating systems.
For more MySQL tutorials, see how to install and get started with MySQL Workbench on Ubuntu, or how to secure your MySQL installation.
Was this article helpful?
YesNo
Home
VIDEOS
How To Completely Uninstall MySQL In Windows
In this article, we go through how to completely uninstall MySQL in Windows. Whether you’re troubleshooting a broken installation, reclaiming disk space, or preparing for a fresh setup, fully removing MySQL from Windows involves more than just hitting Uninstall in the Control Panel.
Leftover service definitions, data folders, registry entries, and environment variables can linger—causing headaches down the road. This guide walks you through every step to ensure MySQL is 100% gone from your system. This will work whether you’re using Windows 7, 8, 10, or 11.
For this to work, you’ll need Administrator privileges. You’ll need to run every command and open every tool as an administrator. Also, if you have any databases you care about, export them first using mysqldump or MySQL Workbench.
Proceed with caution when editing the registry. This is powerful but dangerous. A mistaken deletion can destabilize your PC. Always double‑check which keys you’re removing.
Watch: Install Pygame
Uninstall MySQL In Windows
The first step, which is optional, stop & disable the MySQL Service. Simply open Services by pressing Win+R, type services.msc and hit Enter. Find any service named MySQL, MySQL80, or similar. Right‑click on it and select Stop.
Perform a right‑click once again, select Properties, set Startup type to Disabled and hit OK.
Alternatively, use an elevated Command Prompt:
bat
Copy
Edit
sc stop MySQL80
sc config MySQL80 start= disabled
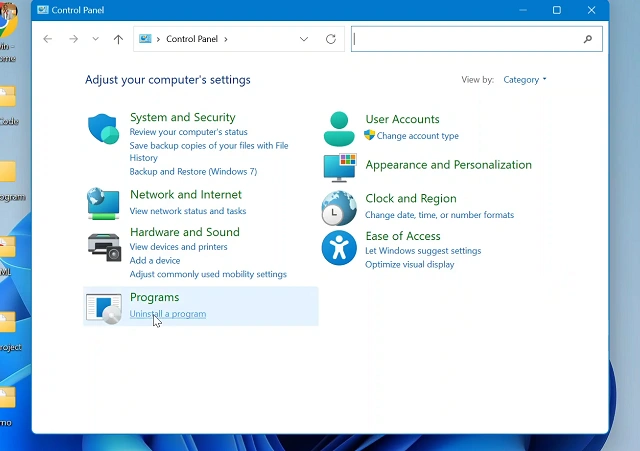
Uninstall a However, this is optional. You can simply start with the uninstallation from the Control Panel. Simply type Control Panel on your computer and select Uninstall a Program, under the Programs section to see all the programs in your computer.
Locate the MySQL Workbench. Simply click on it to highlight, then right-click and select Uninstall.
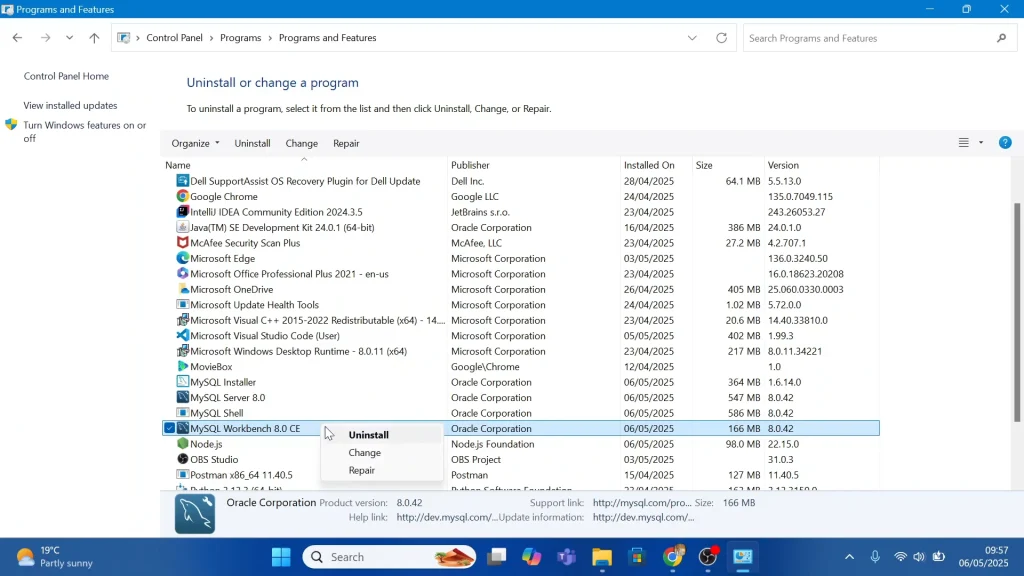
From the two prompts that come up, asking you to confirm the uninstallation, select Yes each time.
Next, click to highlight the MySQL Shell option, then right-click and select Uninstall.
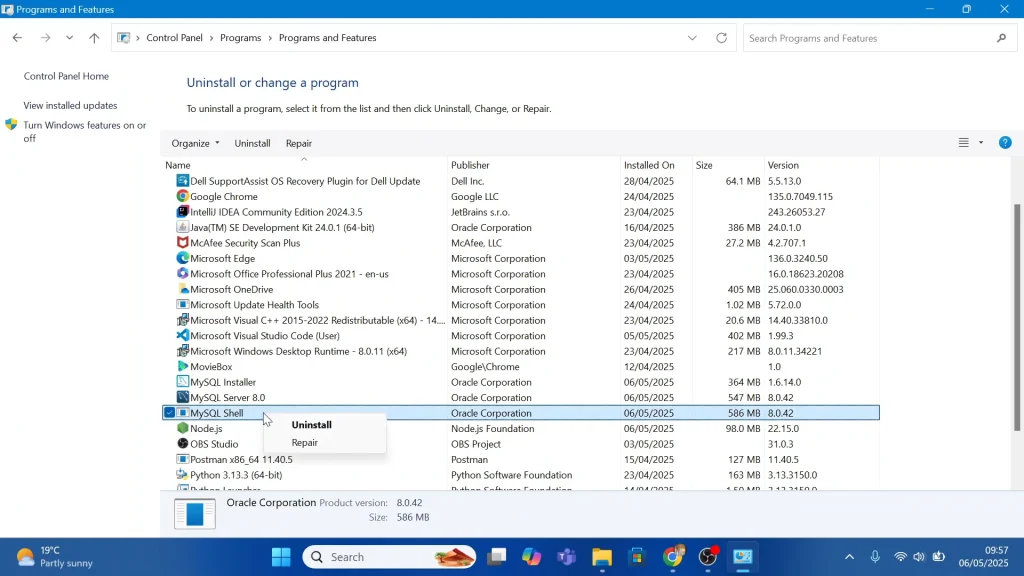
From the two prompts that come up, asking you to confirm the uninstallation, select Yes each time.
Select MySQL Server to highlight it. Then right-click and select Uninstall.
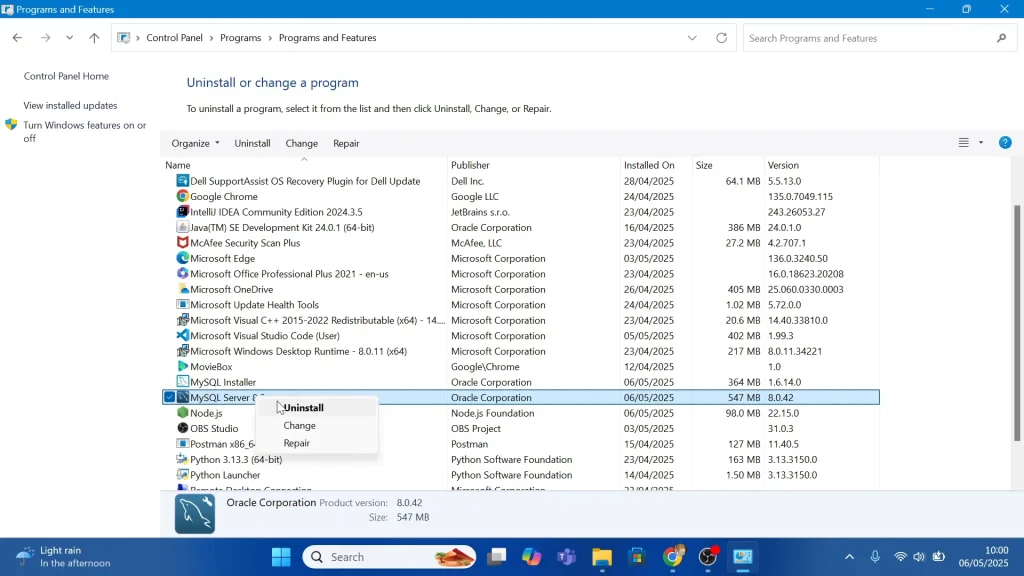
From the two prompts that come up, asking you to confirm the uninstallation, select Yes each time.
Finally, locate the MySQL Installer. Click on it to highlight, then right-click and select Uninstall.
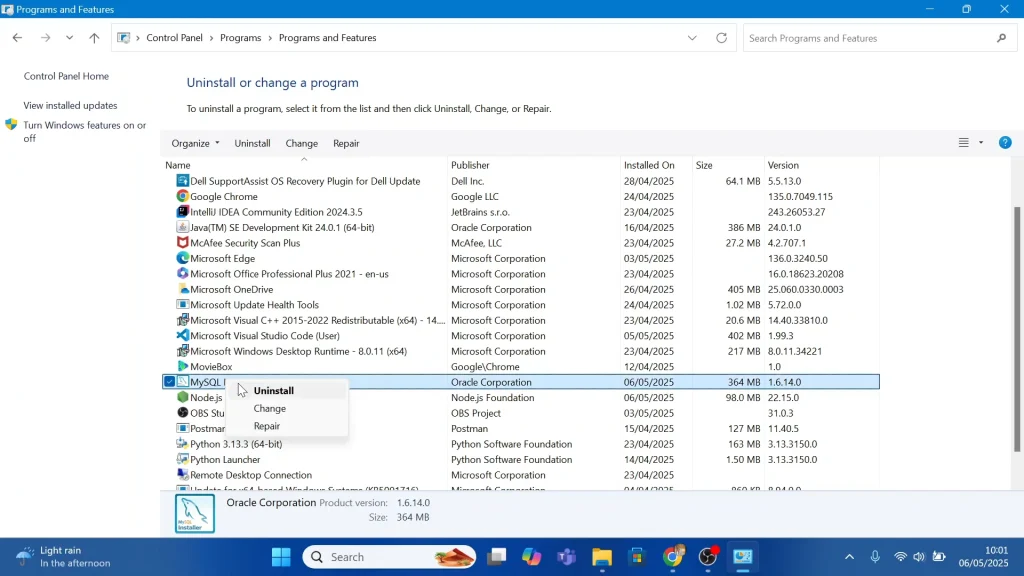
From the two prompts that come up, asking you to confirm the uninstallation, select Yes each time.
This removes the core program files but often leaves data directories and registry traces untouched. Close the Control Panel.
Completely Uninstall MySQL In Windows
Even after uninstalling, you’ll typically find folders here:
Program Files: C:\Program Files\MySQL\
C:\Program Files (x86)\MySQL\
Data directory (default): C:\ProgramData\MySQL\
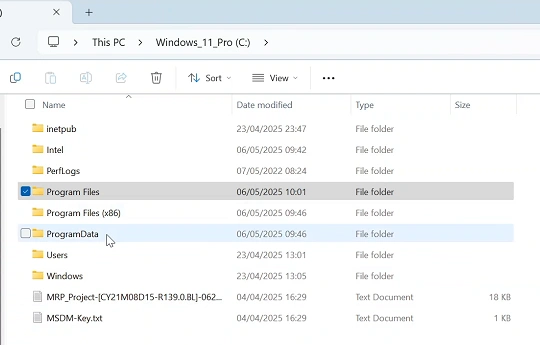
Note: The ProgramData folder is hidden by default— enable Show hidden files in File Explorer (Windows 7/8). For Windows 10/11, simply click on View in the File Explorer options, select Show and enable Hidden Items.
Delete these entire folders to wipe out binaries, libraries, and any remaining data files. Simply right-click on each folder and select the Delete or Bin icon. You can also press Shift+Delete to delete the folders permanently.
You can perform a system reboot if you so choose. This ensures locked files and service definitions are fully cleared from memory. After restarting, rerun the verification checks above. However, a reboot is not necessary.
Read: How To Install Pygame
About The Author
Erick Wachira
Based in Nairobi, Kenya, I am a tech enthusiast who travels down the forgotten road of tutorials regarding everyday tech. We all use our smartphones, TVs, Bluetooth devices, PCs and many more tech devices in our day-to-day. With that, comes issues from time-to-time that need a solution you may not have though of, or might have overlooked. This is where I come in. To the rescue as I offer you solutions and troubleshooting steps to everyday tech problems.
Looking to uninstall MySQL from your Windows 10 machine? Don’t worry, it’s pretty straightforward. First, you’ll stop and remove the MySQL service. Then, you’ll uninstall the MySQL software through the Control Panel. Finally, you’ll delete any leftover MySQL folders. Easy, right? Let’s dive into the details.
In this section, I’ll walk you through each step to successfully uninstall MySQL from your Windows 10 computer. Follow along to ensure MySQL is completely removed.
Step 1: Stop the MySQL Service
Open the Services app by typing «services.msc» in the search bar and hitting Enter.
Once the Services window is open, scroll down to find «MySQL». Right-click on «MySQL» and select «Stop» to halt the service. This ensures the service is not running while you uninstall it.
Step 2: Open the Control Panel
Access the Control Panel by typing «Control Panel» in the search bar and hitting Enter.
In the Control Panel, click on «Programs» and then «Programs and Features». This will present you with a list of all installed programs on your computer.
Step 3: Select and Uninstall MySQL
Scroll through the list to find «MySQL Server» and select it.
Click «Uninstall» at the top of the list. Follow the prompts to complete the uninstallation process. This will remove the MySQL software from your system, but not the configuration files or databases.
Step 4: Delete MySQL Configuration Files
Navigate to the folder where MySQL was installed. This is usually located in «C:Program FilesMySQL».
Delete the MySQL folder and any subfolders. This step is crucial to remove any leftover configuration files and databases. Be sure to back up any important data before deleting these folders.
Step 5: Remove MySQL from Environment Variables
Open System Properties by typing «sysdm.cpl» in the search bar and hitting Enter.
Click on the «Advanced» tab and then «Environment Variables». Under «System variables», look for «Path». Edit it and remove any entries related to MySQL. This ensures that all traces of MySQL are removed from your system.
After completing these steps, MySQL will be completely removed from your Windows 10 machine. You’ll have freed up valuable resources and eliminated any potential software conflicts.
Tips for Uninstalling MySQL in Windows 10
- Backup your databases before starting the uninstallation process.
- Check for any MySQL-related services running in the background.
- Use a reliable uninstaller tool for a more thorough deletion.
- Restart your computer after completing the uninstallation steps.
- Review the registry for any leftover MySQL entries.
Frequently Asked Questions
How do I know if MySQL is uninstalled?
You can check by opening the Command Prompt and typing «mysql». If you get a ‘not recognized’ error, MySQL is uninstalled.
Will uninstalling MySQL delete my databases?
Uninstalling the software won’t delete your databases. However, deleting the MySQL folder will. Always back up your data.
Can I reinstall MySQL after uninstalling it?
Yes, you can reinstall MySQL at any time using the installer from the MySQL website.
Do I need administrative privileges to uninstall MySQL?
Yes, you need administrative privileges to uninstall software and stop services.
Why should I remove MySQL from environment variables?
Removing MySQL from environment variables ensures that no residual paths interfere with other software.
Step-by-Step Summary
- Stop the MySQL service.
- Open the Control Panel.
- Select and uninstall MySQL.
- Delete MySQL configuration files.
- Remove MySQL from environment variables.
Conclusion
Uninstalling MySQL from your Windows 10 system might seem daunting at first, but it’s really just a series of straightforward steps. From stopping the MySQL service to removing all its traces from your environment variables, these steps ensure a clean uninstall. Always remember to back up your important data before starting the process to prevent any loss.
If you ever need to reinstall MySQL, you can do so easily by downloading the installer from the MySQL website. Removing software you no longer need is a great way to keep your computer running smoothly and efficiently. So, if MySQL is no longer serving your needs, don’t hesitate to uninstall it using the steps outlined above. Happy computing!
Matt Jacobs has been working as an IT consultant for small businesses since receiving his Master’s degree in 2003. While he still does some consulting work, his primary focus now is on creating technology support content for SupportYourTech.com.
His work can be found on many websites and focuses on topics such as Microsoft Office, Apple devices, Android devices, Photoshop, and more.
Posted on Oct 27, 2021
Reading time: 1 minute
If you installed MySQL server using the official MySQL Community Server installer, then you can uninstall it from Windows Control Panel.
Head to the Control Panel > Programs > Programs and Features and search for mysql as shown below:
You will see several programs related to MySQL as in the picture above.
To remove MySQL database server, you only need to uninstall the one named MySQL Server x.x which is responsible for starting MySQL server on your computer.
The rest of the programs (connectors, router, etc.) are utility programs to help MySQL runs without any error. You can uninstall them later as well.
Once you double-click on the program name, the uninstallation wizard should appear to guide you on uninstalling the program.
MySQL Server should be removed from your computer once the process is finished.
Optionally, you can also remove any data associated with MySQL, usually located on C:\ProgramData\MySQL.
And that’s how you uninstall MySQL Server installed using the official installer.
If you install MySQL as a part of development tools like XAMPP or WAMP, then you need to uninstall the XAMPP (or WAMP) itself to remove MySQL from your computer.
Thanks for reading! 🙏