
Download Article
Make high-quality screen recordings, with or without audio
Download Article
- Using the Xbox Game Bar
- Using Microsoft Clipchamp
- Using OBS Studio
- Video
- Q&A
|
|
|
|
If you want to record your Windows 10 screen, you have several free options. If you want to record a game or application window but not the entire screen, you can use the built-in screen recorder Xbox Game Bar. To record the whole screen, you can use free, easy-to-install software like Microsoft Clipchamp or OBS Studio. All these options allow you to screen record with audio, and you’ll even have the option to add your voice to the recording. Read on to learn the easiest ways to record your screen in Windows 10.
How to Record the Screen in Windows 10
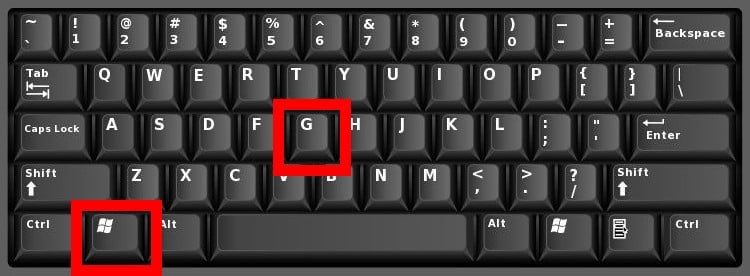
Press the Windows Key + Alt + G to open Game Bar (comes with your system), then press Windows key + Alt + R to start recording. Click the square when you’re finished. To record your entire screen, use Microsoft Clipchamp or OBS Studio—both are free and easy to set up.
-

The Xbox Game Bar comes with your system. To open Game Bar, type game bar into the Windows search bar and click Game Bar, or use the keyboard shortcut Windows key + Alt + G.[1]
- While this tool won’t record the entire screen, it can come in handy if you want to record yourself playing a game or demonstrating something in an app.
- If Game Bar doesn’t open, it may be disabled. To enable it:
- Open the Start menu and select Settings.
- Select Gaming > Game Bar.
- Set «Enable Game Bar for things like recording game clips, chatting with friends, and receiving game invites» to On.[2]
-
If you’d like to fine-tune your screen recording option, you can do so in your Windows Settings. Here’s how:
- Open the Start menu and click Settings.
- Click Gaming.
- Click Game Bar in the left column.
- Scroll down on the right panel to adjust your audio and video preferences.
- Close the Settings window when you’re finished and return to the Xbox Game Bar.
Advertisement
-
A bar displaying your progress will appear at the top-right of the screen.
- Click the microphone icon on the bar to toggle voice recording on or off.
- To record a game or application you’re using full-screen, use Windows key + Alt + G to start and stop recording instead.[3]
-
It’s on an indicator that displays your progress. Your screen recording is now saved to a folder called Captures, which is inside your Videos folder.


Advertisement
-
This free Microsoft app makes it super easy to record your entire screen on Windows 10. This is a great option if you want to record the entire screen with audio, and you’ll even have the option of recording yourself on your webcam at the same time.
- Open the Microsoft Store app in your Start menu.
- Search for «Clipchamp.»
- Click Get and follow the on-screen instructions to install.
-
After signing in with your Microsoft account, you’ll see a purple button near the top of the right panel. If you don’t see it, scroll down a bit to «Your videos,» then click Create your first video here.
-
It’s the option with a video camera, and you’ll see it in the upper-left area of the window.
-
The recording options allow you to record both your screen and camera, just your camera, just your screen, or just audio.
- If you select just the Screen option, you can still record yourself speaking if you’d like. In addition to audio captured from the screen, you can connect an external microphone (such as the one in your headset) or use your computer’s built-in mic.
-
If you want to record with audio or use your webcam, give Clipchamp permission to access your camera and microphone by selecting Allow or Always allow.[4]
-
This opens a screen where you can select what you’d like to include in your screen recording.
-
Alternatively, you can record just a browser tab or a single window.
- If you are using multiple desktops and choose to record the entire screen, select the image of the desktop you want to record.
- If you want to record audio, toggle on the «Also share system audio» option.
-
You can record up to 30 minutes with Clipchamp.[5]
If you want to make a longer video, just record multiple videos. You can even use Clipchamp to combine the videos at the end to make one longer recording. -
This completes the screen recording and allows you to watch what you’ve recorded. If you’re unhappy with it, click Retaking recording to try again.
- If you want to keep your recording, click Save and edit.
-
You can now use Clipchamp’s editing tools to add text, create transitions, and more. To save your recording when you’re finished, click the purple Export button and choose a video quality. You can then give the video a name, click Save to your computer, and select a saving location.
- If you want to make a screen recording longer than 30 minutes, click Record & create again and record your next video. When you save that one, you’ll see both recordings in the media panel. You can easily drag the second recording to the timeline right after the first to make one long video.


Advertisement
-
You can use OBS to record the entire screen with audio, full-screen gameplay, individual windows, and even audio. Download this free screen recording and broadcasting software from https://obsproject.com.
- Once downloaded, double-click the file and follow the on-screen instructions to install it.
-
- If you are just using OBS Studio to record the screen, select Optimize just for recording, I will not be streaming. You can always opt to add streaming features later. Click Next to continue.
- OBS Studio will determine the best resolution and FPS for your recordings. Click Next to continue.
- Click Apply Settings when you’re finished.
-
A list of sources from which you can stream and record will appear.
-
This option allows you to record the entire screen. Alternatively, you can select Window Capture to record just one window, or Game Capture to record a full-screen game.
-
«Automatic» is fine for the Capture Method. If you have multiple displays, select the one you want to record from the «Display» menu. You can also choose whether to include your mouse cursor in the recording.
-
OBS Studio is set to record your system audio and your system microphone by default.[6]
If you don’t want to record system audio, click the mute button under «Desktop Audio.» If you don’t want the screen recording to record your voice or ambient sound around you, click the mute button next to «Mic/Aux.» -
Before you start recording, you can choose where to save the file, the type of file to create, and other details.
- Click Settings in the lower-right corner.
- Click the Output tab.
- Choose the saving location by clicking Browse next to «Recording Path.» By default, OBS Studio will save the recording in your Videos folder.
- Choose a file type (such as MP4 or MOV) from the «Recording Format» menu. The default is MKV.
- Click OK to return to OBS Studio.
-
This instantly begins recording your screen with your selected settings.
- Click Stop Recording when you’re finished. This saves the video at the location you selected.
- Want more tips for recording a screen’s sound and video on Windows? Check out what wikiHow users say on our How do I screen record sound and video on Windows? forum.


Advertisement
Add New Question
-
Question
How to face-cam on Windows 10?
AbigailMiller
Community Answer
If you mean to record your webcam on Windows 10, I’ll recommend some screen recorders. Firstly, OBS is a free and powerful recording tool that enables you to record your webcam. But it is not friendly to newbies. You can search for tutorials about OBS. Paid and affordable software, which is easier-to-use include Bandicam (it’s nice for gameplay recording), RecMaster (It has a simple main interface), Camtasia (many people know it). You can choose any of them according to your needs. They’re all great screen recorders.
Ask a Question
200 characters left
Include your email address to get a message when this question is answered.
Submit
Advertisement
Video
Thanks for submitting a tip for review!
About This Article
Thanks to all authors for creating a page that has been read 94,058 times.
Is this article up to date?
Important: Microsoft Stream support articles are moving! They will soon be part of the Clipchamp support collection as we unify Microsoft 365 video tools under the Clipchamp brand. Learn more in this announcement.
Make your Stream videos more engaging by adding interactive elements like callouts and forms. These features allow you to create a more immersive experience for your viewers, aiding their understanding of complex concepts and offering additional information on relevant topics.
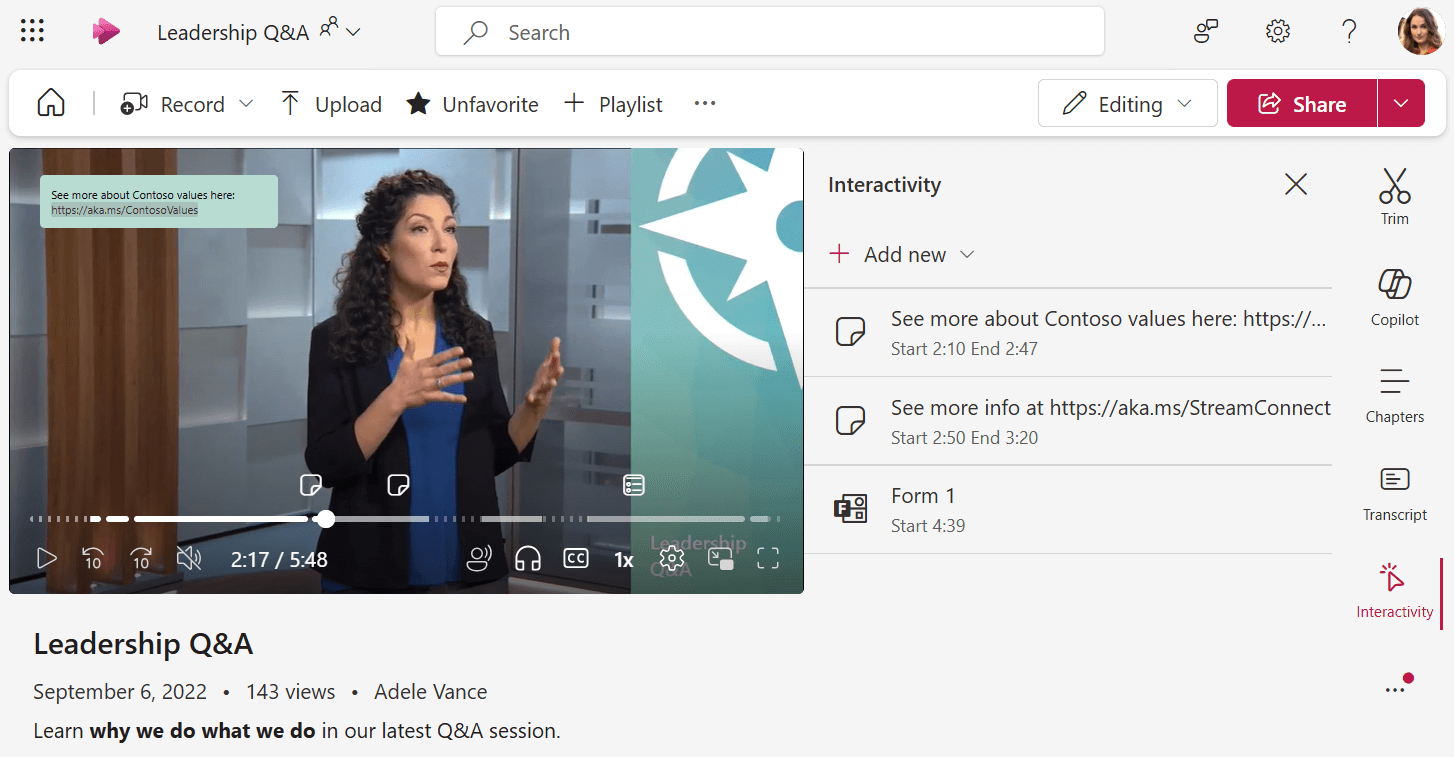
Callouts
Callouts are clickable, customizable elements you can place anywhere in a video.
They allow you to add text or hyperlinks at specific times, helping you draw attention to important points, provide extra context, or guide you to external resources.
-
Make sure you have permission to edit the video. If you do, verify that you are in Edit mode in the player page.
-
Navigate to the Interactivity tab on the right. If Interactivity is toggled off, open the Video settings to toggle it on first.
-
Select Add new
-
Select Add callout
-
On the video itself, enter the text for the callout in the box overlaid on top of the video. Your callout can include links that will become clickable to your viewers.
-
If you want to move the callout to a different spot on the video, use your mouse to hover over the callout on the video until the mouse cursor turns into a hand, you can then click to drag the callout to a different placement. This can be useful to make sure your callout doesn’t cover over something important in the video.
-
Set the Start and End time for the callout, this will be when the callout shows up for viewers watching the video and when it goes away. You can use the video timeline to set a specific point in the video and then click Sync with playhead button next to the start or end time or type a time code in directly.
-
Customize the color of the callout if desired
-
When done, select the check mark to save your changes
-
You can see how your callouts will show up for your viewers by just playing the video across the times set for the callout
-
Viewers can click the point of interest marker on the timeline in the video to jump to and view the interactive element.
Forms
With Forms, you can insert polls, surveys, or quizzes from Microsoft Forms into your video at specific points, allowing you to gather feedback, gauge understanding, or create a more engaging and interactive experience for your viewers.
All your answers will be collected in Microsoft Forms the same way they would if you sent someone the direct link to fill out the form.
-
Make sure you have permission to edit the video. If you do, verify that you are in Edit mode in the player page.
-
Navigate to the Interactivity tab on the right. If Interactivity is toggled off, open the Video settings to toggle it on first.
-
Select Add new
-
Select Add form
-
You can either insert the link to an existing Microsoft Form or select the Go to Microsoft Forms option to create a new form
-
Set the Start time for the form, this will be when the form shows up for viewers watching the video. You can use the video timeline to set a specific point in the video and then click Sync with playhead button next to the start time or type a time code in directly.
-
When done, select the check mark to save your changes
-
You can see how your form will show up for your viewers by just playing the video across the start time set for the form. When the form loads, it will cover the entire player. To return to the video, click the Continue to video button.
-
Any changes you make to your form in Microsoft Forms will be reflected on the video when the form is shown to viewers
Need more help?
Want more options?
Explore subscription benefits, browse training courses, learn how to secure your device, and more.
Whether you want to save a YouTube video you’re watching, or you want to show someone a game you’ve been playing, it’s easy to record a video of your screen on a Windows 10 computer. Here’s how to record your screen on a Windows 10 PC using the Xbox Game Bar, and how to edit your video using the Photos app.
How to Record Your Screen in Windows 10 Using the Game Bar
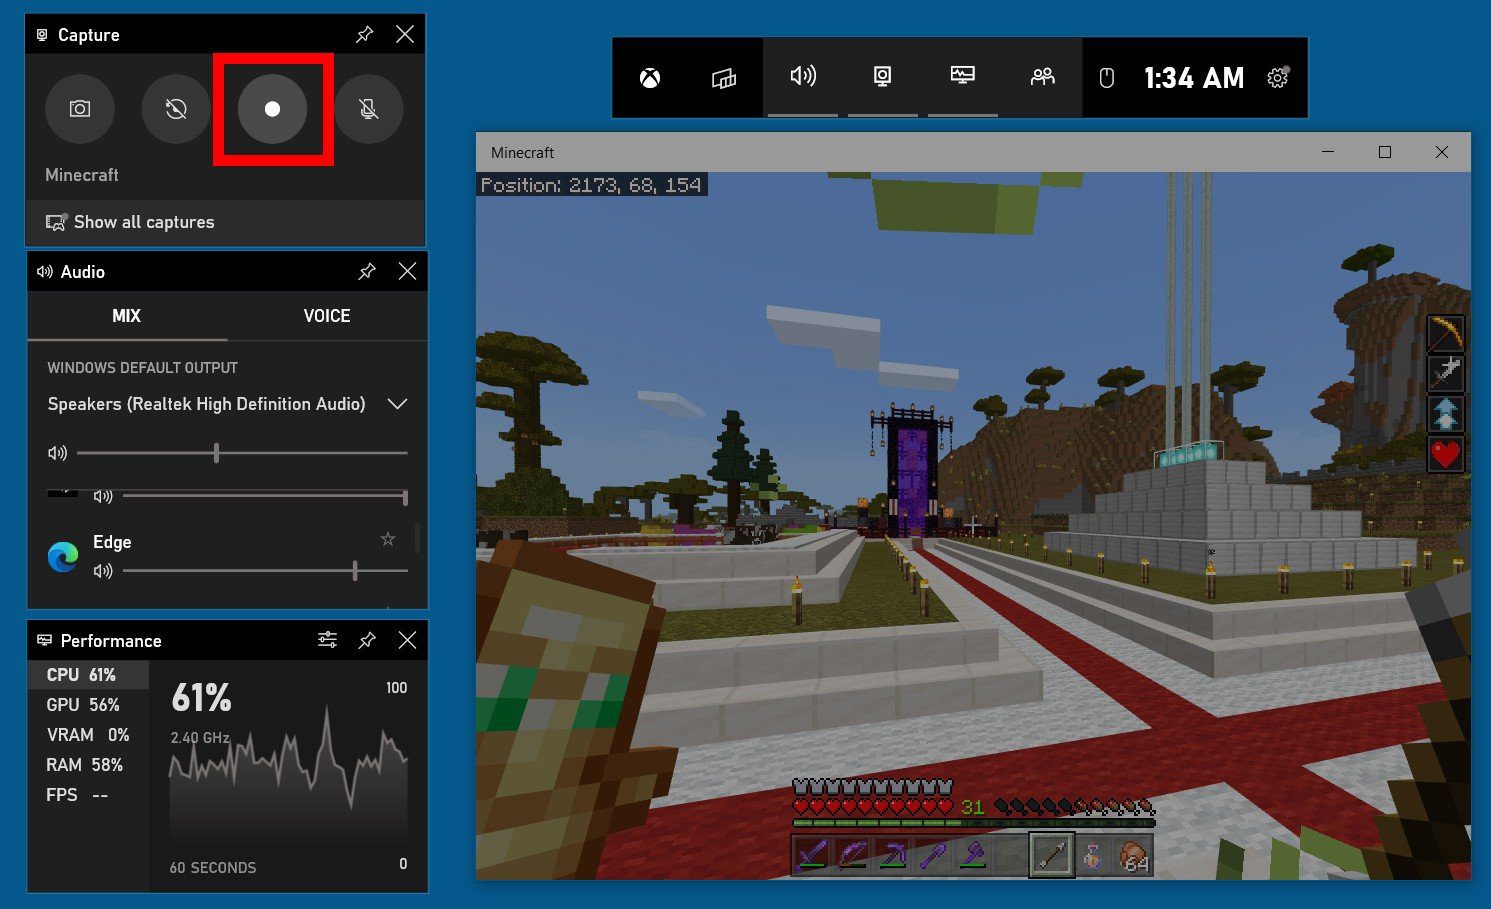
To record your screen on a Windows 10 PC, open an app and then press the Windows + G keys on your keyboard. Then click the Record button in the Capture window to start recording. Finally, click the Stop button to end the recording and the Windows + G keys to view your video.
- Open a window you want to record. You will need to have the app or window open before you can start recording. There are certain areas on your computer that you cannot record with the Xbox Game Bar, including your desktop and File Explorer. In order to create
- Then press the Windows + G keys. When you press both of these keys on your keyboard at the same time, it will open several Xbox Game Bar windows on your screen.

Note: If this keyboard shortcut doesn’t work, make sure Game Bar is enabled. To do this, click the Windows logo in the bottom-left corner of your screen and select Settings. Then, select Gaming in the left sidebar and click the slider under Xbox Game Bar to enable it.
- Next, press the Start Recording button. This is the button with a small circle inside a large circle in the Capture window. Once you press this button, the Xbox Game Bar windows will vanish, and your recording will start. The video will match the size of your window, whether it is full-screen or not.
Note: You can also press the Windows + Alt + R keys to immediately start recording immediately, even before opening the Game Bar.
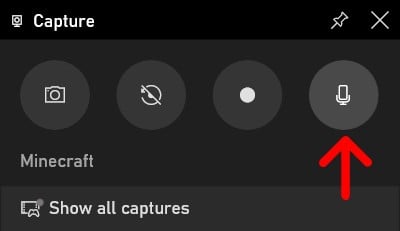
Note: If you also want to record audio, click the microphone button in the Capture window before you click the record button. If the mic icon has a diagonal line over it, it means your microphone is turned off.
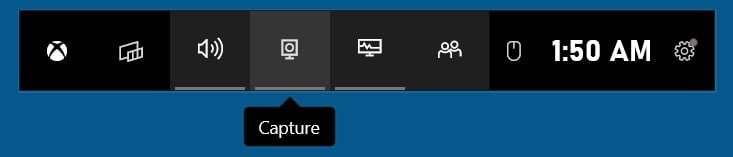
Note: If you do not see the Capture window, or you accidentally close it, you can open it again by clicking the camera icon on the horizontal menu at the top of your screen.
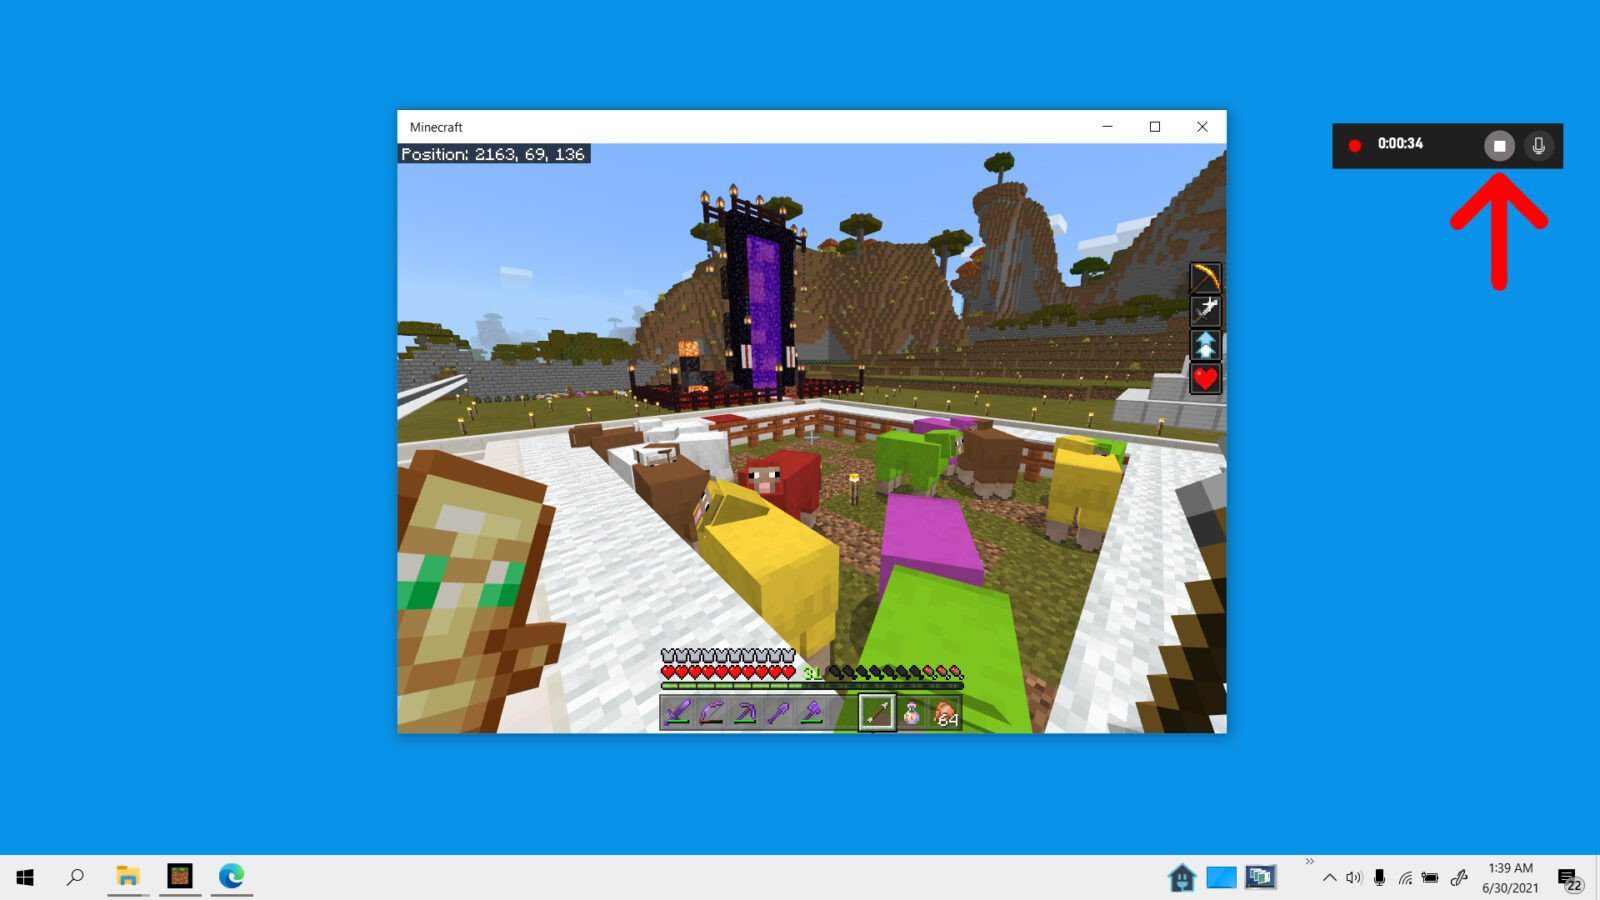
- To stop recording, click the Stop button. This is the button in the small pop-up window with a square in a circle.
Note: You can also turn the microphone on and off from this pop-up window while you are recording your screen.
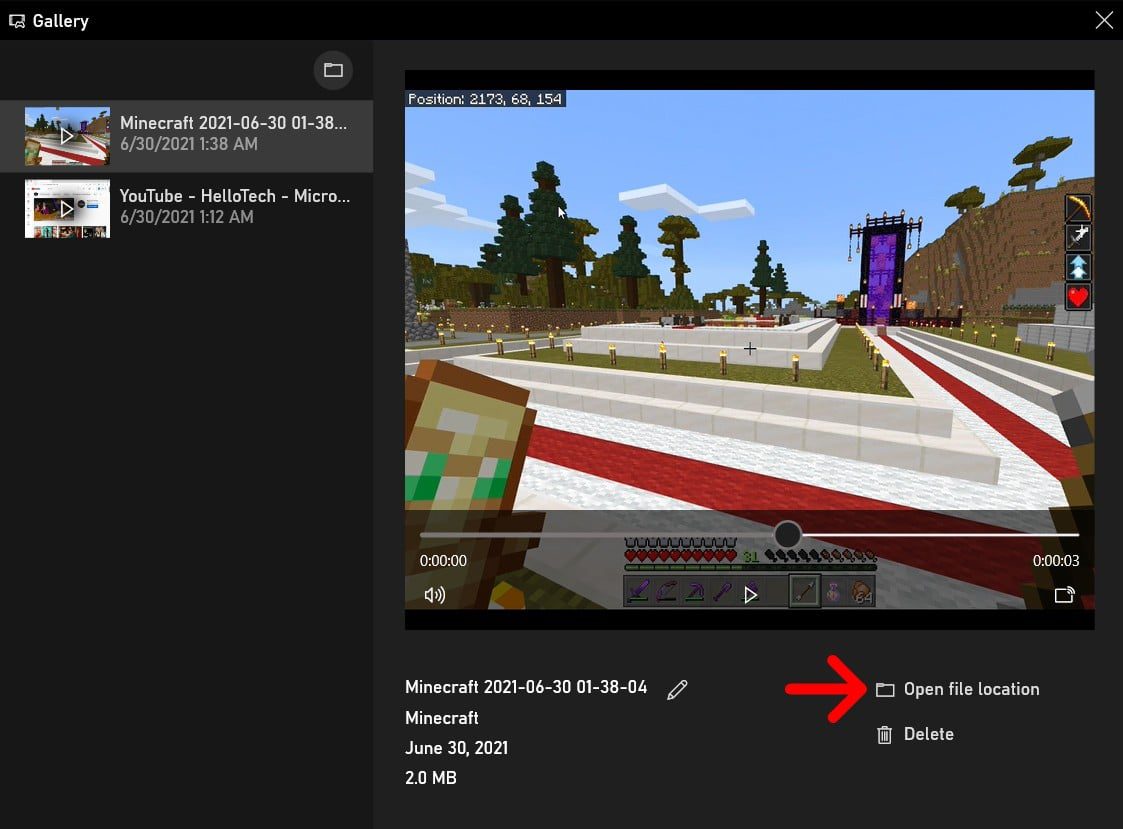
- Finally, press the Windows + G keys to view your recording. From here, you can select each of your video recordings in the left sidebar under Gallery. Then you can watch your recording by clicking the Play button. And you can find your video file by clicking Open file location.

How to Edit Your Screen Recording
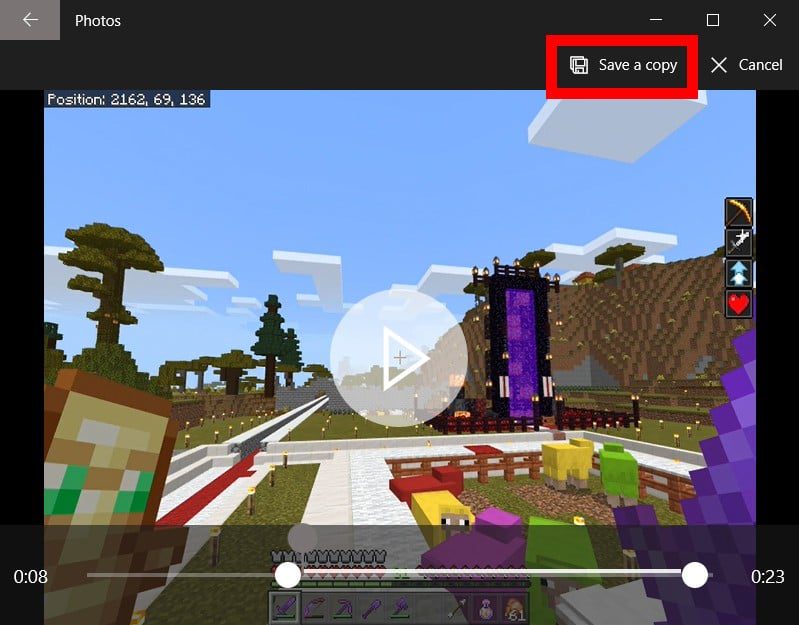
You can edit your screen-recording video or any other video you have using the Photos app on your Windows 10 PC. Then click Edit and Create to see your editing tools. Finally, click Save a copy when you are done editing your video.
- Right-click the video you want to edit.
- Then hover your mouse over Open with.
- Next, choose Photos. This will open your video in the Photos app.
- Then click Edit and Create. You will see this in the top-right corner of the window.
- Select an editing option. Click Trim to cut out the beginning and end of a video.
- Finally, click Save a copy to save your edited video.


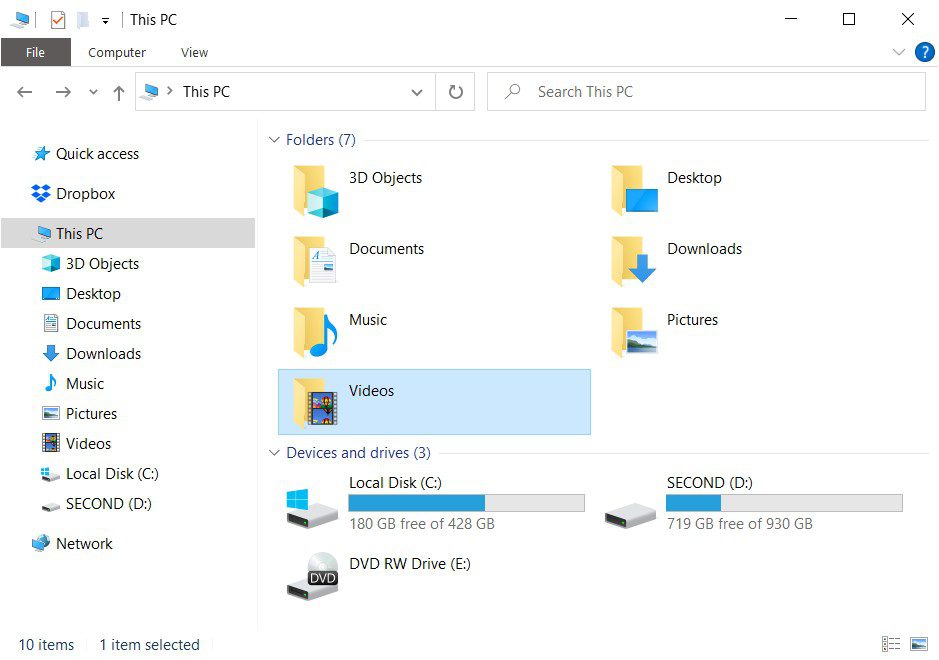
You can find your recording by going to This PC > Videos.
Now that you know how to record your screen on a Windows 10 PC, check out our step-by-step guide on how to record your screen on an iPhone.
HelloTech editors choose the products and services we write about. When you buy through our links, we may earn a commission.
Throughout history, we have developed many different techniques in capturing and recording moments. Starting from paintings on a cave wall to digitally capturing video and images in an instant. You can never satiate progress and screen recording is proof of that.
A businessman who set up an online conference with his managers.
An online student and her teacher in a virtual classroom who are prsereparing study points for the SATs.
A grandmother, 2,000 miles away, who sees her great-grandchild for the first time via Skype.
These moments are the type of moments that need to be recorded and, in this day and age, it has become insanely easy. A free screen recorder gives us the convenience of capturing anything on our PC or laptop screens.
In this article we’ll cover how to record your computer screen on Windows 10. There are several options out there and we are going to walk you through three of them.
So sit back, relax, and let’s jump in.
OPTION 1: Screenrec
Screenrec is free computer screen recording software that allows you to record both your screen and computer audio. It can also serve as a streaming video recorder, 4K screen recorder, software to create tutorial videos, and app to record Skype for Business meetings.
With a minimalistic style interface, using Screenrec is amazingly simple. Everything is front and center and all it takes 2 or 3 mouse clicks.
Screenrec uploads your recordings, in the background, to our secure cloud storage (also free). It evens copies the link to your clipboard, so all you really have to do is click, record and paste the sharing link.
Screenrec is suitable for video screen capture on Windows 7, 8 or 10 and Linux. The Mac version will also be available very soon.
How do you screen record?
Here’s how to screen record on PC with ScreenRec. (Watch the video below or scroll for the text-based guide.)
OPTION 2: Windows 10 Game Recorder
If you’ve ever used the Windows Snipping Tool, you probably wondered at some point,
“How can I record my screen on Windows 10? Is there a video snipping tool?”
Actually, yes, there is! Strictly speaking, the Game Recorder (or Game Bar) was designed as a way to record gameplay on PC. However, you can capture anything that’s on your screen.
The only potential problem is that there are a few hoops you have to jump through first including actually finding the program on your computer. We’ll take it one step at a time.
How To Record Your Computer Screen On Windows 10 Using The Game Bar
- Make sure you have the appropriate graphics card. (Hoop #1). In order to begin recording a screencast, you need a hardware encoder, which means that you’ll need a specific graphics card installed in order to support an encoder like Intel Quick Sync H.260, Nvidia NVENC, or AMD VCE.
- Press Windows + G and the Game Recorder will appear.
- Record audio
- System audio. The sound from your computer is recorded by default. You can disable it by clicking the settings icon at the bottom left of the window, select the “Game DVR” tab and scroll down until you see “Audio”, unselect “Record audio when I record game clips”.
- Microphone audio (Hoop #2). Unfortunately, the Windows 10 Game Recorder is not equipped with voice recording software. If you wish to record your voice during gameplay, you will have to change your computer settings. Watch this video to see how.
- Click the Record button (the circle) to begin recording. When in full screen, press the Windows key + Alt + G to start and stop recording.
- Share your recording (Hoop #3). Once you’re finished recording, a file is created and saved to your computer. There is no way to instantly share, however, you can upload to YouTube or any other video hosting site.
OPTION 3: OBS (Open Broadcaster Software)
OBS is another widely popular way to record video on Windows 10. It’s far more involved and complex than the other two. However, if you’re into video production and would like more control over your screen recording options and capabilities, then OBS may be what you’re looking for.
OBS is still a great piece of screen recording software for Windows 10, so we’ll explore it as our third option. We’ll walk you through each step and you can also watch this tutorial to help you better understand the software.
How to screen record with OBS
The Easiest Way To Record Your Computer Screen
It might be a bit bold but we’ll say it: Screenrec is the easiest way to record your computer screen on Windows. Many other screen recorders (both free and premium ones) add complexity with mandatory third-party downloads and insanely steep learning curves.
Screenrec was designed to make recording your computer screen as simple as possible. From recordings automatically saved to your free private video account, all the way up to sharing instantly with as many people as you’d like anywhere in the world. Screenrec does all the heavy-lifting while you merely click a button or two. If you want to try it, head over to the screen recorder download page.
We’d suggest you try Suggest ScreenRec because it’s fast, it’s very simple to use (only one shortcut to remember), it automatically saves your screen recordings to the cloud and it’s free.
Windows 10 comes with its own screen recording tool called Game Bar. It was mainly designed to enable screen capture during gameplay. You can access it by pressing Windows key + G.
Make your screen resolution as high as possible and do some research to find the best noise cancelling microphone. On Windows 10 PC, go to Start > Settings > System > Display. Select the highest setting in the Resolution drop down and the change will automatically be made. Click “Keep Changes”. Then use an HD screen recorder such as ScreenRec to capture your screen with the best possible quality. ScreenRec saves your screen recordings in the universal MP4 format which offers a great balance between video quality and file size.
References and Further Reading?
- Understanding OBS
- How To Choose The Right OBS Bitrate
- Using Windows 10 Game Recorder
- The Best Free Screen Recorders
- How To Record Live Streaming Video
- How To Edit A Screenshot On A PC
DON’T MISS OUT
Get updates on new articles, webinars and other opportunities:
Screen Record Any Activity on Windows with High Quality
Perhaps you need to record on your Windows 11/10/8/7 PC for a presentation for online classes or meetings, or you are cooking up something that you want to share with your viewers. Regardless of the reasons, you can easily make use of the built-in recorders on Windows PC. However, there are some limitations to the capture size, output settings, etc. Thus, here are 4 efficient ways for you to learn how to screen record on Windows.
| Method | Ease of Use Based on User Experience |
| AnyRec Screen Recorder | Come with a straightforward interface with clear options for screen recording and editing. It may be overwhelming for absolute starters, but it is well-suited for almost everyone. |
| Xbox Game Bar | It was designed for simplicity on Windows computers. It’s perfect for capturing gameplay or quick screen recordings. |
| Snipping Tool | Extremely easy to use for primary screen captures, even though it comes with limited functionalities, it makes it less suitable for complex recording needs. |
| AnyRec Free Screen Recorder | An excellent free online screen recorder alternative if you prefer not to install anything to record Windows 11/10. It can also produce high-quality putput. |
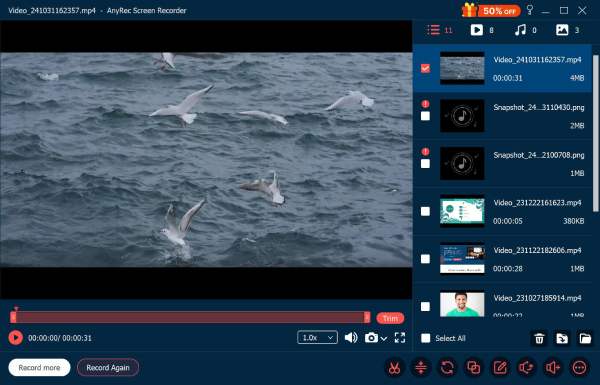
Start this guide with a versatile screen recording tool on Windows 11/10/8/7 called AnyRec Screen Recorder. The program is designed to capture any on-screen activity with a user-friendly interface and a range of features. Whether you are creating tutorials, recording gameplay, or capturing online meetings, the program offers a smooth recording experience for everyone. You can get your desired area with its multiple recording modes alongside your preferred quality with its highly customizable video and audio recording settings. Start recording screen on your Windows PC with high quality now!

AnyRec Screen Recorder
Can record system, sound, microphone, or both while recording screen.
Capture your Windows screen in various resolutions and frame rates.
Edit your recordings within the program with a trimmer, cutter, and more.
Save your screen recording in well-known formats, like AVI, WMV, MP4, etc.
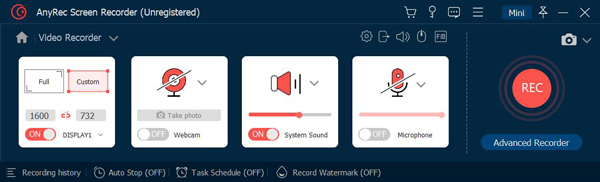
Step 1.Once you have run AnyRec Screen Recorder, the main window will display clear options for recording the screen. Select whether to record the «Full» or «Custom Area».
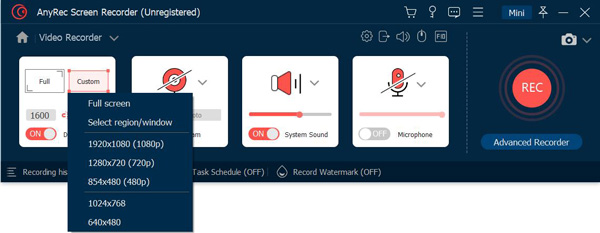
Step 2.Enable the «System Sound» switch button to record internal audio, the «Microphone» one to record your voice, or both, depending on your recording requirements.
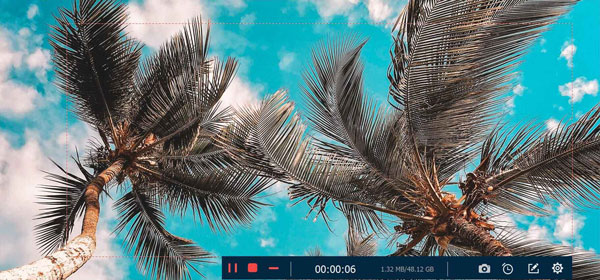
Step 3.After settling everything, click the «REC» button to begin recording your Windows 11/10/8/7 screen activity. Now, you can add annotations and take screenshots.
Step 4.Finally, it’s time to edit your recordings! Once you end the recording, you’ll go to the «Preview» window, where you are able to watch and trim your recording before saving it.
Use Game Bar to Capture Windows Screen
Aside from the software mentioned, Windows 11/10 provides a built-in feature where you can easily understand how to screen record on Windows with audio. You can enjoy the Xbox Game Bar, designed originally for capturing gameplay but perfect for recording any on-screen activity. It acts as a customizable overlay recorder that you can access without leaving your game.
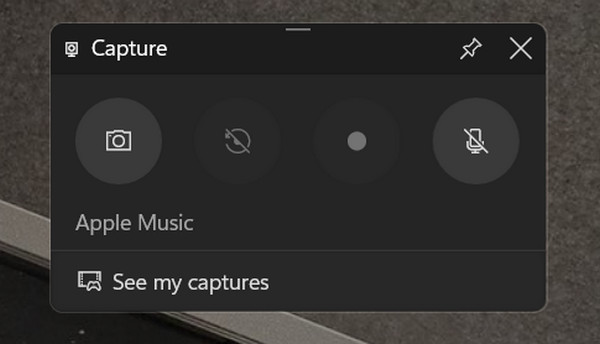
Step 1.To launch the Xbox Game Bar, press the «Windows + G» keys. Click the «Capture» widget in the floating bar if the «Capture» window does not open automatically.
Step 2.Ensure the intended record window is open. Click the «Microphone» icon if you would love to record audio. Then, proceed to the «Red Circle» button to initiate and end the recording.
Note
You can also use the shortcuts «Windows + Alt + R» to start and end the process of recording screen on Windows PC 10/11.
How to Use Snipping Tool on Windows 11/10
If you still want more built-in options in Windows 11/10 computers, you will surely be glad to know about the Snipping Tool! It is a handy application on Windows systems that permits you to screen record on Windows and capture screenshots of specific areas or your entire screen.
Step 1.Start by opening the Snipping Tool, which can be done in two ways:
• Search it in the Windows Search bar by clicking the «Start» menu or the «Windows» key and then typing the «Snipping Tool». Select it from the best results.
• Use the shortcut keys: «Windows + Shift + S» on your keyboard. This will present a small capture menu without launching the entire Snipping Tool window.
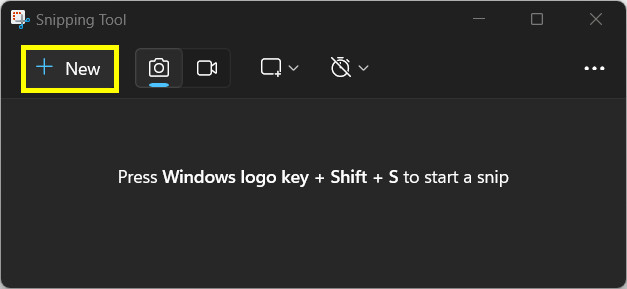
Step 2.Click the «small down arrow» next to the «New» button, then select the «Screen recording» option. Next, click the «New» button to beginning the Windows recording.
Step 3.To record microphone audio along with your Windows screen, don’t forget to enable the «Microphone» icon in the Snipping Tool toolbar.
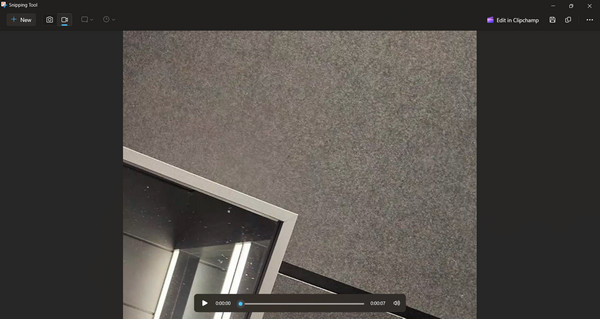
Step 4.If finished, click the «Stop» button or use your keyboard’s «Esc» key to end the session. You can now proceed to edit your recording using the tool’s pen, highlighter, or eraser.
Free Online Way to Screen Record on Windows PC
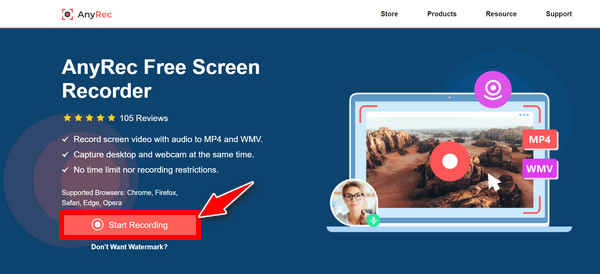
Are you looking for an easy way to screen record on a Windows 11/10 screen without breaking the bank or installing anything? AnyRec Free Screen Recorder provides a feature-packed solution that permits you to capture your desktop activity effortlessly. With this free online tool, you can expect a user-friendly layout and two popular formats, MP4 and WMV, for compatibility with most players and platforms. Also, you can record internal and external audio when capturing your Windows screen, even with a webcam screen.
AnyRec Screen Recorder
Multiple recording modes are supported, like full screen, custom region, etc.
Can record your Windows 11/10 screen and audio for an unlimited time.
Allow you to show or hide the floating toolbar during recording Windows.
Come with real-time annotating tools when recording, like text, shapes, etc.
Step 1.On the AnyRec Free Screen Recorder page, click the «Start Recording» button to begin the operation with the desired area to choose.
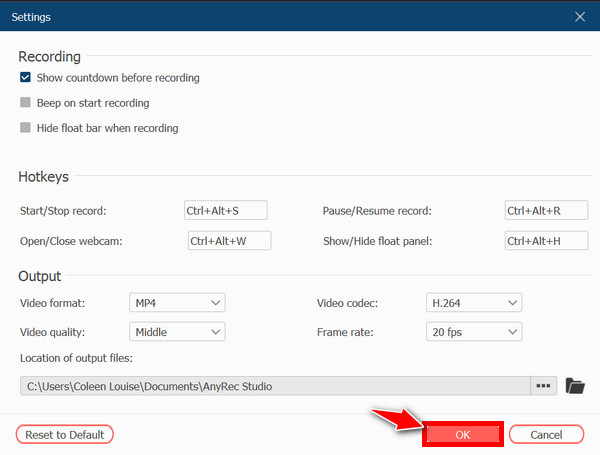
Step 2.Optionally, you can head to the «Settings» button to set your preferred format, quality, codec, and more. Click the «OK» button to put changes into action and record on Windows.
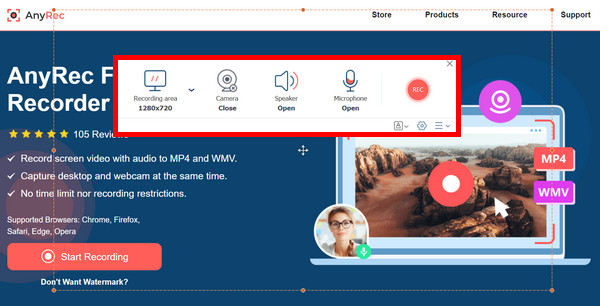
Step 3.After that, click the «REC» button to start capturing Windows screen. After a while, click the «Stop» button, save the video to your chosen format, or share it right now.
FAQs About How to Screen Record on Windows 11/10
-
Does the built-in screen recorder of Windows 11/10 come with editing features?
Unfortunately, no. The built-in tools like Xbox Game Bar and Snipping Tool are only basic recording tools. If you wish for a comprehensive set of editing functionalities, you will need a separate video editing software to trim and edit your recordings or a third-party screen recorder.
-
How to screen record on Windows 7?
Unlike Windows 11/10, if you’re using a Windows 7 computer, there’s no way you can find built-in tools like Xbox Game Bar to record your screen. Thus, just use AnyRec Screen Recorder or other online tools to capture old Windows.
-
How do you use the Snipping Tool to capture Windows screenshots?
Inside the tool, you can select a capture mode from the options: Rectangular Snip, Free-form Snip, Window Snip, or Full-Screen Snip. Then, click the “New” button right after to do the screenshot on your Windows 11/10 screen successfully.
-
Can I record the system sound together with the screen using the Snipping Tool?
Sadly, no. The Snipping Tool can only record your microphone audio, not the system sound from your computer. To do such actions, you will need the help of other tools, such as the Xbox Game Bar, which is a built-in tool on Windows 11/10 systems, too.
Conclusion
YCapturing your Windows 11/10 screen comes so effortlessly with the solutions given in this post today. You can quickly screen record on Windows with built-in tools like the Xbox Game Bar and the Snipping Tool. However, these two are available only on Windows 10/11, so how about capturing your earlier Windows version screens? Use AnyRec Screen Recorder solution for that! This program is accessible on Windows systems, letting you record the screen at the same time with internal or external audio if you want. It also features many exciting tools beyond screen recording.