
Running Mac Apps on Windows: A Comprehensive Guide
Introduction
Running Mac apps on Windows can be a bit tricky, but with the right tools and techniques, you can enjoy the benefits of Mac apps on your Windows machine. In this article, we will explore the process of running Mac apps on Windows, including the necessary steps, tools, and tips to help you get started.
Why Run Mac Apps on Windows?
Before we dive into the process, let’s discuss why running Mac apps on Windows is useful. Mac apps are designed to take advantage of the unique features and capabilities of the Mac platform, such as:
- Security: Mac apps are generally more secure than Windows apps, thanks to their sandboxed environment and strict security protocols.
- Integration: Mac apps can integrate seamlessly with other Mac apps and services, such as iCal, Mail, and Safari.
- Performance: Mac apps can run faster and more efficiently than Windows apps, thanks to their optimized code and hardware acceleration.
Tools and Software Needed
To run Mac apps on Windows, you’ll need the following tools and software:
- Boot Camp: A free tool that allows you to create a virtual machine on your Windows machine, running a Mac operating system.
- Parallels Desktop: A commercial tool that allows you to run multiple operating systems on your Windows machine.
- VirtualBox: A free and open-source tool that allows you to run multiple operating systems on your Windows machine.
- CrossOver: A commercial tool that allows you to run Mac apps on Windows.
Step-by-Step Guide to Running Mac Apps on Windows
Here’s a step-by-step guide to running Mac apps on Windows:
Step 1: Install Boot Camp or Parallels Desktop
- Boot Camp: Download and install Boot Camp from the Apple website.
- Parallels Desktop: Download and install Parallels Desktop from the Parallels website.
- VirtualBox: Download and install VirtualBox from the Oracle website.
- CrossOver: Download and install CrossOver from the CrossOver website.
Step 2: Create a Virtual Machine
- Boot Camp: Create a virtual machine by selecting the «Create a Boot Camp Disk» option.
- Parallels Desktop: Create a virtual machine by selecting the «Create a Virtual Machine» option.
- VirtualBox: Create a virtual machine by selecting the «Create a New Virtual Machine» option.
- CrossOver: Create a virtual machine by selecting the «Create a New Virtual Machine» option.
Step 3: Install the Mac App
- Boot Camp: Install the Mac app by selecting the «Install» option.
- Parallels Desktop: Install the Mac app by selecting the «Install» option.
- VirtualBox: Install the Mac app by selecting the «Install» option.
- CrossOver: Install the Mac app by selecting the «Install» option.
Step 4: Configure the Mac App
- Boot Camp: Configure the Mac app by selecting the «Configure» option.
- Parallels Desktop: Configure the Mac app by selecting the «Configure» option.
- VirtualBox: Configure the Mac app by selecting the «Configure» option.
- CrossOver: Configure the Mac app by selecting the «Configure» option.
Tips and Tricks
- Use a separate user account: Use a separate user account for running Mac apps on Windows to keep your Windows account separate from your Mac account.
- Use a virtual keyboard: Use a virtual keyboard to type in Mac apps, which can be more comfortable than using the Windows keyboard.
- Use a virtual mouse: Use a virtual mouse to control Mac apps, which can be more comfortable than using the Windows mouse.
- Use a separate display: Use a separate display to run Mac apps, which can be more comfortable than using the Windows display.
Common Issues and Solutions
- Boot Camp not recognizing the Mac app: Check that the Boot Camp disk is recognized by the operating system, and that the Mac app is installed correctly.
- Mac app not launching: Check that the Mac app is installed correctly, and that the operating system is configured correctly.
- Mac app not running smoothly: Check that the Mac app is configured correctly, and that the operating system is running smoothly.
Conclusion
Running Mac apps on Windows can be a bit tricky, but with the right tools and techniques, you can enjoy the benefits of Mac apps on your Windows machine. By following the steps outlined in this article, you can create a virtual machine on your Windows machine, install Mac apps, and configure them to run smoothly. Remember to use a separate user account, virtual keyboard, and virtual mouse to run Mac apps on Windows, and to check for common issues and solutions.
Additional Resources
- Apple Support: Apple’s official support website for running Mac apps on Windows.
- Parallels Support: Parallels’ official support website for running Mac apps on Windows.
- VirtualBox Support: VirtualBox’s official support website for running Mac apps on Windows.
- CrossOver Support: CrossOver’s official support website for running Mac apps on Windows.
By following these steps and tips, you can enjoy the benefits of running Mac apps on Windows. Happy coding!
Unlock the Future: Watch Our Essential Tech Videos!
-
Home
-
News
- Want to Run Mac Apps on Windows? Try These Ways!
Want to Run Mac Apps on Windows? Try These Ways!
By Linda | Follow |
Last Updated
Do you need to run Mac apps on Windows? If so, this post is worth reading, in which Partition Magic offers you 3 ways to do that. You can choose one way from them according to your condition.
If you find a piece of amazing software on a Mac, you may want to know whether you can use it on Windows after you switch to a Windows PC. However, Apple’s software is explicitly designed just to run on hardware that’s made by Apple itself. Can you run Mac apps on Windows?
The short answer is YES. In addition, there are several ways for you. You can choose one according to your condition.
How to Run Mac Apps on Windows
A lot of users have macOS apps installed on their Windows PCs because of several reasons and there is no punishment or consequence to the action. If you also have this need, you can try the following ways.
Way 1. Run the Windows Version of the App
Some apps have both the macOS version and the Windows version. You can check if the app has a Windows version. If it has, you can download the Windows version directly. If not, you can try other ways.
Way 2. Run Mac Apps on a Virtual Machine
You can install a macOS virtual machine on your Windows PC and then run Mac apps on this virtual machine.
The defect of this method is that it requires you to be quite technical as you may need to change the OS image format and change some settings when installing the macOS virtual machine.
If you use this method, you may need a disk management tool like MiniTool Partition Wizard to help you create a partition for the virtual machine. In addition, if the partition becomes full as time goes on, this software can help you extend the partition. You can have a try.
MiniTool Partition Wizard FreeClick to Download100%Clean & Safe
Way 3. Run Mac Apps in Cloud-Based macOS Environment
Some cloud-based macOS services like MacinCloud will give you remote access to virtual macOS environments that they are hosting on their servers. This method is predominantly for Apple app and macOS development, but you can still run an app if you wish.
Which Method to Choose?
Should you run Mac apps on a virtual machine or in cloud-based macOS services? Some people may be bothered by this issue. Here, I will list some pros and cons of the two methods and then you can make a decision.
macOS Virtual Machine
- Pros: Free.
- Cons: Making a macOS virtual machine may be a little difficult. In addition, there are computer hardware requirements for running a virtual machine. If the hardware is not good enough, the performance may be affected.
Cloud-Based macOS Services
- Pros: This removes the processing load from your local machine.
- Cons: The service is not free and you’ll need a fast internet connection to avoid performance issues and latency when connecting to the remote servers.
After knowing their pros and cons, you can know which one to choose.
Bottom Line
This introduces how to run Mac apps on Windows. Do you know other ways? If so, contact me and I will add them to my post in the next update.
About The Author
Position: Columnist
Linda has been working as an editor at MiniTool for 5 years. She is always curious about computer knowledge and learns it crazily. Her articles are simple and easy to understand. Even people who do not understand computer can gain something. By the way, her special focuses are disk management, data recovery and PDF editing.
Now it may seem impossible to run Mac program on Windows but it can actually be done easier than you might have initially thought. While the common perception is that Apple’s software is explicitly designed just to run on hardware that’s made by Apple itself, there are actually specific methods you can use to get it running on a Windows Machine. Whether you need to use one Mac program for a simple task or want to transfer the entire macOS to your Windows device, we’ll show you in this guide how you can run Mac programs on Windows in 5 easy ways.
Can I Run macOS Apps on Windows?
As mentioned before, the simple answer to this is yes. Using the methods we’ll list below, you can easily run macOS apps on your Windows computer with a little bit of effort. Even though Apple’s software was made to just run and be compatible with their own hardware, this may be against Apple’s licensing agreements. However, there’s no punishment or consequence to the action and there are a lot of users that have macOS apps installed on their Windows PCs because of several reasons. These may be because it’s more convenient for them, the software is more compatible with their task, or they need a certain exclusive Mac software but don’t want to purchase the device carrying the operating system itself.
5 Ways to Run macOS Apps on Windows
Now that you know that it’s actually possible to run macOS programs on Windows, here are the 5 best ways you can follow to make that happen. From the common method of using a virtual machine to a completely different take such as using a Boot Camp on Mac itself.
1. Virtual Machines
To start off our list, we have the most common and reliable method you can use to run a macOS application on your Windows device. This is called virtual machines where you use certain software such as VirtualBox or VMware to basically insert a computer into your computer. These software allow you to install and run Mac software on Windows and are mostly very secure and effective options.
However, you do need to be quite technical as there are highly specific steps you need to take such as downloading a macOS image file, creating and running the virtual machine itself, and changing some systems in your PC that are essential in the process. Still though, once you set it up, you’ll no longer have to make any major changes as the entire Mac operating system is in your hands. This means you can then download any apps you need from the App Store.
Another thing you should take into consideration is that this method requires your Windows device to be quite powerful as using virtual machines consumes a lot of resources, especially RAM and processing power.

2. Cloud-Based Virtual Machine Services
Since Virtual Machines need you to have powerful local hardware, you can choose this second option and go for a Cloud-Based Virtual Machine Service instead. These include platforms such as MacinCloud which gives you remote access to virtual macOS environments that they are hosting on their servers.
This removes the processing load from your local machine, but you’ll need a fast internet connection to avoid performance issues and latency when connecting to the remote servers. Cloud services also typically require a paid subscription, whereas local virtual machines are free aside from your own hardware costs.
3. Find Windows Versions or Alternatives
While not a true solution for running macOS itself, you may be able to find Windows versions or suitable alternatives for many popular Mac apps and tools these days. If you want to get a specific app that was only developed by Apple, you can take a look and research if the developer offers a Windows version or if there are other alternatives that have the same function.
One amazing example of this is iMovie. iMovie is an application that can only be found on Apple devices and mainly serves as its primary video editing software. However, if you are using a Windows device, you cannot access it. It’s not the end of the world though as there are other great or even better alternatives like Adobe Premiere Pro, Corel VideoStudio, Capcut, Filmora, DaVinci Resolve, and more.

4. Boot Camp
Now this method only works if you have an Intel-based Mac device. This means that you can install Windows on your Mac device using Apple’s Boot Camp Assistant. It gives you the option to choose which operating system you want your computer to boot into and essentially gives you two operating systems in one device.
Once you’re in a Windows operating system, you can just switch to a Mac whenever you need a Mac-only application. However, the biggest and most obvious downside is that you’ll still need access to Mac hardware. This isn’t a true solution for running Windows apps on a Windows PC, but it’s a handy option if you have an Intel Mac lying around. Keep in mind though it doesn’t allow Mac M1 to run Windows apps.
5. Wait for Advanced Virtualization in the Future
As computing technology continues to evolve, more advanced virtualization and emulation techniques may emerge that make it easier and less resource-intensive to run operating systems and apps cross-platform. However, this isn’t really a current solution.
Apple is also expected to open up support for alternative operating systems like Windows on its newer ARM-based silicon in the coming years, which could allow for more seamless integration. But for now, the methods above are your best bets for running macOS programs on a Windows PC. You can learn how to run Windows software on Mac as well.

The Best Platform PDF App for Both Windows and Mac
While the methods above can help you run full macOS apps on a Windows PC, there’s actually an easier solution if you only need certain functionality like PDF editing rather than an entire suite of Mac software. Meet UPDF!
UPDF is a powerful PDF editor that’s designed to work across all major platforms — Windows, Mac, iOS, and Android. With UPDF, you can ditch the hassle of virtual machines or finding alternative apps, since it gives you a seamless experience for working with PDFs no matter which operating system you prefer. So download UPDF now and experience the true PDF-editing experience.
Windows • macOS • iOS • Android 100% secure
Some of UPDF’s standout features include:
- PDF Editing: Without even breaking a sweat you can edit text, images, links, and other PDF content.
- Annotations: UPDF also allows you to add creative annotations with its vast catalog of tools and options including comments, highlights, underlines, stickers, sticky notes, and more!
- AI Capabilities: Perhaps its most unique and advanced feature, UPDF is accompanied by UPDF AI a powerful and state-of-the-art AI assistant that can help you with all of your PDF needs.
- File Conversion: UPDF also gives you the ability to convert your PDF into almost every popular file format from Word to Excel to PowerPoint and more!
- Security: You can also add passwords and watermarks to your PDF to ensure that your PDF is safe and secure and that no one can steal it.
- Electronic & Digital Signatures: With UPDF, you can sign your PDF with electronic and digital signatures
- OCR: Another unique and outstanding feature is UPDF’s OCR where you can scan documents and images and turn them into editable PDFs no matter what language they are in as UPDF has the largest collection of convertible OCR languages.
The best thing about this is that UPDF is now on sale at 61% off! With a single purchase, you can use UPDF simultaneously on all platforms — Windows, Mac, iOS, and Android. Unlike other tools, there are no separate charges for different platforms. Use UPDF on up to 4 devices: 2 desktops and 2 mobiles. So what are you waiting for? With this time-limited deal, you can get full access to UPDF’s robust toolset at a fraction of the regular cost.
Check out UPDF’s helpful video guide below!
Why Do You Need to Run Mac Programs on Windows?
There are a few common reasons why someone might want or need to run Mac programs and apps on their Windows PC. These include:
Work or Professional Needs
There are certain industries, especially in the creative fields like video production and graphic design that heavily use software that’s exclusive to macOS or is only a part of Apple’s ecosystem. This can be a rather difficult situation, especially if these are the main tools that are being used in your workplace and you have a Windows Computer.
Access to Exclusive Mac Apps
Beyond professional tools, Apple’s ecosystem is also home to many consumer apps and programs that don’t have Windows equivalents. This could include apps for creative hobbies, utilities, media tools, financial management, and more. Running macOS lets you tap into Apple’s entire app ecosystem.
Compatibility and File Sharing
In environments where both Windows and Mac hardware are used, having the ability to run apps cross-platform can make collaboration and file sharing much easier. You can avoid compatibility issues and easily move between machines depending on your needs.
FAQs on Running macOS Programs on Windows
1. Will it be slow if I run Mac apps on Windows?
Running a full virtual machine for macOS can indeed be quite slow and resource-intensive if your Windows PC doesn’t have strong hardware specs, especially RAM and processing power. However, using a cloud-based VM service or just running specific Mac apps through virtualization rather than the full operating system can help improve performance.
2. Is it free to run Mac programs on Windows?
For the most part, yes — if you’re using a local virtual machine, the only costs are for your existing Windows PC hardware. Cloud VM services typically have subscription fees, and you’ll need a license for the macOS operating system itself. But there’s no additional charge specifically for running Mac apps on Windows through these methods.
3. What are the risks of running Mac apps onWindows
For now, the biggest risk is that you are violating Apple’s software licensing terms which do not specifically allow macOS or Mac-exclusive apps to be installed on hardware not powered by Apple. There could also be some security risks if you don’t keep your virtual machines and software updated.
Conclusion
While it was initially thought that Apple’s software, especially Mac applications can only run on Apple’s own hardware, the methods mentioned above show that it is actually possible to get the Mac experience on a Windows PC with a bit of effort. However, If you simply need robust PDF editing capabilities across platforms, UPDF is an excellent solution that avoids any virtualization. UPDF gives you a seamless PDF experience on Windows, Mac, and even mobile with a single license.
Don’t settle for subpar PDF software or overly complex workarounds. Download UPDF today and see how it is easy to create, edit, annotate, convert, and secure PDFs no matter which operating system you prefer. If you want to learn more about UPDF, check out the reviews posted on the high-authority website, HowToGeek!
Windows • macOS • iOS • Android 100% secure
Most people think that Mac applications are only available on Mac devices. But what if your Intel-based PC wants in on the fun?
Running Mac apps on a Windows computer may not seem possible, but there are ways to overcome any obstacles. Read on to learn about your options.
Just like you can’t open Windows apps on a Mac, no Windows PC will be able to run a macOS app without taking a few extra steps. However, note that Mac-exclusive apps are exclusive for a reason. Nothing will beat the experience of using them on the platform they were designed for. In addition, installing Apple apps on non-Apple devices is against their terms of use. If you need to run a Mac app on a Windows PC regardless, you have the following options:
- Install a virtual machine on your computer
- Use a virtual machine on the cloud
- Look for the Windows version of the application in question.
Here’s how to tackle the issue.
Install a Virtual Machine
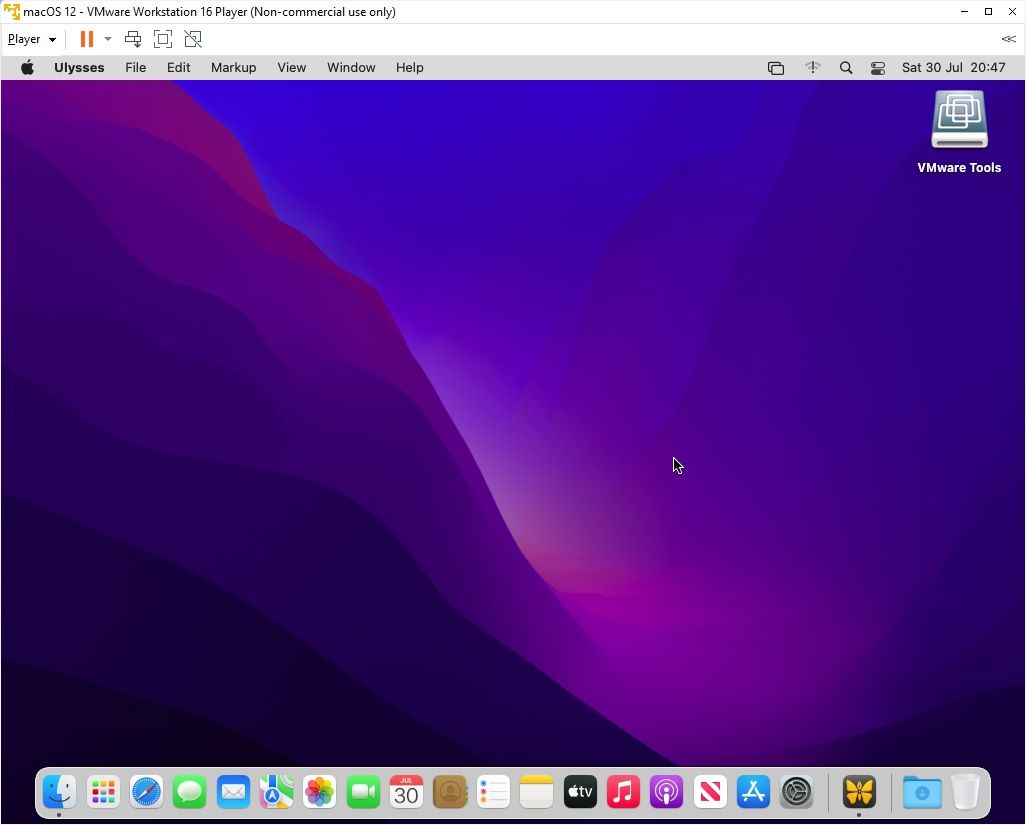
Installing a virtual machine is the best way to overcome any problems between you and the Mac application you want to run on your Windows PC. Imagine a virtual machine like an operating system within your operating system. It will allow you to open the macOS interface in a window on your PC and access all the apps only available on Mac.
Virtual machines can be a bit demanding for PCs with lower specs, so make sure you use a capable device for this task for the smoothest experience.
Besides a PC with strong specs, you’ll need to download two things to get started:
- A virtualizer – The best open-source, actively developed virtualizer out there is VirtualBox by Oracle Corporation. Head to the VirtualBox website and grab the software from their page.
- A copy of the macOS of your choice – You can download any still supported macOS version. Make sure there’s enough space on your computer as the file will be quite hefty.
Once you’ve installed VirtualBox and your macOS file is ready, create a Mac interface within your Windows in the following way:
- Launch VirtualBox and click the “New” button to create a new virtual machine.

- Name your virtual machine and choose its destination folder.
- Make sure you select “Mac OS X” as the system type and “Mac OS X 64-bit” as the system version.
- Allocate some of your RAM for the new virtual machine. Don’t go under 4GB.
- Select the hard disk file you downloaded earlier on the next screen and click “Create.”


The virtual machine is now added to your PC. But you still need to configure the settings before you can start using it:
- Select the macOS you just installed on the VirtualBox main screen.
- Click the “Settings” button.
- Select “System” from the sidebar and configure the following settings:
- Switch to the “Display” menu in the sidebar and allocate 128MB to Video Memory.
- Click “Storage” in the sidebar, select the empty disk from the list, and add your macOS virtual optical disk to “Optical Drivers.”
- Press the “USB” menu and select USB 3.0.
- Save the settings by clicking “OK.”
- Close VirtualBox.


Your virtual Mac is still not fully ready. The next step in the setup process involves executing a few command prompts.
- Open Command Prompt on your Windows and select “Run as administrator.”

- Find your VirtualBox directory with the command below. Make sure to change the path in case you didn’t install VirtualBox in the default directory.
- cd “D:\VirtualBox\”

- cd “D:\VirtualBox\”
- Execute the following commands. Replace the name of your virtual machine in each code with the appropriate name.
- Exit the Command Prompt window.


Having executed these commands, you can now boot your macOS using VirtualBox.
- Launch VirtualBox.

- Select your virtual machine and hit “Start.”
- Select your language.
- Press “Disk Utility” on the next screen to create a clean drive for your macOS.

- Choose “VBOX HARDDISK Media” in the sidebar.

- Hit the “Erase” button. Adjust the settings in the new window according to the following instructions, and then press “Erase.”

- Name your drive.
- Make sure “Scheme” is set to “GUID Partition Map.”
- Name your drive.
- Exit the Disk Utility menu and proceed to install Mac on your newly created drive. Follow the instructions in the installation wizard.


The installation process can take from several minutes to several hours, but eventually, you’ll be greeted by a Mac interface. Log in to your Apple ID, and you’ll be able to download any macOS app on your Windows PC by doing the following:
- Launch the App Store and find the app you want to download.
- Click the “Get” button and then “Install.” For paid apps, click the price button and then “Buy App.”

- Go to your Applications folder to find the app you just installed.


When you’re done using your Mac apps on your Windows PC, be sure to shut down your virtual Mac by clicking the Apple logo and selecting “Shut Down.”
Use a Cloud Server
Installing a virtual machine locally can be demanding for your device. On the lowest recommended settings, you might notice your computer lagging. You can leverage the same idea by using a cloud service to save your device from such hardships. A virtual machine on the cloud gives you the same options as a local one without taking up valuable space.
However, this option is not ideal either. Lags can still occur between your device and the servers, especially if your internet speed isn’t stellar. In addition, cloud services can be costly, so consider carefully whether this option is worthwhile for you.
Find an Alternative for Windows
Virtual machines do the job, but they aren’t without their drawbacks. You can skip lengthy installation processes and expensive cloud subscriptions by simply looking for an alternative to the app you need.
Many macOS apps also have Windows versions, and finding these apps may be the simplest solution to your problem. Look up the developers’ website to find the version you need. If you can’t see a Windows version, you should message the developers to ask whether one will be released in the near future. If no Windows version is available for the app you need, you can also Google an alternative to the app that will provide a similar experience.
Weigh Your Options
If running Mac apps on Windows were an easy and compromise-free process, the apps would hardly be exclusive. But nothing is impossible, and there are several ways to run Mac apps even without a Mac device when you really need to. Install a virtual machine on your device to get access to Apple’s ecosystem without the hardware. You can also choose the easier route and look for an alternative app available for Windows.
Which Mac apps do you wish were available on Windows? Do you think it’s worth going out of your way to get them on your Windows PC? Let us know in the comments section below.
Have you ever found a piece of amazing software, only to realize it is Mac-only? With such a vast range of software available for Windows machines, it is a rarity. But, at times, there are just some apps that are better on macOS.
If you have a Windows 10 system, there are very few ways you can run Mac apps on your device. However, it isn’t impossible.
Here’s how you run Mac apps on your Windows 10 machine for free.
Step 1: Create a macOS Virtual Machine
The easiest way to run Mac or other Apple apps on your Windows 10 machine is with a virtual machine. While it is the easiest method, it is also a lengthy process. Don’t worry!
The above tutorial will guide you through the virtual machine download and installation process, how to download the macOS operating system, and how to install it on the virtual machine.
Once your macOS virtual machine is up and running, return to this tutorial to find out how to install your Mac apps.
Step 2: Log Into Your Apple Account
From here, downloading and using an Apple app is very similar to the regular macOS experience. You still need to log in to your Apple account to download and use apps from the App Store. It’s the same as you’d use on any other Apple devices you own or use. If you cannot remember your Apple ID password, you’ll have to reset it using a different device.
Step 3: Download Your First macOS App
Once you sign into your account, you have the run of the App Store. As a result, you can install almost any macOS software you want on your virtual machine. Alternatively, you can use the default macOS apps.
Select the App Store from the Dock at the bottom of the screen. You may well have to enter your Apple ID credentials again. Browse to the macOS app you want to download. Hit Get, then Install. After installation completes, select Open, and you’re good to go.
Step 4: Save Your macOS Virtual Machine Session
Saving the state of your macOS virtual machine session is easy. Why? Well, you’re using a virtual hard disk. The changes you make to the virtual machine save in the virtual hard drive, ready for the next time you want to open the macOS virtual machine and continue using the Apple Apps on your Windows machine.
The best way to shut down the macOS virtual machine is from within macOS itself. Both VirtualBox and VMware have an option to power down on command, but as with physical hardware, this can cause an issue. In fact, a sudden shutdown on your virtual machine can corrupt the virtual drive.
Select the Apple logo in the top-right corner, then Shut Down. The operating system will close in the correct sequence, then the virtual machine will close.
Snapshot or Power Off?
VirtualBox users also have the option to take a snapshot. A snapshot saves the virtual machine’s current state, allowing you to create a string of snapshots as you use Apple apps and the macOS operating system.
Snapshots are handy if you are about to attempt something that might damage your virtual machine. A snapshot allows you to restore the virtual machine to the previous state, picking up where you left off.
Unfortunately, the free version of VMware doesn’t have the same functionality, though suspending your virtual machine session is also a handy option.
Still, you shouldn’t rely on a snapshot to back up your virtual machine activities, nor are snapshots suitable as an alternative to shutting down your virtual machine using the macOS Shut Down option.
The Apple Apps Aren’t Very Fast in the Virtual Machine
Your macOS virtual machine isn’t working well? Or are the macOS apps you’re downloading not running as you expect?
Remember that your virtual machine doesn’t have the same processing power as your host machine. That is because your virtual machine is sharing the system resources of the host. You may well have a very powerful host machine with incredible amounts of RAM and a multi-core Intel i9 processor. But the vast majority don’t.
What I’m saying is, don’t expect too much from the software you install. It isn’t the same as installing and testing on a dedicated Mac.
Updating Your macOS Virtual Machine
In a word, don’t.
If you update your macOS virtual machine on either VirtualBox or VMware, there is a very strong chance your macOS virtual machine will stop working.
Due to the nature of the configuration of the virtual machines, the update process is not the same as a regular macOS installation on proper hardware. The patches and workarounds that make the macOS virtual machine work with a particular version may not work with the update.
Of course, you are welcome to try, but know that you could lose everything in the virtual machine in the process.
MacinCloud: Run Mac Apps on Windows With a Cloud-Based Service
Running a macOS virtual machine to use Apple apps isn’t an option for everyone. While you can get away with running your macOS virtual machine with 4GB RAM, your experience will suffer. Older machines certainly won’t handle the requirements.
One alternative is to use a cloud-based macOS environment, like MacinCloud. macOS cloud environments are predominantly for Apple app and macOS development, but you can still run an app if you wish. The downside is the cost of the cloud service and the latency between your system and the cloud server, not to mention the cost of purchasing the cloud environment subscription to begin with.
As far as running Apple or Mac apps on Windows goes, this option isn’t the most straightforward—but, then again, none of them are.
Using Apple Apps on Windows 10
The vast majority of Apple apps now also have Windows equivalents or alternatives. Many have a Linux equivalent, too. All it takes is a quick internet search, and you will find the equivalent app, perhaps saving you a heap of time in the process.
Do also note that using macOS on non-Apple hardware is against Apple’s End User License Agreement (EULA).
Running a macOS virtual machine to test an app is handy, but only if you have the correct hardware and a little time to get it all set up.