
Все способы:
- Способ 1: Приложение «Параметры»
- Способ 2: «Редактор реестра»
- Способ 3: Консоль «PowerShell»
- Вопросы и ответы: 0
Способ 1: Приложение «Параметры»
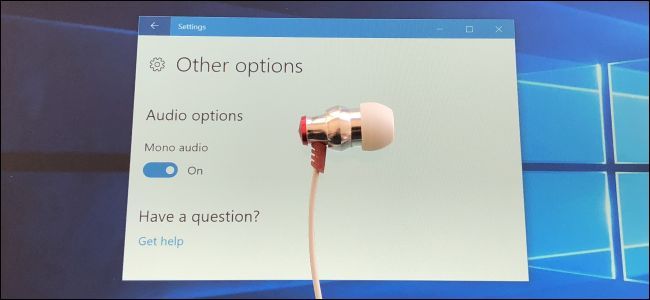
Включить или отключить монофонический звук проще всего в отдельном разделе приложения «Параметры».
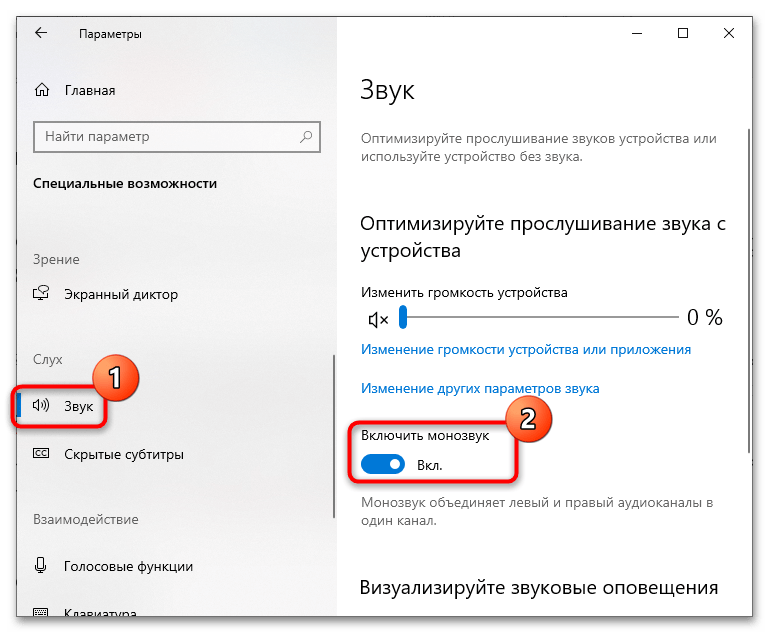
- Откройте приложение «Параметры» и перейдите в раздел «Специальные возможности» → «Звук. Также для быстрого перехода в этот раздел можно использовать команду
ms-settings:easeofaccess-audio, выполненную в диалоговом окошке, которое вызвано клавишами Win + R. - В правой части окна настроек найдите опцию «Включить монозвук» и установите переключатель в положение «Выкл.».
Способ 2: «Редактор реестра»
К этому способу обычно прибегают, когда настройка в приложении «Параметры» по какой-то причине оказывается недоступной.
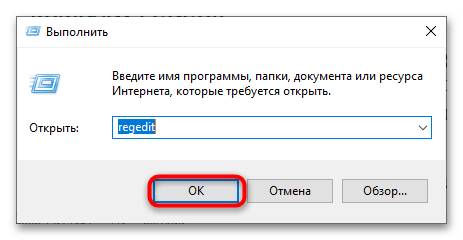
- Запустите «Редактор реестра», выполнив в вызванном нажатием клавиш Win + R окошке команду
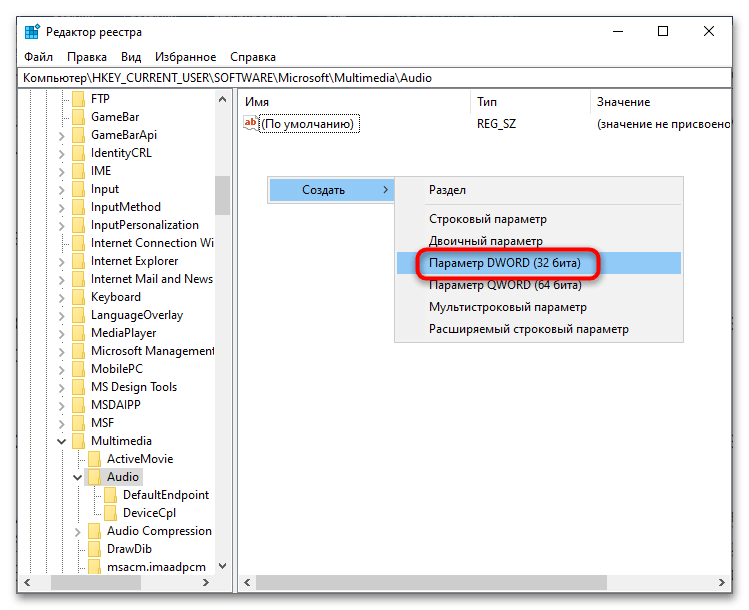
regedit. - Разверните в левой колонке ветку
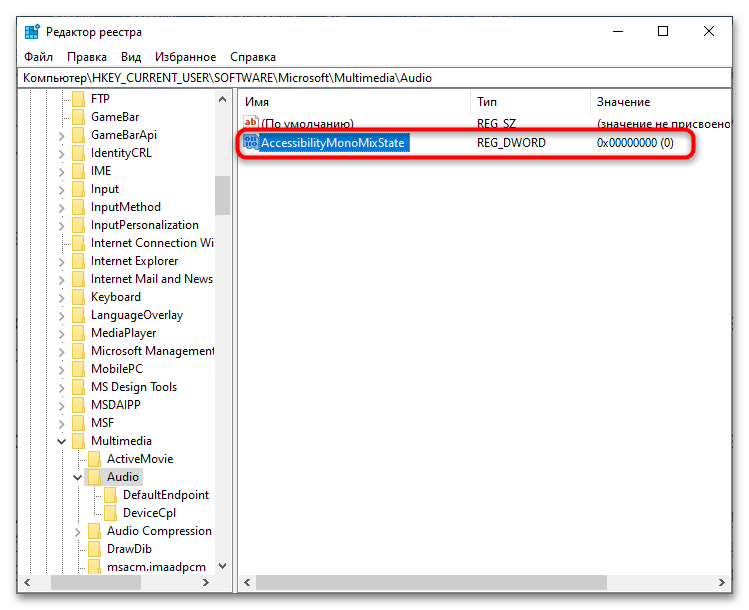
HKEY_CURRENT_USER\Software\Microsoft\Multimedia\Audio, кликните правой кнопкой мыши по пустой области правой колонки и выберите из меню опцию «Создать» → «Параметр DWORD (32 бита)». - Назовите новый параметр «AccessibilityMonoMixState». Если параметр уже присутствует, пропустите этот шаг.
- Откройте окошко редактирования созданного параметра двойным по нему кликом и задайте в качестве его значения «1».
Если новые настройки не вступят в силу сразу, перезайдите в учетную запись либо перезагрузите компьютер.
Способ 3: Консоль «PowerShell»
По большому счету этот способ дублирует предыдущее решение, разница лишь в том, что ключ реестра создается средствами консоли.
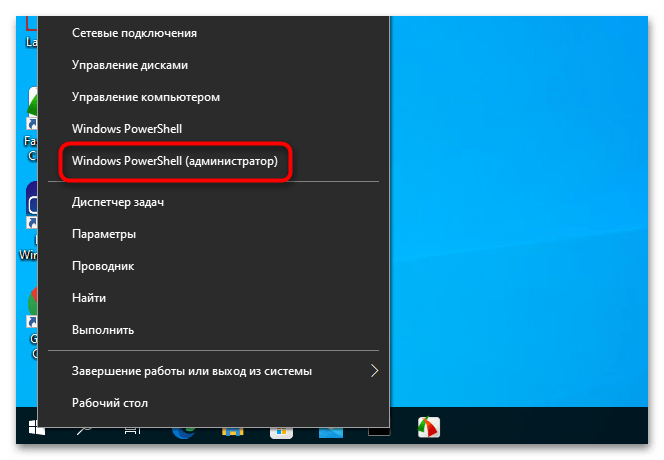
- Запустите консоль «PowerShell» от имени администратора из контекстного меню кнопки «Пуск».
- Скопируйте команду
powershell -windowstyle hidden -command "Start-Process cmd -ArgumentList ‘/s,/c,REG ADD "HKCU\Software\Microsoft\Multimedia\Audio" /V AccessibilityMonoMixState /T REG_DWORD /D 1 /F & net stop "Audiosrv" & net start "Audiosrv"‘ -Verb runAs", вставьте ее в консоль и нажмите клавишу ввода.
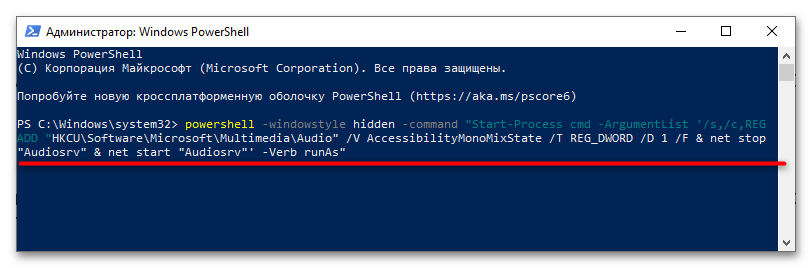
Монофонический звук будет включен. Приведенная выше команда состоит из трех частей. Первая создает параметр с именем «AccessibilityMonoMixState» и устанавливает в качестве его значения «1», вторая команда останавливает службу аудио, а третья команда запускает ее.
Наша группа в TelegramПолезные советы и помощь
Skip to content
Mono audio is a special Accessibility feature of Windows 10 that makes sure that even if a listener has an issue with one ear or one audio channel, he or she will never miss a word or sound of audio playing in a stereo headset or multichannel speakers. For many years, the audio we listen to has come with distinct left and right channels. In this case, the listener receives a different audio stream from both channels with different sounds. Unlike stereo, monoaural audio plays the same stream via both channels. Windows 10 includes a native option to enable Mono audio output.
While this capability has been possible in media player software for quite some time by downmixing stereo or multichannel audio to mono, it hasn’t been available before Windows 10 at the system level. Enabling mono audio output is useful when you are listening to audio which has only one channel, or is encoded incorrectly or if the encoded channels are incompatible with your hardware setup, as a result of which only one headphone or speaker plays the sound.
In Windows 10, the ability to turn on mono audio is part of the Ease of Access features. It can be enabled in Settings under the appropriate category.
- Open Settings.
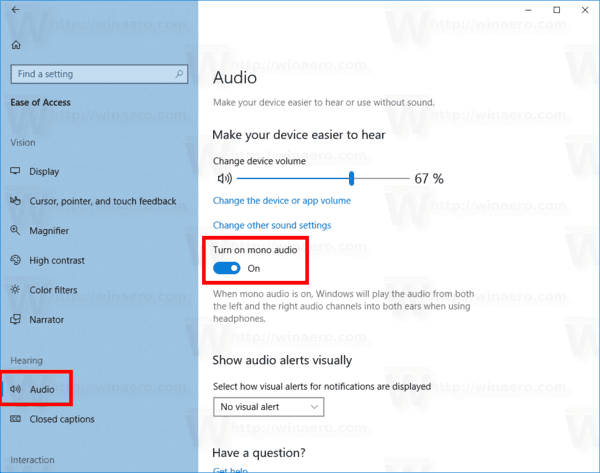
- Go to Ease of Access and click Audio under Hearing on the left.
- On the right, enable the option Turn on mono audio under Make your device easier to hear.

You are done. Mono audio is now enabled.
Alternatively, you can enable or disable mono audio with a Registry tweak. This is useful when you need to customize an offline image or apply this option to a group of computers. Let’s see how it can be done.
Enable mono audio output with a Registry tweak
- Open the Registry Editor app.
- Go to the following Registry key.
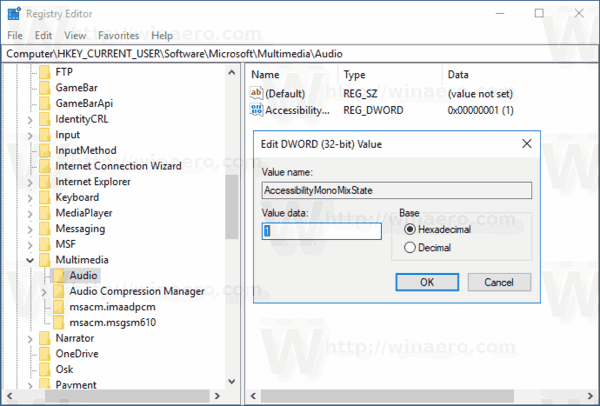
HKEY_CURRENT_USER\Software\Microsoft\Multimedia\Audio
See how to go to a Registry key with one click.
- On the right, create a new 32-Bit DWORD value AccessibilityMonoMixState.
Note: Even if you are running 64-bit Windows you must still create a 32-bit DWORD value.
Set its value data to 1 to enable the mono audio feature.
- A value data of 0 will disable it.

To save your time, you can download the following ready-to-use Registry files:
Download Registry Files
That’s it.
Support us
Winaero greatly relies on your support. You can help the site keep bringing you interesting and useful content and software by using these options:
If you like this article, please share it using the buttons below. It won’t take a lot from you, but it will help us grow. Thanks for your support!
В этой статье показаны действия, с помощью которых можно включить Монозвук (mono audio) в операционной системе Windows 10.
Монозвук — функция специальных возможностей Windows 10, реализованная на системном уровне. Данный функционал будет полезен для пользователей у которых при воспроизведении аудио контента имеются некоторые проблемы, например когда вы слушаете звук, который имеет только один канал, или закодирован неправильно, или если кодированные каналы несовместимы с вашей аппаратной настройкой, в результате чего звук воспроизводится только в одном наушнике или динамике.
Также функция монозвука будет полезна для пользователей имеющих проблемы со слухом. При прослушивании стереозвука, слушатель получает различный аудиопоток с обоих каналов с разными звуками. В отличие от стереозвука, монозвук воспроизводит один и тот же поток через оба динамика.
Содержание
- Как включить функцию «Монозвук» используя «Параметры Windows»
- Как включить функцию «Монозвук» в редакторе реестра
- Как включить функцию «Монозвук» используя файл реестра
Как включить функцию «Монозвук» используя «Параметры Windows»
Чтобы включить функцию «Монозвук», нажмите на панели задач кнопку Пуск и далее выберите Параметры или нажмите на клавиатуре сочетание клавиш + I.

В открывшемся окне «Параметры» выберите Специальные возможности.

Далее выберите вкладку Звук и в правой части окна установите переключатель Включить монозвук в положение Вкл.

Как включить функцию «Монозвук» в редакторе реестра
Данный способ позволяет включить функцию «Монозвук» с помощью внесения изменений в системный реестр Windows используя редактор реестра.
Прежде чем вносить какие-либо изменения в реестр, настоятельно рекомендуется создать точку восстановления системы
Откройте редактор реестра, для этого нажмите сочетание клавиш + R, в открывшемся окне Выполнить введите (скопируйте и вставьте) regedit и нажмите клавишу Enter ↵.

В открывшемся окне редактора реестра перейдите по следующему пути:
HKEY_CURRENT_USER\\Software\\Microsoft\\Multimedia\\Audio
В правой части окна, нажмите правой кнопкой мыши в пустой области и в появившемся контекстном меню выберите Создать > Параметр DWORD (32 бита) (обратите внимание на то, что 32-битный DWORD параметр создается как в 32-разрядной так и в 64-разрядной операционной системе).
Присвойте созданному параметру имя AccessibilityMonoMixState.

Далее дважды щелкните левой кнопкой мыши по созданному параметру, в качестве его значения установите 1 и нажмите кнопку OK, закройте редактор реестра.

Для того чтобы отключить функцию «Монозвук», просто удалите параметр AccessibilityMonoMixState или измените его значение на 0.
Как включить функцию «Монозвук» используя файл реестра
Данный способ также позволяет включить или отключить функцию «Монозвук» с помощью внесения изменений в системный реестр Windows посредством файла реестра.
Прежде чем вносить какие-либо изменения в реестр, настоятельно рекомендуется создать точку восстановления системы
Все изменения производимые в редакторе реестра отображены ниже в листингах файлов реестра.
Чтобы включить функцию «Монозвук, создайте и примените файл реестра следующего содержания:
Windows Registry Editor Version 5.00.
[HKEY_CURRENT_USER\\Software\\Microsoft\\Multimedia\\Audio].
«AccessibilityMonoMixState»=dword:00000001
Чтобы отключить функцию «Монозвук», создайте и примените файл реестра следующего содержания:
Windows Registry Editor Version 5.00.
[HKEY_CURRENT_USER\\Software\\Microsoft\\Multimedia\\Audio].
«AccessibilityMonoMixState»=-
Используя рассмотренные выше действия, можно включить или отключить функцию «Монозвук» (mono audio) в операционной системе Windows 10.
Having trouble hearing audio clearly in one ear can be frustrating. Windows 11 includes a feature that turns stereo sound into mono, making it easier to listen through one speaker or headphone.
This article guides you on how to easily switch your PC’s audio from stereo to mono and back. Discover how with a few clicks, you can improve your listening experience.
Key Takeaways
- Windows 11 lets you turn stereo sound into mono, combining left and right channels. This is great for people who hear better in one ear.
- To switch to mono audio, use Accessibility Settings or Sound settings in the System menu. You just need a few clicks.
- Turning off mono audio is also simple. Go to Settings, then System, and adjust it under Sound options.
- Mono audio helps make sure you don’t miss any sounds when using headphones or speakers with your computer.
- This feature improves listening for music, videos, and more without needing extra tools or setups.
Understanding Mono Audio in Windows 11

Now that we’ve introduced the topic, let’s talk about mono audio in Windows 11. Mono audio combines left and right audio channels into one. Some cases we can misread quiet volume issue as the mono option. But in fact this option makes sound clearer, minimizing some sound issue like buzzing for those who might hear better in one ear than the other.
Windows 11 includes this option to help you enjoy videos, music, and more without missing out on any sounds.
Mono audio on Windows 11 lets you combine stereo sound into a single channel for a balanced listening experience.
Turning on mono audio is easy and can make a big difference in how you listen to content on your device. Whether using headphones or speakers, activating mono sound ensures you won’t miss any part of your favorite song or movie because it only plays in one ear.

To enable mono audio in Windows 11 through Accessibility Settings, go to the Start menu, select “Settings,” then choose “Accessibility” from the left side. To enable mono audio via Windows Settings, navigate to “Sound” within Windows Settings and toggle on the option for mono audio.
Through Accessibility Settings
Windows 11 makes it easy for you to switch audio from stereo to mono right in the Accessibility Settings. First, click on the Start button and select Settings. Then, choose Accessibility from the menu on the left side of your screen.
Look for Audio options and there you’ll find a toggle switch for Mono Audio. Flip this switch to turn on mono audio, combining all sounds into one channel. This way, no matter which headphone or speaker is used, you won’t miss any part of your music or video’s sound.
It’s a simple step that can make listening much easier if you’re using just one earbud or have hearing challenges in one ear.
Via Windows Settings
Open Settings on your computer by pressing the Windows key and I together. Choose “System,” then click on “Sound.” Look for the “Audio” section. Here, you will find an option to enable or disable mono audio.
This feature helps if you use a single earbud or have hearing difficulties in one ear. Simply switch the toggle to turn mono audio on or off as per your need.
I found this method straightforward when aiming to hear everything clearly through my headset while working with different apps. Switching between stereo and mono became hassle-free, enhancing my video and music experience without needing extra hardware or complex setups.
How to Disable Mono Audio in Windows 11
To disable mono audio in Windows 11, follow these steps:
- Open the “Settings” app from the Start menu.
- Click on “System,” then select “Sound” from the left pane.
- Under the “Advanced sound options,” click on “App volume and device preferences.”
- Choose the device for which you want to disable mono audio.
- Ensure that the “Mono audio” toggle is turned off.
These simple steps will help you easily disable mono audio in Windows 11, allowing you to enjoy stereo sound as intended.
Conclusion
Easily changing stereo audio to mono in Windows 11 can improve your listening experience. Whether it’s for accessibility reasons or personal preference, Windows 11 offers a straightforward way to make this adjustment without needing any third-party software.
By toggling a few settings, you can enjoy a richer and more balanced sound output from your devices. With these simple steps, you can start enjoying all your audio content using the mono audio feature in Windows 11.
Sign in to your How-To Geek account
Quick Links
Most audio you listen to is in «stereo», which means that different things are played in through both the left and right speakers. However, you can have your PC mix the sound to mono, playing everything combined through both speakers.
This would allow you to use just one earbud with your PC, but still hear both the left and right audio tracks. It’s also very helpful if you have trouble hearing through one ear.
Windows 10
The mono audio option was introduced in Windows 10’s Creators Update, so it’s built right into the settings, just like on the iPhone and Android.
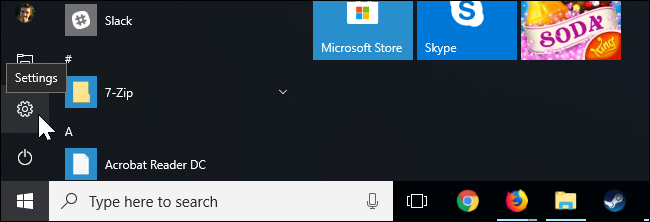
To find this option, click the Start button and select the gear-shaped «Settings» icon.
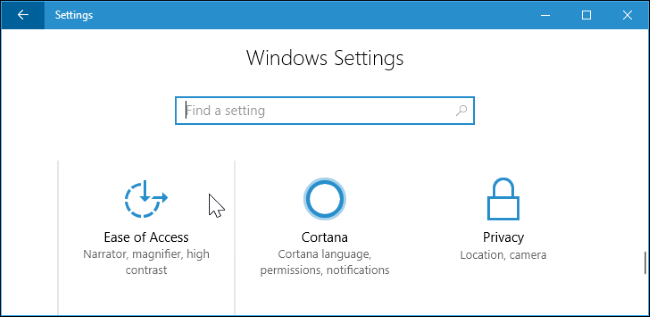
Click the «Ease of Access» icon in the Settings window.
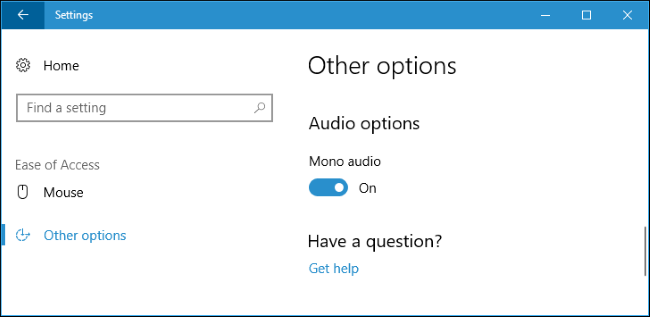
Click «Other options» in the sidebar.
On modern versions of Windows 10, select «Audio» under Hearing in the sidebar instead.
Scroll down to the bottom of the window you’ll find «Mono audio» under Audio options. Set it to «On.»
That’s it! If you ever want to disable this option and re-enable standard stereo audio, just return here and set Mono audio to «Off».
Windows 7 and 8
Older versions of Windows, including Windows 7, offer no way to actually «mix» both stereo tracks to mono without third-party software.
To achieve mono audio for all sound on your PC, the third-party software has to install a virtual audio device. Applications on your PC output sound to the virtual audio device, the virtual audio device software mixes the stereo sound to mono, and mono audio comes out of your PC.
You can do this with the free VoiceMeeter software on any version of Windows. First, install the software and restart your PC.
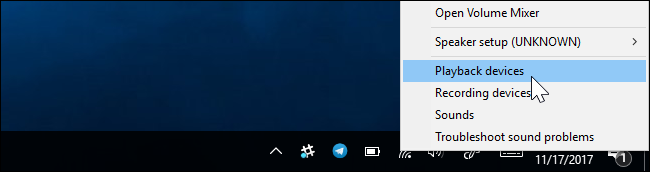
After rebooting your PC, right-click the volume icon in your notification area and select «Playback Devices».
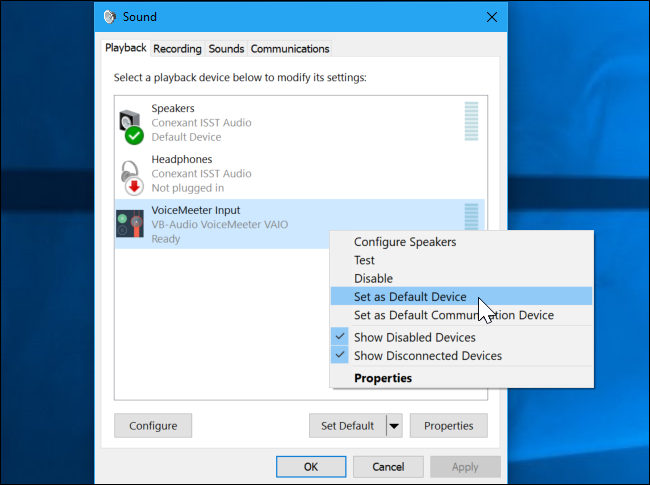
Right-click the «VoiceMeeter» device here and select «Set as Default». This will make all programs on your PC play their sound through VoiceMeeter.
Then, launch the VoiceMeeter application from your Start menu.

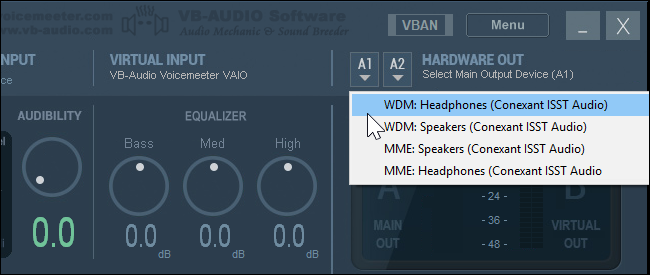
On the Hardware Out tab in VoiceMeeter, click the A1 or A2 button and select the headphones or speakers you want to play audio from.
Be sure to select one of the «WDM» options instead of the «MME» options. These are different sound driver interfaces in Windows, and WDM is faster.
Click the «Mono» button on the Hardware Out tab in VoiceMeeter.
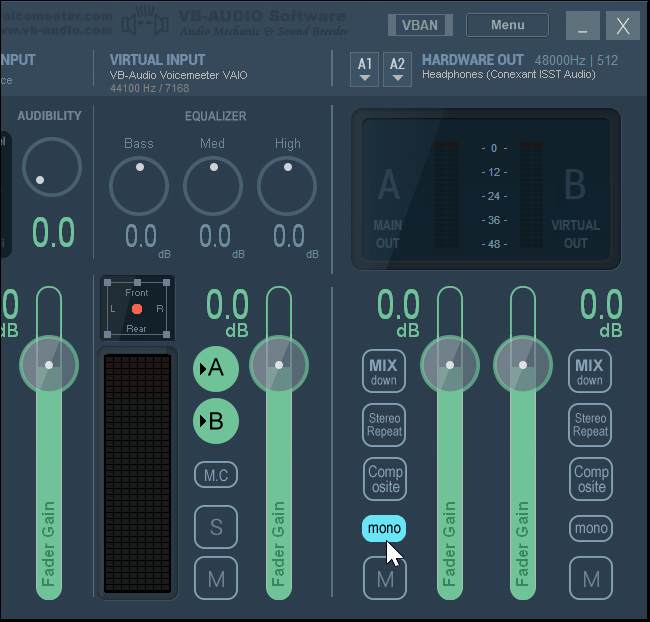
You’re now done. Applications on your computer will play their audio through the virtual VoiceMeeter audio device, and it will mix that audio to mono before outputting it to your headphones. To stop using VoiceMeeter, return to the Playback Devices window and set your standard headphones or speakers as your default audio output device.
You can check that your tweak worked by visiting the Left / Right (Stereo) Sound Test page. The buttons here play sound through the left and right channels separately if you’re using stereo audio, so you can run this test before and after making the change to ensure mono audio is coming out of your PC.