
Sqlite is a serverless relational database management system, what we call an embedded database. It is very lightweight and very easy to use.
In this article we are going to see how to install SQLite3 on Microsoft Windows 10 and 11. I will also show you how to install «DB Browser for SQLite», a graphical user interface for SQLite3.
There are a couple of ways to install SQLite3 on Windows. I will be using the Winget package manager, which is the official command-line package manager for Windows. It comes pre-installed on Windows 10 and Windows 11.
- Install SQLite3 using Winget.
- Install DB Browser for SQLite using Winget.
- Manually Install SQLite 3.
Install SQLite3 using Winget
To install SQLite3 on your Windows computer, Open command prompt as Administrator (CMD or PowreShell) and run the following command:
winget install sqlite.sqliteThat is all you need to do. Now, exit the command prompt and open a new one as Administrator. You will then have access to the sqlite3 command.
Install DB Browser for SQLite using Winget
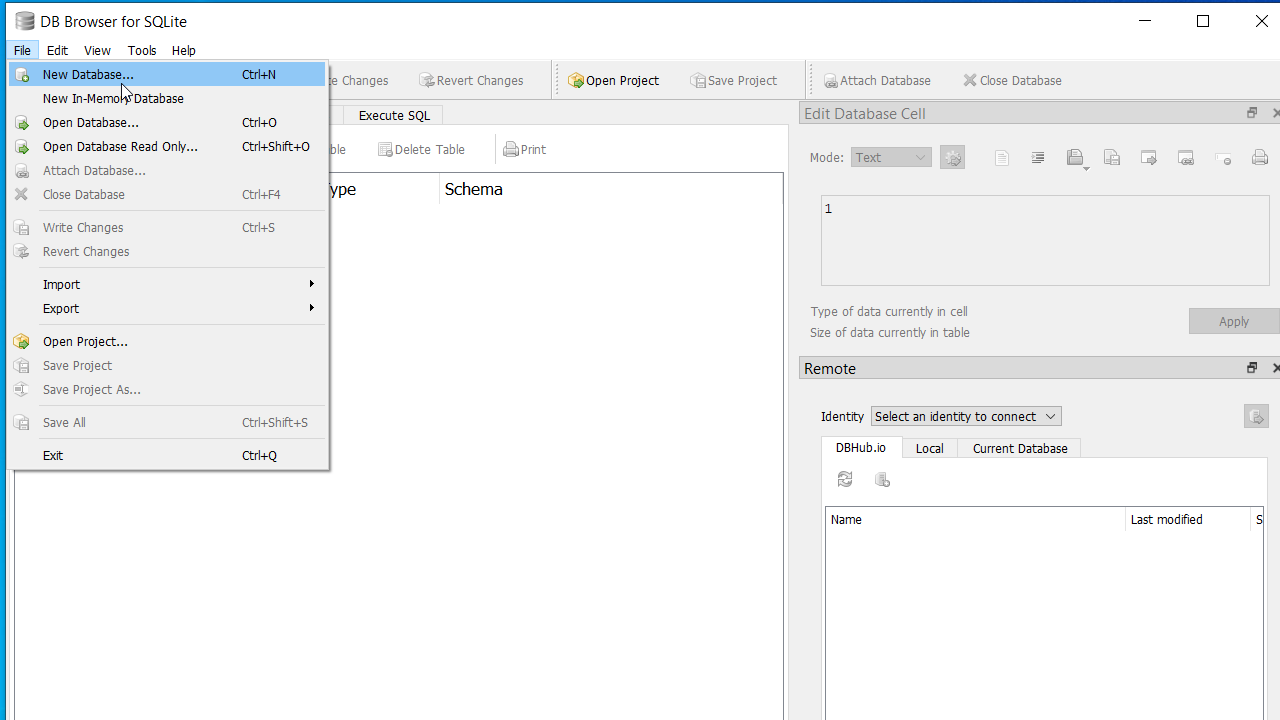
If you prefer to use a graphical user interface, there is an open-source software package called ‘DB Browser for SQLite.’ You can install it on Windows with the following command:
winget install DBBrowserForSQLite.DBBrowserForSQLiteOnce the installation is complete. There will be a start menu shortcut to the DB Browser.
Manually Install SQLite 3
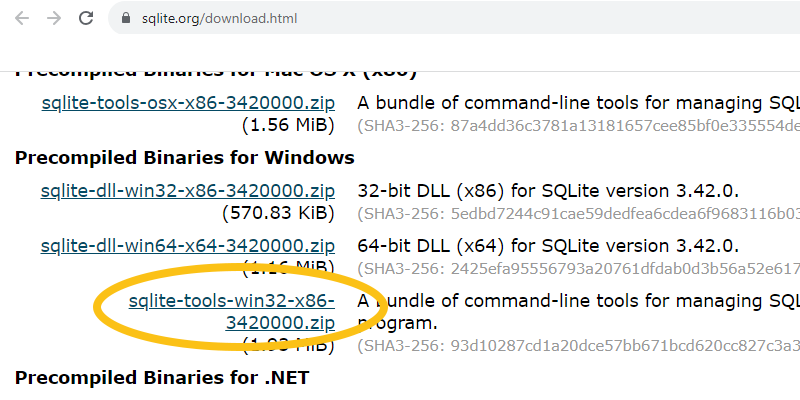
If you are on a computer that does not have a winget package manager, you can download the SQLite 3 from the following URL: https://www.sqlite.org/download.html.
In the website download the sqlite-tools package under the Precompiled Binaries for Windows.
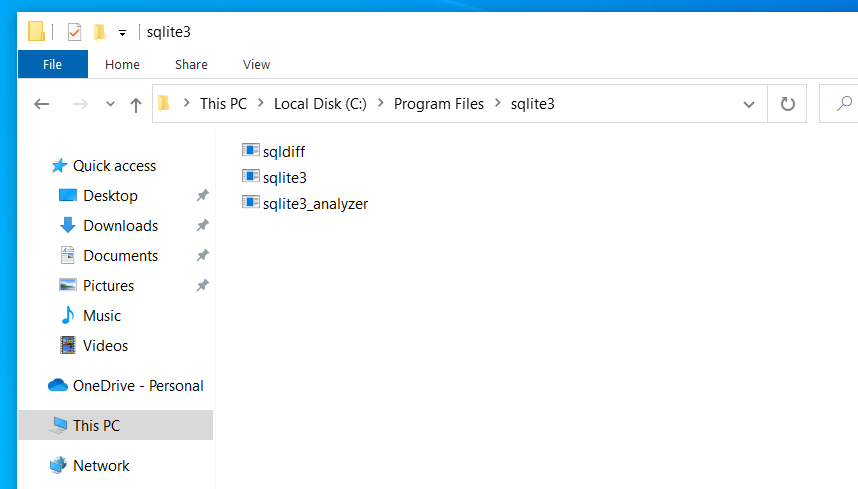
After downloading the zip file, extract its contents to a location of your choice for installing SQLite 3. For example, you can extract the files to 'C:\Program Files\sqlite3'.
Then you need to add that location to the Windows PATH variable. To edit the path variable do the following steps:
- Press the
Windows key + Rto open the Run dialog box. - In the Run dialog box Type
sysdm.cpland press Enter to open the System Properties window. - In the System Properties window, select the Advanced tab, and then click the Environment Variables button.
- Under the ‘System variables,’ select the ‘Path’ variable and click Edit.
- Finally, click the New button and add the path to the SQLite directory (e.g.,
'C:\Program Files\SQLite').
Once you add the SQLite directory to the Path variable, you will have access to the sqlite3 command from both CMD and PowerShell.
A Sqlite database is a one single file, which you can move to anywhere in your computer. Also you can move a database from one operating system to another without any problem.
Step-by-Step Guide to installing SQLite3 on All Platforms
How to Install SQLite3: A Step-by-Step Guide
SQLite3 is a lightweight, self-contained database engine widely used for local storage in various applications. It is easy to install and requires no server setup. This guide provides installation instructions for SQLite3 on Windows, macOS, and Linux. By the end of this tutorial, you will have SQLite3 installed and ready to use for database management and SQL operations.
Installing SQLite3 on Different Operating Systems
On Windows
- Visit the SQLite Downloads Page.
- Download the Precompiled Binaries for Windows (e.g., sqlite-tools-win32-x86-xxx.zip).
- Unzip the downloaded file to a directory of your choice (e.g., C:\sqlite3).
- Open System Properties > Advanced > Environment Variables.
- Edit the Path variable in System Variables.
- Add the directory path (e.g., C:\sqlite3).
- Open Command Prompt and type:
1. Download SQLite3
2. Extract the Files
3. Add SQLite to System PATH
4. Verify Installation
sqlite3 --version
On macOS
- Open the Terminal and run:
1. Install via Homebrew
brew install sqlite
2. Verify Installation
- Type the following command:
sqlite3 --version
On Linux
- For Debian/Ubuntu-based distributions:
1. Install via Package Manager
sudo apt update
sudo apt install sqlite3
sudo yum install sqlite
2. Verify Installation
sqlite3 --version
Using SQLite3 After Installation
Creating a Database
1. Open your terminal or command prompt.
2. Run the following command to create a new database or open an existing one:
Code:
sqlite3 example.db
3. You will enter the SQLite shell, where you can execute SQL commands.
Creating a Table
Code:
-- Create a table named users
CREATE TABLE users (
    id INTEGER PRIMARY KEY AUTOINCREMENT,
    name TEXT NOT NULL,
    age INTEGER
);
Inserting Data
Code:
-- Insert a record into the users table
INSERT INTO users (name, age) VALUES ('Alice', 25);
Querying Data
Code:
-- Retrieve all records from the users table
SELECT * FROM users;
Exiting SQLite Shell
Type .exit or .quit to leave the SQLite shell.
Benefits of SQLite3
1. Lightweight: Minimal resource requirements, making it ideal for embedded systems.
2. No Server Required: Operates without the need for a server process.
3. Cross-Platform: Available for Windows, macOS, and Linux.
4. SQL Support: Executes standard SQL queries for relational data management
Example Usage with Python
Code:
# Import SQLite module
import sqlite3

# Connect to SQLite database (creates example.db if it doesn't exist)
connection = sqlite3.connect("example.db")

# Create a cursor object to execute SQL commands
cursor = connection.cursor()

# Create a table
cursor.execute("""
CREATE TABLE IF NOT EXISTS users (
    id INTEGER PRIMARY KEY AUTOINCREMENT,
    name TEXT NOT NULL,
    age INTEGER
)
""")

# Insert a record
cursor.execute("INSERT INTO users (name, age) VALUES (?, ?)", ("Bob", 30))

# Commit changes and close connection
connection.commit()
connection.close()
Explanation:
Database Connection: Connects to the SQLite database or creates one if it doesn’t exist.
SQL Commands: Creates a table and inserts a record.
Resource Management: Ensures the connection is properly closed after use.
Practical Guides to SQLite Snippets and Examples.
Все способы:
- Шаг 1: Скачивание и распаковка файлов
- Шаг 2: Добавление исполняемого файла в переменную среду
- Шаг 3: Проверка работоспособности
- Вопросы и ответы: 4
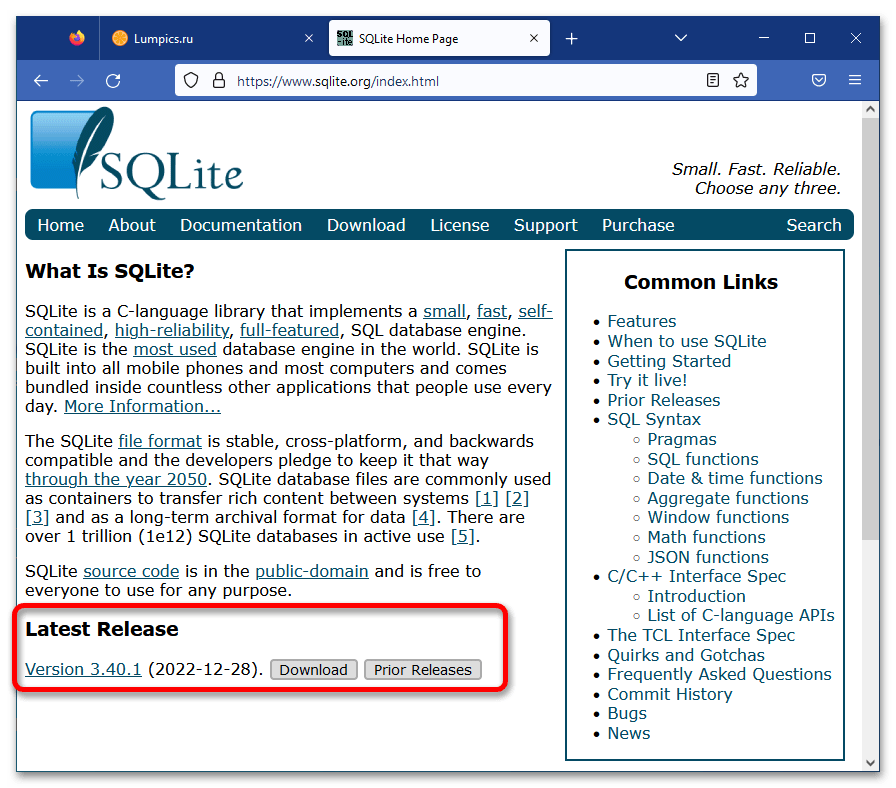
Обратите внимание! Все описываемые далее действия выполняются на примере базы данных SQLite 3.40.1 (2022-12-28), актуальной на момент написания настоящей статьи. Это важно учитывать, так как в будущем разработчиками могут быть внесены серьезные изменения в работу продукта, вследствие чего некоторые инструкции могут потерять свою актуальность.
Шаг 1: Скачивание и распаковка файлов
Первостепенно необходимо скачать файлы SQLite, чтобы в дальнейшем настроить их работу для использования в операционной системе Windows 10. Загружать базу данных рекомендуется с официального сайта разработчиков, это исключит вероятность заражения компьютера вирусными программами.
Скачать SQLite с официального сайта
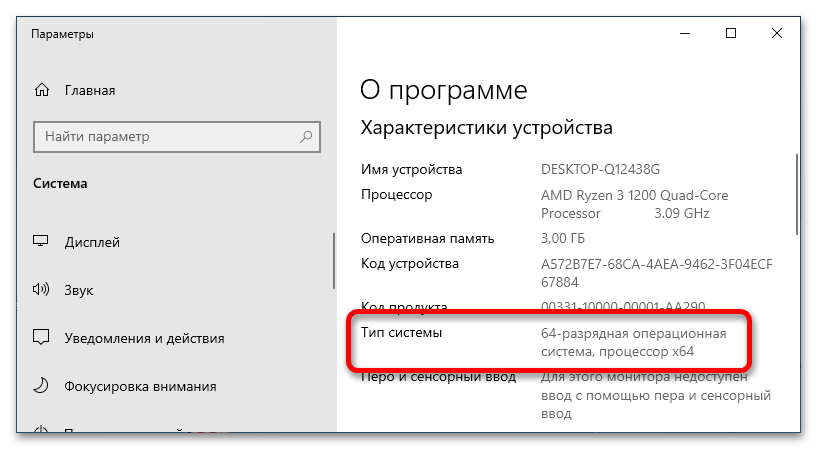
Примечание! При выборе файлов для загрузки следует отталкиваться от разрядности установленной операционной системы. Если этой информацией вы не обладаете, обратитесь за помощью к другой статье на нашем сайте, после чего вернитесь и продолжите выполнять описываемые ниже действия.
Подробнее: Как посмотреть разрядность системы Windows 10
Чтобы установить SQLite в Windows 10, достаточно скачать архивы базы данных нужной версии и распаковать их в удобную для вас директорию:
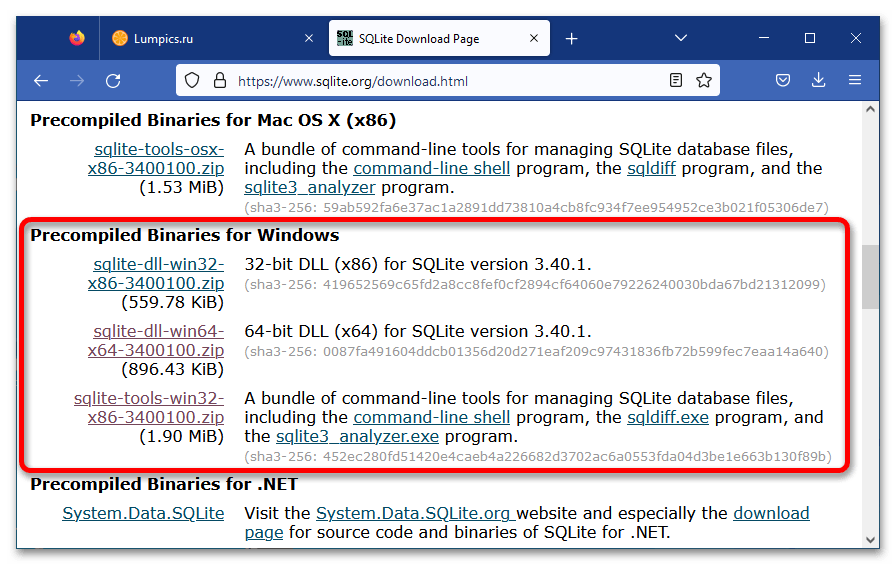
- Находясь на странице загрузки, переместитесь ниже до блока «Precompiled Binaries for Windows». Затем скачайте архив под названием «sqlite-tools-win32-x86-3400100.zip», после чего кликните по ссылке «sqlite-dll-win32-x86-3400100.zip» (для 32-разрядной операционной системы) или «sqlite-dll-win64-x64-3400100.zip» (для 64-разрядной операционной системы).
- В любом удобном месте на диске создайте папку, в которую будут помещены файлы SQLite. На скриншоте ниже видно, что была создана директория «sqlite» в корневом разделе диска C.
-
Распакуйте ранее загруженные архивы в созданный каталог, воспользовавшись специальной программой. В качестве примера приведен WinRAR, но для этих целей можно воспользоваться и штатным инструментом операционной системы.

Обратите внимание! Если с распаковкой архивов возникли трудности, обратитесь за помощью к другой статье на нашем сайте, в которой представлено три способа выполнения поставленной задачи.
Подробнее: Распаковка ZIP-архивов в операционной системе Windows 10
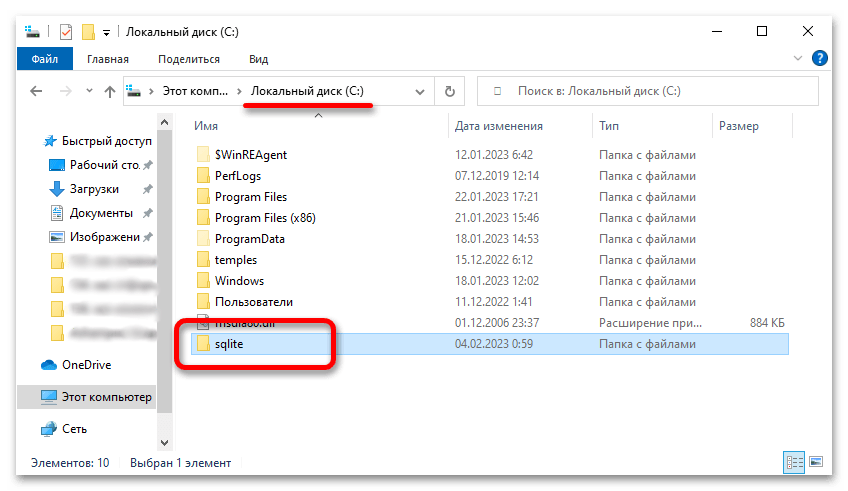


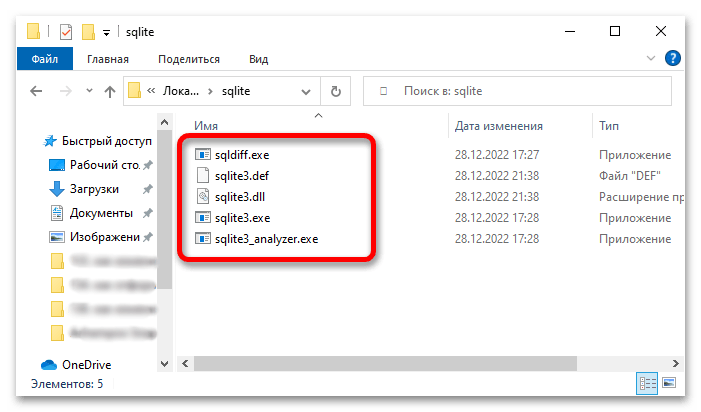
По итогу выполнения этого шага у вас на диске должен появиться каталог, в котором будут находиться пять файлов базы данных SQLite.
Шаг 2: Добавление исполняемого файла в переменную среду
Базой данных SQLite можно начинать пользоваться уже сейчас, запустив приложение «sqlite3.exe». Но для удобства вызова рабочей среды из «Командной строки» рекомендуется добавить в переменную PATH каталог, в котором размещен исполняемый файл программы. Это избавит от необходимости каждый раз открывать файловый менеджер и переходить в папку с базой данных.
-
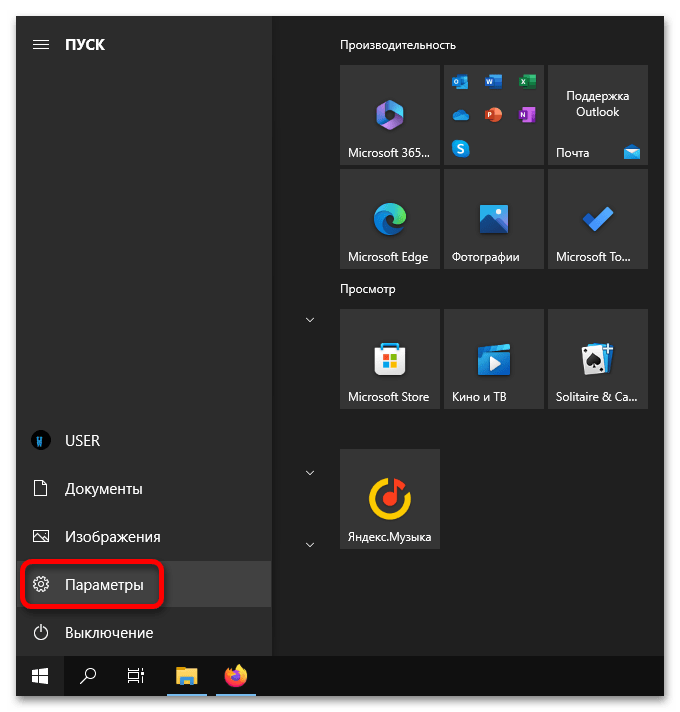
Откройте окно параметров любым доступным способом. Проще всего для этого сделать через меню «Пуск», кликнув по соответствующей кнопке в левом нижнем углу экрана.

Читайте также: Все способы запуска «Параметров» в Windows 10
- Перейдите в раздел «Система», щелкнув левой кнопкой мыши по одноименному блоку в окне параметров.
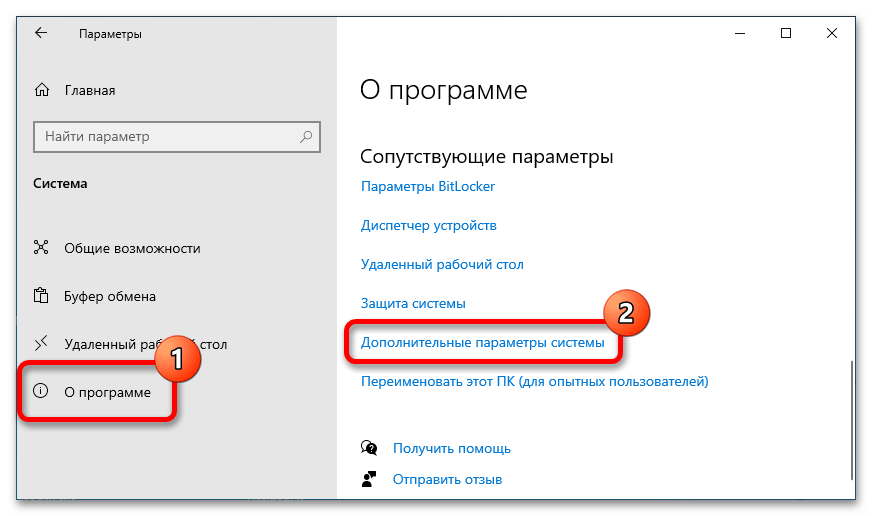
- Воспользовавшись панелью слева, перейдите во вкладку «О программе», после чего в основной части окна пролистайте страницу в самый низ и щелкните по ссылке «Дополнительные параметры системы».
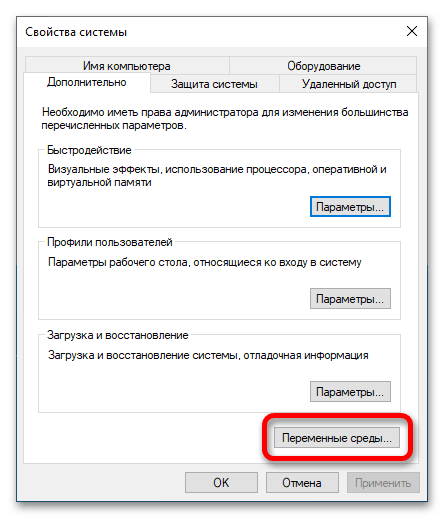
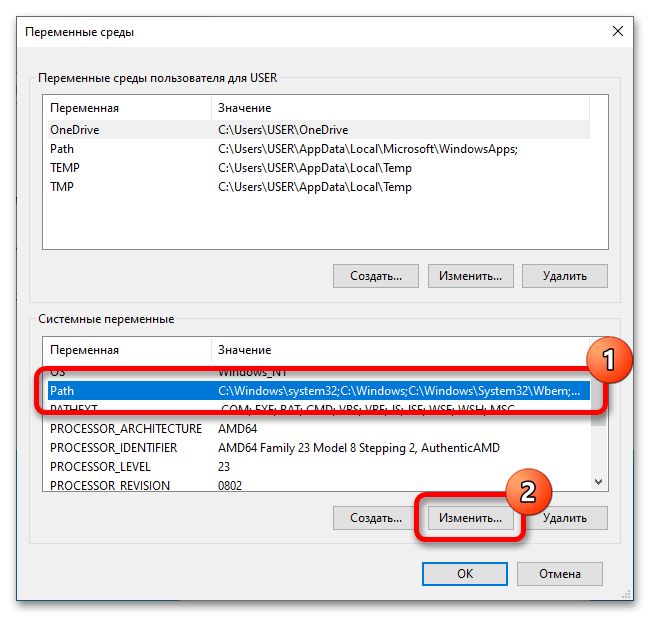
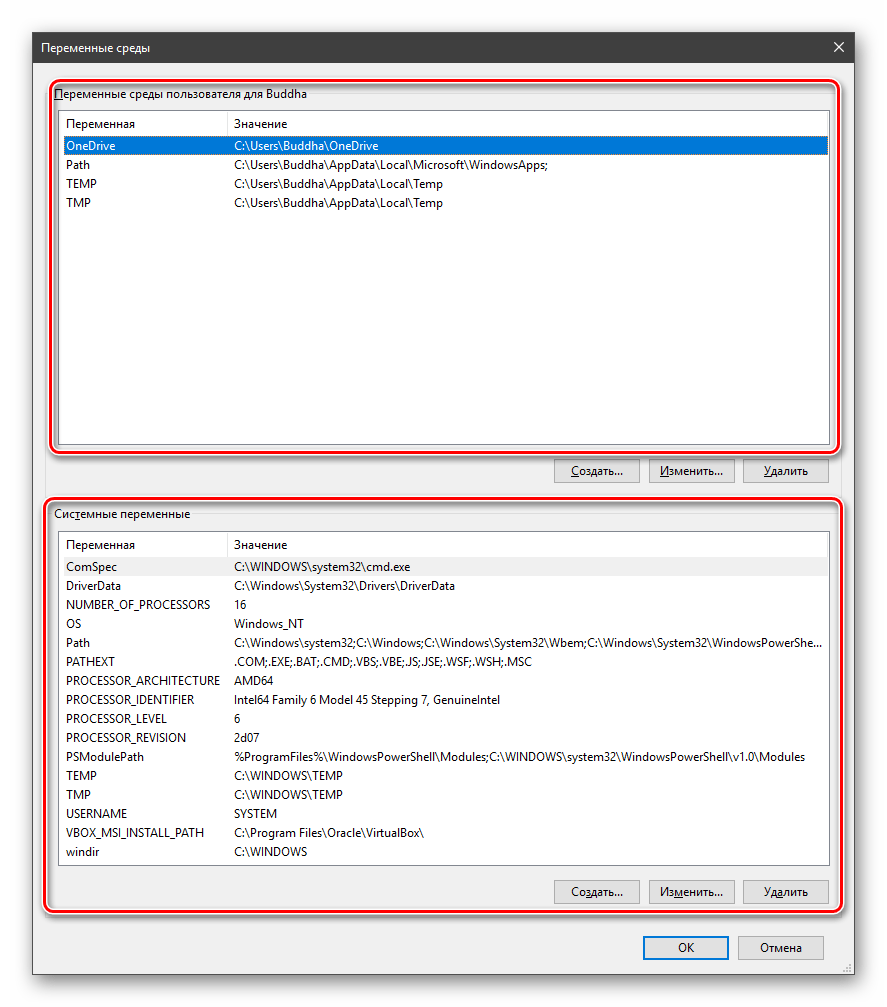
- В новом появившемся окне «Свойства системы», находясь на вкладке «Дополнительно», кликните по кнопке «Переменные среды».
- В меню переменных сред в списке «Системные переменные» выделите строку «Path» и нажмите по кнопке «Изменить».
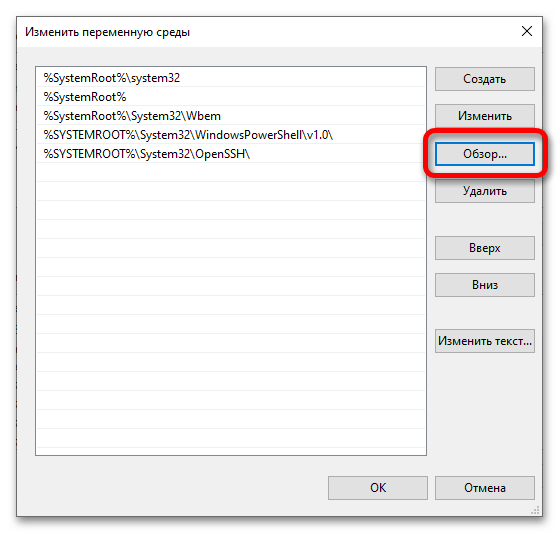
-
Добавьте в список путь к папке, созданной на первом шаге и содержащей все файлы SQLite. Проще всего это сделать через окно файлового менеджера, поэтому нажмите по кнопке «Обзор».

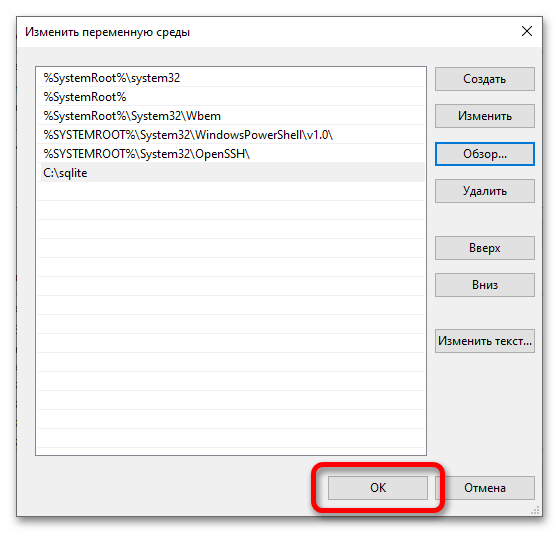
В «Проводнике» перейдите к целевой директории и выделите ее, после этого нажмите «ОК». Обратите внимание, что у вас месторасположение и название папки может отличаться.

Сохраните внесенные изменения в параметры среды, щелкнув по кнопке «ОК». После можете закрыть все оставшиеся окна и приступать к проверке работы базы данных.


Обратите внимание! Если в ходе работы с переменной средой Windows 10 вы столкнулись с проблемами или появилось желание более глубже изучить эту тему, рекомендуем перейти по ссылке ниже к статье, в которой подробно рассказывается о переменных PATH и PATHEXT, а также приводятся практические примеры использования этих компонентов операционной среды.
Подробнее: Изучаем переменные среды в Windows 10
Шаг 3: Проверка работоспособности
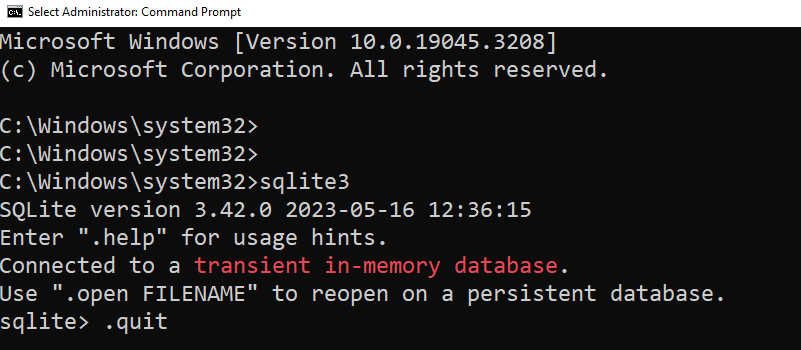
Все готово к запуску базы данных SQLite. Рабочая среда инициализируется в «Командной строке», поэтому предварительно необходимо ее открыть. Для этого проще всего вызвать окно «Выполнить» сочетанием клавиш Win + R, после чего ввести команду cmd и нажать по кнопке «ОК».

Читайте также: Все способы запуска «Командной строки» в Windows 10
В открывшемся окне консоли пропишите команду sqlite3 или sqlite3.exe и нажмите Enter. После этого должно появиться приглашение к вводу команд SQL, выраженное надписью «sqlite>» (без кавычек) в начале строки.
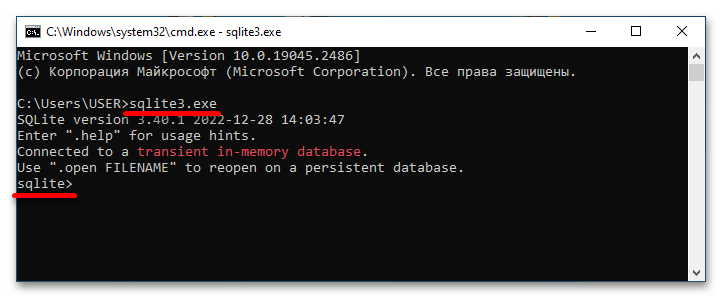
Если у вас все так, как описывается выше, то базу данных SQLite можно считать установленной и готовой к использованию. В противном случае вернитесь к шагу 2 и повторите выполнение всех перечисленных там действие.
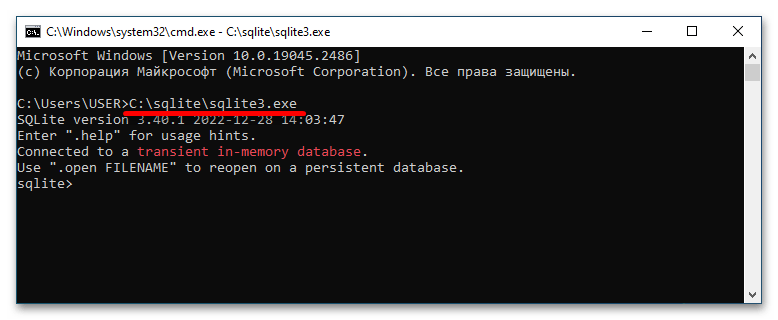
Важно! В качестве альтернативы можно запускать оболочку SQLite через исполняемый файл в корневом каталоге, который создавался на первом шаге. Сделать это можно и через «Командную строку», прописав полный путь к программе, как это показано на скриншоте ниже.
Наша группа в TelegramПолезные советы и помощь
Downloading SQLite binary
Go to sqlite.org/download.html, choose sqlite-tools-win32-x86-*******.zip to download.

Copying binary to installation folder
Create a folder inside C:\Program Files named sqlite. Extract the downloaded zip and put all three binary files in this folder.

Adding path for sqlite binary
Hit Windows key and find for edit the system environment variables control panel shortcut and open it.
Go to environment variables, chose Path variable and add C:\Program Files\sqlite to the path.

Verifying the Installation
Open new command prompt (cmd) and execute this to check sqlite3 version and confirm the installation:
sqlite3 --version
Enter fullscreen mode
Exit fullscreen mode

How to install SQLite3
SQLite is an incredibly lightweight and remarkably popular SQL-compliant database.
In fact, it’s so lightweight that many microdevices and Linux distributions come with SQLite preinstalled, which is why it’s always smart to check if it’s already installed before installing SQLite a second time.
How do I check if SQLite is installed?
To verify if SQLite is already installed and configured on your local OS, simply issue the sqlite3 --version command in a terminal window. If the command fails, you will need to isntall SQLite.
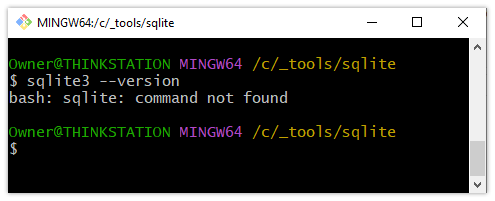
The sqlite3 command has only one “l” and requires the number 3 at the end.
Where can I download SQLite?
The SQLite install media can be downloaded for free from sqlite.org. You won’t hit a registration wall or be asked to sign up for a newsletter. The barriers to entry are minimal for SQLite.
To install SQLite on Windows, you are advised to download and extract two ZIP files:
- The 64-bit DLL for SQLite
- The SQLite command line tool bundle
SQLite3 files
SQLite version 3.47.0 ZIP file extraction will save the following five files to your hard drive:
- sqldiff.exe
- sqlite3.def
- sqlite3.dll
- sqlite3.exe
- sqlite3_analyzer.exe
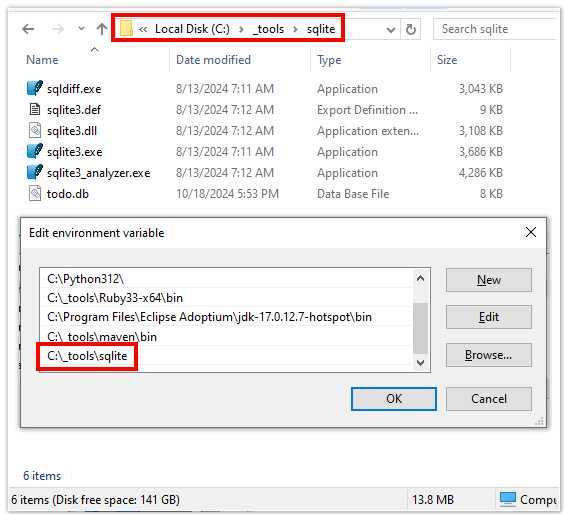
The location of the SQLite3 files should be added to the PATH of your OS.
Add SQLite3 to the System PATH
Move the SQLite files into an appropriate folder on your operating system and then add that folder to your operating system’s PATH variable in order to make the database globally accessible.
Environment variables are only read when the terminal window first loads, so close any open command prompts and then open a new one and type in the sqlite3 --version command.
The command should now be recognized by the terminal, and the version of the installed SQLite3 database will be displayed.

You have successfully installed SQLite3 if the –version switch is recognized.
Databases, tables and CRUD in SQLite3
With the SQLite3 database installed, you now have a light-weight, fully-functional, SQL-compliant database ready for use.
You are now fully prepared to explore the SQLite3 Command Line Interface, which is exactly where this next SQLite tutorial will take you.