
Установка PostgreSQL по шагам
1. Загружаем дистрибутив
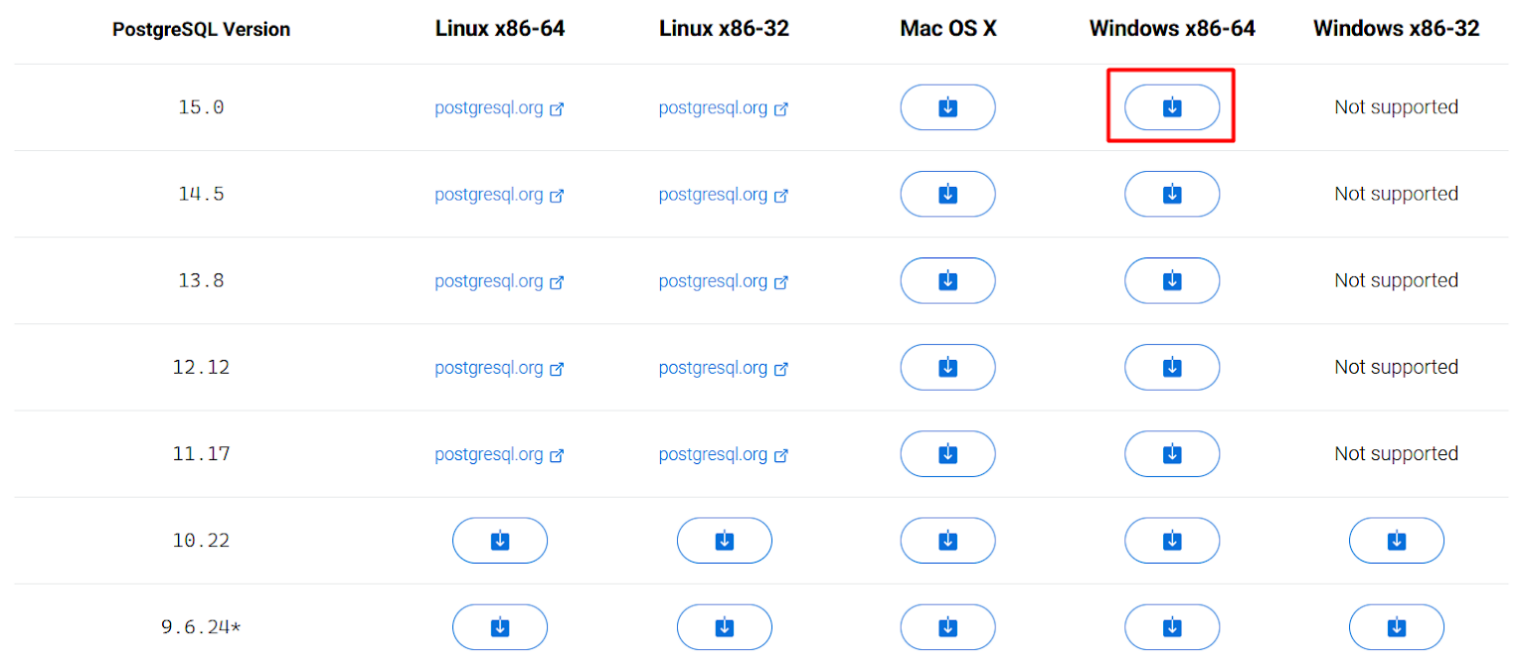
Мы советуем скачивать актуальные версии на официальном сайте СУБД. Чтобы найти установщик PostgreSQL 15 для Windows нажимаем Download → Windows → Download the installer.
На сайте выбираем интересующую нас версию PostgreSQL и платформу Windows x86-64. Начинается загрузка установочного файла на компьютер.
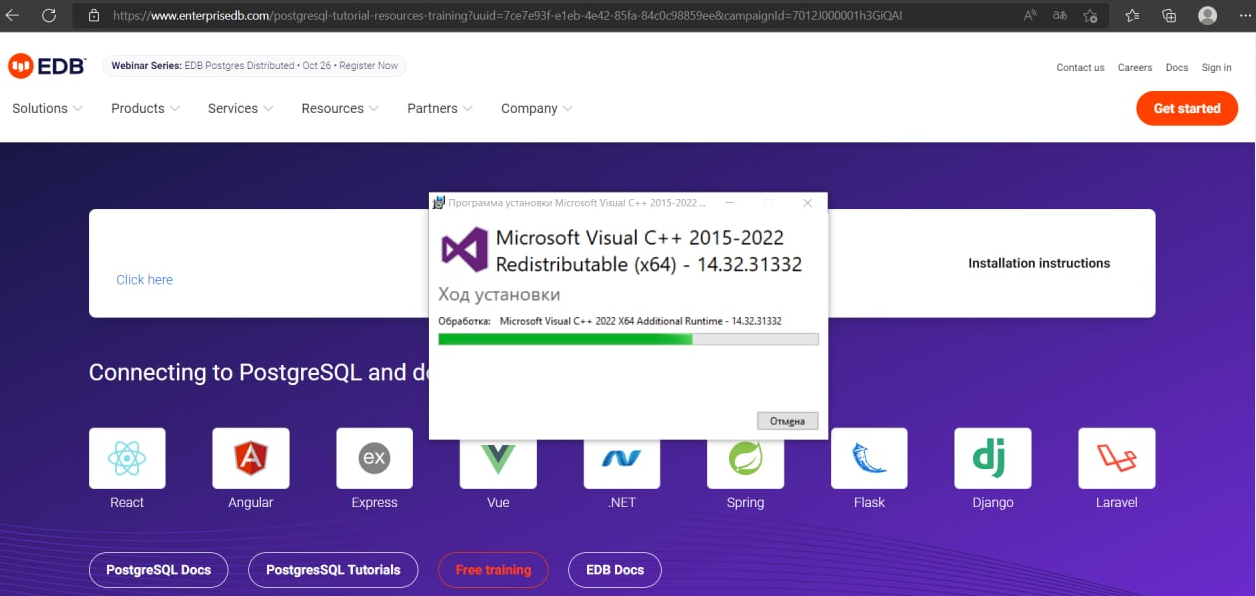
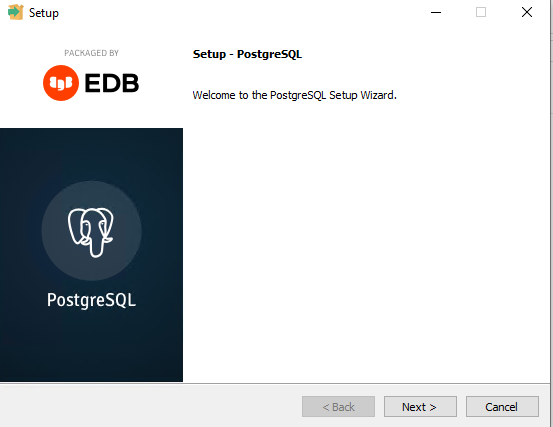
2. Запускаем установочный файл
В ходе установки проводится проверка на наличие необходимых компонентов, например, Microsoft Visual C++. Если каких-то компонентов не хватает, они устанавливаются автоматически.
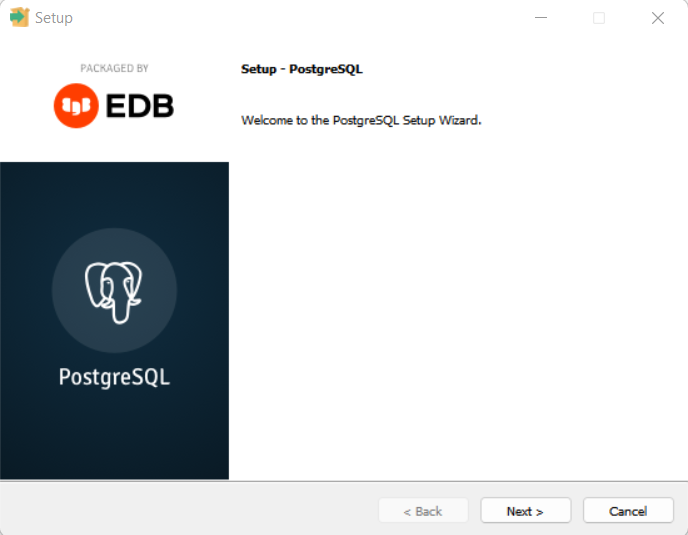
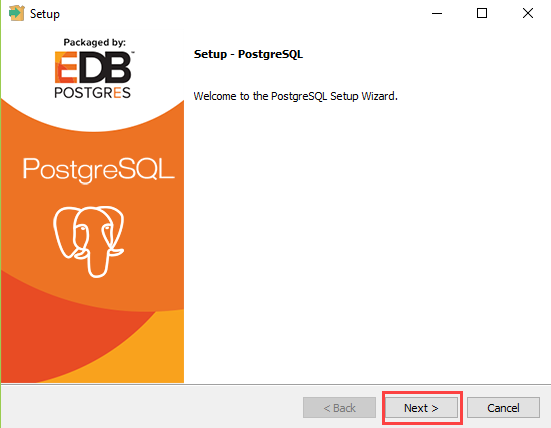
В открывшемся приветственном окне нажимаем Next.
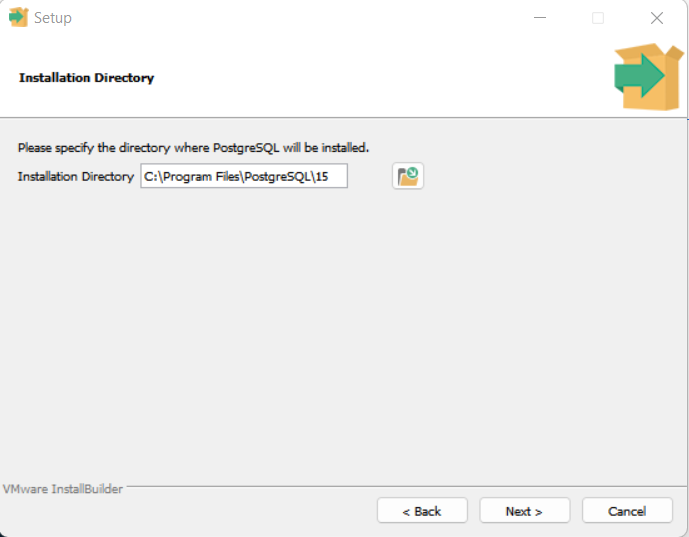
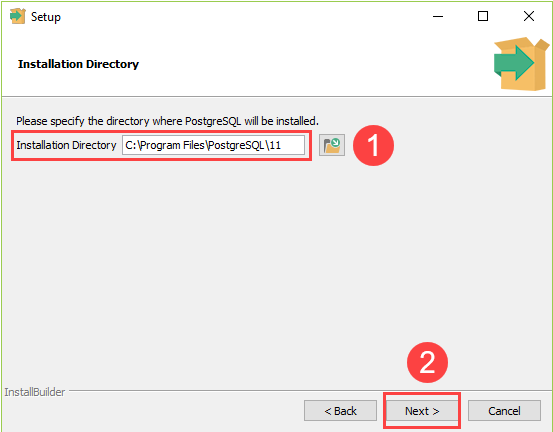
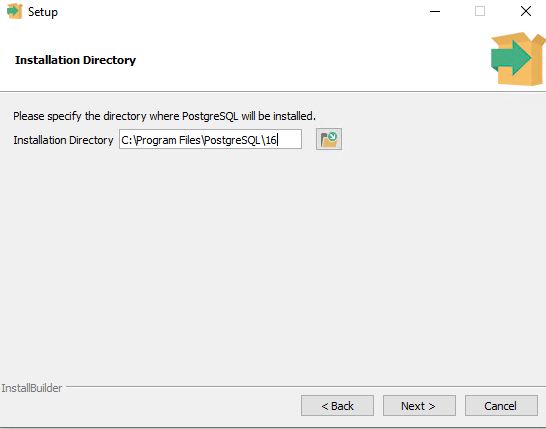
3. Указываем каталог для установки
Выбираем путь, куда нужно установить PostgreSQL 15. По умолчанию предлагается C:\Program Files\PostgreSQL\15, его можно оставить.
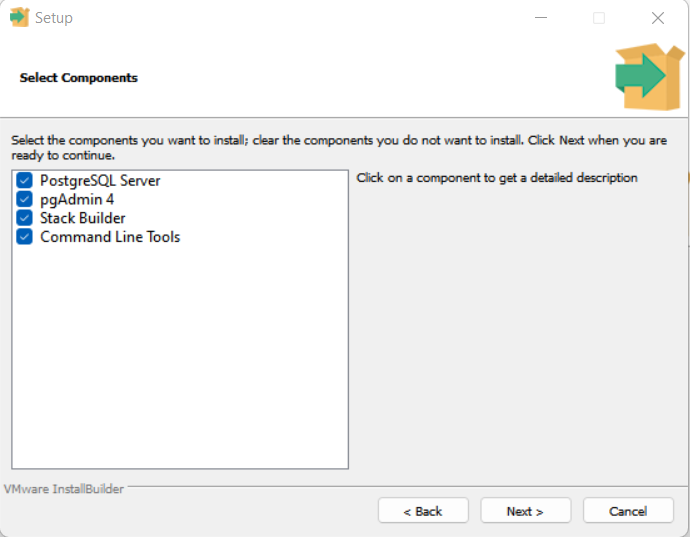
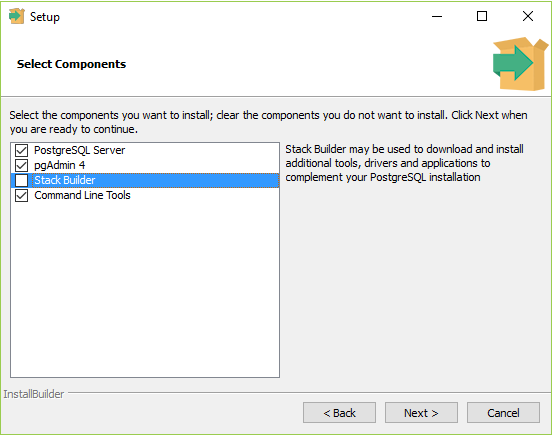
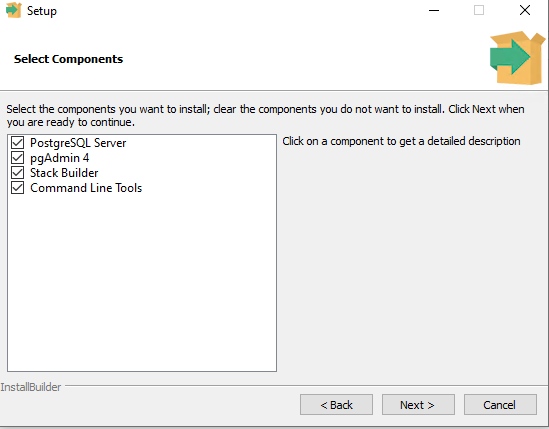
4. Выбираем дополнительные компоненты
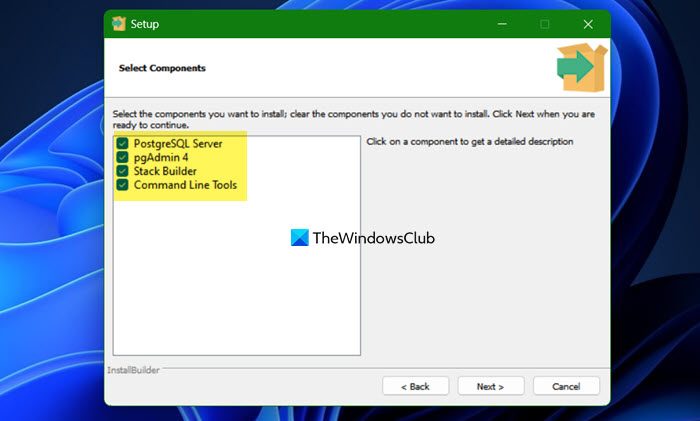
Вместе с СУБД можно установить следующие компоненты:
- PostgreSQL Server — это сам сервер баз данных PostgreSQL;
- pgAdmin 4 — приложение с графическим интерфейсом для администрирования СУБД;
- Stack Builder — утилита, которая поможет установить дополнительные библиотеки и инструменты в PostgreSQL;
- Command Line Tools — инструменты для работы с СУБД через командную строку.
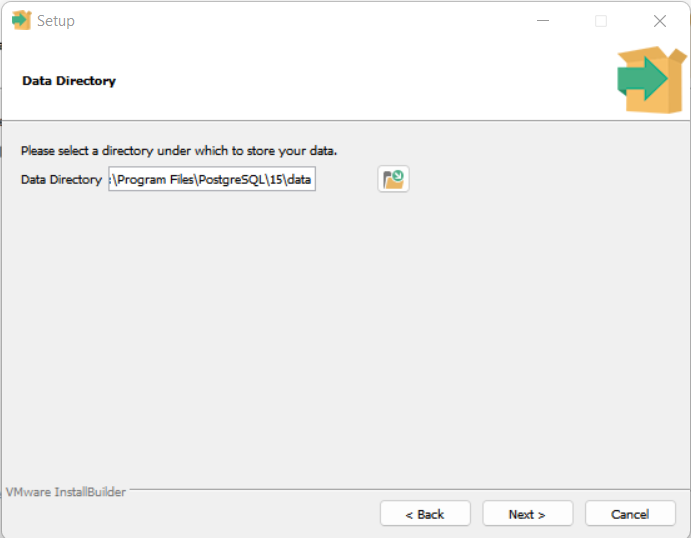
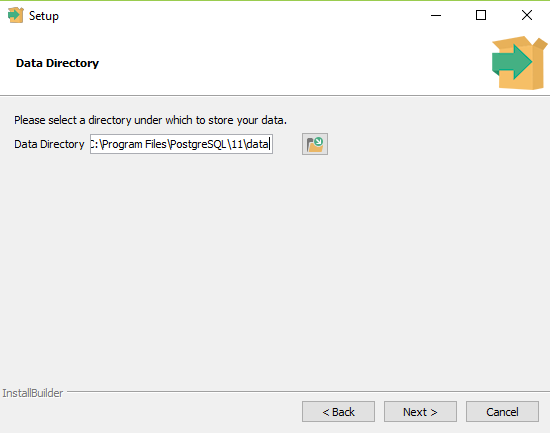
5. Указываем каталог для файлов баз данных
Можно оставить путь по умолчанию C:\Program Files\PostgreSQL\15\data или выбрать свой. Здесь будет храниться вся информация, поэтому перед выбором каталога важно проверить, что на диске достаточно свободного места.
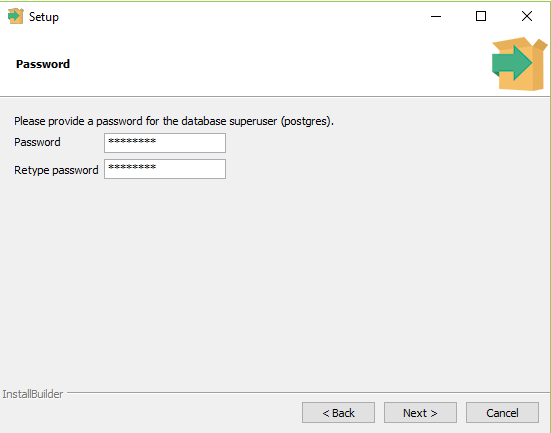
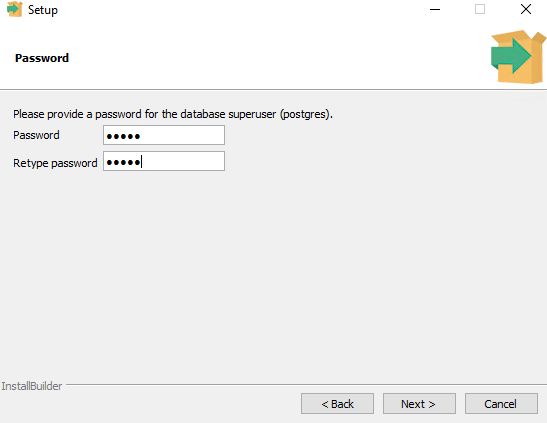
6. Устанавливаем пароль для системного пользователя
Рекомендуем выбирать пароль из 12 и более символов, со строчными и прописными буквами, цифрами и символами. Логин postgres устанавливается по умолчанию.

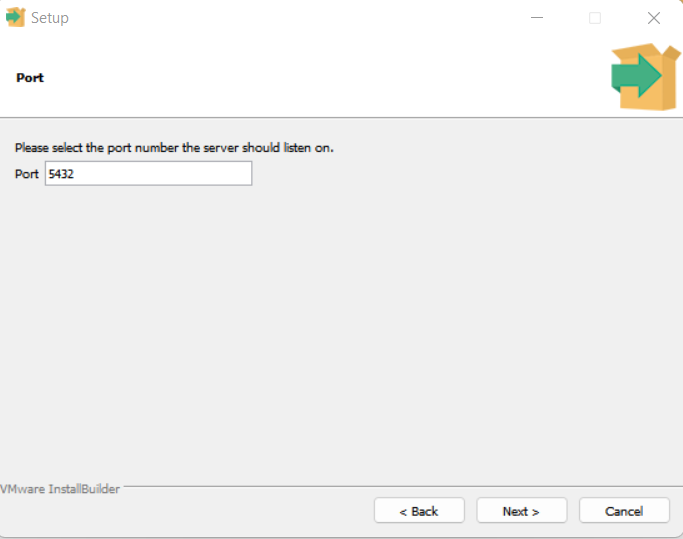
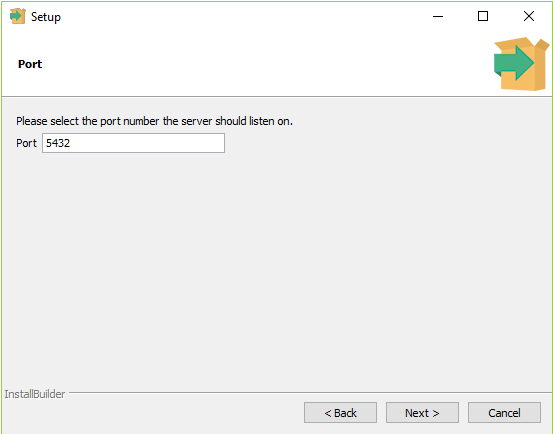
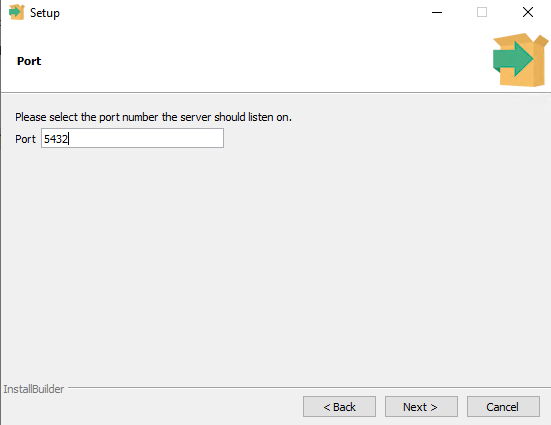
7. Выбираем порт и кодировку
Можно оставить порт по умолчанию 5432 или указать свой. Далее нажать Next.
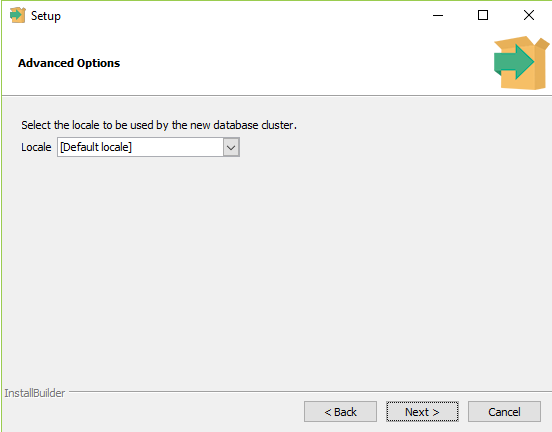
В появившемся списке локалей выбираем подходящую для себя локализацию или оставляем значение по умолчанию [Default locale]. Нажимаем Next.
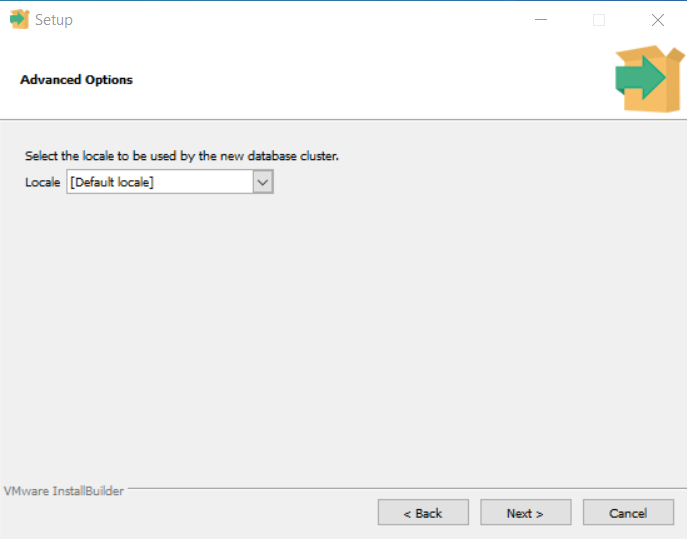
В будущем для новых баз данных на сервере можно будет указать конкретную кодировку.
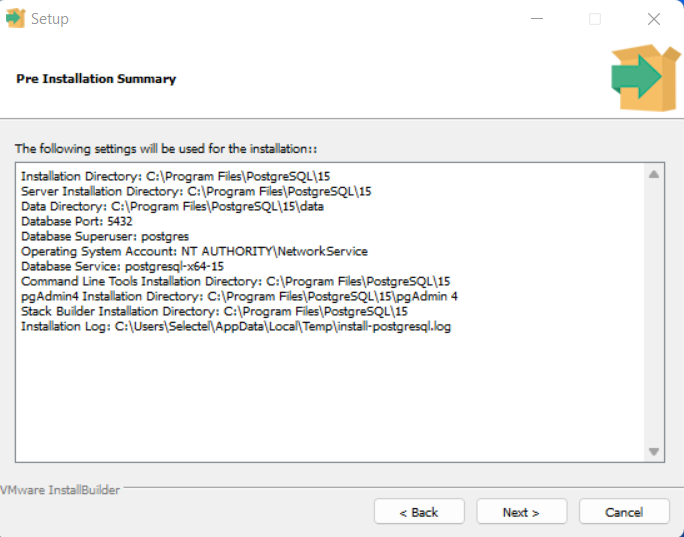
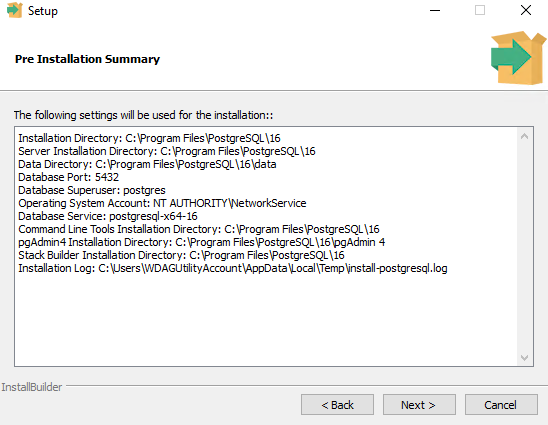
8. Проверяем параметры и завершаем установку
В финальном окне выводится сводная информация об установке PostgreSQL 15: дополнительные компоненты, выбранные порт и каталог, логин. Если параметры указаны верно, нажимаем Next или возвращаемся для корректировок с помощью кнопки Back.
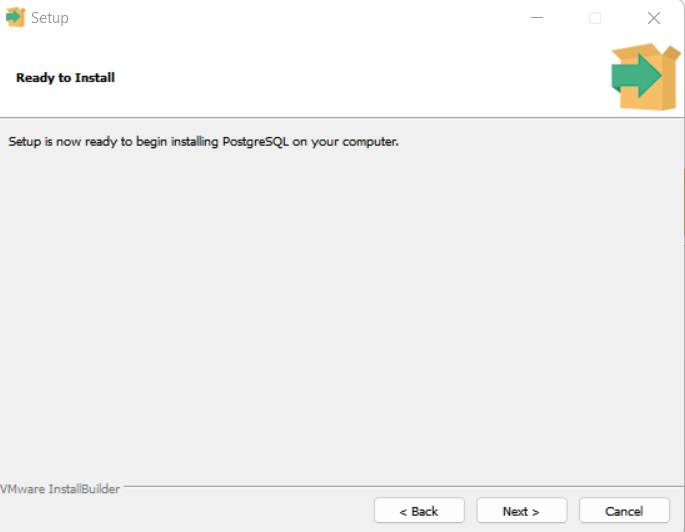
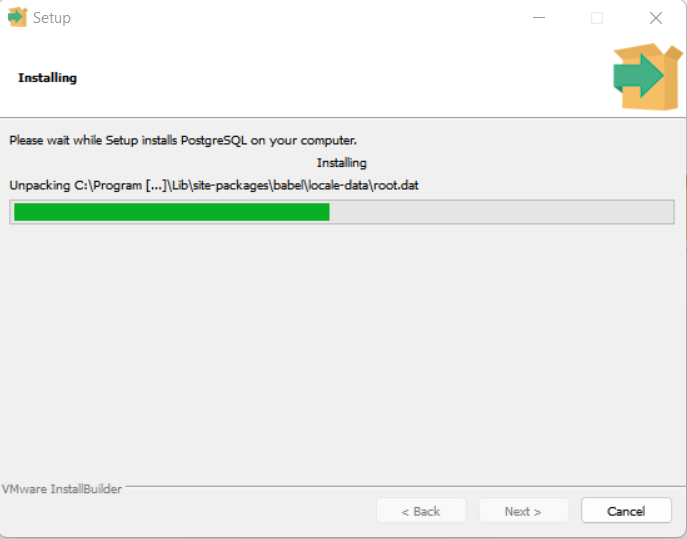
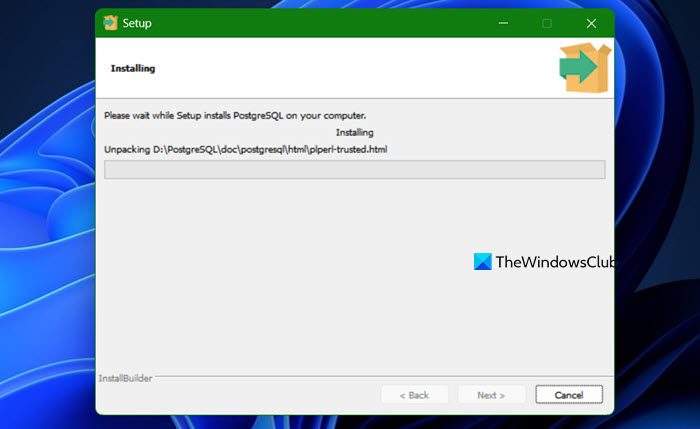
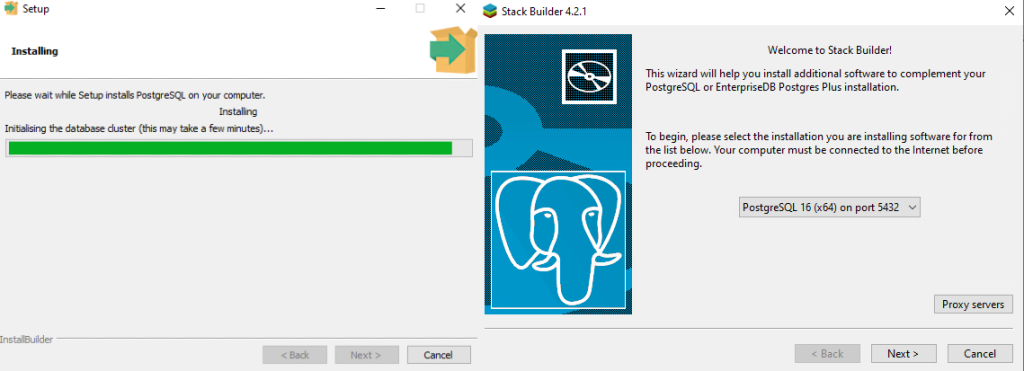
Все готово. Нажмите Next и дождитесь, когда необходимые компоненты установятся. Обычно процесс занимает не более 5 минут.
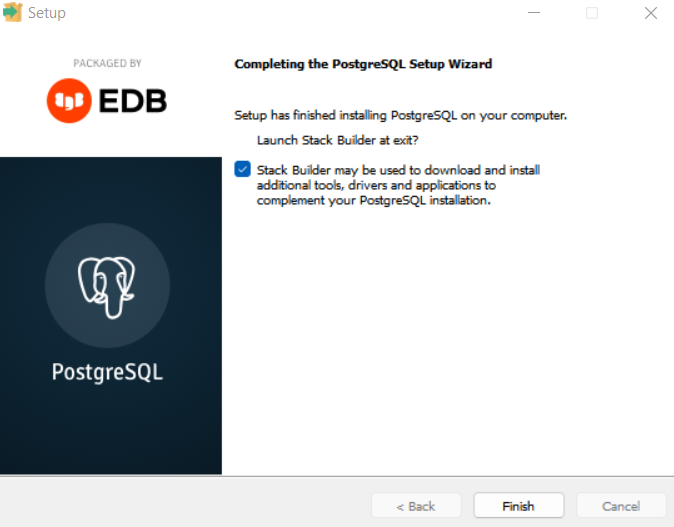
Одновременно с завершением процесса установки можно запустить компонент Stack Builder. Если запуск не требуется, снимаем флажок и нажимаем Finish.
Установка приложений с помощью Stack Builder
Запустить Stack Builder после окончания установки PostgreSQL можно с помощью команды:
C:\"Program Files"\PostgreSQL\15\bin\stackbuilder.exe
При этом путь будет зависеть от того, какие диск и каталог были выбраны во время установки СУБД.
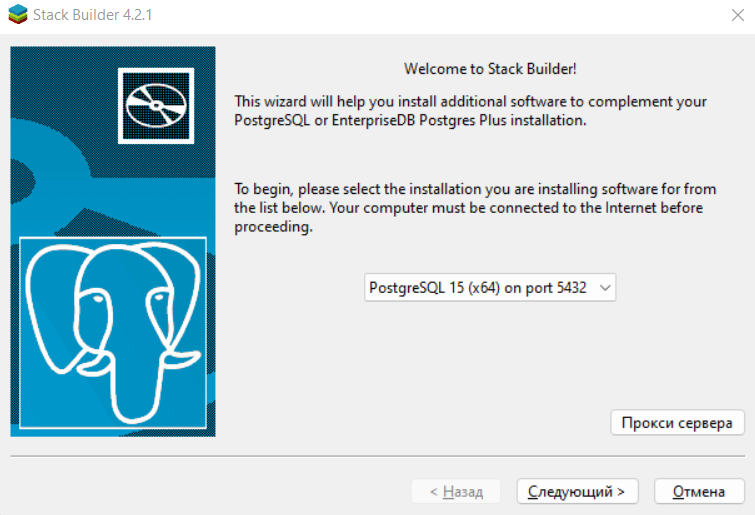
В начальном окне Stack Builder выбираем СУБД, для которой будем устанавливать дополнения. Для дальнейшей загрузки необходимо подключение к Интернету.
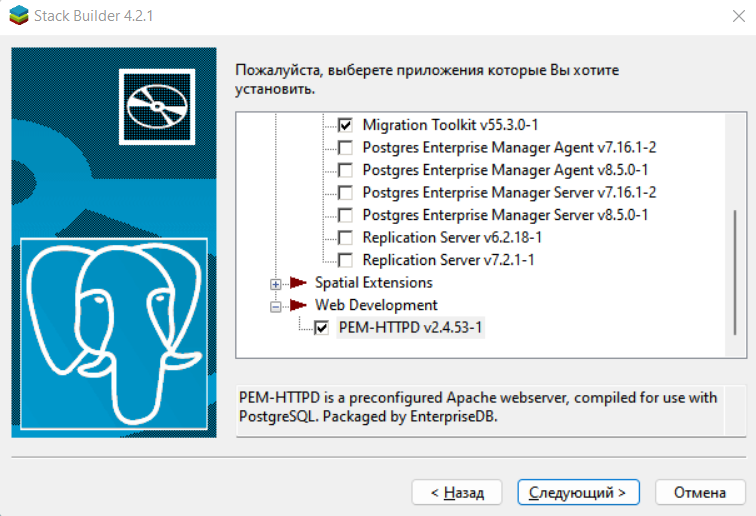
Далее выбираем дополнительные приложения, которые нужны для работы с базой данных. При клике на любой из компонентов внизу окна появляется его краткое описание. Мы выбрали Migration Toolkit и PEM-HTTPD.
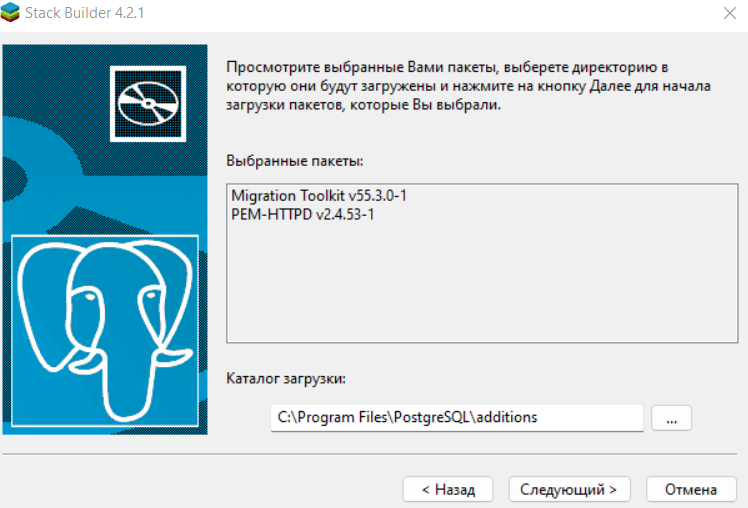
Следующим шагом указываем путь на локальной машине, куда нужно загрузить пакеты выбранных дополнений.
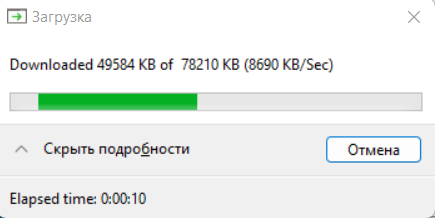
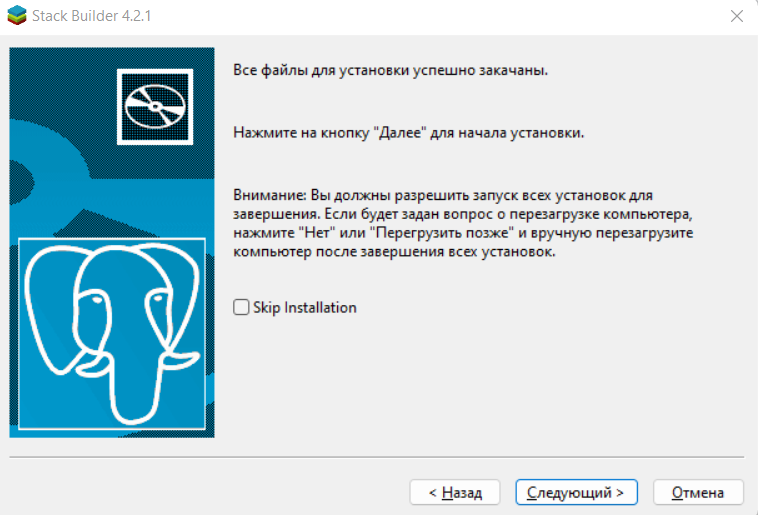
Дожидаемся загрузки файлов.
После этого скачанные приложения устанавливаются по очереди. Перезагружать компьютер следует только после того, как все дополнения из набора будут установлены.
Если устройство все-таки было перезапущено раньше, чем завершилась установка всех приложений, можно запустить инсталляцию с помощью .exe файла. Он находится в папке, которая была выбрана на предыдущем шаге. В нашем примере это папка C:\Program Files\PostgreSQL\additions.
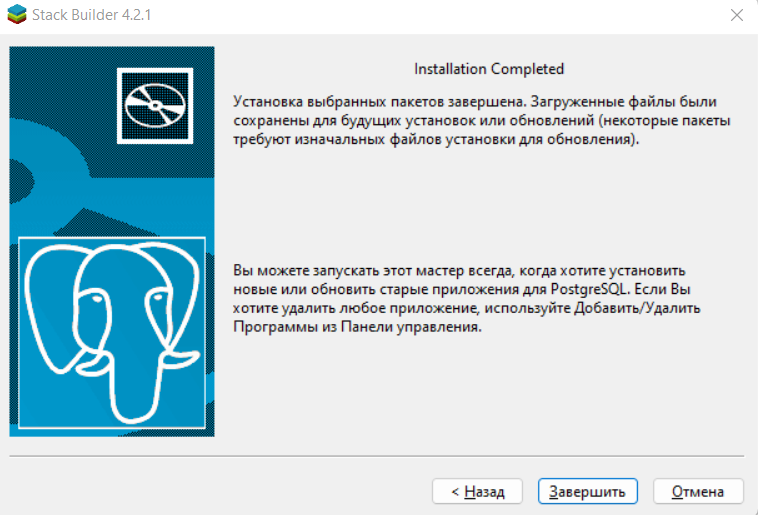
После установки всех выбранных приложений Stack Builder сообщает об успешном завершении.
Запуск pgAdmin 4
pgAdmin 4 — это утилита с простым визуальным интерфейсом, которая помогает работать с PostgreSQL. Ее можно установить отдельно от СУБД, скачав дистрибутив на официальном сайте.
Запустить pgAdmin 4 на устройстве можно через поиск в панели Пуск.

Еще один способ запустить утилиту — ввести в командной строке:
C:\Users\Selectel>C:\"Program Files"\PostgreSQL\15\"pgAdmin 4"\bin\pgAdmin4
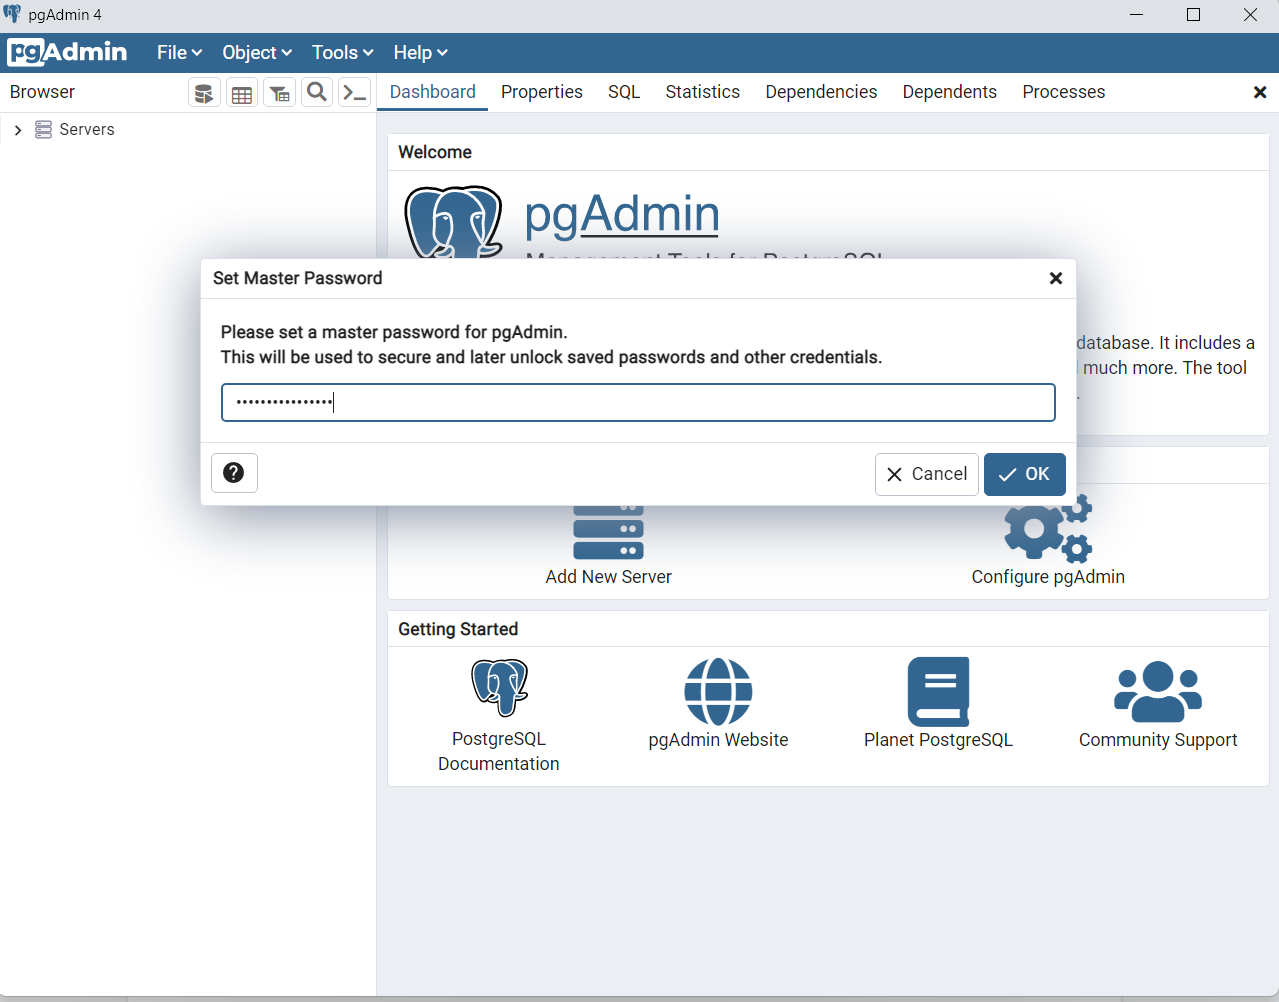
Сразу при запуске необходимо придумать мастер пароль. Он нужен для защиты сервера и последующей разблокировки сохраненных паролей.
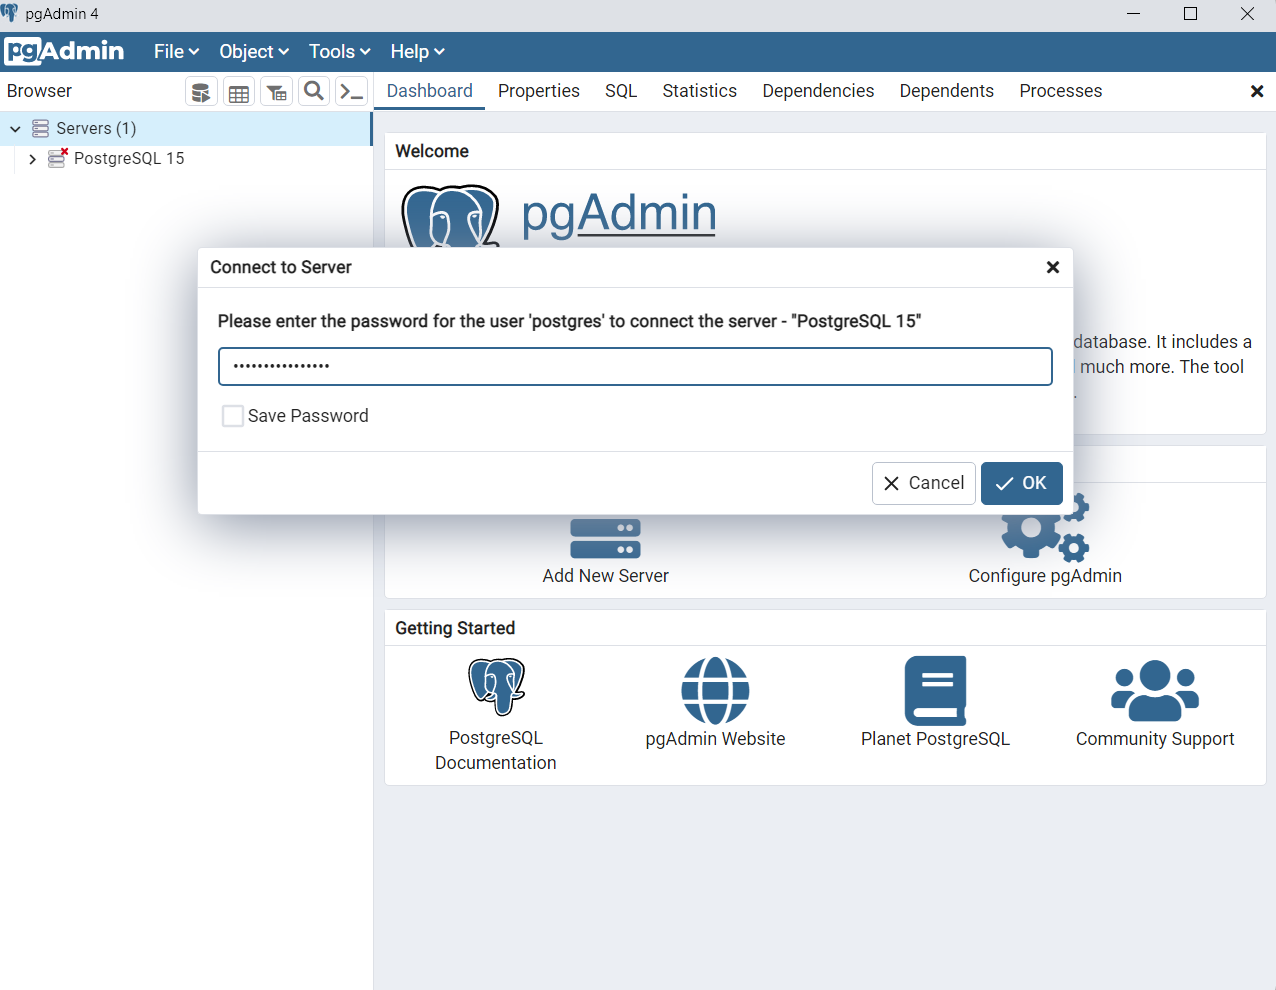
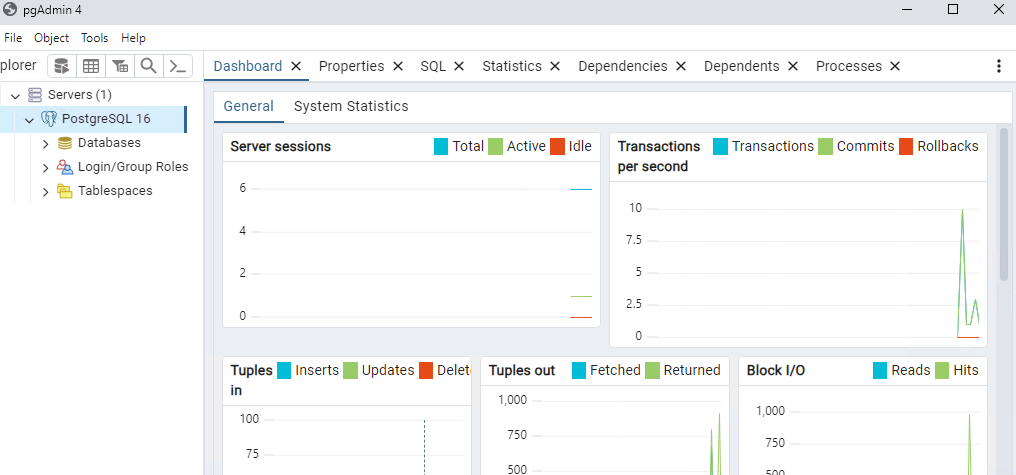
Чтобы подключиться к серверу СУБД кликните на Servers в левой панели и в раскрывшемся списке выберите PostgreSQL 15. Нажмите на него правой кнопки мыши и выберите Connect Server.

Для подключения нужно ввести пароль пользователя postgres — его мы задавали на этапе установки PostgreSQL 15.
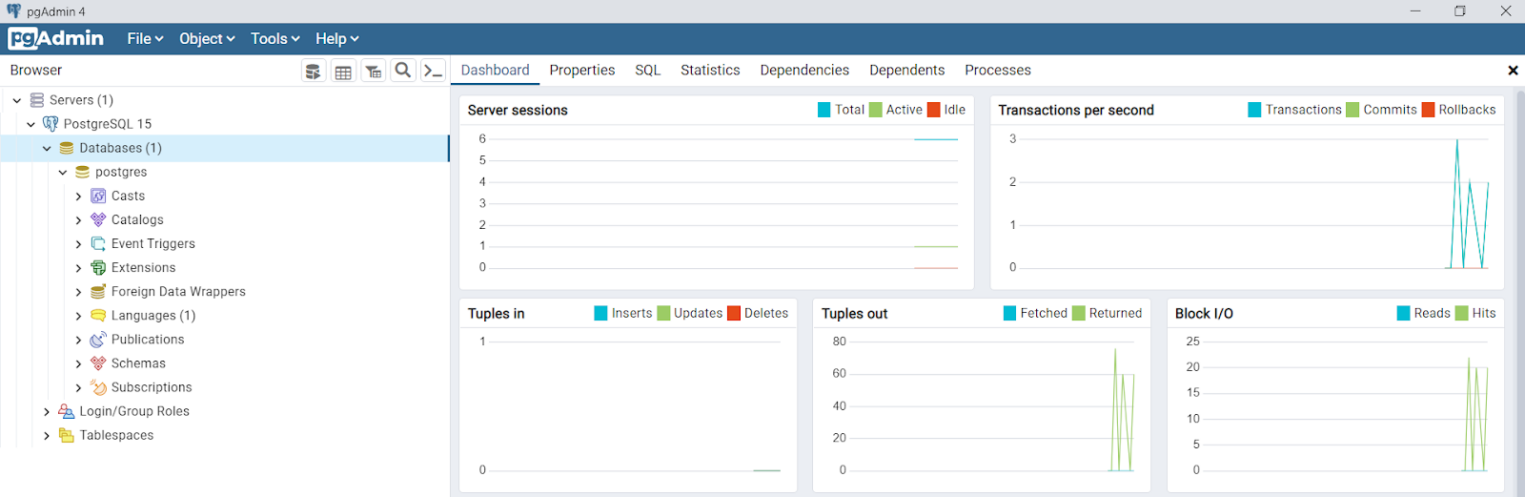
После аутентификации мы подключаемся к своему серверу PostgreSQL 15 и видим все объекты, которые на нем расположены.
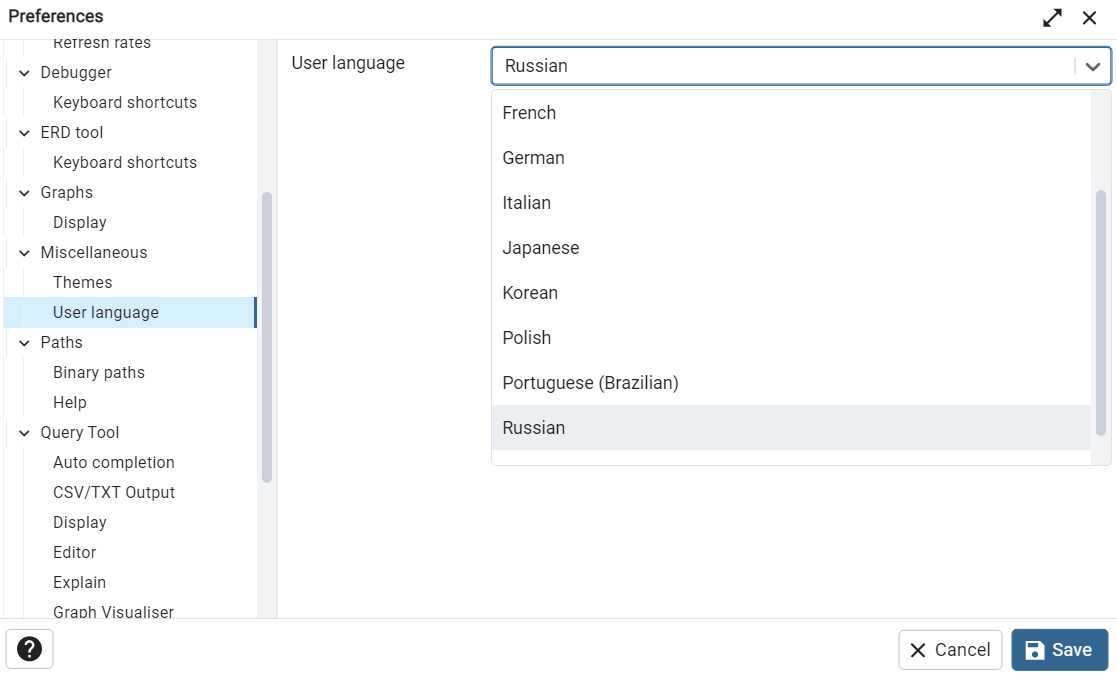
Чтобы изменить язык в pgAdmin 4 нажмите в левом верхнем углу File → Preferences. Далее в открывшемся окне в разделе Miscellaneous выберите пункт User language и в выпадающем списке с доступными языками найдите Russian. Язык изменится после перезагрузки страницы.
Сетевой доступ к PostgreSQL
Чтобы сервер PostgreSQL был доступен другим устройствам по сети, необходимо добавить правила в файрволе Windows. Проще всего сделать это с помощью PowerShell или командной строки. При этом команды необходимо выполнять от имени администратора. Еще можно использовать графический интерфейс. Ниже рассмотрим каждый из способов.
PowerShell
New-NetFirewallRule -Name 'POSTGRESQL-PORT' -DisplayName 'Selectel Port PostgreSQL2' -Direction Inbound -Enabled True -Protocol TCP -LocalPort 5432
Командная строка
netsh advfirewall firewall add rule name="Selectel Port PostgreSQL" dir=in action=allow protocol=TCP localport=5432
Графический интерфейс
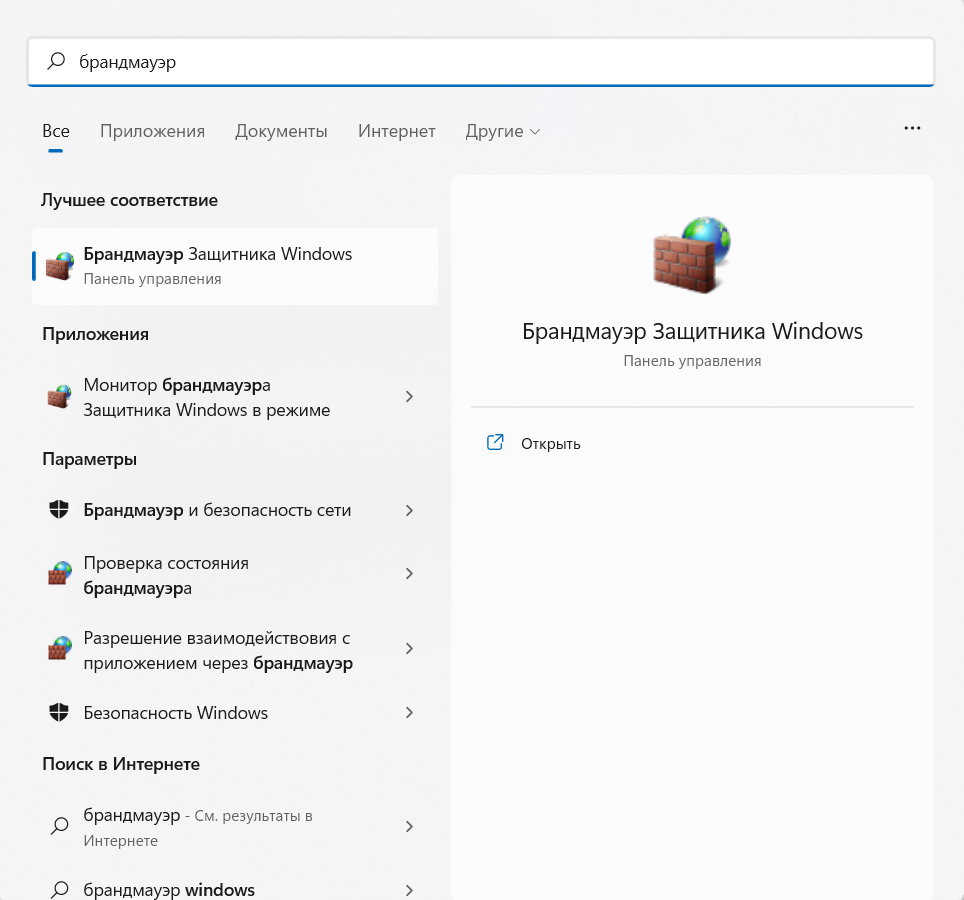
В меню Пуск ищем брандмауэр и выбираем Брандмауэр Защитника Windows.
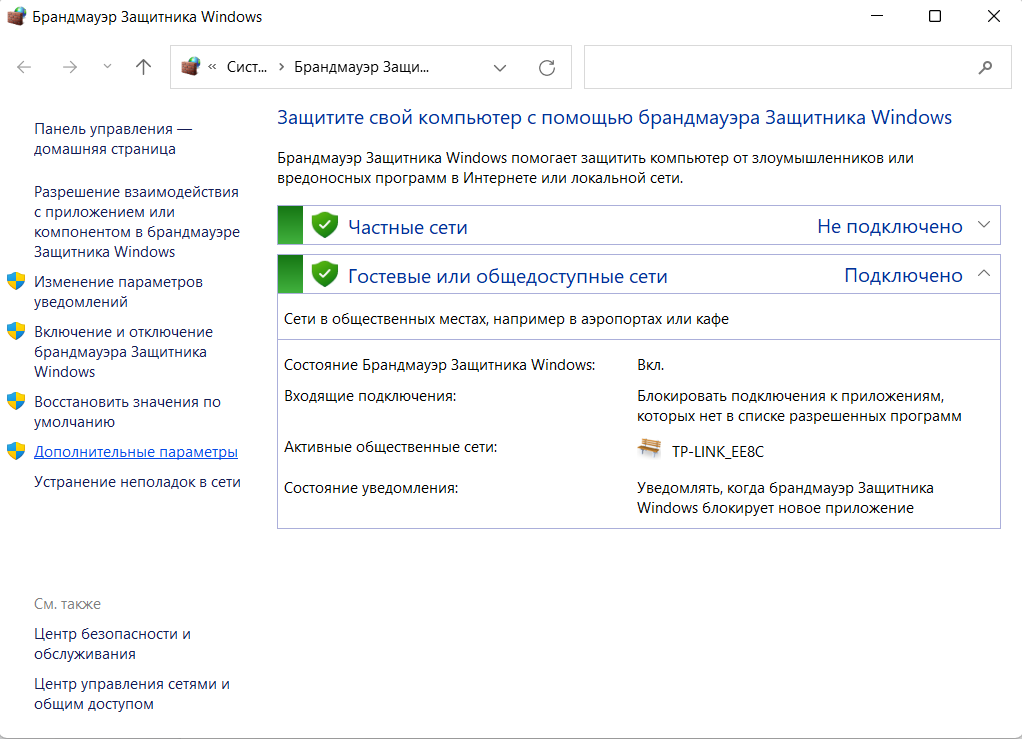
В левом меню кликаем на Дополнительные параметры.
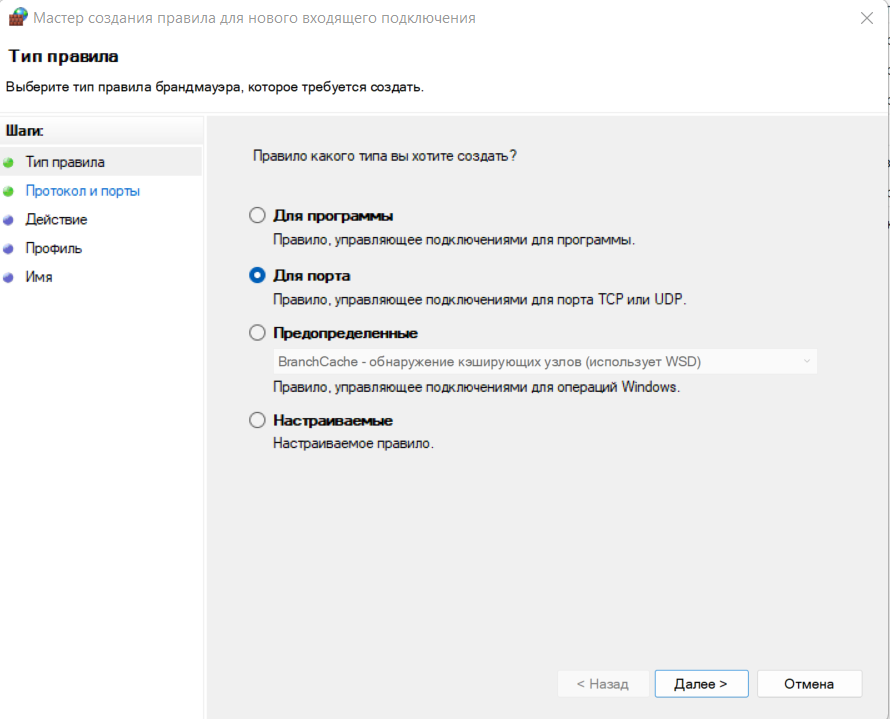
Заходим в Правила для входящих подключений и в правой части окна выбираем Создать правило.

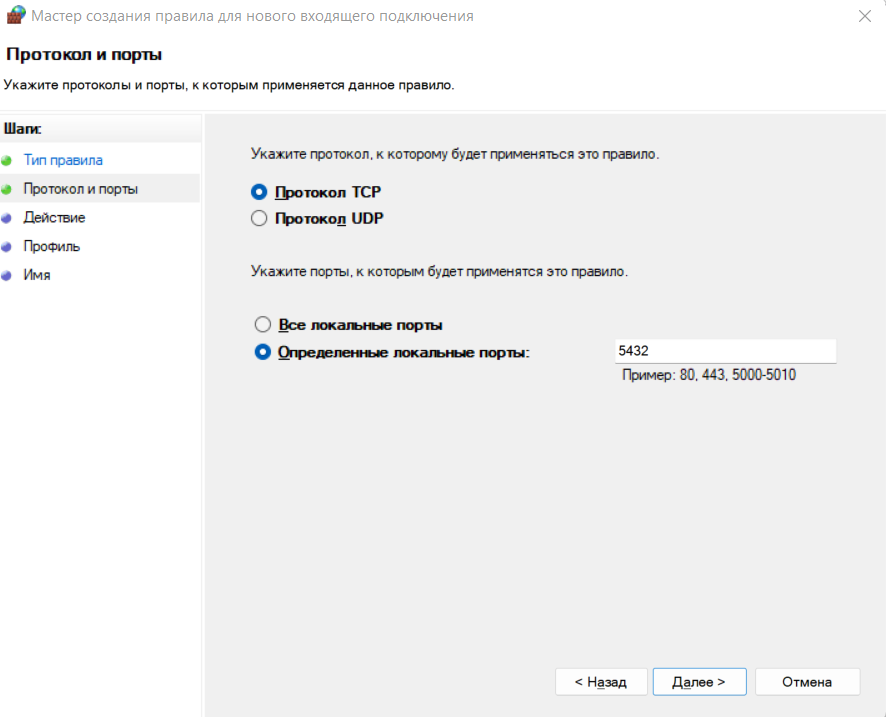
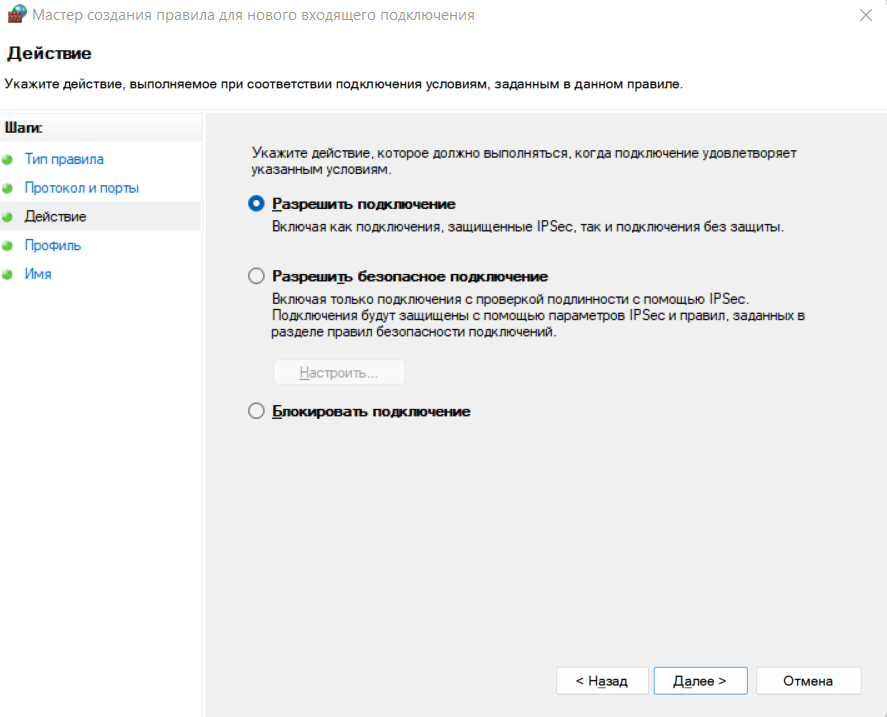
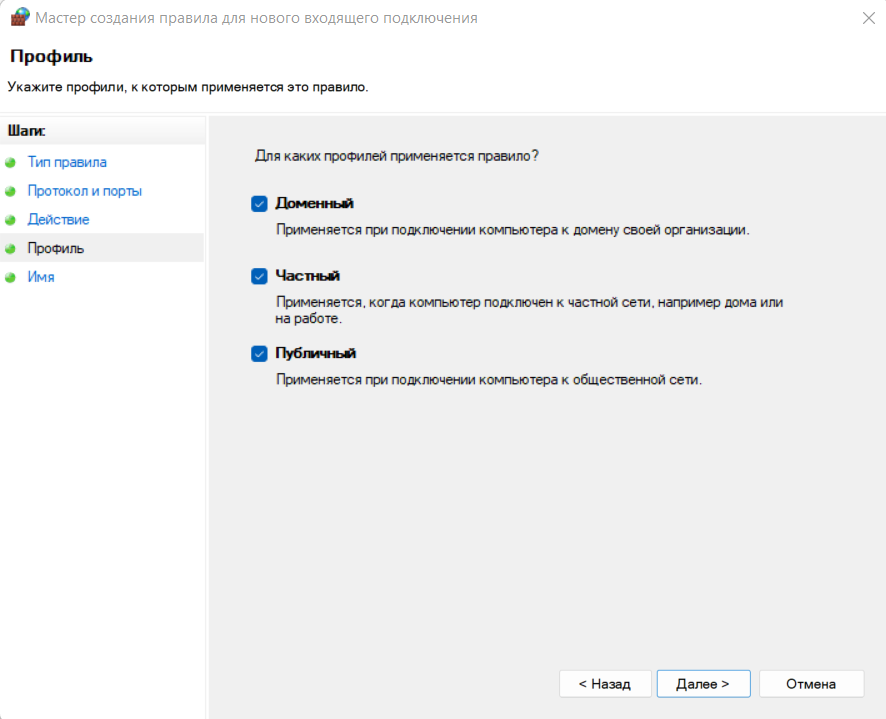
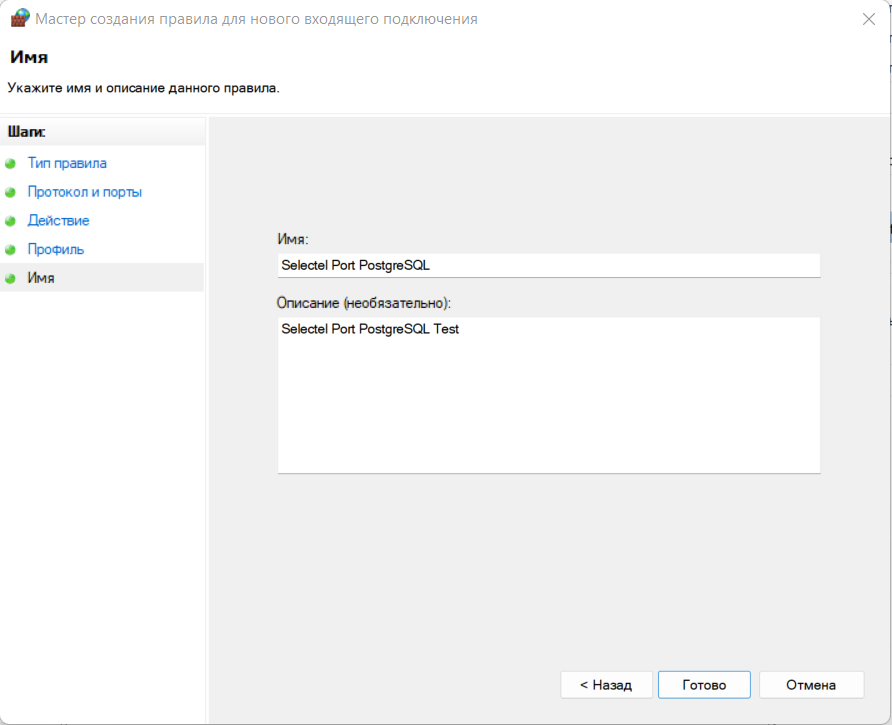
Устанавливаем настройки так, как показано на скринах ниже:
На шаге Профиль вы сами решаете, для каких профилей использовать новое правило. Мы оставим все профили включенными.
Задаем имя для нового правила и его описание.
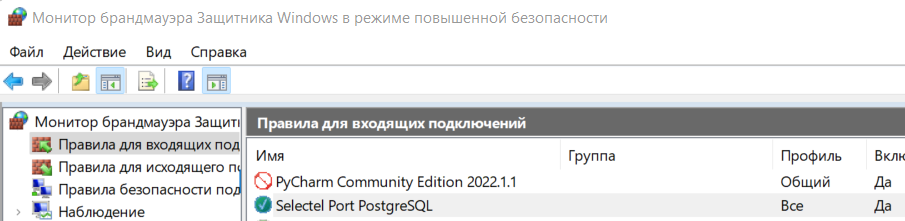
После того, как мы добавили правило в файрволе Windows любым из описанных способов, оно появится в брандмауэре.
Смена порта для подключения к СУБД
Чтобы изменить порт подключения к PostgreSQL находим файл postgresql.conf. Путь к нему — C:\Program Files\PostgreSQL\15\data.
В этом файле ищем строку с указанием port=5432 и меняем номер порта на нужный. Для поиска нужной строки поможет Ctrl+F.
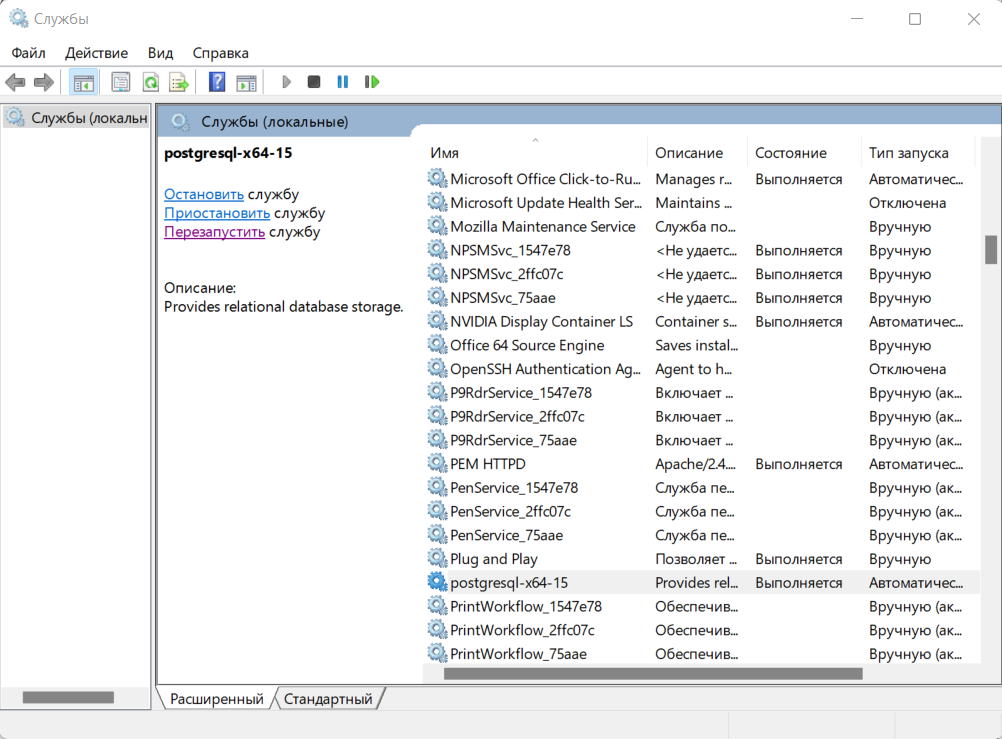
После этого перезапускаем службу postgresql-x64-15 используя встроенное в Windows приложение Службы. Его можно найти в меню Пуск или с помощью команды Win+R на клавиатуре и далее services.msc.
Еще postgresql-x64-15 можно перезапустить с помощью PowerShell. Для этого в консоли PowerShell нужно ввести команду:
Restart-Service-Name postgresql-x64-15
Проверка открытого порта
Проверить открыт ли указанный порт для входящего трафика можно с помощью пробного подключения по протоколу Telnet. Дальше рассмотрим по шагам, как включить этот протокол на Windows 11 и 10.
Telnet на Windows 11
- Через меню Пуск находим и открываем приложение Параметры.
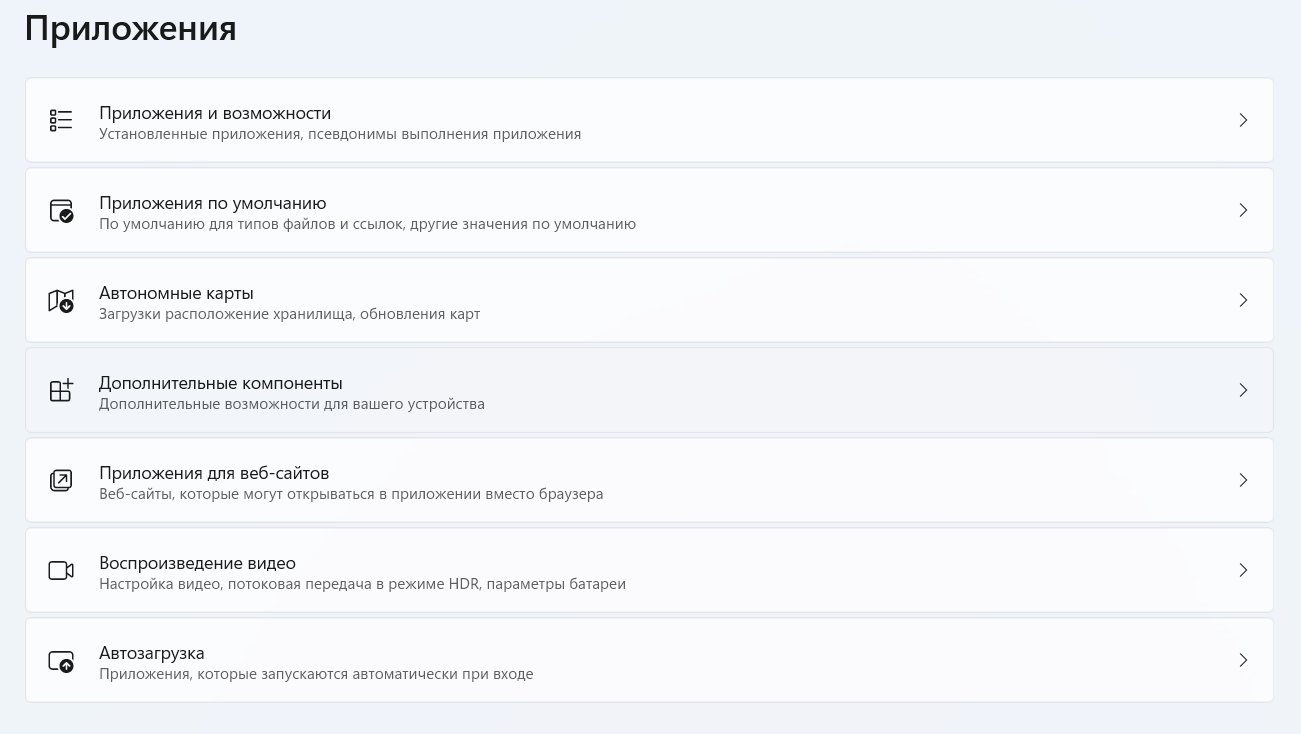
- В открывшемся окне слева выбираем Приложения.
3. В окне Приложения открываем пункт Дополнительные компоненты.
4. В поисковой строке вводим Другие компоненты и открываем указанный параметр.
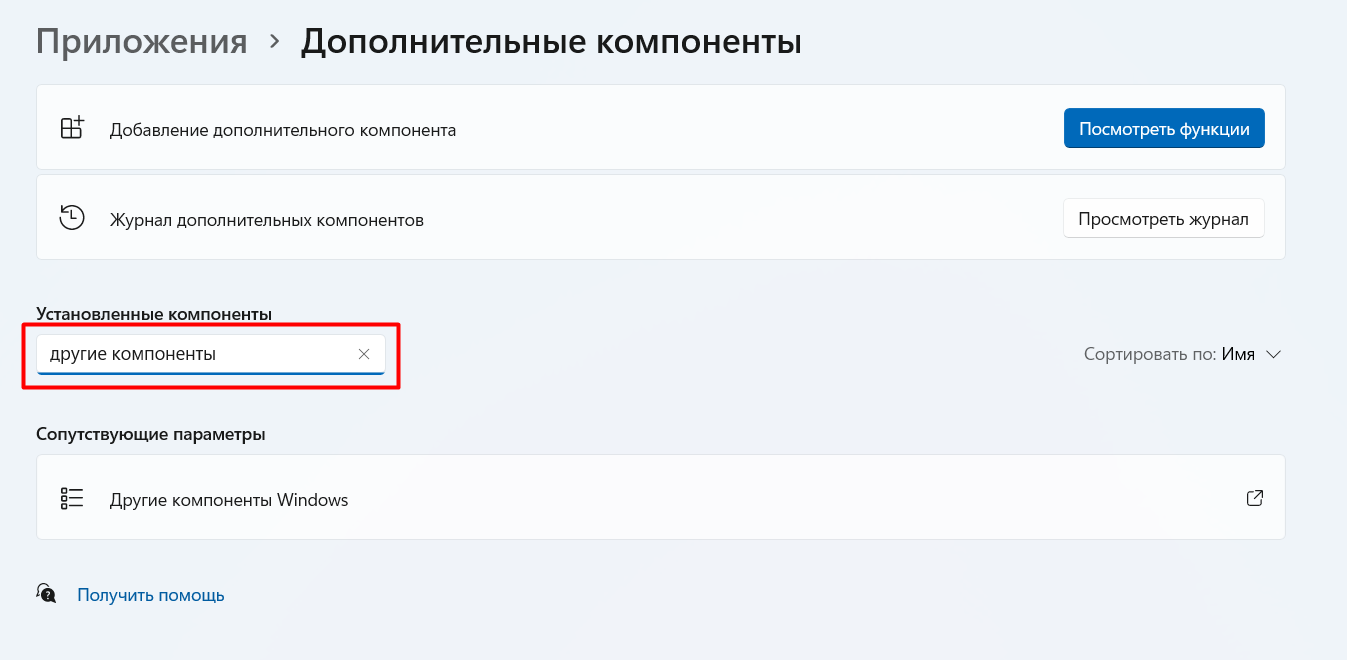
5. В открывшемся окне находим Клиент Telnet и включаем этот компонент, нажав кнопку ОК.
Telnet на Windows 10
- Через меню Пуск находим и открываем приложение Панель управления.
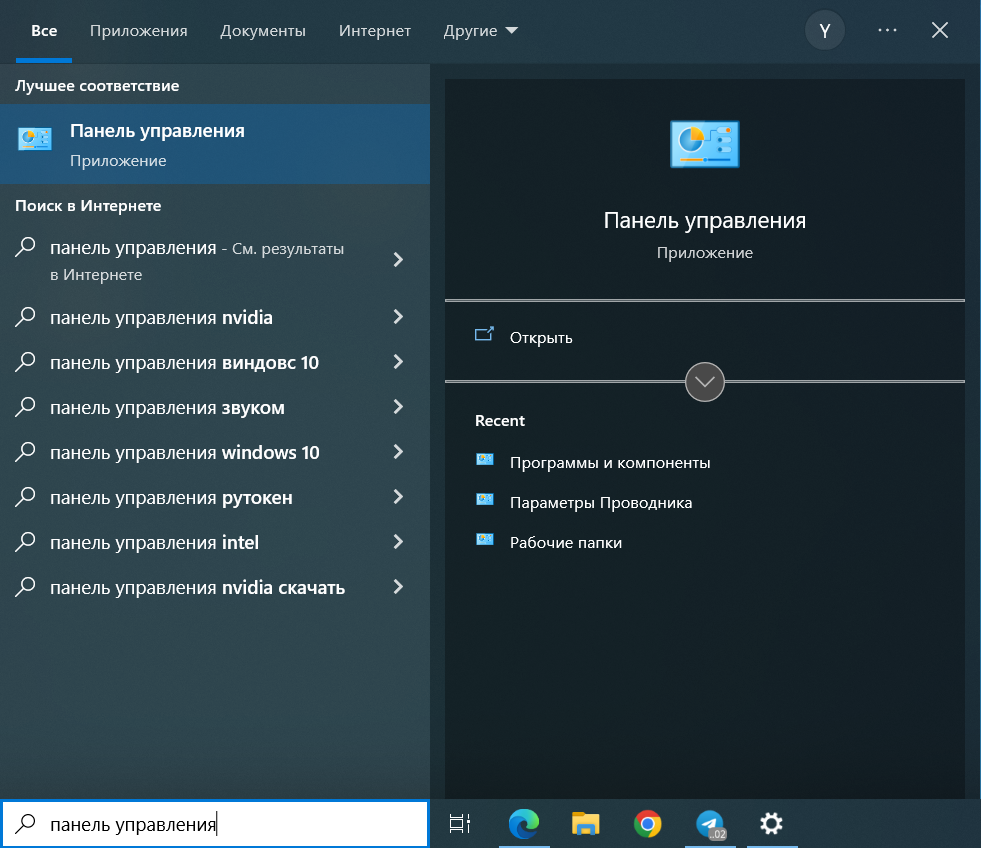
2. В открывшемся окне находим Программы и компоненты.
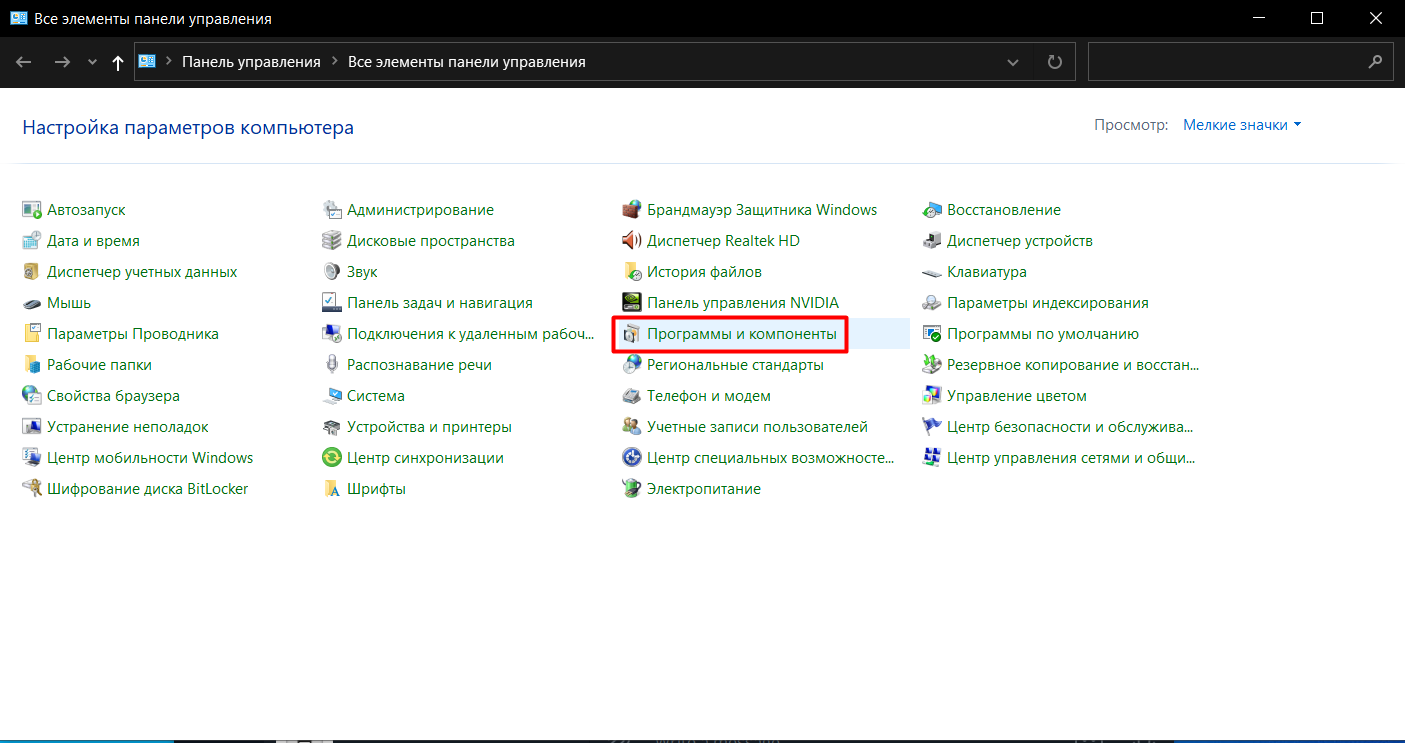
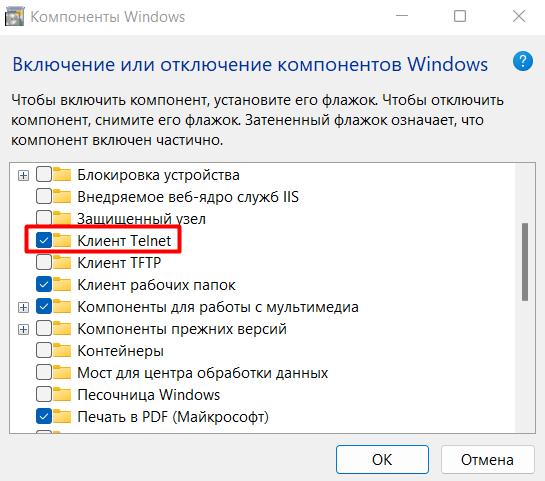
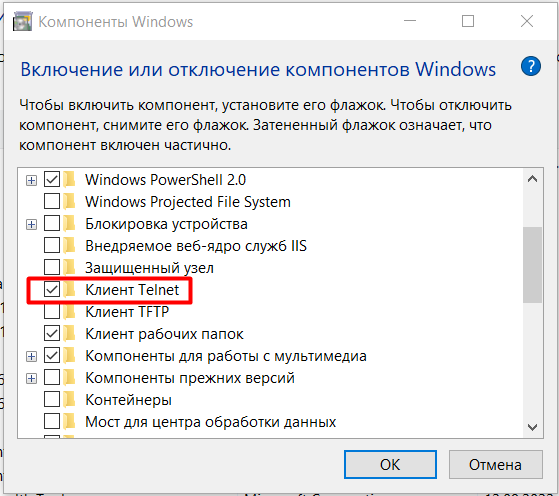
3. Кликаем слева на Включение или отключение компонентов Windows.

4. В открывшемся окне находим Клиент Telnet и включаем этот компонент, нажав кнопку ОК.
Теперь протокол Telnet включен и можно проверить открыт ли порт, который прослушивает PostgreSQL. Для этого в командной строке введем:
telnet <IP-address> <Port>
Где IP-address это IP-адрес сервера или его имя, а Port — номер порта, по которому будет производится подключение. Например,
C:\Users\Selectel>telnet 10.0.10.55 5432
Если подключение произошло успешно и порт открыт, будет отображаться пустая командная строка, а имя окна изменится на Telnet <IP-address>.
Если порт закрыт и подключение произвести не удалось, мы увидим сообщение о сбое.
Управление PostgreSQL через командную строку
Чтобы управлять СУБД с помощью командной строки, необходимо открыть ее от имени администратора.
Далее перейти в каталог \bin, так как все основные инструменты PostgreSQL лежат именно в этой папке:
C:\Users\Selectel>cd C:\Program Files\PostgreSQL\15\bin
С помощью параметра -V можно проверить версию СУБД, которая была установлена:
C:\Program Files\PostgreSQL\15\bin>psql -V
Для корректного отображения русских символов в Windows 10 и 11 советуем сменить кодировку на Windows-1251:
C:\Program Files\PostgreSQL\15\bin>chcp 1251
Чтобы создать новую базу данных есть команда:
C:\Program Files\PostgreSQL\15\bin>createdb -U postgres SelectelDatabase
Где:
createdb — сама команда создания новой базы данных;
-U — параметр для указания имени пользователя;
postgres — имя пользователя;
SelecterDatabase — название новой базы данных.
Теперь проверим была ли создана новая база данных. Введем команду с параметром -l, который выводит список доступных баз данных:
C:\Program Files\PostgreSQL\15\bin>psql -U postgres -l
Получаем список:

Чтобы создать нового пользователя воспользуемся командой:
C:\Program Files\PostgreSQL\15\bin>createuser -U postgres TRex
Где:
postgres — пользователь с правами создавать других пользователей;
TRex — имя нового пользователя.
После этого необходимо ввести пароль пользователя postgres, который инициирует команду.
Чтобы сразу изменить пароль для новой роли, можно использовать команду:
postgres=# ALTER ROLE “TRex” WITH PASSWORD 'password';
В команде вместо ‘password’ указать новый пароль.
При вводе SQL запросов важно не забывать ставить ; в конце запроса. Enter без ; в конце строки просто сделает переход на новую строку. Поэтому, если вы забыли ввести ; и нажали Enter, не нужно снова печатать всю строку. Достаточно ввести ; и запрос отправится на сервер.
Чтобы изменить права для новой роли, используется команда ALTER ROLE. Параметр CREATEDB дает право на создание базы данных:
postgres=# ALTER ROLE "TRex" CREATEDB;
Для просмотра ролей и их описания используется команда:
postgres=# \du
Теперь пользователь TRex имеет права на создание базы данных:

Для выхода из postgres можно использовать команду \q или exit.
С помощью командной строки можно также создавать таблицы и заполнять их данными. Для этого сначала подключимся к базе данных SelectelDatabase:
C:\Program Files\PostgreSQL\15\bin>psql -U "postgres" "SelectelDatabase"
Создадим таблицу с цветами Colors, где первое поле idcolor будет автоматически заполняться порядковым номером, а второе поле namecolor содержит наименование цвета:
SelectelDatabase=# CREATE TABLE Colors
SelectelDatabase-# (idcolor serial PRIMARY KEY,
SelectelDatabase(# namecolor varchar(255) NOT NULL);
Теперь добавим в созданную таблицу данные:
Ввод:
SelectelDatabase=# INSERT INTO Colors (namecolor) VALUES ('black');
Вывод:
INSERT 0 1

Ввод:
SelectelDatabase=# INSERT INTO Colors (namecolor) VALUES ('red');
Вывод:
INSERT 0 1

Ввод:
SelectelDatabase=# INSERT INTO Colors (namecolor) VALUES ('white');
Вывод:
INSERT 0 1

Ввод:
SelectelDatabase=# INSERT INTO Colors (namecolor) VALUES ('blue');
Вывод:
INSERT 0 1
Выведем на экран содержимое таблицы Colors и увидим, что данные успешно записались:
SelectelDatabase=# SELECT * FROM Colors;
Таблица:
С помощью команды \dt можно посмотреть весь список существующих таблиц в базе данных:
SelectelDatabase=# \dt
Все таблицы:
Команда \d позволяет вывести информацию о конкретной таблице. Так, указав таблицу Colors, мы видим параметры с которыми создана данная таблица:
SelectelDatabase=# \d 'Colors'
Параметры таблицы:

Таблицу можно удалить с помощью функции DROP:
SelectelDatabase=# DROP TABLE Colors;
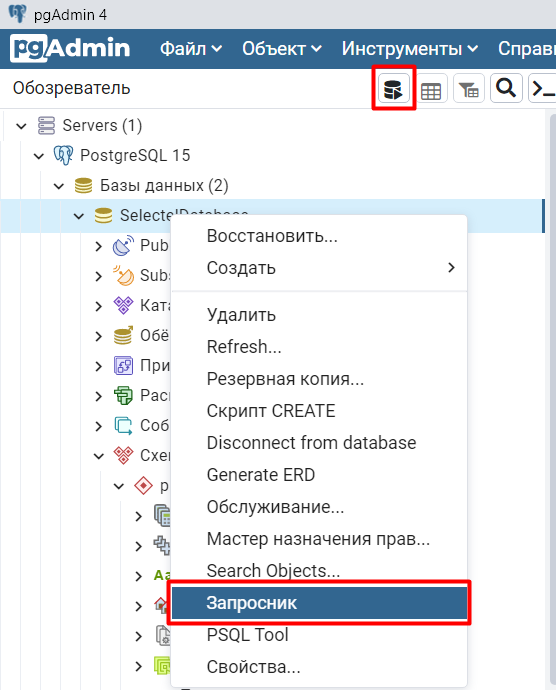
Query Tool — это редактор SQL запросов в pgAdmin 4 с удобным графическим интерфейсом. На русском редактор называется Запросник.
Открыть запросник можно, нажав на одну из указанных на скриншоте кнопок:
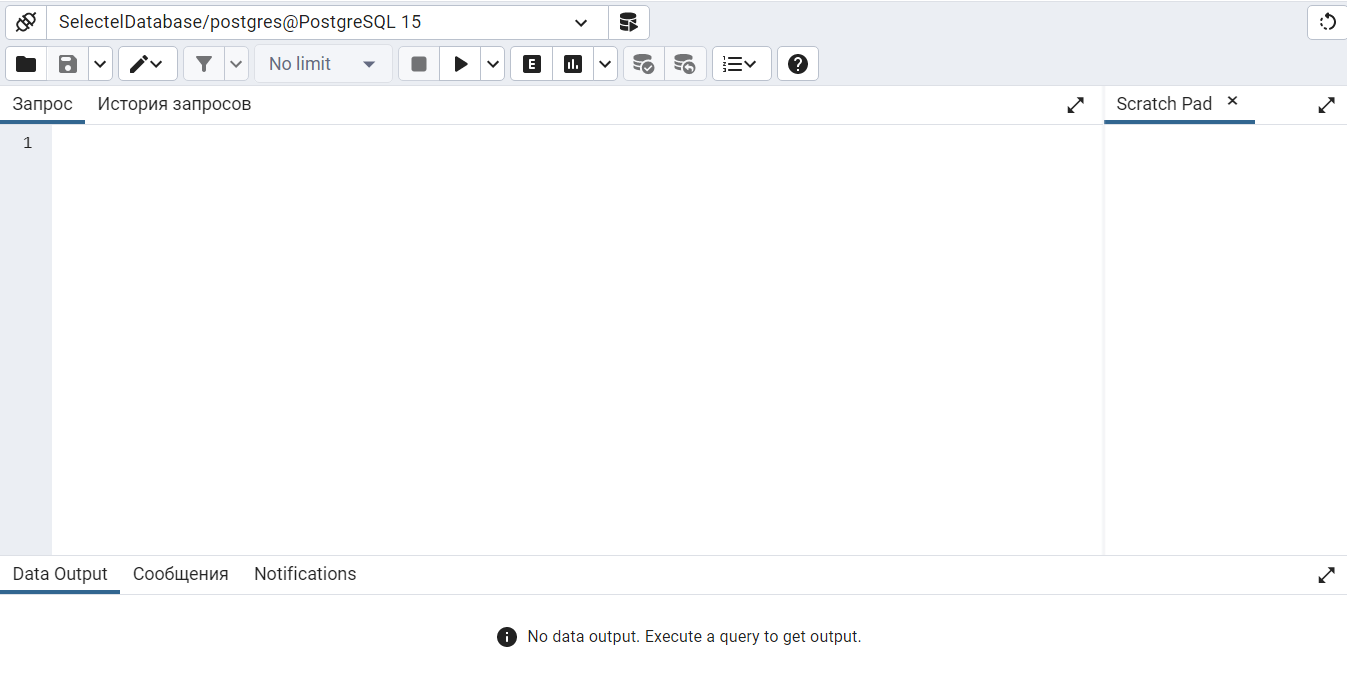
Появляется пустое стартовое окно запросника.
Покажем как работает запросник на примере. Для этого создадим таблицу из пяти полей, где будут указаны рейсы самолетов. Первое поле задается автоматически порядковым номером, второе — точка вылета, третье — точка прилета, четвертое — дата и время отправления, пятое — дата и время прибытия самолета.
Вводим запрос:
CREATE TABLE "flight"
    (
   	 idflight SERIAL PRIMARY KEY,
   	 Apoint VARCHAR(255) NOT NULL,
   	 Bpoint VARCHAR(255) NOT NULL,
   	 Atime timestamp NOT NULL,
   	 Btime timestamp NOT NULL
    );
INSERT INTO "flight" (Apoint, Bpoint, Atime, Btime) VALUES
    ('Saint-Petersburg', 'Novosibirsk', '2022-11-24 10:05:00', '2022-11-24 14:15:00'),
    ('Saint-Petersburg', 'Samara', '2022-11-21 16:45:00', '2022-11-21 18:00:00'),
    ('Saint-Petersburg', 'Moscow', '2022-11-20 13:20:00', '2022-11-20 14:25:00'),
    ('Saint-Petersburg', 'Netherlands', '2022-11-23 02:30:00', '2022-11-23 05:15:00'),
    ('Saint-Petersburg', 'Tashkent', '2022-11-27 06:25:00', '2022-11-27 10:25:00');
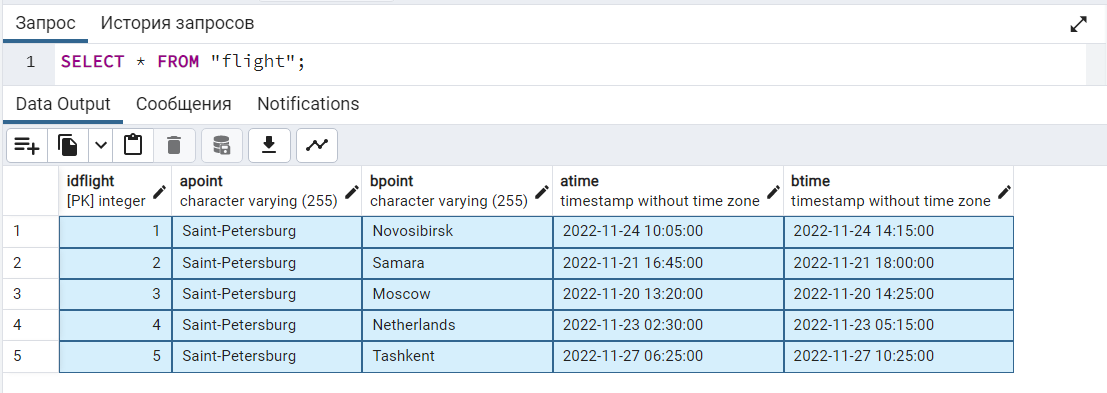
Чтобы отобразить введенную информацию выполним команду:
SELECT * FROM "flight";
Получаем вот такую таблицу с рейсами:
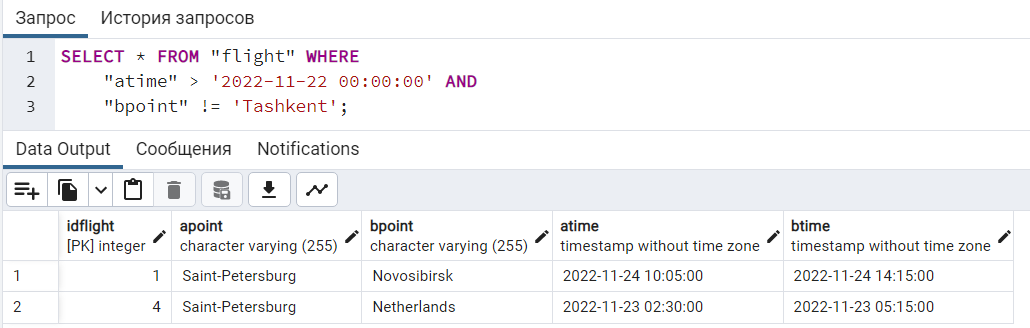
С использованием SQL запроса можно отсортировать данные в таблице по определенным условиям. Например укажем, что дата вылета должна быть после полуночи 22 ноября 2022 года и точкой прилета не должен быть Ташкент.
SELECT * FROM "flight" WHERE
    "atime" > '2022-11-22 00:00:00' AND
    "bpoint" != 'Tashkent';
Выполнив запрос, получим два рейса, которые подходят под заданные условия:
Заключение
В этой инструкции мы рассмотрели, как установить PostgreSQL на устройство с десктопной версией ОС Windows 10 и 11, а также:
- установили дополнительные приложения с помощью утилиты Stack Builder;
- создали правила файрвола для доступа к PostgreSQL по сети;
- поработали с СУБД через командную строку Windows;
- установили и русифицировали pgAdmin 4;
- рассмотрели работу запросника Query Tool.
Last Updated :
09 Aug, 2024
Installing PostgreSQL on your Windows 10 machine is straightforward with the PostgreSQL installer. In this article, we’ll walk you through installing PostgreSQL version 11.3, ensuring a smooth setup process.
Steps to Install PostgreSQL on Windows
There are three crucial steps for the installation of PostgreSQL as follows:
- Download PostgreSQL installer for Windows
- Install PostgreSQL
- Verify the installation
Step 1: Downloading PostgreSQL Installer for Windows
You can download the latest stable PostgreSQL Installer specific to your Windows by clicking here.
Step 2: Installing the PostgreSQL installer
After downloading the installer double click on it and follow the below steps:
- Click the Next button.
- Choose the installation folder, where you want PostgreSQL to be installed, and click on Next.
- Select the components as per your requirement to install and click the Next button.
- Select the database directory where you want to store the data and click on Next.
- Set the password for the database superuser (Postgres).
- Set the port for PostgreSQL. Make sure that no other applications are using this port. If unsure leave it to its default (5432) and click on Next.
- Choose the default locale used by the database and click the Next button.
- Click the Next button to start the installation.
- Wait for the installation to complete, it might take a few minutes.
- Click the Finish button to complete the PostgreSQL installation.

Step 3: Verifying the Installation of PostgreSQL
There are couple of ways to verify the installation of PostgreSQL like connecting to the database server using some client applications like pgAdmin or psql.
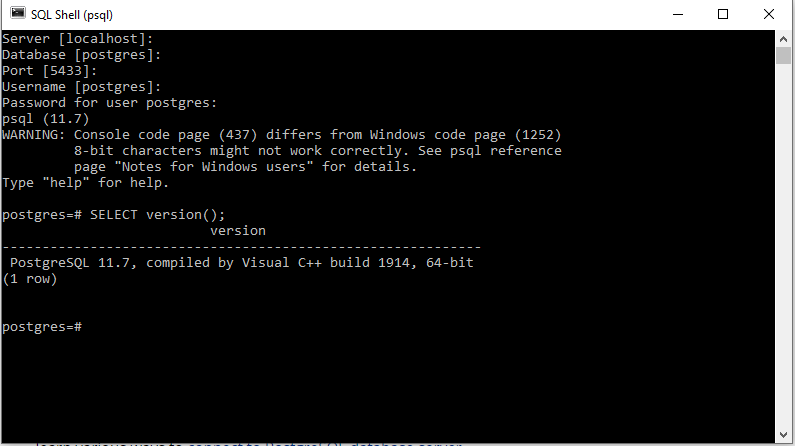
The quickest way though is to use the psql shell. For that follow the below steps:
- Access psql Shell:
- Search for “psql” in the Windows search bar and open it.
- Enter server details (localhost), database (default “postgres”), port (default 5432), username (postgres), and the password you set during installation.
- Check Installation:
- In the psql shell, enter ‘SELECT version();’ to confirm PostgreSQL is installed correctly. You should see version information displayed.
Tips:
- Ensure firewall settings allow PostgreSQL connections.
- Explore pgAdmin or other client tools for database management.
Summary: in this tutorial, you will step by step learn how to install PostgreSQL on your local system.
- Install PostgreSQL on macOS
- Install PostgreSQL on Linux
As an alternative to installing Postgres locally, you can get cloud Postgres in seconds on Neon with a generous free plan. No credit card required.
Get Cloud Postgres
PostgreSQL was developed for UNIX-like platforms, however, it was designed to be portable. It means that PostgreSQL can also run on other platforms such as macOS, Solaris, and Windows.
To install PostgreSQL on Windows, you follow these steps:
- First, download the PostgreSQL installer for Windows.
- Second, install PostgreSQL using the installer.
- Third, add the path to the PostgreSQL’s bin directory to the PATH environment variable.
First, go to the download page of PostgreSQL installers on the EnterpriseDB.
Second, download the PostgreSQL for Windows x86-64 version 16.1 (or the latest version). It’ll take a few minutes to complete.
To install PostgreSQL on Windows, you need to have administrator privileges.
Step 1. Double-click on the installer file and an installation wizard will appear and guide you through multiple steps. Hence, you can choose various options based on your preferences for PostgreSQL.
Step 2. Click the Next button
Step 3. Specify the installation directory by either choosing your preferred location or using the default folder suggested by the PostgreSQL installer and click the Next button
Step 4. Select software components to install:
- PostgreSQL Server option allows you to install the PostgreSQL database server
- pgAdmin 4 option allows you to install the PostgreSQL database GUI management tool.
- Stack Builder provides a GUI that allows you to download and install drivers that work with PostgreSQL.
- Command Line Tools option allows you to install command-line tools such as
psql,pg_restore, and so on. These tools allow you to interact with the PostgreSQL database server using the command-line interface.
For tutorials on this website, you can skip installing Stack Builder. Feel free to uncheck it and click the Next button to proceed to the data directory selection:
Step 5. Choose the database directory to store the data, or accept the default directory. Click the Next button to proceed to the next step:
Step 6. Enter the password for the database superuser (postgres).
After entering the password, retype for confirmation, and then click the Next button:
Step 7. Specify a port number on which the PostgreSQL database server will listen. The default port of PostgreSQL is 5432. Ensure that no other applications are using this port.
Step 8. Select the default locale for the PostgreSQL server. If you leave it as the default, PostgreSQL will use the operating system locale. Afterward, click the Next button.
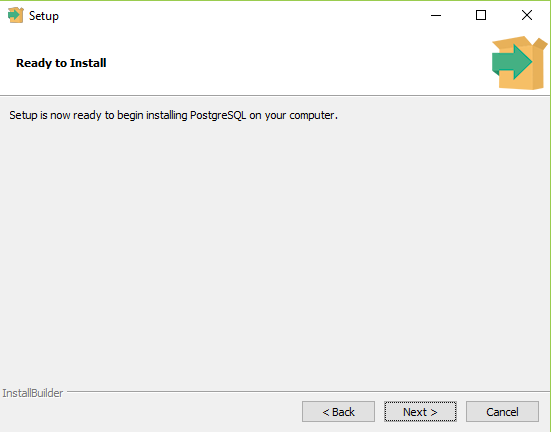
Step 9. The setup wizard will show the summary PostgreSQL information. Review the details, and if everything is correct, click the Next button. Otherwise, click the Back button to adjust the configuration accordingly.
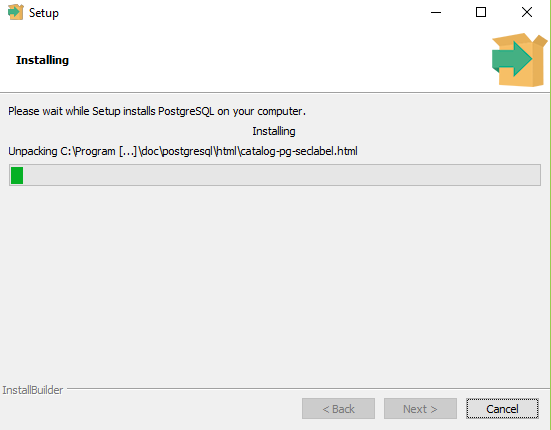
Now, you are ready to install PostgreSQL on your computer. Click the Next button to initiate PostgreSQL installation.
The installation may take a few minutes to complete.
Step 10. Click the Finish button to complete the PostgreSQL installation.
By adding the bin directory of the PostgreSQL to the PATH environment variable, you enable the execution of common PostgreSQL tools, such as plsql and pg_restore, from any directory without the need to navigate the bin directory first.
First, find the path of the bin directory of the PostgreSQL installation directory. Typically, it is set to the following:
C:\Program Files\PostgreSQL\<version>\binThe <version> is PostgreSQL’s specific version. For example, if you install PostgreSQL 16, the path to the bin directory will look like this:
C:\Program Files\PostgreSQL\16\binSecond, open the environment variables:
- Press
Win + Rto open the Run dialog - Type
sysdm.cplan press Enter. The System Properties dialog will display. - Select the Advanced tab and click the
Environment Variables...button.
You’ll see two sections in the Environment Variables window:
- User variables for [YourUsername]
- System variables.
Usually, you can edit the PATH variable under the System variables section, but if you want to add the path only for your user account, you can edit the User variables section.
Third, select the Path variable under the User variables and click the Edit button.
Fourth, in the Edit Environment Variable window, click the New button.
Fifth, enter C:\Program Files\PostgreSQL\16\bin and click OK to add it to the list of paths.
Finally, click the OK button to close the Environment Variables window and click the OK button to close the System Properties window.
Congratulations! You’ve successfully installed the PostgreSQL database server on your local system. Let’s learn various ways to connect to the PostgreSQL database server.
In this post, we will see how to install PostgreSQL on your Windows client computer and how you can connect and use it. PostgreSQL, commonly called Postgres, is an open-source relational database management system that prioritizes extensibility and adherence to SQL standards. Usually, you see PostgreSQL installed and used on a server, but you can do the same on a client device.

How to install PostgreSQL in Windows?
To install PostgreSQL on a Windows computer, you need to first get the installation media from their official website. Then, run the installer file to install the application along with all its components on your computer. We have provided a detailed guide for this hereinafter.
- Download PostgreSQL
- Run the PostgreSQL installer to install Postgres on your computer
- Connect to your PostgreSQL using PgAdmin
Let us talk about them in detail.
1] Download PostgreSQL
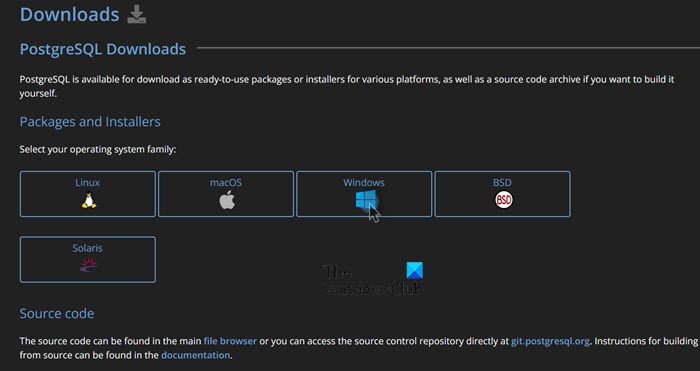
First of all, we need to download PostgreSQL on your computer. Since it is an open-source service, we can download it for free. To do the same, open a browser, navigate to postgresql.org, click on the Download button, then from “Packages and Installers”, click on the Windows icon, and click on Download the installer link. You will be redirected to enterprisedb.com, where you need to download the PostgreSQL version of your choice. I went for 14.11, but you can go pick anyone from the list. The PostgreSQL installation package will start downloading to your system.
Read: How to Download and Install MySQL in Windows?
2] Run the PostgreSQL installer to install Postgres on your computer
Now that we have the installation media for PostgreSQL, let us now go ahead and run the installer. We recommend you go through the entire guide mentioned below and not skip anything.
First of all, open the File Explorer, navigate to the Download folder, and run the installation media. It will trigger the PostgreSQL installation, and you will see the Setup wizard, where you need to click on Next.
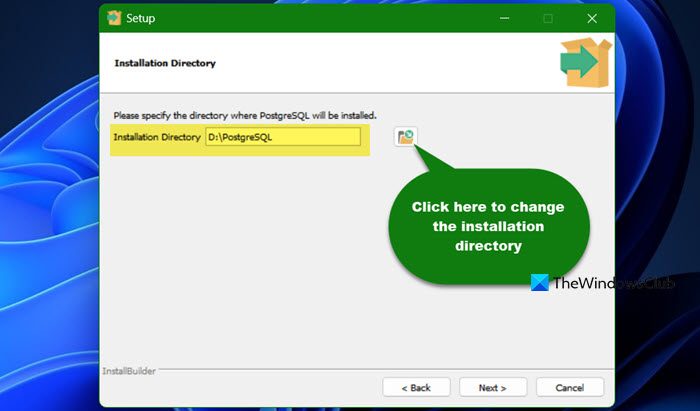
You will be asked to specify a directory where you need the application to get installed, most go with the default option, but since I don’t have enough space in my C drive, I will install it in the D drive. If you too, want to change the directory, just click on the Browse icon and change the default location.
Next up, we need to select the components we need to install. The more components you wish to install the more space it will take. Depending on your needs, you may choose to skip using Stack Builder, which is a graphical interface that simplifies the process of downloading and installing modules that complement your PostgreSQL installation. However, do not uncheck the other. We are going to install all of them.
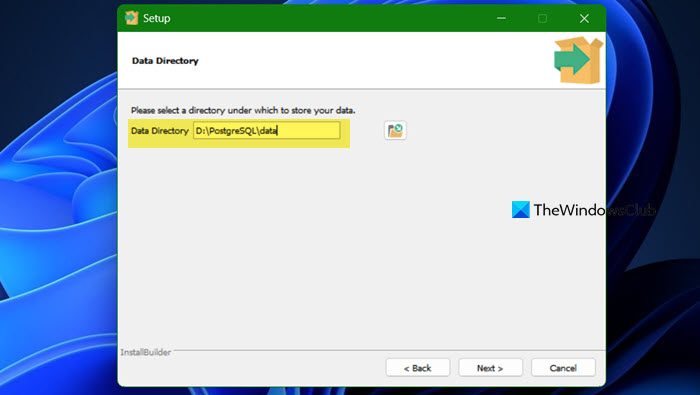
Now, you need to select the directory where you want to store all your data. Based on what you intend to do on your database, select a local storage directory. By default, the data folder will be located inside the directory you intend to install PostgreSQL in, however, it can be altered. To change the directory, click on the Browse icon, navigate to the location where you want to store your data, and select a folder. Once done, click on Next.
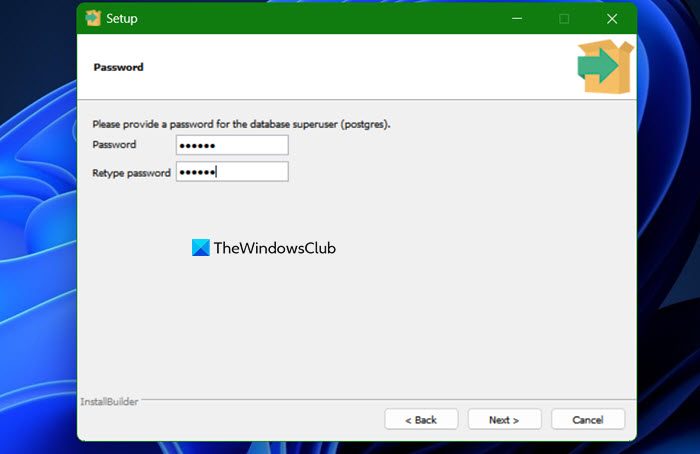
Set a password of your choice, since it is a local DB, there are no rules that you need to adhere to. Just pick a number that you can easily remember and click on Next.
Now, enter the port number if you have one, or leave it to the default number and click on Next. Then, you will be asked to select a language and location, do that from the Locale drop-down menu, and click on Next.
Finally, go through the summary, once satisfied, click on Next and then start the installation process. It might take some time, so, wait for the installation to complete and then move to the next step.
Read: Open Source Database Software Comparison and Features
3] Connect to your PostgreSQL using PgAdmin
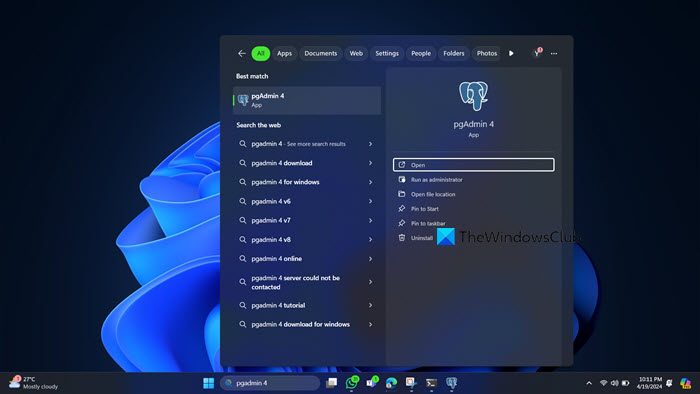
Finally, we are going to connect to your PostgreSQL using PgAdmin. So, search out “PgAdmin” from the Start Menu and open the application. To check your database, go to Servers, expand it, enter your password when asked, and then access your DB.
Now you can practice creating the database, user, tablespace, and fiddle with all the options to get accustomed to the environment.
Read: How to install Oracle Database on Windows?
How do you install postgres in Windows using CMD?
You can create a new Postgres user in Windows and give the administrative privileges, we recommend you follow the steps mentioned below.
- Reboot your Windows computer.
- Then, open Command Prompt with administrative privileges and then run –
runas /user:postgres cmd.exe. - This will trigger the installer so that you can follow the on-screen instructions to complete the process.
This will do the job for you.
Also Read: Difference between SQL and MySQL: Comparision.
PostgreSQL, also known as Postgres is a powerful open-source object-relational database system with a strong reputation for reliability, feature robustness, and performance. Installing PostgreSQL on a Windows system is straightforward.
If you are looking to setup PostgreSQL on Windows machine this guide will walk you through the installation process.
Prerequisites
Before proceeding with the installation of PostgreSQL on Windows, ensure the following prerequisites:
- Compatible Windows Version: Make sure your version of Windows is compatible with the version of PostgreSQL you plan to install.
- System Requirements: Check if your system meets the necessary hardware requirements such as RAM and disk space.
- Administrator Rights: You must have administrator privileges on your Windows machine to install new software.
Installing PostgreSQL on Windows
Following are steps described below to install PostgreSQL Windows operating system:
Step 1: Download PostgreSQL
To download PostgreSQL for Windows, start by visiting the PostgreSQL download Windows page. Click on the “Download the installer” link, which will redirect you to the EnterpriseDB website where the Windows installers provided by EnterpriseDB can be downloaded.

Select the desired version for your Windows architecture 32-bit or 64-bit and download the installer executable file. You can also install the latest PostgreSQL on Windows.
Step 2: Run the Installer
Navigate to the location where the installer was downloaded. Double-click on the executable file to start the installation process. If prompted by User Account Control, click ‘Yes’ to allow the installer to make changes to your system. Click “Next” on the welcome screen.
Set up the installation directory where PostgreSQL can be installed you can set it to by default or write a custom location.
Step 3: Installation Process
Follow these steps in the installation wizard:
- PostgreSQL Server: This is mandatory for running the database itself.
- pgAdmin 4: This is a graphical user interface (GUI) tool for managing your PostgreSQL databases. It’s highly recommended for easier database administration.
- StackBuilder: This is a package manager for installing additional PostgreSQL tools and drivers.
Step 4: Data Directory
The data directory stores your database files. The default location is usually within the PostgreSQL installation directory. You can keep this or choose a custom location. Click “Next”.

Step 5: Set a password
Create a strong password for the PostgreSQL superuser account. This account has full administrative privileges. Remember this password for future use.
Step 6: Port configuration
The default port for PostgreSQL is 5432. You can leave this unchanged unless you have a specific reason to use a different port. Click “Next”.
Install PostgreSQL on Our cheap Windows VPS!
With Ultahost, Hosting Windows VPS has never been easier or faster. Enjoy ultra-fast SSD NVME speeds with no dropouts and slowdowns at a low cost.
Step 7: Review settings
This screen provides a summary of your chosen installation options. Review everything carefully and make any necessary adjustments. Click “Next” to confirm.
Step 8: Start the installation
The installer will begin copying files and setting up PostgreSQL. This might take a few minutes depending on your system speed. If you selected StackBuilder, you might see a prompt to launch it after the installation. You can choose to launch it now or later.
Step 9: Installation complete
Once the installation is finished, click “Finish” to exit the wizard.
Verify the Installation
Press the Windows key, type “cmd”, and press Enter to open the Command Prompt window. Navigate to the PostgreSQL directory cd to C:\Program Files\PostgreSQL\16\bin, because the environment variables are not set up. Type the following command and press Enter:
psql --version
This should display the installed PostgreSQL version information.

Using pgAdmin
Locate the pgAdmin shortcut in your Start menu or search for “pgAdmin” in the Windows search bar. In pgAdmin, you’ll need to create a server connection. Provide the following details:
- Hostname: Usually “localhost” for local installations.
- Port: The port you configured during installation by default is 5432.
- Username: Enter “Postgres” as the superuser account.
- Password: Enter the password you set during installation.
Once connected you can explore your PostgreSQL databases create new users like MySQL, manage users, and perform various database administration tasks using the pgAdmin interface.
Additional Configuration
Following are some additional configurations for installing PostgreSQL on the Windows operating system:
- Environment Variables: It’s good practice to add PostgreSQL’s bin directory to your system’s PATH environment variable for easy access via the command line.
- Firewall Settings: Ensure the PostgreSQL port (default is 5432) is allowed through your firewall if external access is required.
Conclusion
By following this guide you can create a setup PostgreSQL on your Windows system. With the server running and the pgAdmin interface you are now prepared to create and manage databases leverage PostgreSQL’s powerful features, and start your database development.
While installing PostgreSQL on Windows is possible it is not recommended for production environments due to limitations and compatibility issues. Upgrading to an Ultahost VPS hosting plan provides a more reliable and secure solution. This allows for a seamless installation and configuration process, ensuring PostgreSQL runs smoothly and efficiently.
FAQ
What is PostgreSQL?
PostgreSQL is a powerful open-source database system used to store and manage data.
Why use PostgreSQL on Windows?
PostgreSQL on Windows offers a reliable and scalable solution for database management.
Is PostgreSQL free to install on Windows?
Yes, PostgreSQL is free to download and install on Windows operating systems.
Can I install PostgreSQL on different versions of Windows?
Yes, PostgreSQL supports installation on various versions of Windows, including Windows 10 and Windows Server.
Are there any special requirements for installing PostgreSQL on Windows?
No, the installation process for PostgreSQL on Windows is straightforward and does not require any special hardware or software.