
Found A Problem?
SmugWimp at smugwimp dot com 
19 years ago
If you make changes to your PHP.ini file, consider the following.
(I'm running IIS5 on W2K server. I don't know about 2K3)
PHP will not "take" the changes until the webserver is restarted, and that doesn't mean through the MMC. Usually folks just reboot. But you can also use the following commands, for a much faster "turnaround". At a command line prompt, type:
iisreset /stop
and that will stop the webserver service. Then type:
net start w3svc
and that will start the webserver service again. MUCH faster than a reboot, and you can check your changes faster as a result with the old:
<?php>


phpinfo();


?>
in your page somewhere.
I wish I could remember where I read this tip; it isn't anything I came up with...
lukasz at szostak dot biz 
19 years ago
You can have multiple versions of PHP running on the same Apache server. I have seen many different solutions pointing at achieving this, but most of them required installing additional instances of Apache, redirecting ports/hosts, etc., which was not satisfying for me.
Finally, I have come up with the simplest solution I've seen so far, limited to reconfiguring Apache's httpd.conf.
My goal is to have PHP5 as the default scripting language for .php files in my DocumentRoot (which is in my case d:/htdocs), and PHP4 for specified DocumentRoot subdirectories.
Here it is (Apache's httpd.conf contents):
---------------------------
# replace with your PHP4 directory
ScriptAlias /php4/ "c:/usr/php4/"
# replace with your PHP5 directory
ScriptAlias /php5/ "c:/usr/php5/"
AddType application/x-httpd-php .php
Action application/x-httpd-php "/php5/php-cgi.exe"
# populate this for every directory with PHP4 code
<Directory "d:/htdocs/some_subdir">
    Action application/x-httpd-php "/php4/php.exe"
    # directory where your PHP4 php.ini file is located at
    SetEnv PHPRC "c:/usr/php4"
</Directory>
# remember to put this section below the above
<Directory "d:/htdocs">
    # directory where your PHP5 php.ini file is located at
    SetEnv PHPRC "c:/usr/php5"
</Directory>
---------------------------
This solution is not limited to having only two parallel versions of PHP. You can play with httpd.conf contents to have as many PHP versions configured as you want.
You can also use multiple php.ini configuration files for the same PHP version (but for different DocumentRoot subfolders), which might be useful in some cases.
Remember to put your php.ini files in directories specified in lines "SetEnv PHPRC...", and make sure that there's no php.ini files in other directories (such as c:\windows in Windows).
And finally, as you can see, I run PHP in CGI mode. This has its advantages and limitations. If you have to run PHP as Apache module, then... sorry - you have to use other solution (the best advice as always is: Google it!).
Hope this helps someone.
jp at iticonsulting dot nl 
19 years ago
If you get 404 page not found on Windows/IIS5, have a look at C:\SYSTEM32\INETSRV\URLSCAN
There is a .ini file there that prevents some files from being served by IIS, even if they exist, instead IIS will give a 404. The urlscan logfile (same place) should give you some insight into what parameter is preventing a page from loading, if any.
If you’re looking to develop with PHP on a Windows system, knowing how to install PHP on Windows is essential for setting up your development environment. Installing PHP on Windows can seem a bit tricky at first, but with the right steps, it’s a straightforward process. In this guide, we’ll walk you through how to install PHP on Windows, including configuration and verification, so you can start coding in PHP smoothly and efficiently. Whether you’re a beginner or an experienced developer, these steps will help you get up and running with PHP in no time.
Prerequisites
- A Windows machine with administrative access.
- An internet connection to download PHP and related files.
1: Download PHP
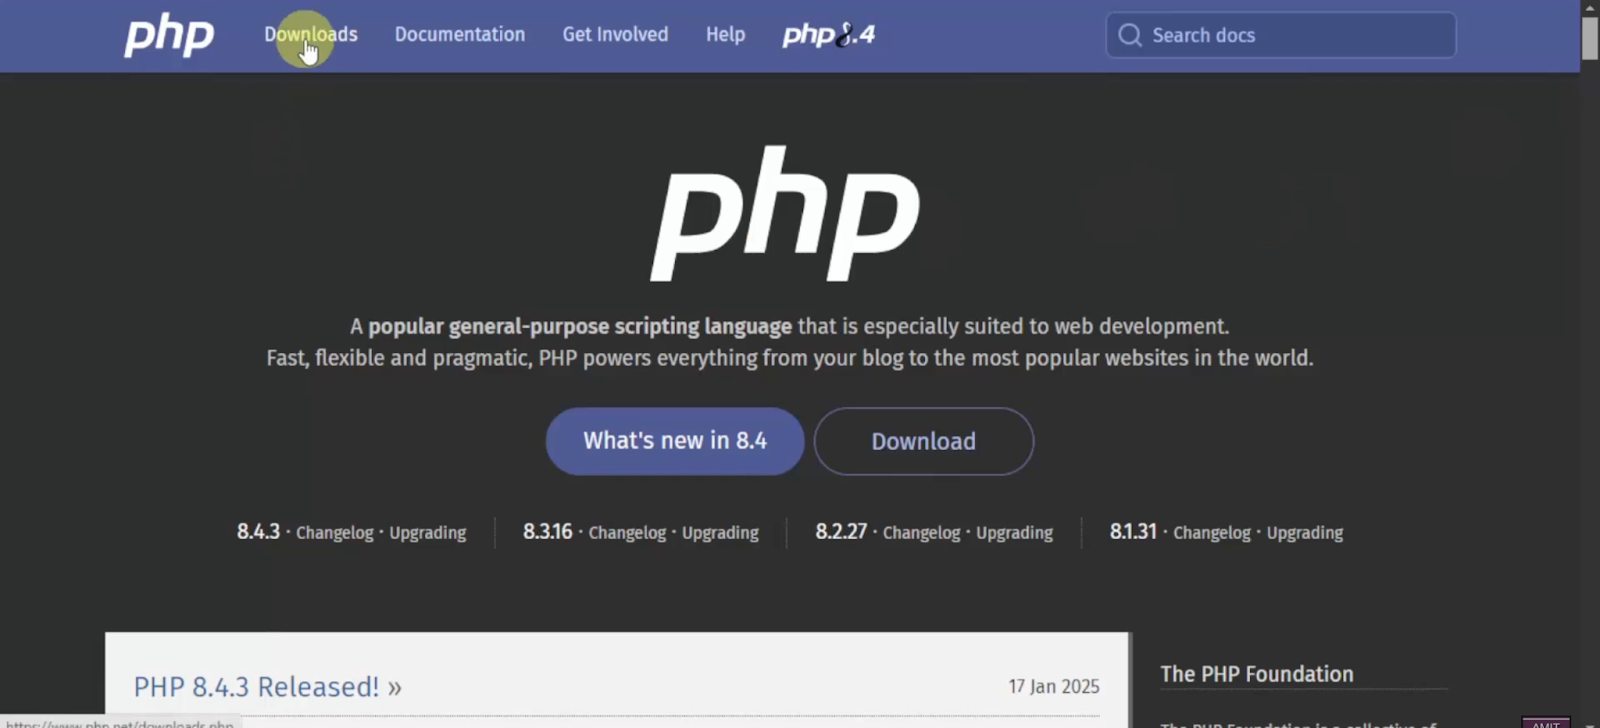
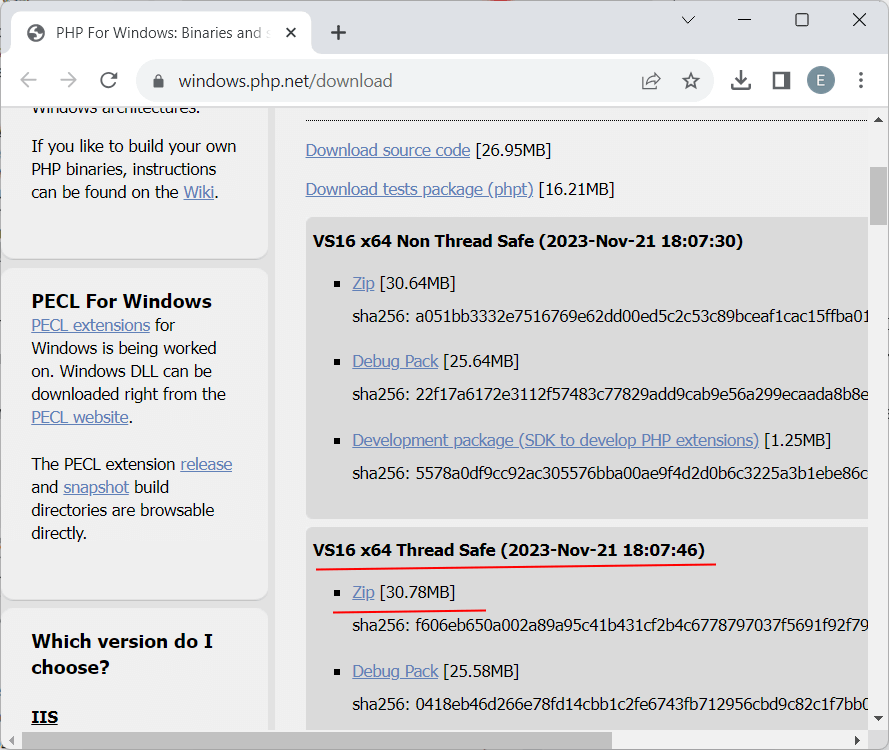
- Visit the PHP Website
Go to the official PHP download page to get the latest stable version of PHP for Windows. - Choose the Thread-Safe Version
Under the Windows downloads section, select the “Thread Safe” version, as it is recommended for web server usage. Download the ZIP file (e.g.,php-8.x.x-Win32-vs16-x64.zip).
2: Extract the PHP Files
- Locate the Downloaded File
Navigate to your downloads folder and locate the ZIP file you downloaded. - Extract PHP to a Folder
Right-click the ZIP file, select “Extract All,” and chooseC:\phpas the destination folder. This is the recommended location for easy configuration, but you can use a different path if needed.
3: Configure PHP Environment Variables
To use PHP from the command line, you’ll need to set it in your system’s PATH environment variable.
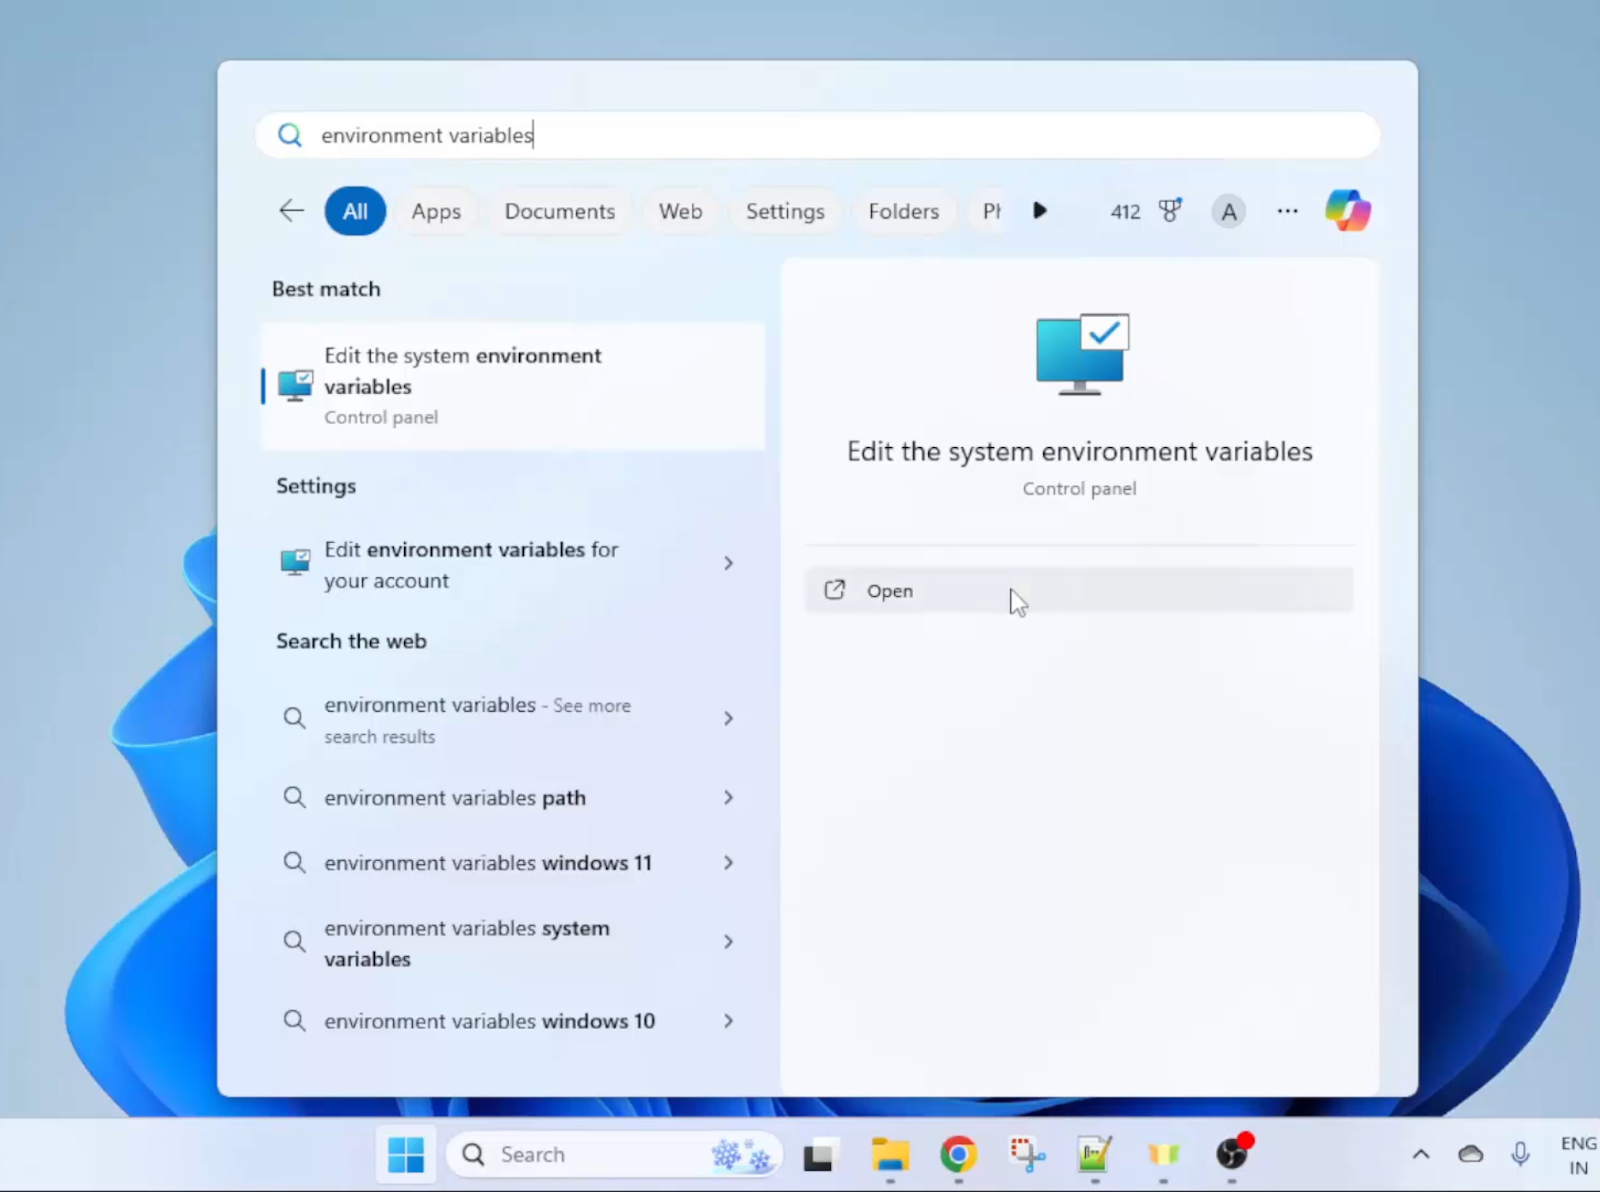
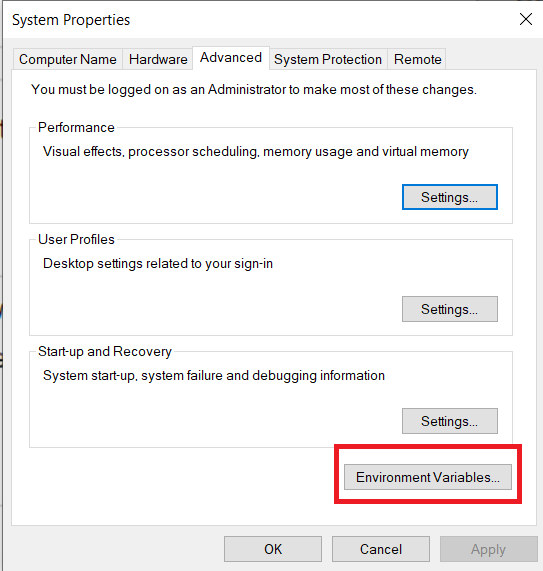
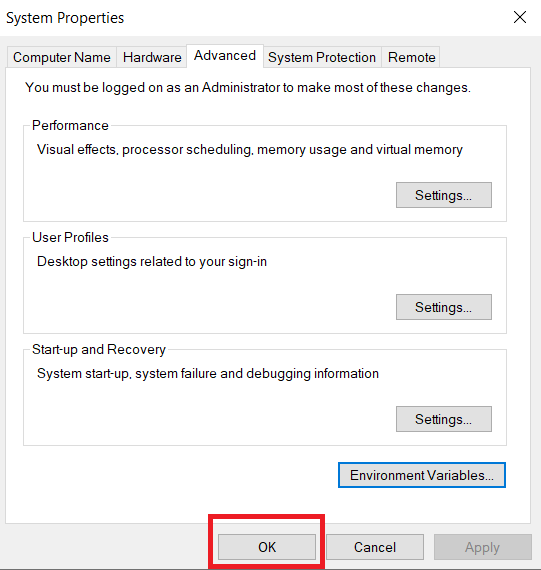
- Open Environment Variables
- Go to Start, type “Environment Variables,” and select Edit the system environment variables.
- In the System Properties window, click on Environment Variables.
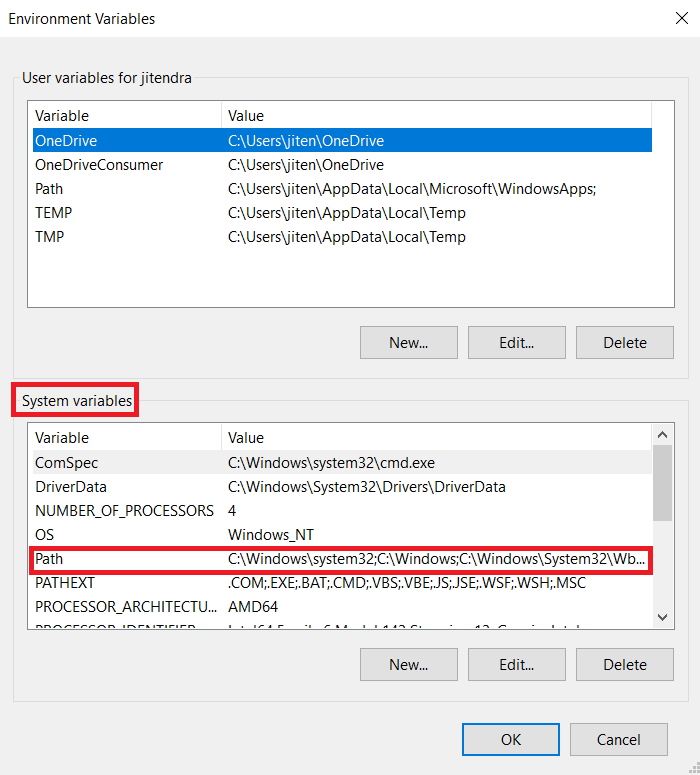
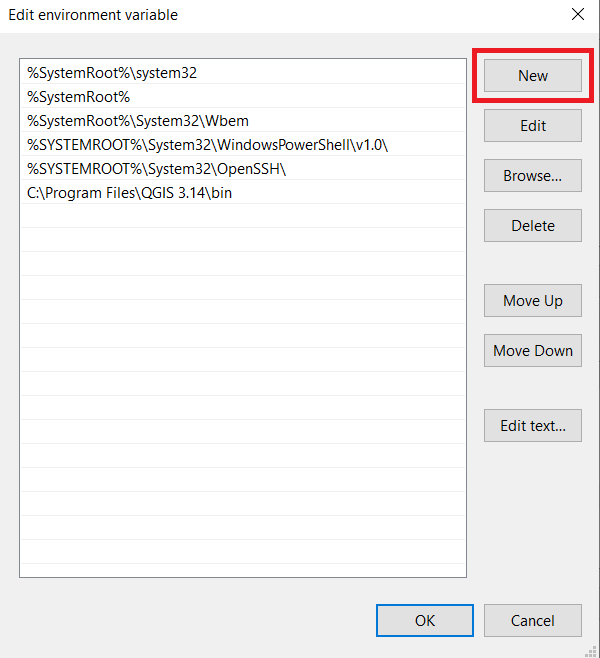
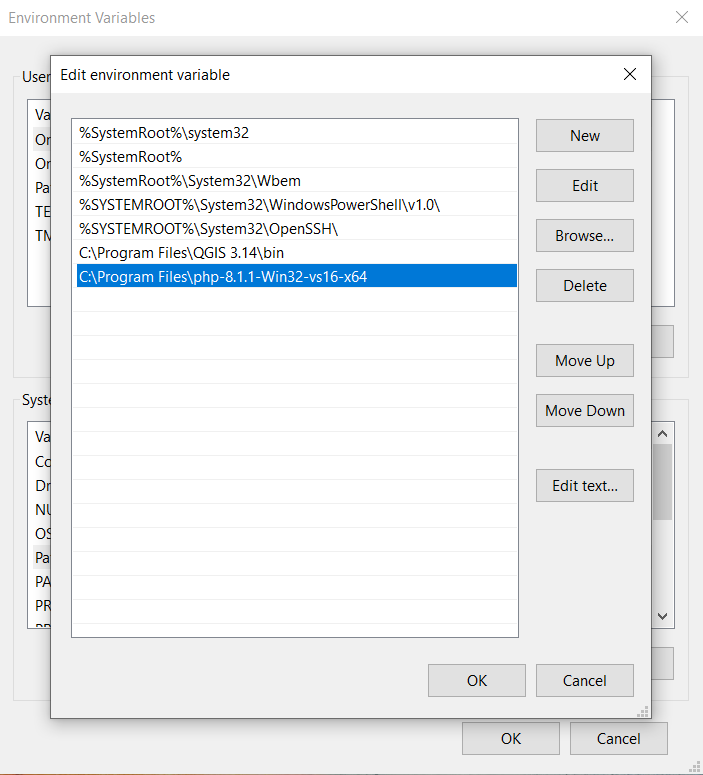
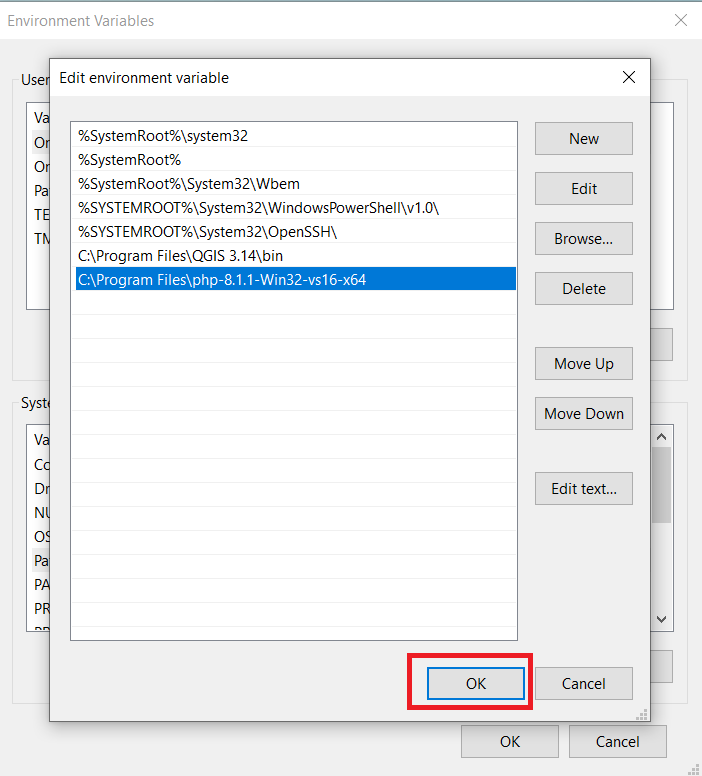
- Add PHP to the Path
- Under System Variables, find the
Pathvariable and click Edit. - Click New and add the path to your PHP folder (e.g.,
C:\php). - Click OK to save and close all windows.
- Under System Variables, find the
4: Configure php.ini
The php.ini file allows you to configure PHP’s behavior.
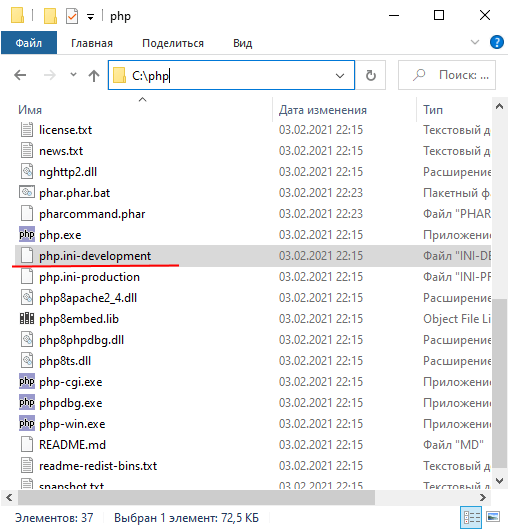
- Locate the
php.iniFile
In theC:\phpdirectory, you’ll see two files:php.ini-developmentandphp.ini-production. Choose one based on your environment:- For development, rename
php.ini-developmenttophp.ini. - For a live server, rename
php.ini-productiontophp.ini.
- For development, rename
- Edit Key Settings
Open thephp.inifile in a text editor (like Notepad) and set the following parameters:- Enable Extensions: Uncomment lines for any extensions you need by removing the semicolon (
;) in front of them, e.g.,extension=mysqli. - Set Timezone: Search for
date.timezoneand set it to your timezone (e.g.,date.timezone = "America/New_York").
- Enable Extensions: Uncomment lines for any extensions you need by removing the semicolon (
- Save and Close
Save the changes and close the file.
5: Verify PHP Installation
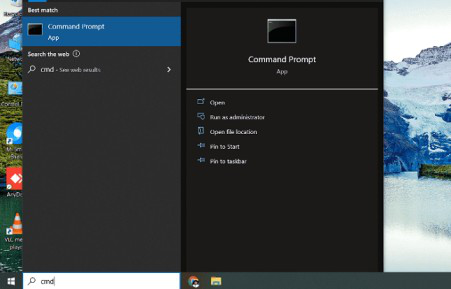
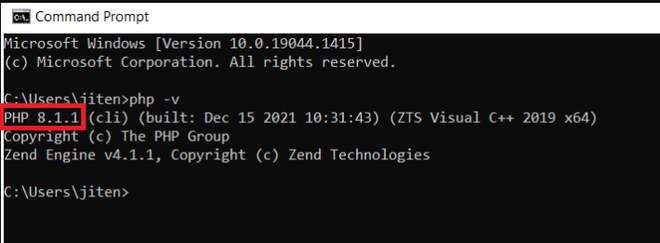
- Open Command Prompt
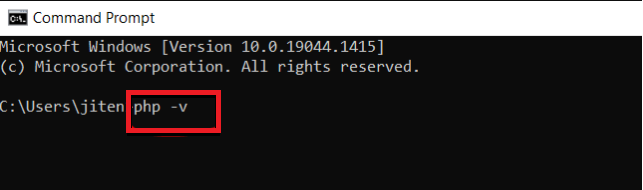
PressWin + R, typecmd, and press Enter to open the command prompt. - Check PHP Version
Typephp -vand press Enter. If PHP is installed correctly, it will display the version and other details.
6: Run a Test PHP Script
Now, let’s ensure PHP is working by creating a simple script.
- Create a PHP File
Open a text editor and type the following PHP code:phpCopy code<?php echo "Hello, PHP is working!";Save the file astest.phpin yourC:\phpdirectory or any directory of your choice. - Run the PHP Script from Command Line
In the command prompt, navigate to the directory where you savedtest.phpand run:Copy codephp test.phpYou should see the output:Hello, PHP is working!.
7: Integrate PHP with a Web Server (Optional)
If you want to run PHP scripts via a web server, you can install a local server like Apache or Nginx.
Option A: Install XAMPP or WAMP (Recommended for Beginners)
- XAMPP and WAMP are all-in-one packages that include Apache, PHP, and MySQL.
- Download and install one of these packages, and it will automatically configure PHP with Apache.
Option B: Manual Apache Configuration (Advanced Users)
Restart Apache, and PHP should be configured to work with your server.
Download and install Apache.
Open Apache’s httpd.conf file and add the following lines to configure PHP:apacheCopy code# Add to the end of httpd.conf LoadModule php_module "C:/php/php8apache2_4.dll" AddHandler application/x-httpd-php .php PHPIniDir "C:/php"
Conclusion
And there you have it! You’re now ready to start learning PHP and build interactive web pages on your Windows machine. For more in-depth tutorials, don’t hesitate to visit Newtum. Dive deeper, experiment, and happy coding!
Edited and Compiled by
This blog was compiled and edited by Rasika Deshpande, who has over 4 years of experience in content creation. She’s passionate about helping beginners understand technical topics in a more interactive way.
About The Author
Installing PHP on Windows 11 can seem troublesome, especially if you’re new to programming or web development. However, with the right guidance, you can set up the latest version of PHP quickly and easily. In this article, we’ll walk you through the steps of installing PHP 8.4.3 on Windows 11 and running your first PHP program. Let’s dive in!
PHP (Hypertext Preprocessor) is a popular server-side scripting language widely used for web development. Its flexibility and ease of use make it suitable for developing dynamic web applications. The latest version, PHP 8.4.3, offers performance improvements and new features that enhance coding efficiency and security.
By installing PHP, you can:
- Create dynamic web pages.
- Connect to databases.
- Utilize various programming libraries and frameworks.
Read More: Installing Ubuntu 22.04 LTS on Windows 11 Using VirtualBox
Step-by-Step Guide to Install PHP 8.4.3 on Windows 11
Step 1: Download PHP
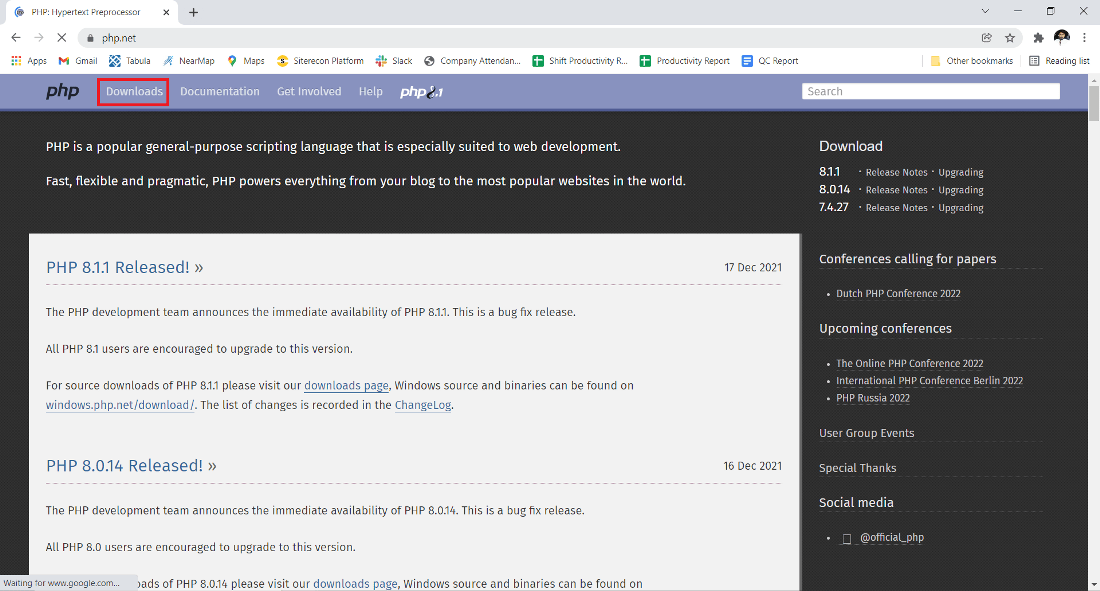
- Open your preferred web browser and search for “PHP” in your search engine. Navigate to the official PHP website.
- Once on the PHP homepage, click on the Downloads section.
- Locate the Windows Downloads option. Choose the link for the current version, which is 8.4.3 in this case.
- You will see two versions available: Non-Thread Safe and Thread Safe. We recommend selecting the Thread Safe version. This version is suitable for use with web servers such as Apache and Nginx.
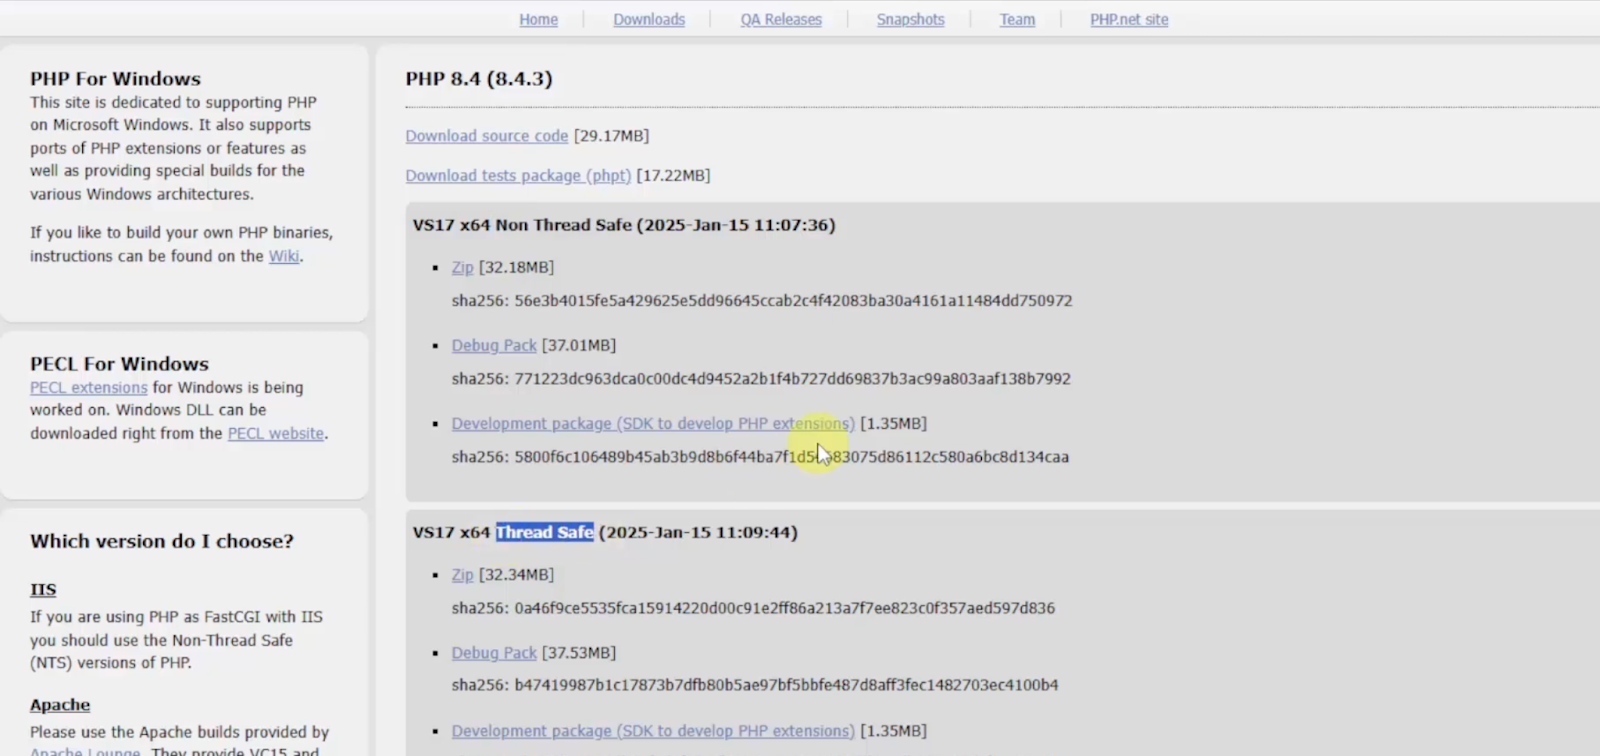
- Click on the appropriate zip file to start downloading.
- Once the download is complete, navigate to the folder where the zip file was saved.
- Right-click on the zip file, select Extract All and specify the folder name as PHP 8.4.3.
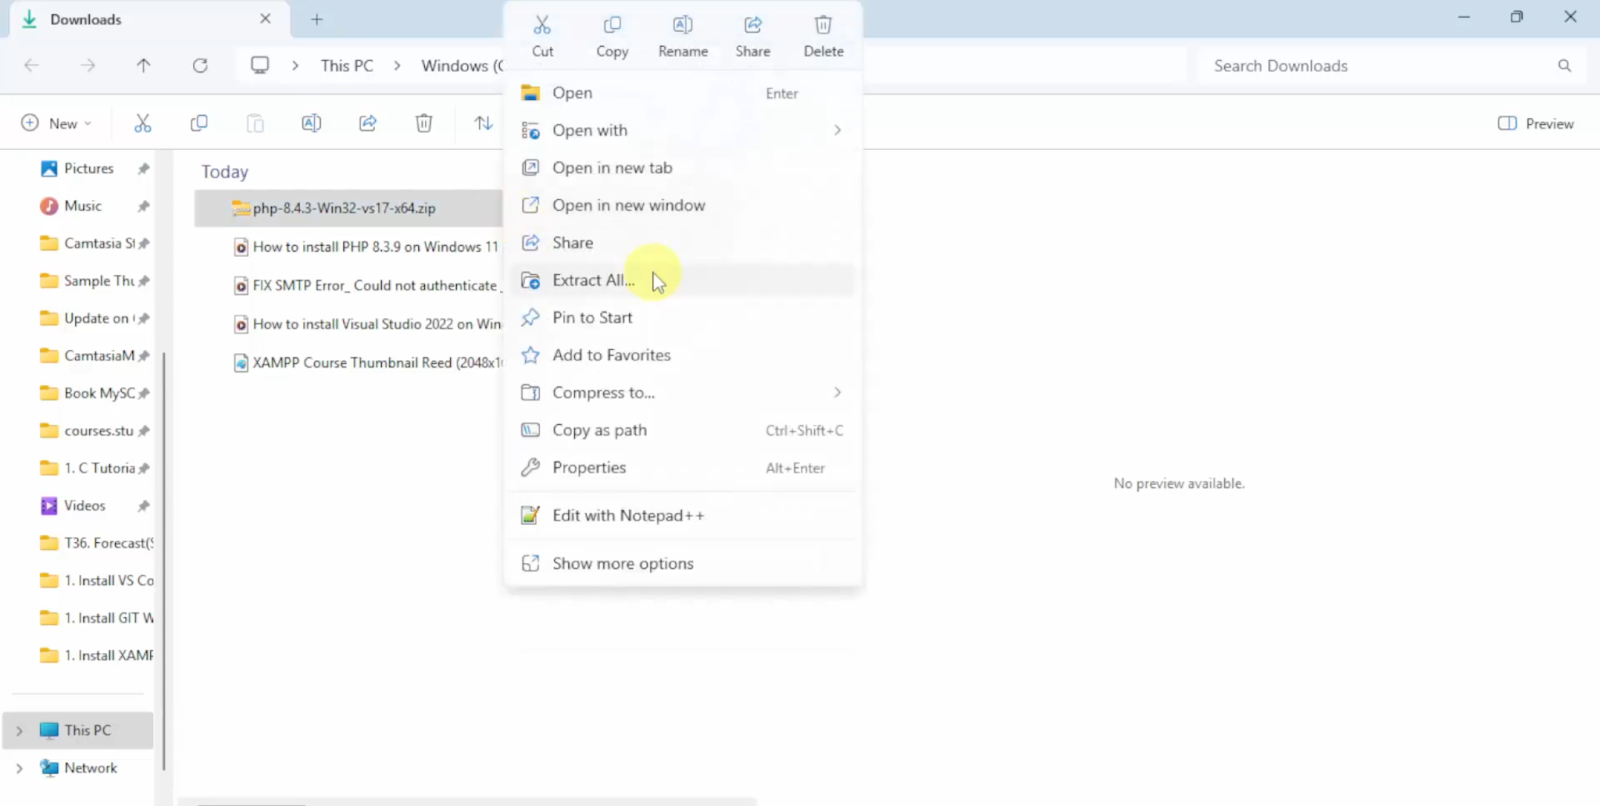
- Click Extract to unzip the files.
Step 3: Move PHP to Program Files
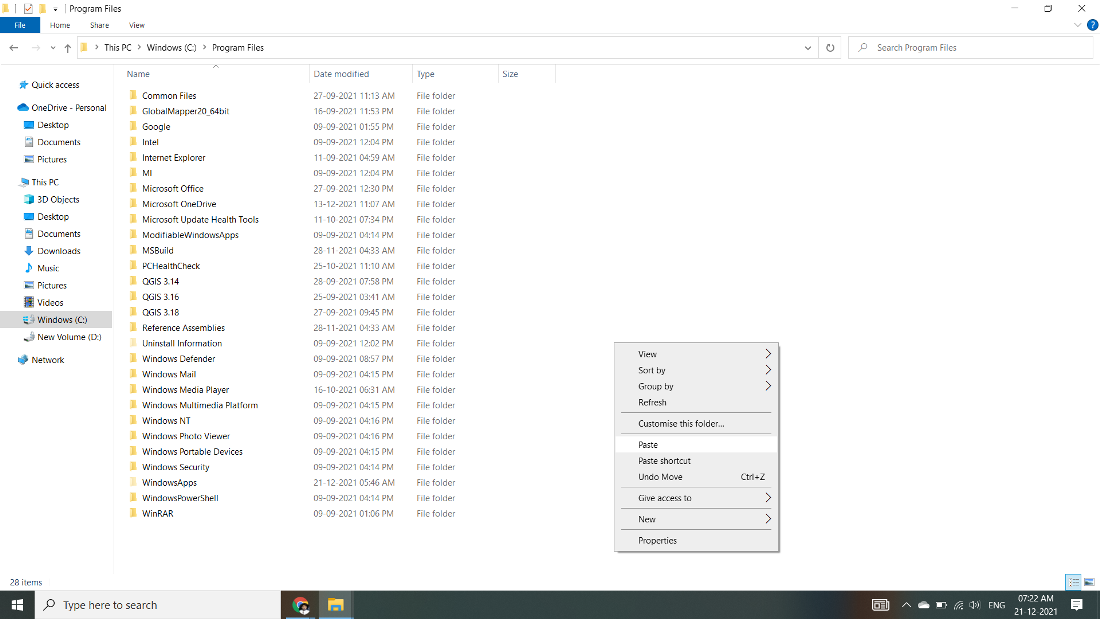
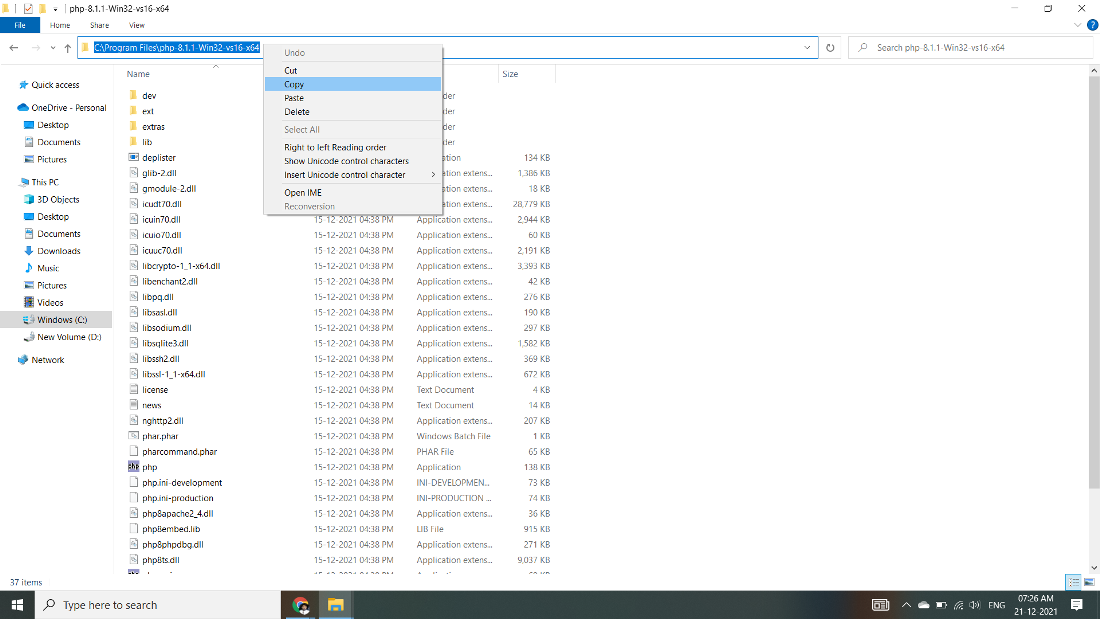
- After extracting, right-click on the PHP folder you just created and select Cut.
- Navigate to the C: drive and open the Program Files folder.
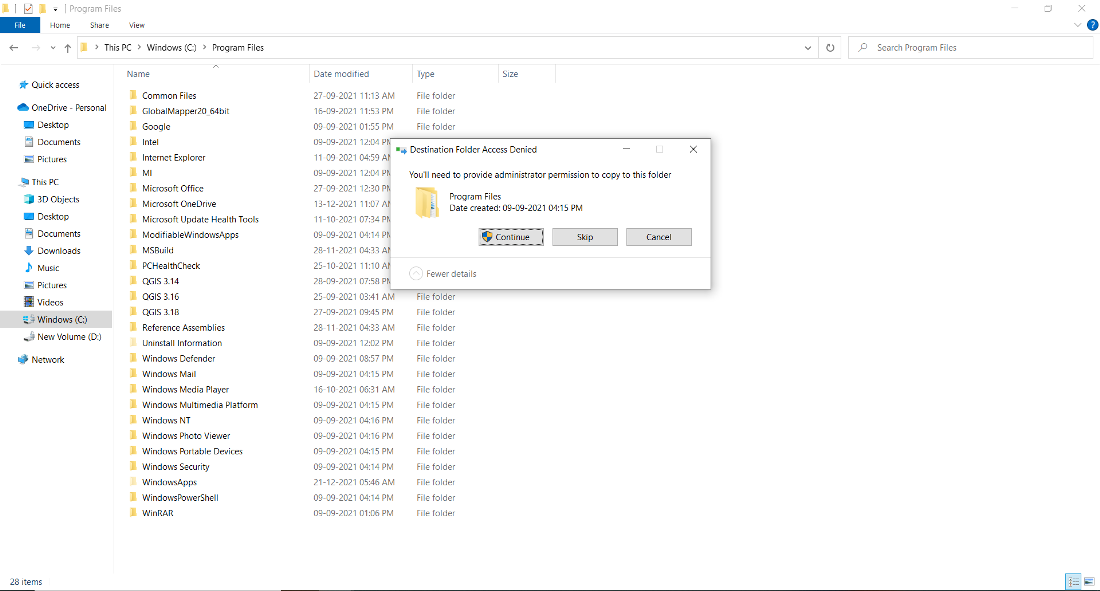
- Right-click in the directory and select Paste. You may need to click Continue to authorize this action.
Step 4: Set Up Environment Variables
To run PHP from the command line, you need to add it to your system’s environment variables:
- Open the Start Menu and type “environment variables.” Click on Edit the system environment variables.
- In the System Properties window, click on the Advanced tab and then on Environment Variables.
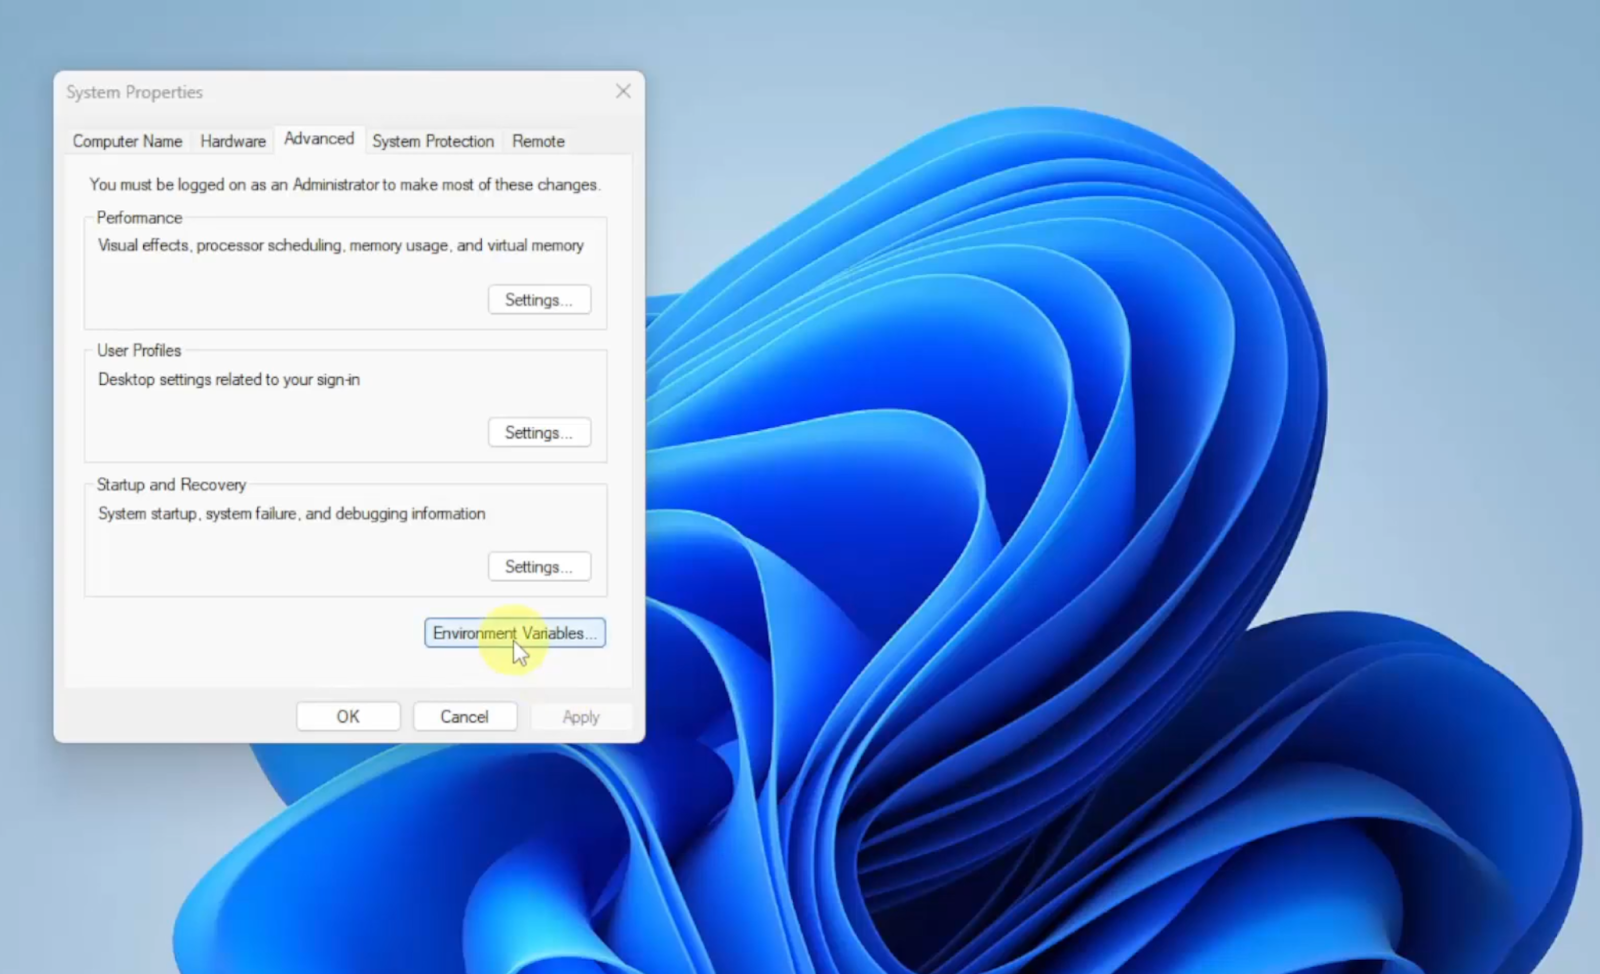
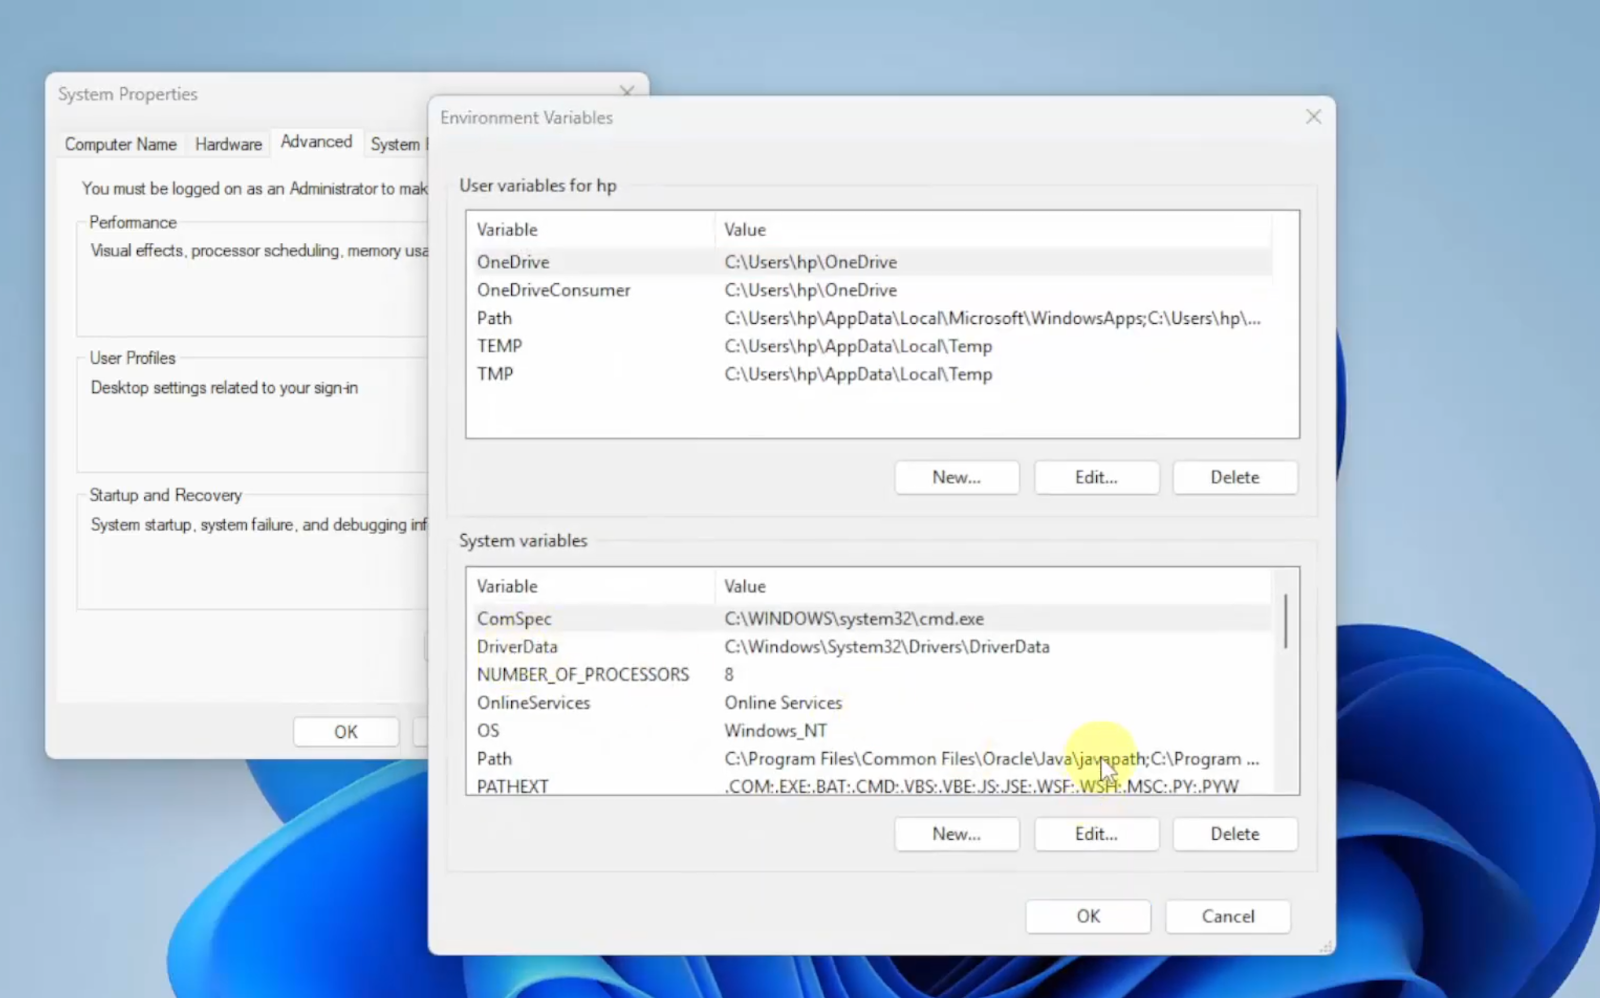
- Find the Path variable in the System variables section and select Edit.
- Click on New and paste the path to your PHP installation (e.g., C:\Program Files\PHP 8.4.3).
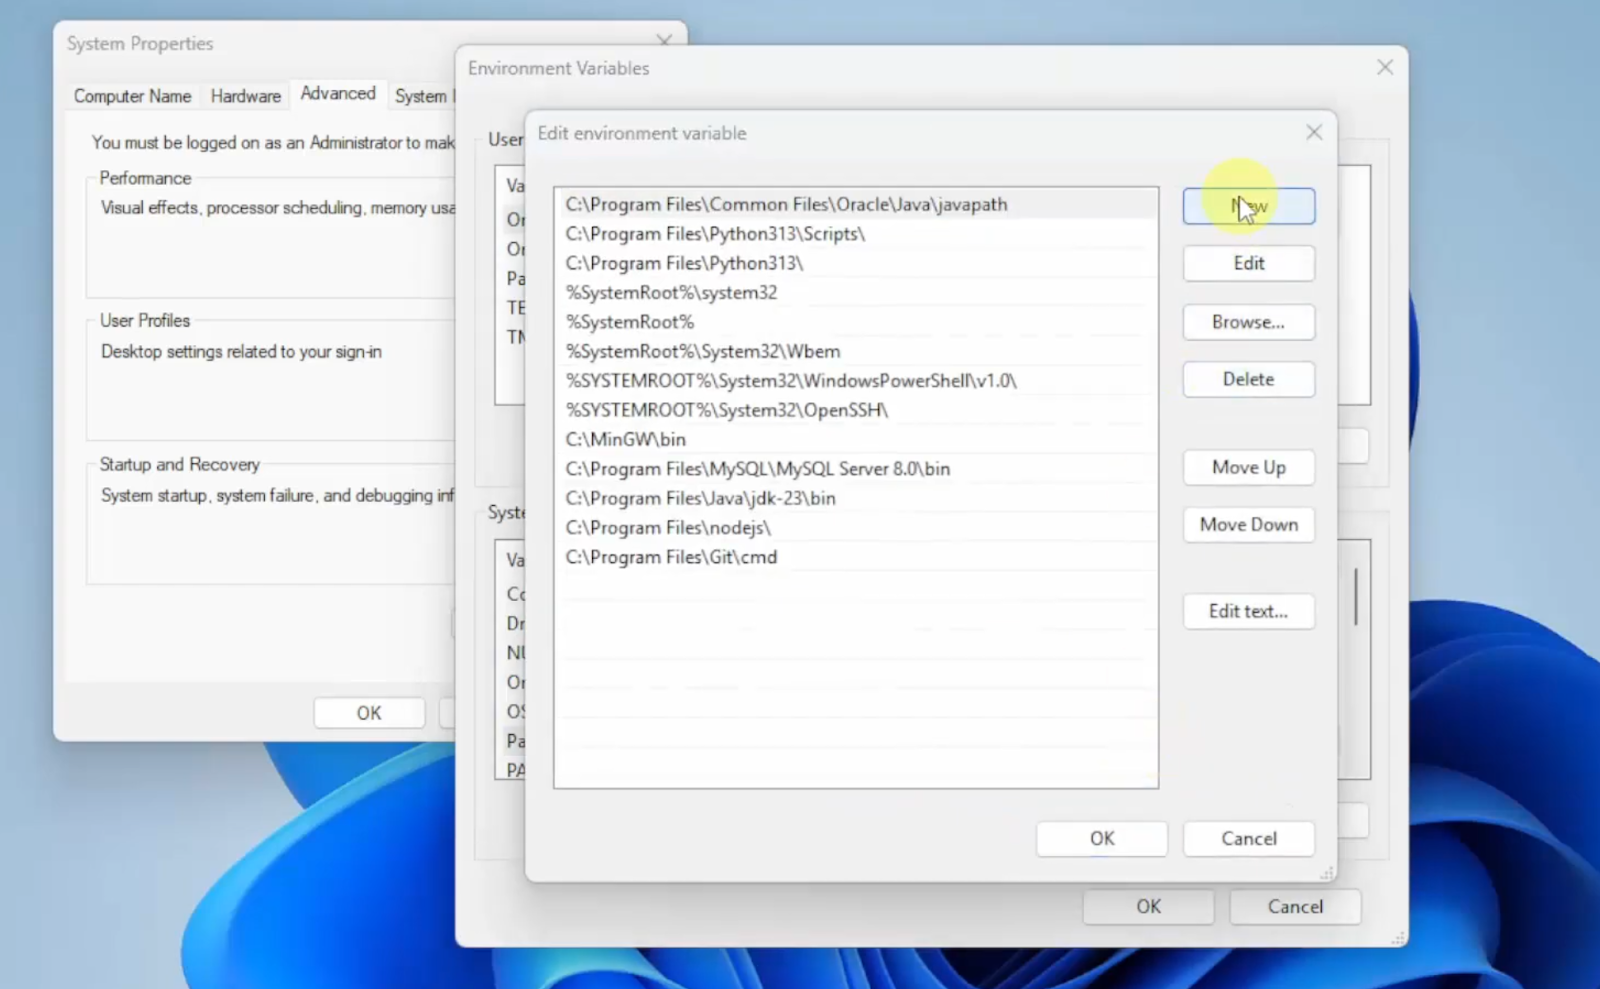
- Click OK to save your changes.
Step 5: Verify the Installation
- Open the Command Prompt (you can search for “CMD” in the Start Menu).
- Type the following command and hit Enter:
PHP -- version - If PHP was installed correctly, you should see the version 8.4.3 displayed.
Step 6: Create Your First PHP Program
Now that PHP is successfully installed, let’s write your first PHP script:
- Go to any drive, for instance, the D: drive, and create a new folder.
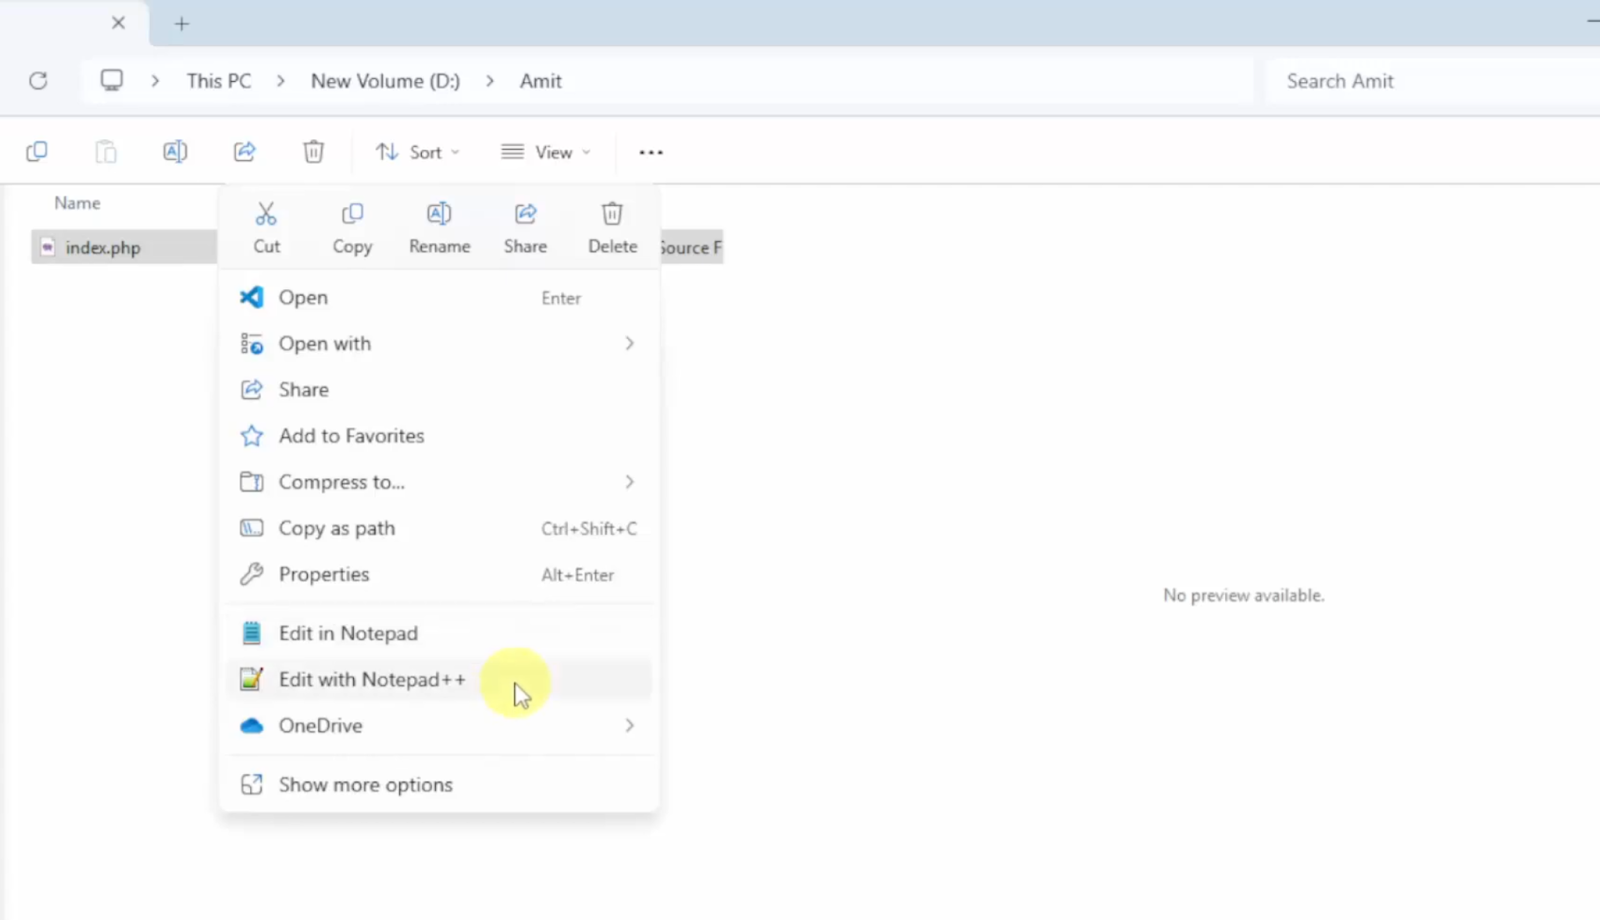
- Inside this folder, right-click and create a new text document. Name it indnex.php.
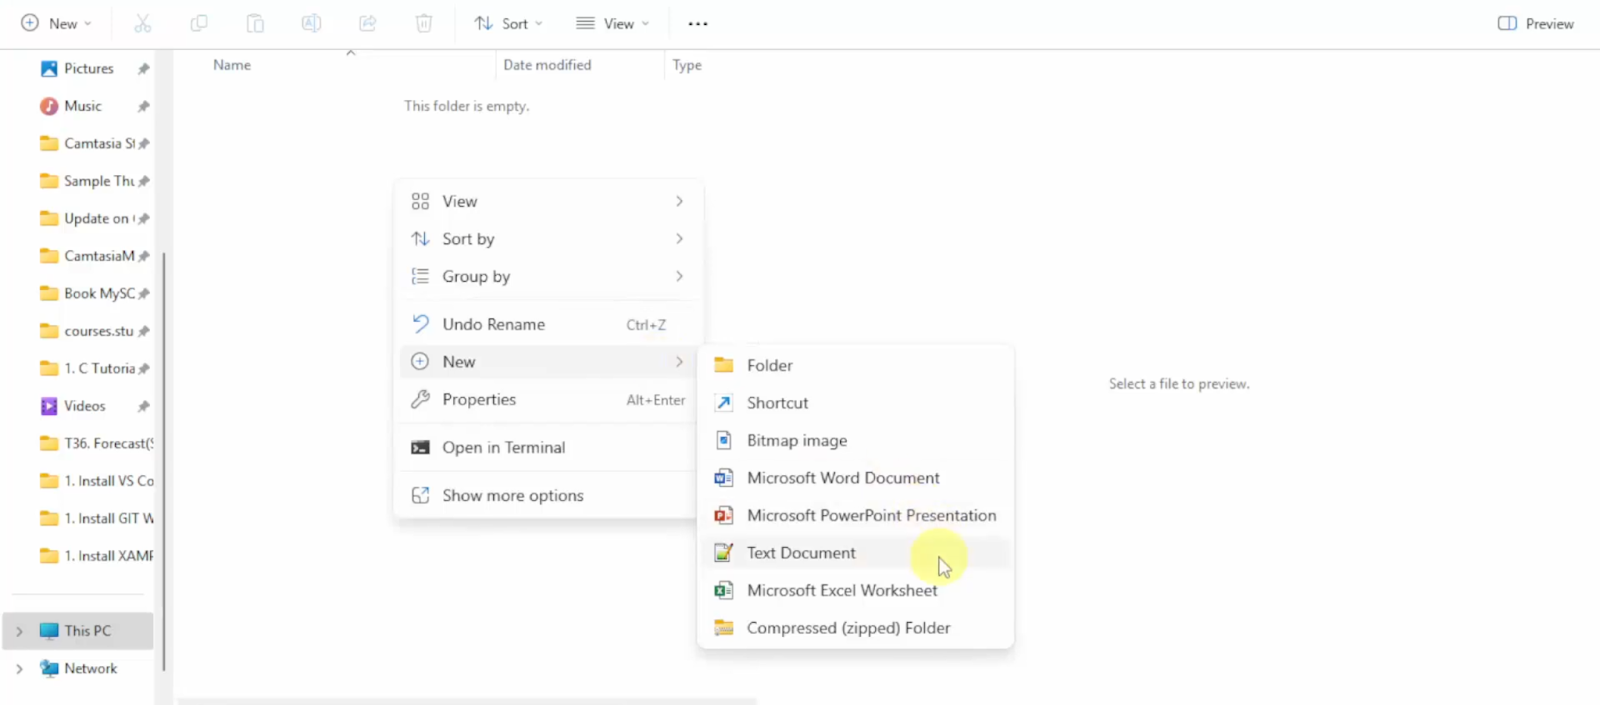
- Right-click on index.php and choose to open it with Notepad or Notepad++.
- Add the following code to your PHP file:
<?php
echo ‘Zarnab’;
?> - Save the file and close the editor.
Step 7: Run Your PHP Script
- Right-click and select “Open in terminal”
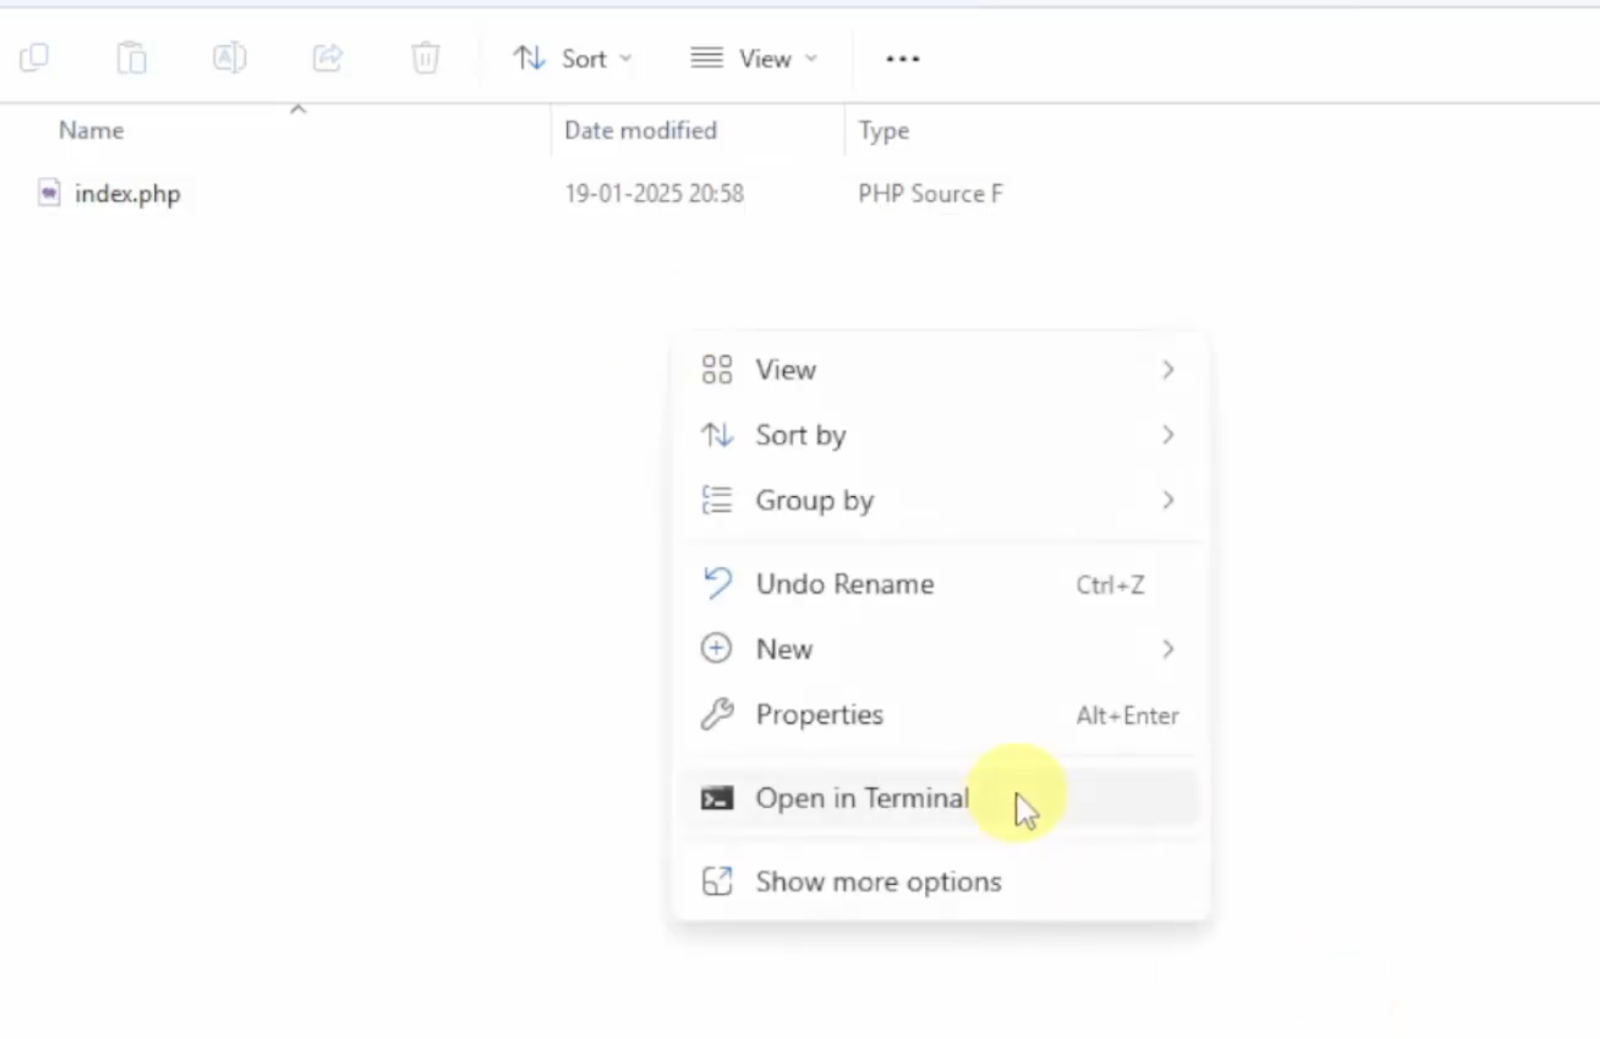
- When the terminal opens, type the following command and press enter.
PS D:\Zarnab> dirOnly file be visible index.php. Now to run it type
php index.php - If everything is set up correctly, you should see “Zarnab” printed in the terminal. Congratulations! You have just installed PHP and run your first program.
Also Read: How to Install VirtualBox on Windows 11
Conclusion
Successfully installing PHP 8.4.3 on Windows 11 provides a solid foundation for web development projects. By following the steps outlined in this guide, you can efficiently set up your development environment and leverage the performance enhancements and new features offered by this latest PHP version.
Last Updated :
09 Sep, 2024
PHP is a general-purpose scripting language geared towards web development. It is an open-source software (OSS), which is free to download and use. PHP stands for «Hypertext Preprocessor». PHP files are saved with an extension called .php. It supports many databases MySQL, Oracle, etc.
Installation of PHP on Windows
Follow the below steps to install PHP on Windows:
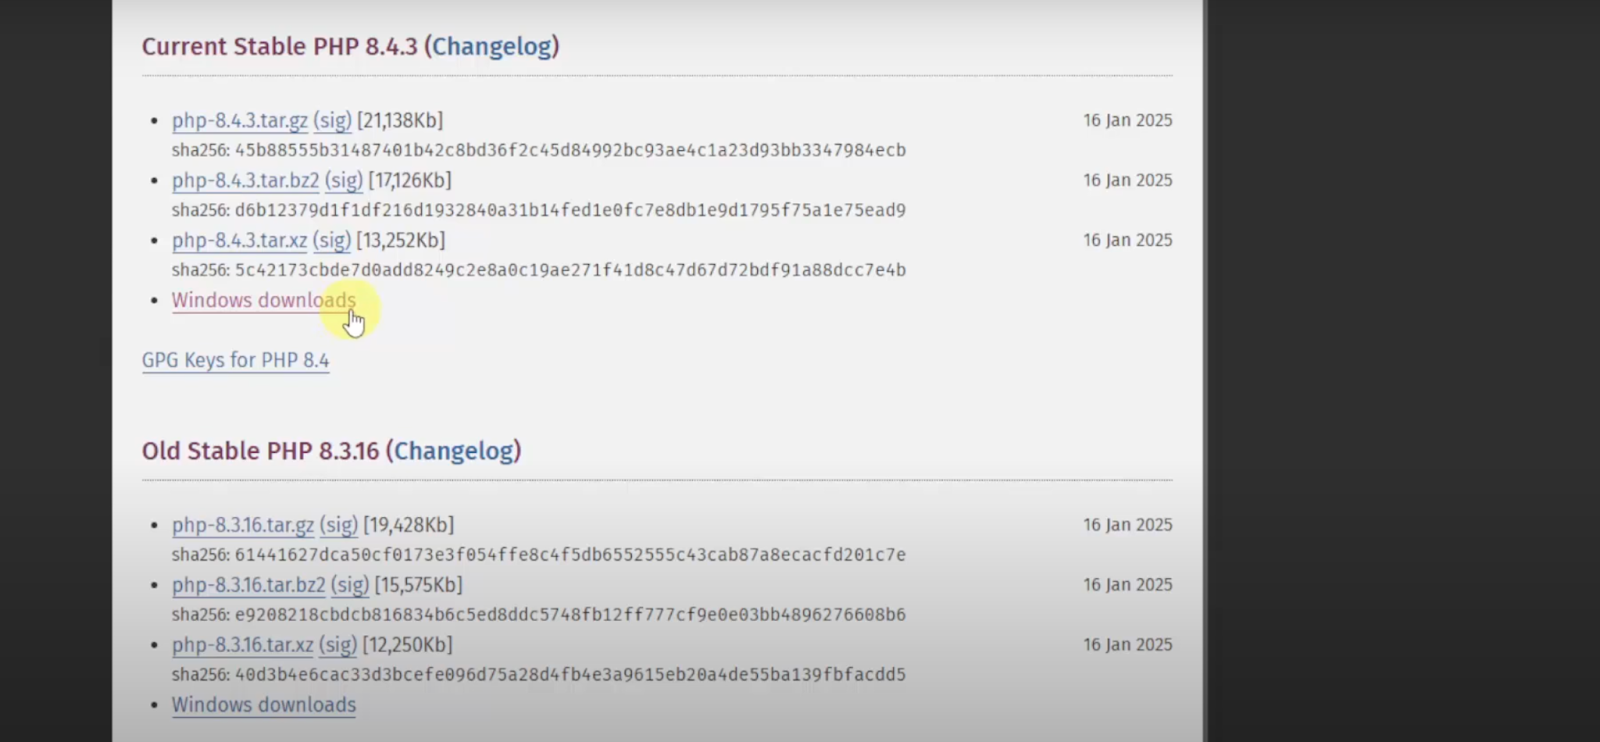
Step 1: Visit https://www.php.net/downloads website using any web browser and click on Downloads.
Step 2: Click on the Windows «Downloads» button.
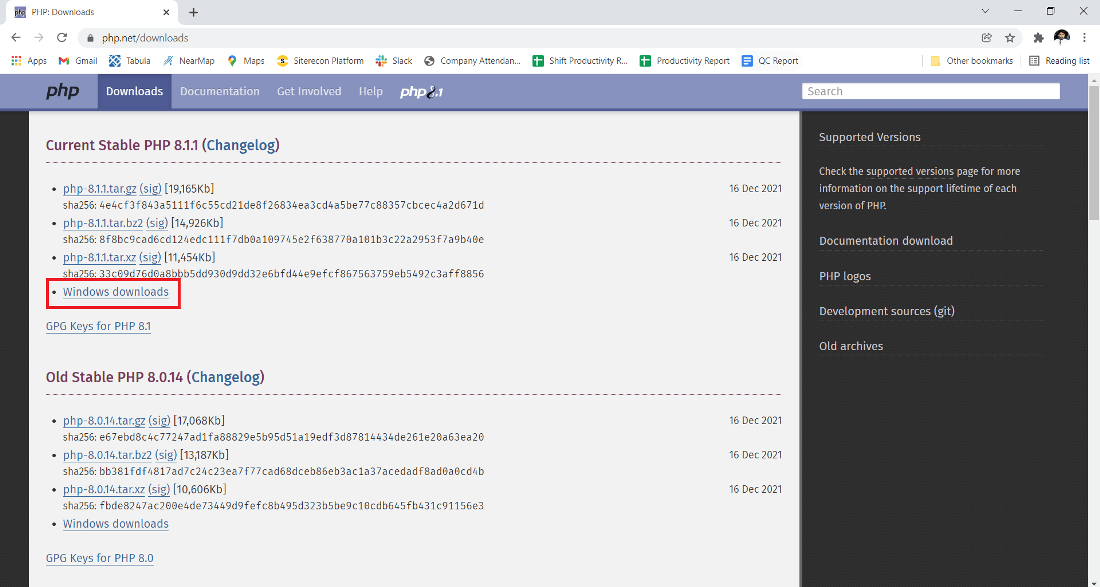
Step 3: The new webpage has different options, choose the Thread safe version, and click on the zip button and Download it.
.jpg)
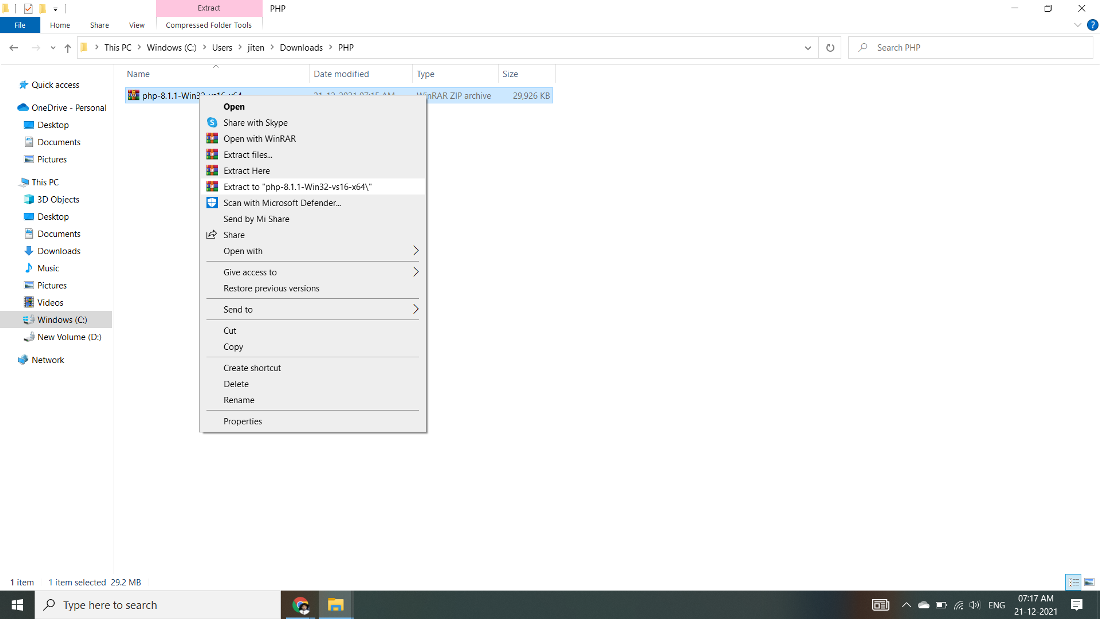
Step 4: Now check for the zip file in downloads in your system and extract it.
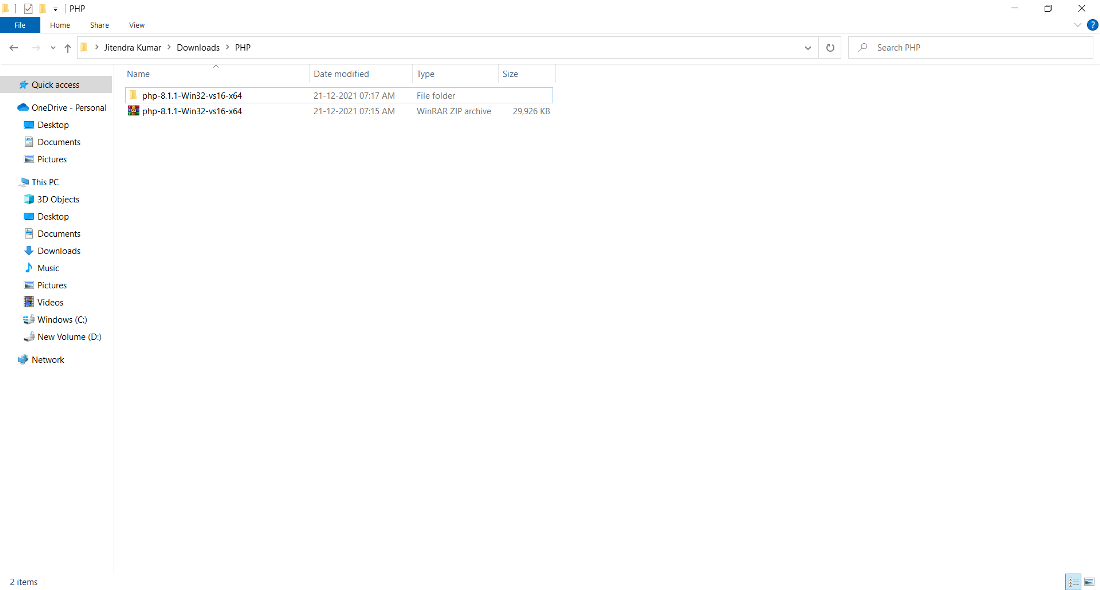
Step 5: After extracting, you get the extracted folder.
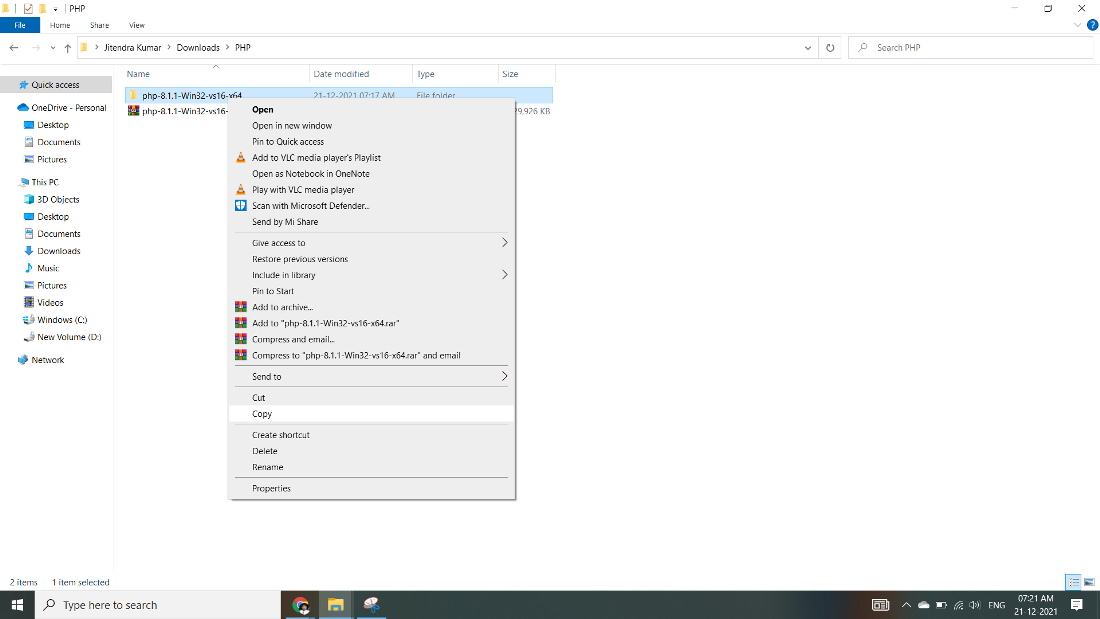
Step 6: Now copy the extracted folder.
Step 7: Now paste the copy folder in your windows drive in the Program files folder.
Step 8: Now the Permission Windows appears to paste the folder in program files then click on «Continue».
Step 9: Now after pasting the folder then copy the address of the folder in program files.
Step 10: Now click on Start Menu and search «Edit the system environment variables» and open it.
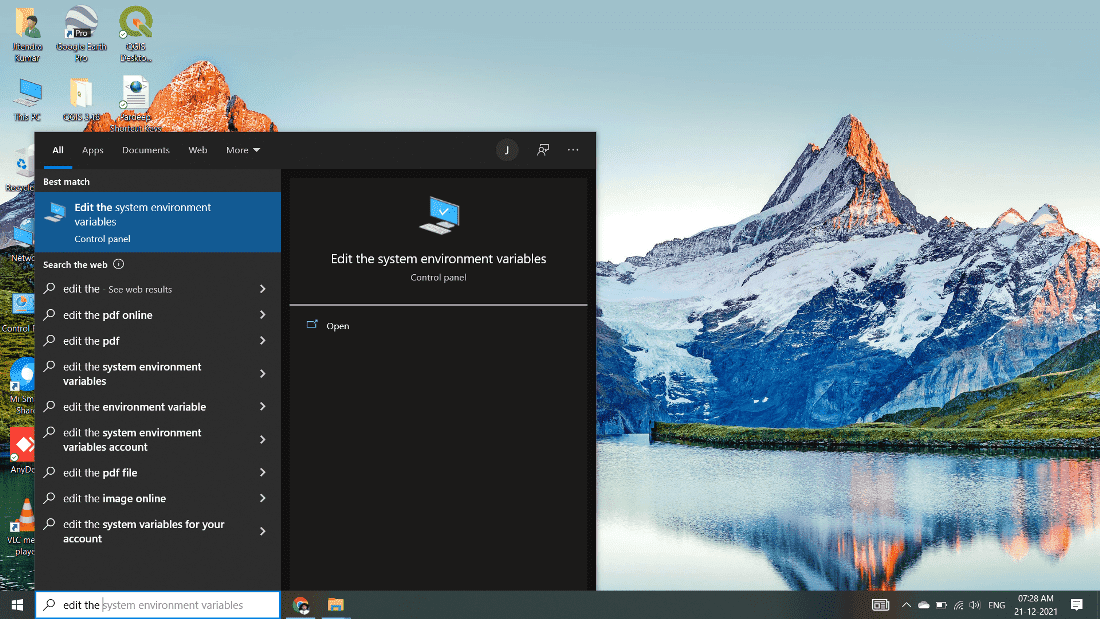
Step 11: After opening System, Variable New window appears, and click on «Environment Variables…»
Step 12: Now go to the «System variables» Path option and double click on Path.
Step 13: Next screen will open and click on the «New» button.
Step 14: After New Paste the address we copy from program files to new and click on Enter button.
Step 15: Now Click on the OK button.
Step 16: Click on the OK button.

Step 17: Click on OK for saving changes.
Step 18: Now your PHP is installed on your computer. You may check by going to the «Start» menu typing Command Prompt. Open it.
Step 19: When the Command Prompt opens, type php -v
Step 20: Now enter the command prompt to show the version of PHP installed on your computer.
Finally, You have successfully installed PHP on your Windows 10 system.
Последнее обновление: 25.11.2023
Есть разные способы установки всего необходимого программного обеспечения. Мы можем устанавливать компоненты по отдельности, а можем использовать уже готовые
сборки на подобие Denwer или EasyPHP. В подобных сборках компоненты уже имеют начальную настройку и уже готовы для создания сайтов. Однако рано или поздно разработчикам
все равно приходится прибегать к установке и конфигурации отдельных компонентов, подключения других модулей. Поэтому мы будем устанавливать все компоненты по отдельности.
В качестве операционной системы будет использоваться Windows.
Что подразумевает установка PHP? Во-первых, нам нужен интерпретатор PHP. Во-вторых, необходим веб-сервер, например, Apache, с помощью которого мы сможем обращаться
к ресурсам создаваемого нами сайта.
Для установки PHP перейдем на офсайт разработчиков https://www.php.net/downloads. На странице загрузок мы можем найти различные дистрибутивы
для операционной системы Linux. Если нашей операционной системой является Windows, то нам надо загрузить один из пакетов со страницы https://windows.php.net/download.
Интерпретатор PHP имеет две версии: Non Thread Safe и Thread Safe. В чем разниц между ними?
Версия Thread Safe позволяет задействовать многопоточность, тогда как Non Thread Safe — однопоточная версия.
Выбрем версию Thread Safe.
Распакуем загруженный архив в папку, которую назовем php. Пусть эта папка у нас будет располагаться в корне диска C, а ее полный путь будет C:\php.
Теперь нам надо выполнить минимальную конфигурацию PHP. Для этого зайдем в распакованный архив и найдем там файл php.ini-development.
Это файл
начальной конфигурации интерпретатора. Переименуем этот файл в php.ini и затем откроем его в текстовом редакторе.
Найдем в файле строку:
;extension_dir = "ext"
Эта строка указывает на каталог с подключаемыми расширениями для PHP. Расширения позволяют задействовать нам некоторую дополнительную функциональность,
например, работу с базой данных. Все расширения находятся в распакованном каталоге ext.
Раскомментируем эту строку, убрав точку с запятой и укажем полный путь к папке расширений php:
extension_dir = "C:\php\ext"
Остальное содержимое файла оставим без изменений.
Теперь установим веб-сервер.