
MSI packages is available for x64 (64 bit) processor architectures and, in some older releases only, for x86 (32 bit). We’ll use screenshots from an x64 installation below (the 32 bit installer is very similar).
Contents
- Installation UI
- Welcome
- License Agreement
- Custom Setup
- Database Authentication/Security Related Properties
- Other Database Properties
- Ready to Install
- End
- New Entries in Start Menu
- Uninstall UI
- Silent Installation
- Properties
- Features
- Silent Installation Examples
- Silent Uninstall
- Installation Logs
- Running 32 and 64 Bit Distributions on the Same Machine
Installation UI
This is the typical mode of installation. To start the installer, just click on
the mariadb-<major>.<minor>.<patch>.msi
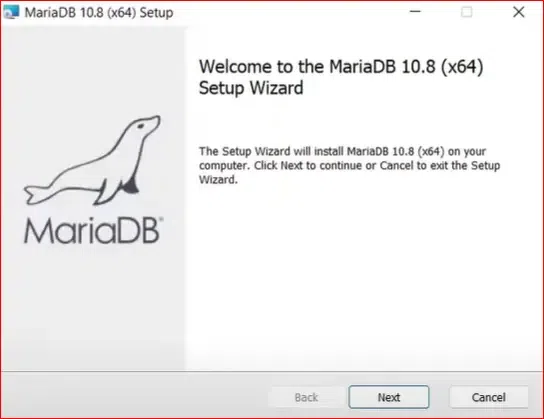
Welcome

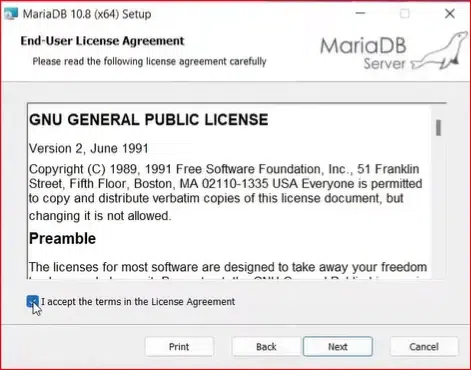
License Agreement
Click on «I accept the terms»
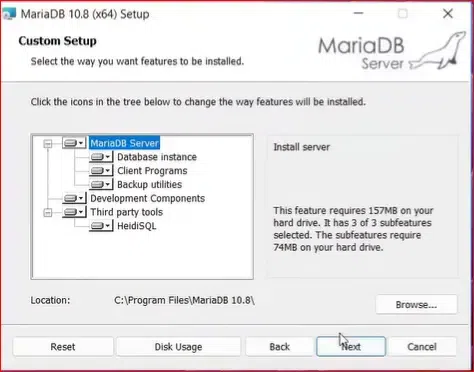
Custom Setup
Here, you can choose what features to install. By default, all features are
installed with the exception of the debug symbols. If the «Database instance»
feature is selected, the installer will create a database instance, by default
running as a service. In this case the installer will present additional
dialogs to control various database properties. Note that you do not
necessarily have to create an instance at this stage. For example, if you
already have MySQL or MariaDB databases running as services, you can just
upgrade them during the installation. Also, you can create additional database
instances after the installation, with the mysql_install_db.exe utility.
NOTE: By default, if you install a database instance, the data directory
will be in the «data» folder under the installation root. To change the data
directory location, select «Database instance» in the feature tree, and use the
«Browse» button to point to another place.
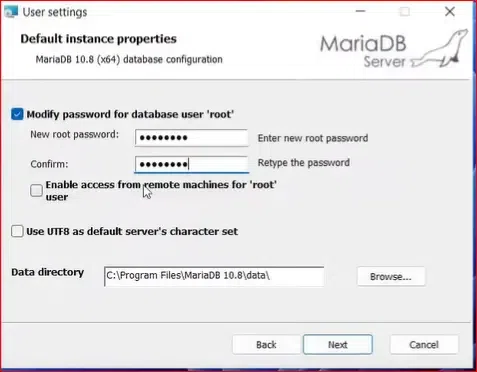
This dialog is shown if you selected the «Database instance» feature. Here, you
can set the password for the «root» database user and specify whether root can
access database from remote machines. The «Create anonymous account» setting
allows for anonymous (non-authenticated) users. It is off by default and it is
not recommended to change this setting.
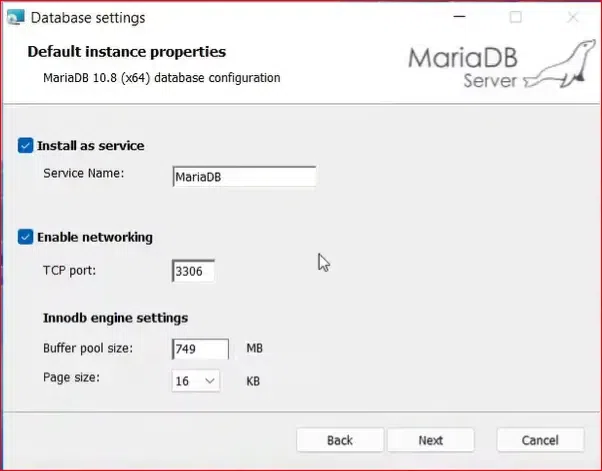
Other Database Properties
- Install as service
- Defines whether the database should be run as a service. If it should be run as a service, then it also defines the service name. It is recommended to run your database instance as a service as it greatly
simplifies database management. In MariaDB 10.4 and later, the default service name used by the MSI installer is «MariaDB». In 10.3 and before, the default service name used by the MSI installer is «MySQL». Note that the default service name for the--installand--install-manualoptions formysqld.exeis «MySQL» in all versions of MariaDB.
- Enable Networking
- Whether to enable TCP/IP (recommended) and which port MariaDB should
listen to. If security is a concern, you can change the bind-address
parameter post-installation to bind to only local addresses. If the «Enable
networking» checkbox is deselected, the database will use named pipes for
communication.
- InnoDB engine settings
- Defines the InnoDB buffer pool size, and the InnoDB page size. The default buffer pool size is 12.5% of RAM, and depending on your requirements you can give InnoDB more (up to 70-80% RAM). 32 bit versions of MariaDB have restrictions on maximum buffer pool size, which is approximately 1GB, due to virtual address space limitations for 32bit processes. A 16k page size is suitable for most situations. See the innodb_page_size system variable for details on other settings.
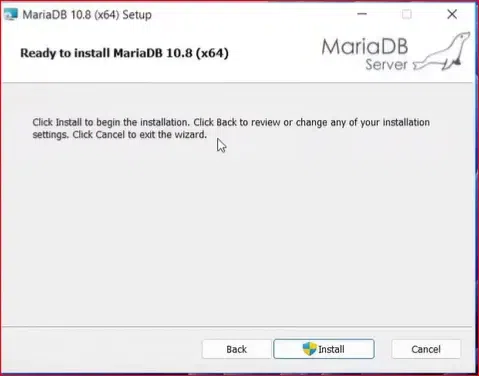
Ready to Install
At this point, all installation settings are collected. Click on the «Install»
button.
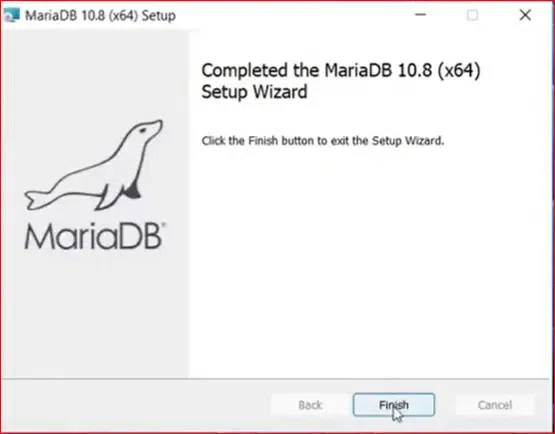
End
Installation is finished now. If you have upgradable instances of
MariaDB/MySQL, running as services, this dialog will present a «Do you want to
upgrade existing instances» checkbox (if selected, it launches the Upgrade
Wizard post-installation).
If you installed a database instance as service, the service will be running
already.
Installation will add some entries in the Start Menu:
- MariaDB Client — Starts command line client mysql.exe
- Command Prompt — Starts a command prompt. Environment is set such that «bin»
directory of the installation is included into PATH environment variable, i.e
you can use this command prompt to issue MariaDB commands (mysqldadmin, mysql
etc…)
- Database directory — Opens the data directory in Explorer.
- Error log — Opens the database error log in Notepad.
- my.ini — Opens the database configuration file my.ini in Notepad.
- Upgrade Wizard — Starts the Wizard to upgrade an existing MariaDB/MySQL
database instance to this MariaDB version.
Uninstall UI
In the Explorer applet «Programs and Features» (or «Add/Remove programs» on
older Windows), find the entry for MariaDB, choose Uninstall/Change and click
on the «Remove» button in the dialog below.
If you installed a database instance, you will need to decide if you want to
remove or keep the data in the database directory.
Silent Installation
The MSI installer supports silent installations as well. In its simplest form
silent installation with all defaults can be performed from an elevated command
prompt like this:
msiexec /i path-to-package.msi /qn
Note: the installation is silent due to msiexe.exe’s /qn switch (no user
interface), if you omit the switch, the installation will have the full UI.
Properties
Silent installations also support installation properties (a property would
correspond for example to checked/unchecked state of a checkbox in the UI, user
password, etc). With properties the command line to install the MSI package
would look like this:
msiexec /i path-to-package.msi [PROPERTY_1=VALUE_1 ... PROPERTY_N=VALUE_N] /qn
The MSI installer package requires property names to be all capitals and contain
only English letters. By convention, for a boolean property, an empty value
means «false» and a non-empty is «true».
MariaDB installation supports the following properties:
Features
Feature is a Windows installer term for a unit of installation. Features
can be selected and deselected in the UI in the feature tree in the «Custom
Setup» dialog.
Silent installation supports adding features with the special property
ADDLOCAL=Feature_1,..,Feature_N and removing features with
REMOVE=Feature_1,..., Feature_N
Features in the MariaDB installer:
Silent Installation Examples
All examples here require running as administrator (and elevated command line
in Vista and later)
- Install default features, database instance as service, non-default datadir
and portmsiexec /i path-to-package.msi SERVICENAME=MySQL DATADIR=C:\mariadb5.2\data PORT=3307 /qn
- Install service, add debug symbols, do not add development components (client
libraries and headers)msiexec /i path-to-package.msi SERVICENAME=MySQL ADDLOCAL=DEBUGSYMBOLS REMOVE=DEVEL /qn
Silent Uninstall
To uninstall silently, use the REMOVE=ALL property with msiexec:
msiexec /i path-to-package.msi REMOVE=ALL /qn
To keep the data directory during an uninstall, you will need to pass an
additional parameter:
msiexec /i path-to-package.msi REMOVE=ALL CLEANUPDATA="" /qn
Installation Logs
If you encounter a bug in the installer, the installer logs should be used for
diagnosis. Please attach verbose logs to the bug reports you create. To create a verbose
installer log, start the installer from the command line with the /l*v
switch, like so:
msiexec.exe /i path-to-package.msi /l*v path-to-logfile.txt
Running 32 and 64 Bit Distributions on the Same Machine
It is possible to install 32 and 64 bit packages on the same Windows x64.
Apart from testing, an example where this feature can be useful is a
development scenario, where users want to run a 64 bit server and develop both
32 and 64 bit client components. In this case the full 64 bit package can be
installed, including a database instance plus development-related features
(headers and libraries) from the 32 bit package.
Skip to content
Summary: in this tutorial, you will learn step by step how to download and install MariaDB on your system.
Download MariaDB
To download MariaDB, you go to the download page and select the latest version to download:
Download MariaDB
To install MariaDB on Windows, you follow these steps:
Step 1. Start installation
Double-click the installer to start the installation process.

Step 2. Accept the end-user license agreement
Read the end-user license agreement and click the Next button:

Step 3. Select features
Choose the directory that stores the MariaDB files and click the Next button. The default location on Windows is C:\Program Files\MariaDB 10.4\.

Step 4. Set root’s password
Type a password for the root user account. You will use this password to connect to MariaDB later. The root user is the default user of the MariaDB, which has all privileges.
If you don’t want the root user to login from a remote machine, you need to uncheck the Enable access from remote machines for 'root' user checkbox.
The Use UTF8 as the default server's character set option allows you to use the UTF8 as the default character set when you create new databases and tables.
Once you complete selecting all options, click the Next button to go to the next step.

Step 5. Configure Database
In this step:
First, install MariaDB as a service by selecting the Install as service option. It allows you to rename the service name.
Second, configure the port for the MariaDB. By default, MariaDB uses 3306 port. However, you can change it to your port if you want.
Third, specify the parameters for the Innodb engine including buffer pool size and page size. 16KB page size is suitable for most databases.
Finally, click the Next button to go to the next step.

Step 6. Submit usage information
If you want to submit anonymous usage information so that MariaDB developers can improve the system, check the checkbox and click the Next button.

Step 7. Ready to install MariaDB
Click the Install button to start installing MariaDB

It will take a few minutes depending on the system.

Step 8. Complete the MariaDB setup
Click the Finish button to complete MariaDB setup

You can find the MariaDB tools in the startup menu:
In this tutorial, you have learned step by step how to install MariaDB on Windows.
Was this tutorial helpful ?
Last Updated :
05 Feb, 2024
MariaDB is an open-source relational database management system commonly used for its fast speed, scalability, and also rich features. The installation and configuration of MariaDB on a Windows OS is a very simple procedure that enables the users to easily create a powerful database server for the different applications.
In this article, we will go through the installation and configuration of MariaDB on Windows.
Install and Configure MariaDB
Step 1: Download MariaDB Installer for Windows
The first step is to download the MariaDB installer for Windows from the official MariaDB website (Download from here). Select the proper version for our Windows platform (32-bit or 64-bit). By clicking on the download link, the installer executable will be saved to our local machine.
Step 2: Run the MariaDB Installer
Find the downloaded installer executable and run it with the administrator privileges. The installer will guide us through the installation process, offering many choices for different components and also configurations.
Follow These Steps:
a. Accept the End-User License Agreement: Read the end-user license agreement and click accept the terms in the license agreement and then click Next button.
b. Select Features: Here we can choose what features to install. We can also see the default install folder location from the setup page itself. So since it is a fresh install we are fine with the default options and proceed by clicking the next button.
c. Database Password: Here we can set the password of the root user in the MariaDB database and specify whether root can access database from remote machines along with other options. There is also an option to enable remote machine access for the root user and the folder location of MariaDB data directory. Click on next button.
d. Configure Database: In this page, We have options like install as a service defines whether the database should be run as a service if it should be run as a service then it also defines the service name. It is recommended to run our database instance as a service. Now choose the option enable networking this defines whether to enable TCP IP which is recommended and which port media database should listen to.
Additionally we also have option to set database pool size and page size during the install itself. So after defining our preferred options, click on the next button.
e. Execute Configuration: We should see the MariaDB ready to install page and at this point all installation settings are collected and click on the install button to start the MariaDB installation.
Step 3: Complete the Installation
once the MariaDB has been installed we should see the following page as that shown below. click on the finish button to finish the installation. Now the MariaDB is installed on your windows.
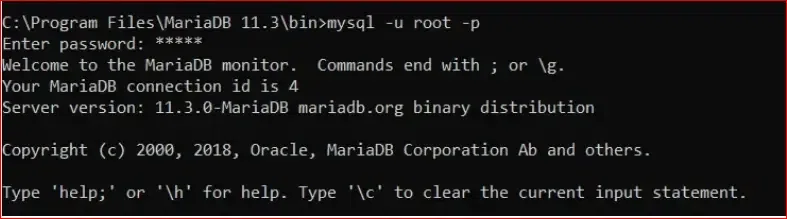
Step 4: Verify the Installation
To verify the successful installation, open a command prompt and run the following command:
mysql -u root -p
When prompted, please enter the root password. If you are able to get to the MariaDB server prompt without any errors, then the installation is complete.
Conclusion
We have successfully installed and have set up MariaDB on your Windows computer. Now, you have a very robust relational database management system that is ready to accommodate your applications and also projects. You are free to learn more about MariaDB features and capabilities and improve your database management experience.
MariaDB is an open-source relational database management system (RDBMS) that was developed as a fork of the popular MySQL database. It is designed to be a drop-in replacement for MySQL and offers high performance, security features, high availability configurations, scalability options, compatibility with MySQL, and a GPL license. It is available on Windows, Linux distributions, and macOS.

Install MariaDB on Windows
1. Download the latest MariaDB version for Windows.
2. Click the mariadb-<major>.<minor>.<patch>.msi to start the installer.
3. Click Next on the welcome page.
4. Accept the license agreement and click Next.
5. Choose features to install, specify the directory as default or in another location for the files, and click Next.
6. If you select the database instance feature, set up the root password and whether to log in as a root user from a remote machine, and choose to use UTF8 as the default character set or not when creating a new database and table. Click Next.
7. Configure the database. Run the database as a service and define its name under Install as service. Enable TCP/IP and define the port to which MariaDB listens to. Specify the Innodb engine settings like buffer pool size (by default, it’s 12.5% of the RAM and you can add up to 70-80%, but a 32-bit version restricts the maximum as 1 GB) and page size.
8. Choose to submit the feedback and usage information or not and click Next.
9. Click Install> Finish.
Install MariaDB on Linux and Its Distributions
On RHEL, CentOS, Fedora, and Other Similar Linux RPM-Based Distributions:
1. Add the MariaDB yum repository.
Install packages from the MariaDB Package Repository script.
curl -sS https://downloads.mariadb.com/MariaDB/mariadb_repo_setup | sudo bash
Or install MariaDB with MariaDB Repository Configuration Tool. Then add the generated repository configuration section to /etc/yum.repos.d/MariaDB.repo.
[mariadb]
name = MariaDB
baseurl = https://rpm.mariadb.org/10.6/rhel/$releasever/$basearch
gpgkey= https://rpm.mariadb.org/RPM-GPG-KEY-MariaDB
gpgcheck=1
2. Download the specific release like MariaDB 10.3.34.
[mariadb]
name = MariaDB-10.3.34
baseurl= http://archive.mariadb.org/mariadb10.3.34/yum/centos/$releasever/$basearch
gpgkey= https://archive.mariadb.org/PublicKey
gpgcheck=1
Clean the existing repository configuration if you have any.
sudo yum clean all
3. Yum will prompt to import the GPG public key to verify the digital signatures of the package for the first time of installation or you can import the key manually.
GPG public id in 2023:
Short: 0xC74CD1D8
Long: 0xF1656F24C74CD1D8
Before 2023:
Short: 0x1BB943DB
Long: 0xcbcb082a1bb943db
sudo rpm —import https://supplychain.mariadb.com/MariaDB-Server-GPG-KEY
4. Install MariaDB with dnf or yum command.
In MariaDB 10.4 and above:
sudo dnf install MariaDB-server galera-4 MariaDB-client MariaDB-shared MariaDB-backup MariaDB-common
In MariaDB until 10.3:
sudo yum install MariaDB-server galera MariaDB-client MariaDB-shared MariaDB-backup MariaDB-common
5. Install MariaDB Server.
sudo dnf install MariaDB-server
6. Install MariaDB Clients.
sudo yum install MariaDB-client MariaDB-shared
On SLES, OpenSUSE, and Other Similar Linux Distributions:
1. Add the MariaDB zypp repository.
Install packages from MariaDB Package Repository script.
curl -sS https://downloads.mariadb.com/MariaDB/mariadb_repo_setup | sudo bash
Or install MariaDB with MariaDB Repository Configuration Tool. Install MariaDB 10.3 on SLES 15 for instance.
sudo zypper addrepo —gpgcheck —refresh https://yum.mariadb.org/10.3/sles/15/x86_64 mariadb
sudo zypper —gpg-auto-import-keys refresh
2. Pin the repository to a specific release.
sudo zypper removerepo mariadb
sudo zypper addrepo —gpgcheck —refresh https://yum.mariadb.org/10.3.14/sles/15/x86_64 mariadb
3. Import the GPG pulic key.
sudo rpm —import https://yum.mariadb.org/RPM-GPG-KEY-MariaDB
4. Install MariaDB packages with zypp.
In MariaDB 10.4 and later:
sudo zypper install MariaDB-server galera-4 MariaDB-client MariaDB-shared MariaDB-backup MariaDB-common
In MariaDB until 10.3:
sudo zypper install MariaDB-server galera MariaDB-client MariaDB-shared MariaDB-backup MariaDB-common
5. Install MariaDB Server.
sudo zypper install MariaDB-server
6. Install MariaDB Clients.
sudo zypper install MariaDB-client MariaDB-shared
On Ubuntu:
1. Log into Ubuntu 20.04 and update the local repositories.
sudo apt update
2. Install MariaDB using the PAT package manager.
sudo apt install mariadb-server mariadb-client -y
3. If you want to install the latest version, follow the steps listed.
a. Install the prerequisite package.
sudo apt install -y software-properties-common
b. Import the GPG public key.
sudo apt-key adv —fetch-keys ‘https://mariadb.org/mariadb_release_signing_key.asc’
c. Add the MariaDB APT repository.
sudo add-apt-repository ‘deb [arch=amd64,arm64,ppc64el] https://mariadb.mirror.liquidtelecom.com/repo/10.6/ubuntu focal main’
d. Update the local repositories and install the MariaDB server and client.
sudo apt update && sudo apt install -y mariadb-server mariadb-client
4. Confirm the version.
mariadb –version
Install MariaDB on macOS
1. Install Homebrew package manager.
2. Install MariaDB Server.
brew install mariadb
3. Start MariaDB Server.
mysql.server start
4. Log in as user or root.
mysql
sudo mysql -u root
5. Update brew installation.
brew update
6. Upgrade the MariaDB Server.
brew upgrade mariadb
7. Use Homebrew to install a pre-release MariaDB Server. The command builds and installs a development version.
brew install mariadb –devel
Conclusion
This article introduces how to download and install MariaDB on Windows, Linux distributions, and macOS. After the installation and usage, it’s important to backup MariaDB data along the way in case of any data loss incident. Backup and restore 6 databases with MariaDB included in Vinchin Backup & Recovery to secure all databases within 4 steps.
Database · November 19, 2024
MariaDB is an open-source relational database management system that is widely used as a drop-in replacement for MySQL. It is known for its performance, scalability, and security features. This article will guide you through the process of installing MariaDB on a Windows operating system, providing step-by-step instructions and useful tips along the way.
System Requirements
Before you begin the installation process, ensure that your system meets the following requirements:
- Windows 7 or later (including Windows Server versions)
- At least 512 MB of RAM (1 GB or more recommended)
- At least 1 GB of free disk space
Downloading MariaDB
To install MariaDB, you first need to download the installer. Follow these steps:
- Visit the official MariaDB website at mariadb.org/download.
- Select the version you wish to install. The latest stable version is recommended for most users.
- Choose the Windows platform and download the MSI installer.
Installing MariaDB
Once the installer is downloaded, follow these steps to install MariaDB:
- Locate the downloaded MSI file and double-click it to start the installation process.
- In the setup wizard, click “Next” to proceed.
- Accept the license agreement and click “Next.”
- Select the installation type. You can choose between “Typical” and “Custom.” The “Typical” option is recommended for most users.
- Choose the installation location. The default path is usually sufficient, but you can change it if needed.
- On the next screen, you will be prompted to set the root password for the MariaDB server. Make sure to choose a strong password and remember it for future use.
- You can also configure the server to run as a Windows service. This option allows MariaDB to start automatically when Windows starts. Select the checkbox to enable this feature.
- Click “Next” to review your settings, then click “Install” to begin the installation.
- Once the installation is complete, click “Finish” to exit the setup wizard.
Configuring MariaDB
After installation, you may want to configure MariaDB to suit your needs. Here are some common configuration tasks:
Accessing the MariaDB Command-Line Client
To access the MariaDB command-line client, follow these steps:
- Open the Command Prompt by searching for “cmd” in the Start menu.
- Type the following command to access the MariaDB client:
- Enter the root password you set during installation when prompted.
mysql -u root -pCreating a New Database
Once you are logged into the MariaDB client, you can create a new database using the following command:
CREATE DATABASE my_database;Replace my_database with your desired database name.
Creating a New User
To create a new user and grant them privileges on your new database, use the following commands:
CREATE USER 'new_user'@'localhost' IDENTIFIED BY 'user_password';
GRANT ALL PRIVILEGES ON my_database.* TO 'new_user'@'localhost';
Replace new_user and user_password with your desired username and password.
Testing the Installation
To ensure that MariaDB is installed correctly, you can perform a simple test:
- Log in to the MariaDB client as the root user.
- Run the following command to show the databases:
- If you see the
my_databaseyou created earlier, the installation was successful.
SHOW DATABASES;Troubleshooting Common Issues
If you encounter issues during installation or configuration, consider the following troubleshooting tips:
- Ensure that your Windows firewall is not blocking MariaDB.
- Check that the service is running by going to the Services application and looking for “MariaDB.” If it is not running, try starting it manually.
- Review the installation logs for any error messages that may provide insight into the problem.
Conclusion
Installing MariaDB on Windows is a straightforward process that can be completed in just a few steps. By following this guide, you should be able to set up a functional MariaDB server and begin managing your databases effectively. For those looking for reliable database hosting solutions, consider exploring options like USA VPS Hosting to enhance your database performance and security.