CMake is a system to automate compilation tasks of code files created in C and C++.
On Unix type systems we can say that it is a “Makefile” generator. He is classified as a SCons.
We already made a brief introduction here on the blog about CMake, but it is also possible to generate Makefiles in Windows, although CMake also generates files for Visual Studio.
Today we will see how to install CMake on Windows.
Dependencies
As in this example we will use GCC, it is important that you have it installed on your Windows via MinGW, see here how to do it.
Now let’s go step by step!
Installation
01. Download CMake by clicking the button below:
Download CMake for Windows 64-bit
After downloading, double-click on the downloaded file: cmake-3.26.0-rc6-windows-x86_64.msi and give administrator permissions to start the installation setup.
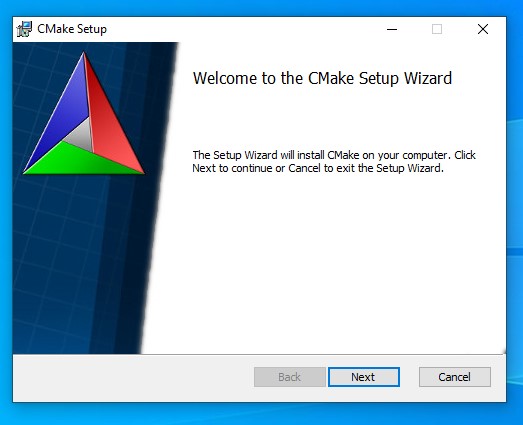
02. Setup presentation
Just click on
Next.
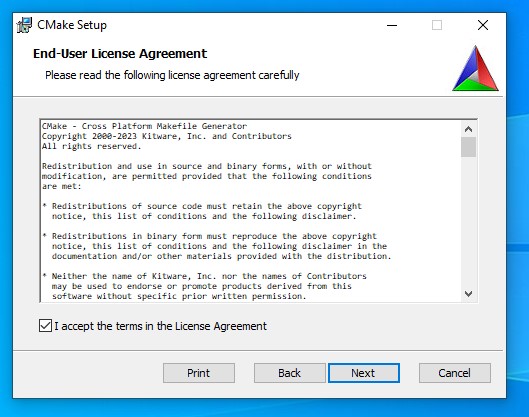
03. Accept the license terms
And then click
Next.
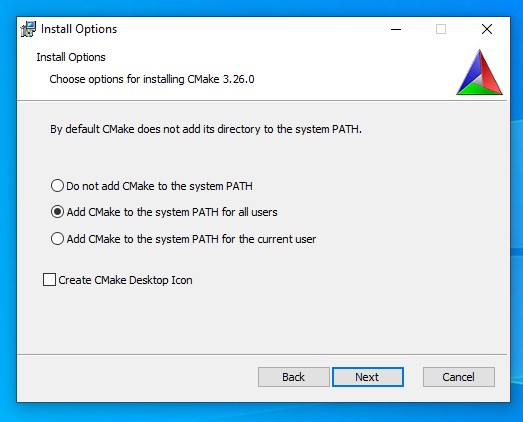
04. Add CMake to your PATH
Check the Add CMake to the system PATH for all users option for the command to be available to all system users. And then click on Next.
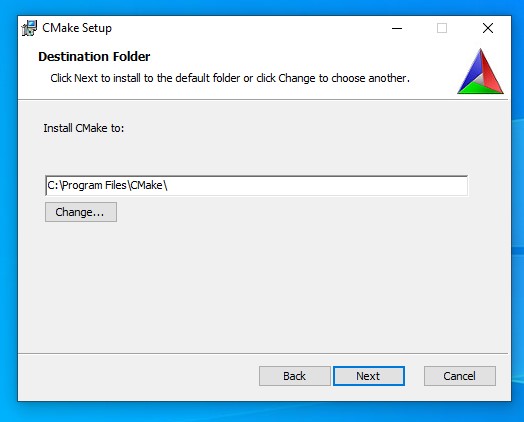
05. Select installation path
Hint: Keep what already appears and click
Next.
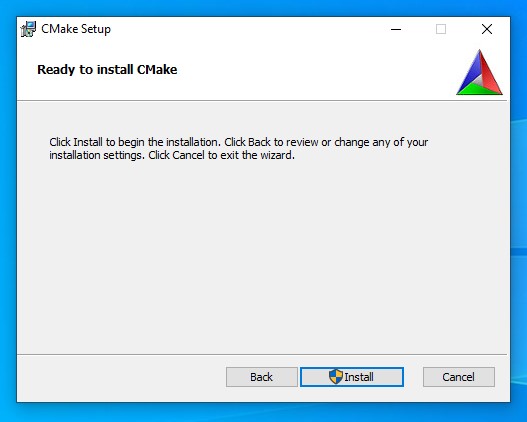
06. Start the installation
Click on Install and wait for the installation to finish.
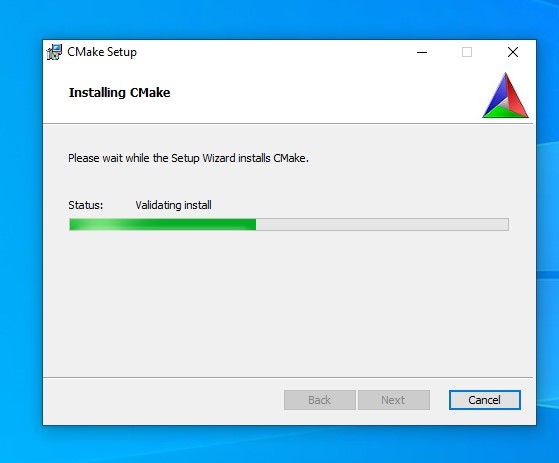
Installing:

Once finished, click on
Finish:
Testing CMake
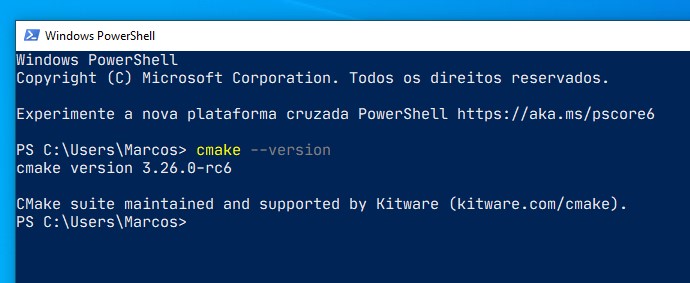
Open PowerShell or CMD and type the command:
cmake --versionIf the output is similar to the image below, everything is right and installed perfectly:
Compiling with CMake
-
Create a folder, for example
MyProject, enter it (by CMD or PowerShell,cd MyProject) and inside it do: -
Create a file named
CMakeLists.txtwith your Preferred Code Editor or IDE and fill it with the code below:
cmake_minimum_required(VERSION 3.10)
project(HelloWorld)
add_executable(hello main.cpp)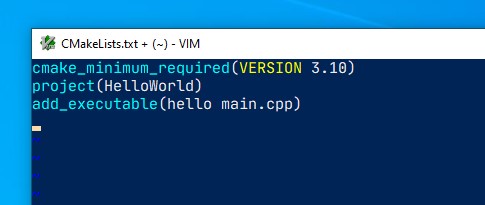
- Also create a
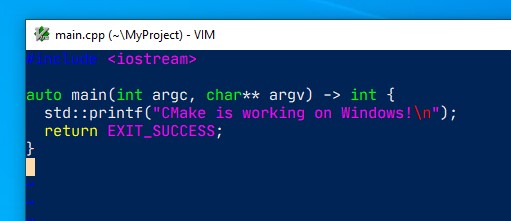
main.cppfile with a basic code, example:
#include <iostream>

auto main(int argc, char** argv) -> int {
   std::printf("CMake is working on Windows!\n");
   return EXIT_SUCCESS;
}
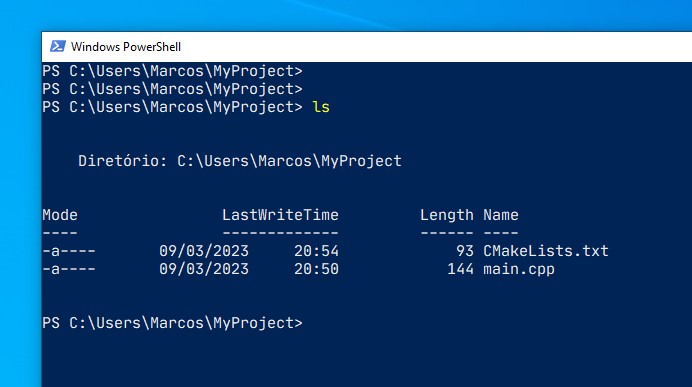
At the end your MyProject folder will have 2 files: CMakeLists.txt and main.cpp as shown in the image below:
- Now run the command:
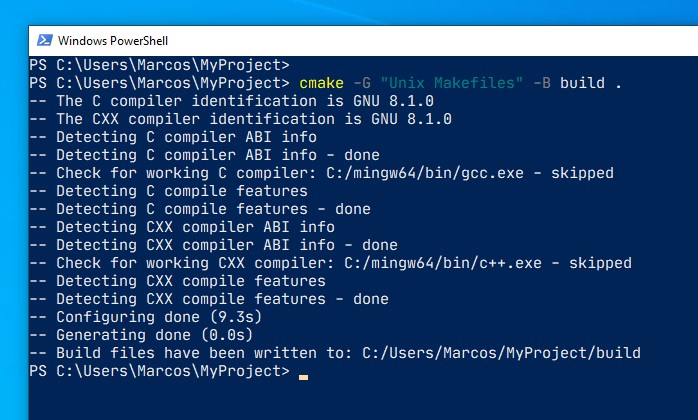
cmake -G "Unix Makefiles" -B buildIt will create a folder called
buildinside your project. If you don’t say-G "Unix Makefiles"it will prepare files for Visual Studio, in which case we want a Unix-like Makefile.
The output will be similar to the image below:
- Once finished, enter the build folder (
cd build) and run themakecommand (if this command does not exist, it is because you did not rename the MinGW file to that name as mentioned in the article about MinGW cited above, then most likely the command will bemingw32-make). And then run the final binary:hello:
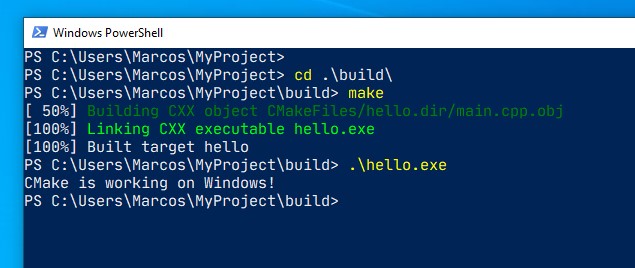
That’s it, now you can compile your C and C++ code with CMake!
Useful links
- https://cmake.org/
- https://cmake.org/download/
- https://github.com/Kitware/CMake/
cmake
windows
Related articles
This article explains how CMake handles complex build processes. Earthly provides robust caching mechanisms to improve on CMake’s efficiency. Learn more about Earthly.
CMake is an open source multiplatform tool that you can use to help with build automation, testing, packaging, and the installation of software. One of the main advantages of CMake is that it supports generating build scripts for a wide variety of platforms including Windows, macOS, and Linux. This gives developers the flexibility they need when building a new project and hopefully helps speed up the build.
In this article, you’ll learn more about CMake and if it’s the right solution for you. You’ll also walk through the process of installing it on Windows.
Pros and Cons of CMake

There are a number of benefits to using CMake to help build your solutions, including the fact that CMake can run on all major platforms, including Windows, Linux, and macOS. This means that a team of developers who are using different operating systems can still have common development tools.
Using CMake for projects, instead of something like Visual Studio projects, helps you avoid being locked into one integrated development environment (IDE). A team can create a project using CMake, and then each developer can use their preferred IDE to work on it. CMake integration is supported by a variety of IDE tools, including CLion, Atom, and Visual Studio.
It may be useful for some developers and software architects to understand what dependencies are within their projects and the nature of the dependency. CMake can create a visualization of any dependencies within the project, that you can use to create documentation.
While many would assume that CMake’s active development is an advantage (which it is!), it also has its downsides: Not everyone within a developer team will be running the same version of CMake. However, to help reduce this issue, CMake has introduced policies that define how certain CMake features should behave. This means your team can set a common policy regardless of what version people are using.
Another disadvantage of CMake is the lack of information available for some versions. It can be hard to find accurate information to resolve an issue or answer a question.
When to Use CMake
As you can see, CMake can be a useful build system. Developers using CMake can quickly check performance on different build backends and easily move between them.
CMake can also help to keep your source code folder clean. It can separate the build system, intermediaries, and output files from the source code, keeping your code clean for the future.
Install CMake on Windows
There are several ways to install CMake on Windows. The first option is to use pre-compiled binaries as either the Windows Installer file (MSI) or the compressed version (ZIP) files. You just have to download the files and then walk through the interactive installation wizard.
The second option is to download and build CMake from the source, and CMake even includes a source release download option.
The third option is to use a package manager tool, such as Windows Package Manager or Chocolatey. This can be especially convenient if you already have either installed on your machine. We will use the package manager method you’ll use for your installation here.
If you’re using Windows Package Manager, run the following command to install CMake:
winget install kitware.cmakeIf you’re using Chocolatey, use the following command:
Install a CMake Extension with Visual Studio
Once you’ve finished installing CMake on Windows, you need to install an extension that lets you integrate the functionality of CMake into your IDE (Visual Studio is used here).
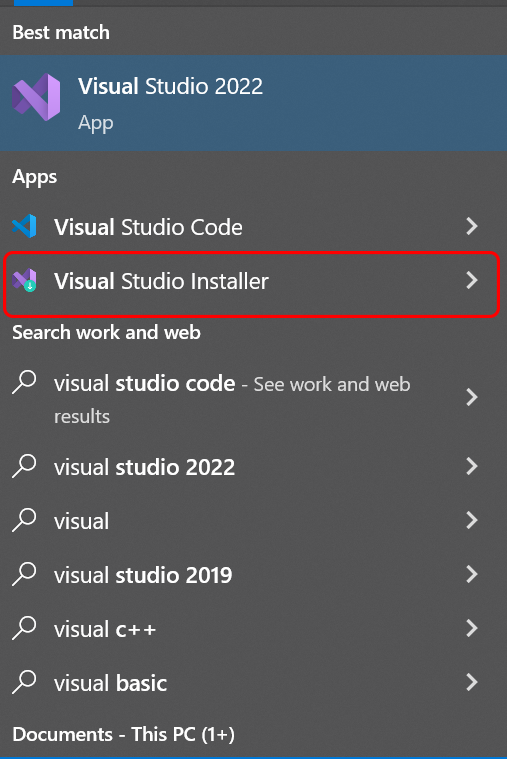
To install the CMake extension, you need to select Start and then open the Visual Studio Installer from the menu:
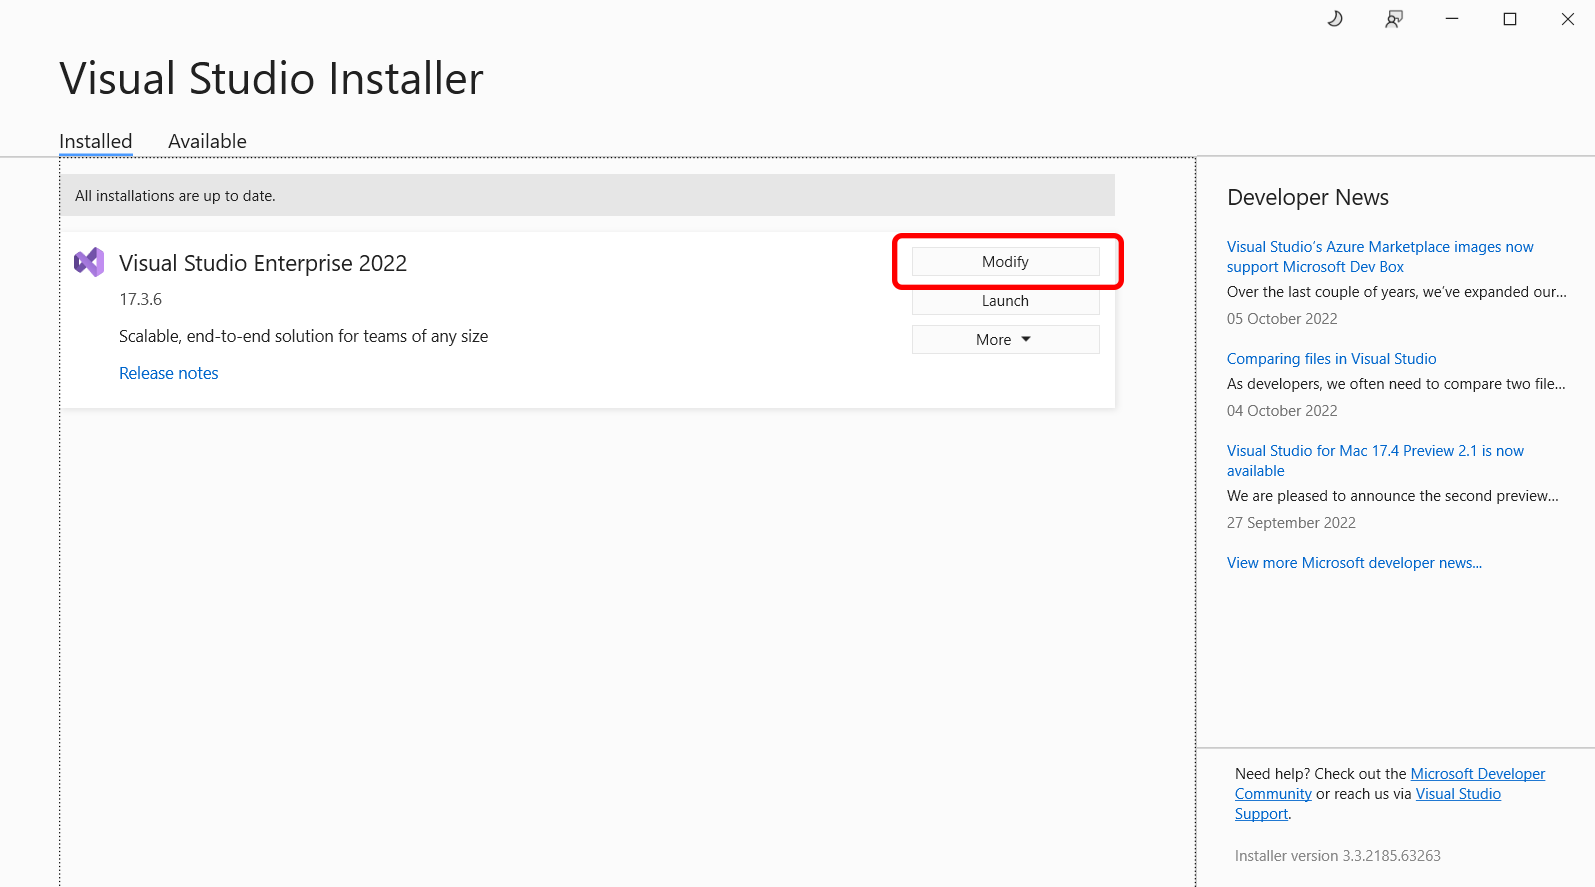
Once the Visual Studio Installer loads, select Modify:
Under Workloads, locate Desktop development with C++, which can be found under Desktop & Mobile:
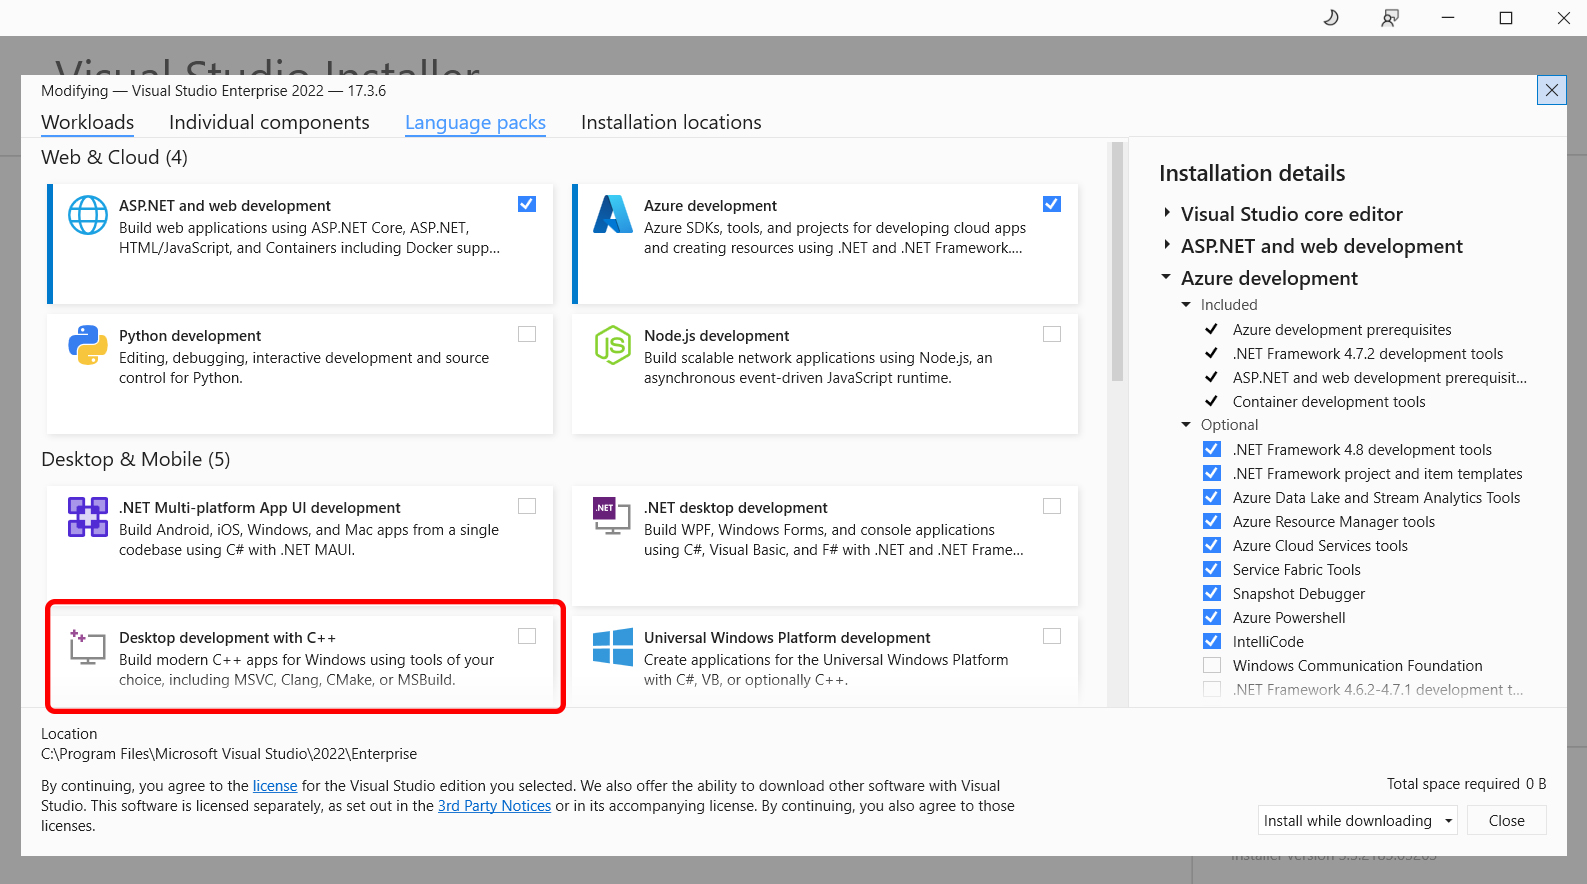
On this same page, you also need to find and select the Linux and embedded development with C++ component. This component ensures you have cross-platform CMake development capabilities:
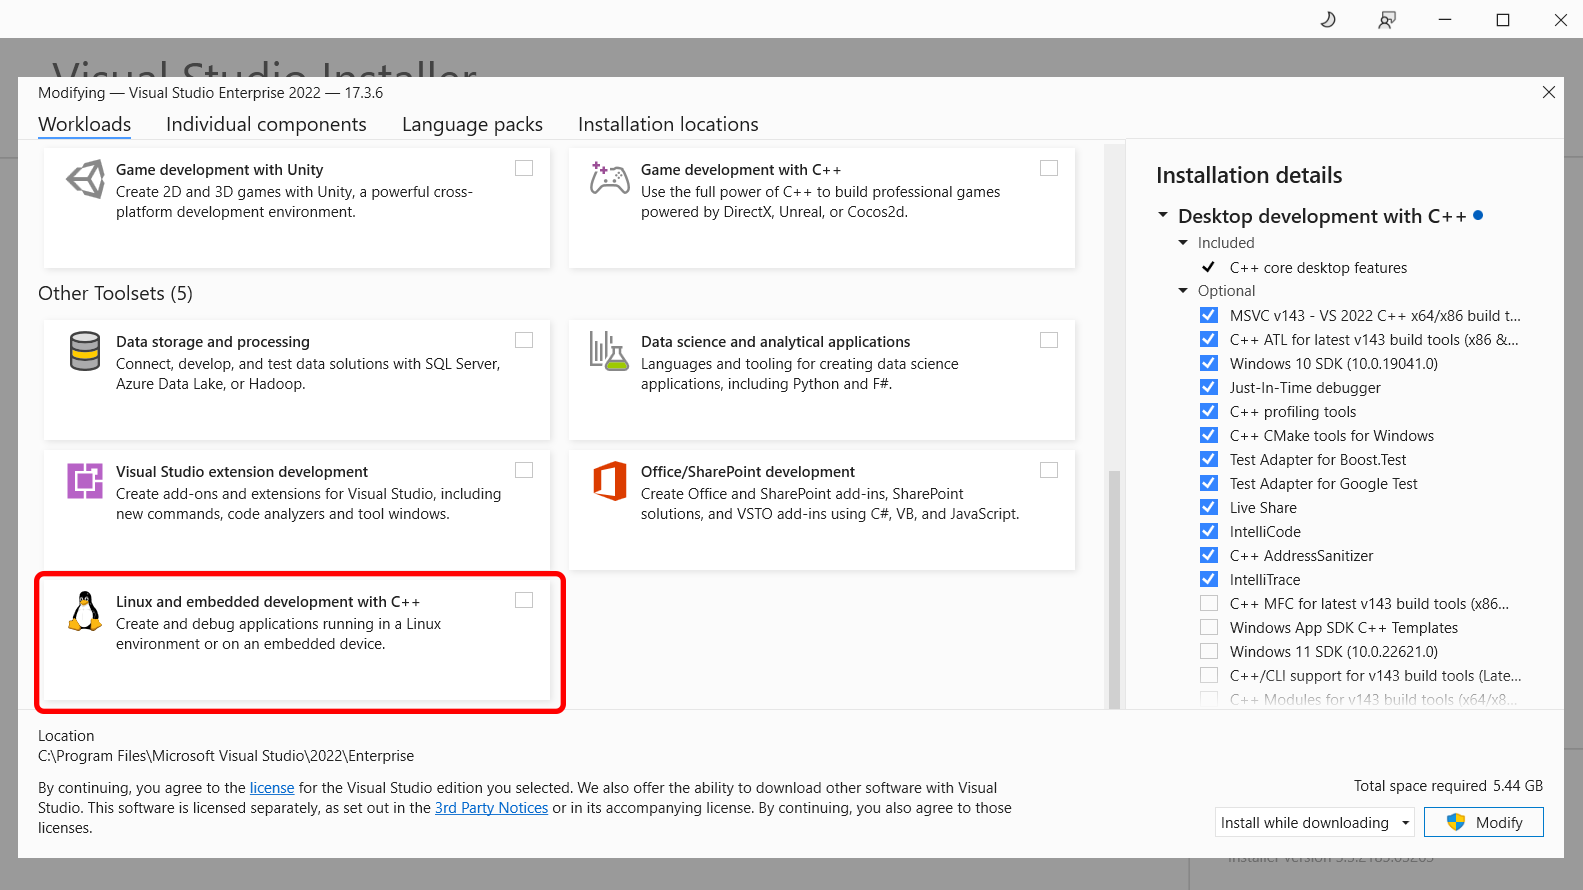
Once you’ve selected both, select Modify again, and the additional tools will be installed.
Integrate an IDE
Now that you’ve installed CMake and a few components, it’s time to use them. Start a new project by opening Visual Studio and selecting Create a new project > CMake project:
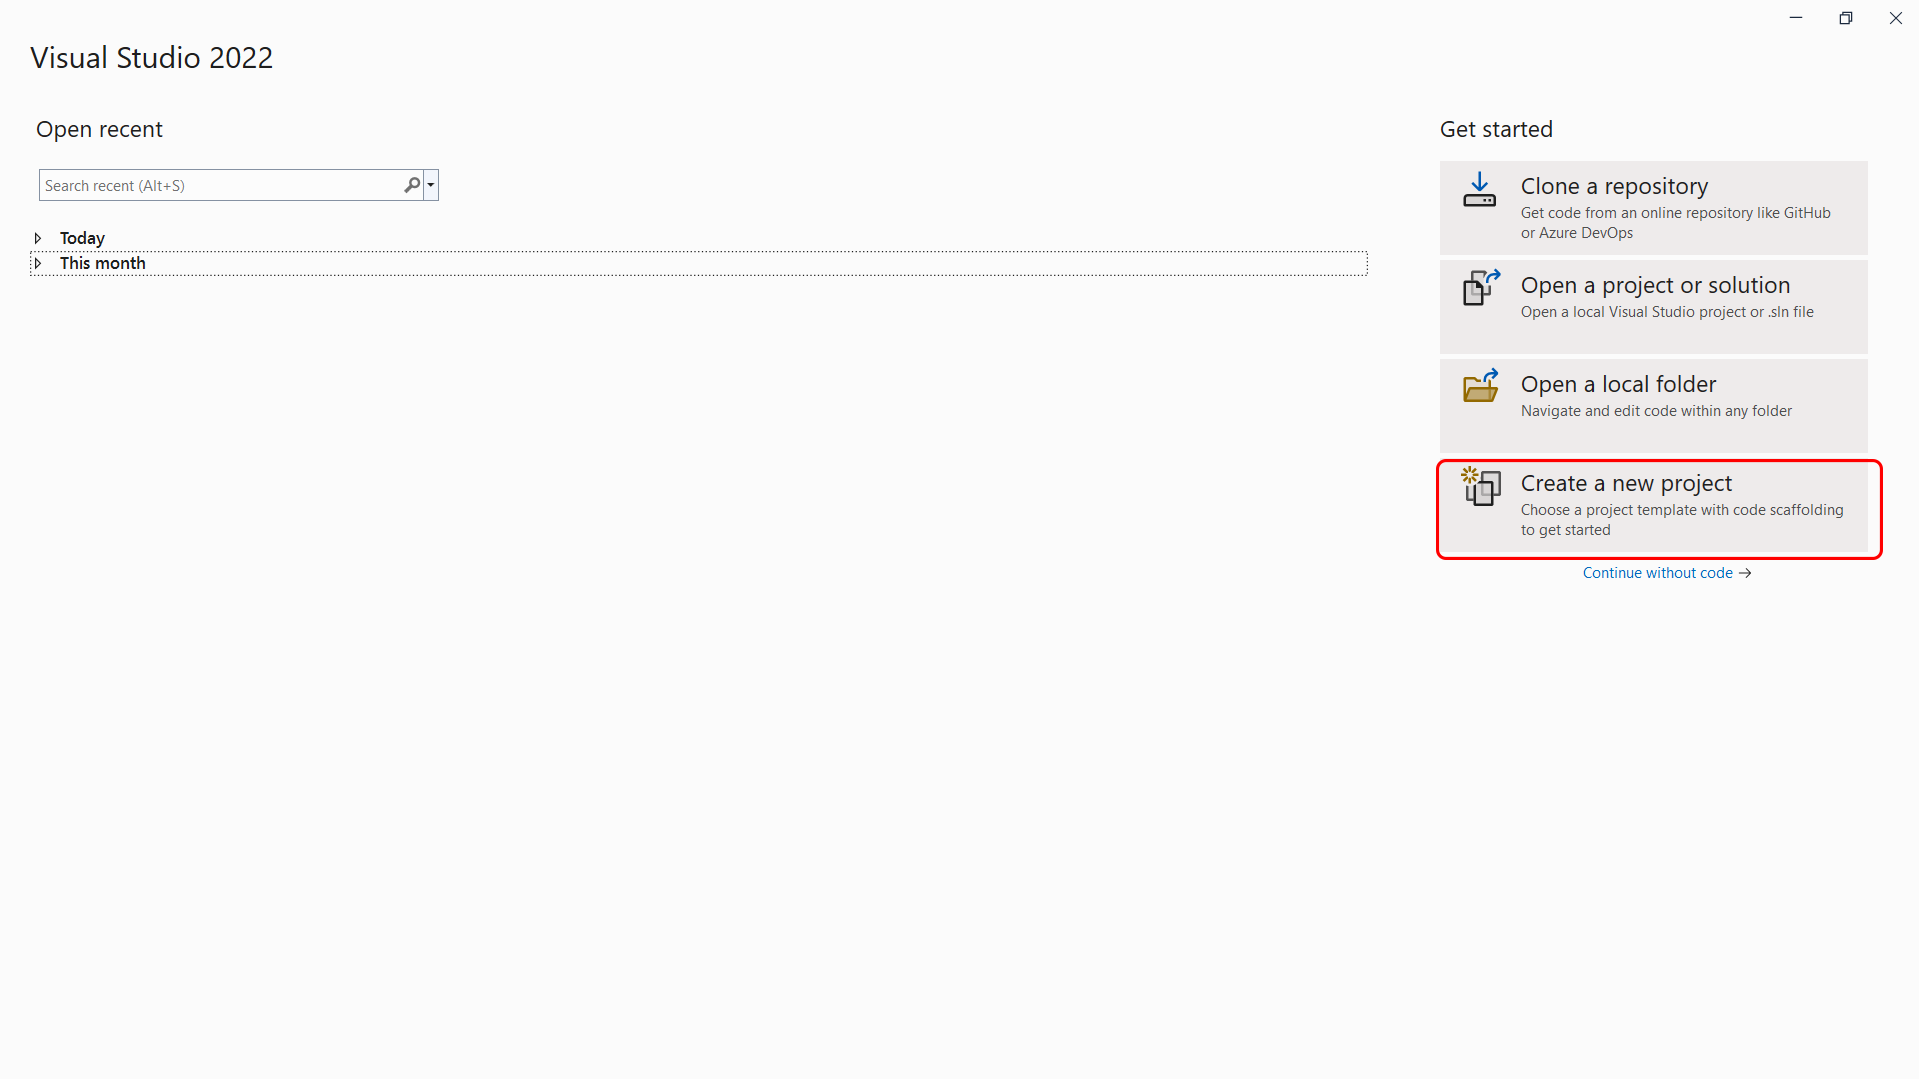
After selecting CMake project, Visual Studio, and CMake will create a directory and a file called CMakeLists.txt, which is a set of instructions describing certain settings within the project, such as source files and targets.
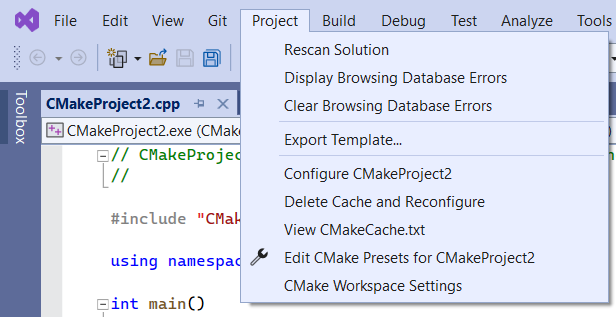
When Visual Studio detects that there is a CMakeLists.txt file within a project that’s been opened, it adds CMake items to the Project menu, which gives you access to commands for viewing and editing CMake scripts:
Configure CMake Projects
CMake supports two files that let you specify build and test options. These files are CMakePresets.json and CMakeUserPresets.json. Microsoft recommends that you use CMakePresets.json.
To ensure that Visual Studio uses the CMakePresets.json file, you need to enable it. You can do so via Tools > Options > CMake > General. Please ensure that the Always use CMake Presets option is selected:
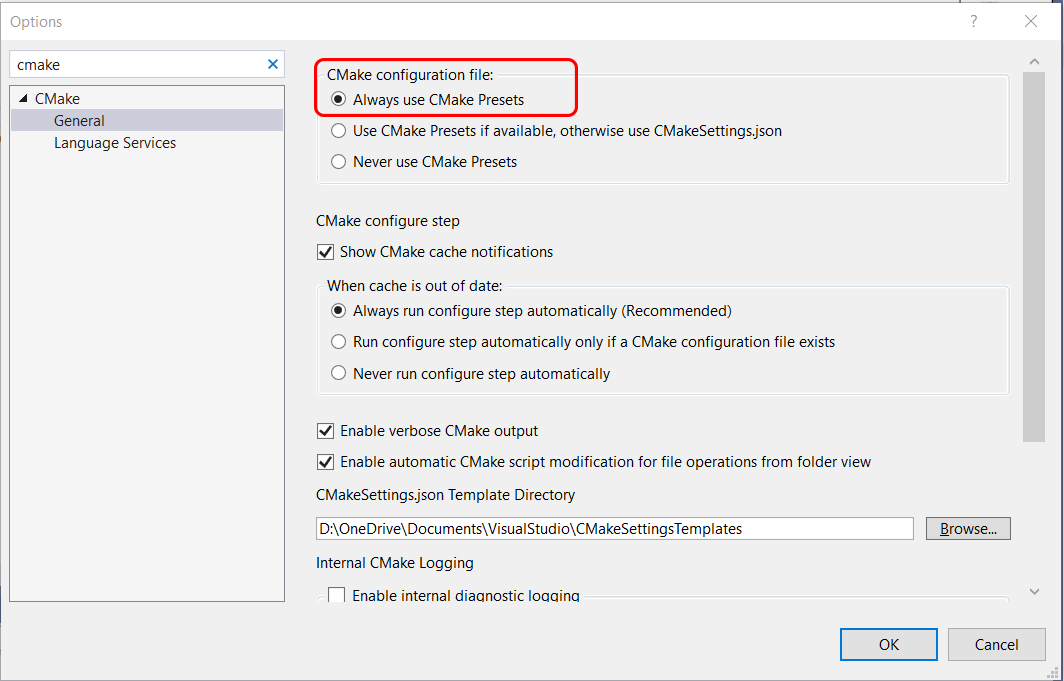
If Visual Studio can’t find a CMakePresets.json file, it will fall back to using the default configure presets.
There are three key settings within your CMakePresets.json file: target systems, configure presets, and build presets. The target system is the system on which CMake is invoked to configure and build your project. You can use systems installed on your local machine, SSH connections, and all Windows Subsystem for Linux (WSL) installations.
The configure preset option is used when CMake is invoked to generate the project build system. Depending on your target system, the options for this will change. So if you are using Ubuntu as your target system, your configure preset could be Linux debug.
The build preset value is used when CMake is invoked to build the project and should align with the configure preset. If Visual Studio can’t find any build presets that are associated with the configure preset, then it will provide the default build preset.
As you can see, there are a lot of options available to configure your CMake projects to suit your needs and project. If you’re looking for even more information on how to configure your projects, check out this Visual Studio documentation.
Build CMake Projects on Visual Studio
When you’re ready, Visual Studio gives you several options to build your CMake projects, including the toolbar or the Solution Explorer.
If you want to use the toolbar, you need to find the Startup Item drop-down:

Select your preferred target to build, and either press F5 or choose Run.
If you want to use the Solution Explorer, navigate to the Solution Explorer on the right-hand side of your screen. By default, it will be set to the Folder View:
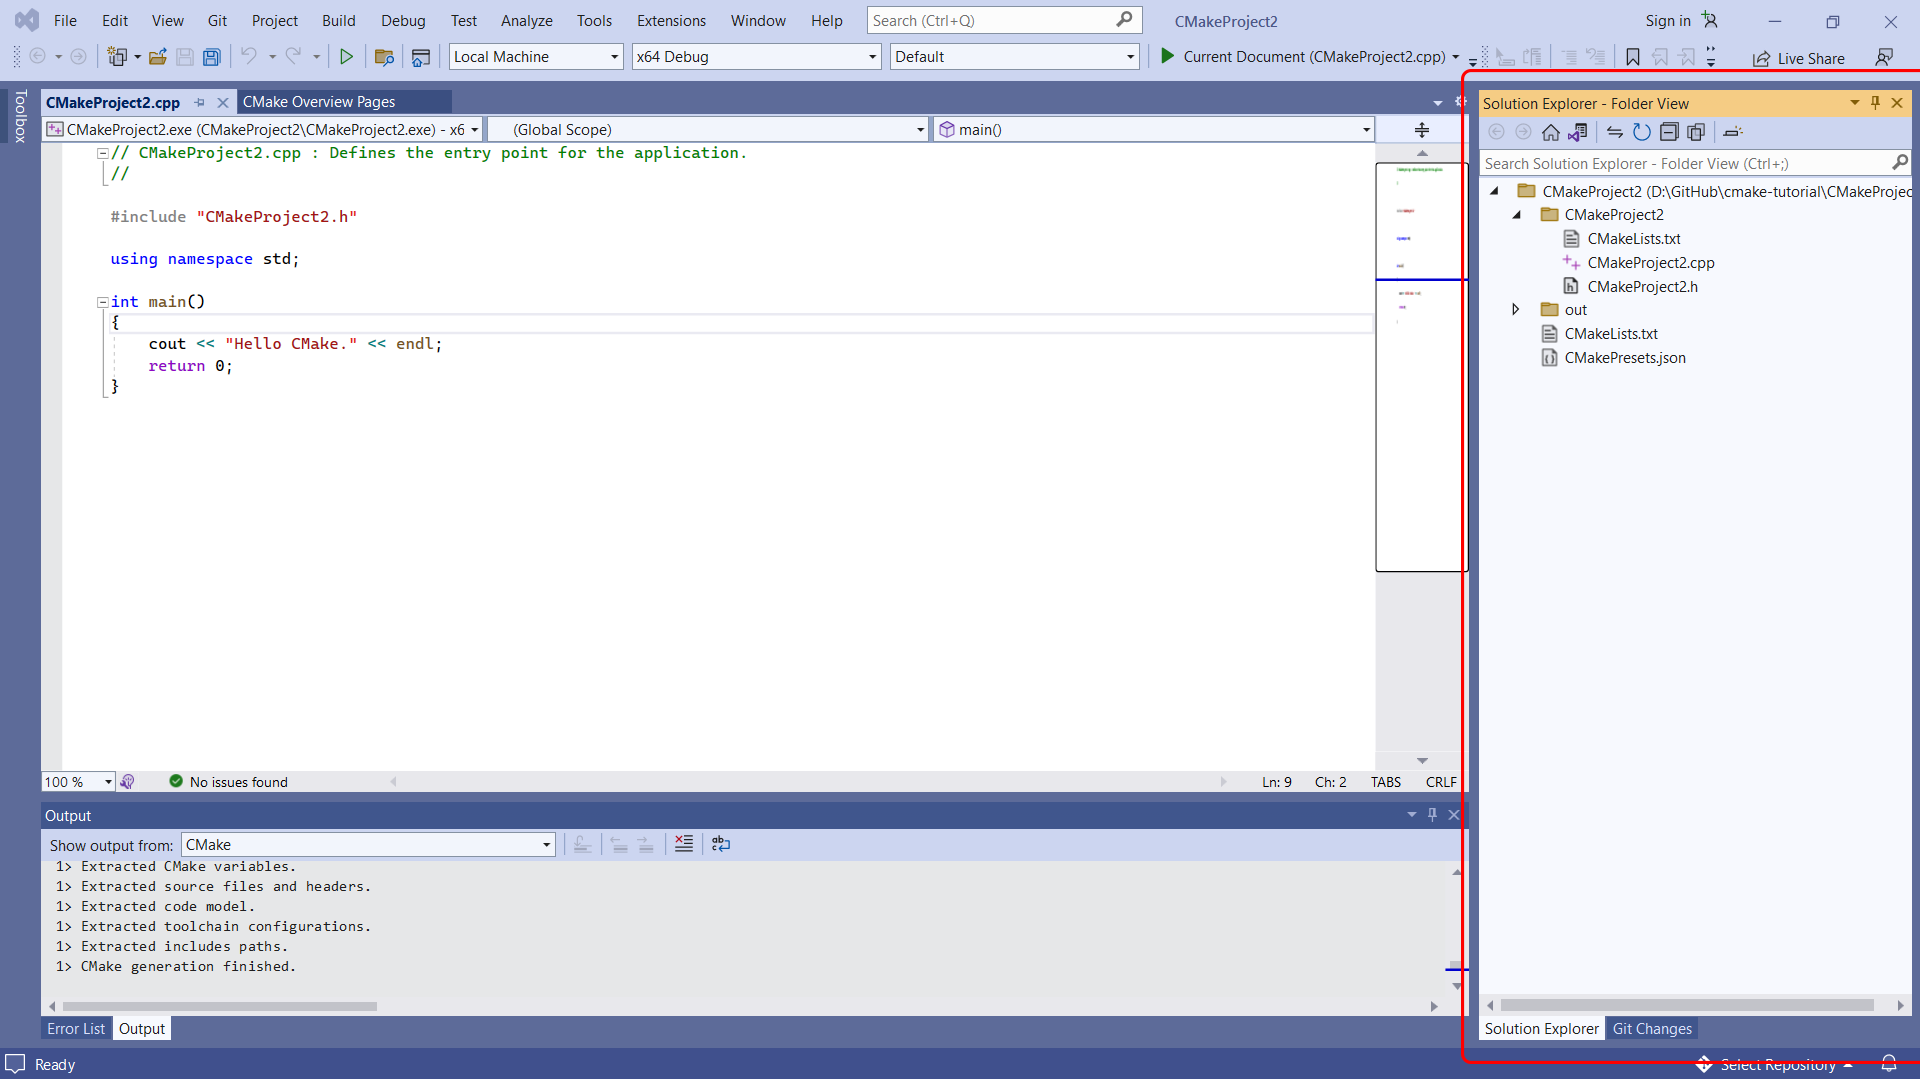
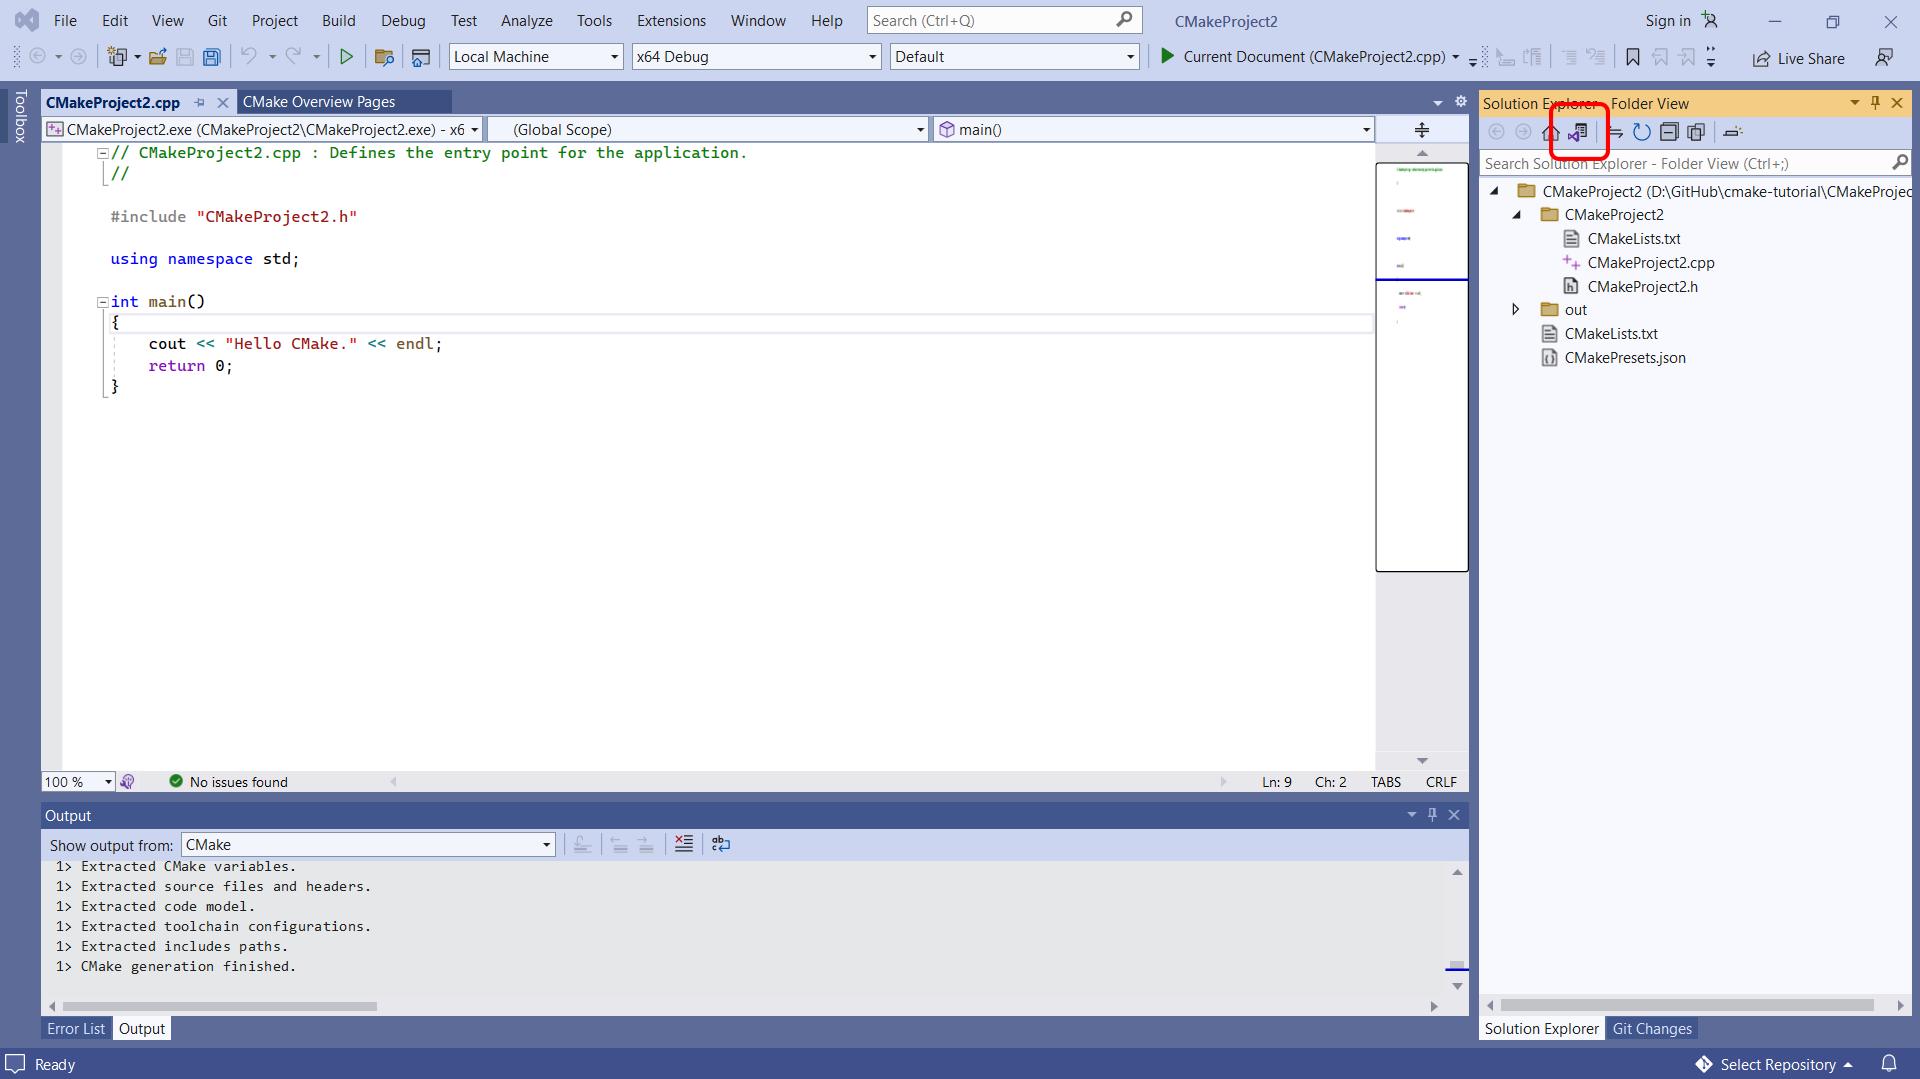
You need to change the Folder View to the CMake Targets View. To do this, select the view icon:
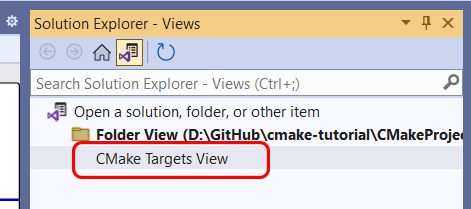
Then select CMake Targets View:
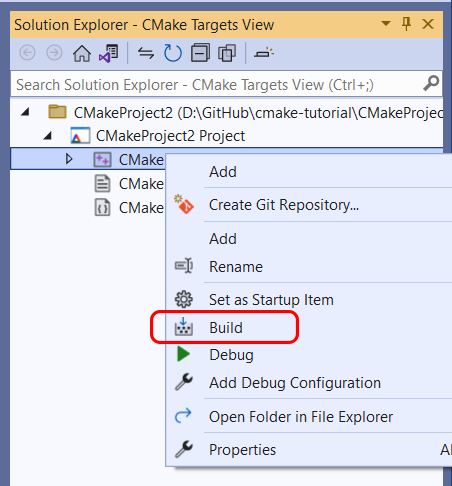
Then right-click on CMake Target and select Build from the context menu:
Lastly, you can select Build > Build All from the main menu of Visual Studio to build your CMake project:

After completing either one of these options, you can find the build results within the Output window and Error List:
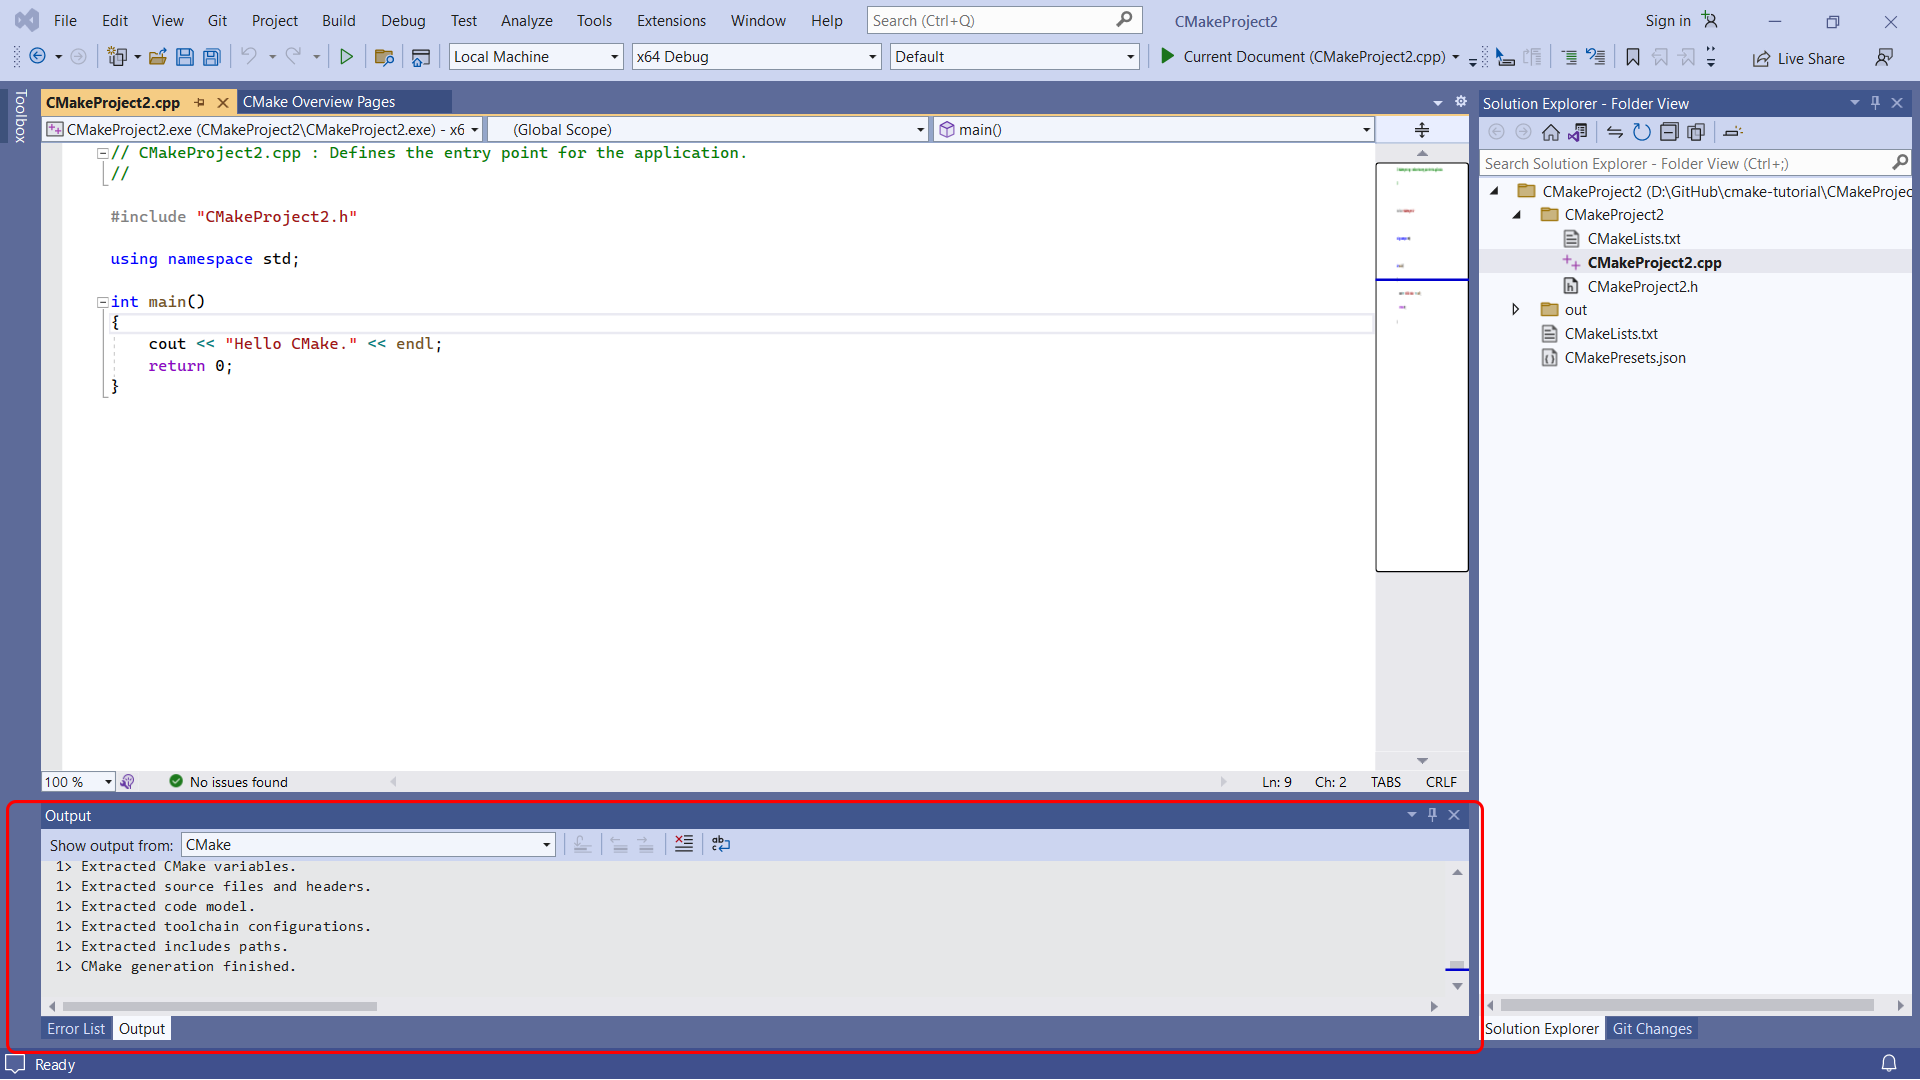
Debug CMake Projects
As you know, when writing code, it’s never perfect the first time, which is why you’ll need to be able to debug your code.
To debug your CMake project using Visual Studio, start by selecting one of the targets shown in the Startup Item drop-down within the toolbar:

Then select Debug > Start Debugging from the main toolbar:
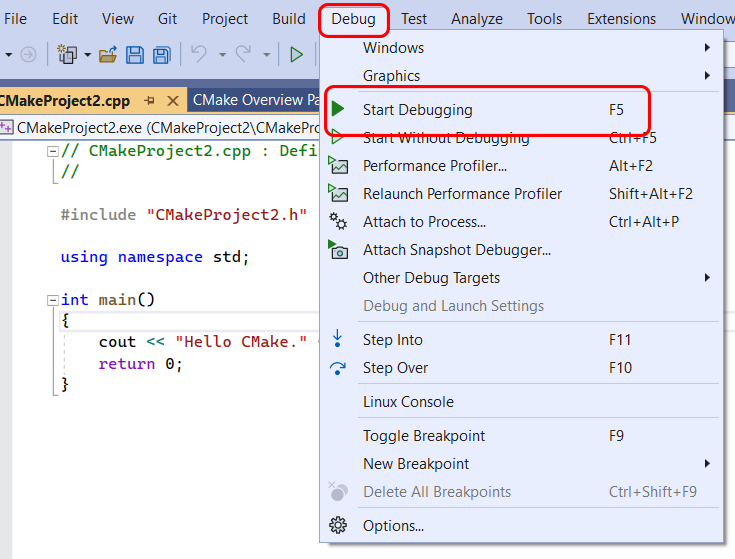
If any changes have been made since the last time you built the project, the debug command will build it first before the debugging can take place.
The launch.vs.json file can be used to customize your CMake debugging session. This file can be used to input any environment variables or command line arguments that you might want to pass into the program during debugging.
Conclusion
CMake is a versatile tool that aids in build automation, testing, packaging, and software installation. It integrates with many IDEs, giving developers the flexibility to stick with their preferred IDE. It ensures your application’s compatibility across any platform. While CMake isn’t for everyone, it can be a robust solution for the right developer or project.
And if you’re looking to optimize your builds further, you might want to give Earthly a shot for its efficient caching and straightforward syntax.
Earthly Lunar: Monitoring for your SDLC
Achieve Engineering Excellence with universal SDLC monitoring that works with every tech stack, microservice, and CI pipeline.
Get a Demo
I am working on a project which require me to build and compile MariaDB database. To build MariaDB, CMake is required. CMake will first verify on which operating system, it is being run, then it will create and\or copy the appropriate directories, files on the operating system.
CMake
It is an open source software under the BSD-3-Clause license. C++ compiler is required to run CMake build system. CMake is used in the software development industry for build automation, testing, packaging and installation of software.
CMake is not a build system, it creates the build system files for other operating systems, which includes support for directory hierarchy.
Let’s install CMake on windows.
Download the code
https://cmake.org/download/
Choose executable from the list
At this time, the current version is 3.26.0
https://github.com/Kitware/CMake/releases/download/v3.26.0/cmake-3.26.0-windows-x86_64.msi
Install CMake from the executable
Step 1 Double click on the downloaded executable file
Step 2 Follow the instructions on the screen


Alert : Make sure to add CMake to the PATH


Step 2 Make sure CMake is installed on the system
Reboot your Machine.
# Command
where cmake
# Output
C:\Program Files\CMake\bin\cmake.exe
Enter fullscreen mode
Exit fullscreen mode
CMake is properly installed on your system.
Disclaimer: I have been working on a project which require me to install, configure, troubleshoot various packages on multiple Operating system. If you find any issue, please reach out to me.
Last Updated :
06 Oct, 2021
CMake is a cross-platform free and open-source software tool for managing the build process of software using a compiler-independent method. It supports directory hierarchies and applications that depend on multiple libraries.
Installation of CMake
CMake in Python can be easily installed with the use of pip package management tool provided by python. Just use the following command for the Installation process:
pip install cmake
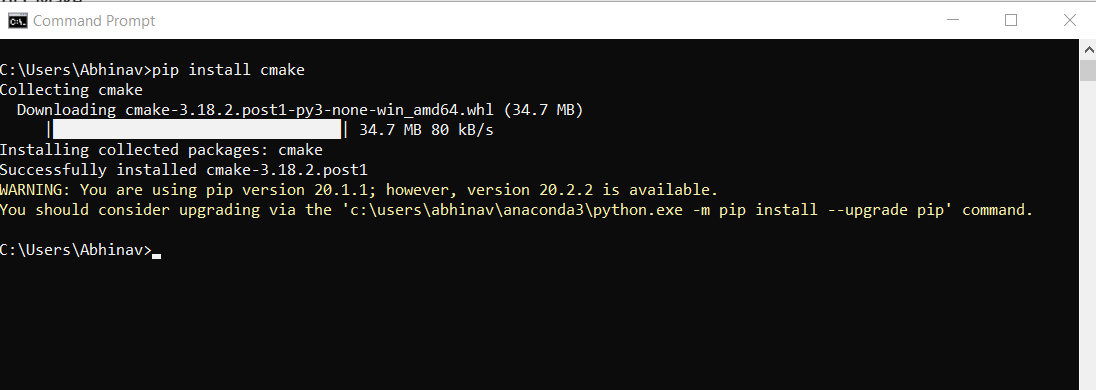
Setting up Environment Variable
Step 1: Open https://cmake.org/ and click on Downloads

Step 2: Download the Zip file of CMake.
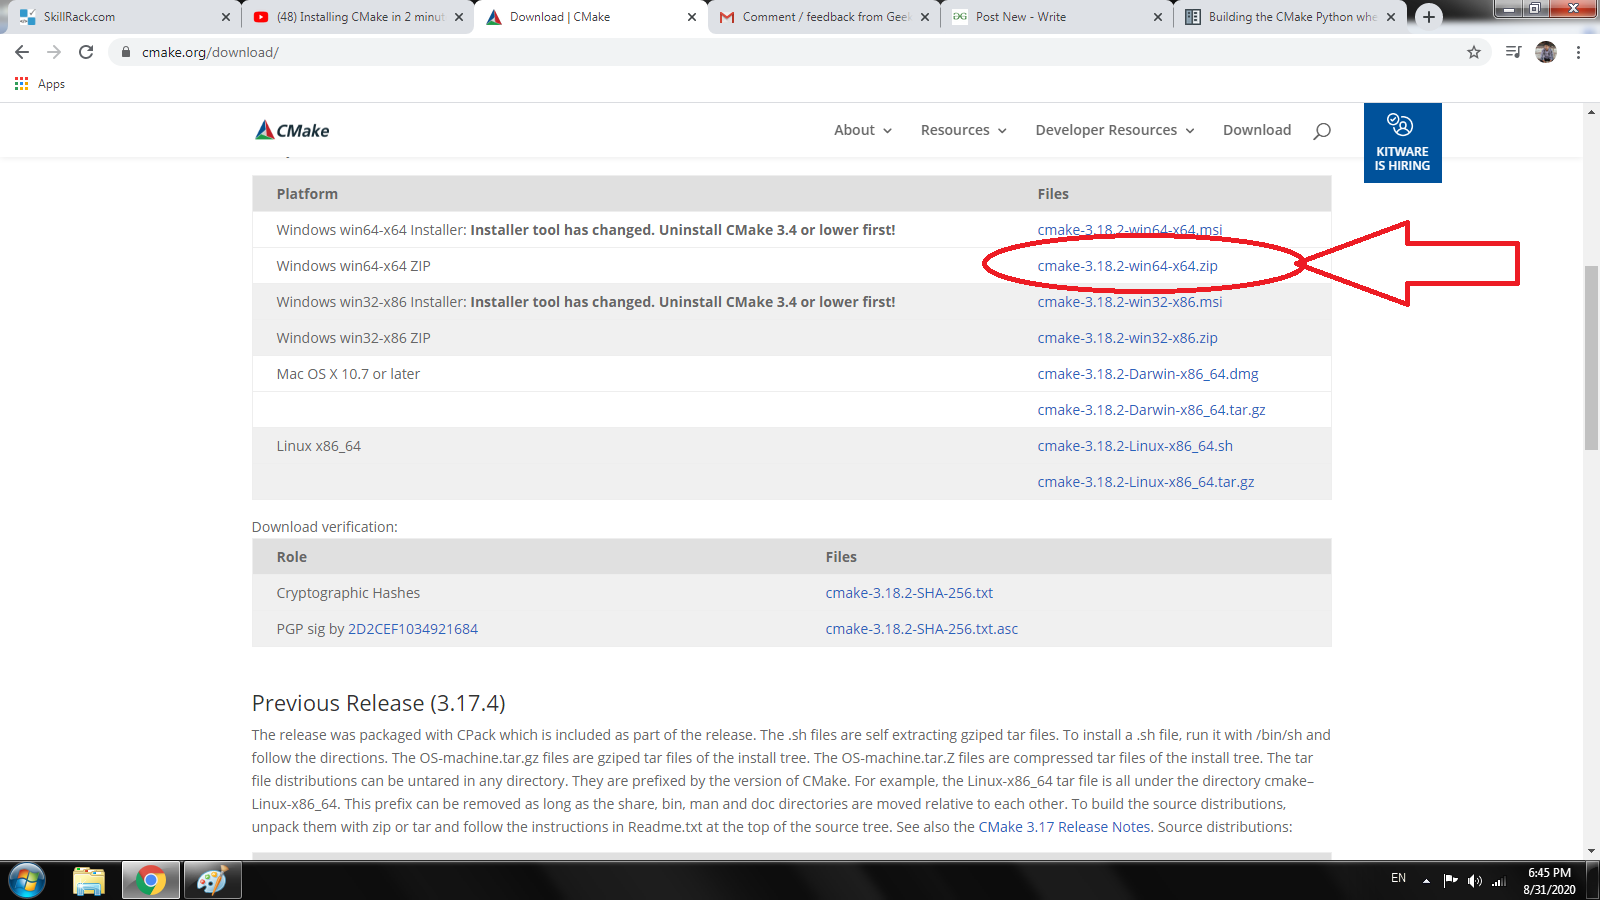
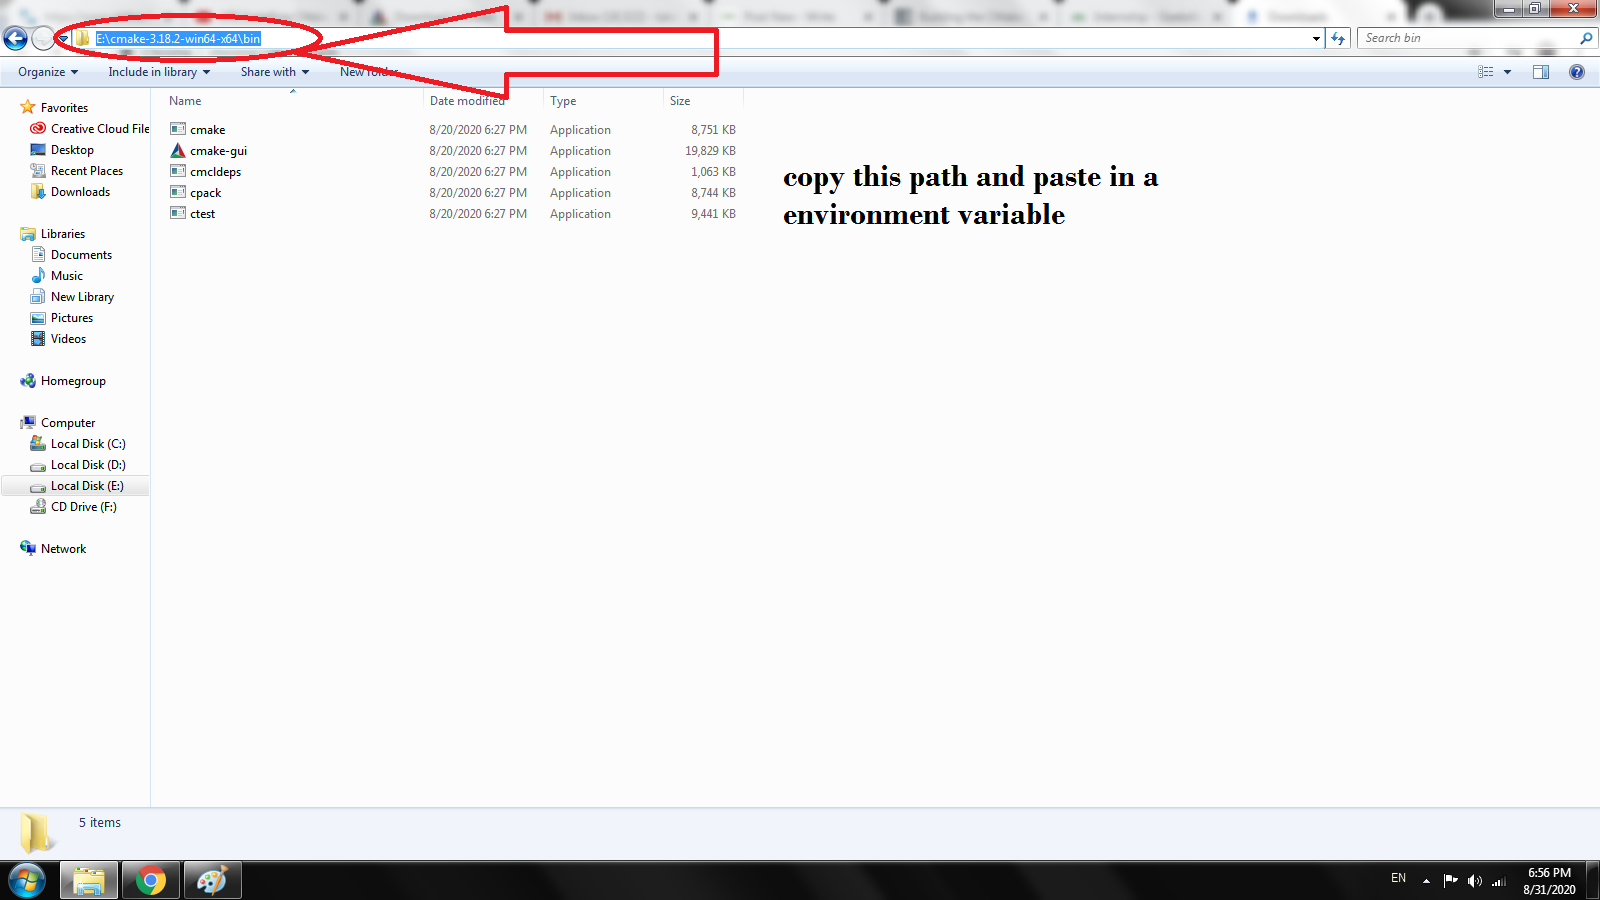
Step 3: Extract the file and copy the bin file path.
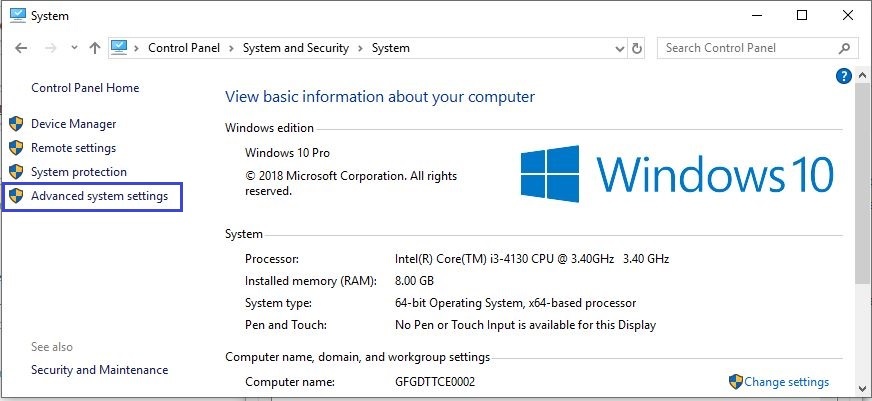
Step 4: Go to Control Panel -> System and Security -> System
Under Advanced System Setting option click on Environment Variables as shown below:
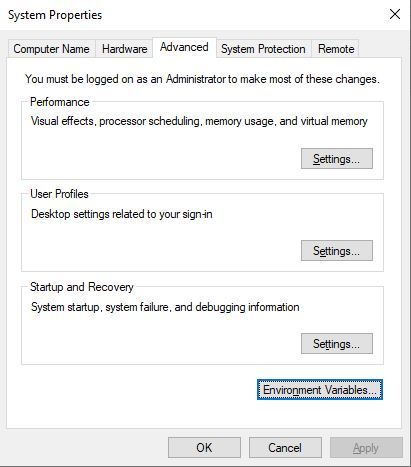
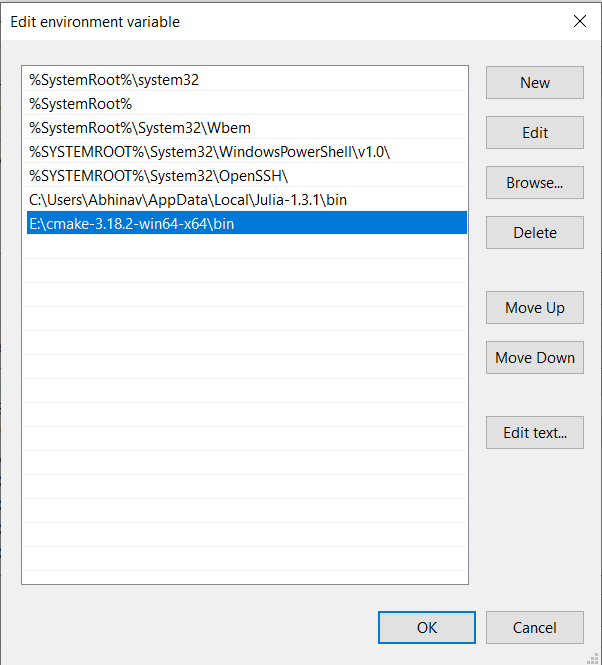
Step 6: Now, we have to alter the “Path” variable under System variables so that it also contains the path to the CMake environment. Select the “Path” variable and click on the Edit button as shown below:
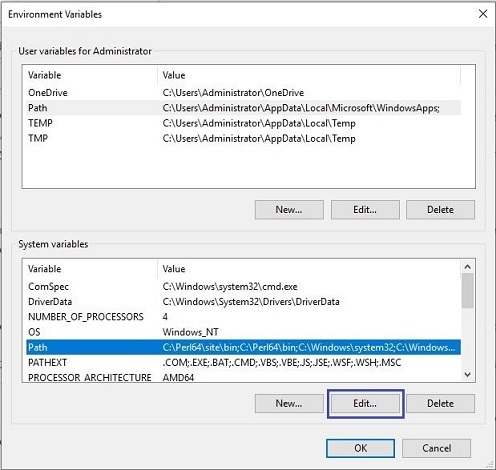
Step 7: We will see a list of different paths, click on the New button, and then add the path where CMake was installed and then click OK.
Similar Reads
-
How to Install PyQt for Python in Windows?
In this article, we will be looking at the stepwise procedure to install the PyQt for python in Windows. PyQt is a Python binding of the cross-platform GUI toolkit Qt, implemented as a Python plug-in. PyQt is free software developed by the British firm Riverbank Computing. Features of PyQt: There ar
2 min read -
How to Install PyMedia for Python in Windows?
PyMedia is a module of Python programming language that manipulates audio files. It supports the given audio formats, including avi, divx, MP3, Ogg, cdda, Wav, dvd, etc. This module allows users to perform various operations on media files such as parsing, multiplexing, encoding-decoding, etc. The P
2 min read -
How to Install Gekko In Python on Windows?
In this article, we will learn how to install Gekko in Python on Windows . GEKKO is a Python package for machine learning and optimization of mixed-integer and differential-algebraic equations. It is coupled with large-scale solvers for linear, quadratic, nonlinear, and mixed-integer programming (LP
2 min read -
How to Install Eli5 in Python on Windows?
Eli5 is an open-source and cross-platform Python library available for various operating systems including Windows, Linux, and macOS, written to easily and quickly debug machine learning classifier models to explain their predictions. It provides support for machine learning frameworks and packages
2 min read -
How to Install glob in Python in Windows?
The Python Glob module searches all path names looking for files matching a specified pattern according to the rules dictated by the Unix shell. In this article, we will look into, how to install the glob module on Windows. Pre-requisites: The only thing that you need for installing the glob module
2 min read -
How to Install Fabric in Python on Windows?
Fabric is a Python library used to execute shell commands remotely over SSH, yielding useful Python objects in return.. In this article, we will look into the process of installing the Fabric Library on Windows. Pre-requisites: The only thing that you need for installing the Scrapy module on Windows
2 min read -
How to Install Cmder on Windows?
Cmder is a command prompt user interface. It is often used in windows machines mainly. Generally, users like to interact with graphical user interfaces. As in command prompt in windows are not that graphical. Understanding some concepts of the GUI method is most important nowadays. Cmder is one of t
2 min read -
How to Install Python docutils in Windows?
Docutils is an open-source text processing system written in Python. It is used to process simple text or plaintext documents into useful formats like LaTex, OpenDocument, HTML, XML, etc. It is easy to use and easy to read, and general and special purpose use. So, in this article, we will be looking
2 min read -
How to Install Python sympy in Windows?
Sympy is a Python library for symbolic mathematics. It aims to become a full-featured computer algebra system (CAS) while keeping the code as simple as possible in order to be comprehensible and easily extensible. SymPy is written entirely in Python. SymPy only depends on mpmath, a pure Python libra
2 min read -
How to Install Turbo C++ in Windows?
Turbo C++ is a single language compiler and integrated development environment for C++. It is free of charge and can be downloaded from any website. The first release of Turbo C++ was released in May 1990 version 1.0, running on MS-DOS computers. Features of Turbo C++ latest version:Complete IDE bun
2 min read
That’s it, ground.
I wonder if it will be friends with me?
Hello, ground!
Obviously to use some tool you need to install it first. CMake can be installed
using your default system package manager or by getting binaries from
Download page.
2.1.1. Ubuntu
CMake can be installed by apt-get:
> sudo apt-get -y install cmake
> which cmake
/usr/bin/cmake
> cmake --version
cmake version 2.8.12.2
Installing CMake GUI is similar:
> sudo apt-get -y install cmake-qt-gui
> which cmake-gui
/usr/bin/cmake-gui
> cmake-gui --version
cmake version 2.8.12.2
Binaries can be downloaded and unpacked manually to any location:
> wget https://cmake.org/files/v3.4/cmake-3.4.1-Linux-x86_64.tar.gz
> tar xf cmake-3.4.1-Linux-x86_64.tar.gz
> export PATH="`pwd`/cmake-3.4.1-Linux-x86_64/bin:$PATH" # save it in .bashrc if needed
> which cmake
/.../cmake-3.4.1-Linux-x86_64/bin/cmake
> which cmake-gui
/.../cmake-3.4.1-Linux-x86_64/bin/cmake-gui
Version:
> cmake --version
cmake version 3.4.1

CMake suite maintained and supported by Kitware (kitware.com/cmake).
> cmake-gui --version
cmake version 3.4.1

CMake suite maintained and supported by Kitware (kitware.com/cmake)
2.1.2. OS X
CMake can be installed on Mac using brew:
> brew install cmake
> which cmake
/usr/local/bin/cmake
> cmake --version
cmake version 3.4.1

CMake suite maintained and supported by Kitware (kitware.com/cmake)
Binaries can be downloaded and unpacked manually to any location:
> wget https://cmake.org/files/v3.4/cmake-3.4.1-Darwin-x86_64.tar.gz
> tar xf cmake-3.4.1-Darwin-x86_64.tar.gz
> export PATH="`pwd`/cmake-3.4.1-Darwin-x86_64/CMake.app/Contents/bin:$PATH"
> which cmake
/.../cmake-3.4.1-Darwin-x86_64/CMake.app/Contents/bin/cmake
> which cmake-gui
/.../cmake-3.4.1-Darwin-x86_64/CMake.app/Contents/bin/cmake-gui
Version:
> cmake --version
cmake version 3.4.1

CMake suite maintained and supported by Kitware (kitware.com/cmake).
> cmake-gui --version
cmake version 3.4.1

CMake suite maintained and supported by Kitware (kitware.com/cmake).
2.1.2.1. DMG installer
Download cmake-*.dmg installer from
Download page and run it.
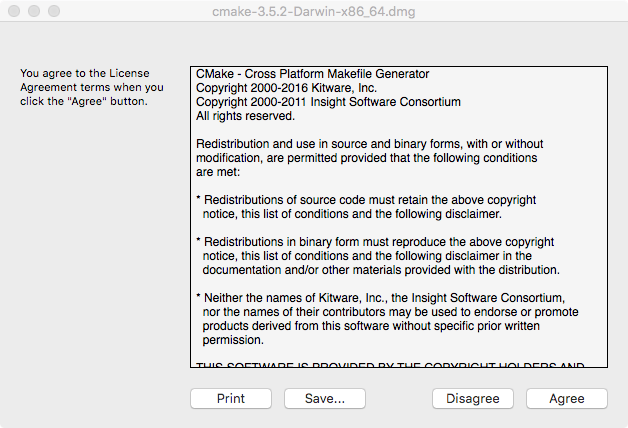
Click Agree:
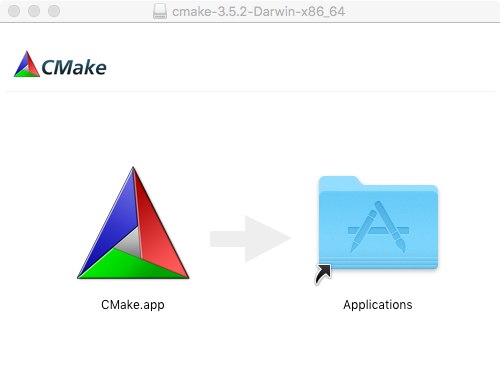
Drag CMake.app to Applications folder (or any other location):
Start Launchpad:
Find CMake and launch it:
2.1.3. Windows
Download cmake-*.exe installer from
Download page and run it.
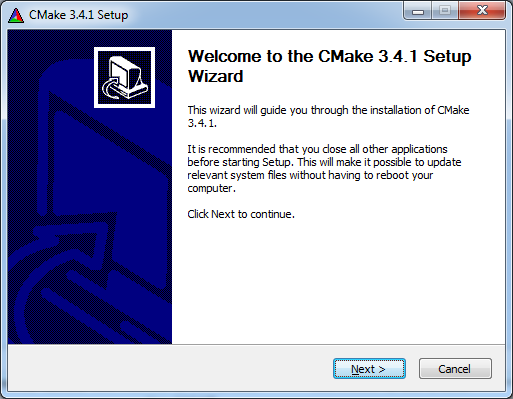
Click Next:
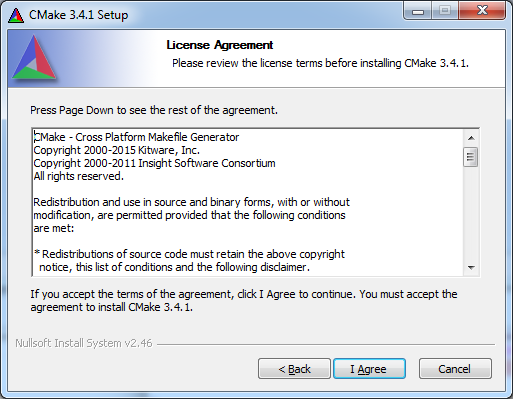
Click I agree:
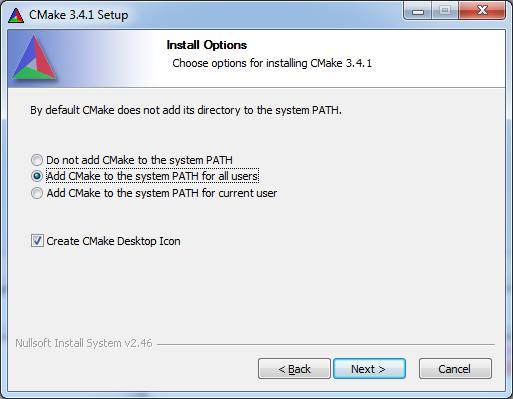
Check one of the Add CMake to the system PATH ... if you want to have
CMake in PATH. Check Create CMake Desktop Icon to create icon on
desktop:
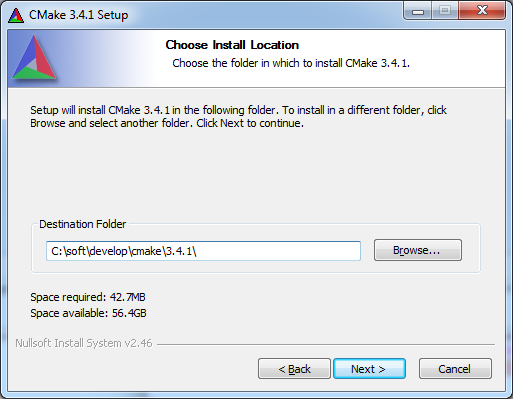
Choose installation path. Add suffix with version in case you want to have
several versions installed simultaneously:
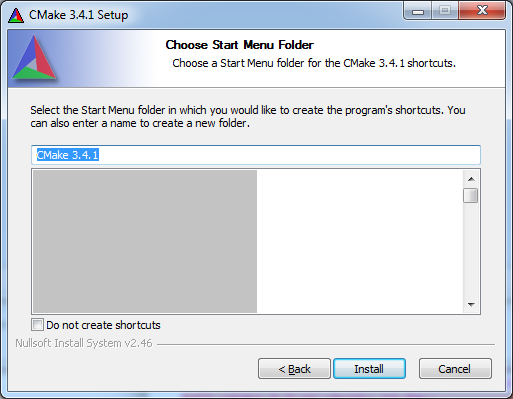
Shortcut in Start Menu folder:
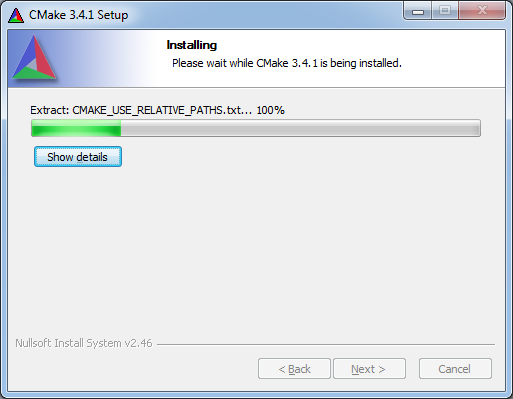
Installing…
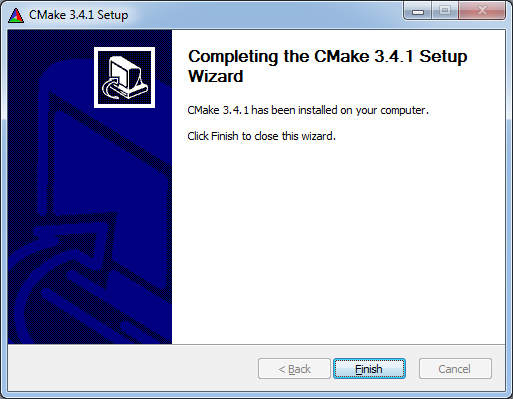
Click Finish:
Desktop icon created:
If you set Add CMake to the system PATH ... checkbox then CMake can be
accessed via
terminal
(otherwise you need to add ...\bin to
PATH environment variable):
> where cmake
C:\soft\develop\cmake\3.4.1\bin\cmake.exe

> where cmake-gui
C:\soft\develop\cmake\3.4.1\bin\cmake-gui.exe

> cmake --version
cmake version 3.4.1

CMake suite maintained and supported by Kitware (kitware.com/cmake).

