
Recently Microsoft added a list of new features to the well-received WSL (Windows Subsystem for Linux) named “WSL 2”. This new version of WSL enables features such as increased file IO performance and full system call compatibility and is not enabled by default.
In this guide, we will install, configure WSL2 on our Windows 10 workstation, as well as install a Linux distribution on it.
Prerequisites
To install WSL 2, you must be running Windows 10. The following versions and builds are supported:
- For x64 systems: Version 1903 or higher, with Build 18362 or higher.
- For ARM64 systems: Version 2004 or higher, with Build 19041 or higher.
- Builds lower than 18362 do not support WSL 2. Use the Windows Update Assistant to update your version of Windows.
Step #1 — Enable the “Windows Subsystem for Linux” feature
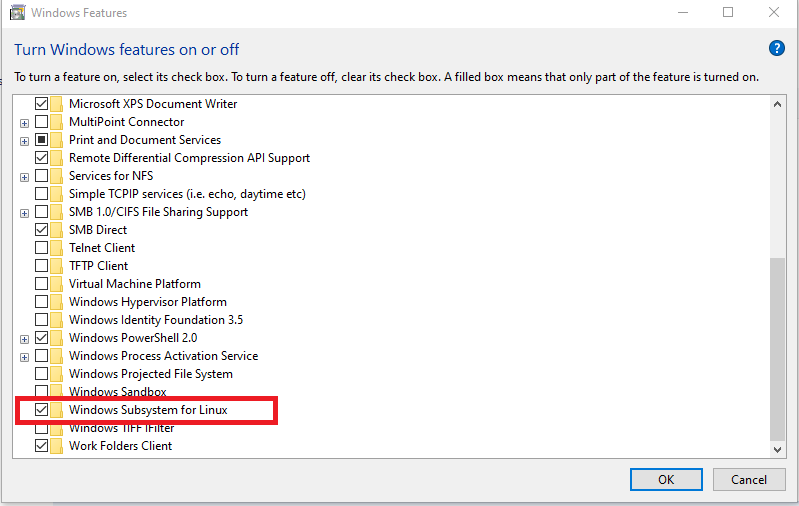
To install WSL (any version) to Windows 10 we must first enable the “Windows Subsystem for Linux” feature in Windows 10. This can be done in two ways:
using Powershell
To enable the “Windows Subsystem for Linux” open Powershell and type the below command:
dism.exe /online /enable-feature /featurename:Microsoft-Windows-Subsystem-Linux /all /norestartusing GUI
Go to Control Panel -> Programs & Features -> Turn Windows features on or off, then find and enable “Windows Subsystem for Linux” like the below screenshot:
Step #2 — Enable the “Virtual Machine Platform” feature
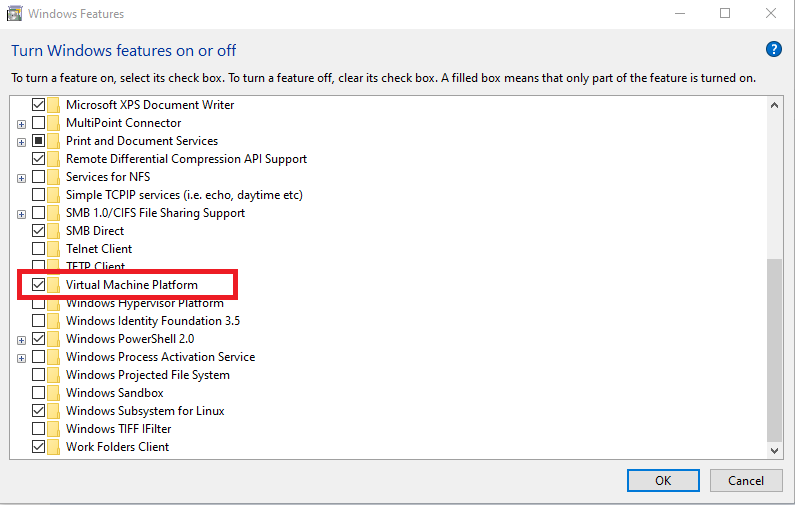
Next, we need to enable the “Virtual Machine Platform” feature. This can be done in two ways:
Powershell
To enable the “Virtual Machine Platform” open Powershell and type the below command:
dism.exe /online /enable-feature /featurename:VirtualMachinePlatform /all /norestartGUI
Go to Control Panel -> Programs & Features -> Turn Windows features on or off, then find and enable “Virtual Machine Platform” like the below screenshot:
Step #3 — Download the “Linux kernel update” package
Microsoft provides the Linux kernel update package, which is needed to support the added feature set of WSL 2. You can find the package at the following links:
WSL2 Linux kernel update package for x64 machines
WSL2 Linux kernel update package for Arm64 machines
If you’re not sure what kind of machine you have, open Command Prompt or PowerShell and enter:
systeminfo | find "System Type".After downloading the package for your machine kind, run the update package downloaded in the previous step. (Double-click to run — you will be prompted for elevated permissions, select ‘yes’ to approve this installation.)
Once the installation is complete, restart your machine to complete the WSL install and update to WSL 2.
Step #4 — Set WSL 2 as your default version
As you can have both versions of WSL installed, it is always nice to set the default version of newly installed distributions to WSL2. To do so, open Powershell and type:
wsl --set-default-version 2This will ensure that the extra features are enabled on the Linux distributions you’re going to download and install in the future, but what about the already installed distros?
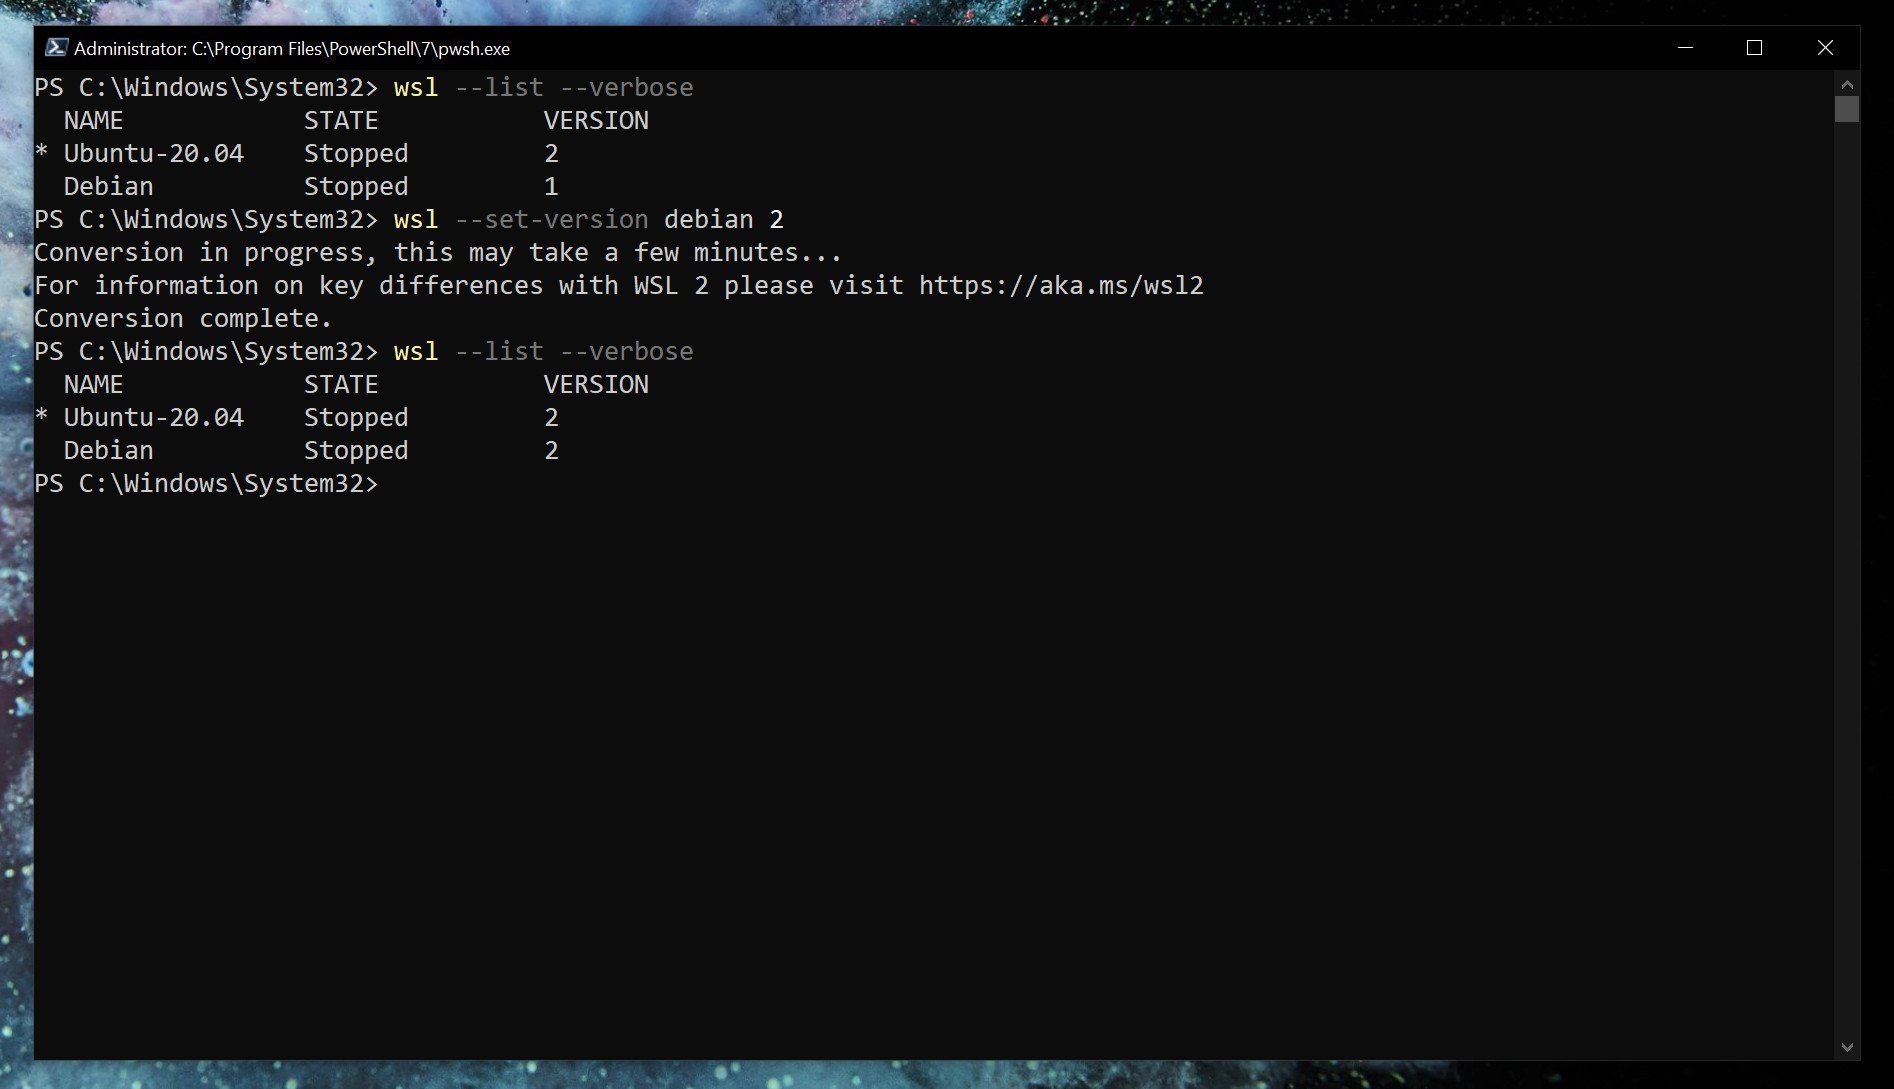
If you have recently updated WSL to WSL2, chances are your already installed distributions are using WSL 1 features. To check, open a Powershell window and type:
wsl --list --verboseThis will return with a list of installed distributions, along with the Version of WSL enabled on those. To update your installed distributions to the newer feature set, open a Powershell window and type:
wsl --set-version <distribution name> <versionNumber>Step #5 — Install your Linux distribution of choice
Now after we’ve set-up all the needed dependencies for WSL 2 and enabled its feature set by default it is time to download and use your distribution of choice.
The following lists all compatible and available distributions in the Microsoft store at the time of writing:
- Ubuntu 16.04 LTS
- Ubuntu 18.04 LTS
- Ubuntu 20.04 LTS
- openSUSE Leap 15.1
- SUSE Linux Enterprise Server 12 SP5
- SUSE Linux Enterprise Server 15 SP1
- Kali Linux
- Debian GNU/Linux
- Fedora Remix for WSL
- Pengwin
- Pengwin Enterprise
- Alpine WSL
To install any of those, go to the Win10 app store “Microsoft Store” and search for them. After you find your selected distribution, click on “Get” to start the download.
The first time you launch a newly installed Linux distribution, a console window will open and you’ll be asked to wait for a minute or two for files to de-compress and be stored on your PC. All future launches should take less than a second.
You will then need to create a user account and password for your new Linux distribution.
CONGRATULATIONS! You’ve successfully installed and set up a Linux distribution that is completely integrated with your Windows operating system!
Now if you like to test things out and restore the distribution to its original settings, you can uninstall it completely from the Settings -> Apps -> Apps & Features and re-install.
Thank you for reading! Be sure to share this post if you found it helpful and don’t hesitate to chat with me about it!
This post was first published on Stathis’ log book by Stathis Athanasiadis aka StatAth
Linux is a widely used operating system and is quite important for developers.
There are times when you might need to have both operating systems – Windows and Linux – either for work, study, or even just experimentation.
Luckily, Windows provides a convenient utility for using Linux along side Windows. This utility is called WSL (Windows Subsystem for Linux). Its recent version is WSL2 and in this guide we’ll discuss it in detail.
We will cover:
- What is WSL2 and what are its advantages?
- How to install WSL2 on Windows 10 with default settings.
- How to install WSL2 with a specific Linux distro.
What is WSL2?
Windows Subsystem for Linux provides a compatibility layer that lets you run Linux binary executables natively on Windows.
WSL2 (Windows Subsystem for Linux version 2) is the latest version of WSL. WSL2 architecture replaces WSL’s architecture by using a lightweight virtual machine. In the new version, you can run an actual Linux kernel which improves overall performance.
Advantages of using WSL
There are some advantages of WSL over a traditional VM setup:
- The setup for WSL is simple and not time consuming.
- It is light weight compared to VMs where you have to allocate resources from the host machine.
- You don’t need to install any ISO or virtual disc image for Linux machines which tend to be heavy files.
- You can use Windows and Linux side by side.
First, enable the windows subsystem for Linux option in settings.
- Go to Start. Search for «Turn Windows features on or off.»
- Check the option Windows Subsystem for Linux.
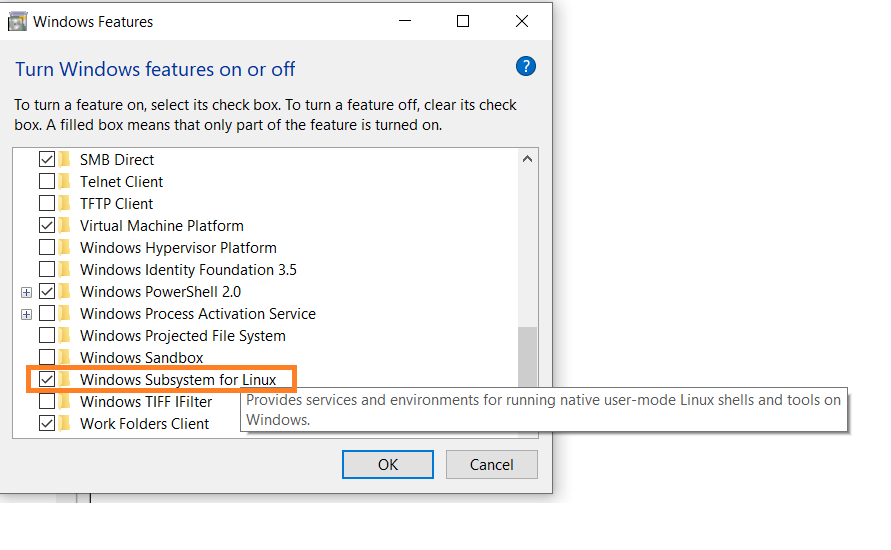
Turn Windows features on or off.
Next, open your command prompt and provide the installation commands.
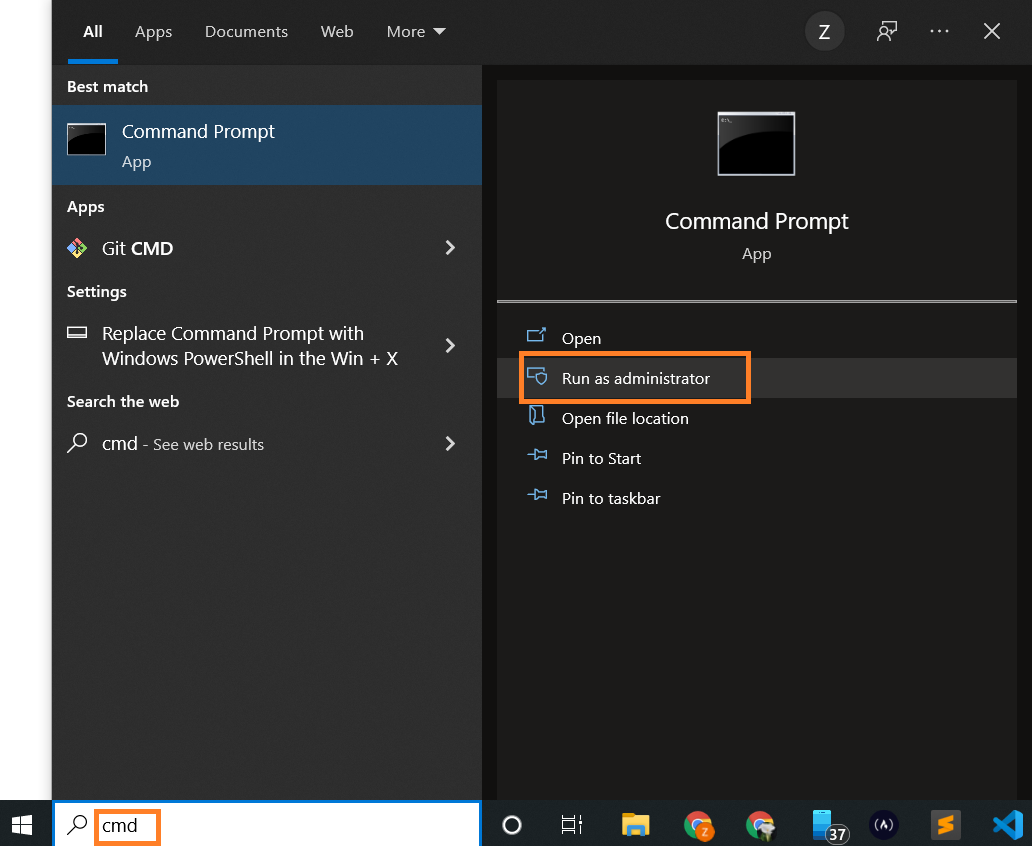
- Open Command Prompt as an administrator.
- Run the command below:
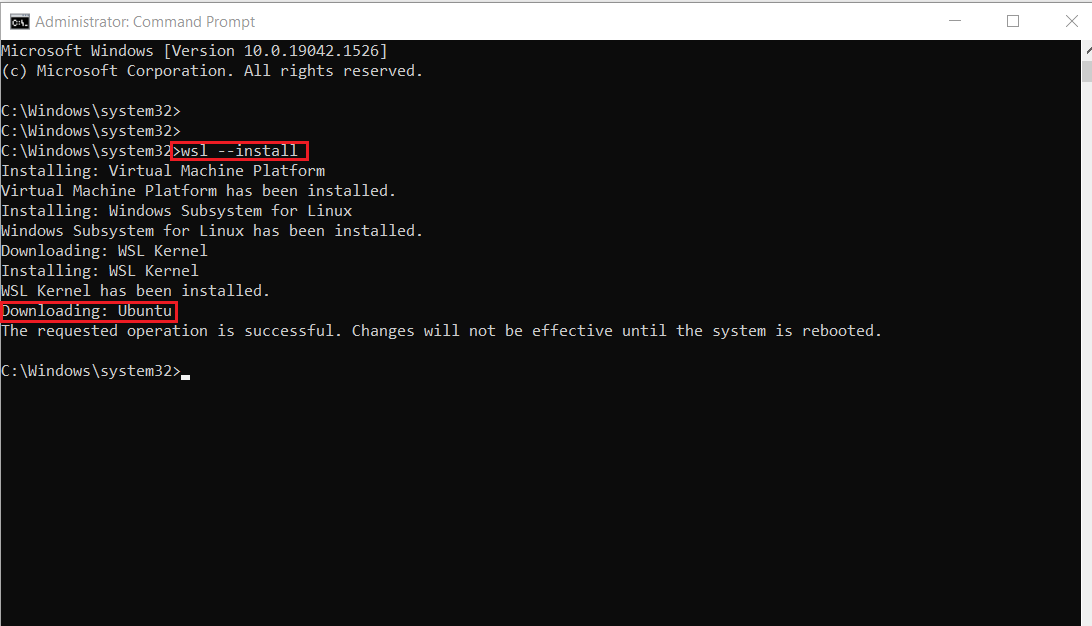
wsl --install
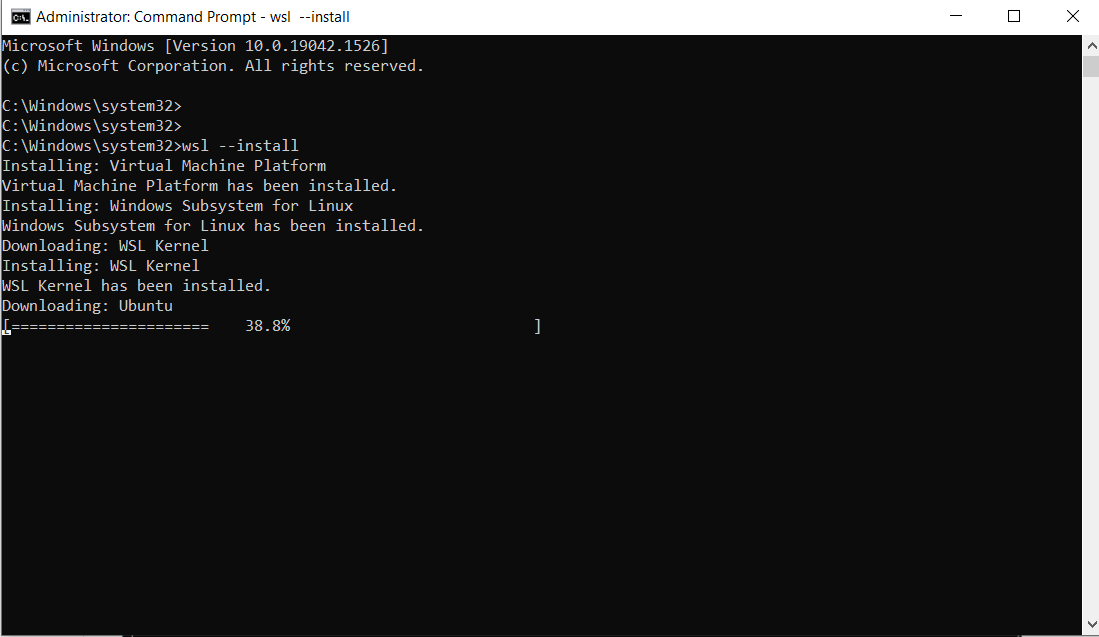
Note: By default, Ubuntu will be installed. But you can install any distro of your choice. We’ll see later how.
Once installation is complete, you’ll need to reboot your Windows machine. So, restart your Windows machine.
After restarting, you might see a window like this:
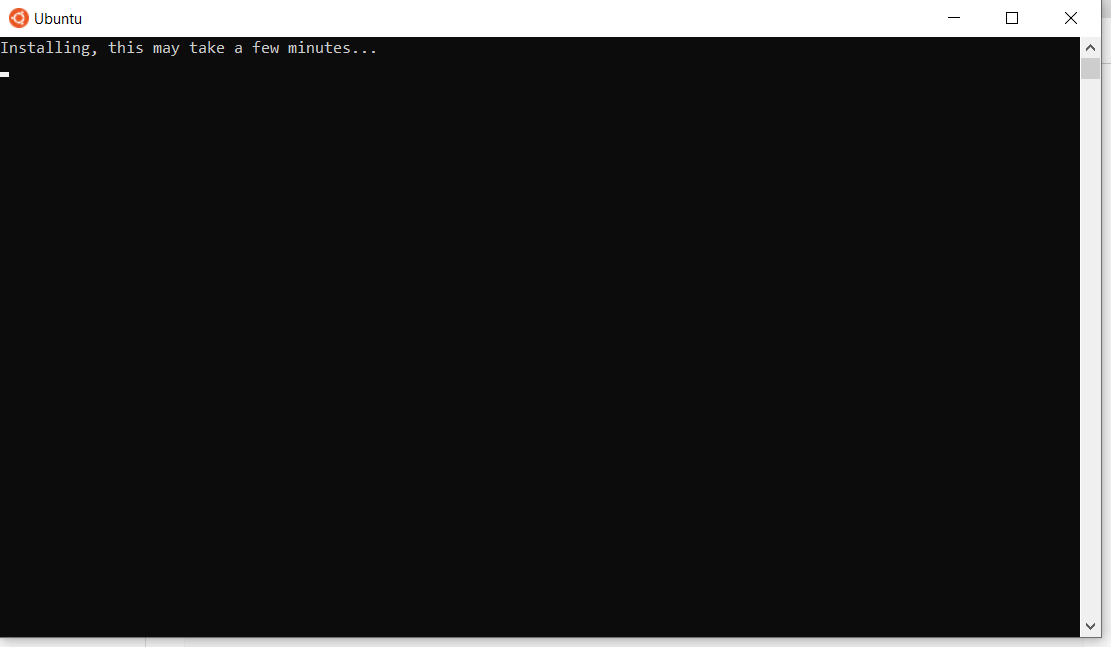
Once installation of Ubuntu is complete, you’ll be prompted to enter your username and password.
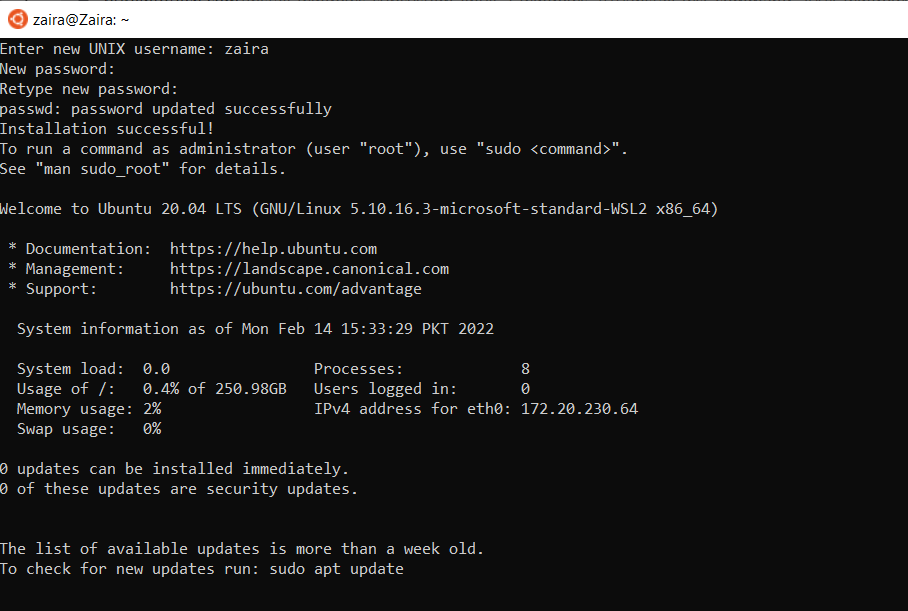
And, that’s it! You are ready to use Ubuntu.
Launch Ubuntu by searching from the start menu.
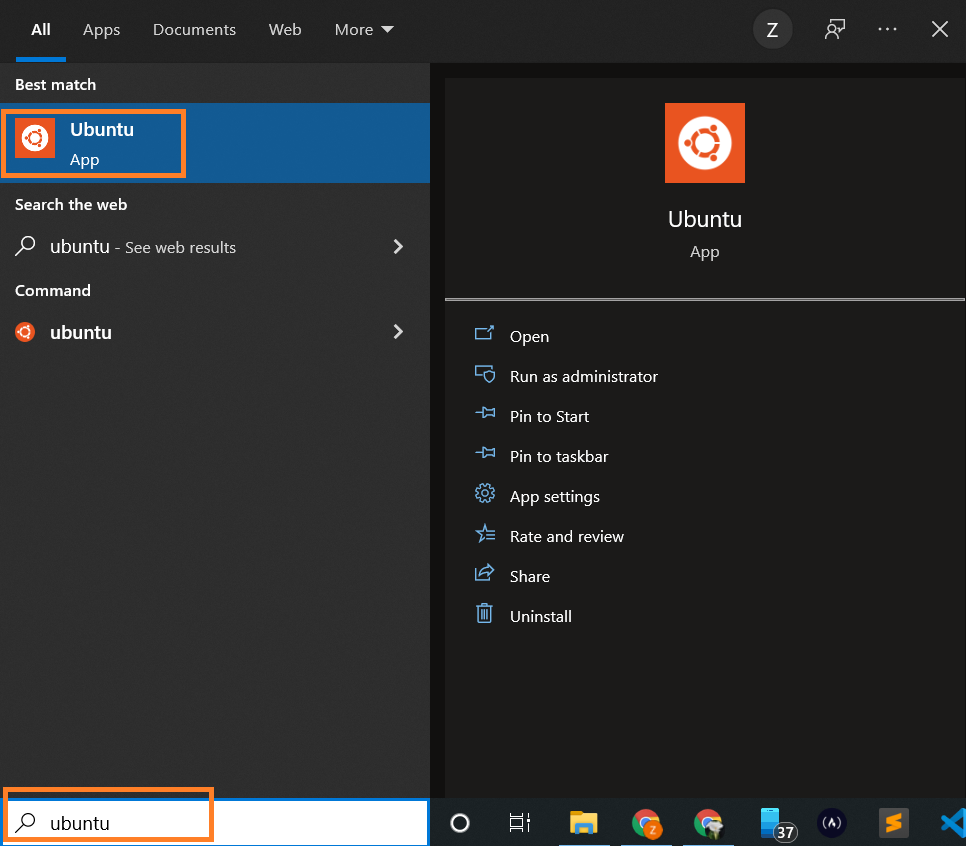
And here we have our Ubuntu instance launched.
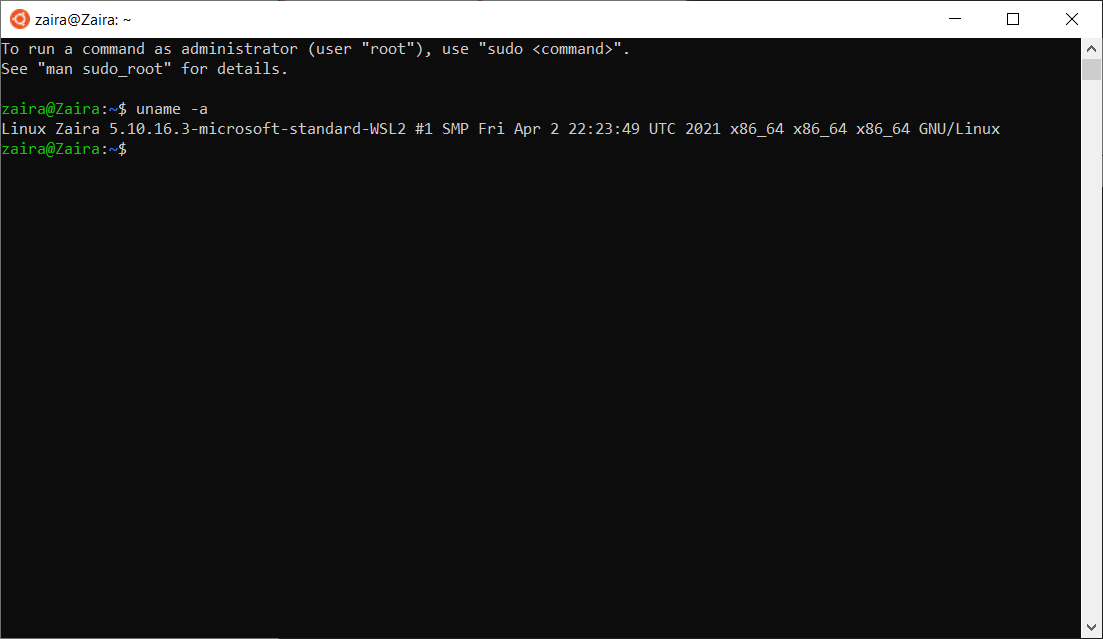
Ubuntu launched via WSL2
How to Install a Specific Linux Distro
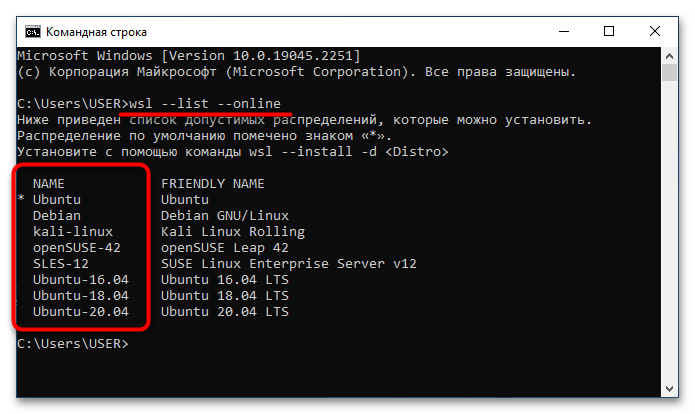
If you use the default method as shown above, Ubuntu will be installed. You can find the available list of distros by running the below command on the Windows command prompt:
wsl --list --online
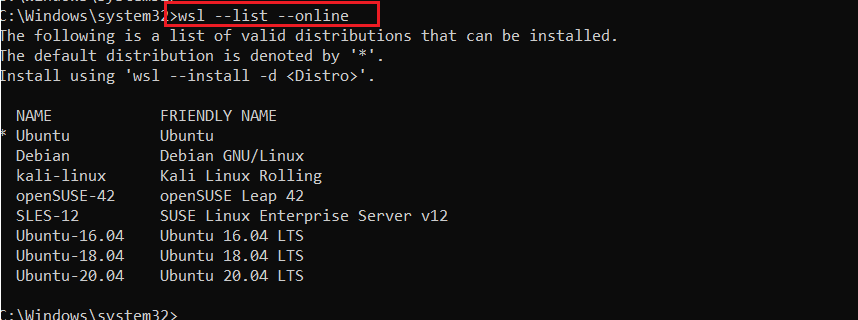
List the online available Linux distros
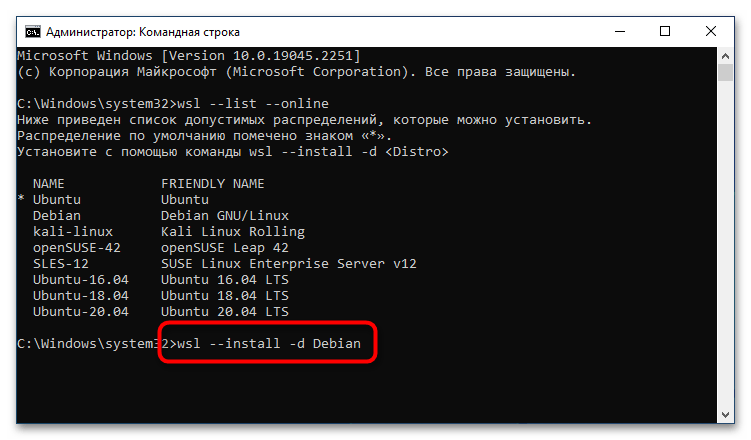
To install a specific distro, use the command below:
wsl --install -d DISTRO-NAME
For example, to install Debian, the command would be modified as follows:
wsl --install -d Debian
Follow the prompts and the specific distribution will be installed.
Tip: You can also look for updates as shown below:
wsl --update
Check the status by launching Windows PowerShell.
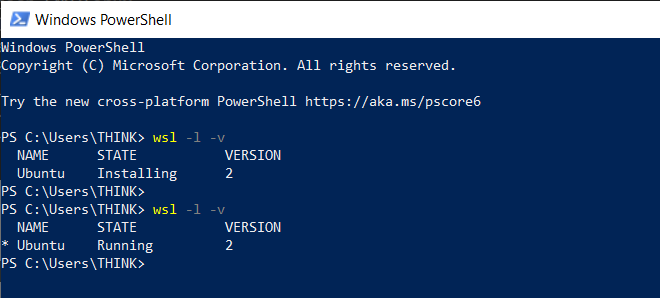
Check status of WSL
Wrapping up
WSL is a great utility to use Linux on a native Windows machine. It gives room for learning specially to those who are just starting out. I hope you found this article helpful.
Let’s connect on Twitter!
Read my other posts here.
Let’s chat on Discord.
Learn to code for free. freeCodeCamp’s open source curriculum has helped more than 40,000 people get jobs as developers. Get started
Microsoft dropped plenty of jaws way back when it launched the Windows Subsystem for Linux (WSL), a way to run actual Linux inside Windows without the need to set up a virtual machine. The project has seen a ton of support, and WSL 2 is the latest and greatest.
It takes things a little further and adds yet more awesomeness to the Linux experience on Windows 10 and Windows 11. WSL 2 uses a proper Linux kernel compared to the virtualized one from the first version, and it has significantly better performance.
More recent developments also reduce the reliance on the Microsoft Store for serving up distro images, and official support is inbound from the likes of Fedora and Arch Linux, too. But before all of that, let’s walk through how you get set up.
Simplified setup of WSL2 on Windows 10 and Windows 11
There is now an extremely simplified way to get WSL 2 up and running on your Windows 10 and Windows 11 PC. To get the very latest version using the simplified method you need to be running Windows 10 version 2004 or higher, or Windows 11.
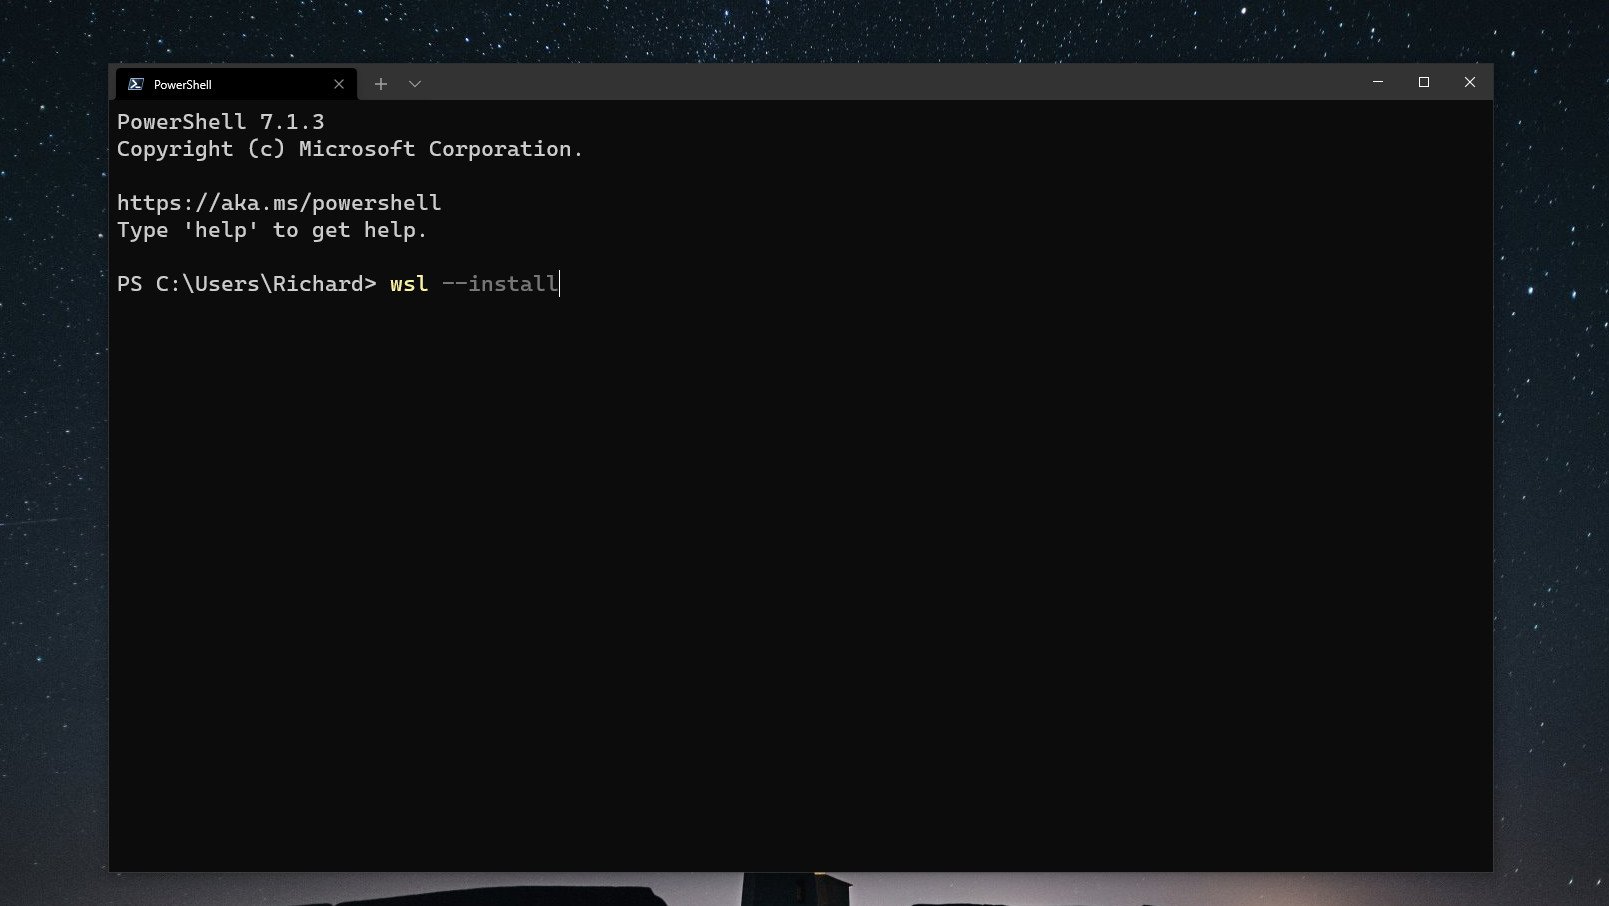
Once this is in place, open up PowerShell and enter this command:
wsl --installThat’s it. The setup process will begin, and you can relax until it’s finished. By default, WSL will enable all system features required and it will download and install Ubuntu. If you don’t want a distribution installed during setup, you can add the —no-distribution tag to the installation command.
Alternatively, if you want a non-Ubuntu distribution installed, you can add its name after the install command. For example, wsl —install Debian.
All the latest news, reviews, and guides for Windows and Xbox diehards.
WSL is also distributed through the Microsoft Store, and the simplified installation process will pull this version in. Alternatively, you can download it directly from its Microsoft Store listing.
You will also require the optional Windows Subsystem for Linux component if you wish to also use WSL 1 alongside WSL 2.
How to enable Windows Subsystem for Linux optional component for WSL 1
WSL 2 is now the standard, but if for any reason you also want to use WSL 1 alongside it, you’ll need the optional Windows Subsystem for Linux component enabling. Fortunately, you can do this in two ways. The first is by adding —enable-wsl1 to the install command used above.
But you can also enable the component at any time, even after you already have WSL 2 up and running. Open PowerShell as administrator and enter this command:
dism.exe /online /enable-feature /featurename:Microsoft-Windows-Subsystem-Linux /all /norestartEventually, you will need to reboot your PC, adding norestart means you won’t be immediately kicked out of whatever you’re doing. If you want to reboot immediately, simply omit this from the end of the command.
Setting WSL 2 for your Linux distros
The good thing about WSL 2 is that it doesn’t replace WSL 1. It just runs alongside it. This means you can run Linux installs with a combination of different versions. You’re able to set either as default, as well as setting a version specifically to each Linux distro you have on your PC.
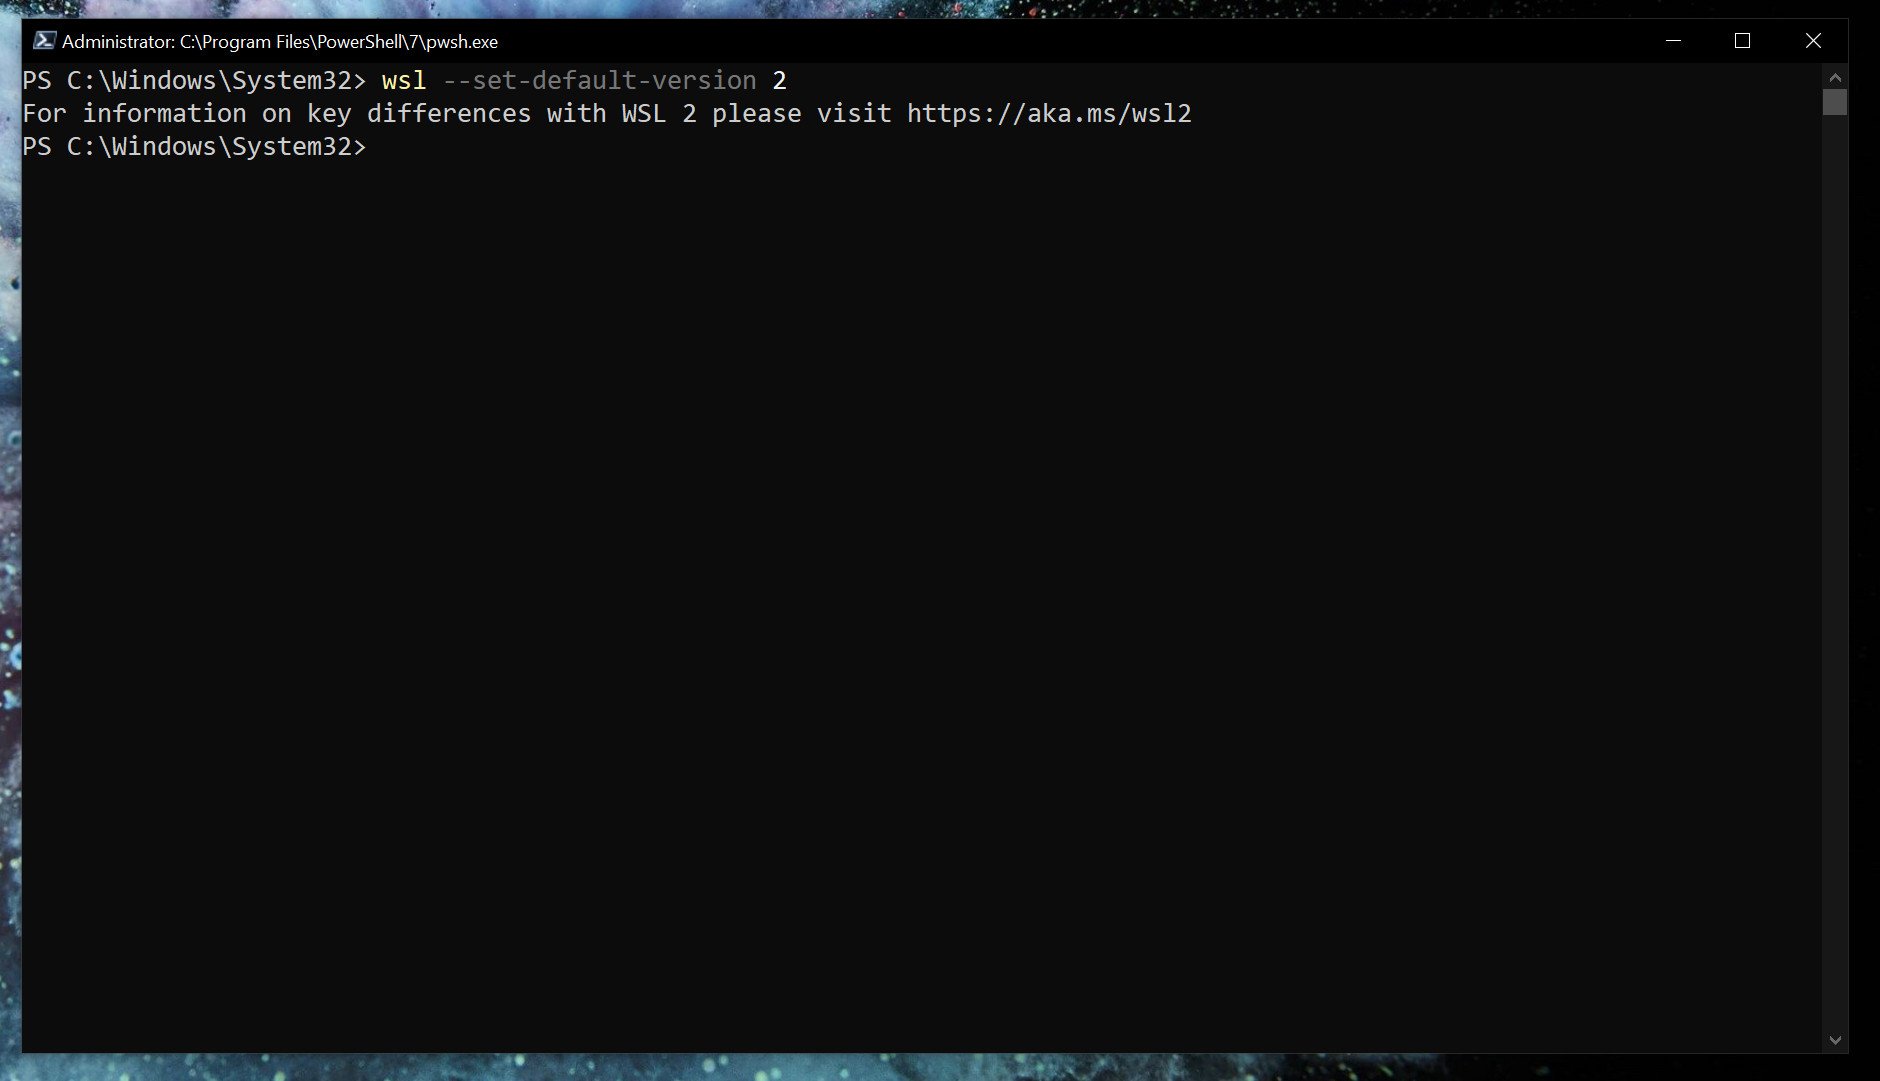
If you want everything to run on WSL 2 as soon as you install it, you can set it as the default version.
wsl --set-default-version 2Listing installed Linux distros and their WSL version
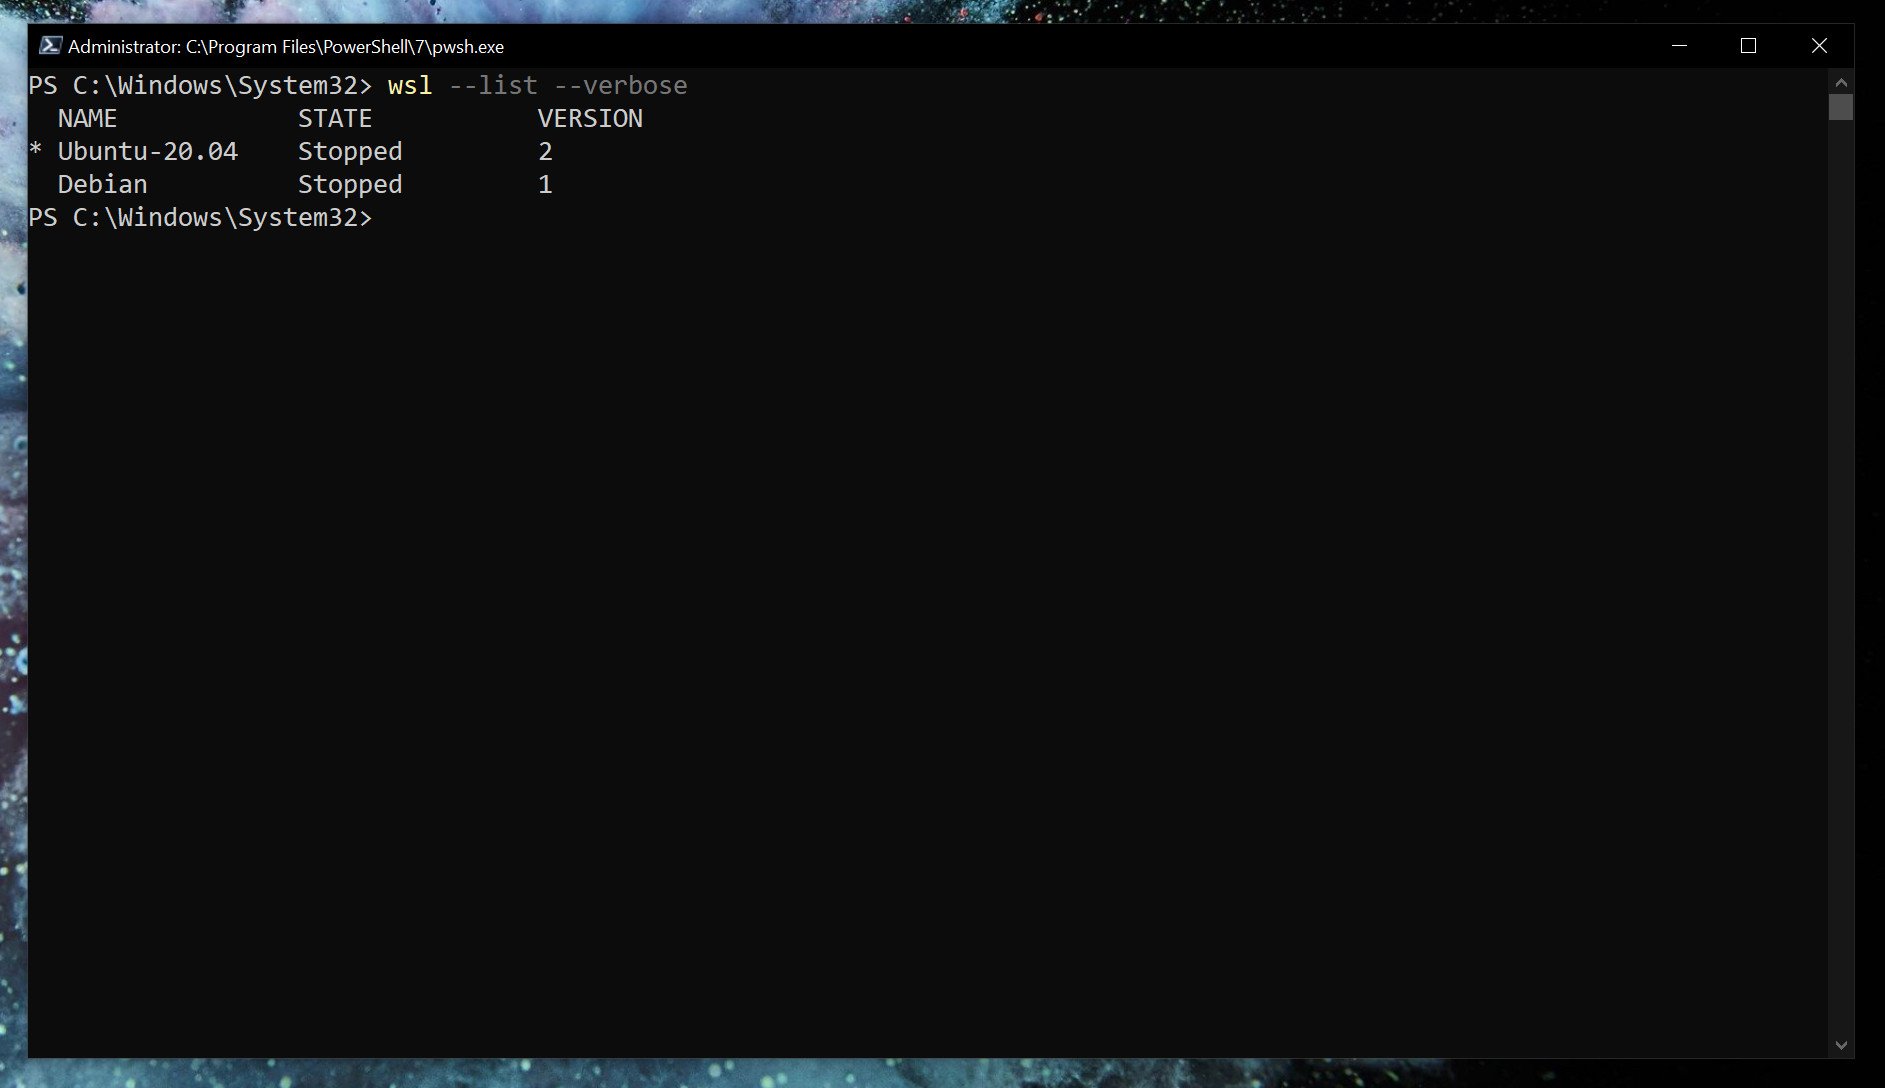
With WSL 2 set as default, any Linux installs after that will use it automatically. You can easily check which version of WSL your installed Linux distros are using.
wsl --list --verbose Using the verbose flag will give you the breakdown of which version of WSL is attached to which Linux installation. Without it, you’ll simply get a list of the versions of Linux you have installed.
Changing the version of WSL per Linux installation
While setting WSL 2 as default will apply it to anything you install afterward. If you’re already set up, you’ll need to manually convert. Likewise, if you wish to go between versions 1 and 2 or run a mixture on your system, you can do that.
wsl --set-version <distribution name=""> <versionnumber></versionnumber></distribution>So, as an example, if you have a Debian installation on WSL that you need to convert to WSL 2, you’d enter
wsl --set-version debian 2Launch specific Linux installations in PowerShell
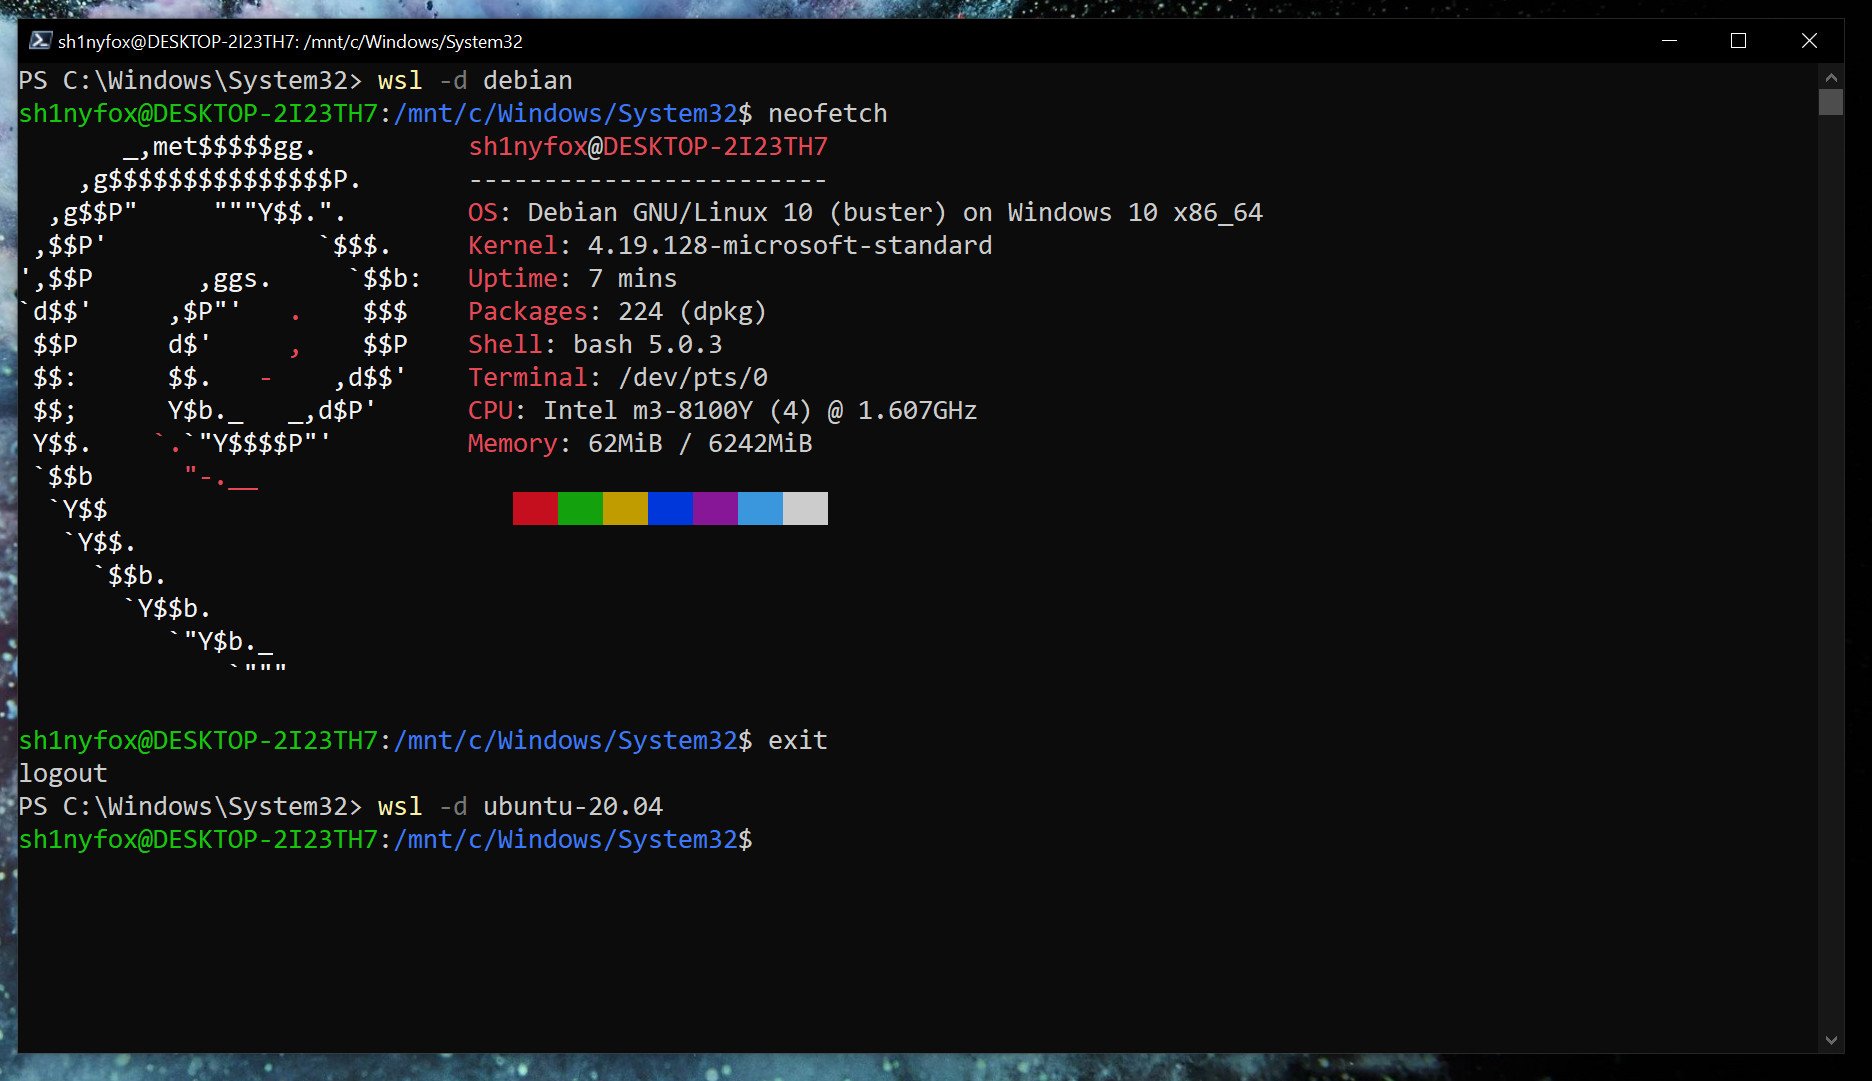
If you only have one version of Linux installed, simply typing
wslin PowerShell will launch you into the associated bash shell. But if you have multiple, you can launch a specific distro with this command.
wsl -d <distribution name=""></distribution>Once you’re done and want to go back to PowerShell, typing
exitwill take you back.
From here on out, you’re ready to go forth and install all the Linux you want. Our full guide will help you along the way, but once WSL 2 is set up how you like it, it just fades into the background.
It’s also worth grabbing the Windows Terminal app from the Microsoft Store if you’re using WSL. While you can just use the standard terminal installed with each or launch through PowerShell as shown above, Windows Terminal has a neat, tabbed interface that lets you run multiple shells at once. Have PowerShell, Linux, Azure Cloud Shell, and even Command Prompt, all open together side-by-side in one window.
Все способы:
- Вариант 1: Установка в полуавтоматическом режиме
- Шаг 1: Выбор доступных дистрибутивов Linux
- Шаг 2: Запуск инсталляции
- Вариант 2: Установка в ручном режиме
- Шаг 1: Предварительная настройка системы
- Шаг 2: Загрузка и настройка ядра WSL2
- Шаг 3: Выбор и инсталляция дистрибутива Linux
- Вопросы и ответы: 1
Вариант 1: Установка в полуавтоматическом режиме
Установка WSL в операционной системе Windows осуществляется посредством выполнения специальных команд в консоли. Для этого потребуется предварительно определиться с дистрибутивом Linux, а затем запустить процесс его инсталляции.
Важно! Приведенная ниже инструкция может быть выполнена только при условии использования Windows 10 версии 2004 (19041) и более новых. Узнать эту информацию можно в свойствах системы.
Шаг 1: Выбор доступных дистрибутивов Linux
Каждому пользователю актуальной версии Windows 10 предоставляется возможность вручную выбрать дистрибутив Linux, который будет использоваться в WSL2. Для просмотра списка доступных систем необходимо ввести специальную команду в консоль, поэтому предварительно запустите «Командную строку» с правами администратора. Сделать это можно множеством способов, например посредством поискового запроса, как показано на изображении ниже.
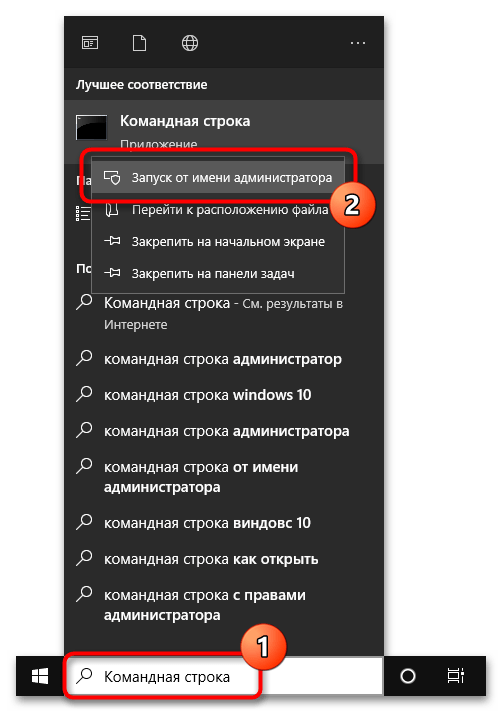
Читайте также: Как открыть «Командную строку» от имени администратора в Windows 10
Примечание! По умолчанию всегда выбрана последняя версия дистрибутива Ubuntu. Если именно его вы и хотите установить, то пропустите этот шаг и переходите сразу ко второму.
После того как окно консоли будет открыто, впишите или вставьте в него одну из нижеприведенных команд, после чего нажмите клавишу Enter:
wsl --list --online или wsl -l -o
В результатах выдачи будет приведен список всех доступных дистрибутивов Linux. На этом этапе вам необходимо запомнить или скопировать в буфер обмена название, которое находится в столбце «NAME».
Обратите внимание! Если в списке доступных дистрибутивов нет желаемого, его можно импортировать в WSL2 посредством файла TAR или APPX. При необходимости есть возможность создать собственный дистрибутив на базе ядра Linux. Эти процессы описываются в официальной документации Microsoft, при необходимости ознакомиться с ними можно, воспользовавшись ссылками ниже.
Импорт любого дистрибутива Linux для использования с WSL
Создание пользовательского дистрибутива Linux для WSL
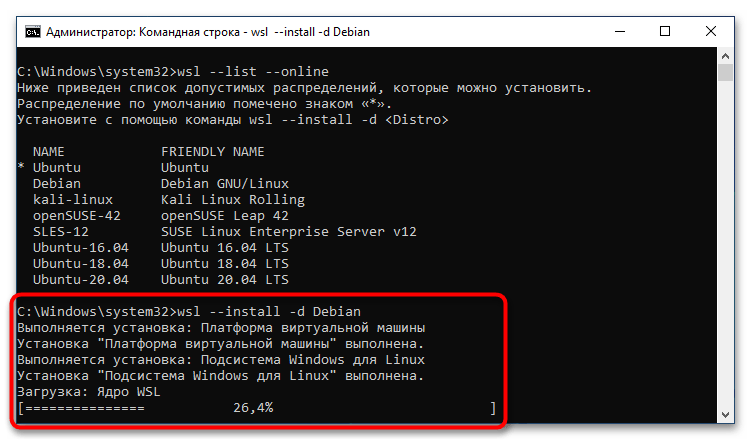
Шаг 2: Запуск инсталляции
После того как версия дистрибутива Linux для WSL2 была выбрана, можно переходить непосредственно к ее инсталляции. Делается это тоже в «Командной строке», для чего нужно воспользоваться приведенной ниже командой. Не забудьте после ее ввода нажать клавишу Enter.
wsl --install -d <НазваниеДистрибутива>
Примечание! Если вы хотите установить версию по умолчанию, тогда нет необходимости прописывать название дистрибутива вручную, можно воспользоваться следующей командой:
wsl —install
Сразу после этого начнется процесс установки платформы виртуальной машины, затем инсталлируется «Подсистема Windows для Linux», а в завершение будет выполнена загрузка ядра WSL2.
После всех этих процедур можно будет воспользоваться WSL2 для вызова подсистемы Linux. Для этого достаточно будет запустить установленный дистрибутив через меню «Пуск».
Вариант 2: Установка в ручном режиме
Если версия вашей операционной системы Windows 10 ниже 2004 (19041), тогда воспользоваться вышеприведенной инструкцией не получится и большинство действий придется выполнять вручную.
Шаг 1: Предварительная настройка системы
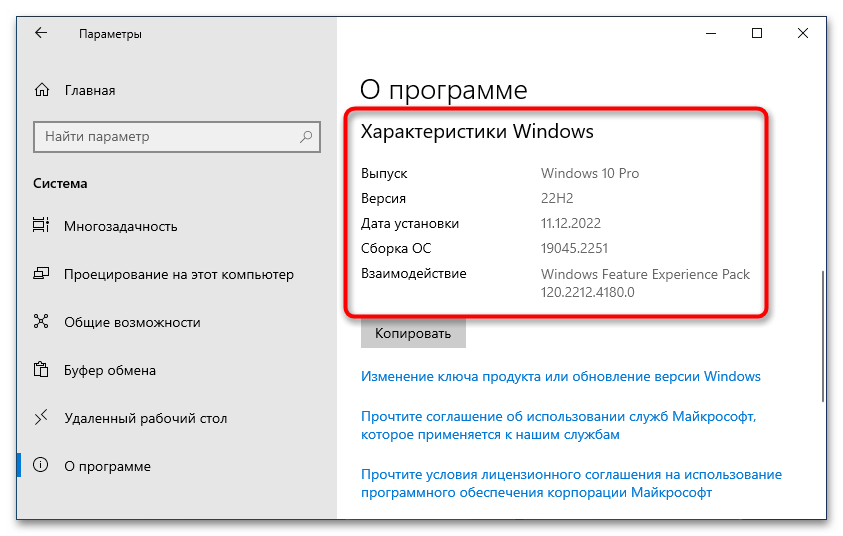
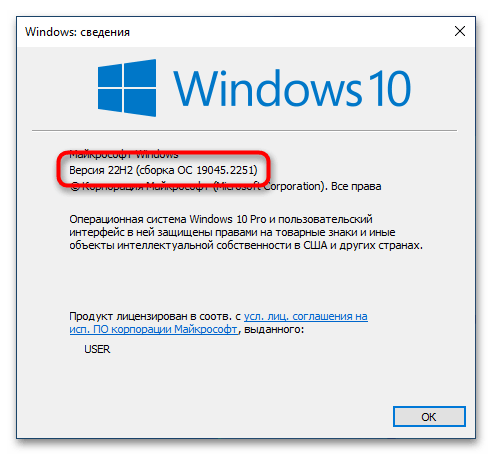
Первостепенно необходимо проверить, поддерживает ли установленная версия операционной системы обновление WSL до второй версии. Сделать это можно посредством вызова окна «Windows: сведения». Для этого нажмите сочетание горячих клавиш Win + R, впишите в поле запроса команду winver и нажмите клавишу Enter.

Появится соответствующее окно, в котором будет указана версия операционной системы и ее сборка. Убедитесь, что она выше 1903 (18362). Если это так, можете продолжить выполнение этой инструкции, в противном случае попробуйте прежде обновить Windows 10 до актуальной версии.
Читайте также: Как обновить Windows 10 до последней версии
Важно! Если ваш компьютер работает на процессоре с архитектурой ARM64, этот способ установки WSL2 не подойдет. Обновитесь до последней версии Windows 10 и воспользуйтесь ранее предоставляемой инструкцией.
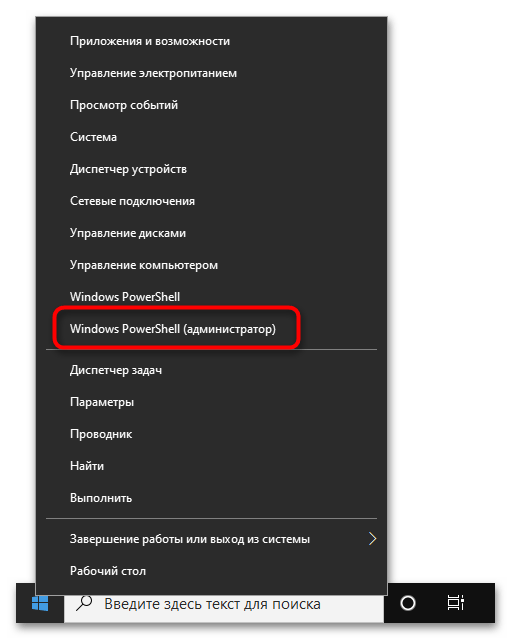
После того как вы удостоверились в актуальности версии операционной системы, необходимо произвести ее предварительную настройку, а именно — включить «Подсистему Windows для Linux» и компонент виртуальных машин. Делается это в оболочке PowerShell, поэтому предварительно запустите ее с правами администратора. Проще всего сделать это через контекстное меню кнопки «Пуск», как показано на изображении ниже. Но это не единственный способ.
Подробнее: Как открыть PowerShell в Windows 10
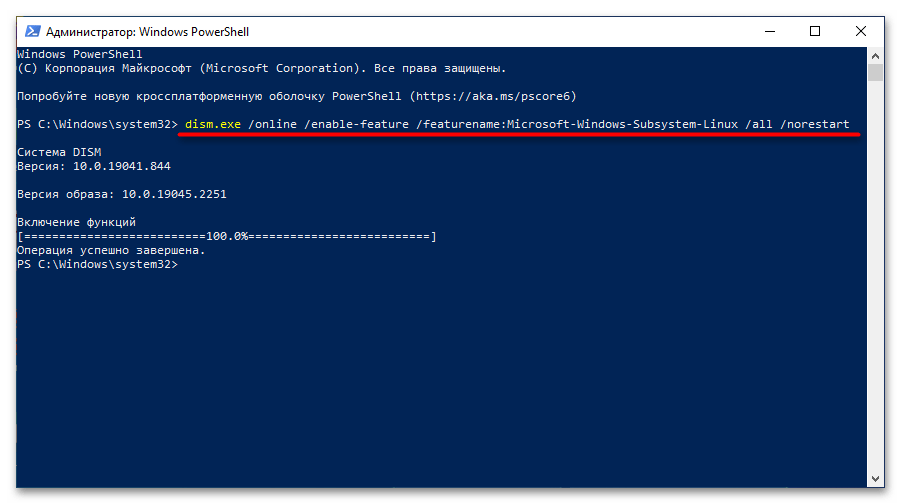
Теперь необходимо включить компонент «Подсистема Windows для Linux». Для этого скопируйте и вставьте в окно консоли PowerShell следующую команду, после чего нажмите Enter:
dism.exe /online /enable-feature /featurename:Microsoft-Windows-Subsystem-Linux /all /norestart
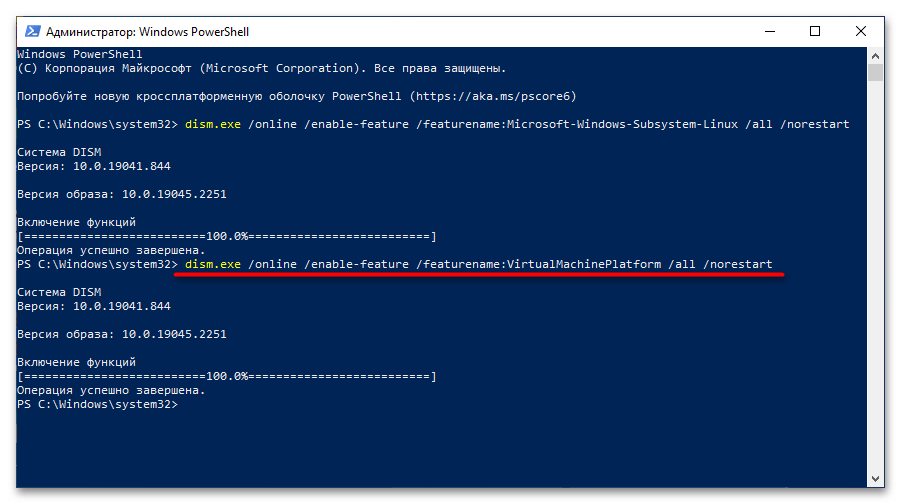
Ожидайте завершения процедуры, когда на экране появится приглашение к вводу новой команды. После этого включите компонент виртуальных машин. Это делается посредством нижепредставленной команды:
dism.exe /online /enable-feature /featurename:VirtualMachinePlatform /all /norestart
Важно! Если результатом ее выполнения является ошибка, потребуется предварительно включить виртуализацию. Делается это через BIOS, но сначала следует проверить статус этой функции в операционной системе. На нашем сайте есть отдельные статьи, посвященные этой теме.
Подробнее:
Как проверить, включена ли виртуализация в Windows 10
Как включить виртуализацию в BIOS

После того как компонент виртуальных машин будет установлен, потребуется перезагрузить компьютер.
Шаг 2: Загрузка и настройка ядра WSL2
Следующим шагом будет загрузка и установка ядра второй версии WSL, но изначально нужно определить архитектуру процессора, на которой работает операционная система. Для этого вызовите окно «Командной строки», в котором выполните следующую команду:
systeminfo | find "Тип системы"
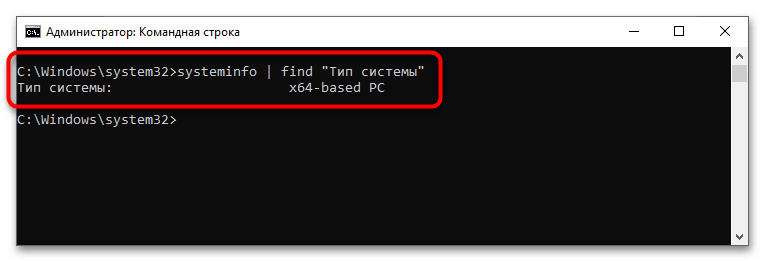
В результатах выдачи будет указана архитектура процессора. Если упоминается x64, скачайте пакет обновления ядра Linux в WSL2 для 64-разрядных компьютеров на базе процессора x86. Если в результатах выдачи есть упоминание ARM64, загрузите пакет обновлений по этой ссылке. Сохраните файл в любое удобное место, после чего запустите его, дважды кликнув по названию. Далее следуйте инструкции инсталлятора, пока не будет произведена установка.

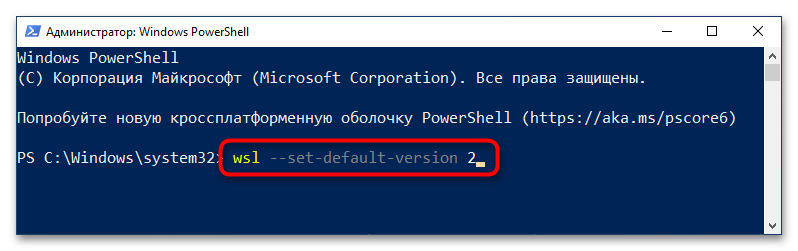
Теперь необходимо выбрать WSL2 версией по умолчанию, чтобы при установке дистрибутивов Linux они инсталлировались в этом окружении. Для этого достаточно в окне PowerShell выполнить представленную ниже команду:
wsl --set-default-version 2
Шаг 3: Выбор и инсталляция дистрибутива Linux
Как только все необходимые компоненты будут установлены, можно переходить к выбору дистрибутива Linux для инсталляции в окружении WSL2. В отличие от первого способа, представленного в этой статье, все действия будут выполняться не в «Командной строке», а в Microsoft Store. Для удобства ниже приведен список доступных систем со ссылками на них:
- Ubuntu 18.04 LTS
- Ubuntu 20.04 LTS
- Ubuntu 22.04 LTS
- openSUSE Leap 15.1
- SUSE Linux Enterprise Server 12 SP5
- SUSE Linux Enterprise Server 15 SP1
- Kali Linux
- Debian GNU/Linux
- Fedora Remix for WSL
- Pengwin
- Pengwin Enterprise
- Alpine WSL
- Raft (пробная версия)
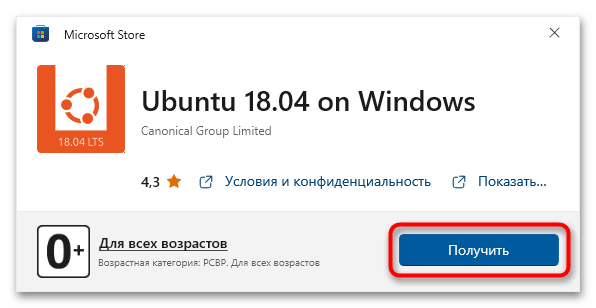
Воспользуйтесь нужной ссылкой, чтобы перейти в магазин приложений от Microsoft. Находясь на странице нужного дистрибутива, щелкните по кнопке «Получить», расположенной рядом с его названием.
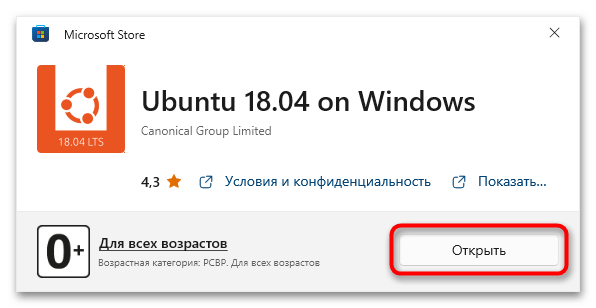
Дождитесь завершения загрузки, после чего кликните по появившейся кнопке «Открыть». Запустится окно консоли, в котором будет предложено подождать несколько минут, пока идет распаковка дистрибутива. В дальнейшем процедура инициализации ядра Linux будет занимать считанные секунды.
Примечание! Представленный выше список дистрибутивов взят с официального сайта Microsoft и может со временем измениться. В случае необходимости рекомендуем обратиться за справкой непосредственно к статье-первоисточнику.
Наша группа в TelegramПолезные советы и помощь
How to Enable WSL2 on Windows 10
If you want to run Linux on your Windows 10 machine without messing around too much, enabling the Windows Subsystem for Linux (WSL2) is your best bet. In a nutshell, WSL2 allows you to run a Linux kernel on your Windows machine. It’s perfect for developers or anyone who wants to use Linux tools without dual booting or using a virtual machine. Here’s a quick and easy guide to help you get WSL2 up and running in no time.
These steps will help you enable WSL2 on your Windows 10 computer, ensuring you can run Linux distributions side-by-side with your Windows apps.
Step 1: Open PowerShell as Administrator
Open the Start menu, type «PowerShell,» right-click on Windows PowerShell, and select «Run as administrator.»
Running PowerShell as an administrator is crucial because you’ll be making system-level changes. If you don’t have admin rights, you won’t be able to enable WSL2.
Step 2: Enable the WSL Feature
In the PowerShell window, type the command dism.exe /online /enable-feature /featurename:Microsoft-Windows-Subsystem-Linux /all /norestart and press Enter.
This command enables the Windows Subsystem for Linux feature on your system. You don’t need to restart your computer at this point, but that will be required later.
Step 3: Enable the Virtual Machine Platform Feature
Next, type dism.exe /online /enable-feature /featurename:VirtualMachinePlatform /all /norestart and press Enter.
The Virtual Machine Platform is a prerequisite for WSL2 as it leverages virtualization technology to run the Linux kernel. Again, no need to restart just yet.
Step 4: Restart Your Computer
Restart your computer to apply the changes.
This step is essential as it ensures that the newly enabled features are properly initialized. Make sure to save your work before restarting.
Step 5: Set WSL Version to WSL2
After restarting, open PowerShell as an administrator again, and type wsl --set-default-version 2 then press Enter.
This command sets WSL2 as your default version, so any new Linux distributions you install will use WSL2 automatically.
Step 6: Install a Linux Distribution from Microsoft Store
Open the Microsoft Store, search for your preferred Linux distribution (like Ubuntu), and click Install.
This step is where you choose the Linux flavor you want to run. Once installed, you can launch it from the Start menu like any other app.
After completing these steps, your Windows 10 machine will have WSL2 enabled. You can now run Linux distributions side-by-side with your Windows applications, providing a seamless development or user experience.
Tips for Enabling WSL2 on Windows 10
- Check System Requirements: Ensure your Windows version is 1903 or higher and build 18362 or higher.
- Keep PowerShell Open: You may need to run multiple commands, so keeping PowerShell open can save time.
- Virtualization Support: Make sure virtualization is enabled in your BIOS/UEFI settings.
- Disk Space: Ensure you have enough disk space for the Linux distributions you want to install.
- Update Windows: Keeping your system up-to-date can prevent compatibility issues.
Frequently Asked Questions
What is WSL2?
WSL2 stands for Windows Subsystem for Linux version 2, a compatibility layer for running Linux binary executables natively on Windows.
Is WSL2 better than WSL1?
Yes, WSL2 offers improved performance, full system call compatibility, and uses a real Linux kernel.
Can I run GUI applications with WSL2?
As of recent updates, you can run GUI applications using WSL2, especially with Windows 11 improvements.
Do I need to uninstall WSL1 to use WSL2?
No, you can upgrade your existing WSL1 distributions to WSL2 using the command wsl --set-version 2.
Is WSL2 secure?
Yes, WSL2 is secure as it runs in a lightweight virtual machine managed by Windows.
Summary
- Open PowerShell as Administrator.
- Enable the WSL Feature.
- Enable the Virtual Machine Platform Feature.
- Restart Your Computer.
- Set WSL Version to WSL2.
- Install a Linux Distribution from Microsoft Store.
Conclusion
And there you have it! Enabling WSL2 on Windows 10 is a straightforward process that opens up a world of possibilities. Whether you’re a developer needing Linux tools or just curious about exploring different operating systems, WSL2 makes it easy and seamless. Plus, with our step-by-step guide and handy tips, you’ll have it up and running in no time.
WSL2 offers a truly integrated experience, allowing you to switch between Windows and Linux effortlessly. This is particularly useful for developers who need to test applications in both environments or use specific Linux tools. The compatibility and performance enhancements in WSL2 make it a valuable addition to any tech-savvy individual’s toolkit.
If you’re interested in more advanced configurations or troubleshooting tips, plenty of resources are available online. Microsoft’s official documentation is a great place to start, providing detailed guides and community forums where you can ask questions and share your experiences.
So, what are you waiting for? Go ahead and enable WSL2 on your Windows 10 machine and start exploring the best of both worlds today!
Kermit Matthews is a freelance writer based in Philadelphia, Pennsylvania with more than a decade of experience writing technology guides. He has a Bachelor’s and Master’s degree in Computer Science and has spent much of his professional career in IT management.
He specializes in writing content about iPhones, Android devices, Microsoft Office, and many other popular applications and devices.
Read his full bio here.