
You can download and install the Chrome web browser at no charge, and use it to browse the web.
How to install Chrome
Important: Before you download, you can check if Chrome supports your operating system and other system requirements.
Windows
- On your computer, download the installation file.
- To install the file, follow the on-screen instructions.
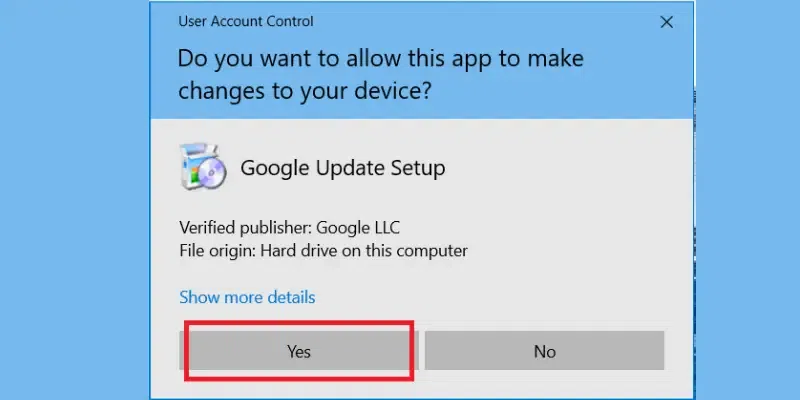
- If you get the message «Do you want to allow this app to make changes to your device,» select Yes.
- Open Chrome.
- Windows 10 and up: After the installation is completed, a Chrome window opens. You can make Chrome your default browser.
Tip: If you’ve used a different browser, like Firefox, you can import your settings into Chrome.
Install Chrome offline
If you have issues when you download Chrome on your Windows computer, use the alternate link to download Chrome on a different computer.
- On your computer, download a Chrome installerfor a different computer.
- At the bottom of the page, under “Chrome Family,” select Other Platforms.
- Select the OS of the device you wish to install Chrome on.
- Download the file.
- Move the file to the computer where you want to install Chrome.
- To install, follow the on-screen instructions.
Mac
To use Chrome on Mac, you need macOS Big Sur 11 and up.
- On your computer, download the installation file.
- Open the file named «googlechrome.dmg.»
- In the window that opens, you can find Chrome.
- Drag Chrome to the Applications folder.
- You may have to enter the admin password.
- If you don’t know the admin password, drag Chrome to a place on your computer where you can make edits, like your desktop.
Tip: To clean up after the install, in the Finder’s sidebar, to the right of Chrome, select Eject .
Linux
To install Chrome, use the same software that installs programs on your computer. You need to enter the administrator account password.
- On your computer, download the installation file.
- To open the package, select OK Install Package.
To make sure Chrome stays up-to-date, it’s added to your software manager.
Chromebook
System requirements to use Chrome
Windows
- To use Chrome on Windows with an Intel processor, you need:
- Windows 10 and up
- An Intel Pentium 4 processor or up that’s SSE3 capable
- To use Chrome on Windows with an ARM processor, you need:
- Windows 11 and up
Mac
To use Chrome on Mac, you need macOS Big Sur 11 and up.
Linux
To use Chrome on Linux, you need:
- 64-bit Ubuntu 18.04+, Debian 10+, openSUSE 15.5+, or Fedora Linux 39+.
- An Intel Pentium 4 processor or up that’s SSE3 capable.
Related resources
- Fix problems installing Chrome
- Sign in and sync in Chrome
- Update Google Chrome
- Uninstall Google Chrome
Was this helpful?
How can we improve it?
How to Download and Install Google Chrome on Windows 10
In an era where browsing the internet is an integral part of our daily lives, the choice of web browser can significantly influence our online experiences. Google Chrome, developed by Google, is one of the most popular web browsers globally, known for its speed, simplicity, and powerful features. In this guide, we will walk you through the process of downloading and installing Google Chrome on a Windows 10 system, ensuring that you can enjoy a fast and seamless web browsing experience.
Understanding Google Chrome
Before we dive into the installation process, let’s take a moment to understand what Google Chrome is and what makes it a preferred choice for many users. Launched in 2008, Google Chrome is designed to be fast, simple, and secure. It boasts a minimalist user interface, a robust extension ecosystem, and advanced security features like sandboxing and safe browsing. Chrome offers synchronization options, allowing users to access bookmarks, history, and settings across devices, making it a handy tool for users who operate on multiple platforms.
System Requirements for Google Chrome
Before installing Chrome, it’s essential to ensure that your system meets the necessary requirements. Fortunately, Google Chrome runs on various platforms, including Windows, macOS, and Linux, with Windows 10 being one of the most supported operating systems. The minimum system requirements for Google Chrome on Windows 10 include:
- A compatible Windows 10 version (64-bit recommended).
- At least 1 GB of RAM (2 GB recommended for a better experience).
- 350 MB of free disk space for installation.
- An active internet connection for downloading and updating.
Step-by-Step Guide to Download and Install Google Chrome on Windows 10
Let’s break down the entire process into simple, easy-to-follow steps. By the end of this guide, you will have successfully downloaded and installed Google Chrome on your Windows 10 PC.
Step 1: Open Your Current Web Browser
To get started, you’ll need to use your current web browser. This could be Microsoft Edge, Internet Explorer, Mozilla Firefox, or any other browser installed on your Windows 10 system. If you primarily use another browser, that’s perfectly fine.
Step 2: Navigate to the Official Google Chrome Download Page
In your current browser, type in the URL for the Google Chrome download page. The most reliable and direct link is:
https://www.google.com/chrome/
Once you enter this URL in the address bar, press «Enter» on your keyboard. You will be taken to the official Google Chrome website, where you can find all the necessary information and options for downloading the browser.
Step 3: Start the Download
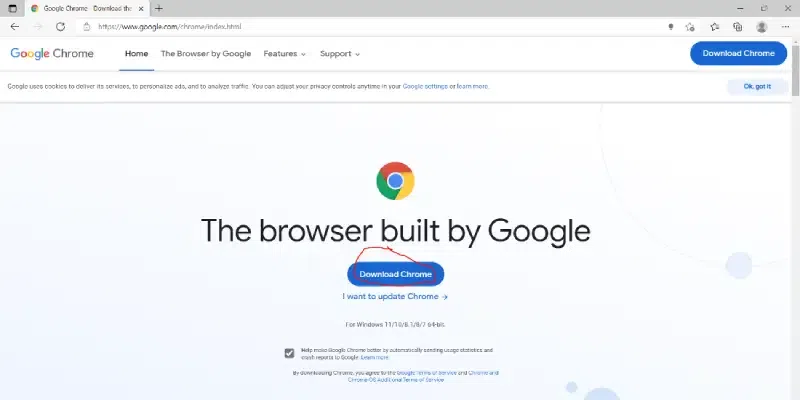
On the Google Chrome homepage, you will see a prominent button that says “Download Chrome.” Click on this button. This action will lead you to a new page that briefly describes Chrome, including its features and system requirements.
Step 4: Agree to the Terms of Service
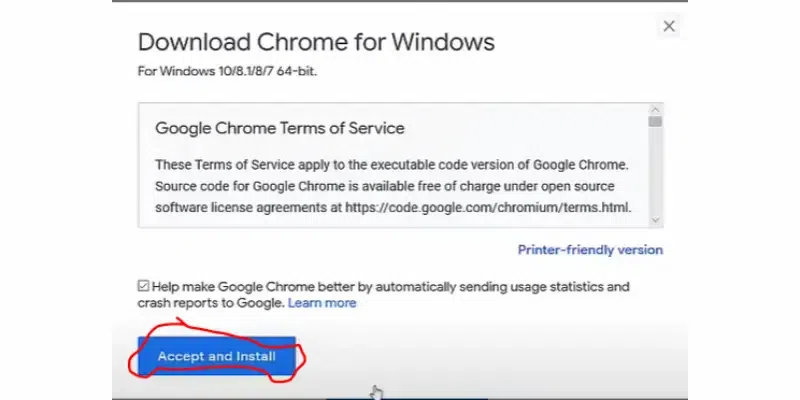
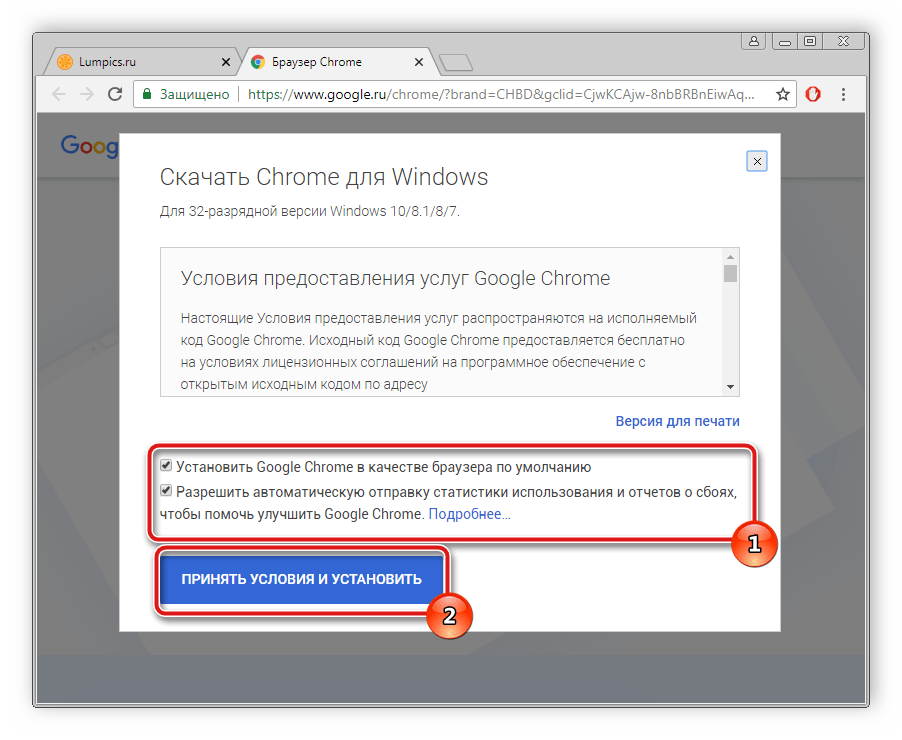
After clicking the download button, a dialog box will appear, showing Google’s Terms of Service. Before downloading, you must agree to these terms. Typically, there will be a checkbox or button that says “Accept and Install.” Click on it to proceed with the download.
Step 5: Choose the Right Version (If Necessary)
Most Windows 10 users will receive the correct version of Google Chrome automatically. However, if you’re using a specialized version of Windows (e.g., if you’re on an enterprise machine), you might need to select the appropriate package. You usually won’t need to tackle this if you’re using standard Windows 10.
Step 6: Download the Installer
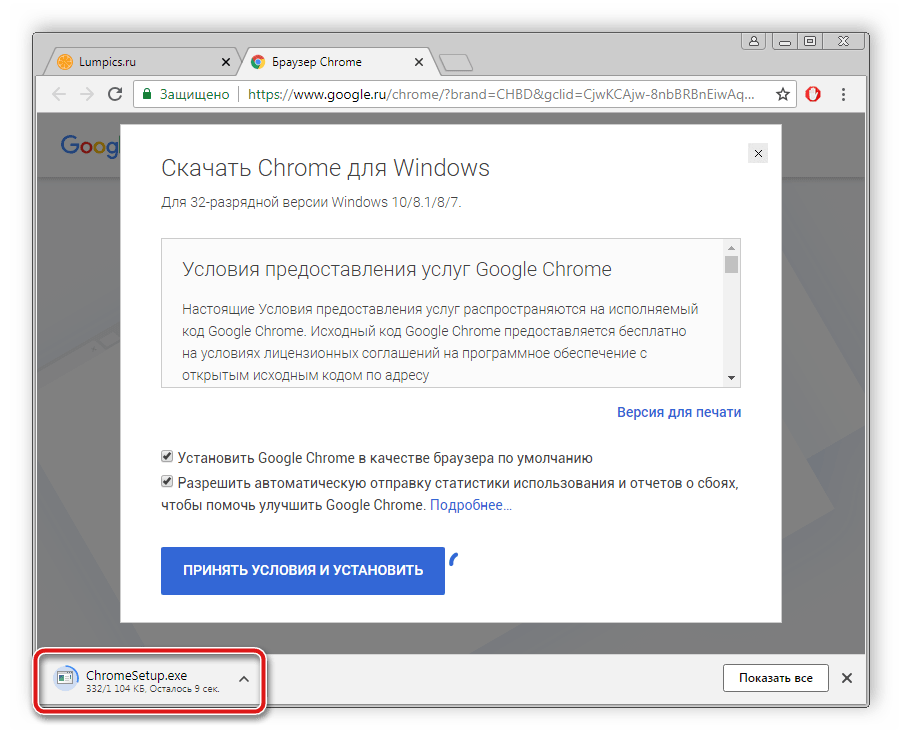
Once you accept the terms, your browser will begin downloading the Chrome setup file, which is usually named «ChromeSetup.exe.» You’ll see the download progress typically at the bottom of your browser window. The file size is relatively small (around 1 MB), so the download should be completed in just a few moments.
Step 7: Locate the Downloaded File
After the download is complete, navigate to your Downloads folder or wherever you have saved the installer. You can typically access this by:
- Pressing the Windows key + E to open File Explorer.
- Clicking on the “Downloads” folder in the left sidebar.
Alternatively, you may find the «ChromeSetup.exe» file in the bottom bar of your current browser. You can click on it directly to initiate the installation.
Step 8: Run the Installer
To begin the installation, double-click on the «ChromeSetup.exe» file. If prompted by Windows with a User Account Control dialog asking whether you want to allow this app to make changes to your device, click «Yes.» This security feature is standard on Windows operating systems to prevent unauthorized changes.
Step 9: Installation Process
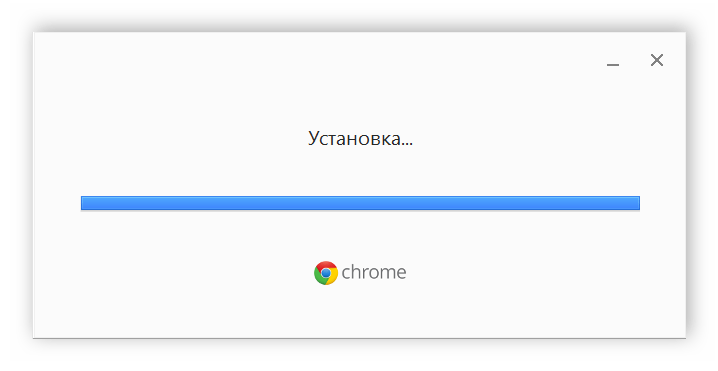
Once you have approved the installation, Google Chrome will automatically begin installing itself on your computer. The installation process is quick and usually takes less than a minute, depending on your computer’s speed and performance.
Step 10: Launch Google Chrome
After the installation is complete, you will see a notification that Google Chrome has been installed successfully. A new window will open, asking if you’d like to make Chrome your default browser. If you prefer using Chrome as your primary browser, select “Yes.” Otherwise, you can choose «No» and set it later.
You will also see a shortcut created on your desktop if you opted for it. You can open Google Chrome by either:
- Clicking on the Chrome icon on your desktop.
- Searching for «Google Chrome» in the Windows search bar.
Step 11: Initial Setup and Configuration
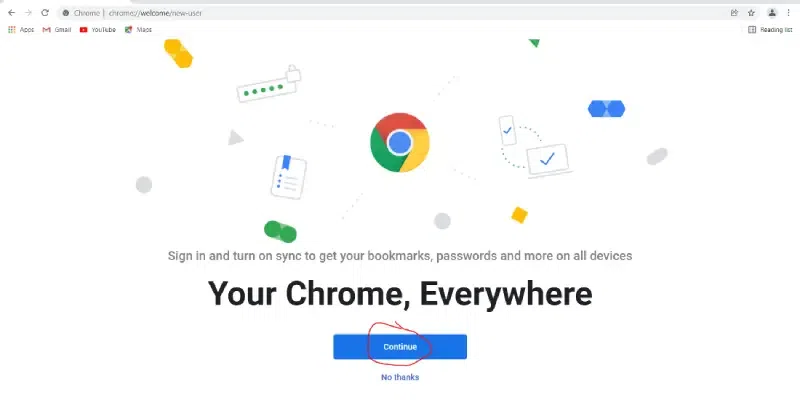
Upon launching Google Chrome for the first time, you’ll be greeted with some initial settings and configuration options. If you have a Google account, you can sign in to sync your bookmarks, history, and other settings across devices.
If you don’t have a Google account, you can choose to continue using Chrome without signing in. This will still allow you to use the browser, but without the benefit of synchronization.
Step 12: Importing Bookmarks from Other Browsers (Optional)
If you transition from another browser and want to import your bookmarks, Google Chrome offers a convenient option. Here’s how:
- Click on the three vertical dots (Chrome menu) located in the upper-right corner.
- Go to «Bookmarks» > «Import bookmarks and settings.»
- Choose the browser you’re importing from and select the data you wish to bring over (such as bookmarks, saved passwords, etc.).
- Click “Import” to complete this process.
Step 13: Customizing Google Chrome
Once Google Chrome is installed and you have imported your bookmarks (if applicable), you might want to customize the browser according to your preferences. Here are some options you can explore:
- Themes: Go to Settings > Appearance > Themes to choose different visual styles.
- Extensions: Visit the Chrome Web Store to find extensions that enhance your browsing capabilities.
- Homepage and Startup: In Settings, you can change the homepage, startup behavior, and manage your new tab settings.
Step 14: Keeping Google Chrome Up-to-Date
One of the advantages of Google Chrome is its automatic updates. By default, Chrome will update itself in the background, ensuring you always have the latest features and security improvements. However, it’s good practice to check for updates regularly. To do this:
- Click on the three vertical dots in the upper-right corner.
- Hover over “Help” and click on “About Google Chrome.”
- Chrome will check for updates and install them if available.
Conclusion
Downloading and installing Google Chrome on Windows 10 is a straightforward process that takes only a few minutes. With its speed, simplicity, and powerful functionalities, Chrome remains a top choice for internet users. By following the steps outlined in this guide, you should now have Google Chrome ready to use on your Windows 10 PC.
As you continue using Chrome, explore its vast array of features, extensions, and settings to optimize your browsing experience. Whether you are looking to improve productivity with extensions, customize your interface with themes, or stay secure while browsing, Google Chrome has something for everyone.
Embrace the web more efficiently with Chrome and enjoy the seamless experience it provides. Whether for work, education, or entertainment, a reliable browser is essential, and Google Chrome is designed to fit your needs perfectly. Happy browsing!
Last Updated :
03 Feb, 2025
Google Chrome is one of the most popular web browsers, offering fast performance, security and synchronization across devices. If you’re using Windows 11, 10 or older versions like Windows 7, this guide is for you. We will walk you through the various steps of downloading, installing, running, and setting Chrome as a default web browser, and uninstalled Chrome when required. Let’s get started:
Prerequisites:
- A Windows PC (Windows 11, 10, 8 or 7)
- A stable Internet Connection
- Admin access
Table of Content
- How to Download Chrome on Windows PC
- Steps to Install Google Chrome
- Set Chrome as Your Default Browser
- How to Check Your Chrome Version in Windows
How to Download Chrome on Windows PC
Follow the below steps to download Chrome Browser:
Step 1: Visit the Chrome Official Site
Visit the official website using any web browser.

Step 2: Click on Download Chrome
Click on the Download Chrome button to start downloading Chrome.
Step 3: Click Accept and Install
Now the dialogue box will open then click on Accept and Install.
Steps to Install Google Chrome
Once the chrome web browser download is complete in your system, now it’s time to proceed with the Google Chrome Installation.
Step 1: Check and execute the downloaded file.
Now find the executable file in the downloads folder in your system and run it.

Step 2: Confirm the Installation (UAC) to Proceed
UAC (Use Account Control) will prompt confirmation to make changes to your system. Click on Yes.
Step 3: Finish Setup
After this installation process will start and will take a few minutes depending on your Internet speed to complete the installation and Google Chrome will launch automatically.
Set Chrome as Your Default Browser
Once you download and install Google Chrome browser, it will ask to «set as a default browser». If not, follow this quick step to choose Google Chrome as your default web browser.
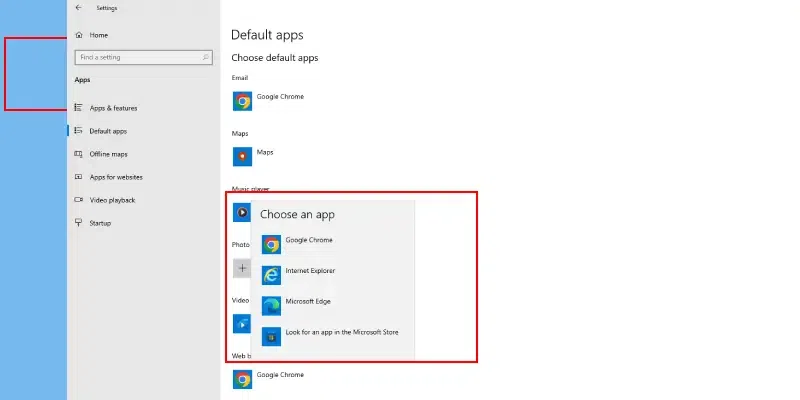
Windows 10
- Go to Settings
- Search for ‘Apps’
- Go to Default Apps
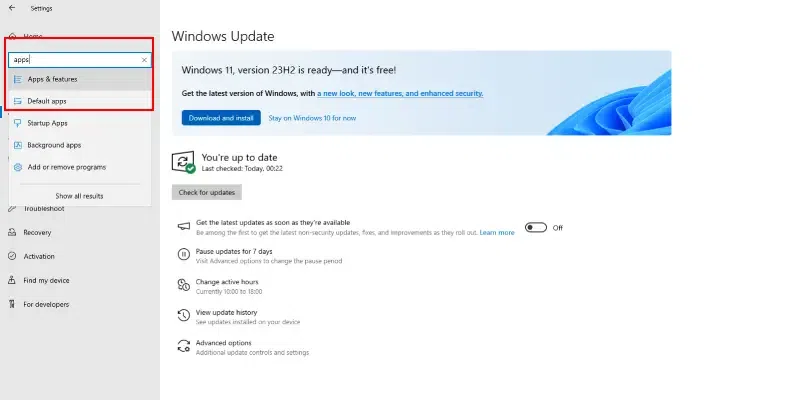
- Select ‘Web browser’ and click ‘Google Chrome’
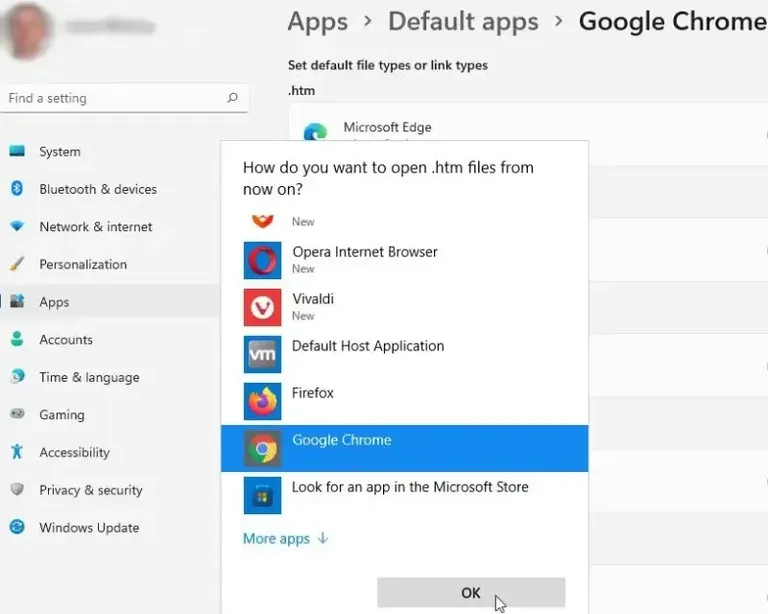
Windows 11
- Go to Settings
- Click on Apps
- Select Default apps
- Scroll down and click on Google Chrome
- Click Set default
By following this, you can easily set Google Chrome as your default web browser.
How to Check Your Chrome Version in Windows
Follow the steps below to check which Chrome version you’re using:
- Open Google Chrome
- Click on the three-dot menu on the top right corner
- Navigate to Help > About Google Chrome
- The Google Chrome version will be displayed [ like Version 132.0.6834.160 (Official Build) (64-bit) ]
Uninstall Google Chrome from Windows
If you wish to remove Google Chrome, follow the steps below to uninstall it:
Windows 11/10
- Press Win + R, type appwiz.cpl and press Enter
- Scroll down and choose Google Chrome
- Click Uninstall > Click Yes
- (Optional) If prompted, check «Also delete browsing data» and follow the on-screen instructions to remove Chrome completely.
Windows 7/8
- Open the Control Panel
- Click Programs > Programs and Features
- Find Google Chrome, click Uninstall
- Restart your system for changes to take effect.
Conclusion
By following this guide, you can easily install, update, set Chrome as a default web browser, and even check it’s latest version. Irrespective of the version you’re using, Windows 11, 10, 8 or 7, these steps will cater your needs and will ensure a smooth transition.
Download Article
A user-friendly guide to get Google Chrome for the first time on your computer, iPhone, or Android
Download Article
- Using PC, Mac, or Linux
- Using iPhone or iPad
- Using Android
- Video
- Q&A
- Tips
|
|
|
|
|
Do you want to install Google Chrome to use as your default web browser? Luckily, Google Chrome is available to download for Windows, Mac OS, Linux, Android, and iOS. You’ll just need an existing browser to reach the download page, or the App Store on iOS. This wikiHow will show you how to download the Google Chrome web browser on your computer and mobile devices.
Things You Should Know
- On desktop, go to the download website. Click «Download Chrome», then launch the setup to install.
- On iOS, open the App Store. Open the Google Chrome app page, tap «Get», then confirm.
- On Android, go to the download website. Tap «Install», then «Accept».
-

Go to the Google Chrome download page in your web browser. You can use any web browser to download Google Chrome. If you haven’t installed a browser, you can use your operating system’s preinstalled web browser, such as Microsoft Edge for Windows and Safari for Mac OS.
-

This is the blue button in the center of the page.
- Uncheck the box below if you don’t wish to send usage statistics to Google.
- You should see your download progress in your browser’s Downloads section. This may look like a down-arrow or appear as a section at the bottom of the window.
- The setup may take a few moments to download.
Advertisement
-
Click the download icon in your browser to open your downloads folder, or you can navigate to your downloads using the File Explorer (Windows) or the Finder (Mac).[1]
- This will look like ChromeSetup.exe or google-chrome-stable_current_amd64.deb. Double-click the .exe (PC), .dmg (Mac) or .deb/.rpm (Linux) file to run the setup.
- This may take a few moments to install. When it’s finished, Google Chrome will open automatically. You can now set it as your default browser.[2]


Advertisement
-
This will resemble a white A with a blue background.[3]
-
You’ll need to tap the search field to type into it.
-
Make sure this is the app created by Google LLC.
-
This will bring up the installation window. Depending on your device and settings, you may need to double-click the lock button or use Face ID to download the app.
- You may also be asked to enter your Apple ID password. Tap OK.
- Google Chrome will begin installing to your device. You’ll now be able to use Google Chrome.
- If you want to make Chrome your default browser, go to Settings → Chrome → Default Browser App → select Chrome.[4]


Advertisement
-
Open the Google Chrome download in your mobile browser. With most Android devices, Google Chrome is already the default browser. If you’re trying to troubleshoot Chrome, you’ll need to uninstall it before trying to install it again.[5]
- Chrome is available on Android phones and tablets running Android 7.0 and later.
-
This is the blue button.
-
Your download will begin immediately.
- When the download is finished, launch the app from your Home or All Apps page.


Advertisement
Add New Question
-
Question
When downloading, do I click «Save» or «Save As»?
You can just click Save and then Run.
-
Question
How long does it take to install Google Chrome on a Windows 10 computer?
It depends on your internet speed. It shouldn’t take more than a few minutes.
-
Question
How do I install Chrome on my Android tablet if I don’t have Google Play Store on it?
Find an APK file and download it, using a File Manager to install it. Don’t forget to enable the installation of third-party applications in the Settings menu.
See more answers
Ask a Question
200 characters left
Include your email address to get a message when this question is answered.
Submit
Advertisement
Video
-
Google Chrome requires 350 MB of free disk space and 512 MB of RAM to run optimally. Verify that your computer has these resources freed up prior to installing Chrome.[6]
Thanks for submitting a tip for review!
Advertisement
About This Article
Article SummaryX
1. Go to https://www.google.com/chrome.
2. Click Download Chrome.
3. Determine whether to make Chrome the default browser.
4. Click Accept and Install.
Did this summary help you?
Thanks to all authors for creating a page that has been read 1,879,721 times.
Is this article up to date?
Компания Google уже много лет имеет свой фирменный браузер, в котором работают миллионы юзеров по всему миру. Однако у новых пользователей часто возникают вопросы касаемо установки данного веб-обозревателя себе на компьютер. В этой статье мы постараемся подробно описать каждое действие, дабы даже новичок смог с легкостью выполнить инсталляцию вышеупомянутого браузера.
Устанавливаем Google Chrome на компьютер
В самом процессе скачивания и установки нет ничего сложного, вам достаточно лишь иметь на компьютере любой другой веб-обозреватель, например, Opera или Internet Explorer. Кроме этого ничто не мешает вам загрузить Хром с другого устройства себе на флешку, а потом уже подключить его к ПК и произвести процедуру инсталляции. Давайте пошагово разберем инструкцию:
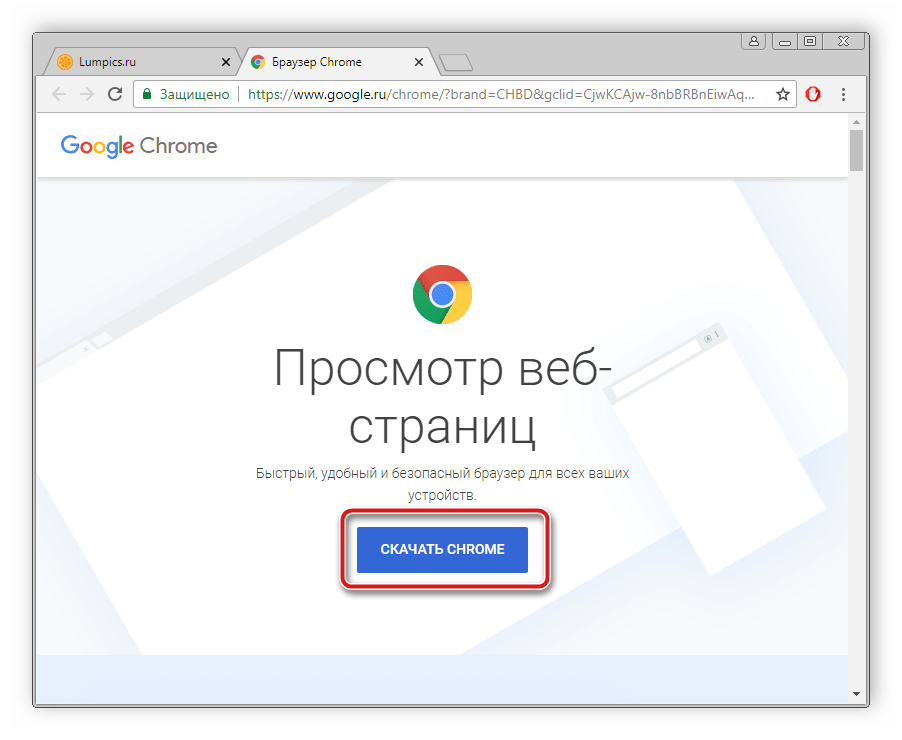
- Запустите любой удобный браузер и перейдите на официальную страницу загрузки Google Chrome.
- В открывшейся вкладке потребуется нажать на кнопку «Скачать Chrome».
- Теперь стоит ознакомиться с условием предоставления услуг, чтобы в будущем не возникло никаких проблем с использованием. Кроме этого отметьте галочками пункты ниже описания, если это необходимо. После этого уже можно нажать на «Принять условия и установить».
- После сохранения запустите скачанный инсталлятор из окна загрузок в браузере или через папку, куда был сохранен файл.
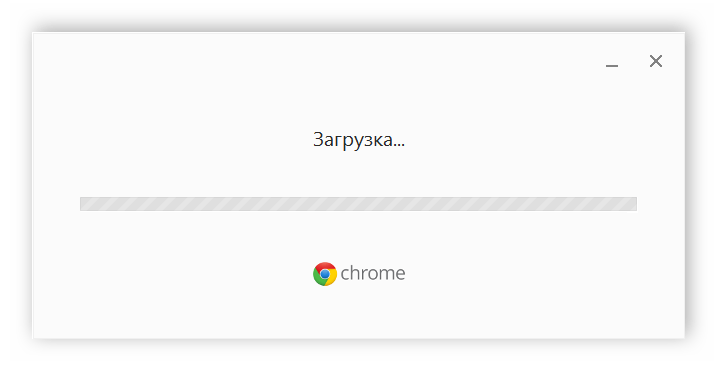
- Начнется сохранение необходимых данных. Не отключайте компьютер от интернета и дождитесь завершения процесса.
- После скачивания файлов начнется установка. Она произведется автоматически, от вас не требуется выполнять какие-либо действия.
- Далее запустится Гугл Хром с новой вкладкой. Теперь вы можете приступать к работе с ним.
Для более комфортного использования браузера рекомендуем создать персональную электронную почту в Google, чтобы получить доступ к Google+. Это позволит сохранять файлы, синхронизировать контакты и несколько устройств. Детально о создании почтового ящика Gmail читайте в другой нашей статье по ссылке ниже.
Подробнее: Создаем электронную почту на gmail.com
Вместе с почтой открывается доступ к видеохостингу YouTube, где вы можете не только просматривать бесчисленное количество роликов от разных авторов, но и добавлять собственные на свой канал.
При возникновении проблем с инсталляцией советуем ознакомиться со статьей, где описываются способы устранения ошибок.
Подробнее: Что делать, если не устанавливается браузер Google Chrome
В редких случаях установленный браузер может не запуститься. Для этой ситуации тоже есть решение.
Подробнее: Что делать, если не запускается браузер Google Chrome
Google Chrome – удобный бесплатный браузер, установка которого на ПК не займет много времени и сил. Вам потребуется сделать всего несколько простых действий. Однако стоит отметить, что Хром является тяжелым веб-обозревателем и не подходит для слабых компьютеров. Если у вас наблюдаются тормоза во время работы, рекомендуем подобрать другой, легкий браузер из списка, приведенного в статье ниже.
Читайте также: Какой выбрать браузер для слабого компьютера
Наша группа в TelegramПолезные советы и помощь