
(Image credit: Mauro Huculak)
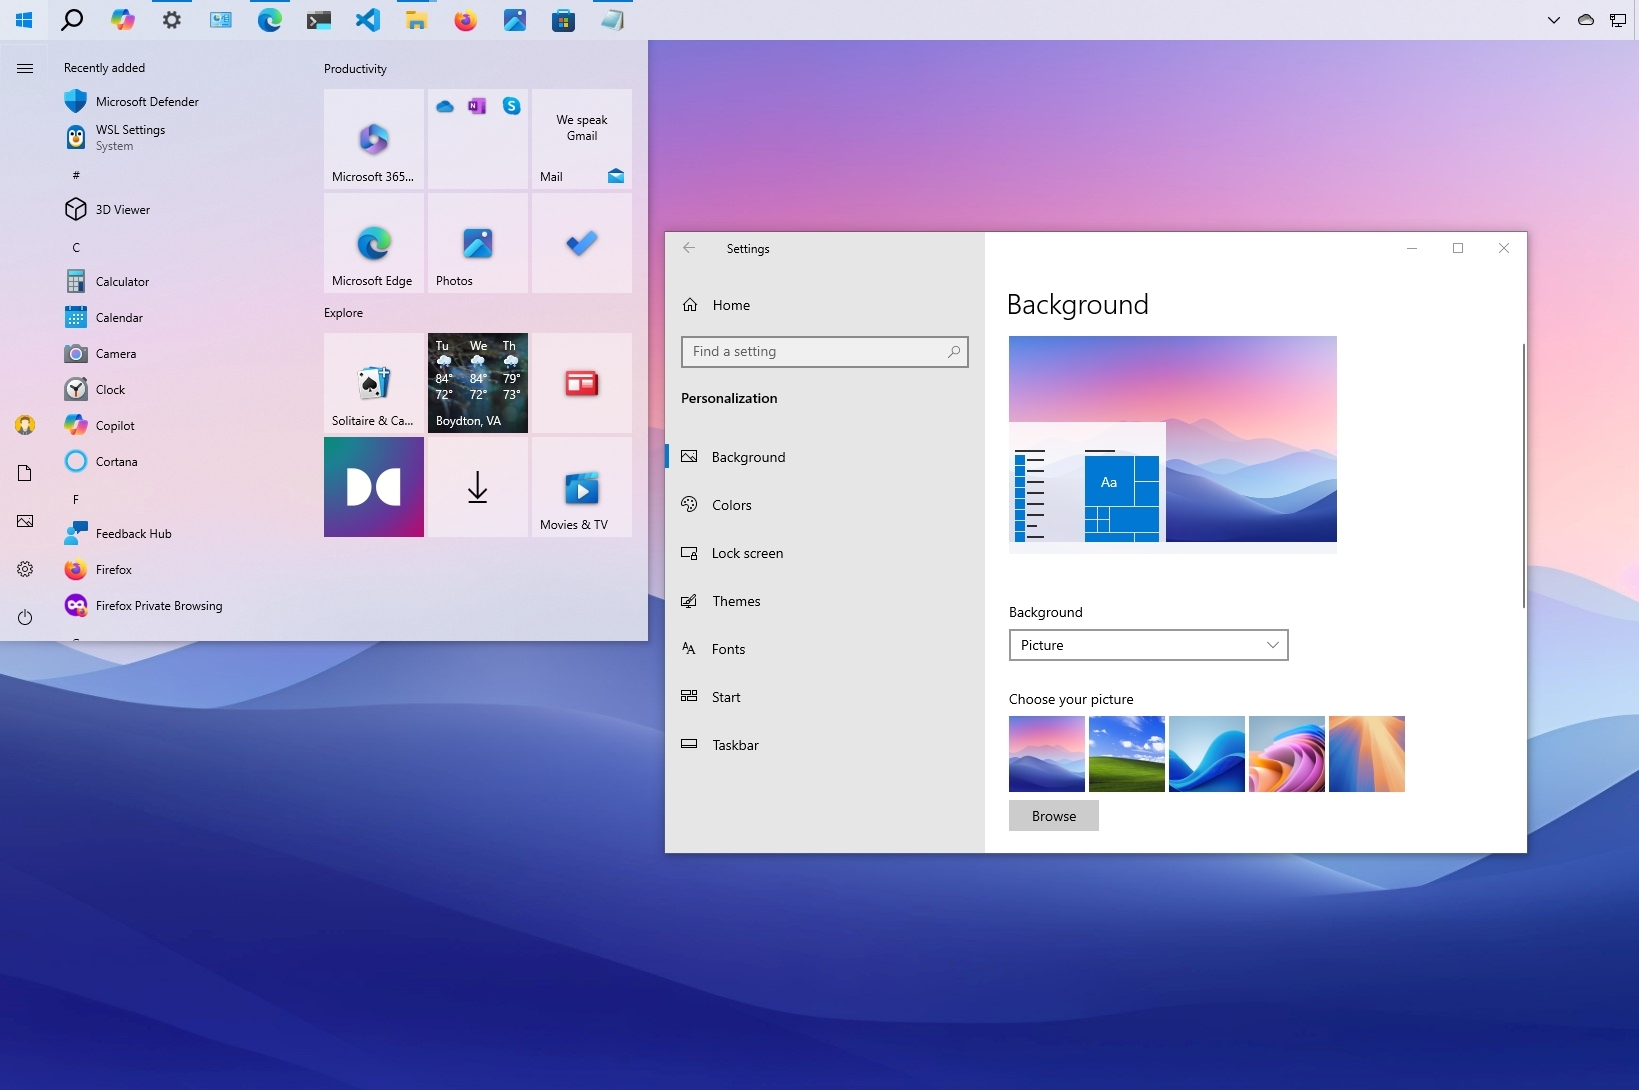
Windows 10 includes a slew of settings to customize the appearance of the desktop and apps, making them look better and reflecting your personality.
For example, you can change the desktop background with a custom image or use a theme from the Microsoft Store. You can enable the dark mode or change the color accent for visual elements. You can tweak and organize the Start menu and Taskbar, and you can adjust a variety of settings to change the entire look and feel of Windows 10.
In this how-to guide, I will explain how to customize the desktop appearance and make the experience more personal. (You can change the appearance of Windows 11 with these instructions.)
How to change desktop background on Windows 10
The easiest way to personalize Windows 10 is to change the desktop background with a custom image or collection of pictures.
Change desktop wallpaper
To change the Windows 10 desktop background, use these steps:
- Open Settings.
- Click on Personalization.
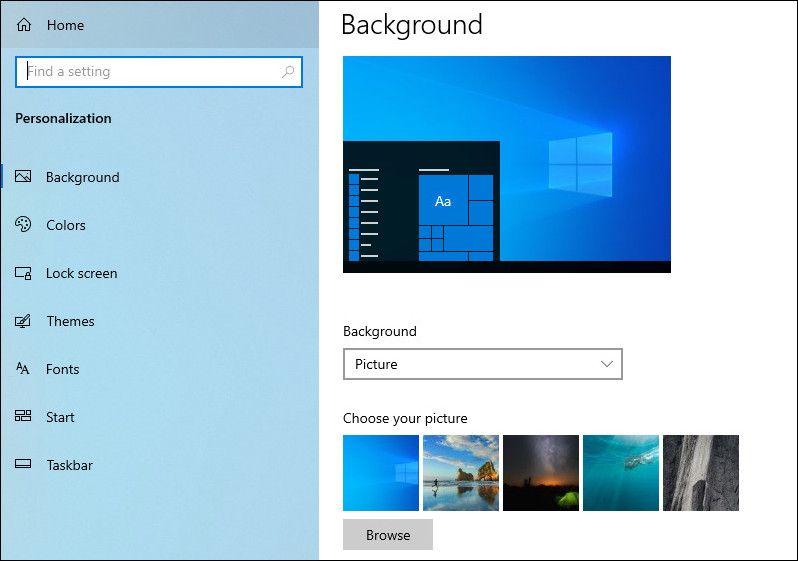
- Click on Background.
- Select the Picture option using the «Background» menu.
- Click the Browse button
- Choose the image to set as background.
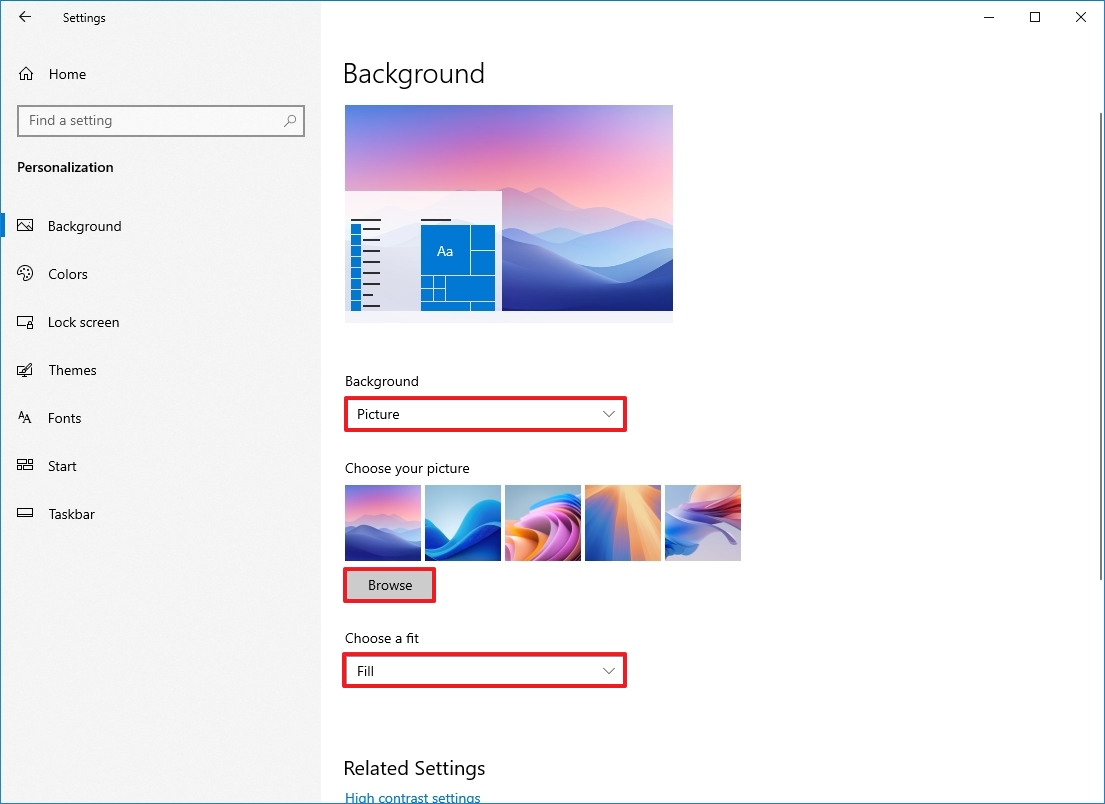
- Select the fit that best suits the images using the «Choose a fit» menu:
- Fill.
- Fit.
- Stretch.
- Center.
- Span.
If you have a multi-monitor setup, use these steps to choose a different background for each display.
Set up desktop slideshow
To showcase a picture collection on the desktop, use these steps:
All the latest news, reviews, and guides for Windows and Xbox diehards.
- Open Settings.
- Click on Personalization.
- Click on Background.
- Select the Slideshow option using the «Background» menu.
- Click the Browse button.
- Choose the folder with the picture collection.
- Select how often images should rotate using the «Change picture every» menu.
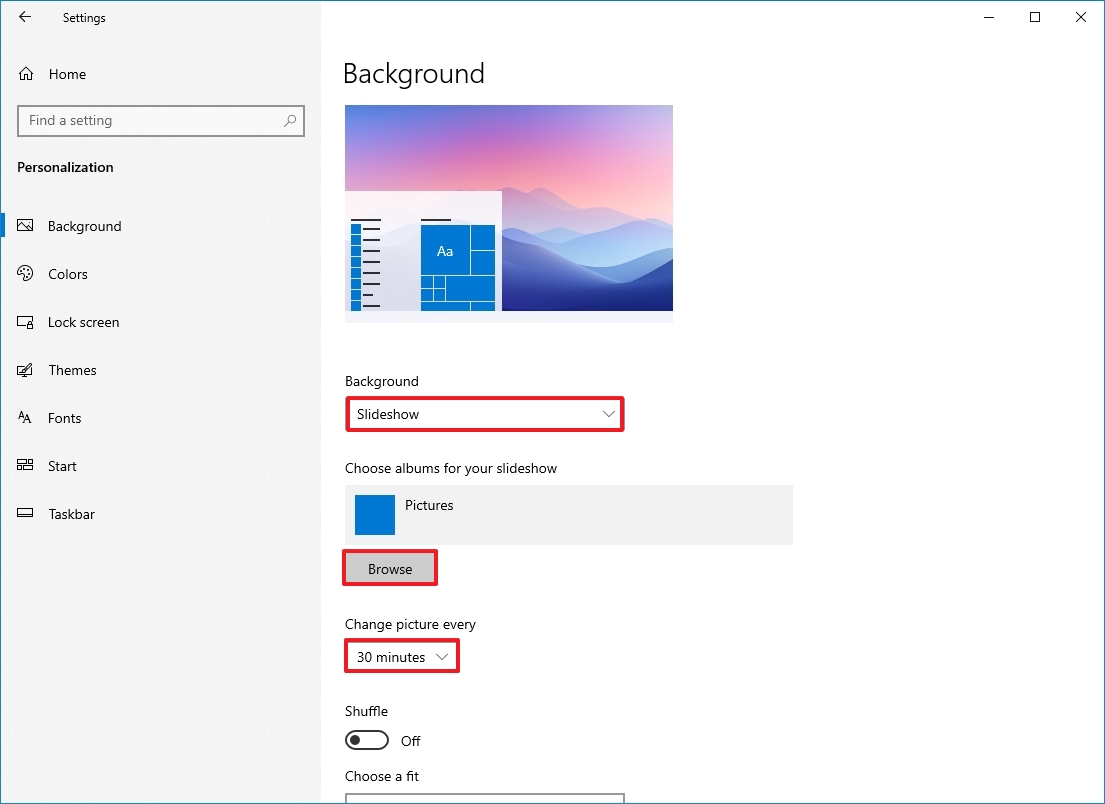
- (Optional) Turn on the Shuffle toggle switch to show images in random order.
- Select the fit that best suits the images using the «Choose a fit» menu:
- Fill.
- Fit.
- Stretch.
- Center.
- Span.
Once you complete these steps, the desktop will display the collection of pictures in the background at the intervals you specified.
How to change system colors on Windows 10
Windows 10 allows you to change the color accent for elements that appear across the experience, including for Start, taskbar, Action Center, title bars, and links in apps and Settings.
Enable dark or light mode
Windows 10 includes two personalization modes. The light mode is the default mode and works well during the daytime, and then there’s the dark mode, which uses a dark color scheme in backgrounds, other parts of the operating system, and supported apps. It’s also an option more suited for a low-light environment.
To switch between the light and dark modes, use these steps:
- Open Settings.
- Click on Personalization.
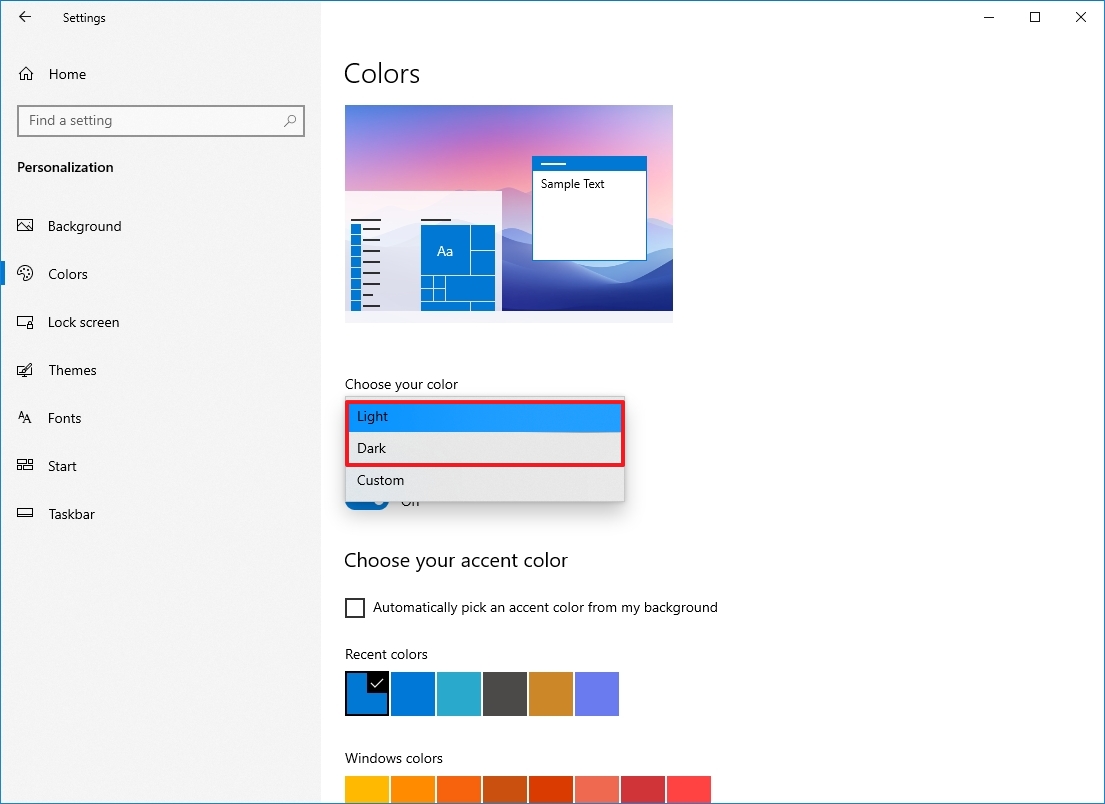
- Click on Colors.
- Select the Light or Dark mode using the «Choose your color» menu.
If you want to go a step further, you can use this guide to configure your computer to switch between the dark and light mode automatically.
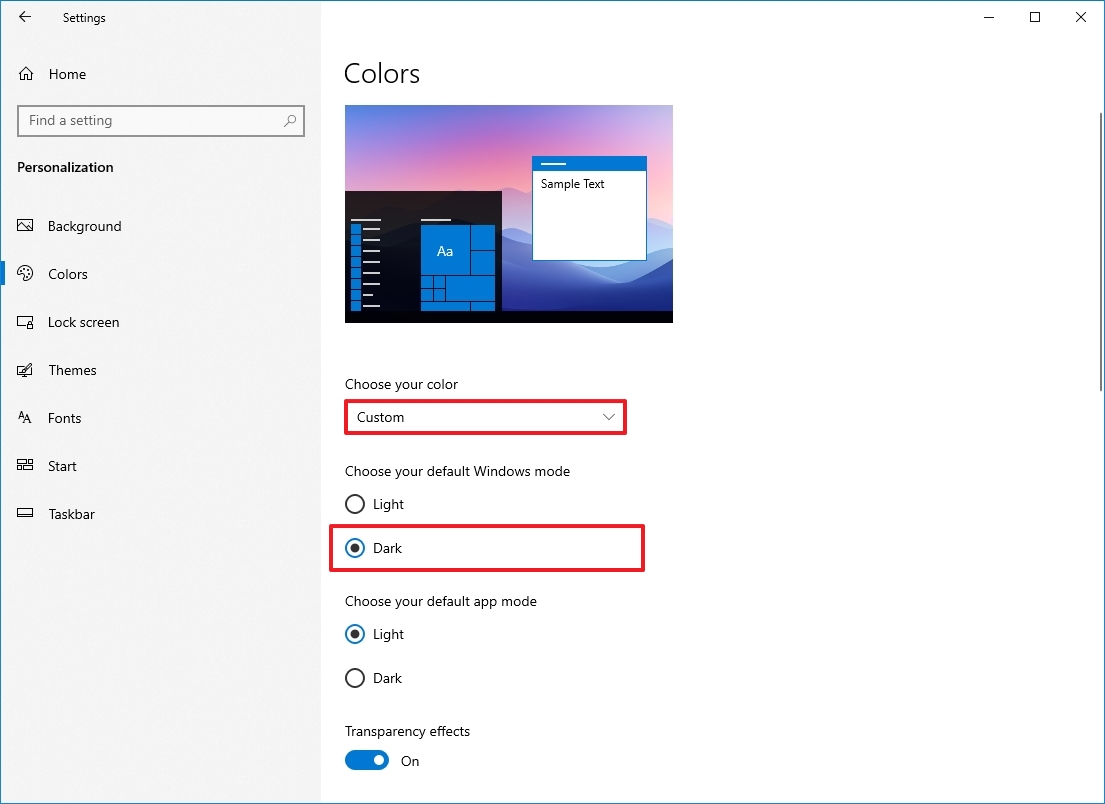
Set custom color mode
You can also use a custom color mode on Windows 10 using these steps:
- Open Settings.
- Click on Personalization.
- Click on Colors.
- Select the Custom option using the «Choose your color» menu.
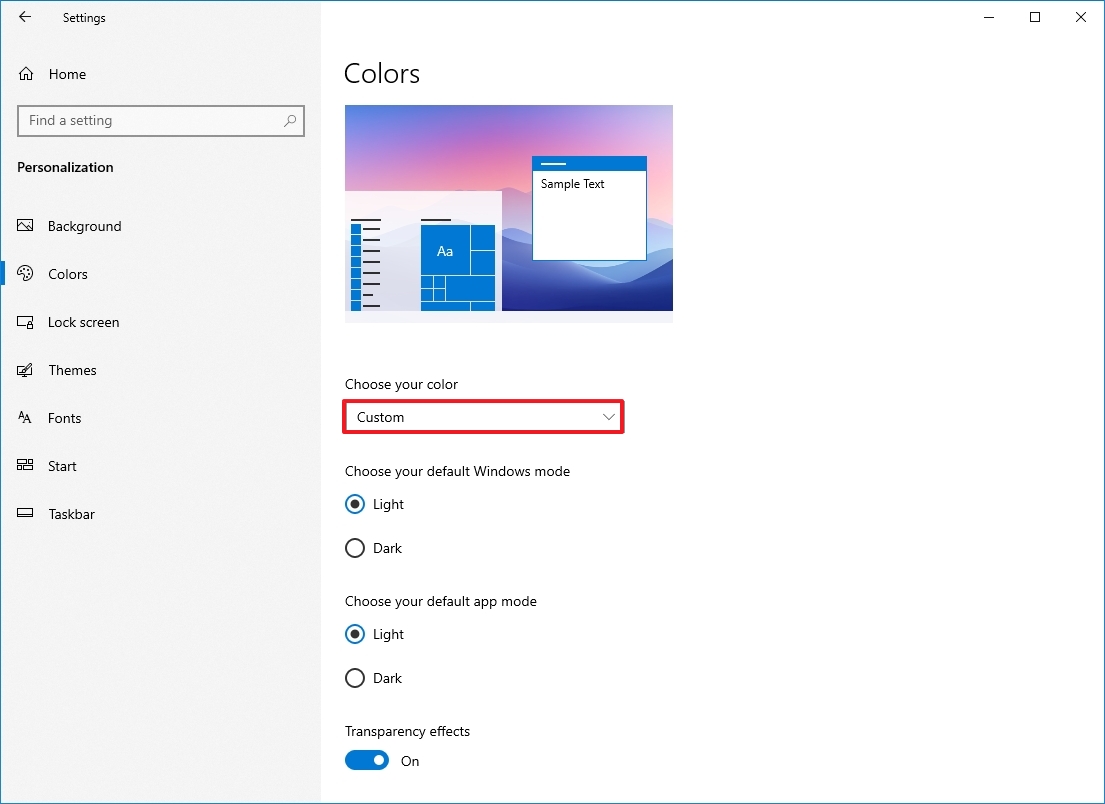
- Use the «Choose your default Windows mode» options to decide whether the Start, Taskbar, Notifications, and other elements should use light or dark color mode.
- Use the «Choose your default app mode» option to decide whether apps should use light or dark color modes.
After you complete the steps, the color mode will apply depending on your configuration.
If you want to use the original light color mode, you need to select «Dark» for the Windows mode and «Light» for the default app mode.
Control transparency effects
Some elements of Windows 10, such as the Start, taskbar, Notifications, and apps, include transparency effects with blur and noise textures. You can enable or disable these effects on the «Colors» page.
To enable or disable Windows 10 transparency, use these steps:
- Open Settings.
- Click on Personalization.
- Click on Colors.
- Turn on or off the Transparency effects toggle switch.
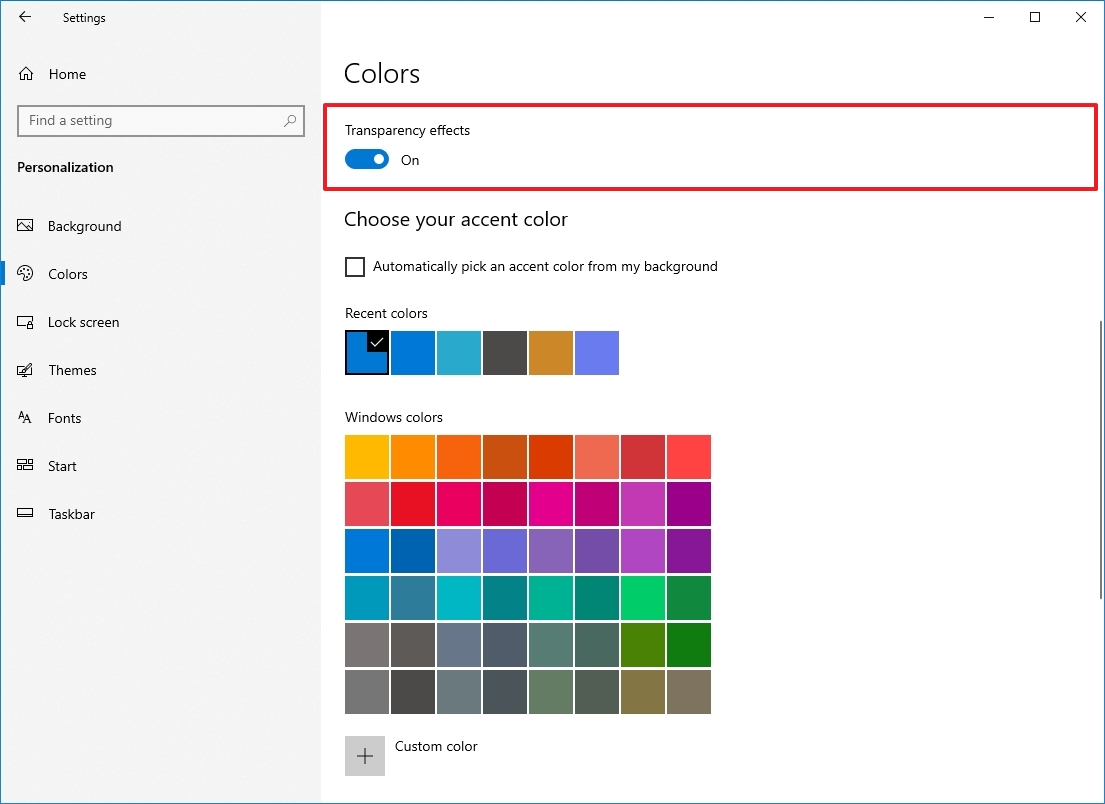
Once you complete the steps, transparency effects will be available according to your selection.
Select color accent
To change the system color on Windows 10, use these steps:
- Open Settings.
- Click on Personalization.
- Click on Colors.
- Select the color accent you want across Windows 10
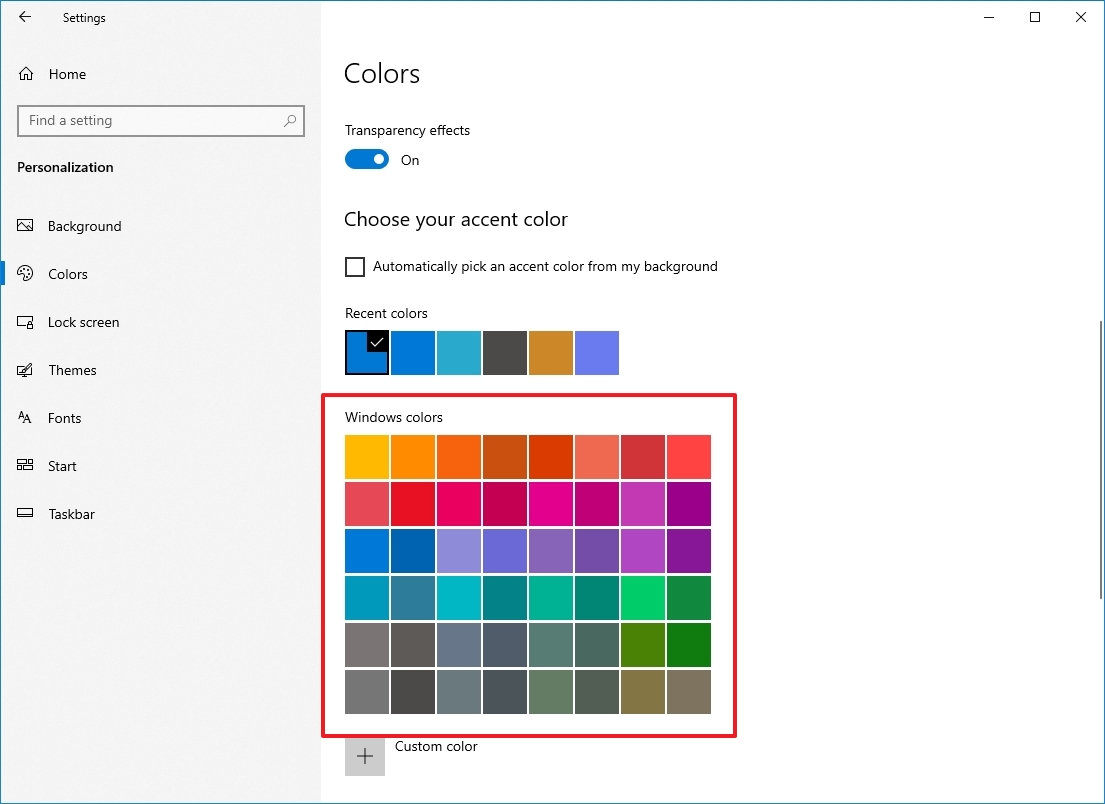
- Quick tip: If you want to use again a previous color, you can use the «Recent colors» list.
- (Optional) Check the «Automatically pick an accent color from my background» option under the «Choose your accent color» section to allow the system to set a color scheme based on the colors of the current wallpaper.
After you complete the steps, buttons, links, system icons, and other elements will switch to the color you specified. If you want to see Start, taskbar, Notifications, and other components use the same color scheme, you must enable the options at the bottom of the page.
Create custom accent color
If the color you want isn’t on the list, you can create a custom one using these steps:
- Open Settings.
- Click on Personalization.
- Click on Colors.
- Click the Custom color button.
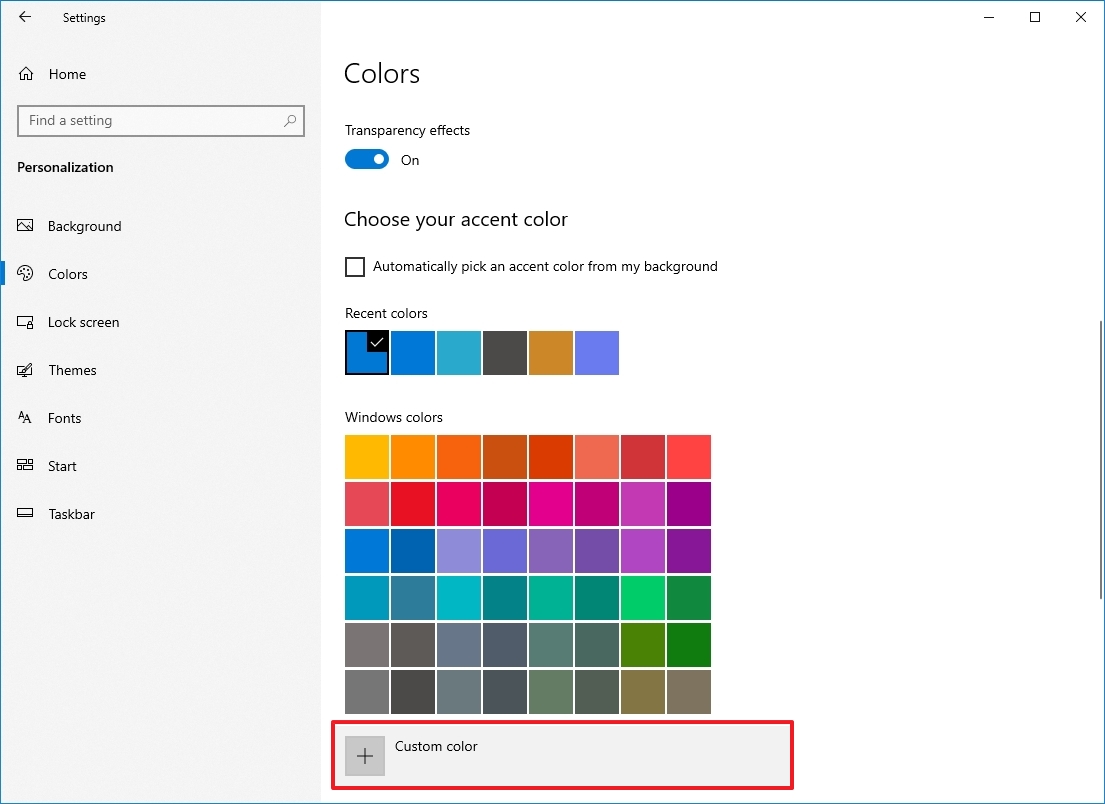
- Create a custom color using the palette.
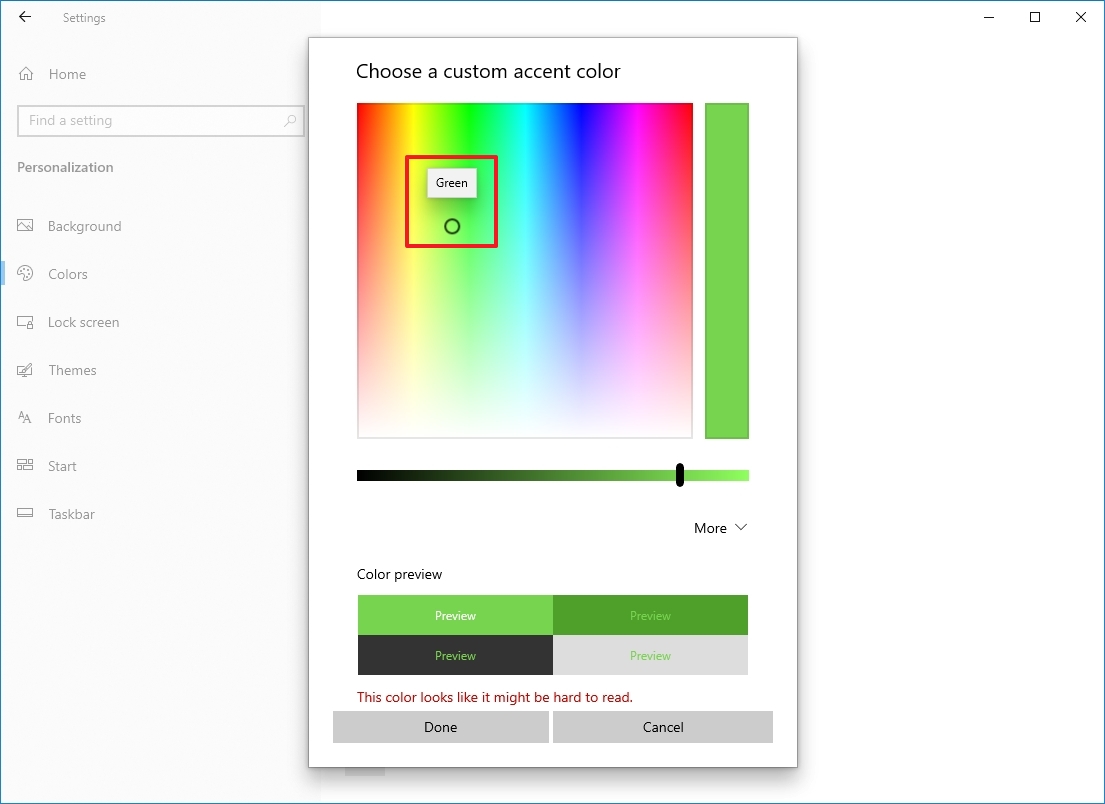
- (Optional) Click the More button to use RGB or HSV codes to create a new color.
- Click the Done button.
Once you complete the steps, the desktop will use the custom color you created.
Set accent color for elements
Windows 10 uses a dark and light color scheme for the Start, Taskbar, Notifications, and File Explorer out of the box. You can also use an accent color to customize these elements further.
To show accent color for Windows 10 elements, use these steps:
- Open Settings.
- Click on Personalization.
- Click on Colors.
- Select the Custom option using the «Choose your color» menu.
- Choose the Dark option using the «Choose your default Windows mode» option.
- Check the «Start, taskbar, and action center» option under the «Show accent color on the following surfaces» section.
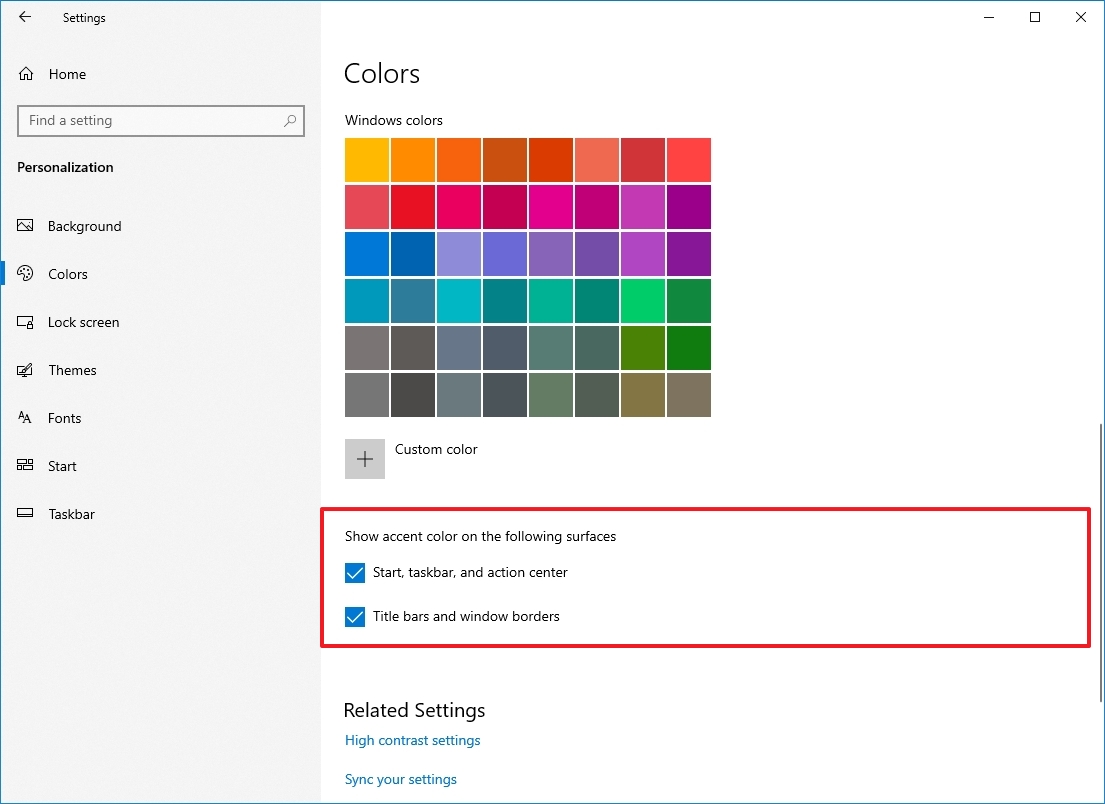
- Check the «Title bars and window borders» option.
After you complete the steps, the Start menu, Taskbar, Notifications, and other elements will use the selected color instead of a dark or light color scheme.
How to customize the Lock screen on Windows 10
You can also customize the Lock screen, which is the screen that slides up every time you need to get to the Sign-in screen.
Set custom image on Lock screen
The lock screen uses «Windows Spotlight» as the default option to display different backgrounds every time you sign in to Windows 10, and while this option pulls stunning images from the cloud, you can also set any image you want.
To use a custom image on the Windows 10 Lock screen, use these steps:
- Open Settings.
- Click on Personalization.
- Click on Lock screen.
- Select the Picture option using the «Background» menu.
- Click the Browse button.
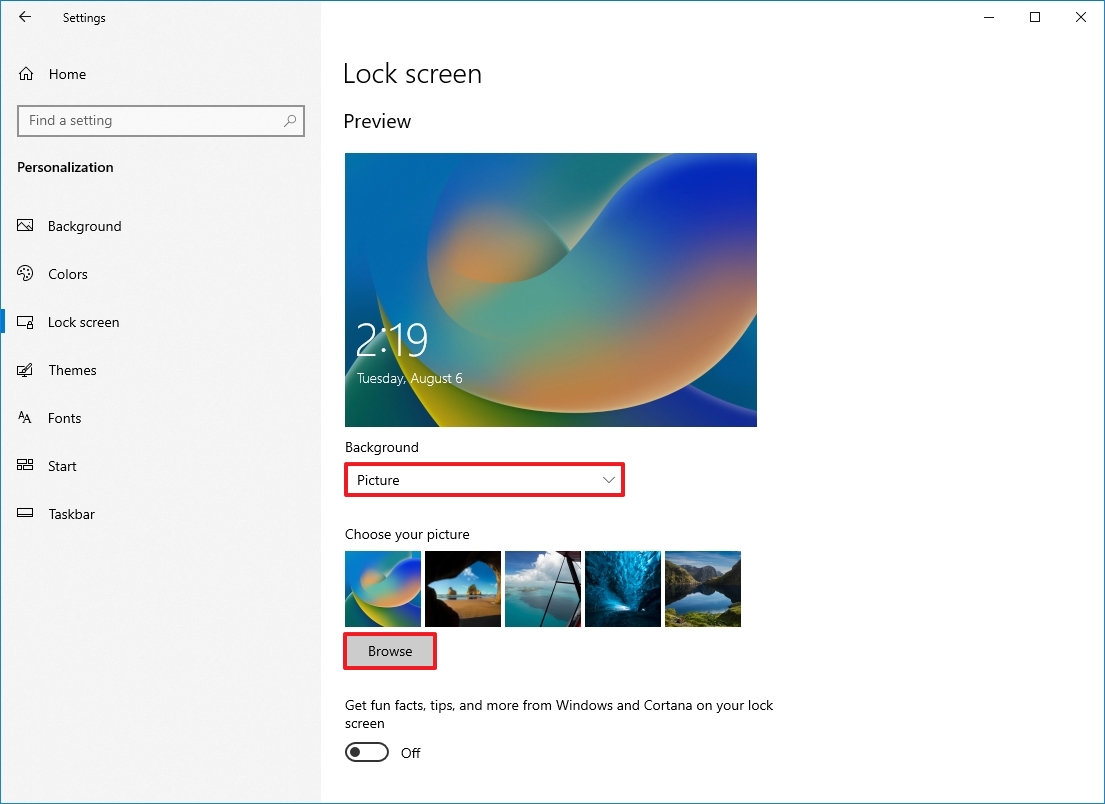
- Select the picture you want to use.
- Click the Choose picture button.
- (Optional) Turn off the «Get fun facts, tips, tricks, and more on your lock screen» option.
Once you complete the steps, the Lock screen will show the custom image that you selected.
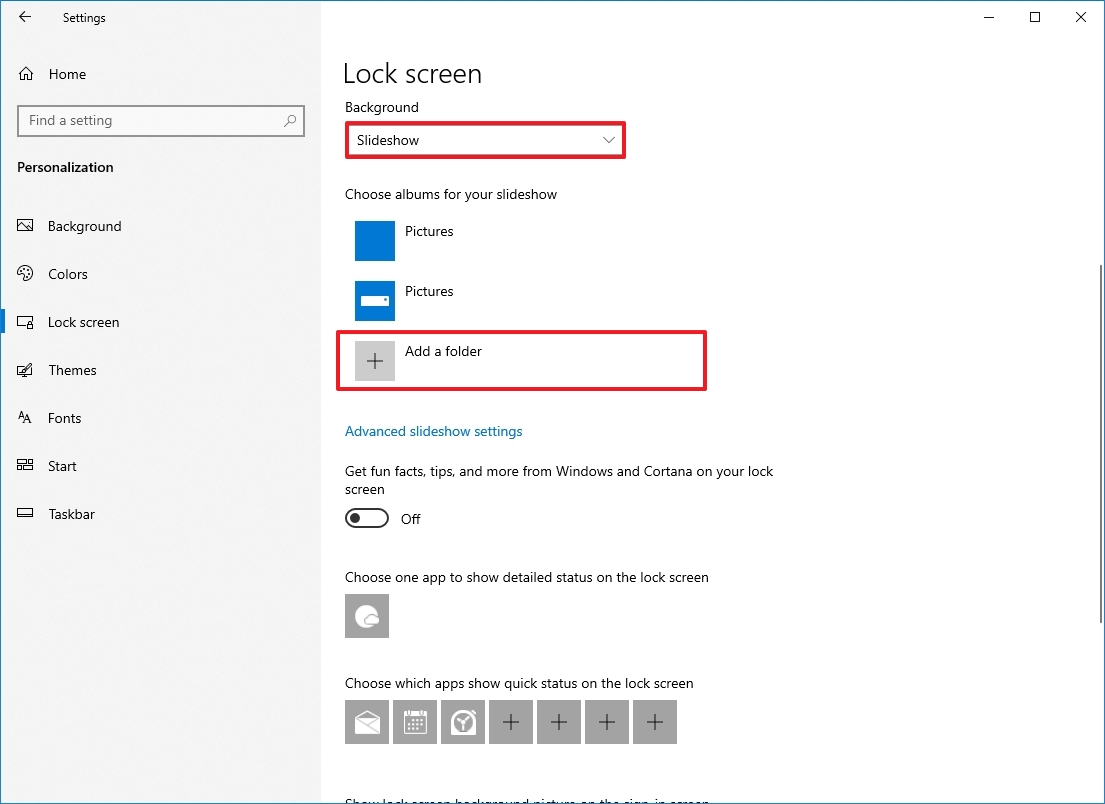
Display slideshow on Lock screen
To show a collection of pictures in the Lock screen, use these steps:
- Open Settings.
- Click on Personalization.
- Click on Lock screen.
- Select the Slideshow option using the «Background» menu.
- Click the «Add a folder» button to locate the folder with the images you want to see.
- Quick tip: You can delete a source by selecting the item from the list and clicking the «Remove» button.
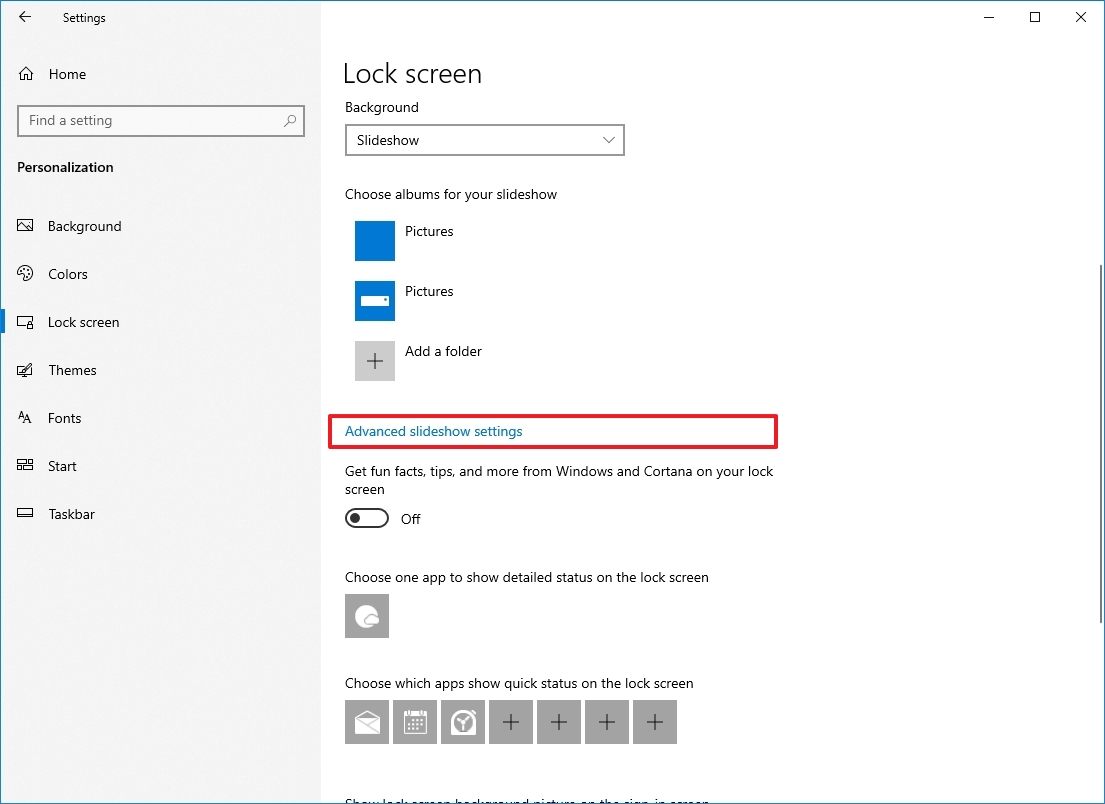
- (Optional) Turn off the «Get fun facts, tips, tricks, and more on your lock screen» option.
- (Optional) Click the «Advanced slideshow settings» option.
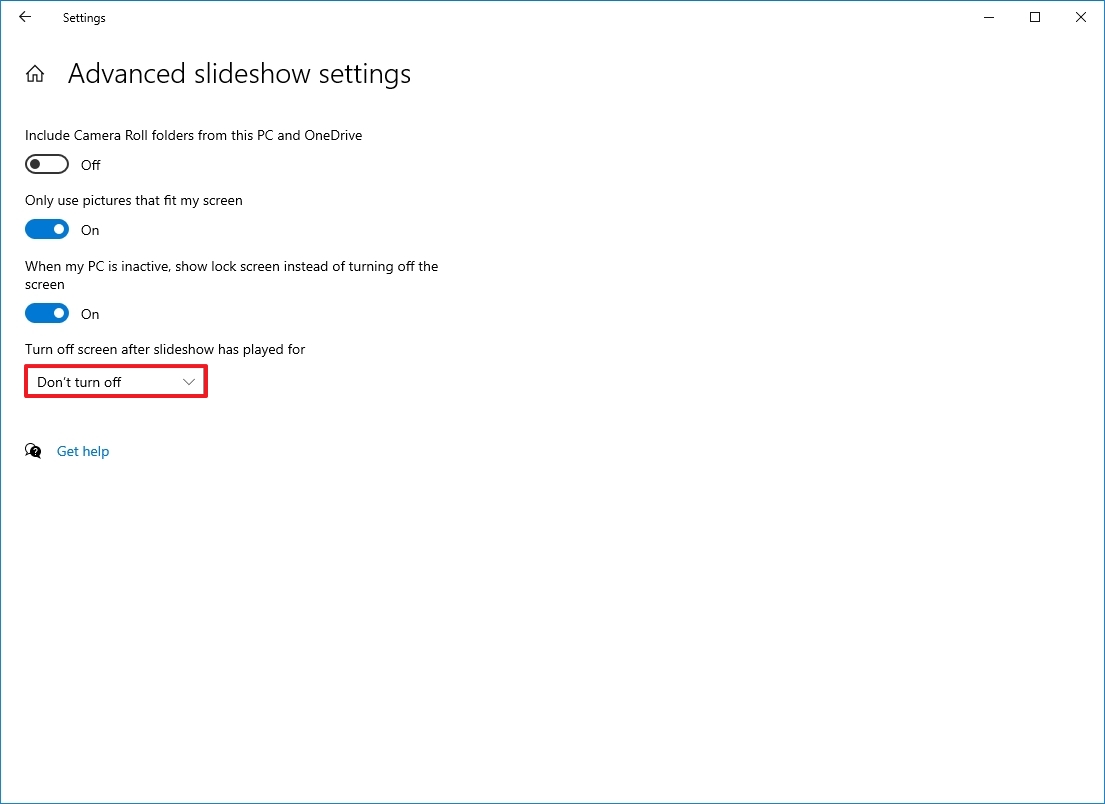
- Select the slideshow settings:
- Include Camera Roll folders from this PC and OneDrive.
- Only use pictures that fit my screen.
- When my PC is inactive, show lock screen instead of turning off the screen.
- Use the «Turn off screen after the slideshow has played for» menu and select when turning off the monitor.
After you complete the steps, every time you power on your device, the Lock screen will show a different image background from the collection.
Enable Windows Spotlight on Lock screen
On Windows 10, it’s also possible to show background images dynamically in the Lock screen similarly like in the desktop.
To enable Spotlight on the Lock screen, use these steps:
- Open Settings.
- Click on Personalization.
- Click on Lock screen.
- Select the Windows Spotlight option using the «Background» menu.
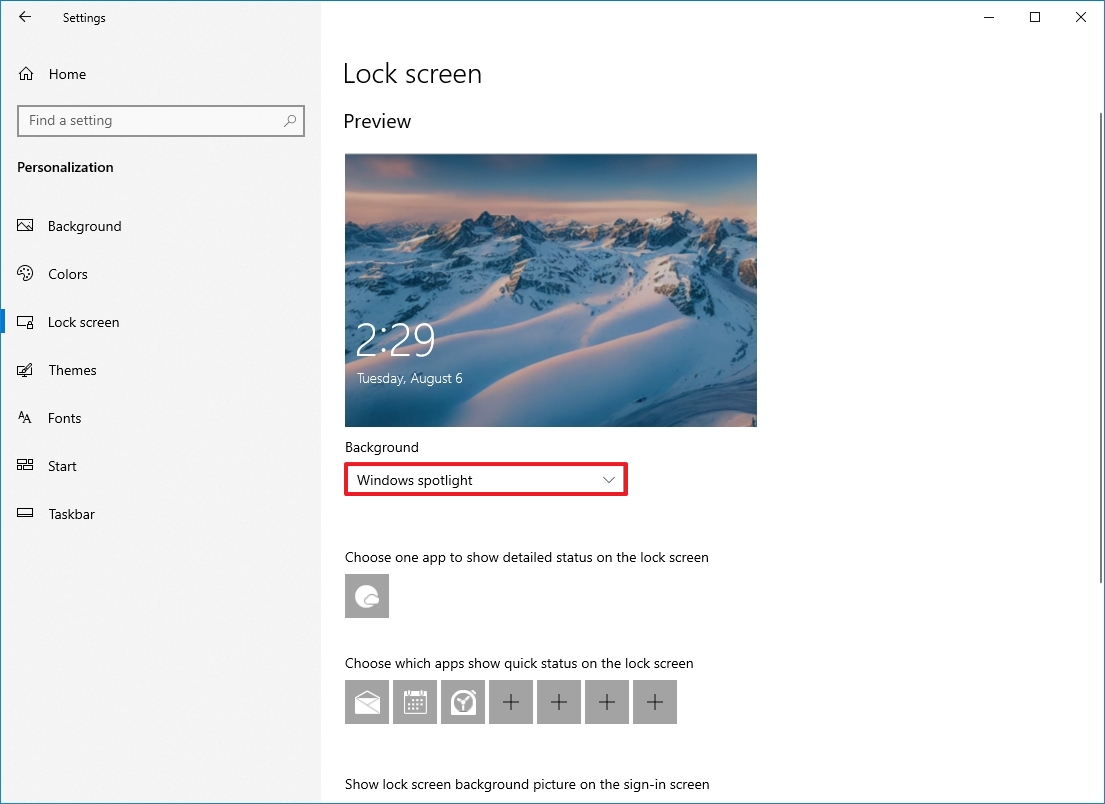
Once you complete the steps, the Lock screen will periodically showcase different wallpapers downloaded automatically from the cloud.
Control weather notifications on Lock screen
The Lock screen, by default, shows the weather along with other widgets for news, sports, and finance, but you can always enable or disable this feature or choose other apps to show notifications.
To manage the Lock screen notification settings, use these steps:
- Open Settings.
- Click on Personalization.
- Click on Lock screen.
- Under the «Choose one app to show detailed status on the lock screen» section, click the plus (or app icon) button and select the «Weather and more» option to show weather information or the «None» option to disable it.
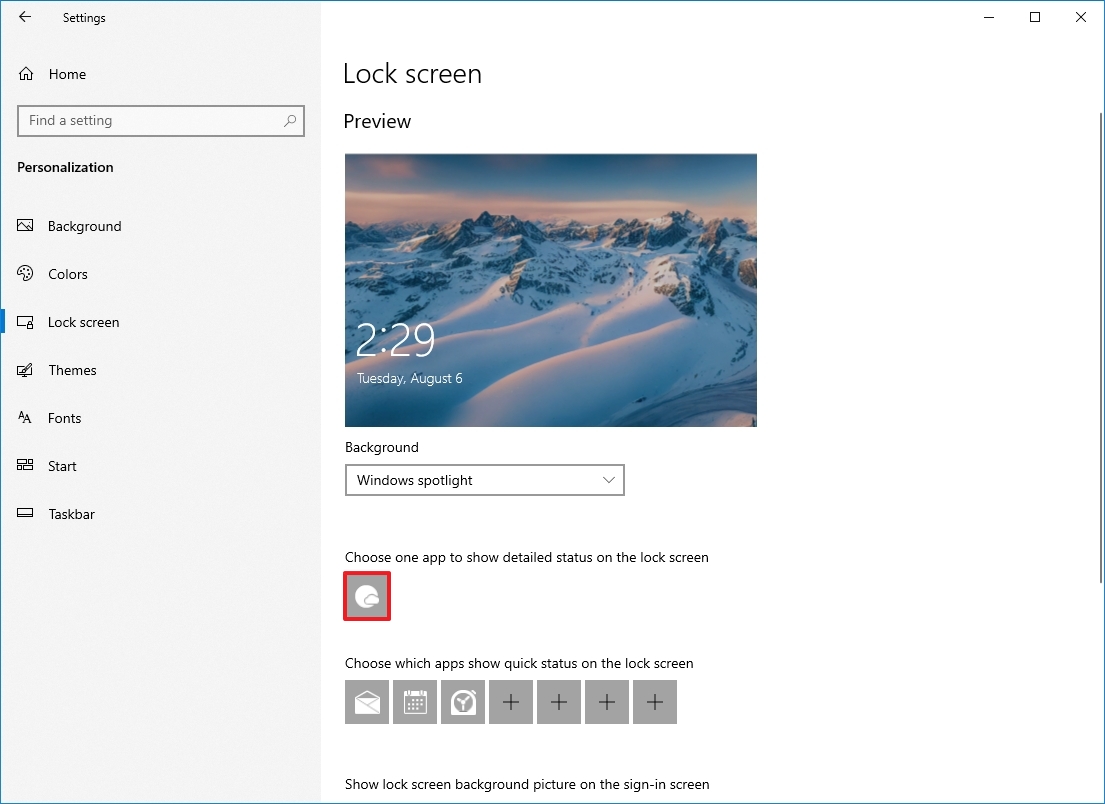
- Under the «Choose which apps show quick status on the lock screen» section, click the plus (or app icon) button and select an app.
- Repeat step 5 to show up to six apps with quick status on the lock screen.
Once you complete the steps, the Lock screen will display notifications for apps in the bottom-left corner of the screen.
Disable Sign-in screen background
Windows 10 shows the same lock screen background on the sign-in screen, and you can disable this behavior if you only want to show a solid color background.
To disable the Sign-in screen background, use these steps:
- Open Settings.
- Click on Personalization.
- Click on Lock screen.
- Turn off the «Show lock screen background picture on the sign-in screen» toggle switch.
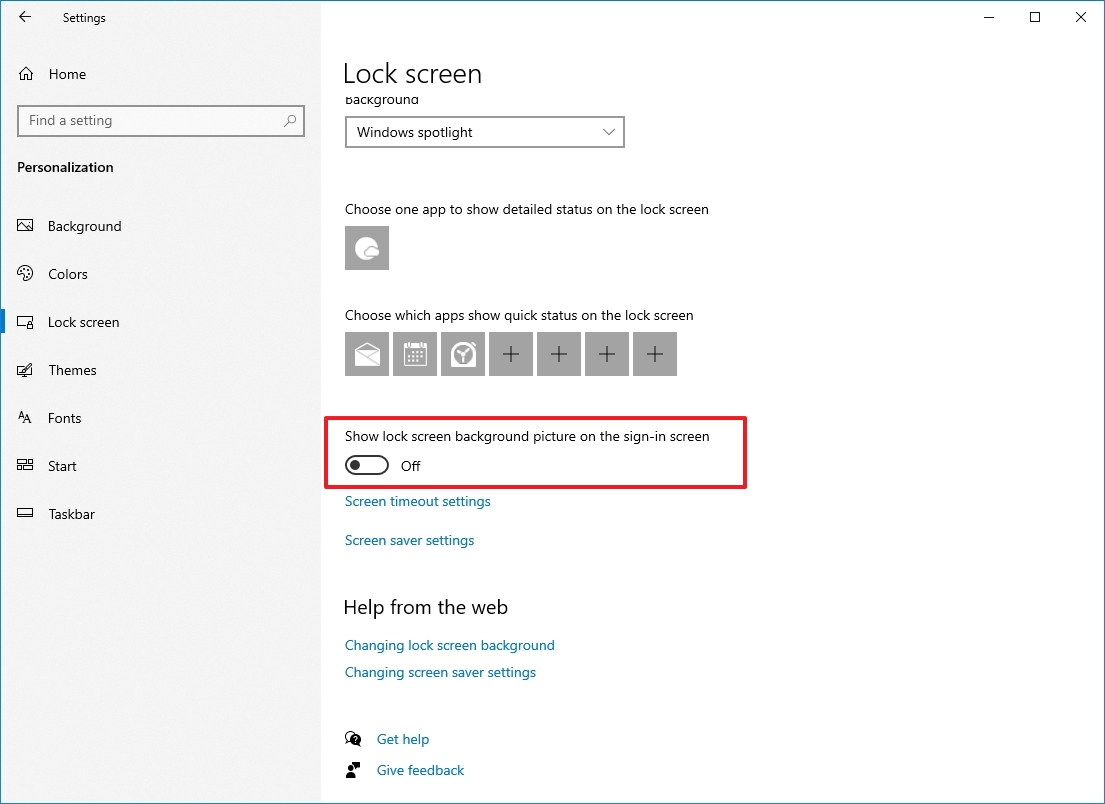
After you complete the steps, the Sign-in screen will display a solid color as the background.
How to change themes on Windows 10
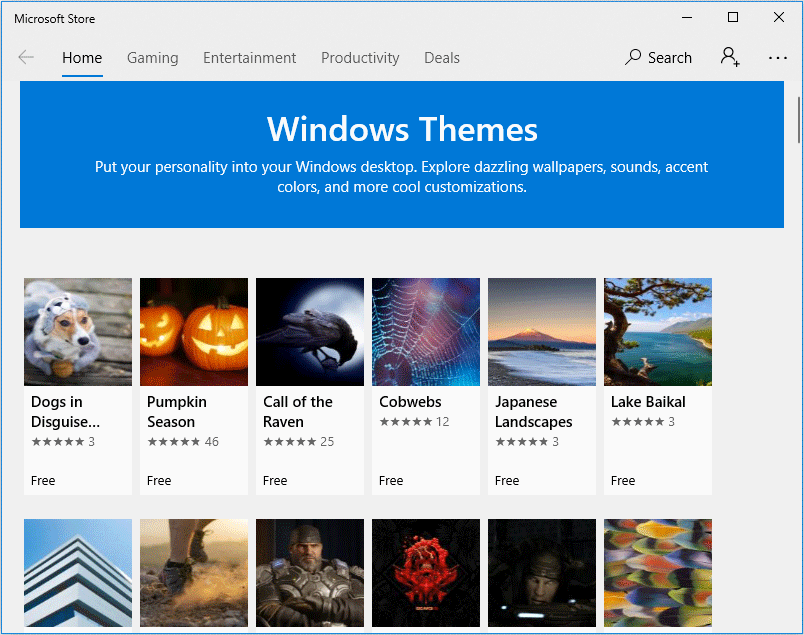
On Windows 10, a theme is a small package containing one or more background images, accent colors, and, in some cases, sounds. If you want to personalize your desktop, you can choose from hundreds of them from the Microsoft Store.
To download and install a new theme on Windows 10, use these steps:
- Open Settings.
- Click on Personalization.
- Click on Themes.
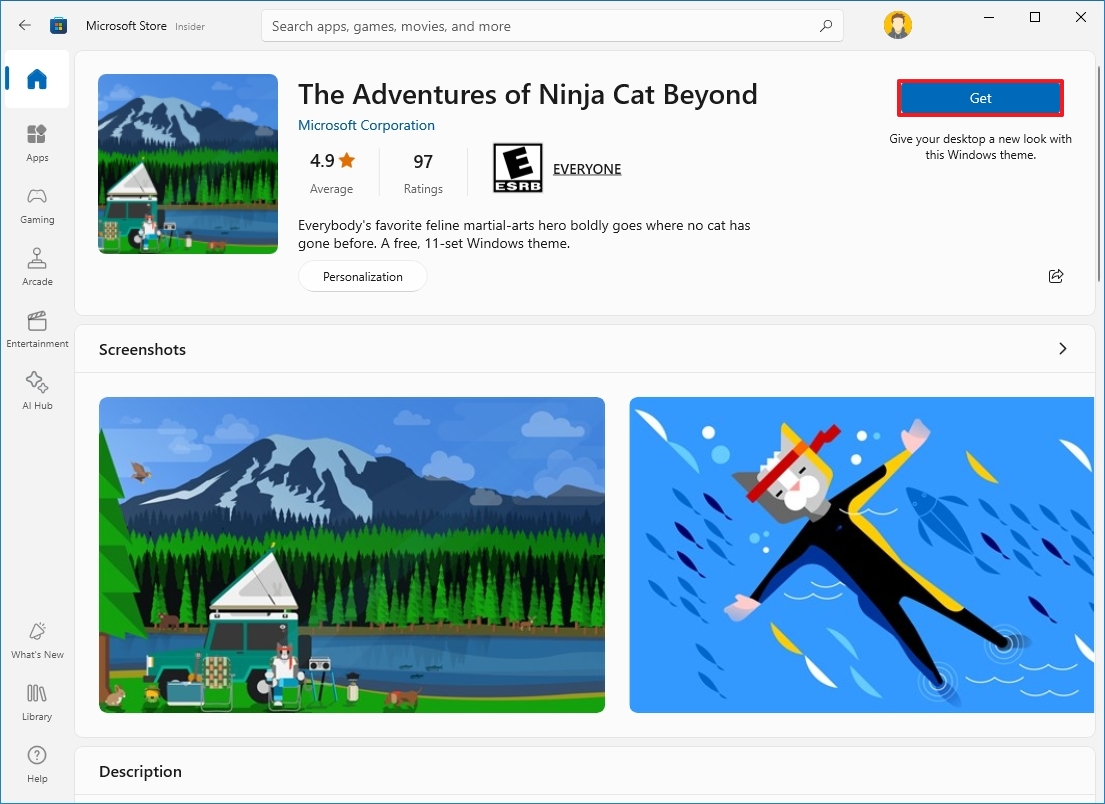
- Click the «Get more themes in the Microsoft Store» option.
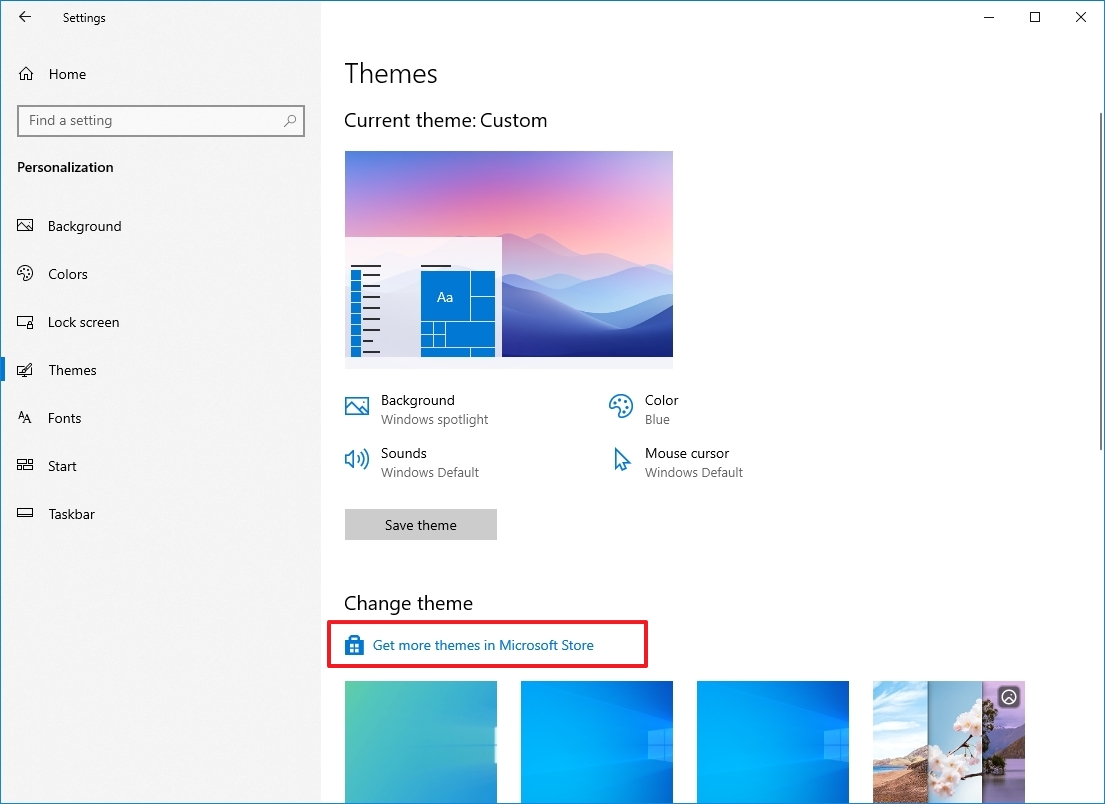
- Select the theme you want.
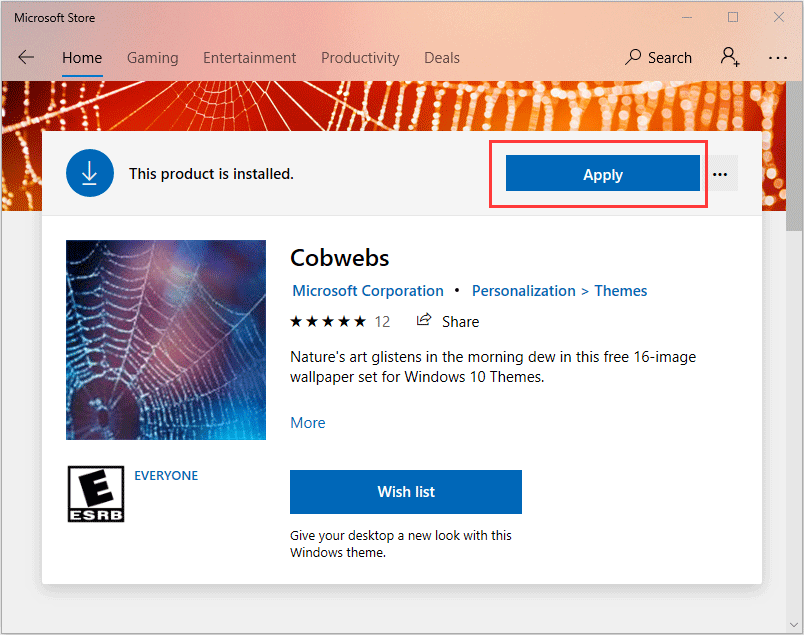
- Click the Get (or Install) button.
- Click the Apply button.
- Click the newly added theme to apply it from the «Themes» page.

Once you complete the steps, the theme will apply, and the background will be updated with a collection of images and custom accent colors.
How to customize the Start menu on Windows 10
The Start menu is an essential component of Windows 10, as it’s the experience where you can find your apps, settings, and files.
There are several ways to customize the menu. Some of the settings can be customized from Start itself, and some additional options can be configured through the Settings app.
To customize the Start menu with the Settings app, use these steps:
- Open Settings.
- Click on Personalization.
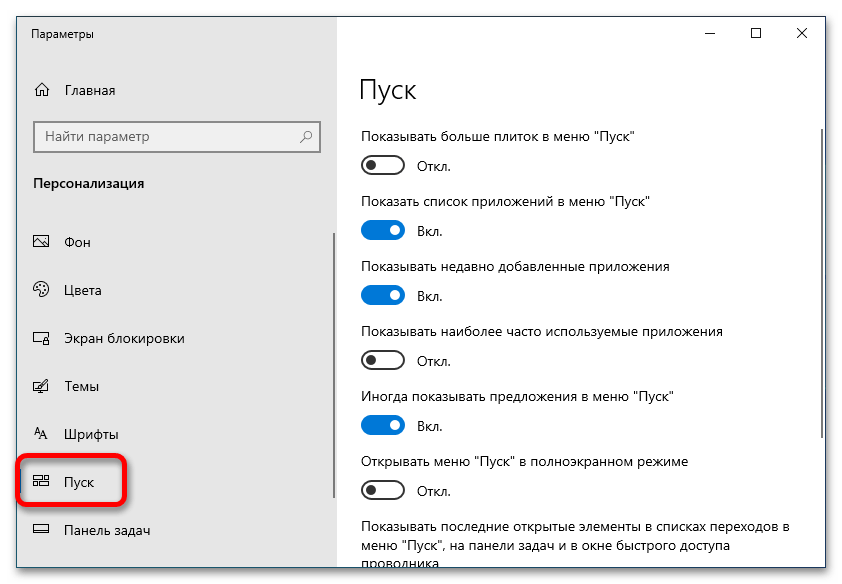
- Click on Start.
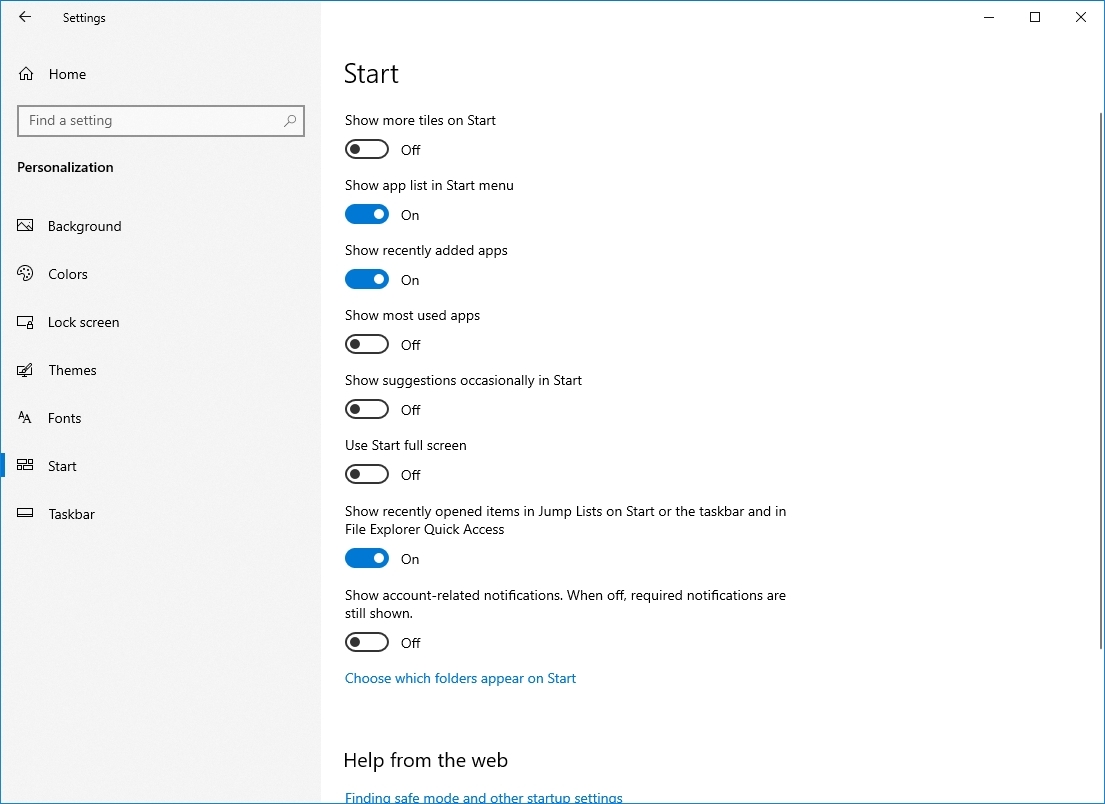
The Start page includes several options you can customize, including:
- Show more tiles on Start — Allows you to add a fourth column of tiles to fit up to 8 (small) tiles in a single row.
- Show app list in Start menu — Disabling this option will remove the all apps list with only access to your pinned Live Tiles. You can continue to access the apps clicking the All apps button on the top-left, or typing a search as you open the menu.
- Show recently added apps — If you’re not interested in seeing the «Recently added» list, you can turn off this option.
- Show most used apps — The Start menu lists your more frequently used apps, but you can disable this option if you only want to see all the apps.
- Occasionally show suggestions in Start — You can disable this option to prevent seeing recommendations from the Microsoft Store.
- Use full screen — Enables a Windows 8.1 Start screen-like experience to stretch the menu across the desktop, allowing you to see more pinned tiles without scrolling.
Control folders on Start
To add or remove quick folder access from the Start menu, use these steps:
- Open Settings.
- Click on Personalization.
- Click on Start.
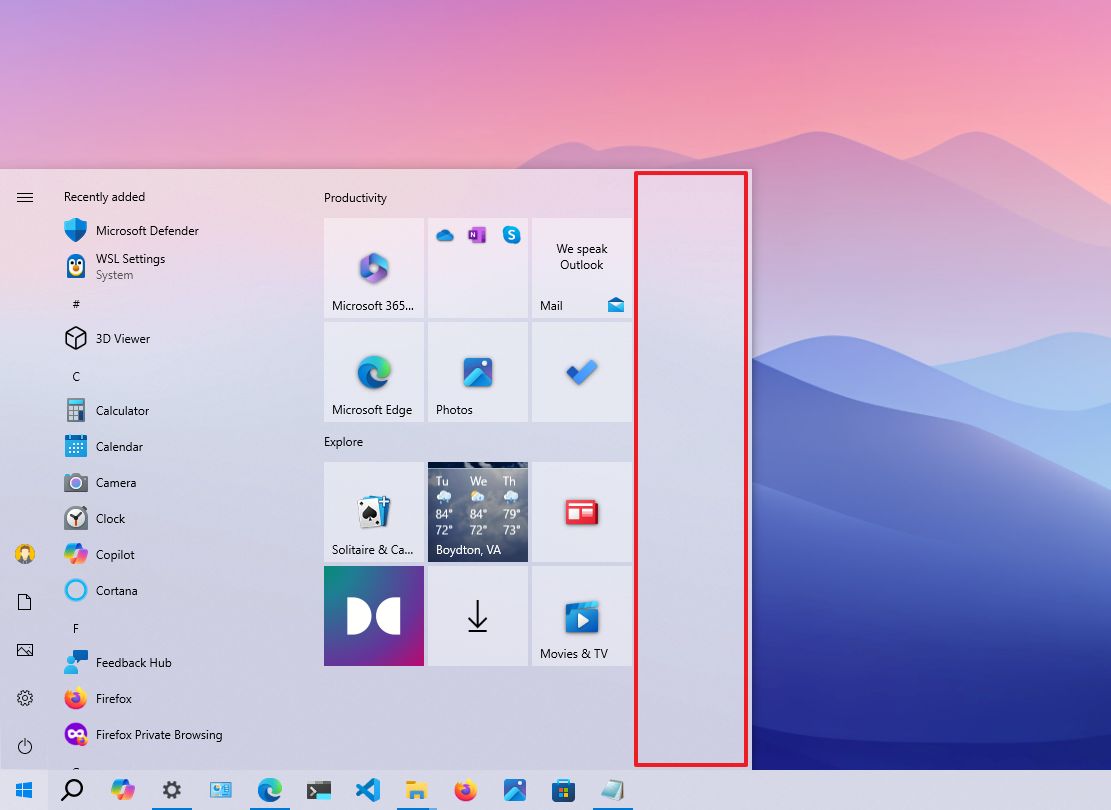
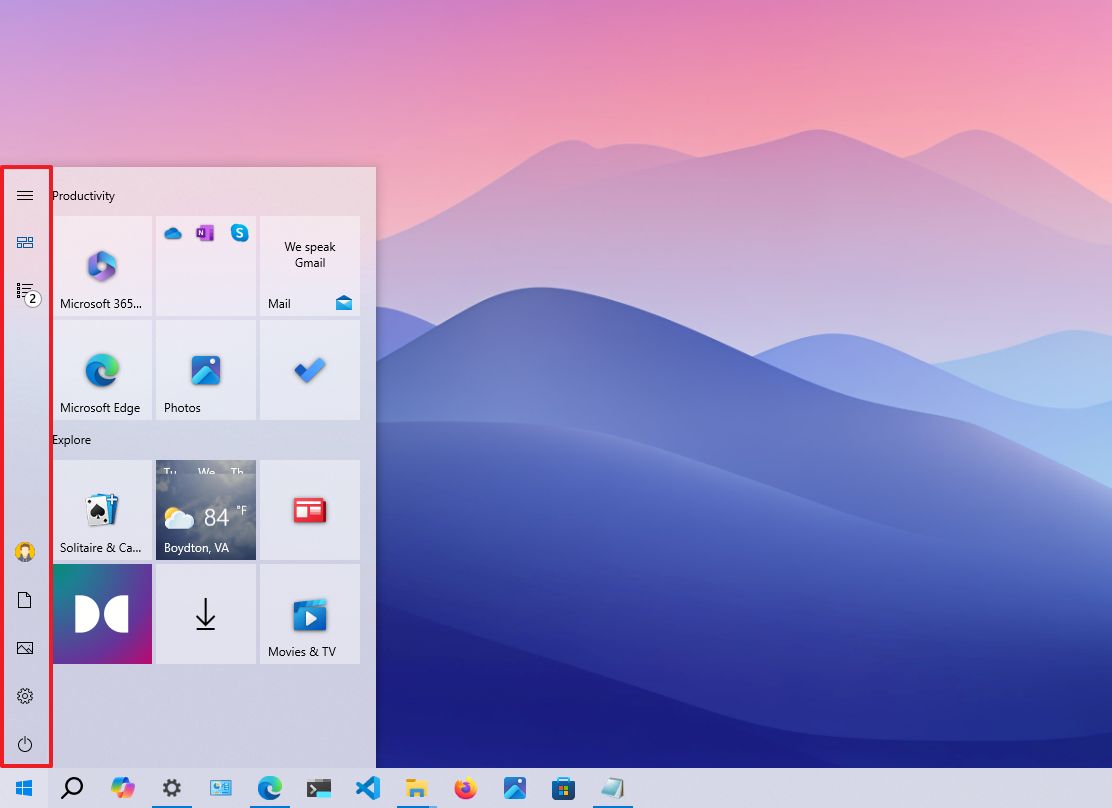
- Click the «Choose which folders appear on Start» option.
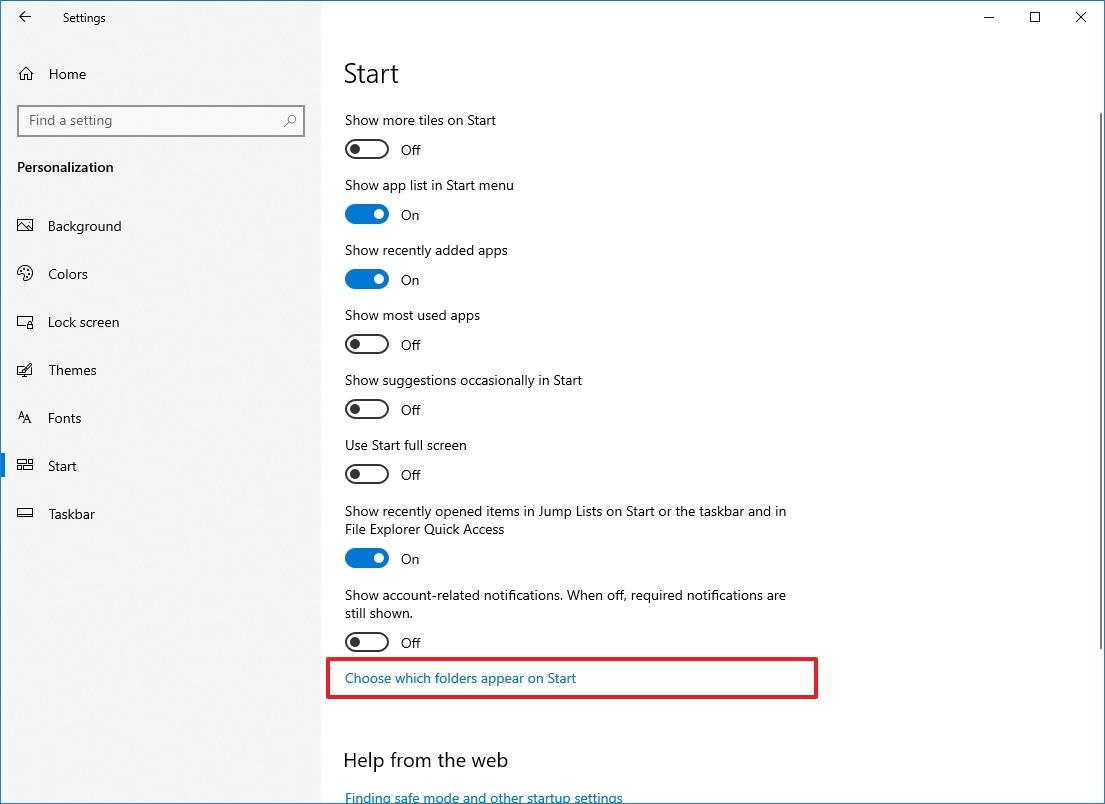
- Turn on or off the toggle switches for the items you want to be listed in the Start menu.
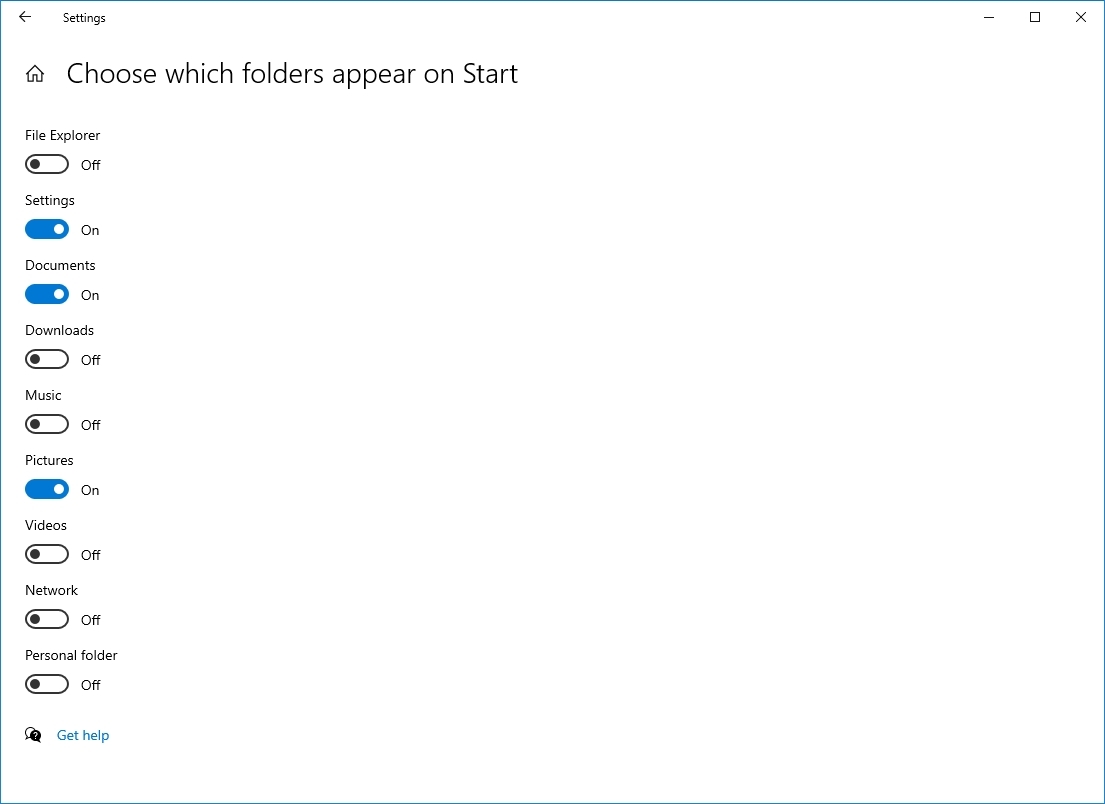
Once you complete the steps, the left rail menu will only include access to the folder you specified.
Customize Live Tiles
In addition to the customization options available, you can also personalize the experience from within the menu.
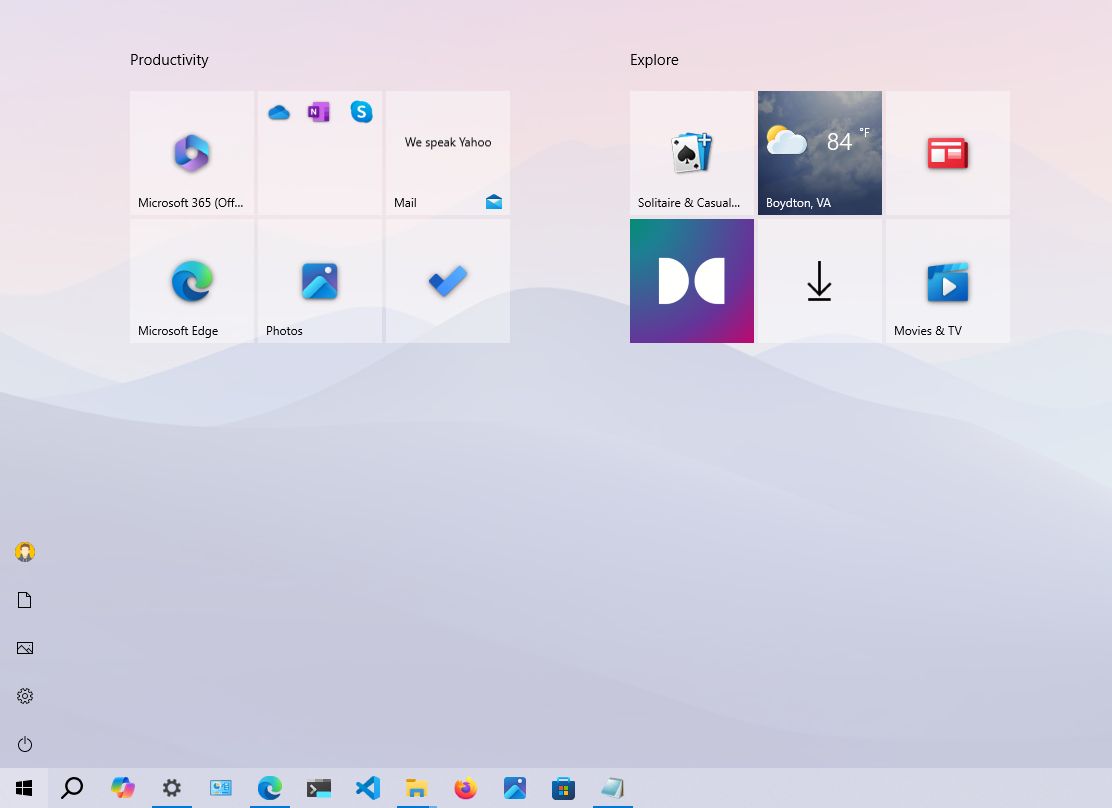
Resizing Start
You can resize the menu vertically and horizontally by stretching the edges outwards using the mouse.
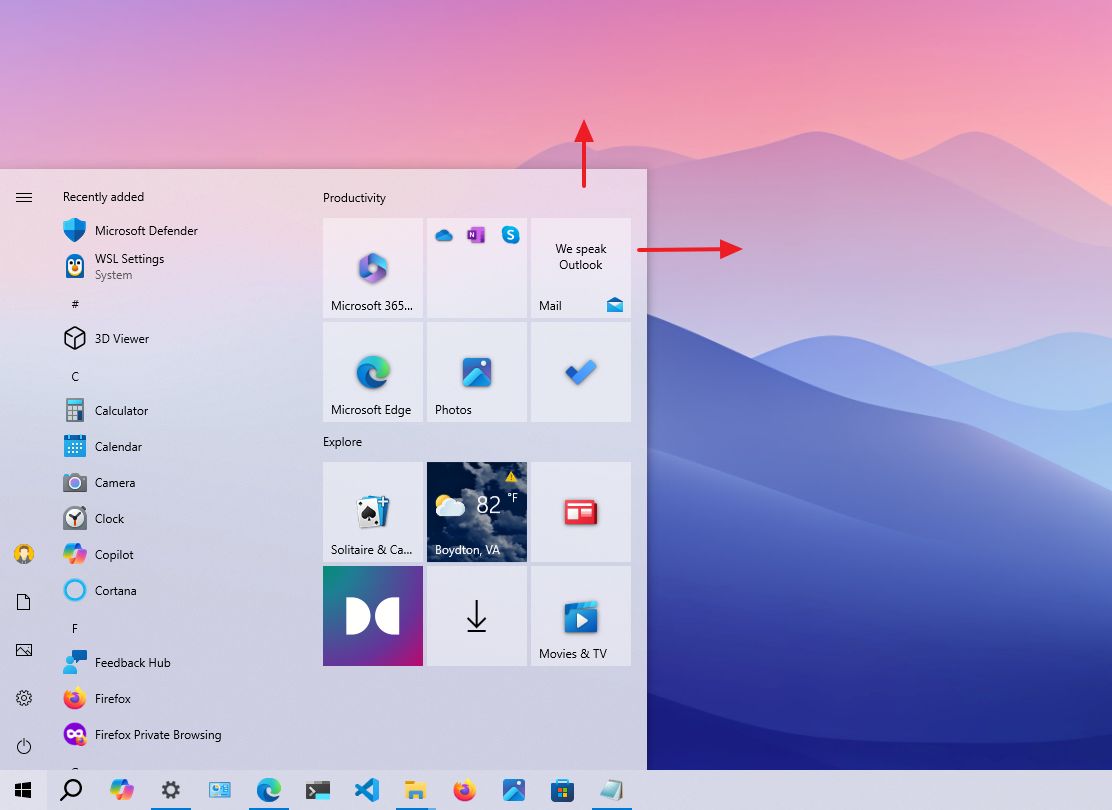
You can also open the menu and use the «Ctrl + arrow keys» keyboard shortcut to change the height and width.
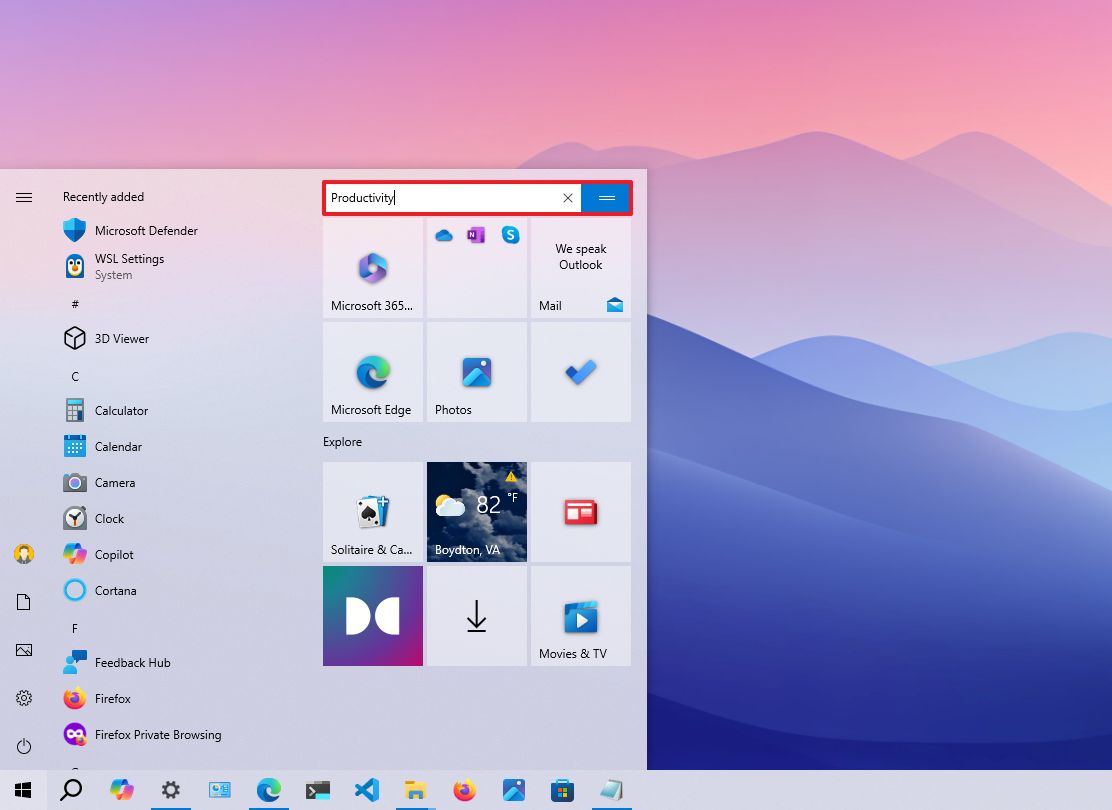
Working with tiles, folders, and groups
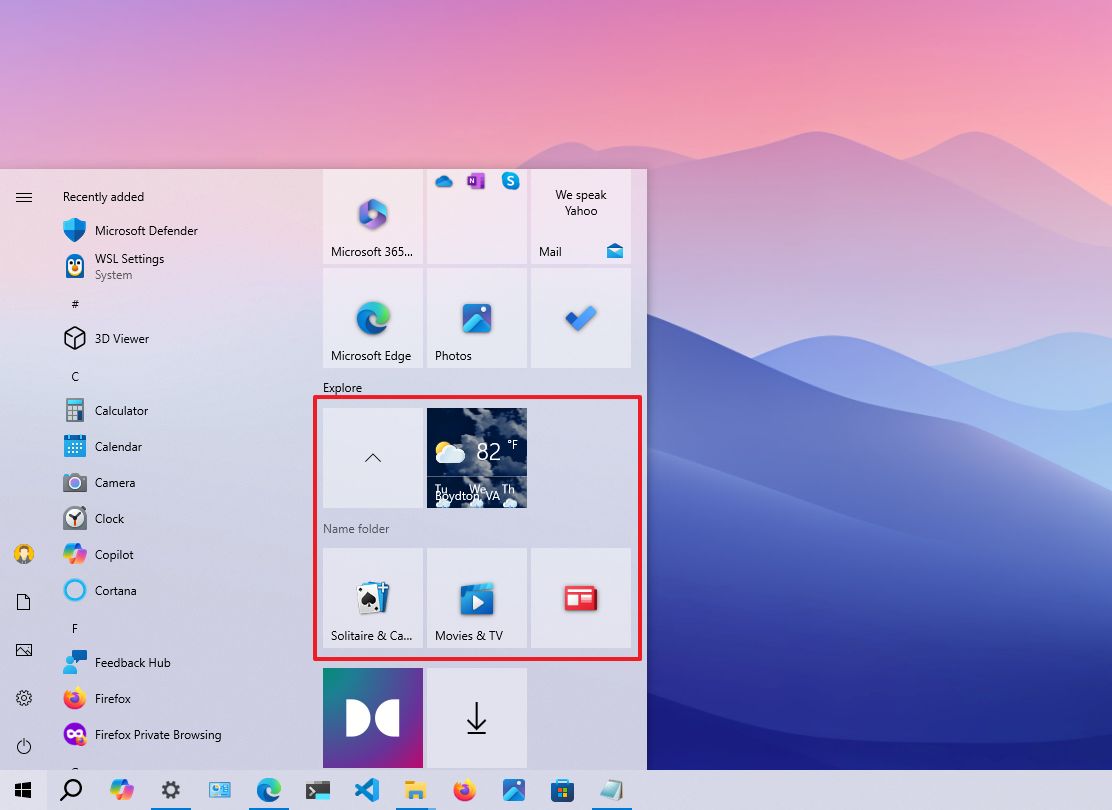
The Start menu provides the ability to drag tiles around, group tiles together in sections, and create folders anywhere on the menu.
To better organize your app tiles, you can create a group by dragging tiles into an empty space. You can even click the group’s header to change its name to anything that makes more sense for the group—and yes, emojis are supported.
You can also create folders, which is another way to group tiles to optimize the Start menu space. You can create a new folder by dragging and dropping a tile on top of another tile. Then, dropping more items into the folder will add them to the group.
Live Tiles and folders include support for different sizes, which you can change by right-clicking a tile, selecting the «Resize» menu, and choosing from one of the available sizes, including «Small,» «Medium,» «Wide,» or «Large.»
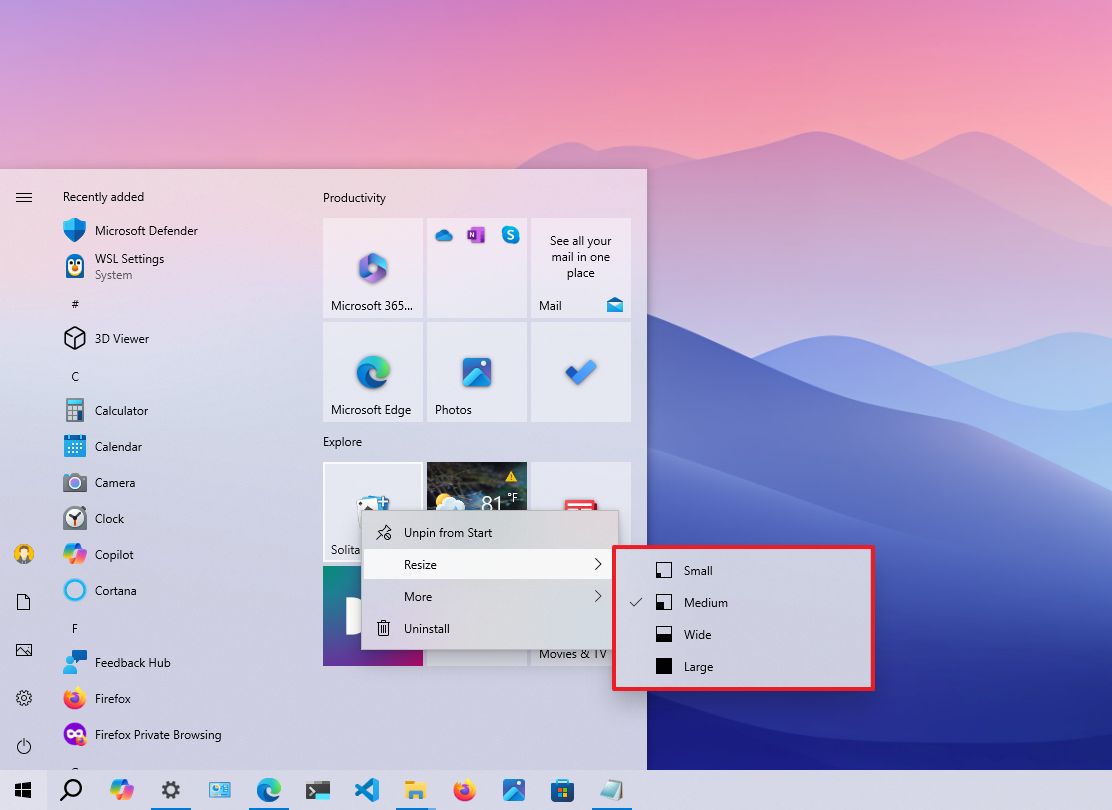
If you’re not interested in live updates, right-click the tile, select the «More» menu, and choose the «Turn Live Tile off» option. Depending on the app, you may also see additional options, such as the option to pin or unpin the taskbar, run it with administrator privileges, and more.

How to customize Taskbar on Windows 10
The Taskbar is perhaps one of Windows 10’s essential components, and you can customize it in many ways using the Settings app and options available within the experience.
Change Taskbar settings
To change basic Taskbar settings on Windows 10, use these steps:
- Open Settings.
- Click on Personalization.
- Click on Taskbar.
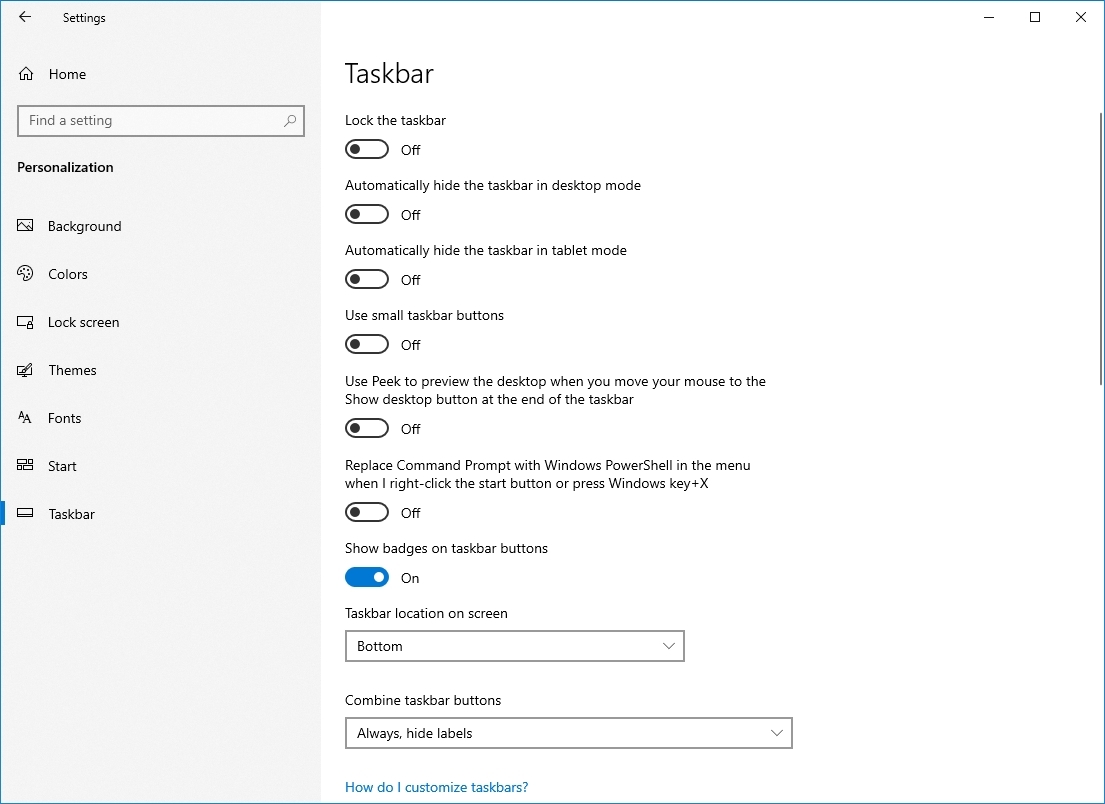
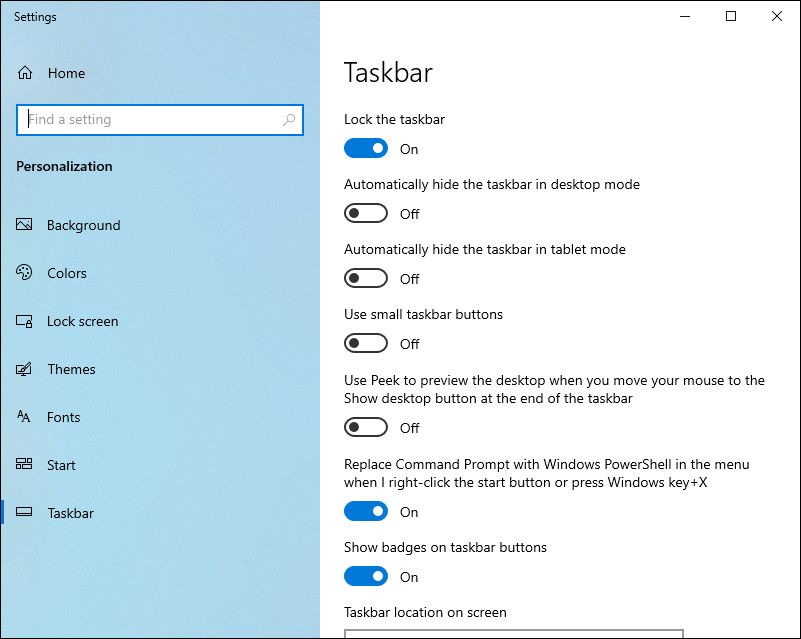
In the Taskbar page, you can change many basic settings, including:
- Lock the taskbar — When enabled, you can’t move or resize the taskbar. If disabled, you can click and drag the taskbar to any side of the screen, and you drag the edge of the bar to change the height.
- Automatically hide the taskbar in desktop mode — If enabled, the bar will stay hidden, unless you’re actively interacting with it in normal mode.
- Automatically hide the taskbar in tablet mode — If enabled, the bar will stay hidden, unless you’re actively interacting with it in tablet mode.
- Use small taskbar buttons — Allows you to use smaller buttons to reduce the footprint of the taskbar.
- Show badges on taskbar buttons — Apps in the taskbar can show status notifications, and this option lets you disable or enable the feature.
Change Taskbar location
Although you can change the location of the taskbar by dragging it around with the mouse, this page also includes a drop-down menu that allows you to relocate the bar anywhere you like.
To change the Taskbar location, use these steps:
- Open Settings.
- Click on Personalization.
- Click on Taskbar.
- Select the location using the «Taskbar location on screen» menu:
- Left.
- Top.
- Right.
- Bottom.
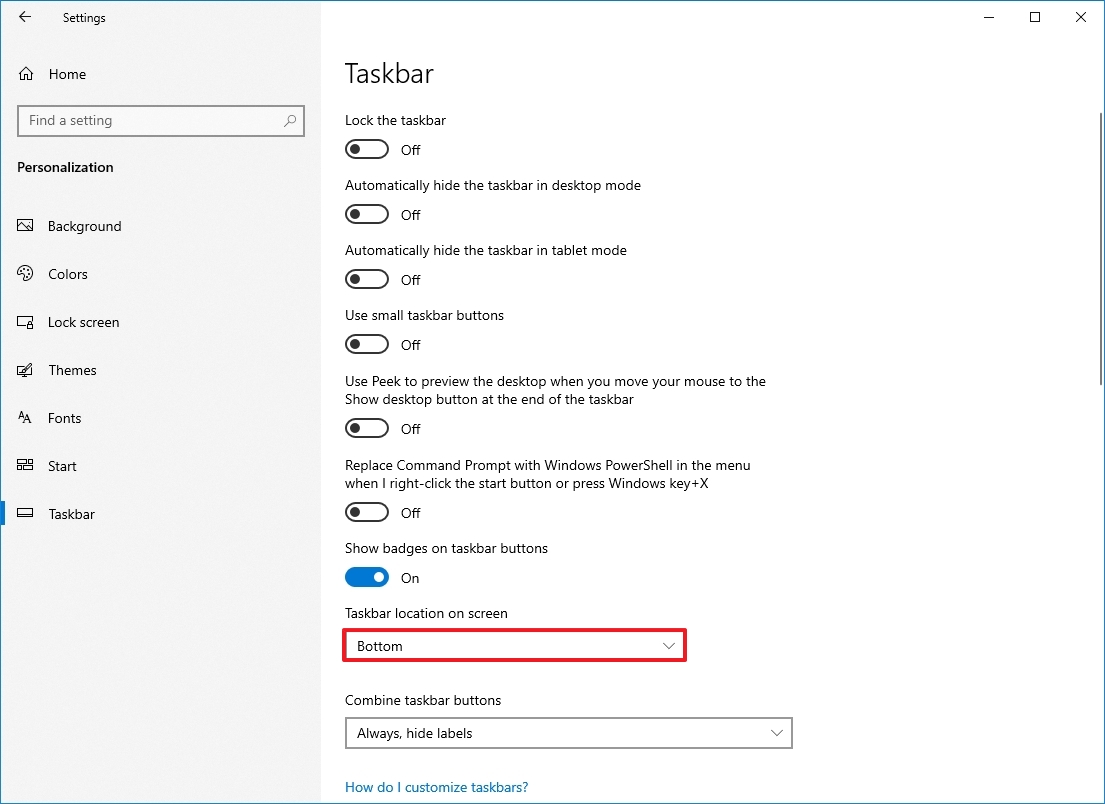
After you complete the steps, the taskbar will relocate to the side of the screen you selected.
Customize Taskbar visuals
The taskbar also lets you combine buttons in three different ways, including always combine and hide their labels (default), show labels and combine buttons only when the taskbar is full, and never combine and show button labels.
To combine the Taskbar buttons, use these steps:
- Open Settings.
- Click on Personalization.
- Click on Taskbar.
- Select the best option for you using the «Combine taskbar buttons» menu:
- Always, hide labels.
- When taskbar is full.
- Never.
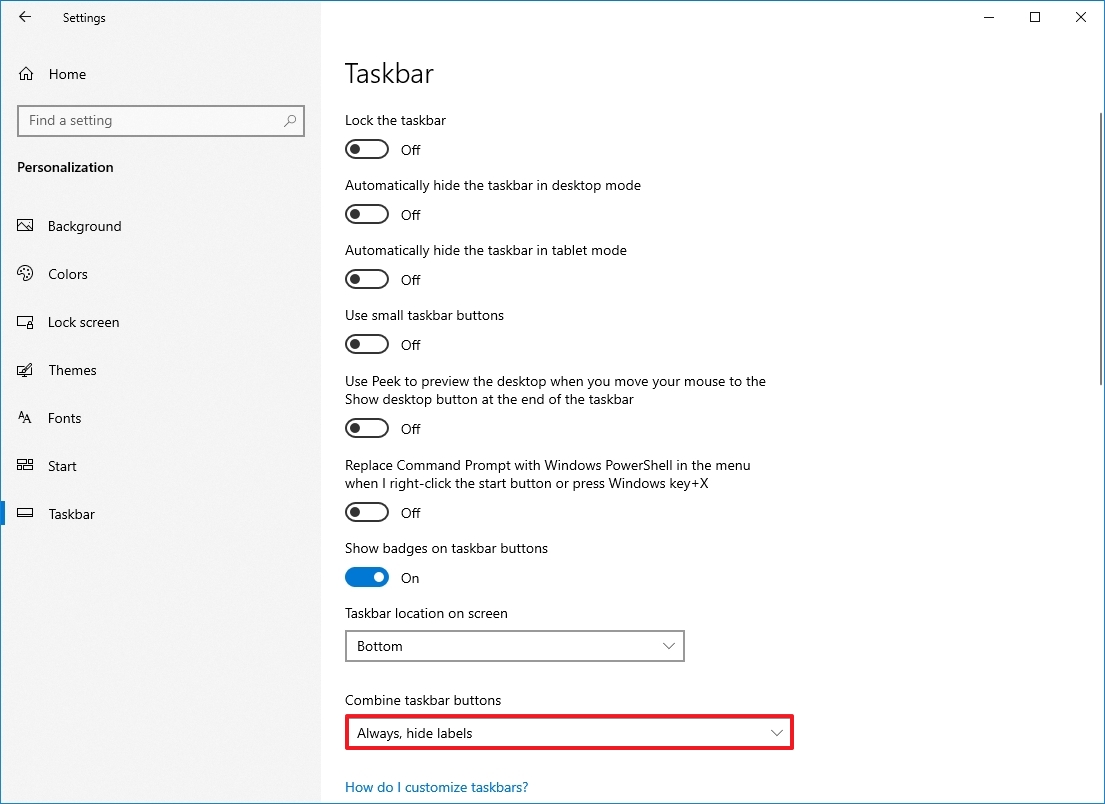
Once you complete the steps, the taskbar the changes will apply accordingly.
Customize notification area
The bottom-right corner of the taskbar is where the notification area is located, and it usually gets cluttered with system and app icons. However, you can customize it to show only the icons you need using these steps:
- Open Settings.
- Click on Personalization.
- Click on Taskbar.
- Click the «Select which icons appear on the taskbar» option under the «Notification area» section.
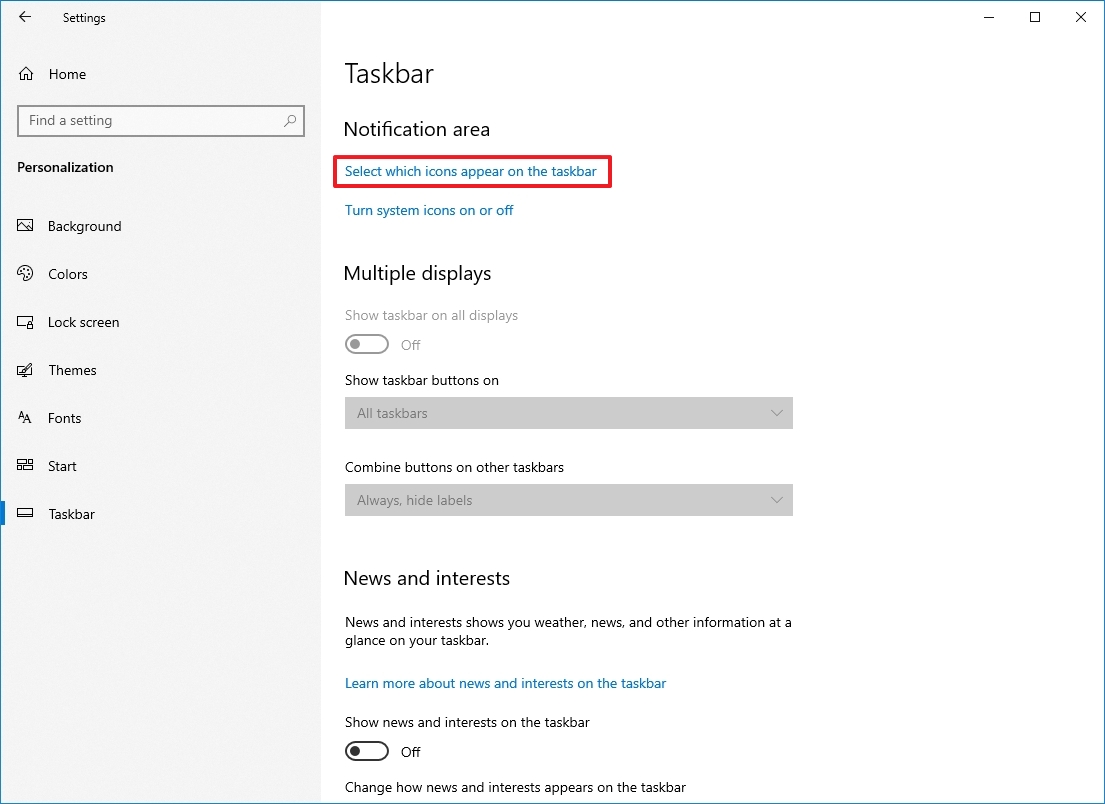
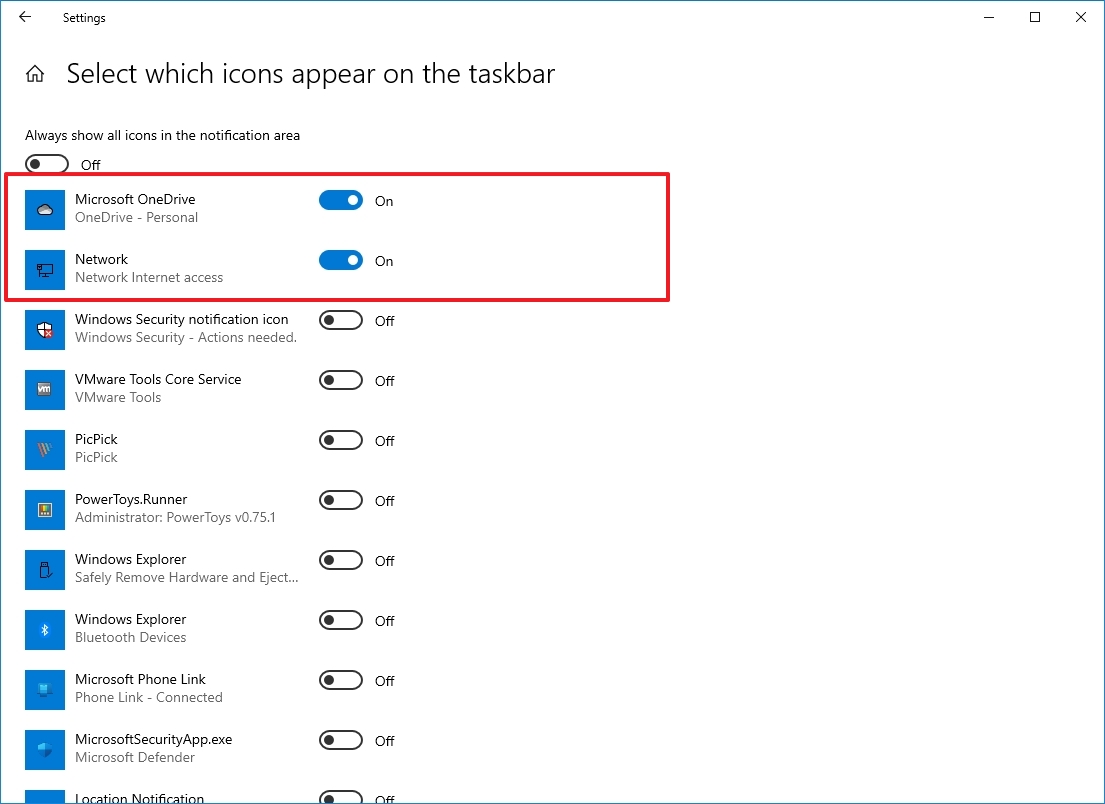
- Turn on the toggle switch for each icon you want to appear in the bottom-right corner of the screen.
Quick tip: There’s also a toggle switch to always show all icons in the notification area, but it’ll clutter the taskbar reducing the space to pin apps.
- Click the «Turn system icons on or off» option under the «Notification area» section.
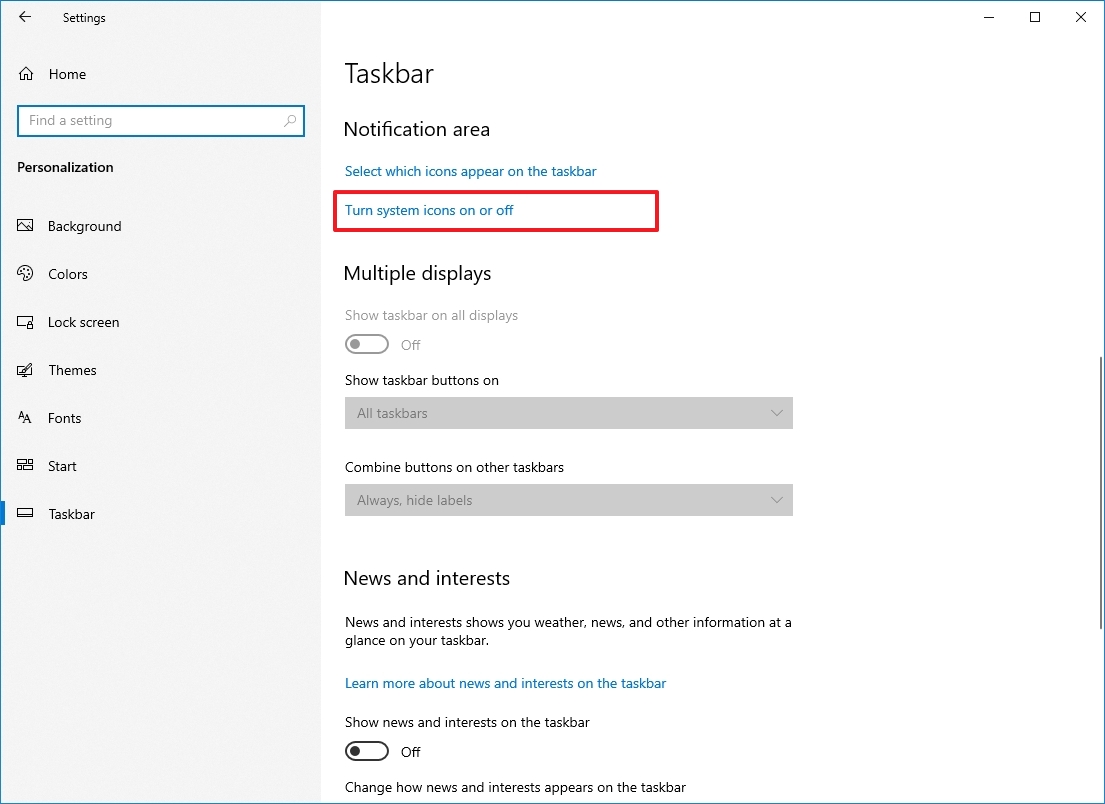
- Turn on the toggle switch for each system icons (such as Clock, Volume, and Network) that will appear in the bottom-right corner of the screen.
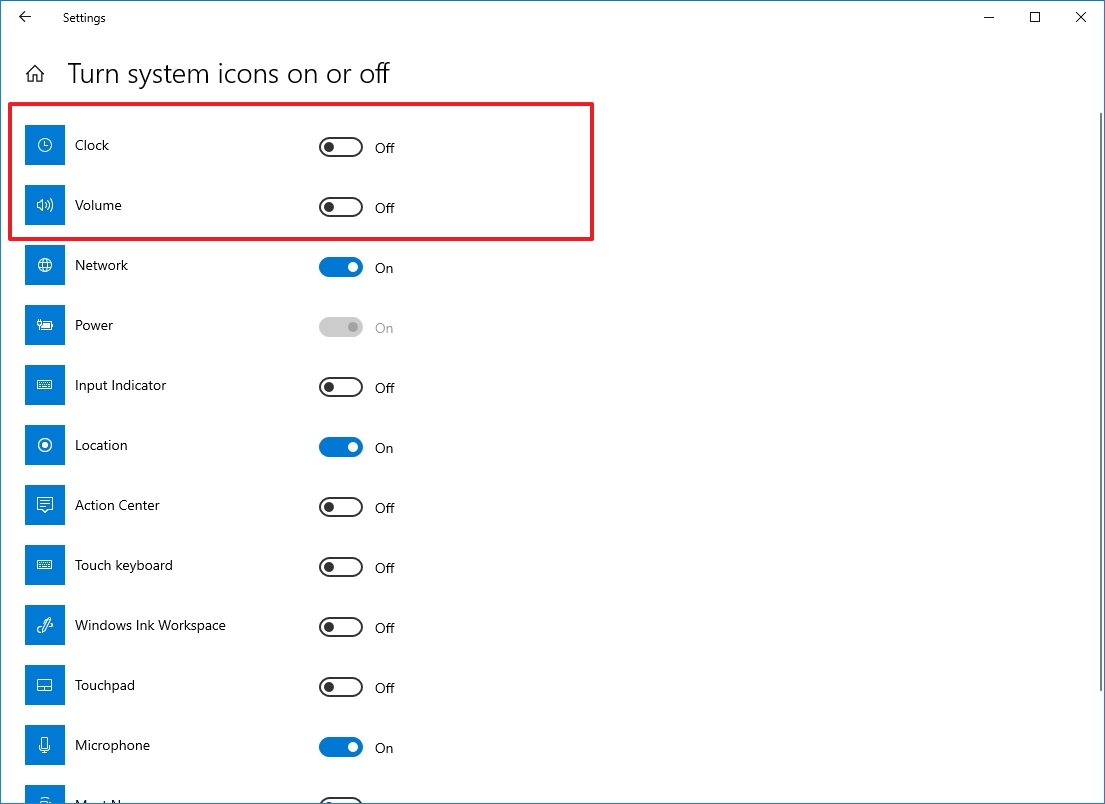
After you complete these steps, only the icons you need will appear in the notification area.
Customize Taskbar for multiple displays
If you have a multi-monitor setup, the Taskbar page also includes additional settings to show the bar on all displays, choose where the apps button appears, and combine buttons on another Taskbar.
To customize the taskbar for multiple displays, use these steps:
- Open Settings.
- Click on Personalization.
- Click on Taskbar.
- Turn on the «Show taskbar on all displays» toggle switch under the «Multiple displays» section.
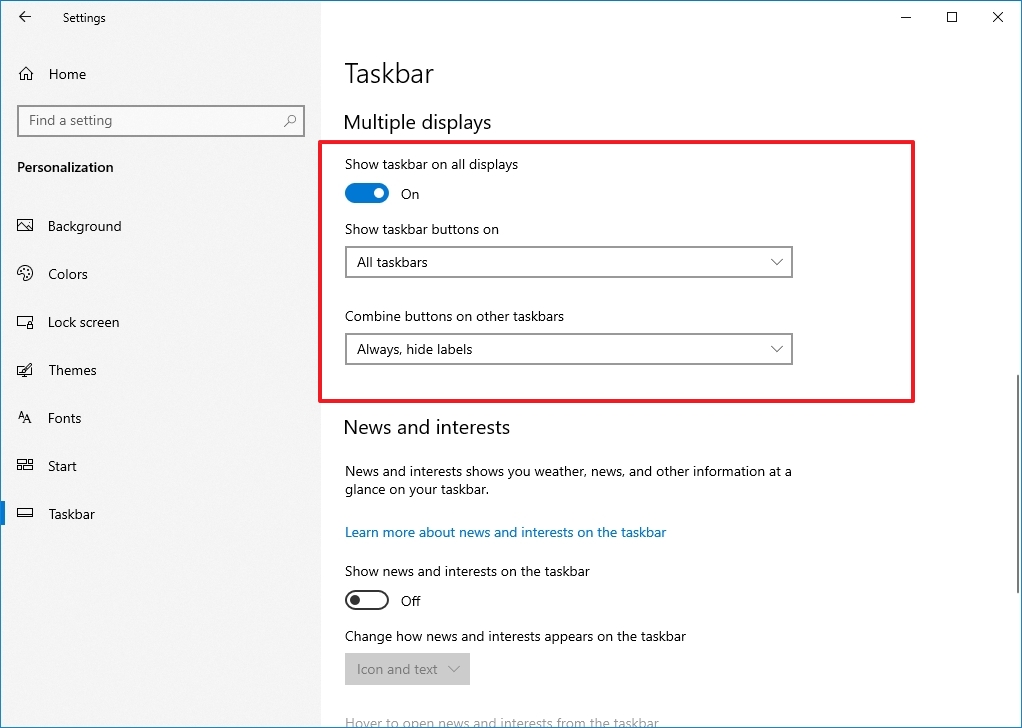
- (Optional) Use the Show taskbar button on the drop-down menu and select in which displays the buttons should appear:
- All taskbars.
- Main taskbar and taskbar where window is open.
- Taskbar where window is open.
- (Optional) Use the «Combine buttons other taskbars» menu and select the best option for you:
- Always, hide labels.
- When taskbar is full.
- Never.
Once you complete the steps, the taskbar will display on all the monitors according to your settings selection.
Optimize taskbar space
In addition to the customization options available through the Settings app, you can change a few other options from the taskbar itself.
For instance, if you don’t actively use the search box, you can make it smaller or remove the box to create more space to pin additional apps.
To remove the search box, you can right-click the taskbar, select «Search,» click the «Hidden» option, or select the «Show search box» option.
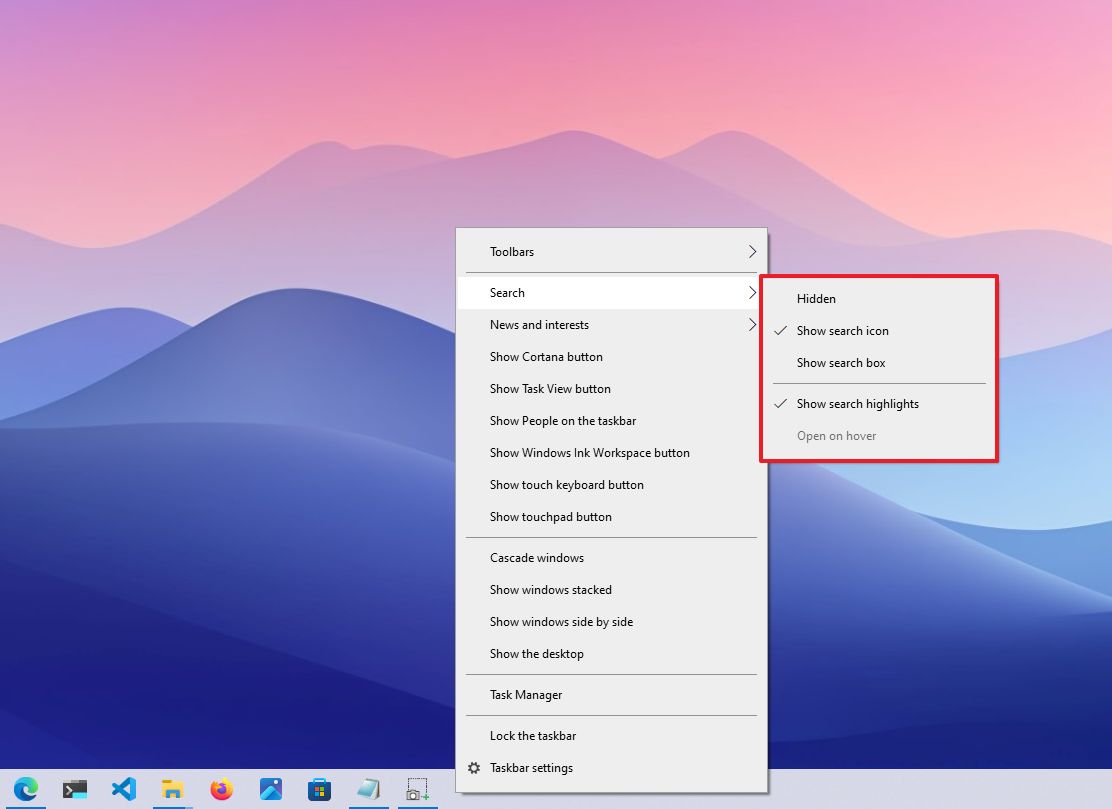
Using the same Taskbar context menu, you can remove the Task View and other buttons, which will free up valuable space.
You can also check this guide for more details on how to fully optimize the space on the Taskbar.
While the default settings should be more than adequate for most users, Windows 10 offers many settings to make the experience more personal without requiring third-party tools or hacks.
I’m focusing this guide on personalizing the desktop with settings that would fit more users, but it’s worth noting that there are many other ways to customize Windows 10.
More resources
For more helpful articles, coverage, and answers to common questions about Windows 10 and Windows 11, visit the following resources:
- Windows 11 on Windows Central — All you need to know
- Windows 10 on Windows Central — All you need to know
Mauro Huculak has been a Windows How-To Expert contributor for WindowsCentral.com for nearly a decade and has over 15 years of experience writing comprehensive guides. He also has an IT background and has achieved different professional certifications from Microsoft, Cisco, VMware, and CompTIA. He has been recognized as a Microsoft MVP for many years.
Do you like to customize your computer? Do you know how to customize your computer? MiniTool shows you how to customize Windows 10 with software and built-in utilities. With these tools, you can modify the way Windows 10 looks and acts.
You may spend a lot of time on your computer, playing games, working, watching movie, listening music, etc. In a word, you do everything on your computer. However, after a long time of use, have you ever been dissatisfied with the relatively fixed appearance and the behavior of computer for a moment?
If you don’t want to endure your computer’s default appearance and behavior anymore, you should read this post and start to customize Windows 10.
Back up Data Before Customize Windows 10
To customize your computer better, you may need to use some Windows 10 tweakers. However, these Windows 10 customization tools will modify system files. To avoid deleting a vital part of the UI and making a mess of your computer, you should make a backup of your computer before you beautify Windows 10 to get yourself a better browsing experience.
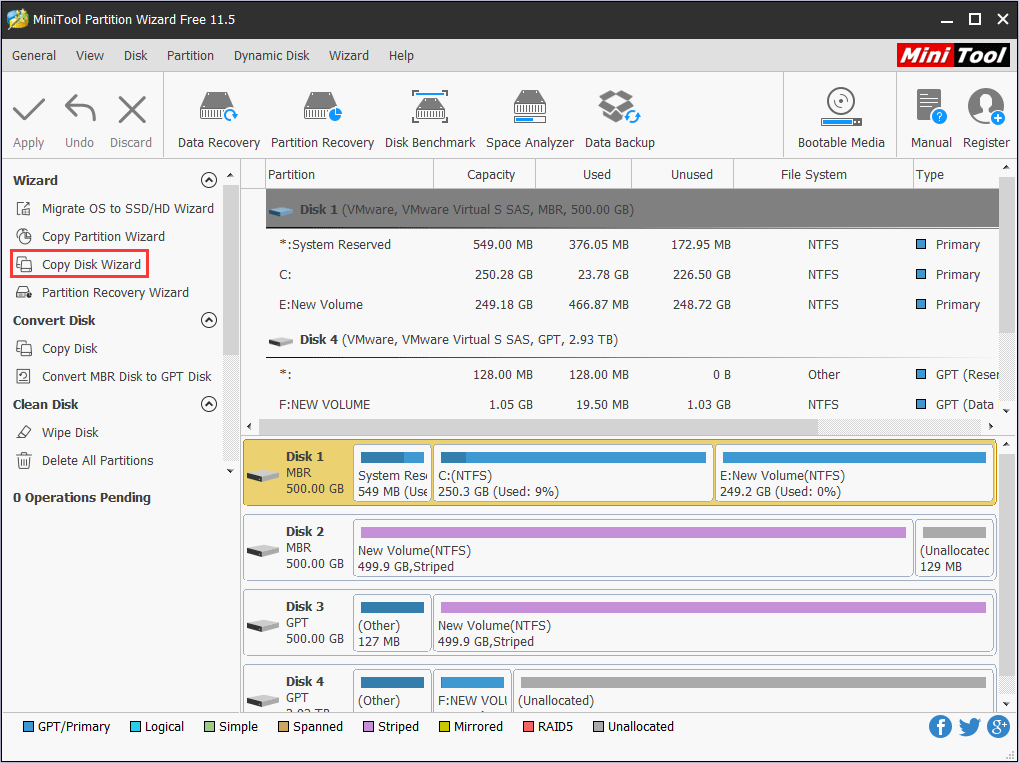
To back up your computer, you can use Clone Disk Wizard of MiniTool Partition Wizard.
MiniTool Partition Wizard FreeClick to Download100%Clean & Safe
In addition, if you are dissatisfied with the default layout of partition in your computer, you can also modify it with MiniTool Partition Wizard. You can refer to the following post:
After backing up the computer, you can customize Windows 10 without worries. Then, please read on to get Windows 10 tweakers and learn how to use them.
How to Customize Windows 10 Themes
A Windows theme includes styles, desktop wallpapers, screensavers, mouse pointers, system sound events, icons, etc. Among them, except that the style is a must, other parts are optional. What the style can define is everything that everyone can see in Windows, for example, the appearance of the window, the font, the color, and the appearance of the button.
By switching themes, you can complete Windows 10 UI customization quickly and easily. To download and install themes for Windows 10, I offer you two methods: one is official, while the other is not.
Install Themes Through Microsoft Store
Microsoft hosts several Windows 10 themes for free within the Microsoft Store. You can download and install themes through it. This method is the official one. Please refer to the following steps:
Step 1: Right-click on your desktop and choose Personalize.
Step 2: Select Themes in the left panel and scroll down the right panel to find Get more themes in the Store. Then, click this button and you can see many Windows themes in the Store.
Step 3: Click the theme you want and click Get button. Then, after a while, you will be informed that “this product is installed“. Then, click Apply button to return Themes settings.
Step 4: Under Apply a theme section, click the newly-installed theme to apply it.
Install a Third-party Theme with UltraUXThemePatcher
UltraUXThemePatcher is a program that allows you to install a third-party Windows 10 theme. How to customize Windows 10 themes with it? Please refer to the following steps:
Step 1: Download and install UltraUXThemePatcher. After installing it, you will be asked to restart your computer. Please do as required.
Step 2: Find a theme you want in a third-party website like DeviantArt. Then, download this theme and you will get a ZIP file.
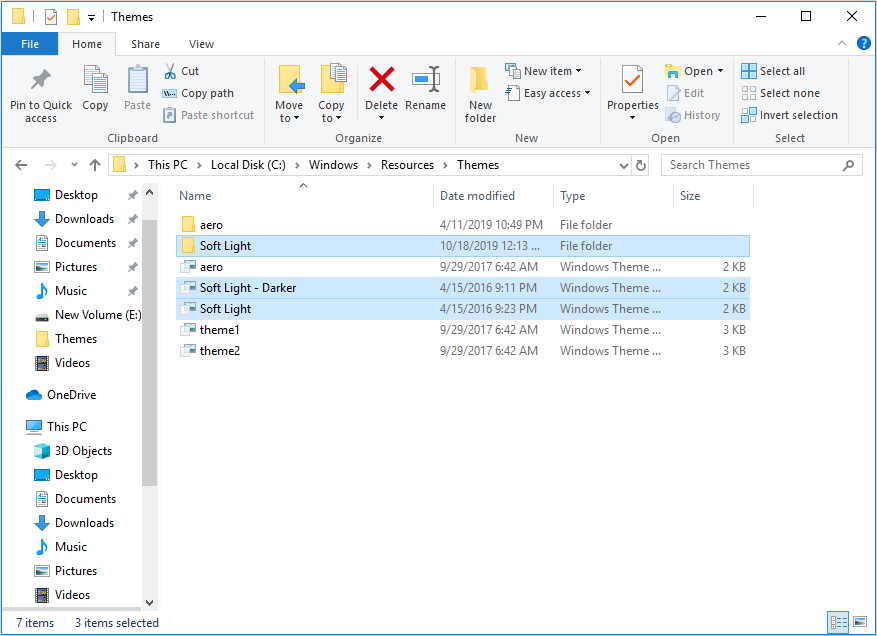
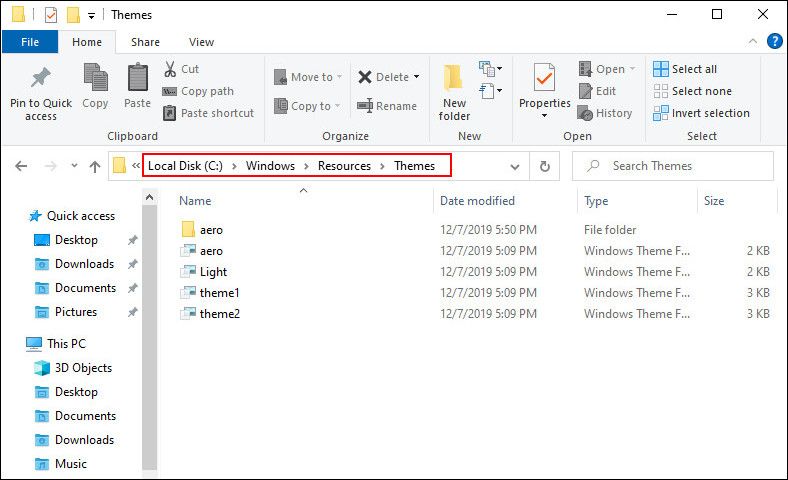
Step 3: Extract the theme ZIP file and move the contents of the folder to C:WindowsResourcesThemes.
Note: There may be many files in the newly-downloaded theme folder. You should move the theme files compatible with your Windows version to the C drive theme folder. To know your Windows version, refer to this post: What Version of Windows Do I Have. In addition, the file transfer will require administrator permission.
Step 4: Apply the new theme through double-clicking the theme file or apply in Windows Theme settings.
How to Customize Windows 10 Desktop
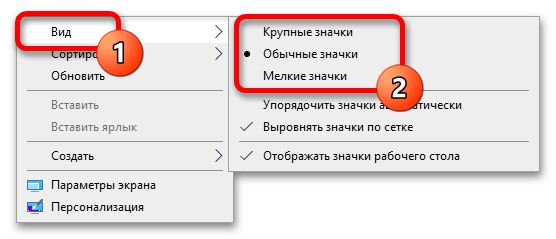
Windows 10 offers you few desktop customization tools. It only allows you to change desktop background and hide all the desktop icons (right-click on the blank space on the desktop and uncheck Show desktop icon in View). This is the easiest way to create a simple and beautiful desktop. However, Rainmeter and Fence offer you more options.
Customize Skins with Rainmeter
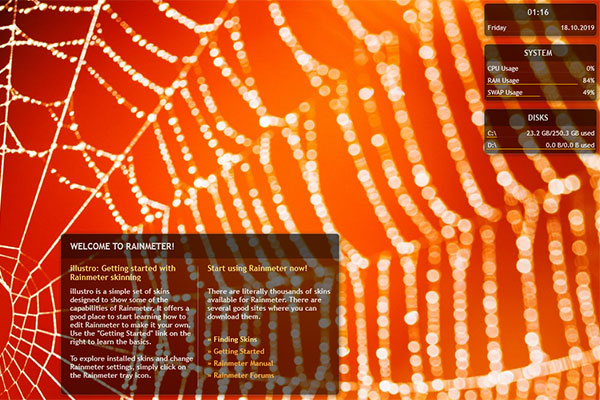
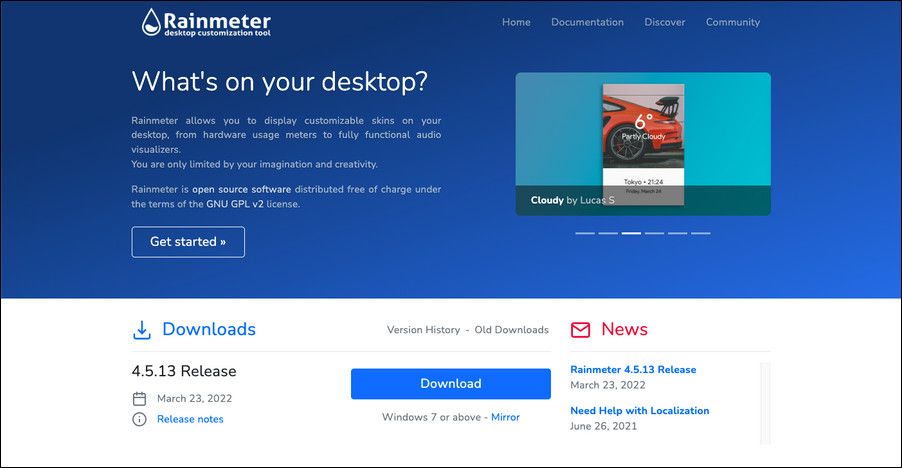
Rainmeter is an open-source program that allows you to display customizable skins on your desktop, from hardware usage meters to fully functional audio visualizers.
With Rainmeter, you can create an interactive, parallax 3D wallpaper; display your favorite images and GIFs directly on your desktop, like one would picture on a desk; and re-skin a few widely used media players. In Rainmeter, you are only limited by your imagination and creativity.
How to customize desktop Windows 10 with Rainmeter? Please refer to the following steps:
Step 1: Download and install Rainmeter. If you install it successfully, your computer will display several black windows just like the following picture:
Tip: These black windows are default skins, which can be removed by right-clicking them and choosing Unload skin.
Step 2: Download Rainmeter skins from a third-party website like DeviantArt. The downloaded Rainmeter skin files can be divided into two types: rmskin files marked by a green water droplet, and ZIP or RAR files.
Step 3: Apply skins. According to different skin file types, there are different installation steps that you should adhere to.
- To install a rmskin file, you just need to double-click it and choose Install from the pop-up window.
- To install a ZIP or RAR file, you should follow the steps below:
- Extract the ZIP or RAR file and check whether there are files whose file extensions are “.ini“. If there is no INI file, this skin can’t be installed by Rainmeter. To check file extension, read this post: How to Show File Extensions in Windows 10?
- Find Rainmeter (on Taskbar or in hidden system tray) and right-click on this icon. Move the cursor onto Skins in the shortcut menu and then choose Open folder.
- Move the skin file to the folder opened in the last step. The location of the folder may be C:UsersusernameDocumentsRainmeterSkins.
- Right-click the Rainmeter icon again to choose Refresh all.
- Click the Rainmeter icon to open it. Expand the new skin directory that consists of many secondary directories (many small widgets) until you find INI files. Then, click the files and load
With Rainmeter, you can combine two skins into one so that you can make a unique skin. That’s one of the Rainmeter’s charms. However, it doesn’t change any visual styling in Windows like the Start Menu or taskbar or window frames. All it does is allow you to add “skins”, which are like widgets, to your desktop.
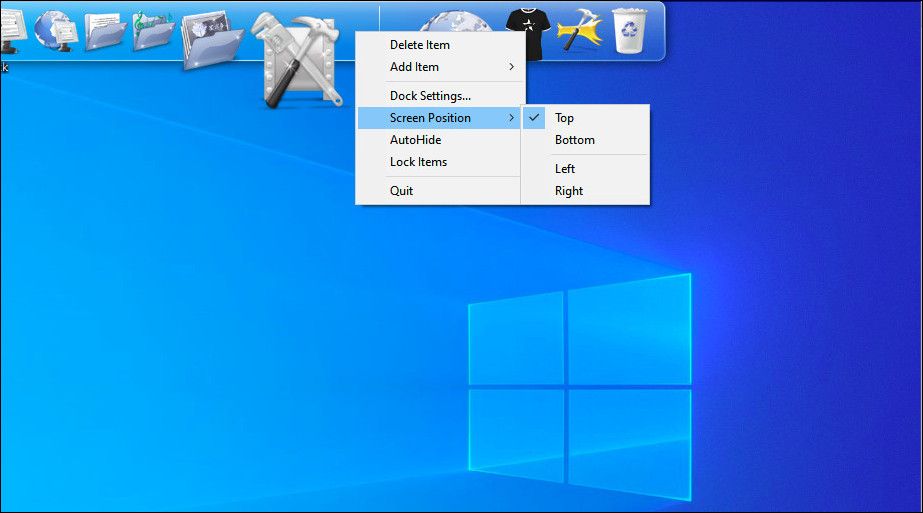
Manage Desktop with Fences
To beautify desktop, many users would like to hide desktop icon or pin them to taskbar. However, that may be inconvenient if there are many desktop icons. If so, Fences can help you manage desktop better.
How to use Fences? Here is a brief tutorial.
Step 1: Download and install Fences. Once it is launched, you can create fences by yourself or allow it to create fences automatically. The effect is shown as follows:
Step 2: Create and remove a fence manually.
- To create a fence, you just need to left-click your desktop and drag. Then, choose Create Fence here option and name the fence. Finally, you can drag and drop a program into this fence.
- To remove a fence, you just need to click the cross icon appearing on the fence when you move the cursor onto it, and then click Remove Fence.
Step 3: Right-click desktop and choose Configure Fences. You can get the following window, in which you can customize the look of Fences very easily and enact rules in Fences, which not only automatically organizes your files but downloads particular files into your fence automatically.
The Start menu is an essential feature of Windows 10. You can find your apps, settings, and files there. If you don’t like the default Start menu, you can customize it through Windows built-in utilities or third-party software like Start 10.
Customize Start Menu in Windows 10 Settings
There are a number of ways to customize the Start menu in Windows 10 Settings. Please refer to the following steps:
Step 1: Change Start menu’s color.
- Right-click on your desktop and choose Personalize.
- Skip to Colors in the left panel and scroll down the right panel to check Start, taskbar, and action center under Show accent color on the following surfaces
Step 2: Define apps showing on the Start menu. If you want to choose which apps and folders can appear on Start menu, do as follows:
- Right-click on your desktop and choose Personalize.
- Skip to Start in the left panel to choose what kind of apps and folders can appear on Start menu.
Step 3: Resize Start menu and tiles on it.
- To resize the Start menu, you should use your mouse pointer to drag from any edge in the Start menu.
- To resize tiles on the Start menu, you should right-click on them and move the cursor onto Resize. Then, you can choose Small, Medium, Wide, or Large from the pop-up window.
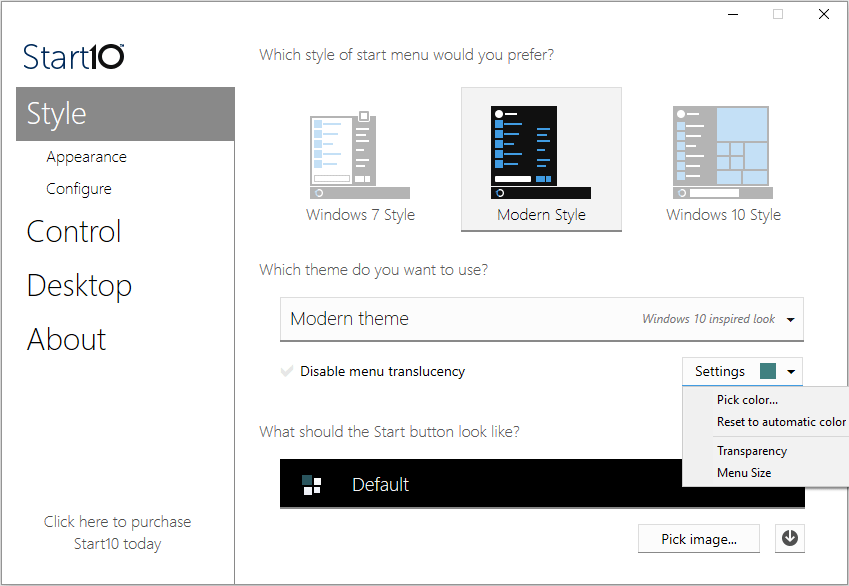
Customize Windows 10 Start Menu with Start 10
Start 10 is produced by Stardock who develops Fences. It not only allows you to choose Start menu style from Windows 7 style, Modern Style, and Windows 10 Style, but also allows you to choose your background and color and use different Start menu themes.
How to Customize Windows 10 Taskbar
Taskbar can be also customized in Windows 10 Settings or by third-party software. In Windows 10, the Taskbar customization options are integrated on Personalize > Taskbar panel. You can hide taskbar, use small taskbar buttons, change taskbar location, etc. To know how to do that, please read this post: 3 Ways to Change the Taskbar Button Width in Windows 10.
As for third-party Taskbar customization software, RocketDock is a good choice. It allows you to change icons and pin shortcuts anywhere on the desktop. In addition, it can make Windows 10 have a Mac OS Dock look. Of course, some tricks can also create a Mac OS Dock look on Windows 10 without third-party software (this will be demonstrated later).
2 Tricks Help You Customize Windows 10 Better
Simulate Mac OS Dock
With this trick, you can make Windows 10 have a Mac OS Dock look without third-party software.
Step 1: Create an empty folder.
Step 2: Right-click on the blank space in the taskbar and uncheck Lock the taskbar. Then, move the cursor onto Toolbars and choose New toolbar from the pop-up menu.
Step 3: In the pop-up window, choose the newly-created empty folder.
Step 4: Drag the newly-created toolbar to the left until the application icons are “squeezed” to the right. Then, right-click on the new toolbar and uncheck Show Text and Show title properties. Finally, drag the app bar to your preferred location and check Lock the taskbar again.

In this way, you can simulate a Mac OS Dock look on Windows 10.
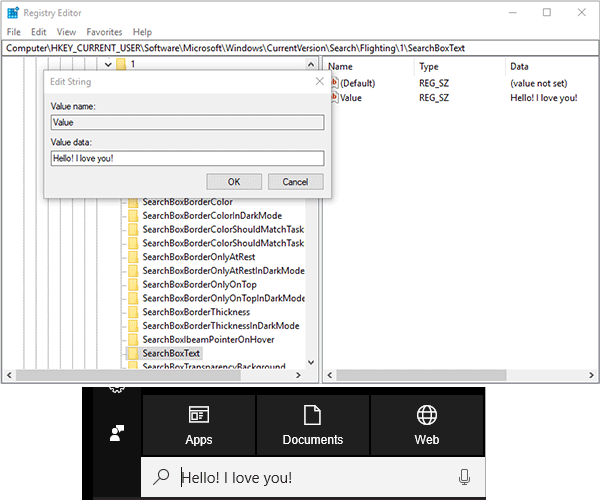
Modify the Display Text of the Cortana Search Box
If you still have Cortana search box on your taskbar, you can modify its display text to make it more personal.
Step 1: Press “Windows + R” keys and type “regedit” into the Run box. Then, hit Enter key to open Registry Editor.
Step 2: Navigate to ComputerHKEY_CURRENT_USERSoftwareMicrosoftWindowsCurrentVersionSearchFlighting. Then, double-click Current and RotateFlight to change their values to “0” one by one.
Step 3: Navigate to the following two locations and double-click their Value options to change their content to the text you want Cortana to display, respectively.
- ComputerHKEY_CURRENT_USERSoftwareMicrosoftWindowsCurrentVersionSearchFlightingSearchBoxText
- ComputerHKEY_CURRENT_USERSoftwareMicrosoftWindowsCurrentVersionSearchFlighting1SearchBoxText
Here is a detailed guide to Windows 10 customization. If you want to beautify your desktop, this post can definitely help you.Click to Tweet
Bottom Line
If you still have some doubts about how to customize Windows 10 with the above methods, or you have any other ideas on Windows 10 customization, please leave a comment below. If you have problems in backing up data, you can email us at [email protected]. We will reply to you as soon as possible.
Do you desire a desktop that looks and feels like your own? This guide will help create a fully customized Windows 10 desktop and user interface (UI).
A few minutes is all it takes to turn your desktop into a unique UI suited to your needs and wants. It’s fun, it’s easy, and the results will be stunning. Let us take you through the process step-by-step.
1. Introduction to Desktop Customization
1.1 Why Should I Customize My Desktop?
Your desktop is simple. You use it to send emails, write documents, store photos, and watch movies. In short, you do everything on your computer. Yet it sits there, bare and without a personal touch. Besides, why mess with what works?
Others have grown to love the thrill of customization. First, you begin customizing your Start Menu tiles. Then, program icons. Next thing you know, you’re simulating whole operating systems within your Windows 10 environment.
Think of your PC like a desk. Now imagine working at an empty desk every day. No matter your PC knowledge—whether you consider yourself an amateur or a pro—no one has to settle for a boring desktop. Let your personality flow through your screen. Read on to go from drab and default to outstanding in minutes!
1.2 How This Guide Is Written
This guide is best read from beginning to end. Since desktop customization often requires prior knowledge and multiple programs, it’s best to start with simple feature changes. Slowly but surely—as you gain experience dealing with different parts of the Windows 10 UI—you’ll learn how to customize more and more.
If you’d like a simple one-click solution, though, feel free to jump ahead to the Themes section.
2. Themes
2.1 An Introduction to Desktop Themes
No matter what Windows version you’re using (Windows XP, Windows 7, Windows 8, Windows 10, or Windows 11), making your desktop look fantastic is super simple.
Let’s take our Taskbar, for example. Right-click on your Taskbar. Then, select Taskbar settings. This will open a window that allows users to customize certain simple features in their Taskbar.
As you can see, we already have several options to change the appearance of our Taskbar. You can choose to hide it, use smaller Taskbar buttons, and lock the Taskbar, so you don’t accidentally delete a shortcut.
Just like that, you’ve already started customizing your Windows 10 UI. That’s only the beginning.
2.2 Where Can I Get Themes for My Computer?
There are plenty of ways—some official and some not—to download and install themes for Windows 10. For one, Microsoft hosts several Windows 10 themes for free within the Microsoft Store.
To access the Microsoft Store, click on your start menu and type in store. Click on the Microsoft Store option. Then, type in Themes in the search bar, hit enter, and select the Get your theme option.
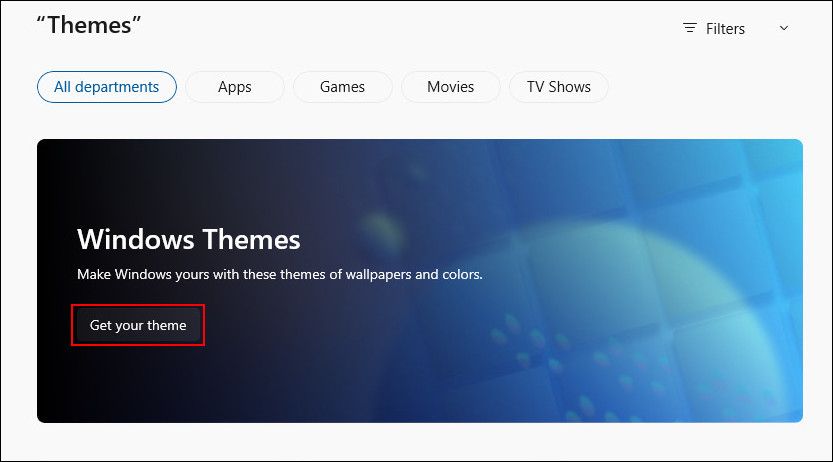
This will allow you to install a simple theme quickly, officially, and for free.
2.3 How Do I Use Themes Properly?
Before we get into the more nuanced tweaks, it’s best to start with default desktop customization, so you familiarize yourself with Windows 10’s UI. We’ll start with themes. Windows 10 themes are basic background and color combinations you can use for your desktop.
To access Themes, right-click an empty space on your desktop and select Personalize.
This will open the Background section of your Windows 10 settings.
Expand your window and select the Themes option in the sidebar. You can access and save themes in this window. Then, scroll down to and click the Get more themes option. From the list provided, select an option and download the theme. Once the theme is downloaded, select Launch and choose your theme from the selection.
That’s it! In a few seconds, we went from the following default desktop:
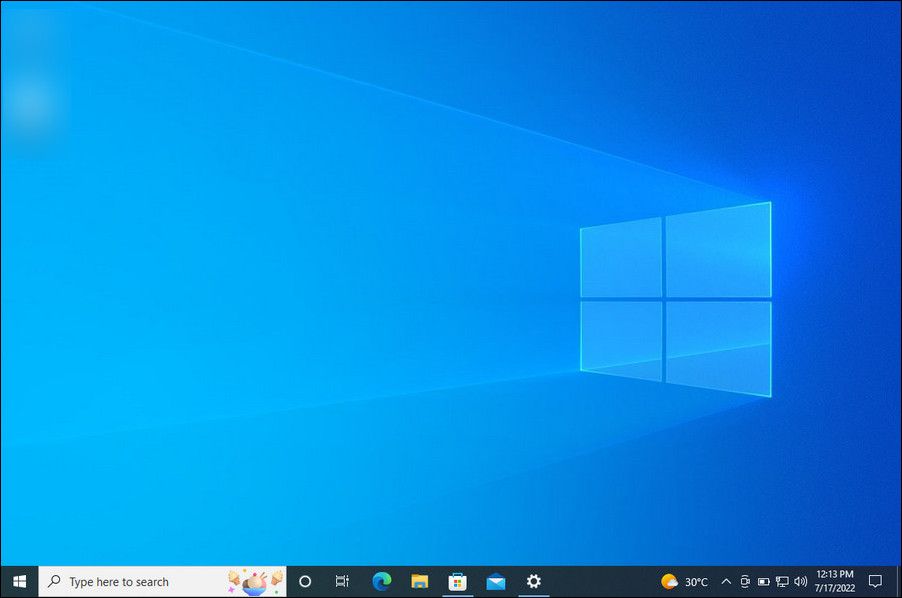
To this:
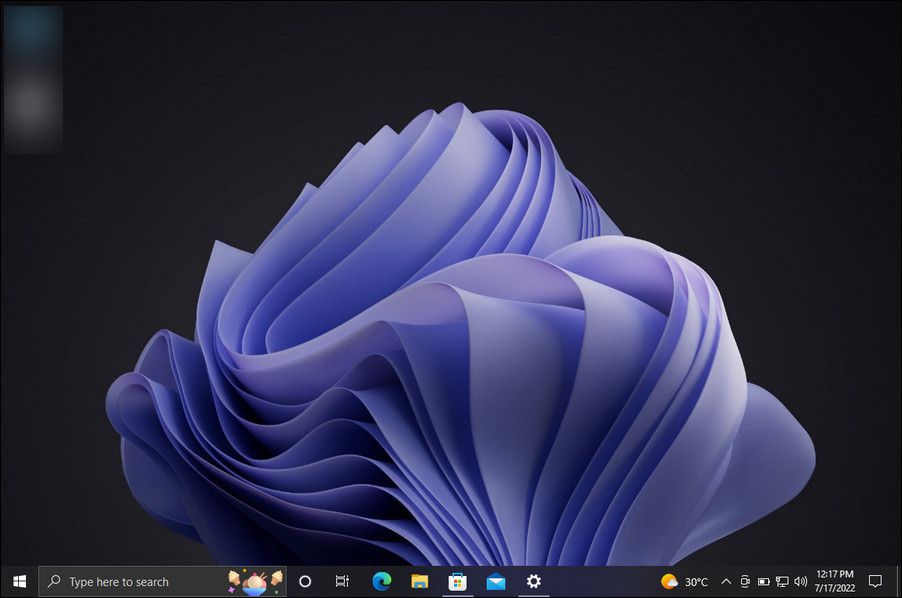
All in a few clicks. Note that not only the background changed, but the Taskbar color and all applicable Windows 10 windows as well. You can also install dark themes if you are not a fan of the lighter options, and if you are feeling creative, then what’s better than creating your own Theme on Windows?
That’s enough on default changes for now. Let’s go over how to install third-party themes.
2.4 Should I Use a Third-Party Theme Installer?
The following is a popular method among Windows 10 aficionados to install third-party themes onto their Windows 10 computers. This method will allow you to control the look of your File Explorer, a major component of the Windows 10 UI, and other applicable programs like Task Manager.
2.4.1 DevianArt Themes
First, head to DeviantArt and enter Windows 10 themes in the search bar. You’ll be presented with several popular options by default.
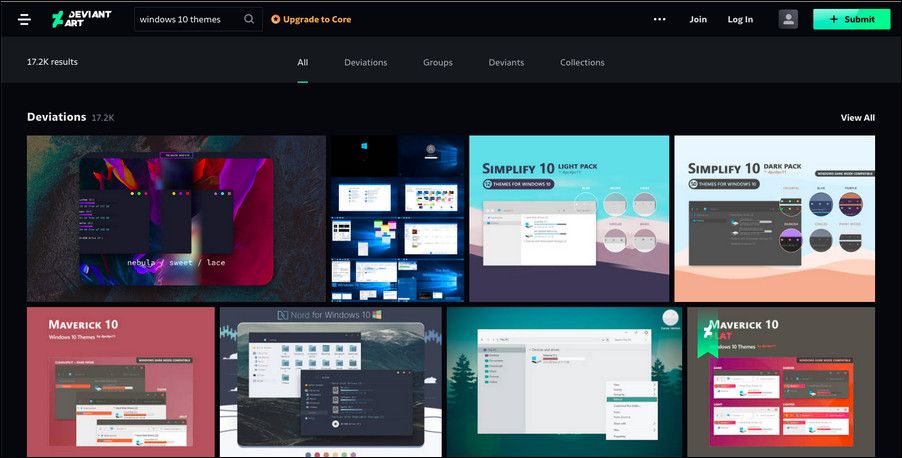
You can install any theme available in the search results. However, before continuing, a few words of warning.
Always set a restore point before installing a custom theme. Developers will often explicitly state this in their documentation. Since we’re dealing with the Windows UI, we have to take extra precautions when tweaking it to ensure we don’t delete a vital part of the UI. Take note of exactly how the developer explains the installation.
2.4.2 Theme Installers
As for the theme, you’ll need a few programs before installing it. OldNewExplorer, the first program you’ll need, deactivates the ribbon section of your File Explorer. The second program, UltraUXThemePatcher, will allow for third-party Windows 10 themes.
Ensure you are using the correct version of each piece of software with the correct Windows version. If you install a version of the software that is not compatible with your Windows version—installing UltraUXThemePatcher for Windows 8 in Windows 10, for example—you may run into problems.
2.4.3 Installing a Third-Party Theme
Once you’ve installed these programs, download and install the actual theme. Then, extract the theme ZIP file and move the folder’s contents to C:\Windows\Resources\Themes. Ensure you change the C in the repository address to the applicable driver letter.
Finally, select the theme in your Settings options using the method explained above. Voila! You just installed a custom Windows 10 theme.
Using a few third-party programs, we’ve completely changed our Windows 10 UI in minutes. Keep in mind that third-party software can cause errors. Nevertheless, developers are cautious in fully explaining the possible issues you may encounter. Moreover, always remember to read the documentation that comes with the programs. Follow the installation steps to the last detail.
2.5 How Do I Revert to the Original Theme?
To restore the original Windows 10 theme, simply right-click on your desktop and select Personalize. Then, select Themes and click on the Windows option.
You can also use the restore point created earlier.
This will not only revert your Theme to default; it will revert your icons and system configurations back to normal as well.
3. Rainmeter
3.1 What Is Rainmeter?
A particular dynamo when it comes to desktop customization is Rainmeter. A long-time favorite Windows program, Rainmeter will allow you to include various tweaks to your desktop.
There’s no cutoff to what you can do with Rainmeter. Want to create an interactive, parallax 3D wallpaper? Rainmeter can do that.
Want to include your favorite images and GIFs directly on your desktop, as one would picture on a desk? You can do that as well.
Simply head to the Rainmeter website and download the application.
3.2 Getting Started With Rainmeter
Rainmeter is very simple to use but will definitely require some getting used to. Rainmeter allows users to load skins and INI files onto their desktops. These files can control music, show time, weather, and the like. Think of them as third-party widgets allowing far more options than the default Windows widgets.
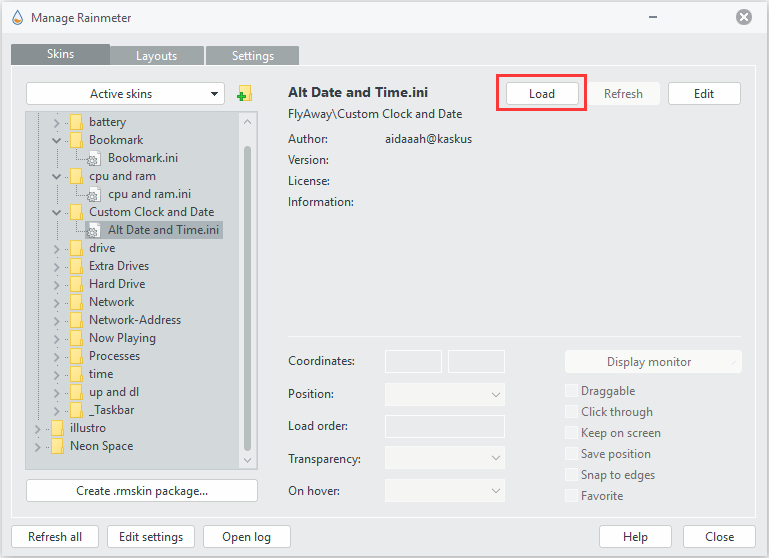
Download and install the final stable release of Rainmeter. Once installed, head to your Taskbar drawer and double-click Rainmeter’s teardrop logo. This will show your Manage Rainmeter window, allowing you to load and unload widgets or skins.

On the left-hand side are all the Rainmeter skins installed on your PC. Your skins and any new skins you install are located in the C:\Users\Waves\Documents\Rainmeter\Skins directory by default.
Locate the folder’s INI file to activate a skin and double-click or select the Load option in the Manage Rainmeter window. To unload, right-click your skin and select Unload. You can also unload your skin using the Manage Rainmeter window by selecting the skin in the left-hand dropdown menu and clicking Unload.

That’s the basic mechanics of using a Rainmeter.
3.3 Where Can I Get Custom Skins?
While Rainmeter is a great program, it’s only as useful as your skin selection. Rainmeter is very sparse by default. That means you’ll have to install third-party skins. Luckily, DeviantArt is a dream repository for Rainmeter skins. Head to the DeviantArt website and type rainmeter into the search bar.
DeviantArt will be your central repository for custom Rainmeter skins. First, head to the skin’s DeviantArt web page.
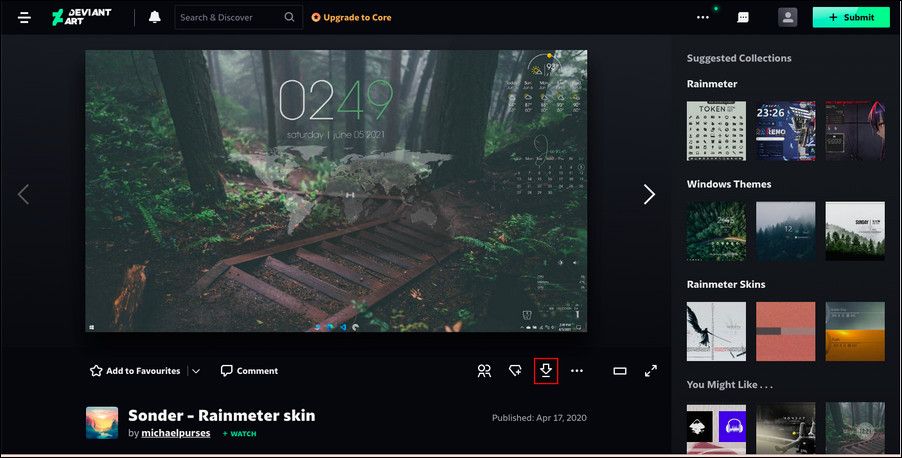
Once the file is downloaded, double-click on the file like you would open an executable file. In the following Rainmeter Installer window, click Install.
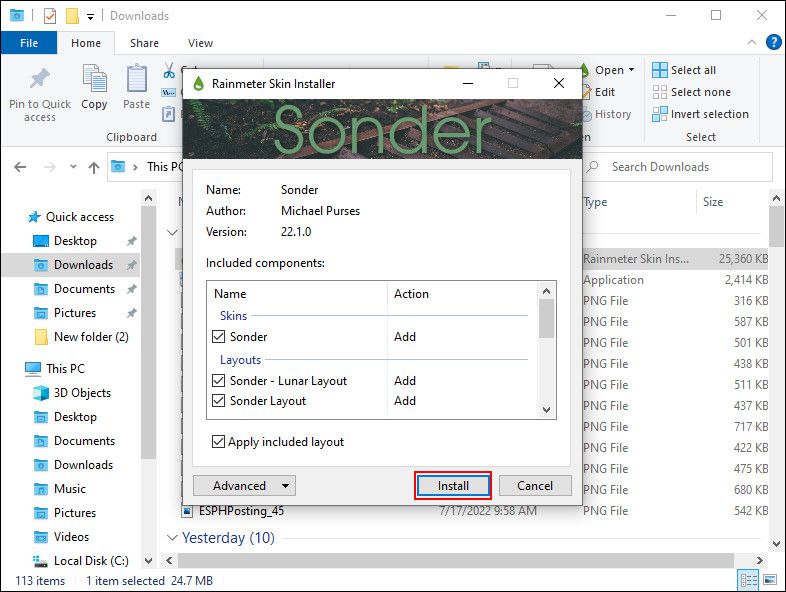
That’s it! You just installed a Rainmeter skin. Now, head to your Manage Rainmeter window by double-clicking its Taskbar icon, locate the INI file in the left-hand selection, and Load the skin.
Voila! You’ve just loaded a live skin.
3.4 What If I Want to Modify Something?
At times, the default Rainmeter skin will not function on your desktop. The skin will either be too small, too big, or lack your particular weather and location information. Luckily, Rainmeter makes editing their skins straightforward.
For example, if the skin presented above gives you the weather for the wrong location, right-click the skin and select Edit skin.
With weather applications, in particular, you’ll note most of them require a LocationCode. This code is based on your whereabouts and will provide the weather using particular websites. If you need to change your location, head to a website like weather.codes, look up your location, and copy and paste the code into the LocationCode parameter.
Then, press CTRL + S on your keyboard to save the document and refresh the skin by right-clicking it and selecting Refresh skin.
That’s it! You just edited a Rainmeter skin.
3.5 How Can I Connect Rainmeter to Other Applications?
Some Rainmeter skins require other programs to control functionality. When this is the case, you’ll need to download and install some sort of Rainmeter plugin. For example, the highly popular Win10Widgets suite requires a Spotify plugin so that you can control the program via a Rainmeter widget.
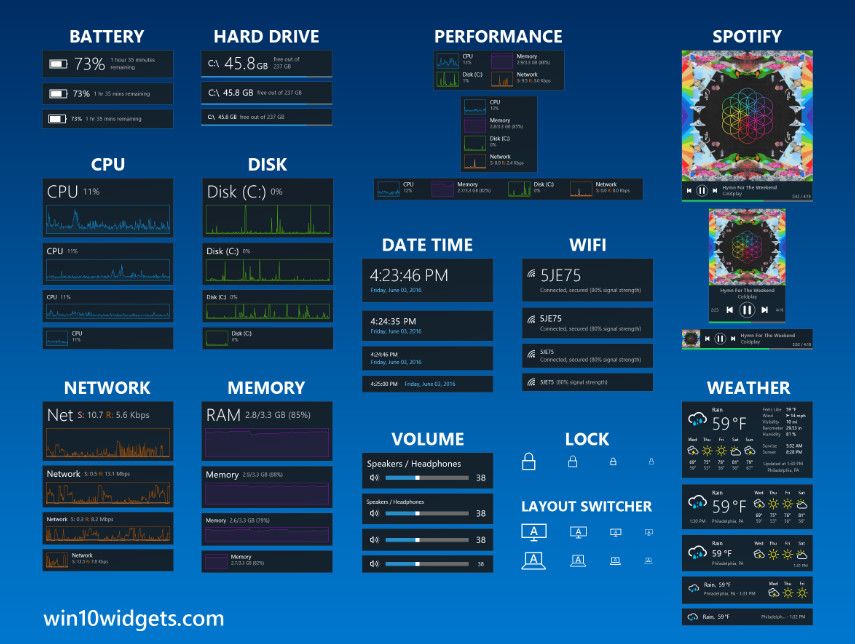
You can check this Reddit post wherein you can download the aptly called SpotifyPlugin automatically.
That’s it! You just connected Rainmeter to an application.
3.6 I Want to Get More In-Depth.
If you’d like to wander through Rainmeter, you’ll find plenty of useful documentation in Rainmeter’s official manual.
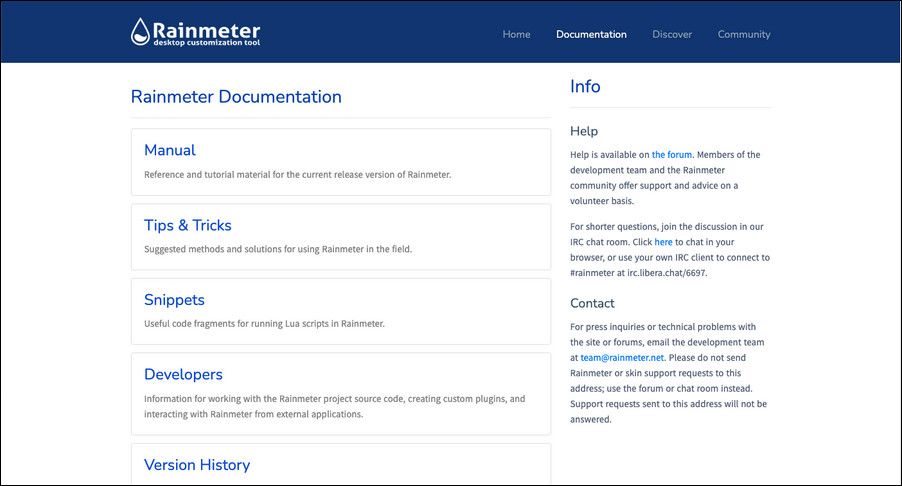
There are official documentation pages dedicated to explaining Rainmeter parameters and tricks.
You can be the Rainmeter developer all other users look to for favorite skins, so feel free to read up as much as you’d like on Rainmeter. There’s no limit to what you can do using this free piece of software.
4. More Apps
There are plenty of apps online which allow users to customize their desktops. We’ve selected the very top of the batch, and here they are!
4.1 How to Customize Your Favorite Media Player
The great thing about Rainmeter is it allows you to control most music and media controls on your PC. That makes it a great media skin program, along with being a great desktop widget software.
That said, there are a few widely used media players you can re-skin directly within the program as well.
4.1.1 VLC Media Player
Did you know you can re-skin the highly popular VLC application? A personal favorite of ours, and one of the best Windows programs ever, VLC allows users to install custom skins for VLC. It even hosts skins on the official VLC website.
Download a skin and keep it in a place you’ll remember. Your file should be in VLT format.
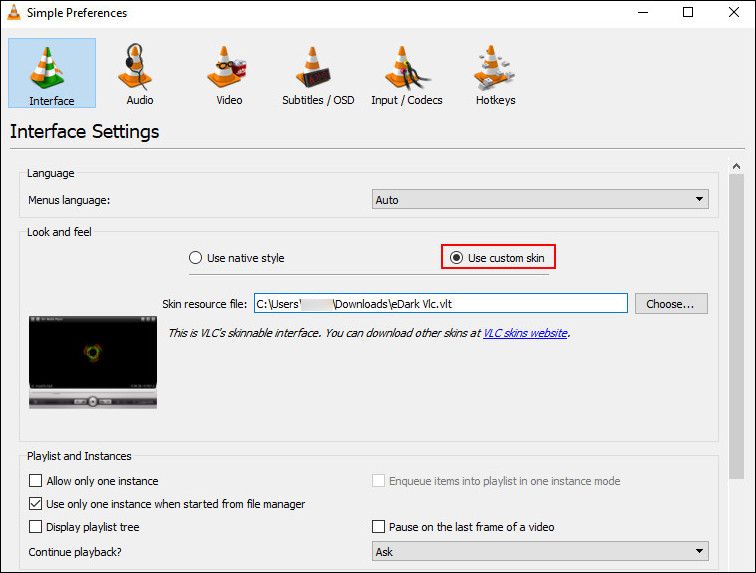
To install, open VLC. Then, head to Tools > Preferences. In the following window, click on the Use custom skin radio button. Next, click the Choose option and select the location of your VLT file.
Finally, select Save and exit VLC. Open VLC again, and it should open with your theme installed. Here’s VLC before.
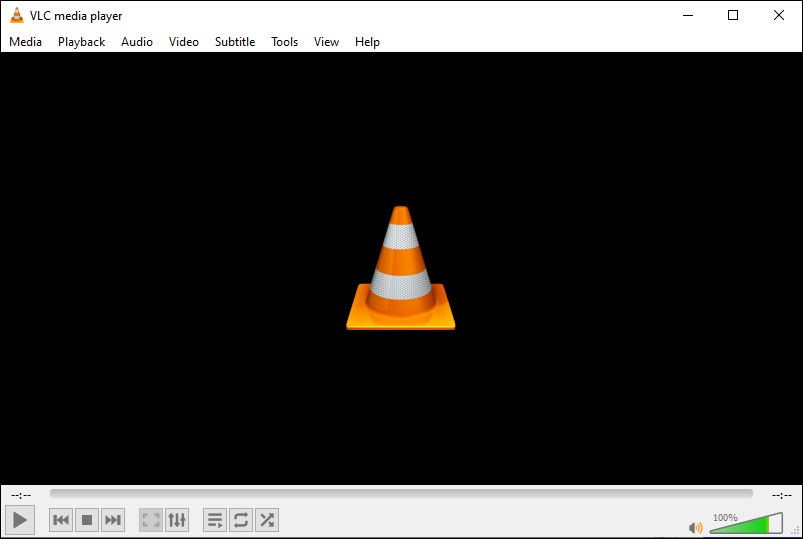
Here’s VLC after.
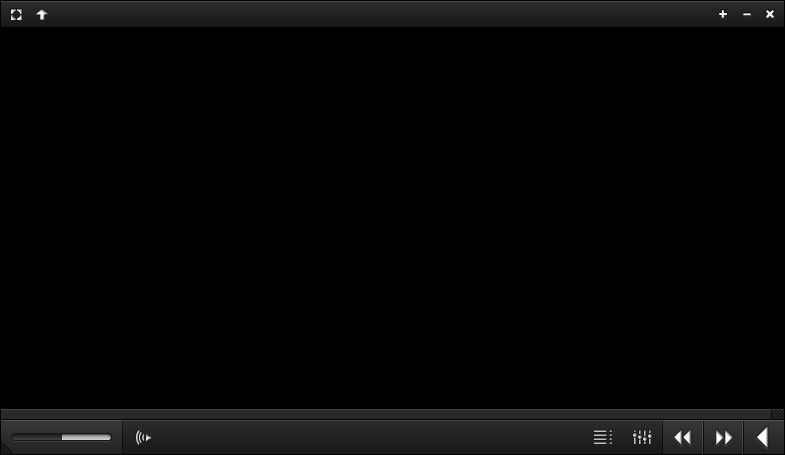
It’s that simple.
4.2 What Is RocketDock?
RocketDock is a tiny docking application that presents and launches programs from a dock. Everything about the dock, from the size to the icons, is customizable. All in all, it’s the single best docking software available online.
4.2.1 Getting Started With RocketDock
You can download and install RocketDock from the official website. Install as you would any other program. Once installed, click on your Start Menu and type in rocketdock. Select the RocketDock option. Your default dock should now pop up.
RocketDock hosts plenty of features and options for users immediately after installation. Simply right-click your RocketDock to view your options.
If you want to remove icons from your dock, click and drag the icon out of your dock. To add icons to your dock, drag the program shortcut into the dock like you would on the desktop.
4.2.2 RocketDock Theme & Icon Changes
Another great aspect of RocketDock is the possible customization options. Right-click your dock and select Icon Settings. From this window, you can install various icons installed on your PC. We’ve got you covered if you’re looking to customize your icons. If you want to download free icons, head over to Flaticon and search for your favorites.
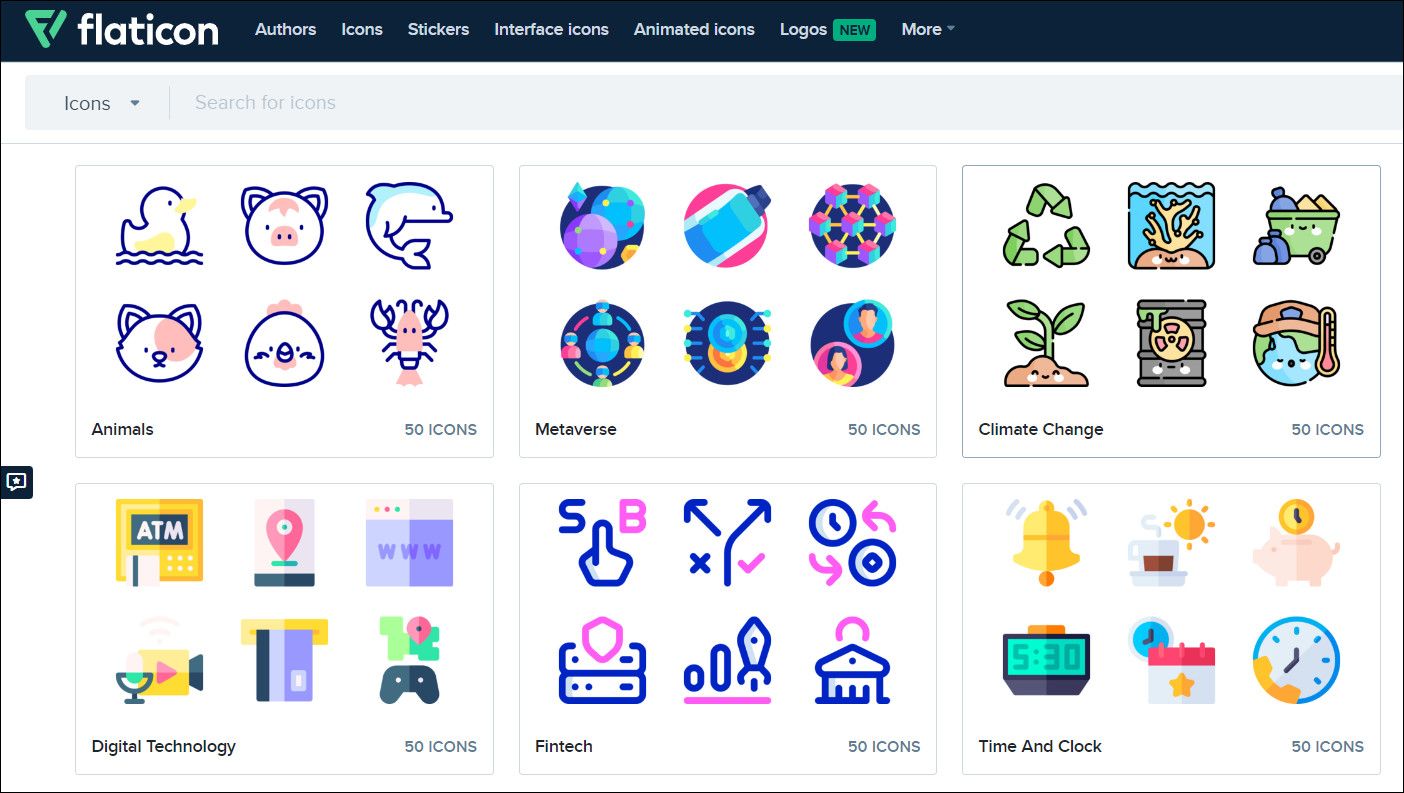
Download the icon or icon pack, and unzip it if necessary. Then, click on the + sign on the left-hand side of the window and locate your icon folder. From here, click on the dropdown buttons until you find your icon images. They’ll appear on the right-hand side of the window.
Select whatever icon you wish and click OK. Repeat this with every icon.
To install third-party custom themes, you can head to DeviantArt, search for RocktDock themes, and download them. Unzip the file, and then copy and paste the unzipped folder in C:\Program Files (x86)\RocketDock\Skins (or whatever disk drive letter you’ve installed RocketDock on). Restart RocketDock and head to your Theme settings to change your dock’s theme to the newly downloaded one.

Just like that, you have a completely custom RocketDock with a custom theme and icons!
4.2.3 RocketDock Alternatives
If you don’t wish to use RocketDock for whatever reason, there is a paid alternative called ObjectDock. It has the same abilities as RocketDock, though it is a bit newer and customizable.
4.3 Fences
Fences, a program created by Stardock, is an application that allows you to create small fences on the desktop, which can help you sort the clutter on your desktop. Try it out using the 30-day trial if you’re curious.
Download and install the program. It will require that you enter your email and activate the trial via the email link.
4.3.1 Getting Started
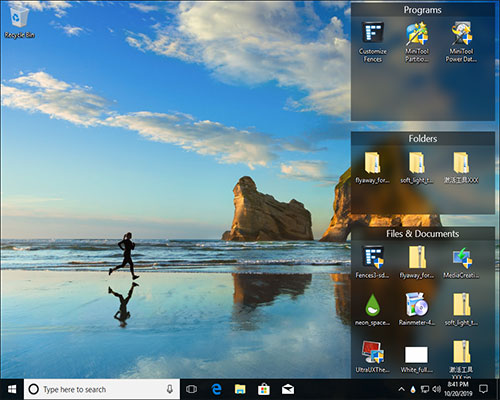
Once you’ve downloaded Fences, it’s surprising how intuitive the program is. For one, your desktop programs should organize immediately.
To create a fence, left-click your desktop and drag. An option will open which reads Create Fence here. Name the fence whatever you’d like—we named ours Programs for our program files. Drag and drop a program into this fence, and you will now be able to access this program via your fence.

That’s the basics of it, but that’s not all you can do. You can also enact rules in Fences, which not only automatically organizes your files but downloads particular files into your fence automatically.
To do so, right-click your desktop and select Configure Fences. Click on the Sorting & organizing option to open the Type-based rules selection. Since we are making a programs-based fence, we will check the Program Shortcuts option. A small additional option will open, asking that you choose a Fence for your files. Click on the link and select an option, in our case, the Programs fence.
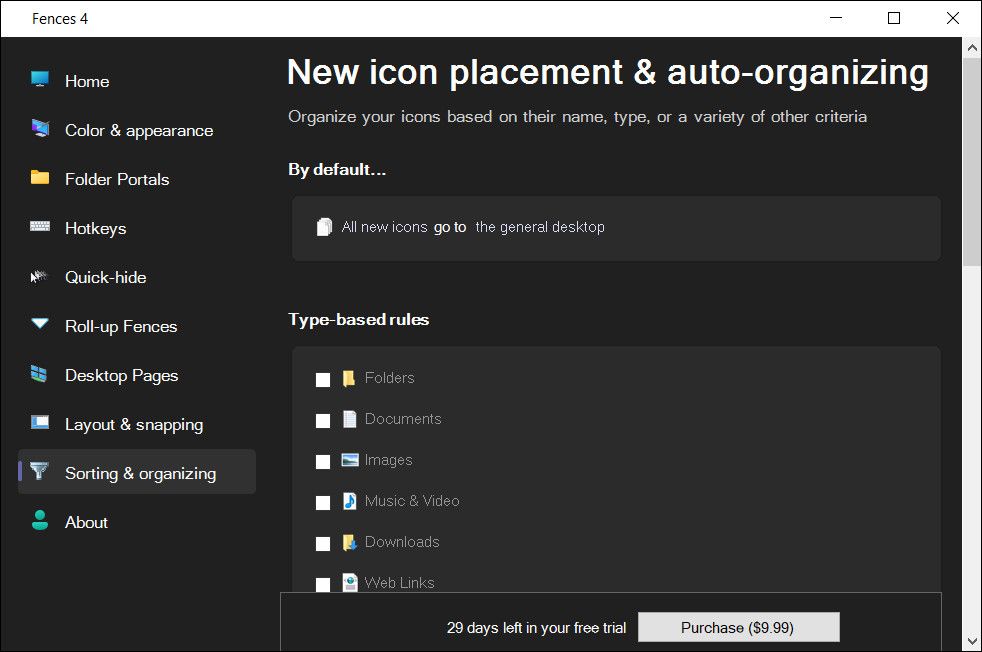
Scroll down and click on the Apply rules now link.
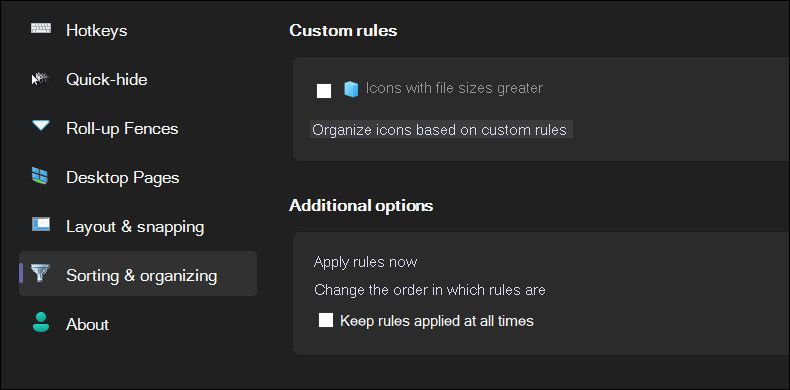
Voilà! Your program shortcuts should now have automatically merged into your Program fence. You can also check the Keep rules applied at all times option to send program shortcuts to this fence every time you’ve downloaded one onto your desktop.
We’ve only scratched the surface of what you can do with Fences, so feel free to play around with the software.
That said, now you know how to utilize the organizing power of Fences from the get-go! Once you start using Fences, you’ll wonder how you managed without it.
4.3.2 More Customization
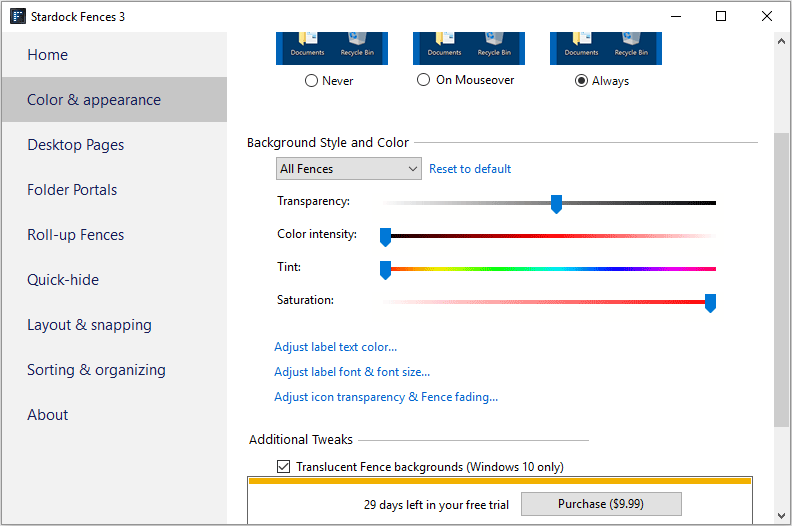
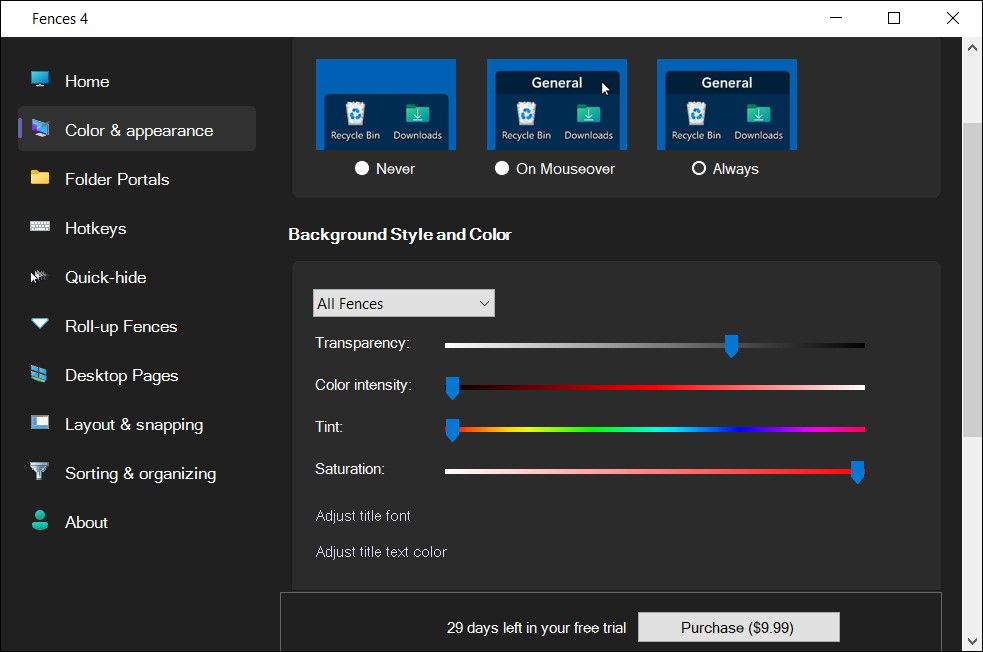
As with most programs presented in this list, you can easily customize Fences’ look. Right-click your desktop and select Configure Fences. Then, select Color & appearances. Under Background Style and Color, click on the dropdown menu and select a particular Fence (or keep the option at All Fences).
Using the color sliders, adjust the color and saturation of your fences. Your changes should take effect automatically.
Here’s our desktop after organizing files with Fences and adjusting their color.
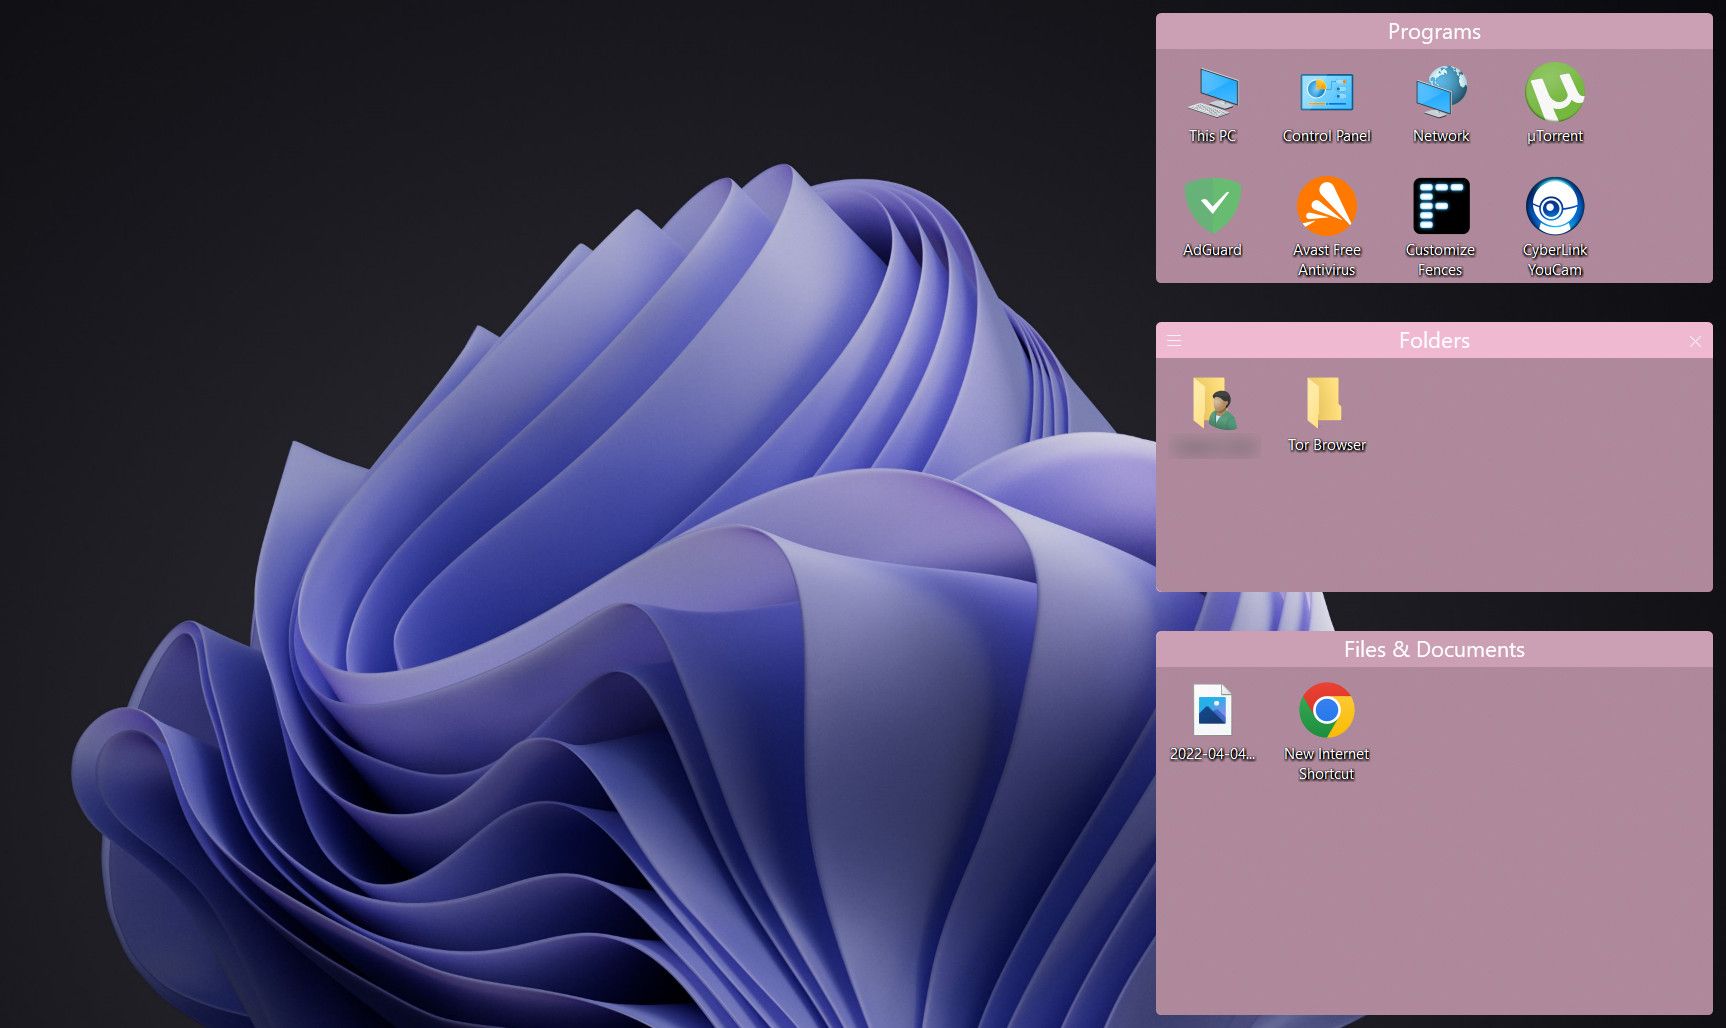
Not only are the icons organized, the Fences aesthetic can’t be any more satisfying.
5. Best-Of: Instant Customization
5.1 Best-Of List
While you may want to go for a system that fits you, we understand that sometimes you just want it to look a bit better than the default themes and skins that Windows 10 offers. Here is a list of tools you’ll want to use if you want a custom-to-order desktop. They’re reliable, largely free, and will create fantastic results.
- UltraUXThemePatcher: Without this, you’d be hard-pressed to find a custom theme for Windows 10 that actually works.
- Rainmeter: This is the widget king. The extent to which you can modify this is astounding, and there is no end to the tutorials and guides that can help you make Rainmeter fit.
- Fences: Fences is beyond helpful in organizing clutter and making your desktop a bit more pretty. You can change the colors of the fences how you wish, label them, and drop in all the files that we know are cluttering your desktop. Section 5.2 can tell you how to use it.
- VLC Player: There’s always going to be a debate on the best media player, and here we’ve decided that VLC will take the pedestal. Along with the vast customization options, it offers a wealth of other abilities, from playing some videos to streaming YouTube videos and playlists within the VLC application.
- F.lux: It’s very unhealthy to stare at a screen at night. The blues in the light simulate sunlight, meaning getting to sleep can be a lot harder. Flux solves this problem by reducing the blue hues as day turns to night. It takes a while to get used to it, but you’ll sleep better, and it reduces strain on the eyes.
- Classic Shell: Many who switched to Windows 8 instantly disliked it for many reasons, especially the start menu’s death. This problem is (partially) solved with the 8.1 updates, but this application should let you get back that beloved windows button–and its menu.
With these pieces of software, you’ll be able to turn Windows 10 (and most other modern Windows versions) into a personalized command console.
Making It All Come Together
Your desktop is just that—your desktop. You can turn it into anything. Change colors, change icons, change themes—within only a few minutes, you can create a desktop environment that will have friends and coworkers giving your screen a second look.
For example, the desktop presented above only requires a GIF and a few Rainmeter skins to create. Just like that, you have a desktop with a distinct color palette and looping movement using free software and a little know-how.
Remember that your desktop will only be as good as the time you put into it. While a proper, beautiful desktop may take minutes to set up, it may take hours of skin scavenging and option changing to configure your desktop exactly.
Like other versions of Windows, Windows 10 has a variety of options you can customize the desktop with. The platform has options that enable users to configure the desktop wallpaper, theme, color scheme, desktop icons and more besides. You can select most of those options from the Personalization window under Settings.
Customizing the Colors in Windows 10
First, check out some of the options Windows 10 has for customizing its colors. To open the window in the shot below, right-click the Desktop and select the Personalize option from context menu.
Then select the Colors option and maximize the window.

You might find that the Automatically pick an accent color from my background setting is on. If that is so, then click the option to switch it to off. That will then open a color palette as shown below.

You can select a color scheme for Windows 10 from that palette. To include a matching color scheme on the taskbar and Start menu, click the checkbox for the Show accent color on Start, taskbar, action center and title bar option to On.

On the right-side of the window is a High contrast settings option.

Click that to open the window in the snapshot directly below. You can also access it in the Ease of Access section of the Settings menu.

Turn on high contrast by clicking the toggle switch on the page.

Click the Choose a theme dropdown menu to select you contrast theme. Then, click Apply for the changes to take effect.

Customize the Start Menu
Next you can configure the Start menu. Click Start on that window to open some further options. That includes a preview of the Start menu at the top with the selected settings.

To add more tiles to the Start menu, switch the Show more tiles option to On. In addition, you can also add more folders to the menu by selecting Choose which folders appear on Start. That opens the window below where you can choose to add more folders. The extra folders are included at the bottom left of the Start menu.

Adding New Wallpaper to the Desktop
Of course, you can always add alternative wallpaper to the desktop. To do so in Windows 10, click Themes and Theme settings. From there, select your desired Desktop background option from the dropdown menu or browse through your Pictures gallery.

The window above includes a drop-down list at the top from which you can choose three wallpaper options. One thing that’s new here is the Solid color setting. Select that to open a palette of solid colors that you can add to the desktop.
Windows 10 also has a Slideshow option included with previous versions. Click that option and you can then choose a slideshow with wallpaper.

To add your own, select Browse and the folder that includes the slideshow images in it. As such, you’ll need to have set up a new folder and moved your slideshow photos into it.
There are a few extra slideshow options. Adjust the duration each picture is on the desktop for by clicking the Change picture drop-down list. Below that there is also a Choose a fit drop-down list. If you’re sure the images can fit the whole desktop, select Fill from there.
Alternatively, you can add just the one wallpaper to desktop. Click the Background drop-down list and select Picture. Then choose one of the picture thumbnails below, or click Browse to select one of your own desktop wallpaper photos.
Customizing the Windows 10 Theme
You can also customize the Windows 10 theme. Note that will also alter the wallpaper and add additional color configurations to Windows that match the background better. Right-click the desktop, select Personalize, Themes and Theme settings to open window shown below.

From this window you can select default Windows 10 themes with alternative wallpaper and color configurations. But there’s a lot more you can add from the Windows site. Click here to open a selection of Windows 10 themes. Then click the Download button beneath a specific theme to save it to the Downloads folder. Select the theme file in the folder you saved it in to add it to the themes listed in the Personalization window.
Customizing the Windows 10 Desktop Icons
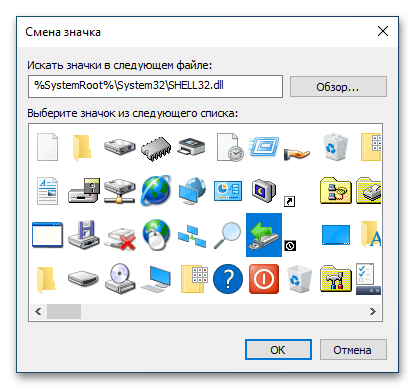
There are a few ways to customize the Windows 10 desktop icons. Firstly, you can customize some of the system icons from the Desktop Icons Settings window. To open that window, right-click desktop, select Personalize, Themes, Theme Settings and then Change desktop icons.

The window above includes a few desktop icons you can customize. Select an icon there and Change Icon to open a smaller window with a variety of alternative icons to choose from. Select an Icon from there and click OK to close window. Then press the Apply button to switch the desktop icon to the one selected.
You can also remove the system icons included on that window. There are few check boxes at the top of the window. Click a ticked checkbox to remove the system icon from the desktop. Press the Apply button to confirm.
Note that themes can also change the icons on the desktop. To keep the icons as they are, irrespective of the theme, click the Allow themes to change desktop icons checkbox so that it’s no longer selected. Then you can press the Apply button and OK to close the window.
However, you can only customize a few icons from there. You can add alternative icons for software shortcuts by right-clicking an icon on the desktop and selecting Properties to open the window below. Then press Change Icon and click Browse to select an alternative icon for it from one of your folders. Press the OK button on the Change Icon window to confirm selection.

Of course, you’ll also need to have some alternative desktop icons saved in a folder. To find some new icons, check out sites such as Icon Archive. Enter desktop in the search box on the website to find new icons. Then click an icon there and press the Download ICO button to save it to your Downloads folder.
So those are the main options and settings that you can select in Windows 10 to customize the desktop. With them you can add a little more pizzaz to the desktop. Remember that there are also numerous third-party packages available that you can further customize Windows 10’s desktop with.
Все способы:
- Вариант 1: Ручная кастомизация рабочего окружения
- Элементы интерфейса
- Панель задач
- Меню «Пуск»
- Персонализация
- Шрифты
- Файловый менеджер
- Вариант 2: Инструкция по изменению внешнего вида
- Подготовительные мероприятия
- Изменение визуального оформления
- Вопросы и ответы: 2
Важно! Операционная система Windows 10 имеет несколько редакций, каждая из которых отличается набором возможностей и особенностями в использовании определенных компонентов. Есть вероятность, что для улучшения внешнего вида графической оболочки достаточно будет установить другую версию дистрибутива. Поэтому рекомендуем предварительно ознакомиться со всеми редакциями системы от Microsoft, воспользовавшись представленной ниже ссылкой на соответствующий материал.
Подробнее: Различия версий операционной системы Windows 10

Вариант 1: Ручная кастомизация рабочего окружения
Улучшение внешнего вида операционной системы подразумевает изменение параметров рабочей среды, которые отвечают за отрисовку графической составляющей. Соответственно, некоторые манипуляции для этого производятся непосредственно в настройках Windows 10, но особых эффектов можно добиться только с помощью программного обеспечения от сторонних разработчиков.
Далее по тексту будет представлена не четкая инструкция по улучшению графической составляющей, а описание инструментов, помогающих добиться этого самостоятельно. Овладев базовыми навыками редактирования интерфейса оболочки, вы сможете создать собственный дизайн.
Элементы интерфейса
Операционная система штатными средствами позволяет изменять размер значков, которые располагаются на рабочем столе. При создании собственного стиля окружения зачастую это бывает необходимо. На нашем сайте есть подробная инструкция по решению этой задачи, каждое действие в которой сопровождается соответствующим скриншотом. При необходимости рекомендуем ознакомиться с представленным там материалом.
Подробнее: Меняем размер значков на рабочем столе в Windows 10
Редактированию подлежат и иконки папок, которые могут располагаться не только на рабочем столе, но и непосредственно в файловом менеджере «Проводник». Помимо размера, можно изменить их визуальное отображение. При необходимости даже разрешается выбирать значок из внутренней памяти компьютера. В отдельной статье автор подробно описал все необходимые действия для достижения поставленной цели, поэтому рекомендуем с ней ознакомиться.
Подробнее: Как изменить значок папки в Windows 10
Если пользователь вошел в свой аккаунт Microsoft, то по умолчанию активируется работа облачного хранилища OneDrive. Это сопровождается синхронизацией файлов в заранее обозначенных директориях. Для понимания того, какие данные были помещены в хранилище, рядом с их иконками располагается соответствующий индикатор — зеленая галочка или синие стрелки. При необходимости их можно убрать, чтобы не нарушать единый стиль интерфейса операционной системы. В отдельных статьях на нашем сайте рассказано, как это сделать.
Подробнее: Как убрать зеленые галочки / синие стрелки на файлах в Windows 10

Курсор мышки — элемент графического интерфейса, который практически всегда остается на виду. Поэтому улучшение внешнего вида операционной системы зачастую подразумевает в том числе и смену этого значка. В настройках Windows 10 есть отдельное меню, предоставляющее такую возможность. Но стоит отметить, что программы от сторонних разработчиков содержат больше функций и позволяют более кардинально изменить визуальное оформление курсора. На нашем сайте есть публикация, в которой подробно описан процесс выполнения этой задачи.
Подробнее: Изменение вида курсора в Windows 10

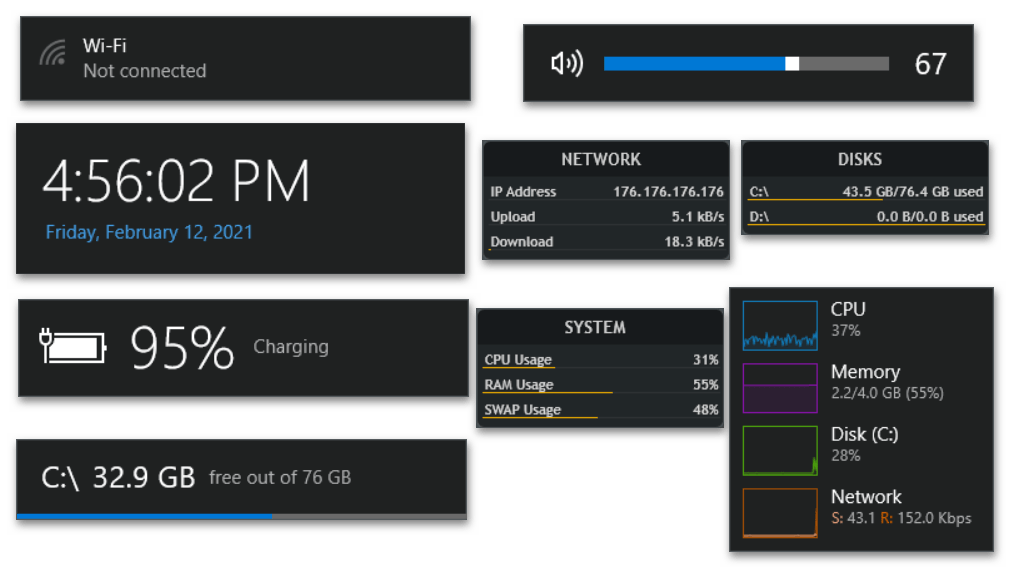
На визуальный стиль операционной системы внушительно влияет наличие гаджетов рабочего стола, которые до этого встречались только в Windows 7. По умолчанию этих компонентов в десятой версии системы нет, но их можно добавить посредством установки стороннего программного обеспечения. В базовом наборе есть индикаторы загруженности компьютера, монитор прогноза погоды и тому подобное, но список можно расширить путем дозагрузки дополнительных гаджетов. В другой статье детально описан процесс инсталляции нужных программ и предоставлена инструкция по их использованию.
Подробнее: Установка гаджетов на Windows 10
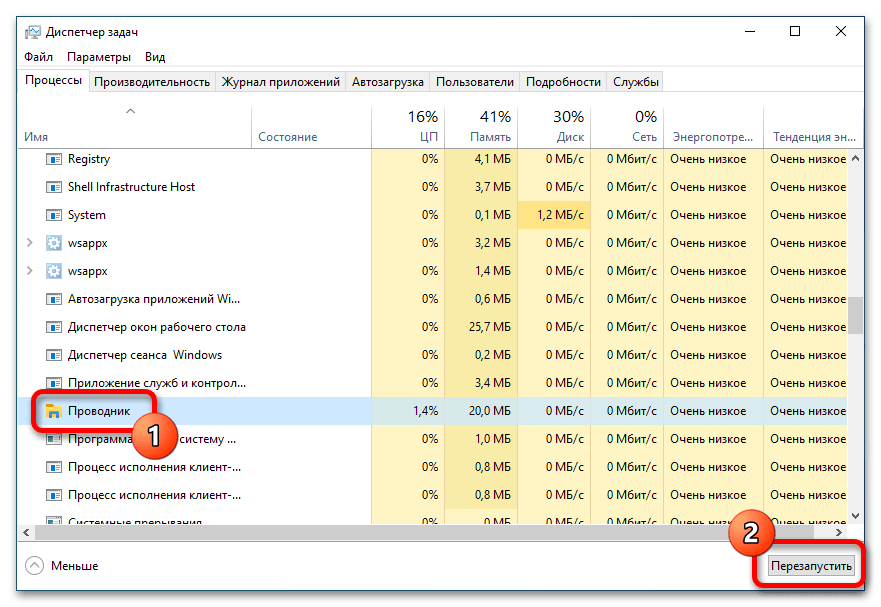
Примечание! Из-за вмешательства в работу операционной системы посредством других приложений могут возникать разного рода проблемы. Одной из таковых является исчезновение рабочего стола. Она не является критической и может быть исправлена путем перезапуска оболочки Windows 10. Чтобы узнать, как это сделать, ознакомьтесь с соответствующей статьей на нашем сайте.
Подробнее: Решение проблемы с пропавшим рабочим столом в Windows 10
В отличие от Windows 7, в десятой версии операционной системы от Microsoft нет эффекта Aero, который обеспечивал прозрачность окон. Это можно исправить путем установки специального приложения, распространяющегося по бесплатной лицензии. Если есть необходимость внести изменения в визуальный стиль оформления окон, рекомендуем обратиться к другой статье на нашем сайте, в которой подробно описан процесс настройки этого эффекта.
Подробнее: Как сделать прозрачные окна в Windows 10 с помощью Aero Glass

Обратите внимание! Вмешательство сторонней программы в операционную систему может спровоцировать ряд неполадок, которые связаны с корректным отображением изображения на мониторе. В случае возникновения такой проблемы, обратитесь к соответствующей статье на нашем сайте, где она подробно рассматривается другим автором.
Подробнее: Устранение пропадающего изображения на мониторе в Windows 10
Некоторых пользователей смущает появление всплывающих уведомлений на рабочем столе Windows 10, а остающийся после их отображения индикатор количества пропущенных оповещений может нарушать целостность единого стиля системы. В таком случае рекомендуется отключить эту функцию. Все действия выполняются непосредственно в настройках операционной системы, так что дополнительное программное обеспечение устанавливать не придется. На нашем сайте есть отдельная статья, посвященная этой теме.
Подробнее: Отключение уведомлений в ОС Windows 10

Для настройки красивого оформления Windows 10 важно установить соответствующее модели монитора разрешение экрана. Зачастую операционная система автоматически определяет конфигурацию компьютера и выставляет корректные параметры, но если этого не произошло, обратитесь за помощью к другому материалу на нашем сайте.
Подробнее: Изменение разрешения экрана в Windows 10
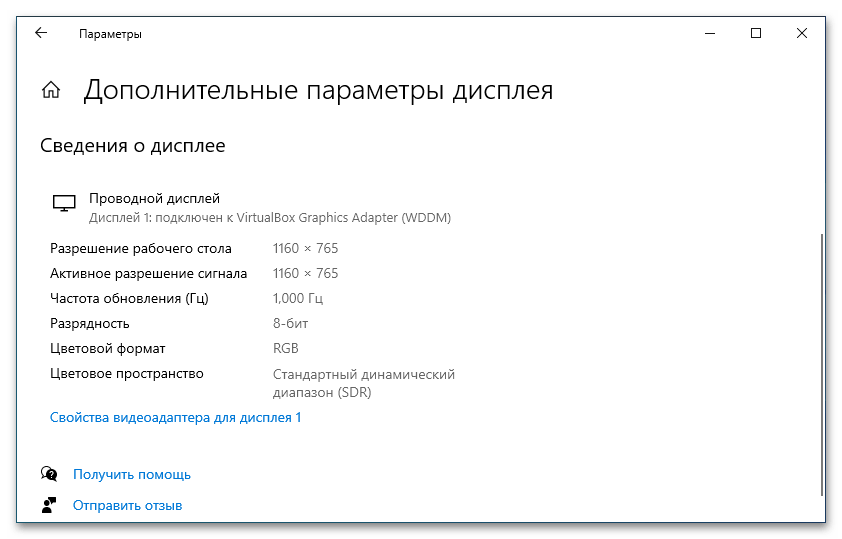
Если в настройках системы не было обнаружено нужного разрешения подключенного к компьютеру монитора, необходимо будет произвести ряд действий, направленных на устранение этой проблемы. Зачастую, достаточно установить актуальные драйвера графического процессора, но это не всегда помогает устранить неполадку. В случае возникновения такой проблемы обратитесь к статье другого автора, который подробно изложил алгоритм действий в таких ситуациях.
Подробнее: Решение проблемы с отсутствием нужного разрешения экрана в Windows 10
Обратите внимание! При изменении разрешения могут появляться графические артефакты, например, размытие изображения. Эта проблема и ее устранение детально рассмотрено в другой статье на сайте.
Подробнее: Решение проблемы размытого изображения в Windows 10
С помощью дополнительных утилит можно также изменить поведение окон при их перетаскивании. Это не только позволит приукрасить графическое оформление операционной системы, но и добавит дополнительные возможности, что облегчит взаимодействие с интерфейсом. На нашем сайте есть отдельная статья, во второй части которой подробно описываются эти самые приложения.
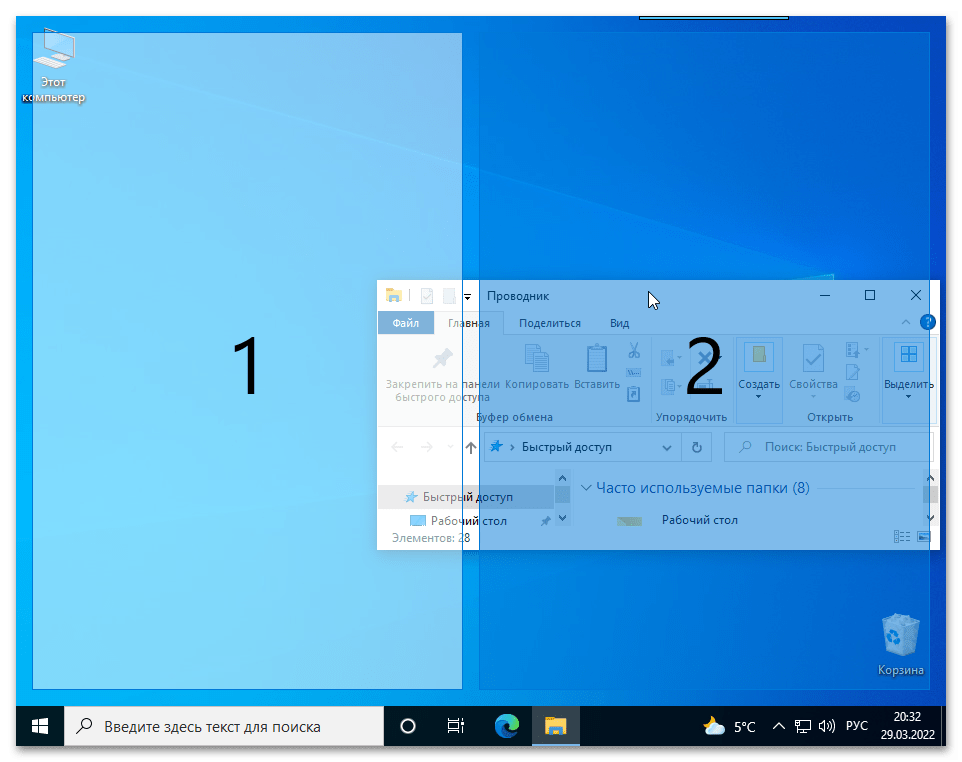
Подробнее: Способы разделения экрана на две части в Windows 10
Панель задач
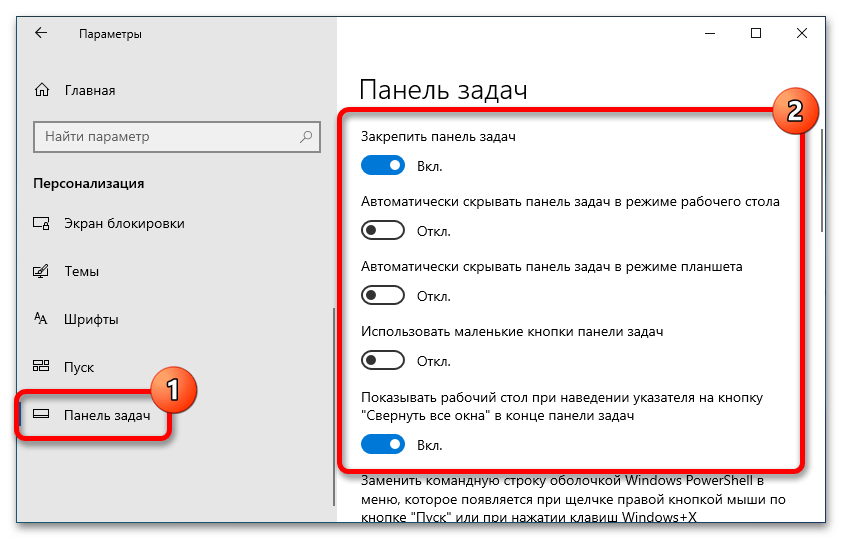
На визуальное восприятие всей системы сильно влияет стилистическое оформление панели задач, так как именно этот элемент практически всегда остается на виду. Стоит отметить, что большая часть манипуляций по улучшению дизайна выполняется с помощью штатных инструментов. В отдельной статье на нашем сайте подробно рассмотрен раздел параметров системы, отвечающих за настройку панели задач.
Подробнее: Настройка панели задач в Windows 10
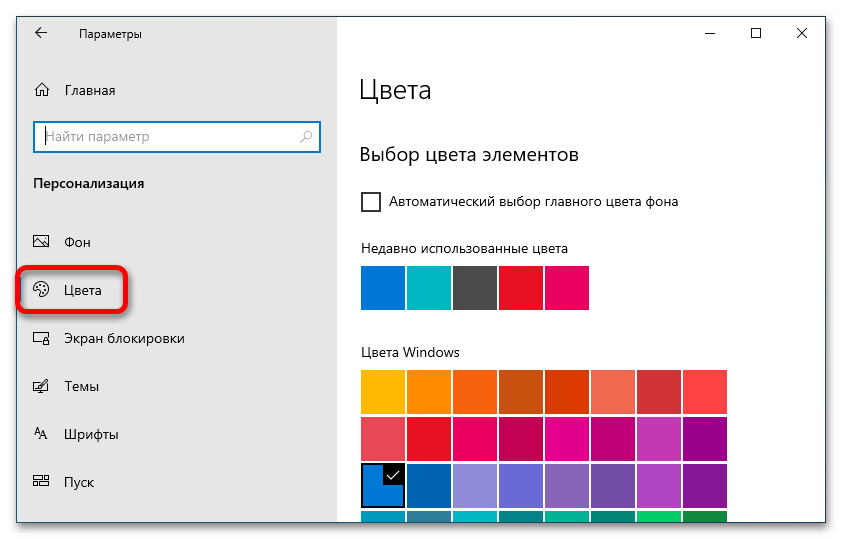
Чтобы задать авторский стиль Windows 10, можно изменить цвет отображения панели задач. Делается это тоже без применения программ от сторонних разработчиков — через параметры персонализации. Этот раздел настроек имеет множество дополнительных меню, поэтому рекомендуем обратиться за помощью к тематической статье на нашем сайте.
Подробнее: Изменение цвета панели задач в Windows 10
Лаконичный стиль не терпит громоздкости, поэтому для создания красивого визуального оформления операционной системы зачастую уменьшают размер панели задач. Для этого достаточно изменить всего один параметр в настройках Windows 10. Подробно об этом рассказано в другой статье на нашем сайте.
Подробнее: Уменьшение панели задач в ОС Windows 10

Помимо всего прочего, есть возможность сделать панель задач прозрачной. Встроенные средства операционной системы не позволяют в полной мере добиться желаемого эффекта, но программное обеспечение от сторонних разработчиков предоставляет внушительный набор возможностей. Об этом всем можно прочитать в другой статье на нашем сайте.
Подробнее: Как сделать прозрачной панель задач в Windows 10

В процессе настройки отображения панели задач могут возникнуть ошибки, которые приведут к некорректному отображению этого элемента интерфейса в операционной системе.
Важно! Если проблемы, возникшие с панелью задач, не относятся к средствам ее отображения, причина неисправности может заключаться в повреждении системных файлов. Это комплексная ошибка, которая требует серьезного подхода с поэтапным выявлением таких компонентов и восстановлением их работы. Об этом детально рассказано в соответствующей статье на нашем сайте.
Подробнее: Исправление неполадок «Панели задач» в Windows 10
Меню «Пуск»
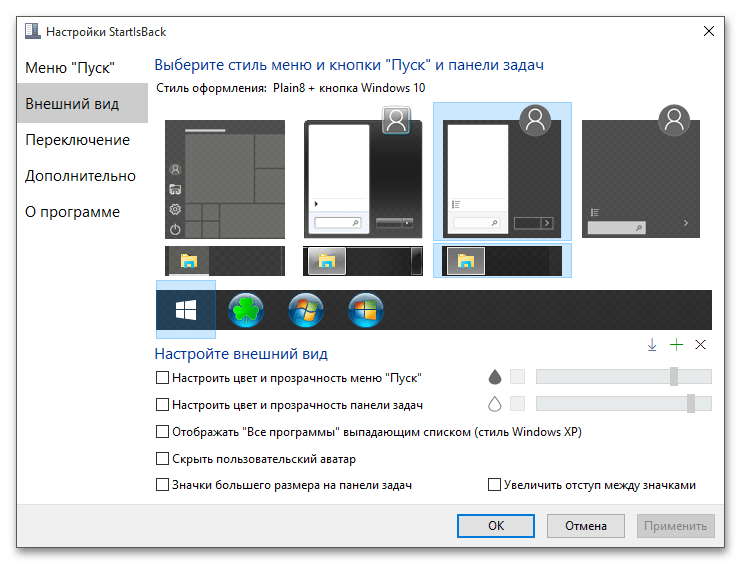
Меню «Пуск» — отдельный компонент операционной системы, поэтому при создании общего стиля Windows 10 следует внести изменения и в визуальное отображение этого элемента интерфейса. Штатные инструменты не позволяют кардинально исправить положение, но набор специальных утилит от сторонних разработчиков поможет создать уникальный дизайн. На нашем сайте есть отдельный материал, посвященный этой теме, рекомендуем с ним ознакомиться.
Подробнее: Настройка внешнего вида меню «Пуск» в Windows 10
Меню «Пуск», начиная с восьмой версии операционной системы от Microsoft, претерпело кардинальные изменения и сильно стало отличаться от того, что использовалось в Windows 7. При необходимости можно вернуть старый дизайн, но для этого потребуется воспользоваться программами от сторонних разработчиков. В другой публикации на сайте есть подборка таких приложений с подробным руководством по использованию.
Подробнее: Возвращаем меню «Пуск» от Windows 7 в Windows 10
Персонализация
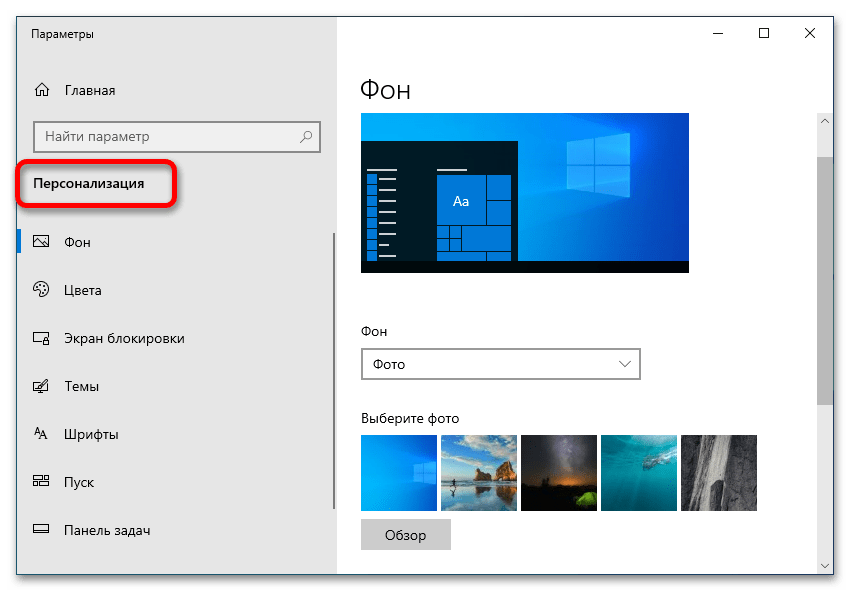
Для настройки графического оформления оболочки Windows 10 в параметрах системы есть специальный раздел, который позволяет внести изменения в основные элементы интерфейса. Там находится довольно много опций, поэтому предварительно рекомендуем ознакомиться с тематической статьей на нашем сайте, перейдя по представленной ниже ссылке.
Подробнее: Параметры персонализации в Windows 10
Примечание! Если операционная система не была активирована после установки на компьютер, то все средства персонализации окажутся недоступны. Эту проблему можно устранить, о чем написано в другой статье на нашем сайте.
Подробнее: Как устранить ошибку «Для персонализации компьютера нужно активировать Windows 10»
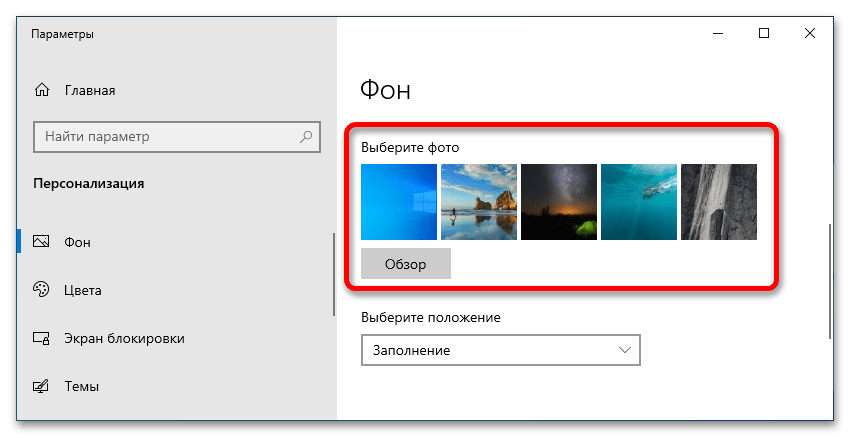
По умолчанию в операционной системе есть ограниченное число фоновых изображений, которые можно установить в качестве обоев рабочего стола. Они выбираются и изменяются в настройках персонализации. Но также есть возможность установить в качестве заставки собственное изображение, предварительно скачанное из интернета. О том, как это сделать, рассказано в соответствующей статье, написанной другим автором.
Подробнее: Изменение фонового изображения в Windows 10
После установки Windows 10 по умолчанию применяется стандартная тема оформления заголовков окон приложений. При улучшении визуального стиля операционной системы этот элемент интерфейса нуждается в подборе другого оттенка. Сделать это можно через настройки, а как именно — рассказано в соответствующей публикации на нашем сайте.
Подробнее: Изменение цвета окна в Windows 10

Изначально пользователям предлагается в настройках персонализации выбрать тему оформления всей графической оболочки системы, но вариантов не очень много. При необходимости можно расширить этот список, установив дополнительные темы на компьютер. Делать это разрешается как с помощью встроенного магазина Microsoft Store, так и посредством программного обеспечения от сторонних разработчиков. Во втором случае даже предоставляется больший набор инструментов кастомизации операционной системы.
На нашем сайте представлена отдельная статья, в которой автор подробно описал все способы инсталляции в Windows 10 дополнительных тем оформления.
Подробнее: Как установить тему на Windows 10

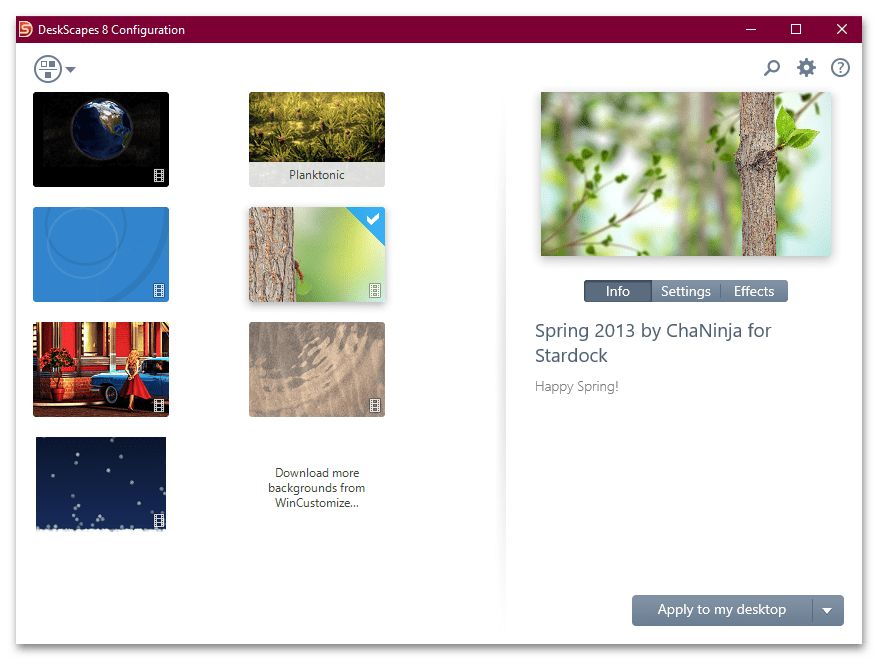
Когда речь заходит о том, как сделать Windows 10 красивее, зачастую упоминаются и «живые» обои. Они отличаются от стандартных тем, что являются не статичным изображением, а цикличным видеороликом, который бесконечно воспроизводится на фоне рабочего стола. Встроенными инструментами операционной системы добиться такого эффекта невозможно, поэтому потребуется задействовать специальное программное обеспечение. В отдельной публикации на нашем сайте автором рассматривается три таких приложения с подробным описанием действий для создания «живых» обоев.
Подробнее: Установка «живых» обоев на Windows 10
Примечание! Работа «живых» обоев — требовательный к ресурсам компьютера процесс, так как на перманентное воспроизведение потокового видеоролика затрачивается много оперативной памяти, также нагрузка ложится и на центральный процессор. Если после их установки стала наблюдаться нестабильная работа операционной системы, рекомендуем выполнить манипуляции по увеличению производительности устройства. Это комплекс мер, который подробно описан в другой статье на нашем сайте, доступной по ссылке ниже.
Подробнее: Увеличение производительности компьютера на Windows 10
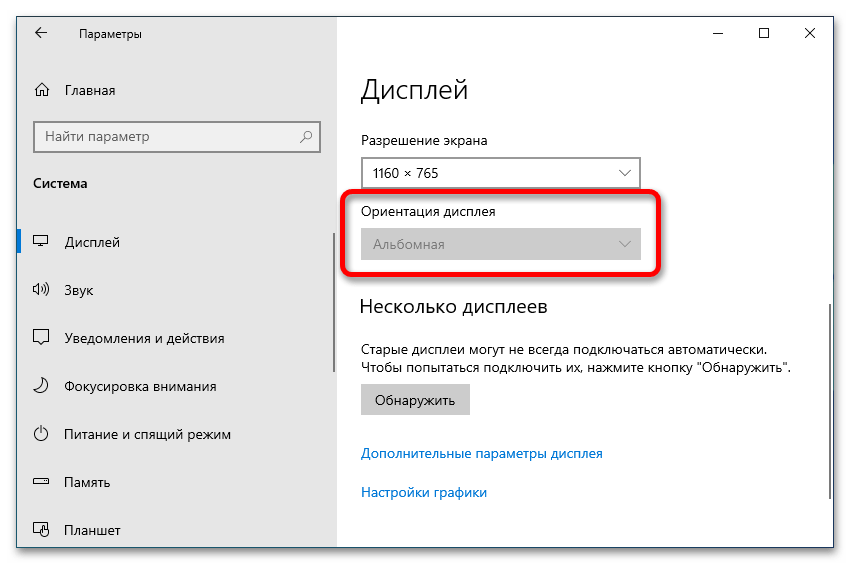
Для создания оригинального рабочего места с уникальным графическим оформлением может потребоваться изменить ориентацию экрана — вместо привычной альбомной установить портретную. Несмотря на специфичность поставленной задачи, выполняется она посредством встроенных инструментов системы, достаточно поменять всего один параметр в настройках дисплея. Если эта процедура вызывает трудности, обратитесь за помощью к соответствующему материалу на нашем сайте.
Подробнее: Изменение ориентации экрана в Windows 10
Для точной настройки визуального оформления следует учитывать и отображение цветовой палитры, которую каждый монитор передает по-разному. Для достижения наилучшего результата следует выполнить калибровку. В идеальном случае это делается с помощью отдельно приобретенного в магазине калибратора, но за неимением инструмента можно воспользоваться специальным программным обеспечением или встроенным средством операционной системы. В тематической статье на нашем сайте подробно описан процесс настройки цветов монитора, поэтому рекомендуем ее изучить.
Подробнее: Калибровка цветов монитора в Windows 10

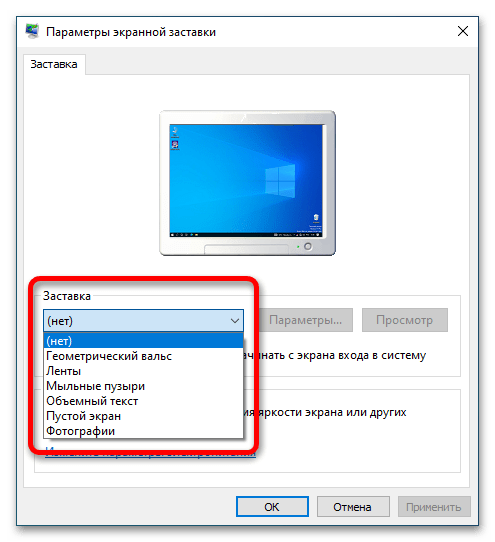
На завершенность задуманного визуального стиля Windows 10 оказывает влияние множество факторов, даже наличие или отсутствие экранной заставки. По умолчанию она включена на компьютере, но при необходимости эту функцию можно отключить. Об этом рассказывается в другой статье на нашем сайте.
Подробнее: Как убрать экранную заставку в Windows 10
Шрифты
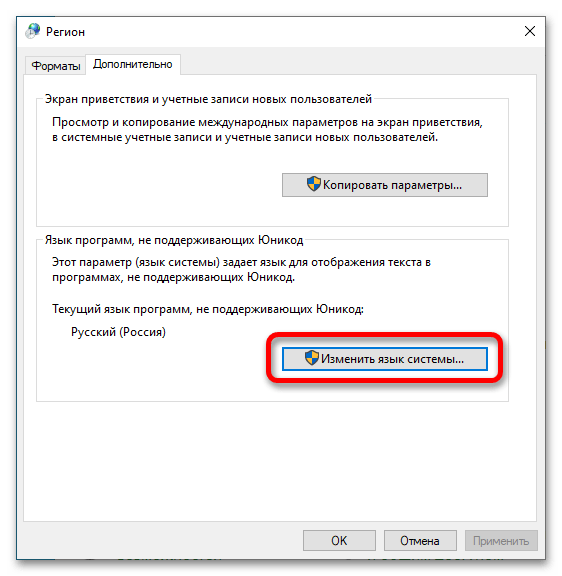
Стандартный шрифт Windows 10 может нравиться не всем, и при необходимости в качестве основного может быть выбран любой другой. Чтобы это сделать, потребуется внести правки непосредственно в конфигурационные файлы операционной системы. Процедура требует соответствующих навыков, а для того, чтобы самостоятельно ее выполнить, рекомендуем обратиться за помощью к тематической статье на нашем сайте.
Подробнее: Изменение шрифта в Windows 10

Есть вероятность, что после установки нового шрифта он будет работать некорректно, а именно не отображать кириллические символы, заменяя их другими нечитабельными. Это известная проблема, поэтому в отдельной статье на нашем сайте собраны все способы ее устранения.
Подробнее: Исправление проблемы с отображением русских букв в Windows 10
При настройке пользовательских шрифтов может возникнуть множество проблем, большая часть из них не критична, но способна испортить визуальный стиль всей операционной системы. Зачастую отключается опция сглаживания, из-за чего каждый отдельный символ выглядит некрасиво. Это довольно легко исправить, воспользовавшись специальной утилитой в Windows 10. О ее месторасположении и способе применения рассказано в другой публикации на сайте.
Подробнее: Активация сглаживания шрифтов в Windows 10

Довольна похожая проблема может заключаться в появлении некоторой размытости в тексте. Зачастую это относится только к тем символам, которые отображаются в приложениях. Чтобы все исправить, потребуется внести изменения в соответствующие параметры системы. О том, как это сделать, рассказано в другом материале на сайте, ознакомьтесь при необходимости.
Подробнее: Исправление размытых шрифтов в Windows 10

Файловый менеджер
Файловый менеджер «Проводник» — часть оболочки операционной системы. Этим приложением в процессе работы за компьютером приходится пользоваться довольно часто, поэтому при создании красивого графического оформления нужно также изменить и его дизайн.
В Windows 10 была добавлена темная тема, при необходимости ее можно активировать для «Проводника». В соответствующем разделе системных настроек есть множество дополнительных опций, поэтому рекомендуем изучить эту тему, обратившись к соответствующей статье на нашем сайте.
Подробнее: Включение темной темы «Проводника» в Windows 10
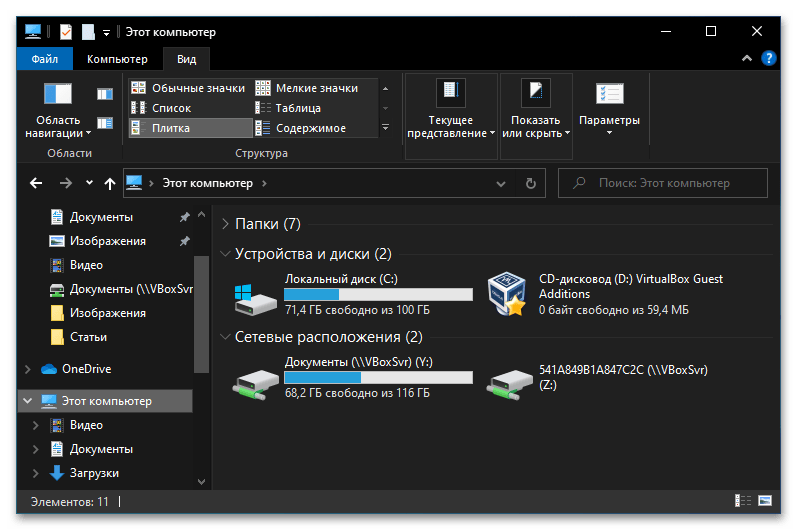
Особый стиль операционной системе может придать добавление дополнительных функций. Например, в «Проводнике» посредством программного обеспечения от сторонних разработчиков можно активировать возможность создания дополнительных вкладок, что повлечет за собой не только визуальную лаконичность интерфейса при использовании файлового менеджера, но и упростит менеджмент дискового пространства.
В отдельной статье на нашем сайте автором рассматриваются четыре приложения, которые позволяют добавить такую функцию в «Проводник». При необходимости рекомендуем ознакомиться.
Подробнее: Создание вкладок в «Проводнике» Windows 10
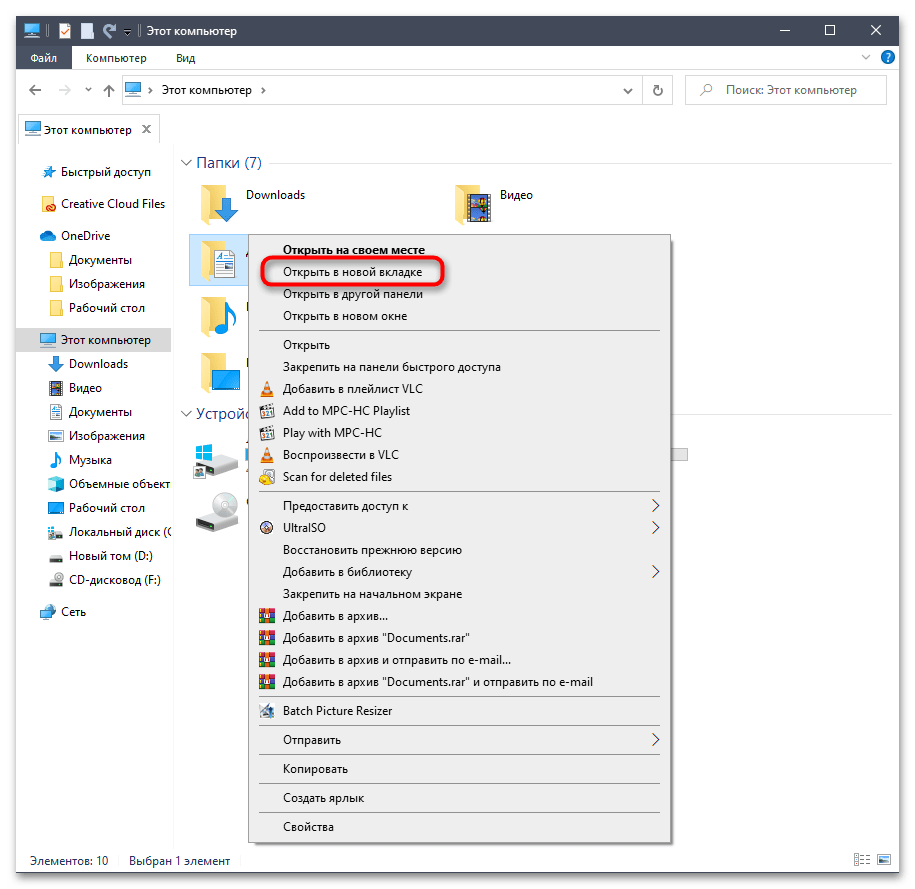
Если ранее вами был включен режим отображения скрытых директорий, они будут видны постоянно. Это может нарушать единый стиль, особенно, когда появляется потребность сортировки пользовательских папок. При необходимости скрытые директории можно убрать. Как именно это сделать — рассказано в другой статье на нашем сайте.
Подробнее: Скрытие скрытых папок в Windows 10
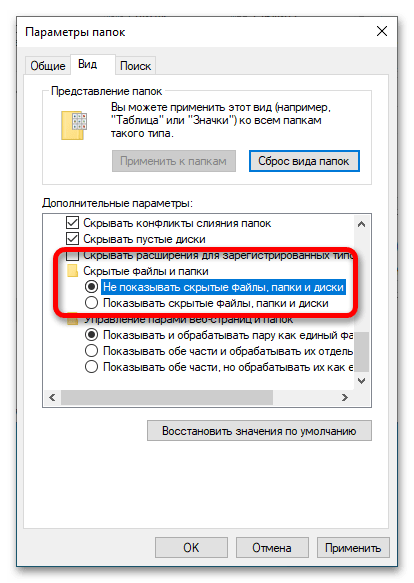
Многие пользователи стараются структурировать все данные в «Проводнике», размещая файлы в соответствующих папках. Но в некоторых случаях определенные каталоги могут выдавать ошибку при попытке их переименовать или удалить. Чтобы осуществить задуманное, потребуется разобраться в причине появления неисправности, после чего внести изменения в параметры системы. Это объемная тема, которая подробно описана в другой публикации на нашем сайте. Если в процессе создания собственного графического оформления Windows 10 появилась описываемая проблема, обратитесь за помощью к статье, перейдя по ссылке ниже.
Подробнее: Удаление неудаляемой папки в Windows 10
Вариант 2: Инструкция по изменению внешнего вида
Ранее в статье было описано подавляющее количество средств, которые позволяют изменить внешний вид операционной системы Windows 10, далее же мы предоставим подробную инструкцию по их использованию на примере создания минималистичного дизайна рабочего стола и смежных приложений.
Важно! Ниже рассматривается всего один из многочисленных вариантов оформления операционной системы. Сделано это для того, чтобы продемонстрировать практическое применение озвученных ранее программ и инструментов.
Подготовительные мероприятия
Первостепенно необходимо подготовить нужные файлы и установить программу для создания собственного дизайна операционной системы. Скачать их можно с Яндекс.Диска, кликнув по кнопке-ссылке, расположенной ниже.
Скачать скины для рабочего стола
Также следует инсталлировать на компьютер специальную программу Rainmeter, которая позволяет размещать на рабочем столе дополнительные виджеты и изменять визуальное отображение некоторых элементов интерфейса. Приложение распространяется бесплатно.
Скачать Rainmeter с официального сайта
После установки программы в системной директории «Документы» появится папка «Rainmeter», в которой будет находиться каталог «Skins». Переместите в него содержимое ранее скачанного архива со скинами. По итогу в конечной директории должно располагаться пять папок: «@Vault», «fromjupiter», «illustro», «Rainmeter Dock» и «Visualizer».
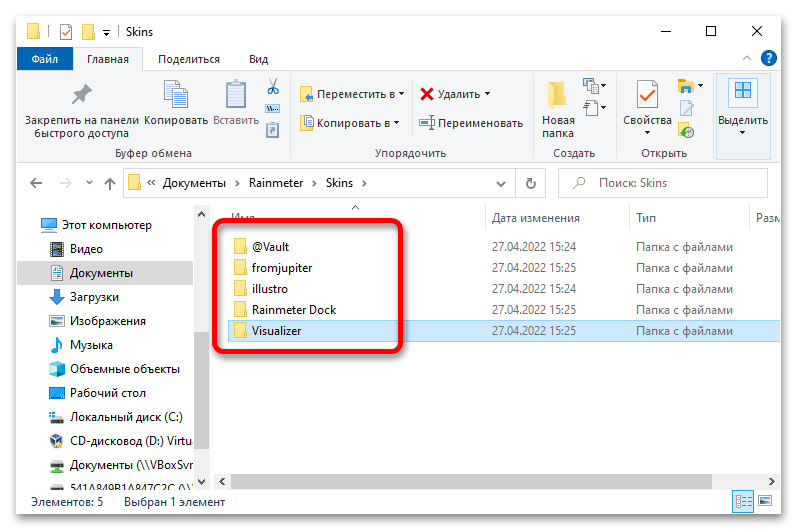
Изменение визуального оформления
Установив нужную программу и разместив в соответствующей директории все вспомогательные файлы, можно приступать непосредственно к изменению визуального стиля операционной системы.
- Закройте все элементы на рабочем столе, добавленные автоматически после установки приложения Rainmeter. Для этого поочередно кликните по каждому правой кнопкой мыши и выберите опцию «Закрыть скин».
- Установите в качестве фоновых обоев рабочего стола изображение под названием «forest.jpg», которое находится в корневом каталоге скачанного архива. Для этого кликните по файлу правой кнопкой мыши и из списка выберите пункт «Сделать фоновым изображением рабочего стола».
-
Уберите с рабочего стола все объекты. Для этого достаточно кликнуть в любом свободном месте правой кнопкой мыши и в контекстном меню навести курсор на пункт «Вид», после чего снять отметку с опции «Отображать значки рабочего стола».

Примечание! Все файлы по-прежнему будут оставаться на компьютере, только получить доступ к ним через рабочий стол уже не получится. В качестве альтернативы можно воспользоваться файловым менеджером «Проводник», открыв директорию «Рабочий стол», расположенную на боковой панели слева.
- Откройте окно приложения Rainmeter. Чтобы это сделать, разверните системный трей, нажав по стрелке в правой части панели задач, и кликните по иконке в виде капли.
- Разместите на рабочем столе виджет текущей даты. Для этого предварительно кликните по кнопке «Обновить все», чтобы программа считала ранее добавленные в директорию «Документы» скины. Затем, воспользовавшись древовидной структурой каталогов, перейдите в папку «fromjupiter» → «Date». Кликните по файлу «Date.ini» левой кнопкой мыши, чтобы выделить, а затем нажмите по кнопке «Загрузить».
- Сразу после этого измените позицию виджета, выбрав из одноименного выпадающего списка значение «Позади».
- Аналогичным образом добавьте виджет времени, который находится в папке «fromjupiter» → «Time» и носит название «Time.ini». Не забудьте также определить его позицию «На рабочем столе».
- Зажав левую кнопку мыши, смените месторасположение двух виджетов на предпочитаемое. В данном случае они будут установлены по центру рабочего стола.
- С помощью Rainmeter разместите на экране док-панель со списком предустановленных приложений. Для этого в главном меню программы раскройте папку «Rainmeter Dock», выделите файл «Rainmeter Dock.ini» и кликните по кнопке «Загрузить».
- Переместите классическую панель задач на боковую грань экрана и активируйте ее автоматическое сворачивание. Делается это непосредственно в настройках системы. Кликните правой кнопкой мыши по панели и выберите пункт «Параметры панели задач». Затем в появившемся меню включите опцию «Автоматически скрывать панель задач в режиме рабочего стола», после чего из выпадающего списка «Положение панели задач на экране» выберите значение «Слева» или «Справа».
- Зажав левую кнопку мыши, переместите ранее добавленную на рабочий стол док-панель в нижнюю часть экрана, расположив по центру.
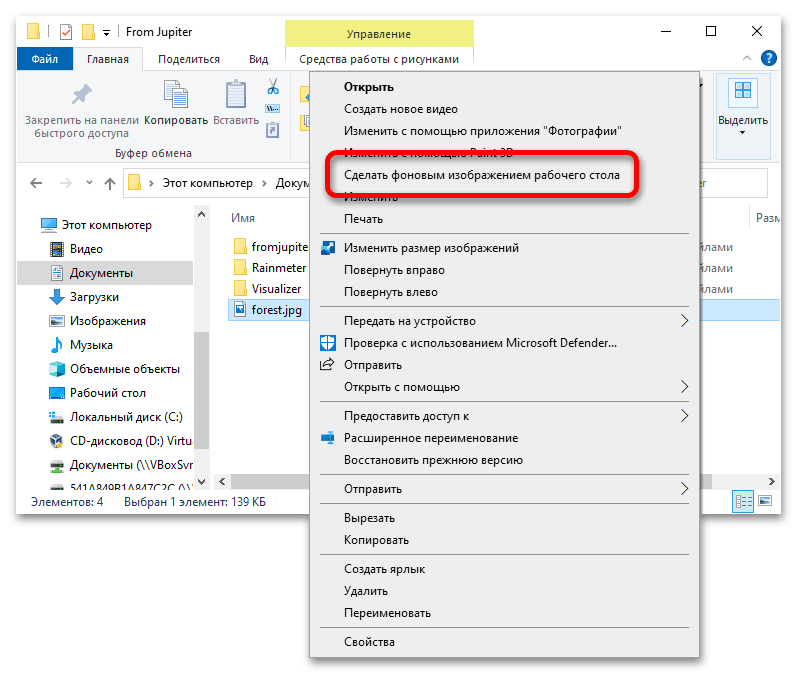
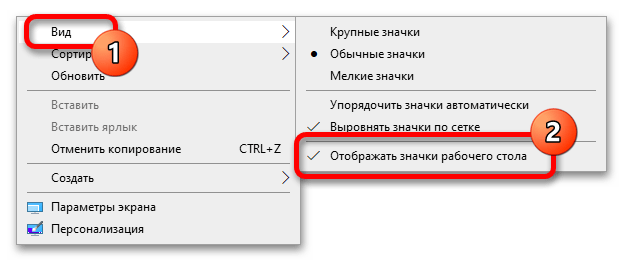
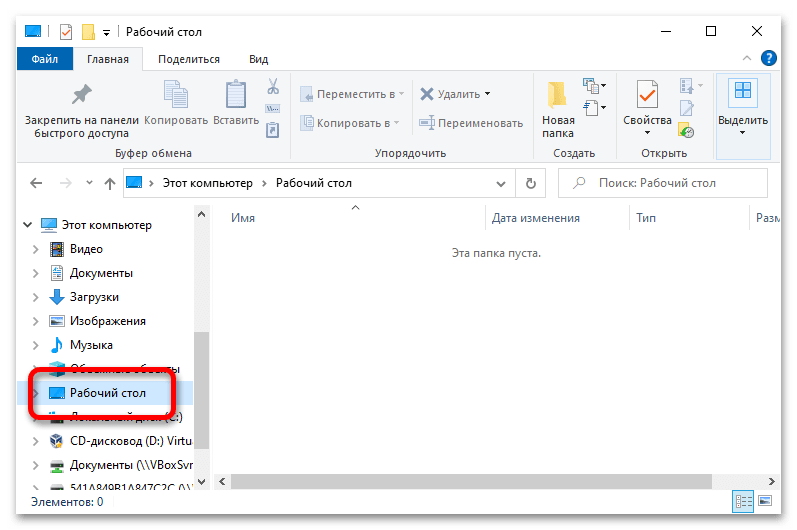
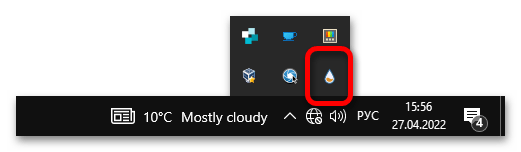
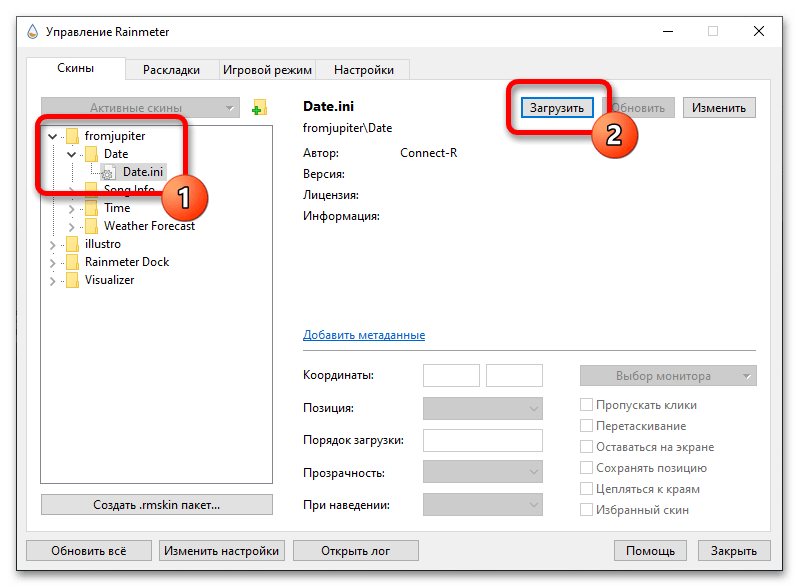
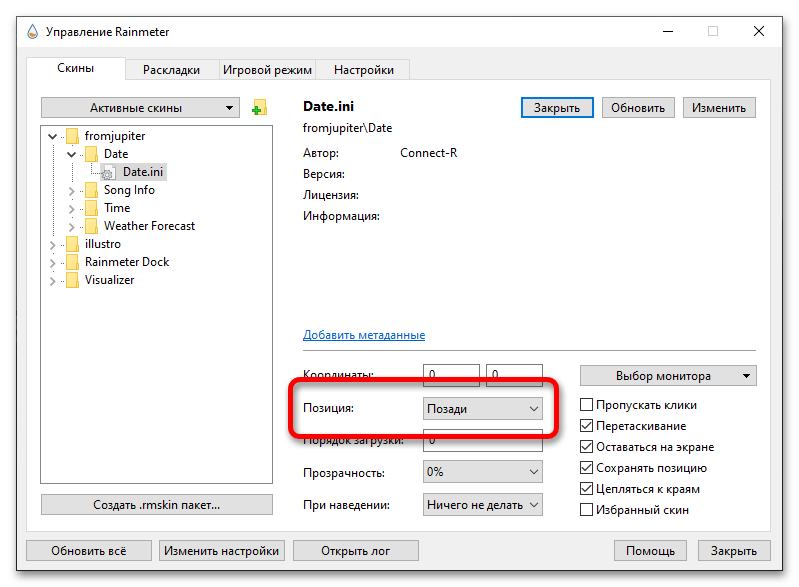


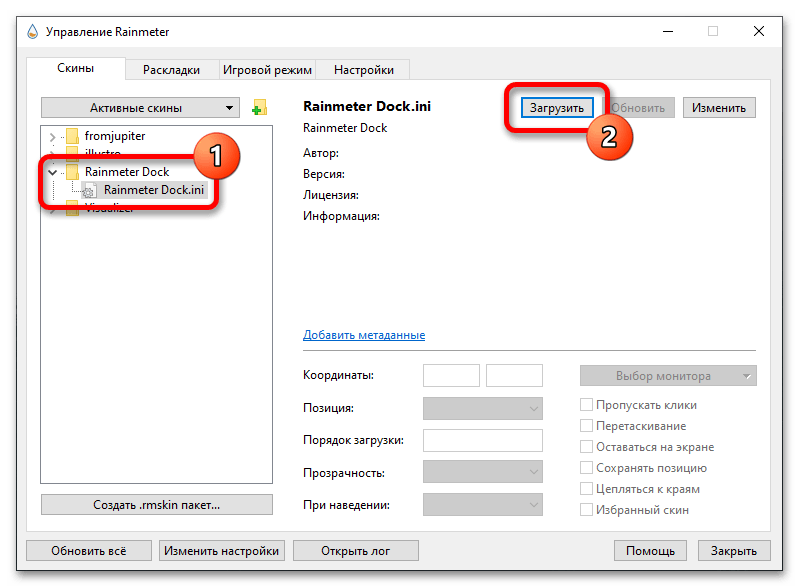
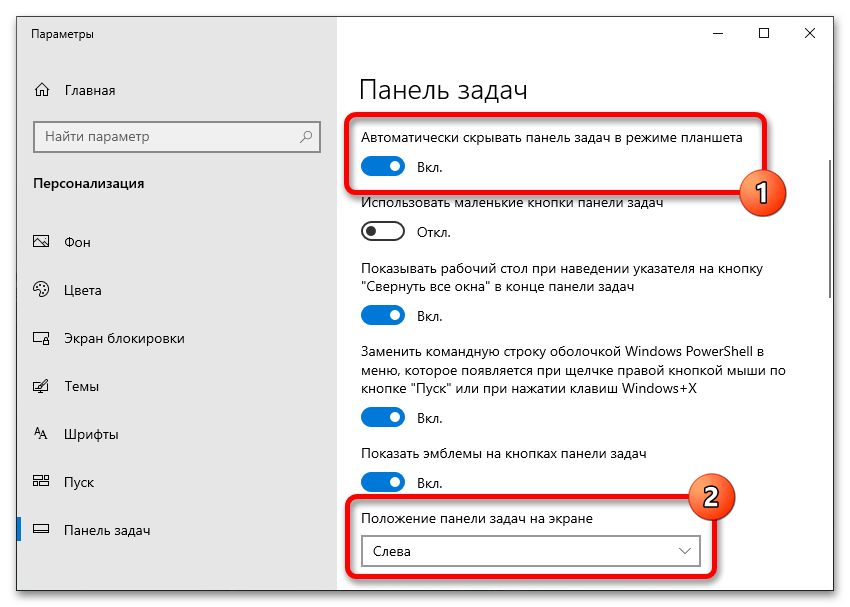
Таким образом удалось создать минималистичный дизайн операционной системы Windows 10, сделав ее более визуально привлекательной. Стоит отметить, что в представленной инструкции использовались не все средства графического преобразования, которые рассматривались в первой части статьи. Но при необходимости вы можете задействовать и их, чтобы создать уникальный авторский стиль.
Наша группа в TelegramПолезные советы и помощь