
For some reason, it is surprisingly hard to create a bootable Windows USB using macOS. These are my steps for doing so, which have worked for me in macOS Monterey (12.6.1) for Windows 10 and 11. After following these steps, you should have a bootable Windows USB drive.
1. Download a Windows disc image (i.e. ISO file)
You can download Windows 10 or Windows 11 directly from Microsoft.
2. Identify your USB drive
After plugging the drive to your machine, identify the name of the USB device using diskutil list, which should return an output like the one below. In my case, the correct disk name is disk2.
/dev/disk0 (internal, physical):
   #:                       TYPE NAME                    SIZE       IDENTIFIER
   0:      GUID_partition_scheme                        *500.3 GB   disk0
   1:                        EFI EFI                     314.6 MB   disk0s1
   2:                 Apple_APFS Container disk1         500.0 GB   disk0s2

/dev/disk1 (synthesized):
   #:                       TYPE NAME                    SIZE       IDENTIFIER
   0:      APFS Container Scheme -                      +500.0 GB   disk1
                                 Physical Store disk0s2
   1:                APFS Volume MacHDD - Data           180.3 GB   disk1s1
   2:                APFS Volume MacHDD                  15.4 GB    disk1s2
   3:              APFS Snapshot com.apple.os.update-... 15.4 GB    disk1s2s1
   4:                APFS Volume Preboot                 481.8 MB   disk1s3
   5:                APFS Volume Recovery                1.1 GB     disk1s4
   6:                APFS Volume VM                      1.1 GB     disk1s5

/dev/disk2 (external, physical):
   #:                       TYPE NAME                    SIZE       IDENTIFIER
   0:     FDisk_partition_scheme                        *15.5 GB    disk2
   1:                 DOS_FAT_32 WINDOWS10               15.5 GB    disk2s1
3. Format USB drive
Format the drive with the following command, substituting disk2 with whatever is the one that corresponds in your machine.
diskutil eraseDisk MS-DOS "WINDOWS10" MBR disk2
4. Mount the Windows ISO and check its size
Mount the ISO file in your system (usually by simply double-clicking it), and verify it’s listed in /Volumes—the disk name usually starts with CCCOMA_. With the disk mounted, check the size of the sources/install.wim file with the following command:
ls -lh /Volumes/CCCOMA_X64FRE_EN-US_DV9/sources/install.wim
5. Copy (almost) all files to USB drive
If sources/install.wim is less than 4GB in size, you can copy all the files from the mounted disk image onto the USB drive with the following command (notice the trailing slash in the first path!):
rsync -avh --progress /Volumes/CCCOMA_X64FRE_EN-US_DV9/ /Volumes/WINDOWS10
If sources/install.wim is more than 4GB, then we’ll need to split the file before copying it. In the meantime, we can copy all the other files from the mounted image onto the USB drive with the following command (again, notice the trailing slash in the first path!):
rsync -avh --progress --exclude=sources/install.wim /Volumes/CCCOMA_X64FRE_EN-US_DV9/ /Volumes/WINDOWS10
6. Use wimlib to split and copy sources/install.wim
If sources/install.wim is more than 4GB, it is too large to copy onto a FAT32-formatted drive. Microsoft’s official solution is to split the file, and there is a free utility available in macOS and Linux to do so—wimlib. The tool can be installed with Homebrew:
After installing wimlib, split and copy sources/install.wim using the following command:
wimlib-imagex split /Volumes/CCCOMA_X64FRE_EN-US_DV9/sources/install.wim /Volumes/WINDOWS10/sources/install.swm 3800
Here, 3800 means that the file should be split in 3,800MB chunks.
- To create a Windows 11 USB installer from macOS, you’ll have to download the official ISO file, format a USB flash drive using the “diskutil” tool, split the “install.wim” file with the “wimlib” tool, and transfer the files to the bootable USB drive.
- Alternatively, you can also use the WinDiskWriter app, which makes it easier to create a Windows USB installer similar to the Rufus tool.
UPDATED 7/12/2024: If you have to install Windows 11 (or 10) on a computer but only have a Mac running Apple’s macOS, you can create a bootable USB flash drive using a non-Windows machine in the same way you can use a Windows computer to create a macOS bootable USB installer.
Although you have multiple methods to create an installation media for Windows 11, they are only available for Windows devices. However, it’s also possible to use macOS. The only issue is that the operating system only lets you format the USB storage using the FAT32 file system that can only store files less than 4GB when the “install.wim” file (containing the installation files) is usually larger than 4GB (usually 5.6GB). As a result, we have to resource third-party tools to split the image into two smaller files to complete the process.
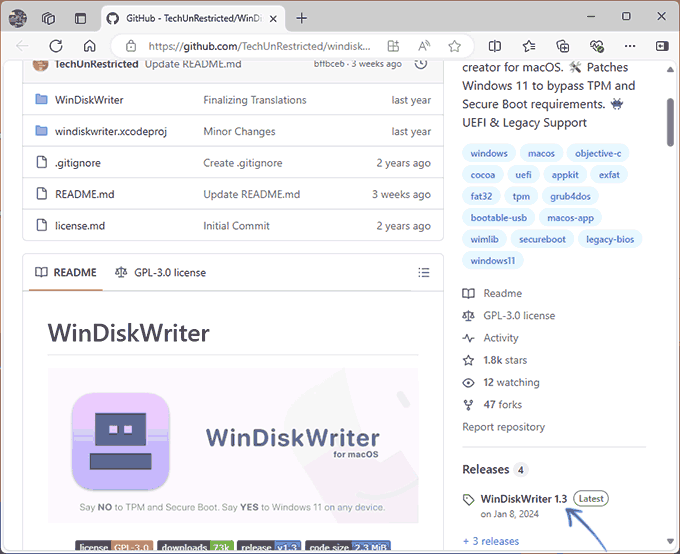
In addition, you can also use WinDiskWriter, which is a third-party app available through GitHub as a free download and streamlines the USB flash drive creation to process to only a few clicks without the need to use the Terminal command console.
In this guide, I will outline the steps to create a bootable USB using macOS to install Windows 11 as well as Windows 10 using the macOS Terminal command console and the WinDiskWrinter app.
- Create Windows 11 (or 10) bootable USB on macOS using Terminal
- Create Windows 11 (or 10) bootable USB on macOS using WinDiskWriter
Create Windows 11 (or 10) bootable USB on macOS using Terminal
To create a bootable USB to clean install Windows 11 using macOS, use these steps:
-
Open the Windows 11 ISO download page.
-
Choose the Windows 11 option under the “Download Windows 11 Disk Image (ISO) for x64 devices” setting.

-
Click the Download Now button.
-
Select the installation language.

-
Click the Confirm button.
-
Click the “64-bit Download” button to save the ISO file on your macOS device, more specifically in the “Downloads” folder.
-
Connect a USB flash drive of at least 8GB of storage.
Quick note: This process erases everything on the drive. As such, it’s recommended that any important data be backed up in the storage.
-
Open Launchpad.
-
Search for Terminal and click on the top result to open the command console.
-
Type the following command to identify the USB flash drive storage and press Return:
diskutil list

Quick note: In my case, the USB is identified as “disk4.”
-
Type the following command to clean and format the USB flash drive to make it bootable, and press Return:
diskutil eraseDisk MS-DOS "Windows_USB" MBR disk4
Quick tip: You can change “Windows_USB” to any name you want, but to avoid issues while running typing commands, make sure the name doesn’t include any space. I made that mistake and had to retype some of the commands because names with spaces have to be specified with quotation marks. Also, change “disk4” for the identifier of your USB flash drive.
-
Type the following command to open the “Downloads” folder where the ISO file is located and press Return:
cd Downloads
-
Type the following command to mount the Windows 11 ISO file to macOS and press Return:
hdiutil mount Win11_2xH2_English_x64vx.iso
-
Type the following command to transfer the installation files from the ISO file to the USB flash drive (excluding the install.wim file because it’s too large a FAT32 partition) and press Return:
rsync -avh --progress --exclude=sources/install.wim /Volumes/CCCOMA_X64FRE_EN-US_DV9/ /Volumes/Windows_USB
-
Type the following command to install the Homebrew tool on macOS and press Return:
/bin/bash -c "$(curl -fsSL https://raw.githubusercontent.com/Homebrew/install/HEAD/install.sh)"
Quick note: Homebrew is a package manager that will allow you to install the “wimlib” command tool to split the “install.wim” file and transfer it to the USB flash drive.
-
Confirm your macOS account password and press Return to continue.
-
Type the following command two commands to add Homebrew to your “PATH” and press Return on each line:
(echo; echo 'eval "$(/opt/homebrew/bin/brew sheval "$(/opt/homebrew/bin/brew shellenv)"ellenv)"') >> /Users/YOUR-ACCOUNT/.zprofile
eval "$(/opt/homebrew/bin/brew shellenv)"

In the command, update “YOUR-ACCOUNT” to match the name of your macOS account.
-
Type the following command to install the wimlib tool and press Return:
brew install wimlib
-
Type the following command to split the “install.wim” image and transfer the packages to the USB flash drive, and press Return:
wimlib-imagex split /Volumes/CCCOMA_X64FRE_EN-US_DV9/sources/install.wim /Volumes/Windows_USB/sources/install.swm 3500
Quick note: The “3500” number is the size in MiB of the file split. You can specify any number as long as it’s less than 4GB.


Once you complete the steps, you will end up with a bootable USB flash drive that you can connect to a computer to perform a clean install of the operating system.
Create Windows 11 (or 10) bootable USB on macOS using WinDiskWriter
To create a Windows 11 bootable USB with the WinDiskWriter tool, use these steps:
-
Open the Windows 11 ISO download page.
-
Choose the Windows 11 option under the “Download Windows 11 Disk Image (ISO) for x64 devices” setting.
-
Click the Download Now button.
-
Select the installation language.
-
Click the Confirm button.
-
Click the “64-bit Download” button to save the ISO file on your macOS device, more specifically in the “Downloads” folder.
-
Connect a USB flash drive of at least 8GB of storage.
Quick note: This process erases everything on the drive. As such, it’s recommended that any important data be backed up in the storage.
-
Open the WinDiskWrinter download page.
-
Click the WinDiskWriter.x.x.zip option to download the file on your Mac.

-
Press the Control key + click the WinDiskWriter Zip file, and choose the Open option to extract the tool.
-
Press the Control key + click the extracted WinDiskWriter tool file, and choose the Open option.
Quick note: Since this is not an official app, you will receive the “WinDiskWriter.app can’t be opened because Apple cannot check it for malicious software” message, which is an expected behavior for this app.
-
Press the Control key + click the extracted WinDiskWriter tool file again, and choose the Open option.

-
Click the Open button.
-
Click the Choose button in the “Windows Image” setting.

-
Select the Windows 11 (or 10) ISO image.
-
Click the Open button.
-
(Optional) Check the “Patch Installer Requirements” option to install Windows on unsupported hardware.
-
(Optional) Check the “Install Legacy BIOS Boot Sector” option to install the operating system on a device without UEFI firmware. (This option will require to reopen the app.)
-
Click the Start button.
-
Click the Start button again.
-
Click the Allow button.


After you complete the steps, you will have a bootable USB flash drive to install the operating system.
Update July 12, 2024: This guide has been updated to ensure accuracy and reflect changes to the process.
Why You Can Trust Pureinfotech
The author combines expert insights with user-centric guidance, rigorously researching and testing to ensure you receive trustworthy, easy-to-follow tech guides. Review the publishing process.
Если вам требуется создать загрузочный установочный USB накопитель с Windows 11/10 в MacOS, особенно на устройствах с процессорами Apple Silicon (M1, M2, M3, M4), это может вызвать проблемы: описанные в сети способы сделать это вручную понятны не всем, а однотипные платные приложения не всегда работоспособны.
WinDiskWriter — бесплатное приложение с открытым исходным кодом, позволяющее легко записать загрузочную флешку с Windows 11, Windows 10 или предыдущей системой на MacBook и других компьютерах Mac с процессорами Apple Silicon и Intel, о нём и пойдёт речь далее в статье.
Использование WinDiskWriter
Скачать последнюю версию WinDiskWriter можно с официальной страницы GitHub в разделе Releases.
Достаточно распаковать архив и запустить приложение: вы можете получить предупреждение безопасности MacOS о том, что не удается его проверить, потребуется подтвердить открытие (если кнопка запуска отсутствует, перезапустите приложение).
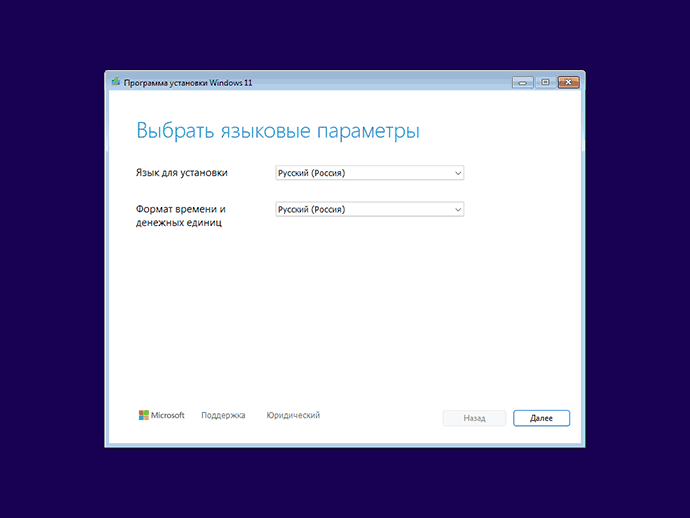
Дальнейшие шаги по созданию загрузочной флешки Windows 11/10 на MacOS не будут отличаться от таковых при использовании аналогичных программ в «родной» операционной системе, к тому же в приложении присутствует русский язык интерфейса:
- Укажите ISO образ Windows, который следует записать на флешку. Скачать его можно, например, с помощью CrystalFetch (к сожалению, для РФ загрузка блокируется) или другими способами. Поддерживаются образы ISO x64 (64-бит) и x86 (32-бит).
- Выберите флешку, на которую будет записан образ. Важно: все данные с накопителя будут удалены.
- Для Windows 11 вы можете установить отметку «Пропатчить требования установщика» для отключения проверки соответствия компьютера техническим требованиям системы.
- Отметка «Установить загрузочный сектор для Legacy BIOS» позволит создать флешку, которая будет загружаться как в UEFI, так и в Legacy режимах (по умолчанию — только UEFI).
- Выберите файловую систему: FAT32 (в этом случае файл install.wim в образе будет разбит на части, если он не может быть помещен на раздел FAT32) и ли ExFAT. Я использовал FAT32 — этот вариант дольше, но по отзывам работает надёжнее.
- Нажмите кнопку «Начать» для запуска записи накопителя. Подтвердите запись.
- Дождитесь завершения создания загрузочной флешки.


Готово, образ будет записан на флешку и её можно использовать для загрузки и установки Windows на ПК:
В моём тесте (запись на FAT32) с образом Windows 11 всё работало исправно, каких-либо проблем ни при записи, ни при последующей загрузке с созданного накопителя не возникло — всё прошло в штатном режиме. Для некоторых записанного накопителя может потребоваться отключение Secure Boot в БИОС/UEFI компьютера.
На близкую тему вас может заинтересовать: Как установить Windows на Mac с Apple Silicon M1, M2, M3.
Будем честны, запись загрузочных USB флешек с Microsoft Windows на macOS — боль. Особенно для рядового пользователя, который, вероятно, никогда ранее не видел Терминал и не использовал виртуальные машины.
Без длительного вступления, хочу презентовать программное обеспечение собственной разработки, задачей которого является максимально упростить процесс записи флешек с Windows на macOS.
Стоит заранее отметить, что данное программное обеспечение является полностью бесплатным продуктом с открытым исходным кодом.
- Поддержка UEFI и Legacy загрузочных режимов (даже для Windows 11)
- Поддержка x64 и x32 образов
- Возможность удаления проверок TPM 2.0 и Secure Boot с образов Windows 11
- Оптимизация оригинальных образов Microsoft Windows для загрузки c FAT32 разделов (автоматическое разделение install.wim на части)
- Оптимизация образов Windows 7 и Vista для загрузки в EFI режиме
- Windows 11
- Windows 10
- Windows 8.1
- Windows 8
- Windows 7
- Windows Vista
На любой версии системы, начиная с Mac OS X Snow Leopard 10.6 и вплоть до последней на текущий момент — macOS Sonoma 14.0.
Поддерживаются компьютеры с процессорами Intel и Apple silicon.
Для начала необходимо загрузить образ нужной вам редакции Windows в .iso формате.
Стоит отметить, что на данный момент упор делался только на оригинальные сборки Microsoft Windows. Поэтому желательно использовать официальные релизы.
· Страница репозитория: Открыть на GitHub
· Страница с последней версией приложения: Открыть на GitHub
При первоначальном запуске вас может встретить сообщение вида:
Почему это происходит? Apple просит $100 за сертификат разработчика для подписи приложения. Платить я не готов, поэтому обходим это предупреждение.
После чего у нас появляется опция запуска приложения.
Приложение на данный момент доступно на двух языках: английский и русский. В качестве примера будет использована международная английская версия.
- Windows Image: Путь к образу с Microsoft Windows в .iso формате
- Target Device: Устройство назначения (USB флешка)
Если устройство не отображается (в основном происходит, если у вас Hackintosh с некорректно настроенной разметкой USB-портов), то в верхнем меню нажмите на «Отладка» → «Сканировать все диски». - Patch Installer Requirements: Включите, если хотите установить Windows 11 на компьютер, который не соответствует требованиям установщика (TPM 2.0 & Secure Boot)
- Install Legacy BIOS Boot Sector: Включите, если записываете образ для компьютера, который не поддерживает UEFI загрузку. Работает даже для Windows 11. (Данная опция требует перезапуска приложения с правами администратора, так как необходимо осуществлять прямую запись бут-сектора на диск)
- File System: Файловая система, в которую будет отформатирована флешка. Оставьте FAT32. exFAT не поддерживается на большинстве прошивок материнских плат.
Нажимаем на «Start«.
Если всё прошло без ошибок — поздравляю!
У вас теперь есть рабочая флешка с Microsoft Windows, которую вы создали на своём компьютере Mac!
Теперь вы можете загрузиться с установочной флешки на вашем ПК.
В качестве примера на скриншоте выше, я записал флешку с Windows 11 с поддержкой UEFI и Legacy, а также с пропатченными требованиями к железу!
Greetings, fellow Mac users! If you’re eager to venture into the world of Windows 11, whether it’s for your trusty Mac or a PC, you’ll need a reliable bootable USB drive. In this guide, I’ll use only Microsoft and Apple tools to create a bootable USB of Windows 11 on macOS.
While this may involve some Terminal wizardry, don’t worry! I’ll take it step by step, ensuring a smooth journey for both the tech-savvy and those new to the command line. So, let’s start on the adventure of creating your very own Windows 11 bootable USB on macOS!
Creating a Bootable Windows 11 USB on a Mac: What You’ll Need

For creating a bootable Windows USB drive on your Mac, you are going to need the following essentials:
1. Mac Computer Compatible with Boot Camp: Ensure your Mac supports Boot Camp, as this is essential for the installation process.
2. Windows 11 ISO File: Download the Windows 11 ISO file from the official Microsoft website or use this direct link. You are recommended to download the Windows 11 ISO file as it is necessary for the installation.
3. USB Flash Drive (8GB or More): Choose a USB drive with at least 8GB of storage space. This will be the vessel for your bootable Windows installation.
4. Stable Internet Connection: A reliable internet connection is crucial for downloading the necessary files and resources.
With these tools in your arsenal, you’re well-prepared to create a bootable USB on your Mac. Now, let’s dive into the process step by step.
Create a Bootable USB of Windows 11 on macOS

Here are three methods to create a bootable USB of Windows 11 on macOS:
Method 1: Boot Camp Assistant
Boot Camp Assistant is an Apple tool designed to help users install Windows on a Mac. It also enables Mac users who wish to run Windows alongside macOS. Beyond its primary function of setting up a dual-boot system, Boot Camp Assistant can also be utilized to create a bootable Windows USB.
However, this method is only available on Intel-based Macs and may not be supported on newer Apple silicon models.
Quickly: Boot Camp Assistant > Create a Windows 11 or later install disk and follow the prompts to choose the ISO file and the USB drive.
Step 1. Opening Boot Camp Assistant
Boot Camp Assistant is located in the Utilities folder within the Applications directory. Launch it to initiate the process.
Step 2. Creating a Windows 11 Install Disk

Select the option that reads Create a Windows 11 or later install disk. This triggers a guided process where you will be prompted to choose the Windows 11 ISO file and designate the target USB drive. Ensure the USB drive has sufficient space (at least 8GB).
Step 3. Formatting the USB Drive
Boot Camp Assistant will undertake the task of formatting the USB drive to the necessary specifications for Windows installation. It will then copy the essential files required for booting.
Additional Tips: Ensure you have a stable power source for your Mac during this process to prevent any interruptions.
Troubleshooting: If you encounter any errors during the process, ensure that the USB drive is properly inserted and try reformatting it using Disk Utility before attempting the process again.
Method 2: Terminal Commands
Utilizing Terminal empowers users with greater control over the process, making it suitable for those comfortable with command-line interfaces. This method works on both Intel-based and Apple-silicon Macs.
Quickly: Termnial > “diskutil” > Mount Windows 11 .
Step 1. Open Terminal on Mac
Navigate to Applications > Utilities > Terminal to access the command-line interface.
Step 2. Format USB Drive for Windows
Begin by identifying your USB drive using the “diskutil” command. This step ensures that you select the correct drive for the Windows installation. Now format the USB drive for the Windows installation files.
diskutil unmountDisk /dev/diskXReplace the “diskX” with your USB disk number.
sudo diskutil eraseDisk FAT32 Windows11 MBRFormat /dev/diskX- You can replace “Windows11” with the desired name for your USB drive.
- Replace diskX with your actual disk number.
- Note: The sudo command may prompt you for your password.
Your USB will be formatted.
Step 3. Mount the Windows 11 ISO file
This step grants you access to the contents necessary for copying. So, we will give access to the Windows 11 ISO file to USB now.
Use the “dd” command to write the Windows 11 ISO to the USB drive. Replace “/path/to/windows11.iso” with the actual path to your ISO file and “/dev/diskX” with the device name of your USB drive (I named it “Windows11”). Be very careful with this command as it can erase data if used incorrectly:
sudo dd if=/path/to/windows11.iso of=/dev/diskX bs=1m- The “if” flag specifies the input file (the Windows 11 ISO).
- The “of” flag specifies the output file (the USB drive).
- The “bs” flag sets the block size, which in this case is 1MB.
Additional Tips: Double-check the device name before executing any ‘dd’ command to avoid overwriting the wrong drive. And take your time and ensure accuracy in typing out commands to prevent any unintended errors.
Troubleshooting: If you encounter any errors, double-check the syntax of your commands and ensure that the paths and device names are accurate.
Method 3: Third-party Tools
There are third-party applications available that simplify the process of creating a bootable Windows 11 USB on a Mac. One such tool is UUByte ISO Editor for Mac. UUByte ISO Editor for Mac provides an excellent alternative for users seeking a streamlined, user-friendly experience.
Quickly: Download & Install > Launch > Choose USB > Burn.
Step 1. Downloading and Installing UUByte ISO Editor
Start by downloading and installing UUByte ISO Editor for Mac.
Step 2. Launching UUByte ISO Editor
Open the application and select the Windows 11 ISO file you downloaded.
Step 3. Choosing the USB Drive
Select the USB drive as the target for the Windows installation files.
Step 4. Burning the ISO to USB
Click the Burn button to initiate the process. UUByte ISO Editor will handle the rest, creating a bootable Windows 11 USB.
Additional Tips: Ensure you have sufficient disk space on your Mac to accommodate both the UUByte ISO Editor application and the Windows 11 ISO file.
Troubleshooting: If you encounter any issues with UUByte ISO Editor, ensure that you have downloaded the correct version compatible with your Mac’s operating system.
By following these methods, you can create a bootable Windows 11 USB on macOS. Always exercise caution, especially when using Terminal commands, to prevent any unintended consequences. Remember to save your work and back up important data before proceeding with any of these methods.