
Способ 1: Системные инструменты
В Windows 10 есть возможность поменять вид любой папки. Для этого можно использовать либо системную иконку, либо значок, скачанный со сторонних ресурсов.
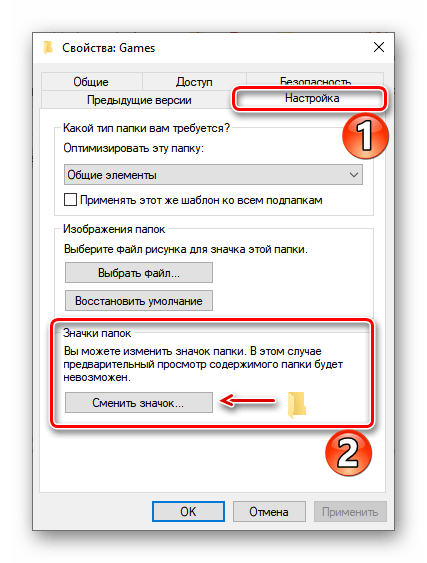
- Выбираем папку, которой хотим поменять иконку, и открываем ее «Свойства».
- Переходим во вкладку «Настройка» и в блоке «Значки папок» жмем «Сменить значок».
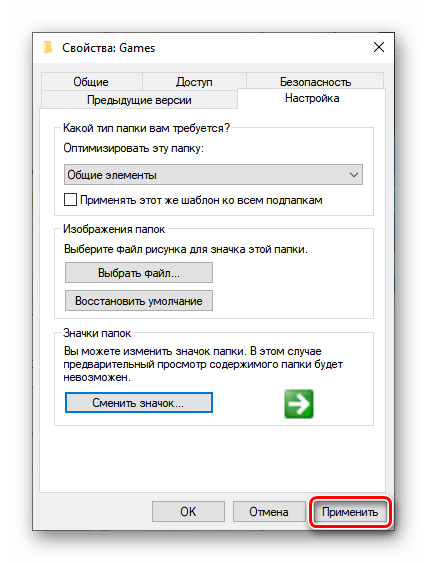
- Из списка выбираем подходящую иконку и нажимаем «OK».

Чтобы сохранить изменения, жмем «Применить».
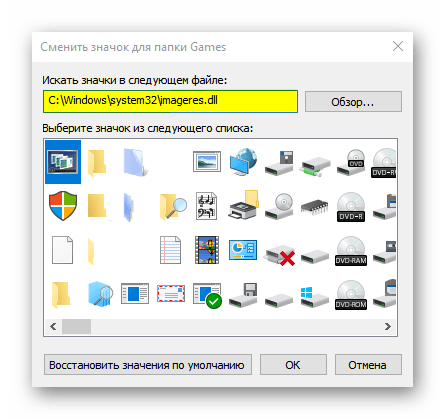
- В Виндовс 10 есть и другие комплекты значков. Чтобы получить доступ к ним, по очереди в адресной строке вводим:
C:\Windows\system32\imageres.dllC:\Windows\system32\moricons.dllC:\Windows\explorer.exeПосле каждого адреса жмем «Enter».
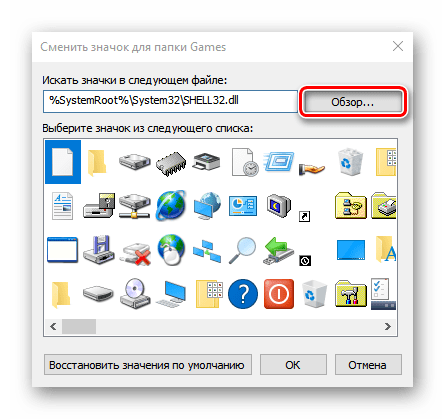
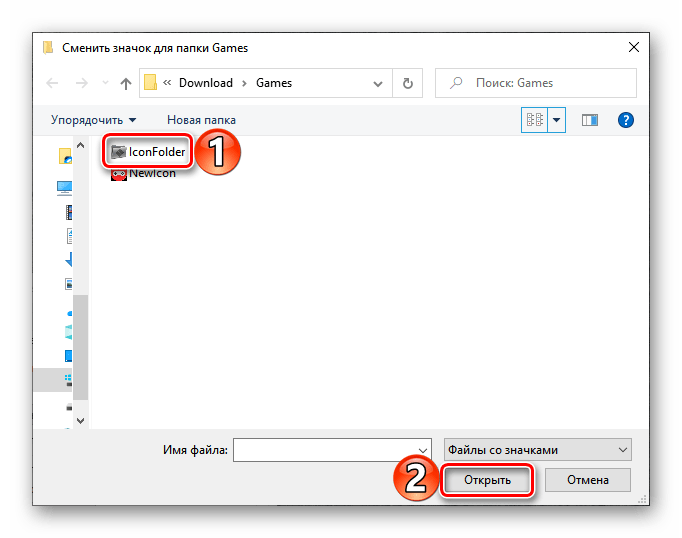
- Если необходимо установить значок, созданный самостоятельно или скачанный из интернета, жмем «Обзор».
- Находим нужную иконку и нажимаем «Открыть».

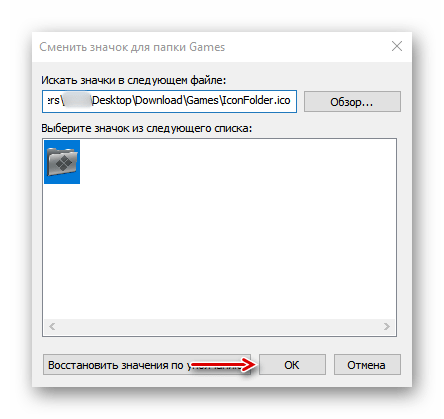
В следующем окне жмем «OK».

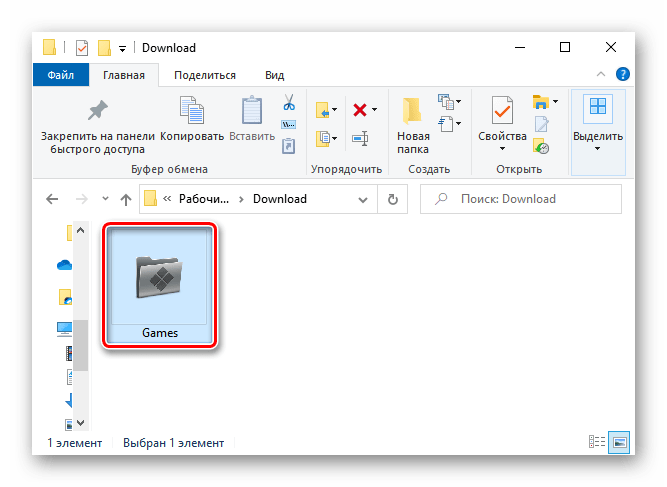
Иконка папки поменяется сразу.
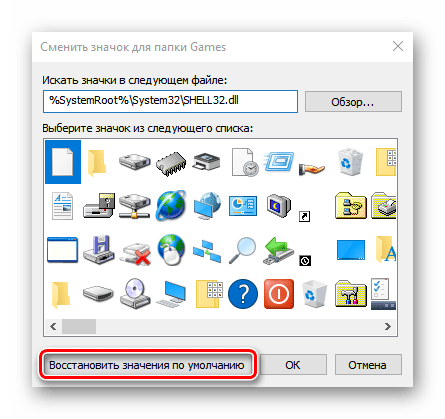
- Чтобы вернуть каталогу стандартный значок, жмем «Восстановить значения по умолчанию».


Сделать все папки на компьютере одного вида можно путем создания соответствующего параметра в редакторе реестра Windows 10.
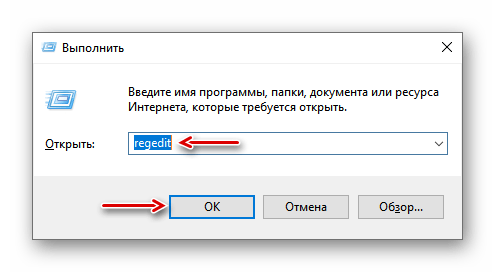
- Сочетанием кнопок Win+R вызываем окно «Выполнить», вписываем код
regeditи щелкаем «OK».
Читайте также:
Вызов оснастки «Выполнить» в ОС Windows 10
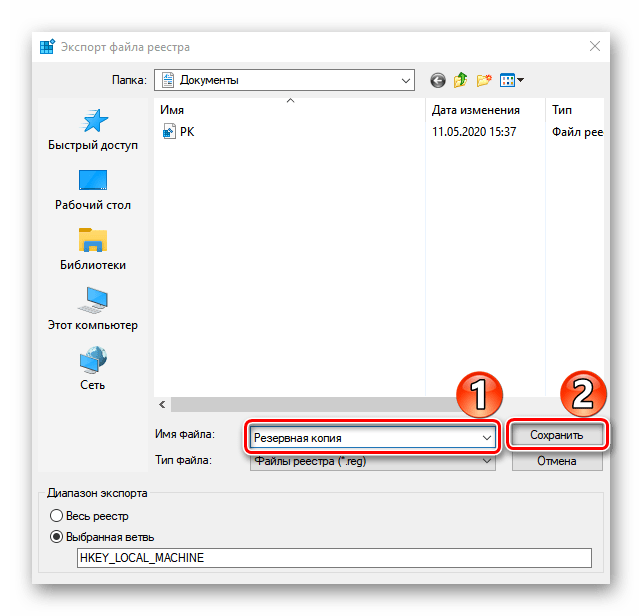
Способы запуска «Редактора реестра» в Windows 10 - Работать будем с веткой HKEY_LOCAL_MACHINE (HKLM), поэтому сначала делаем резервную копию. Выделяем ее, открываем вкладку «Файл» и жмем «Экспорт».

Указываем место сохранения резервной копии, присваиваем ей имя и жмем «Сохранить».
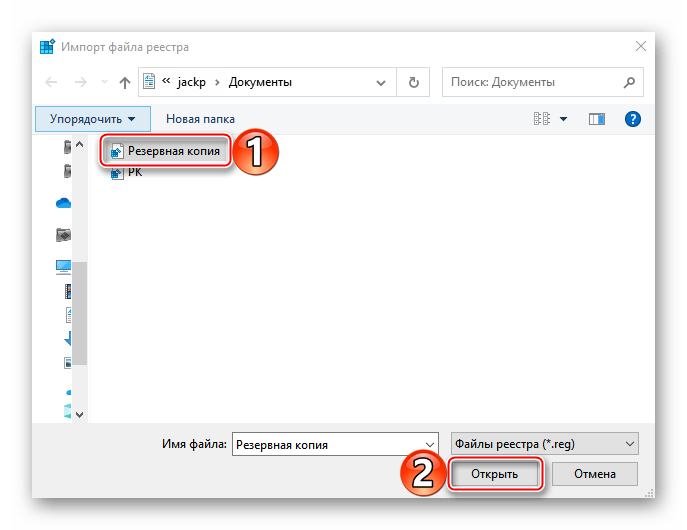
- Чтобы потом восстановить реестр, во вкладке «Файл» нажимаем «Импорт».
Выделяем резервную копию и щелкаем «Открыть».
- Следуем по адресу:
HKLM\Software\Microsoft\Windows\CurrentVersion\Explorer\Shell Icons
Если в реестре такой раздел отсутствует, жмем правой кнопкой мышки по каталогу «Explorer» и создаем его.
- В папку «Shell Icons» добавляем «Расширяемый строковый параметр».

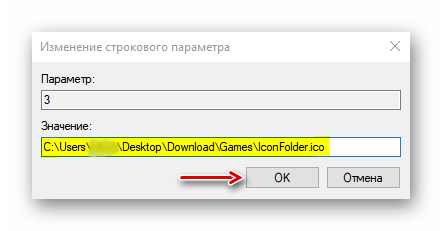
В его названии ставим цифру 3.
- Дважды щелкаем по новому параметру мышкой, в поле «Значение» указываем путь до иконки, которую хотим присвоить папкам, и жмем «OK». В конце обязательно ставим расширение .ICO.
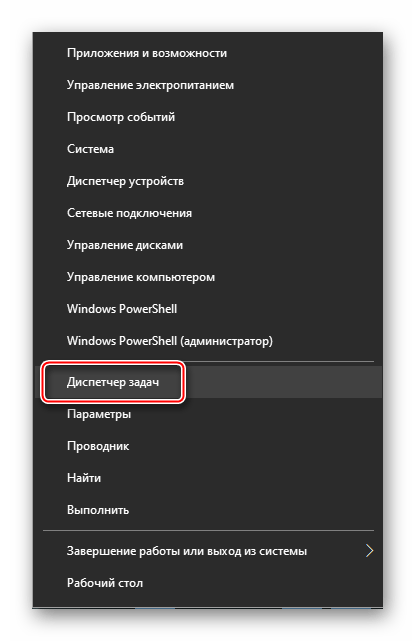
- Перезапускаем «Проводник». Для этого правой кнопкой мышки щелкаем по меню «Пуск» и открываем «Диспетчер задач».

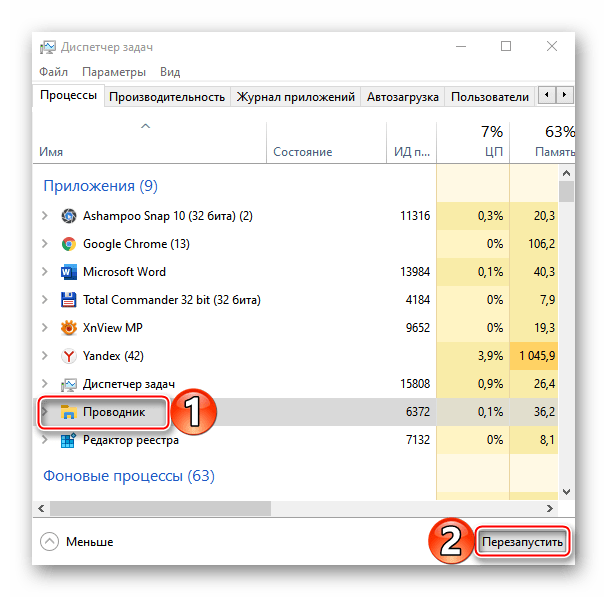
В списке активных приложений находим «Проводник» и жмем «Перезапустить».

Читайте также:
Методы запуска «Диспетчера задач» в Windows 10
Перезапуск системного «Проводника» в Windows 10


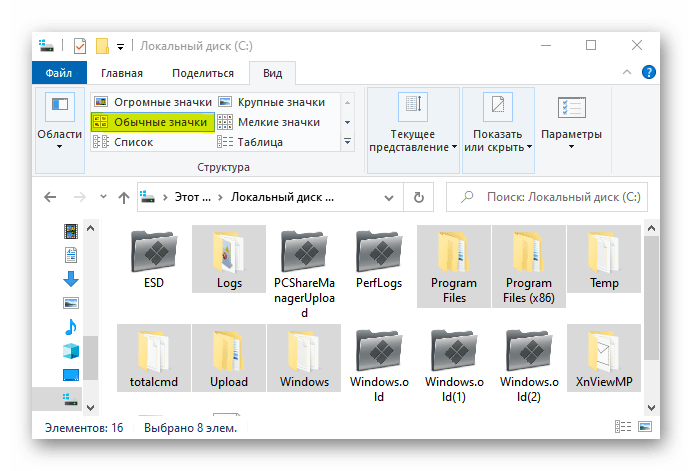
В результате описанных действия вид папок поменяется, но при отображении их в режиме огромных, крупных или обычных значков папки с вложенными файлами будут стандартного вида.
Изменить значок в данном случае мешает функция предварительного просмотра, благодаря которой отображаются эскизы (миниатюры) видеофайлов и изображений, а также иконки программ, сохраненных на диске. При необходимости эту опцию можно отключить.
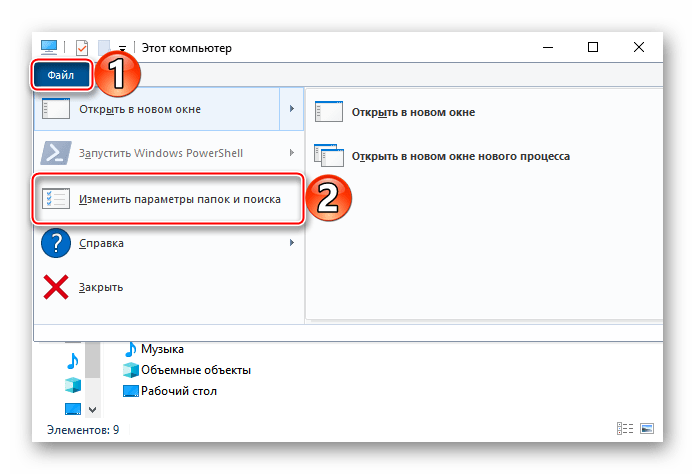
- Запускаем «Проводник», открываем вкладку «Файл» и щелкаем «Изменить параметры папок и поиска».

Читайте также: Запуск «Проводника» в ОС Windows 10
- Во вкладке «Вид» отмечаем «Всегда отображать значки, а не эскизы», сохраняем изменения и закрываем окно.
- Убеждаемся, что все папки получили одинаковые значки.


Способ 2: Специальный софт
Помимо системных инструментов, изменить иконки папок, файлов, локальных дисков и других элементов Виндовс 10 можно с помощью стороннего софта. Для этих целей разработано много специальных утилит, также есть просто пакеты со всеми необходимыми файлами, для использования которых не требуется дополнительное ПО. Об этом подробно написано в отдельной статье.
Подробнее: Как установить иконки на Windows 10

Наша группа в TelegramПолезные советы и помощь
How to Reset Default Icons on Windows 10
- Open your “Desktop Icon Settings.”
- Press the “Search” tab and enter “desktop icon” in the box.
- Hit “Show or hide common icons on the desktop.”
- Select a modified desktop icon and press “Restore Default.”
- Hit the “OK” button to apply the changes.
- How do I restore default folder icons in Windows 10?
- How do I change the default folder icon in Windows?
- How do I change a folder icon permanently?
- Why did my icons change Windows 10?
- How do I restore default file format?
- How do I restore default files and icons?
- How do I reset my taskbar icons?
- How do I change my icons back to normal Iphone?
- How do I change the folder icon in Windows 10?
- How do I change the default icon size in Windows 10?
- How do I change an icon in Windows 10?
How do I restore default folder icons in Windows 10?
How to restore and show default desktop icons in Windows 10
- The standard desktop icons in Windows 10. …
- Show shortcuts on your desktop. …
- Hide shortcuts from your desktop. …
- Press Personalize. …
- Click or tap on Themes. …
- Access Desktop icon settings. …
- Select the icon from the highlighted area. …
- Press on Restore Default.
How do I change the default folder icon in Windows?
To change a folder icon, right-click the folder you want to change and then choose “Properties.” In the folder’s properties window, switch to the “Customize” tab and then click the “Change Icon” button.
How do I change a folder icon permanently?
in earlier version of windows, i can set the custom folder icon to permanent by editing the «desktop. ini» file, with simply erase some part of the icon file address into iconresource=»icon name». ico,0. it works in win 7, 8, and 8.1.
Why did my icons change Windows 10?
If the icons changed after you restart Windows, any of the following can be true: The icon cache (This is where Windows keeps copies of each icon.) is not updated correctly, corrupted icon database or icon layouts are not being saved upon restarting Windows.
How do I restore default file format?
To reset File Associations in Windows 10, do the following.
- Open Settings.
- Navigate to Apps — Defaults Apps.
- Go to the bottom of the page and click the Reset button under Reset to the Microsoft recommended defaults.
- This will reset all file type and protocol associations to the Microsoft recommended defaults.
How do I restore default files and icons?
1. Go to Control Panel > Default programs and select Associate a file type or protocol with a program. 2. From the list of file extensions, select the extension that you want to change the default program to open with and then click Change program.
How do I reset my taskbar icons?
Right-click on the taskbar and click on Taskbar Settings. Scroll down to the Notification area and click on Turn system icons on or off. Now, toggle the system icons on or off as shown in the image below (default).
How do I change my icons back to normal Iphone?
Tip: quickly reset your Home screen icons to the default layout
- Launch the Settings app on the iOS device you want to reset the Home screen app layout on.
- Navigate to General > Reset > Reset Home Screen Layout and tap on it.
- When prompted by a pop-up message, confirm the Home screen reset by tapping on the red Reset Home Screen button.
How do I change the folder icon in Windows 10?
How to Change Folder Icon in Windows 10
- Open This PC in File Explorer.
- Locate the folder whose icon you wish to customize.
- Right click it and select Properties in the context menu.
- In the Properties window, go to the Customize tab.
- Click on the button Change Icon.
- In the next dialog, pick a new icon and you are done.
How do I change the default icon size in Windows 10?
How to Change the Size of Desktop Icons in Windows 10
- Right-click on an empty space on the desktop.
- Select View from the contextual menu.
- Select either Large icons, Medium icons, or Small icons. The default is medium icons.
How do I change an icon in Windows 10?
To customize the Folder icons in Windows 10, perform the following steps:
- Right-click the folder and select ‘Properties’ in the context menu.
- Select ‘Customize’ and hit ‘Change Icon’ in the Properties window.
- You can replace the folder icon with a basic/personalized icon.
- Now click ‘OK’ to save the changes.
Download Windows Speedup Tool to fix errors and make PC run faster
By default, your personal Documents, Desktop, Downloads, Music, Pictures, Videos folder are located in your account’s %UserProfile% location – for example in the C:\Users\Chidum.Osobalu folder. In this post, we will show you how to change or restore the default icons for any of the aforementioned personal folders in Windows 11/10.
You can change or restore the Folder default icon in Windows 11/10 using any of the following methods:
- Change Folder default icon in Properties
- Change Folder default icon in desktop.ini file
- Restore Folder default icon in Properties
- Restore Folder default icon in desktop.ini file
In this post, we will be putting the focus on the Documents folder. But the procedure applies to any other personal folder.
Now, let’s take a look at the description of the process involved in changing or restoring Folder default icon, as it concerns each of the methods.
1] Change Documents Folder default icon in Properties
To change the Documents folder default icon, do the following:
- Press Windows key + E to open File Explorer.
- Open your Documents folder’s current location (in this case C:\Users\Chidum.Osobalu) in File Explorer.
- Next, right-click the Documents folder, and click Properties.
- Click the Customize tab.
- Click the Change Icon button.
- Click the Browse button.
- Navigate to and select the icon library .dll or .ico file you want to use.
The %SystemRoot\System32\shell32.dll and %SystemRoot\System32\imageres.dll files contain most of Windows default icons.
- Click Open.
- Select the icon you want to use
- Click OK.
- Click OK to apply changes.
2] Change Documents Folder default icon in desktop.ini file
To change the Documents Folder default icon in desktop.ini, do the following:
- Press Windows key + R to invoke the Run dialog.
- In the Run dialog box, copy and paste the environment variable below and hit Enter.
%UserProfile%\Documents\desktop.ini
If you changed the default location of your Documents folder, then you will need to substitute %UserProfile%\Documents in the path above with the actual full path of your Documents folder’s current location instead.
- In the text file that opens up, on the IconResource= line in the desktop.ini window, change the full path to the full path of the icon you want to use.
If you do not have the IconResource=<icon path> line, then you will need to add it.
- Next, press CTRL + S to save changes.
- Exit the text file.
- Restart the explorer process or sign out from your profile current session and sign back in to apply.
3] Restore Documents Folder default icon in Properties
To restore the Documents Folder default icon in Properties, do the following:
- Open File Explorer.
- Open your Documents folder’s current location (in this case C:\Users\Chidum.Osobalu) in File Explorer.
- Next, right-click the Documents folder, and click Properties.
- Click the Customize tab.
- Click the Change Icon button.
- Click the Restore Defaults button.
4] Restore Documents Folder default icon in desktop.ini file
To restore Documents Folder default icon in desktop.ini file, delete the line starting with IconResource =… Or just delete the file itself. Or do the following:
- Invoke the Run dialog.
- In the Run dialog box, copy and paste the environment variable below and hit Enter.
%UserProfile%\Documents\desktop.ini
- In the text file that opens up, on the IconResource= line in the desktop.ini window, change the full path to the following:
%SystemRoot%\system32\imageres.dll,-112
- The above path tells Windows to use the icon identified by the index -112 (typically the folder icon) from the imageres.dll file. The imageres.dll file is a dynamic link library (DLL) in the System32 directory that contains many of the default system icons used by Windows. This file stores a large collection of icons that Windows and applications can reference.
- Next, press CTRL + S to save changes.
- Exit the text file.
- Restart the explorer process or sign out from your profile current session and sign back in to apply.
TIP: These free software to change Folder icon color in Windows are sure to interest you.
That’s it!
How to restore default folder icon?
If you changed the icon through Folder Properties, right-click the folder, select ‘Properties’, go to the ‘Customize’ tab, and click ‘Restore Default’ under the Folder icons section. If you changed the icon using the desktop.ini file, navigate to the folder and delete or rename the desktop.ini file to remove custom icon settings. After making the changes, delete the IconCache.db file in the C:\Users\<YourUsername>\AppData\Local folder to clear the icon cache and then restart your computer. This will refresh your system’s icon settings and restore the default folder icons.
How do I permanently change the icon of an EXE file?
You may use Resource Hacker to permanently change the icon of an executable file. It is a free software that allows editing or replacing existing resources within executables on a Windows 11/10 PC. Launch Resource Hacker, load the executable and expand ‘Icon Group’ in the left panel. This will display all the icons embedded in the file. To replace an icon, right-click on the icon group and select ‘Replace Resource’. Next, browse and select a new ‘.ico’ file from your system and click Replace. Save the modified file via File > Save As to apply the custom icon system-wide.
Read Next: How to Resize Desktop icons or Change Explorer View type quickly.
Obinna has completed B.Tech in Information & Communication Technology. He has worked as a System Support Engineer, primarily on User Endpoint Administration, as well as a Technical Analyst, primarily on Server/System Administration. He also has experience as a Network and Communications Officer. He has been a Windows Insider MVP (2020) and currently owns and runs a Computer Clinic.
Reader Interactions
Do you not like the default icon used for a specific folder in Windows 10/11? Want to change the folder icon to your favorite photo or icon? This guide will show you how to change the folder icon in Windows 10/11.
Change the folder icon for a specific folder in Windows 10/11
Step 1: In the File Explorer, right-click the folder you want to customize by setting a different icon and then click the Properties option.
NOTE: You cannot change the icon of multiple folders at once. So, please select only one folder at a time.
Tip: After selecting a folder, you can open the properties dialog with Alt + Enter hotkey.
Step 2: In the Properties dialog, click on the Customize tab.
Step 3: Under the Customize tab, click on the Change icon button.
Step 4: In the File name field, type %SystemRoot%\System32\SHELL32.dll (if not available by default) and click the Open button to see system icons. You can select one of the many icons available here.
However, if you wish to use a custom icon, click the Browse button to navigate to the icon you want to use as the folder icon.
Note that you cannot set a picture file as a folder icon by default, as standard picture file types such as PNG and JPEG are not allowed. The folder icon must be in .ico format. So, if you like to set a photo as a folder icon, please use one of the many online picture to icon converts and then repeat these steps.
Step 5: Select the icon file and then click the Open button.
Step 6: Finally, click on the Apply button to set the selected icon as your folder icon.
The new folder icon should appear immediately. If not, you can restart Windows 10/11 or refresh the icon cache to see the new folder icon.
Change the folder icon & color for all folders in Windows 10/11
Although Windows 10 and 11 support changing the icon of a specific folder, they do not allow changing the folder icon of all folders at once. If you are not happy with the default folder icons, you can consider using third-party programs to change the default folder icon as well as the color.
Folder Painter and Folder Marker are two of the free software available to change the folder icon and color. Refer to our four free folder color-changing tools guide to learn more about these third-party programs.
John | 30 Sep 2022
When you install an application on your Windows PC, its shortcut in form of an icon is created on the desktop and added to the start menu.
An icon is a small pictorial representation of a program, feature, or file usually displayed on a computer screen to help users to navigate easily through the computer system and in various applications.
Clicking on an icon launches the application or opens the file, or feature associated with it.
If you are so much into personalization and customization, you may want to change the application icons to more visually appealing ones.
In this article, I will show you how to change the default icons for various applications and folders on your Windows PC and replace them with custom icons.
How to change the application icons on Windows
There are two ways in which you can change the applications icons on Windows:
- Replacing with available built-in options
- Replacing with custom external icon file
The process is the same for the two methods but only differs at the point of new icon selection.
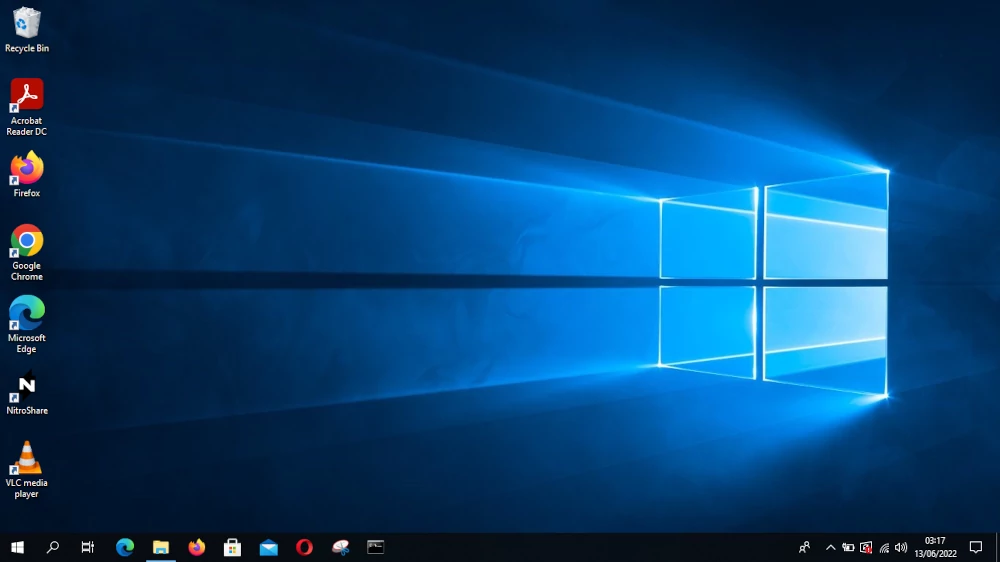
Below is the Windows 10 desktop screen with some application shortcut icons. Using the first method, we will change the icon for Google Chrome, and using the second method we will change the icon for Mozilla Firefox.
Replacing default icon with available built-in options
Follow the steps below:
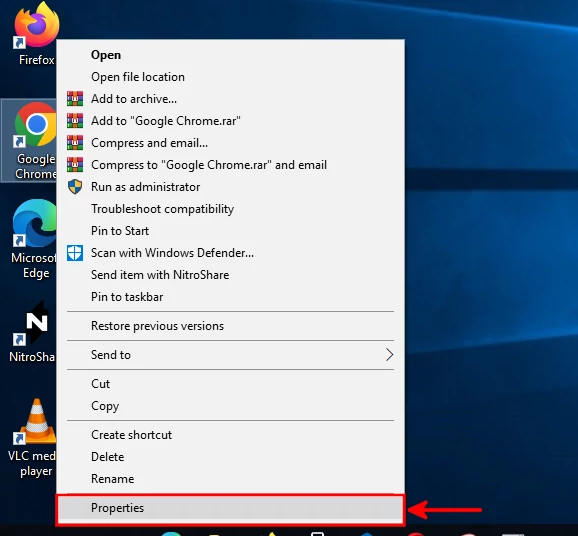
Step 1: Right-click on the application icon that you want to change. Then click on the Properties option of the context menu.
Step 2: A small window will open. Navigate to the Shortcut tab and then click on the Change Icon button.
Step 3: Another small window will open with a list of available icons to choose from. Click on your preferred icon to select it and then click on the OK button.
Step 4: The small window will close and now you will be able to see the selected icon displayed next to the application name at the top of the Shortcut tab of the application’s properties window. Click on the Apply button to apply the changes.
Step 5: A small popup window will appear prompting you to provide administrator permission to change the settings. Just click on the Continue button to proceed.
Step 6: Click on the OK button to exit the properties window.
Now the old app (Google Chrome) icon has been replaced with the one we just selected from the options. It’s that easy.
Replacing an app icon with a custom external icon file
In most cases for most of the applications, you won’t find an appealing icon to choose from in the available options. In such a case, you will need to use a custom icon file, which you will browse from your computer storage.
Follow the steps below:
Step 1: Prepare the icon file that you will use in replacing the default one.
You can make this file yourself using tools such as Photoshop, GIMP, etc (if you are a designer). Alternatively, you can download it from the web. A simple Google search is guaranteed to give you many desirable custom icons to choose from.
Below is a list of a few websites on which you can get good icons for free.
- FLaticon
- Vecteezy
- Icons8
Just search the app name on these sites or browse through categories. It’s advisable to download the icon in PNG format.
Microsoft Windows works with «.ico» files for icons, so you will need to convert the icon to ICO format.
You can convert the icon file format easily by opening it in design tools such as Photoshop or GIMP and exporting it with a «.ico» extension. Alternatively, there are free online tools that allow you to do file conversion.
A good example of an online tool to use is ConvertICO. It allows you to upload PNG image files and download converted ICO files in a matter of seconds. You just drag and drop your files or click inside the box to select the file(s) from your device storage and then click on the download (arrow) buttons on the right side of each of the converted files.
Save the ICO icon file(s) into a folder that you will keep permanent in your computer storage.
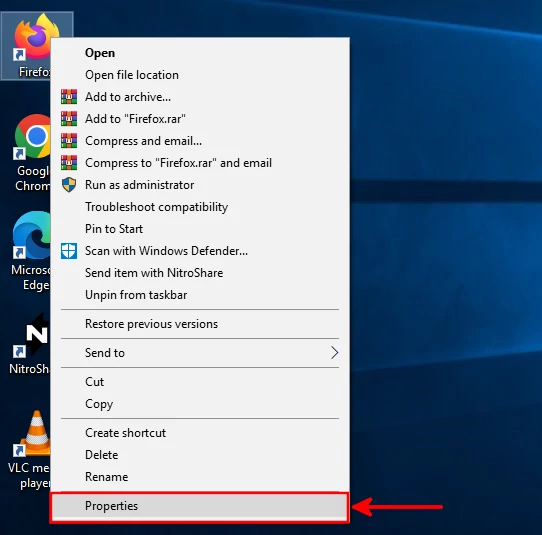
Step 2: Right-click on a desktop icon that you want to replace and then click on the Properties option of the context menu.
Step 3: In the application properties window that opens, navigate to the Shortcut tab. Then click on the Change Icon button.
Step 4: A small window will open with some icons to choose from and also the option to browse for an icon file from your computer storage. Click on the Browse button.
Step 5: A dialog box will open to allow you to select the icon file. Browse through your computer storage to the folder in which you have saved the icon that you want to replace the current with. Click on the icon file to select it. Its name will appear at the «File name» input box at the bottom once selected. Click on the Open button to proceed.
Step 6: The selected icon will be previewed, click on the OK button to confirm the selection.
Step 7: The new icon will be displayed at the top of the tab next to the application’s name. Click on the Apply button.
Step 8: Click on the Continue button if you get prompted to provide administrator permission.
Step 9: At this point, the icon will be updated on the desktop shortcut. Click on the OK button to exit the window.
Now you will be able to see that the custom icon that you just set has replaced the default app icon.
You can change it to any other icon file or reverse it to the default one. All you need to do is repeat the same process.
How to change folder icons on Windows
In addition to changing the icons for applications on your Windows PC, you can also customize your folders in Windows File Explorer to have new, personalized, and more visually appealing icons.
There are basically no better-looking built-in folder icons than the default one in Windows. Therefore, we will only cover how to use external custom icons.
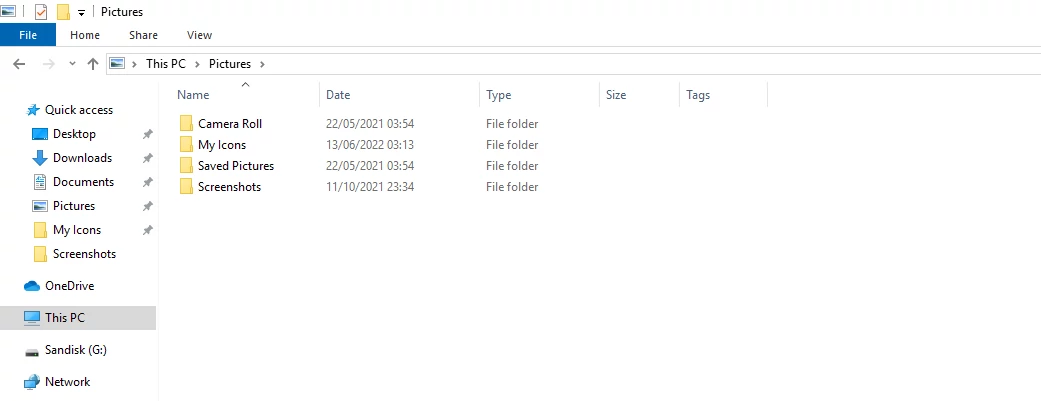
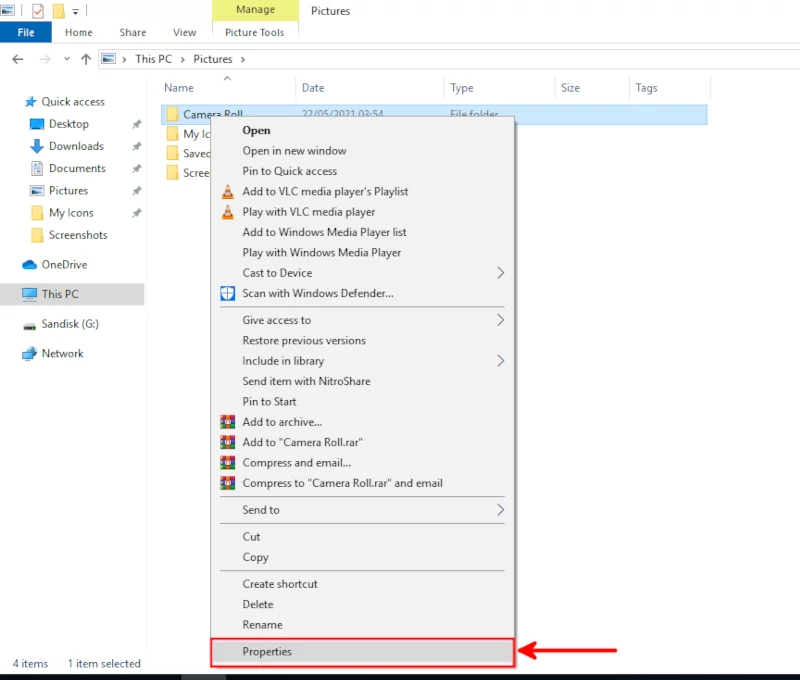
We have these four folders located in the File Explorer «Pictures» folder, which we will be replacing their icons in this guide.
Follow the steps below to replace the default folder icon with a custom one in windows:
Step 1: Prepare the ICO file to use as the folder icon. In the same way, as described above on replacing an app icon with a custom icon file, you can download a cool folder icon from the web or make one yourself. Remember to have it as a «.ico» file and save it somewhere it will remain permanent on your computer’s storage.
Step 2: Open the Windows File Explorer and navigate to the location where the folder whose icon you want to change is located. Right-click on the folder and open its Properties from the context menu.
Step 3: The folder’s properties window will open. Open the Customize tab and then click on the Change Icon button.
Step 4: A small window will open with tons of icons to choose from. Click on the Browse button.
Step 5: A dialog box will open to allow you to select an icon file from your PC storage. Browse through your computer to the folder where the icon is stored. Click on the icon to select it, then click on the Open button.
Step 6: Your selected icon will be previewed. Click on the OK button.
Step 7: Click on the Apply and then on the OK buttons.
Your cool custom folder icon will now replace the default one. To change or replace this icon with a different or the default one, repeat the same process. I used the same process to change the icons for the other 3 folders as shown in the image below.
Conclusion
Icons are very crucial in computing. They help the computer user to easily recognize applications and to also to navigate through the computer system.
Out of curiosity or love of customizations, you may want to change the default application icons on your computer and replace them with custom icons or from other built-in icons.
In this article, we have covered in detail how to change the default applications and folders icons either with other built-in icons or with custom external icon files.
It’s my hope that you found this article useful and have the answer you were looking for.