
Если встроенный антивирус Windows 11 не дает запускать какие-то из ваших программ или игр, при этом вы уверены в необходимости их запуска, не обязательно полностью отключать защиту, достаточно добавить соответствующие файлы или папки в исключения.
В этой пошаговой инструкции подробно о том, как в Windows 11 добавить исключения в Защитник Windows 11 или Microsoft Defender (ранее — Windows Defender).
Добавление исключений Защитника Windows 11 в параметрах безопасности Windows
Для того, чтобы добавить исключения в Microsoft Defender в Windows 11, используйте следующие шаги:
- Перейдите в окно «Безопасность Windows». Для этого можно использовать значок защитника в области уведомлений или перейти в Параметры — Конфиденциальность и защита — Безопасность Windows — Открыть службу «Безопасность Windows».
- Перейдите в раздел «Защита от вирусов и угроз», а затем в разделе «Параметры защиты от вирусов и других угроз» нажмите «Управление настройками».

- Пролистайте содержимое окна вниз и нажмите «Добавление или удаление исключений».
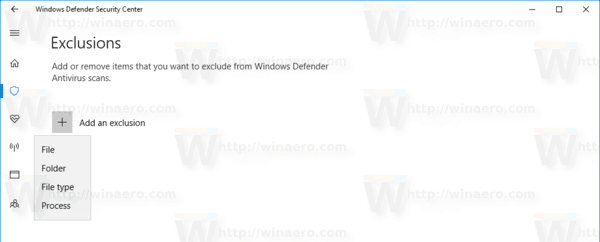
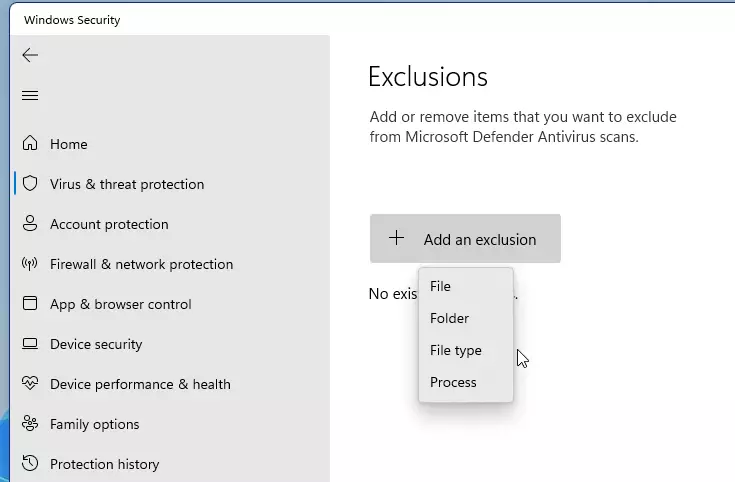
- Нажмите кнопку «Добавить исключение» и выберите один из вариантов — «Файл», «Папка», «Тип файла» или «Процесс». Как правило, для игр и программ (если их блокирует Защитник Windows) имеет смысл добавлять в исключения папку с программой.

- Укажите путь к элементу, который нужно добавить в исключения.


На этом всё: выбранный элемент отобразится в списке исключений, Windows Defender не будет блокировать его выполнение.
В дальнейшем, если вы захотите убрать программу, игру или другой элемент из списка исключений, перейдите в тот же раздел параметров безопасности Windows, нажмите по ранее добавленному в исключения элементу и используйте кнопку «Удалить».
Как добавить исключения Microsoft Defender в Windows PowerShell (Терминале Windows)
При необходимости вы можете использовать команды PowerShell для добавления исключений Защитника Windows:
- Запустите Терминал Windows 11 от имени администратора: нажмите правой кнопкой мыши по кнопке Пуск и выберите соответствующий пункт контекстного меню.
- Используйте команды Add-MpPreference для добавления исключений.
- Обычно достаточно добавить в исключения папку, команда будет следующей:
Add-MpPreference -ExclusionPath "путь_к_папке"

- Элемент будет добавлен в исключения, причем если вы зайдете в параметры исключений в окне «Безопасность Windows», там он также будет отображаться.

Другие доступные параметры для команды Add-MpPreference можно найти в справке на сайте Майкрософт. На близкую тему может быть полезным: Где находится карантин Microsoft Defender и как восстановить файлы из него.
In Windows 10 Creators Update, there is a new app called Windows Defender Security Center. The app, formerly known as «Windows Defender Dashboard», has been created to help the user control his security and privacy settings in a clear and useful way. It combines all essential security features under a single dashboard. It can be used to add an exception to Windows Defender Virus Protection. Here is how.

Before you proceed, here is what you need to know. Don’t confused Windows Defender with Windows Defender Security Center. Windows Defender is the built-in anti-virus software which provides real-time protection against threats. The Windows Defender Security Center app is just a dashboard which allows you to track your protection state. It can be used to configure various security options like SmartScreen. It shows an icon in the system tray.
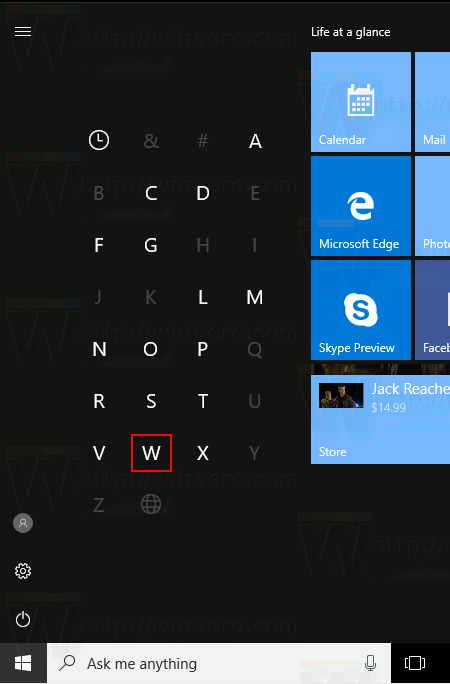
You can launch Windows Defender Security Center from the Start menu. Navigate to the letter «W» using the alphabet navigation feature of the new Start menu and click the «W» letter in the grid as shown below.
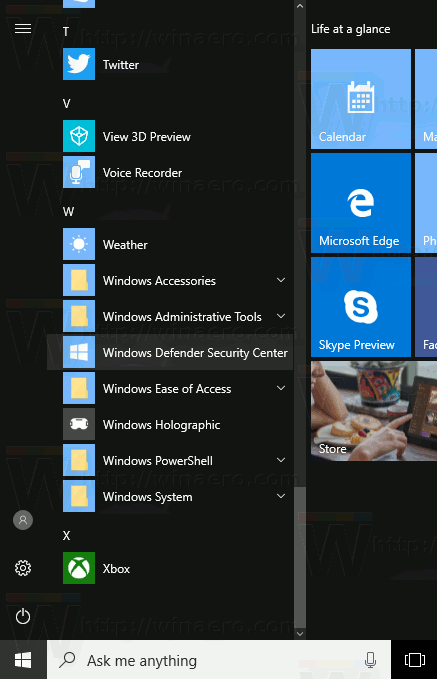
There, you’ll find the shortcut to the new Security Center app.
The app unifies many useful security options you might want to track and control. The user interface of the Windows Defender Security Center app comes with a toolbar on the left and the main area which occupies the rest of the window area.
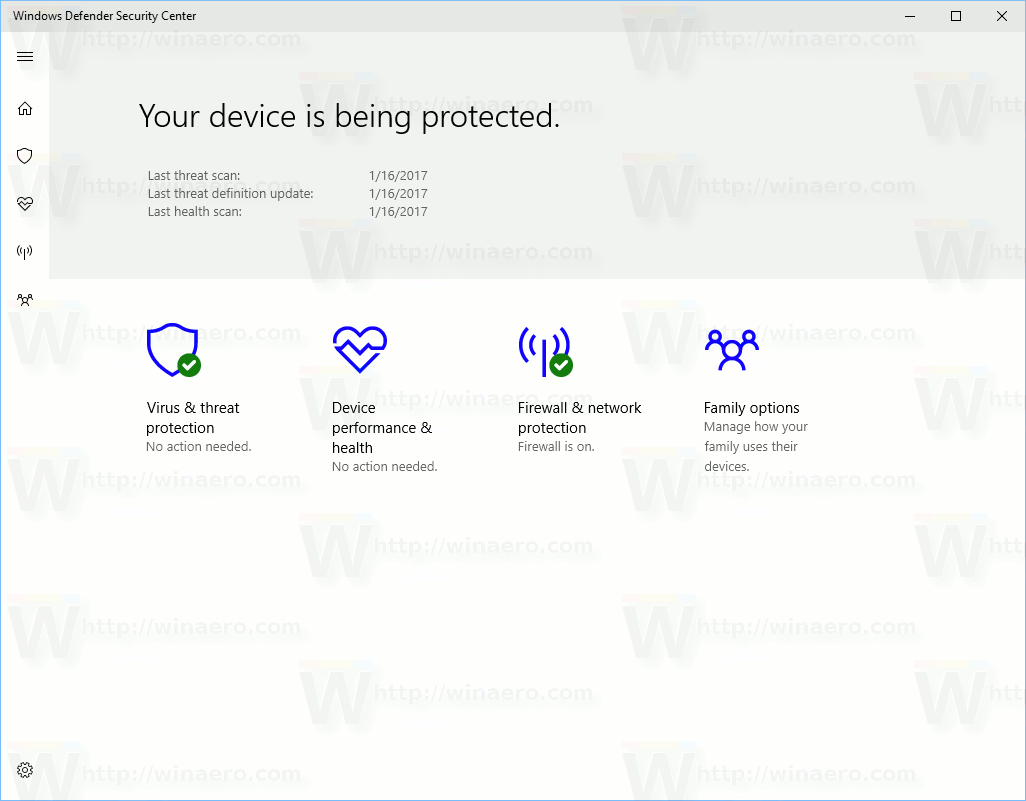
Once you open the app, it shows a special start page. The start page comes with the following sections:
- Virus & threat protection
- Device performance & health
- Firewall & network protection
- Family options
Each section has its own icon. A special check mark indicates that a section has no issues.
Virus & threat protection is what we are looking for. Before proceeding, ensure that your user account has administrative privileges. Now, follow the instructions below.
To add an exception to Windows Defender in Windows 10, do the following.
- Open Windows Defender Security Center as described above.
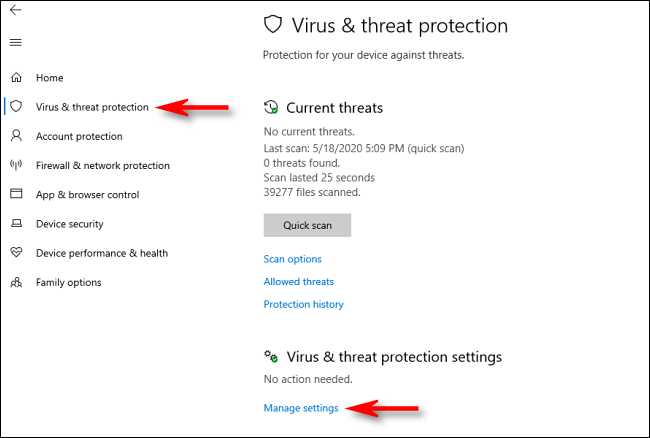
- Click on the Virus & threat protection icon.
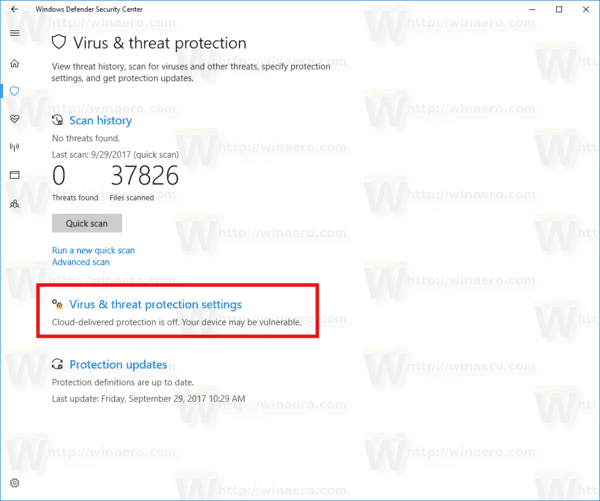
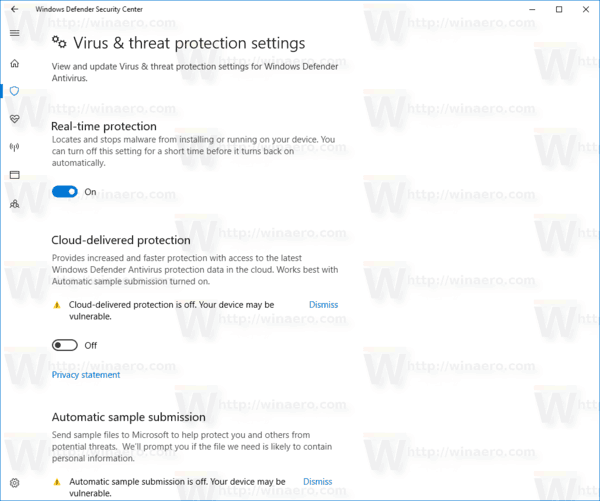
- Click on the link Virus & threat protection settings.

This will open the following page:
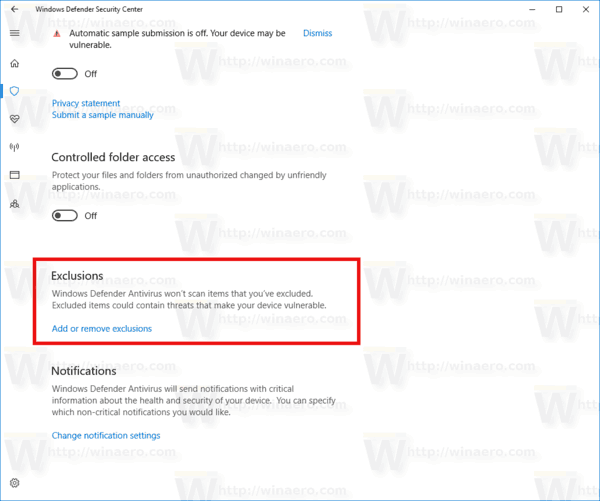
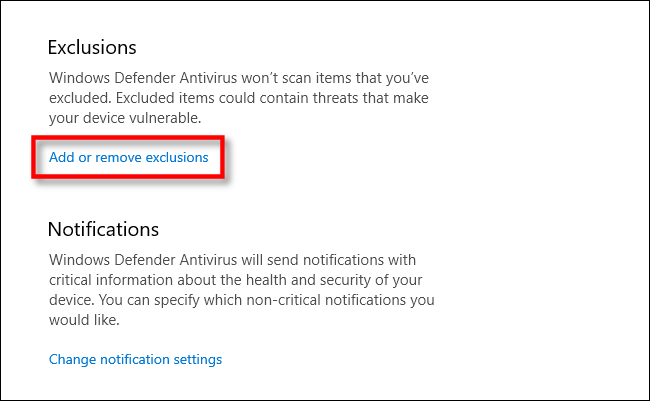
- Scroll down to Exclusions and click on the link Add or remove exclusions.
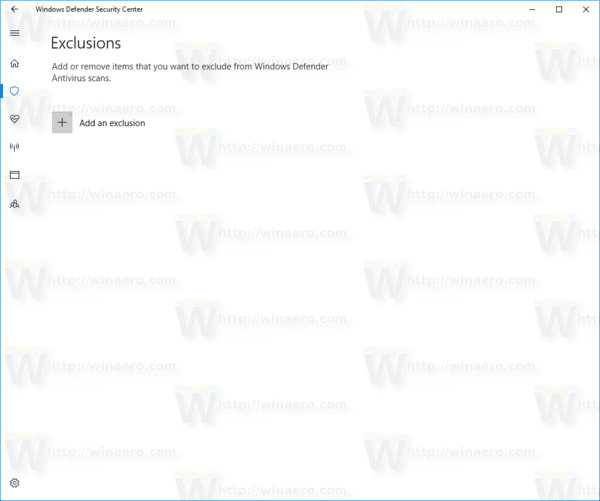
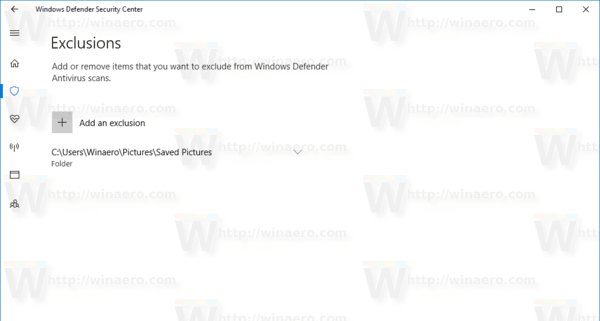
- The following page will open:
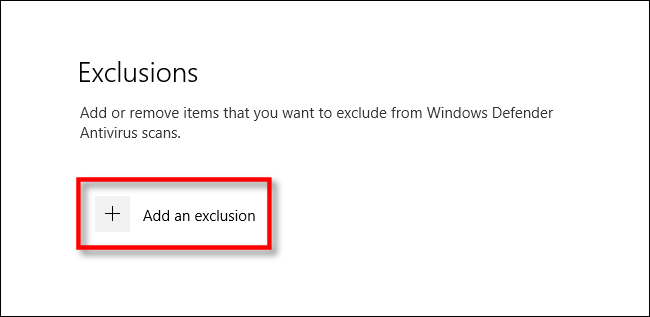
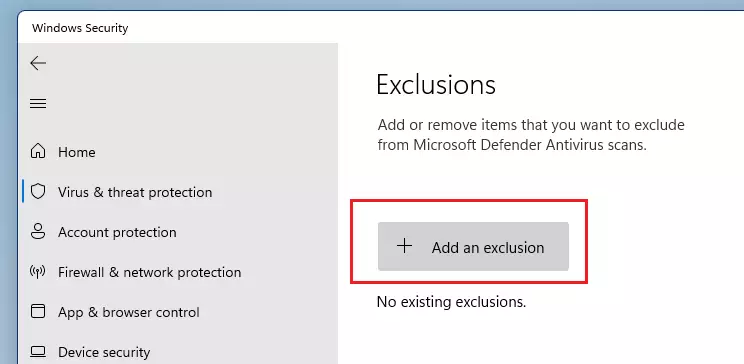
Here, click on the button Add an exclusion.

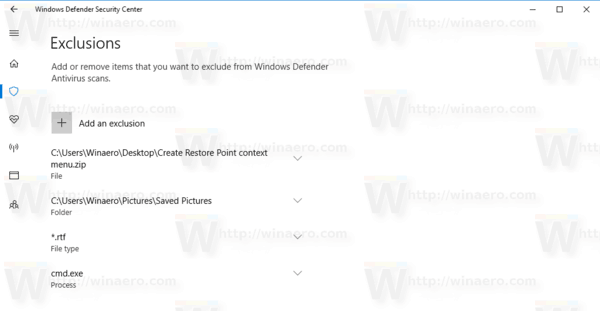
In the drop down menu select one of the following options:
- File
	- Folder
	- File type
	- Process
- Specify the desired object to exclude, e.g. a folder and you are done.

Here is something you need to know.
File — this option removes a specific file from being scanned by Windows Defender.
Folder — this option removes a specific folder from being scanned by Windows Defender. All its contents will be excluded recursively.
File type — here you can add a file extension (e.g. *.txt) as an exclusion.
Process — this option can be used to add a process as an exclusion, so any file used by this process won’t be scanned by Windows Defender.
See the following screenshot:
That’s it.
Support us
Winaero greatly relies on your support. You can help the site keep bringing you interesting and useful content and software by using these options:
If you like this article, please share it using the buttons below. It won’t take a lot from you, but it will help us grow. Thanks for your support!
Sign in to your How-To Geek account
Windows Defender, integrated into Windows 10, runs in the background and scans your files for malware. To improve performance for tasks like compiling code or running virtual machines, you can add an exclusion and Windows Defender will never scan those files.
Exclusions can also help if you’re running into false positives where Windows Defender marks legitimate files as malware.
Warning: Be careful about what you exclude. Windows Defender won’t scan your excluded files and directories for malware. You wouldn’t want to exclude everything in your Downloads folder, for example!
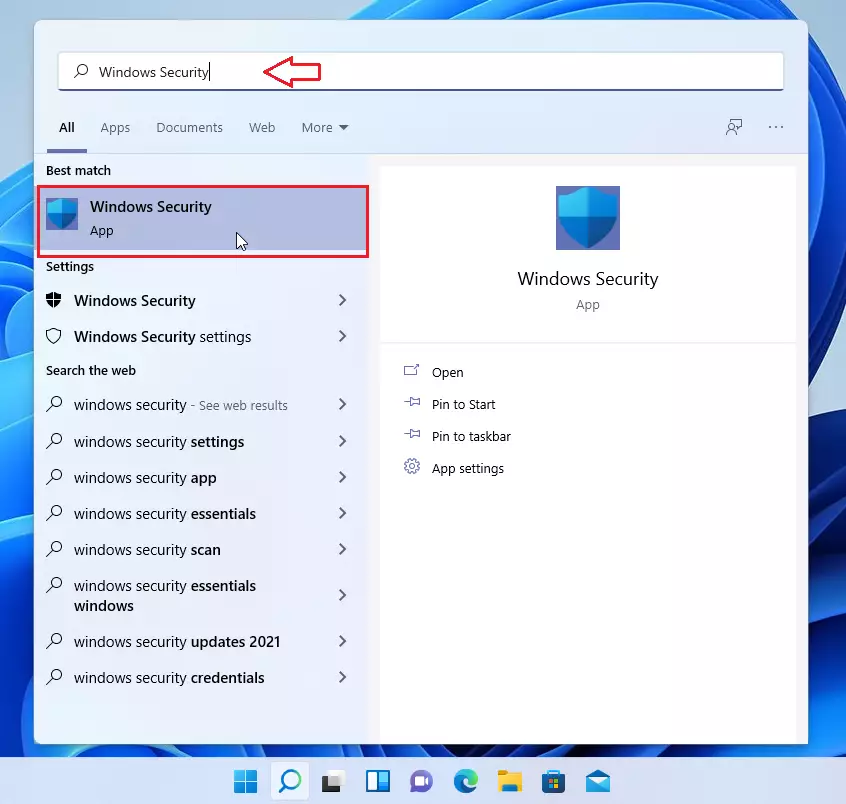
First, we need to launch Windows Security to change some settings. Open the Start menu and type «Windows Security.» Then, select the «Windows Security» app.

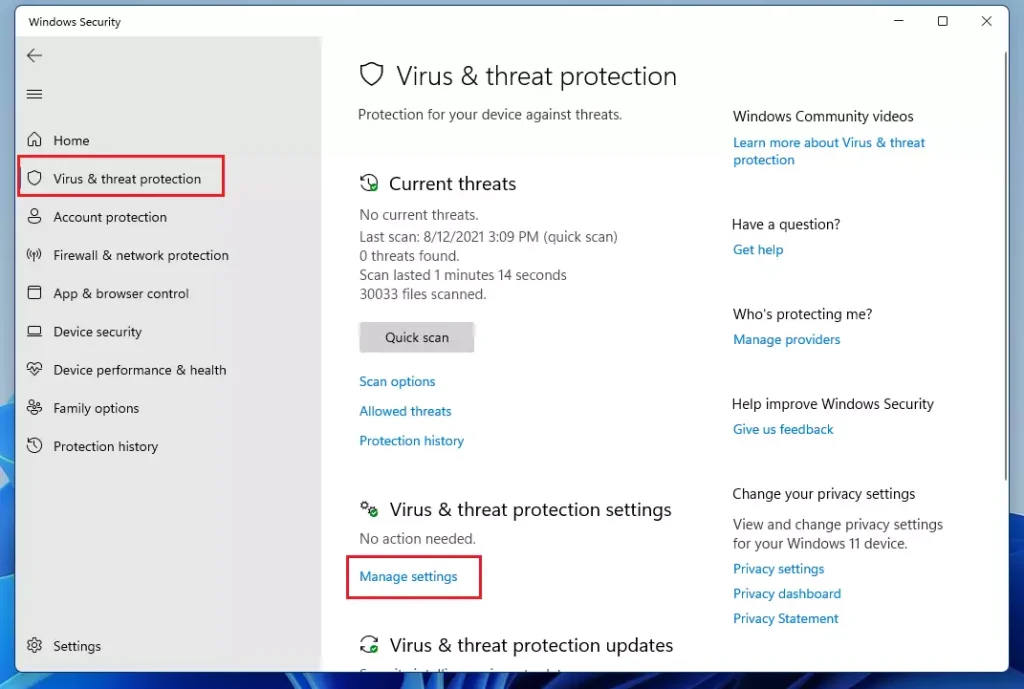
In Windows Security, navigate to «Virus & Threat Protection.» Then, click «Manage Settings.»
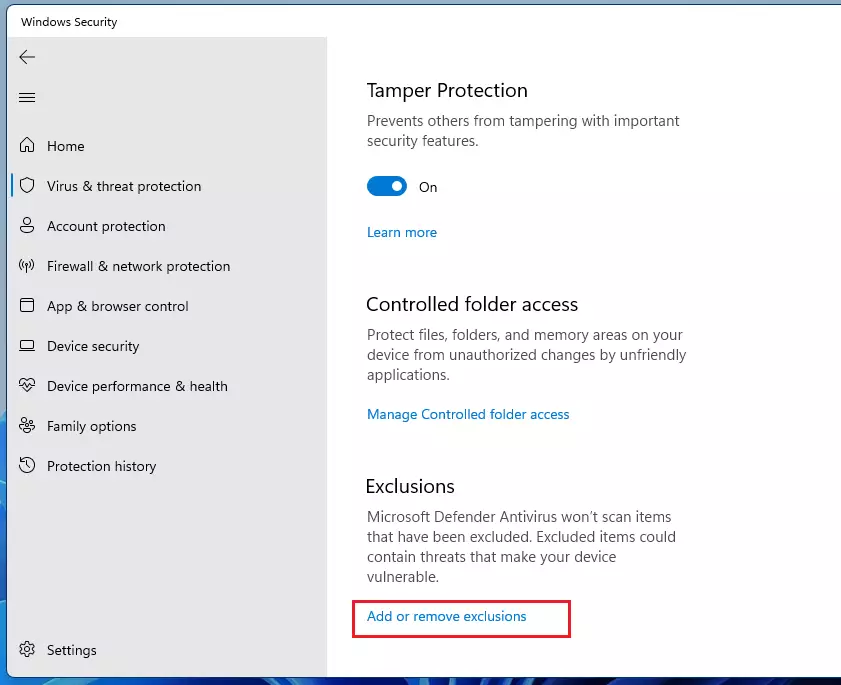
In «Virus & Threat Protection Settings,» scroll down to the very bottom of the page, and click «Add or Remove Exclusions.»
On the Exclusions page, you can add or remove files that you want to exclude from Windows Defender scans. To add an exclusion, click the «Add An Exclusion» button beside the large plus symbol (+).
A small menu will pop up allowing you to define your exclusion by File, Folder, File type, or Process.

What you choose depends on what type of exclusion you are trying to make. Here’s what each choice does.
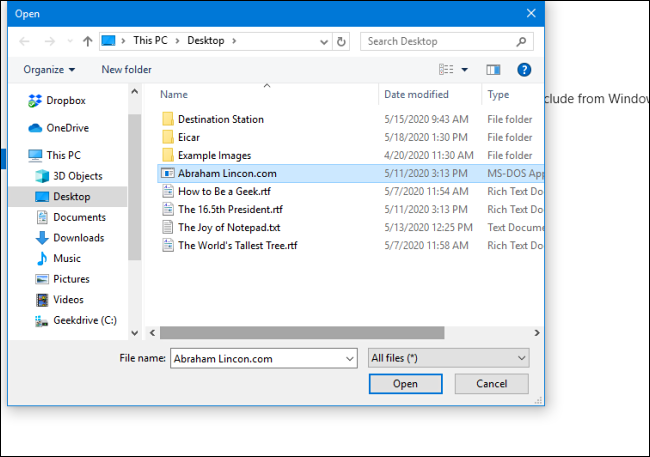
- File: If you select this, a box will pop up allowing you to browse your computer to select a single file that will be excluded from future scans. Select the file you’d like, then click «Open.»
- Folder: Like the File option, this will let your browse your computer for a specific folder to exclude from scans. The folder’s contents and subfolders will be excluded as well.
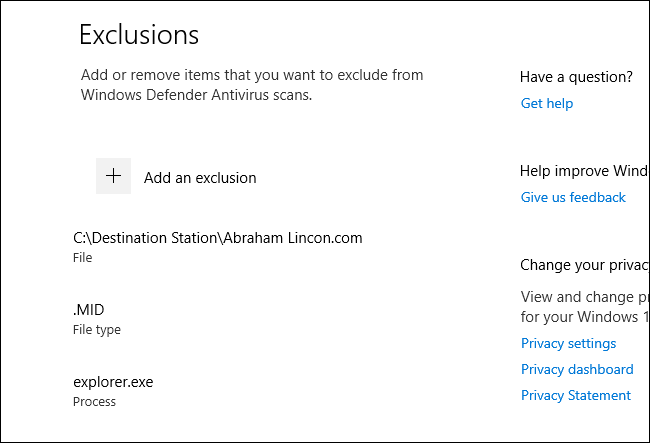
- File type: A box will pop up asking you to enter a file extension (e.g., «.MID») representing the file type that you’d like to exclude. All files of that type will be excluded from future scans. This one is dangerous because you might accidentally exclude a large class of potentially hazardous files, such as PDF or DOC files.
- Process: A pop-up will ask you to enter the name of a process (a running program, i.e., «explorer.exe») to exclude from scans. If a certain program you know is safe keeps getting flagged by Defender, you can enter it here.
Select one of these options and make the necessary selections in the pop-up dialog that follows.
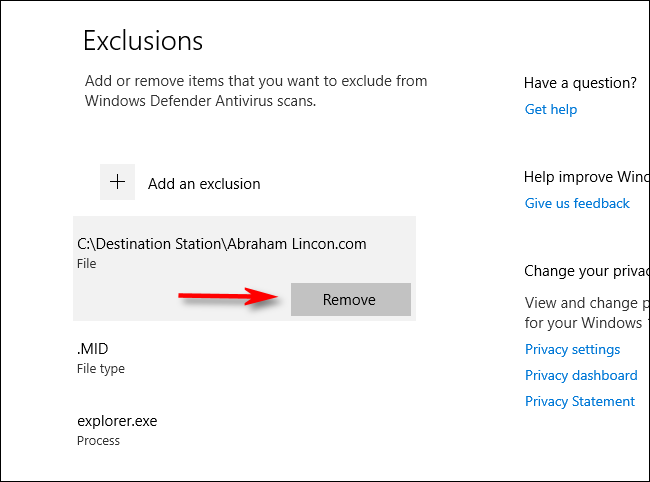
Once you add an exclusion, it will show up in a list on the Exclusions page.
If you’d like to remove an exclusion you’ve already defined, hover your mouse cursor over the item until the downward-pointing carat arrow appears, then click the «Remove» button that pops up.
When you’re all done, close Windows Security and your settings will be saved. The next time your system does a Defender scan, the items you added to the exclusions list will no longer cause trouble.
This post shows steps for students and new users to add an exclusion to Microsoft Defender on Windows 11.
Microsoft Defender (formally Windows Defender) will scan your computer files for viruses and malware. If you’re performing certain tasks or running virtual machines, you may want to exclude certain files and folder areas so that Microsoft Defender does not scan these.
Exclusions may help improve system’s performance; however, be cautious with this feature, as Microsoft Defender won’t scan your excluded files and directories for malware. If these excluded directories are compromised, there won’t be any detection, and your computer might be vulnerable to threats.
On the other hand, you wouldn’t want to scan all files and directories. Microsoft Defender has built-in exclusions to improve the system’s performance. If Microsoft Defender impacts certain tasks or application scans, you can do the same.
To add exclusions to Microsoft Defender, follow the steps below.
How to add exclusions to Microsoft Defender on Windows 11
As mentioned above, one can add exclusions to Microsoft Defender when scans impact the system’s performance. Microsoft Defender has built-in exclusions, but you can add more.
To do that, open the Windows Security app. Click the Start button and, search for Windows Security, under Best match, select Open.
In the Windows Security dashboard, navigate to Virus & Threat Protection. Then, select Manage Settings under Virus & threat protection settings as highlighted below.
Next, scroll down to the very bottom of the page and click Add or Remove Exclusions to begin adding or removing items on the exclusion list.
On the Exclusions page, you can add or remove files that you want to exclude from Microsoft Defender scans. Click the Add An Exclusion button with a plus sign to add an exclusion.
Choose the type of exclusions you want to add:
- File: Choose a file to select a single file that will be excluded from future scans. You’ll browse and select the file you’d like to exclude.
- Folder: Choose a folder to exclude an entire folder from scans. The folder’s contents and subfolders will be excluded as well.
- File type: Choose file type to enter a file extension (e.g., “.TXT”) representing the file type that you’d like to exclude. All files of that type will be excluded from future scans.
- Process: Choose process and enter the name of a process (a running program, i.e., “explorer.exe”) to exclude from scans.
When you’re done, close Windows Security, and your settings will be saved.
That should do it!
Conclusion:
Adding exclusions to Microsoft Defender can significantly enhance your system’s performance during specific tasks or applications. However, it’s essential to exercise caution when utilizing this feature, as excluded files and folders will not be scanned for malware. To summarize:
- Exclusions can improve system performance by reducing scan times.
- Always be cautious about what you exclude, as it may expose your computer to vulnerabilities.
- You can easily manage exclusions through the Windows Security app.
- Regularly review and update your exclusions as needed to ensure ongoing protection.
- Efficient use of exclusions allows uninterrupted tasks while maintaining a degree of security.
Иногда, хоть и достаточно редко, «Защитник Windows 10» неправильно оценивает файлы или целые папки, определяя их как небезопасные с последующим удалением. Для пользователей, которые активно качают различные файлы из сети, это настоящая проблема, которую на самом деле очень легко можно решить — всё необходимое уже есть в системе.
Как добавить файл или папку в исключения Защитника Windows 10
Хотя Windows 10 трудно назвать понятной и интуитивной, особенно когда речь заходит о поиске каких-то не очень популярных функций, некая логика в системе всё же наблюдается.
Список действий:
- откройте меню «Параметры» через «Пуск» или нажатием комбинации Win+I;
- перейдите во вкладку «Обновления и безопасность»;
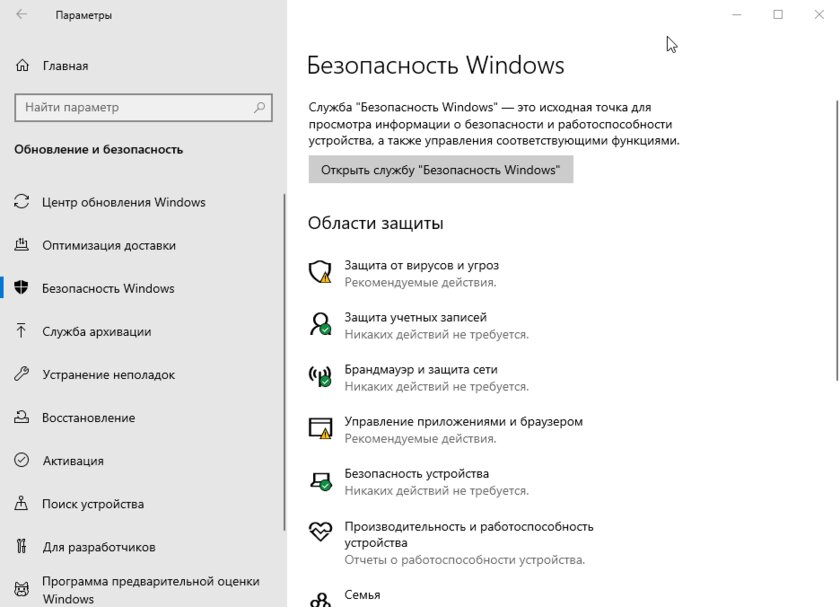
- слева в меню выберите пункт «Безопасность Windows», в открывшейся вкладке кликните по кнопке «Открыть службу Безопасность Windows»;

- кликните по пункту «Защита от вирусов и угроз», пролистайте вниз и выберите пункт «Управление настройками»;
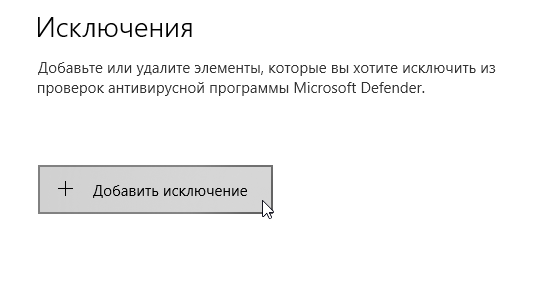
- в подменю «Исключения» нажмите на «Добавление или удаление исключений»;

- кликните по кнопке «Добавить исключения» и выберите файл или папку, которые нужно защитить от удаления.


Теперь данный контент не будет затронут «Защитником», пока вы не удалите правило в исключениях.