
Rick Akura
In this guide, you will learn how to fix common host process task errors on Windows 10 using 5 different methods. Let’s get started.
Tasks on Windows 10 can take up a huge amount of memory or CPU usage. They may also cause error pop-ups, and make it hard to use your device. A task that users have problems with particular is “Host Process for Windows Tasks” which appears in your Task Manager.

Many users report that the taskhost.exe process (which also appears as “Host Process for Windows Tasks”) uses high CPU or disk, or comes up with an error such as “Host Process for Windows Tasks has stopped working.” This is bad, as the process is a core part of Windows 10 and should be working precisely at all times.
In this article, you can learn more about these errors, and find solutions to fix them entirely. Simply scroll down to the desired section and take in the information.
How to fix the “Host Process for Windows Tasks has stopped working” error
One of the most common errors related to this process is a message stating that the Host Process for Windows Tasks has stopped working. This leaves a lot of confusion left behind. You won’t immediately know what happened to the process, or what it means for it to stop working.

As the Host Process for Windows Tasks is a crucial process for your system, leaving it to crash is a big mistake. Below are several methods to fix this error and ensure that the process continues to work in the future without crashing.
Method 1: Repair corrupted BITS files

- Press the Windows + R keys on your keyboard. This is going to bring up the Run utility.
- Type in the following line and hit Enter: Programdata\Microsoft\network\downloader
- If prompted, click the “Continue” button to grant permissions for accessing the folder.
- You should see the File Explorer open up with the “Downloader” folder displayed. Here, delete every file that begins with “qmgr” such as qmgr0.dat, qmgr1.dat, etc.
- After deleting these files, update your system from Settings → Update & Security → Windows Update. This should replace the corrupted BITS.
Method 2: Run the System File Checker

- Press the Windows + R keys on your keyboard. This is going to bring up the Run utility.
- Type in “cmd” and press the Ctrl + Shift + Enter keys on your keyboard. Doing so, you’re launching the Command Prompt with administrative permissions.
- If prompted, click Yes to allow the Command Prompt to make changes on your device.
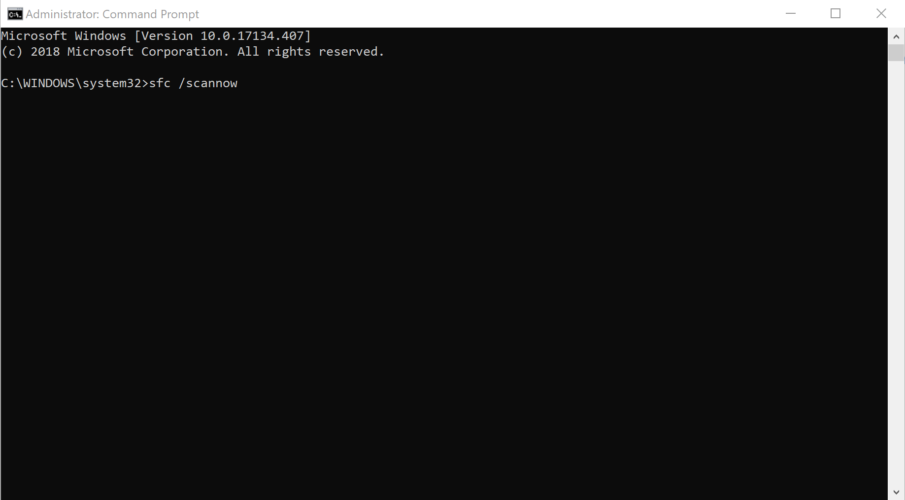
- Once in the Command Prompt, type in the following command and press Enter to execute it: sfc /scannow
- Wait for the SFC scan to finish scanning your computer and repairing corrupt files. This may take a long time; ensure that you don’t close the Command Prompt or shut your computer down.
- Restart your device after the scan is complete.
Method 3: Run the DISM command

- Press the Windows + R keys on your keyboard. This is going to bring up the Run utility.
- Type in “cmd” and press the Ctrl + Shift + Enter keys on your keyboard. Doing so, you’re launching the Command Prompt with administrative permissions.
- If prompted, click Yes to allow the Command Prompt to make changes on your device.
- Once in the Command Prompt, type in the following two commands and press Enter after reach one to execute it: Dism /Online /Cleanup-Image /StartComponentCleanup, Dism /Online /Cleanup-Image /RestoreHealth
- Wait for the commands to finish running and restart your computer.
Method 4: Run the Windows Memory Diagnostic tool

- Press the Windows + R keys on your keyboard to bring up the Run utility. Here, simply type in “mdsched.exe” and press the OK button.
-
Choose “Restart now and check for problems (recommended)” to instantly being a memory scan. Make sure to save any files and close all open applications before clicking on this option.
Otherwise, choose “Check for problems the next time I start my computer” and restart the device at a more convenient time. - During the next boot, you’ll see the Windows Memory Diagnostic tool check for issues. Make sure to read all the information displayed on the screen and wait for the completion.
- Once the memory test is complete, you’ll be able to see if any issues were identified. If there were none, your memory is luckily working fine.
Method 5: Use CCleaner to clean your system and Registry

- Download CCleaner by clicking here. This is the official website, meaning that all downloads are safe from any malware.
- Click on the setup file you just downloaded to launch the installation wizard. Simply follow the on-screen instructions to install CCleaner onto your device.
- Launch CCleaner using a created shortcut or the search bar.
- First, select “Cleaner” from the left-side panel. Simply click the blue “Run Cleaner” icon to begin the process. Optionally, you can uncheck any options that you don’t want to delete before beginning the cleaning.
- Wait until the cleaning is complete, then switch to the “Registry” tab.
- Click the “Scan for Issues” button and wait for CCleaner to identify any Registry errors. If any issues are found, click on “Fix selected issues…”
- Restart your computer.
How to fix the Host Process for Windows Tasks high CPU, RAM or Disk usage

When in the Task Manager, you may notice that the Host Process for Windows Tasks is using up an unusually high amount of resources. This isn’t normal, however, it can be fixed easily. You won’t have to deal with a slow computer because of this error anymore if you follow our simple guides below to fix it.
Method 1: Run a script in PowerShell
- Right-click on any empty space on your desktop and create a new text document using New → Text document. Name it something like “CPU Fix.txt” without the quotes.
- Open the text file you just created and and paste in the following script:
Get-ScheduledJob | ? Name -eq “Kill SettingSyncHost” | Unregister-ScheduledJob
Register-ScheduledJob -Name “Kill SettingSyncHost” -RunNow -RunEvery “00:05:00” -Credential (Get-Credential) -ScheduledJobOption (New-ScheduledJobOption -StartIfOnBattery -ContinueIfGoingOnBattery) -ScriptBlock {
Get-Process | ?{ $_.Name -eq “SettingSyncHost” -and $_.StartTime -lt ([System.DateTime]::Now).AddMinutes(-5) } | Stop-Process -Force
}
- Save the document using File → Save as… in the header menu.
- Change the file type to “All files.”
- Remove the “.txt” extension in the file name and rename the file to “CPU Fix.ps1” without the quotes.
- Right-click on “CPU Fix.ps1” and choose “Run with PowerShell.”
- If this method worked, you may have to repeat Step 6 every time your computer is restarted to ensure the process doesn’t hog your resources again after a reboot.
Method 2: Scan your computer for malware

Below is a short guide on how to use Malwarebytes for scanning and removing viruses and other types of malware from your device. However, you can use just about any antivirus app — it’s up to your preference.
- Launch your antivirus application. Again, we’re using Malwarebytes to demonstrate this process.
- Click on the “Scan” option using the application’s left-side menu.
- Click the “Start Scan” button to start a malware scan on your device.
- Wait for Malwarebytes to finish scanning your PC for malware. If any malicious files are found, you can immediately neutralize them by allowing Malwarebytes to put them in quarantine.
- Optionally, allow Malwarebytes to delete the malicious files from your PC.
Conclusion
We hope that this article was able to help you fix common issues with the Host Process for Windows Tasks process on Windows 10.
Are you interested in learning more about Windows 10? You can browse our dedicated Help Center section and learn more about how to fix Windows power Shell using high CPU.
If you’re looking for a software company you can trust for its integrity and honest business practices, look no further than SoftwareKeep. We are a Microsoft Certified Partner and a BBB Accredited Business that cares about bringing our customers a reliable, satisfying experience on the software products they need. We will be with you before, during, and after all the sales.
Learn what the Host Process for Windows Tasks is, why it may consume high resources, and how to resolve common issues with this critical Windows component.
Published
3 min read

If you’ve ever opened Task Manager to investigate performance issues on your Windows PC, you may have noticed multiple instances of something called “Host Process for Windows Tasks” or “Service Host” consuming system resources. This article explains what this process is, why it’s important, and how to troubleshoot problems when it stops working or uses excessive CPU, disk, or memory.
What is the Host Process for Windows Tasks?
The Host Process for Windows Tasks, also known as Service Host, is a core Windows component responsible for running multiple system services. It acts as a container for services that are loaded from DLL (Dynamic Link Library) files rather than standalone executable files.
In Windows 11 and 10, this process is named “taskhostw.exe” and is located in the System32 folder. Previously in Windows 7, it was called “taskhost.exe”. Each instance of the Host Process for Windows Tasks that you see in Task Manager represents one or more services running in the background.
Microsoft moved many Windows services to DLL files to improve maintainability and make updates easier. However, DLL files can’t run on their own – they need a host process to execute them. That’s where the Host Process for Windows Tasks comes in.
Why Does It Sometimes Use High Resources?
There are a few reasons why you might see the Host Process for Windows Tasks consuming significant CPU, memory, or disk resources:
- During system startup, it loads and initializes multiple DLL services, which can temporarily spike resource usage.
- Some background services may periodically perform intensive tasks like indexing files or running scheduled maintenance.
- If a particular service has a bug or is malfunctioning, it could cause the host process to use more resources than normal.
In most cases, high resource usage should be temporary. If it persists, you may need to investigate further.
Troubleshooting Host Process for Windows Tasks Issues
If you encounter problems with the Host Process for Windows Tasks stopping or using excessive resources, try these troubleshooting steps:
Step 1: Restart your computer. This simple step can often resolve temporary glitches or hung processes.
Step 2: Check for Windows updates. Microsoft regularly releases patches that can fix bugs related to system processes:
- Open the Start menu and click on Settings.
- Go to Windows Update.
- Click “Check for updates” and install any available updates.
Step 3: Perform a clean boot to identify if third-party software is causing conflicts:
- Press Windows Key + R, type “msconfig” and hit Enter.
- Go to the Services tab and check “Hide all Microsoft services”.
- Click “Disable all”.
- Go to the Startup tab and click “Open Task Manager”.
- Disable all startup items.
- Restart your computer.
If the issue doesn’t occur in a clean boot state, gradually re-enable services and startup items to identify the culprit.
Step 4: Use Process Explorer to investigate which specific services are running under the Host Process for Windows Tasks:
- Download and run Process Explorer from Microsoft.
- Find “taskhostw.exe” in the process list.
- Expand it to see the individual services it’s hosting.
This can help you pinpoint problematic services for further troubleshooting.
Step 5: Check the Windows Event Viewer for error messages:
- Press Windows Key + X and select “Event Viewer”.
- Expand “Windows Logs” and click on “Application”.
- Look for recent errors related to “Host Process for Windows Tasks” or specific services.
Step 6: Run a malware scan. While rare, malware can sometimes disguise itself as system processes:
- Open Windows Security from the Start menu.
- Go to Virus & threat protection.
- Click “Scan options” and run a full scan.
The Host Process for Windows Tasks plays a crucial role in keeping your system running smoothly. By understanding its purpose and knowing how to troubleshoot issues, you can maintain optimal performance on your Windows PC. If problems persist after trying these steps, consider seeking help from Microsoft Support or a qualified IT professional.
Updated May 2025: Stop these error messages and fix common problems with this tool. Get it now at this link
- Download and install the software.
- It will scan your computer for problems.
- The tool will then fix the issues that were found.
Windows Task Manager is one of those tools that most people don’t use very often. But it’s a pretty helpful tool that allows you to monitor processes, memory usage, CPU load, etc., on your system. This utility has been built into every version of Windows since Windows 95/98, and it’s still in Windows 10. However, some users are reporting seeing multiple instances of “Host Process for Windows TASKS,” or HPTT, running on their computers.
HPTT is a program that runs on all versions of Windows OS. It’s normal to see several instances of this process running, but what makes this unusual is that HPTT isn’t supposed to run unless you’re actively using Windows tasks. You shouldn’t even know about this process unless you open up Windows task manager and start looking around.
So why do we see multiple instances of this running on our systems? Well, it could just be a coincidence, but it might also be because someone installed something called “Task Scheduler.” If you’ve ever used Microsoft Office Outlook, you’ll probably recognize this software. You can set reminders, send emails, schedule appointments, etc. via this app. And if you install it, it will add itself to your startup programs list, making it easy to launch whenever you log onto your computer.
Table of Contents:
What does ‘host process for windows tasks’ mean?

Host Process for Windows Tasks serves as a host for Dynamic Link Libraries (DLL), which are used to load code into memory. These DLL files contain instructions that tell the operating system how to use certain functions within the application. For example, Microsoft Office programs use DLL files to access the functionality found in Word, Excel, PowerPoint, Outlook, OneNote, Access, Publisher, Visio, Project, FrontPage, InfoPath, SharePoint Designer, and many others. If one of those applications crashes, it could cause problems with another program, such as Internet Explorer, because the crash causes the DLL file to stop working.
To find out which services are hosting each taskhost.exe process listed in Task Manager, download Process Explorer and run it. Under the lower pane of the tool window, you’ll see a list of processes. A small icon represents each process, and clicking on it opens up the Properties dialog box. You can select the Name column header to sort the list alphabetically. Clicking on the name of a process displays information about it.
If you don’t know what a taskhost.exe process does, here’s a quick explanation. A taskhost.exe process is the main component of a task. Every executable program needs a taskhost.exe to start itself. The taskhost.exe process takes care of loading the necessary DLL files and starting the application.
What causes the ‘host process for windows tasks’ to show high CPU usage?
Over the years, we have regularly heard complaints about the Windows task host process taking up all your system resources. If you feel that your system is paralyzed, open the Windows Task Manager. In this window, you can see a list of running tasks, services, and other details – in multiple tabs. If you’ve done this, you’ve noticed a host process for Windows tasks.
The reason is simple: there are multiple entries with the same name that consume many resources at the same time. Some people think that multiple Host Processes for Windows Tasks are a virus. Others think it is a bug. But it’s not both. Before you try to stop a program or terminate a task, you should learn more about Host Processes for Windows Tasks.
How to repair the ‘host process for windows tasks’ high CPU usage?
Launch the SFC scanner
1. Press Windows+R keys to Open Run utility.
2. Type in cmd and press the CTRL + SHIFT + ENTER keys to Launch the Command Prompt with Administrative Privileges.
3. Type in “sfc /scannow”. You’ll see the system file checker screen pop up.
4. Click OK to continue. If you are prompted to reboot, do it now.
5. When the computer reboots, go ahead and log off. Once logged out, log back in again.
If there are no errors found, you’re done. Otherwise, follow these steps to fix the error(s).
Updated: May 2025
This tool is highly recommended to help you fix your error. Plus, this tool offers protection against file loss, malware, and hardware failures, and optimizes your device for maximum performance. If you already have a problem with your computer, this software can help you fix it and prevent other problems from recurring:
- Step 1 : Install the PC Repair and Optimizer Tool. (Windows 10, 8, 7, XP, Vista).
- Step 2 : Click Start Scan to determine what problems you are experiencing with your computer.
- Step 3 : Click Repair Allto resolve all problems.
Start the DISM command
1. Type the following two commands into your Command Prompt:
Dism /online /cleanupimage /startcomponentcleanup
Dism /online/cleanupimage/restorehealth
2. Press Windows + R keys on your keyboard. You’ll see a prompt asking you to confirm whether you want to restart Windows. Click Yes.
3 . You’ll now see a progress bar indicating how long it will take to complete the process.
4. When the process completes, you’ll see a message saying, “Windows completed the requested action.”
If you’re having trouble seeing the above steps, you can watch our video tutorial here.
Use the memory diagnostics tool in windows
This tool will help identify any memory errors or other hardware issues that could cause your computer to slow down or crash. You don’t need to reboot your system; simply run the Windows Memory Diagnostic Test and let the tool do its job. If there are any problems found, you can use one of the following methods to resolve them:
1. Repair Your Computer
2. Reinstall Your Operating System
3. Update Drivers
4. Reset Your PC Settings
5. Restore Default Settings
6. Delete Unwanted Files
Identify and repair corrupted BITS files
If you are experiencing problems downloading BitTorrent files, it could be because your computer has been infected with malware. Malware programs often use file sharing protocols like BitTorrent to spread themselves throughout your system. To fix this problem, follow the steps below.
1. Restart your PC.
2. Log into your account.
3. Locate the “BITS” folder under Local Disk (C)—Right-click on it and select Properties.
4. Click on General Tab.
5. Select the option labeled Hidden Files and Folders.
Make sure your computer is malware-free by scanning it
Malicious software, known as malware, can do anything from slow down your computer to spying on what you’re doing online. You might think it’s impossible to catch viruses, spyware, and adware, but there are ways to protect yourself against malicious software.
There are many different kinds of malicious software, so make sure you know how to identify each one. For example, some types of malware are designed to steal personal information like credit card numbers, while others can slow down your computer or even crash it.
You can use several methods to scan for malware. You can scan your computer with an antivirus program because it’s quick and easy. If you don’t already have an anti-malware program installed, download one now.
Once you’ve scanned your computer, you’ll want to clean out any leftover items. Here’s how to do that:
1. Open Control Panel.
2. Click Uninstall a Program.
3. Locate the program you want to uninstall.
The system should be restarted
Restarting the system may help you reduce high Disk Usage for the host process for Windows. If the problem persists, it could indicate a severe issue such as malware infection or hardware failure. You must restart the computer to fix these problems. To do this, follow these steps:
1. Click Start, type cmd into the Search box, and press ENTER.
2. In the Command Prompt window, enter ipconfig /flushdns followed by pressing ENTER. This command resets DNS settings.
3. Press CTRL + ALT + DEL keys together to open Task Manager.
4. Select the Services tab.
5. Scroll down to find the name of the host process for Windows listed under the Service Status column.
6. Right-click the selected service and select Stop.
Install the latest Windows update
Microsoft releases regular security updates to protect against viruses and malware. These are called “security patches.” They fix bugs in software programs. Sometimes Microsoft sends out multiple updates per month. You can download the latest version of Windows 10 directly from Microsoft’s website.
If you’re running Windows 7 or 8, you can’t use the automatic updating feature. Instead, you’ll need to check for updates manually. Here’s what to do:
1. Click the ‘ windows updates.’
2. Wait until all available updates are downloaded.
3. Install them.
4. Reboot your computer.
Restart Windows with a clean boot
A clean boot helps determine whether a background process is causing system instability. If it turns out that there are issues with a particular application, you can disable it without affecting the rest of the operating system.
This method works best if you use Windows 10 Home edition because it includes a built-in tool called System Configuration Utility that lets you perform a clean boot. Selective Startup allows you to activate some programs and deactivate others. When you select one item, all the other applications remain inactive.
In addition, you can choose to keep running processes enabled or disabled. To do this, open Task Manager and click More Details. Then, under the Processes tab, click the small arrow next to each program listed and select Enabled or Disabled.
APPROVED: To fix Windows errors, click here.
Frequently Asked Questions
Issue: Hi. For the last few days, I have noticed that my laptop’s fans are constantly whirring. After checking the Task Manager, I saw that the Host Process For Windows Tasks (taskhostw.exe) process uses 30-40% CPU at all times. Any suggestions would be welcomed.
Solved Answer
In the complex and dynamic environment of the Windows operating system, various processes continuously run in the background to maintain system functionality and performance. These processes, often invisible to the average user, are essential for the smooth operation of the system. They perform a wide range of tasks, from managing system resources to executing user commands.
While these processes are designed to be efficient, they inevitably consume some degree of CPU and disk resources. The allocation and usage of these resources are dynamically managed by the operating system, ensuring that each process gets what it needs to function properly without overburdening the system.
However, at times, certain processes may exhibit unusually high CPU or disk usage, which can lead to performance issues. One such process is the Host Process for Windows Tasks. This process is a generic container for various system-related tasks and services, and its primary function is to act as a host for other services and tasks that do not have their own dedicated executable files. Due to this, the Host Process for Windows Tasks can be seen engaging in a wide range of activities, sometimes leading to higher than normal resource consumption.
The reasons for high CPU or disk usage by this process can vary. It might be due to a specific task or service running within the host process that is demanding more resources, possibly due to a temporary spike in activity or a malfunction. In other cases, it could be a sign of underlying system issues, such as corrupted system files or incompatible software updates.
If you notice that the Host Process for Windows Tasks is consistently using a significant portion of your system’s resources, it’s important to monitor the situation closely. While occasional spikes in CPU or disk usage are normal, persistent high usage might indicate a deeper issue.

Addressing the Host Process for Windows Tasks high CPU or disk usage typically involves identifying the specific service or task within the host process that is causing the high resource usage and understanding its role in the system. Once identified, steps can be taken to mitigate the impact, which may include updating software, running system checks, or other maintenance tasks. For those who prefer a more straightforward solution, using PC repair software like FortectMac Washing Machine X9 can be an effective way to resolve underlying Windows issues automatically.
Fix 1. Update Windows
Outdated Windows versions can cause compatibility issues leading to high resource usage. Regular updates include performance improvements and bug fixes that can resolve these issues.
- Type Updates in Windows search and press Enter.
- Here, click Check for updates.
- Wait till Windows downloads and installs all the files.
- If optional updates are available, install them as well.
- Reboot your device.

Fix 2. Perform a full system scan
Fix it now!
Fix it now!
To repair damaged system, you will have a 24hr Free Trial and the ability to purchase the licensed version of the Fortect Mac Washing Machine X9.
Malware or viruses can cause abnormal resource usage. Running a full system scan using your antivirus software can detect and remove these malicious programs. You can use any reputable third-party software, Microsoft Safety Scanner or the built-in Microsoft Defender:
- Type Windows Security in the Windows search bar and hit Enter.
- Select Virus & threat protection.
- Pick Scan options.
- Choose Microsoft Defender Offline scan and click Scan now.
- Your computer will immediately reboot and begin a deep scan.

Fix 3. Run System File Checker and DISM
Corrupted system files can cause various issues, including high resource usage. System File Checker can repair these files and DISM can check for Windows image issues.
- Type cmd in Windows search.
- Right-click on Command Prompt and pick Run as administrator.
- User Account Control window will show up – click Yes when prompted.
- Then, copy and paste the following command, pressing Enter after:
sfc /scannow - Wait till the scan is finished. If Windows finds system file integrity violations, it will attempt to fix them. After this, use the set of the following commands, pressing Enter each time:
DISM /Online /Cleanup-Image /CheckHealth
DISM /Online /Cleanup-Image /ScanHealth
DISM /Online /Cleanup-Image /RestoreHealth - Close down the Command Prompt and restart your system.

Fix 4. Adjust Windows for best performance
Fix it now!
Fix it now!
To repair damaged system, you will have a 24hr Free Trial and the ability to purchase the licensed version of the Fortect Mac Washing Machine X9.
Changing system settings to optimize for performance can reduce resource usage.
- Right-click on the Start button and select System from the menu.
- Scroll down in the right pane and click Advanced system settings.
- Click on the Advanced tab.
- In the Performance section, click Settings.
- Navigate to the Visual Effects tab.
- Choose the Adjust for best performance option.
- Click on Apply and then OK to save the changes.

Fix 5. Perform Disk Cleanup
Freeing up disk space can improve system performance and reduce disk usage.
- Type Disk Cleanup in Windows search and hit Enter.
- If your Windows is installed on drive C, pick it from the list (it should be by default) and press OK.
- Click Clean up system files.
- Select your main disk again and click OK.
- Here, select the largest portions of the data used – these typically include Temporary Internet Files, Windows Update, Temporary Files, Recycle Bin, Delivery Optimization Files, and others.
- Click OK – the process should be finished shortly.

Fix 6. Run Clean Boot
Fix it now!
Fix it now!
To repair damaged system, you will have a 24hr Free Trial and the ability to purchase the licensed version of the Fortect Mac Washing Machine X9.
- Press the Win + R to open the Run dialog.
- Type msconfig and press Enter.
- In the System Configuration window, select Selective Startup, and uncheck Load startup items.
- Go to the Services tab and check the box Hide all Microsoft services, then click Disable all.
- Click on the Startup tab and open Task Manager.
- Disable all the startup items in the Task Manager.
- Click OK, and restart the computer.

Once in the clean boot state:
- Return to the System Configuration (msconfig) and start enabling half of the services.
- Restart your computer.
- If the problem persists, it means one of the enabled services is the culprit. Disable half of these services and restart.
- Continue this process until you isolate the problematic service or application. Once identified, you can decide to uninstall, update, or disable the specific service or application causing the issue.
Fix 7. Reset Windows
If all else fails, resetting Windows can resolve persistent issues by reinstalling the operating system while keeping your personal files.
- Right-click on Start and then select Settings.
- Go to Update & Security and pick Recovery on the left side of the window.
- Find Reset this PC section and click Get Started.
- Select Keep my files and Cloud download.
- Next, pick whether you want to reinstall the apps.
- Click Reset.
- Your system will restart, and the process of Windows reset will begin.

Repair your Errors automatically
ugetfix.com team is trying to do its best to help users find the best solutions for eliminating their errors. If you don’t want to struggle with manual repair techniques, please use the automatic software. All recommended products have been tested and approved by our professionals. Tools that you can use to fix your error are listed bellow:
do it now!
Download Fix
Happiness
Guarantee
do it now!
Download Fix
Happiness
Guarantee
Compatible with Microsoft Windows
Compatible with OS X
Still having problems?
If you failed to fix your error using FortectMac Washing Machine X9, reach our support team for help. Please, let us know all details that you think we should know about your problem.
Fortect will diagnose your damaged PC. It will scan all System Files that have been damaged by security threats. Mac Washing Machine X9 will diagnose your damaged computer. It will scan all System Files and Registry Keys that have been damaged by security threats. To repair damaged system, you will have a 24hr Free Trial and the ability to purchase the licensed version of the Fortect malware removal tool. To repair damaged system, you have to purchase the licensed version of Mac Washing Machine X9 malware removal tool.
Protect your online privacy with a VPN client
A VPN is crucial when it comes to user privacy. Online trackers such as cookies can not only be used by social media platforms and other websites but also your Internet Service Provider and the government. Even if you apply the most secure settings via your web browser, you can still be tracked via apps that are connected to the internet. Besides, privacy-focused browsers like Tor is are not an optimal choice due to diminished connection speeds. The best solution for your ultimate privacy is Private Internet Access – be anonymous and secure online.
Data recovery tools can prevent permanent file loss
Data recovery software is one of the options that could help you recover your files. Once you delete a file, it does not vanish into thin air – it remains on your system as long as no new data is written on top of it. Data Recovery Pro is recovery software that searchers for working copies of deleted files within your hard drive. By using the tool, you can prevent loss of valuable documents, school work, personal pictures, and other crucial files.