
Install Home Assistant Operating System
Download the appropriate image
-
VirtualBox (.vdi)
-
VMware Workstation (.vmdk)
-
Hyper-V (.vhdx)
After downloading, decompress the image. If the image comes in a ZIP file, for example, unzip it.
Follow this guide if you already are running a supported virtual machine hypervisor. If you are not familiar with virtual machines, install Home Assistant OS directly on a Home Assistant Yellow, a Raspberry Pi, or an ODROID.
Create the virtual machine
Load the appliance image into your virtual machine hypervisor. (Note: You are free to assign as much resources as you wish to the VM, please assign enough based on your add-on needs).
Minimum recommended assignments:
- 2 GB RAM
- 32 GB Storage
- 2vCPU
All these can be extended if your usage calls for more resources.
Hypervisor specific configuration
VirtualBox
Unraid
KVM (virt-manager)
KVM (virt-install)
VMware Workstation
Hyper-V
- Create a new virtual machine.
- Select type Linux and version Linux 2.6 / 3.x / 4.x (64-bit).
- Under Hardware, select the amount of memory and number of CPUs. Then, select Enable EFI.
- Make sure EFI is enabled. If EFI is not enabled, HAOS won’t boot.
- Under Hard Disk, select Use an existing virtual hard disk file, select the unzipped VDI file from above.
- Then go to Network > Adapter 1. Choose Bridged Adapter and choose your network adapter.
Please keep in mind that the bridged
adapter only functions over a hardwired Ethernet connection.
Using Wi-Fi on your VirtualBox host is unsupported. - Then go to Audio and choose Intel HD Audio as audio controller.
By default, VirtualBox does not
free up unused disk space. To automatically shrink the vdi disk image the discard option must
be enabled using your host machine’s terminal:
VBoxManage storageattach <VM name> --storagectl "SATA" --port 0 --device 0 --nonrotational on --discard on
More details can be found about the command can be found here.
- Download the .qcow2 image above and decompress it. (Extract all in Windows)
- Store the image in the isos share on your server.
- Make sure under Settings > VM manager, Enable VMs is enabled.
- Create a new virtual machine: VMS > Add VM.
- Select type Linux and give the VM a name and a description.
- Select the CPU cores you want to let the VM use and give it some memory.
- Under Primary vDisk Location, select Manual and then select the qcow2 image.
- Select your keyboard language under VM Console Keyboard.
- Select br0 under Network Source.
- Select virtio under Network model.
- Select any USB-devices that you want to pass through to Home Assistant, such as Zigbee- or Z-Wave controllers.
- Deselect Start VM after creation.
- Select Create.
- Select the name of your new VM and select the capacity number for your disk. Here, you can expand the disk to whatever your needs are. The default is 32 GB.
- Select the icon of your new VM and select start with console (VNC).
- Create a new virtual machine in
virt-manager. - Select Import existing disk image, provide the path to the QCOW2 image above.
- Choose Generic Default for the operating system.
- Check the box for Customize configuration before install.
- Under Network Selection, select your bridge.
- Under customization select Overview > Firmware > UEFI x86_64: …. Make sure to select a non-secureboot version of OVMF (does not contain the word
secure,secboot, etc.), e.g.,/usr/share/edk2/ovmf/OVMF_CODE.fd. - Click Add Hardware (bottom left), and select Channel.
- Select device type: unix.
- Select name: org.qemu.guest_agent.0.
- Finally, select Begin Installation (upper left corner).
virt-install --name haos --description "Home Assistant OS" --os-variant=generic --ram=4096 --vcpus=2 --disk <PATH TO QCOW2 FILE>,bus=scsi --controller type=scsi,model=virtio-scsi --import --graphics none --boot uefi
If you have a USB
dongle to attach, you need to add the option --hostdev busID.deviceId. You can
discover these IDs via the lsusb command. As example, if lsusb output is:
   Bus 004 Device 001: ID 1d6b:0003 Linux Foundation 3.0 root hub
   Bus 003 Device 004: ID 30c9:0052 Luxvisions Innotech Limited Integrated RGB Camera
   Bus 003 Device 003: ID 1a86:55d4 QinHeng Electronics SONOFF Zigbee 3.0 USB Dongle Plus V2
   Bus 003 Device 002: ID 06cb:00fc Synaptics, Inc.
   Bus 003 Device 005: ID 8087:0033 Intel Corp.
   Bus 003 Device 001: ID 1d6b:0002 Linux Foundation 2.0 root hub
   Bus 002 Device 001: ID 1d6b:0003 Linux Foundation 3.0 root hub
   Bus 001 Device 001: ID 1d6b:0002 Linux Foundation 2.0 root hub
You can recognize the Sonoff dongle at Bus 003 Device 003. So the command to install the VM will become:
virt-install --name haos --description "Home Assistant OS" --os-variant=generic --ram=4096 --vcpus=2 --disk <PATH TO QCOW2 FILE>,bus=scsi --controller type=scsi,model=virtio-scsi --import --graphics none --boot uefi --hostdev 003.003
Note that this configuration (bus 003, device 003) is just an example, your dongle could be on another bus and/or with another device ID.
Please check the correct IDs of your USB dongle with lsusb.
- Start VMware Workstation and select Create a New Virtual Machine.
- Note: the exact name and location of the settings below depend on the VMware version. This procedure is based on version 17.
- Select I will install the operating system later, then select Linux > Other Linux 5.x kernel 64-bit.
- Give the VM a name,
home-assistant, and define an easy to reach storage location, such asC:\home-assistant. - Specify the disk size and select Store virtual disk as a single file.
- Select Customize Hardware.
- Define the amount of memory and the number of cores the VM is allowed to use.
- Remove the New CD/DVD entry. It will not be used.
- Connect an Ethernet cable and make sure it is connected to your network.
- Under Network adapter, select Bridged: Connected directly to the physical network.
- Make sure Replicate physical network connection state is not selected.
- Select Configure Adapters.
- Make sure all virtual adapters and Bluetooth devices are deselected.
- Select your host network adapter. Most likely, this is one of the first 2 checkboxes in the list:
- Select the one for Ethernet.
- The exact names of these adapters depend on your hardware.
- At the end of the wizard, select Finish.
Edit the VM settings
- In Windows Explorer, navigate to the storage location of your newly created VM, for example under
C:\home-assistant. - Delete the
home-assistant.vmdkfile. - In the
Downloadsfolder, find thehaos_ova_xx.x.vmdkfile.- If you haven’t unzipped the archive, unzip it.
- Within the folder, find the
.vmdkfile and rename it tohome-assistant.vmdk. - Paste the file (not the unzipped folder) into the
C:\home-assistantfolder.
- Right-click the
.vmxfile and select Open with > Notepad. - Under
.encoding, add a line. Enterfirmware = "efi". - Now continue with the next step to start your VM.
- If you see a message about side channel mitigations, select OK.
- If you see a message stating that the
.vmdkfile could not be found, in step 3, you likely pasted the folder, not the file. Repeat step 3.
⚠️ Hyper-V does not have USB support
- Create a new virtual machine.
- Select Generation 2.
- Select Connection > Your Virtual Switch that is bridged.
- Select Use an existing virtual hard disk and select the VHDX file from above.
After creation, go to Settings > Security and deselect Enable Secure Boot.
Start up your virtual machine
- Start the virtual machine.
- Observe the boot process of the Home Assistant Operating System.
- Once completed, you will be able to reach Home Assistant on homeassistant.local:8123. If you are running an older Windows version or have a stricter network configuration, you might need to access Home Assistant at homeassistant:8123 or
http://X.X.X.X:8123(replace X.X.X.X with your virtual machine’s IP address).
Help us improve Home Assistant
Have you just installed Home Assistant? The Home Assistant team is looking
to talk to you to understand how the installation went.
Help now
With the Home Assistant Operating System installed and accessible, you can continue with onboarding.
Install Home Assistant Core
Install WSL
To install Home Assistant CoreHome Assistant Core is the heart of Home Assistant itself. It is a Python program that powers every installation type, but can be installed standalone. [Learn more] on Windows, you will need to use the Windows Subsystem for Linux (WSL). Follow the WSL installation instructions and install Ubuntu from the Windows Store.
As an alternative, Home Assistant OS can be installed in a Linux guest VM. Running Home Assistant CoreHome Assistant Core is the heart of Home Assistant itself. It is a Python program that powers every installation type, but can be installed standalone. [Learn more] directly on Windows is not supported.
Caution
This is an advanced installation process, and some steps might differ on your system. Considering the nature of this installation type, we assume you can handle subtle differences between this document and the system configuration you are using. When in doubt, please consider one of the other installation methods, as they might be a better fit instead.
Prerequisites
This guide assumes that you already have an operating system setup and have installed Python 3.13 (including the package python3-dev) or newer.
Install dependencies
Before you start, make sure your system is fully updated, all packages in this guide are installed with apt, if your OS does not have that, look for alternatives.
sudo apt-get update
sudo apt-get upgrade -y
Install the dependencies:
sudo apt-get install -y python3 python3-dev python3-venv python3-pip bluez libffi-dev libssl-dev libjpeg-dev zlib1g-dev autoconf build-essential libopenjp2-7 libtiff6 libturbojpeg0-dev tzdata ffmpeg liblapack3 liblapack-dev libatlas-base-dev
The above-listed dependencies might differ or missing, depending on your system or personal use of Home Assistant.
Create an account
Add an account for Home Assistant Core called homeassistant.
Since this account is only for running Home Assistant Core the extra arguments of -rm is added to create a system account and create a home directory.
sudo useradd -rm homeassistant
Create the virtual environment
First we will create a directory for the installation of Home Assistant Core and change the owner to the homeassistant account.
sudo mkdir /srv/homeassistant
sudo chown homeassistant:homeassistant /srv/homeassistant
Next up is to create and change to a virtual environment for Home Assistant Core. This will be done as the homeassistant account.
sudo -u homeassistant -H -s
cd /srv/homeassistant
python3 -m venv .
source bin/activate
Once you have activated the virtual environment (notice the prompt change to (homeassistant) homeassistant@raspberrypi:/srv/homeassistant $) you will need to run the following command to install a required Python package.
python3 -m pip install wheel
Once you have installed the required Python package, it is now time to install Home Assistant Core!
pip3 install homeassistant==2025.4.4
Troubleshooting: If you do not see the above version of Home Assistant package in your environment, make sure you have the correct Python version installed, as defined under the Prerequisites.
Start Home Assistant Core for the first time. This will complete the installation for you, automatically creating the .homeassistant configuration directory in the /home/homeassistant directory, and installing any basic dependencies.
You can now reach your installation via the web interface on http://homeassistant.local:8123.
If this address doesn’t work you may also try http://localhost:8123 or http://X.X.X.X:8123 (replace X.X.X.X with your machines’ IP address).
Note
When you run the hass command for the first time, it will download, install and cache the necessary libraries/dependencies. This procedure may take anywhere between 5 to 10 minutes. During that time, you may get a site cannot be reached error when accessing the web interface. This will only happen the first time. Subsequent restarts will be much faster.
Help us improve our documentation
Suggest an edit to this page, or provide/view feedback for this page.
Edit
Provide feedback
View given feedback
In this article, you will discover how to perform a Home Assistant installation on the Windows Desktop operating system, which includes the supervisor and add-ons store.
This tutorial is tailored for Windows Desktop users who desire to run Home Assistant Supervised directly from their desktop.
If you want to test drive Home Assistant on your Windows PC, or you want to build a Home Assistant server based on Windows so that it can perform other Windows-specific tasks, then this tutorial will guide you through the process step-by-step.
If you’re interested in setting up a dedicated server for Home Assistant, such as one without a monitor or in a “headless” configuration, it is recommended to use Debian Linux directly instead.
You can refer to this tutorial to learn how to install Debian directly on a dedicated PC and run Home Home Assistant Supervised without the need for a virtual machine, however the process is more complicated so if you are looking for an easier method, you are in the right place!
Table Of Contents
- Can Home Assistant Supervised Run on Windows?
- Can I run Home Assistant Core Natively on Windows?
- Prerequisite
- Installing VirtualBox on Windows
- Downloading the Microsoft C++ Redistributable Package
- Create a New VirtualBox Virtual Machine for Home Assistant
- Download Home the Assistant OS Drive Image
- Create a new VirtualBox VM
- Configure the VirtualBox VM
- How to Use the Home Assistant Virtual Machine
- Conclusion
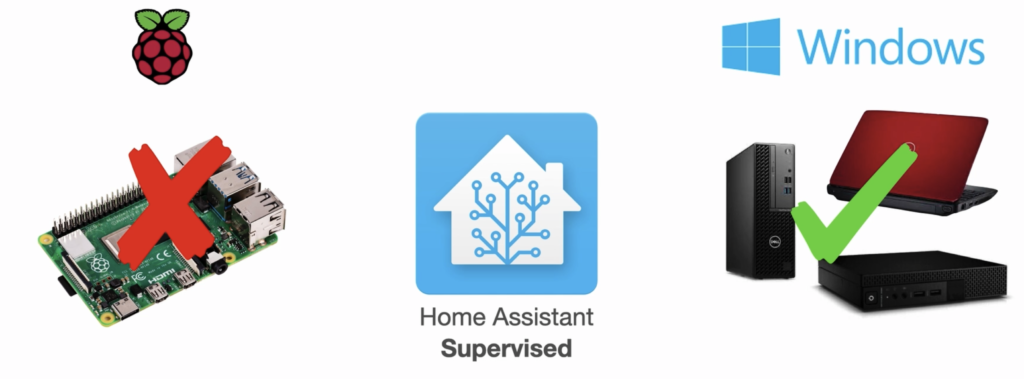
Home Assistant Supervised cannot be run natively on Windows. However, it is possible to run Home Assistant Supervised using freely available virtualization software like VirtualBox.
The solution involves creating a virtual machine that can run one of the supported operating systems within Windows. Home Assistant can then be installed on the virtual machine.
In this configuration we refer to Windows as the host operating system and the virtual machine operating system as the guest operating system.
The virtualization software when provides a link between the host and guest, allowing the guest to access resources on the host such as it’s USB ports and network connection.
The end result provides a seamless experience no different to running Home Assistant natively on supported hardware.
Can I run Home Assistant Core Natively on Windows?
Yes it is possible to run the Home Assistant Core natively on Windows, without using a virtual machine. However this method of running Home Assistant will not give you the full set of features.
Running the Home Assistant Core without the Supervisor element will leave you without the add-ons store and without the ability to easily manage essential add-on tools such as the File Editor.
For further information about the key components of Home Assistant, including the Core and Supervisor, take a look at this article.
Therefore it is recommended to follow the method in this article instead as it will be the right method for mostly all users.
Prerequisite
To run Home Assistant Supervised on Windows, we will utilize a pre-installed disk image that contains the Home Assistant Operating System (OS). This OS is a streamlined version of Linux specifically designed for running Home Assistant.
In this setup, your primary operating system, Windows, will act as the host OS, while Home Assistant will function as the guest OS.
To proceed with the installation, you will need a computer running Windows 8, 10 or 11.
Your system should meet the following minimum requirements:
- 4GB of RAM or more: It is recommended to allocate at least 2GB of RAM to the virtual machine to match the minimum requirement for the Home Assistant. Additionally, it is advised to have double that amount on the host system to accommodate both the host and guest operating systems.
- 32GB of disk storage space or more.
- At least 2 processor cores.
If you are using a relatively modern computer from the past decade, it is highly likely that you won’t encounter any issues meeting the system requirements. However, these requirements may become more significant when running Home Assistant on hardware such as a single board computer (SBC).
You will also need to have your Windows computer connected to your network and with internet access, which is required for downloading the necessary files.
Can I Use WiFi to Connect my Home Assistant Virtual Machine to the Network?
Yes, you can connect your Home Assistant Virtual machine to your external network using WiFi when using VirtualBox.
There is some confusion surrounding this topic, as the official website states that VirtualBox does not support WiFi.
However my own tests show that WiFi does in fact work with bridged networking, therefore it is possible that the information on the official site is out of date at the time of writing.
Installing VirtualBox on Windows
The first thing we need to do is download and install VirtualBox. You can download VirtualBox for Windows directly from the official site. Make sure you choose the correct version, the one for Windows hosts.
Once VirtualBox has downloaded, double-click the downloaded file and follow the installation procedure.
Downloading the Microsoft C++ Redistributable Package
Upon loading the installer, you may encounter an error that states that the Microsoft C++ Redistributable package is required. These packages are grouped by year.
If you encounter this error, make a note of the year required (at the time of writing, the 2019 package is required), head on over to the Microsoft website and download the package.
Once the package has downloaded, double click the file and install the package. Once complete, run the VirtualBox installer again and complete the installation.
Create a New VirtualBox Virtual Machine for Home Assistant
Before we can create a new virtual machine to run Home Assistant, we need to download the Home Assistant OS disk image. This image contains Home Assistant Core and Home Assistant Supervisor pre-installed within the Home Assistant Operating System.
Download Home the Assistant OS Drive Image
- Navigate to the latest releases page for Home Assistant OS: https://github.com/home-assistant/operating-system/releases/latest
- Scroll down and locate the file haos_ova-x.x.vdi.zip, where x.x is the number of the current latest release. Click the file to download it.
- Once downloaded, navigate to the download folder and double-click the file to extract the disk image haos_ova-x.x.vdi.

Create a new VirtualBox VM
Next, we can create a new virtual machine for running Home Assistant:
- Open VirtualBox
- Click the new button in order to create a new virtual machine

- Name the new VM something like Home Assistant.
- Choose Other Linux (64-bit) for the version.
- Click Next to continue.

- Choose a minimum of 2GB RAM to meet the Home Assistant OS minimum requirement.
- Choose a minimum of 2 processor cores to meet the Home Assistant OS minimum requirement.
- Make sure Enable EFI (special OSes only) is checked.
- Click Next to continue.

- Choose the option to Use an Existing Virtual Hard Disk File.
- Select the haos_ova-x.x.vdi file that you downloaded and extracted earlier.
- Click Next to continue.
- On the summary page, click Finish to complete the setup.

Configure the VirtualBox VM
Once you have finished the setup wizard, you should see a new VM in the left-hand sidebar. Next, we need to complete some further configuration:
- Right-click the new VM and click settings.
- In the Audio section, change the Audio Controller to Intel HD Audio.

- If you are using a wired network connection (ethernet), in the Network section, change the attachment to Bridged Adapter. If you are using WiFi to connect your computer to the network, leave the setting as default and follow the steps in this section before continuing.
- Click OK to accept the changes.

How to Use the Home Assistant Virtual Machine
Now that we have completed the virtual machine configuration, we are ready to launch the virtual machine.
- With the Home Assistant VM selected in the left-hand sidebar, click the Start button.
- A new window will open and Home Assistant OS will begin the boot process. Once complete, you will arrive at the
ha>command prompt.

- In order to access Home Assistant, open a new browser window and navigate to http://homeassistant.local:8123
- In some cases this does not work, so you can use the IP address given instead. Your IP address is given in the system information (under the large “Home Assistant” text, for example http://192.168.88.146:8123 for my system shown here.
Note that you must use HTTP and not HTTPS as Home Assistant does not support SSL out of the box. You can learn more about how to set securely access Home Assistant in this tutorial.

Conclusion
The Home Assistant Operating System disk image simplifies the setup process of Home Assistant on various systems. In this tutorial, we have configured VirtualBox to enable the running of Home Assistant Supervised on Windows Desktop.
Please keep in mind that Windows may not be the most optimal choice of operating system for a dedicated Home Assistant server. If you intend to build a Home Assistant server, it is recommended to use Debian Linux instead.
Thanks so much for visiting my site! If this article helped you achieve your goal and you want to say thanks, you can now support my work by buying me a coffee. I promise I won’t spend it on beer instead… 😏
So I guess you have got here in one of three ways:
- You have been scanning the home assistant forms, trying to find out how you can run home assistant supervised on Windows and have been presented with, is some very unhelpful and abrupt “NO” responses without actually giving you some helpful information.
- You just can’t get your hands on a Raspberry Pi 4 to run your Home Assistant supervised installation, but you’ve got some old PC hardware that is gathering dust and now you want to utilise it to run Home Assistant Supervised and are looking for some support.
- You have found my YouTube Video.
Well if you haven’t found my YouTube Video you can find it here:
The video is a companion to this Step by Step guide and visually covers every step of this process and is designed to run side by side with this so please open it up in a new window and use it the follow along.
Few things before we get into it. You’re going to need to PC running windows, in my example I’m using windows 10 but windows 11 is also fine.
That PC need to be online and connected to your home network.
You also need to make sure that virtualisation has been turned on in your computer’s BIOS setting.
There is a detailed Articale over on https://www.simplilearn.com/ that shows you how to do this on Windows 10.
Step 1: Get Your Tools
First, we need to get the tools that we are going to need to get Debian Linux Installed in a VM on Windows.
For these make sure you download the correct version for your computer system. There is an ARM and AMD/Intel (x64) version of each app.
1.01 Debian: https://www.debian.org
1.02 VirtualBox: https://www.virtualbox.org
1.03 Visual C++: https://learn.microsoft.com/ (Look for the “Visual Studio 2015, 2017, 2019 and 2022 section).
1.04 Once downloaded install “Visual C++” and then “VirtualBox”. The Debian ISO file is for the next step.
Step 2: Install Debian
2.01 Open “VirtualBox” and select New.
2.02 Give your VM a name: “homeassistant”.
2.03 Select the pulldown on ISO image and select “Other”.
2.04 Select the download Debian ISO – This will be in your download folder.
2.05 Click on “Skip Unattended Installation” this will stop the installation from setting up a desktop environment that we will not be using.
2.06 Set the base memory. This will work with 2GB however my advice would be to set it to 4GB or more.
2.07 Processors ideally set this to 2 as a minimum. If you’re not going to use the PC for anything other than Home Assistant I would set this to 75% of what’s available to you.
2.08 The Virtual Hard Disk is where Home Assistant Supervised will keep all files and history. I Have Rana system for 6 months with only 64GB however I would recommend that you set it to 120GB as a minimum this way you don’t have to change anything later if you run the system for a long time.
2.09 Click “Finish”
2.10 Click “Setting”, and “Network” and change the Network Adaptor from “NAT” to “Bridged Adaptor”
2.11 Click “OK”
2.12 Now Start the VM
Follow the install process inside of the VM window.
2.13 Hostname is the name of your computer and could be anything: homeassistant
2.14 For Domain Name if you are already using this in your home set this as you normally would, if not then you can make one or just press return to skip: ha.home
2.15 Your root password and user password should be different.
2.16 The user name I’m using here is “smlp” you will need to change this where needed.
2.17 For the Partitioning method use: “Guided – use entire disk”.
2.18 Select the disk to partition, you should only see one option
2.19 For the Partitioning scheme you can use any option here but I used: “Separate /home partition”.
2.20 Select “Finish partitioning and write changes to disk”.
2.21 Write the changes to disk?: “Yes”
2.22 For Scan extra installation media? Select: “No”.
2.23 For the Debian archive mirror select your country and then the preselected option that shows. In my example: the United Kingdom, deb.debian.org.
2.24 If you are using an HTTP proxy you will already have the information for “HTTP proxy information” if not just press: “Continue”
2.25 Participate in the package usage survey? This is up to you: “Yes” or “No”
2.26 Under software to install:
Deselect “Debian desktop environment”
Deselect “GNOME”
Select “SSH server”
Select “standard system utilities”
2.27 Install the GRUB boot loader to your primary drive?: “Yes”
2.28 Device for boot loader installation: Select the “VBOX” device listed
2.29 Installation complete: Continue
2.30 The VM will now reboot.
Step 3: Get Ready to Install Home Assistant
First, get the IP address for the system.
3.01 Login user your username and password setup in the installation process.
3.02 Get the system IP address:
ip aYour address will be shown under the “BROADCAST” section, not the “LOOPBACK” section.
My ip shows as: 192.168.1.186/24
Discard the “/24” so my IP is 192.168.1.186
3.03 Now switch to root and install Sudo. Having this will help with being able to follow along more easily with guides and tutorials from other websites in case you want to do more with the system at a later date. Enter the commands:
su(Enter your root password setup in the installation process)
3.04 Install sudo
apt install sudo3.05 Next, we need to add your user “smlp” to be able to use “sudo”.
nano /etc/sudoersUnder the line:
root ALL=(ALL:ALL) ALLAdd the line
smlp ALL=(ALL:ALL) ALLRemember you will need to change “smlp” to your user name.
Hold “Ctrl X”, and then “Y” to save and return to confirm the file.
Step 4: Install Dependencies and Home Assistant
4.01 In the Windows search bar type CMD and “RETURN” to open the command prompt.
4.02 Now connect via SSH but remember to use your user name and IP address.
ssh [email protected]Type “yes” to confirm “Fingerprint”
Enter you user password.
4.03 You are now connected to the system via SSH and we are going to use this to install Docker that runs Home Assistant the dependencies that make everything work as well as Home Assistant Supervised. Simply copy and paste the command into the command prompt in the order listed:
4.04
sudo su -4.05
apt-get update
apt-get upgrade -y
apt-get dist-upgrade -y
4.06
apt-get install \
apparmor \
jq \
wget \
curl \
udisks2 \
libglib2.0-bin \
network-manager \
dbus \
lsb-release \
systemd-journal-remote -y
4.07
curl -fsSL get.docker.com | sh4.08 For the following commands, you first need to make sure that version “1.4.1” is the correct and latest version of Home Assistant before entering the command. You do this by heading over to the Home Assistant Github first to check the listed version number then edit the “1.4.1” to the latest version for the next two commands.
Home Assistant Github: https://github.com/home-assistant/os-agent/releases/
4.09
wget https://github.com/home-assistant/os-agent/releases/latest/download/os-agent_1.4.1_linux_x86_64.deb4.10
dpkg -i os-agent_1.4.1_linux_x86_64.deb4.11
wget https://github.com/home-assistant/supervised-installer/releases/latest/download/homeassistant-supervised.deb4.12
dpkg -i homeassistant-supervised.deb4.13 Home Assistant Supervised is now installed close down the Virtual Machine Window and select “send the shutdown signal”.
Step 5: Additional Setup
5.01 In the left-hand panel on VirtualBox right click on your VM and select “Create Shortcut on Desktop”
5.02 Now hold down the Windows Key and “R” on the keyboard.
5.03 Enter the command “shell:start” this will open a folder.
5.04 Copy the new VM shortcut on the desktop into the “Start-up” folder, next time Windows starts it will auto-open your new Home Assistant VM.
5.05 If you have a Zigbee USB Dongle like the two listed below you can set these up by plugging them into your Windows PC then in Setting, USB on VirtualBox you can link them to your Home Assistant VM.
Debug Point has an article showing you how to do this: https://www.debugpoint.com/enable-usb-virtualbox/
5.06 Windows Remote Desktop allow you to connect to your Window PC from any other computer or iOS or Android mobile phone via the Remote Desktop App when you are on your home network. This is not available on Windows Home 10/11.
To set up Remote Desktop click on Windows/Start, Setting and search for Remote Desktop and Enable.
5.07 Also, you can set Windows up so that if it has been restarted or accidentally turned off it will Auto start without the need for entering your Windows username and password when it first boots up. You can enter your Windows username and password to get VirtualBox going again after a shutdown via Remote Desktop from another computer but if you want to set it without doing this:
Click on Windows/Start, Setting and search “Sign-in option” and change Requires sign-in to “never”
This will not always work but there is a more detailed article on Help Desk Geek on how to do this: https://helpdeskgeek.com
5.08 If you want to keep a copy of your new Home Assistant VM before you fully set it up so that you have a fallback in case something goes wrong you can do this from VirtualBox by right-clicking on your VM and selecting “Clone”. Remember if you switch to using this Clone you will also need to add a shortcut for it to the windows “Start-up” folder and remove the old one if it’s no longer needed.
Step 6: Home Assistant Supervised
If Everything has gone to plan you are now done. Start your new Home Assistant VM and wait for it to boot.
6.01 You can now access Home Assistant using your VM’s IP address followed by the Home Assistant Port. For me this would be:
http://192.168.1.186:8123
Thank you for taking the time to follow along with my guide. If you have any feedback or additional pointers please let me know in the comments here or on my YouTube Channel.
If you found it helpful and want to support me you can buy me a coffee on Ko-Fi or just help promote the guides that I am making by sharing this post, liking or subscribing to my video on my Youtube Channel.
Other Links:
Setting up Home Assistant Supervised on Debian: https://mathesonsteplock.ca
Setting up HACS on Home Assistant: Smart Home Junkie
Provide feedback
Saved searches
Use saved searches to filter your results more quickly
Sign up
Уровень сложностиСредний
Время на прочтение8 мин
Количество просмотров50K
Несмотря на огромное количество текстов по установке Home Assistant, решил написать свой.
В первую очередь для себя, чтобы при повторной установке не рыться в бесконечном количестве ссылок.
Home Assistant развивается, часть мануалов устарела, часть содержит ошибки, часть написана Очень Умными Парнями, живущими в Линуксе и которые пишут что-то вроде: «сделай три раздела, два для систем и один для хомяка, и при установке систем подключай раздел с хомяком к каждой, только не форматируй его постояннo» (с). Это подлинная цитата, причём одна из самых понятных.
Мой текст написан виндузятником для себя и для людей, которые видят командную строку максимум раз в пару дней и не обязаны помнить все ключи команд линкуса. Описан весь процесс, собранный по многим мануалам. На часть мануалов приведена ссылка.
Итак.
В качестве подопытного был выбран ноутбук Acer Aspire E15. Тупо был. Был куплен бэушным семь лет назад за 10 тыс. рублей для разъездного менеджера по принципу: если потеряет – чтобы было не жалко. То есть, он был изрядно устаревшим уже тогда. Потом лежал на антресолях, всеми забытый. Думаю, в каждой мало-мальской приличной фирме такого хлама найдется с десяток штук и вам его подарят за пару пива знакомому сисадмину. Если нет знакомого сисадмина, то авито в помощь. Все равно в итоге получится в те же деньги или чуть дешевле и лучше, чем приличный одноплатник. Плюсом вы получите нормальный процессор, жесткий диск вместо вечно умирающей флешки и, если повезёт, не совсем дохлую батарею вместо источника бесперебойного питания.
На моём ноуте был проводной Ethernet, кто-то (возможно даже я) уже позаботился дорастить память до 8Gb вместо 4 и воткнуть древний SATA SSD диск на 256 Gb. Для работы с Windows так себе, но для моих целей – за глаза.
Способ установки — виртуальная машина на Debian. Попробую объяснить, почему.
1. Немного пояснений
1.1. Почему всё-таки, хоть плохонький, но PC, я объяснил выше. Основное – это желание иметь полноценный жесткий диск. Наличие у ноута своего экрана и клавиатуры – тоже плюс в тех редких случаях, когда удалённый доступ почему-либо невозможен.
1.2. С другой стороны, для одного HA, такой машины, всё таки, жирновато, поэтому хочется, если уж затевать такую пьянку, повесить на него функции домашнего NAS на внешнем диске и DLNA сервера, чтобы смотреть скачанные с торрентов купленные на официальных сервисах кино долгими зимними вечерами. Чуть позже добавится маленький Apache и VPN сервер.
1.3. Можно тупо поставить HASSOS, как операционную систему. Тогда DLNA и NAS можно запустить, как плагины. Я попробовал — мне не понравилось. Во-первых очень заморочная установка, во-вторых нужные мне плагины показались мне довольно кривыми. В третьих, сама операционка и мои права в ней усечены до крайности. Для Raspberry пойдет, для полноценного ноута – так себе.
1.4. Можно поставить как контейнер в докере. В таком случае вы автоматически лишаетесь плагинов. Среди них есть очень даже полезные. Можно, конечно, каждый из них ставить отдельными контейнерами. По мне – тот еще гемор.
1.5. Более продвинутый вариант – тот же докер в режиме Supervised. Моя предыдущая установка была именно такая. Плагины работают. Не все, правда, но почти все. Но с какого-то обновления пошли необъяснимые проблемы с совместимостью, перестал обновляться супервизор. Стал рыться – проблема не у меня одного. Возникает спорадически у разных людей. Лечение – полная переустановка. Или «Обновитесь до последней версии». А у меня какая??? Я тебя ставил 10 минут назад. Бесит, короче.
1.6. Ну и чисто эстетически мне перестал нравится docker. Постоянная борьба с логами, которые он пишет в самые затейливые места и тихо засирает диск, проблемы с совместимостью пакетов. Нельзя, как в Windows, поставить пакет, а потом его просто удалить. Обязательно либо остаются хвосты по всему диску, либо удаляемый пакет забирает с собой что-то важное. То есть – штука одноразовая. Короче, после очередного раунда безуспешной борьбы, я решил, что у меня есть более важные занятия в жизни, чем разбираться в докере и его причудах. Память позволяет, диск позволяет, процессор позволяет. Итак: виртуальная машина с HASSOS живёт, никому не мешает и ей никто не мешает. В остальной памяти делаю, что хочу.
2. Предварительные ласки
2.1. Загружаем образ Debian с официального сайта. Можно любой другой дистрибутив Linux. Лично мне нравится Debian своей незамутненностью. Он не пытается быть похожим на винду, как многие, ибо все равно получается плохо. Такой чистый брутал. Стабильный. Ну и много литературы по нему, конечно. Внимание. Некоторые команды отличаются в разных дистрибутивах. Всё, что написано далее – написано про Debian 12.
2.2. Скачиваем с официального сайта последнюю версию Rufus. Вставляем флешку, все настройки по умолчанию, выбираем только что скачанный образ — делаем загрузочную флешку.
3. Установка
3.1. На ноуте, нажинаем F2 при загрузке, проверяем настройки загрузки. В параметрах должно стоять UEFI, флешка первой в порядке загрузки. Корректируем при необходимости.
3.2. Для некоторых дистрибутивов (например для HASSOS) требуется отключить безопасную загрузку, но соответствующий пункт меню подсвечен серым и не выбирается. Для того, чтобы его активировать, нужно установить пароль супервизора. После этого выбор режима безопасной загрузки становится активным. К счастью, Debian 12 такого не требует. Оставляем, как есть. Если безопасный режим всё-таки выключен, то ИМХО лучше включить.
3.3. Запускается загрузка. Выбираем установку в графическом режиме. Красноглазые поборники расовой чистоты пингвинов конечно фыркнут, но графический режим чисто визуально приятнее.
3.4. Выбор языка. Выбираем русский, страну, раскладку клавиатуры, часовой пояс. Далее пароли администратора, имя и пароли пользователя и т.п.
3.5. Сетевые карты установились автоматически, но иногда приходится бежать за драйвером. На этот случай полезно иметь под рукой второй компьютер и еще одну флешку.
3.6. Спрашивает про разметку диска. Я весь диск отдал целиком, с разделами по умолчанию. Переспросила — уверен ли я. Уверен. Все данные на диске уничтожены. Плакать поздно.
3.7. Выбор софта. Я оставляю выбор по умолчанию, оболочку Gnome по причинам, указанным в п.1.1, добавляю к умолчанием еще SSH сервер. После этого можно идти пить чай. Что-то устанавливается сразу, что-то подкачивается из интернета и тоже устанавливается. Процесс небыстрый.
3.8. Перезагрузка. Вынимаем флешку. После перезагрузки нелишне проверить в биосе порядок загрузки. Правим при необходимости.
4. Настраиваем вход через терминал
4.1. Идем в настройки роутера, ищем нового клиента, в настройках DHCP прописываем ему статический адрес. Передергиваем DHCP, убеждаемся, что ваш компьютер переподключился по новому адресу. Выписываем адрес на листочек, запоминаем.
4.2. Теперь можно заходить на него со своего рабочего компьютера по SSH через PuTTY или что-у-вас-там-вместо-телнета.
4.3. Свой логин и пароль, введенные ранее в п.2.4., надеюсь, помним?
5. Включаем себя в группу sudo
5.1. Заходим под рутом. Другой вариант – заходить под своим логином , далее уходить в root командой su –
usermod -aG sudo ИмяПользователя
5.2. Возвращаемся обратно
su – «Имя пользователя»
4.3. Проверяем. Например:
sudo ls -la /root
6. Лично мне иногда удобно пользоваться графическим удаленным рабочим столом. Настраиваем его. Опционально.
5.1. Включаем
sudo apt install xrdp
5.2. В Windows набираем «Подключение к удаленному рабочему столу». Получаем примерно это.
5.3. Вводим адрес из п. 3.1. Подключаемся.

7. Убираем засыпание Debian
7.1. Убираем общие засыпания.
sudo systemctl mask sleep.target suspend.target hibernate.target hybrid-sleep.target
7.2. Поскольку у нас ноутбук, нам надо убирать засыпание при закрытии крышки
sudo nano /etc/systemd/logind.conf
7.3. В секции [Login] Находим строчки HandleLidSwitch= и HandleLidSwitchDocked=
7.4. Ставим ignore
HandleLidSwitch=ignore
HandleLidSwitchDocked=ignore
7.5. Не забываем раскомментировать.
7.6. Сохраняем, выходим,
7.7. Рестарт службы
sudo systemctl restart systemd-logind.service
8. Полезности
8.1 Файл менеджер mc. Опционально. Иногда удобно.
sudo apt install mc
8.2. Пакет управления сетью. Потребуется для следующих шагов.
sudo apt install ethtool
9. Если несмотря на ИБП питание выключилось, а с ним выключился компьютер, полезно иметь возможность разбудить компьютер по сети
9.1. При загрузке, заходим в BIOS. Проверяем в биосе, что WOL включен. Если не включен – включаем.
9.2. Смотрим список сетевых интерфейсов
ip a
9.3. Находим название проводного интерфейса. Обычно это eth0, но бывают варианты. У меня enp3s0
9.4. Делаем временный WOL
sudo ethtool --change enp3s0 wol g
9.5. Проверяем
sudo ethtool enp3s0
9.6. Смотрим вывод. Ищем строчку wake-on: g. Если есть, то всё в порядке.
9.7. Запихиваем это в автозагрузку. Для этого:
9.8. Узнаем путь к ethtool
which ethtool
9.9. Смотрим вывод. У меня оно хранится в /usr/sbin/ethtool
9.10. Создаём файл wol.service в /etc/systemd/system
sudo nano /etc/systemd/system/wol.service
9.11. В него вписываем:
[Unit]

Description=Enable Wake On Lan

[Service]

Type=oneshot

ExecStart = /usr/sbin/ethtool --change enp3s0 wol g

[Install]

WantedBy=basic.target
9.12. Запускаем службу
sudo systemctl daemon-reload
sudo systemctl enable wol.service
9.13. Проверяем
sudo shutdown
9.14. Будим машину удобным для вас способом. В интерфейсе кинетике для есть специальная кнопочка.
9.15. Если все работает, настраиваем автозапуск будилки на роутере или на другом внешнем устройстве гарантированно запасающемся по сбою питанию. На Keenetic это делается через opkg
10. Устанавливаем виртуальную машину.
(сперта https://g-soft.info/linux/10968/kak-ustanovit-virtualbox-7-0-v-debian/)
10.1. Проверяем зависимости, большая часть уже на месте, те, которых не хватает, устанавливаем.
sudo apt install dirmngr ca-certificates software-properties-common apt-transport-https curl -y
10.2. Необходимо импортировать ключ GPG (GNU Privacy Guard). Ключ GPG является частью системы криптографии с открытым ключом, которая позволяет убедиться в том, что устанавливаемые пакеты являются подлинными и получены из официального репозитория VirtualBox
curl -fSsL https://www.virtualbox.org/download/oracle_vbox_2016.asc | gpg --dearmor | sudo tee /usr/share/keyrings/virtualbox.gpg > /dev/null
10.3. Добавляем репозиторий Virtialbox
echo "deb [arch=$( dpkg --print-architecture ) signed-by=/usr/share/keyrings/virtualbox.gpg] http://download.virtualbox.org/virtualbox/debian $(lsb_release -cs) contrib" | sudo tee /etc/apt/sources.list.d/virtualbox-7.list
10.4. Обновляем список репозиториев
sudo apt update
10.5. Установка Virtual Box
sudo apt install virtualbox-7.0 linux-headers-$(uname -r) -y
10.6. Добавляем пользователя в группу
sudo usermod -aG vboxusers alexl
10.7. Находим значок VirtialBox. Запускаем, проверяем
11. Установка Home assistant.
подсмотрено здесь: https://ivan.bessarabov.ru/blog/how-to-install-home-assistant-in-virtualbox)
11.1. Скачиваем vdi образ с официального сайта https://www.home‑assistant.io/installation/alternative
11.2. Разархивируем
11.3. Открываем виртуальную машину
11.4. На правой панели жмём Создать
11.5. Пишем название (лучше без пробелов)
11.6. Образ ISO оставляем пустым
11.7. Тип: Linux
11.8. Версия: Linux 2.6 / 3.x / 4.x (64-bit).
11.9. Вкладка Оборудование: сколько не жалко, но не менее 2 процессоров и не менее 2GB RAM
11.10. Ставим галку EFI
11.11. Вкладка Жесткий диск: ставим использовать существующий виртуальный диск. Выбираем наш скачанный образ
11.12. Создать машину
11.13. Идем в опции сети. Меняем NAT на bridge
11.14. Запускаем
12. Настройка доступа из сети
12.1. Идем в роутер, видим новое устройство. Это виртуальная машина. Прописываем ей статический адрес
12.2. В настройках роутера прописываем доменное имя на этот адрес и порт 8123
13. Прописываем автозапуск виртуальной машины при перезагрузке.
(https://redos.red-soft.ru/base/arm/os-virtual/virtualbox/virtualbox-autostart/)
13.1. Создаем новую службу
sudo nano /etc/systemd/system/vbox@.service
13.2. Прописываем туда
Description=Virtual Box Guest %I

After=network.target vboxdrv.service

Before=runlevel2.target shutdown.target

[Service]

User=свой юзернайм

Group=vboxusers

Type=forking

Restart=no

TimeoutSec=5min

IgnoreSIGPIPE=no

KillMode=process

GuessMainPID=no

RemainAfterExit=yes

ExecStart=/usr/bin/VBoxManage startvm %i --type headless

ExecStop=/usr/bin/VBoxManage controlvm %i acpipowerbutton

[Install]

WantedBy=multi-user.target
13.3. Реинициализируем службы.
systemctl daemon-reload
13.4. %1 в первой строке – это параметр, куда вставляется имя или идентификатор вашей виртуальной машины. Имя вы знаете из п. 10.5, но идентификатор использовать правильнее. Узнаем его
VBoxManage list vms
13.5. Находим нужную машину, копируем идентификатор, вставляем в следующую команду
sudo systemctl status vbox@идентификатор
13.6. Что‑то вроде:
sudo systemctl status vbox@cea2060b-61a1-44a1-b5df-f9a6b0b82f43
13.7. Если ошибки нет, смотрим статус. После @будет ваш идентификатор.
sudo systemctl status vbox@cea2060b-61a1-44a1-b5df-f9a6b0b82f43
13.8. Если все норм, добавляем в автозагрузку. (идентификатор меняем на свой)
sudo systemctl enable vbox@cea2060b-61a1-44a1-b5df-f9a6b0b82f43
14. Финальная настройка
14.1. Заходим по вашему адресу, например:
http://192.168.0.15:8123
14.2. Или, как у меня
https://Hassio.mydomen.keenetic.pro
14.3. Вводим пароль, логин
14.4. Ждём
14.5. Настраиваем параметры места.
14.6. Пользуемся!