
Загрузочная флешка с macOS Catalina пригодится, когда нужно поставить систему с нуля, либо обновить сразу несколько машин. Сейчас я расскажу, как создать такую флешку в самой macOS и в Windows. Инструкция подходит для High Sierra, Mojave и Catalina.
• 3 min read
Как создать загрузочную флешку в macOS
Нам понадобится любой USB-накопитель от 8 Гб и бесплатная утилита Disk Creator. Флешку также можно создать консольными командами через терминал, но я не вижу смысла мучаться.
🧰 Скачать Disk Creator, 2.2 МБ
Шаг 1. Загрузите macOS Catalina
Если сейчас у вас установлена macOS High Sierra или более поздняя версия macOS, то вы можете загрузить macOS Catalina из Mac App Store, после чего в папке Приложения macOS появится новая иконка .

Шаг 2. Запустите Disk Creator
Если вы заранее загрузили установщик macOS Catalina, то утилита Disk Creator автоматически найдет его и отобразит в интерфейсе. Останется только выбрать флешку, на которую вы хотите развернуть образ:
Шаг 3. Создайте загрузочный диск
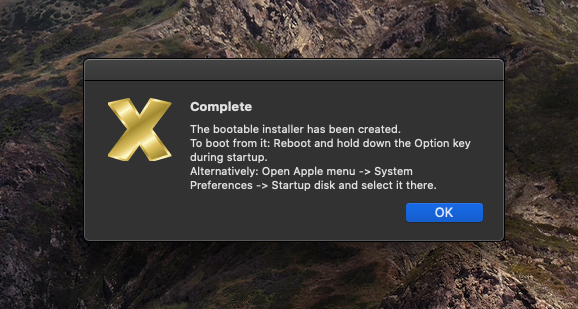
Нажмите Create Installer и подождите пока Disk Creator создал загрузочную флешку с Catalina. На быстром накопителе процесс занимает 3–4 минуты.
👨💻 Читайте также: что стоит на моем Mac в 2019 году
Как загрузится с флешки и начать установку
Вставьте загрузочную флешку в Mac и включите его удерживая клавишу Option. Компьютер начнет загружаться в флешки. Если вы собираетесь устанавливать систему на Хакинтош, то выберете флешку в качестве «загрузочной» в BIOS.
🤦♂️Если загрузка с флешки не происходит, стоит попробовать пересоздать её еще раз или попробовать другой накопитель. Я сам не раз сталкивался с ситуациями, когда с определенными плешками установщик просто не хотел грузиться.
И обязательно почитайте мои 5 советов по переустановке macOS с нуля. В этой статье я рассказал, как ничего не забыть и потратить на переустановку системы минимум времени.
Как создать загрузочную флешку macOS в Windows
При создании флешки в Windows понадобится утилита TransMac. Она платная, но после установки есть двухнедельный пробный период. Чего нам более чем достаточно.
🧰 Скачать TransMac, 2.1 МБ
Шаг 1. Загрузите macOS Mojave
Увы, но официального способа сказать macOS из под Windows нет. Вам придется скачать его при помощи iMac или MacBook. Либо же найти установщик на торрентах.

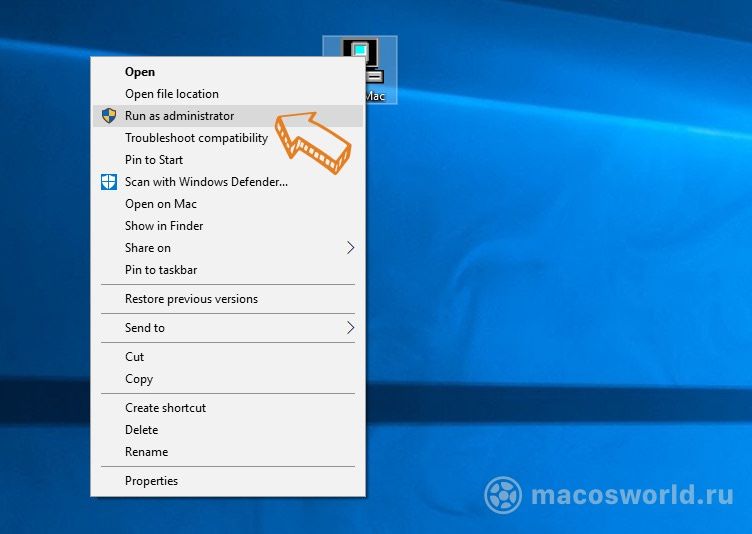
Шаг 2. Запустите TransMac в режиме администратора
Нажмите правой кнопкой на иконке TransMac и выберете соответствующий пункт в меню.
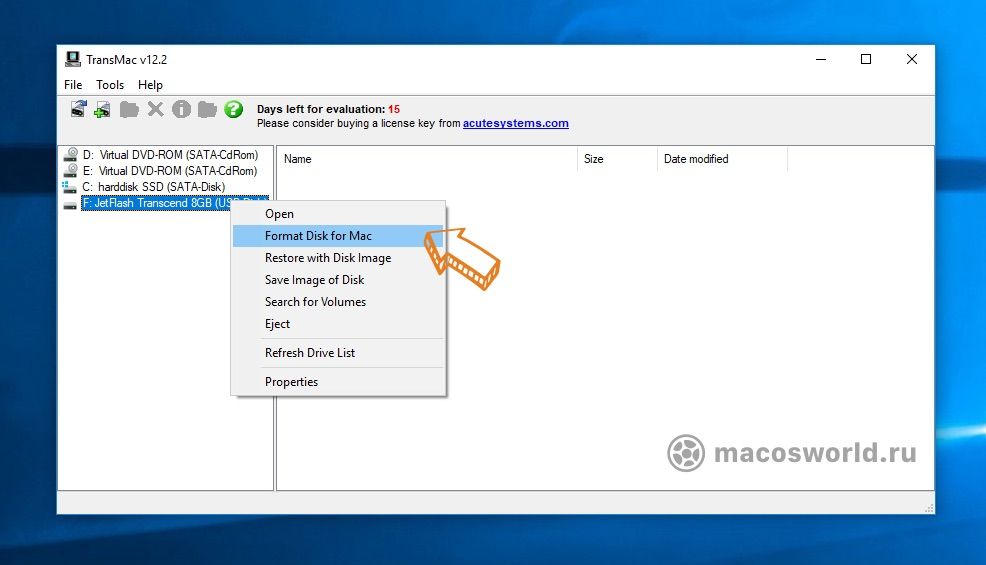
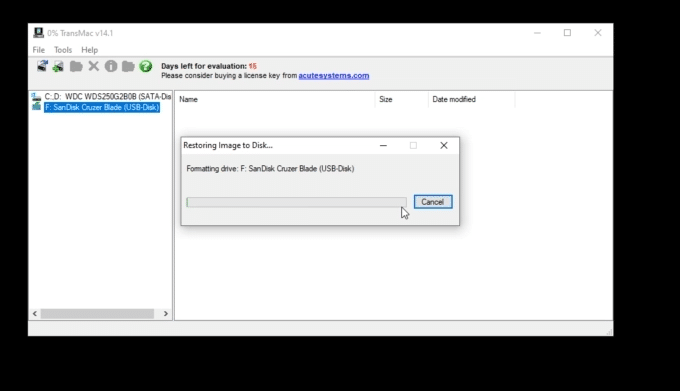
Шаг 3. Отформатируйте флешку
- Правый клик на названии флешки;
- Format Disk for Mac.
Шаг 4. Выберете dmg-файл с образом macOS
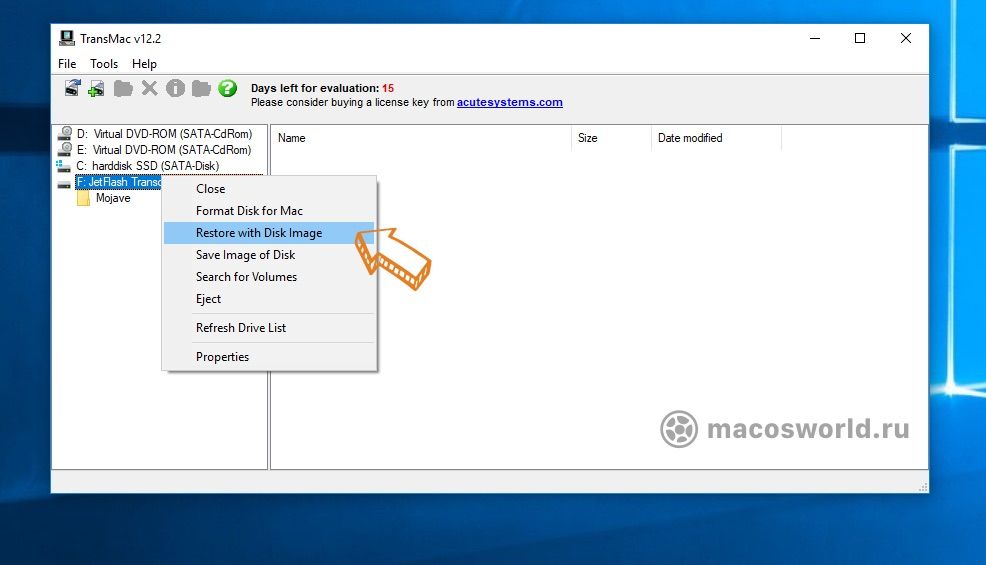
- Правый клик на названии флешки;
- Restore with Disk Image;
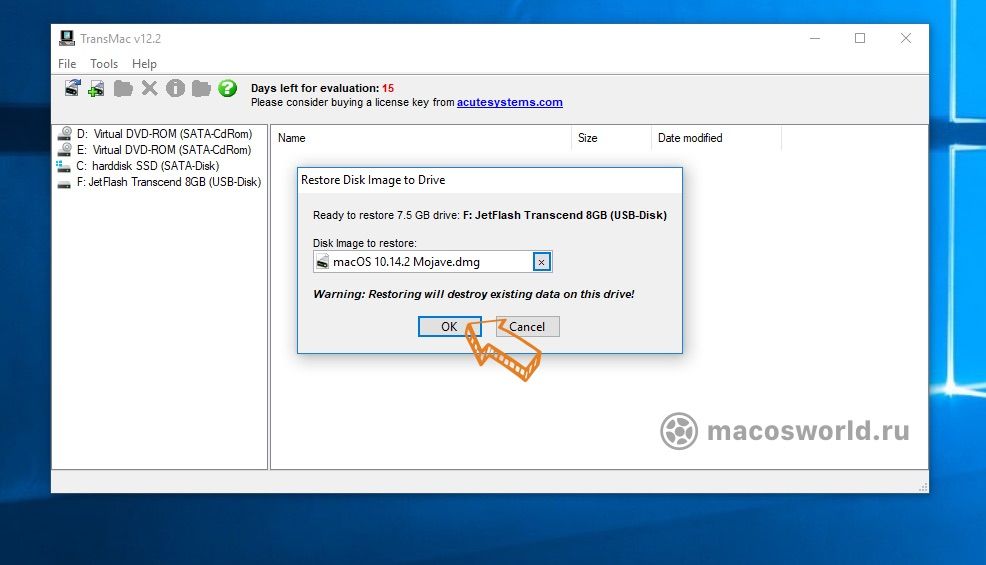
- Укажите путь к установочному файлу macOS;
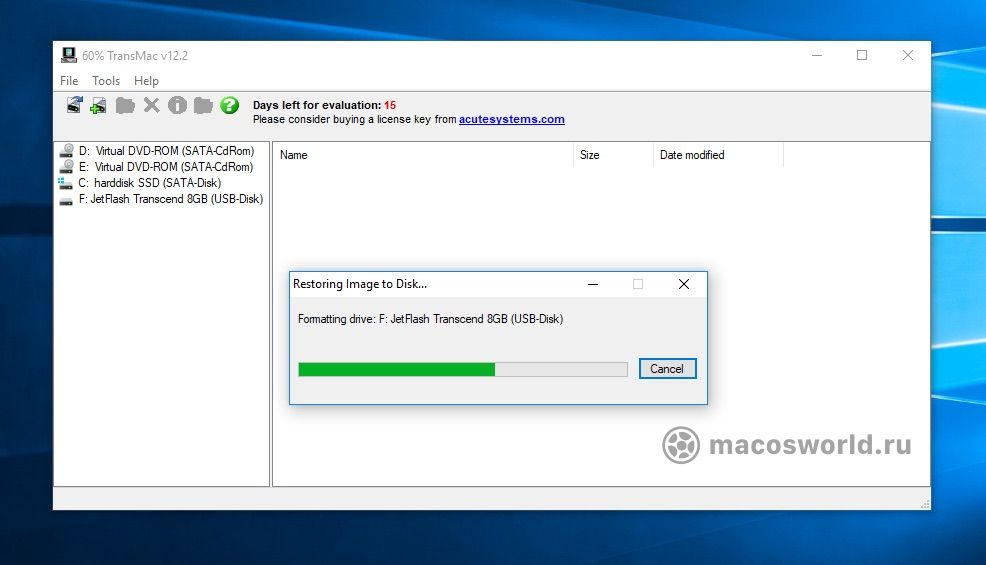
- Дождитесь завершения создания загрузочной флешки.
Как загрузится с флешки и начать установку
Вставьте загрузочную флешку в Mac и включите его удерживая клавишу Option. Так вы сможете начать установку. Если вы собираетесь устанавливать систему на Хакинтош, то выберете флешку в качестве «загрузочной» в BIOS.
И обязательно почитайте мои 5 советов по переустановке macOS с нуля. В этой статье я рассказал, как ничего не забыть и потратить на переустановку системы минимум времени.
Читайте также: 16 Способов освободить место на диске в Windows 10.
Microsoft в новых версиях Windows 10 скрыла от пользователей старое доброе «Средство Просмотра фотографий Windows», На смену которому пришло современное приложение, под названием «Фотографии» (Photos), нельзя сказать, что новое приложение не удобное, просто не совсем привычное.
Несмотря на то что новое приложение «Фотографии» имеет более богатый функционал в отличии от старого классического, но многие пользователи хотят вернуть «Средство Просмотра фотографий Windows», на самом деле это несложно.
Как вернуть Классическое Средство Просмотра фотографий в Windows 10?
Предлагаем нашим читателям Три способа, с помощью которых, вы сможете установить классический просмотрщик для использования в качестве программы по умолчанию, для просмотра ваших любимых изображений и фотографий.
- Первый способ — позволит вам иметь под рукой готовый Reg файл, вы всегда сможете восстановить средство просмотра фотографий на нескольких компьютерах.
- Второй способ — более быстрый, просто выполните команду в Windows Powershell.
- Третий способ — с помощью приложения и библиотеки shimgvw.dll
Microsoft, не удалила Просмотрщик из Windows 10, установить в настройках Средство Просмотра фотографий Windows по умолчанию нельзя, так как оно отсутствует в списке Приложения по умолчанию. А в Классической панели управления ассоциировать с ним можно только файлы с расширением TIFF. Давайте исправим это ограничение в Windows 10 и включим всеми любимый старый, добрый «Просмотр фотографий».
Просмотр фотографий Windows может быть активирован путем редактирования реестра. Необходимо добавить набор значений для ассоциации графических файлов в Раздел реестра —
[HKEY_LOCAL_MACHINE\SOFTWARE\Microsoft\Windows Photo Viewer\Capabilities\FileAssociations].Это можно сделать в ручную или с помощью команды Powershell.
Включить Windows Photo Viewer с помощью готового Reg файла.
Чтобы сэкономить Ваше время, ниже, я добавил уже готовый файл реестра, теперь вам нет необходимость вносить сложные правки в реестре вручную, все что нужно — загрузить архив, распаковать и запустить файл: Windows 10 Photo Viewer.reg.
Шаг 1: Загрузите архив Windows 10 Photo Viewer.zip и распакуйте его.
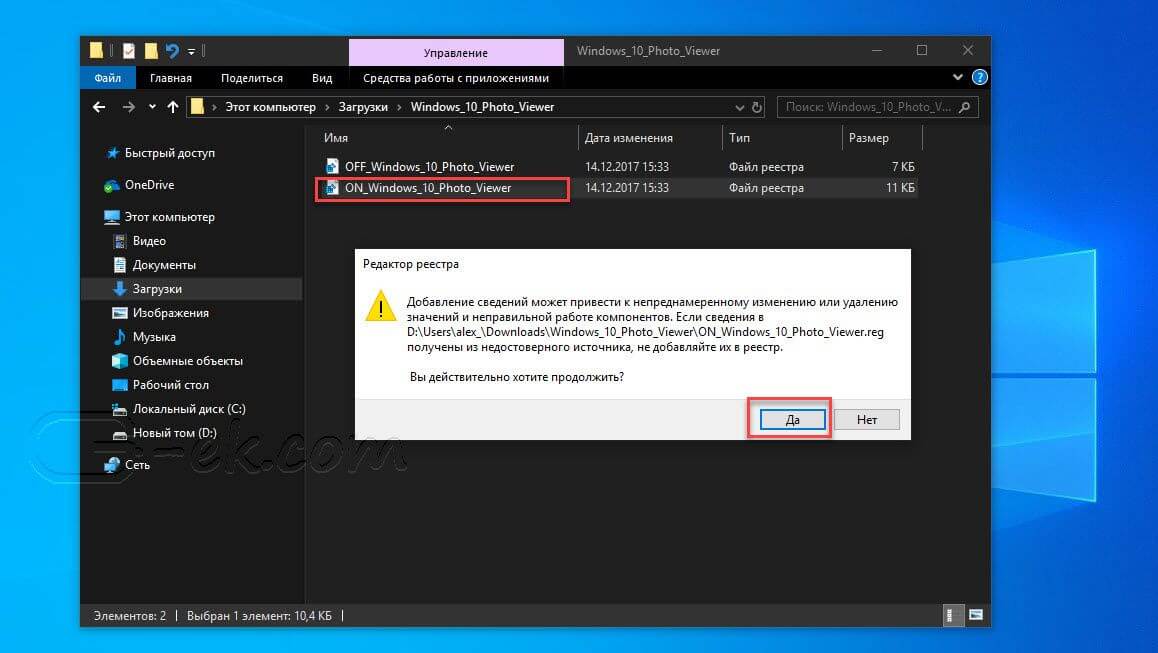
Шаг 2: В полученной папке, найдите и запустите файл — «ON_Windows_10_Photo_Viewer»
Шаг 3: Подтвердите запрос контроля учетных записей и добавление сведений.
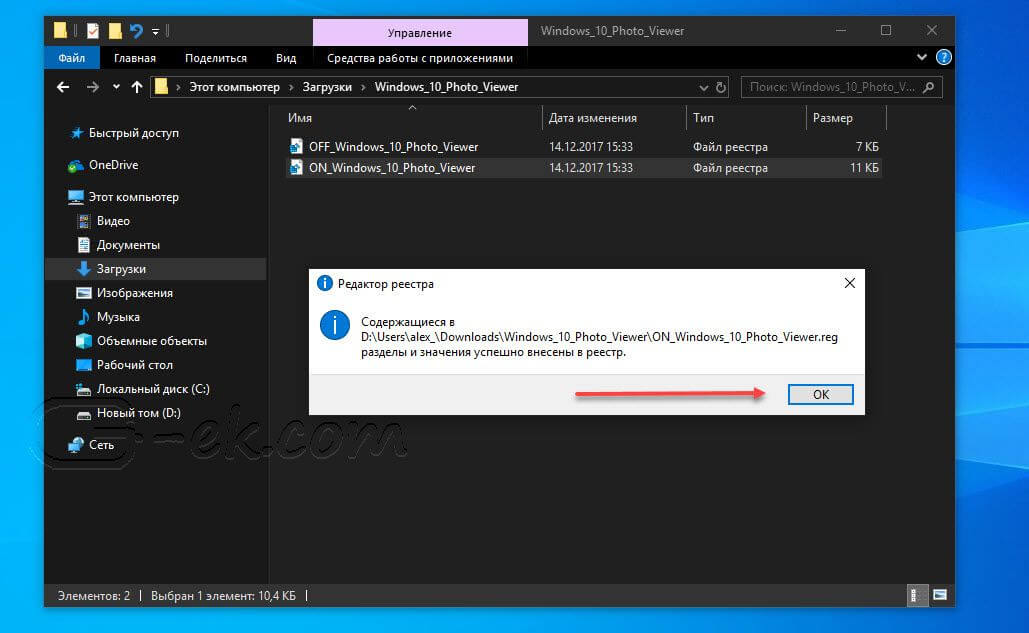
После запуска, все необходимые разделы и значения будут автоматически внесены в реестр, о чем вы будете оповещены, (см. скриншот ниже).
Шаг 4: Теперь откройте Параметры Windows, нажав сочетания клавиш Win + I или нажмите на значок шестеренки в меню «Пуск».
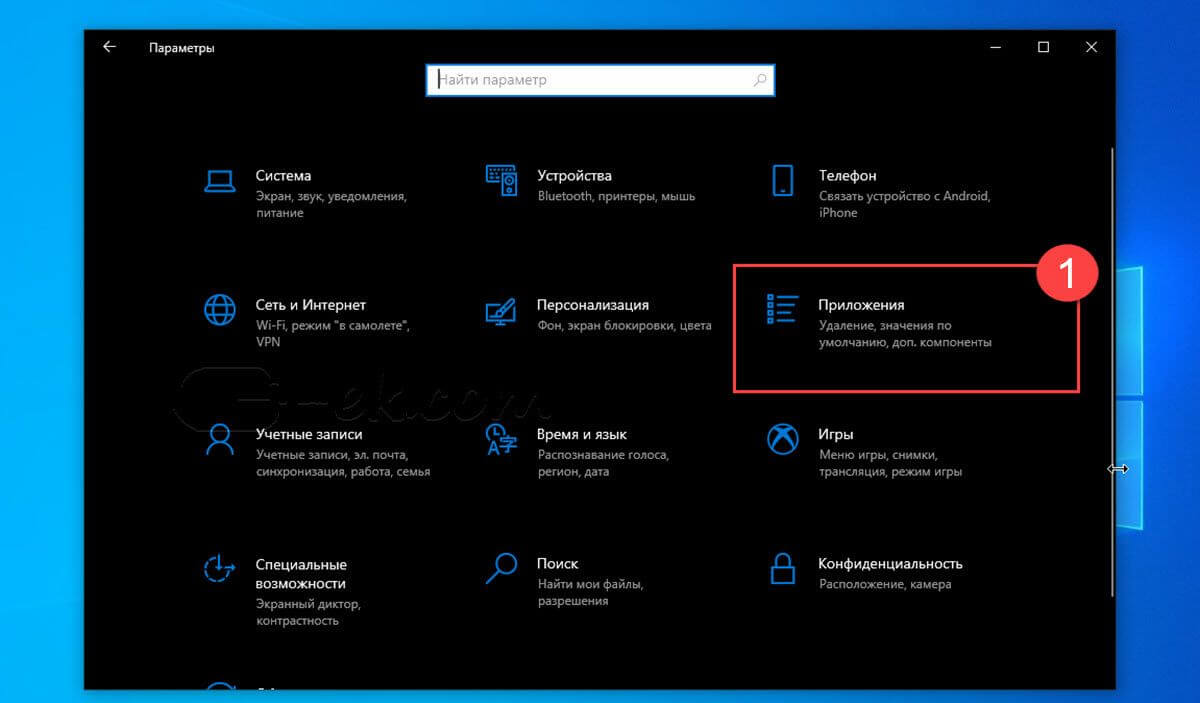
Шаг 5: Перейдите в группу настроек «Приложения» → «Приложения по умолчанию».
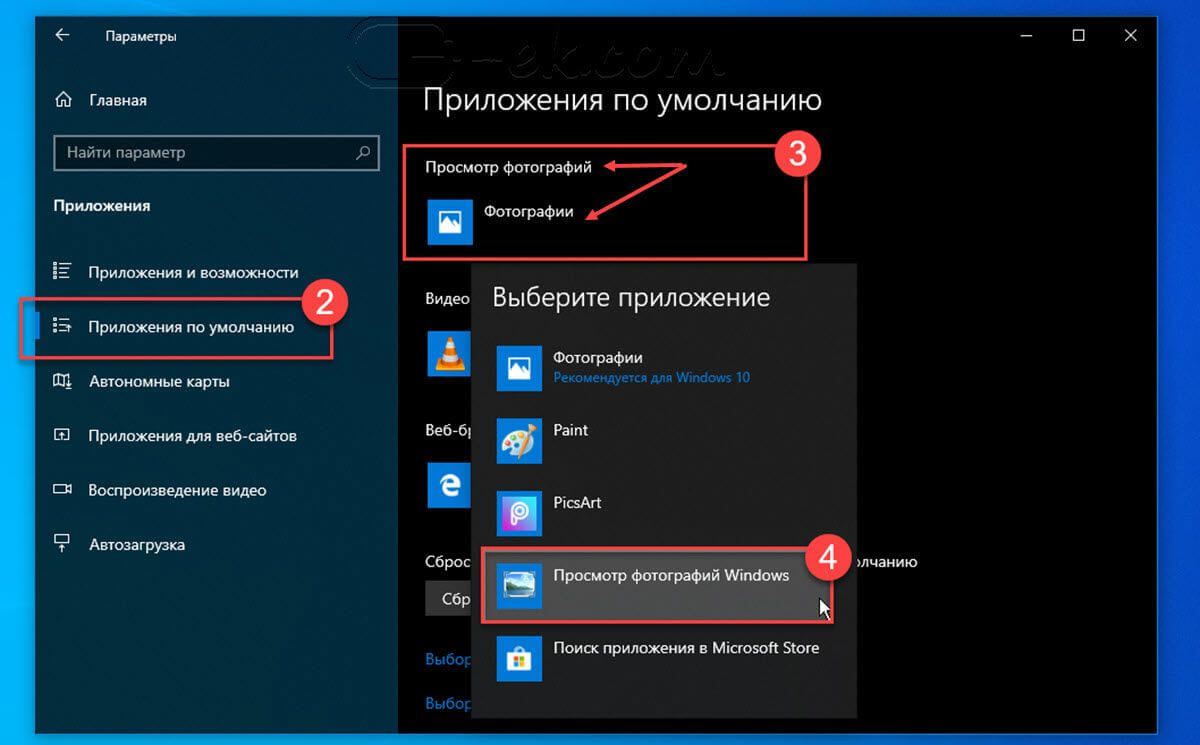
На открывшийся странице «Приложения по умолчанию», найдите раздел «Просмотр фотографий», нажмите на значок приложения которое используется по умолчанию и выберите в выпадающем меню «Просмотр фотографий Windows». См. скрин ниже:
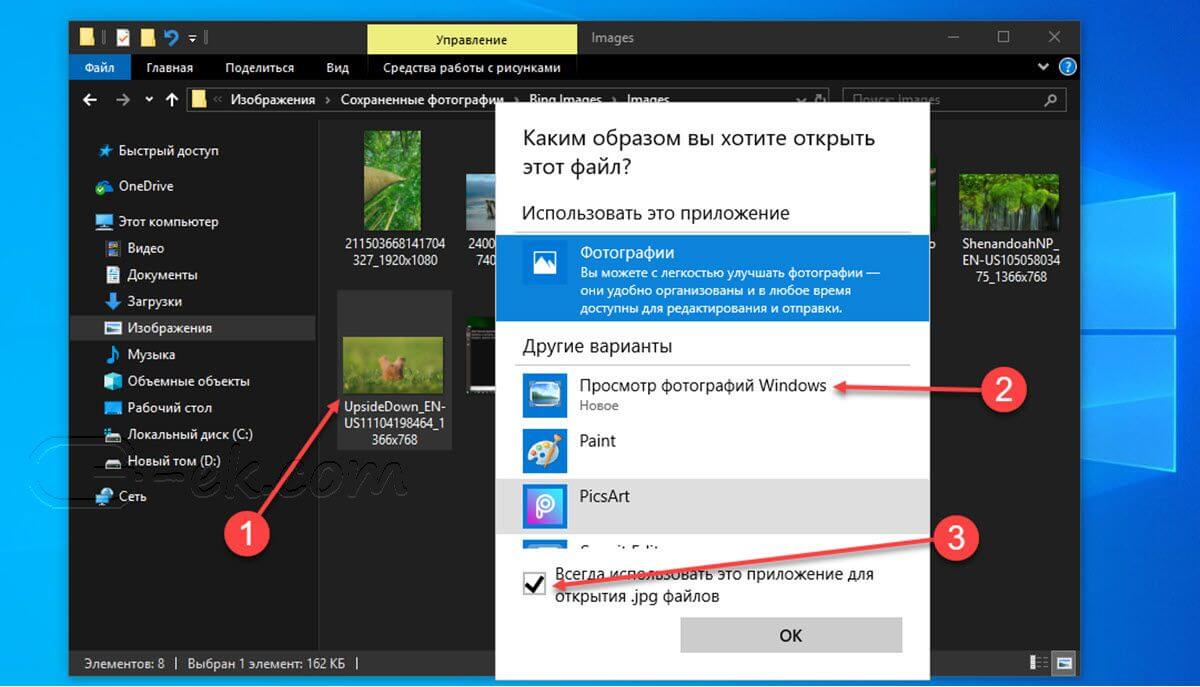
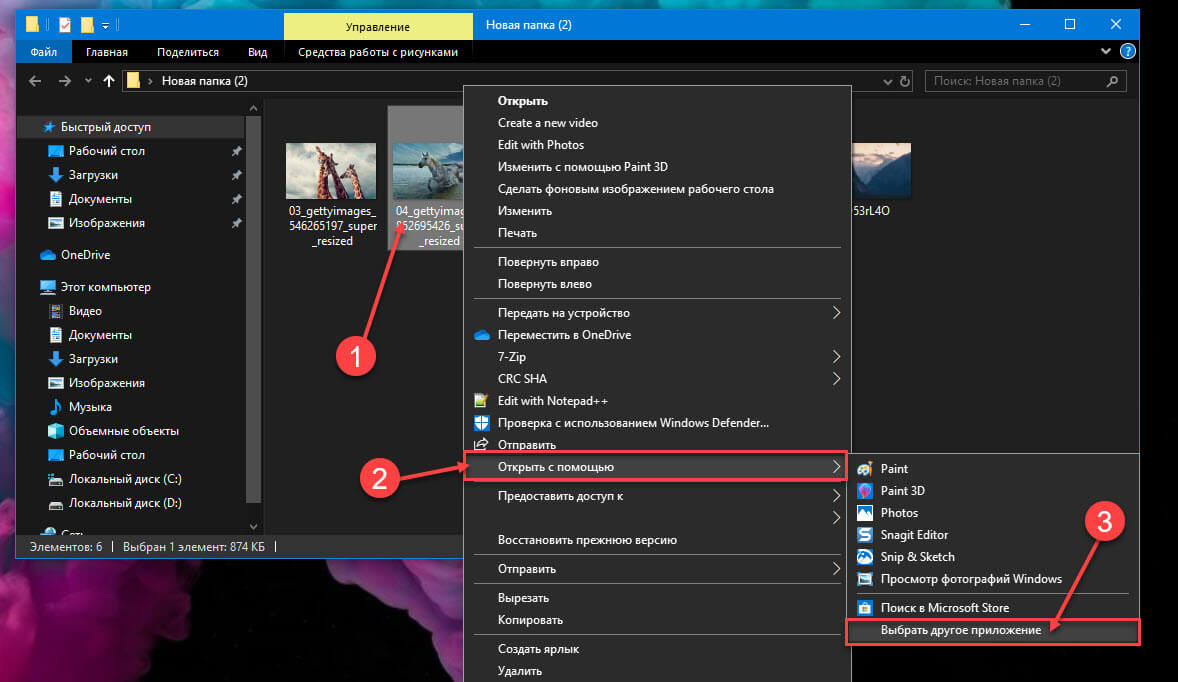
Или, вы можете кликнуть правой кнопкой мыши на любом изображении и выбрать в контекстном меню «Открыть с помощью»
В появившимся окне «Каким образом вы хотите открыть этот файл», выберите «Просмотр фотографий Windows».
Примечание: Если вы захотите вернуть настройки по умолчанию файл отката присутствует в архиве.
Все!
Способ 2 — Включить классическое средство просмотра фотографий с помощью Powershell.
Данный способ отличается от первого, только настройкой Приложения по умолчанию, выполняется для каждого типа изображения.
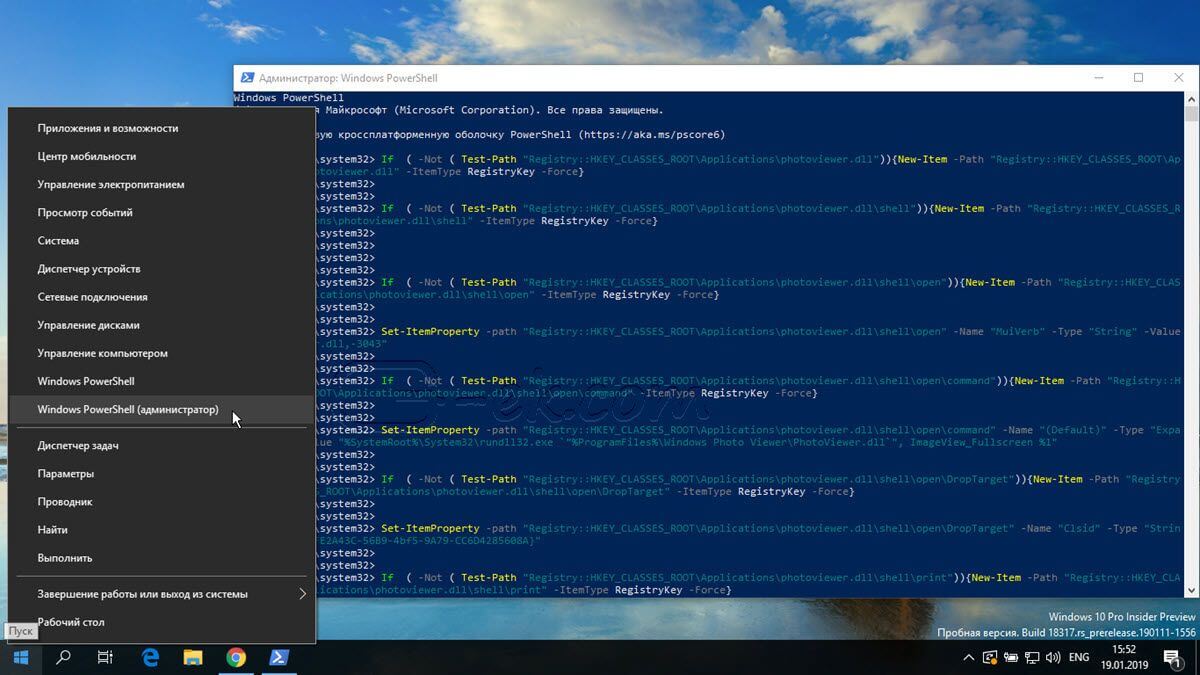
Шаг 1: Кликните правой кнопкой мыши на меню «Пуск».
Шаг 2: В появившемся контекстном меню выберите Windows Powershell (администратор) — Это важно!
Шаг 3: Скопируйте и вставьте следующие команды:
Примечание: Скопируйте и вставьте все команды за один раз включая символ # и нажмите клавишу Enter.
If  ( -Not ( Test-Path "Registry::HKEY_CLASSES_ROOT\Applications\photoviewer.dll")){New-Item -Path "Registry::HKEY_CLASSES_ROOT\Applications\photoviewer.dll" -ItemType RegistryKey -Force}
If  ( -Not ( Test-Path "Registry::HKEY_CLASSES_ROOT\Applications\photoviewer.dll\shell")){New-Item -Path "Registry::HKEY_CLASSES_ROOT\Applications\photoviewer.dll\shell" -ItemType RegistryKey -Force}
If  ( -Not ( Test-Path "Registry::HKEY_CLASSES_ROOT\Applications\photoviewer.dll\shell\open")){New-Item -Path "Registry::HKEY_CLASSES_ROOT\Applications\photoviewer.dll\shell\open" -ItemType RegistryKey -Force}
Set-ItemProperty -path "Registry::HKEY_CLASSES_ROOT\Applications\photoviewer.dll\shell\open" -Name "MuiVerb" -Type "String" -Value "@photoviewer.dll,-3043"
If  ( -Not ( Test-Path "Registry::HKEY_CLASSES_ROOT\Applications\photoviewer.dll\shell\open\command")){New-Item -Path "Registry::HKEY_CLASSES_ROOT\Applications\photoviewer.dll\shell\open\command" -ItemType RegistryKey -Force}
Set-ItemProperty -path "Registry::HKEY_CLASSES_ROOT\Applications\photoviewer.dll\shell\open\command" -Name "(Default)" -Type "ExpandString" -Value "%SystemRoot%\System32\rundll32.exe `"%ProgramFiles%\Windows Photo Viewer\PhotoViewer.dll`", ImageView_Fullscreen %1"
If  ( -Not ( Test-Path "Registry::HKEY_CLASSES_ROOT\Applications\photoviewer.dll\shell\open\DropTarget")){New-Item -Path "Registry::HKEY_CLASSES_ROOT\Applications\photoviewer.dll\shell\open\DropTarget" -ItemType RegistryKey -Force}
Set-ItemProperty -path "Registry::HKEY_CLASSES_ROOT\Applications\photoviewer.dll\shell\open\DropTarget" -Name "Clsid" -Type "String" -Value "{FFE2A43C-56B9-4bf5-9A79-CC6D4285608A}"
If  ( -Not ( Test-Path "Registry::HKEY_CLASSES_ROOT\Applications\photoviewer.dll\shell\print")){New-Item -Path "Registry::HKEY_CLASSES_ROOT\Applications\photoviewer.dll\shell\print" -ItemType RegistryKey -Force}
If  ( -Not ( Test-Path "Registry::HKEY_CLASSES_ROOT\Applications\photoviewer.dll\shell\print\command")){New-Item -Path "Registry::HKEY_CLASSES_ROOT\Applications\photoviewer.dll\shell\print\command" -ItemType RegistryKey -Force}
Set-ItemProperty -path "Registry::HKEY_CLASSES_ROOT\Applications\photoviewer.dll\shell\print\command" -Name "(Default)" -Type "ExpandString" -Value "%SystemRoot%\System32\rundll32.exe `"%ProgramFiles%\Windows Photo Viewer\PhotoViewer.dll`", ImageView_Fullscreen %1"
If  ( -Not ( Test-Path "Registry::HKEY_CLASSES_ROOT\Applications\photoviewer.dll\shell\print\DropTarget")){New-Item -Path "Registry::HKEY_CLASSES_ROOT\Applications\photoviewer.dll\shell\print\DropTarget" -ItemType RegistryKey -Force}
Set-ItemProperty -path "Registry::HKEY_CLASSES_ROOT\Applications\photoviewer.dll\shell\print\DropTarget" -Name "Clsid" -Type "String" -Value "{60fd46de-f830-4894-a628-6fa81bc0190d}"
#
Шаг 4: После выполнения команды закройте окно Powershell и откройте папку с изображениями.
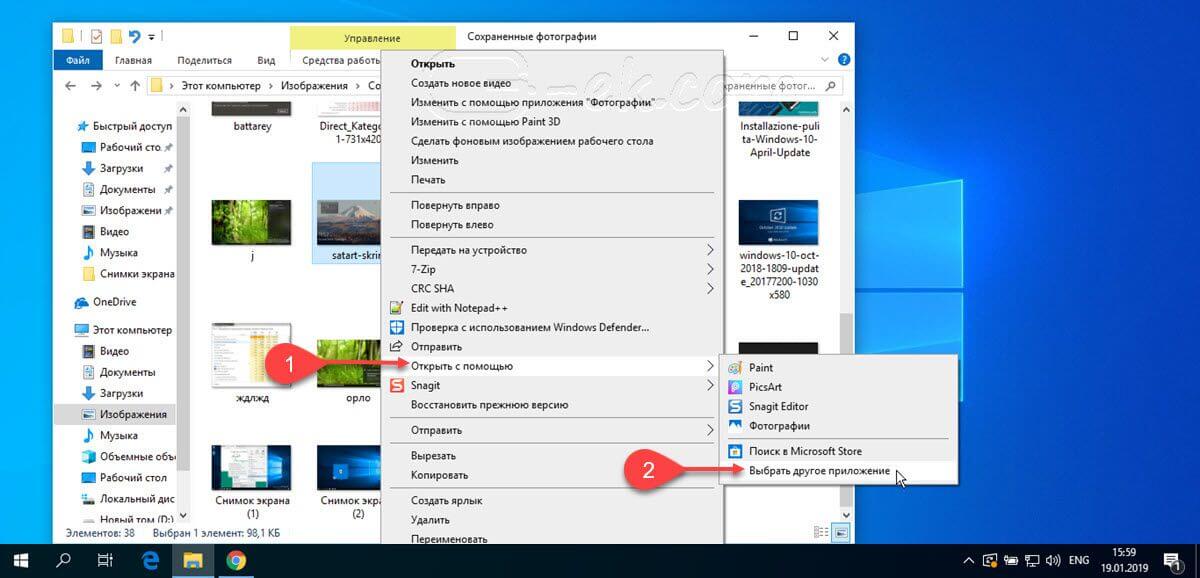
Шаг 5: Нажмите правой кнопкой мыши на любой картинке и выберите в контекстном меню «Открыть с помощью» → «Выбрать другое приложение».
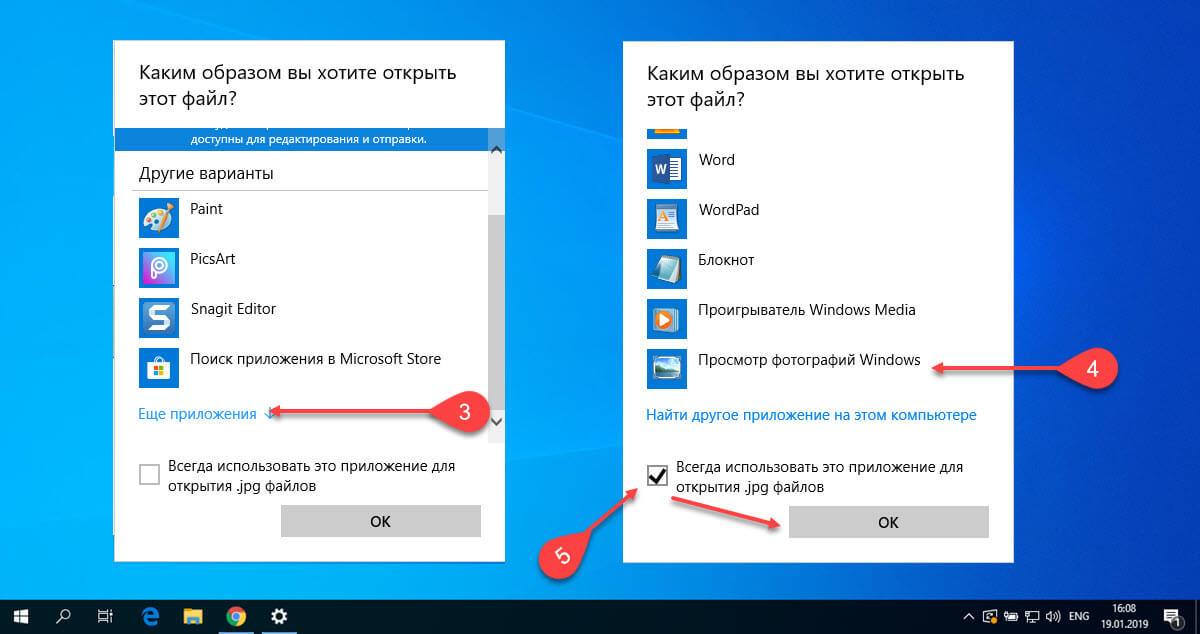
Шаг 6: В открывшимся окне Найдите и нажмите «Просмотр фотографий Windows», Для того чтобы фото и картинки открывались всегда с помощью «Средства Просмотра фотографий Windows» не забудьте поставить галочку как на скриншоте ниже:
Все! вы справились, перейдите в папку с изображениями или фотографиями и дважды кликните на любой картинке, изображение откроется в «Средстве Просмотра фотографий Windows»!
Способ 3 — Как вернуть стандартный просмотрщик изображений с помощью приложения.
Поскольку способы выше работают при условии что в системе есть файл библиотеки динамической компоновки shimgvw.dll. Еще один способ вернуть средство просмотра фотографий, с помощью отдельного приложения которое уже включает в себя нужную библиотеку если ваша по какой либо причине, повреждена.
Оригинальный просмотрщик картинок в Windows — это не совсем обычное приложение. Расположено оно в библиотеке shimgvw, следовательно и запустить его напрямую нельзя — нужен как минимум rundll32.
Чтобы сделать загрузчик не нужно ничего кроме небольшого числа функций WinAPI, получилось мини-приложение не требующее установки, которое включает в себя две библиотеки shimgvw.dll из Windows 7 и XP SP3, с размером всего 502 килобайта. На выходе получаем независимый просмотрщик картинок, который можно записать на флешку и всегда иметь под рукой.
Шаг 1: Загрузите мини приложение: Средство просмотра изображений для Windows 10.
Шаг 2: Распакуйте полученный архив Sredstvo_prosmotra_fotografij.zip в любое место, я скопирую содержимое архива в корневую директорию диска С:\.
Шаг 3: Теперь, откройте папку с изображениями, кликните на одном из них правой кнопкой мыши и выберите «Открыть с помощью» → «Выбрать другое приложение».
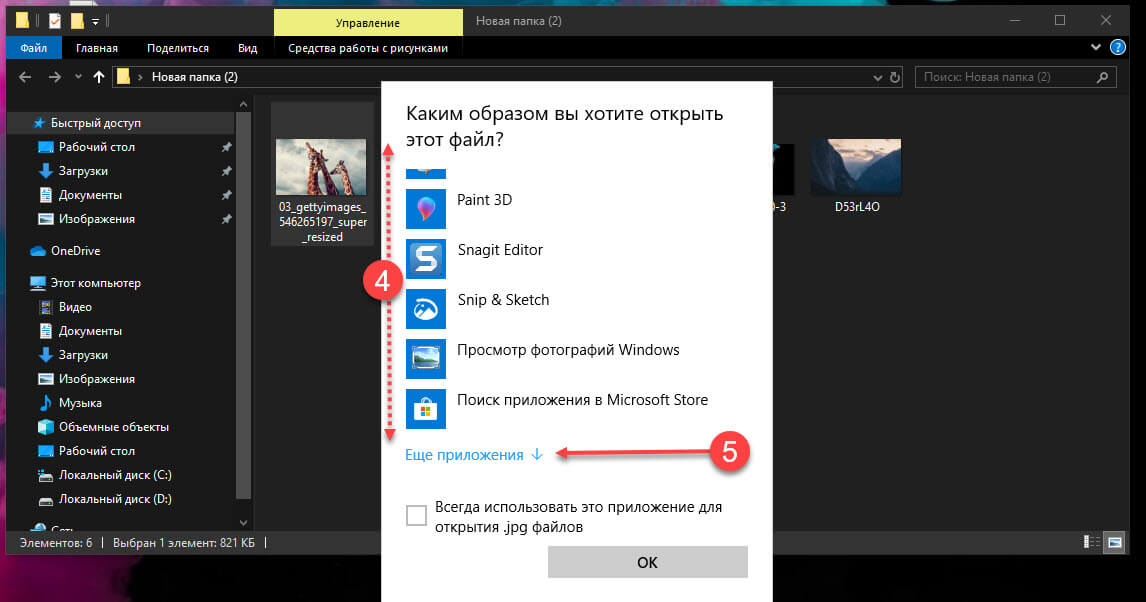
Шаг 3: В окне запроса «Каким образом вы хотите открыть этот файл» прокрутите список в самый низ и нажмите ссылку «Еще приложения».
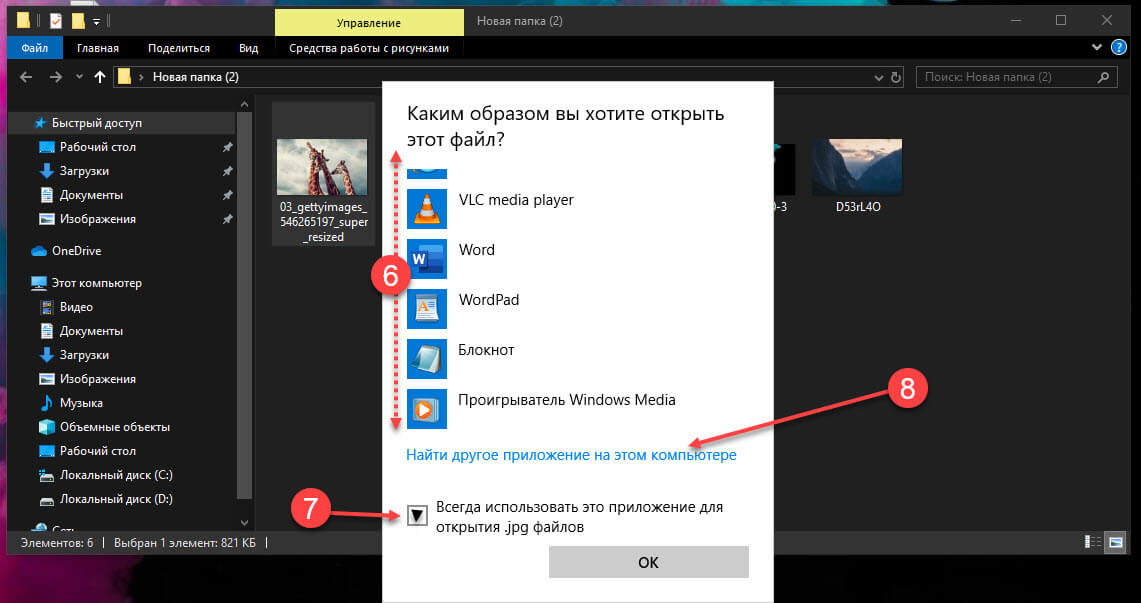
Шаг 4: В следующем окне, установите флажок для «Всегда использовать это приложение для открытия файла jpg» и нажмите ссылку «Найти другое приложение на этом компьютере».
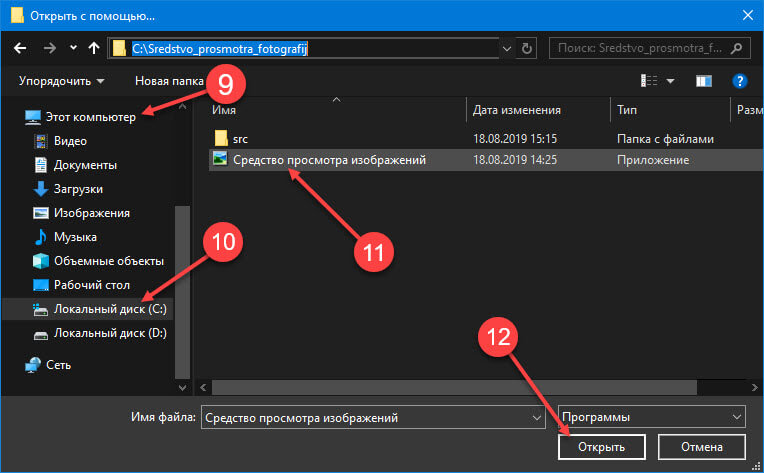
Шаг 5: Теперь перейдите в папку где вы распаковали загруженный архив (я поместил содержимое архива в корень диска С:\Sredstvo_prosmotra_fotografij), выберите файл «Средство просмотра изображений» и нажмите кнопку «Открыть».
Все! Просмотрщик работает!
Повторите эту процедуру для таких типов файлов: .jpg, .jpeg, .png, .tiff, .bmp, .gif, .tif Или, Вы можете настроить ассоциации файлов в приложении «Параметры» перейдите «Приложения» → «Приложения по умолчанию» → «Выбор стандартных приложений для всех типов».
Для того чтобы вернуть просмотр фотографий как в XP, в нем работают анимированные гифки, вам придётся выполнить часть данного руководства, описанную выше. После выполнения, просто переименуйте в папке «Sredstvo_prosmotra_fotografij» библиотеку shimgvw.dll в Win7-shimgvw.dll, а xp-shimgvw.dll в shimgvw.dll.
Все!
Вам может быть интересно: Как вернуть классическое Средство Просмотра фотографий в Windows 11
Когда компьютер Mac внезапно перестал запускаться, а резервной копии macOS под рукой нет, поможет чистая переустановка системы.
Если рядом есть другой Mac, то проблем с созданием загрузочной флешки не возникнет. Сейчас расскажем, как выкрутиться из ситуации с Windows-ПК.
? Спасибо re:Store за полезную информацию. ?
Как создать загрузочную флешку в Windows
1. Для создания флешки скачиваем приложение TransMac.
Утилита распространяете на сайте разработчика по цене $59. К счастью, есть бесплатный 15-дневный триал.
2. Теперь потребуется найти образ для установки macOS.
Официального способа скачать операционную систему из Windows нет. Придется либо искать друга с компьютером Mac, либо пользоваться известными всем сайтами.
Обратите внимание, что для работы утилиты TransMac нужен образ macOS в формате *.dmg
Если удастся найти друга с яблочным компьютером и скачать macOS из Mac App Store, будет проще у него же и сделать нагрузочную флешку по инструкции.
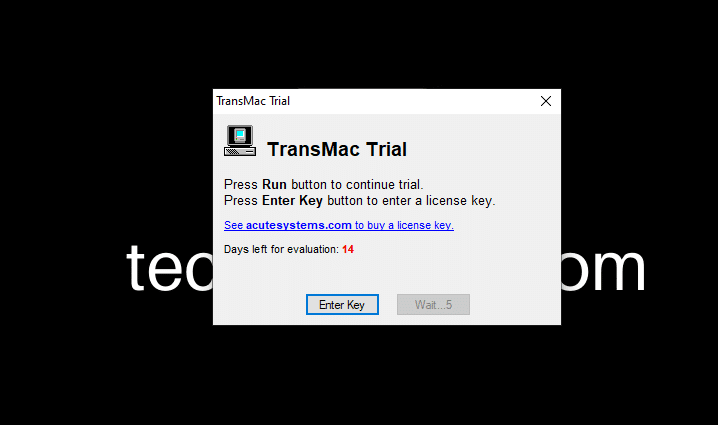
3. Когда образ скачан, а утилита установлена, запускаем TransMac от имени Администратора и соглашаемся на триальный период использования программы.
4. Подключаем к компьютеру флешку (понадобится накопитель емкостью 8ГБ и более)
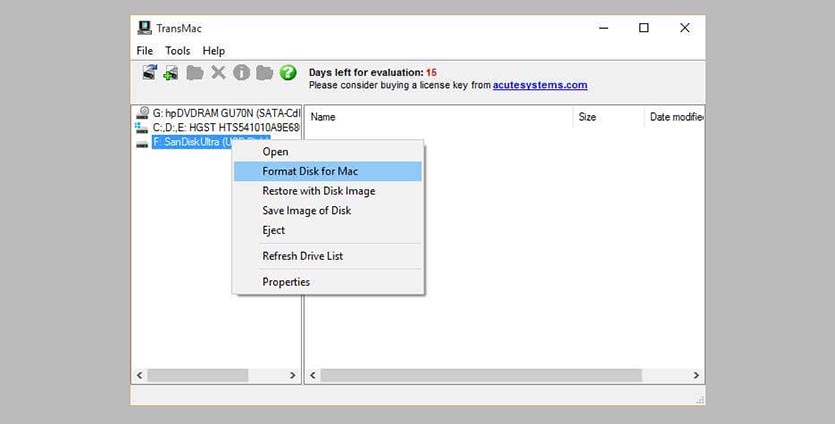
5. В боковом меню находим подключенный накопитель и через контекстное меню форматируем командой Format Disk for Mac.
Внимание! Данный процесс является необратимым, все данные с флешки будут удалены.
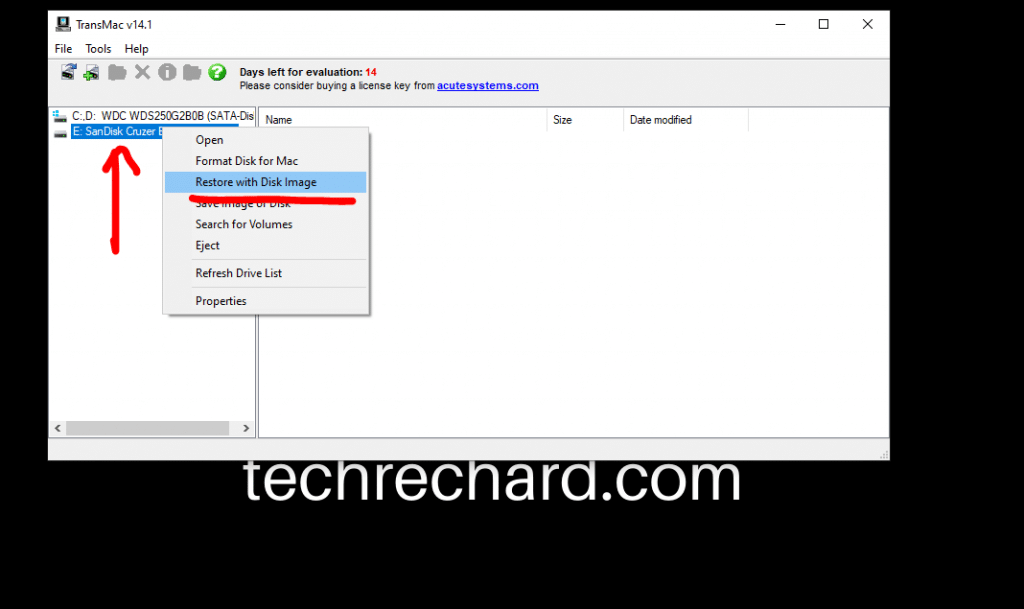
6. После окончания форматирования снова вызываем контекстное меню диска и выбираем пункт Restore with Disk Image.
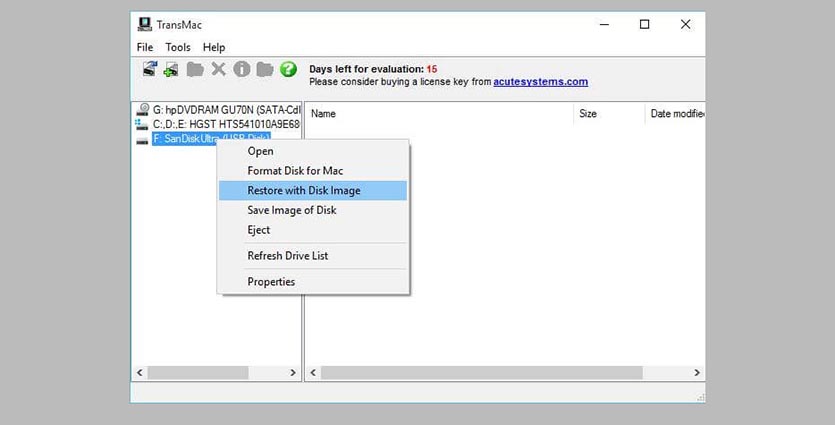
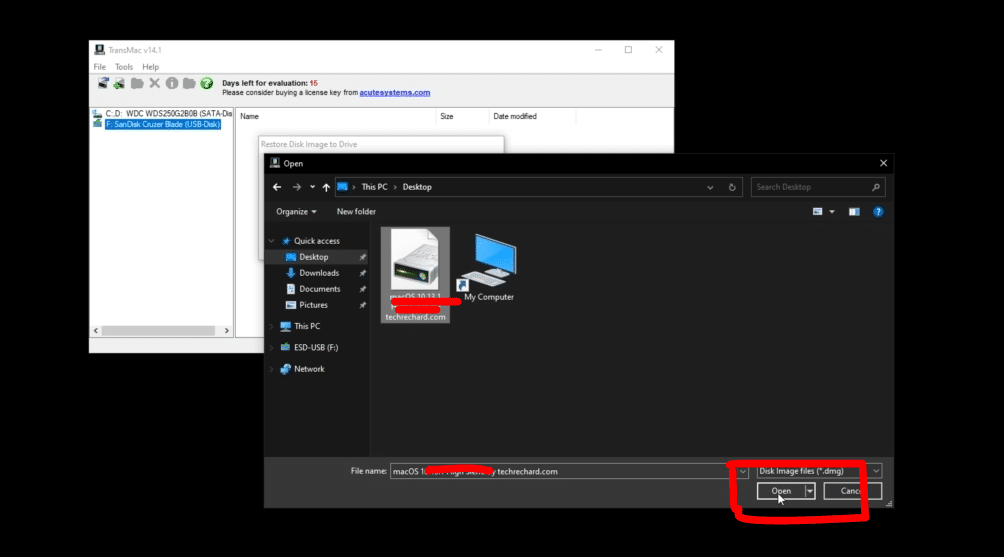
7. В открывшемся окне проводника указываем скачанный образ для установки macOS.
8. Подтверждаем запись образа на флешку и ждем 20-30 минут, пока процесс не завершится.
Все! Флешка для установки macOS готова.
Как запустить Mac с флешки
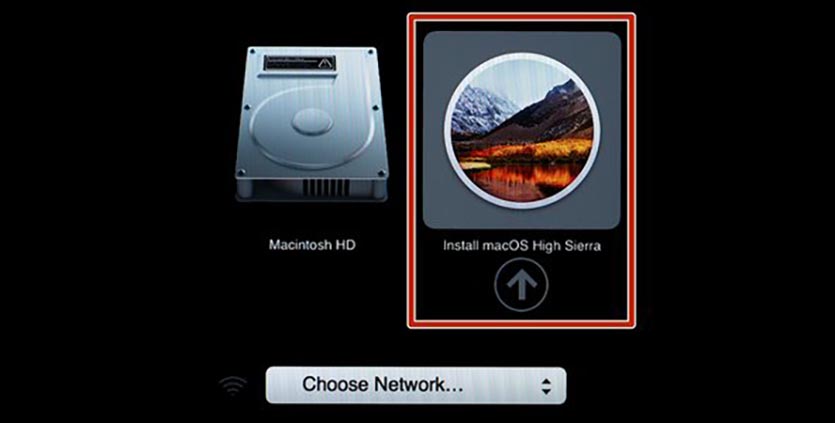
Подключаем наш накопитель к компьютеру Mac и включаем его с зажатой клавишей Alt (Option).
Обратите внимание, что для загрузки со внешних накопителей на Mac с чипом T2 нужно произвести некоторые манипуляции.
В меню выбора диска указываем флешку и производим установку macOS.
Следуйте подсказкам мастера установки и через несколько минут получите работоспособный Mac.
(159 голосов, общий рейтинг: 4.41 из 5)
iPhones.ru
Это может пригодиться каждому, когда нет второго Mac под рукой.
Артём Суровцев
@artyomsurovtsev
Люблю технологии и все, что с ними связано. Верю, что величайшие открытия человечества еще впереди!
Table of Contents
Today, we will dive into a much deeper method on How To Create macOS Catalina Bootable USB on Windows!
In our previous post, we shared an easy method to Create Bootable USB Installer for any macOS on Windows 10. We also shared a method on How to Create a Bootable Disk of MacOS X: 2 Easy Steps using a MAC system.
Create macOS Catalina Bootable USB on Windows: Required Files
- macOS Catalina DMG file for a clean installation. (Download links have been provided below)
- A good internet connection to download the macOS Catalina DMG file. The file is around 8GBs, so you will need a good internet connection. Alternatively, you can use the Internet Download Manager tool that will help you enhance your downloading speed. I have provided the download links below.
- A USB Drive (Pen-Drive or External Disk). Your USB device must be of sufficient memory for the installation.
- TransMac tool from Acute Systems. This tool is a Windows application that may replicate and manage folders and files around Apple drives and apparatus, such as Mac-formatted hard drives, flash drives, and other memory devices, also, to open and burn disk images and .dmg along with .sparseimage documents.
How To Create macOS Catalina Bootable USB on Windows: Step by Step
This is a 4 step process, so please ensure you do not skip any part of it and eventually get frustrated with the failure. I have also shared a complete video tutorial on How To Create macOS Catalina Bootable USB on Windows: Step by Step, you can find the video at the end of this post.
Step 1: Download the required files to Create macOS Catalina Bootable USB on Windows
- macOS_Catalina_10.15_19A583 by techrechard (Google Drive + MediaFire)
- TransMac tool from Acute Systems- This file is password protected and the password is www.techrechard.com. You can extract this file using WinRAR download free and support: WinRAR (win-rar.com).
- IDM 6.27 Build 2 Registered (32bit + 64bit Patch) [Techrechard.com] – This file is password protected and the password is www.techrechard.com. You can extract this file using WinRAR download free and support: WinRAR (win-rar.com).
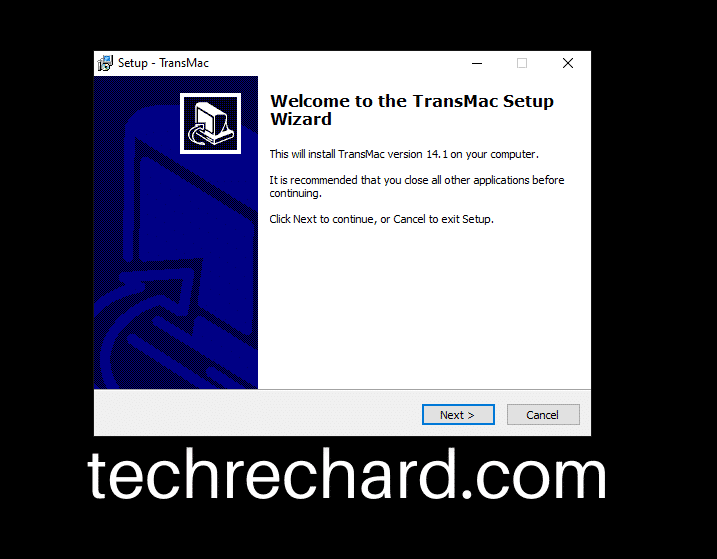
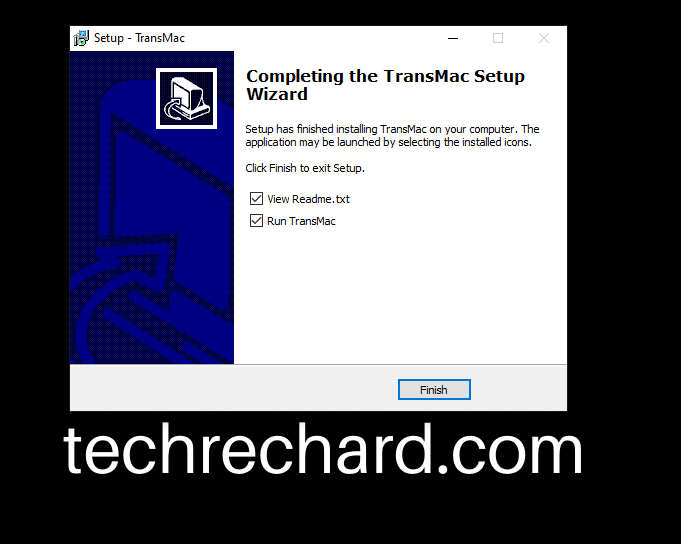
Step 2: Install TransMac Tool on your Windows 10
After downloading the TransMac tool from the above links, you can simply proceed with the installation. You will see the following contents:

After the files have downloaded, click SETUP.
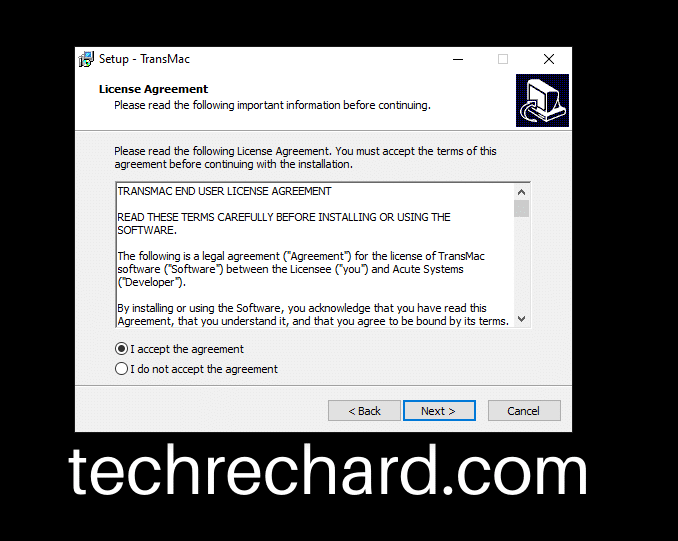
And click, Next.
Accept the terms and conditions.
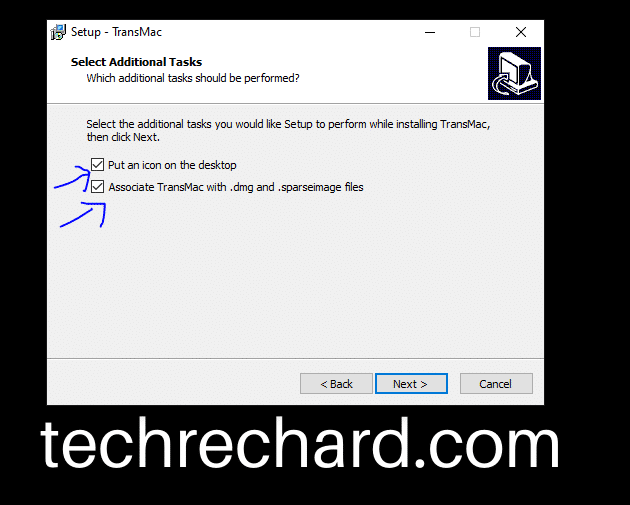
Choose the directory for installation.

Leave the default ticks and click Next.
And you see that within no time the setup is complete.
Step 3: Open TransMac Tool
Once the installation is over, the transmac tool will open itself. And you will see the following message.
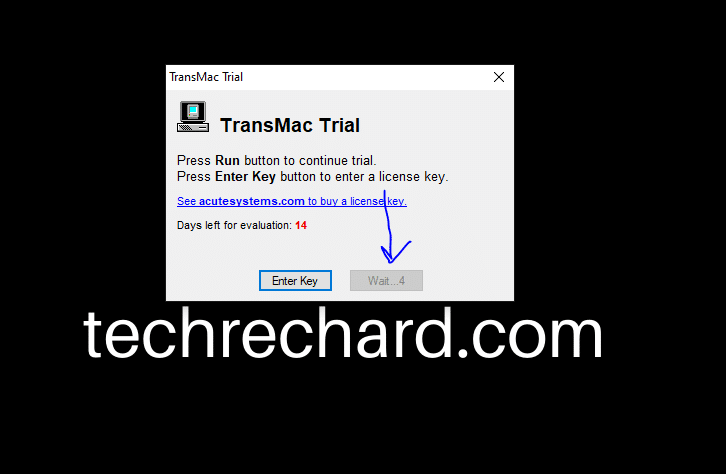
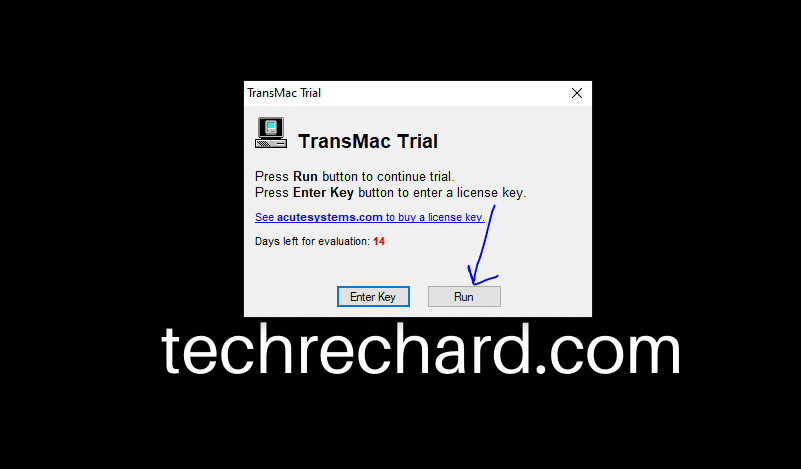
Since we are running the trial version of TransMac, you need to wait for 7 seconds and it will open up automatically. After the 7 seconds are over, you can simply click, Run.
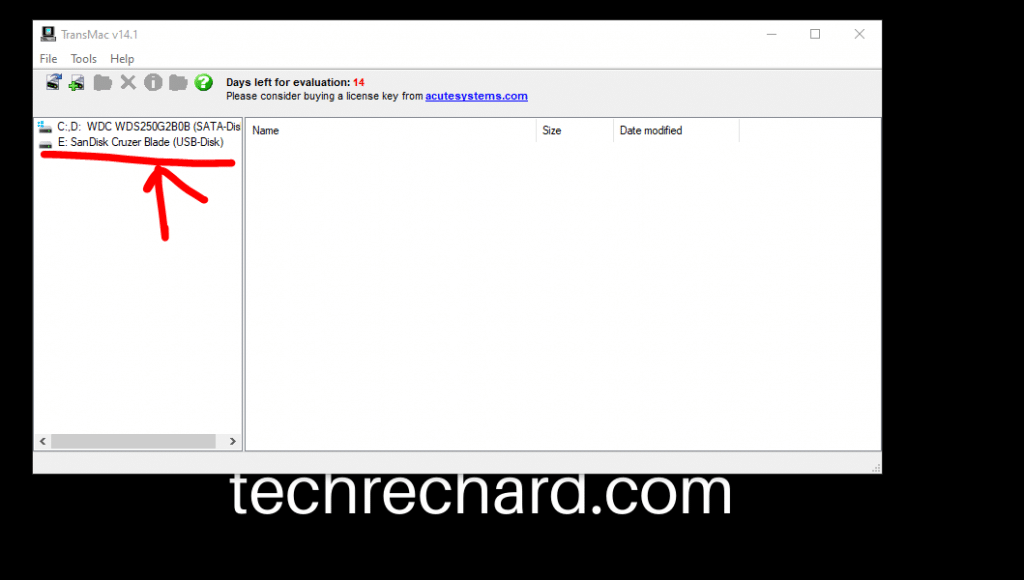
Now insert your pendrive, usb drive or any external disk.
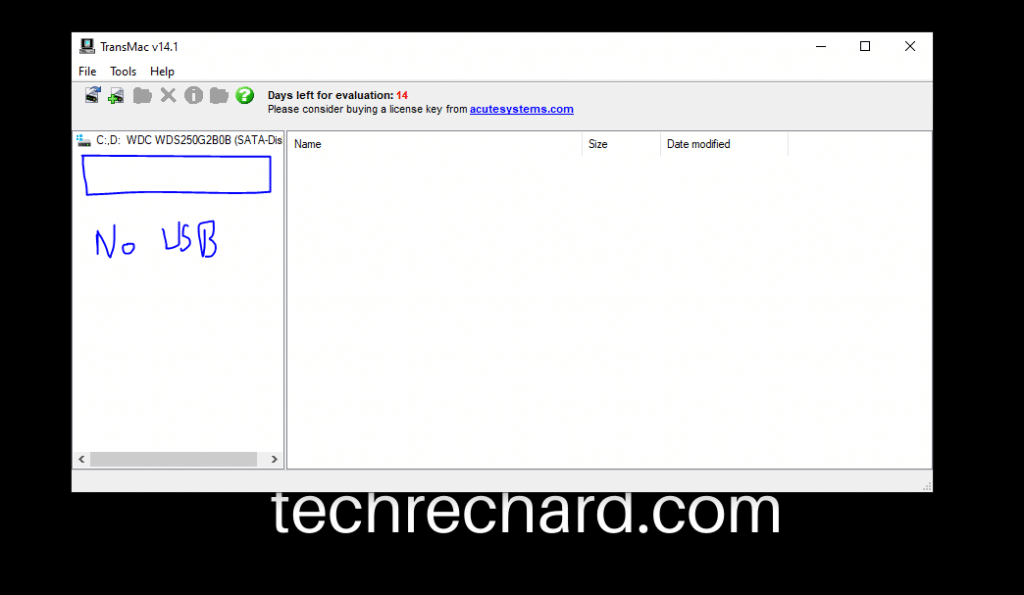
And click Tools, followed by Refresh drive list.

Once you click refresh drive list, you will see your USD device attached.
Step 4: Complete the installation
Now, right click your USB and click Restore with Disk Image.
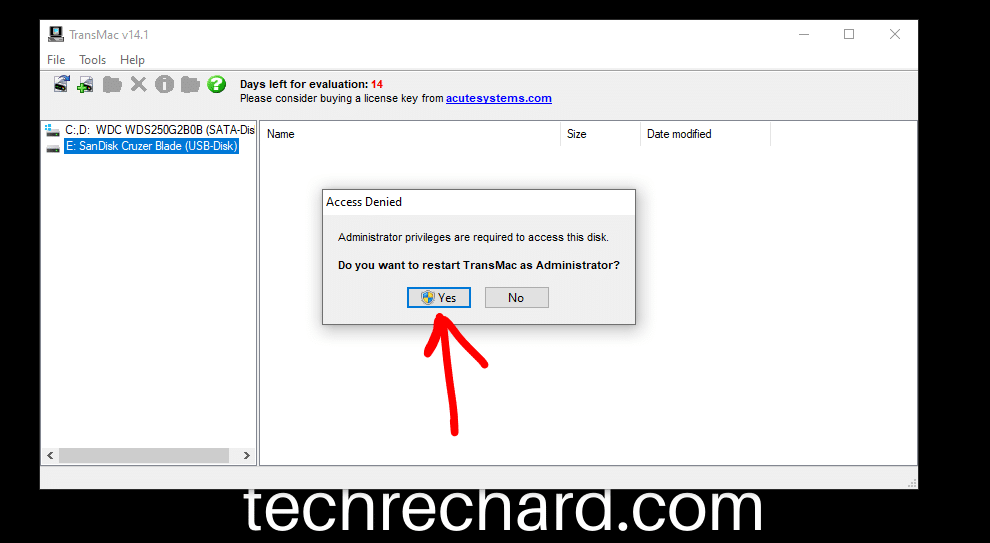
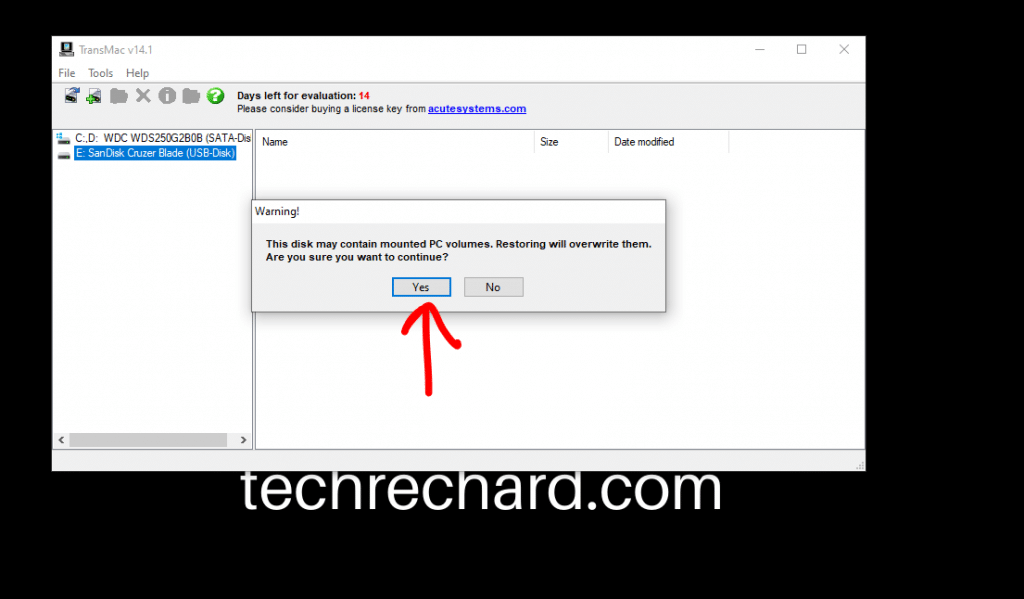
Now, you will be prompted an error that you need to run TransMac using administrator access. So you simply click YES.
Now, wait again for 7 seconds.
Now, right click on your USB device and click Restore from Disk Image again. You will be prompted with a warning and you can click Yes.
Now you select the Catalins DMG file and upload it.
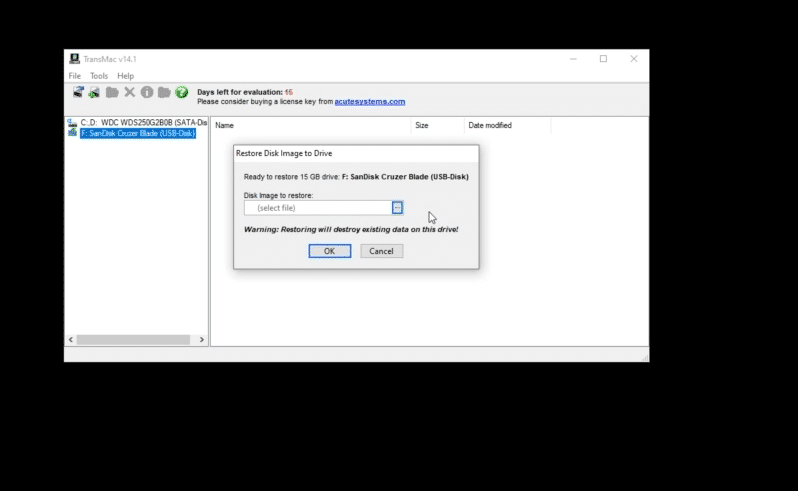
Now click OK,
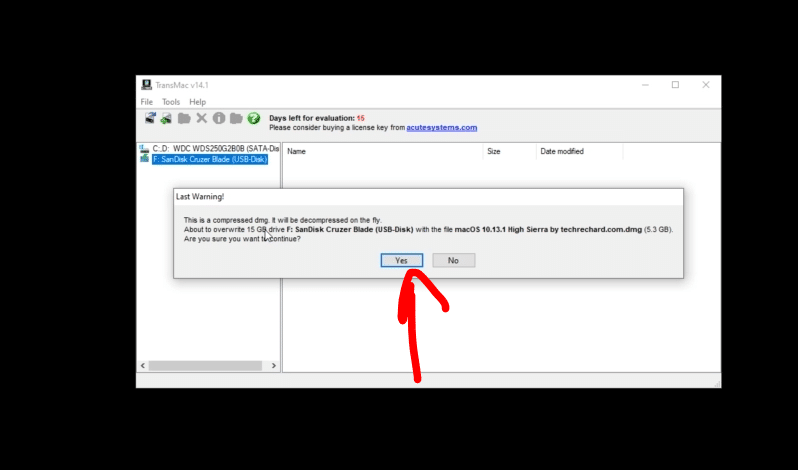
Now you will get your last warning that the USD device will be formatted. You can simply click YES.
The restoration process will begin and it will take around 20-30 minutes, depending upon your USD speed. For me, it took around 17 minutes.
Once complete, you will see.
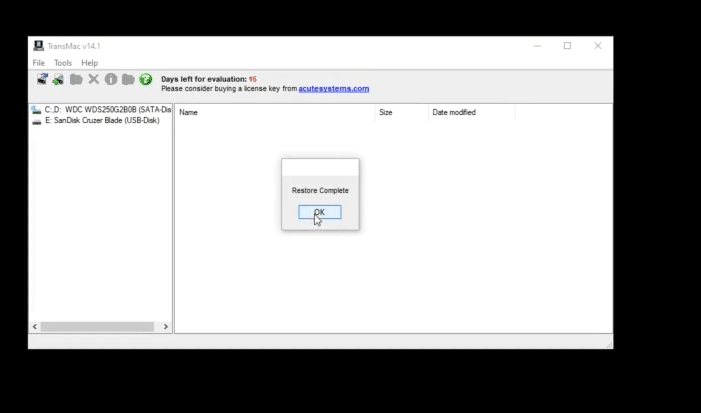
Now the Restore process is complete, and you can use this USB as macOS Catalina Bootable USB. To check the contents of this USB, you will need a MAC system. If you do not have a spare MAC, no need to worry. I will show you the contents of this USB created.
NOTE: This USB will not work on Windows anymore. If you plug it again on your desktop, it will ask you to format the drive. So do not worry. The contents of this USB will be visible only on a MAC system.
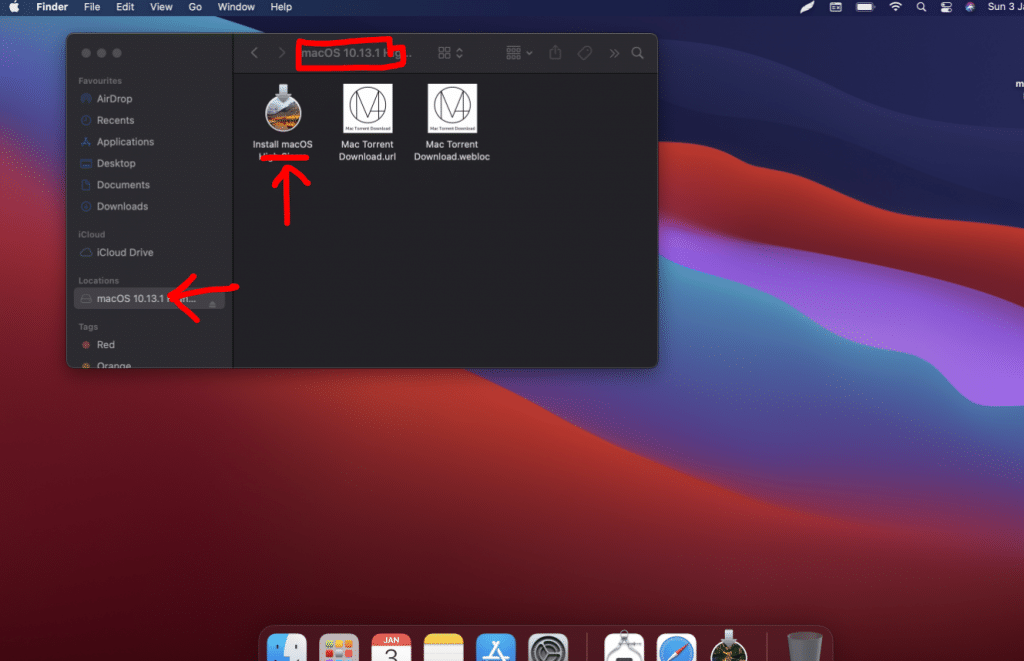
As you can see the contents of the USB device. Now, you can use this as a macOS Catalina Bootable USB.
After this process is complete, you can use this USB to install macOS Catalina on your MAC system using the BIOS mode. You simply need to boot your MAC using this USB device at startup.
Here are some other posts that you might be interested in-
How to change the working of the function keys in Catalina?
How to Install macOS Catalina on VirtualBox on Windows: 8 Step Ultimate Guide
How to Install macOS Catalina on Unsupported Mac: 9 Easy Steps
How To Download Macos Catalina Vmware and Virtualbox Image – Latest Version
How To Download Macos 10.15 Catalina Iso + Dmg + Vmdk
How to Speed Up macOS Catalina? 7 Easy Methods
How To Create macOS Catalina Bootable USB on Windows: Conclusion
I hope you have enjoyed this article and have successfully created macOS Catalina Bootable USB on Windows. If you find any issues, you can leave your comments below. I have also created a complete video tutorial that you use and learn How To Create macOS Catalina Bootable USB on Windows below.
Performing a clean installation is mostly of losing the operating system itself with not having the backup of the OS. The time machine is the safest and perfect default tool of Apple’s operating system for taking a backup of the OS and the Files. In windows, this feature is called the system recovery or system backup and for files, it is called File History. So, whatever when the operating system is lost you are not able to work until a clean installation is performed. To perform a clean installation you need another computer with any operating system in it. It can be Linux, Windows, Mac OS X, and even Zorin OS. The truth is, each operating system requires a specific method of itself to create bootable USB for macOS 10.15 Catalina, Windows, and Linux. Since Zorin OS is built-in of the macOS, Windows, and Ubuntu, any of these three methods will work on them. Since I am about to cover How to Create Bootable USB for macOS 10.15 Catalina on Windows PC, I won’t be performing the wrest of the options. They can remain for another tutorial.
macOS 10.15 Catalina is coolest and refreshed current operating system of Apple which is about to be completely released on September 10. On September 10 alongside the Apple’s iPhone 11 Series, the macOS 10.15 Catalina will be on the final stead. Since Apple has accomplished these hard work over a year after releasing macOS 10.14 Mojave, they moved its name too. This time it is chosen from the beautiful island in the southwest of California. The macOS 10.15 Catalina has a set of new features, new desktop wallpapers, new look and finally new name. The macOS 10.15 Catalina New features Include different apps for music (No more iTunes), Dolby Audio Support, Podcasts, sync with Apple TV, Music and Podcasts, New look for Photos, Support for Apple pencil and more. For more updates upon the features of macOS 10.15 Catalina click the below link.
- What are the macOS 10.15 Catalina New Features?
Steps to Create Bootable USB for macOS Catalina on Windows
Step 1. Download the Acquired files
- USB Flash Drive: A USB Flash Drive with 8 GB storage is acquired for this process. if the flash contains more storage then the 8 gigs of RAM, there is no worries cause later the format process can undo flash changes. A USB-C is the best option to create bootable USB for macOS 10.15 Catalina on Windows PC. Not only for macOS but for creating bootable USB for Windows and other operating systems, the best options is USB-C. Because it is all about saving as much time as possible.
- Download macOS 10.15 Catalina Installer or download macOS 10.15 Catalina DMG file: Both the Installer and DMG differ a little bit but the macOS 10.15 Catalina Installer can not be used to create bootable USB for macOS 10.15 Catalina directly in windows. But Indirectly it can easily be used to create bootable USB for macOS 10.15 Catalina on Windows. That Remain for another article but since you are creating bootable USB for macOS 10.15 Catalina directly on Windows, the macOS 10.15 Catalina DMG file 100% required. Since you are a windows user, you can directly download the macOS 10.15 Catalina DMG file using the IDM. Even your internet is a connection is slow, you can download it over a month with the resume compatibility of IDM.
- Another small software which is so important is the WinRAR or 7Zip. Both are the compressed software but WinRAR is not free but 7-zip is open-source compressing software. Doesn’t matter which one you are using, as long as you have installed it on your system. Since macOS 10.15 Catalina DMG file is Zipped within the WinRAR, you have to right-click and extract it from compress.
- Download TransMac: The Main software which is so crucial for creating bootable USB for macOS 10.15 Catalina on Windows. You have to download and install it on your system too.
Introducing TransMac…
Well, TransMac is software designed by acute systems to open dmg file format on windows. Since the extension of macOS software is with dmg, windows can not open them, except the third party software such the Power-ISO. But Power-ISO cannot create bootable USB for macOS 10.15 Catalina on Windows. The TransMac can format a disk for macOS, it can open DMG files alongside to copy files inside a Disk with HFS and APS Partition. In the meantime, TransMac can format the disk for HFS and APS both, it also can compress, zip, expand and split DMG file into multiple parts. It also a burner feature with multi session and hybrid CDs. That’ why this software is required can be used to create bootable USB for macOS 10.15 Catalina on Windows PC. Rather than that it is not free but you can use the trial version for 15 days but then you have to buy TransMac for $59. Also, keep in mind you can use any Windows Operating system to Create Bootable USB for macOS 10.15 Catalina on Windows. Any Windows Operating system means Windows Vista, Windows 7, Windows 8 and 8.1 and Finally Windows 10. It can even work with Windows XP and Windows Server 2012, 2012R2, Windows Server 2016 and Server 2019.
Notice For Windows Users: if a USB Flash Drive is formatted with HFS and APS partition while attaching that to Windows a format dialog window will appear. Do not format it because Windows can not recognize the macOS File format that’s why it asks you to format.
Step 2. Install the downloaded software.
Begin the installation with WinRAR or 7-Zip, then extract the macOS 10.15 Catalina and TransMac from zip file.
Step 3. Attach the USB Flash Drive to the computer.
Step 4. Format the USB for macOS 10.15 Catalina using TransMac
Since you have installed TransMac and attached the USB Flash Drive to the computer, right-click on the TransMac and run it as Administrator.
When the TransMac is launched, right-click on the USB Flash Drive> then select format for mac.
Step 5. Copy macOS 10.15 Catalin on the USB Flash Drive
Right-click on the USB flash Drive inside the TransMac and select Restore with Disk Image. Ignore for warning of TransMac by selecting yes, and now locate the macOS 10.15 Catalin DMG File.
Again you have to ignore the warning by selecting yes.
Step 6. Wait…
Depending on the USB it takes some time but mostly the USB 3.0 takes 1 hour to create bootable USB for macOS 10.15 Catalina on Windows.
How to Boot macOS 10.15 Catalina Using USB?
Creating bootable USB for macOS Catalina acquires some time and finally, it is done. But the truth is the better your USB flash Drive should be, the better it saves time, infects I was using a USB 2.0. I’m Gladly thinking you are not using a USB 2.0, cause you will be bored as me. So, when the installation is complete, restart the operating system, and hold the option key, if you are on a mac. But if your computer holds within the Windows Operating system, the Alt is not the option which is wildly spread on the internet, infect it is the Boot Key of you Computer is. Each laptop has it’s own boot key and BISO Key, But mostly the Dell Boot key is F12, ASUS’s boot keys are one Key Recovery, ESC, and F2 (Depends on the laptop), Lenovo’s boot keys are Fn + F2 or Fn + F12, and Finally the HP boot key is F9. So, you have to figure out yourself which key can work on your computer.
If your default laptop is Apple, then you are good to go, I mean after holding the option key you will be on the place boot options. Select the macOS 10.15 Catalina and go on for the installations.
Hold on Windows Users…
if you are thinking that creating bootable USB for Installing macOS 10.15 Catalina on Your laptop or PC is enough just like you install Windows.
Then you certainly a Moron,
Why?
See, Apple’s computer’s are built-in with the default of the bootloader of Apple’ macOS with the kexts to configure. Since the Windows computer’s do not have macOS by default the big problem will be the configuring bootloader. Once that is configured you are going to configure the Kexts, in Windows Words the Drivers. Windows is so good that an update or the Driver Pack solution can do the Job for macOS, every version, every driver requires a special kexts which is created by that company. Suppose your computer has an Invidia Graphics, for that you have to download it’s kexts from its site. However I think it is better for you guys, I have to create another tutorial with configuring Kexts and Drivers.
How to Create a Bootable USB Installer for macOS 10.15 Catalina on mac?
You might be thinking of as a moron, cause the title of the post is How to Create Bootable USB for macOS 10.15 Catalina on Windows PC?, It is said in Windows, But why in the world I’m telling you guys How to Create a Bootable USB for macOS 10.15 Catalina on macOS 10.14 Mojave.
Because this process can be done on windows too, with a little bit more time and work with a speedy internet connection.
What Do I mean?
Well, back in the days when macOS 10.12 Sierra was released, the TransMac was not fully responsive, I was using this method. I was creating a Virtual Machine (VM), then I was creating bootable USB for macOS Sierra. The same method can be applied for macOS 10.15 Catalina on Windows, as long as you have a running Virtual Machine of macOS. It is fine even if you have an older version of mac such as Yosemite, as long as it is a mac, it can do the job. if you don’t know How to Install macOS 10.15 Catalina on VMware and VirtualBox on Windows follow the below links.
- How to Install macOS 10.15 Catalina on VMware and VirtualBox on Windows?
Here are the methods.
Step 1. Download macOS 10.15 Catalina
You can download it from App store, or use the DMG file of macOS 10.15 Catalina, however inside the DMG file the installer of macOS 10.15 Catalina is contained. You have to open the container and copy the DMG file to the Application.
Step 2. Format the USB Flash Drive with mac Partition
Open disk utility, select the disk and click erase> then set the format to Mac OS Extended Journaled with GUID Partition Map settings.
Step 3. Open Terminal and Copy the below codes one by one
sudo /Applications/Install\ macOS\ 10.15\ Beta.app/Contents/Resources/createinstallmedia --volume /Volumes/Untitled —applicationpath/Applications/Install\macOS\ 10.15\ Beta.app —nointeraction
If the first command did not work the second command can do the job easily.
sudo /Applications/Install\ macOS\ 10.15\ Beta.app/Contents/Resources/createinstallmedia --volume /Volumes/USB --applicationpath /Applications/Install\ macOS\ 10.15\ Beta.app
Well, that’s all for creating bootable USB for macOS 10.15 Catalina on Windows, with the TransMac and Virtual Machine.
Alternative methods…
Alternative methods are always the other options which can accomplish the bootable Job for macOS Catalina. These methods can be done only inside the macOS itself, not on Windows. However, a running Virtual machine of macOS on Windows can be a good option.
- Unibeast: The most popular app for creating bootable USB for macOS 10.15 Catalina is Unibeast. Unibeast is the app which is developed by Tonymacx86, for every version of mac, the unbieast differs, that’s why you have to download Catalina it’s version. The Unibeast is free to use as long as you have an account inside the tonymacx86.com.
- Myhack App: It is the most compared app ever to unibeast, cause it has more features and functionalities to Unibeast and DiskMaker X. Basically it is a Mac App but it has built-in support of MBR too.
- Diskmaker X: It has a longer history compare to the Unibeast, it is even better and easy compare to unibeast. It has also the same script to work with the Apple operating system as unibeast, it also differs with each version of macOS. While downloading DiskMaker X, you do not need an account and finally, it is contained with dmg file and you have to drag it to the application while using.
- UNetBootin: It is a cross-platform application which can be used for Apple’s macOS 10.15 Catalina too.
- Mac Linux USB Loader: It is designed specifically for mac operating systems.
- Install Disk Creators