
Knowing which DLL files are registered on your Windows 10 system isn’t just for tech geeks; it’s essential for anyone serious about maintaining a smooth-running, secure computer. This guide provides four easy ways to view all registered DLLs in Windows 10, making it easier than ever to get your system back on track.
How to View All Registered DLLs in Windows 10
To view all registered DLLs in Windows 10 and other versions as well, all you need to do is either run some commands, search for them manually, or use a third-party tool.
- Use Command Prompt
- Apply the ‘regsvr32’ Command
- Navigate to the Registry Editor
- Use Third-Party Software
1. Use Command Prompt
1. Open Command Prompt as Administrator
Press Win + S to open the search bar and then type “Command Prompt” or “cmd”.
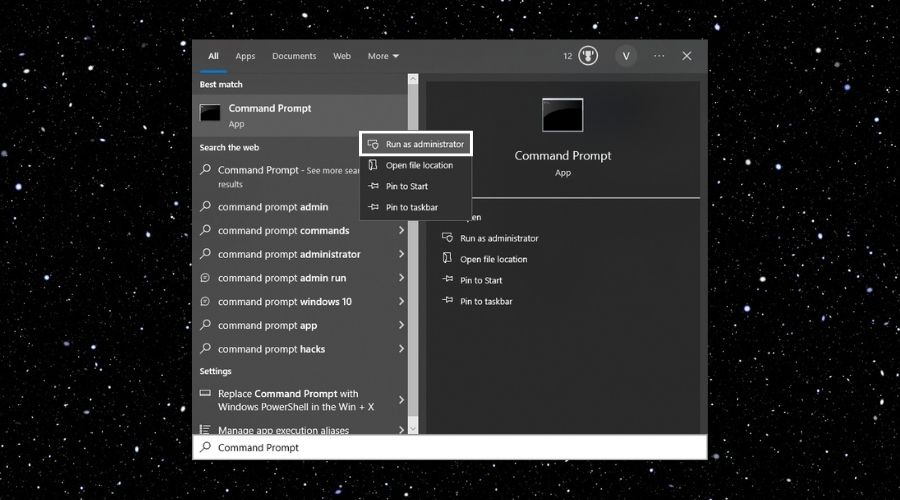
Right-click on the Command Prompt from the search results and select “Run as administrator”.
2. Execute the Command
In the Command Prompt window, type the following command and press Enter: reg query HKLM\SOFTWARE\Classes /s /f *.dll
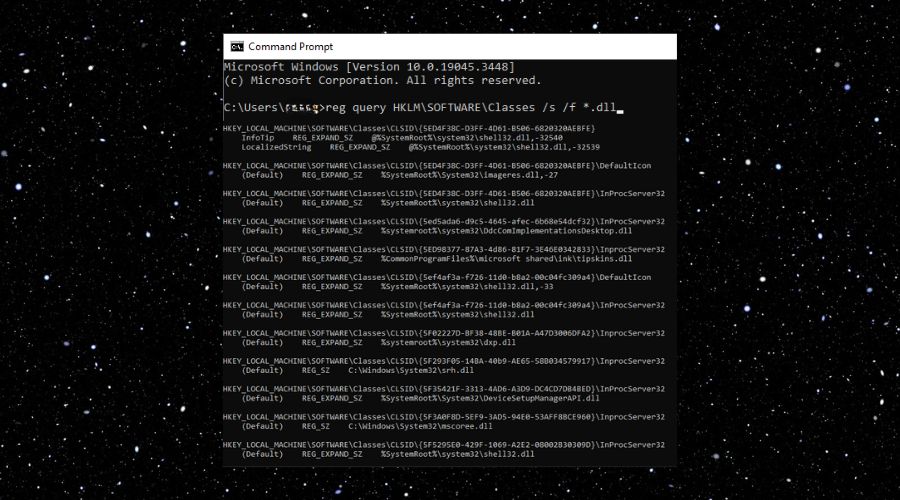
This command will search the Registry for all registered DLL files and display them. It should look a bit like the example above.
2. Apply the ‘regsvr32’ command
In the Command Prompt window, type regsvr32 /u [DLL file name] and press Enter.
Exemple: I will use a common .dll and this command. If you did this step correctly, you should receive a similar message containing the name of the .dll that you unregistered.
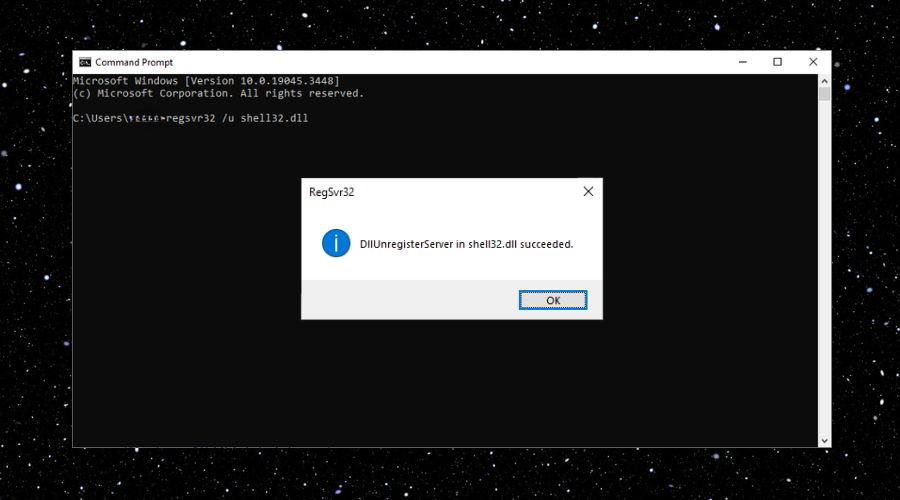
If you want to revert the previous action or to register a .dll do not add the /u and leave the command as regsvr32 [DLL file name]. You will receive a similar message, but instead of DllUnregisterServer you will get DllRegisterServer.
Learn more: This command uses the service interface to run and manage services, and it is also known as a command-line utility. It registers and unlists Object Linking and Embedding controls like DLLs files.
3. Navigate to the Registry Editor
Attention: Before editing anything into the Registry editor, make sure that you create a System Backup.
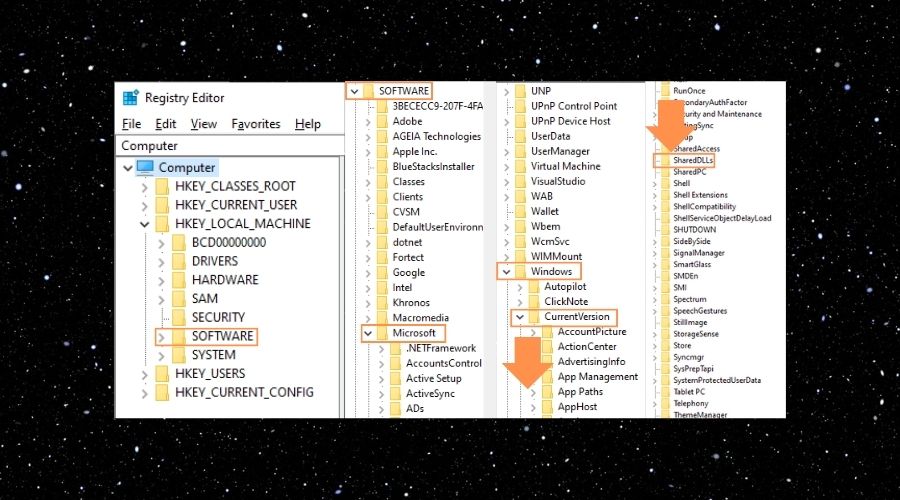
→ Type Regedit in the Windows search bar and open the Registry Editor.
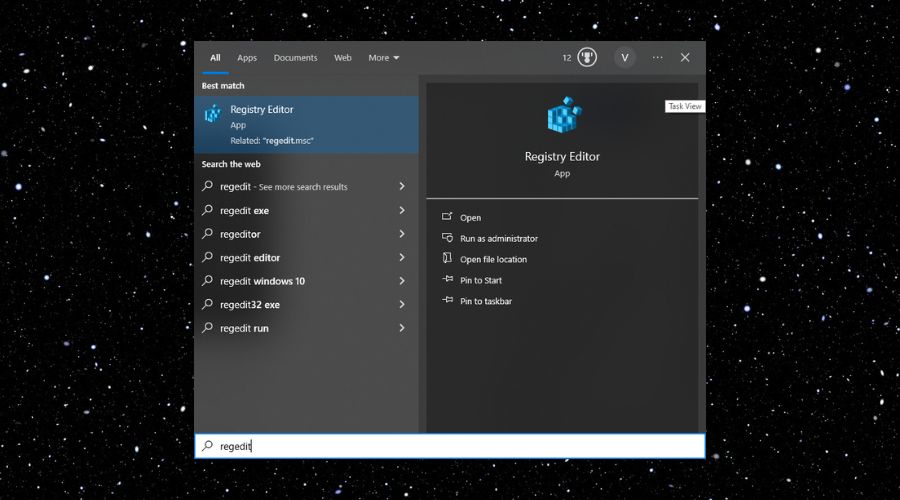
→ Navigate to: HKEY_LOCAL_MACHINE\SOFTWARE\Microsoft\Windows\CurrentVersion\SharedDLLs.
4. Use Third-Party Software
If you prefer, you can also use specialized software to manage DLL files, as we explained in our guide on best DLL fixers.
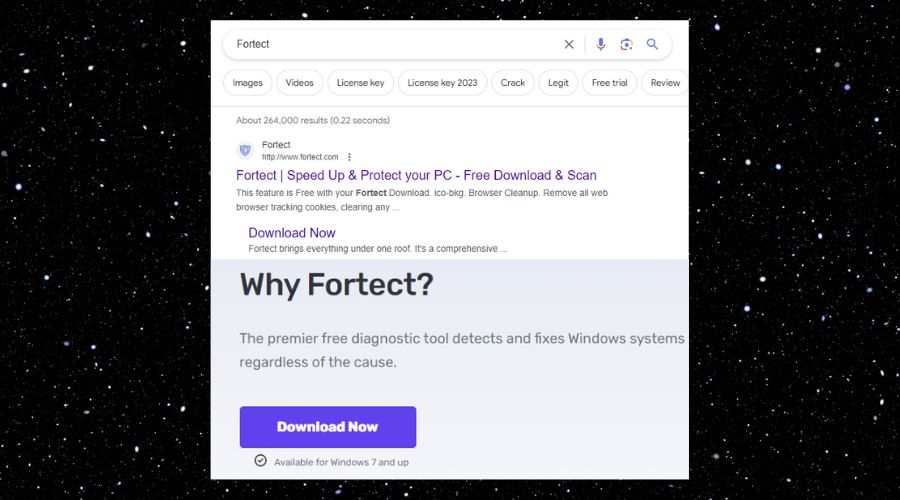
1. Download Fortect
2. Visit the Fortect website and download the software.
3. Install and Run Fortect
Once Fortect is installed, Right-click on the application and select Properties.
4. Navigate to the Compatibility Tab and tick the box next to Run this program as an administrator.
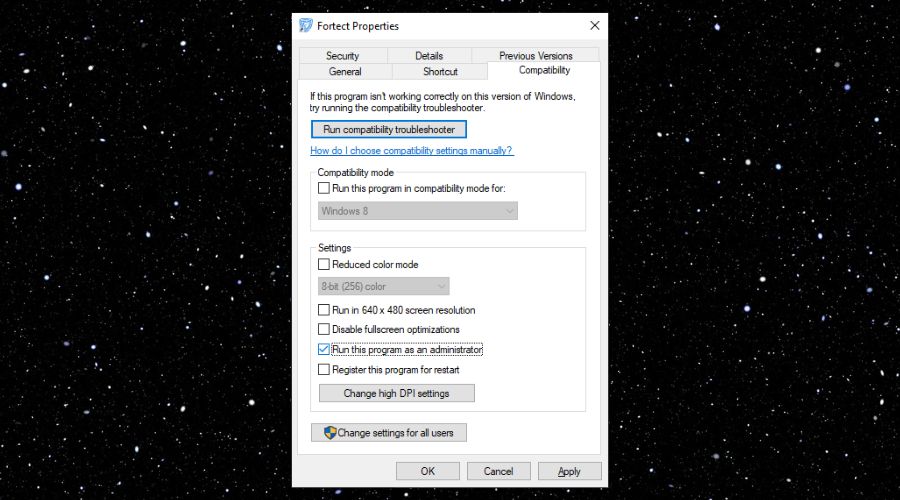
From now on you will open Fortect as an administrator.
5. View Registered DLLs
The software will automatically list all registered DLLs on your system.
Final Thoughts
By following this guide, you’ll gain a complete understanding of how to view all registered DLLs in Windows 10, allowing you to manage your system more effectively. Keep in mind that before you modify Registry files or use commands in the Command Center, you should create a system restore point just to make sure that you don’t mess anything up.
The legacy shared DLLs reference counting is a mechanism by which the Windows Operating System ensures that files which are shared are reference counted, so that if a product attempts to uninstall a file which is used by another product, then the file is not deleted.
The reference counts reside in the registry key:
[HKEY_LOCAL_MACHINE\SOFTWARE\Microsoft\Windows\CurrentVersion\SharedDLLs]Each file has an individual entry with a REG_DWORD integer value which is the count itself. As each uninstall is executed, the individual counts for those files are decremented and the file remains intact on the workstation until the count reaches zero, at which point the file is finally deleted.
What Is Wrong with That?
Who decides whether it is shared or not? If I build an MSI installer which ships a file to any folder and I say it is shared, then a reference count is created and managed. If another software vendor makes a product legacy installer which just so happens to have the same file in the same location and they decide NOT to set it as a shared file, then their installer will not update my reference count, so when they uninstall their product, my file is likely to be removed.
Software vendors often handle this key poorly. You will sometimes find file reference counts have been setup as REG_SZ string values not REG_DWORD integer values and so cannot be incremented or decremented correctly by installer engines.

Some vendors have decided to never let the file be removed by manually setting unfeasibly large values in their reference counts, essentially making them permanent files.

Finally, because the reference count is simply an integer value (1, 2, 3, 2, 1, 0), it is not possible to tell if I am decrementing the value I incremented earlier or I am decrementing the count which some other installer incremented. Ideally the count should be shared amongst all products but registered against the individual product, which is the method Windows Installer uses and removes the possibility of decrementing somebody else’s count.
Although this mechanism of sharing files pre-dates the Windows Installer reference count, it does interact with these registry keys and will not remove a file which has non-zero SharedDLLs count. In addition Windows Installer reference counts the component in a different part of the registry (but that is not discussed here).
Why Does It Need Fixing?
If, for whatever reason, these reference counts remain after the file has been removed, then your MSI install will be preserving a count that is no longer relevant. This will result in unexpected uninstall results, especially after having applied a patch or a major upgrade to a product. If the file is no longer present, there is no reason to keep the reference count, especially if it affects future maintenance of the product.
What Can We Do About This?
The following script enumerates the SharedDLLs Registry Key and checks to see if all the files still exist, any which do not are removed and are noted in a report file. It is a simple Windows Managements Interface script to improve the health of your SharedDLLs reference counting.
const HKEY_LOCAL_MACHINE = &H80000002
const ForReading = 1, ForWriting = 2

Set wmoReg = GetObject("winmgmts:{impersonationLevel=impersonate}!.rootdefault:StdRegProv")
RegPath = "SOFTWAREMicrosoftWindowsCurrentVersionSharedDLLs"
Set fso = CreateObject("Scripting.FileSystemObject")
Set f   = fso.OpenTextFile("C:BadSharedDLLs.txt", ForWriting, True)
f.WriteLine "Removed SharedDLLs reference count for missing files:"
f.WriteLine " "

wmoReg.EnumValues HKEY_LOCAL_MACHINE, RegPath, Names, Types
For i = 0 To UBound(Names)
If Not fso.FileExists(Names(i)) Then
f.WriteLine "FileName: " & Names(i)
wmoReg.DeleteValue HKEY_LOCAL_MACHINE, RegPath, Names(i)
End If
Next
Estimated reading time: 5 minutes
In this guide, you will learn:
- What is a Windows Registry?
- How to Use the Registry Editor
What is a Windows Registry?
The Windows Registry is a storage place for a large compilation of details about your computer. All activities in your PC when you first started using it until this date are all recorded in your Registry.
Your PC always creates entries but sometimes does not delete them even if they are not in use any more. It will accumulate unused and junk registry entries which can affect the performance of the system.
How to Use the Registry Editor
Think of Registry Editor as your computer’s brain – it holds all the secrets to how your system functions. This is where you will clean up the Windows Registry.
BEFORE YOU START: Editing your computer’s registry can cause serious errors on your computer. Always create a backup before making any changes.
STEP 1: Open the Registry Editor
- On your keyboard, press the Windows ⊞ and R keys at the same time to open the Run window.
- In the Open field, type regedit, and then press ENTER. The Registry Editor will open in a new window.
STEP 2: Create a Registry Backup
Registry keys are important to the functionality of your computer and its installed programs. Accidental removal of an essential registry entry may damage the system of your PC. Having a backup allows you to recover accidentally deleted entries.
- Click File on the menu bar, and then select Export.

- Choose where you want to save the backup file, and then click Save.
After saving, the Registry Editor may become unresponsive. It is saving all entries to the backup file and you will need wait for it to be responsive so you can proceed.
To recover the created back up, choose the option to Import and then open the backup file that you saved.
STEP 3: Clean up Program and Application Registry Entries
Installed applications create many registry keys that are essential for their functionality. It is important to locate and delete entries of uninstalled software if they have not yet been removed before.
- Double-click the HKEY_CURRENT_USER address to expand the entries under it, and then double-click SOFTWARE. These are sub-keys associated to applications installed on a specific user account.
- Check the entries and look for applications you know are already uninstalled. Right-click on the specific sub-key, and then select Delete.
- Once done, double-click on SOFTWARE and on HKEY_CURRENT_USER to minimize them.
- Double-click on HKEY_LOCAL_MACHINE, and then double-click SOFTWARE. These are sub-keys associated to applications installed on all user accounts in the computer.
- Check the entries and look for applications you know are already uninstalled. Right-click on the specific sub-key, and then select Delete.
STEP 4: Clean up Prematurely Removed Software Registry Entries
Manual deletion of applications and programs will only delete the programs and their files, but it will not automatically remove their created registry entries. These entries will stay there until they are removed.
- Expand HKEY_LOCAL_MACHINE, and navigate to the location HKEY_LOCAL_MACHINE\SOFTWARE\Microsoft\Windows\CurrentVersion\Uninstall.
- Under the Uninstall key are sub-keys that contain values named UninstallString within them.
-
Check if there are still sub-keys of files or programs that do not exist anymore or verify the path given in the value data of these entries.
The registry key is invalid if the path is not complete, incorrect, or the UninstallString value does not exist.
- If it is invalid, right-click the sub-key and select Delete.
STEP 5: Clean up Invalid Shared DLLs
The Shared DLLs key contains all DLL files that are commonly used by multiple programs and applications. There might be some invalid or corrupted entries that can be removed.
- Expand HKEY_LOCAL_MACHINE, and navigate to the location HKEY_LOCAL_MACHINE\SOFTWARE\Microsoft\Windows\CurrentVersion\SharedDLLs.
- The Shared DLL key contains hundreds of entries with DWORD Values. The name of these entries are the location/path of the file. To check if it is an invalid entry, see if the location/path is correct.
- You can either correct the path of these entries (if you know it) or delete it.
STEP 6: Clean up Startup Items
Startup items are programs that automatically run when you login to your computer. Entries that are invalid can be removed so the computer will not check them anymore during startup.
- Navigate to the following locations one at a time:
- HKEY_CURRENT_USER\SOFTWARE\Microsoft\Windows\CurrentVersion\Run
- HKEY_CURRENT_USER\ SOFTWARE\Microsoft\Windows\CurrentVersion\RunOnce
- HKEY_LOCAL_MACHINE\SOFTWARE\Microsoft\Windows\CurrentVersion\Run
- HKEY_LOCAL_MACHINE \SOFTWARE\Microsoft\Windows\CurrentVersion\RunOnce
- Check the path of the entries. Right-click on the entry and select Delete if they have the incorrect path.
Changes made under HKEY_CURRENT_USER will only be applied to the current user account being used, while changes made under HKEY_LOCAL_MACHINE will be applied to all user accounts in the computer.
BOOST YOUR DEVICE’S LIFESPAN AND PRODUCTIVITY
Explore strategies to enhance your device’s performance and get valuable insights on safeguarding yourself against scams, maintaining network security, and protecting your personal identity.
Visit our 👉 Cybersecurity Learning Center! 👈
How helpful was this article?
-
It wasn’t helpful at all.
-
Somewhat helpful.
-
Just okay.
-
It was somewhat helpful.
-
It was helpful.
- *Feedback submitted will only be used as reference for future product, service and article improvements.
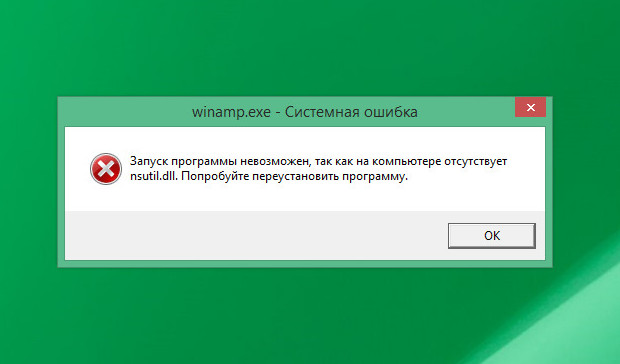
После системного сбоя либо неудачной установке или деинсталляции программного обеспечения иногда приходится сталкиваться с ошибкой «Файл .dll не найден». Как правило, это сообщение появляется, когда пользователь пытается запустить какую-либо программу или игру. В зависимости от типа и назначения файла, сообщение об ошибке может отличаться. Например, при запуске ряда игр оно может выглядеть как «Порядковый номер не найден в библиотеке DLL (NAME)».
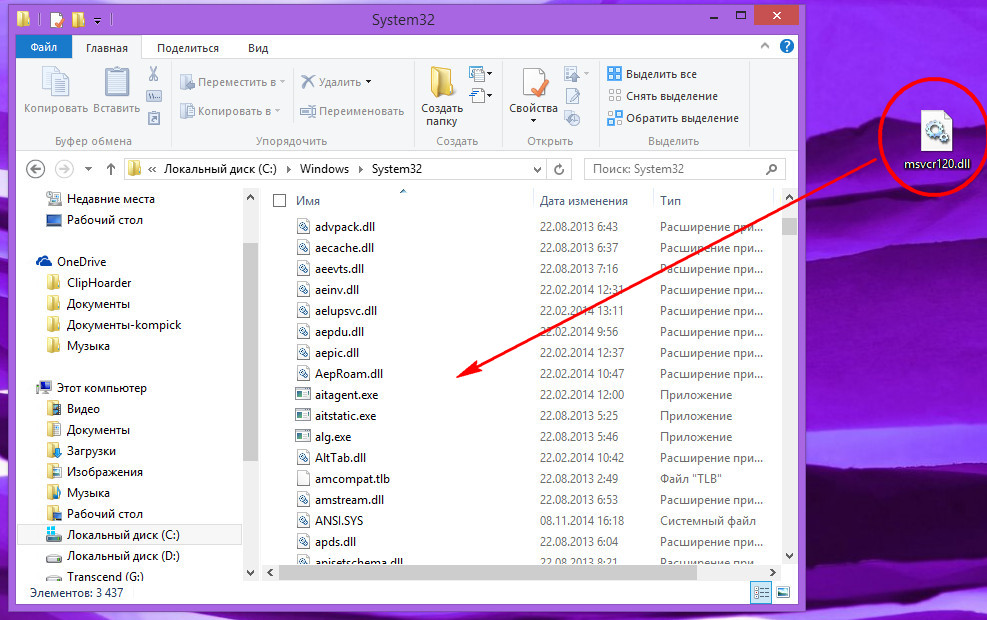
Тщательное удаление и повторная установка сбойного приложения нередко позволяет решить проблему, но так бывает не всегда. Помимо собственных библиотек, обычно содержащихся в папке с программой, практически все сторонние приложения используют для своей работы библиотеки операционной системы, того же Microsoft .NET Framework. При удалении или повреждении системного файла простая переустановка программы не поможет. В таком случае необходимо перейти в каталог system32 и отыскать указываемый в окне ошибки файл. В Windows 64-бит также рекомендуется проверить содержимое системного каталога SysWOW64.
Если файл окажется на месте, для начала его нужно попробовать зарегистрировать. Вполне возможно, что программа его просто «не видит». Если файл физически отсутствует, ничего не поделать, придётся поискать его в интернете на специализированных сайтах или скопировать с другого компьютера с той же версией Windows, после чего перенести в соответствующий каталог на вашем ПК, а уже потом зарегистрировать.
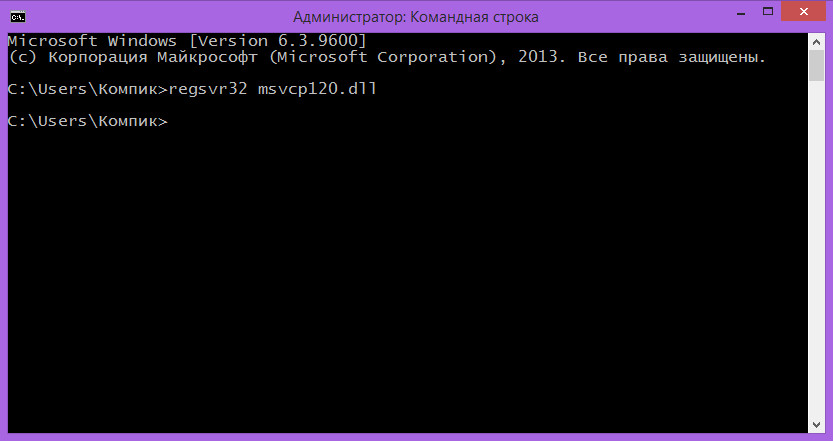
Процедура регистрации предельно проста. Откройте от имени администратора командную строку и выполните следующую команду:
regsvr32 Name.dll
, где Name.dll — имя библиотеки. Например, для файла msvcr120.dll команда регистрации будет выглядеть как regsvr32 msvcp120.dll.
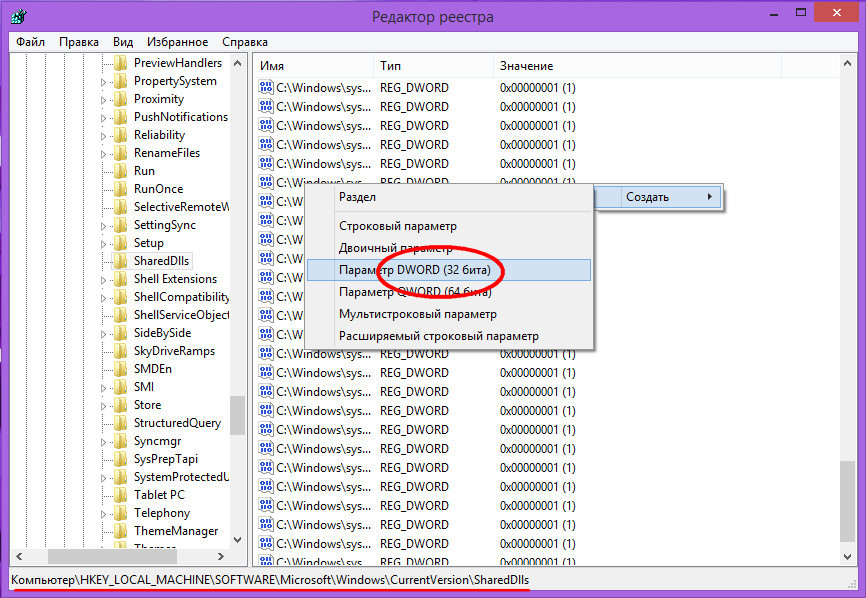
При удачной регистрации вы получите соответствующее сообщение. Прописать библиотеку можно и вручную. Для этого откройте редактор реестра и перейдите в следующую ветку:
HKEY_LOCAL_MACHINE/SOFTWARE/Microsoft/Windows/CurrentVersion/SharedDLLs
Создайте в подразделе SharedDLLs новый параметр типа DWORD.
В качестве его имени укажите полный путь к библиотеке, а в качестве значения установите 1.
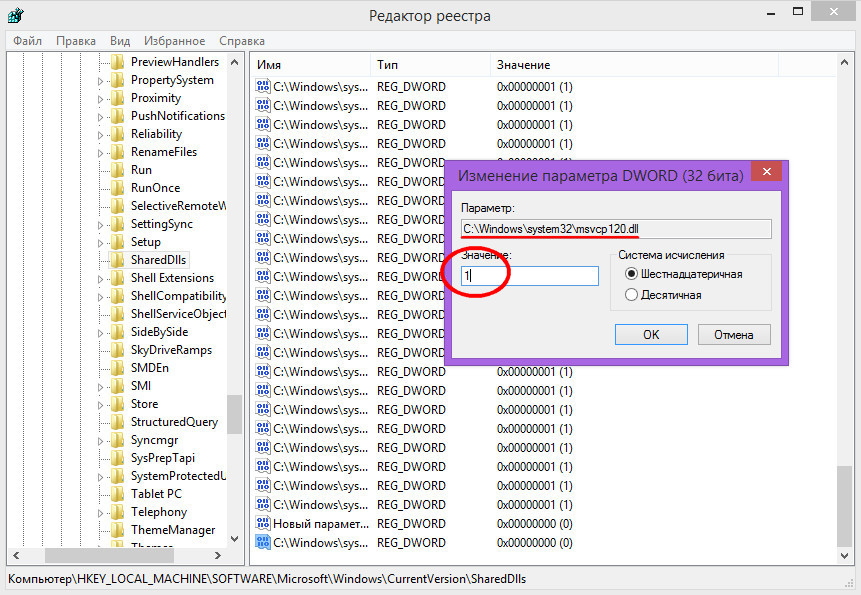
Перезагрузите компьютер.
Если вышеописанными способами ошибку устранить не удаётся, например, при выполнении команды regsvr32 появляется окошко с сообщением «Модуль №1 загружен, но точка входа №2 не найдена…».
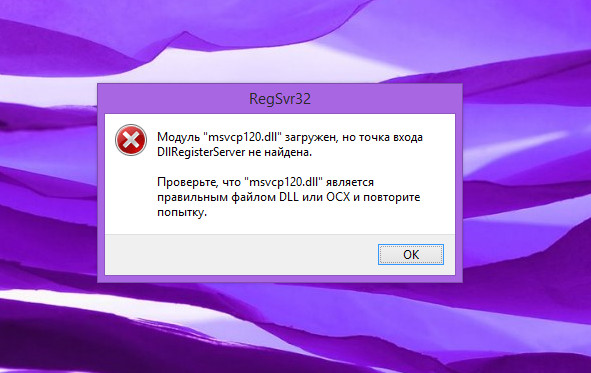
Основных причин появления этого сообщения две: либо файл не является библиотекой DLL или OSX, либо имеет место неправильный экспорт точек входа из модуля. Увы, но выбор тут невелик. Ищите в сети другие версии библиотеки и пробуйте их регистрировать одну за другой. Возможно, вам повезёт, и какая-то из них окажется подходящей для вашей системы.
Также можно порекомендовать выполнить следующие действия:
1. Убедитесь, что ваш профиль пользователя не повреждён. Попробуйте зарегистрировать библиотеку из-под учётной записи администратора.
2. Просканируйте систему на предмет ошибок командой sfc /scannow.
3. Переустановите компоненты Microsoft Visual C++, .NET Framework или DirectX.
И последнее. Столкнуться с проблемами при использовании команды regsvr32 вы можете также при попытке зарегистрировать 32-битную библиотеку DLL в 64-битной Windows. В этом случае переместите файл библиотеки из папки System32 в SysWOW64 и в запущенной от имени администратора консоли CMD выполните команду %systemroot%/SysWoW64/
egsvr32 {полный путь к DLL} без фигурных кавычек.
Shared DLLs
HKEY_LOCAL_MACHINE\Software\Microsoft\Windows\CurrentVersion\SharedDLLs
This registry key contains references to shared DLLs (Dynamic Link Libraries). DLLs are used to store functions that can be called by programs to perform certain tasks. They can be shared by multiple applications to reduce memory and disk space requirements.
If a shared DLL is deleted or moved to another folder, the functions that are stored in this DLL become inaccessible to applications because the corresponding registry entry in the SharedDLLs section no longer points to the actual location of the DLL. This can cause problems for the applications that use functions stored in the missing DLL file.
If Registry Clean Pro cannot find a DLL file that is referenced from the SharedDLLs section, the registry entry pointing to this DLL is removed.
If a registry reference to a DLL file is specified as a short filename without the full path, Registry Clean Pro tries to find the file in all the folders on your hard drives. If the file in question is not found, the registry entry referring to this file is considered invalid and is removed from the registry. If one or more files with that name are found, Registry Clean Pro does not remove the reference from the registry. If a reference points to a file located on a network drive, Registry Clean Pro does not remove this reference.
Next: Fonts
Copyright © 2002-2003 QSX Software Group. All Rights Reserved.