
<< Prev Next >>
10.2.8.1. On Windows
The 1C:Enterprise application includes the lmsetup.exe utility used to install the HASP License Manager. The utility is located on the 1C:Enterprise installation disk. You can start it either directly from the command line or through the 1C:Enterprise installer menu.
You can install HASP License Manager on any computer on a local network running Microsoft Windows operating systems. At the same time, you can install HASP License Manager in any of these systems as an ordinary application. In Microsoft Windows 2000 or later, you can also install it as a Windows service.
To install the HASP License Manager, start the lmsetup.exe installation program (the following is an example of installing the HASP License Manager version 8.32).

- Fig. 71. Language selection
Then select English for the installation (see above).
Next, confirm that you accept the proposed license.
- Fig. 72. License acceptance
If you install the HASP License Manager on a computer running Windows 2000 or later, you will be offered two options for installing the HASP License Manager: as an application (Application) or as a service (Service). If you install the HASP License Manager on a computer running Windows 98/Me, this dialog box will be skipped since only the application can be installed on these operating systems.

- Fig. 73. Selecting installation mode
Next, you will be prompted to select a directory where the HASP License Manager executable files and the help file will be placed. If you install the HASP License Manager as a Windows service, the executable files will be placed in the Windows system directory, and only the help file will be installed in the selected directory.

- Fig. 74. Choosing the HASP License Manager installation path
At the next step of the installation, you will be prompted to select a group in which the shortcuts for starting the HASP License Manager and the help file will be placed. By default, a new group is created with the name HASP License Manager, but you can select an existing group or change the name of the group being created.

- Fig. 75. Specifying a group name
If you install the HASP License Manager as a Microsoft Windows application, you will be prompted to place the HASP License Manager shortcut in the Startup directory. In this case, the HASP License Manager will start automatically when the operating system boots. If you choose the other option, you will have to start the HASP License Manager manually.

- Fig. 76. Selecting run mode
At the next step, it is proposed to install the HASP Device Driver, which is necessary for the normal operation of the HASP License Manager. Using this driver, the HASP License Manager interacts with the HASP4 Net USB dongle. If the HASP Device Driver has already been installed on the computer, then reinstalling the HASP License Manager is not required.

- Fig. 77. Installing the protection driver
After the installation process is complete, you will be prompted to start the HASP License Manager. If you refuse, you can start it later manually. Procedures for starting the HASP License Manager for various installation options are described below.

- Fig. 78. HASP License Manager starting dialog
10.2.8.1.1. Starting HASP License Manager as Microsoft Windows application
If the HASP License Manager was installed as a Microsoft Windows application, it is started by running the program file nhsrvw32.exe, which is placed on the hard drive of the computer by the HASP License Manager Setup program.
When you run nhsrvw32.exe from a command line, you can set the parameters, by which HASP License Manager can be more «instructed» about using a particular network protocol for interaction with the protected programs.
Note that configuring network protocols makes sense only when the default mode of using the network protocols causes unstable operation or there are serious delays in running protected programs.
Each parameter is preceded with «—» or «/». Example:
nsrvw32 -tcpip
Or:
nsrvw32 /tcpip
When you start the nhsrvw32.exe program, the following parameters can be used.
-addrpath=<path>
Specifies where to save the haspaddr.dat file. By default, the file is saved in the directory where the HASP License Manager was downloaded.
-ipx
Instructs the HASP4 Net application to use the IPX protocol with SAP.
-ipxnosap
Instructs the HASP4 Net application to use the IPX protocol without SAP. When using the HASP License Manager for Win32, other protocols can be loaded using the-tcpip or -netbios commands. In this case, the HASP License Manager creates a newaddr.dat file that contains the address of the station where the HASP License Manager is running. When you download the HASP License Manager with one of these keys, only those protected applications that have access to the newaddr.dat file will be able to exchange data with it.
-ipxsocket num=<number>
Use this parameter if you want to change the socket that is used to exchange data with HASP License Manager. The default socket is 7483 (hex value).
-localnet
Use this parameter if you want the HASP License Manager to serve the stations exclusively on the local network. If the HASP License Manager receives requests from workstations that are not on the local network, they get error code 140.
-nbname=<name>
Assigns a NetBIOS name to the HASP License Manager. The parameter action is identical to -nethaspnb name.
-netbios
This parameter allows you to use the HASP4 Net application only with NetBIOS protocol. When using the HASP License Manager for Win32, other protocols can be loaded using the -tcpip or -ipxnosap commands.
-portnum=<number>
If you use TCP/IP, this parameter allows you to specify a network port that will use the HASP License Manager. Default port: 475.
-srvname=<name> [,name]
Assigns one or more IPX, TCP/IP, or NetBIOS names to the HASP License Manager. A maximum of 6 names can be assigned.
-tcpip
This parameter allows you to use the HASP4 Net application only with TCP/IP protocol. When using the HASP License Manager for Win32, other protocols can be loaded using the -ipx or -netbios parameters.
-use lananum=<x> [,x]
Instructs HASP License Manager to operate with specific communication channel numbers.
-userlist
Limits the number of users serviced by the HASP License Manager. Default value: 250.
10.2.8.1.2. Running HASP License Manager as a Microsoft Windows service
You can start HASP License Manager as a Microsoft Windows service only if it was installed to operate as a service. As noted above, this is possible only in the environment of Microsoft Windows 2000 or later.
When you install HASP License Manager as a Microsoft Windows service, it is installed as a startup, that is, HASP License Manager will start every time you start Microsoft Windows.
If necessary, you can change the startup settings of the service and start and stop it manually.
To start, stop, and configure HAPS License Manager manually, click Start – Setup – Control Panel – Administrative Tools – Service. In the list of services that appears, find the HASP Loader service and right-click it. Through the context menu that appears, you can perform all the necessary actions with the service.
10.2.8.2. On Linux
Download HASP License Manager for Linux before proceeding with the installation. HASP License Manager also requires you to install HASP Device Driver.
To install the HASP License Manager, perform the following steps (actions must be performed as administrator):
- Copy the downloaded file to the directory where the HASP License Manager will be located (for example,/opt/hasplm).
- Unpack the archive by executing the command:
tar xzf hasplm_linux_8.30.tgz
- Add the HASP License Manager starting command (before exit 0 command) to the /etc/rc.local file from the directory where it was unpacked:
/opt/hasplm/hasplm
Adding a command to the rc.local file will cause the HASP License Manager to start automatically when the system restarts.
- Start HASP License Manager by executing the command:
hasplm
If you want to configure HASP License Manager using the nhsrv.ini configuration file, specify the path to the configuration file in the HASP License Manager command line:
/opt/hasplm/hasplm -c /etc/nhsrv.ini
10.2.8.3. Configuring the HASP License Manager with a configuration file
You can specify some HASP License Manager settings using the nhsrv.ini configuration file.
If you are using keys with a lot of user licenses (for 300, 500, and 1,000 users), please pay attention to the NHS_USERLIST parameter when configuring HASP License Manager.
<< Prev Next >>
Помимо драйвера ключа на серверы 1С нужно установить службу менеджера лицензий «HASP License Manager» (HASP LM), которая будет раздавать клиентам 1С подключенный к серверу USB-ключ с клиентскими лицензиями.
HASP LM регистрируется на сервере в качестве системной службы HASP Loader с исполняемым процессом nhsrvice.exe, который открывает прослушиватель на порту TCP 475 и отвечает на запросы клиентов, желающих получить клиентскую лицензию.
Скачать инсталлятор «HASP License Manager» последней версии 8.32.5.40 (May 2008) раньше можно было по ссылке с сайта Центр загрузки Sentinel (thales-sentinel.ru) , но теперь эта ссылка не работает. Поэтому мы выложили данный архивный дистрибутив здесь: Aladdin-HASP-License-Manager-8.32.5.40-May-2008.zip
Для тех у кого есть действующая подписка на ИТС 1С, более старую версию «HASP LM» 8.31 от 2007 года на текущий момент времени можно загрузить с закрытого раздела сайта releases.1c.ru.
Мы в своём примере далее будем использовать инсталлятор «HASP License Manager» последней версии 8.32.5.40.
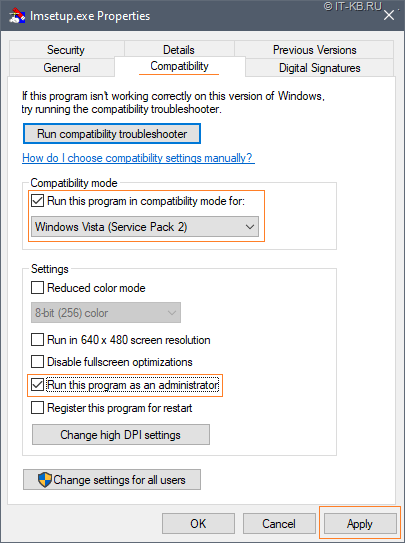
Распаковываем архив и устанавливаем в свойствах инсталлятора lmsetup.exe режим совместимости Windows Vista (Service Pack 2), а также включаем обязательный режим запуска с правами администратора. Это необходимо сделать для успешной работы инсталлятора в Windows Server 2012 R2/2022.
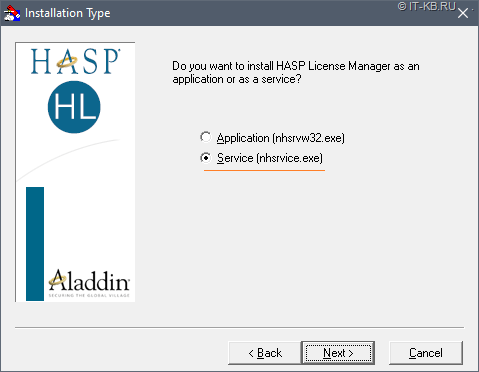
Запускаем инсталлятор и выбираем вариант установки HASP License Manager в режиме службы:
Установка по умолчанию выполняется в каталог C:\Program Files (x86)\Aladdin\HASP LM.
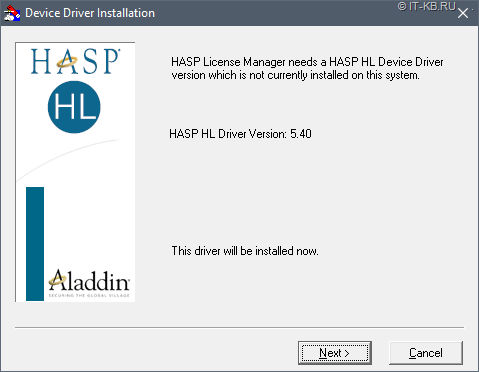
Для своей работы HASP LM использует HASP HL Device Driver, который будет установлен попутно.
После успешной установки драйвера может появится странное окошко, в котором мы должны нажать кнопку ОК, в противном случае процесс установки будет висеть в таком состоянии до бесконечности. Такое поведение было замечено при установке на Windows Server 2012 R2, но не воспроизвелось на Windows Server 2022.
Если современные компоненты Sentinel LDK Run-time были установлены в систему до установки HASP LM, то мы можем получить сообщение об отмене установки драйвера более ранней версии из состава HASP LM.
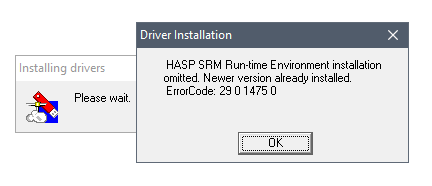
Данное сообщение не приводит к прерыванию установки HASP LM и является более информирующим, нежели говорящем о проблеме.
В конце установки инсталлятор предложит запустить службу «HASP Loader» (исполняемый путь C:\Windows\system32\nhsrvice.exe -service) и предупредит, что HASP ключи уже должны быть подключены нами к серверу.

После окончания процесса установки перейдём в системную оснастку управления службами Windows (services.msc). Убедимся в том, что служба «HASP Loader» успешно запустилась, и открыв её свойства, настроим автоматический перезапуск в случае ошибки.
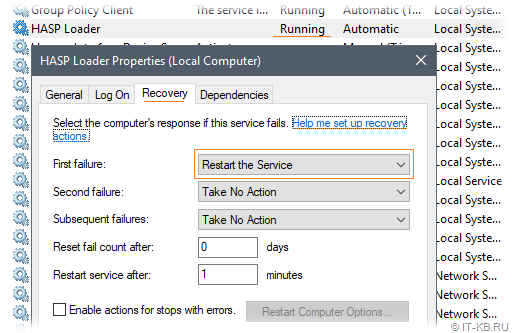
Помимо этого, после установки HASP LM, в документации рекомендовано исключать основной рабочий процесс службы «HASP Loader» (nhsrvice.exe) из действия механизма Data Execution Prevention (DEP).
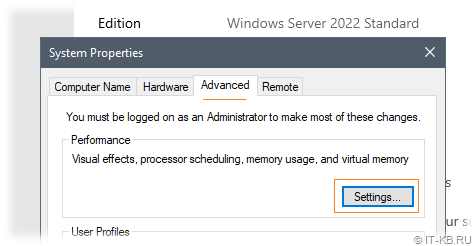
Для того, что настроить исключение для DEP, откроем свойства системы, например, через панель управления Control Panel > System > Advanced system settings. Перейдём на вкладку расширенных настроек Advanced, затем в разделе Performance нажмём кнопку Settings
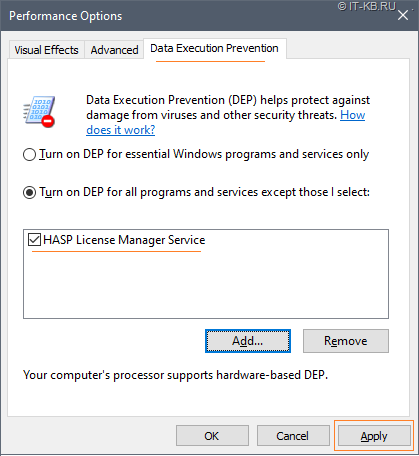
В окне Performance Options выберем вкладку Data Execution Prevention и в случае, если включена опция «Turn on DEP for all programs and services except those I select» (настройка по умолчанию), воспользуемся кнопкой Add и добавим в список исключений путь к исполняемому файлу nhsrvice.exe:
-
Путь для 32-битной системы:
С:\Windows\system32\nhsrvice.exe, -
Путь для 64-битной системы:
C:\Windows\SysWOW64\nhsrvice.exe
После этого служба HASP LM должна работать без проблем на Windows Server 2012 R2/2022.
Дополнительно может оказаться полезным добавление процесса HASP LM (nhsrvice.exe) в исключения антивирусного ПО.
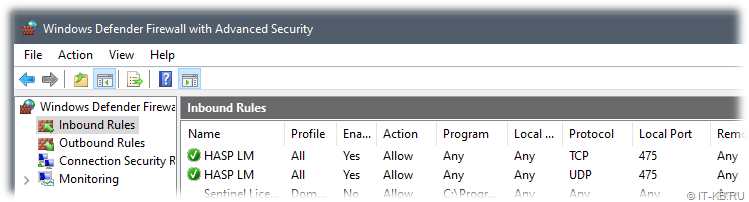
Также обратите внимание на то, что инсталлятор HASP LM в ходе установки добавляет в Windows Firewall два правила, разрешающих входящий трафик на порт 475 для протоколов TCP и UDP с любых удалённых адресов. Можно подправить эти правила, например, сузив область адресов, с которых клиенты могут обращаться за лицензией ключей HASP.
Здесь может возникнуть соблазн отключить правило для протокола UDP и ориентироваться в дальнейшей настройке только на работу с протоколом TCP. Однако стоит помнить несколько важных моментов:
-
Утилита Aladdin Monitor работает только по протоколу UDP (порт 475) и не позволит мониторить состояние ключей, если в HASP LM протокол UDP выключен или порт UDP 475, прослушиваемый HASP LM, блокируется брандмауэром Windows.
-
Есть информация, что платформа 1Сv8 работает с ключами только по протоколу UDP, однако можно попытаться заставить использовать её TCP, но для этого потребуется и на стороне клиента и на стороне сервера HASP LM включать поддержку устаревшего протокола NetBios over TCP/IP (свойства сетевого адаптера > свойства протокола TCP/IP > Properties > Advanced > WINS). На наш взгляд, оно того не стоит.
В общем случае, если сеть между клиентами и сервером HASP LM функционирует нормально, то отказываться от использования протокола UDP в пользу TCP не имеет особого смысла. Подробней об этом можно почитать в старой инструкции Working_with_HASP_and_1C.pdf
Чтобы настроить на сервере основную службу «HASP Loader» потребуется отредактировать конфигурационный файл nhsrv.ini.
Так как в нашем случае HASP LM установлен как служба, то, для вступления изменений в силу, настроенный конфигурационный файл nhsrv.ini из каталога установки C:\Program Files (x86)\Aladdin\HASP LM нужно будет скопировать в каталог C:\Windows\SysWOW64 (для 32-бытных ОС — C:\Windows\System32) и выполнить перезапуск службы HASP Loader .
Отредактируем на сервере файл следующим образом (приведены только незакомментированные строки):
- nhsrv.ini
-
[NHS_SERVER]

NHS_USERLIST    = 1000    ; maximum number of concurrent logins
                          ; to this LM (default=250, max = 65520)
NHS_SERVERNAMES = APP41   ; server names to match the name a client
                          ; requests (max 6 names, max 7 chars/name)
NHS_HIGHPRIORITY = no     ; run LM at high priority (default=no)

[NHS_IP]

NHS_USE_UDP      = enabled  ; enabled or disabled (default: enabled)
NHS_USE_TCP      = enabled   ; enabled or disabled (default: enabled)
NHS_IP_portnum   = 475       ; IP port number (default: 475 (IANA registered))

[NHS_IPX]

NHS_USE_IPX       = disabled ; enabled or disabled (default: enabled)

[NHS_NETBIOS]

NHS_USE_NETBIOS   = disabled  ; enabled or disabled (default: enabled)
Как видно, в секции основных настроек сервера в параметре NHS_USERLIST мы увеличили количество допустимых клиентских сессий с 250 до 1000. В параметре NHS_SERVERNAMES мы задали короткое имя этого сервера (это полезно делать, когда в сети больше одного HASP LM). Ну и наконец, в параметрах NHS_USE_IPX и NHS_USE_NETBIOS мы отключили старые неиспользуемые протоколы.
После того, как настроенным таким образом файл скопирован в системный каталог Windows, нужно перезапустить службу менеджера лицензий HASP LM, например, с помощью PowerShell:
Get-Service "HASP Loader" | Restart-Service
После этого с помощью утилиты netstat убедимся в том, что в системе прослушивается порт 475 по протоколу TCP и UDP:
netstat -na | findstr 0:475

Теперь на нашем сервере мы можем запустить утилиту Aladdin Monitor и убедиться в том, что в нём доступна информация о клиентском ключе HASP. Однако, стоит учесть то, что информация о клиентском ключе будет недоступна, пока к ключу не установлено клиентских соединений.
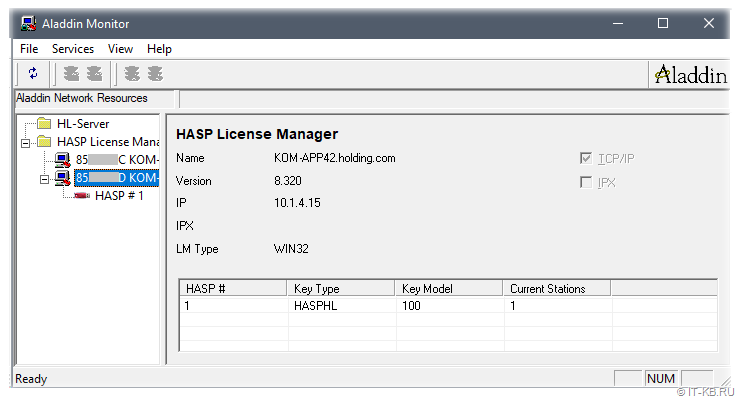
Позже, после развёртывания кластера серверов 1С и настройке клиентов, утилита Aladdin Monitor пригодится нам для анализа ситуации с получением клиентскими экземплярами 1С:Предприятие клиентских лицензий.
Дополнительные источники информации:
-
Установка HASP LM на Linux:
Проверено на следующих конфигурациях:
| Версия ОС сервера 1С |
|---|
| Microsoft Windows Server 2012 R2 Standard EN (6.3.9600) |
| Microsoft Windows Server 2022 Standard EN (10.0.20348) |
Автор первичной редакции:
Алексей Максимов
Время публикации: 10.03.2023 12:47
Обращаем ваше внимание, что Фирма 1С Прекращает свободную продажу продуктов «1С:Предприятие» с аппаратной защитой (USB) с 09.03.2022 года до возобновления поставок необходимых комплектующих (USB-ключей).
Рекомендуем приобретать электронные поставки программных продуктов.
КУПИТЬ ЭЛЕКТРОННЫЕ ПОСТАВКИ
Преимущества электронных поставок:
- Быстро приобретаются и доставляются клиенту
- Надежно хранятся в личном кабинете клиента
- Не ломаются и не теряются, как USB защита
Для общего удобства и по просьбам системных администраторов разместим программное обеспечение фирмы Aladdin для установки ключей HASP.
- Драйвер устройства: необходим для установки ключа, как устройства.
- Менеджер лицензий: программное обеспечение для обеспечения запуска программ 1С во всей локальной сети.
- Монитор лицензий: программное обеспечение для мониторинга аппаратных ключей защиты в локальной сети.
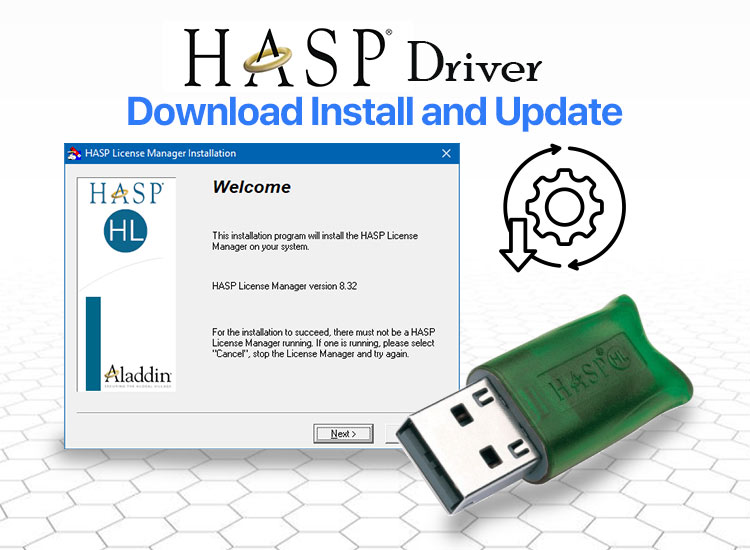
Let’s have a look at some of the most amazing methods to execute the HASP driver download and update for Windows 10/11 and various other operating systems.
A Hardware Key (HASP) is a physical and external device for Windows that’s often referred to as a dongle. This dongle can be inserted into the USB port of your system for connectivity and use. However, unlike any other dongle, the HASP device is usually password-protected and encrypted for the user’s use and protection.
To use the HASP device on your system, you need to install the HASP driver for Windows 10/11. A driver for any device is responsible for establishing communication between the device and the system. It is the driver that defines how a device will react to the commands of the user and vice versa.
Hence, having an up-to-date HASP driver is of utmost importance to use the device. In this guide, we will help you install this driver for your Windows PC so that you can use the required HASP device on your PC without any faults, interruptions, or glitches.

Methods to Download and Update the HASP Driver for Windows 10/11
In the following sections of this simple guide, you will find multiple solutions explaining how to execute the HASP driver download and update for Windows. You can opt for any of the solutions provided here to get the driver. But first, do have a look at all of the methods before choosing your favorite.
Method 1: Update the Driver Using Device Manager
One of the best methods to execute the HASP driver update is using the Device Manager. The Device Manager is one of many Windows-integrated tools and utilities. This utility is responsible for handling the connected devices for the user. Follow the steps offered below to learn how this tool can help you with the driver updates:
- Right-click on the Windows button on the taskbar and click on the Device Manager.
- Double-click on Universal Serial Bus Controllers to proceed.
- Right-click on the necessary HASP device and select the option to update the driver.
- Click on the option to Search Automatically for Driver Updates.
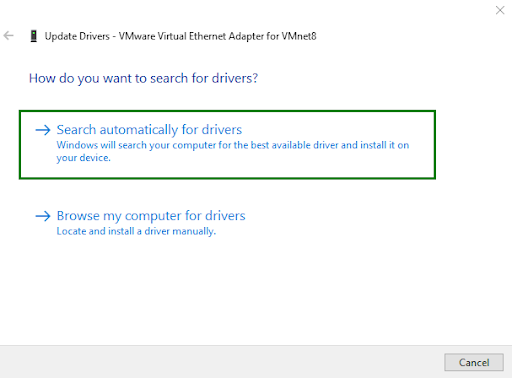
- Use the on-screen instructions to install the driver.
- Restart your computer when the process is complete.
This is a simple and effective method to update the HASP driver for Windows 10/11 and other operating systems. You can use either of the following methods if you didn’t like this one.
Also know: Download Canon MF3010 Printer Driver on Windows 11/10
Method 2: Use the Microsoft Update Catalog
The official website of Microsoft Update Catalog can allow you to execute the HASP driver download for Windows 11/10. You can search for the necessary updates on this website and download them. The same goes for drivers as well. Follow the instructions offered below to learn more:
- Visit the official website of Microsoft Update Catalog.
- Type HASP in the search bar and press Enter.
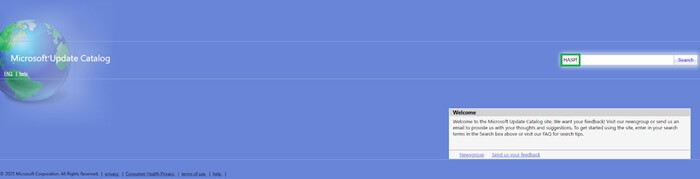
- Look for your required driver in the list that appears. Use the Download button to get the driver.
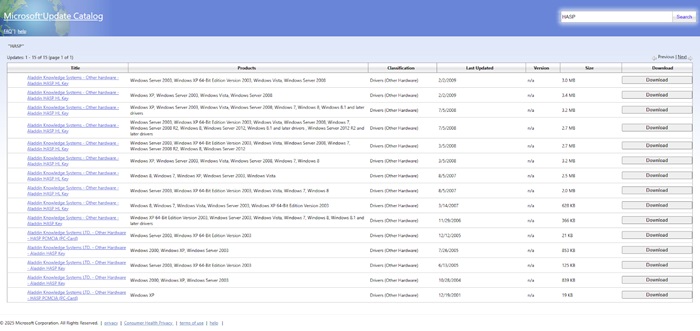
- Once the download completes, run the file to install the driver.
This method may fail to provide you the updates for some HASP drivers. Hence, if you fail to download the HASP driver from the Microsoft Update Catalog, use the next solution.
Method 3: Update the Operating System
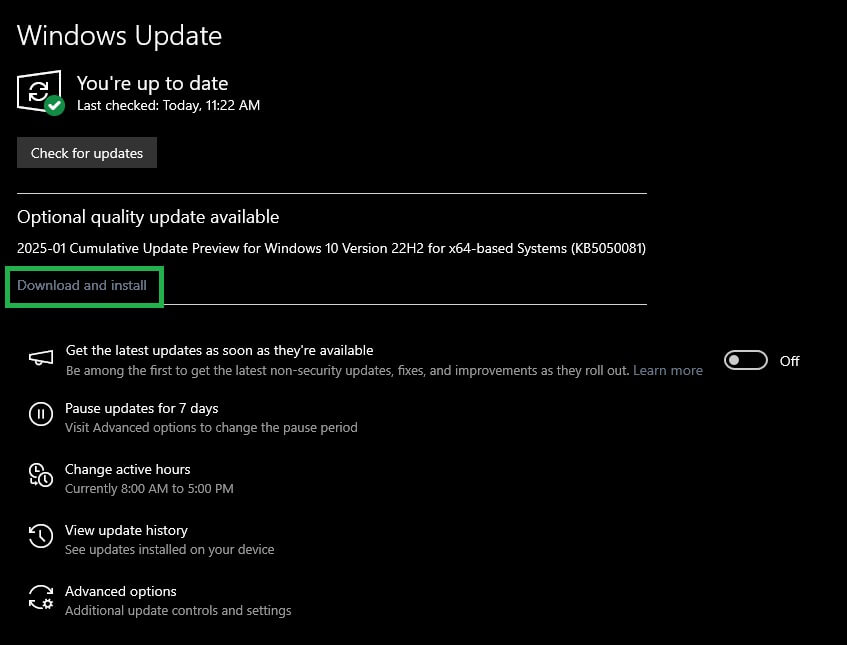
Here’s the last yet another reliable method to execute the HASP driver update for Windows. You can update the operating system for the driver updates as the OS update components can contain the updates for multiple device drivers. Follow the steps provided below to learn more:
- Press the Win + I keys to open the device Settings.
- Click on Update & Security to proceed.
- Wait for the tool to load and click on the Check for Updates button afterwards.
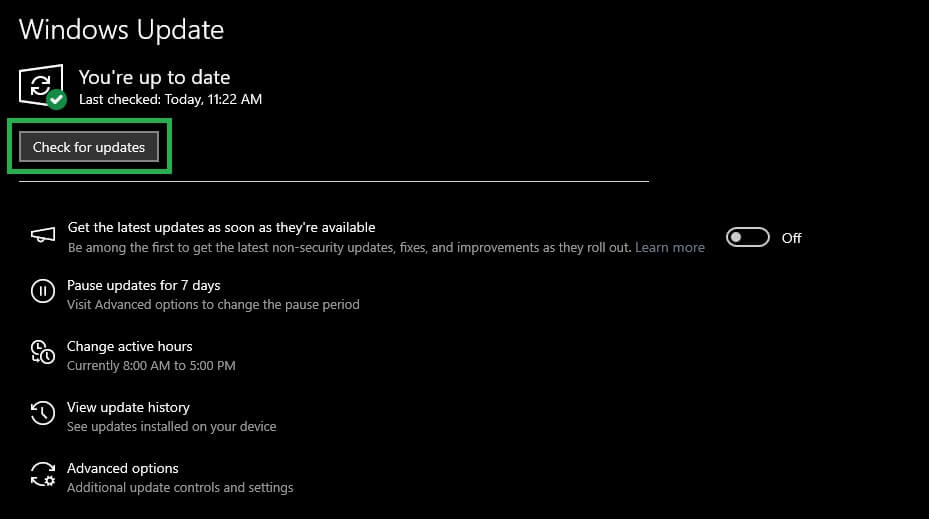
- Use the Download & Install button to install the updates on your system.
Also know: FT232R USB UART Driver Download and Update for Windows
HASP Driver Install: Complete
The HASP driver is a very crucial component in the Windows operating system. As it is the main element that can establish the communication between the HASP device and the system, missing, faulty, outdated, or otherwise damaged drivers can cause usage issues for you.
To stay ahead of these issues, you can execute the HASP driver download and update. The above sections of this guide offer some of the best and safest methods to install the driver on any Windows operating system. Using any of these solutions, you can get the latest version of the driver and ensure that the device never causes any issues while you use it.
If you have any questions related to the guide or its methods, you can ask them in the comments section below. The solutions provided here will help you enhance the performance of your HASP device and overall performance of the system as well. You can also provide feedback and suggestions in comments as well.
If you liked this guide on how to download the HASP driver and install it, you can subscribe to our newsletter for daily blog updates. Also, you can follow our social media pages to stay up to date with the latest blog additions. See you on the next blog.
На сегодняшний день электронными ключами Sentinel HASP защищается от нелегального использования и пиратского тиражирования большое количество программных продуктов.
Для полноценного функционирования такого программного обеспечения на компьютере пользователя, либо сервере предприятия, необходима установка, помимо самой программы, ещё и драйвера ключа.
Зачастую драйвер HASP уже входит в состав дистрибутива устанавливаемого ПО (примером может послужить 1С: Бухгалтерия  и ставится автоматически при установке основного комплекта. Но так построены не все дистрибутивы, поэтому совсем не помешает иметь навыки по установке драйвера ключей HASP, особенно при обслуживании программных продуктов, защищённых с их помощью — той же системы 1С: Предприятие.
В зависимости от необходимого нам процесса инсталляции драйвера, различают два типа пакета установки:
- Sentinel LDK and Sentinel HASP Run-time Environment Installer GUI — представляет собой наиболее привычный для большинства пользователей графический интерфейс установки драйвера
- Sentinel LDK and Sentinel HASP Run-time Environment Command-line Installer — предназначен для продвинутых пользователей, установка драйвера выполняется из командной строки
Для составления данного обзора воспользуемся утилитой haspdinst.exe из второго варианта пакета установки драйвера. Скачать оба пакета инсталляции драйвера ключей Sentinel HASP вы можете по этой ссылке.
Для установки в системе драйвера электронных ключей Sentinel HASP необходимо запустить утилиту haspdinst.exe с индексом «-i» (install):
haspdinst.exe -i
Результатом успешной установки драйвера послужит уведомление:
Для завершения процесса установки драйвера необходимо подключить электронный ключ Sentinel HASP к свободному USB порту компьютера (светодиодный индикатор ключа в это время ещё не будет активным).
Windows обнаружит подключение нового устройства:

И начнёт его установку:
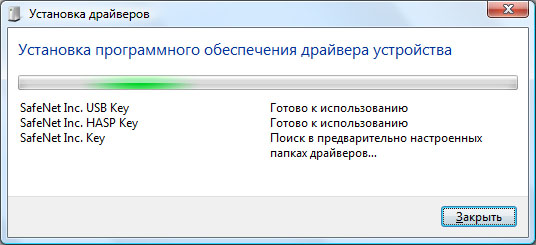
По окончании которой выдаст соответствующее уведомление:
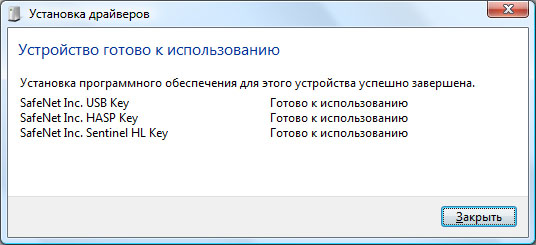
На данном этапе установка драйвера электронного ключа Sentinel HASP считается завершённой, и светодиодный индикатор ключа будет равномерно светиться.
Обзор составлен на примере установки драйвера электронных ключей Sentinel HASP HL на компьютере под управлением операционной системы семейства Microsoft Windows. Версия устанавливаемого драйвера Sentinel HASP — 6.60.
Чтобы получить более подробную информацию об электронных ключах Sentinel HASP перейдите в данный раздел нашего сайта, либо задайте интересующие вас вопросы.