
After installing Ubuntu 22.04 & Ubuntu 23.10, you may found that dual- or multi-boot systems in your PC disappeared. That’s because of the change of Grub boot-loader. And, here’s the step by step guide shows you how to fix it.
Grub 2.06 disable os-prober by default
Ubuntu 22.04 uses Grub 2.06 to provide boot menu on startup, which disabled the os-prober feature by default.
Grub boot-loader uses the os-prober to find out other operating systems installed on the same machine. Since v2.06, it disables the feature by default. Because it’s a potential attack vector to execute os-prober and create boot entries automatically!
Which means, not only Ubuntu 22.04 but also the next Ubuntu 22.10 and higher, as well as other Linux default to Grub 2.06+ will not find other OSes installed on same PC out-of-the-box, until Grub changes the rule.
The solution is quite easy, as user may re-enable this feature either by manually editing the config file or using the Grub Customizer tool.
Method 1: Edit the Grub config file manually
Without installing anything, user may manually edit the config file and re-enable the feature by adding a new line.
1.) Firstly, press Ctrl+Alt+T on keyboard to open terminal. When it opens, run command:
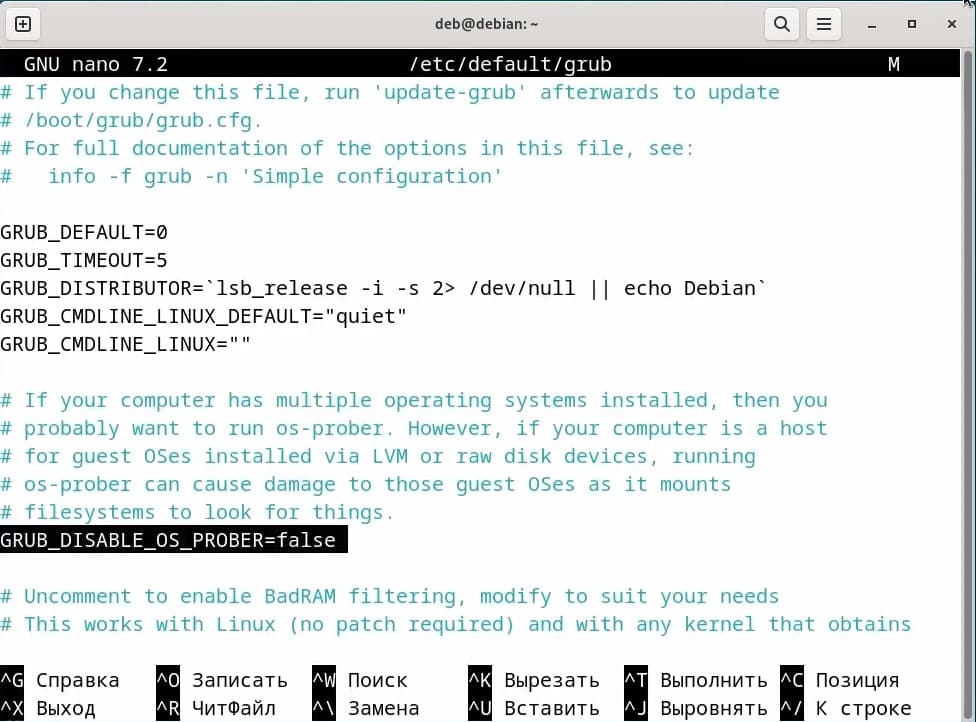
sudo nano /etc/default/grub
The command will open ‘/etc/default/grub‘ config file via the nano command line text editor.
2.) Next, scroll down and add the new line below:
GRUB_DISALBE_OS_PROBER=”false”
If 'GRUB_DISALBE_OS_PROBER' line already exist, just change its value to 'false'
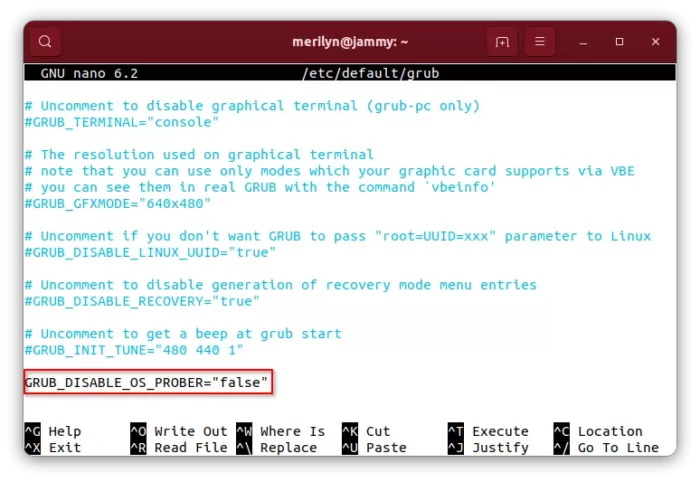
And, press Ctrl+X, type y and hit Enter to save change.
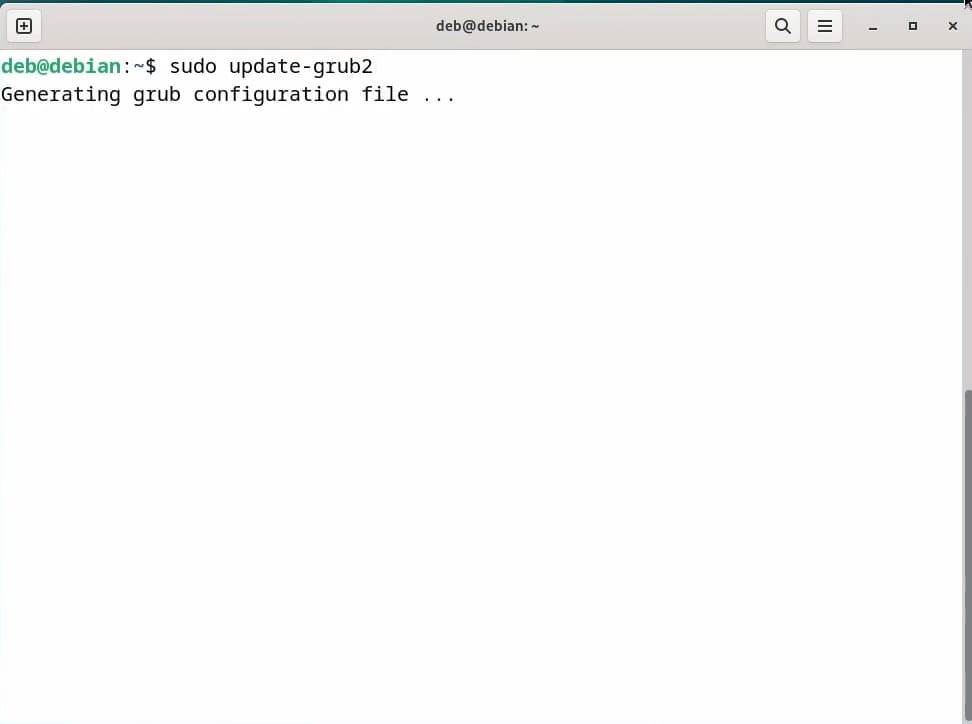
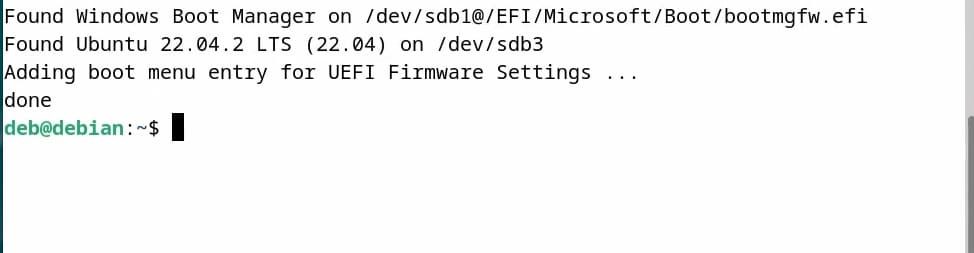
3.) Finally, apply change by running command:
sudo update-grub
For Fedora with UEFI, the command is grub2-mkconfig -o /boot/efi/EFI/fedora/grub.cfg

Method 2: Re-enable os-prober via Grub Customizer
GRUB Customizer is removed from Ubuntu 22.04 repository due to its broken logic! The maintainer fixed the issue and publish the packages into PPA.
First, press Ctrl+Alt+T on keyboard to open terminal. When it opens, run the commands below one by one to install Grub Customizer:
- Add its official PPA by running command below. Type user password when it asks and hit Enter to continue:
sudo add-apt-repository ppa:danielrichter2007/grub-customizer
- Then update system package cache via:
sudo apt update
- Finally, install Grub-customizer via command:
sudo apt install grub-customizer
After installing the graphical configuration tool for Grub boot-loader, search for and launch it from system start menu (or ‘Activities’ overview).
When it opens, navigate to “General Settings” tab, and click on “advanced settings” button. Finally, in pop-up dialog set GRUB_DISABLE_OS_PROBER (add if not exist) to false.
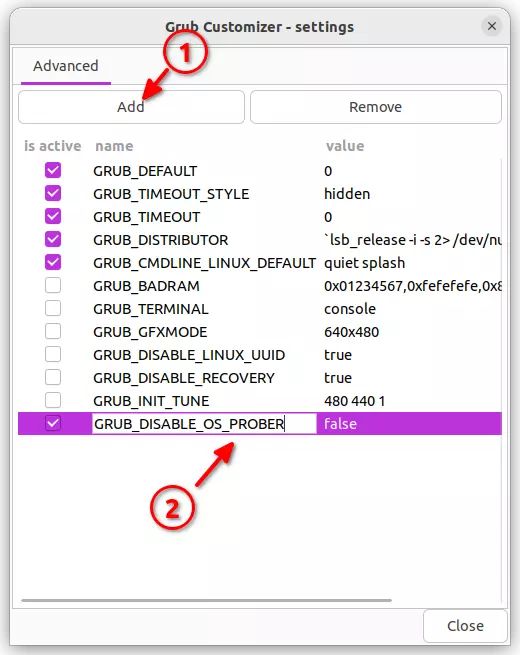
Finally, click on ‘Save‘ button and done.
That’s all. Enjoy!
In this tutorial we will dual boot between Windows 10 UEFI (1803) and Linux (ArcoLinuxB-Mate-Minimal).
It does not matter if I filmed this on virtual box or not. You need to follow the exact same steps, if you want to dual boot on an SSD or a harddisk.
If you want to install linux to your SSD or harddisk then you need these things
- an working usb stick 3.0 or 3.1 these days of 3GB+
- an application to write the iso to usb like mintstick or etcher (more info)
- figure out how to boot from usb on your hardware (more info)
We use grub-customizer to tell him which partition or which desktop it should boot up with by default.
We can also change the /etc/lightdm/lightdm.conf so that we can boot up without typing a password. That is the autologin option. Suited for desktops, less so for laptops that leave the privacy of your home.
TIP OR TRICK
You can also autologin into W10 with the use of the application netplwiz.
Adding a Windows Boot Entry to GRUB
If you’re dual-booting Windows and Linux, you may have noticed that GRUB, the Linux bootloader, doesn’t automatically list Windows as an option when you boot your computer. This can be a bit of a pain, especially if you’re used to being able to quickly and easily choose between operating systems.
Fortunately, adding a Windows boot entry to GRUB is a relatively simple process. In this article, I’ll walk you through the steps involved.
I’ll start by explaining what GRUB is and how it works. Then, I’ll show you how to find the Windows installation files on your hard drive. Finally, I’ll show you how to add a Windows boot entry to GRUB so that you can easily choose between Windows and Linux when you boot your computer.
By the end of this article, you’ll be able to dual-boot Windows and Linux with ease!
| Column 1 | Column 2 | Column 3 |
|---|---|---|
| Step 1 | Boot into the live environment of your Linux distribution. | This can be done by either using a bootable USB drive or by burning a live CD. |
| Step 2 | Open the terminal. | You can do this by pressing Ctrl+Alt+T. |
| Step 3 | Install the grub-efi package. | This package provides the tools necessary to create and edit GRUB boot entries. |
| Step 4 | Create a new GRUB boot entry for Windows. | To do this, run the following command: |
| Step 5 | Reboot your system. | When you boot your system, you should now see a GRUB menu with an entry for Windows. |
This guide will show you how to add a Windows boot entry to GRUB, the bootloader used by most Linux distributions. This will allow you to dual-boot between Windows and Linux, or to boot into Windows from a Linux live USB.
Prerequisites
To follow this guide, you will need:
- A working installation of GRUB
- A Windows installation that is accessible from the GRUB menu
Locating the Windows Boot Entry
The Windows boot entry is located in the `/boot/grub/grub.cfg` file. This file contains all of the information that GRUB needs to boot your system.
To find the Windows boot entry, open the `grub.cfg` file in a text editor. The Windows boot entry will be a line that starts with `menuentry`. The following is an example of a Windows boot entry:
menuentry “Windows 10” {
linuxefi /EFI/Microsoft/Boot/bootmgfw.efi
initrdefi /EFI/Microsoft/Boot/wimboot.efi
}
Editing the Windows Boot Entry
To edit the Windows boot entry, you will need to make the following changes:
- Change the `title` of the boot entry to something more descriptive.
- Change the `kernel` line to point to the location of the Windows kernel.
- Change the `initrd` line to point to the location of the Windows initrd.
Here is an example of an edited Windows boot entry:
menuentry “Windows 10” {
title Windows 10
linuxefi /EFI/Microsoft/Boot/bootmgfw.efi
initrdefi /EFI/Microsoft/Boot/wimboot.efi
}
Saving the Changes
Once you have made your changes, save the `grub.cfg` file.
Reloading GRUB
To make the changes to the Windows boot entry take effect, you need to reload GRUB. You can do this by running the following command:
sudo grub-mkconfig -o /boot/grub/grub.cfg
Testing the Windows Boot Entry
Once you have reloaded GRUB, you can test the Windows boot entry by rebooting your system. When the GRUB menu appears, select the Windows boot entry and press Enter. Your system should boot into Windows.
This guide has shown you how to add a Windows boot entry to GRUB. By following these steps, you can dual-boot between Windows and Linux, or boot into Windows from a Linux live USB.
Adding the Windows Boot Entry to GRUB
To add the Windows boot entry to GRUB, you need to edit the `/boot/grub/grub.cfg` file. This file contains the configuration settings for GRUB, including the list of operating systems that GRUB can boot.
To add the Windows boot entry, you need to find the Windows partition in the file and add the following lines to the end of the entry:
set root=(hd0,0)
chainloader +1
The `set root=(hd0,0)` line tells GRUB to use the first hard disk (hd0) and the first partition (0) as the root partition. The `chainloader +1` line tells GRUB to load the operating system that is located on the first partition of the first hard disk.
Once you have added the Windows boot entry to GRUB, you need to save the `/boot/grub/grub.cfg` file and reboot the system. When the system boots, you will be able to select the Windows boot entry from the GRUB menu.
Rebooting the System
Once you have added the Windows boot entry to GRUB, you need to reboot the system. To do this, you can follow these steps:
1. Press the power button to turn on the computer.
2. When the BIOS screen appears, press the F10 key to enter the BIOS setup.
3. Use the arrow keys to navigate to the Boot tab.
4. Select the Windows Boot Manager option and press Enter.
5. Press F10 to save your changes and exit the BIOS setup.
The system will now reboot and you will be able to select the Windows boot entry from the GRUB menu.
In this tutorial, you learned how to add a Windows boot entry to GRUB. This allows you to boot into Windows from a Linux system.
If you have any questions, please feel free to leave a comment below.
Additional Resources
- [GRUB Documentation](https://www.gnu.org/software/grub/manual/grub.html)
- [How to Add a Windows Boot Entry to GRUB](https://www.howtogeek.com/197747/how-to-add-a-windows-boot-entry-to-grub/)
- [Adding a Windows Boot Entry to GRUB on Ubuntu](https://linuxize.com/post/how-to-add-a-windows-boot-entry-to-grub-on-ubuntu/)
Q: How do I add a Windows boot entry to GRUB?
A: To add a Windows boot entry to GRUB, follow these steps:
1. Boot your computer into the GRUB bootloader.
2. Press the e key to edit the GRUB configuration file.
3. Find the line that starts with `menuentry ‘Windows’`.
4. Add the following options to the end of the line:
options=quiet
5. Save the file and exit the editor.
6. Press Ctrl+X to boot into Windows.
Q: What if I get an error when I try to add a Windows boot entry to GRUB?
A: If you get an error when you try to add a Windows boot entry to GRUB, there are a few things you can check:
- Make sure that you are using the correct version of GRUB.
- Make sure that the Windows installation is located on a partition that is listed in the GRUB configuration file.
- Make sure that the Windows installation is using the correct boot loader.
If you are still having problems, you can try using a different method to add a Windows boot entry to GRUB, such as using a Windows installation disc or a bootable USB drive.
Q: How do I remove a Windows boot entry from GRUB?
A: To remove a Windows boot entry from GRUB, follow these steps:
1. Boot your computer into the GRUB bootloader.
2. Press the e key to edit the GRUB configuration file.
3. Find the line that starts with `menuentry ‘Windows’`.
4. Delete the line.
5. Save the file and exit the editor.
6. Press Ctrl+X to boot into your operating system.
Q: What are the advantages of adding a Windows boot entry to GRUB?
A: There are a few advantages to adding a Windows boot entry to GRUB:
- You can easily boot into Windows from a GRUB-based operating system.
- You can use GRUB to manage your Windows installation, such as updating the boot loader or repairing the operating system.
- You can use GRUB to dual-boot between Windows and another operating system.
Q: What are the disadvantages of adding a Windows boot entry to GRUB?
A: There are a few disadvantages to adding a Windows boot entry to GRUB:
- If you make a mistake when editing the GRUB configuration file, you could damage your Windows installation.
- If you are not familiar with GRUB, it can be difficult to add a Windows boot entry correctly.
- If you are not using a GRUB-based operating system, you may not be able to use GRUB to manage your Windows installation.
Q: What is the best way to add a Windows boot entry to GRUB?
The best way to add a Windows boot entry to GRUB depends on your specific needs and preferences. If you are not familiar with GRUB, you may want to use a graphical tool, such as GRUB Customizer, to add the boot entry. If you are comfortable working with the command line, you can add the boot entry manually by editing the GRUB configuration file.
In this tutorial, we have shown you how to add a Windows boot entry to GRUB. We first discussed the basics of GRUB and how it works. Then, we showed you how to create a Windows boot entry in GRUB. Finally, we tested our new boot entry by rebooting our system.
We hope that this tutorial has been helpful. If you have any questions or comments, please feel free to leave them below.
Author Profile
-
Hatch, established in 2011 by Marcus Greenwood, has evolved significantly over the years. Marcus, a seasoned developer, brought a rich background in developing both B2B and consumer software for a diverse range of organizations, including hedge funds and web agencies.
Originally, Hatch was designed to seamlessly merge content management with social networking. We observed that social functionalities were often an afterthought in CMS-driven websites and set out to change that. Hatch was built to be inherently social, ensuring a fully integrated experience for users.
Now, Hatch embarks on a new chapter. While our past was rooted in bridging technical gaps and fostering open-source collaboration, our present and future are focused on unraveling mysteries and answering a myriad of questions. We have expanded our horizons to cover an extensive array of topics and inquiries, delving into the unknown and the unexplored.
Latest entries
В этой статье мы разберем, как установить Windows 10 рядом с дистрибутивами Linux (например, Ubuntu и Debian). Мы рассмотрим процесс выделения свободного места на диске, запись образа Windows на флешку, установку и настройку загрузчика GRUB, чтобы в конце иметь возможность выбирать при загрузке между Linux и Windows.
Приобрести оригинальные ключи активации Windows всегда можно у нас в каталоге от 1099 ₽
1) Выделение свободного места под Windows 10
1. Если ваш диск уже содержит дистрибутивы Linux, освободите примерно 50 ГБ для Windows.
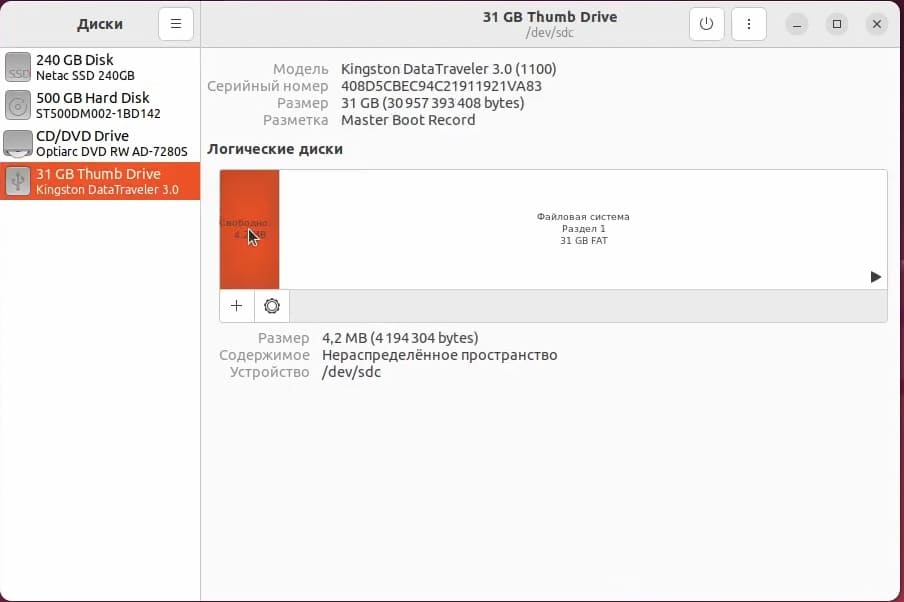
2. Для изменения размеров диска или освобождения места воспользуйтесь:
— Утилитой «Диски» (встроена в некоторые дистрибутивы linux).
— Приложением GParted (поддерживает расширенные функции управления разделами).
3. Освободить пространство можно как на том же диске, где уже установлены Linux, так и на другом физическом диске. Главное — обеспечить наличие неразмеченной области подходящего размера.
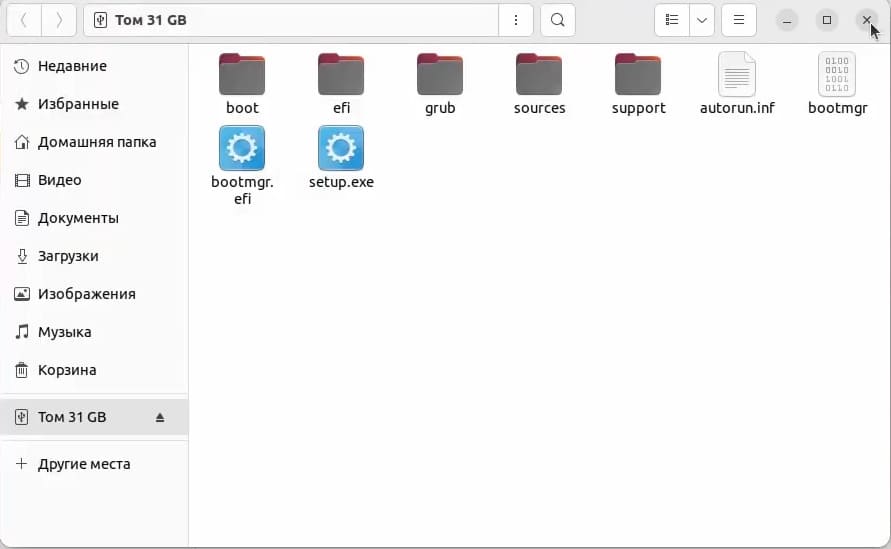
2) Подготовка установочной флешки с Windows 10
1. Загрузите ISO-образ Windows 10, найти нужный вам образ можно у нас в каталоге.
2. С помощью утилиты WoeUSB (или аналогичной) запишите образ на флешку:
— В Linux: WoeUSB, Ventoy
— В Windows: Rufus.
Можно воспользоваться нашей инструкцией.
3. Перезагрузите компьютер и в BIOS/UEFI выберите загрузку с USB-флешки.
3) Установка Windows 10
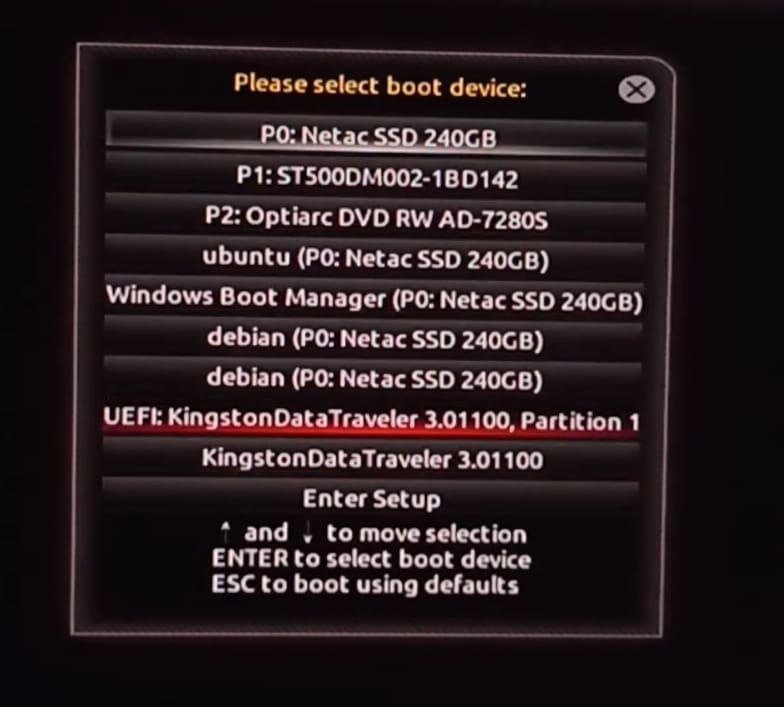
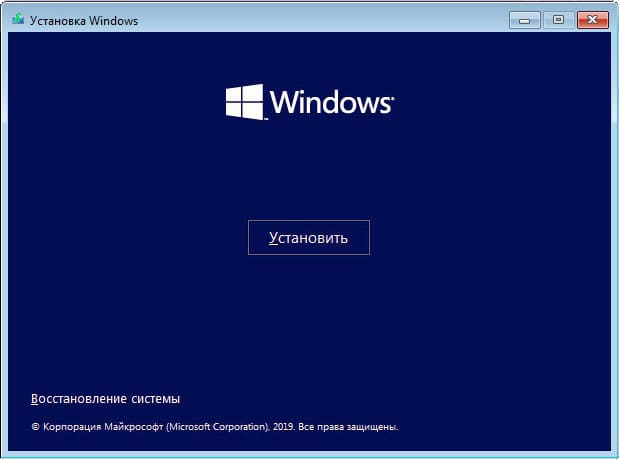
1. При появлении меню загрузки выберите загрузку с флешки (учтите режим — UEFI или Legacy).
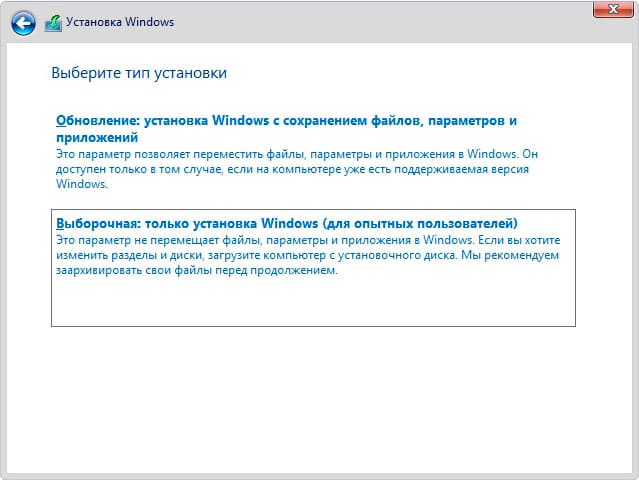
2. Начнется стандартная установка Windows, где необходимо выбрать вариант «Выборочная (только установка Windows)».
3. Найдите свободное место, которое вы заранее подготовили (около 50 ГБ).
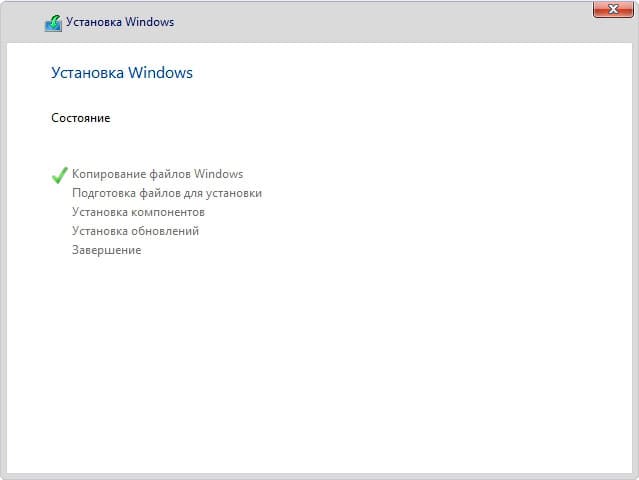
4. Установите Windows 10 на это неразмеченное пространство.

5. Дождитесь окончания установки и перезагрузки — по умолчанию теперь будет загружаться Windows 10.
4) Восстановление загрузчика GRUB (Linux)
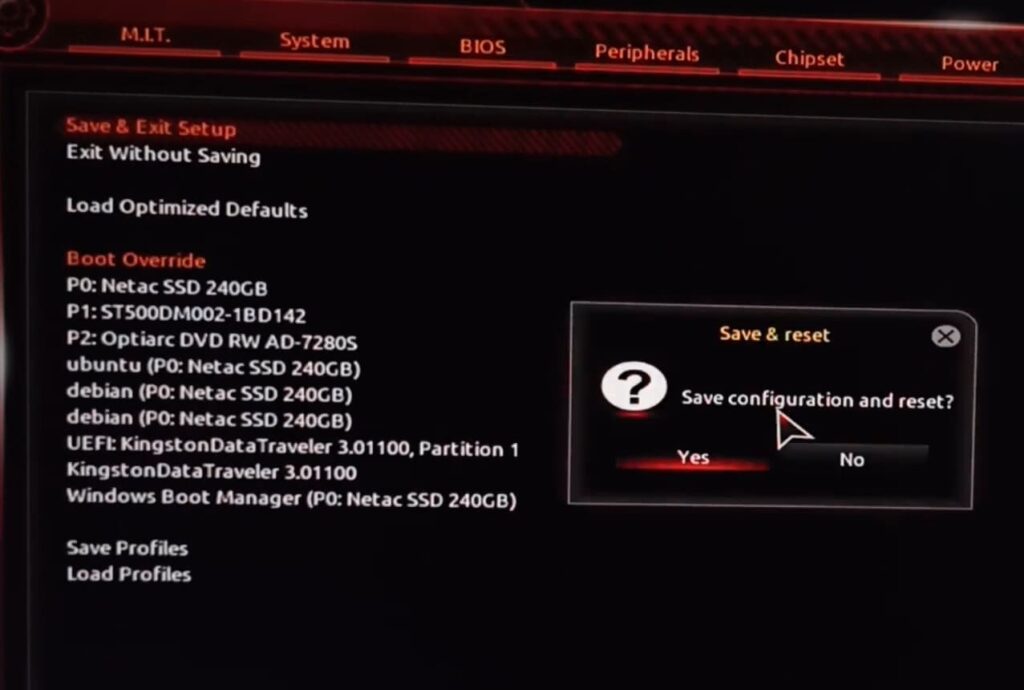
1. Перезагрузите компьютер и войдите в BIOS/UEFI (обычно клавиша F2 или Del).
2. Установите загрузку с Linux (например, Debian) в качестве приоритетного варианта.
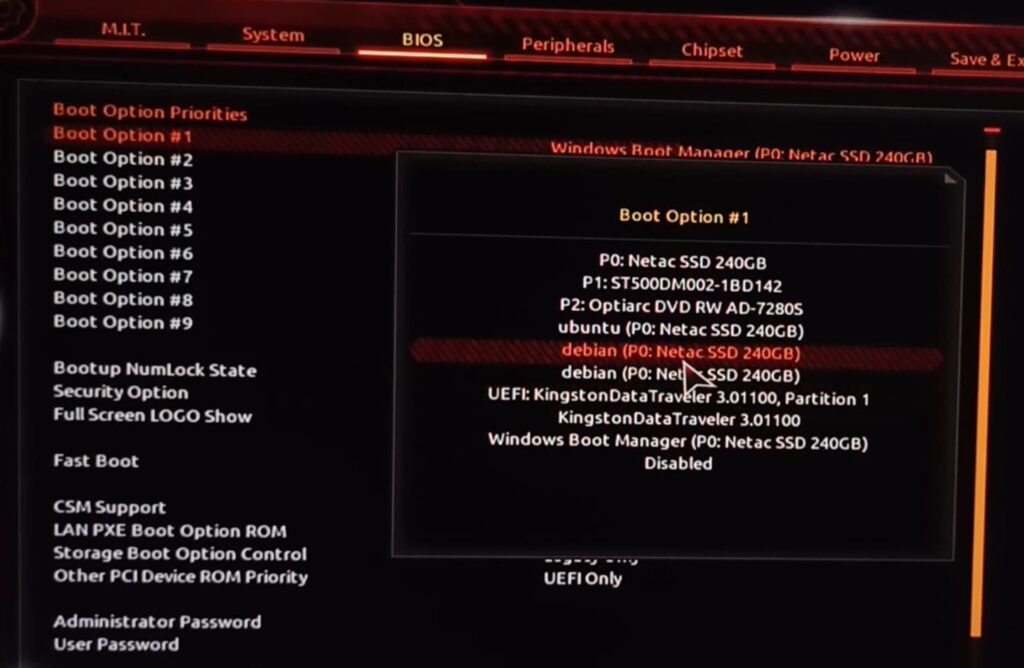
3. Сохраните настройки и выйдите из BIOS/UEFI — должно загрузиться меню GRUB, однако Windows может быть не видно в списке.
5) Добавление Windows 10 в список GRUB
1. Загрузитесь в установленный Linux (Ubuntu, Debian и т.д.).
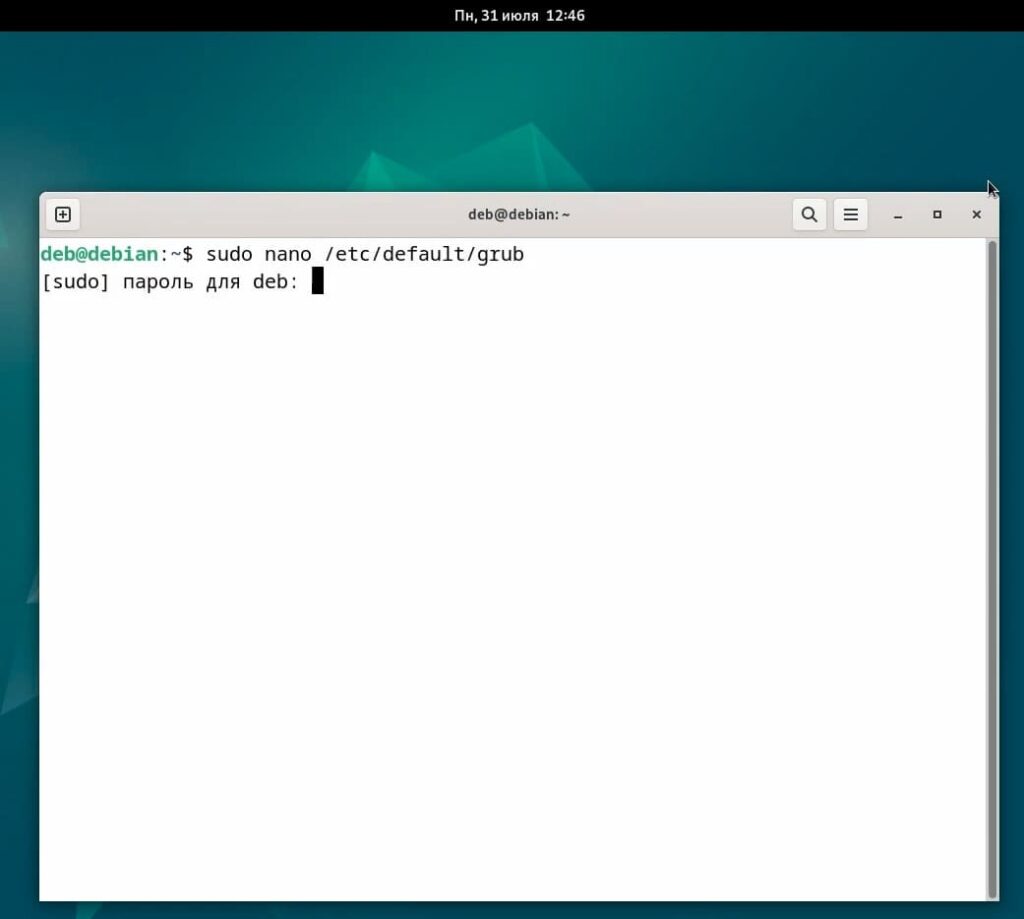
2. Откройте (с правами суперпользователя) файл настроек GRUB. Обычно он расположен по пути:
/etc/default/grub либо воспользуйтесь графической утилитой GRUB Customizer.
3. Убедитесь, что в конфигурации присутствует запись для Windows, иначе — добавьте вручную или используйте автоматический поиск.
4. Запустите команду обновления GRUB:
sudo update-grub
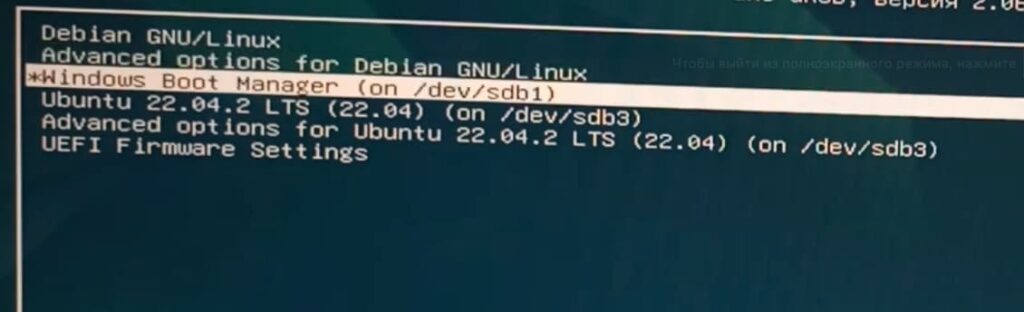
5. После перезагрузки система должна обнаружить Windows 10 в меню GRUB.
Теперь у вас на одном компьютере установлены Windows 10 и Linux (Ubuntu, Debian или другой дистрибутив). При включении компьютера меню загрузчика GRUB позволит выбирать, какую ОС запускать. Если Windows не появилась в списке, используйте команду update-grub или отредактируйте конфигурационный файл GRUB вручную. При необходимости можно воспользоваться GRUB Customizer для упрощения процесса. Теперь вы можете комфортно работать как в Linux, так и в Windows без переустановки операционных систем.
Лицензионный ключ активации Windows от
Dual-boot or even multi-boot Ubuntu with other operating systems? You may wish to change which OS starts as default in the Grub2 boot-loader.
If you’ve booted into Ubuntu, you can change the boot order via two ways:
- use Grub-Customizer, a graphical tool.
- configure Grub2 manually via a few commands.
Set Default OS by Manually configuring Grub:
For those who don’t wish to customize Ubuntu via third-party applications, open terminal from App Launcher or via Ctrl+Alt+T keys and do following steps:
All settings related to the GRUB2 will be stored in /etc/default/grub file. Whatever the changes you made in this file will be reflected to the GRUB2.
Make a backup of /etc/default/grub file before making any changes.
sudo cp /etc/default/grub /etc/default/grub.bak
1. First edit the configuration file via command:
gksudo gedit /etc/default/grub
Tip: for those who don’t have gksu, install it first via command:
sudo apt install gksu.
For Ubuntu Server, use the command below to edit the Grub configuration file:
sudo nano /etc/default/grub
And save changes by pressing Ctrl+X, typing Y, and finally hitting Enter.
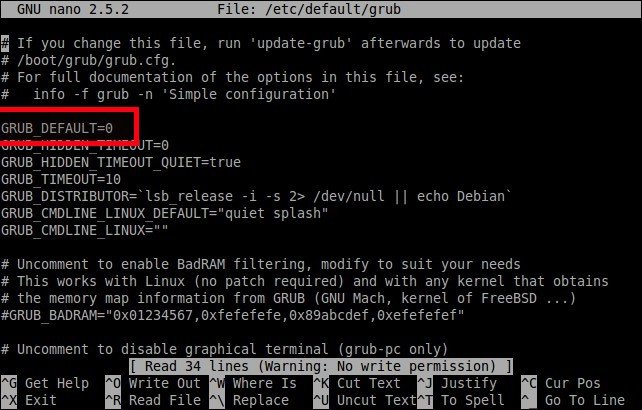
1. Select default OS (GRUB_DEFAULT)
First line should be:
GRUB_DEFAULT=0
Change the value 0 with the position of your desired OS.
To find at which place your OS is, note at which position your OS is in, while in GRUB. Subtract one and you have your number.
Ex. In GRUB, if Windows is at 5th position, then replace 0 with 4.
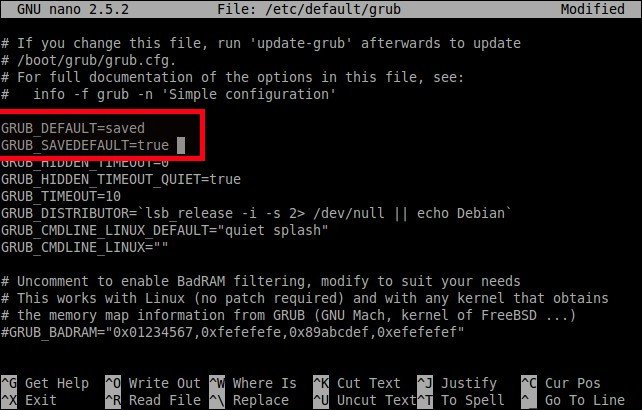
Also, if you have more than one OS in your system, you can boot the last operating system using the value GRUB_DEFAULT=saved. Whenever you reboot the system, the last operating system will start boot. Please note that you should add a line GRUB_SAVEDEFAULT=true to make this trick work.
Update grub to apply the configuration changes:
sudo update-grub
Finally set a default boot OS simply via command:
sudo grub-set-default NUMBER
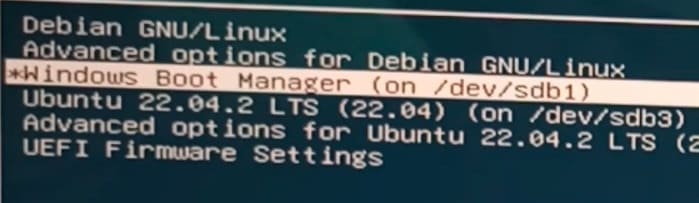
Start counting boot entries from 0. In the top picture, the Windows Boot Manager is the fifth entry, so the NUMBER is 4.
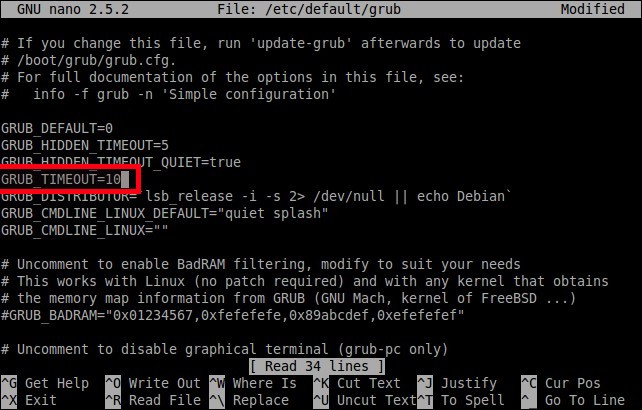
2. Set OS timeout (GRUB_TIMEOUT)
By default, the selected entry from the boot menu will start to boot in 10 seconds.
You can increase or decrease this timeout setting. If the value is “0”, the default OS will immediately start to boot. If the value is “5” , the boot menu will appear for 5 seconds, so that you can select which OS you want to load when the system starts.
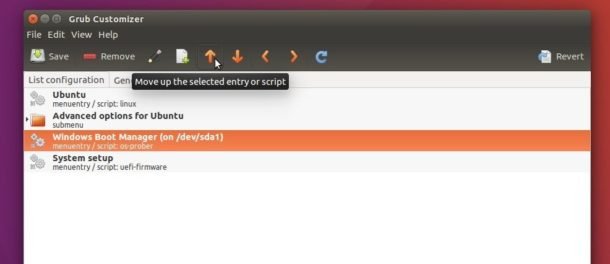
Change boot-order via Grub-Customizer:
Grub-Customizer is graphical tool to configure Grub2 / Burg settings. Besides changing the boot order, it can also:
- add, remove, move boot entries.
- Change background image.
- Edit boot text font
- Add kernel parameters
- reinstall grub into MBR (MicroSoft Boot Loader)
To install the software, open terminal, and run the commands below one by one to get it from PPA:
sudo add-apt-repository ppa:danielrichter2007/grub-customizer
sudo apt-get update
sudo apt-get install grub-customizer
The first command may ask you to type in password. Just type in mind since there’s no visual feedback and hit Enter.
For those who don’t want to add PPA, grab grub-customizer_xxx_i386/amd64.deb package (amd64 for 64bit, i386 for 32bit) from link below:
[button color=”black” link=”http://ppa.launchpad.net/danielrichter2007/grub-customizer/ubuntu/pool/main/g/grub-customizer/” type=”small” newwindow=”yes”] Grub Customizer PPA File Archive[/button]
And click install the .deb package via Ubuntu Software.
That’s all folks. If you find this guide helpful, please share it on your social and professional networks.
Cheers!
I’m a freelance WordPress Developer and Project Manager. Specialize in WordPress, Woocommerce, Custom WordPress Theme and Plugin Development, and Shopify. Highly skilled in HTML5, CSS3, SCSS, JavaScript, jQuery, Ajax, ES6, Bootstrap, PHP and MySQL.