

Many people prefer to install Linux in dual boot mode with Windows. Some of them use Linux as their primary OS while some prefer Windows as their primary OS.
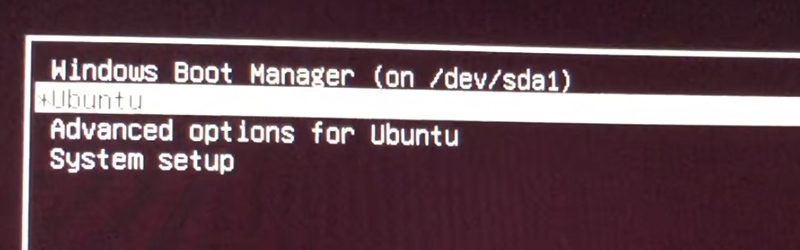
When you install Ubuntu or Linux Mint or elementary OS along with Windows in dual boot mode, Linux becomes the default OS. At the boot time, on the grub screen, if you do not choose Windows for login within 10 seconds (default Grub timeout), it boots up into the Linux.
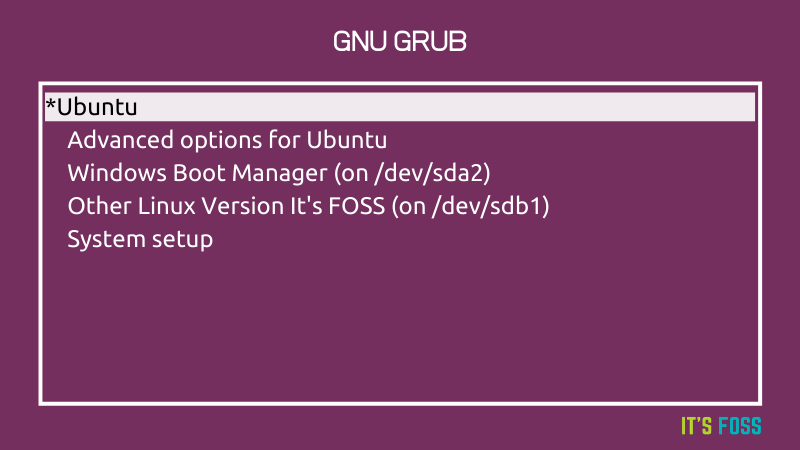
This grub behavior creates problem if you prefer to have Windows as your primary OS. You have to wait till the computer boots up and stay close to your computer to choose Windows for login.
This is inconvenient, I can understand. The good news is that you can customize grub to your liking.
In this tutorial, I’ll show you the graphical method to change the Grub boot order and make Windows default.
🚧
While Grub Customizer is an easy to use tool, it’s just a front end for changing the Grub config files. The changes you make are permanent.
GUI Method: Change Grub Boot Order with Grub Customizer
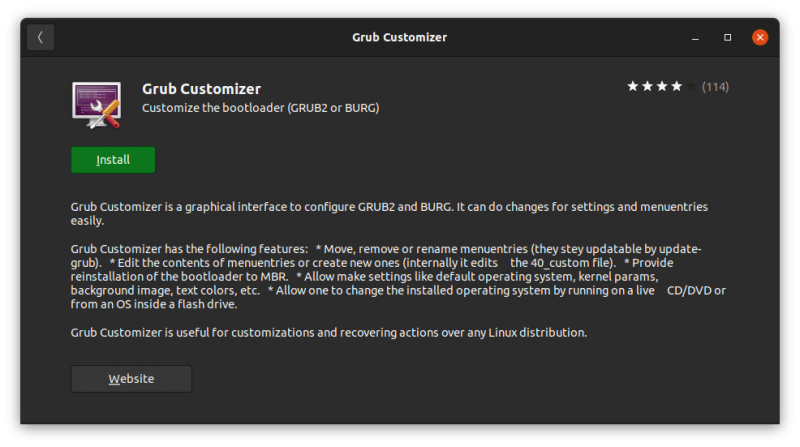
Grub Customizer is a graphical tool that allows you to customize server aspects of the Grub bootloader. You can reduce the grub boot time, change the background and change the boot order among several other things.
Let me show you how to use this tool.
Install Grub Customizer in Ubuntu-based distributions
Starting with Ubuntu 20.04, it is available in the Universe repository. This means that you can easily install Grub Customizer on Ubuntu from the software center:
Or, use the apt command to install the package in terminal:
sudo apt install grub-customizerInstallation instructions for Ubuntu 18.04
For Ubuntu 18.04 and Linux Mint 19 series, you’ll have to use PPA. Open a terminal and use the following commands one by one:
sudo add-apt-repository ppa:danielrichter2007/grub-customizer
sudo apt update
sudo apt install grub-customizer
Using Grub Customizer
Once installed, search for Grub Customizer in the menu and open it.

It requires the admin password because you are dealing with an important configuration that requires root privileges. Enter your password.
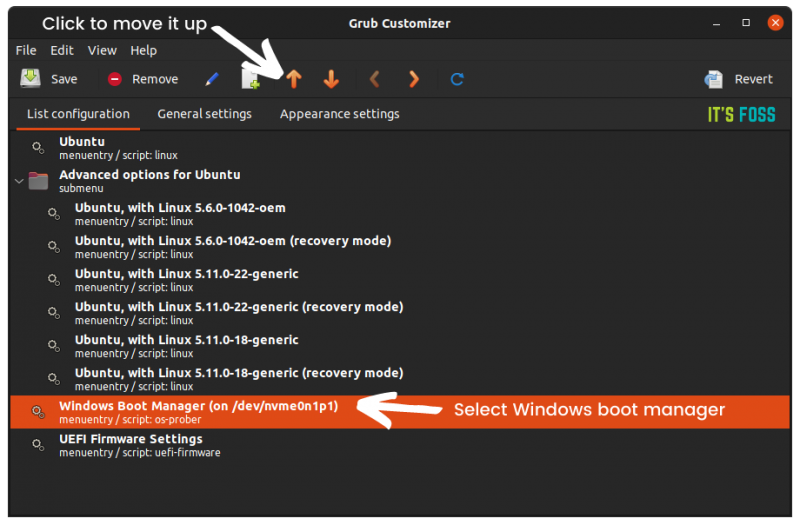
After that, you’ll see a screen where you can access the configuration. You can see that Windows lies at the bottom after so many Ubuntu options.
All you have to do is to move Windows over the first Ubuntu. You can use the arrow option from the top menu for this task.
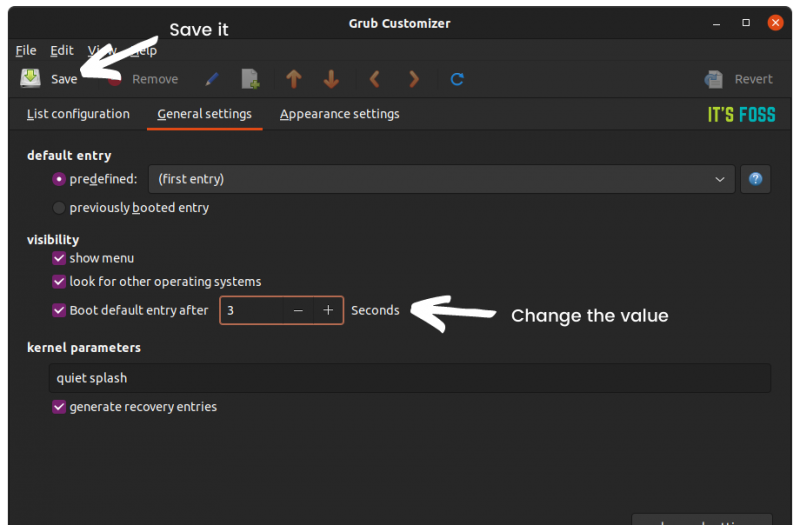
Once done, you should have Windows on the top of this list. At this point, you should save this configuration.
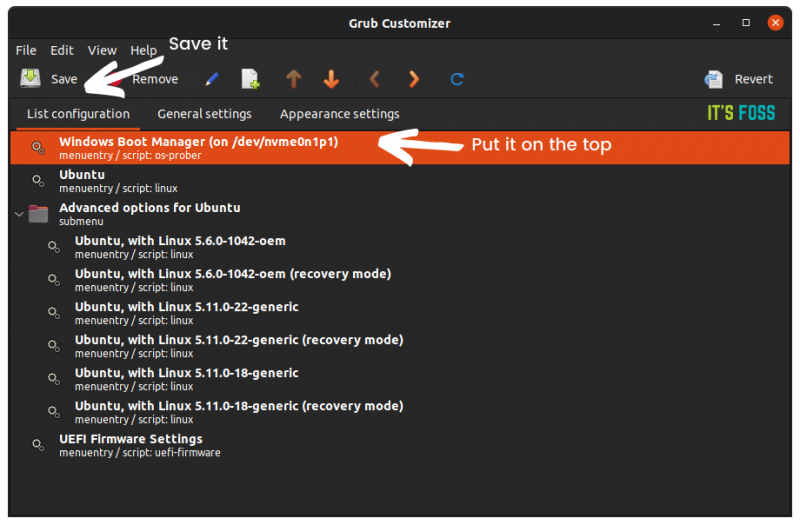
This will edit the Grub menu and you can see the changed boot order at the next restart.
Bonus tip: Reduce the grub boot time
If you do not interact with the grub menu at the boot time, it takes 10 seconds to boot into the default operating system. You can use Grub Customizer and reduce this boot time to something of your choice like 3 seconds or 5 seconds.
You can do this from General Settings tab in Grub Customizer.
It’s an optional tip and will help you in reduce boot time (if you don’t manually press the enter key).
You can do some other grub customization as well with this wonderful tool.
I hope the tutorial helped you to change the grub boot order in Ubuntu and other Linux distribution and make Windows the default OS in your dual boot system. Grub Customizer is an amazingly simple tool for this task.
Questions, suggestions, a word of thanks are always welcome.
About the author
Abhishek Prakash
Created It’s FOSS 11 years ago to share my Linux adventures. Have a Master’s degree in Engineering and years of IT industry experience. Huge fan of Agatha Christie detective mysteries 🕵️♂️
- How do I edit grub in Windows?
- How do I add windows to grub customs?
- How do I customize grub bootloader?
- How do I skip grub boot menu?
- How do I use Windows boot manager instead of grub?
- How do I open windows from grub?
- How do I remove GRUB bootloader from BIOS?
- How do I open grub menu in Windows?
- How do I remove grub and Windows bootloader?
- How do I change Windows bootloader?
- How do I use Windows Boot Manager?
How do I edit grub in Windows?
How To Use Grub Customizer:
- Start Grub Customizer.
- Select Windows Boot Manager and move it to the top.
- Once Windows is on the top, save your changes.
- Now you’ll boot into Windows by default.
- Reduce the default boot time in Grub.
How do I add windows to grub customs?
2 Answers
- Boot to your Linux.
- Open a Terminal window.
- Type: sudo os-prober.
- If the results identify a Windows 10 install, type sudo update-grub which will update the GRUB entries and add it.
- Reboot your computer and test to see if Windows 10 is a new option to select.
How do I customize grub bootloader?
- Select default OS (GRUB_DEFAULT) Open /etc/default/grub file using any text editor, for example nano. …
- Set OS timeout (GRUB_TIMEOUT) By default, the selected entry from the boot menu will start to boot in 10 seconds. …
- Change GRUB background image.
How do I skip grub boot menu?
You can do the job easily via Grub-Customizer (available in Ubuntu Software) under General Settings tab. However, you need to also disable “look for other operating systems” option. Any time you want to show the Grub menu, press ESC while booting up will NO longer show dual-boot (multi-boot) systems other than Ubuntu.
How do I use Windows boot manager instead of grub?
Just overwrite the MBR(Master Boot Record) over GRUB. To do that, boot into your Windows and make a recovery drive (search create a recovery drive in start menu and follow the on-screen instructions).
How do I open windows from grub?
Here are the steps to do this.
- Boot your system to the GRUB menu.
- Select (highlight) the GRUB boot menu entry Windows 7 (loader) (on /dev/sda1) .
- Press e to edit the GRUB boot commands for Windows 7.
- Make two changes to this list of commands as illustrated in the menuentry above.
How do I remove GRUB bootloader from BIOS?
Type «rmdir /s OSNAME» command, where OSNAME will be replaced by your OSNAME, to delete the GRUB bootloader from your computer. If prompted press Y. 14. Exit the command prompt and restart the computer the GRUB bootloader is not longer available.
How do I open grub menu in Windows?
Fix Dual Boot system booting straight to Windows
- In Windows, go to the menu.
- Search for Command Prompt, right click on it to run it as administrator.
- This is strictly for Ubuntu. Other distributions might have some other folder name. …
- Restart and you’ll be welcomed by the familiar Grub screen.
How do I remove grub and Windows bootloader?
Remove GRUB bootloader from Windows
- Step 1(optional): Use diskpart to clean disk. Format your Linux partition using Windows disk management tool. …
- Step 2: Run Administrator Command Prompt. …
- Step 3: Fix MBR bootsector from Windows 10. …
- 39 comments.
How do I change Windows bootloader?
Change Default OS In Boot Menu Using Startup Options
- In the boot loader menu, click the link Change defaults or choose other options at the bottom of the screen.
- On the next page, click Choose a default operating system.
- On the next page, select the OS you want to set as the default boot entry.
How do I use Windows Boot Manager?
To do this, click the gear for «Settings» inside your Start menu, then click «Update & Security» in the window that appears. In the menu on the left side of the window, click «Recovery,» then under the «Advanced Startup» heading click «Restart Now.» Your computer will restart and give you access to the Boot Manager.
Download project files
How do I verify a
download?
|
1 → of |
First Previous • |
5.2.5 release
from the
5.2 series released
Release information
Release notes:
fixed errors with outdated grub2 scripts (wont be executed anymore)
Changelog:
fixed errors with outdated grub2 scripts (wont be executed anymore)
5.2.4 release
from the
5.2 series released
Release information
Changelog:
fixed empty «if statement» problem of generated code
5.2.3 release
from the
5.2 series released
Release information
Changelog:
fixed CRLF problem
5.2.2 release
from the
5.2 series released
Release information
Changelog:
g++-12 compatibility fix
5.2.1 release
from the
5.2 series released
Release information
Changelog:
small bugfix / optimization
5.2.0 release
from the
5.2 series released
Release information
Changelog:
changed /etc/grub.
5.1.0 release
from the
5.1 series released
Release information
Release notes:
* version info (-v)
* some internal changes
* translation updates
* new icons
Changelog:
* version info (-v)
* some internal changes
* translation updates
* new icons
5.0.8 release
from the
5.0 series released
Release information
Changelog:
partition table reading fix
5.0.6 release
from the
5.0 series released
Release information
Release notes:
* preventing plaintext entries from being moved into submenu (when they are not visible)
* fixed some errors on entry editor
Changelog:
* preventing plaintext entries from being moved into submenu (when they are not visible)
* fixed some errors on entry editor
5.0.5 release
from the
5.0 series released
Release information
Release notes:
* fixed some errors on entry editor
* fixed error on trash view when selecting rule behind submenu
Changelog:
* fixed some errors on entry editor
* fixed error on trash view when selecting rule behind submenu
|
1 → of |
First Previous • |
In this tutorial we will dual boot between Windows 10 UEFI (1803) and Linux (ArcoLinuxB-Mate-Minimal).
It does not matter if I filmed this on virtual box or not. You need to follow the exact same steps, if you want to dual boot on an SSD or a harddisk.
If you want to install linux to your SSD or harddisk then you need these things
- an working usb stick 3.0 or 3.1 these days of 3GB+
- an application to write the iso to usb like mintstick or etcher (more info)
- figure out how to boot from usb on your hardware (more info)
We use grub-customizer to tell him which partition or which desktop it should boot up with by default.
We can also change the /etc/lightdm/lightdm.conf so that we can boot up without typing a password. That is the autologin option. Suited for desktops, less so for laptops that leave the privacy of your home.
TIP OR TRICK
You can also autologin into W10 with the use of the application netplwiz.
2.9.4.2 grub-customizer — утилита редактирования загрузчика ОС
Скачать документ
GRUB (Grand Unified Bootloader) – программа-загрузчик операционной системы, которая позволяет выбирать и загружать операционные системы, установленные на компьютере. Помимо этого grub инициализирует параметры ядра системы и подготавливает систему к загрузке.
Настройка и редактирование загрузчика grub могут быть произведены с помощью графической утилиты grub-customizer. Данный вариант является довольно удобным и понятным.
Установка
Для установки утилиты grub-customizer перейдите в сеанс пользователя root:
su -
и выполните команду:
dnf install grub-customizer
После установки запуск утилиты доступен из «Главного меню» — «Администрирование» — «Настройки загрузчика» или через консоль командой:
grub-customizer
Перед запуском утилиты потребуется ввести пароль, так как для редактирования загрузчика операционной системы требуются права администратора.
Настройка утилиты
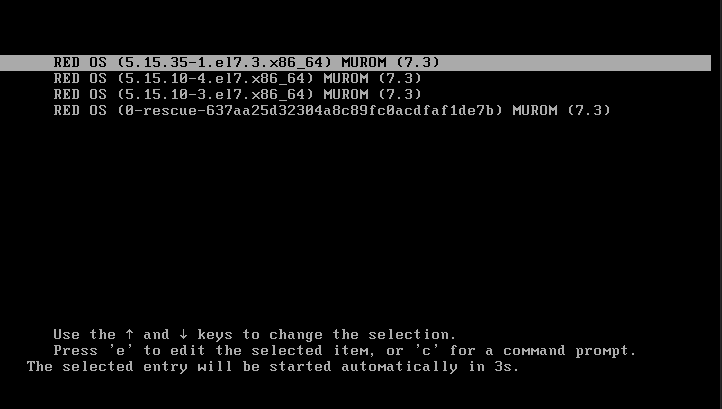
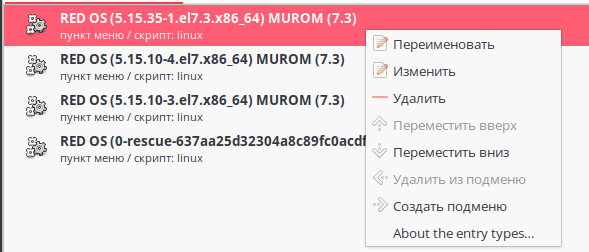
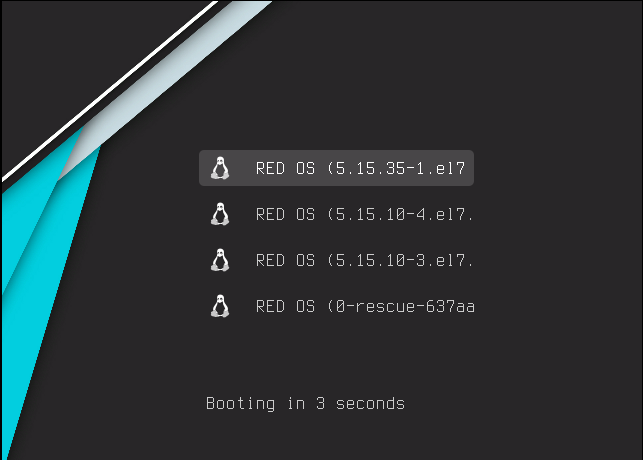
В главном окне программы отображается список доступных операционных систем, а в случае, если установлена одна ОС, то список представляет собой доступные версии ядра для загрузки.
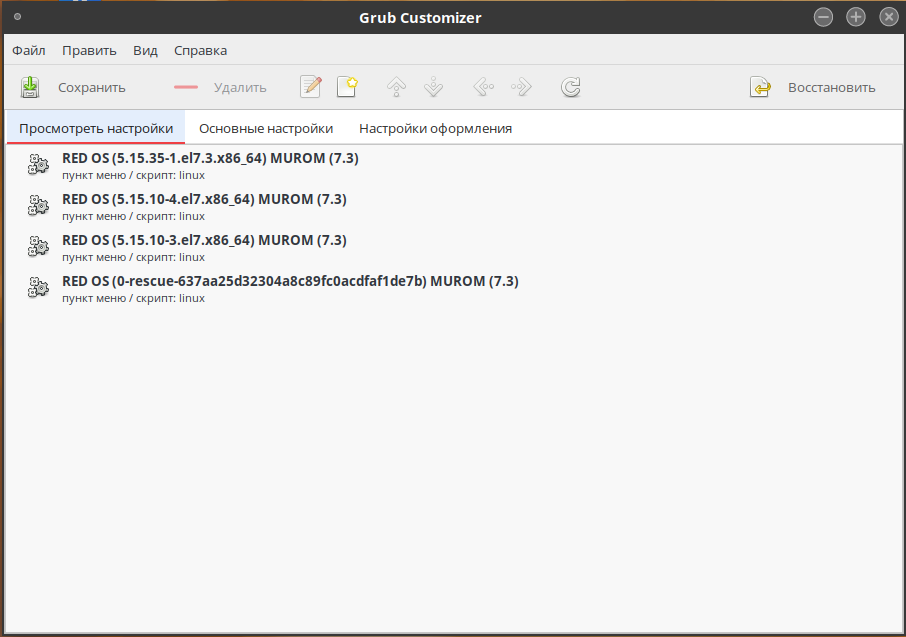
В контекстном меню, вызываемом нажатием правой кнопкой мыши по требуемой ОС или версии ядра, есть возможность переименовать, отредактировать или переместить конфигурацию каждой ОС.
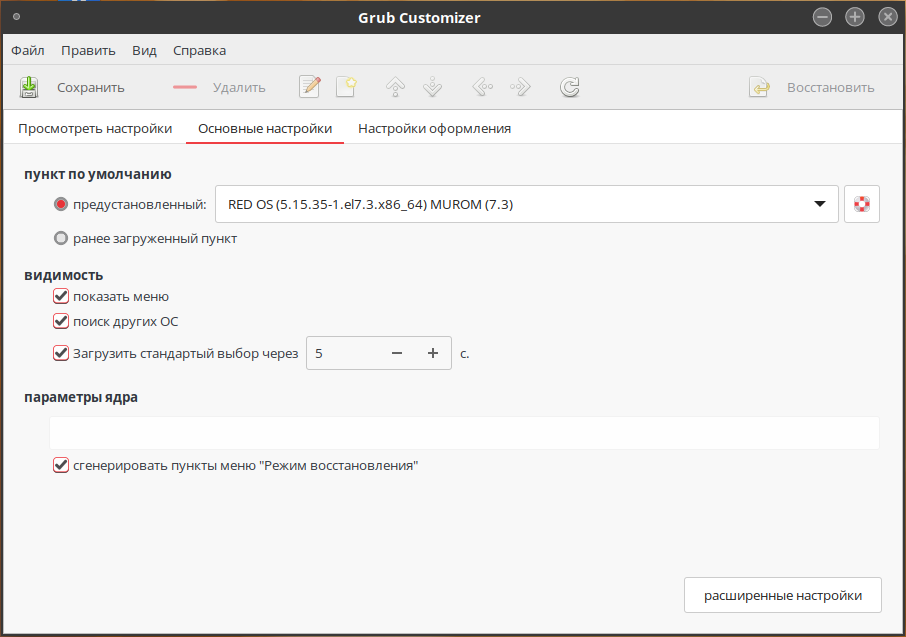
На вкладке «Основные настройки» можно выбрать необходимый пункт загрузчика, который будет использоваться по умолчанию, время, на протяжении которого будет отображаться меню grub, и параметры ядра для каждого пункта по умолчанию.
Вкладка «Настройки оформления» позволяет настроить отображение меню grub, а именно — цвет текста и фон. Также можно добавлять различные темы и устанавливать удобное разрешение экрана.
Для установки темы необходимо скачать архив понравившегося оформления меню grub с сайта gnome-look.org.

После того как архив выбранной темы будет скачан, с ним необходимо провести следующие преобразования: извлечь из архива папку с названием темы и заархивировать её отдельно. Данные действия необходимы для архивов, в которых помимо основной папки есть файл с разрешением .sh.
Для того чтобы добавить тему через утилиту grub-customizer, необходимо нажать на знак «+» рядом с раскрывающимся списком тем.

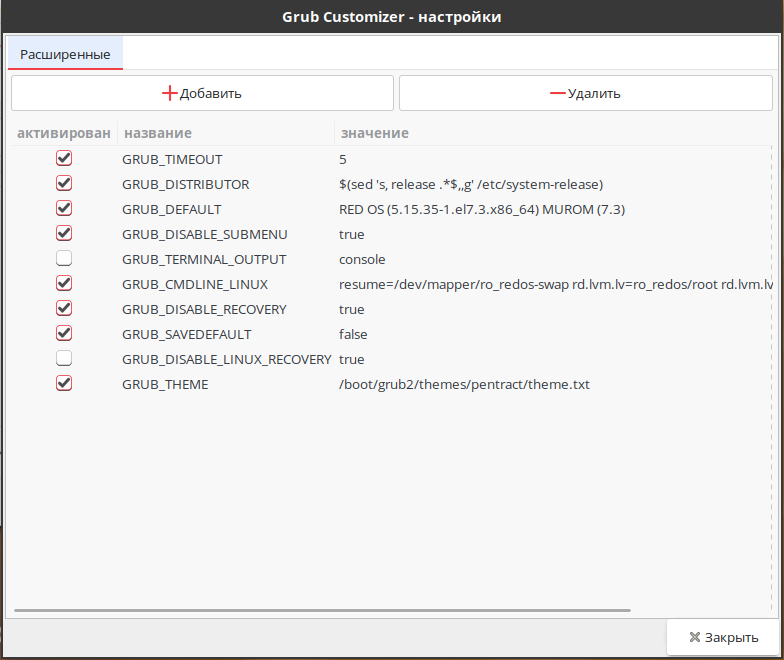
Кроме того, внизу экрана есть кнопка «Расширенные настройки». В открывшемся окне можно более детально настроить значения переменных из конфигурационного файла /etc/default/grub.
Когда настройка grub будет завершена, необходимо нажать кнопки «Сохранить» и «Обновить» на верхней панели инструментов.
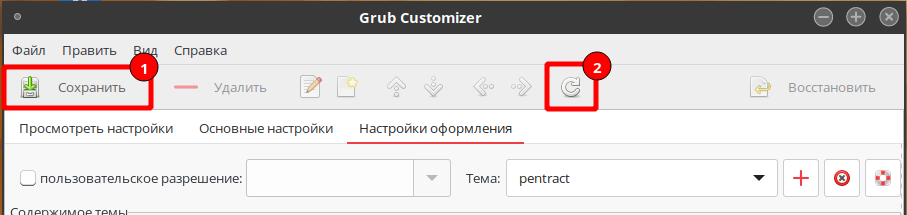
При следующей перезагрузке системы меню grub будет выглядеть в соответствии с выбранной и настроенной темой.
Эта информация оказалась полезной? ДА НЕТ
Дата последнего изменения: 09.09.2024
Если вы нашли ошибку, пожалуйста, выделите текст и нажмите Ctrl+Enter.