
После подключения компьютера с Windows 11 к внешним дисплеям вы можете настроить параметры для каждого из них.
Перед началом работы
Перед изменением параметров внешних мониторов обеспечьте правильное подключение. Вот что можно сделать:
-
Правильно подключите кабели к компьютеру или док-станции.
-
Проверьте наличие обновлений Windows. Чтобы проверить наличие обновлений, выберите Пуск , затем найдите параметры. Выберите Параметры > Центр обновления Windows > Проверить наличие обновлений.
Совет: Если вы используете адаптер беспроводного дисплея, подключите адаптер к порту HDMI на новых телевизорах, а затем подключите к нему компьютер по беспроводной сети. После подключения адаптера беспроводного дисплея к телевизору перейдите на Windows 11 компьютер, нажмите клавишу с логотипом Windows+ K, чтобы открыть приведение, а затем выберите адаптер беспроводного дисплея.
Изменение порядка мониторов
Этот параметр отображается, если Windows обнаруживает несколько мониторов. Каждый монитор будет пронумерован для упрощения идентификации.
Идентификация монитора
Чтобы узнать, какой номер соответствует дисплею, выберите Пуск , а затем найдите параметры. Выберите Параметры > Система > Дисплей > Идентифицировать. На экране монитора появится номер, который ему назначен.
Обнаружение монитора
Если вы подключили другой дисплей и он не отображается в настройках, выберите Пуск > Параметры > Система > Дисплей > Несколько дисплеев > Обнаружить.
Подключение беспроводного дисплея
Если вы подключили беспроводной дисплей и он не отображается в разделе Параметры, выберите Пуск > Параметры > Система > Дисплей > Несколько дисплеев > Подключиться.
Упорядочение мониторов
Если у вас несколько мониторов, вы можете изменить их порядок. Это удобно, если вы хотите, чтобы ваши мониторы соответствовали их настройке у вас дома или в офисе. В разделе параметров «Дисплей» выберите и перетащите монитор, куда хотите. Проделайте это для всех мониторов, которые нужно переместить. После получения нужного расположения нажмите Применить. Протестируйте свое новое расположение, перемещая указатель мыши на разных мониторах, чтобы убедиться в их правильной работе.
Совет: Используйте параметр Определить при упорядочении дисплеев, чтобы увидеть номер дисплея на экране.
Несколько параметров отображения
При отстыковке компьютера окна на внешнем мониторе сворачиваться. При повторной закреплении компьютера к монитору Windows помещает все точно так же, как раньше.
Чтобы настроить это поведение, выполните следующие действия:
-
Выберите Пуск > Параметры > Отображение системных >.
-
Прокрутите вниз и выберите Несколько дисплеев , чтобы развернуть этот раздел.
-
Установите флажки в соответствии со своими предпочтениями:
-
Запоминать расположения окон на основе подключения монитора
-
Свертывание окон при отключении монитора.
-
Изменение параметров мониторов
-
Изменение яркости и цвета дисплея
-
Изменение разрешения, масштабирования и макета дисплея
-
Изменение частоты обновления отображения
Выбор варианта отображения
Чтобы изменить то, что отображается на дисплеях, нажмите клавишу с логотипом Windows+ P. Вот параметры, которые можно выбрать.
|
Если необходимо: |
Выберите |
|
Просматривать элементы только на одном мониторе. |
Только экран компьютера |
|
Просматривать одинаковые элементы на всех мониторах. |
Повторяющийся |
|
Просматривать рабочий стол на нескольких экранах. При расширении мониторов вы можете перемещать элементы между двумя экранами. |
Расширить |
|
Просматривать все только на втором мониторе. |
Только второй экран |
To boost workflow efficiency and experience significant advantages, many users prefer to use two or more monitors. In Windows 10, setting up multiple monitors is pretty easy as you are allowed to connect a decent number of virtual desktops without taking the help of any third-party software. Such setup doesn’t only look great but significantly improves productivity moreover keeps the PC organized.
Multi-monitor setup is more efficient when you know how to switch between monitors in Windows 10 furthermore configure them properly. By dragging your mouse, pressing a particular hotkey, and adjusting settings, you can easily switch between the screens plugged into your GPU.
Switch between monitors windows 10
Here is how to switch between monitors windows 10 –
1] Using the mouse
The most convenient approach to switch between screens is using the mouse pointer. By moving the cursor toward the right or left edge of your main screen, you can shift from one display to another. Before you can use the mouse to move between displays, you must know if the second monitor is on the right edge or left. For that –
- Press – Windows + I.
- Click – System.
- Select – Display.
- From the right-pane hover and click the display as you want to switch.
- Click – Apply.
2] Keyboard shortcut to switch monitors
- Press – Windows + P.
- From the Project menu, choose the display you want to keep active. For example, PC screen only or Second screen only.
- Now, you will see the image on opted screen only.
3] Adjust Display settings
You can switch between monitors windows 10 through the Windows settings app too. To do so –
- Press – Windows + D.
- Right-click on an empty space and choose – Display settings.
- Move to the right-hand side.
- Click the drop-down list present beneath Multiple displays.
- Pick the display you want to work with.
See – How to Use SensorExplorer 2.0 to Check Dual Screen in Windows 10.
Methods list:
1] Move between monitors using mouse
2] Make use of keyboard shortcut
3] Adjust Display settings
That’s all!!!
Windows 10 Reset External Monitors Settings: A Comprehensive Guide
Windows 10 has established itself as a versatile operating system, widely used by individuals and businesses alike. One of its standout features is the ability to support multiple external displays, enabling enhanced productivity and an improved user experience. However, configuring and resetting settings for external monitors can sometimes become perplexing, especially when you encounter issues like screen resolution problems, overscanning, or incorrect display arrangements. This article serves as a comprehensive guide on how to effectively reset external monitor settings in Windows 10, along with best practices, troubleshooting tips, and insights for optimizing your multi-monitor setup.
Understanding External Monitor Configuration
Before diving into the complexities of resetting external monitor settings, it’s critical to understand how Windows 10 handles multiple displays. When you connect an external monitor to your Windows 10 device—be it a laptop or desktop—it is recognized by the operating system as an additional display. The following key elements are involved in configuring external displays:
-
Display Mode: Windows 10 offers several display modes: Duplicate (mirror), Extend (use as an extension of your desktop), and Second Screen Only.
-
Resolution Settings: Each monitor can run at different resolutions. Windows allows you to customize the resolution for each display.
-
Orientation: Monitors can be oriented differently (landscape vs. portrait), which can affect how content is displayed.
-
Scaling: Scaling settings adjust how content appears on high-DPI displays, making text and icons larger or smaller.
Understanding these components lays the foundation for troubleshooting and resetting monitor settings when needed.
Steps to Reset External Monitor Settings in Windows 10
Step 1: Disconnect and Reconnect the Monitor
This simple approach can often solve many display-related issues. Begin by disconnecting the external monitor from your computer. Wait for a few moments and then reconnect it. Windows should automatically detect the monitor and revert to the default settings.
Step 2: Access Display Settings
If the disconnect/reconnect method doesn’t solve your problem, you can manually reset the settings through Windows display settings. To do this:
-
Right-click on the desktop and select Display settings from the context menu.
-
This will open the Display settings window, where you’ll see all connected screens listed as 1 and 2 (or more if applicable).
Step 3: Identify Your Displays
To ensure you’re changing settings for the correct monitor:
-
Click the Identify button in the Display settings window. Numbers will appear on each screen.
-
This will help you know which monitor corresponds to which number in the settings.
Step 4: Adjust the Display Arrangement
Sometimes, the arrangement of screens might be set incorrectly, leading to confusion:
-
In the Display settings page, drag and drop the displayed monitors to match their physical arrangement on your desk.
-
Ensure that the monitors are lined up correctly, so moving your cursor between them feels seamless.
Step 5: Reset Display Mode
Now, ensure you’re in the desired display mode. Under the Multiple displays section, select:
-
Extend these displays: This allows for an extended workspace across multiple screens.
-
Duplicate these displays: This mirrors the same content on both screens.
-
Second screen only: This option will turn off your primary display and use the external monitor as the sole screen.
After selecting the desired mode, click Apply to save changes.
Step 6: Set Screen Resolutions
After ensuring your displays are arranged correctly and the mode is selected, you may need to reset the resolutions:
-
Click on the monitor you want to adjust.
-
Scroll down to Scale and layout.
-
Under Display resolution, select the recommended resolution for the monitor you have chosen. If you’re encountering issues, it may help to experiment with different resolutions.
Step 7: Adjust Scaling Settings
In cases where text appears too small or too large, adjusting the scaling can provide a crisp and readable display:
-
In the same Scale and layout section, you will find the Change the size of text, apps, and other items option.
-
Try different scaling percentages (100%, 125%, 150%) to find the suitable size for your display.
Step 8: Update Graphics Drivers
Outdated or corrupt graphics drivers can cause issues with display settings. To reset:
-
Press Windows + X and select Device Manager.
-
Expand the Display adapters section.
-
Right-click your graphics device and select Update driver.
-
Choose Search automatically for updated driver software and follow the on-screen instructions.
Step 9: Reset Graphics Control Panel Settings
If your monitor is still not functioning correctly, it might be worth looking at your graphics card’s control panel (NVIDIA Control Panel, AMD Radeon Settings, Intel Graphics Control Panel).
-
Open the relevant control panel from the system tray or by searching in the Windows search bar.
-
Look for monitor settings that might have been altered and reset them to their defaults.
Step 10: Windows Troubleshooter
If all else fails, running the Windows troubleshooting tool can sometimes uncover hidden issues:
-
Go to Settings > Update & Security > Troubleshoot.
-
Select Additional troubleshooters and run the Hardware and Devices troubleshooter.
This can detect any problems related to external devices, including monitors, and suggest fixes.
Optimizing Your Multi-Monitor Setup
Once your settings are reset and functioning correctly, consider optimizing your multi-monitor setup for enhanced productivity and comfort:
1. Use Monitor Calibration Tools
Many monitors come with built-in color calibration and adjustment settings. Additionally, third-party software tools can help calibrate your displays, ensuring they have matching color temperatures and brightness.
2. Positioning Your Monitors
Ergonomics play a crucial role in user comfort. Position your monitors at eye level and at a comfortable distance. Ideally, the top of the monitor should be at or just below eye level.
3. Keyboard Shortcuts for Multi-Monitor Setup
Familiarizing yourself with keyboard shortcuts can significantly speed up your workflow:
-
Windows + P: Quickly bring up the display options to switch between different configurations.
-
Windows + Shift + Left/Right Arrow: Move active windows to the left or right monitor.
4. Use Taskbar Settings
You can extend your taskbar across multiple displays or limit it to the main display. Right-click on the taskbar and select Taskbar settings to customize your preferences.
5. Backgrounds and Themes
Personalize each display with different backgrounds. Right-click the desktop, select Personalize, and customize background settings per monitor.
Common Troubleshooting Tips
Even after resetting the settings, you may face persistent issues. Here are a few common troubleshooting tips:
Check Physical Connections
Ensure that the cables connecting your monitors are secure. Loose or damaged cables can cause display recognition issues.
Perform System Updates
Ensure that Windows is updated regularly. Go to Settings > Update & Security > Windows Update to check for updates.
Restore Default Settings
If all settings seem problematic, consider restoring default system settings. Within the display settings, you can revert back to the original settings by selecting the default options for your monitors.
Test with Different Cables/Ports
Sometimes the problem lies in the cable or the port you’re using. Try using a different cable or connecting to a different port on your device.
Reboot Your System
A simple reboot can often resolve temporary software glitches. If you’ve made changes, reboot your system to allow Windows to apply the new settings.
Conclusion
Resetting external monitor settings in Windows 10 may seem daunting, but with the right steps and understanding, you can easily navigate the process. Whether you aim to enhance productivity with multiple displays or rectify issues with screen resolution and orientation, following the steps outlined above can lead you to an optimal setup.
Learning how to configure and troubleshoot external monitors effectively can significantly improve your user experience. By understanding Windows 10’s display settings, utilizing best practices for your multi-monitor environment, and implementing proper troubleshooting techniques, you’ll ensure that your external monitors are a valuable asset in your workflow.
As technology continues to evolve, keeping abreast of the latest tips and tricks for Windows 10 will empower you to make the most out of your multi-monitor configuration. Whether you’re working from home, in an office, or gaming, a well-configured external monitor setup contributes significantly to overall efficiency, comfort, and enjoyment.
Windows уже давно поддерживает работу с несколькими мониторами одновременно. Нередко этим пользуются стримеры и дизайнеры. О том, как переключаться между экранами, вы узнаете из нашего материала.
Как настроить несколько мониторов
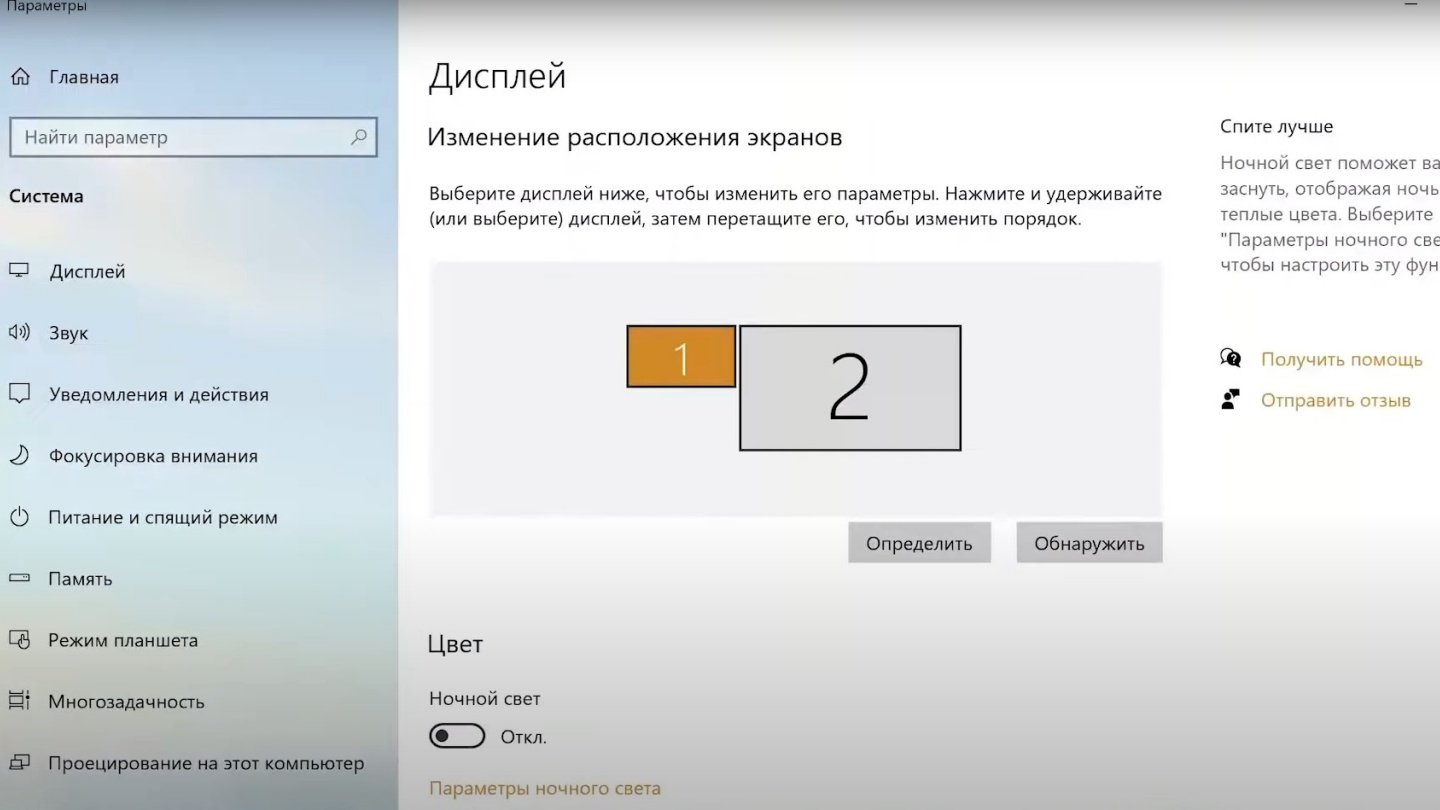
Во-первых, убедитесь, что ваш компьютер «видит» второй монитор. После этого вам нужно кликнуть правой кнопкой мыши по свободному месту на рабочем столе и выбрать «Параметры экрана».

Источник: CQ / Как найти параметры экрана
Укажите порядок экранов, перетащив при необходимости прямоугольники в нужном порядке и нажмите «Применить». К примеру, если дисплей 1 — это экран вашего ноутбука, а внешний монитор, дисплей 2, находится слева от вашего гаджета на столе, вам нужно установить дисплей 2 слева от дисплея 1.
Если вы не знаете, под каким номером монитор, кликните на опцию «Определить».
Источник: CQ / Настройки параметра экрана
Если система не может обнаружить второй дисплей, хотя он исправен и правильно подключен, возможно, он отключен в настройках драйвера. В этом случае вам нужно будет проверить настройки драйвера в диспетчере устройств.
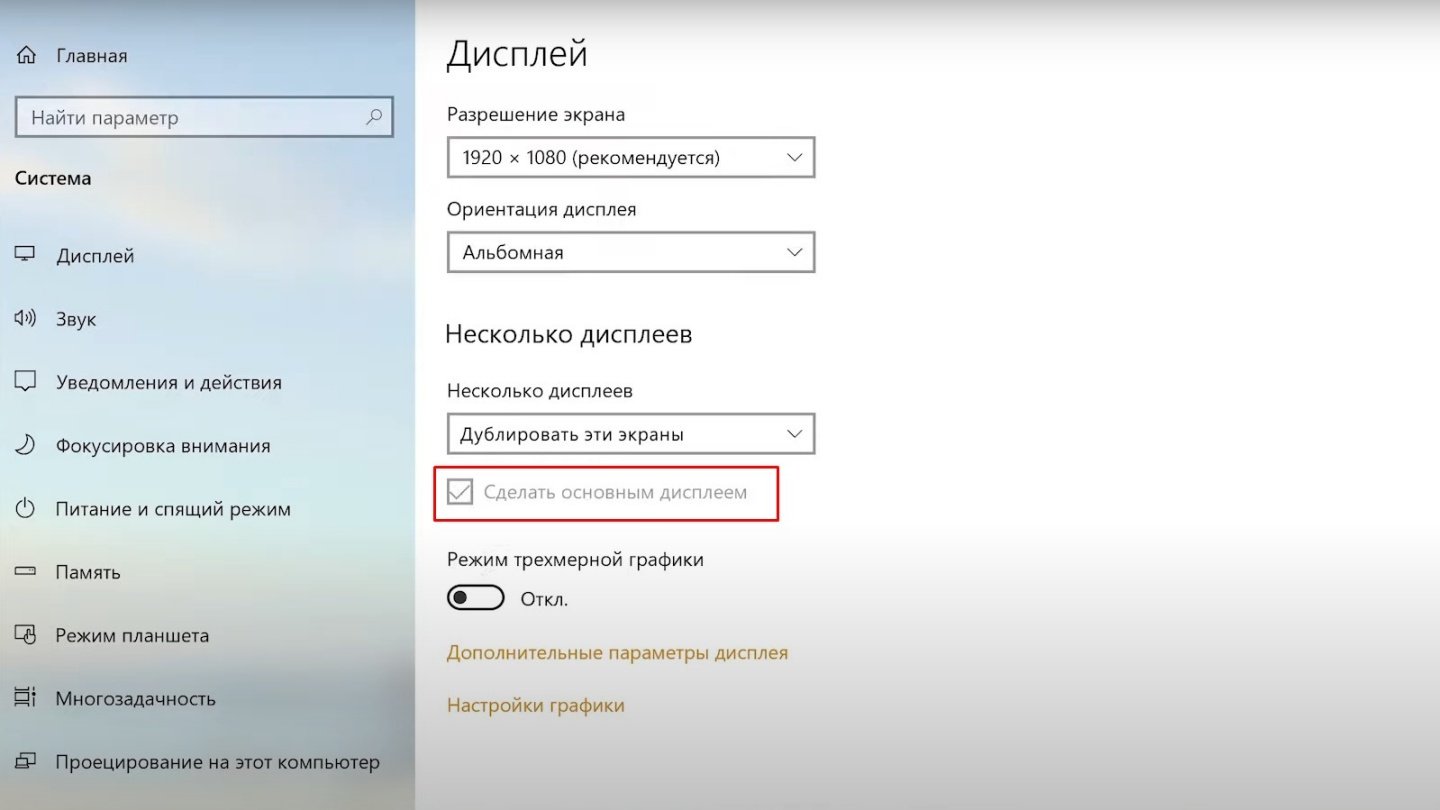
Вы также можете установить основной экран — именно на нем сначала будут открываться все задачи и окна. Для этого достаточно в настройках дисплея поставить галочку в соответствующем пункте.
Режимы работы двух экранов
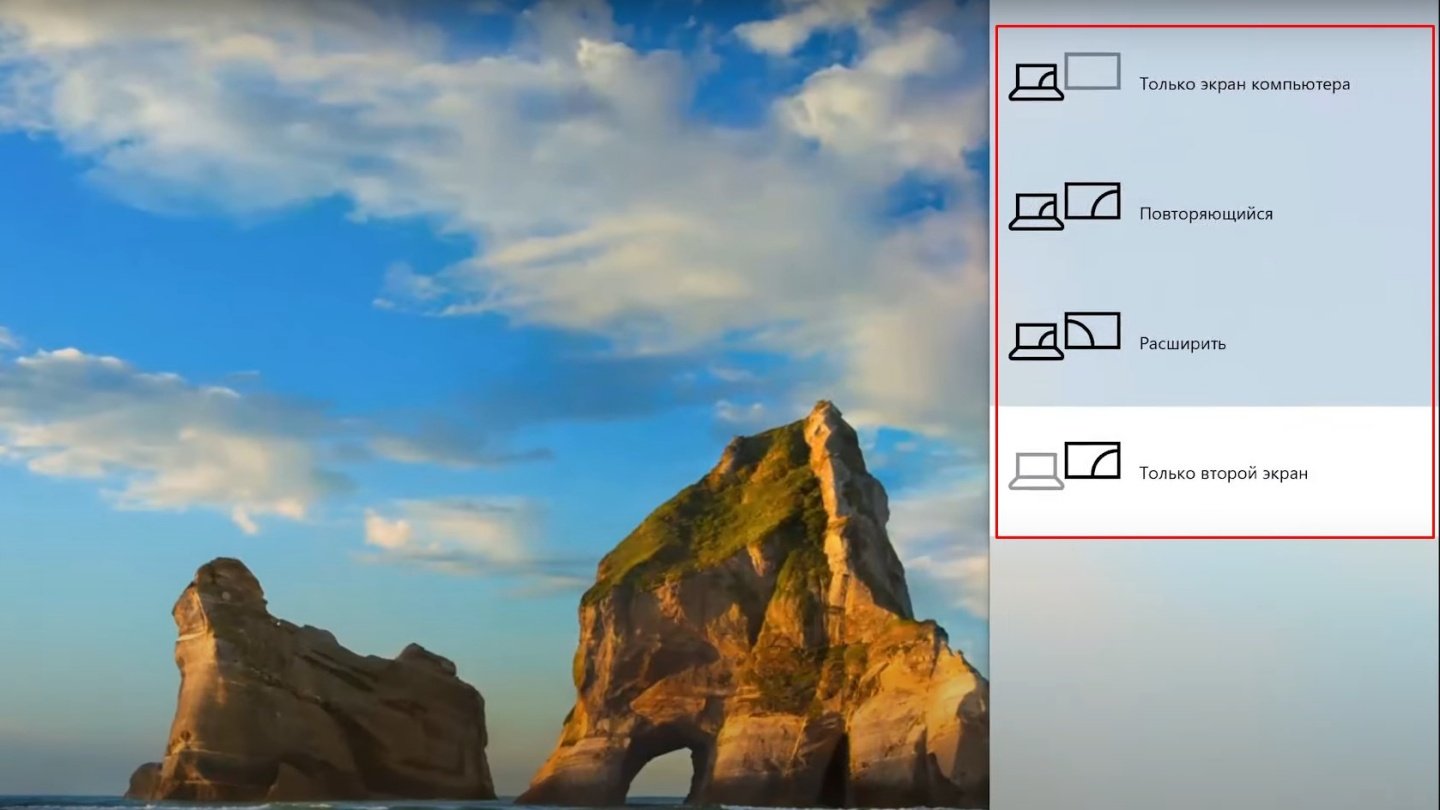
Windows 10 и Windows 11 предусматривают четыре режима работы экранов, каждый из которых принципиально отличается друг от друга. Их можно вызвать комбинацией клавиш «Win + P».
Источник: Microsoft / Режимы двух экранов
- Только экран компьютера: демонстрация только на одном мониторе;
- Повторяющийся: все выбранные рабочие столы демонстрируют одинаковое изображение, что может быть полезно, например, для проведения презентаций;
- Расширить: рабочий стол распределяется на несколько экранов, между которыми можно перетаскивать окна (захватывается строка заголовка (верхняя часть) окна мышью);
- Только второй экран: демонстрация только на втором мониторе.
Как быстро переключаться между экранами
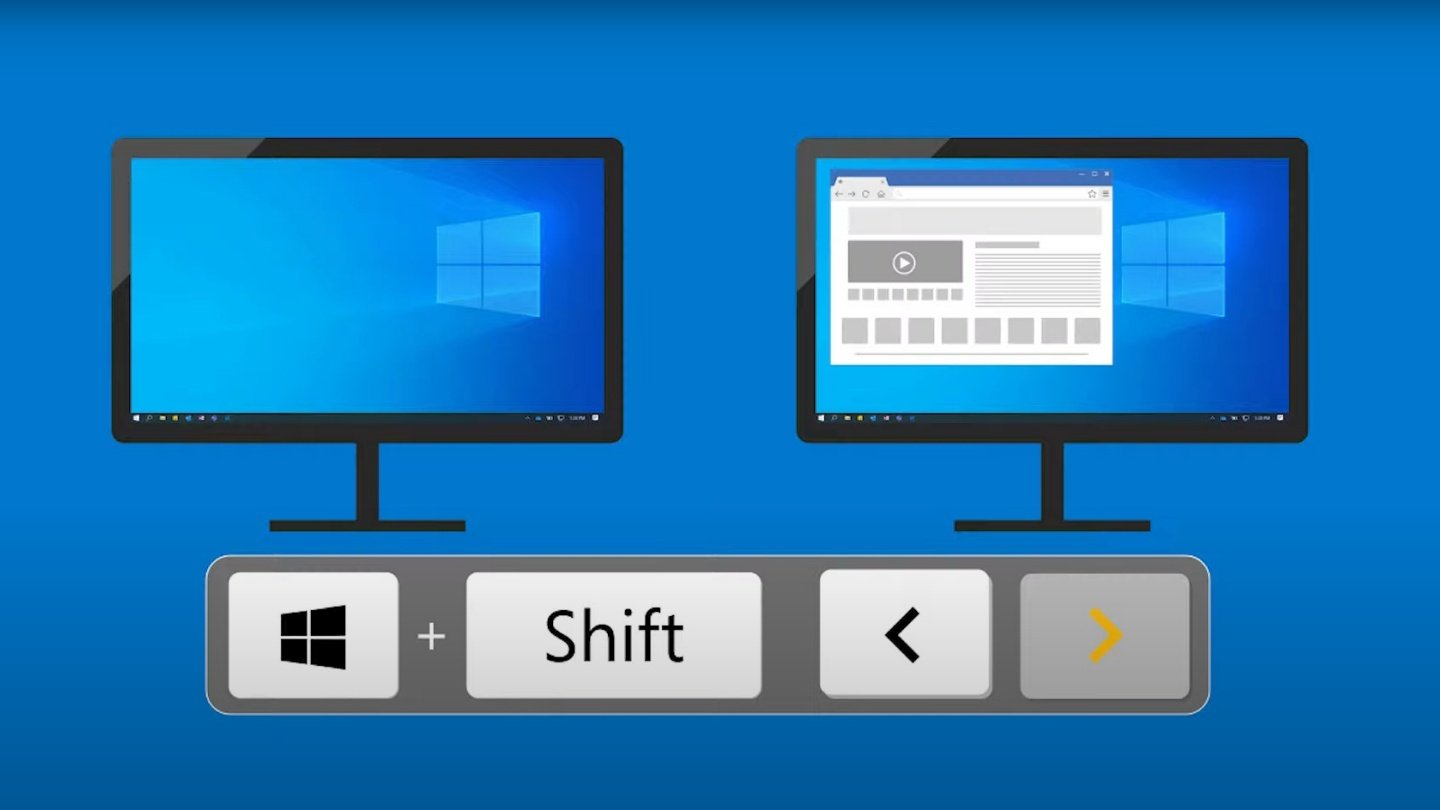
Источник: Microsoft / Комбинации для быстрого перемещения окон между мониторами
Если вы не хотите свести использование мышки к минимуму, то можете воспользоваться комбинацией клавиш для быстрого перемещения окон между экранами.
- Windows + Shift + стрелка влево — перемещение на экран слева;
- Windows + Shift + стрелка вправо — перемещение на экран справа.
Использование нескольких мониторов значительно повысит комфорт при работе за компьютером. Это особенно важно для тех, кто увлекается стримингом или выполняет задачи, требующие одновременного использования множества программ.
Заглавное фото: PC World
Читайте также:
- Как откалибровать монитор
- Как подключить два монитора к компьютеру
- Как устранить полосы на экране монитора
- Как подключить монитор к ПК
- Как подключить монитор к ноутбуку