
В случае проблем с обновлением Chrome вы можете увидеть следующие сообщения об ошибках:
- Не удалось выполнить обновление. Обновления отключены администратором.
- Не удалось выполнить обновление (ошибка 3 или 11). При проверке обновлений произошла ошибка: сервер обновлений недоступен.
- Не удалось выполнить обновление (ошибка 4 или 10). При проверке обновлений произошла ошибка: не удалось выполнить проверку обновлений.
- Не удалось выполнить обновление (ошибка 7 или 12). При проверке обновлений произошла ошибка: ошибка при скачивании.
- Google Chrome больше не будет обновляться на этом компьютере, так как поддержка Windows XP и Windows Vista прекращена.
- Обновления для Google Chrome могут быть недоступны.
- Другие сообщения со словами «Не удалось выполнить обновление».
Воспользуйтесь приведенными ниже советами.
Скачайте Chrome ещё раз
Возможно, на вашем компьютере не хватает некоторых файлов. Выполните следующие действия:
- Удалите Chrome.
- Убедитесь, что система отвечает этим требованиям.
- Скачайте браузер Chrome ещё раз и установите его. Если это не помогло, сделайте следующее:
- В Windows запустите автономный установщик.
- В macOS повторно скачайте и откройте файл Google Software Update.
Если выполнить эти действия не удается, свяжитесь с администратором, чтобы завершить обновление Chrome.
Проверьте настройки антивируса, брандмауэра и родительского контроля
Выполните следующие действия:
- Убедитесь, что системе обновления ПО разрешен доступ к интернету.
- Убедитесь, что сайты
tools.google.comиdl.google.comне заблокированы.
Перезагрузите компьютер
Возможно, установка обновлений не была завершена. Перезагрузите компьютер и снова обновите Chrome.
Проверьте наличие вредоносного ПО
Нежелательное ПО может мешать Chrome устанавливать обновления.
macOS
Удалите подозрительные программы, в том числе те, которые вы не устанавливали. Вот как это сделать:
- Откройте Finder.
- Слева выберите Программы.
- Найдите программы, которые кажутся вам незнакомыми, затем выполните одно из следующих действий:
- Дважды нажмите Удалить или Программа удаления и следуйте инструкциям на экране.
- Если вы не видите этих кнопок, перетащите значок приложения из папки «Программы» в корзину.
- Очистите корзину.
Подозрительные программы
Ниже перечислены некоторые приложения, которые могут менять настройки компьютера и вызывать неполадки.
- BrowseFox
- PullUpdate
- Vitruvian
- V-Bates
- SearchProtect
- SupTab
- MySearchDial
- SaveSense
- Price Meter
- Mail.ru Sputnik/Guard
- Conduit Toolbars, Community Alerts & ValueApps
- Wajam
- Multiplug
- Shopper Pro
- Stormwatch
- SmartBar
- Dealply
- SmartWeb
- MySearch123
- AdPea
- Etranslator
- CouponMarvel
- PriceFountain
- Techsnab
- Colisi
- BrApp
- LuckyTab
- OneCall
- Crossrider
- Eorezo
- Consumer Input
- Content Defender
- Movie Dea
Убедитесь, что ваше устройство соответствует системным требованиям
Chrome не работает на следующих устаревших платформах:
- Windows XP;
- Windows Vista;
- Windows 7, 8 и 8.1;
- macOS 10.12–10.15.
Чтобы вам были доступны последние версии и функции Chrome, рекомендуем обновить операционную систему. Ниже перечислены требования для разных операционных систем.
Windows
Чтобы использовать Chrome на компьютере с Windows, вам понадобится:
- Windows 10 или более поздняя версия.
- Процессор Intel Pentium 4 или более производительная версия с поддержкой SSE3
Как исправить ошибку «Более не поддерживается» в Windows
Если вы используете современную версию ОС, но Chrome не запускается или появляется сообщение о том, что версия Windows не поддерживается, возможно, вы настроили для браузера режим совместимости. Chrome не может работать в этом режиме.
Вот как его отключить:
- Нажмите правой кнопкой мыши на значок Chrome.
- Выберите Свойства Совместимость.
- Снимите флажок «Запустить программу в режиме совместимости с:».
macOS
Чтобы использовать Chrome на компьютере с macOS, вам понадобится:
- macOS Big Sur 11 и более поздние версии
Linux
Чтобы использовать Chrome на компьютере с Linux, вам понадобится:
- Ubuntu 18.04 (64-разрядная версия), Debian 10, openSUSE 15.5, Fedora Linux 39 или более поздние версии этих операционных систем.
- Процессор Intel Pentium 4 или более производительная версия с поддержкой SSE3.
Не удалось устранить проблему? Посетите справочный форум Google Chrome или прочитайте о том, как устранить проблемы при установке Chrome.
Эта информация оказалась полезной?
Как можно улучшить эту статью?
We all love Google Chrome, and the usage stats speak for themselves. However, lately, there seems to be a problem for a few users updating Chrome. If you are one of those, and you come across the message “Can’t update Chrome,” – we came up with a few methods to try and fix this issue on Windows and Mac.
What is the “Can’t update Chrome” Error?
As per the official information provided by Google, here are some of the following errors that provide you the error message “Can’t update Chrome” or “Update Failed.”
- Update failed: Updates are disabled by an administrator
- Update failed (Error: 3 or 11) An error occurred while checking for updates: Update server not available
- Update failed (Error: 4 or 10) An error occurred while checking for updates: Update check failed to start
- Update failed (Error: 7 or 12) An error occurred while checking for updates: Download failed
- This computer will no longer receive Chrome updates because Windows XP and Windows Vista are no longer supported
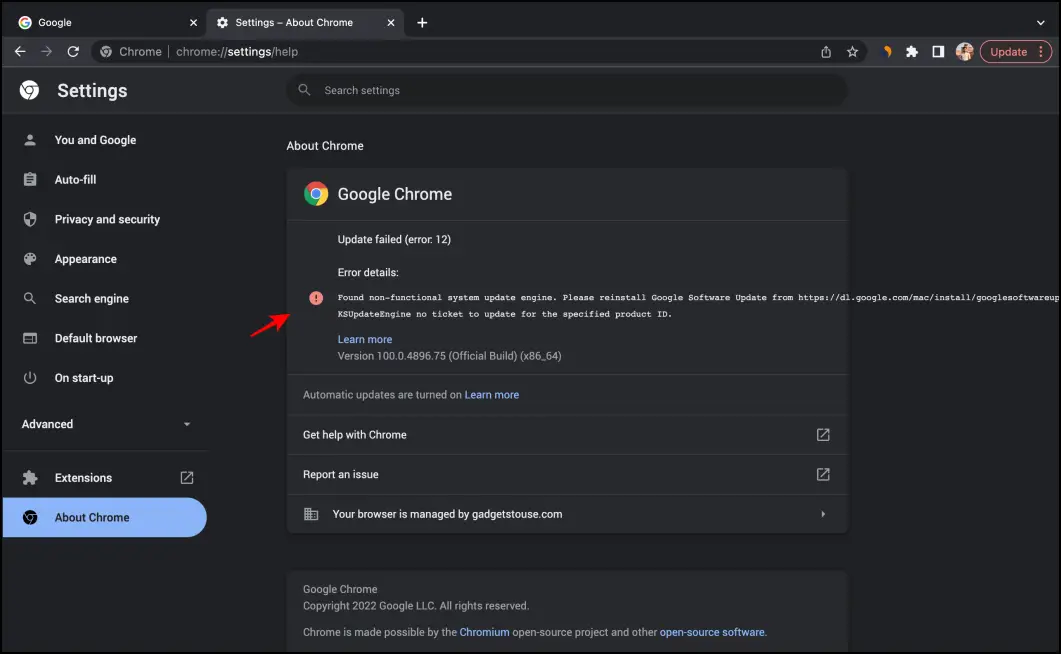
Apart from the above errors, users also are facing the peculiar error, which says, “Found non-functional system update engine.”
How to Fix Can’t Update Chrome on Windows & Mac
Fortunately, a wide range of methods can help fix and update Chrome properly without any issues. We were able to try a few of these, and we can confidently recommend the same. Read on.
1. Check Firewall Settings
The Google Chrome update service runs as a separate .exe application. In case it is restricted from using the internet and network access, you will not be able to update Chrome. To ensure that Chrome update services are getting access to the internet:
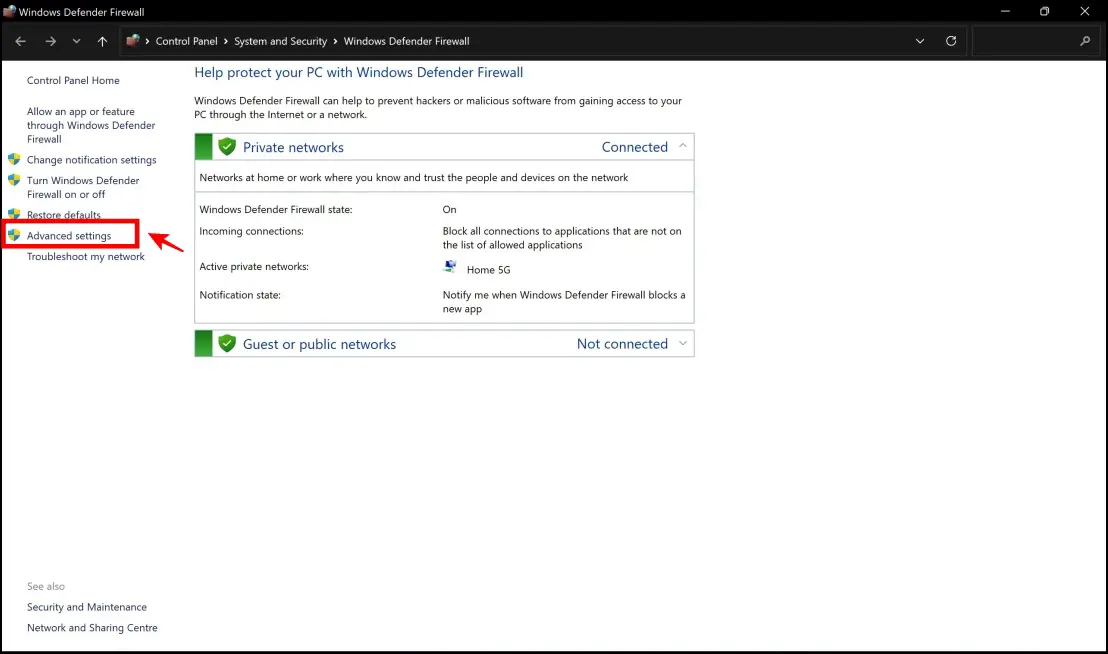
Step 1: Open Control Panel on your PC.
Step 2: Navigate to System and Security > Windows Defender Firewall.
Step 3: Click on Advanced Settings on the sidebar.
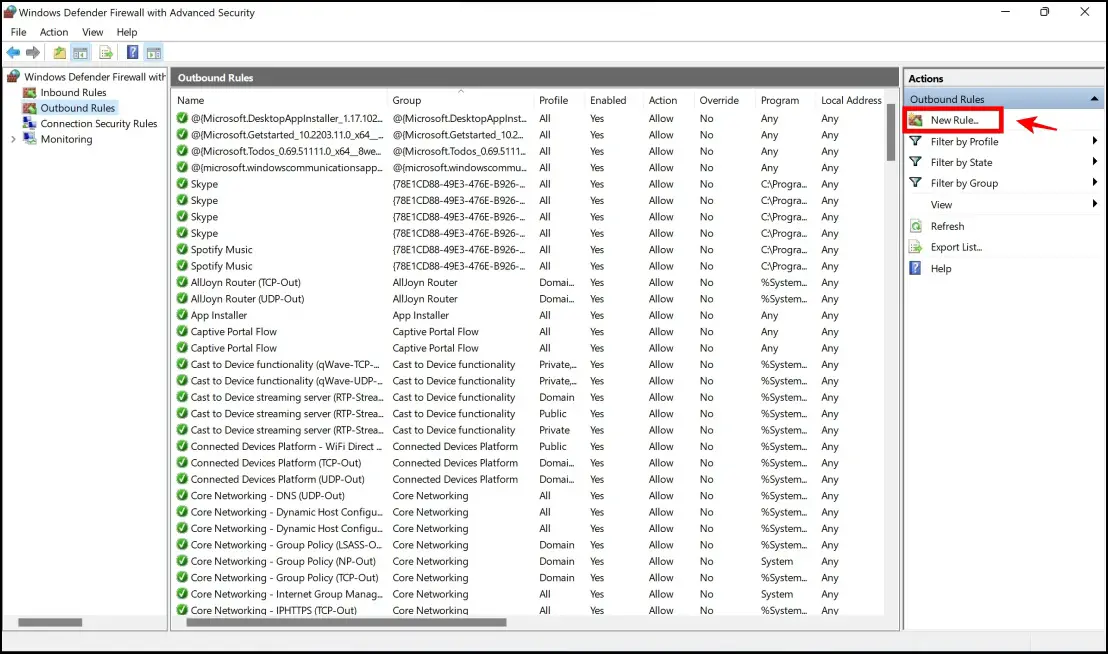
Step 4: Click on Outbound Rules.
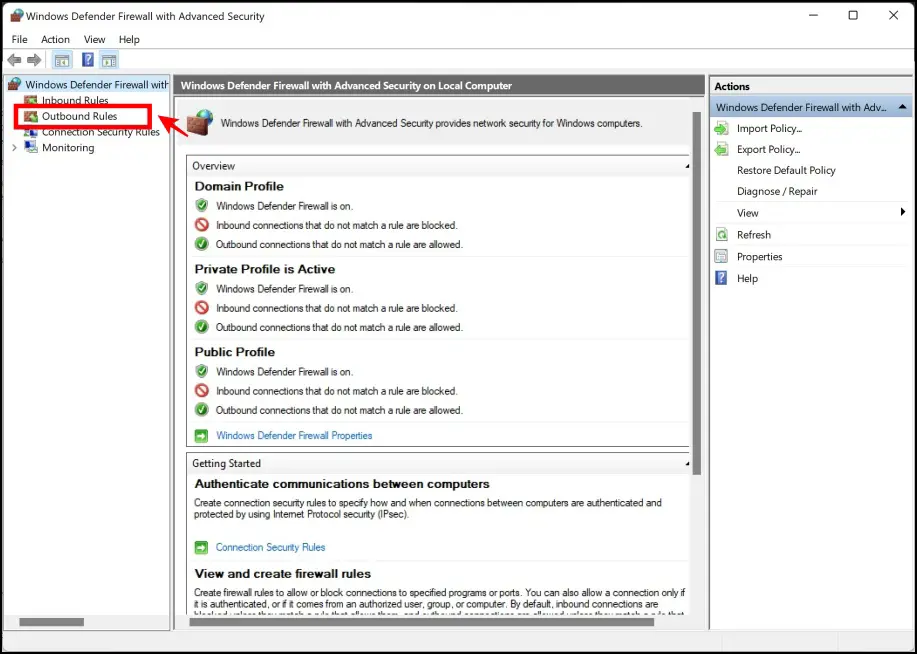
Step 5: Click on New Rule.
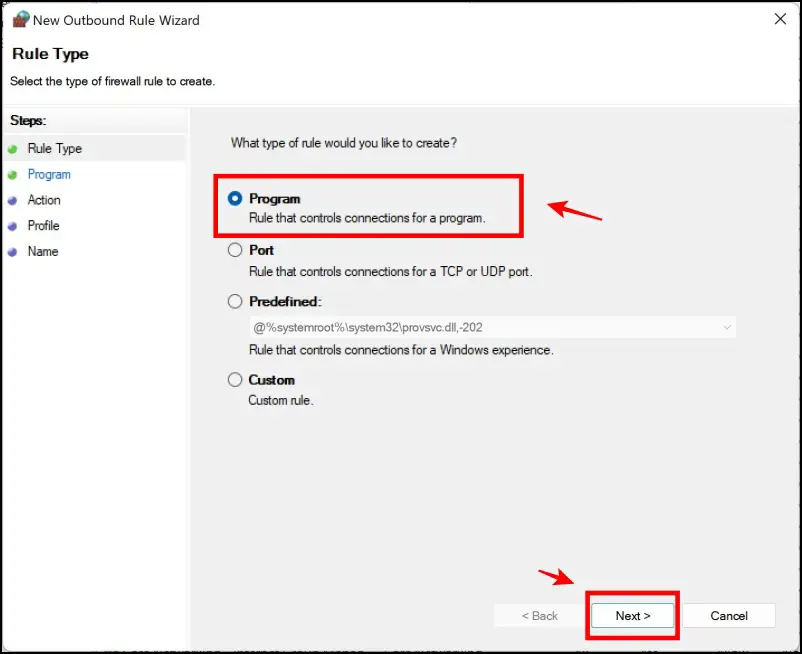
Step 6: In rule type, select the Program option. Click on Next.
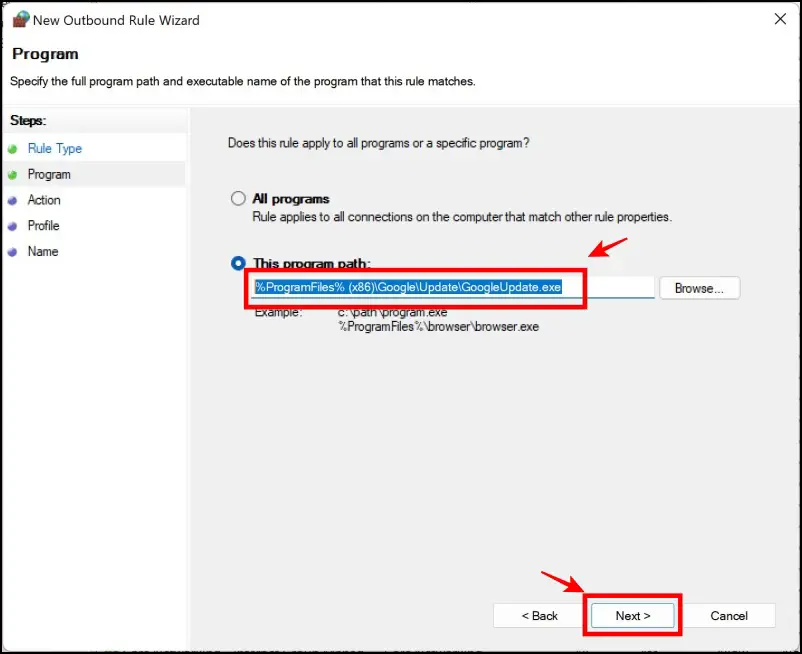
Step 7: In this step, you need to provide the destination path for the Update.exe component. You will have to paste %ProgramFiles%(x86)\Google\Update\GoogleUpdate.exe
Click on Next.
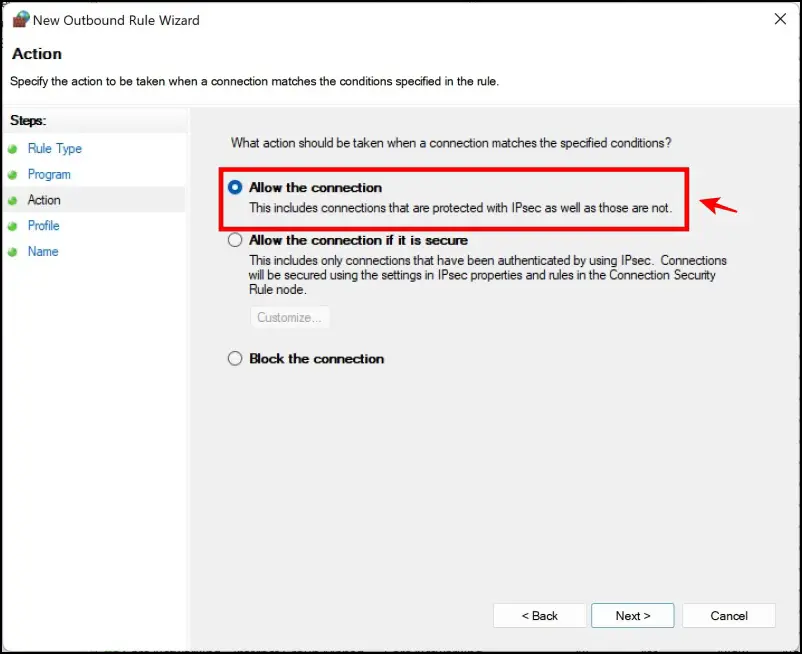
Step 8: Select the option to Allow the connection. Proceed to the Next section.
Step 9: Here, ensure that all the options are selected. Proceed to Next.
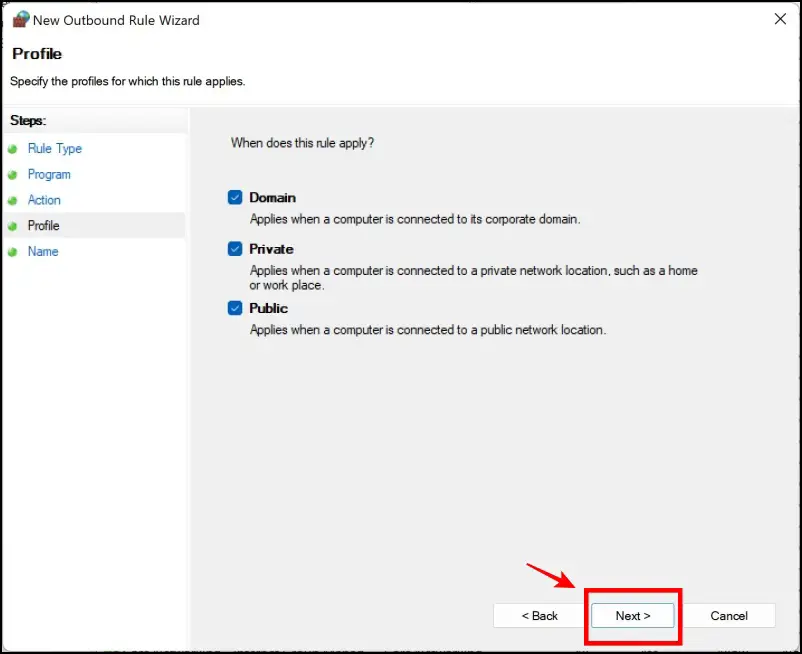
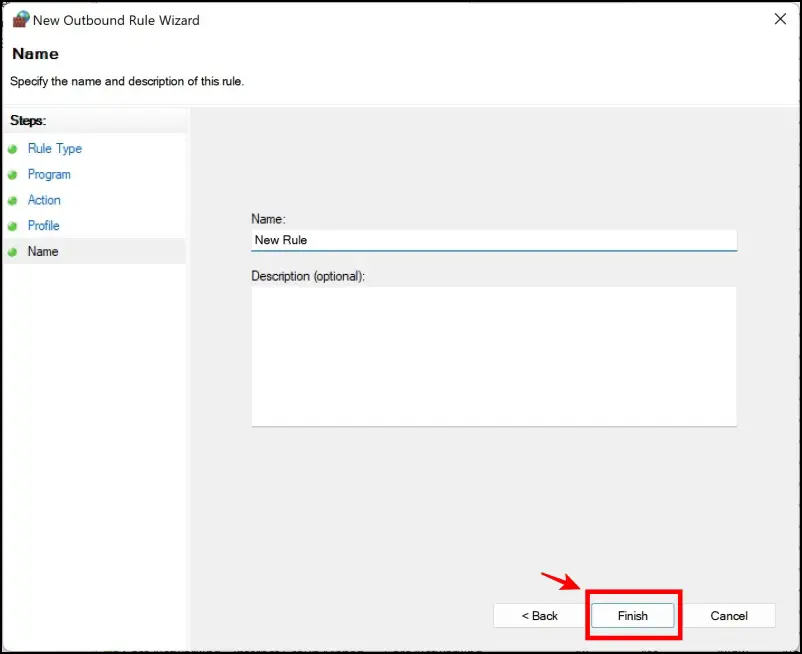
Step 10: Provide a name to the rule you just added. And now, click on Finish.
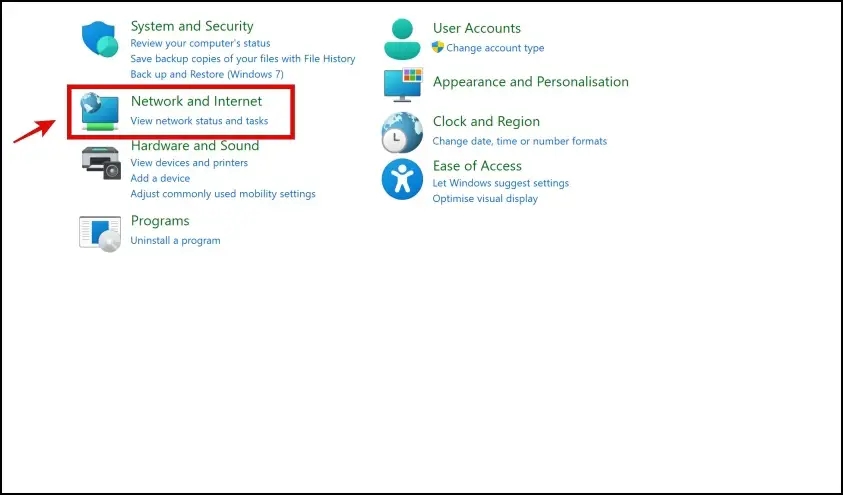
This will ensure the update component has access to the internet. Now, we also need to ensure that Windows does not block some websites necessary for the update. Here’s how to do it.
Step 1: In the control panel, click on Network and Internet.
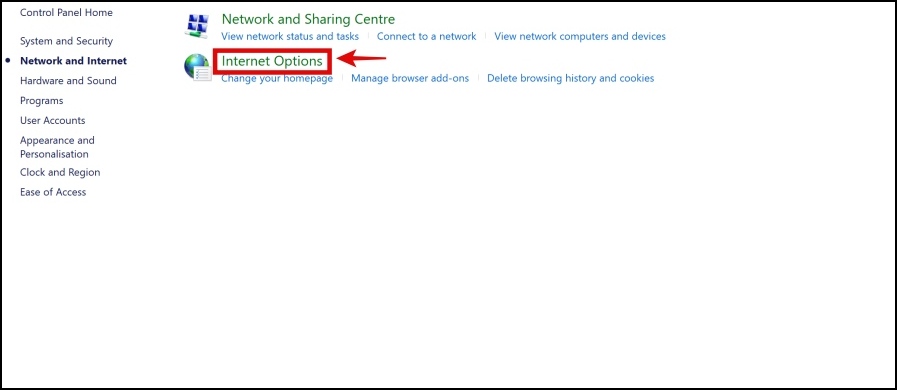
Step 2: Click on Internet Options.
Step 3: Click on Security.
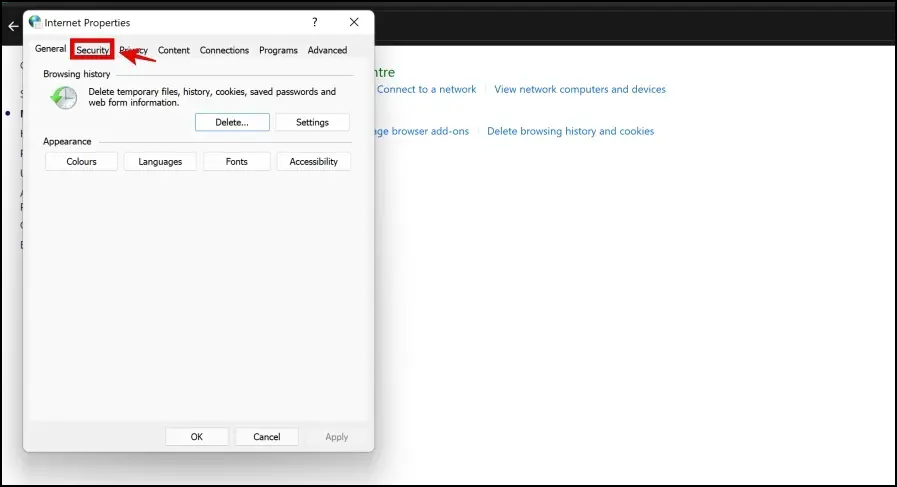
Step 4: Click on Restricted Sites.
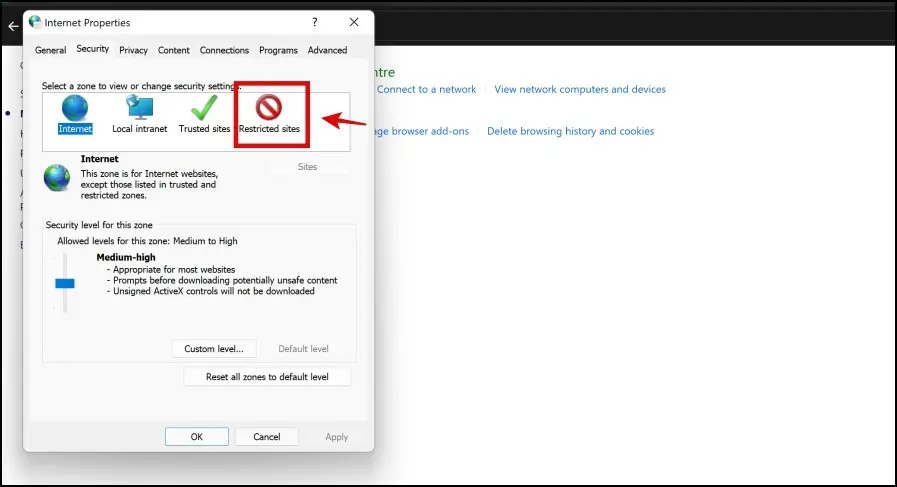
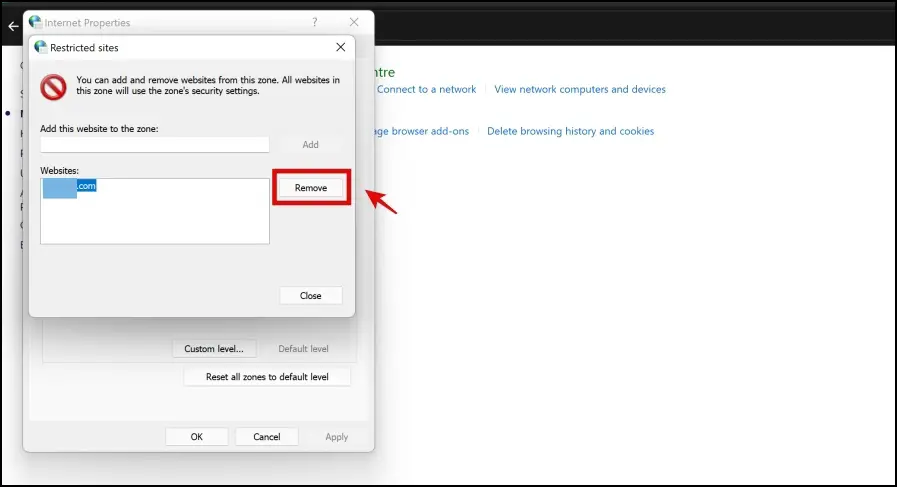
Step 4: In case you find the following URLs in the list :
- tools.google.com
- dl.google.com
Click on them and tap on Remove.
2. Clear DNS Cache
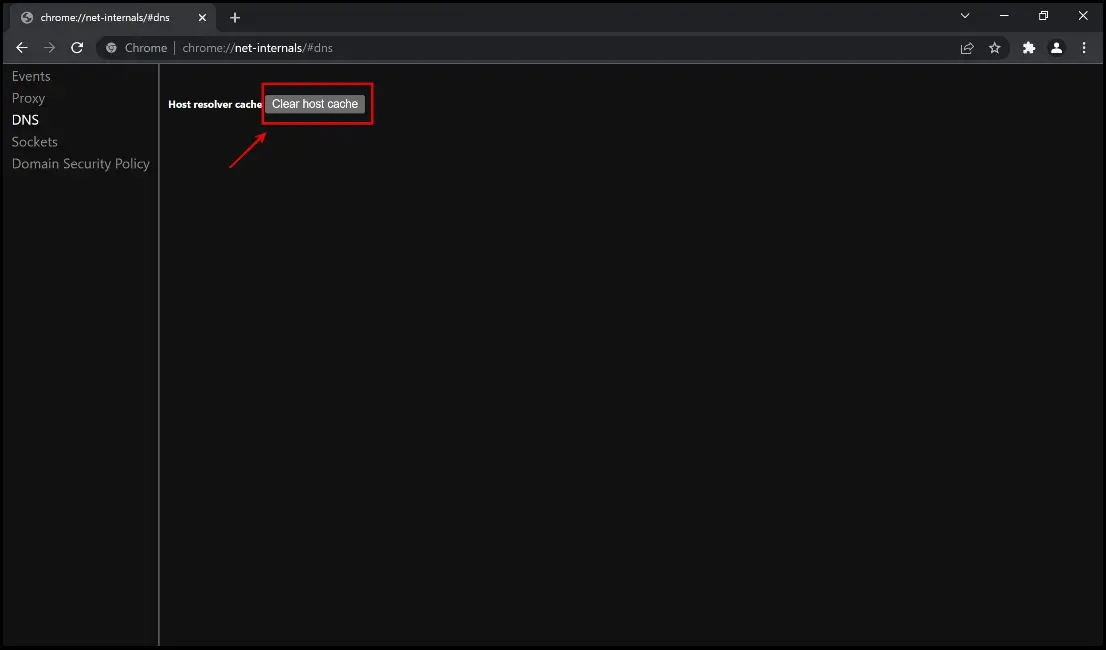
Clearing the DNS cache might help the issue “can’t update Chrome.” Here’s how to clear the host and DNS cache on Chrome.
Step 1: Type in “chrome://net-internals/#dns” in the address bar, and hit Enter.

Step 2: Click on “Clear host cache.”
3. Check For Malware
If there are any malicious elements on your PC, they might possibly prevent you from being able to update Chrome. Either way, it is always important to scan your computer once in a while and discard these elements.
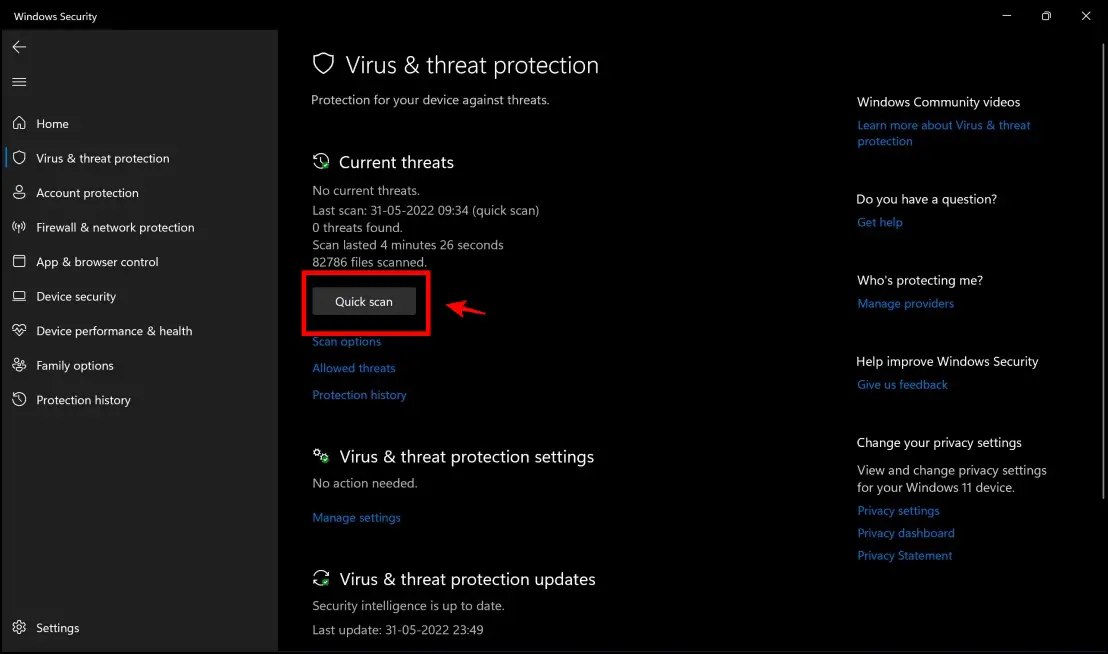
You can use Windows Defender on your PC to perform a Quick Scan that can detect and will let you eliminate malware.
As per Google’s official website, they mention a list of applications you will probably have to uninstall to try and fix the issue of concern. Take a look at the apps that made it to this list :
- BrowseFox
- PullUpdate
- Vitruvian
- V-Bates
- SearchProtect
- SupTab
- MySearchDial
- SaveSense
- Price Meter
- Mail.ru Sputnik/Guard
- Conduit Toolbars, Community Alerts & ValueApps
- Wajam
- Multiplug
- Shopper Pro
- Stormwatch
- SmartBar
- Dealply
- SmartWeb
- MySearch123
- AdPea
- Etranslator
- CouponMarvel
- PriceFountain
- Techsnab
- Colisi
- BrApp
- LuckyTab
- OneCall
- Crossrider
- Eorezo
- Consumer Input
- Content Defender
- Movie Dea
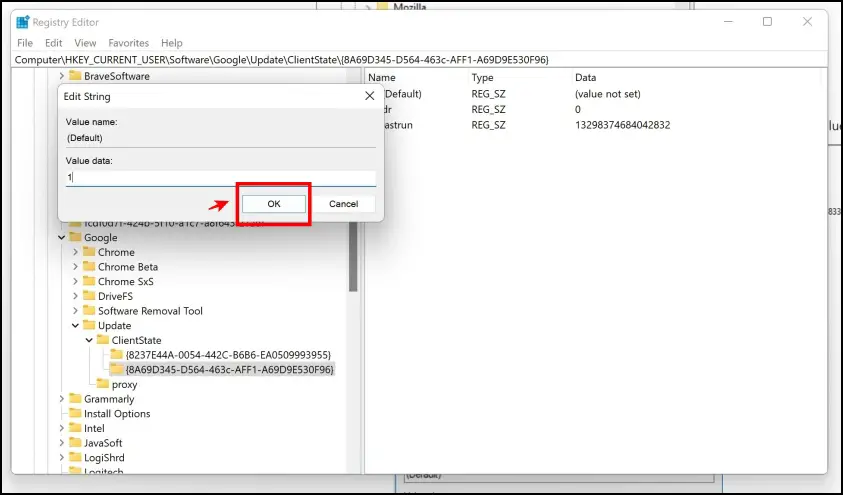
4. Fix the Registry – “Updates are disabled by the administrator”
If you are facing the issue of “Updates are disabled by the administrator” and hence not being able to update Chrome, here’s how to fix it.
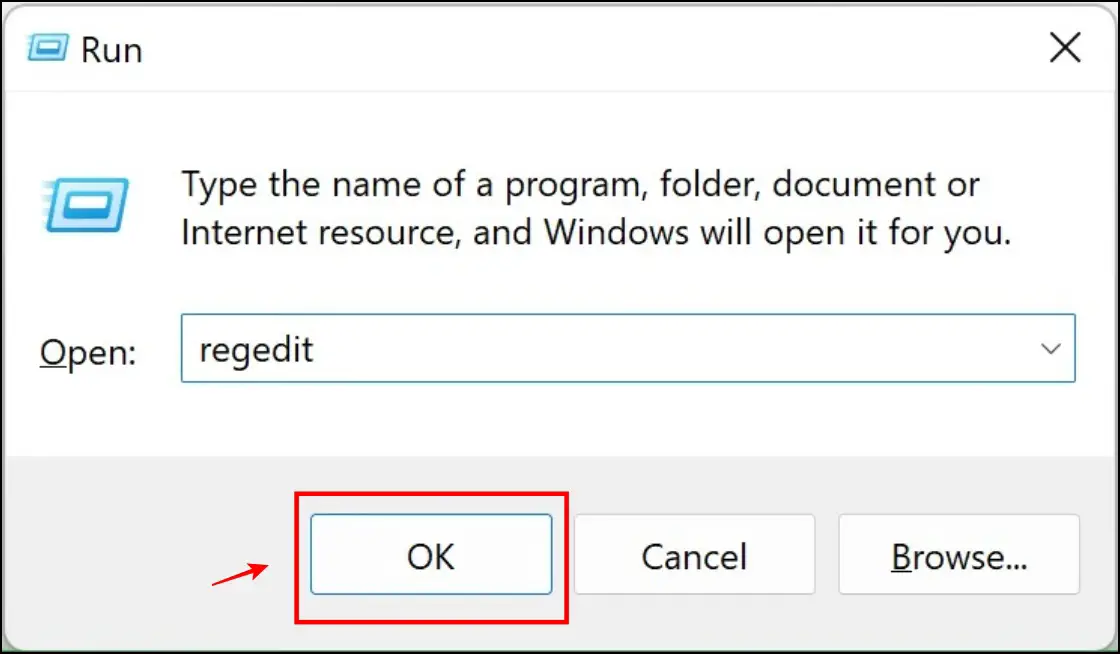
Step 1: Open the Run program on your PC.
Step 2: Type in regedit in the search box.
Step 3: Click on OK.
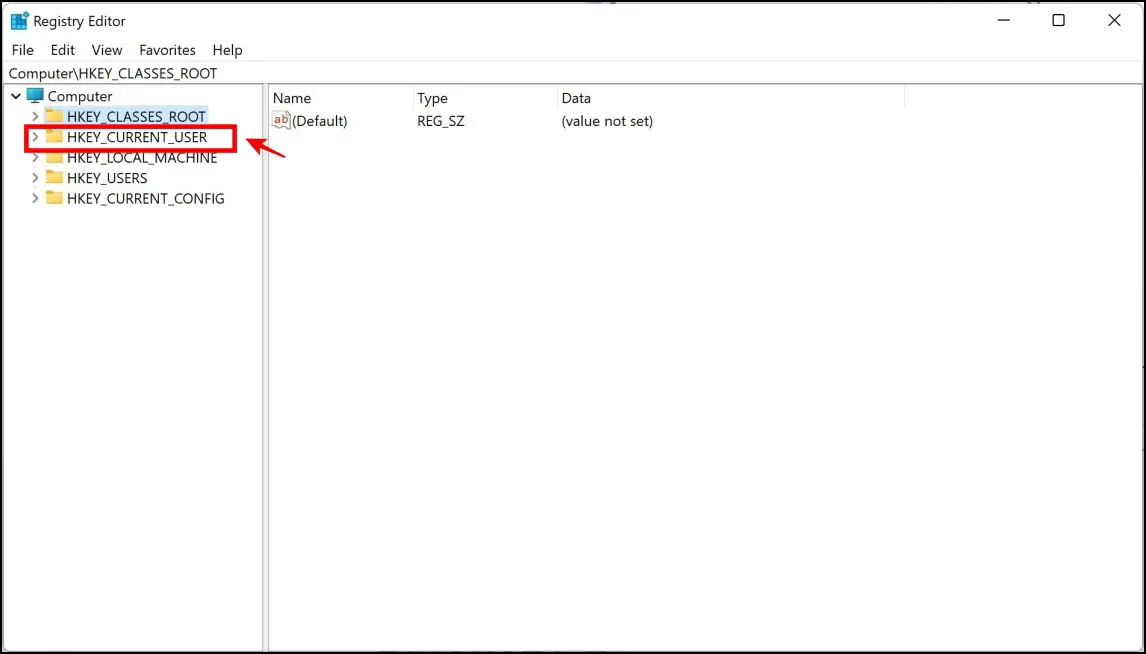
Step 4: In the window that opens up, click on HKEY_CURRENT_USER
Step 5: In the dropdown list, select Software.
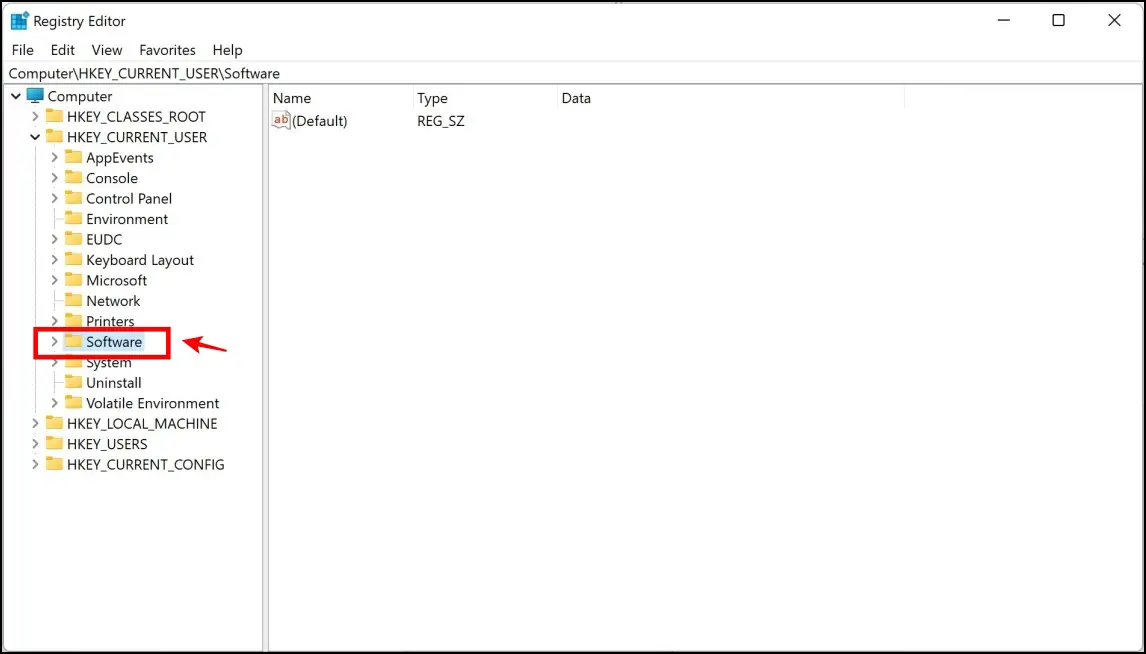
Step 6: The next folder you need to click on in the tree is Google.
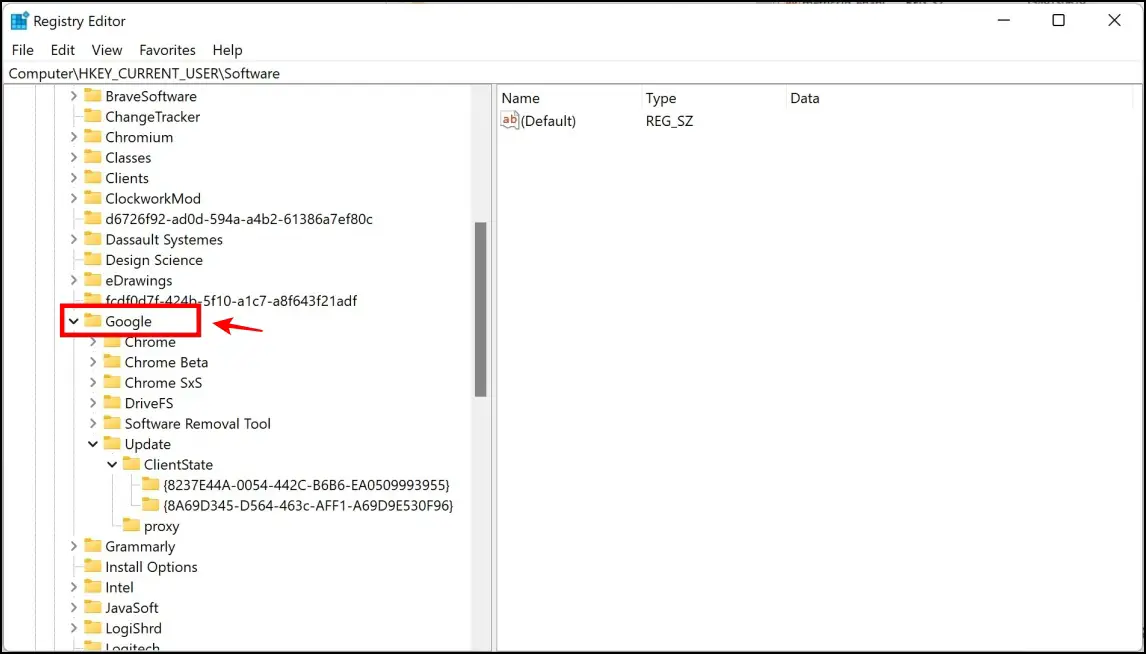
Step 7: Now, tap on the Update folder.
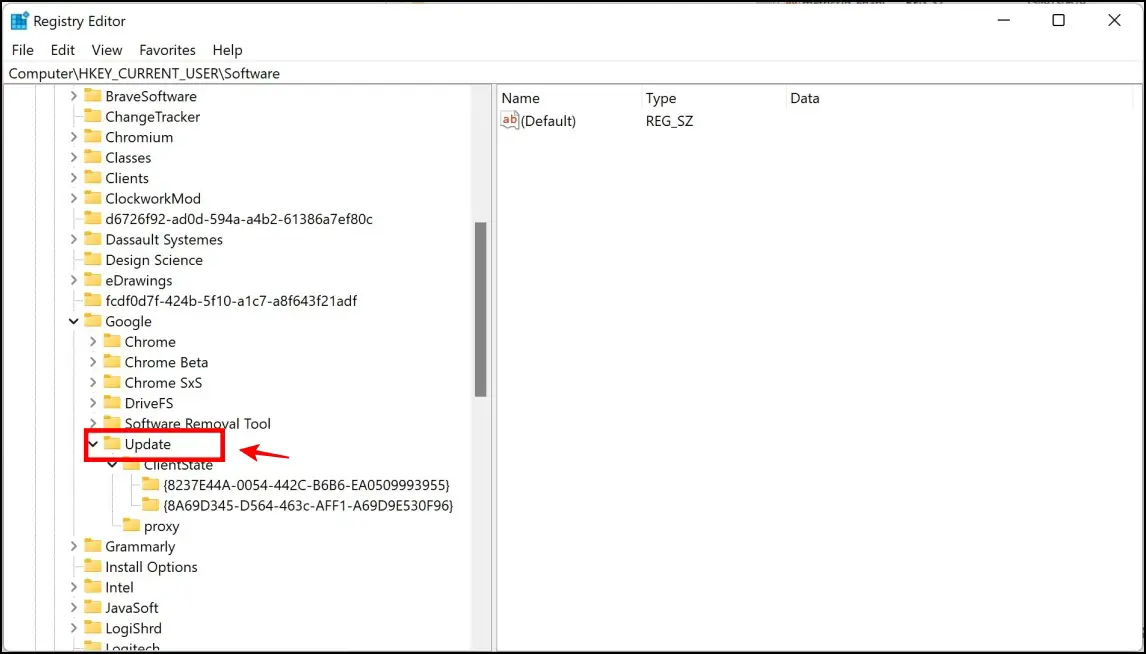
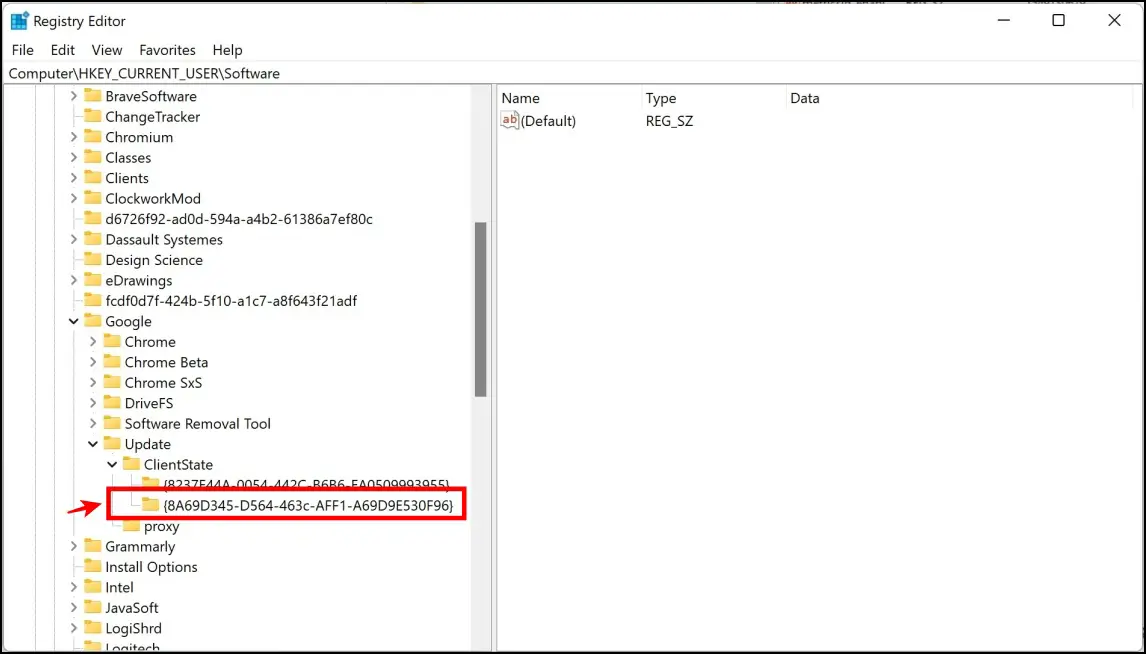
Step 8: In the dropdown list that opens up, click on the second folder.
Step 9: In the main window, click on (Default).
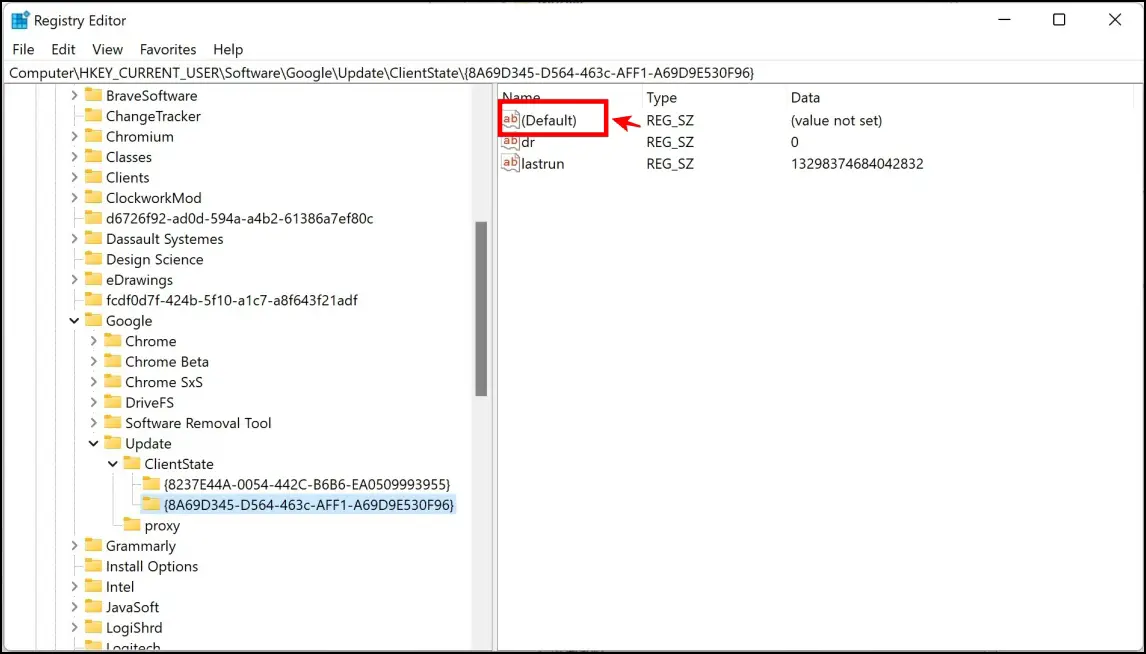
Step 10: In the pop-up box that appears, enter the Value data as 1. Click on OK.
Once you complete all the above steps, you can restart Chrome to check if the “Can’t update Chrome” issue is resolved.
Is your Chrome managed by your organization? Here’s why Chrome shows your browser is managed by organization.
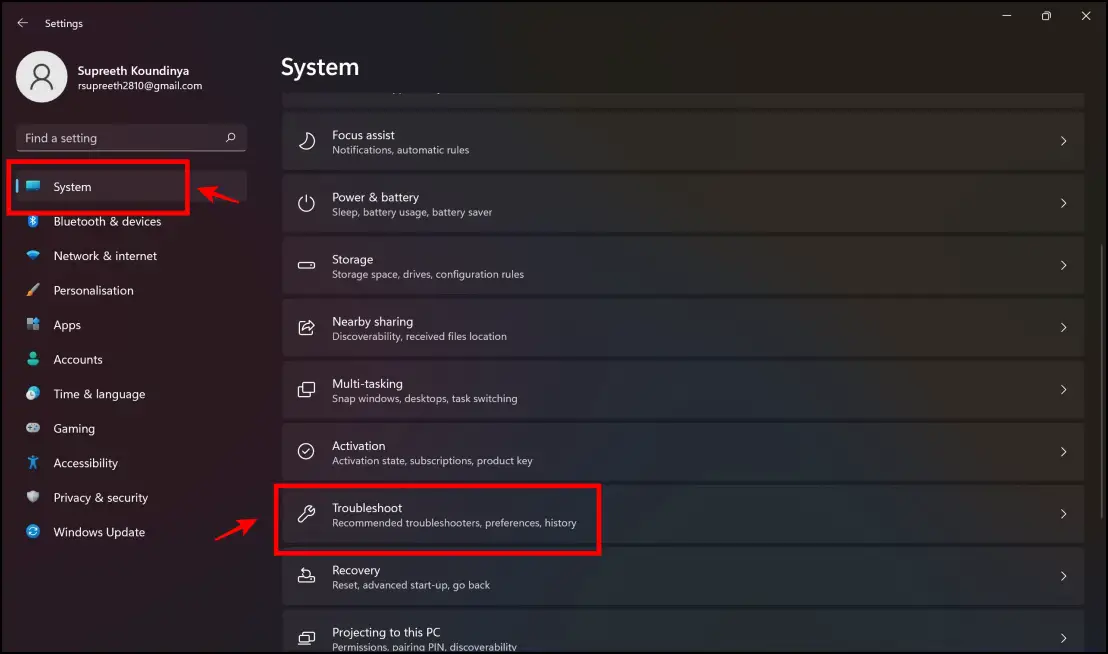
5. Check and Rectify Network Configurations
The issue of Chrome updates failing can also occur due to some issues in your network. Here’s how you can troubleshoot to fix any network issues.
Step 1: Open the Settings app on Windows.
Step 2: Stay on the System section as it opens up. Scroll down to find Troubleshoot.
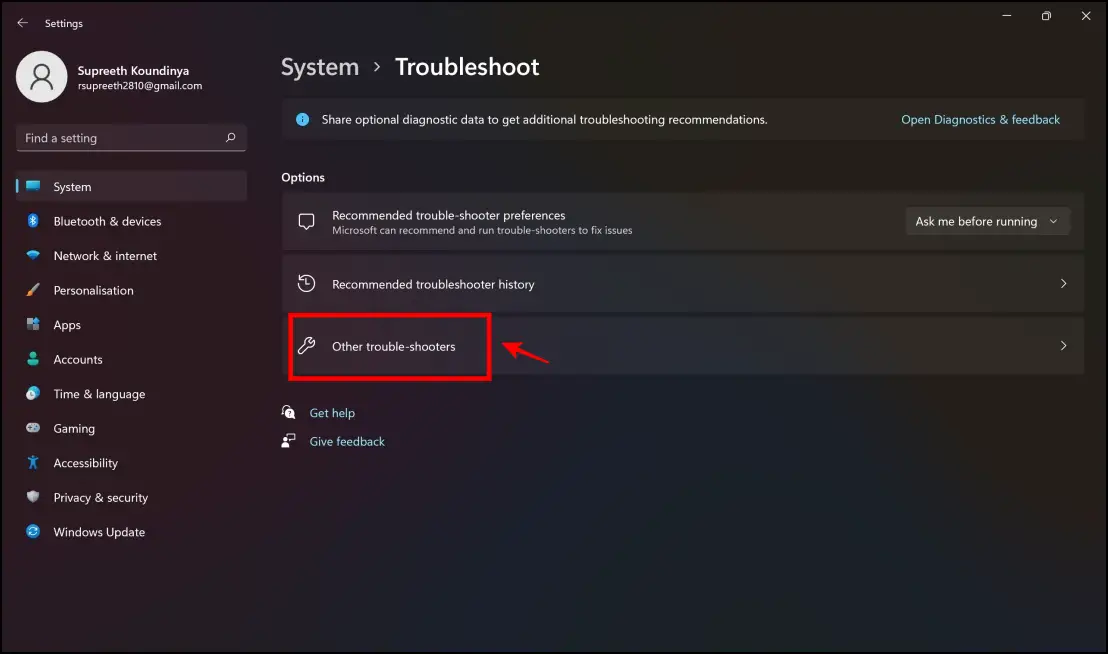
Step 3: Now click on Other trouble-shooters.
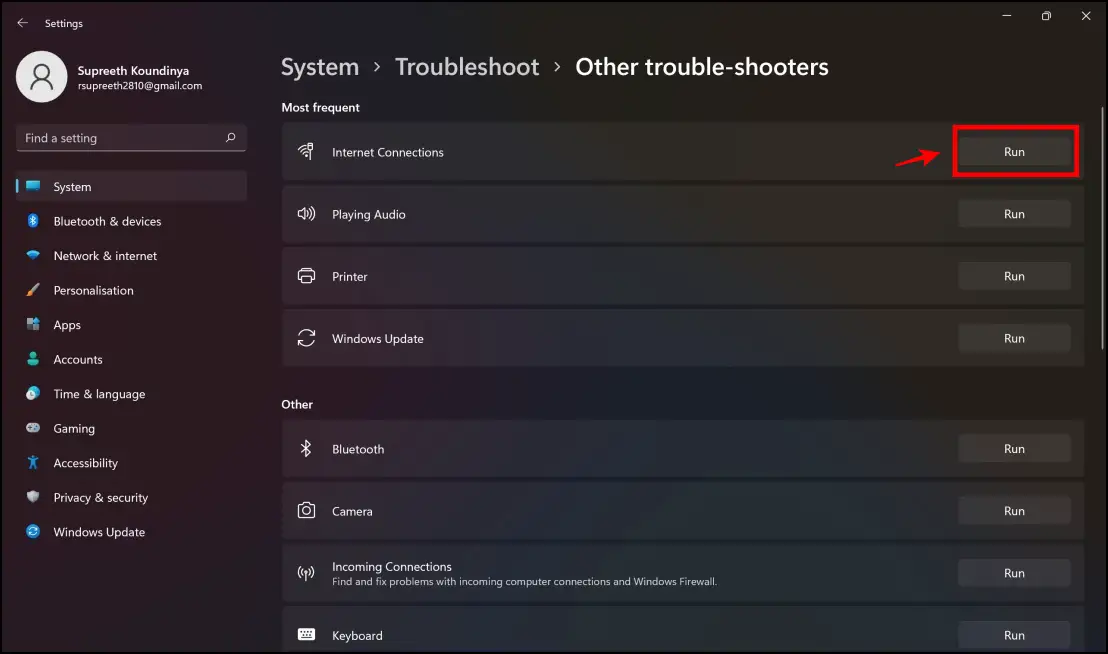
Step 4: In the Internet Connections option, click on Run.
6. Check Compatibility Mode
If you have previously enabled any compatibility settings for Google Chrome, it might end up causing issues. So, disable any compatibility mode settings and check if this was the culprit in the failed update.
Step 1: Right-click on the Google Chrome icon.
Step 2: Click on Properties.
Step 3: Deselect the option to Run this program in compatibility mode for.
Step 4: Now click on OK to complete the procedure.
7. Use Terminal on macOS
Step 1: Close all open Chrome windows.
Step 2: Open Terminal, enter the following, and press enter:
$ sudo rm -rf /Library/Google && sudo rm -rf ~/Library/Google
Step 3: Open Chrome. It may show you a yellow bar to turn on auto-updates. Click that and enter your password as usual.
You should now be able to go back into Chrome settings and update successfully.
8. Ensure System Requirements are Met
A major reason you can’t update Chrome is that you might not be running a compatible operating system version. Here are the operating system requirements you need to use and stay on the latest updated version of Chrome.
Please note that Chrome does not work with the following older platforms:
- Windows XP
- Windows Vista
- Mac OS X 10.6, 10.7, and 10.8
9. Issues With GoogleSoftwareUpdate.App on Mac?
GoogleSoftwareUpdate.app is an essential component that facilitates automatic updates for Chrome on Mac. It could be that you uninstalled it unknowingly or knowingly, especially when using tools like CleanMyMac.
If the component is removed, Chrome will no longer update automatically and throw a “Found non-functional system update engine” error. While you cannot separately reinstall GoogleSoftwareUpdate.app, reinstalling Chrome does bring it back and fix the error.
10. Reconfigure the Google Update Service
You probably can’t update Chrome if the update service does not start automatically. Go ahead and reconfigure the Google Update service, and it can likely help you fix the issue.
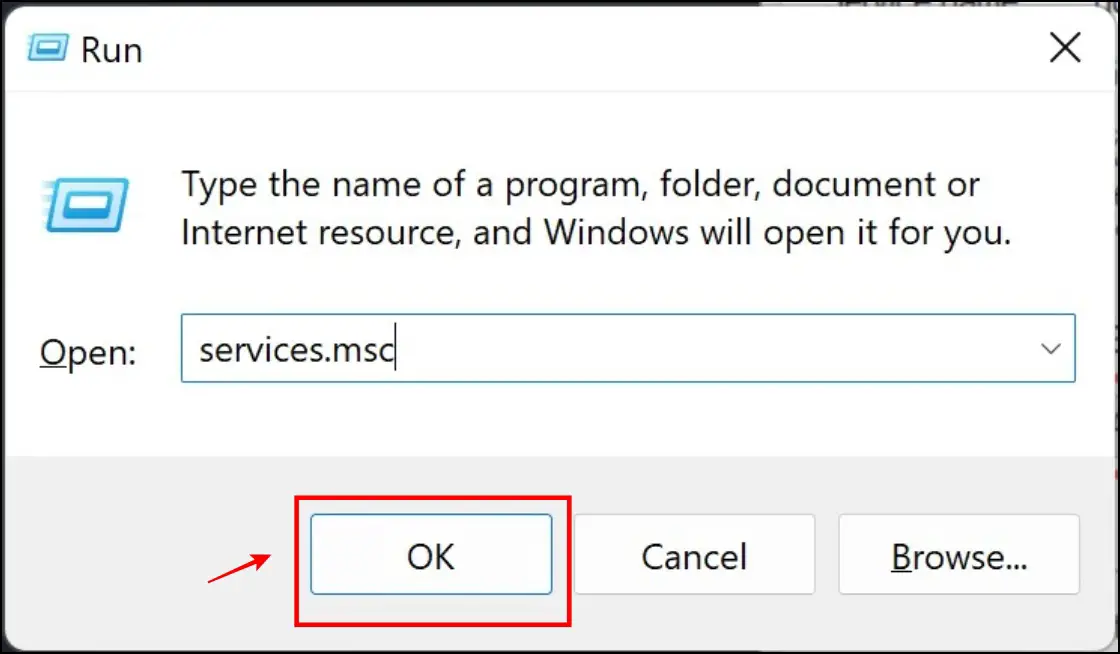
Step 1: Open the Run program on your PC.
Step 2: Type in services.msc in the search box.
Step 3: Click on OK.
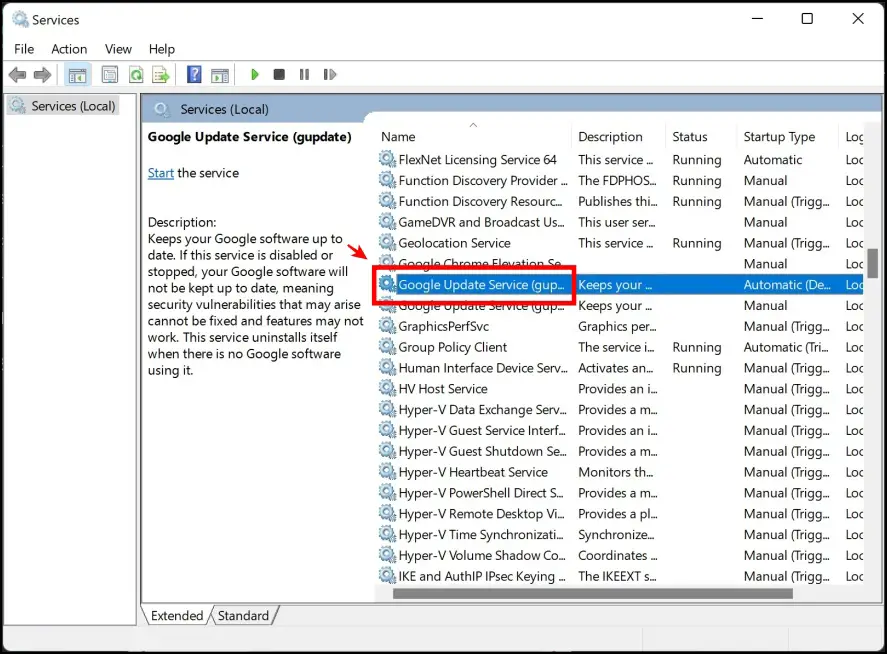
Step 4: Locate the Google Update Service (update).
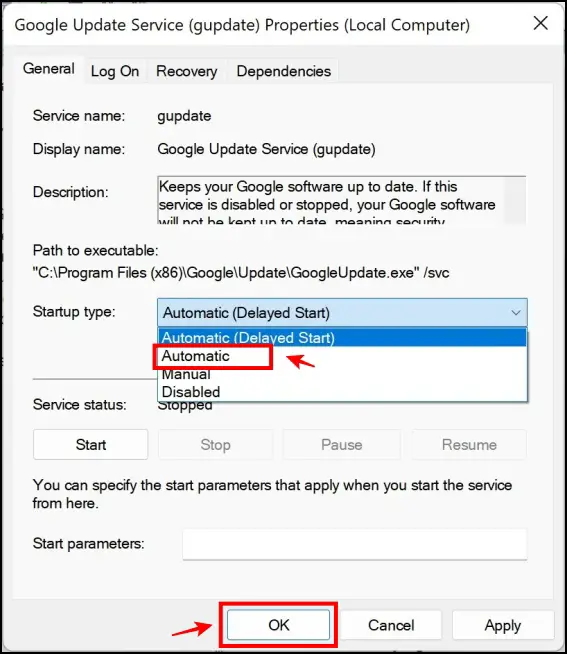
Step 5: In the pop-up menu that appears, click on the dropdown menu in the Startup type option.
Step 6: Now click on Automatic, and now click on OK to apply the settings.
11. Reset Google Chrome
Unknowingly or due to a bug, a few settings might be misconfigured on Chrome. While it might be a bit difficult to pinpoint these settings, an easy way would be to reset Chrome.
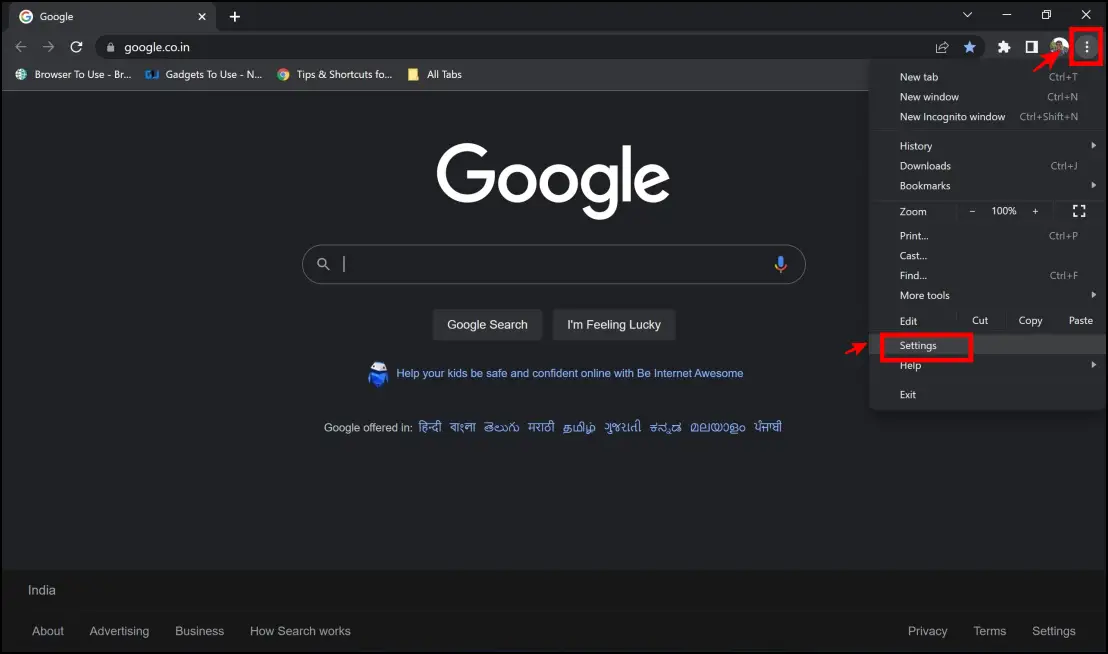
Step 1: Click on the three dots menu in the top right corner > select Settings.
Step 2: Click on Advanced.
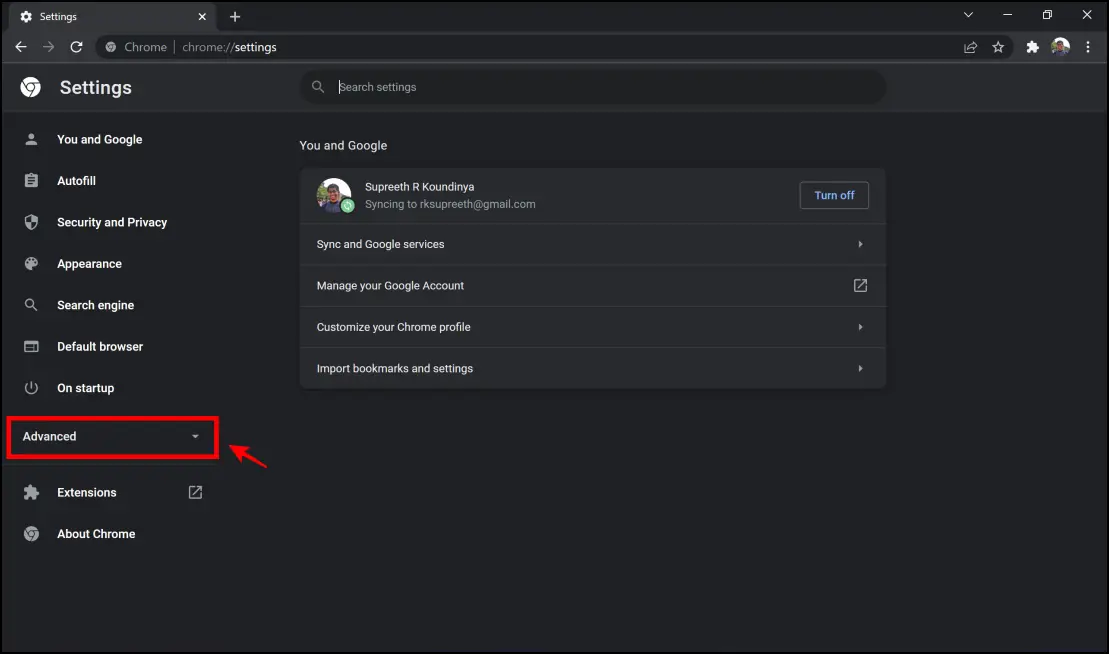
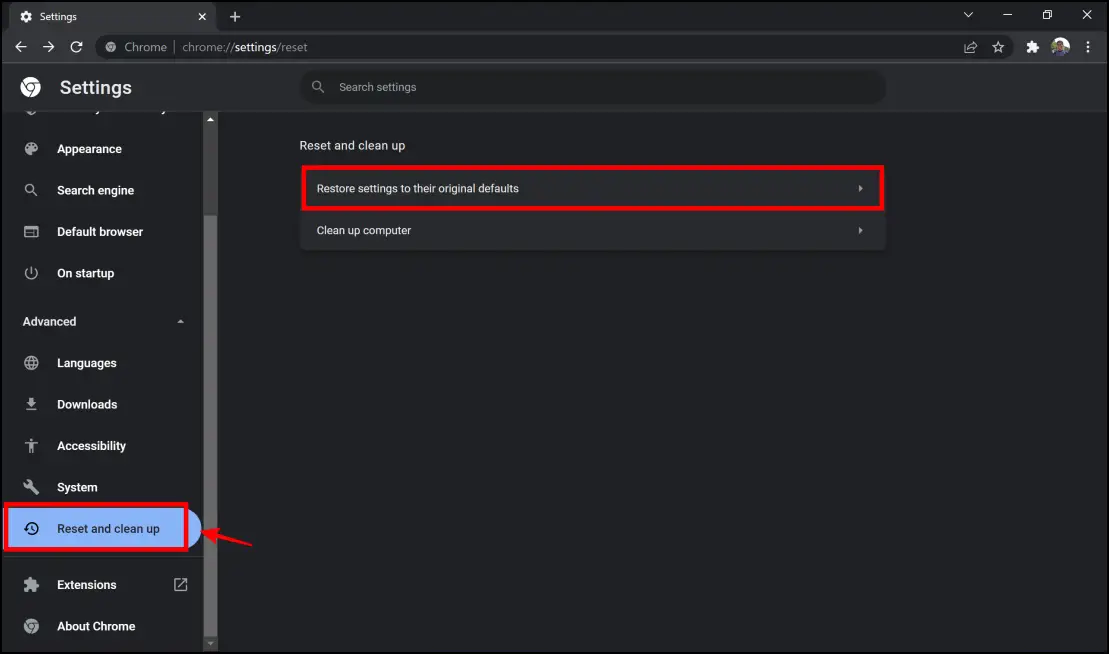
Step 3: Click on Reset and Cleanup > Restore settings to their original defaults.
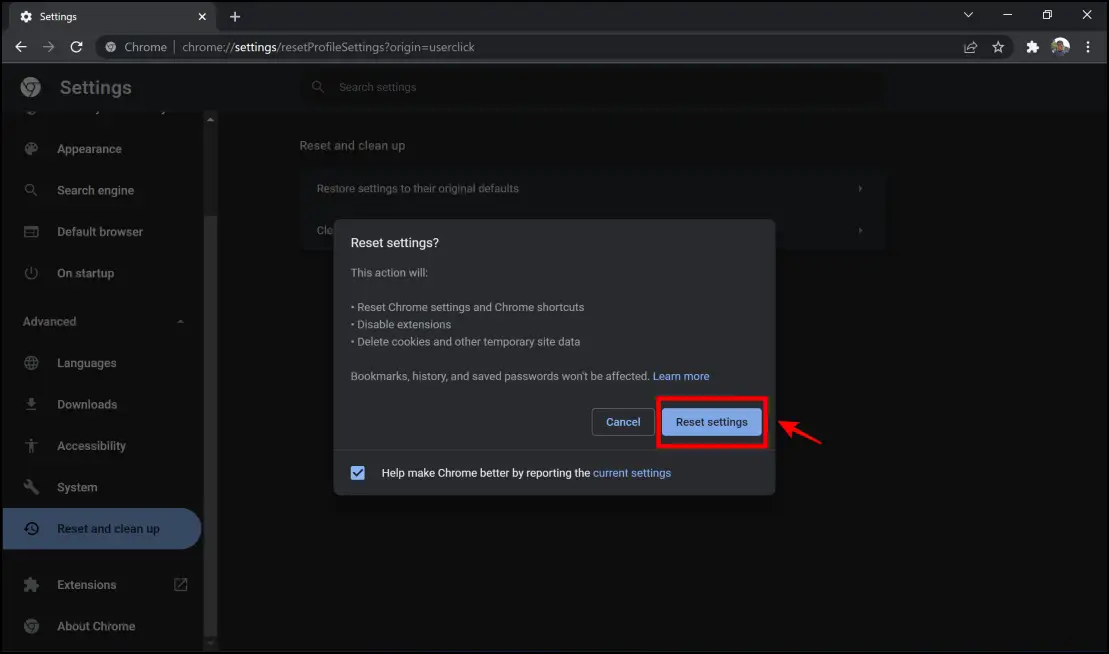
Step 4: Here, tap Reset Settings. All the settings will now be reset on Chrome.
12. Reinstall Google Chrome
As a last resort, if none of the above methods work, you can try and reinstall Chrome. Here’s how to do it.
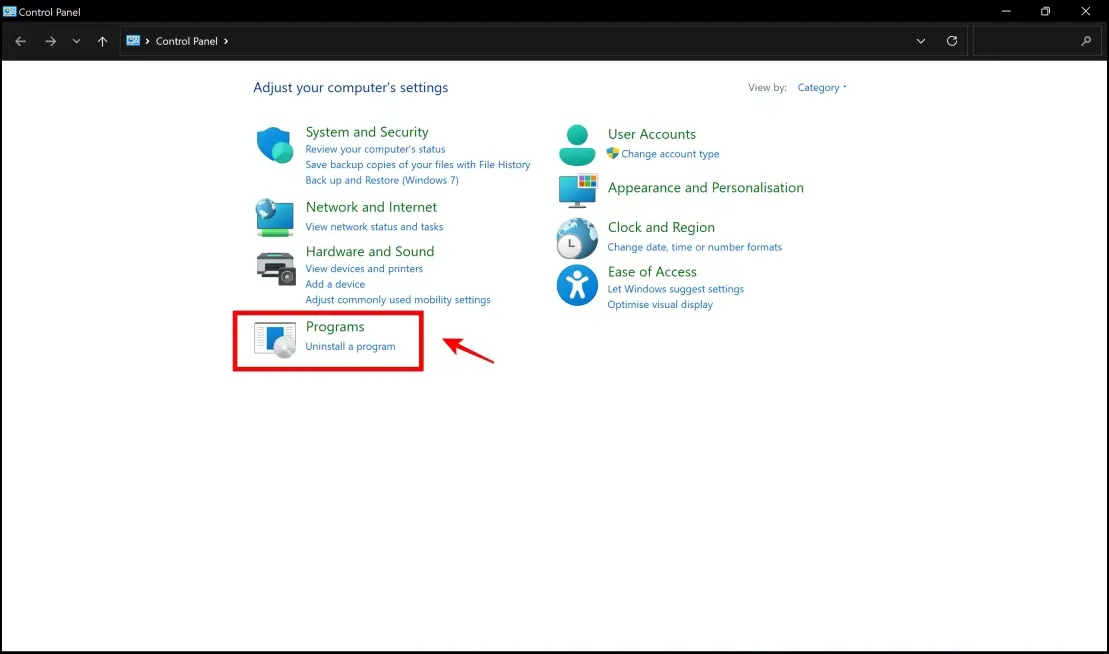
Step 1: Launch Control Panel on your PC.
Step 2: Click on Uninstall a program under Programs.
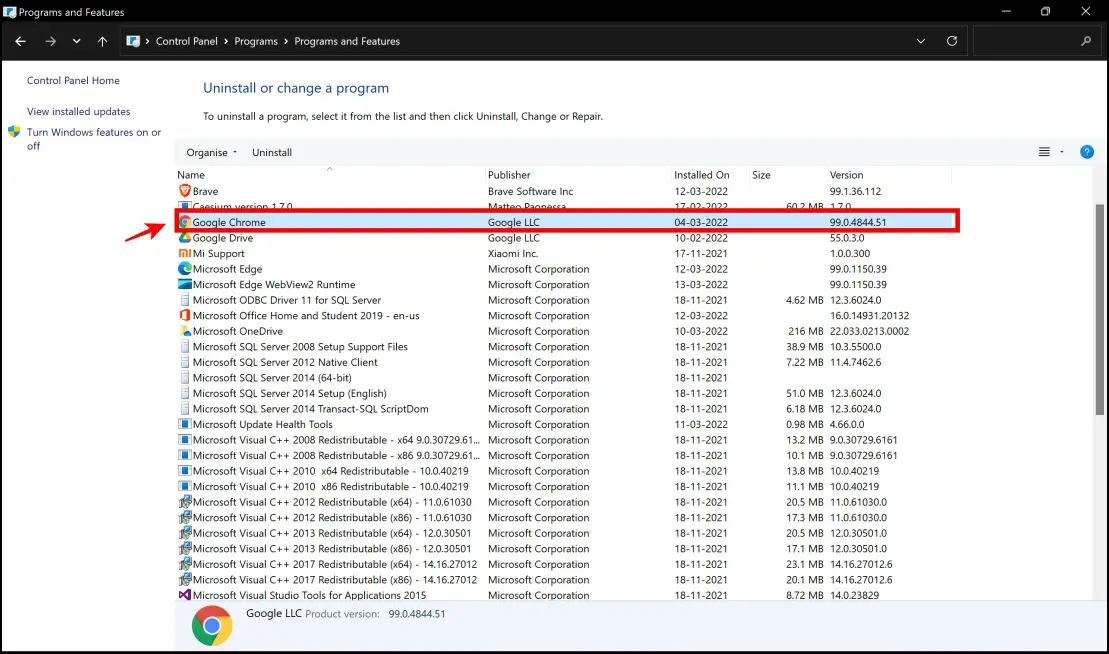
Step 3: Click on Google Chrome.
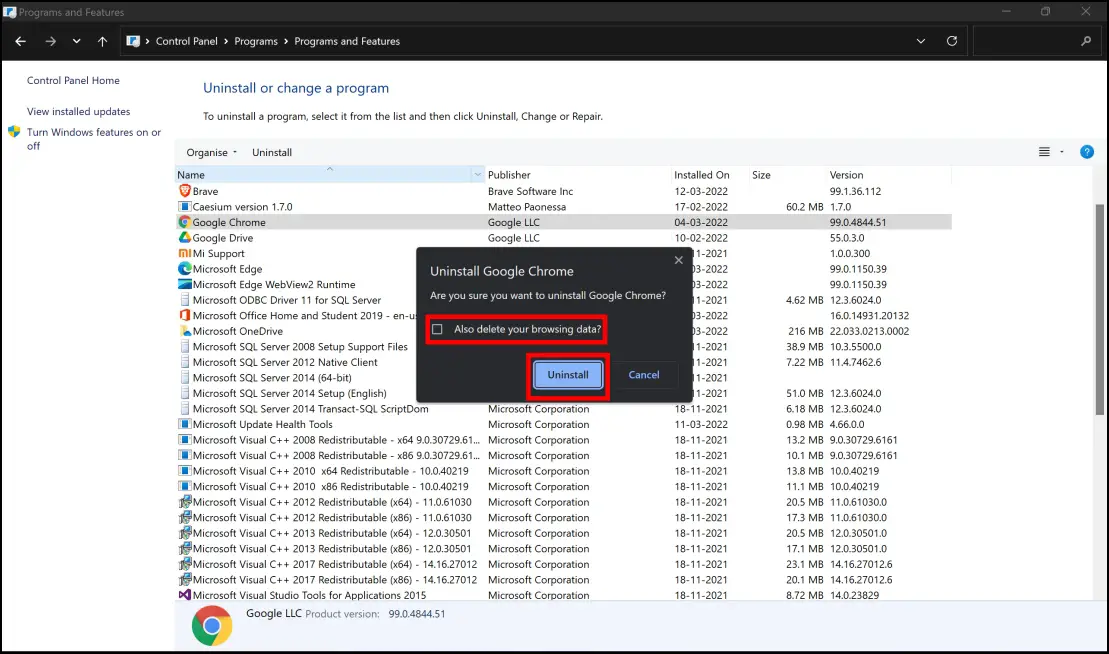
Step 4: Check the box to delete your browsing data. Click on Uninstall.
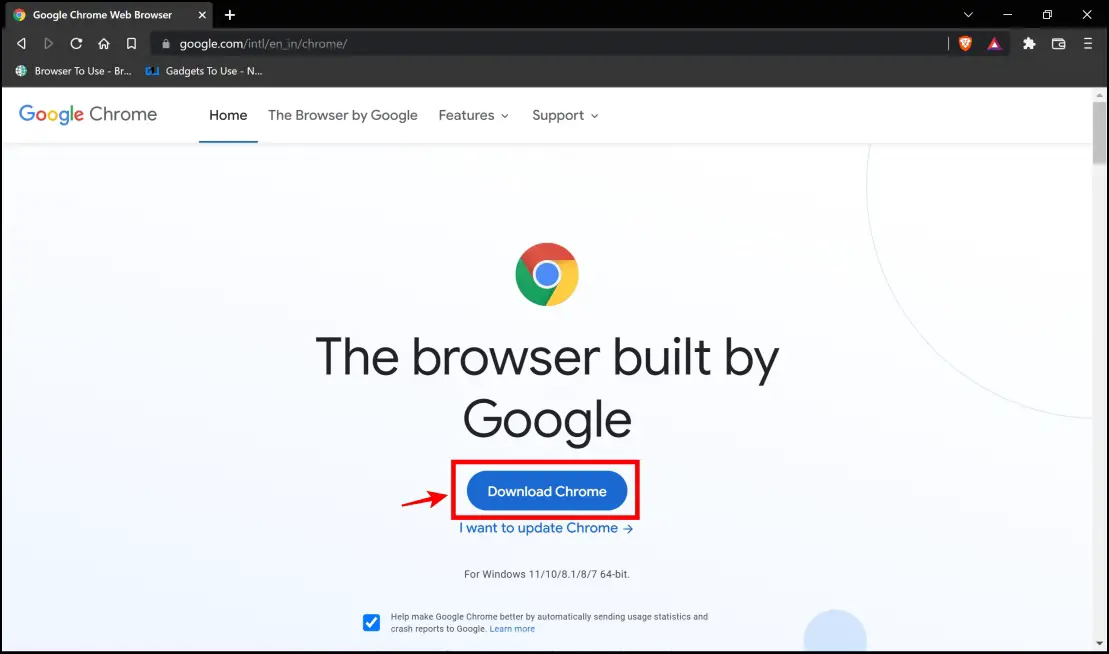
Step 5: Open your secondary browser and visit the Chrome Installation Page. Click on Download Chrome, and install Chrome on your PC.
Wrapping Up
These are some of the issues due to which you can’t update Chrome. With the methods we provided, we hope you were able to resolve the problem and update Chrome normally without any issues. For more such guides and articles focusing on issues that affect your browsing experience, stay tuned to Browser To Use. We always have a fix!
Related: 5 Ways to Update Your Web Browser For Free (Windows, Mac)
With every update, Chrome ensures that users get the latest security features and experience enhanced speed and performance. In fact, Chrome recently rolled out version 100 on March 29th, 2022, and apart from a brand new logo, it has introduced various development features, security improvements, and much more. With this version, it has fixed 28 security vulnerabilities with nine of them marked as high severity. However, some users are unable to update Google Chrome and there could be various reasons such as –
- Obsolete DNS cache
- Presence of malware
- Windows Defender firewall interfering
- Accumulation of web browser cache
- Missing Google Chrome files
And, there are many others. In this post, let’s have a look at some of the best ways to fix “Chrome not updating” on Windows 11/10 computers –
How To Update Google Chrome?
Unable to update Google Chrome? Here are some ways to fix the issue. After each of these methods –
1. Click on the three vertical dots
2. Click on Help and then on About Google Chrome
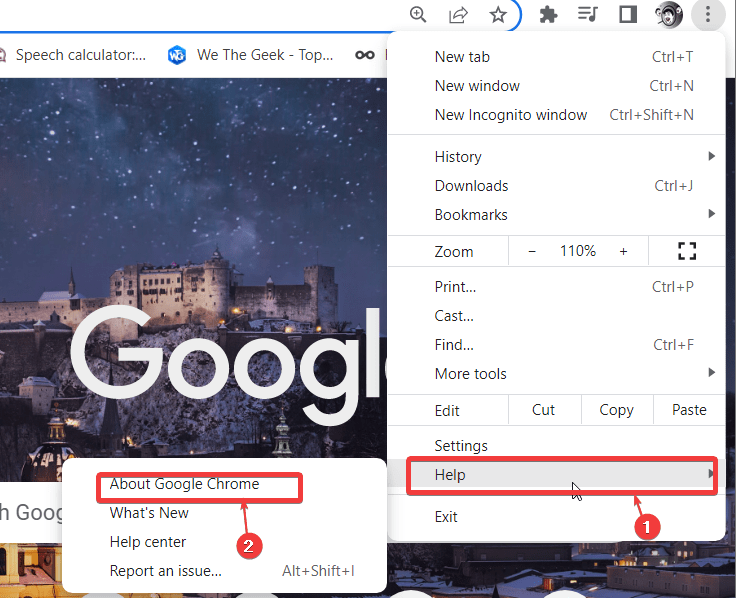
3. Check if Google Chrome gets updated to the latest version or not
How To Resolve Google Chrome Not Updating Issue
1. Restart Your Computer
If there are any minute bugs that are Google Chrome from updating on your Windows 11/10 PC, then a quick restart would resolve those and you should be able to update Google Chrome hassle-freely. But, before that, make sure you quit Google Chrome and bookmark or save any opened important tabs.
2. Check If You Have A Faulty Internet Connection
Can’t update Google Chrome? Chances are you have a faulty internet connection. In that scenario, you can run some preliminary checks such as checking internet reception on other devices and checking the router. You can also try the fixes mentioned in this post. One of the things you can do is execute the inbuilt network troubleshooter. Here are the steps for the same –
- Press Windows + I key combination and open Settings
- From the left-hand side, click on System if not already selected
- From the right-hand side, click on Troubleshoot

- Click on Other Troubleshooters

- Under Most Frequent, click on the Run button next to Internet Connections


After you have followed the on-screen instructions, check if you can now update Google Chrome.
3. Flush DNS Cache
An outdated DNS or Domain Name System cache can prevent Google Chrome from connecting to Google’s update servers. Flushing the DNS cache can help in fixing this issue and hence you will be able to update Google Chrome. Here are the steps for the same –
- In the Windows search bar, type cmd
- From the right-hand side select Run as administrator
- When the Command Prompt window opens, type ipconfig /flushdns and press Enter
Now, check if you are able to update Google Chrome or not.
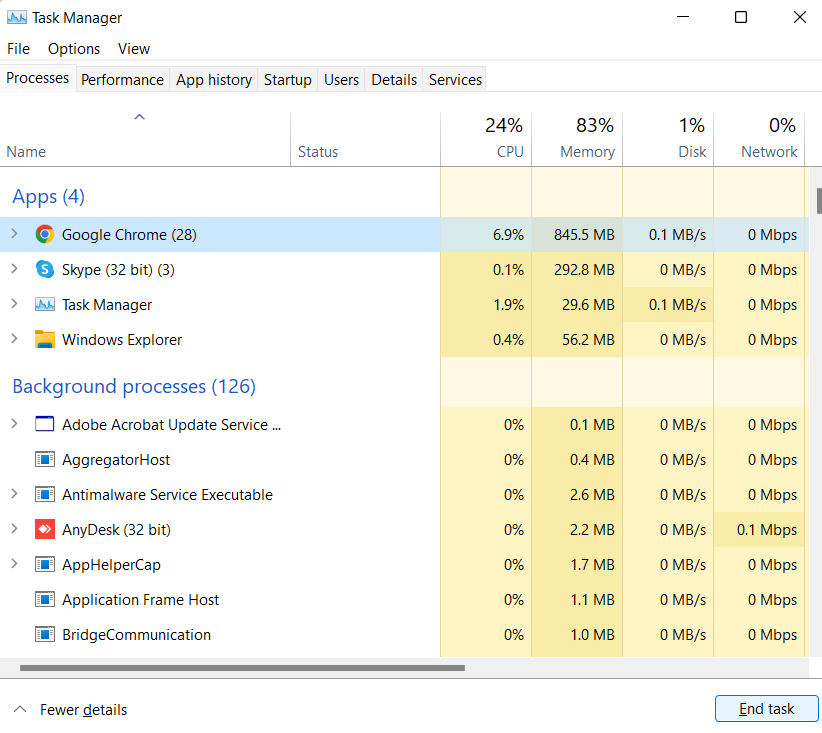
4. Close Chrome Via Task Manager
One of the ways that has helped users get over the issue is running the Task Manager to exit Chrome. For this –
- Press ctrl + shift + esc to open the Task Manager

- Select Google Chrome
- Click on the End Task button at the bottom-right corner of the screen

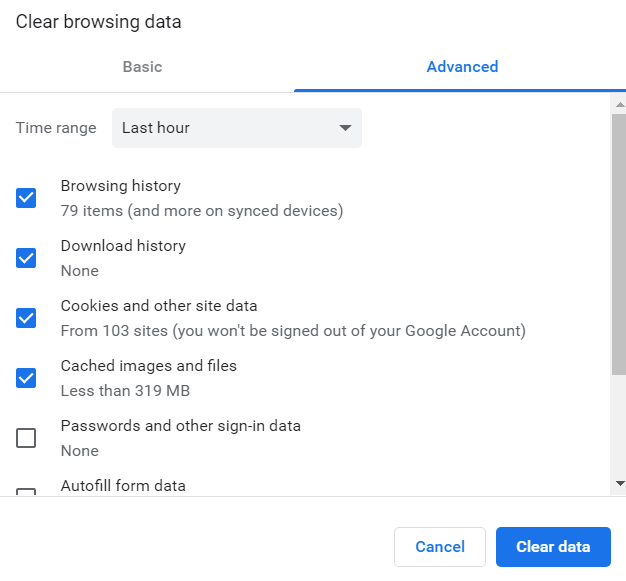
5. Clear Chrome Cache
An overstuffed browser cache can mess up updates. Also, your stuffed browser cache might also be hiding corrupt cache entries as well which if not looked into can lead to further issues. So, here’s how you can clear your browser cache on Google Chrome –
- Click on the three vertical dots and then click on More Tools
- Next, click on Clear Browsing Data
- Click on the Advanced tab and then click on the blue-colored Clear data button from the bottom-right
6. Enable Google Update Services
There are chances that Google Update Services are disabled on your Windows computer which is the reason why Chrome is not updating on your computer. Check and enable the services for the updates to take place in Google Chrome –
- Press Windows + R button to open the Run dialog box

- When the dialog box pops up, type services.msc and press Enter
- When the Services window opens, scroll down and locate Google Update Service (gupdate)

- Click on the Startup type dropdown and then select Automatic (Delayed Start), if not already selected

- Click on Apply and then OK


Check if now you can update Google Chrome or not.
7. Reset Chrome
As the name suggests, this method will reset Chrome to its original settings and there are high chances that you might just then be able to fix “Chrome not updating on Windows”. For this –
1. Open Google Chrome
2. In the address bar, type chrome://settings/reset
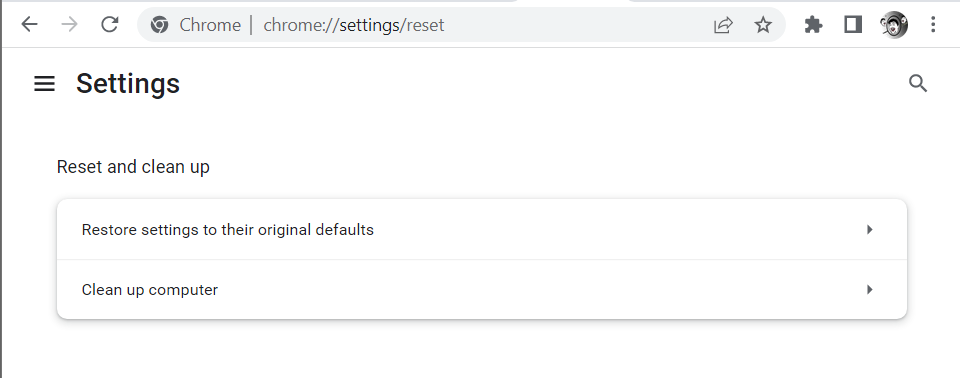
3. Click on Restore settings to their original defaults

4. Click on the blue-colored Reset settings
8. Uninstall and Reinstall Chrome
Quite possible you are unable to update Google Chrome because of some missing files. This can be resolved by uninstalling Google Chrome and reinstalling it. Here we’d like to emphasize the importance of completely uninstalling Google Chrome first because this would ensure a smooth reinstallation. For this, you can choose from some of the best uninstaller software. Prior to that, you can use the Control Panel to uninstall Google Chrome –
1. In the Windows search bar. type control panel and click on Open from the right-hand side

2. Under Programs, click on Uninstall a program
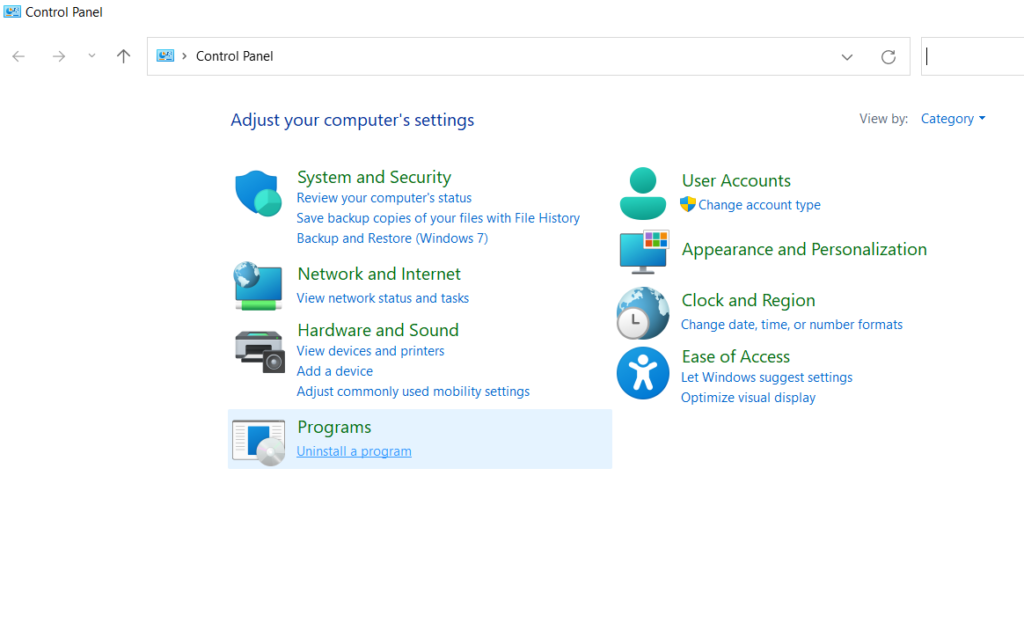
3. From the list of programs, click on Google Chrome and then click on the Uninstall button from the top

4. Download and install Google Chrome
You should now be able to get your hands on the latest version of Google Chrome.
9. Check For Malware
Your Chrome update problem could be pointing towards an impending malware. It is always recommended to have an Antivirus by your side because an Antivirus can identify and remove malware in real-time before it causes any further damage. Since we are talking of Windows, Systweak Antivirus is one Antivirus program that you can lay your trust on. Let’s quickly have a look at some of its best features –
- It runs in the background without affecting your PC’s performance
- Provides multiple scanning modes
- Provides web security
- Constantly updates itself with the latest malware definitions so that no malware can hideaway
- Tracks the malware in real-time before it can pounce on your PC functionality and data
- You can schedule scanning at your desired time
- Lightweight on resources
Also Read: How To Choose The Right Antivirus Program?
How To Use Systweak Antivirus To Detect Malware
1. Download, run and install Systweak Antivirus
2. Click on the magnifying glass icon from the left-hand side of the screen
3. Select the mode of scan
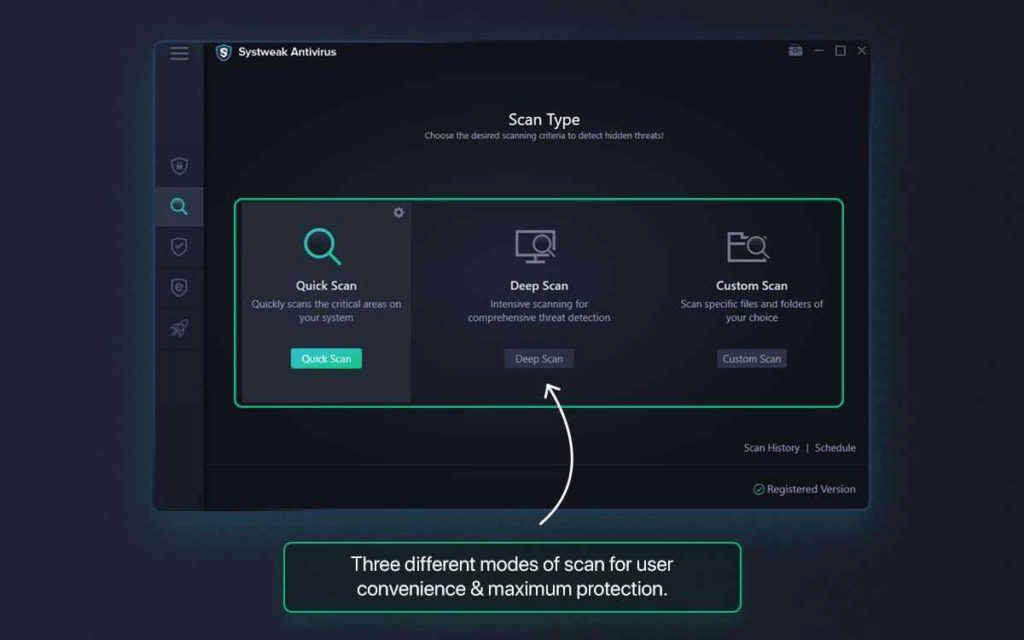
Systweak Antivirus will track any malicious threat and remove them.
Also Read: Here is A comprehensive review of Systweak Antivirus.
Wrapping Up
Hopefully, by now you must have resolved the Google Chrome not updating issue. If yes, do let us know which of the above fixes helped you out in the comments section. For more such content – tech reviews, troubleshooting guides, app listicles, and much more, keep reading WeTheGeek.
Google Chrome is probably one of the most preferred browsers globally due to its features, performance and security. If you are using an outdated version of the Chrome, you could be putting your computer and personal information at risk. For this reason, it is important to update your browser to fix any security bugs as well as enjoy improved features. Besides, you may be unable to access some modern websites as they are designed to use features provided by up-to-date browsers. Being said that, Google updates Chrome browser automatically using Google Update feature. However, you could encounter some problems whenever Google Update couldn’t get the connection to server. In this article, we will help you to resolve some of the common Chrome update issues. If your Chrome app crashes frequently, check out on how to fix Chrome frequently crashing problems.
How to Fix Google Chrome Update Problems?
Chrome checks for available updates whenever you launch the browser app. If you are not closing the app for longer time, Chrome will show an “Update” button in the browser. You can click on the “Update” button to get the latest version. However, there could be many reasons the update may fail in Google Chrome. You can follow the below suggestions and try to fix the issue.
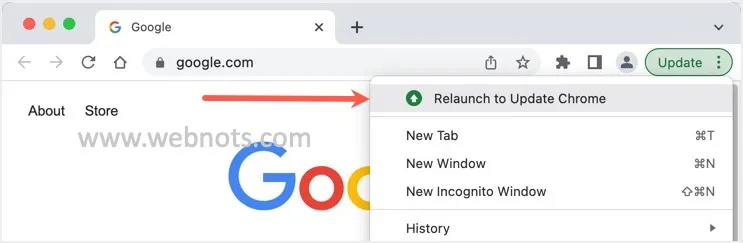
1. Try Manual Update
If Chrome is not updating automatically, you can first try to update it manually.
- Open the browser and click on the menu icon located at the top right corner of the browser window.
- Hover the mouse over “Help” option and select “About Google Chrome”.
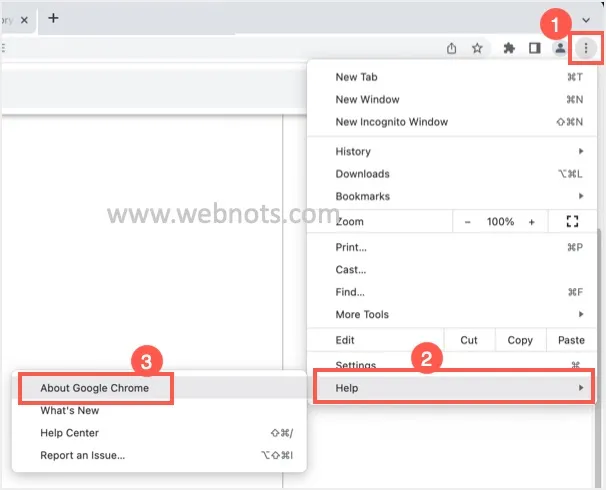
- Chrome will look for available updates and install them automatically.
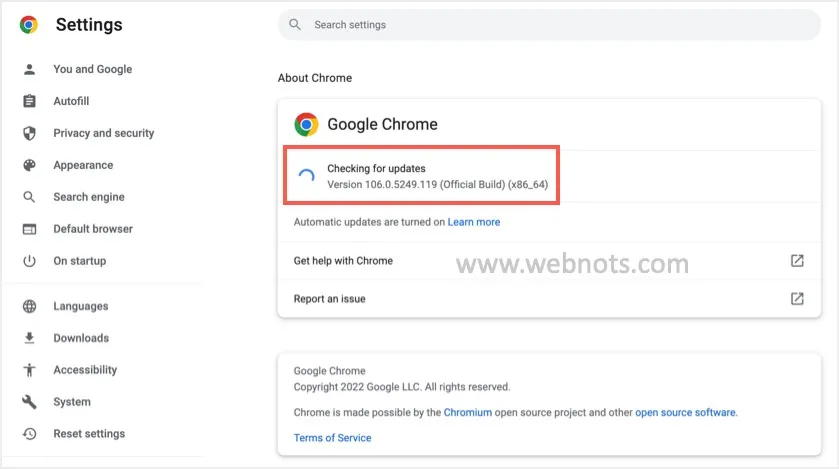
- If there are issues in auto update, Chrome will show the error like below mentioning the update check is failed to start.
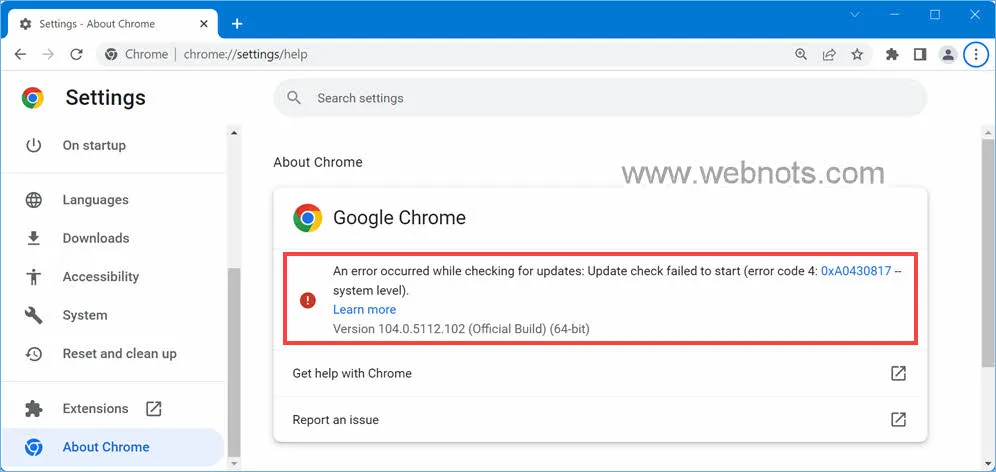
This indicates that you have some problems in updating to latest version. In this case, check whether you have proper internet connection and Google services are not blocked. Try to update your browser manually by going to the command URL “chrome://settings/help” in the address bar.
2. Ensure You Haven’t Disabled Auto Update
The real problem with Chrome auto update is that it does not allow downgrading to the previous version in case of issues. When there are major changes to the functionalities, you may get annoyed with the auto updated version. So sometimes people play around with Services and Registry entries on Windows PC to disable the auto update. If you have disabled auto update, enable the services and registry entries back by following the instructions in this article.
3. Check Your Internet Connection
You need to have a stable internet connection for the Chrome update to work. Remember, many countries like China completely blocks Google services. Also, some restricted networks like organizations, schools and colleges block update services. So, if you have travelled to such countries or working inside a restricted network then Chrome update will get time out. In this case, the only solution is to use VPN or connect your computer to the unrestricted network that is not blocking Google updates.
4. Restart Google Chrome
Most of the simply restarting your browser will help to resolve the update problems.
- On Windows PC, navigate the Chrome menu by click the icon (three vertical dots) at the top-right corner of the browser and click “Exit”. On Mac, go to “Chrome > Quit Google Chrome” menu.
- Launch the browser afresh and try the manual update again.
5. Enable Google Update Services
Chrome update check could fail if the Google update services are disabled in your computer. To enable the services:
- Open the Windows Run utility by pressing the “Win + R” keys, then type “services.msc” then click “OK”.
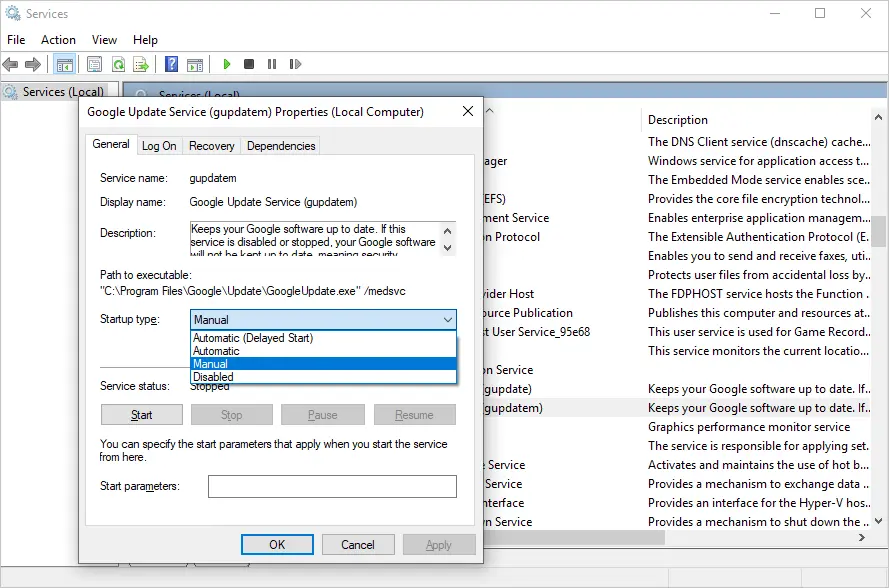
- It will open the Services Manager where you can see all the services running on your PC. Scroll down and find the “Google Update Service (gupdate)”.
- Double click on the service, then click on the arrow under “Startup type” and select either “Automatic” or “Automatic (Delayed Start)” option.
- Click “Apply” and then “Ok” button.

- This will take you back to the services window, double click on the next service “Google Update Service (gupdatem)”.
- Click on the drop-down box against the “Startup type” option and select “Manual” from the list.
- Click “Apply” button and then “OK” button to set the update service to manual startup.
- Now restart your PC and try to update Google Chrome by navigating to “chrome://settings/help” page.
6. Enable Google Updates from Windows Registry Editor
- Press the “Win + R” keyboard shortcuts to open run utility, type “regedit” and click the “Ok” button to open the registry editor.
- Click the “HKEY_LOCAL_MACHINE” folder to expand it and then navigate to “SOFTWARES > Policies” section.
- Look for “Google > Update” key.
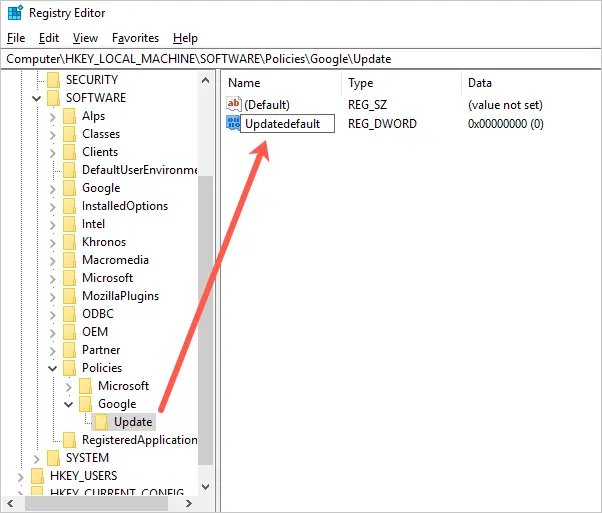
- Double click on the “UpdateDefault” key and enter 1 in the “Value data” field.
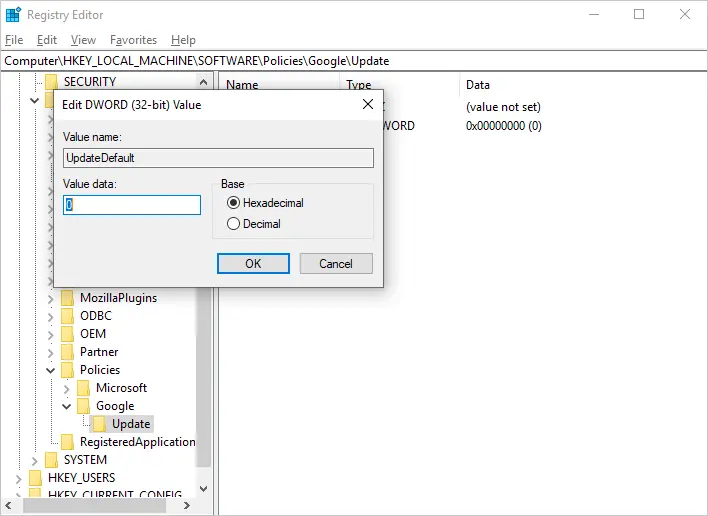
- Close the registry editor and restart your PC, then check for Chrome updates.
If you did not see the “Google” folder in registry, simply create the folder and further entries to setup the value as 1.
7. Reset and Reinstall Chrome
If the above options don’t work, it is possible that Chrome app may be missing files or having corrupted files. In this case, you can try resetting the browser by going to “chrome://settings/reset” URL. This will remove all your customizations and restore the browser to factory settings. However, your bookmarks, passwords and history will be retained.

If resetting also did not help, then you can delete the app and install afresh to resolve the issue. Since this will delete all stored data, we recommend login with your Google account and sync the data in Google server before deleting the app. This will help to restore your data from Google server after reinstalling the app.
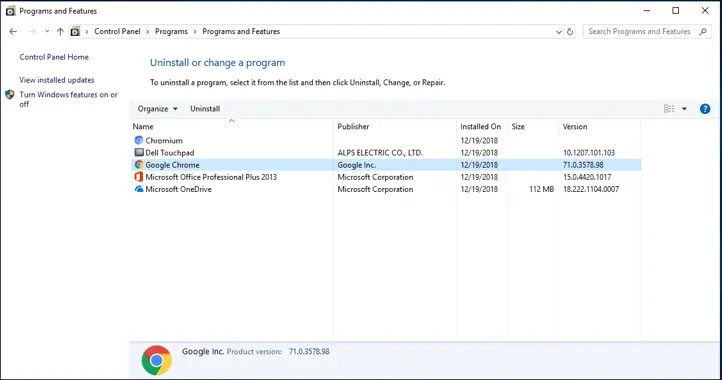
- On Windows computer, go to control panel by typing “Control” in the Windows Search and select “Control Panel” app.
- Under “Programs” click on “Uninstall a program”.
- From the list of the installed programs, click on Google Chrome and click “Uninstall” at the top of the list.
- Wait for the program to uninstall and once uninstalled successfully, restart your computer.
On Mac, you can simply drag and drop the Chrome app to Trash for deleting it. After deleting the app, go to the official Chrome website from Edge, Safari or any other browser, and click the “Download Chrome” button.
You will be prompted to accept terms and install, click “Accept and Install”. Follow the instructions to complete the installation process. It is important to ensure that your system’s features meet the requirements for the latest version of the browser.
Sometimes extensions you have installed on your Chrome can also cause problems in update. Therefore, disable all extensions in Chrome to check whether that helps to fix the problem.
Conclusion
It is important to ensure that your browser is up to date to ensure that you stay safe and secure when browsing with Chrome. Though Chrome is set to update automatically, you may need to update it manually. If updating Chrome fails, it could be due to various reasons and trying the above options will resolve the Chrome update problems.
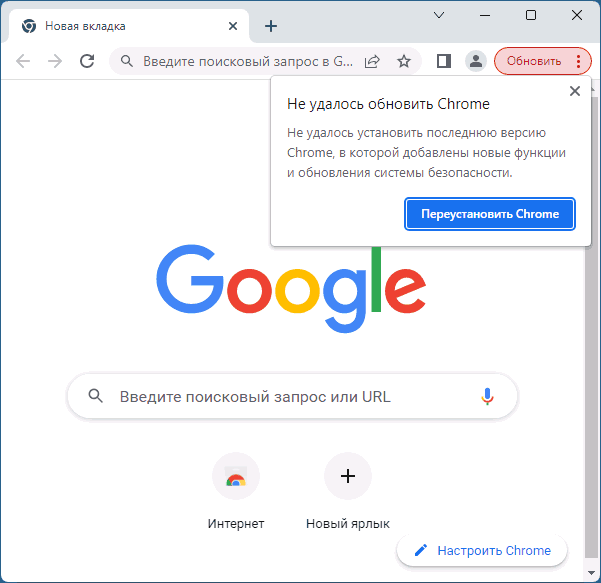
Если по той или иной причине вы используете старую версию Chrome, отключили обновления браузера или они не работают по иной причине, вы можете начать получать уведомления справа от адресной строки с текстом «Версия Chrome устарела» или «Не удалось обновить Chrome».
В этой инструкции подробно о том, как убрать такие уведомления Chrome, а в случае, если вы, наоборот, хотели бы выполнить обновление браузера —решить эту проблему. На близкую тему: Как убрать уведомление Google Chrome о необходимости обновления Windows.
Параметры ярлыка Google Chrome
Самый быстрый способ отключить уведомления о невозможности обновления и устаревшей версии Chrome — добавить параметры ярлыка, изменяющие его поведение в части обнаружения устаревшей версии браузера. Шаги будут следующими:
- Откройте свойства ярлыка Google Chrome: правый клик по ярлыку — свойства. В случае если ярлык расположен в меню «Пуск», в Windows 11 и Windows 10 вы можете нажать по нему правой кнопкой мыши, выбрать «Дополнительно» — «Перейти к расположению файла», чтобы открыть папку с ярлыком, а затем его свойства. Если для запуска используется значок Chrome в панели задач, открепите его от панели задач, выполните редактирование ярлыка на рабочем столе или в папке ярлыков меню Пуск, а затем через контекстное меню закрепите ярлык на панели задач.
- В свойствах ярлыка в поле «Объект» после закрывающих кавычек поставьте пробел и вставьте следующую строку
--simulate-outdated-no-au="01 Jan 2199"
- Нажмите «Ок» для сохранения измененного ярлыка.
Готово, теперь при запуске браузера Google Chrome с указанного ярлыка уведомления об устаревшей версии или о том, что не удалось обновить браузер, появляться не будут.
Обычно этого способа достаточно, при условии, что вы самостоятельно отключали обновления Google Chrome с той или иной целью. Если это не так и задача — решить вопрос с обновлением и обновить Chrome, возможные решения описаны в последней части статьи.
Политики обновлений Chrome в реестре

Вторая возможность отключить уведомления о необходимости или невозможности обновления Google Chrome — задать соответствующие политики в реестре. Это можно сделать вручную, но проще будет создать reg-файл со следующим кодом:
Windows Registry Editor Version 5.00

[HKEY_LOCAL_MACHINE\SOFTWARE\Policies\Google\Update]
"AutoUpdateCheckPeriodMinutes"=dword:00000000
"Update{8A69D345-D564-463C-AFF1-A69D9E530F96}"=dword:00000000
"Update{4DC8B4CA-1BDA-483E-B5FA-D3C12E15B62D}"=dword:00000000
"UpdateDefault"=dword:00000000
После создания файла «запустите» его и согласитесь с добавлением данных в реестр. В итоге будут отключены обновления Chrome и проверка доступности обновлений, что обычно решает и проблему с уведомлениями «Версия Chrome устарела» или «Не удалось обновить Chrome».
При использовании этого способа дополнительно рекомендуется отключить задания Google Update в планировщике заданий: Win+R — taskschd.msc и последующее отключение заданий (например, с помощью контекстного меню) Google Update в разделе «Библиотека планировщика заданий».
Обновление или переустановка Chrome
Если задачи отключить обновления Chrome нет, при этом вы наблюдаете рассматриваемые в статье уведомления, причиной может быть:
- Устаревшая операционная система, например, Windows 7 или 8.1. Решений для этой ситуации, кроме обновления операционной системы я предложить не могу.
- Что-то, мешающее подключению к серверам Google для обновления: неправильные дата и время на компьютере, использование прокси и VPN, блокировка в файле hosts, вмешательство стороннего антивируса в работу сети (попробуйте отключить функции защиты сети), неправильное разрешение имен серверов DNS-сервером (попробуйте изменить DNS-сервер на 8.8.8.8 и 8.8.4.4), работа вредоносных программ.
Во втором случае правильнее всего будет разобраться в проблеме, но, если это не удалось, можно попробовать скачать оффлайн-установщик Chrome, запустить его и выполнить установку актуальной версии браузера.