
Время на прочтение9 мин
Количество просмотров114K
Несмотря на то, что кроссплатформенность стала фактически стандартным атрибутом практически всех современных языков и библиотек, создавать по-настоящему кроссплатформенный продукт, всё равно было непросто. Компилируемые языки и сопутствующие библиотеки требовали сложной установки и настройки среды сборки и библиотек, а интерпретируемые — обязывали иметь или деплоить в составе необходимую версию интерпретатора. Есть немало проектов, пытающихся сделать этот процесс чуть более простым, но зачастую единственным решением оставалось устанавливать отдельный сервер и компилировать нативно.
В Go кросс-платформенность вышла на тот уровень, когда впервые можно смело отказаться от compile farms, специально настроенных dev-сред, виртуальных машин для сборки или chroot/docker-dev решений. И это ещё один серьезный game-changer, подробнее о котором я и хочу рассказать и показать на примерах
Поехали.

Как известно, в Go сознательно отказались от динамической линковки — по ряду причин, основная из которых очень схожа с обычным объяснением дизайна почти любого аспекта Go — «преимущества [динамической линковки] намного меньше её недостатков и сложности, которая она привносит в архитектуру». Что ж, главной причиной появления dynamic linking было желание экономить ресурсы — прежде всего диcковое пространство и память — которые сейчас достаточно дешевы, не только на серверах, но и в embedded-устройствах (коптеры, к примеру, несут на борту уже по 1-2 Гб RAM!). Вобщем, перечислять плюсы и минусы отдельного способа линковки — это потянет на отдельный пост, так что пока просто принимаем, как есть — в Go на выходе всегда имеем статический бинарник.
На данный момент для актуальной версии Go 1.4.1 реализована поддержка следующих платформ:
- Linux 2.61 и выше — amd64, 386, arm
- MacOS X 10.6 и выше — amd64, 386
- Windows XP и выше — amd64, 386
- FreeBSD 8 и выше — amd64, 386, arm
- NetBSD — amd64, 386, arm
- OpenBSD — amd64, 386
- DragonFly BSD — amd64, 386
- Plan 9 — amd64, 386
- Google Native Client — amd64p32, 386
- Android — arm
1 — официально поддерживаются ядра 2.6.23 и выше, но в реальности всё работает и на более ранних ядрах ветки 2.6 — к примеру немало людей используют Go на RHEL5/CentOS5 с 2.6.18.
В Go 1.5 ожидается поддержка iOS.
Еще примечательно, что изначально поддержки Windows в Go не было — команда маленькая, и
пачкать руки
заниматься имплементацией кода для Windows было некому, но благодаря тому, что проект открыли для open-source разработки — порт для Windows был очень быстро написан сторонними людьми и интегрирован в официальную кодовую базу.
Хотя описанные далее процессы будут абсолютно одинаковы для всех платформ (за исключеним, разве что, Android и Native Client (NaCl), для которых нужны лишние телодвижения), далее в статье будет по-умолчанию считаться, что вы используете одну из трех самых популярных десктопных платформ — Linux, MacOS X или Windows. Кроме того, для большей простоты я буду подразумевать, что мы пишем и используем исключительно Go-код, без необходимости линковаться с С-библиотеками (и, тем самым, без необходимости использовать cgo/gcc). Есть еще отдельный кейс — когда нужно использовать ряд функций из стандартной библиотеки, завязанных на cgo, но об этом я напишу отдельной главой в конце.
Подготовка toolchain
Первый шаг, который необходимо выполнить — это собрать toolchain для нужной платформы.
Переходим в директорию с исходным кодом Go (она же $GOROOT/src, она же всегда есть у вас на машине) и пересобираем под нужную платформу, скажем Windows/amd64:
cd $(go env GOROOT)/src
sudo GOOS=windows GOARCH=amd64 CGO_ENABLED=0 ./make.bash --no-clean
Процесс занимает на Macbook Air 2012 около 26 секунд. Скрипт make.bash — это стандартный скрипт сборки Go, которым бы вы инсталлировали Go, если бы ставили из исходников. Он собирает, собственно, Go, и всю стандартную библиотеку, только в этот раз — для платформы windows/amd64.
Также, по упомянутой выше причине, мы отключили поддержку CGO.
Значения GOOS и GOARCH
Таблица значений GOOS (если кто знает, как на Хабре сделать таблица в 50% ширины — подскажите):
| OS | $GOOS |
|---|---|
| Linux | linux |
| MacOS X | darwin |
| Windows | windows |
| FreeBSD | freebsd |
| NetBSD | netbsd |
| OpenBSD | openbsd |
| DragonFly BSD | dragonfly |
| Plan 9 | plan9 |
| Native Client | nacl |
| Android | android |
И GOARCH:
| Architecture | $GOARCH |
|---|---|
| x386 | 386 |
| AMD64 | amd64 |
| AMD64 с 32-указателями | amd64p32 |
| ARM | arm |
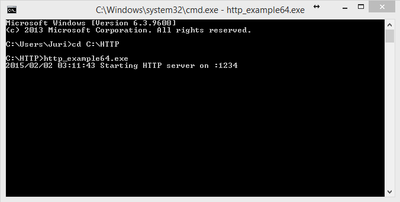
Пример 1. Веб-сервер, написанный и собранный в Linux для Windows
Напишем простенький веб-сервер, который в Go писать проще, чем в некоторых языках/библиотеках парсить командную строку.
package main

import (
	"log"
	"net/http"
)

func Handler(w http.ResponseWriter, r *http.Request) {
	w.Write([]byte("Hello, world\n"))
}

func main() {
	http.HandleFunc("/", Handler)

	log.Println("Starting HTTP server on :1234")
	log.Fatal(http.ListenAndServe(":1234", nil))
}
И соберем его для Windows 32- и 64-bit:
GOOS=windows GOARCH=386 go build -o http_example.exe
GOOS=windows GOARCH=amd64 go build -o http_example64.exe
Проверяем:
$ file http_example*.exe
http_example.exe:   PE32 executable for MS Windows (console) Intel 80386 32-bit
http_example64.exe: PE32+ executable for MS Windows (console) Mono/.Net assembly
Думаю, не нужно говорить, что оба бинарника готовы к копированию на целевую Windows-систему и будут работать.

Пример 2. Кросс-компиляция под ARM для телефона Nokia N9
Сразу скажу, что сейчас я с embedded-девайсами плотно не работаю, поэтому могу какие-то детали не знать — так что постараюсь не углубляться в эту тему, но в целом за ситуацией с Go на embedded слежу. Вообще говоря, Go не позиционировался как язык для embedded-платформ, что, впрочем, не помешало народу активно начать его использовать в этой области. Возможно, причина в том, что embedded-индустрия сделала скачок вперед, и теперь «встраиваемое» устройство уже не означает критически малое количество ресурсов, а возможно компромиссы не в пользу экономии памяти в Go оказались гораздо менее ощутимыми на практике, но факт есть факт — для Go уже создано масса проектов вроде Gobot (robotics-фреймворк для целой кучи платформ — от Arduino, Raspberry PI и Beaglebone Back до LeapMotion, Pebble и ArDrone) или EMBD (фреймворк для работы с hobby-бордами), а PayPal уже пару лет использует Go в своем beacon-девайсе для беспроводных чекинов и платежей.
Для примера возьмем Nokia N9 (или N950, кому повезло) — и соберем вышеприведенный пример для него:
GOOS=linux GOARCH=arm go build -o http_example_arm
scp http_example_arm developer@192.168.2.16:/home/user/
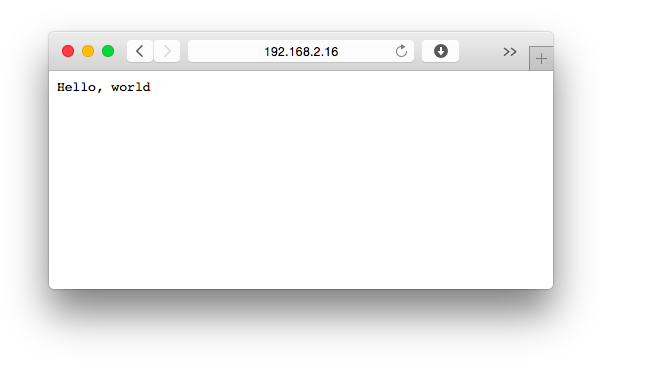
Вот так просто, да.
Для ARM-платформ, на самом деле, может понадобиться еще указывать флаг GOARM, но тут, если версия по-умолчанию не подходит, бинарник на целевой платформе выдаст понятное сообщение, вроде такого:
runtime: this CPU has no floating point hardware, so it cannot
run this GOARM=7 binary. Recompile using GOARM=5.
Автоматизируем процесс
Казалось бы, что может быть проще указания одной переменной перед go build. Но есть ситуации, когда код нужно собирать и деплоить на разные платформы по 100 раз в день. Для таких задач есть несколько проектов, для автоматизации процессов подготовки toolchain-ов и, непосредственно, сборки кода под нужную платформу.
Gox
Ссылка: github.com/mitchellh/gox
Инсталляция и подготовка сразу всех возможных toolchain-ов:
go get github.com/mitchellh/gox
gox -build-toolchain
...
Теперь, вместо «go build», пишем «gox»:
$ gox
Number of parallel builds: 4

-->      darwin/386: github.com/mitchellh/gox
-->    darwin/amd64: github.com/mitchellh/gox
-->       linux/386: github.com/mitchellh/gox
-->     linux/amd64: github.com/mitchellh/gox
-->       linux/arm: github.com/mitchellh/gox
-->     freebsd/386: github.com/mitchellh/gox
-->   freebsd/amd64: github.com/mitchellh/gox
-->     openbsd/386: github.com/mitchellh/gox
-->   openbsd/amd64: github.com/mitchellh/gox
-->     windows/386: github.com/mitchellh/gox
-->   windows/amd64: github.com/mitchellh/gox
-->     freebsd/arm: github.com/mitchellh/gox
-->      netbsd/386: github.com/mitchellh/gox
-->    netbsd/amd64: github.com/mitchellh/gox
-->      netbsd/arm: github.com/mitchellh/gox
-->       plan9/386: github.com/mitchellh/gox
Можно указывать конкретный пакет или конкретную платформу:
gox -os="linux"
gox -osarch="linux/amd64"
gox github.com/divan/gorilla-xmlrpc/xml
Остальные аргументы командной строки идентичны go build. Достаточно интуитивно.
GoCX
GoCX — это один из самых известных врапперов вокруг фич кросс-компиляции, но с упором на пакаджинг (умеет делать .deb даже) и различные плюшки для автоматизированных сборок. Сам не пользовал, поэтому, кому интересно, смотрите сайт и документацию.
github.com/laher/goxc
Разбираемся с CGO
Если кто-то смотрел видео с конференции GopherCon 2014, которая проходила прошлой весной в Денвере, то, возможно, помнит выступление Alan Shreve «Build Your Developer Tools in Go» — и одну из вещей, которую он говорит достаточно категорично: «не используйте кросс-компиляцию, компилируйте нативно». Дальше идет объяснение — причина в Cgo. Если вам не нужно использовать cgo — все окей. И на самом деле, очень малая часть очень специфичного кода в Go нуждается в сторонних С-библиотеках. В чем же проблема?
Проблема в том, что некоторые функции стандартной библиотеки зависят от cgo. Тоесть, если мы собираем Go с CGO_ENABLED=0, они просто не будут доступны и на этапе компиляции мы получим ошибку. Несмотря на то, что тут есть очень удобный и красивый workaround, давайте разберемся, что же именно в стандартной библиотеке зависит от cgo.
К счастью, сделать это просто:
# cd $(go env GOROOT)/src/
# grep  -re "^// +build.*[^\!]cgo" *
crypto/x509/root_cgo_darwin.go:// +build cgo
net/cgo_android.go:// +build cgo,!netgo
net/cgo_linux.go:// +build !android,cgo,!netgo
net/cgo_netbsd.go:// +build cgo,!netgo
net/cgo_openbsd.go:// +build cgo,!netgo
net/cgo_unix_test.go:// +build cgo,!netgo
os/user/lookup_unix.go:// +build cgo
runtime/crash_cgo_test.go:// +build cgo
Вкратце пройдемся по этим файлам:
- crypto/x509/root_cgo_darwin.go — имплементирует одну функцию для получения корневых X.509 сертификатов в MacOS X. Если вы не используете явно эту фичу — ничего страшного, без cgo у вас все будет работать.
- net/cgo_android/linux/netbsd/openbsd/cgo_unix_test.go — код необходимый для использования нативного DNS-резолвера в разных unix-ах. Чуть ниже подробности.
- os/user/lookup_unix.go — функции из пакета os/user — для получения информации о текущем юзере (uid, gid, username). Используется getpwuid_r() для чтения passwd-записей
- runtime/crash_cgo_test.go — файл с тестами для хендлинга крешей, ничего релевантного
Теперь подробнее про DNS-resolver.
Каждый файл из того списка (который скомпилируется только для своей платформы благодаря тегам // +build) содержит имплементацию единственной функции cgoAddrInfoFlags(), которая, в свою очередь, используется в cgoLookupIP(), которая, используется в dnsclient_unix.go, в котором мы находим функцию goLookupIP(), которая служит fallback-вариантом при отсутствии cgo-enabled кода, и тут же находим объяснение:
// goLookupIP is the native Go implementation of LookupIP.
// Used only if cgoLookupIP refuses to handle the request
// (that is, only if cgoLookupIP is the stub in cgo_stub.go).
// Normally we let cgo use the C library resolver instead of
// depending on our lookup code, so that Go and C get the same
// answers.
goLookupIP фактически резолвит только по Hosts-файлу и по DNS-протоколу, что для большинства систем — ок. Но могут быть проблемы, если в системе будут использоваться нестандартные методы резолвинга имён. Полагаю, что в 99% случаев, hosts и dns будут более, чем достаточно.
В сухом остатке имеем — если ваш код не использует С/С++-библиотеки через Cgo, и не использует следующие две вещи:
- проверку x.509 сертификатов, которая должна работать на MacOS X
- гарантированно получать системную информацию о текущем юзере
то на все заморочки с Cgo можно забить.
Первая часть (с X.509) на самом деле не такая уж редкая. Если я правильно понимаю — этот код нужен, если ваша программа использует стандартный net/http.StartAndListenTLS() — и вы используете реальные сертификаты, которые реально нужно проверять.
Поэтому вкратце о простом workaround вокруг этой темы — называется он gonative, и делает одну простую вещь — скачивает с официального сайта бинарные версии golang нужной версии для нужной платформы, в которой уже есть скомпилированные бинарники всех стандартных пакетов и, фактически, завершает процесс «собрать toolchain с cgo-кодом».
Всё что нужно сделать, это установить её (go get github.com/inconshreveable/gonative) и выполнить одну простую команду:
gonative
И дальше использовать стандартные процедуры кросскомпиляции, как и раньше, ручками или через gox/gocx.
Подробнее о gonative тут: inconshreveable.com/04-30-2014/cross-compiling-golang-programs-with-native-libraries
Практическое применение
Теперь о главном — применении на практике. Я использовал в продакшене пока только три схемы — «сборка на darwin/amd64 -> деплой на linux/386», «linux/amd64 -> linux/386» и «linux/amd64 -> windows/amd64». Это продукты, которые уже больше года полноценно работают. Третий случай (деплой на windows) тогда меня вообще застал врасплох — был сервер, успешно бегущий на Linux, и тут вдруг резко понадобилось его запускать на Windows. Причем «вот срочно надо». Вспоминая бессонные ночи опыта с кросс- — да что там кросс, просто с компиляцией Qt для деплоя на Windows — 60-секундный процесс «гуглим как это делается → сборка toolchain → перекомпиляция проекта → деплой на windows» — стал просто шоком, я тогда даже не поверил глазам.
Но тут возникает следующий момент — раз кросс-компиляция и деплой становятся такими простыми и быстрыми, появляется стимул все зависимости от файлов — будь-то конфиги, сертификаты или что угодно еще — встраивать в бинарник тоже. Впрочем, это достаточно простая задача, даже для сторонних библиотек, благодаря эффективному использованию io.Reader интерфейса и пакету go-bindata, но это уже тема для отдельной статьи.
Надеюсь, ничего из главного не упустил.
Но в целом это на самом деле очень существенная разница со всем предыдущим опытом кросс-сборки. Если честно, я до сих пор не привык к этой перемене. Больше не нужны виртуалки с настроенной dev-средой, не нужны докер-имиджи для сборки — да вообще dev-environment отпадает как таковой. Это слишком резкий game changer, чтобы так быстро привыкнуть.
Ссылки
dave.cheney.net/2012/09/08/an-introduction-to-cross-compilation-with-go
blog.hashbangbash.com/2014/04/linking-golang-statically
www.limitlessfx.com/cross-compile-golang-app-for-windows-from-linux.html
-
Documentation
-
Download and install
-
Installing Go from source
This topic describes how to build and run Go from source code.
To install with an installer, see Download and install.
Introduction
Go is an open source project, distributed under a
BSD-style license.
This document explains how to check out the sources,
build them on your own machine, and run them.
Most users don’t need to do this, and will instead install
from precompiled binary packages as described in
Download and install,
a much simpler process.
If you want to help develop what goes into those precompiled
packages, though, read on.
There are two official Go compiler toolchains.
This document focuses on the gc Go
compiler and tools.
For information on how to work on gccgo, a more traditional
compiler using the GCC back end, see
Setting up and using gccgo.
The Go compilers support the following instruction sets:
-
amd64,386 -
The
x86instruction set, 64- and 32-bit. -
arm64,arm -
The
ARMinstruction set, 64-bit (AArch64) and 32-bit. -
loong64 - The 64-bit LoongArch instruction set.
-
mips64,mips64le,mips,mipsle -
The
MIPSinstruction set, big- and little-endian, 64- and 32-bit. -
ppc64,ppc64le - The 64-bit PowerPC instruction set, big- and little-endian.
-
riscv64 - The 64-bit RISC-V instruction set.
-
s390x - The IBM z/Architecture.
-
wasm - WebAssembly.
The compilers can target the AIX, Android, DragonFly BSD, FreeBSD,
Illumos, Linux, macOS/iOS (Darwin), NetBSD, OpenBSD, Plan 9, Solaris,
and Windows operating systems (although not all operating systems
support all architectures).
A list of ports which are considered «first class» is available at the
first class ports
wiki page.
The full set of supported combinations is listed in the
discussion of environment variables below.
See the Go Wiki MinimumRequirements page for the
overall system requirements.
Install Go compiler binaries for bootstrap
The Go toolchain is written in Go. To build it, you need a Go compiler installed.
The scripts that do the initial build of the tools look for a «go» command
in $PATH, so as long as you have Go installed in your
system and configured in your $PATH, you are ready to build Go
from source.
Or if you prefer you can set $GOROOT_BOOTSTRAP to the
root of a Go installation to use to build the new Go toolchain;
$GOROOT_BOOTSTRAP/bin/go should be the go command to use.
The minimum version of Go required depends on the target version of Go:
- Go <= 1.4: a C toolchain.
- 1.5 <= Go <= 1.19: a Go 1.4 compiler.
- 1.20 <= Go <= 1.21: a Go 1.17 compiler.
- 1.22 <= Go <= 1.23: a Go 1.20 compiler.
- Going forward, Go version 1.N will require a Go 1.M compiler,
where M is N-2 rounded down to an even number. Example: Go 1.24 and 1.25 require Go 1.22.
There are four possible ways to obtain a bootstrap toolchain:
- Download a recent binary release of Go.
- Cross-compile a toolchain using a system with a working Go installation.
- Use gccgo.
- Compile a toolchain from Go 1.4, the last Go release with a compiler written in C.
These approaches are detailed below.
Bootstrap toolchain from binary release
To use a binary release as a bootstrap toolchain, see
the downloads page or use any other
packaged Go distribution meeting the minimum version requirements.
Bootstrap toolchain from cross-compiled source
To cross-compile a bootstrap toolchain from source, which is
necessary on systems Go 1.4 did not target (for
example, linux/ppc64le), install Go on a different system
and run bootstrap.bash.
When run as (for example)
$ GOOS=linux GOARCH=ppc64 ./bootstrap.bash
bootstrap.bash cross-compiles a toolchain for that GOOS/GOARCH
combination, leaving the resulting tree in ../../go-${GOOS}-${GOARCH}-bootstrap.
That tree can be copied to a machine of the given target type
and used as GOROOT_BOOTSTRAP to bootstrap a local build.
Bootstrap toolchain using gccgo
To use gccgo as the bootstrap toolchain, you need to arrange
for $GOROOT_BOOTSTRAP/bin/go to be the go tool that comes
as part of gccgo 5. For example on Ubuntu Vivid:
$ sudo apt-get install gccgo-5
$ sudo update-alternatives --set go /usr/bin/go-5
$ GOROOT_BOOTSTRAP=/usr ./make.bash
Bootstrap toolchain from C source code
To build a bootstrap toolchain from C source code, use
either the git branch release-branch.go1.4 or
go1.4-bootstrap-20171003.tar.gz,
which contains the Go 1.4 source code plus accumulated fixes
to keep the tools running on newer operating systems.
(Go 1.4 was the last distribution in which the toolchain was written in C.)
After unpacking the Go 1.4 source, cd to
the src subdirectory, set CGO_ENABLED=0 in
the environment, and run make.bash (or,
on Windows, make.bat).
Once the Go 1.4 source has been unpacked into your GOROOT_BOOTSTRAP directory,
you must keep this git clone instance checked out to branch
release-branch.go1.4. Specifically, do not attempt to reuse
this git clone in the later step named «Fetch the repository.» The go1.4
bootstrap toolchain must be able to properly traverse the go1.4 sources
that it assumes are present under this repository root.
Note that Go 1.4 does not run on all systems that later versions of Go do.
In particular, Go 1.4 does not support current versions of macOS.
On such systems, the bootstrap toolchain must be obtained using one of the other methods.
Install Git, if needed
To perform the next step you must have Git installed. (Check that you
have a git command before proceeding.)
If you do not have a working Git installation,
follow the instructions on the
Git downloads page.
(Optional) Install a C compiler
To build a Go installation
with cgo support, which permits Go
programs to import C libraries, a C compiler such as gcc
or clang must be installed first. Do this using whatever
installation method is standard on the system.
To build without cgo, set the environment variable
CGO_ENABLED=0 before running all.bash or
make.bash.
Fetch the repository
Change to the directory where you intend to install Go, and make sure
the goroot directory does not exist. Then clone the repository
and check out the latest release tag or release branch (go1.22.0, or release-branch.go1.22,
for example):
$ git clone https://go.googlesource.com/go goroot
$ cd goroot
$ git checkout <tag>
Where <tag> is the version string of the release.
Go will be installed in the directory where it is checked out. For example,
if Go is checked out in $HOME/goroot, executables will be installed
in $HOME/goroot/bin. The directory may have any name, but note
that if Go is checked out in $HOME/go, it will conflict with
the default location of $GOPATH.
See GOPATH below.
Reminder: If you opted to also compile the bootstrap binaries from source (in an
earlier section), you still need to git clone again at this point
(to checkout the latest <tag>), because you must keep your
go1.4 repository distinct.
(Optional) Switch to the master branch
If you intend to modify the go source code, and
contribute your changes
to the project, then move your repository
off the release tag, and onto the master (development) branch.
Otherwise, skip this step.
$ git checkout master
Install Go
To build the Go distribution, run
$ cd src
$ ./all.bash
(To build under Windows use all.bat.)
If all goes well, it will finish by printing output like:
ALL TESTS PASSED

---
Installed Go for linux/amd64 in /home/you/go.
Installed commands in /home/you/go/bin.
*** You need to add /home/you/go/bin to your $PATH. ***
where the details on the last few lines reflect the operating system,
architecture, and root directory used during the install.
For more information about ways to control the build, see the discussion of
environment variables below.
all.bash (or all.bat) runs important tests for Go,
which can take more time than simply building Go. If you do not want to run
the test suite use make.bash (or make.bat)
instead.
Testing your installation
Check that Go is installed correctly by building a simple program.
Create a file named hello.go and put the following program in it:
package main

import "fmt"

func main() {
	fmt.Printf("hello, world\n")
}
Then run it with the go tool:
$ go run hello.go
hello, world
If you see the «hello, world» message then Go is installed correctly.
Set up your work environment
You’re almost done.
You just need to do a little more setup.
How to Write Go Code
Learn how to set up and use the Go tools
The How to Write Go Code document
provides essential setup instructions for using the Go tools.
The source code for several Go tools (including gopls)
is kept in the golang.org/x/tools repository.
To install one of the tools (gopls in this case):
$ go install golang.org/x/tools/gopls@latest
The usual community resources listed on the help page have
active developers that can help you with problems with your installation or your
development work.
For those who wish to keep up to date,
there is another mailing list, golang-checkins,
that receives a message summarizing each checkin to the Go repository.
Bugs can be reported using the Go issue tracker.
Keeping up with releases
New releases are announced on the
golang-announce
mailing list.
Each announcement mentions the latest release tag, for instance,
go1.9.
To update an existing tree to the latest release, you can run:
$ cd go/src
$ git fetch
$ git checkout <tag>
$ ./all.bash
Where <tag> is the version string of the release.
Optional environment variables
The Go compilation environment can be customized by environment variables.
None is required by the build, but you may wish to set some
to override the defaults.
$GOROOTThe root of the Go tree, often
$HOME/go1.X.
Its value is built into the tree when it is compiled, and
defaults to the parent of the directory whereall.bashwas run.
There is no need to set this unless you want to switch between multiple
local copies of the repository.$GOROOT_FINALThe value assumed by installed binaries and scripts when
$GOROOTis not set explicitly.
It defaults to the value of$GOROOT.
If you want to build the Go tree in one location
but move it elsewhere after the build, set
$GOROOT_FINALto the eventual location.$GOPATHThe directory where Go projects outside the Go distribution are typically
checked out. For example,golang.org/x/toolsmight be checked out
to$GOPATH/src/golang.org/x/tools. Executables outside the
Go distribution are installed in$GOPATH/bin(or
$GOBIN, if set). Modules are downloaded and cached in
$GOPATH/pkg/mod.The default location of
$GOPATHis$HOME/go,
and it’s not usually necessary to setGOPATHexplicitly. However,
if you have checked out the Go distribution to$HOME/go,
you must setGOPATHto another location to avoid conflicts.$GOBINThe directory where executables outside the Go distribution are installed
using the go command. For example,
go install golang.org/x/tools/gopls@latestdownloads, builds,
and installs$GOBIN/gopls. By default,$GOBINis
$GOPATH/bin(or$HOME/go/binifGOPATH
is not set). After installing, you will want to add this directory to
your$PATHso you can use installed tools.Note that the Go distribution’s executables are installed in
$GOROOT/bin(for executables invoked by people) or
$GOTOOLDIR(for executables invoked by the go command;
defaults to$GOROOT/pkg/$GOOS_$GOARCH) instead of
$GOBIN.$GOOSand$GOARCHThe name of the target operating system and compilation architecture.
These default to the values of$GOHOSTOSand
$GOHOSTARCHrespectively (described below).Choices for
$GOOSare
android,darwin,dragonfly,
freebsd,illumos,ios,js,
linux,netbsd,openbsd,
plan9,solaris,wasip1,
andwindows.Choices for
$GOARCHare
amd64(64-bit x86, the most mature port),
386(32-bit x86),arm(32-bit ARM),arm64(64-bit ARM),
ppc64le(PowerPC 64-bit, little-endian),ppc64(PowerPC 64-bit, big-endian),
mips64le(MIPS 64-bit, little-endian),mips64(MIPS 64-bit, big-endian),
mipsle(MIPS 32-bit, little-endian),mips(MIPS 32-bit, big-endian),
s390x(IBM System z 64-bit, big-endian), and
wasm(WebAssembly 32-bit).The valid combinations of
$GOOSand$GOARCHare:$GOOS$GOARCHaixppc64android386androidamd64androidarmandroidarm64darwinamd64darwinarm64dragonflyamd64freebsd386freebsdamd64freebsdarmillumosamd64iosarm64jswasmlinux386linuxamd64linuxarmlinuxarm64linuxloong64linuxmipslinuxmipslelinuxmips64linuxmips64lelinuxppc64linuxppc64lelinuxriscv64linuxs390xnetbsd386netbsdamd64netbsdarmopenbsd386openbsdamd64openbsdarmopenbsdarm64plan9386plan9amd64plan9armsolarisamd64wasip1wasmwindows386windowsamd64windowsarmwindowsarm64$GOHOSTOSand$GOHOSTARCHThe name of the host operating system and compilation architecture.
These default to the local system’s operating system and
architecture.Valid choices are the same as for
$GOOSand
$GOARCH, listed above.
The specified values must be compatible with the local system.
For example, you should not set$GOHOSTARCHto
armon an x86 system.$GO386(for386only, defaults tosse2)This variable controls how gc implements floating point computations.
GO386=softfloat: use software floating point operations; should support all x86 chips (Pentium MMX or later).GO386=sse2: use SSE2 for floating point operations; has better performance but only available on Pentium 4/Opteron/Athlon 64 or later.
$GOARM(forarmonly; default is auto-detected if building
on the target processor, 7 if not)This sets the ARM floating point co-processor architecture version the run-time
should target. If you are compiling on the target system, its value will be auto-detected.GOARM=5: use software floating point; when CPU doesn’t have VFP co-processorGOARM=6: use VFPv1 only; default if cross compiling; usually ARM11 or better cores (VFPv2 or better is also supported)GOARM=7: use VFPv3; usually Cortex-A cores
If in doubt, leave this variable unset, and adjust it if required
when you first run the Go executable.
The GoARM page
on the Go community wiki
contains further details regarding Go’s ARM support.$GOAMD64(foramd64only;
default isv1)This sets the microarchitecture level for which to compile.
Valid values arev1(default),v2,v3,
v4.
See the Go wiki
MinimumRequirements page for more information.$GOMIPS(formipsandmipsleonly)
$GOMIPS64(formips64andmips64leonly)These variables set whether to use floating point instructions. Set to «
hardfloat» to use floating point instructions; this is the default. Set to «softfloat» to use soft floating point.$GOPPC64(forppc64andppc64leonly)This variable sets the processor level (i.e. Instruction Set Architecture version)
for which the compiler will target. The default ispower8.GOPPC64=power8: generate ISA v2.07 instructionsGOPPC64=power9: generate ISA v3.00 instructions
$GORISCV64(forriscv64only)This variable sets the RISC-V user-mode application profile for which to compile. The default is
rva20u64.GORISCV64=rva20u64: only use RISC-V extensions that are mandatory in the RVA20U64 profileGORISCV64=rva22u64: only use RISC-V extensions that are mandatory in the RVA22U64 profile
$GOWASM(forwasmonly)This variable is a comma separated list of experimental WebAssembly features that the compiled WebAssembly binary is allowed to use.
The default is to use no experimental features.GOWASM=satconv: generate saturating (non-trapping) float-to-int conversionsGOWASM=signext: generate sign-extension operators
Note that $GOARCH and $GOOS identify the
target environment, not the environment you are running on.
In effect, you are always cross-compiling.
By architecture, we mean the kind of binaries
that the target environment can run:
an x86-64 system running a 32-bit-only operating system
must set GOARCH to 386,
not amd64.
If you choose to override the defaults,
set these variables in your shell profile ($HOME/.bashrc,
$HOME/.profile, or equivalent). The settings might look
something like this:
export GOARCH=amd64
export GOOS=linux
although, to reiterate, none of these variables needs to be set to build,
install, and develop the Go tree.
Updated on February 7, 2024
Go programs can be easily cross-compiled for various operating systems like
Windows, macOS, and Linux using GOARCH and GOOS environment variables, which
denote the architecture and target OS respectively.
By default, they’re set to your system’s architecture (GOHOSTARCH) and OS
(GOHOSTOS):
go env. . .
GOARCH="amd64"
GOHOSTARCH="amd64"
GOHOSTOS="linux"
GOOS="linux"
. . .Cross-compile Go for Windows
You can cross-compile Go for 64-bit Windows machines with:
GOOS=windows GOARCH=amd64 go build -o bin/app-amd64.exe app.goFor 32-bit, change GOARCH to 386:
GOOS=windows GOARCH=386 go build -o bin/app-386.exe app.goCross-compile Go for macOS
Use GOOS=darwin for macOS, applicable for both 64-bit and 32-bit:
GOOS=darwin GOARCH=amd64 go build -o bin/app-amd64-darwin app.go # 64-bitGOOS=darwin GOARCH=386 go build -o bin/app-386-darwin app.go # 32-bitFor Arm-based Macs (Apple Silicon), supply GOARCH=arm64:
GOOS=darwin GOARCH=arm64 go build -o bin/app-arm64-darwin app.go # Apple SiliconCross-compile Go for Linux
To build your Go programs for Linux, specify GOOS=linux:
GOOS=linux GOARCH=amd64 go build -o bin/app-amd64-linux app.go # 64-bitGOOS=linux GOARCH=386 go build -o bin/app-386-linux app.go # 32-bitCross-compiling for other platforms
Go supports many other OS and CPU combinations. Use the command below to view
them all:
go tool dist listThis command lists combinations in GOOS/GOARCH format, like this:
aix/ppc64
android/386
android/amd64
android/arm
android/arm64
darwin/amd64
darwin/arm64
dragonfly/amd64
freebsd/386
freebsd/amd64
freebsd/arm
freebsd/arm64
freebsd/riscv64
illumos/amd64
ios/amd64
ios/arm64
js/wasm
linux/386
linux/amd64
linux/arm
linux/arm64
linux/loong64
linux/mips
linux/mips64
linux/mips64le
linux/mipsle
linux/ppc64
linux/ppc64le
linux/riscv64
linux/s390x
netbsd/386
netbsd/amd64
netbsd/arm
netbsd/arm64
openbsd/386
openbsd/amd64
openbsd/arm
openbsd/arm64
plan9/386
plan9/amd64
plan9/arm
solaris/amd64
wasip1/wasm
windows/386
windows/amd64
windows/arm
windows/arm64
You can then choose the relevant values for the platform you’re interested in
and cross-compile as before:
GOOS=android GOARCH=arm64 go build -o bin/app-arm64-android app.go # AndroidThanks for reading, and happy coding!
- #golang
One of Golang’s strengths is that it supports cross-compiling to any common Operating System and CPU architecture out of the box. However, that’s only true for projects written in pure Go. Normally that’s not a problem, but sometimes we depend on 3rd-party C libraries… and that’s when things tend to get complicated.
In this post, I will explain how you can cross-compile your cgo project for multiple operating systems and architectures in a clear and structured manner.
Some Background
Over the last few years, I’ve been writing software mainly for remote controlling our Amateur Radio station over the Internet. Most of these programs are written in Go and published on my Github profile under permissive Open Source licenses. The most prominent program is remoteAudio, a low latency, multi-user audio streaming application.
While one can achieve a lot in native Go, sometimes there is just no way around using C libraries. One could re-implement those libraries in Go, but often it’s just not feasible. In the case of remoteAudio, I’m using for example the OPUS audio codec and Portaudio for handling cross-platform Audio APIs. Both of them are written in C.
Assumptions
I personally like Debian flavored Linux systems. That’s what this article has been written for. However, it should be also valid for all other Linux distros. In most cases, you just have to replace the apt-get package manager commands with the ones from your distro.
Two important terms have to be defined:
| Term | Meaning |
|---|---|
| Host System | This is the system on which the compiler and the tools are run. |
| Target System | This is the system for which we generate the programs/libraries. |
In my case, the Host System is Linux/amd64.
Get a Cross Compiler
You could build the (GCC based) cross compiler yourself,
but fortunately, the popular Linux distributions provide them pre-compiled with all dependencies through their respective package managers.
To get started you need at least the cross-compiler and the platform-specific standard library (libc). The corresponding packages are:
| Operating System | Architecture | Needed package(s) |
|---|---|---|
| Linux | armhf | gcc-arm-linux-gnueabihf |
| libc6-dev-armhf-cross | ||
| Linux | arm64 | gcc-aarch64-linux-gnu |
| libc6-dev-arm64-cross | ||
| Linux | i386 | gcc-multilib |
| libc6-dev-i386 | ||
| linux-libc-dev:i386 | ||
| Windows | amd64 | gcc-mingw-w64-x86-64 |
| Windows | i386 | gcc-mingw-w64-i686 |
If your cgo program only uses the standard C library this would be all you need. However, we often depend on additional libraries. For example, remoteAudio depends also on libopus and libportaudio. Since our target architecture (e.g. arm64) differs from our host’s architecture (amd64), we cannot simply install the needed libraries with apt-get. This would just install the amd64 versions of those libraries.
Add support for target architectures
Debian-based distributions come fortunately with Multiarch support. This allows us to install library packages for multiple architectures on the same machine. Dependencies will be automatically correctly resolved.
To my knowledge, Debian supports at least the following architectures:
amd64, i386, armel, armhf, arm64, mips, powerpc and ppc64el.
With the help of dpkg, the Debian Package Manager we can add additional architectures (e.g. arm64) to our host system:
$ dpkg --add-architecture arm64
After updating the packages sources with apt-get update we can install now pre-compiled library packages for the target system. These packages are distinguished by the :<architecture> suffix. So installing the opus and portaudio libraries (and header files) for arm64 looks like this:
$ apt-get update
$ apt-get install -y libopus-dev:arm64 \
                    libopus0:arm64 \
                    libportaudio19-dev:arm64 \
                    libportaudio2:arm64
The Debian package manager will store the installed files on our host system in folders named after the respective architecture. For the case above, we can find the arm64 libraries in /usr/lib/aarch64-linux-gnu/ and the corresponding header files in /usr/include/aarch64-linux-gnu.
Preparing the environment
Before we can cross-compile our (c)go program, we have to set a few environment variables. We could all set them inline when calling the go compiler, but for the sake of clarity, we will set and discuss the variables one by one.
export GOOS=linux
export GOARCH=arm64
export CGO_ENABLED=1
export CC=aarch64-linux-gnu-gcc
export PKG_CONFIG_PATH=/usr/lib/aarch64-linux-gnu/pkgconfig
With GOOS and GOARCH, we tell the go compiler the operating system and architecture of our target system. Since our program contains C code, we have to explicitly enable cgo by setting CGO_ENABLED (cgo is disabled by default for cross-compiling). Instead of using the host’s default C compiler (GCC), we want to use the previously installed cross compiler for arm64. This is accomplished by setting the CC variable to the C compiler of choice. Finally, we have to set the PKG_CONFIG_PATH so that pkg-config uses the pkg-config files for our target architecture. Just in case you wonder, the pkg-config files are installed automatically with the corresponding package library.
Compile
Once all the preparations have been done, it’s just a matter of calling
In case you don’t use pkg-config and haven’t specified LDFLAGS with a cgo directive in your source code, you can specify the locations of the libraries and header files with the -ldflags flag:
$ go build -ldflags="-Ipath/to/headerfile -Lpath/to/lib"
Containerize it
While we could certainly install everything required for cross-compiling on our host system,
I prefer to keep my host system as clean as possible. Over the years, Docker has become one of my indispensable tools. It’s the perfect tool for our cross-compilation chains.
For remoteAudio I created the repository remoteAudio-xcompile which contains Dockerfiles for each combination of os/architecture I support. These containers can be build either locally or downloaded from the Docker Hub registry.
Below you can find the Dockerfile with remoteAudio’s arm64 cross-compilation chain.
FROM golang:1.13-buster
LABEL os=linux
LABEL arch=arm64

ENV GOOS=linux
ENV GOARCH=arm64
ENV CGO_ENABLED=1
ENV CC=aarch64-linux-gnu-gcc
ENV PATH="/go/bin/${GOOS}_${GOARCH}:${PATH}"
ENV PKG_CONFIG_PATH=/usr/lib/aarch64-linux-gnu/pkgconfig

# install build & runtime dependencies
RUN dpkg --add-architecture arm64 \
    && apt update \
    && apt install -y --no-install-recommends \
        protobuf-compiler \
        upx \
        gcc-aarch64-linux-gnu \
        libc6-dev-arm64-cross \
        pkg-config \
        libsamplerate0:arm64 \
        libsamplerate0-dev:arm64 \
        libopusfile0:arm64 \
        libopusfile-dev:arm64 \
        libopus0:arm64 \
        libopus-dev:arm64 \
        libportaudio2:arm64 \
        portaudio19-dev:arm64 \
    && rm -rf /var/lib/apt/lists/*

# install build dependencies (code generators)
RUN GOARCH=amd64 go get github.com/gogo/protobuf/protoc-gen-gofast \
    && GOARCH=amd64 go get github.com/GeertJohan/go.rice/rice \
    && GOARCH=amd64 go get github.com/micro/protoc-gen-micro
To compile the program for arm64 you just need to call from the source directory:
$ docker run --rm -v "$PWD":/usr/src/myapp -w /usr/src/myapp dh1tw/remoteaudio-xcompile:linux-arm64 /bin/sh -c 'go build'
With the -v flag we mount the current directory of our host ($PWD) into the container under the path /usr/src/myapp. We select the same directory as our working directory with the -w. After generating our binary we automatically delete the container with the --rm flag.
After the successful compilation, we find the binary in the current directory of our host system and we can confirm that it has been built for arm64 (aarch64).
$ file ./remoteAudio
./remoteAudio: ELF 64-bit LSB executable, ARM aarch64, version 1 (SYSV), statically linked, no section header
Microsoft Windows
Cross-compiling cgo applications from Linux host systems for Microsoft Windows is a bit more complicated and requires a few extra steps. MinGW (Minimalist GNU for Windows) provides a development environment for native Microsoft Windows applications. MinGW is available on Linux and Windows. MinGW works out of the box if no 3rd-party C-Runtime libraries (DLLs) are involved… and that’s unfortunately again a problem since remoteAudio depends on 3rd-party libraries like opus and portaudio. How cool would it be if we could also install our dependencies with a package manager like Debian’s apt-get ?
MSYS2 & Pacman to the rescue!
As it turns out, some smart folks have solved this problem and created MSYS2 which is a software distro and building platform for Windows. MSYS2 is built around the MinGW-w64 toolchain and comes with a ported version of Arch Linux’ package manager Pacman. MSYS2 provides ready-to-go installers for Windows, but installing MSYS2 on Linux is a bit more work.
Fortunately, Gary Kramlich who is one of Pidgin’s core developers, has done all the hard work for us and created the Debian based msys2-cross Container. Using this container as the base image, I created containers to compile remoteAudio for windows/amd64 and windows/i386 directly from Linux. You can find the Dockerfiles in the respective folders of the remoteAudio-xcompile repository.
This is the Dockerfile for windows/amd64:
FROM rwgrim/msys2-cross
LABEL os=windows
LABEL arch=amd64

ENV GOVERSION="1.13.4"
ENV GOOS=windows
ENV GOARCH=amd64
ENV GOPATH=/go
ENV CGO_ENABLED=1
ENV CC=x86_64-w64-mingw32-gcc
ENV CXX=x86_64-w64-mingw32-g++
ENV PATH="/go/bin:/usr/local/go/bin:${PATH}"
ENV PKG_CONFIG_PATH=/windows/mingw64/lib/pkgconfig
ENV MSYS2_ARCH=x86_64

# install build dependencies
RUN set -ex \
    && apt-get update \
    && apt-get install -y --no-install-recommends \
        build-essential \
        gcc-mingw-w64-x86-64 \
        git \
        protobuf-compiler \
        upx \
        pkg-config \
    && rm -rf /var/lib/apt/lists/*

# install golang
RUN set -ex \
    && wget -P /tmp -q https://dl.google.com/go/go$GOVERSION.linux-amd64.tar.gz \
    && tar -C /usr/local -xzf /tmp/go$GOVERSION.linux-amd64.tar.gz

# install build dependencies
RUN set -ex \
    && pacman --noconfirm --needed -Sy mingw-w64-$MSYS2_ARCH-libsamplerate \
    && pacman --noconfirm --needed -Sy mingw-w64-$MSYS2_ARCH-portaudio \
    && pacman --noconfirm --needed -Sy mingw-w64-$MSYS2_ARCH-opus \
    && pacman --noconfirm --needed -Sy mingw-w64-$MSYS2_ARCH-opusfile \
    && pacman --noconfirm -Sc

# install runtime dependencies (DLLs)
RUN set -ex \
    && pacman-cross --noconfirm --needed -Sy mingw-w64-$MSYS2_ARCH-libsamplerate \
    && pacman-cross --noconfirm --needed -Sy mingw-w64-$MSYS2_ARCH-portaudio \
    && pacman-cross --noconfirm --needed -Sy mingw-w64-$MSYS2_ARCH-opus \
    && pacman-cross --noconfirm --needed -Sy mingw-w64-$MSYS2_ARCH-opusfile \
    && pacman-cross --noconfirm -Sc

# install build dependencies (code generators)
RUN set -ex \
    && GOOS=linux GOOARCH=amd64 go get github.com/gogo/protobuf/protoc-gen-gofast \
    && GOOS=linux GOOARCH=amd64 go get github.com/GeertJohan/go.rice/rice \
    && GOOS=linux GOOARCH=amd64 go get github.com/micro/protoc-gen-micro

COPY ./scripts /scripts
Here we are installing the 3rd-party dependencies twice. Once for linking & compiling and once for the pre-build DLLs which we later extract conveniently with a script.
So to compile our (c)go program for windows/amd64 and extract the dlls, we just execute:
$ docker run --rm -v "$PWD":/usr/src/myapp -w /usr/src/myapp dh1tw/remoteaudio-xcompile:windows-amd64 /bin/sh -c 'go build && /scripts/getlibs.sh .'
[output not shown]

$ ls -al | grep '*.exe\|*.dll'
-rwxr-xr-x   1 user  staff    85136 Dec 12 14:57 libgcc_s_seh-1.dll
-rwxr-xr-x   1 user  staff    44544 Dec 12 14:57 libogg-0.dll
-rwxr-xr-x   1 user  staff   406177 Dec 12 14:57 libopus-0.dll
-rwxr-xr-x   1 user  staff    54568 Dec 12 14:57 libopusfile-0.dll
-rwxr-xr-x   1 user  staff   183508 Dec 12 14:57 libportaudio-2.dll
-rwxr-xr-x   1 user  staff  1498448 Dec 12 14:57 libsamplerate-0.dll
-rwxr-xr-x   1 user  staff    55808 Dec 12 14:57 libwinpthread-1.dll
-rwxr-xr-x@  1 user  staff  9446400 Dec 12 14:57 remoteAudio.exe

$ file ./remoteAudio.exe
remoteAudio.exe: PE32+ executable (console) x86-64 (stripped to external PDB), for MS Windows
Conclusion
In this article, I’ve explained my approach on how to cross-compile Go applications that depend on C libraries for different architectures & operating systems. Putting the Cross-compilation chains into Docker containers does not only keep our host system clean, but it also documents the build process and shows the needed dependencies. As a bonus, the containers integrate nicely in our Continous Integration & Continous Delivery (CI/CD) Pipeline so that we can generate releases for a variety of platforms without any additional effort.
The Automatic (but unsupported) Way: winstrap
The winstrap tool is used by the Go project to turn a fresh Windows VM image into a Windows builder. It installs all necessary dependencies. It’s sometimes out of date, though, as it’s only updated when we need to update the Windows base image for the Go continuous build.
To use winstrap, download the latest version of winstrap.exe from the winstrap page and run it.
It will download some installers to your desktop, which you should run. Just click through; all the defaults are fine.
Then it will check out Go and place it in c:\Users\%USER%\goroot and build it.
That’s it.
Note however that winstrap is not supported. It’s considered an internal tool used for occasional setup of new Windows builder images and is not actively maintained until we need it ourselves.
The Manual Way
Install MinGW/MSYS
Download and save the latest version of the automated MinGW installer executable (exe) file from SourceForge.
http://sourceforge.net/projects/mingw/files/OldFiles/mingw-get-inst/
Open and run the saved automated MinGW installer executable file, which is named mingw-get-inst-yyyymmdd.exe, where yyyymmdd is the version date stamp. For example, mingw-get-inst-20110530.exe.
The MinGW Setup Wizard window will open with the title “Setup — MinGW-Get”. Except for the following, accept the setup defaults, unless it’s necessary to change them.
For Repository Catalogues, check the Download latest repository catalogues button.
For Select Components, the MinGW Compiler Suite, the C Compiler box is automatically checked. Scroll down to the bottom of the list and check the MinGW Developer Toolkit box, which includes the MSYS Basic System.
For Ready to Install, review and verify the installation settings, which should look similar this:
    Installing:
        mingw-get
        pkginfo
        C Compiler
        MSYS Basic System
        MinGW Developer Toolkit
    Downloading latest repository catalogues
    Destination location:
        C:\MinGW
When the installation settings are correct, Install.
The installation loads the package installation catalogues and downloads and installs the files. The installation may take some time, largely depending on the download speed.
The MSYS terminal window may be opened by opening and running the C:\MinGW\msys\1.0\msys.bat batch file.
Build
git clone https://go.googlesource.com/go
cd go\src
all.bat
64-bit Notes
- Ensure you are able to compile a working 32-bit Go first.
- Grab the latest zip from http://sourceforge.net/projects/mingw-w64/files/Toolchains%20targetting%20Win64/Automated%20Builds/ and extract it over the MinGW directory, so that for example the .exe files end up in the same location as the 32-bit ones.
- Replace
gcc.exeandar.exewith their 64-bit counterparts. - Set
GOARCH=amd64and away you go!
This content is part of the Go Wiki.