
GLFW Error 65542 Minecraft Windows 10 or 11 is one of the most common issues that have been making serious trouble for gamers. The problem usually shows up while launching the game and occurs with the Java-based version of Minecraft. Thankfully, several affected users were able to overcome this problem by just copying the missing opengl32.dll file into the Java (JRE) directory. However, we will cover all the solutions that work to fix GLFW Error 65542: WGL: The driver does not appear to support OpenGL.
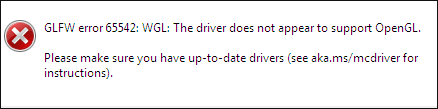
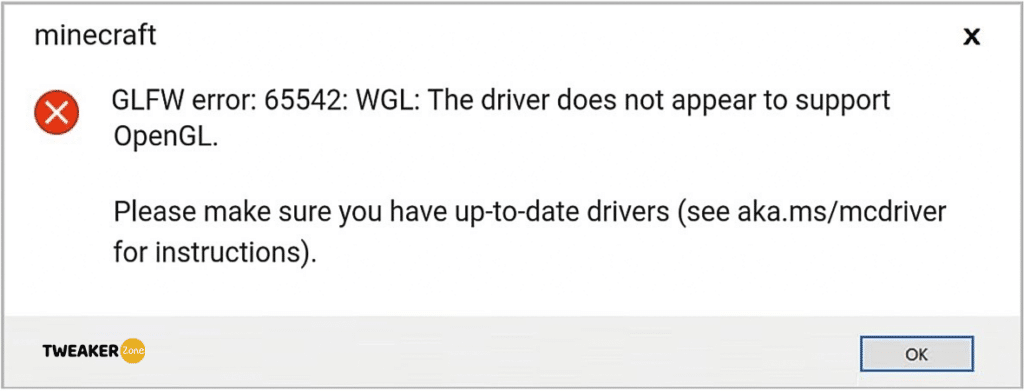
Apart from manually modifying the JRE directory, you have other options as well. You can reinstall the GPU drivers so that every opengl32.dll may be re-installed in the system. In the Java edition of this game, GLFW Error 65542 appears when it gets into a collision with DisplayLink driver. So go through the below section to try out the workarounds and see which one brings the game back. Full message is “GLFW Error 65542: WGL: The driver does not appear to support OpenGL. Please make sure you have up-to-date drivers (see aka.ms/mcdriver for instructions)”.
GLFW Error 65542: WGL: The driver does not appear to support OpenGL
Here is how to fix GLFW Error 65542 Minecraft Windows 10 or 11–
1] Manually Add OpenGL32.DLL File to JRE Folder
The display driver in Windows 11 or 10 usually holds all the necessary dynamic link library in short DLL files in most cases. However, some of these might go missing due to reasons like corruption in the system or accidental delete of the file itself. Missing opengl.dll file most likely results in GLFW Error 65542 Minecraft Windows 11 or 10.
In order to fix the issue, you can simply perform opengl32.dll download and then add it to the JRE (Java directory) manually. Adding this will allow Minecraft to access opengl.dll file and the error will not appear while starting the game. Follow the below steps to add the DLL files to JRE folder –
- Click this link.
- Extract the opengl32.zip file.
- Double click on opengl32 folder.
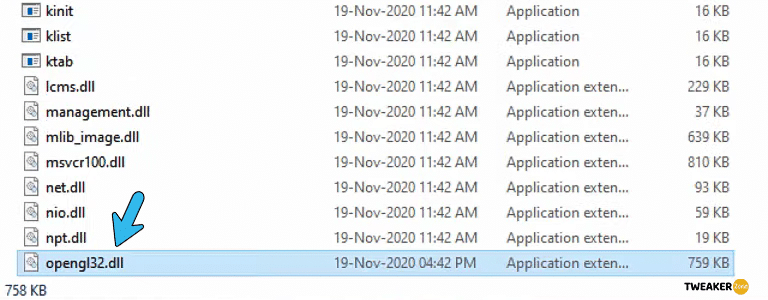
- Copy the opengl32.dll.
- Now go to –
C:\Program Files\Java\*JRE Version*\bin
Note – Please note that, *JRE Version* in the navigation path above is just a placeholder. Replace it with the JRE version you are using. If you have installed the Java environment for Minecraft in a customized location, head to that file instead.
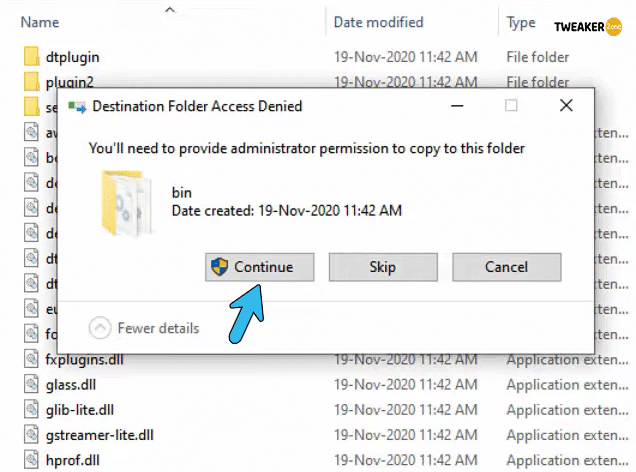
- Right click and select Paste.
- Click Continue when you will get a ‘Destination folder access denied’ pop up.
- If the DLL file is placed correctly in the proper environment, the GLFW Error 65542 Minecraft Windows 10 or 11 should resolve by now.
2] Reinstall GPU drivers using Device Manager
In case, display drivers become obsolete and do not have the capability to run the opengl32.dll file, then you will obviously encounter GLFW Error 65542 Minecraft Windows 11 and 10. The same drawback may also come up if the system had faced malware issues recently resulting in deleting some necessary files required to run the OpenGL.
In order to fix the problem, the best way is to uninstall the drivers associated with GPU and then install them again from official sites. For that, follow the below steps –
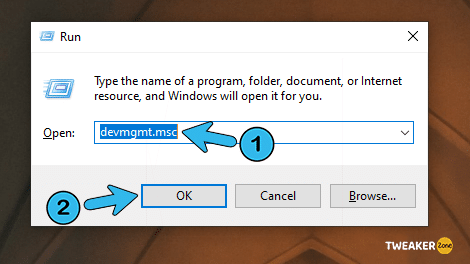
- Hit “Win + R“.
- Type devmgmt.msc and press Enter.
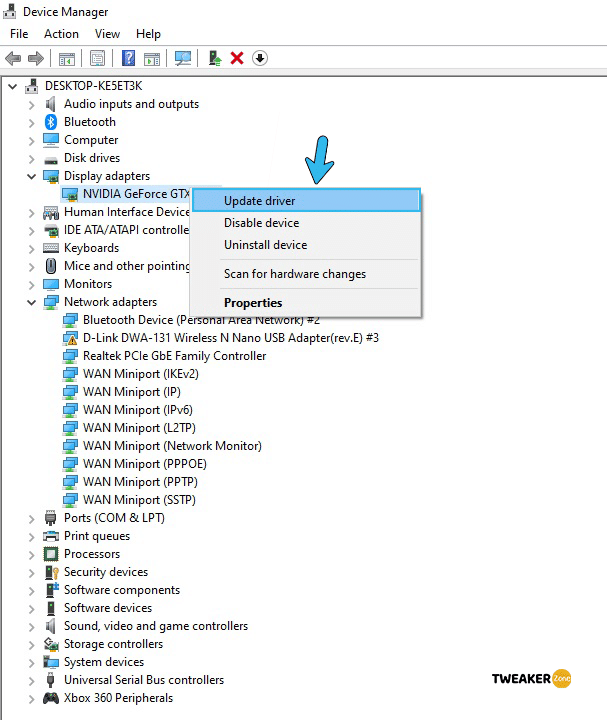
- Double click on Display adapters.
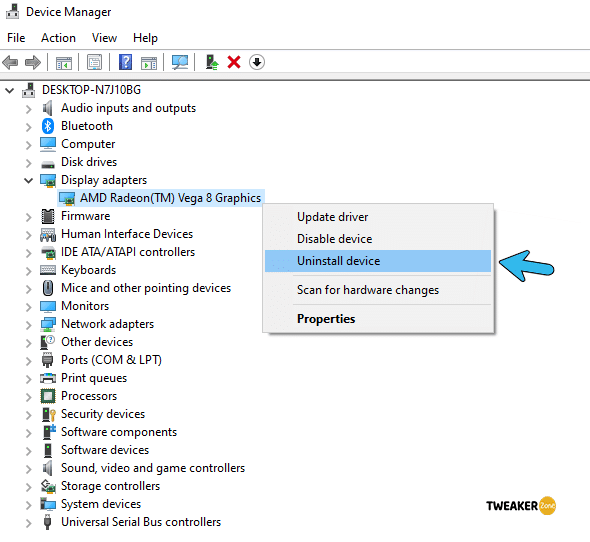
- Right-click the display driver and select Uninstall device. Click Uninstall again from the confirmation popup.
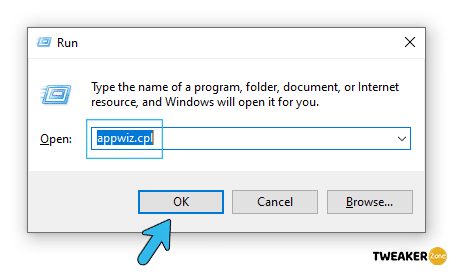
- Once the uninstallation gets completed, launch Run again.
- Type appwiz.cpl and click OK to access the Programs and Features window.
- Reach out to the programs related to GPU manufacturer (Nvidia, AMD, or Intel).
- Right-click each and select Uninstall. Follow the on-screen guidelines and finish uninstalling them.
- Once finished uninstallation, restart Windows 10 PC.
- Upon startup, launch a web browser and visit the GU manufacturer’s official web page. Download the latest compatible driver.
- Install them again and try running Minecraft.
3] Uninstall DisplayLink driver to fix GLFW Error 65542 Minecraft Windows 10 or 11
This is a special workaround for the users who are using the DisplayLink driver actively in Windows 11 or 10. This ‘driver’ has potential to conflict with the Java version for Minecraft and thereby cause GLFW Error 65542 Minecraft Windows 11 or 10.
Therefore if you are using DisplayLink USB Graphics Software, uninstall the same to resolve the error and you can run Minecraft again without any issue. To remove, follow the below instructions –
- Type Control Panel in the Taskbar Search and press Enter to access the same.
- Click Programs and Features.
- Reach out to DisplayLink Graphics Driver and right-click on it.
- Select the Uninstall option.
- If User Account Control prompts up for permission, click Yes to give consent.
- Finish the process following the on-screen guidelines.
- Lastly, reboot Windows 10 or 11 and try running Minecraft.
Hopefully, GLFW Error 65542 Minecraft Windows 10 or 11 will not show up anymore. You can reset the game using – How to Reset Minecraft App in Windows 10. In order to get Nether version, follow – How to Download Minecraft 1.16 Nether Update on Windows 10 PC. And to simply update – 4 ways to Update Minecraft in Windows 11 or 10.
Methods:
1]Manually Add OpenGL32.DLL File to JRE Folder
2] Reinstall GPU drivers using Device Manager
3] Uninstall DisplayLink driver
That’s all!!
Sometimes when you open Minecraft launcher and try to play the game a quick dialog box appears with an error message that reads:
GLFW Error 65542: WGL: The driver does not appear to support OpenGL
Please make sure you have up-to-date drivers (Accompanied by a link to MCDriver instructions)
If you made upto this blog post, then chances are you annoyed by the same error message, right? Let’s dig into the issue.
Usually, Minecraft GLFW Error 65542 error message pop-up when your device is having a problem running Open GL API. Now you might be wondering, what’s that? It is a programming interface, using which your computer can render 2D and 3D graphics.
Now there could be various reason behind this to happen like corrupted graphic card, missing installation files, and when installation is not done properly.
Fortunately, it is possible to fix this kind of Minecraft errors can be fixed by making few changes to your device. In upcoming lines, we will cover some of the possible solution using which you can Fix GLFW error 65542 in Minecraft error
Reboot your device
If you encounter this error, then you might try restarting your computer first. Your computer might not be able to run the resources like OpenGL API, and this error might be encountered. Many times, restarting your computer will resolve the issue.
However, if the error is still encountered, even if you have restarted your computer, then you can try the methods mentioned ahead.
Update Windows
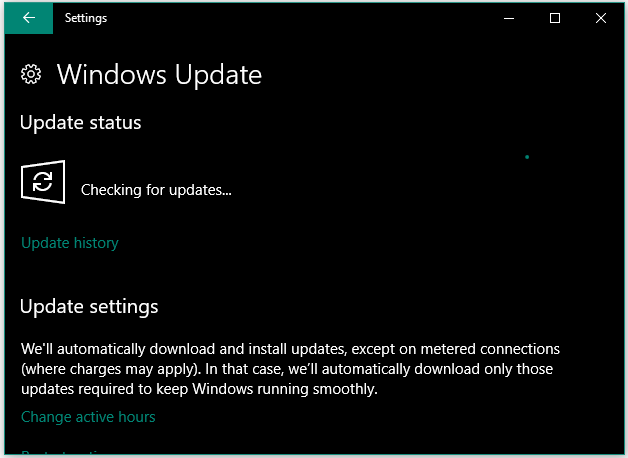
Many times, the problem with OpenGL API not working properly can be solved by updating your windows device. If you have encountered this error, then you can try updating your windows. Here’s how you can do that:
On your Windows 10 PC, launch Settings > Update and Security > Windows Update. Here on the right side, Check for updates, and install any pending updates. Once done, restart your computer and check if the problem is solved or not.
Reinstall Graphics Drivers
The next solution that you can try is reinstalling the graphic drivers. Here’s how you can do that:
Right-click on the Start button and select Device Manager.
In the Device manager, double-click on the Display adapters. You will see Graphic card installed on your device.
Right-click on the driver and select Update and then follow on-screen instructions. Make sure, device is connected to internet while performing this.
If you get a message that driver are up to date, then right-click on the driver and and select Uninstall.
Once done, you can go to your graphic card manufacturer’s website (either AMD, NVIDIA or INTEL) to download the latest driver for your graphic card. If you are using a laptop, then you can also download the drivers from the official website of your laptop brand.
Uninstall DisplayLink Driver
Sometimes users reported that they were able to fix the issue by uninstalling the DisplayLink Driver. However, note that this method is only applicable to the users who have the DisplayLink driver installer on their PC.
The same driver can cause compatibility issues with the Minecraft java version, and if you are receiving GLFW error 65542, then this might be because of this driver.
To uninstall the driver, go to the Control panel, and then click on the Programs section. Now from the list of applications, search for DisplayLink driver. Click on the driver and Uninstall it. Once done, reboot your PC, and remove any leftover files of the driver.
Alternative, you can go to Settings > Apps > Apps & features. On the right side, look for DisplayLink driver and click Uninstall twice.
Now try playing Minecraft after trying this fix, and the error will be fixed. If you are still encountering the error, then you can try the next solution.
Adding OpenGL DLL File Manually
If any of the methods didn’t work, then you can try adding the OpenGL DLL file manually. You may be receiving the error because the OpenGL DLL file was not preset causing the API to not work properly.
First, download the DLL file on your computer, and then extract the file.
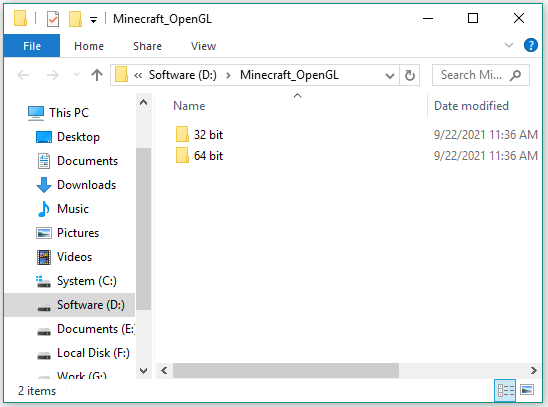
You will get two folders 32-bit and 64-bit. Here depending on your system, open the folder to copy the OpenGL DLL file.
After that, head over to this location: C:\Program Files (x86)\Java\jre1.8.0_281\bin and here, paste the same file. jre1.8.0_281 – This folder name could be different depending on what version of the game you’re using.
The JRE version will be replaced by the actual version of the Java runtime environment installed on your PC.
Once done you restart your computer, and you won’t see the error again.
However, if you are still seeing the error, then you should report your problem to Minecraft Help Center.
-
Home
-
Partition Manager
- [Fixed] GLFW Error 65542 in Windows 10
By Ariel | Follow |
Last Updated
GLFW Error 65542 in Minecraft
Lots of Minecraft players encountered the error “GLFW error 65542: WGL: The driver does not appear to support OpenGL” when they start the Minecraft launcher. Why does the error appear? How to fix the error? Keep reading.
Tip: If you need a professional partition management tool for Windows 10, you can give MiniTool Partition Wizard a try. It is an all-in-one utility that can complete basic disk management tasks and advanced tasks such as data recovery, disk backup, disk health check, and so on.
MiniTool Partition Wizard FreeClick to Download100%Clean & Safe
Fix 1: Update the Video Card Driver
When you receive GLFW error 65542, you might notice that a suggestion follows the error and it reads “please make sure you have up-to-date drivers …”.
Therefore, to fix GLFW error 65542, you can try updating your video card driver first, and the steps are displayed below.
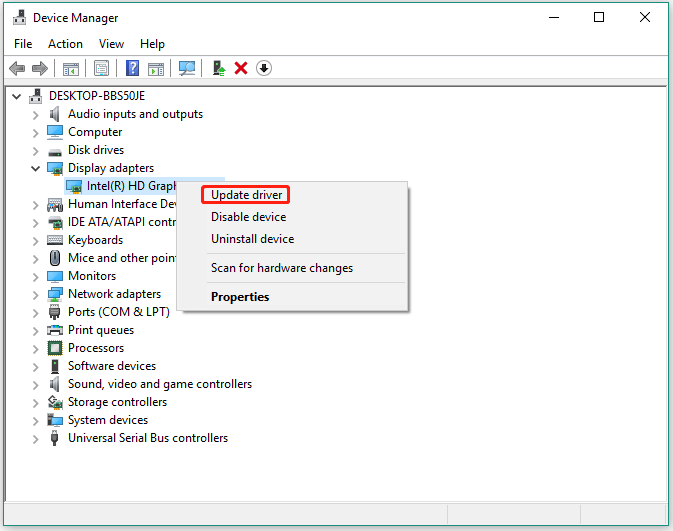
Step 1: Right-click the Windows icon on the taskbar and then choose the Device Manager option from the pop-up menu.
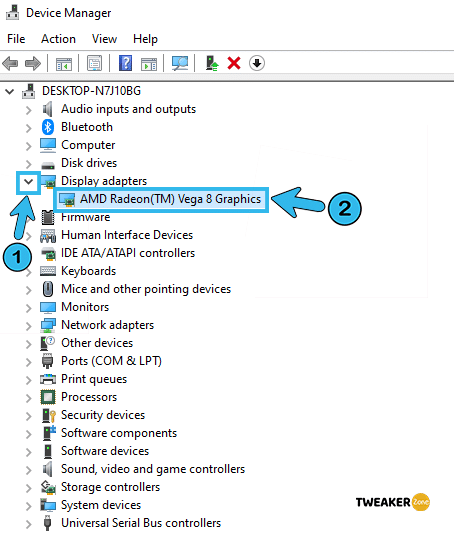
Step 2: Once you are inside Device Manager, find and expand the Display adapters entry.
Step 3: Right-click the item listed below Display adapters and then choose the Update driver option.
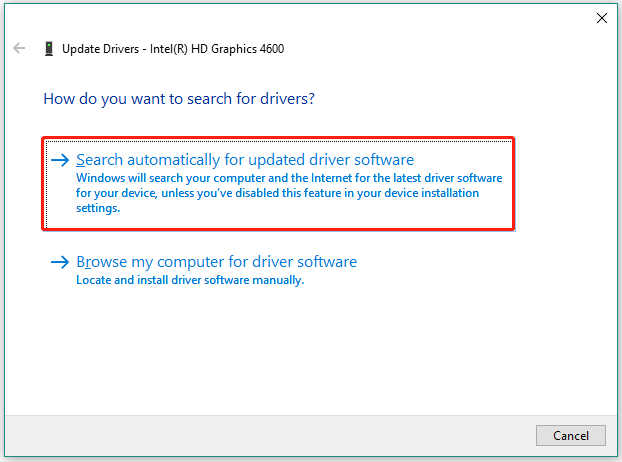
Step 4: On the “How do you want to search for drivers” window, choose the Search automatically for updated driver software option.
Step 5: Wait patiently until the scanning process comes to an end.
Step 6: View the result once you get it.
If you see the message saying “The best drivers for your device are already installed”, it means the video card driver is not the culprit, and you should try other solutions.
If you see the driver software, you should install it according to the on-screen instructions. Once you finish the driver installation, you can restart Minecraft and see if the error message “GLFW error 65542: WGL: The driver does not appear to support OpenGL” will appear.
Fix 2: Uninstall the DisplayLink Graphics Driver
The DisplayLink Graphics Driver conflicts with the Java-powered version of Minecraft. Therefore, you should remove the software if you are actively using it.
For how to uninstall the software, here are the steps:
- Press Windows + R at the same time to launch the Run dialog box.
- Type cpl into the box and then hit the Enter key.
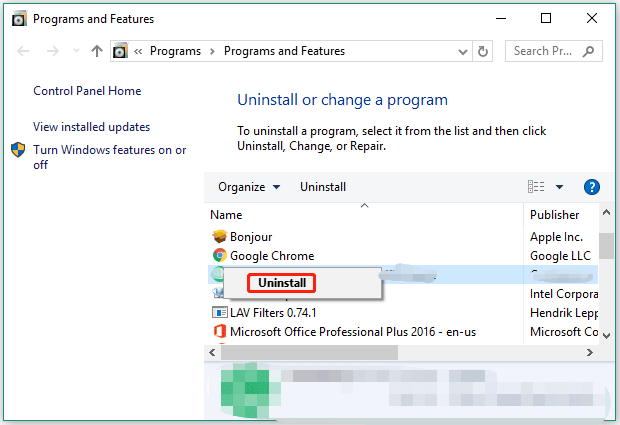
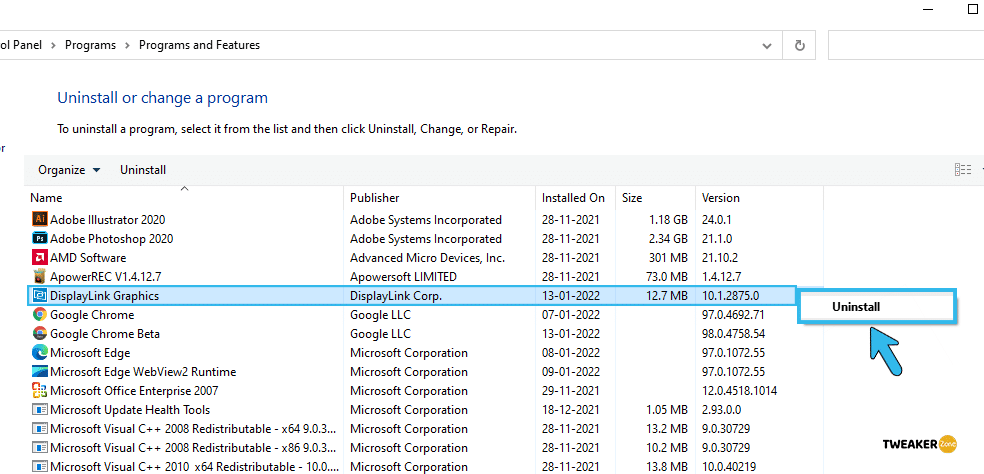
- Once you are inside the Programs and Features window, find and right-click the software in the list and choose the Uninstall
- Follow the on-screen instructions to complete the uninstallation.
Fix 3: Add the OpenGL.DLL File to File Explorer
Aside from driver issues, missing files like opengl32.dll or opengl64.dll can also trigger GLFW error 65542. So, go to the path C: Program Files Java *JRE VERSION* bin to check if the file is still here (“JRE VERSION* represents the version of JRE). If the file is missing, you can manually get the file back through the following steps:
Step 1: Check your system type.
Right-click the Windows icon on the taskbar, choose the Settings option, choose the System option, choose the About option, and read the information following System type.
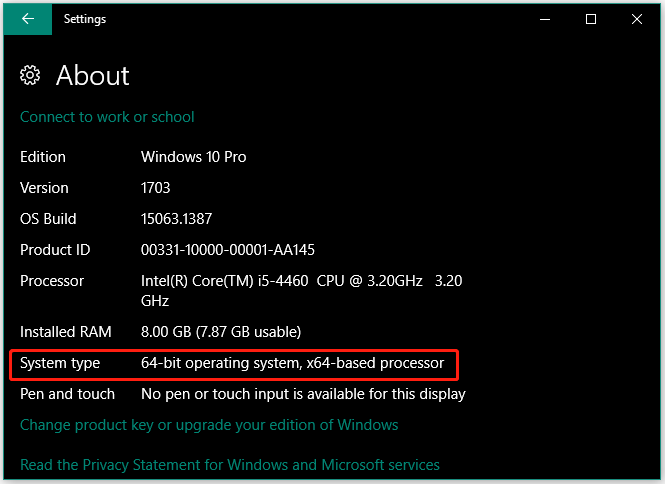
You might be interested in How to Upgrade 32 Bit to 64 Bit in Win10/8/7 without Data Loss.
Step 2: Download Opengl.dll file from a trusted source. Alternatively, you can copy the Dll file from your friends’ computer and paste it into your computer.
Step 3: Once the file is downloaded, navigate to the save location and extract the zip file to a folder.
Step 4: Open the extracted folder and double-click the 32 bit or 64 bit folder based on your system type.
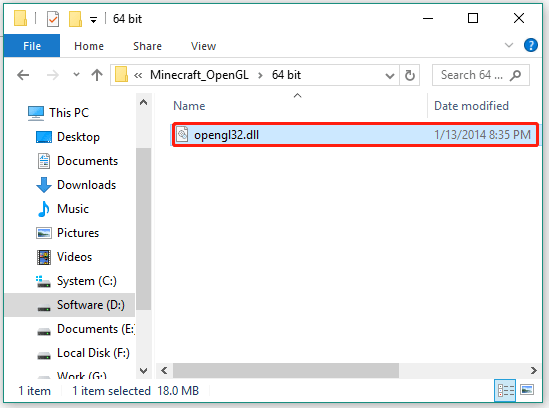
Step 5: Once you see the opengl.32dll file, right-click it and then choose the Copy or Cut option.
Step 6: Go to the path again: C:Program FilesJava*JRE Version*bin and paste the opengl32.dll file.
Step 7: When the UAC (User Account Control) window appears, click the Yes button to grant admin access.
Step 8: Once the file is added to File Explorer, restart your computer.
When the computer boots, check if you have gotten Minecraft out of the error.
You might be interested in Recover Missing Files On Windows 10.
Fix 4: Update Your Operating System
If none of the above fixing methods helps you get rid of GLFW Error 65542, you can try the last tactic — update your operating system.
Here is how to update Windows 10:
- Press Windows + X and then choose the Settings option from the menu.
- Choose the Update & security
- Click the Check for update button on the right side of the window.
- Wait a while for Windows to check and install the latest updates for you.
- Restart your computer.
Then, check if the error gets solved.
About The Author
Position: Columnist
Ariel has been working as a highly professional computer-relevant technology editor at MiniTool for many years. She has a strong passion for researching all knowledge related to the computer’s disk, partition, and Windows OS. Up till now, she has finished thousands of articles covering a broad range of topics and helped lots of users fix various problems. She focuses on the fields of disk management, OS backup, and PDF editing and provides her readers with insightful and informative content.
Minecraft is one of the most popular sandbox video games that everyone loves. But one of the most annoying things about playing this game is when the Minecraft GLFW Error 65542 causes some interruption.
The best ways to solve the GLFW Error 65542 are reinstalling Minecraft, modifying graphics settings, and updating Windows. You may also need to update GPU driver, reinstall it, install the latest Java package, disable OpenGL, or add OpenGL.DLL manually.
Let’s find out in detail why this problem occurs and the exact steps of fixing the issue.
What Are Primary Reasons For OpenGL Errors on Minecraft?
We all want to know how to fix Minecraft GLFW error 65542 without understanding the actual reasons that are causing this error. Typically, there are eight primary reasons why you keep on getting this error while playing Minecraft. And those are as follows!
- The graphics card driver is corrupt, broken, or completely missing from the system.
- Corrupt or buggy shader and associated files
- Incomplete Java installation or outdated version of Java
- Obsolete or outdated version of Windows operating system
- The in-game graphic setting is too high to handle by the GPU.
- Improper OpenGL setup or the OpenGL file path is wrong.
- Glitch or bug in OpenGL.DLL or other DLL files in the installation package.
- The hardware specification is below the minimum requirement.
Although Mojang Studio tried to make this game flawless, many gamers reported getting this error. You may also get frequent graphics errors while playing the game, especially while using bow and arrows. In that case, you can follow our step-by-step guide to repair bows in Minecraft.
3 General Methods To Solve Minecraft GLFW Error 65542
The Minecraft GLFW error can trigger due to several reasons. But before you try anything exotic, follow these three basic steps to quickly solve this issue without changing the core files of the game.
Table of Contents
- 1 1. Reinstall Minecraft
- 2 2. Modify Graphics Settings
- 3 3. Update Your Windows
- 4 4. Update GPU Driver
- 5 5. Reinstall Graphics Card Drivers
- 6 6. Install the Latest Java File Package
- 7 7. Disable OpenGL
- 8 8. Disable Showing OpenGL Errors
- 9 9. Add OpenGL.DLL Manually
- 10 10. Uninstall DisplayLink (If Applicable)
- 11 11. Use Display Driver Uninstaller
- 12 Additional Fix – Update Your Hardware
- 13 FAQs
- 13.1 Q. How do I fix GLFW error 65542?
- 13.2 Q. How do you fix OpenGL on Minecraft?
- 13.3 Q. What version of OpenGL does Minecraft use?
- 13.4 Q. How do I fix OpenGL not supported?
- 14 Conclusion
1. Reinstall Minecraft
If you want to solve the GLFW error in Minecraft quickly, start with reinstalling your Minecraft again. Restarting the game often solves the OpenGL errors. But yes, your user data will be lost if you reinstall the game again without backing up the core data.
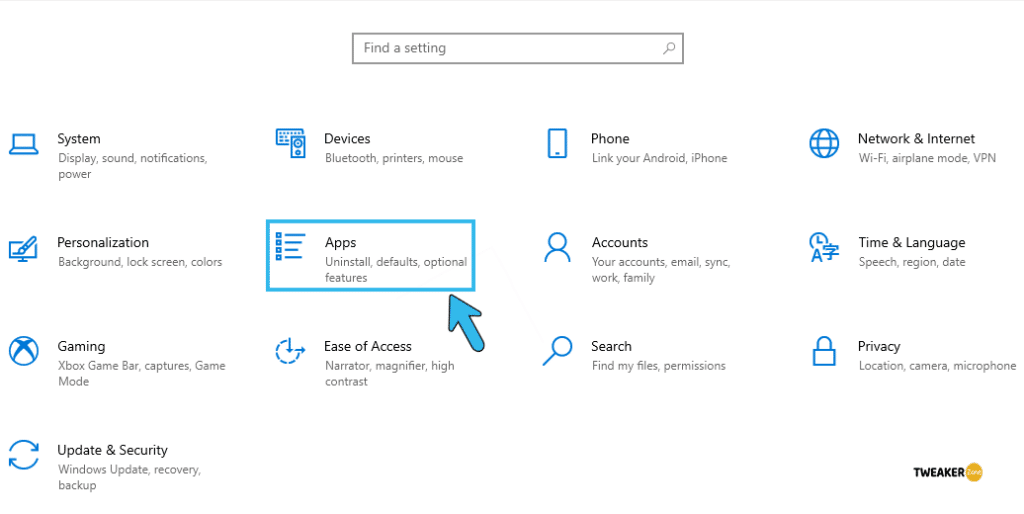
- Step 1: Press “Windows Key” to launch the start button & headover to settings in the Microsoft system.
- Step 2: A new window will pop up where you need to find “Apps” and open it up.
- Step 3: From the newly-opened list, search for “Minecraft” and click on it.
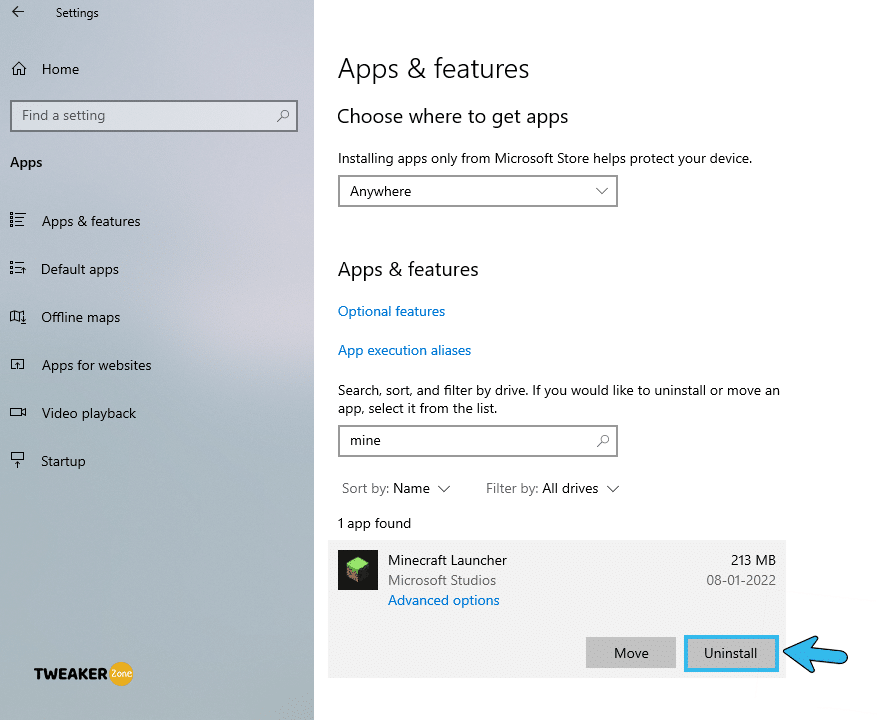
- Step 4: Select uninstall and wait till the game is completely removed from your system.
- Step 5: Reboot your device and reinstall the game again.
2. Modify Graphics Settings
Although it is one of the old-school techniques to solve the GLFW Error, it is often effective in fixing the issue without altering any core data. However, your gaming experience may get a little compensated with modified graphics settings.
- Step 1: Open Minecraft on your PC and click on the “Option” icon.
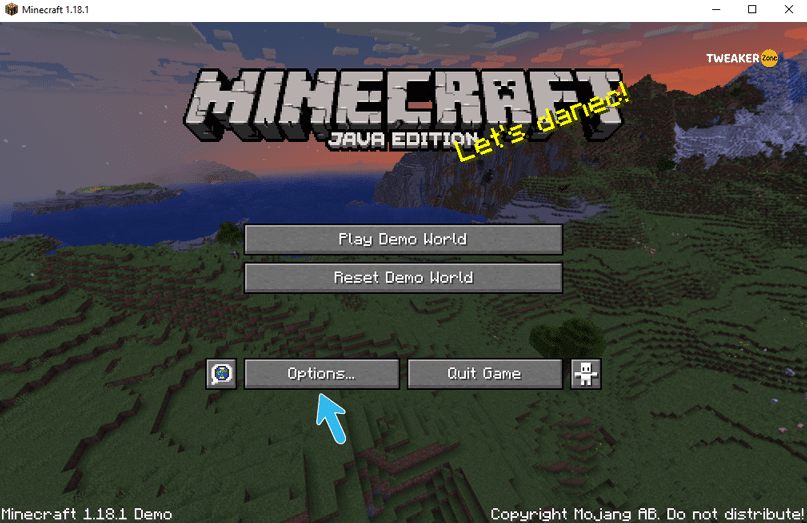
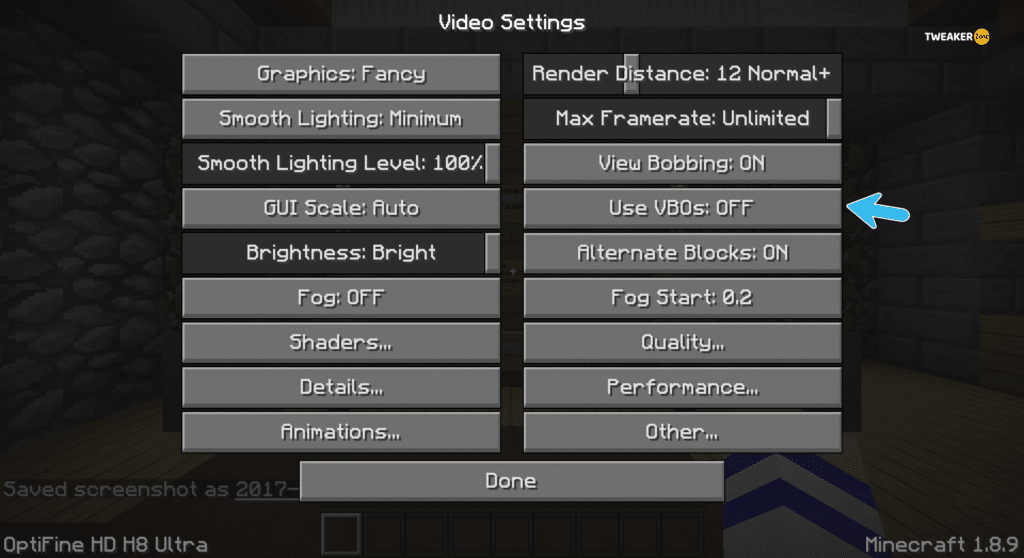
- Step 2: Navigate to the “Video Settings” and find “VBOs,” “Render Region,” and “Clear Water” options.
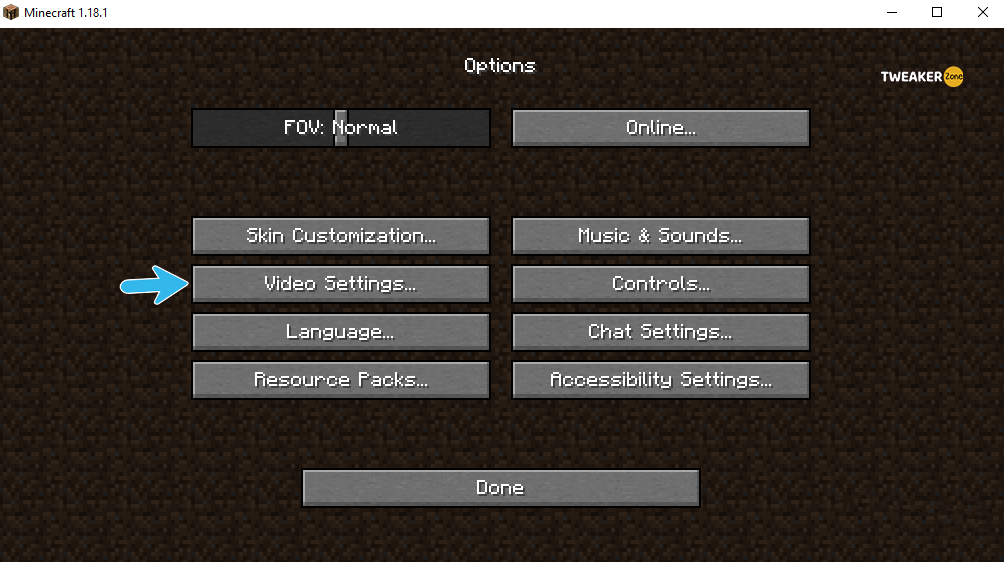
- Step 3: Disable “VBOs,” “Render Region,” and “Clear Water“ three options and quit the game.
- Step 4: Relaunch the game to enjoy it in a new graphics setting.
3. Update Your Windows
You may not know, but just updating your windows can provide a practical GLFW error 65542 fix. If the driver is not supported by the obsolete version of your windows, it can create OpenGL errors. So, to solve it, follow these steps.
- Step 1: Click on the “Search” (magnifying glass icon) button on the bottom-left corner of your windows taskbar panel.
- Step 2: Type “Windows Update Settings” on the search box and hit enter.

- Step 3: Search for the “Windows Update” option on the left column of the newly-opened window.
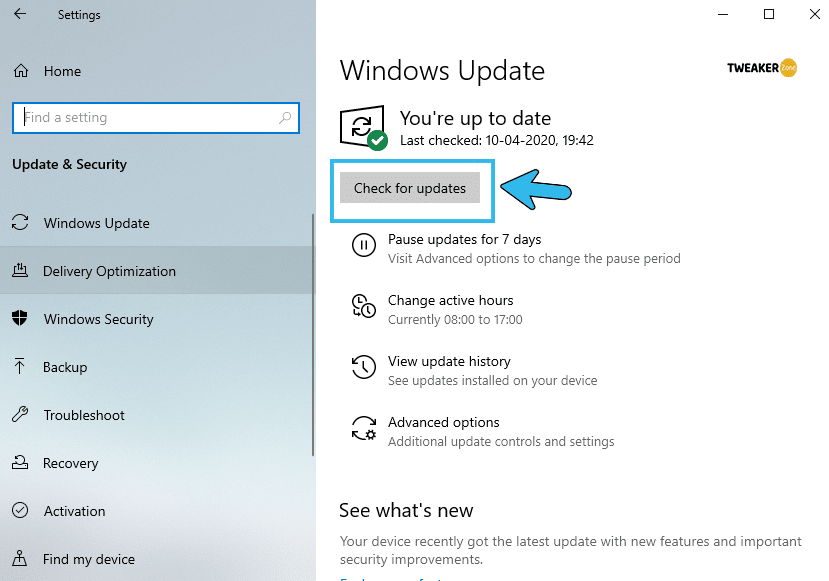
- Step 4: Navigate to “Check for Updates” and click on it.
- Step 5: Click on “Install New Updates” if the dialogue pops up.
- Step 6: Restart your system and try to rerun the game.
It will be even better if you schedule a time to check for your system updates routinely. You can also enable the automatic update option from the windows settings.
8 Pro Methods To Fix Minecraft GLFW Error 65542
If your issue persists even after trying the standard fixes, you need to take alternative routes to fix the Minecraft GLFW Error 65542 in the windows system. Here are all the pro methods that can solve this issue to assure you a flawless gaming experience.
4. Update GPU Driver
Your GPU driver may be running on an old version that can conflict with the optimum settings for Minecraft. And updating the driver can typically solve the issue on Windows PC.
- Step 1: Right-click on the “Windows” icon or “Start” button (Depending on the version of your windows).
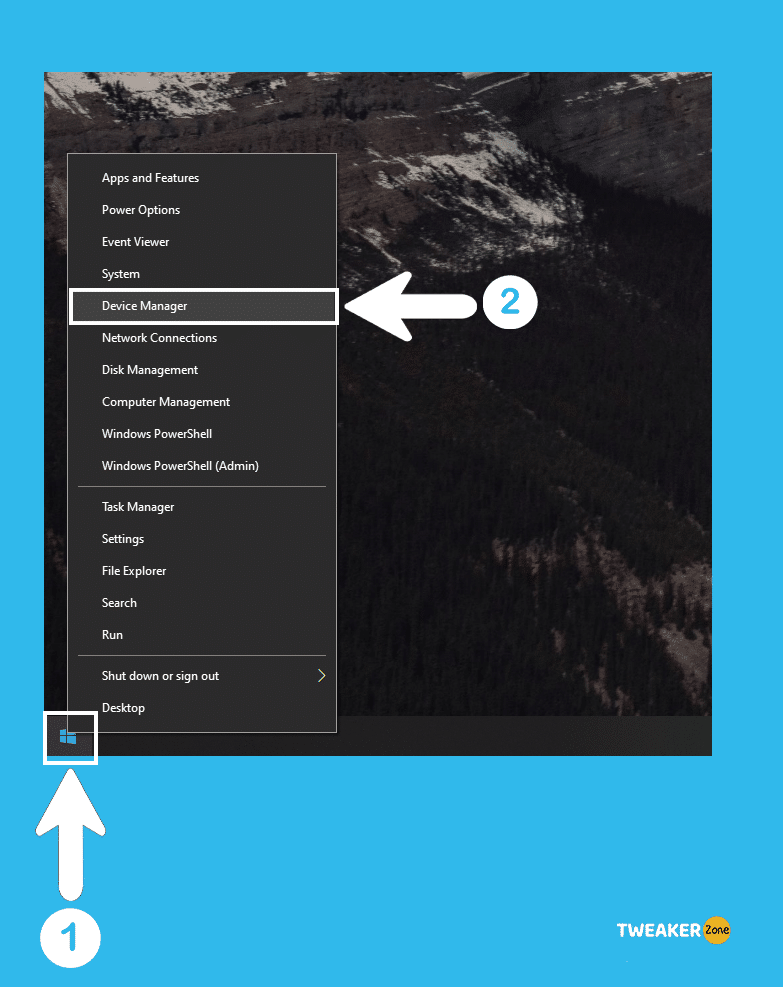
- Step 2: Navigate to “Device Manager” and click on it.
- Step 3: Navigate to the “Display Adapter” section on the new window and expand it.

- Step 4: Navigate to your graphics card and right-click on it to find the “Update Driver” option.
- Step 5: Click on the “Search automatically for drivers” option and follow the instruction.

- Step 6: Reboot your device once the updating process is completed.
5. Reinstall Graphics Card Drivers
If updating the graphics driver still can’t solve the GLFW error 65542: WGL Minecraft, you should completely uninstall the driver and then reinstall it again. And to do that, follow these steps.
- Step 1: Press “Windows Key + R” to open the “Run” dialogue box on the windows system.
- Step 2: Type “devmgmt.msc” inside the box and hit enter.
- Step 3: Click on “Yes” to grant admin access if UAC pops up.
- Step 4: Under the “Device Manager” window, find “Display Adapter” and expand it.
- Step 5: Navigate to your graphics driver and right-click to select the “Uninstall” option (Uninstall both the integrated and dedicated graphics driver)
- Step 6: Reboot the system and then visit Nvidia, AMD, or Intel Graphics driver pages to download the latest driver.
- Step 7: Install the new driver and restart the game.
Your screen may flicker a few times after you uninstall the graphics driver. But don’t worry; this flicker will automatically stop once you install the latest driver package from the official sites of your graphics card.
6. Install the Latest Java File Package
If you don’t know how to fix GLFW error on the Minecraft Java edition, you should start by disabling and reinstalling the Java again. Incompatible or obsolete Java editions can create interference issues on OpenGL. And to fix it, follow these steps.
- Step 1: Right-click on the “This PC” or “My Computer” icon, depending on your windows version.
- Step 2: Navigate to “Properties” from the menu and click to open the “Settings” panel.
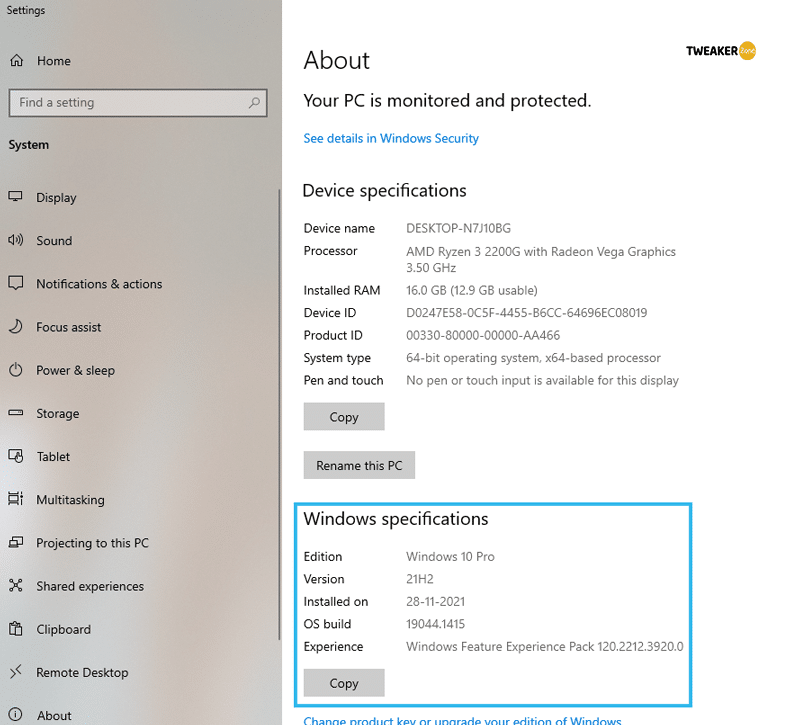
- Step 3: Check the OS architecture of your windows operating system.
- Step 4: Download the Java file package according to your OS architecture (either 32-bit or 64-bit).
- Step 5: Press “Windows Key + E” to launch the file explorer and navigate to either “C:\Program Files\Java” (32-bit) or “C:\Program Files (x86)\Java” (64-bit).
- Step 6: Manually copy the Java file package you have already downloaded and paste it into this folder.
- Step 7: Download any Minecraft mod manager and edit your profile.
- Step 8: Click on the “Executable” option under Java setting and paste the correct path of your java folder.
- Step 9: Hit “Enter” to change the java folder path and reboot your system.
You should carefully select the original folder name where you’ve installed the manual java file package. The mod will only work if the folder name matches the java file package.
7. Disable OpenGL
OpenGL is a programming interface that renders 2D and 3D vector graphics. If you have any glitches and bugs in that, this issue can arise. So, you need to disable that interface to solve this glitch.
- Step 1: Launch Minecraft and click on the “Option” icon.
- Step 2: Navigate to “Video Settings” and scroll down till you find “Advanced OpenGL settings” in the menu.
- Step 3: OFF or disable the OpenGL and “Save” the settings.
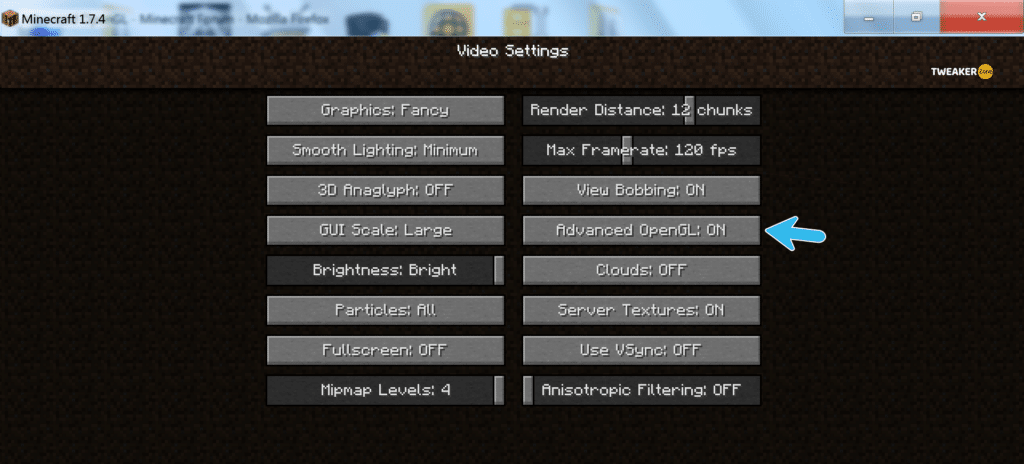
- Step 4: Restart your game to launch Minecraft without OpenGL assistance.
You may not be able to play the game in the highest graphics settings after disabling the OpenGL. So, running the game in either a low or moderate visual setup is recommended to experience smooth and lag-free gameplay.
8. Disable Showing OpenGL Errors
Many gamers don’t prefer to turn off OpenGL completely as it can significantly decrease the overall gaming experience. So, you can try Fix issue by disabling the option to show OpenGL error even if it pops up while playing the game.
- Step 1: Launch the Minecraft game and click on the “Option” button.
- Step 2: Navigate to “Video Settings” and scroll down till you find the “Others” option.
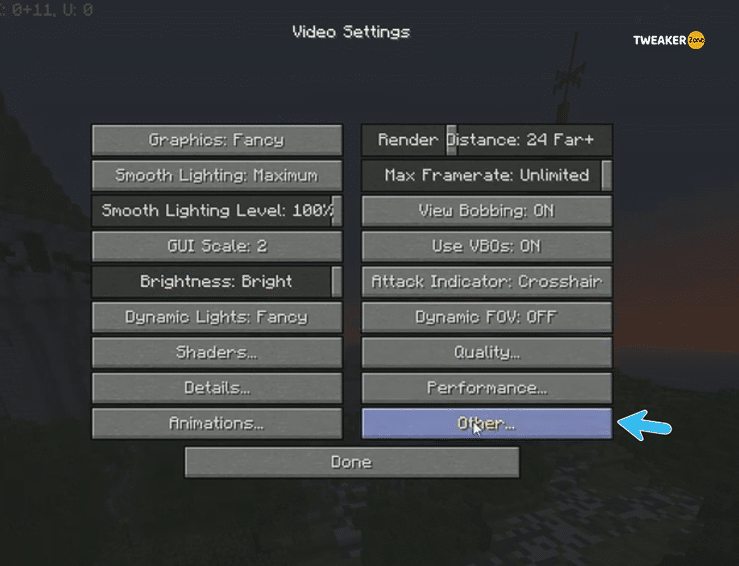
- Step 3: Click to open a new menu and navigate to the “Show GL Errors” option.
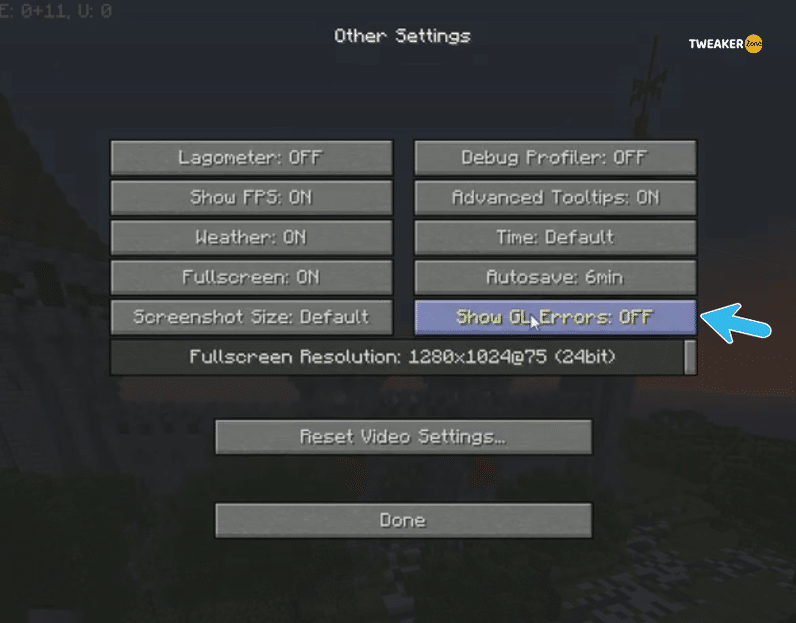
- Step 4: “disable” that feature and restart your game.
9. Add OpenGL.DLL Manually
Dynamic-link library or DLL is an essential shared library file that works as the backbone of any game or application. And by manually adding the DLL file of OpenGL, you can fix Error 65542 in your windows system.
- Step 1: Download the “OpenGL” file on your computer.
- Step 2: Extract the zip file with either WinZip or 7-Zip application on the windows system.
- Step 3: Copy the extracted “opengl32.dll” file according to the architecture of your OS (either 32-bit or 64-bit).
- Step 4: Go to “C:\Program Files\Java\<Your JRE Version>\bin” and paste the “opengl32.dll” file.
- Step 5: Grant admin permission if you get any prompt by User Account Control (UAC).
- Step 6: Reboot your system and relaunch your game.
10. Uninstall DisplayLink (If Applicable)
You may not know, but DisplayLink driver has an immense reputation for conflicting java-based Minecraft setup. So, if you are getting this error, you better uninstall the DisplayLink USB Graphics completely.
- Step 1: Press “Windows Key + R” to launch the “Run” dialog box.
- Step 2: Type “appwiz.cpl” inside the box and hit enter to open the “Programs and Features” menu.
- Step 3: Scroll down till you find the “DisplayLink Graphics Driver” option.
- Step 4: Right-click and select the “Uninstall” option from the context menu.
- Step 5: Select “Yes” if you get an authentication prompt and let the driver uninstall from your system completely.
- Step 6: Once uninstalled, reboot your computer and relaunch Minecraft.
11. Use Display Driver Uninstaller
If your already-installed Minecraft setup has any missing DLL or glitch during the setup process, you may not fully uninstall the game with the manual method. And in that case, you need to download a third-party uninstaller to fix the error 65542 in your system.
- Step 1: Download “Display Driver Uninstaller” on your system. (Ignore if you get any prompt from your antivirus; it is completely safe.)
- Step 2: Unzip the package once it is downloaded and find the “DDU.exe” file.
- Step 3: Double click on the file and let the Display Driver Uninstaller start.
- Step 4: Follow the on-screen prompts and navigate to the “Clean and restart” option.
- Step 6: Click on that option to erase your game from the system completely and then reboot it.
Once the old Minecraft package is completely uninstalled from your system, download the latest version of the game and reinstall it.
Additional Fix – Update Your Hardware
Although Minecraft was launched by Mojang Studios a decade ago, the developers constantly improved several factors, including the graphics and ambient structures. And a low-end PC can’t handle that. So, to solve the error, your hardware should meet the minimum system requirements.
- CPU: Intel Core i3 3210 (or Higher) / AMD A8 7600 (or Higher)
- RAM: 4GB DDR3
- Hard Drive: 180 MB (System Space) / 1 GB (Disk Space)
- Graphics Card: NVIDIA GeForce 400 / AMD Radeon R5 / Intel HD Graphics 4000
- Monitor: 1024 x 768 (60Hz Refresh Rate)
- Network: 256 MBPS Broadband Connection
- Operating System: Windows 7 64-bit (or Higher) / Yosemite MacOS (or Higher)
You should concentrate mainly on upgrading CPU, GPU, and RAM to increase the overall Minecraft gaming experience. It is also better to use a dedicated graphics card rather than a shared one.
FAQs
Q. How do I fix GLFW error 65542?
Updating your GPU driver and installing the latest version of Windows OS is likely to solve the Minecraft GLFW error 65542. If it doesn’t, you can try adding the OpenGL.DLL manually or can disable the error message to show up. You can also uninstall DisplayLink if you are using it.
Q. How do you fix OpenGL on Minecraft?
There are two primary ways to fix OpenGL errors on Minecraft. First, you can manually add the OpenGL.DLL file directly to the root folder of the game. And secondly, you can open the in-game setting and navigate to video settings to permanently disable showing OpenGL Errors.
Q. What version of OpenGL does Minecraft use?
Minecraft currently supports several versions of OpenGL, although it finally depends on the version of OpenGL with which your graphics card is compatible. The minimum recommended version is OpenGL 1.3, but you won’t get the best performance. And Mojang recommends at least OpenGL 4.4 or higher.
Q. How do I fix OpenGL not supported?
You should start by updating your GPU driver. If it doesn’t work, you can completely uninstall the driver and reinstall the latest version. Besides, you can also update your Windows OS to the newest version. You can also upgrade your graphics card to enable a compatible OpenGL version.
Conclusion
Minecraft GLFW Error 65542 is quite a common issue reported by Minecraft patrons. However, it is not a problem that should stop you from enjoying your favorite game! We are confident that if you follow the steps that we have mentioned above, the error message issue will be eliminated in no time, and you can enjoy an uninterrupted and smooth gaming experience in no time!
Let us know if our recommendations have helped you or not! Are you facing other problems while playing your favorite game? Let us know – and we will try to solve the issue!
When launching Minecraft after the 1.17 update, many users with older integrated GPUs, like Intel HD Graphics 3000, encounter an error stating OpenGL isn’t supported. This error prevents the game from loading and shows GLFW Error 65542, indicating your graphics driver doesn’t support OpenGL, which Minecraft needs.

This error occurs because the game now uses OpenGL 3.2, which older GPUs don’t support. Previous versions of Minecraft worked with older OpenGL, but the new update demands the latest version. Using old or broken drivers can also cause this error, worsening the issue for those with outdated hardware and drivers.
For systems with integrated GPUs that can’t support newer OpenGL, the main options are to upgrade to a dedicated graphics card or wait for possible updates or workarounds. However, we have some solutions for users facing this issue with a dedicated graphics card.
1. Replace OpenGL32.dll Manually
OpenGL32.dll is a file that refers to OpenGL and is used by standard processes for rendering 2D and 3D graphics. If it’s damaged or missing, you might get errors like GLFW Error 65542. Replacing the file with a new, safe copy can fix these issues by giving the game a fresh start.
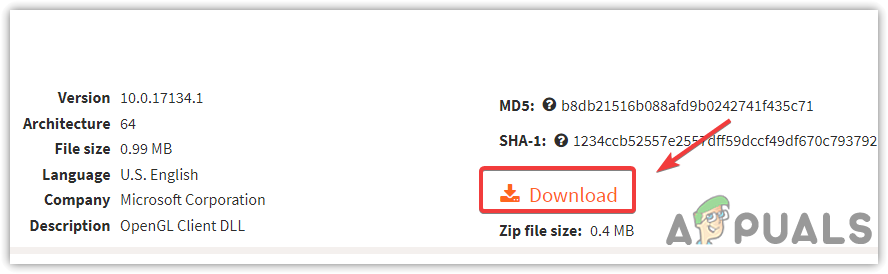
- Download the OpenGL32.dll file from this page.
- Click Download and choose the version that matches your system (32-bit or 64-bit).

- Once downloaded, go to your downloads folder to find the ZIP file.
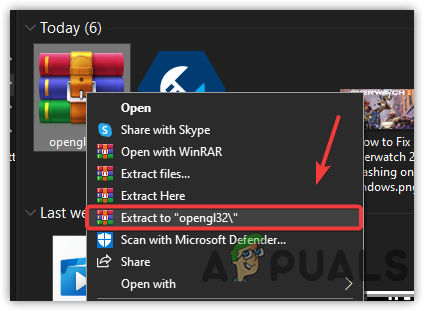
- Extract the ZIP file using a program like WinRar or similar.

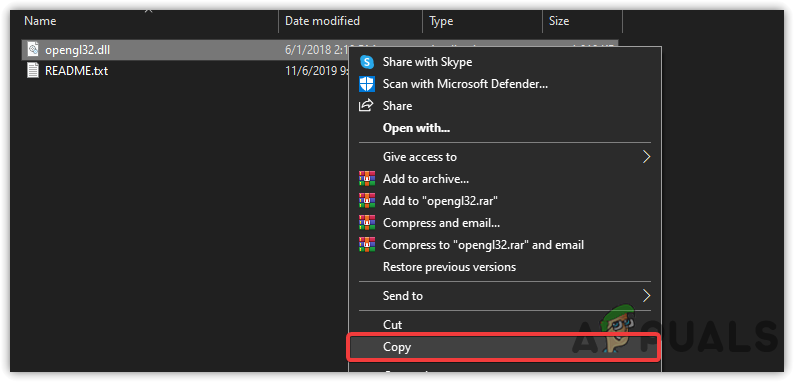
- Open the extracted folder and copy the OpenGL32.dll file by selecting it and pressing Ctrl + C.

- Go to the folder where Java is installed on your computer. The default path is usually:
C:\Program Files\Java\jdk-16.0.2\bin
- Paste the OpenGL32.dll file into this folder by pressing Ctrl + V. If prompted, allow the action with admin permissions.
- Once done, start Minecraft to see if the issue is fixed.
2. Update your Integrated Graphics Driver
When Minecraft updates, it may require more from your graphics card, and outdated drivers might not support these new requirements, leading to compatibility issues.
By installing the latest drivers, you ensure your GPU can handle Minecraft’s updated graphics and features, potentially fixing the error and improving gaming performance.
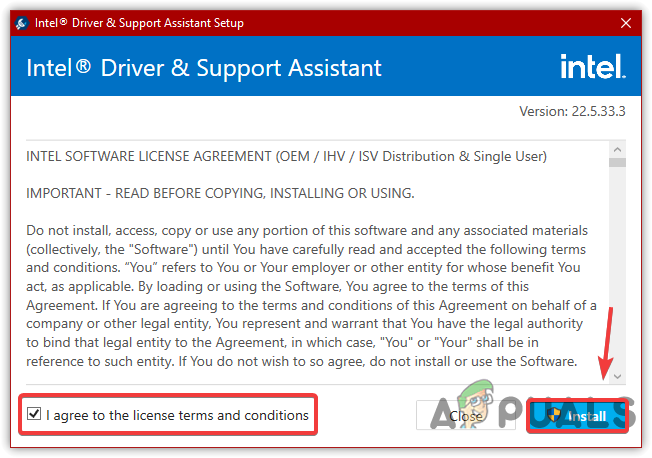
- Go to the Intel Driver & Support Assistant page and download the software.
- Run the installer by double-clicking on it.
- Agree to the license terms.
- Click on Install and complete the installation process.

- Accept the prompt and start the installation.
- Restart your computer as needed to complete the setup.
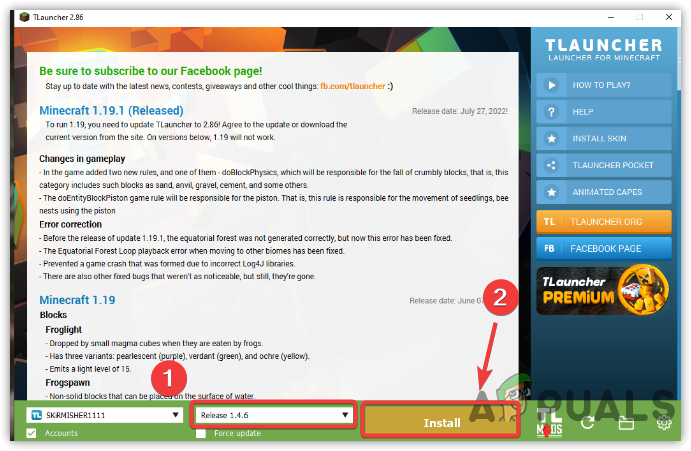
3. Try a Different Version of Minecraft
If the issue persists after trying all methods, your last option is to downgrade the Minecraft version that ran well on your computer.
- To install an older version, open the TL Launcher and select the desired Minecraft version.
- Click Install and wait for the installation to finish.

Installing Previous Version Of Minecraft - Launch the game to see if the error is resolved.
Kevin Arrows
Kevin Arrows is a highly experienced and knowledgeable technology specialist with over a decade of industry experience. He holds a Microsoft Certified Technology Specialist (MCTS) certification and has a deep passion for staying up-to-date on the latest tech developments. Kevin has written extensively on a wide range of tech-related topics, showcasing his expertise and knowledge in areas such as software development, cybersecurity, and cloud computing. His contributions to the tech field have been widely recognized and respected by his peers, and he is highly regarded for his ability to explain complex technical concepts in a clear and concise manner.