
- Tier: Free, Premium, Ultimate
- Offering: GitLab.com, GitLab Self-Managed, GitLab Dedicated
GitLab Runner uses the Docker executor to run jobs on Docker images.
You can use the Docker executor to:
- Maintain the same build environment for each job.
- Use the same image to test commands locally without the requirement of running a job in the CI server.
The Docker executor uses Docker Engine
to run each job in a separate and isolated container. To connect to Docker Engine, the executor uses:
- The image and services you define in
.gitlab-ci.yml. - The configurations you define in
config.toml.
Prerequisites:
- Install Docker.
Docker executor workflow
The Docker executor uses a Docker image based on Alpine Linux that
contains the tools to run the prepare, pre-job, and post-job steps. To view the definition of
the special Docker image, see the GitLab Runner repository.
The Docker executor divides the job into several steps:
- Prepare: Creates and starts the services.
- Pre-job: Clones, restores cache,
and downloads artifacts from previous
stages. Runs on a special Docker image. - Job: Runs your build in the Docker image you configure for the runner.
- Post-job: Create cache, upload artifacts to GitLab. Runs on
a special Docker Image.
Supported configurations
The Docker executor supports the following configurations.
For known issues and additional requirements of Windows configurations, see Use Windows containers.
| Runner is installed on: | Executor is: | Container is running: |
|---|---|---|
| Windows | docker-windows |
Windows |
| Windows | docker |
Linux |
| Linux | docker |
Linux |
These configurations are not supported:
| Runner is installed on: | Executor is: | Container is running: |
|---|---|---|
| Linux | docker-windows |
Linux |
| Linux | docker |
Windows |
| Linux | docker-windows |
Windows |
| Windows | docker |
Windows |
| Windows | docker-windows |
Linux |
GitLab Runner uses Docker Engine API
v1.25 to talk to the Docker
Engine. This means the
minimum supported version
of Docker on a Linux server is 1.13.0.
On Windows Server, it needs to be more recent
to identify the Windows Server version.
Use the Docker executor
To use the Docker executor, define Docker as the executor in config.toml.
The following sample shows Docker defined as the executor and example
configurations. For more information about these values, see Advanced configuration
concurrent = 4

[[runners]]
name = "myRunner"
url = "https://gitlab.com/ci"
token = "......"
executor = "docker"
[runners.docker]
  tls_verify = true
  image = "my.registry.tld:5000/alpine:latest"
  privileged = false
  disable_entrypoint_overwrite = false
  oom_kill_disable = false
  disable_cache = false
  volumes = [
    "/cache",
  ]
  shm_size = 0
  allowed_pull_policies = ["always", "if-not-present"]
  allowed_images = ["my.registry.tld:5000/*:*"]
  allowed_services = ["my.registry.tld:5000/*:*"]
  [runners.docker.volume_driver_ops]
    "size" = "50G"
Configure images and services
Prerequisites:
- The image where your job runs must have a working shell in its operating system
PATH. Supported shells are:- For Linux:
shbash- PowerShell Core (
pwsh). Introduced in 13.9.
- For Windows:
- PowerShell (
powershell) - PowerShell Core (
pwsh). Introduced in 13.6.
- PowerShell (
- For Linux:
To configure the Docker executor, you define the Docker images and services in .gitlab-ci.yml and config.toml.
Use the following keywords:
image: The name of the Docker image that the runner uses to run jobs.- Enter an image from the local Docker Engine, or any image in
Docker Hub. For more information, see the Docker documentation. - To define the image version, use a colon (
:) to add a tag. If you don’t specify a tag,
Docker useslatestas the version.
- Enter an image from the local Docker Engine, or any image in
services: The additional image that creates another container and links to theimage. For more information about types of services, see Services.
Define images and services in .gitlab-ci.yml
Define an image that the runner uses for all jobs and a list of
services to use during build time.
Example:
image: ruby:2.7

services:
  - postgres:9.3

before_script:
  - bundle install

test:
  script:
  - bundle exec rake spec
To define different images and services per job:
before_script:
  - bundle install

test:2.6:
  image: ruby:2.6
  services:
  - postgres:9.3
  script:
  - bundle exec rake spec

test:2.7:
  image: ruby:2.7
  services:
  - postgres:9.4
  script:
  - bundle exec rake spec
If you don’t define an image in .gitlab-ci.yml, the runner uses the image defined in config.toml.
Define images and services in config.toml
To add images and services to all jobs run by a runner, update [runners.docker] in the config.toml.
If you don’t define an image in .gitlab-ci.yml, the runner uses the image defined in config.toml.
Example:
[runners.docker]
  image = "ruby:2.7"

[[runners.docker.services]]
  name = "mysql:latest"
  alias = "db"

[[runners.docker.services]]
  name = "redis:latest"
  alias = "cache"
This example uses the array of tables syntax.
Define an image from a private registry
Prerequisites:
- To access images from a private registry, you must authenticate GitLab Runner.
To define an image from a private registry, provide the registry name and the image in .gitlab-ci.yml.
Example:
image: my.registry.tld:5000/namespace/image:tagIn this example, GitLab Runner searches the registry my.registry.tld:5000 for the
image namespace/image:tag.
Network configurations
You must configure a network to connect services to a CI/CD job.
To configure a network, you can either:
- Recommended. Configure the runner to create a network for each job.
- Define container links. Container links are a legacy feature of Docker.
Create a network for each job
You can configure the runner to create a network for each job.
When you enable this networking mode, the runner creates and uses a
user-defined Docker bridge network for each job. Docker environment
variables are not shared across the containers. For more information
about user-defined bridge networks, see the Docker documentation.
To use this networking mode, enable FF_NETWORK_PER_BUILD in either
the feature flag or the environment variable in the config.toml.
Do not set the network_mode.
Example:
[[runners]]
  (...)
  executor = "docker"
  environment = ["FF_NETWORK_PER_BUILD=1"]
Or:
[[runners]]
  (...)
  executor = "docker"
  [runners.feature_flags]
    FF_NETWORK_PER_BUILD = true
To set the default Docker address pool, use default-address-pool in
dockerd. If CIDR ranges
are already used in the network, Docker networks may conflict with other networks on the host,
including other Docker networks.
This feature works only when the Docker daemon is configured with IPv6 enabled.
To enable IPv6 support, set enable_ipv6 to true in the Docker configuration.
For more information, see the Docker documentation.
The runner uses the build alias to resolve the job container.
How the runner creates a network for each job
When a job starts, the runner:
- Creates a bridge network, similar to the Docker command
docker network create <network>. - Connects the service and containers to the bridge network.
- Removes the network at the end of the job.
The container running the job and the containers running the service
resolve each other’s hostnames and aliases. This functionality is
provided by Docker.
Configure a network with container links
You can configure a network mode that uses Docker legacy container links and the default Docker bridge to link the job container with the services. This network mode is the default
if FF_NETWORK_PER_BUILD is not enabled.
To configure the network, specify the networking mode in the config.toml file:
bridge: Use the bridge network. Default.host: Use the host’s network stack inside the container.none: No networking. Not recommended.
Example:
[[runners]]
  (...)
  executor = "docker"
[runners.docker]
  network_mode = "bridge"
If you use any other network_mode value, these are taken as the name of an already existing
Docker network, which the build container connects to.
During name resolution, Docker updates the /etc/hosts file in the
container with the service container hostname and alias. However,
the service container is not able to resolve the container
name. To resolve the container name, you must create a network for each job.
Linked containers share their environment variables.
Overriding the MTU of the created network
For some environments, like virtual machines in OpenStack, a custom MTU is necessary.
The Docker daemon does not respect the MTU in docker.json (see Moby issue 34981).
You can set network_mtu in your config.toml to any valid value so
the Docker daemon can use the correct MTU for the newly created network.
You must also enable FF_NETWORK_PER_BUILD for the override to take effect.
The following configuration sets the MTU to 1402 for the network created for each job.
Make sure to adjust the value to your specific environment requirements.
[[runners]]
  (...)
  executor = "docker"
  [runners.docker]
    network_mtu = 1402
    [runners.feature_flags]
      FF_NETWORK_PER_BUILD = true
Restrict Docker images and services
To restrict Docker images and services, specify a wildcard pattern in the allowed_images and allowed_services parameters. For more details on syntax, see doublestar documentation.
For example, to allow images from your private Docker registry only:
[[runners]]
  (...)
  executor = "docker"
  [runners.docker]
    (...)
    allowed_images = ["my.registry.tld:5000/*:*"]
    allowed_services = ["my.registry.tld:5000/*:*"]
To restrict to a list of images from your private Docker registry:
[[runners]]
  (...)
  executor = "docker"
  [runners.docker]
    (...)
    allowed_images = ["my.registry.tld:5000/ruby:*", "my.registry.tld:5000/node:*"]
    allowed_services = ["postgres:9.4", "postgres:latest"]
To exclude specific images like Kali:
[[runners]]
  (...)
  executor = "docker"
  [runners.docker]
    (...)
    allowed_images = ["**", "!*/kali*"]
Access services hostnames
To access a service hostname, add the service to services in .gitlab-ci.yml.
For example, to use a WordPress instance to test an API integration with your application,
use tutum/wordpress as the service image:
services:
- tutum/wordpress:latest
When the job runs, the tutum/wordpress service starts. You can
access it from your build container under the hostname tutum__wordpress
and tutum-wordpress.
In addition to the specified service aliases, the runner assigns the name of the service image as an alias to the service container. You can use any of these aliases.
The runner uses the following rules to create the alias based on the image name:
- Everything after
:is stripped. - For the first alias, the slash (
/) is replaced with double underscores (__). - For the second alias, the slash (
/) is replaced with a single dash (-).
If you use a private service image, the runner strips any specified port and applies the rules.
The service registry.gitlab-wp.com:4999/tutum/wordpress results in the hostname
registry.gitlab-wp.com__tutum__wordpress and registry.gitlab-wp.com-tutum-wordpress.
Configuring services
To change database names or set account names, you can define environment variables
for the service.
When the runner passes variables:
- Variables are passed to all containers. The runner cannot pass variables to specific
containers. - Secure variables are passed to the build container.
For more information about configuration variables, see the documentation of each image
provided in their corresponding Docker Hub page.
Mount a directory in RAM
You can use the tmpfs option to mount a directory in RAM. This speeds up the time
required to test if there is a lot of I/O related work, such as with databases.
If you use the tmpfs and services_tmpfs options in the runner configuration,
you can specify multiple paths, each with its own options. For more information, see the
Docker documentation.
For example, to mount the data directory for the official MySQL container in RAM,
configure the config.toml:
[runners.docker]
  # For the main container
  [runners.docker.tmpfs]
      "/var/lib/mysql" = "rw,noexec"

  # For services
  [runners.docker.services_tmpfs]
      "/var/lib/mysql" = "rw,noexec"
Building a directory in a service
GitLab Runner mounts a /builds directory to all shared services.
For more information about using different services see:
- Using PostgreSQL
- Using MySQL
How GitLab Runner performs the services health check
After the service starts, GitLab Runner waits for the service to
respond. The Docker executor tries to open a TCP connection to the
exposed service port in the service container.
- In GitLab 15.11 and earlier, only the first exposed port is checked.
- In GitLab 16.0 and later, the first 20 exposed ports are checked.
The HEALTHCHECK_TCP_PORT service variable can be used to perform the health check on a specific port:
job:
  services:
    - name: mongo
      variables:
        HEALTHCHECK_TCP_PORT: "27017"
To see how this is implemented, use the health check Go command.
Specify Docker driver operations
Specify arguments to supply to the Docker volume driver when you create volumes for builds.
For example, you can use these arguments to limit the space for each build to run, in addition to all other driver specific options.
The following example shows a config.toml where the limit that each build can consume is set to 50 GB.
[runners.docker]
  [runners.docker.volume_driver_ops]
      "size" = "50G"
Using host devices
You can expose hardware devices on the GitLab Runner host to the container that runs the job.
To do this, configure the runner’s devices and services_devices options.
- To expose devices to
buildand
helper containers, use thedevicesoption. - To expose devices to services containers, use the
services_devicesoption.
To restrict a service container’s device access to specific images, use exact image names or glob patterns.
This action prevents direct access to host system devices.
For more information on device access, see Docker documentation.
Build container example
In this example, the config.toml section exposes /dev/bus/usb to build containers.
This configuration allows pipelines to access USB devices attached to the host
machine, such as Android smartphones controlled over the
Android Debug Bridge (adb).
Since build job containers can directly access host USB devices, simultaneous
pipeline executions may conflict with each other when accessing the same hardware.
To prevent these conflicts, use resource_group.
[[runners]]
  name = "hardware-runner"
  url = "https://gitlab.com"
  token = "__REDACTED__"
  executor = "docker"
  [runners.docker]
    # All job containers may access the host device
    devices = ["/dev/bus/usb"]
Private registry example
This example shows how to expose /dev/kvm and /dev/dri devices to container images from a private
Docker registry. These devices are commonly used for hardware-accelerated virtualization and rendering.
To mitigate risks involved with providing users direct access to hardware resources,
restrict device access to trusted images in the myregistry:5000/emulator/* namespace:
[runners.docker]
  [runners.docker.services_devices]
    # Only images from an internal registry may access the host devices
    "myregistry:5000/emulator/*" = ["/dev/kvm", "/dev/dri"]
The image name **/* might expose devices to any image.
Configure directories for the container build and cache
To define where data is stored in the container, configure /builds and /cache
directories in the [[runners]] section in config.toml.
If you modify the /cache storage path, to mark the path as persistent you must define it in volumes = ["/my/cache/"], under the
[runners.docker] section in config.toml.
By default, the Docker executor stores builds and caches in the following directories:
- Builds in
/builds/<namespace>/<project-name> - Caches in
/cacheinside the container.
Clear the Docker cache
Use clear-docker-cache to remove unused containers and volumes created by the runner.
For a list of options, run the script with the help option:
The default option is prune-volumes, which removes all unused containers (dangling and unreferenced)
and volumes.
To manage cache storage efficiently, you should:
- Run
clear-docker-cachewithcronregularly (for example, once a week). - Maintain some recent containers in the cache for performance while you
reclaim disk space.
The FILTER_FLAG environment variable controls which objects are pruned. For example usage, see the
Docker image prune documentation.
Clear Docker build images
The clear-docker-cache script does not remove Docker images because they are not tagged by the GitLab Runner.
To clear Docker build images:
-
Confirm what disk space can be reclaimed:
clear-docker-cache space Show docker disk usage ---------------------- TYPE TOTAL ACTIVE SIZE RECLAIMABLE Images 14 9 1.306GB 545.8MB (41%) Containers 19 18 115kB 0B (0%) Local Volumes 0 0 0B 0B Build Cache 0 0 0B 0B -
To remove all unused containers, networks, images (dangling and unreferenced), and untagged volumes, run
docker system prune.
Persistent storage
The Docker executor provides persistent storage when it runs containers.
All directories defined in volumes = are persistent between builds.
The volumes directive supports the following types of storage:
- For dynamic storage, use
<path>. The<path>is persistent between subsequent runs of the same concurrent job for that project. The data is attached to a custom cache volume:runner-<short-token>-project-<id>-concurrent-<concurrency-id>-cache-<md5-of-path>. - For host-bound storage, use
<host-path>:<path>[:<mode>]. The<path>is bound to<host-path>on the host system. The optional<mode>specifies that this storage is read-only or read-write (default).
Persistent storage for builds
If you make the /builds directory a host-bound storage, your builds are stored in:
/builds/<short-token>/<concurrent-id>/<namespace>/<project-name>, where:
<short-token>is a shortened version of the Runner’s token (first 8 letters).<concurrent-id>is a unique number that identifies the local job ID of the
particular runner in context of the project.
IPC mode
The Docker executor supports sharing the IPC namespace of containers with other
locations. This maps to the docker run --ipc flag.
More details on IPC settings in Docker documentation
Privileged mode
The Docker executor supports several options that allows fine-tuning of the
build container. One of these options is the privileged mode.
Use Docker-in-Docker with privileged mode
The configured privileged flag is passed to the build container and all
services. With this flag, you can use the Docker-in-Docker approach.
First, configure your runner (config.toml) to run in privileged mode:
[[runners]]
  executor = "docker"
  [runners.docker]
    privileged = true
Then, make your build script (.gitlab-ci.yml) to use Docker-in-Docker
container:
image: docker:git
services:
- docker:dind

build:
  script:
  - docker build -t my-image .
  - docker push my-image
Containers that run in privileged mode have security risks.
When your containers run in privileged mode, you disable the
container security mechanisms and expose your host to privilege escalation.
Running containers in privileged mode can lead to container breakout. For more information,
see the Docker documentation about
runtime privilege and Linux capabilities.
You might need to
configure Docker in Docker with TLS, or disable TLS
to avoid an error similar to the following:
Cannot connect to the Docker daemon at tcp://docker:2375. Is the docker daemon running?Use rootless Docker-in-Docker with restricted privileged mode
In this version, only Docker-in-Docker rootless images are allowed to run as services in privileged mode.
The services_privileged and allowed_privileged_services configuration parameters
limit which containers are allowed to run in privileged mode.
To use rootless Docker-in-Docker with restricted privileged mode:
-
In the
config.toml, configure the runner to useservices_privilegedandallowed_privileged_services:[[runners]] executor = "docker" [runners.docker] services_privileged = true allowed_privileged_services = ["docker.io/library/docker:*-dind-rootless", "docker.io/library/docker:dind-rootless", "docker:*-dind-rootless", "docker:dind-rootless"] -
In
.gitlab-ci.yml, edit your build script to use Docker-in-Docker rootless container:image: docker:git services: - docker:dind-rootless build: script: - docker build -t my-image . - docker push my-image
Only the Docker-in-Docker rootless images you list in allowed_privileged_services are allowed to run in privileged mode.
All other containers for jobs and services run in unprivileged mode.
Because they run as non-root, it’s almost safe to use with privileged mode
images like Docker-in-Docker rootless or BuildKit rootless.
For more information about security issues,
see Security risks for Docker executors.
Configure a Docker ENTRYPOINT
By default the Docker executor doesn’t override the ENTRYPOINT of a Docker image. It passes sh or bash as COMMAND to start a container that runs the job script.
To ensure a job can run, its Docker image must:
- Provide
shorbashandgrep - Define an
ENTRYPOINTthat starts a shell when passedsh/bashas argument
The Docker Executor runs the job’s container with an equivalent of the following command:
docker run <image> sh -c "echo 'It works!'" # or bashIf your Docker image doesn’t support this mechanism, you can override the image’s ENTRYPOINT in the project configuration as follows:
# Equivalent of
# docker run --entrypoint "" <image> sh -c "echo 'It works!'"
image:
  name: my-image
  entrypoint: [""]
For more information, see Override the Entrypoint of an image and How CMD and ENTRYPOINT interact in Docker.
Job script as ENTRYPOINT
You can use ENTRYPOINT to create a Docker image that
runs the build script in a custom environment, or in secure mode.
For example, you can create a Docker image that uses an ENTRYPOINT that doesn’t
execute the build script. Instead, the Docker image executes a predefined set of commands
to build the Docker image from your directory. You run
the build container in privileged mode, and secure
the build environment of the runner.
-
Create a new Dockerfile:
FROM docker:dind ADD / /entrypoint.sh ENTRYPOINT ["/bin/sh", "/entrypoint.sh"] -
Create a bash script (
entrypoint.sh) that is used as theENTRYPOINT:#!/bin/sh dind docker daemon --host=unix:///var/run/docker.sock \ --host=tcp://0.0.0.0:2375 \ --storage-driver=vf & docker build -t "$BUILD_IMAGE" . docker push "$BUILD_IMAGE" -
Push the image to the Docker registry.
-
Run Docker executor in
privilegedmode. Inconfig.tomldefine:[[runners]] executor = "docker" [runners.docker] privileged = true -
In your project use the following
.gitlab-ci.yml:variables: BUILD_IMAGE: my.image build: image: my/docker-build:image script: - Dummy Script
Use Podman to run Docker commands
If you have GitLab Runner installed on Linux, your jobs can use Podman to replace Docker as
the container runtime in the Docker executor.
Prerequisites:
- Podman v4.2.0 or later.
- To run services with Podman as an executor, enable the
FF_NETWORK_PER_BUILDfeature flag.
Docker container links are legacy
and are not supported by Podman. For services that
create a network alias, you must install thepodman-pluginspackage.
-
On your Linux host, install GitLab Runner. If you installed GitLab Runner
by using your system’s package manager, it automatically creates agitlab-runneruser. -
Sign in as the user who runs GitLab Runner. You must do so in a way that
doesn’t go aroundpam_systemd.
You can use SSH with the correct user. This ensures you can runsystemctlas this user. -
Make sure that your system fulfills the prerequisites for
a rootless Podman setup.
Specifically, make sure your user has
correct entries in/etc/subuidand/etc/subgid. -
On the Linux host, install Podman.
-
Enable and start the Podman socket:
systemctl --user --now enable podman.socket -
Verify the Podman socket is listening:
systemctl status --user podman.socket -
Copy the socket string in the
Listenkey through which the Podman API is being accessed. -
Make sure the Podman socket remains available after the GitLab Runner user is logged out:
sudo loginctl enable-linger gitlab-runner -
Edit the GitLab Runner
config.tomlfile and add the socket value to the host entry in the[runners.docker]section.
For example:[[runners]] name = "podman-test-runner-2022-06-07" url = "https://gitlab.com" token = "x-XxXXXXX-xxXxXxxxxx" executor = "docker" [runners.docker] host = "unix:///run/user/1012/podman/podman.sock" tls_verify = false image = "quay.io/podman/stable" privileged = true
Use Podman to build container images from a Dockerfile
The following example uses Podman to build a container image and push the image to the GitLab Container registry.
The default container image in the Runner config.toml is set to quay.io/podman/stable, so that the CI job uses that image to execute the included commands.
variables:
  IMAGE_TAG: $CI_REGISTRY_IMAGE:$CI_COMMIT_REF_SLUG

before_script:
  - podman login -u "$CI_REGISTRY_USER" -p "$CI_REGISTRY_PASSWORD" $CI_REGISTRY

oci-container-build:
  stage: build
  script:
    - podman build -t $IMAGE_TAG .
    - podman push $IMAGE_TAG
  when: manual
Use Buildah to build container images from a Dockerfile
The following example shows how to use Buildah to build a container image and push the image to the GitLab Container registry.
image: quay.io/buildah/stable

variables:
  IMAGE_TAG: $CI_REGISTRY_IMAGE:$CI_COMMIT_REF_SLUG

before_script:
  - buildah login -u "$CI_REGISTRY_USER" -p "$CI_REGISTRY_PASSWORD" $CI_REGISTRY

oci-container-build:
  stage: build
  script:
    - buildah bud -t $IMAGE_TAG .
    - buildah push $IMAGE_TAG
  when: manual
Specify which user runs the job
By default, the runner runs jobs as the root user in the container. To specify a different, non-root user to run the job, use the USER directive in the Dockerfile of the Docker image.
FROM amazonlinux
RUN ["yum", "install", "-y", "nginx"]
RUN ["useradd", "www"]
USER "www"
CMD ["/bin/bash"]
When you use that Docker image to execute your job, it runs as the specified user:
build:
  image: my/docker-build:image
  script:
  - whoami   # www
Configure how runners pull images
Configure the pull policy in the config.toml to define how runners pull Docker images from registries. You can set a single policy, a list of policies, or allow specific pull policies.
Use the following values for the pull_policy:
always: Pull an image even if a local image exists. Default.if-not-present: Pull an image only when a local version does not exist.never: Never pull an image and use only local images.
[[runners]]
  (...)
  executor = "docker"
  [runners.docker]
    (...)
    pull_policy = "always" # available: always, if-not-present, never
Set the always pull policy
The always option, which is on by default, always initiates a pull before
creating the container. This option makes sure the image is up-to-date, and
prevents you from using outdated images even if a local image exists.
Use this pull policy if:
- Runners must always pull the most recent images.
- Runners are publicly available and configured for auto-scale or as
an instance runner in your GitLab instance.
Do not use this policy if runners must use locally stored images.
Set always as the pull policy in the config.toml:
[[runners]]
  (...)
  executor = "docker"
  [runners.docker]
    (...)
    pull_policy = "always"
Set the if-not-present pull policy
When you set the pull policy to if-not-present, the runner first checks
if a local image exists. If there is no local image, the runner pulls
an image from the registry.
Use the if-not-present policy to:
- Use local images but also pull images if a local image does not exist.
- Reduce time that runners analyze the difference in image layers for heavy and rarely updated images.
In this case, you must manually remove the image regularly from the local Docker Engine store to
force the image update.
Do not use this policy:
- For instance runners where different users that use the runner may have access to private images.
For more information about security issues, see
Usage of private Docker images with if-not-present pull policy. - If jobs are frequently updated and must be run in the most recent image
version. This may result in a network load reduction that outweighs the value of frequent deletion
of local images.
Set the if-not-present policy in the config.toml:
[[runners]]
  (...)
  executor = "docker"
  [runners.docker]
    (...)
    pull_policy = "if-not-present"
Set the never pull policy
Prerequisites:
- Local images must contain an installed Docker Engine and a local copy of used images.
When you set the pull policy to never, image pulling is disabled. Users can only use images
that have been manually pulled on the Docker host where the runner runs.
Use the never pull policy:
- To control the images used by runner users.
- For private runners that are dedicated to a project that can only use specific images
that are not publicly available on any registries.
Do not use the never pull policy for auto-scaled
Docker executors. The never pull policy is usable only when using a pre-defined cloud instance
images for chosen cloud provider.
Set the never policy in the config.toml:
[[runners]]
  (...)
  executor = "docker"
  [runners.docker]
    (...)
    pull_policy = "never"
Set multiple pull policies
You can list multiple pull policies to execute if a pull fails. The runner processes pull policies
in the order listed until a pull attempt is successful or the list is exhausted. For example, if a
runner uses the always pull policy and the registry is not available, you can add the if-not-present
as a second pull policy. This configuration lets the runner use a locally cached Docker image.
For information about the security implications of this pull policy, see
Usage of private Docker images with if-not-present pull policy.
To set multiple pull policies, add them as a list in the config.toml:
[[runners]]
  (...)
  executor = "docker"
  [runners.docker]
    (...)
    pull_policy = ["always", "if-not-present"]
Allow Docker pull policies
In the .gitlab-ci.yml file, you can specify a pull policy. This policy determines how a CI/CD job
fetches images.
To restrict which pull policies can be used from those specified in the .gitlab-ci.yml file, use allowed_pull_policies.
For example, to allow only the always and if-not-present pull policies, add them to the config.toml:
[[runners]]
  (...)
  executor = "docker"
  [runners.docker]
    (...)
allowed_pull_policies = ["always", "if-not-present"]- If you don’t specify
allowed_pull_policies, the list matches the values specified in thepull_policykeyword. - If you don’t specify
pull_policy, the default isalways. - The job uses only the pull policies that are listed in both
pull_policyandallowed_pull_policies.
The effective pull policy is determined by comparing the policies specified in
pull_policykeyword
andallowed_pull_policies. GitLab uses the intersection
of these two policy lists.
For example, ifpull_policyis["always", "if-not-present"]andallowed_pull_policies
is["if-not-present"], then the job uses onlyif-not-presentbecause it’s the only pull policy defined in both lists. - The existing
pull_policykeyword must include at least one pull policy specified inallowed_pull_policies.
The job fails if none of thepull_policyvalues matchallowed_pull_policies.
Image pull error messages
| Error message | Description |
|---|---|
Pulling docker image registry.tld/my/image:latest ... ERROR: Build failed: Error: image registry.tld/my/image:latest not found |
The runner cannot find the image. Displays when the always pull policy is set |
Pulling docker image local_image:latest ... ERROR: Build failed: Error: image local_image:latest not found |
The image was built locally and doesn’t exist in any public or default Docker registry. Displays when the always pull policy is set. |
Pulling docker image registry.tld/my/image:latest ... WARNING: Cannot pull the latest version of image registry.tld/my/image:latest : Error: image registry.tld/my/image:latest not found WARNING: Locally found image will be used instead. |
The runner has used a local image instead of pulling an image. |
Pulling docker image local_image:latest ... ERROR: Build failed: Error: image local_image:latest not found |
The image cannot be found locally. Displays when the never pull policy is set. |
WARNING: Failed to pull image with policy "always": Error response from daemon: received unexpected HTTP status: 502 Bad Gateway (docker.go:143:0s) Attempt #2: Trying "if-not-present" pull policy Using locally found image version due to "if-not-present" pull policy |
The runner failed to pull an image and attempts to pull an image by using the next listed pull policy. Displays when multiple pull policies are set. |
Retry a failed pull
To configure a runner to retry a failed image pull, specify the same policy more than once in the
config.toml.
For example, this configuration retries the pull one time:
[runners.docker]
  pull_policy = ["always", "always"]
This setting is similar to the retry directive
in the .gitlab-ci.yml files of individual projects,
but only takes effect if specifically the Docker pull fails initially.
Use Windows containers
To use Windows containers with the Docker executor, note the following
information about limitations, supported Windows versions, and
configuring a Windows Docker executor.
Nanoserver support
With the support for PowerShell Core introduced in the Windows helper image, it is now possible to leverage
the nanoserver variants for the helper image.
Known issues with Docker executor on Windows
The following are some limitations of using Windows containers with
Docker executor:
-
Docker-in-Docker is not supported, because it’s
not supported by
Docker itself. -
Interactive web terminals are not supported.
-
Host device mounting not supported.
-
When mounting a volume directory it has to exist, or Docker fails
to start the container, see
#3754 for
additional detail. -
docker-windowsexecutor can be run only using GitLab Runner running
on Windows. -
Linux containers on Windows
are not supported, because they are still experimental. Read
the relevant issue for
more details. -
Because of a limitation in Docker,
if the destination path drive letter is notc:, paths are not supported for:builds_dircache_dirvolumes
This means values such as
f:\\cache_dirare not supported, butf:is supported.
However, if the destination path is on thec:drive, paths are also supported
(for examplec:\\cache_dir).To configure where the Docker daemon keeps images and containers, update
thedata-rootparameter in thedaemon.jsonfile of the Docker daemon.For more information, see Configure Docker with a configuration file.
Supported Windows versions
GitLab Runner only supports the following versions of Windows which
follows our support lifecycle for Windows:
- Windows Server 2022 LTSC (21H2)
- Windows Server 2019 LTSC (1809)
For future Windows Server versions, we have a
future version support policy.
You can only run containers based on the same OS version that the Docker
daemon is running on. For example, the following Windows Server Core images can
be used:
mcr.microsoft.com/windows/servercore:ltsc2022mcr.microsoft.com/windows/servercore:ltsc2022-amd64mcr.microsoft.com/windows/servercore:1809mcr.microsoft.com/windows/servercore:1809-amd64mcr.microsoft.com/windows/servercore:ltsc2019
Supported Docker versions
GitLab Runner uses Docker to detect what version of Windows Server is running.
Hence, a Windows Server running GitLab Runner must be running a recent version of Docker.
A known version of Docker that doesn’t work with GitLab Runner is Docker 17.06.
Docker does not identify the version of Windows Server resulting in the
following error:
unsupported Windows Version: Windows Server DatacenterRead more about troubleshooting this.
Configure a Windows Docker executor
When a runner is registered with c:\\cache
as a source directory when passing the --docker-volumes or
DOCKER_VOLUMES environment variable, there is a
known issue.
Below is an example of the configuration for a Docker
executor running Windows.
[[runners]]
  name = "windows-docker-2019"
  url = "https://gitlab.com/"
  token = "xxxxxxx"
  executor = "docker-windows"
  [runners.docker]
    image = "mcr.microsoft.com/windows/servercore:1809_amd64"
    volumes = ["c:\\cache"]
For other configuration options for the Docker executor, see the
advanced configuration
section.
Services
You can use services by
enabling a network for each job.
Native Step Runner Integration
The Docker executor supports running the CI/CD steps natively by using the
gRPC API provided by step-runner.
To enable this mode of execution, you must specify CI/CD jobs using the run keyword instead of the legacy script
keyword. Additionally, you must enable the FF_USE_NATIVE_STEPS feature flag. You can enable this feature flag at
either the job or pipeline level.
step job:
  stage: test
  variables:
    FF_USE_NATIVE_STEPS: true
  image:
    name: alpine:latest
  run:
    - name: step1
      script: pwd
    - name: step2
      script: env
    - name: step3
      script: ls -Rlah ../
Known Issues
-
In GitLab 17.9 and later, the build image must have the
ca-certificatespackage installed or thestep-runnerwill fail to pull the steps
defined in the job. Debian-based Linux distribution for example do not installca-certificatesby default. -
In GitLab versions before 17.9, the build image must include a
step-runnerbinary in$PATH. To achieve this, you can either:- Create your own custom build image and include the
step-runnerbinary in it. - Use the
registry.gitlab.com/gitlab-org/step-runner:v0image if it includes the dependencies you need to run your
job.
- Create your own custom build image and include the
-
Running a step that runs a Docker container must adhere to the same configuration parameters and constraints as
traditionalscripts. For example, you must use Docker-in-Docker. -
This mode of execution does not yet support running
Github Actions.
- Tier: Free, Premium, Ultimate
- Offering: GitLab.com, GitLab Self-Managed, GitLab Dedicated
GitLab Runner implements different executors that can be used to run your
builds in different environments.
If you are not sure about which executor to select, see Selecting the executor.
For more information about features supported by each executor, see the compatibility chart.
GitLab Runner provides the following executors:
- SSH
- Shell
- Parallels
- VirtualBox
- Docker
- Docker Autoscaler
- Docker Machine (auto-scaling)
- Kubernetes
- Instance
- Custom
These executors are locked and we are no longer developing or accepting
new ones. For more information, see Contributing new executors.
Prerequisites for non-Docker executors
Executors that do not rely on a helper image require a Git
installation on the target machine and in the PATH. Always use the latest available version of Git.
GitLab Runner uses the git lfs command if Git LFS is installed
on the target machine. Ensure Git LFS is up to date on any systems where GitLab Runner uses these executors.
Be sure to initialize Git LFS for the user that executes GitLab Runner commands with git lfs install. You can initialize Git LFS on an entire system with git lfs install --system.
To authenticate Git interactions with the GitLab instance, GitLab Runner
uses CI_JOB_TOKEN.
Depending on the FF_GIT_URLS_WITHOUT_TOKENS setting,
the last used credential might be cached in a pre-installed Git credential helper (for
example Git credential manager)
if such a helper is installed and configured to cache credentials:
- When FF_GIT_URLS_WITHOUT_TOKENS is
false, the last usedCI_JOB_TOKEN
is stored in pre-installed Git credential helpers. - When FF_GIT_URLS_WITHOUT_TOKENS is
true, theCI_JOB_TOKEN
is never stored or cached in any pre-installed Git credential helper.
Selecting the executor
The executors support different platforms and methodologies for building a
project. The table below shows the key facts for each executor which helps
you decide which executor to use.
| Executor | SSH | Shell | VirtualBox | Parallels | Docker | Docker Autoscaler | Instance | Kubernetes | Custom |
|---|---|---|---|---|---|---|---|---|---|
| Clean build environment for every build | ✗ | ✗ | ✓ | ✓ | ✓ | ✓ | conditional 4 | ✓ | conditional 4 |
| Reuse previous clone if it exists | ✓ | ✓ | ✗ | ✗ | ✓ | ✓ | conditional 4 | ✓ 6 | conditional 4 |
| Runner file system access protected 5 | ✓ | ✗ | ✓ | ✓ | ✓ | ✓ | ✗ | ✓ | conditional |
| Migrate runner machine | ✗ | ✗ | partial | partial | ✓ | ✓ | ✓ | ✓ | ✓ |
| Zero-configuration support for concurrent builds | ✗ | ✗ 1 | ✓ | ✓ | ✓ | ✓ | ✓ | ✓ | conditional 4 |
| Complicated build environments | ✗ | ✗ 2 | ✓ 3 | ✓ 3 | ✓ | ✓ | ✗ 2 | ✓ | ✓ |
| Debugging build problems | easy | easy | hard | hard | medium | medium | medium | medium | medium |
Footnotes:
- If the builds use services installed on the build machine, selecting executors is possible but problematic.
- Requires manual dependency installation.
- For example, using Vagrant.
- Depends on the environment you are provisioning. Can be completely isolated or shared between builds.
- When a runner’s file system access is not protected, jobs can access the entire system,
including the runner’s token and other jobs’ cache and code.
Executors marked ✓ don’t allow the runner to access the file system by default.
However, security flaws or certain configurations could allow jobs
to break out of their container and access the file system hosting the runner. - Requires persistent per-concurrency build volumes configuration.
Shell executor
The Shell executor is simplest configuration option for GitLab Runner. It executes jobs locally on
the system where GitLab Runner is installed, requiring all dependencies to be manually installed on the same
machine.
This executor supports Bash for Linux, macOS, and FreeBSD operating systems, while offering PowerShell
support for Windows environments.
While ideal for builds with minimal dependencies, it only provides limited isolation between jobs.
Docker executor
Docker executor provides clean build environments through containers. Dependency management is straightforward,
with all dependencies packaged in the Docker image. This executor requires Docker installation on the Runner host.
This executor supports additional services like MySQL.
It also accommodates Podman as an alternative container runtime.
This executor maintains consistent, isolated build environments.
Docker Machine executor (deprecated)
The Docker Machine executor is a special version of the Docker executor with support for auto-scaling. It works like the typical
Docker executor but with build hosts created on demand by Docker Machine. This capability makes it particularly effective
in cloud environments like AWS EC2, offering excellent isolation and scalability for variable workloads.
Docker Autoscaler executor
The Docker Autoscaler executor is an autoscale-enabled Docker executor that creates instances on demand to
accommodate the jobs that the runner manager processes. It wraps the Docker executor so that all
Docker executor options and features are supported.
The Docker Autoscaler uses fleeting plugins to autoscale.
Fleeting is an abstraction for a group of autoscaled instances, which uses plugins that support cloud providers,
like Google Cloud, AWS, and Azure. This executor particularly suits environments with dynamic workload requirements.
Instance executor
The Instance executor is an autoscale-enabled executor that creates instances on demand to accommodate
the expected volume of jobs that the runner manager processes.
This executor and the related Docker Autoscale executor are the new autoscaling executors that works in conjunction with the GitLab Runner Fleeting and Taskscaler technologies.
The Instance executor also uses fleeting plugins to autoscale.
You can use the Instance executor when jobs need full access to the host instance, operating system, and
attached devices. The Instance executor can also be configured to accommodate single-tenant and multi-tenant jobs.
Kubernetes executor
You can use the Kubernetes executor to use an existing Kubernetes cluster for your builds. The executor calls the
Kubernetes cluster API and creates a new Pod (with a build container and services containers) for each GitLab CI/CD job.
This executor particularly suits cloud-native environments, offering superior scalability and resource utilization.
SSH executor
The SSH executor is added for completeness, but it’s among the least supported executors.
When you use the SSH executor, GitLab Runner connects to an external server and runs the builds there.
We have some success stories from organizations using this executor, but usually you should use one of the other types.
Custom executor
You can use the Custom executor to specify your own execution environments.
When GitLab Runner does not provide an executor (for example, Linux containers),
it allows you to use custom executables to provision and clean up environments.
Compatibility chart
Supported features by different executors:
| Executor | SSH | Shell | VirtualBox | Parallels | Docker | Docker Autoscaler | Instance | Kubernetes | Custom |
|---|---|---|---|---|---|---|---|---|---|
| Secure Variables | ✓ | ✓ | ✓ | ✓ | ✓ | ✓ | ✓ | ✓ | ✓ |
.gitlab-ci.yml: image |
✗ | ✗ | ✓ (1) | ✓ (1) | ✓ | ✗ | ✗ | ✓ | ✓ (by using $CUSTOM_ENV_CI_JOB_IMAGE) |
.gitlab-ci.yml: services |
✗ | ✗ | ✗ | ✗ | ✓ | ✗ | ✗ | ✓ | ✓ |
.gitlab-ci.yml: cache |
✓ | ✓ | ✓ | ✓ | ✓ | ✓ | ✓ | ✓ | ✓ |
.gitlab-ci.yml: artifacts |
✓ | ✓ | ✓ | ✓ | ✓ | ✓ | ✓ | ✓ | ✓ |
| Passing artifacts between stages | ✓ | ✓ | ✓ | ✓ | ✓ | ✓ | ✓ | ✓ | ✓ |
| Use GitLab Container Registry private images | not applicable | not applicable | not applicable | not applicable | ✓ | ✓ | not applicable | ✓ | not applicable |
| Interactive Web terminal | ✗ | ✓ (UNIX) | ✗ | ✗ | ✓ | ✗ | ✗ | ✓ | ✗ |
- Support added in GitLab Runner 14.2.
Refer to the Overriding the base VM image section for further details.
Supported systems by different shells:
| Shells | Bash | PowerShell Desktop | PowerShell Core | Windows Batch (deprecated) |
|---|---|---|---|---|
| Windows | ✗ (4) | ✓ (3) | ✓ | ✓ (2) |
| Linux | ✓ (1) | ✗ | ✓ | ✗ |
| macOS | ✓ (1) | ✗ | ✓ | ✗ |
| FreeBSD | ✓ (1) | ✗ | ✗ | ✗ |
- Default shell.
- Deprecated. Default shell if no
shell
is specified. - Default shell when a new runner is registered.
- Bash shell on Windows is not supported.
Supported systems for interactive web terminals by different shells:
| Shells | Bash | PowerShell Desktop | PowerShell Core | Windows Batch (deprecated) |
|---|---|---|---|---|
| Windows | ✗ | ✗ | ✗ | ✗ |
| Linux | ✓ | ✗ | ✗ | ✗ |
| macOS | ✓ | ✗ | ✗ | ✗ |
| FreeBSD | ✓ | ✗ | ✗ | ✗ |
The following diagram shows which executor to choose based on your operating system and platform:
graph TD
    Start[Which executor to choose?] --> BuildType{Autoscaling or No Autosclaing?}


    BuildType -->|No| BuildType2{Container or OS Shell builds?}
    BuildType-->|Yes| Platform{Platform}
    BuildType2 -->|Shell| ShellOptions{Operating System}
    BuildType2 -->|Container| ContainerOptions{Operating System}


    Platform -->|Cloud Native| Kubernetes[Kubernetes]
    Platform -->|Cloud VMs| OSType{Operating System}

    OSType -->|Windows| WinExec{Executor Type}
    OSType -->|macOS| MacExec{Executor Type}
    OSType -->|Linux| LinuxExec{Executor Type}


    WinExec --> AutoscalerWin[Fleeting: Docker Autoscaler Executor]
    WinExec --> InstanceWin[Fleeting:Instance Executor]

    MacExec --> AutoscalerMac[Fleeting: Docker Autoscaler Executor]
    MacExec --> InstanceMac[Fleeting:Instance Executor]

    LinuxExec --> AutoscalerLin[Fleeting: Docker Autoscaler Executor]
    LinuxExec --> InstanceLin[Fleeting:Instance Executor]


    ShellOptions -->|Linux| Linux_Shell[Bash;Zsh]
    ShellOptions -->|macOS| MacOS[Bash;Zsh]
    ShellOptions -->|Windows| Windows[Powershell 5.1; PowerShell 7.x]
    ShellOptions -->|Remote Machine| SSH[SSH]


    ContainerOptions -->|Linux| Linux_Shell2[Docker;Podman]
    ContainerOptions -->|macOS| macOS2[Docker]
    ContainerOptions -->|Windows| Windows2[Docker]

    %% Styling
    classDef default fill:#f9f9f9,stroke:#333,stroke-width:2px;
    classDef decision fill:#e1f3fe,stroke:#333,stroke-width:2px;
    classDef executor fill:#dcffe4,stroke:#333,stroke-width:2px;

    class Start default;
    class BuildType,BuildType2,Container,Scaling,AutoScale,NoAutoScale,ShellOptions,ContainerOptions,OSType,WinExec,MacExec,Platform,LinuxExec decision;
    class Kubernetes,Docker,Custom,Shell,Windows,SSH,DockerMachineWin,AutoscalerWin,InstanceWin,DockerMachineMac,AutoscalerMac,InstanceMac,DockerMachineLin,AutoscalerLin,InstanceLin executor;
Recenltly I worked on a task to provision a new GitLab Runner with Docker for Windows Executor. The Windows VM which hosted the runner needed to be configured with Terraform and PowerShell.
While working on the task, I discovered that GitLab documentation was a bit inaccurate, outdated, or not detailed enough.
I also did not find any guides how to provision a Runner in unattended mode.
So, I decided to publish this article to make other people’s work easer if they need to work on the similar task.
We will start from the ground up without any infrastructure and finish with a working Runner building a sample project with Docker for Windows.
Table of Contents
-
Note on Security
-
Before you begin
- Google Cloud
- Grant Permissions
- Gitlab
-
Working folder
- Edit
.envfile - Review provider.tf
- Edit variables.tf
- Review gitlab.tf
- Review gcp_windows_vm.tf
- Review startup.ps1
- Edit
-
Run the Demo
-
Clean Up
-
Links to Other Guides
Note on Security
The guide is focussed on automation rather than security, so trade off were made to keep it short. Terraform state and access keys are stored locally, service account permissions are too loose etc.
Let me know in the comments if you’d like to see the part two of the guide where we harden security.
Before you begin
Clone the GitHub repository and cd to the working folder terraform.
git clone https://github.com/kpoxo6op/gitlab-runner-docker-windows.git
cd gitlab-runner-docker-windows/terraform
Install Terraform.
Google Cloud
Some manual steps are required due to sensitivity of the billing details we need to provide.
Create a new project with a unique name. I’ll be using runner-demo-xxxx in this article. GCP project names are globally unique, so your project name will be different from mine.
Enable Billing for your project.
Note: Google provides a credit for all new accounts, you won’t be charged if you complete this guide. Just don’t forget to clean up resources when you are done.
Grant Permissions
Install Google Cloud SDK.
Enable Compute API so get permission for creating a Windows machine. This machine will host our GitLab Runner and Docker for Windows.
gcloud services enable compute.googleapis.com
Create Service account Terraform Admin.
PROJECT_ID=$(gcloud config get-value project)

gcloud iam service-accounts create terraform-admin \
    --description="Service account for Terraform operations" \
    --display-name="Terraform Admin"

gcloud projects add-iam-policy-binding ${PROJECT_ID} \
    --member=serviceAccount:terraform-admin@${PROJECT_ID}.iam.gserviceaccount.com \
    --role=roles/compute.admin \
    --role=roles/iam.serviceAccountUser
Create the key for Terraform Admin, save it to disk.
gcloud iam service-accounts keys create ~/terraform-admin-key.json \
    --iam-account terraform-admin@${PROJECT_ID}.iam.gserviceaccount.com

# verify the key
cat ~/terraform-admin-key.json
Terraform will connect to Google Cloud as Terraform Admin with the key in our home directory.
Gitlab
Sign up for a GitLab account.
Create any Group and Project with any name during the sign up process (GitLab won’t let you skip it). We will create another group with terraform later.
Create a Personal Access Token with api scope. We will use it the next step.
Working folder
Let’s edit/review files in terraform folder.
Edit .env file
Create the .env file from the sample provided.
cp .env.sample .env
cat .env
export GITLAB_TOKEN="glpat-xxxxxxxxxxxxxxxxxxxxxxxxxxxx"
export TF_VAR_my_ip_address="0.0.0.0/32"
export GOOGLE_APPLICATION_CREDENTIALS="/home/${USER}/terraform-admin-key.json"
Set environment variable values:
GITLAB_TOKEN: GitLab token from the previous step.
TF_VAR_my_ip_address: Your IP address in case you want to access the Windows VM we are about to create.
GOOGLE_APPLICATION_CREDENTIALS: Service Account keys from Google Cloud step.
Review provider.tf
Both Google and GitLab providers use credentials defined in .env file.
terraform {
  required_providers {
    gitlab = {
      source  = "gitlabhq/gitlab"
      version = "16.11.0"
    }
    google = {
      source  = "hashicorp/google"
      version = "5.26.0"
    }
  }
}

provider "google" {
    project = var.project_name
    region = var.gcp_region
}

provider "gitlab" {
  base_url = "https://gitlab.com/api/v4/"
}
Edit variables.tf
Set project_name to your unique Google project name. Optionally, set GCP zone and region too.
variable "my_ip_address" {
  description = "The IP address allowed for RDP access"
  type        = string
}

variable "project_name" {
  description = "Google Cloud project name"
  type        = string
  # your project name
  default     = "runner-demo-xxxx"
}

variable "gitlab_token" {
  description = "gitlab personal token"
  type        = string
}

variable "gcp_zone" {
  description = "Google Cloud Zone"
  type        = string
  default     = "australia-southeast1-a"
}

variable "gcp_region" {
  description = "Google Cloud Region"
  type        = string
  default     = "australia-southeast1"
}
Review gitlab.tf
In this file we:
- create GitLab project
- add the pipeline file to the project
- create the Runner on Gitlab side of things
We set long build_timeout for the project builds because we don’t want our build to fail while the Windows VM is being provisioned.
gitlab_user_runner will produce the authentication token for the new runner. We we will use it in the next file.
cat gitlab.tf
resource "gitlab_project" "project" {
  name             = "GitLab-${var.project_name}"
  description      = "Build an app inside Windows Container"
  visibility_level = "public"
  build_timeout    = "36000"
}

resource "gitlab_repository_file" "pipeline" {
  project        = gitlab_project.project.id
  file_path      = ".gitlab-ci.yml"
  branch         = "main"
  content        = base64encode(file("${path.module}/.gitlab-ci.yml"))
  commit_message = "Init pipeline"
  author_name    = "Terraform"
}

resource "gitlab_user_runner" "runner" {
  runner_type = "project_type"
  project_id  = gitlab_project.project.id
  description = "Runner with Docker for Windows executor"
  tag_list    = ["windows", "docker"]
}
Review gcp_windows_vm.tf
Note: this is not a full file, only the interesting parts.
We template the authentication token gitlab_user_runner.runner.token into the Windows startup script startup.ps1.
We allow RDP and SSH access from the IP defined in the .env file.
data "template_file" "startup_script" {
  template = file("${path.module}/startup.ps1")
  vars = {
    runner_token = gitlab_user_runner.runner.token
  }
}

resource "google_compute_instance" "windows_vm" {
  metadata = {
    windows-startup-script-ps1 = data.template_file.startup_script.rendered
  }
}

resource "google_compute_firewall" "allow_rdp" {
  source_ranges = [var.my_ip_address]

}

resource "google_compute_firewall" "allow_ssh" {
  source_ranges = [var.my_ip_address]
}
startup.ps1
Note: this is not a full file, only the interesting parts.
This is the most important and confusing part of the project to get right.
First, we install docker for Windows with install-docker-ce.ps1 provided by Microsoft.
The script will do some prep work, reboot the VM and start executing itself again when the VM starts.
Second, we wait until the second reboot when Docker service starts up.
Third, we register the runner with Docker for Windows executor. Let’s look at the parameters:
--token: Terraform from gcp_windows_vm.tf will substitute${runner_roken}with the token created by gitlab.tf--docker-image,--docker-helper-imageare set to nanoserver version because we don’t want to download over 10GB of data with the default images.--docker-useris set to Administrator to work around ‘Access Denied’ issue.
Finally, we install, start and verify the runner service.
.\install-docker-ce.ps1 -Force -DockerVersion '26.1.1'
if (Get-Service *docker* -ea SilentlyContinue) {
  Invoke-WebRequest -Uri $gitlabRunnerUrl -OutFile $runnerExe

  Write-Output "Register runner with token ${runner_token}"
  $registerParams = @(
    "register",
    "--builds-dir", $runnerDir,
    "--cache-dir", $runnerDir,
    "--config", "$runnerDir\config.toml",
    "--description", "Docker for Windows runner",
    "--executor", "docker-windows",
    "--non-interactive",
    "--token", "${runner_token}",
    "--url", "https://gitlab.com/",
    "--docker-image",
    "mcr.microsoft.com/powershell:lts-nanoserver-ltsc2022",
    "--docker-helper-image",
    "registry.gitlab.com/gitlab-org/gitlab-runner/gitlab-runner-helper:x86_64-bleeding-nanoserver21H2",
    "--docker-user", "ContainerAdministrator"
  )
  & $runnerExe @registerParams

  Write-Output "Install runner service"
  $commonParams = @{
    FilePath    = $runnerExe
    NoNewWindow = $true
    Wait        = $true
  }
  $installArgs = @(
    "install",
    "--working-directory", $runnerDir,
    "--config", "$runnerDir\config.toml"
  )
  Start-Process @commonParams -ArgumentList $installArgs

  Write-Output "Start runner service"
  Start-Process @commonParams -ArgumentList "start"

  Write-Output "Verify runners"
  & $runnerExe "verify"
  Get-WinEvent -ProviderName gitlab-runner | Format-Table -wrap -auto

} else {
  Write-Output "Waiting for Docker before registering runner"
}
It may be possible to execute Docker and Runner stages in separate Google startup scripts to make the code simpler. I could not make it working, either Docker or Runner parts would break and and annoy me a lot.
Run the Demo
Run terraform.
source .env
terraform init
terraform plan
terraform apply
Go to GitLab projects, navigate to the pipeline. The pipeline should be in pending state while the runner VM is being configured.
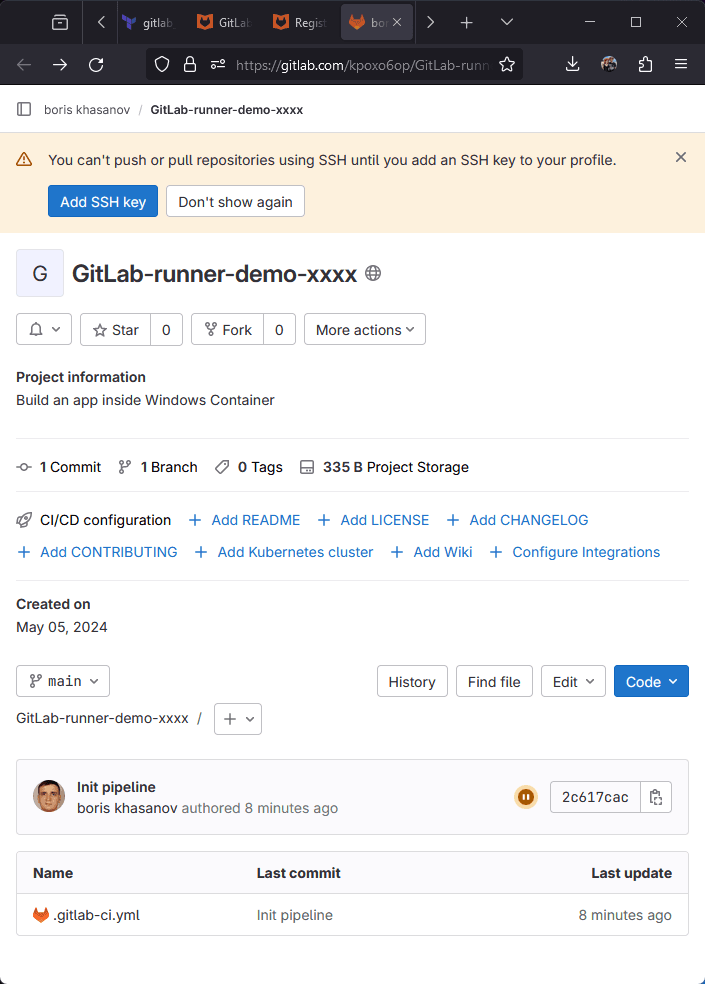
Go to CI/CD settings -> Runners -> click Expand. Your should see «Runner has never contacted this instance» message.
I was too slow taking the perfect screenshot, and my runner came online already.
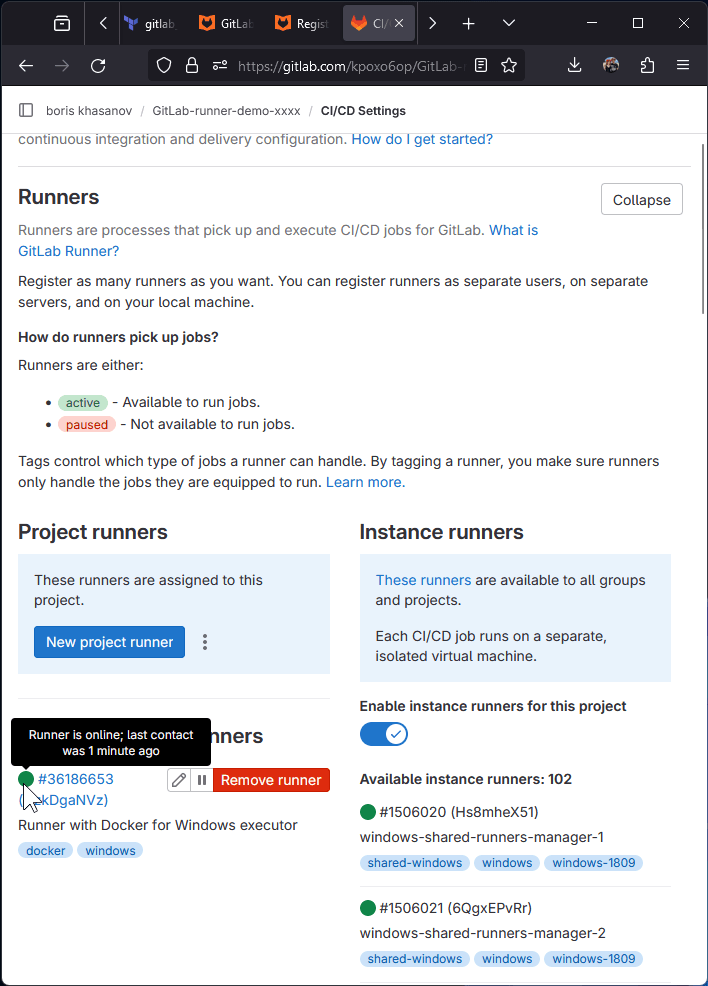
Check what VM is doing. Note: Connection errors may occur because the VM will restart.
Inspect the runner config. Check the running services, check the runner logs. You may see a new lines being written to a log file.
gcloud compute ssh gitlab-runner-windows
pwsh
Get-Content C:\Logs\startup.txt -Wait
#Ctrl+C to exit
Get-Content C:\GitLab-Runner\config.toml
Get-Service docker, gitlab-runner
Get-Eventlog Application -Source gitlab-runner -Newest 20 |
  Format-Table -Wrap -Auto
Go back to Gitlab. The runner should be Online, the job should be completed.

Clean Up
Run terraform destroy to tear down the Google Cloud VM and Gitlab Project.
terraform destroy --auto-approve
Links to Other Guides
I will be adding links to other related guides here. Feel free to suggest a link in the comments.
- Thomas’es guide at codingwiththomas.com. Thomas creates his own Dockerfile for Windows container (
--docker-imageparameter for runner executable). Watch out for--tag-listparameter as it no longer works. Runner tags need to be set at the GitLab server now (gitlab.tf).
GITLAB
If you are trying to use the GitLab.com shared runners, you may run out of minutes. Or you may have issues verifying your account. So, in order to maintain control over your CI/CD pipelines without the limitations of shared runners, setting up your own GitLab CI Runner with a Docker executor on Windows 10⁄11 can be a great solution. In this guide, we will take you through the steps needed to accomplish this.
Table of Contents
-
Prerequisites
-
Installing Docker Desktop
-
Installing GitLab Runner
-
Registering the Runner
-
Configuring the Runner
-
Running a Sample Pipeline
-
Troubleshooting Common Issues
-
Conclusion
Prerequisites
Before we begin, ensure that you have the following prerequisites:
-
A machine running Windows 10⁄11.
-
A GitLab account with a repository for your projects.
-
Administrative access to install software on your machine.
Installing Docker Desktop
-
Download Docker: Visit the Docker Desktop for Windows page and download the installer.
-
Install Docker Desktop:
-
Run the downloaded installer
.exefile. -
Follow the prompts in the installation wizard. Ensure that you enable the option to install WSL 2 if prompted.
-
-
Start Docker Desktop:
-
After installation, start Docker Desktop from the Start menu.
-
Configure Docker to use WSL 2 as the backend if not already configured.
-
-
Verify Installation: Open a command prompt or PowerShell and run:
You should see the version of Docker installed.
Installing GitLab Runner
-
Download GitLab Runner: Access the GitLab Runner releases page and download the appropriate binary for Windows.
-
Install GitLab Runner:
-
Place the downloaded
gitlab-runner-windows-amd64.exein a directory of your choice (e.g.,C:\GitLab-Runner). -
Rename the file to
gitlab-runner.exe.
-
-
Register GitLab Runner as a Service:
-
Open a command prompt with administrative privileges.
-
Navigate to the directory where
gitlab-runner.exeis located and run:
gitlab-runner.exe install-
To start the service, use:
-
Registering the Runner
To make your runner usable on a GitLab project, you need to register it.
-
Generate a Registration Token:
-
Go to your project in GitLab.
-
Navigate to Settings > CI/CD and expand the Runners section.
-
Find the registration token needed for your runner.
-
-
Register the Runner:
-
In the command prompt, run:
gitlab-runner.exe register-
Follow the prompts to enter the following information:
-
URL: Your GitLab instance URL (e.g.,
https://gitlab.com). -
Token: The registration token you obtained from your project settings.
-
Description: A friendly name for the runner (e.g.,
Windows Docker Runner). -
Tags: You can specify tags if needed (e.g.,
docker). -
Executor: Select
dockeras the executor.
-
-
-
Set Up Docker Image: When prompted for the default Docker image, you can choose a suitable image like
alpine:latestor any other image relevant to your project.
Configuring the Runner
The config.toml file is where you can make custom settings for your runner.
-
Locate the Configuration File: The file is typically located at
C:\Users\<YourUserName>\.gitlab-runner\config.toml. -
Modify Configuration (Optional): You can modify the configuration to set environments, manage volumes, and add custom Docker options. A basic config example looks like this:
   [[runners]]
     name = "Windows Docker Runner"
     url = "https://gitlab.com/"
     token = "YOUR_GENERATED_TOKEN"
     executor = "docker"
     [runners.docker]
       image = "alpine:latest"
       privileged = true
       disable_entrypoint_overwrite = false
       oom_kill_disable = false
       disable_userns = false
       volumes = ["/cache"]
       shm_size = 0
Running a Sample Pipeline
To confirm everything is working, create a sample .gitlab-ci.yml file in your repository:
stages:
  - build

build_job:
  stage: build
  script:
    - echo "Hello, GitLab CI/CD"
-
Commit and Push: Commit the file and push it to your GitLab repository.
-
Check Pipeline: Navigate to CI/CD > Pipelines in your GitLab project to see your jobs running.
Troubleshooting Common Issues
If you experience issues while setting up the GitLab Runner, consider these tips:
-
Docker Daemon Not Running: Ensure that Docker Desktop is running and the Docker daemon is active.
-
Permission Issues: Run the GitLab Runner commands in an elevated command prompt (Run as Administrator).
-
Network Issues: Ensure your firewall settings allow Docker to access the network.
Conclusion
Setting up a GitLab CI Runner with a Docker executor on Windows 10⁄11 can greatly enhance your CI/CD workflow by allowing you to bypass limitations associated with shared runners. By following this guide, you can install, configure, and utilize your GitLab CI Runner effectively. Whether you’re handling small projects or large enterprise applications, having your CI/CD environment under your control is a valuable asset. Start enjoying the benefits of a self-hosted CI environment today!
Suggested Articles
GITLAB
GITLAB
GITLAB
GITLAB
GITLAB
GITLAB
In this blogpost I will cover how to use Ansible to do all of the following in a single playbook:
- Create an EC2 instance using a Windows Server 2019 image
- Create and attach an EBS volume to the instance
- Initialize, partition and format the EBS volume
- Configure the Docker daemon
- Build our Docker images: vsbuildtools2019, miniconda3, miniforge3
- Install and launch a Gitlab-CI runner with docker-windows executor
I will finish this post with an example of how you can make use of this runner from within a Gitlab-CI configuration file. At the very end you will find a Gist with the Ansible playbook and the associated files.
But before going into details, first a bit of background as to why I had to do all of this.
Background
Our team at the Franklin is currently developing the RFI-File-Monitor, which will be used to archive, process and catalogue the data that is collected at our institute, according to a user-defined pipeline of operations that is applied to every file that occurs in an observed directory. Written in Python, development is split over two repositories: the core GUI and generic operations are available through a public Github repo, while the operations that are specific to the Franklin (the extensions) are being developed in a private Gitlab repository.
To ensure that the Monitor can be easily installed on our instrument control machines, most of which are expected to run Windows, we need installers that will easily install this package and all of its dependencies. To create these installers, we use conda-constructor, which makes this task (relatively) easy, as it fully supports the Anaconda packaging system, on which we rely for the development of the Monitor.
As it is cumbersome to run the constructor script manually whenever a new release is made, a CI/CD pipeline was configured in the extensions Gitlab repo to produce them automatically, and upload them to an S3 bucket. This blogpost explains in detail how the Gitlab-CI runner was set up to create the installers for the Windows platform using Ansible.
Create an EC2 instance using a Windows Server 2019 image
Amazon offers hundreds of images for different versions of Windows Server. In our case however, we are constrained by the version requirements of the docker-windows executor of the Gitlab-CI runner, and by the fact that we are going to be using containers to get this up and running, so we end up with searching the image library with:
- name: List available Windows images
  ec2_ami_info:
    aws_access_key: "{{ aws_access_key }}"
    aws_secret_key: "{{ aws_secret_key }}"
    region: "{{ region }}"
    filters:
      name: "*2019*Core*Containers*"
      platform: windows
  register: win_ec2_windows_images
- name: Print last image
  debug:
    msg: "Image: {{ (win_ec2_windows_images.images | last).name }}"
In this case, we are interested in the last image in the returned list, as it corresponds to the most recent build.
Next, we need to create a security group for the instance that will allow us to provision it with WinRM (port 5986) and use RDP for an interactive session (port 3389), which is very useful for debugging:
- name: Create security group for win ec2 instance(s)
  ec2_group:
    name: '{{ security_group_name }}'
    description: "Rules for gitlab-ci-runner Windows VM"
    aws_access_key: "{{ aws_access_key }}"
    aws_secret_key: "{{ aws_secret_key }}"
    region: "{{ region }}"
    state: present
    rules:
      - proto: tcp
        from_port: 3389
        to_port: 3389
        cidr_ip: 0.0.0.0/0
      - proto: tcp
        from_port: 5986
        to_port: 5986
        cidr_ip: 0.0.0.0/0
  register: win_ec2_security_group_result
An SSH public key is required, and must be installed on the VM. Do keep in mind that this key needs to be in the PEM format, which is not the default! I ended up using:
ssh-keygen -P "" -t rsa -b 4096 -m pem -f id_rsa_ec2
Import the keypair with:
- name: Import keypair
  ec2_key:
    name: "{{ key_name }}"
    key_material: "{{ lookup('file', ssh_public_key) }}"
    aws_access_key: "{{ aws_access_key }}"
    aws_secret_key: "{{ aws_secret_key }}"
    region: "{{ region }}"
    state: present
With this done, one can now spin up the EC2 instance:
- name: Create win ec2 instance
  ec2:
    instance_type: '{{ flavor }}'
    image: '{{ (win_ec2_windows_images.images | last).image_id }}'
    group_id: '{{ win_ec2_security_group_result.group_id }}'
    key_name: '{{ key_name }}'
    user_data: '{{lookup("file", "win_ec2_user_data")}}'
    exact_count: 1
    count_tag:
      Name: gitlab-ci-runner
    instance_tags:
      Name: gitlab-ci-runner
    wait: yes
    aws_access_key: "{{ aws_access_key }}"
    aws_secret_key: "{{ aws_secret_key }}"
    region: "{{ region }}"
  register: win_ec2_instance
- name: Print EC2 instance results
  debug:
    msg: "Image results: {{ win_ec2_instance }}"
Important here is the use of exact_count, count_tag and instance_tags to ensure that only one VM will be created, and that this will remain so when the Ansible script is run again! We will also be installing a small file with user_data to ensure it can be provisioned with Ansible later.
This instance comes with Windows Server installed on a drive of 30 GB, with about 18 GB left as free space. I initially thought that this would be enough to generate and store the Docker images, but this turned out to be false: the Docker image with a minimal installation of the Visual Studio build tools is huge!
Create and attach an EBS volume to the instance.
The solution was to attach another disk that is sufficiently large to hold the Docker images. I used 50 GB, which did the trick:
- name: Attach EBS 50 GB
  ec2_vol:
    instance: '{{ win_ec2_instance.tagged_instances[0].id }}'
    volume_size: 50
    aws_access_key: "{{ aws_access_key }}"
    aws_secret_key: "{{ aws_secret_key }}"
    region: "{{ region }}"
    device_name: /dev/xvdg
    delete_on_termination: yes
At this point, we need to wait until the instance is ready to accept WinRM connections, and afterwards obtain the initial password that was given to the Administrator user on the VM. We will use this password to provision the VM, but it may also be used to log in via RDP:
- name: Wait for instance to listen on winrm https port
  wait_for:
    state: started
    host: '{{ win_ec2_instance.tagged_instances[0].public_ip }}'
    port: 5986
    delay: 5
    timeout: 360
- name: Obtain initial passwords for win ec2 instance
  ec2_win_password:
    instance_id: '{{ win_ec2_instance.tagged_instances[0].id }}'
    key_file: "{{ ssh_private_key }}"
    wait: yes
    aws_access_key: "{{ aws_access_key }}"
    aws_secret_key: "{{ aws_secret_key }}"
    region: "{{ region }}"
  register: win_ec2_password
- name: Print admin password
  debug:
    msg: "Admin password: {{ win_ec2_password.win_password }}"
Until now, we have been using localhost to execute these commands, but now we have to switch to the EC2 instance, so we need to start a new play after creating a new host for it to use:
- name: Store floating ip internally
  add_host:
    name: vm-ip
    ansible_host: '{{ win_ec2_instance.tagged_instances[0].public_ip }}'
    ansible_port: 5986
    ansible_user: Administrator
    ansible_password: '{{ win_ec2_password.win_password }}'
    ansible_winrm_server_cert_validation: ignore
    ansible_connection: 'winrm'
Initialize, partition and format the EBS volume.
With the new play running, we can now hook up the EBS volume to the D: drive:
- name: Get disk facts
  win_disk_facts:
- name: Output disk facts
  debug:
    var: ansible_facts.disks
- name: Init, partition and format EBS
  block:
    # replace with win_initialize_disk in Ansible 2.10
    - name: Initialize disk
      win_command: powershell.exe -
      args:
        stdin: Initialize-Disk -Number 1
    - name: Partition EBS
      win_partition:
        drive_letter: D
        partition_size: -1
        disk_number: 1
    - name: Format EBS
      win_format:
        drive_letter: D
        file_system: NTFS
        full: no
  when: ansible_facts.disks[1].partition_count == 0
This will initialize the disk, partition it using all available space, and format the drive with NTFS.
With Ansible 2.9 we need to initialize the disk using a powershell command, as a dedicated module will only be available in 2.10. Since this command is not idempotent, I put these three actions into a block that is invoked only when the disk has not been partitioned.
Configure the Docker daemon
The Docker daemon is configured to use the C: drive for storing caches, images etc by default. There is also a 20 GB limit on building and running images, which is rather close to the expected size of the images we need to build, so it is best to increase this:
- name: Create Docker Cache folder
  win_file:
    path: D:\DockerCache
    state: directory
- name: Install vim
  win_chocolatey:
    name: vim
    state: present
- name: Copy Docker daemon config file
  win_copy:
    src: daemon.json
    dest: C:\ProgramData\Docker\config\daemon.json
  register: daemon_json_copied
- name: Restart Docker
  win_service:
    name: docker
    state: restarted
  when: daemon_json_copied.changed
with daemon.json:
{
    "storage-opts": [
    	"size=50GB"
    ],
    "data-root": "D:\\DockerCache"
}
Since we updated the Docker configuration, we need to restart it to ensure the changes are picked up. I am also install vim, using chocolatey, to help me with debugging via RDP.
With Docker using the D: drive to store its data, we can now start building our Docker images. Since we plan on building binary Python modules, conda-build will need the Visual Studio Build Tools and its cl.exe compiler for C and C++ code, as well as the Windows SDK with its headers. I wrote three Dockerfiles:
A Dockerfile with the required command-line tools and headers from Visual Studio Build Tools
# escape=`

# Use the latest Windows Server Core image with .NET Framework 4.8.
FROM mcr.microsoft.com/dotnet/framework/sdk:4.8-windowsservercore-ltsc2019

# Restore the default Windows shell for correct batch processing.
SHELL ["cmd", "/S", "/C"]

# Download the Build Tools bootstrapper.
ADD https://aka.ms/vs/16/release/vs_buildtools.exe C:\TEMP\vs_buildtools.exe

# Install Build Tools with the Microsoft.VisualStudio.Workload.VCTools workload
RUN C:\TEMP\vs_buildtools.exe --quiet --wait --norestart --nocache `
    --installPath C:\BuildTools `
    --add Microsoft.VisualStudio.Workload.VCTools `
    --add Microsoft.VisualStudio.Component.VC.Tools.x86.x64 `
    --add Microsoft.VisualStudio.Component.Windows10SDK.18362 `
    --remove Microsoft.VisualStudio.Component.VC.CMake.Project `
    --remove Microsoft.VisualStudio.Component.VC.Llvm.Clang `
    --remove Microsoft.VisualStudio.Component.VC.Llvm.ClangToolset `
    --remove Microsoft.VisualStudio.ComponentGroup.NativeDesktop.Llvm.Clang `
    --locale en-US `
 || IF "%ERRORLEVEL%"=="3010" EXIT 0


# Define the entry point for the docker container.
# This entry point starts the developer command prompt and launches the PowerShell shell.
ENTRYPOINT ["C:\\BuildTools\\Common7\\Tools\\VsDevCmd.bat", "&&", "powershell.exe", "-NoLogo", "-ExecutionPolicy", "Bypass"]
Dockerfile.miniconda
This Dockerfile extends the previous one with a miniconda installation, which currently comes with Python 3.8, and installs the conda-build package into it.
# escape=`

FROM buildtools2019:latest

# Restore the default Windows shell for correct batch processing.
SHELL ["cmd", "/S", "/C"]

# Download the Miniconda installer
ADD https://repo.anaconda.com/miniconda/Miniconda3-latest-Windows-x86_64.exe C:\TEMP\miniconda.exe

# Run the installer
RUN C:\TEMP\miniconda.exe /InstallationType=AllUsers `
    /AddToPath=1 `
    /RegisterPython=1 `
    /S `
    /D=C:\Miniconda

RUN conda update --all -y
RUN conda install -y conda-build

ENTRYPOINT ["C:\\BuildTools\\VC\\Auxiliary\\Build\\vcvars64.bat", "&&", "powershell.exe", "-NoLogo", "-ExecutionPolicy", "Bypass"]
Dockerfile.miniforge
The last Dockerfile also extends the vsbuildtools2019 image with a miniconda installer, but updated all packages with their latest conda-forge counterparts, and made this channel default for all subsequent conda invocations.
# escape=`

FROM buildtools2019:latest

# Restore the default Windows shell for correct batch processing.
SHELL ["cmd", "/S", "/C"]

# Download the Miniconda installer
ADD https://repo.anaconda.com/miniconda/Miniconda3-latest-Windows-x86_64.exe C:\TEMP\miniconda.exe

# Run the installer
RUN C:\TEMP\miniconda.exe /InstallationType=AllUsers `
    /AddToPath=1 `
    /RegisterPython=1 `
    /S `
    /D=C:\Miniconda

RUN conda config --prepend channels conda-forge

RUN conda update --all -y
RUN conda install -y conda-build

ENTRYPOINT ["C:\\BuildTools\\VC\\Auxiliary\\Build\\vcvars64.bat", "&&", "powershell.exe", "-NoLogo", "-ExecutionPolicy", "Bypass"]
These three images are built using the win_command Ansible module, as the Docker Ansible module is unfortunately not supported on Windows. However, the docker commands are idempotent, which makes life easy:
- name: Create BuildTools folder
  win_file:
    path: C:\BuildTools
    state: directory
- name: Copy our Dockerfiles
  win_copy:
    src: 'Dockerfile.{{ item }}'
    dest: C:\BuildTools\
  loop:
    - vsbuildtools
    - miniconda
    - miniforge
- name: Build vsbuildtools Docker image
  win_command: docker build -t buildtools2019:latest -m 2GB -f Dockerfile.vsbuildtools .
  args:
    chdir: C:\BuildTools
- name: Build miniconda3 Docker image
  win_command: docker build -t miniconda -t miniconda3 -m 2GB -f Dockerfile.miniconda .
  args:
    chdir: C:\BuildTools
- name: Build miniforge3 Docker image
  win_command: docker build -t miniforge -t miniforge3 -m 2GB -f Dockerfile.miniforge .
  args:
    chdir: C:\BuildTools
Install and launch a Gitlab-CI runner with docker-windows executor
While you may think that this would be the hardest part to get right, it turned out to be the easiest, as I could make use of the excellent riemers.gitlab-runner Ansible role, which I have used before successfully to install Gitlab-CI runners on an Openstack Linux VM. This role will install the runner, configure it and will register itself with the Gitlab instance whose repos will be making use of it:
- role: riemers.gitlab-runner
  # keep this until https://gitlab.com/gitlab-org/gitlab/-/issues/239013 is fixed
  gitlab_runner_wanted_version: 13.2.2
  gitlab_runner_registration_token: "{{ gitlab_registration_token }}"
  gitlab_runner_coordinator_url: "{{ gitlab_instance }}"
  gitlab_runner_runners:
    - name: 'GitLab Runner Docker Windows'
      executor: docker-windows
      docker_image: 'miniconda3'
      tags:
        - windows
      docker_volumes:
        - "C:\\cache"
      extra_configs:
        runners.docker:
          memory: 2048m
          pull_policy: never
          allowed_images:
            - miniconda
            - miniconda3
            - miniforge
            - miniforge3
            - buildtools2019
Configure your Gitlab repository CI to use these images
The following example .gitlab-ci.yml demonstrates how to make use of these images. It assumes that your repo contains a Python package called my-cool-package, and with folders called conda-build and conda-constructor that contain the conda and constructor recipes (meta.yaml and construct.yaml).
stages:
  - build
  - deploy

variables:
  AWS_DEFAULT_REGION: eu-west-2
  BUCKET_NAME: my-cool-bucket
  VERSION: 0.1.0

windows:build:
  stage: build
  image: miniforge3
  tags:
    - windows
  script:
    - conda build --python 3.8 conda-build
    - Copy-Item -Path C:\Miniconda\conda-bld\win-64\my-cool-package* -Destination .
  artifacts:
    paths:
      - my-cool-package*

windows:deploy:
  stage: deploy
  only:
    - tags
  image: miniconda3
  tags:
    - windows
  dependencies:
    - windows:build
  script:
    - New-Item -ItemType Directory -Path C:\Miniconda\conda-bld\win-64
    - New-Item -ItemType Directory -Path C:\Miniconda\conda-bld\noarch
    - Copy-Item -Path my-cool-package* -Destination C:\Miniconda\conda-bld\win-64\
    - conda index C:\Miniconda\conda-bld
    - conda install -y constructor
    - constructor conda-constructor
    - conda install -y -c conda-forge awscli
    - aws s3 cp my-cool-package-${VERSION}-Windows-x86_64.exe s3://${BUCKET_NAME}/${VERSION}/my-cool-package-${VERSION}-Windows-x86_64.exe
I use different images here in both steps: miniforge3 is used to build the conda package as I prefer to use conda-forge packages for this (I maintain many of the conda-forge feedstocks that are in the RFI-File-Monitor dependency stack). However, conda-constructor doesn’t appear to work with conda-forge’s conda-build, and requires the one from the defaults channel, so I have to use miniconda3 instead, even though the installer may include packages from any channel you want.
The gist of it
And here are all the files in a gist… Let me know if you have questions!