
download
Downloading projects
Last Updated :
16 Sep, 2024
GitLab is a popular DevOps platform that provides a robust solution for source code management, continuous integration/continuous deployment (CI/CD), and other development workflows. While GitLab is typically hosted on Linux servers, it can also be installed on Windows using a virtual machine or Docker.
In this article, we will walk you through the steps to install GitLab on Windows using Docker, which provides a manageable and efficient way to run GitLab without needing to configure a full Linux environment.
Prerequisites
Before installing GitLab on Windows, ensure you have the following prerequisites:
- Windows 10 Pro, Enterprise, or Education: Required for Docker Desktop.
- Docker Desktop: A platform that allows you to run Docker containers on Windows.
- Sufficient System Resources: At least 4 CPU cores and 4GB of RAM for GitLab to run smoothly. Higher specifications are recommended for production environments.
Installing Docker on Windows
To run GitLab on Windows, you’ll need to install Docker Desktop, which enables running containers on Windows systems.
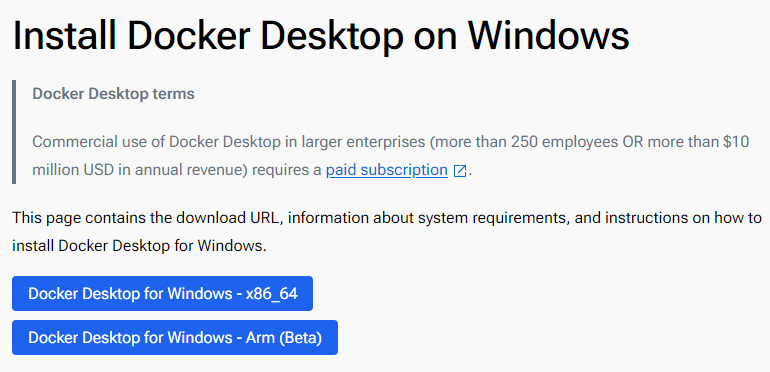
Step 1: Download Docker Desktop
Go to the Docker Desktop website and download the installer for Windows.
Step 2: Install Docker Desktop
- Run the installer and follow the on-screen instructions.
- When prompted, enable the option for Windows Subsystem for Linux (WSL 2) for better performance.
Step 3: Start Docker Desktop
- Once installed, launch Docker Desktop and ensure it is running. You should see the Docker icon in the system tray.
Step 4: Verify Docker Installation
Open Command Prompt or PowerShell and type:
docker --version
You should see the version of Docker installed, confirming that Docker is set up correctly.
Downloading and Running GitLab Using Docker
With Docker installed, you can now download and run GitLab using Docker containers.
Step 1: Pull the GitLab Docker Image
Open PowerShell or Command Prompt and pull the GitLab image from Docker Hub:
docker pull gitlab/gitlab-ee:latest
This command pulls the latest version of GitLab Enterprise Edition. If you prefer the Community Edition, use gitlab/gitlab-ce:latest.
Step 2: Run GitLab in a Docker Container
Create a new directory on your Windows system to store GitLab configuration and data. This ensures data persists even if the container is removed:
mkdir C:\gitlab\data
mkdir C:\gitlab\logs
mkdir C:\gitlab\config
Step 3: Start the GitLab container:
docker run --detach `
  --hostname gitlab.local `
  --publish 443:443 --publish 80:80 --publish 22:22 `
  --name gitlab `
  --restart always `
  --volume C:\gitlab\config:/etc/gitlab `
  --volume C:\gitlab\logs:/var/log/gitlab `
  --volume C:\gitlab\data:/var/opt/gitlab `
  gitlab/gitlab-ee:latest
Options:
- —hostname: Sets the hostname for GitLab (e.g., gitlab.local).
- —publish: Maps ports from the container to the host (HTTP, HTTPS, and SSH).
- —name: Names the container gitlab.
- —restart always: Ensures GitLab restarts automatically if the container stops or the host reboots.
- —volume: Maps local directories to container directories for persistent storage.
Step 3: Wait for GitLab to Initialize:
It may take several minutes for GitLab to initialize. You can monitor the process using:
docker logs -f gitlab
Wait until you see the message indicating that GitLab is ready.
Configuring GitLab
After GitLab starts, you can configure it through the GitLab interface:
Step 1: Access GitLab
- Open a web browser and navigate to http://localhost.
- You should see the GitLab login screen.
Step 2: Set Up the Root Password
The first time you access GitLab, you’ll be prompted to set the root password. Enter a secure password and save it.
Step 3: Log In:
Log in using the username root and the password you just set.
Step 4: Configure GitLab Settings
Navigate to the Admin area to configure GitLab settings, such as email notifications, user management, and project settings.
Accessing GitLab
To access GitLab, simply navigate to the hostname you set during the Docker run command (e.g., http://localhost if using the default setup). If you mapped the ports differently or used a different hostname, adjust the URL accordingly.
Setting Up GitLab Runner (Optional)
GitLab Runner is a tool used for running CI/CD jobs on your GitLab instance. Installing GitLab Runner on Windows allows you to leverage GitLab’s powerful CI/CD pipelines.
Step 1: Download GitLab Runner
Visit the GitLab Runner downloads page and download the binary for Windows.
Step 2: Install GitLab Runner:
- Extract the binary to a directory, for example, C:\GitLab-Runner.
- Open Command Prompt as Administrator and register the runner:
C:\GitLab-Runner\gitlab-runner.exe register
- Follow the prompts to configure the runner with your GitLab instance, including:
- GitLab URL.
- Registration token (found in GitLab’s Admin area under Runners).
- Runner description, tags, and executor type (use shell for simplicity on Windows).
Step 3: Start the Runner
Install and start GitLab Runner as a service:
C:\GitLab-Runner\gitlab-runner.exe install
C:\GitLab-Runner\gitlab-runner.exe start
Download
GitHub has in a short time become one of the most used development platform for teams of software developers. GitHub is an online platform where developers code can share and manage. Because of this, teams can easily at the same time to the same application work.
GitHub is for the big teams is still quite expensive and the developed code is not on the private servers. For organizations that are looking for a free alternative is the open source package GitLab.
GitLab is an open source version of GitHub. It makes use of Git to a team of software development.
GitLab can be downloaded for free and installed on an own server room. In contrast to GitHub need for GitLab so don’t have to be paid, and the code is not on a remote server.
With GitLab you are able to create tickets, comment, code hosting, access to the code and manage code by several developers merge.
GitLab has the following characteristics:
- free developer platform,
- support of software development in a team,
- installation on own server space,
- clone from GitHub,
- open source,
- MIT-license.
GitLab screenshots


You can free download Gitlab 32, 64 bit and safe install the latest trial or new full version for Windows 10 from the official site.
This article provides a step-by-step guide on how to configure GitLab in Windows. It covers the installation process, setting up the GitLab server, working with GitLab repositories, integrating GitLab with CI/CD, and securing GitLab. By following this guide, you will be able to effectively use GitLab for version control and collaboration in your Windows environment.
Key Takeaways
- Install GitLab on Windows by following the provided steps.
- Create a new project, manage users and permissions, and configure webhooks in GitLab.
- Learn how to clone a repository, push and pull changes, and perform branching and merging in GitLab.
- Configure CI/CD pipelines, run tests and deployments, and monitor and log activities in GitLab.
- Implement security measures such as enabling two-factor authentication, setting up SSL/TLS, and implementing access controls in GitLab.
Installing GitLab on Windows

Prerequisites
Before you can configure GitLab, there are a few things you need to have in place. First, make sure you have all the necessary requirements to use this module. For more details, check out the Requirements section. Once you have everything set up, follow these steps to create a configuration source provider from GitLab:
- Open the navigation menu and click on Developer Services.
- Under Resource Manager, click on Configuration Source Providers.
- On the Configuration source providers page, select a compartment.
- Click on Create configuration source provider.
- In the Create configuration source provider panel, enter a name and optional description for the configuration source provider. Avoid entering confidential information.
- Select the compartment where you want to create the configuration source provider.
That’s it! Once you have completed these steps, you will be ready to move on to the next section and start configuring GitLab.
Downloading GitLab
To download GitLab, follow these steps:
- Go to the GitLab website.
- Click on the ‘Download’ button.
- Select the appropriate version for your operating system.
- Choose the installation method that suits your needs.
- Follow the on-screen instructions to complete the installation.
Once GitLab is downloaded and installed, you can start configuring it to meet your requirements.
Configuring GitLab
To configure GitLab, follow these steps:
- Open the GitLab settings page.
- Navigate to the ‘Server URL’ section and enter the service endpoint. Examples include:
- GitLab.com product: https://gitlab.com/
- GitLab installation (relative URL): https://example.com/gitlab
- GitLab installation (subdomain): https://gitlab.example.com/
- Provide the personal access token (PAT) in the designated field.
- (Optional) Click ‘Show advanced options’ to assign tags to the configuration source provider. You can add a defined tag by selecting an existing namespace or add a free-form tag by leaving the value blank.
Remember to save your changes after configuring GitLab.
Setting up GitLab Server

Creating a New Project
To create a new project in GitLab, follow these steps:
- Open GitLab and click on ‘Create a project’ to start the project creation process.
- Select the ‘Blank Project’ option and provide a name and slug for your project.
- For better security, it is recommended to set the visibility level of the repository to private.
- Once you have configured the project settings, click on ‘Create project’ to proceed.
If you are importing an existing project, you can also associate it with a Git repository. Simply go to ‘VCS’ and select ‘Create Git Repository’. Specify the directory where the repository will be created and follow the prompts.
Remember to regularly commit and push your changes to ensure continuous delivery of your project.
Managing Users and Permissions
To manage users and permissions in GitLab, you must have the Owner role for the project. This role gives you full control over the project and its settings. To access the project settings, go to the left sidebar and select Search or find your project. Then, navigate to Settings > General. In the Visibility, project features, permissions section, you can enable or disable various features by toggling the corresponding options. Make sure to save your changes.
It is important to note that GitLab Premium offers additional features and capabilities for managing users and permissions. With GitLab Premium, you can take advantage of advanced access controls, group-level permissions, and more. If you’re looking for enhanced user management capabilities, consider upgrading to GitLab Premium.
For more information on managing users and permissions in GitLab, refer to the GitLab documentation or reach out to the GitLab support team for assistance.
Configuring Webhooks
To configure webhooks in GitLab, follow these steps:
- Go to the project’s settings in GitLab.
- Navigate to the ‘Webhooks’ section.
- Click on ‘Add webhook’ to create a new webhook.
- Enter the webhook URL and choose the events you want to trigger the webhook.
- Optionally, you can add a secret token for added security.
- Save the webhook configuration.
Once the webhook is set up, GitLab will send HTTP POST requests to the specified URL whenever the selected events occur. This allows you to integrate GitLab with other tools and services for automated actions and notifications.
Working with GitLab Repositories

Cloning a Repository
When cloning a repository, you have a few options depending on your specific situation. If you have already logged in to the selected hosting service, completion will suggest the list of available repositories that you can clone. Simply click on the Clone button to initiate the cloning process. If you want to create a project based on the sources you have cloned, click Yes in the confirmation dialog. Git root mapping will be automatically set to the project root directory. If your project contains submodules, they will also be cloned and automatically registered as project roots.
Pushing and Pulling Changes
When you are ready to push your commits, you can do so by selecting Git | Push from the main menu or pressing Control+Shift+K. If you haven’t added any remotes yet, you can click the Define remote link to add a remote. In the dialog that opens, specify the remote name and the URL where it will be hosted, and click OK. Once you have added a remote, you can push your commits by selecting Git | Push from the main menu or pressing Control+Shift+K. GitLab provides a direct link to create a merge request in response to the git push. Simply copy the link and paste it in your browser to create the merge request.
Branching and Merging
To create a merge request in GitLab, there are several methods you can use. Here are a few options:
-
From the merge request list: Go to your project and select Code > Merge requests. Click on New merge request in the upper-right corner. Choose the source and target branches, then click on Compare branches and continue. Fill out the required fields on the New merge request page and click on Create merge request.
-
When adding, editing, or uploading a file: If you’re making changes to a file in the repository, you can create a merge request directly from there. After making your changes, enter a commit message and select the target branch or create a new branch. Make sure to check the ‘Start a new merge request with these changes’ checkbox. Click on Commit changes to create the merge request.
-
When creating a new branch: If you’re creating a new branch, you can also create a merge request at the same time. Go to your project and select Code > Branches. Enter a branch name and click on New branch. On the right side, click on ‘Create merge request’ to open the merge request page. Fill out the necessary details and click on Create merge request.
Remember to provide a clear and concise description of the changes you’re proposing in the merge request. This will help reviewers understand the purpose and impact of your changes.
Integrating GitLab with CI/CD

Configuring CI/CD Pipelines
In GitLab, CI/CD Pipelines are a powerful tool for automating the build, test, and deployment processes of your software projects. With CI/CD Pipelines, you can ensure that your code is continuously integrated, tested, and delivered to production with ease. Here are some key points to keep in mind when configuring CI/CD Pipelines in GitLab:
- Use components to create modular and reusable pipeline configurations. Components can be listed in the CI/CD Catalog and released with specific versions, allowing for better organization and versioning of your pipeline configurations.
- Tag pipelines can be used to test components before running the release job. By configuring the tag pipeline, you can ensure that your components are thoroughly tested before being released.
- Take advantage of GitLab’s extensive documentation and resources to learn more about CI/CD Pipelines and how to configure them effectively. GitLab provides a wealth of resources, including videos, ebooks, and webcasts, to help you get started and optimize your CI/CD workflows.
Implementing CI/CD Pipelines in GitLab can greatly streamline your software development process and improve the quality and reliability of your code. By automating the build, test, and deployment processes, you can ensure that your software is always ready for production.
Running Tests and Deployments
In this section, we will cover the process of running tests and deployments in GitLab. Running tests and deployments is a crucial step in ensuring the quality and reliability of your code. It allows you to test your code changes and deploy them to your live environment.
To run tests and deployments in GitLab, follow these steps:
- Configure your CI/CD pipelines to include the necessary tests for your project.
- Once your pipelines are set up, GitLab will automatically run the tests whenever a new commit is pushed to the relevant branch.
- Monitor the test results in the CI/CD pipelines dashboard.
- If the tests pass, you can proceed with the deployment process.
- Configure your deployment settings in GitLab to specify the target environment and any additional configurations.
- GitLab will automatically deploy the code changes to your live environment based on your configuration.
Remember to regularly monitor the test results and ensure that your deployments are successful. This will help you catch any issues early and maintain the stability of your application.
Monitoring and Logging
Monitoring and logging are crucial aspects of managing a GitLab server. They provide valuable insights into the performance and security of your system. Separate machines should be dedicated to monitoring and logging to ensure accurate and reliable data. Here are some key points to consider:
- Implement a table for presenting structured, quantitative data. Ensure it’s succinct and formatted correctly in Markdown.
- Use a bulleted or numbered list for less structured content, like steps, qualitative points, or a series of related items.
Additionally, it’s important to regularly review the monitoring and logging data to identify any issues or anomalies. This can help in troubleshooting server errors, debugging performance problems, and ensuring the overall health of your GitLab environment.
Tip: Make sure to configure alerts and notifications based on specific metrics or events to proactively address any potential issues.
By following these best practices, you can effectively monitor and log activities in your GitLab server.
Securing GitLab

Enabling Two-Factor Authentication
To enable two-factor authentication for your GitLab account, follow these steps:
- Go to your GitLab account settings.
- Select the ‘Security’ tab.
- Under the ‘Two-Factor Authentication’ section, click on the ‘Enable’ button.
- Follow the prompts to set up two-factor authentication using an authentication app on your mobile device.
- Once set up, you will be required to enter a verification code from your authentication app every time you log in to GitLab.
By enabling two-factor authentication, you add an extra layer of security to your GitLab account, protecting it from unauthorized access even if your password is compromised.
Setting up SSL/TLS
To set up SSL/TLS for your GitLab server, follow these steps:
- Get the certificate information for your private Git server.
- Install the OpenSSL command line application.
- Get the certificate chain.
- Get the server certificate.
To get the certificate information, you can select the certificate in the Certificates service when creating the configuration source provider. For Linux, run the command sudo yum install openssl. For MacOS, run brew install openssl. For Windows, download the openssl binary from Win32/Win64 OpenSSL and configure the environment. To get the certificate chain, run the command openssl s_client -connect $SERVERNAME:$PORT -servername $SERVERNAME -showcerts 2>&1 < /dev/null | sed -n '/-----BEGIN/,/-----END/p' > certChain.pem. Finally, to get the server certificate, run the command openssl s_client -connect $SERVERNAME:$PORT -servername $SERVERNAME -showcerts 2>&1 < /dev/null | sed -n '/-----BEGIN/,/-----END/p' > serverCert.pem.
Implementing Access Controls
To implement access controls for your project, you must have the Owner role. On the left sidebar, select Search or go to and find your project. Select Settings > General. Expand Visibility, project features, permissions. From the Project visibility dropdown list, select an option. The visibility setting for a project must be at least as restrictive as the visibility of its parent group. Select Save changes.
You can also change the visibility of individual features in a project. Prerequisites: You must have the Owner role for the project. On the left sidebar, select Search or go to and find your project. Select Settings > General. Expand Visibility, project features, permissions. To enable or disable a feature, turn on or turn off the feature toggle. Select Save changes.
Additionally, you have the ability to change the visibility of all groups. On the left sidebar, select Search or go to and find your group. Select Settings > General. Expand Naming, visibility. For Visibility level, select an option. The visibility setting for a project must be at least as restrictive as the visibility of its parent group. Select Save changes.
Administrators can also restrict the use of public or internal projects. This setting helps prevent users from publicly exposing their projects. Public projects and groups have certain access permissions for unauthenticated users, including users with the Guest role. Public groups can have public, internal, or private subgroups.
Remember, to implement access controls, you must have the Owner role for the project or group. Make sure to save your changes and consider the visibility settings of your parent group.
Securing GitLab is crucial for maintaining the security of your codebase. With the increasing number of cyber threats, it is important to implement robust security measures to protect your GitLab instance. At Home Page – DevSecOps, we specialize in providing comprehensive security solutions for GitLab. Our team of experts can help you secure your GitLab environment by implementing best practices, conducting security audits, and providing ongoing support. Don’t wait until it’s too late, take action now and ensure the security of your GitLab instance. Contact us today to learn more about our services and how we can help you secure your GitLab environment.
Conclusion
Configuring GitLab on Windows is a straightforward process that allows you to take advantage of powerful version control and collaboration features. By following the steps outlined in this article, you can easily install GitLab, set up a GitLab server, work with repositories, integrate with CI/CD, and secure your GitLab environment. Whether you’re a developer, project manager, or system administrator, GitLab provides a robust platform for managing your code and streamlining your development workflow. So, get started with GitLab on Windows and unlock the full potential of your software projects!
Frequently Asked Questions
What are the prerequisites for installing GitLab on Windows?
The prerequisites for installing GitLab on Windows include a compatible version of Windows, a supported version of Git, and a server with sufficient resources.
How do I download GitLab on Windows?
To download GitLab on Windows, you can visit the official GitLab website and download the installer for Windows. Follow the installation instructions to complete the installation process.
What are the steps to configure GitLab on Windows?
The steps to configure GitLab on Windows include setting up the server, creating a new project, managing users and permissions, and configuring webhooks.
How do I clone a repository in GitLab?
To clone a repository in GitLab, you can use the ‘git clone’ command followed by the repository URL. This will create a local copy of the repository on your machine.
How do I push and pull changes in GitLab?
To push changes to GitLab, you can use the ‘git push’ command. To pull changes from GitLab, you can use the ‘git pull’ command. Make sure you are in the correct branch before executing these commands.
How do I create a new project in GitLab?
To create a new project in GitLab, you can navigate to the GitLab interface and click on the ‘New Project’ button. Follow the prompts to set up the project and configure its settings.
How do I configure the GitLab CI/CD pipeline?
To configure the GitLab CI/CD pipeline, you can create a ‘.gitlab-ci.yml’ file in your project repository and define the stages, jobs, and scripts for your pipeline. GitLab will automatically run the pipeline based on the configuration.
How do I enable two-factor authentication in GitLab?
To enable two-factor authentication in GitLab, you can navigate to your account settings and enable the option for two-factor authentication. Follow the prompts to set up and verify your authentication method.
Download GitLab for Windows: Step-by-Step Guide to Installation
Are you ready to enhance your development experience? Downloading GitLab for Windows is the first step towards managing your projects more efficiently. With the right tools, you can streamline your workflow and collaborate with your team seamlessly.
To get started, you will need the GitLab download link. This link will direct you to the official site where you can find the latest version of GitLab tailored for Windows users. Once you have the link, you can easily access the software and begin the installation process.
Following a GitLab installation tutorial can make this process even smoother. These tutorials provide detailed instructions that guide you through each step, ensuring that you don’t miss anything important. Whether you are a beginner or have some experience, a good installation tutorial can be a valuable resource.
If you’re looking for a comprehensive GitLab Windows guide, you’re in the right place. This guide will cover everything from downloading the software to completing the installation. By the end, you’ll be ready to start using GitLab to its full potential.
How to Download GitLab for Windows 11 and 10
Downloading GitLab for Windows is a straightforward process that can significantly improve your project management. Whether you are using Windows 10 or Windows 11, you can enjoy GitLab’s powerful features.
To ensure GitLab Windows compatibility, follow these steps to get the right version for your operating system.
- Visit the official GitLab website.
- Locate the GitLab download link.
- Choose the version that suits your Windows operating system.
With just a few clicks, you can have GitLab ready to go on your computer!
GitLab download for Windows 10 64-bit
If you’re using Windows 10 64-bit, you need to ensure that you download the correct version. Here’s how to do it:
- Go to the GitLab download link.
- Select the Windows 10 64-bit option.
- Follow the prompts to complete the download.
This version is optimized for your system, ensuring smooth performance and full GitLab Windows support.
GitLab download for Windows 11
For those using Windows 11, the process is just as easy. Here’s what you need to do:
- Access the GitLab download link.
- Choose the version compatible with Windows 11.
- Download and install the software.
With GitLab Windows support, you can take full advantage of the latest features and improvements tailored for your operating system.
Now you’re all set to start using GitLab on your Windows machine! 🎉
Installing GitLab on Windows
Are you excited to get GitLab up and running on your Windows machine? This process can be straightforward if you follow the right steps. With the help of a GitLab installation tutorial, you can easily navigate through the installation and setup phases.
Here’s what you need to do to ensure a successful installation:
Step 1: Install Docker on Windows
To begin your GitLab Docker setup, you first need to install Docker on your Windows system. Docker allows you to run GitLab in a container, making it easier to manage and maintain.
- Download Docker Desktop: Visit the official Docker website and download Docker Desktop for Windows.
- Install Docker: Follow the installation prompts to set up Docker on your machine.
- Configure Docker: Make sure to enable virtualization on Windows, as this is essential for Docker to function properly.
By completing these steps, you will have set the stage for GitLab virtualization on Windows!
Step 2: Install GitLab Runner
Next, it’s time to set up the GitLab Runner for Windows. This tool is crucial for automating your CI/CD processes.
- Download GitLab Runner: Get the latest version of GitLab Runner from the official site.
- Install the Runner: Follow the installation instructions to get it running on your system.
- Configure GitLab CI/CD integration: Make sure to link your GitLab Runner with your GitLab instance to enable seamless job execution.
With the GitLab Runner installed, you’re one step closer to optimizing your development workflow!
Step 3: Wait for GitLab to Initialize
After setting everything up, it’s important to wait for GitLab to initialize properly. This process can take some time, but it’s essential for ensuring everything works smoothly.
- Monitor the Initialization: Keep an eye on the logs to see the progress.
- Check for Errors: If you encounter any issues, refer to GitLab Windows troubleshooting resources.
Once GitLab is fully initialized, you’ll be able to enjoy its powerful features for GitLab job execution and GitLab results reporting.
Step 4: Verify Docker Installation
Finally, it’s crucial to verify that Docker is installed correctly to ensure GitLab Windows compatibility.
- Open Command Prompt: Type
docker --versionto check if Docker is running. - Run a Test Container: Execute a simple command to run a test container and confirm everything is functioning as expected.
Other Official, Supported Installation Methods
When it comes to installing GitLab, you have several options to choose from. Whether you prefer GitLab self-hosted solutions or GitLab cloud hosting, there’s a method that fits your needs.
Benefits of GitLab Self-Hosted Solutions
- Control: You have complete control over your environment.
- Customization: Tailor the setup to your specific requirements.
- Security: Keep your data within your own infrastructure.
Advantages of GitLab Cloud Hosting
- Ease of Use: No need to manage hardware or software updates.
- Scalability: Easily scale your resources as your team grows.
- Accessibility: Access your projects from anywhere with an internet connection.
Choosing Between GitLab Enterprise Edition and Community Edition
- GitLab Enterprise Edition: Ideal for larger organizations needing advanced features.
- GitLab Community Edition: Perfect for smaller teams or individual developers looking for a robust open-source platform.
Summary of Installation Methods
| Installation Method | Description |
|---|---|
| GitLab Self-Hosted Solutions | Full control and customization |
| GitLab Cloud Hosting | Managed service with easy access |
| GitLab Enterprise Edition | Advanced features for large teams |
| GitLab Community Edition | Open-source platform for smaller projects |
Reference Architectures
When considering GitLab, it’s essential to understand the different reference architectures available. These architectures can help you decide how to implement GitLab effectively.
- GitLab Community Edition: This open-source platform is great for teams looking to collaborate without the need for extensive resources.
- Scalable Architectures: Design your setup to accommodate growth and increased usage over time.
Similar Reads
If you’re interested in enhancing your development process, exploring GitLab for software teams can be beneficial.
- Collaboration Tools: Discover how GitLab fosters a collaborative environment for your team.
- Integration Options: Learn about integrating GitLab with other tools to streamline your workflow.
FAQ
Have questions about GitLab? You’re not alone! Here are some common queries that many users have. Let’s dive in and find the answers you need!
Can I install GitLab on Windows?
Absolutely! You can install GitLab on your Windows machine. Just make sure to follow the GitLab Windows installation steps carefully to ensure everything goes smoothly.
- Check GitLab Windows compatibility: Before you start, verify that your Windows version supports GitLab.
- Follow the installation guide: This will help you avoid any hiccups during the setup.
How do I download GitLab?
Downloading GitLab is a breeze! Here’s how you can do it:
- Visit the GitLab download link: This will take you to the official site.
- Select the right version: Make sure to choose the version that fits your Windows operating system.
- Follow the GitLab installation tutorial: This will guide you through the download and installation process step by step.
Is there a GitLab desktop app?
Yes, there is a GitLab Desktop app! This app is designed specifically for GitLab for developers who prefer a desktop interface.
- Easy access: The GitLab Desktop app allows you to manage your projects directly from your computer.
- Enhanced features: Enjoy the benefits of GitLab’s powerful features right at your fingertips.
Can I use GitLab for free?
Yes, you can use GitLab for free! The GitLab community edition is an excellent option for those looking to explore GitLab’s capabilities without any cost.
- Open-source platform: This edition provides a robust set of features that cater to individual developers and small teams.
- Community support: You can also benefit from the GitLab community, where you can find help and share experiences with other users.