
Время на прочтение9 мин
Количество просмотров29K
Я работаю в операционной системе «Windows 10». У меня на компьютере установлена программа «Git for Windows» версии 2.35.1. В принципе, «Git for Windows» — это та же знаменитая программа (набор программ) «Git» (система управления версиями), только скомпилированная из исходного кода в исполняемый файл, который может запускаться в операционных системах «Windows» (изначально исходный код «Git» был написан для компиляции в исполняемый файл, запускаемый в операционной системе «Linux»).
Дистрибутив «Git for Windows» кроме программы «Git» содержит разные полезные для работы с «Git» программы, вроде программы-оболочки «Git Bash» с интерфейсом командной строки и программы «Git GUI» с графическим оконным интерфейсом. В документации сказано, что «Git for Windows» является подмножеством платформы (набора инструментов и библиотек) «MSYS2». Как я понимаю, для компиляции используется компилятор из набора инструментов «MinGW-w64».
Окончания строк в разных операционных системах
Как известно (возможно, не всем), в операционных системах «Windows» окончание строки обычно представляется двумя символами, в таблице Юникода они обозначены кодами U+000D (возврат каретки, по-английски «Carriage Return», сокращенно «CR») и U+000A (подача бумаги на следующую строку, по-английски «Line Feed», сокращенно «LF»). В мир компьютеров эти управляющие коды пришли из мира печатных (пишущих) машинок.
В Unix-подобных операционных системах окончание строки обычно представляется одним символом «LF». (Говорят, в операционных системах от компании «Apple» до появления операционной системы «Mac OS X», которая вышла в 2001 году, окончание строки представлялось одним символом «CR». Сейчас в операционных системах «macOS» окончание строки представляется одним символом «LF», как и в других Unix-подобных операционных системах.)
Из-за того, что большинство текстовых редакторов (даже заточенных под написание текстов программ) плохо умеет работать с окончаниями строк разного вида, вышеописанная разница приносит проблемы, если над одним и тем же проектом работают программисты из разных операционных систем.
Я подготовил для экспериментов текстовый файл, содержащий несколько строк с окончаниями разного вида. Для работы с кодом я обычно использую программы «VS Code» и «Notepad++». Обе эти программы могут правильно отображать строки с окончаниями разного вида. Однако, программа «VS Code» не отображает отдельные символы, входящие в окончания строк, поэтому в ней не получается понять, где и какое окончание строки использовано. Для просмотра и определения видов окончаний строк я обычно использую программу «Notepad++», она умеет отображать отдельные символы, входящие в окончания строк. Вот как у меня на компьютере выглядит в программе «Notepad++» тестовый файл «myfile.txt» (включено отображение всех символов, то есть и тех, которые обычно не отображаются в текстовых редакторах):

На иллюстрации выше видно, что две строки имеют окончания в виде пары символов CR и LF (эту пару символов часто обозначают как «CRLF»), а другие две строки — в виде LF. В программе «Notepad++» у меня не получилось создать разные виды окончаний строк в одном и том же файле (хотя можно скопировать и вставить существующие с помощью инструмента специальной вставки), поэтому я сначала ввел текст файла в программе «Notepad++» с одинаковыми окончаниями строк, а потом подправил два из этих окончаний строк в шестнадцатеричном (двоичном) редакторе. Кодировка файла «myfile.txt» — UTF-8 (как видно на иллюстрации, размер файла — 222 байта, русские буквы занимают по два байта).
Также на иллюстрации выше видно, что в строке состояния программы «Notepad++» режим работы с окончаниями строк показан как «Windows (CR LF)». Этот режим не влияет на отображение символов только что открытого файла. Он лишь говорит о том, что при вставке нового окончания строки (нажатием клавиши «Enter») будет вставлено окончание строки вида CRLF. Этот режим можно переключить на «Unix (LF)» или на «Macintosh (CR)», после чего можно будет клавишей «Enter» вставлять окончания строк вида LF или CR. Однако, переключение этого режима не дает возможности работать в одном файле одновременно с несколькими видами окончаний строк, так как при переключении этого режима меняются сразу все окончания строк в файле на выбранный в режиме вид окончаний строк.
Тестовый файл «myfile.txt» я разместил в папке C:\Users\Илья\source\repos\test\. Пока он в этой папке один. Будем считать эту папку папкой нашего проекта.
Создание Git-репозитория и параметр «core.autocrlf»
С программой «Git» можно работать множеством способов, но я предпочитаю самый универсальный — из командной строки. Для этого я обычно использую программу-оболочку «PowerShell» версии 7, а запускаю ее в программе-«эмуляторе терминала» «Windows Terminal». Итак, проверим, что программа «Git» установлена на компьютере и доступна в папке нашего проекта:
PS C:\Users\Илья\source\repos\test> git --version
git version 2.35.1.windows.2
Создадим Git-репозиторий для нашего проекта:
PS C:\Users\Илья\source\repos\test> git init
Initialized empty Git repository in C:/Users/Илья/source/repos/test/.git/
«Репозиторием» обычно называют папку (хранилище, базу данных), в которой хранится исходный код программы (папку проекта). А «Git-репозиторием» называют базу данных, в которой хранятся разные версии файлов нашего проекта, информация о них и об изменениях, вносимых в эти файлы. Сама программа (система программ) «Git» у меня установлена в папке C:\Program Files\Git\. Чтобы обеспечить управление версиями файлов нашего проекта, в папке нашего проекта с помощью вышеприведенной команды была создана скрытая папка «.git» (у меня в программе «Проводник Windows» включено отображение скрытых папок, поэтому ее там видно), в которой хранятся база данных с версиями файлов нашего проекта и разные служебные файлы.
Сразу после создания папки «.git» в ней уже есть файлы базы данных и разные служебные файлы. Но пока что эта база данных пуста (пока еще не содержит версий файлов нашего проекта). Чтобы файлы нашего проекта попали под отслеживание в них изменений от программы «Git», они должны быть добавлены в базу данных в папке «.git» посредством коммитов («коммит» — это операция регистрации изменений в файлах проекта).
Настройка работы программы «Git» может быть произведена на трех разных уровнях: на уровне операционной системы (для всех ее пользователей), на уровне отдельного пользователя (global) и на уровне проекта (local). При установке программы «Git» программа-установщик обычно задает умолчательные настройки на уровне текущего пользователя операционной системы. В рамках данного поста мы затронем только настройки на уровне текущего проекта, они хранятся в файле \.git\config (этот файл не имеет расширения) текущего проекта. Этот файл был создан в результате вышеприведенной команды «git init», он — текстовый, но нет нужды редактировать его вручную, для этого есть отдельная команда «git config».
Если какой-либо параметр не определен в вышеупомянутом файле настроек текущего проекта, то значение этого параметра будет автоматически взято из файла настроек текущего пользователя операционной системы. Для чистоты эксперимента мы будем прямо прописывать нужное значение нужного параметра в файле настроек текущего проекта с помощью следующей команды:
PS C:\Users\Илья\source\repos\test> git config --local core.autocrlf trueКак работает параметр «core.autocrlf» мы проверим экспериментально, после чего станет понятно, для чего этот параметр можно использовать.
1. Параметр «core.autocrlf», значение «true»
Итак, с помощью команды, приведенной выше, мы установили для параметра «core.autocrlf» значение «true». Совершим первый коммит, в который включим текущую версию нашего тестового файла «myfile.txt»:
PS C:\Users\Илья\source\repos\test> git add "myfile.txt"
warning: LF will be replaced by CRLF in myfile.txt.
The file will have its original line endings in your working directory

PS C:\Users\Илья\source\repos\test> git commit -m "Первый коммит"
[master (root-commit) 4d71045] Первый коммит
 1 file changed, 4 insertions(+)
 create mode 100644 myfile.txt
В блоке кода выше приведены сразу две команды подряд. Команда «git add» формирует список содержимого будущего коммита. Когда содержимое коммита сформировано, делаем сам коммит (регистрацию изменений в коде программы в базе данных в папке «.git» нашего проекта) с помощью команды «git commit».
Два сообщения, выданные после первой команды в блоке кода выше, могут запутать неопытного пользователя. Первое сообщает о том, что окончания строк вида LF будут заменены окончаниями строк вида CRLF в нашем тестовом файле «myfile.txt». Второе сообщает, что версия файла «myfile.txt», находящаяся в папке проекта, сохранит окончания строк в оригинальном виде. На первый взгляд, эти сообщения противоречат друг другу. Путаница возникает из-за того, что в обоих сообщениях употреблено будущее время, но не уточняется, что события, о которых идет речь, хоть и произойдут в будущем, но произойдут НЕ одновременно.
На самом деле, во втором сообщении имеется в виду, что оригинальные окончания строк в файле «myfile.txt» останутся нетронутыми работой запущенной команды «git add». А первое сообщение предупреждает о том, что в будущем, после извлечения версии файла «myfile.txt» из базы данных в папку проекта, окончания строк вида LF будут затерты окончаниями строк CRLF из-за текущего значения настройки «core.autocrlf».
Проверим это на практике. После окончания работы двух команд, показанных в блоке кода выше, я заглянул в файл «myfile.txt», находящийся в папке проекта (в терминах программы «Git» ее называют «рабочей папкой» [working directory], так как именно тут мы работаем с файлами проекта, вносим в них изменения), и убедился, что окончания строк в нем остались без изменений (две строки с окончаниями вида CRLF, две строки с окончаниями вида LF). То есть обещание «The file will have its original line endings in your working directory» сбылось.
После этого я удалил файл «myfile.txt» из папки проекта в корзину операционной системы. Представим, что я потерял рабочие файлы своего проекта. Восстановим их (конкретно в нашем проекте один файл, но в общем случае их может быть много) в папку проекта из базы данных, созданной ранее средствами программы «Git» для нашего проекта:
PS C:\Users\Илья\source\repos\test> git checkout -f master
Already on 'master'
В результате этой команды в папке проекта снова появился файл «myfile.txt». Однако, все четыре окончания строк в этом файле теперь стали одного вида: CRLF. Сбылось обещание из предупреждения «warning: LF will be replaced by CRLF in myfile.txt.».
Как работает настройка «core.autocrlf» со значением «true»? Если при такой настройке мы помещаем версию измененного файла в базу данных «Git» данного проекта, то все найденные в этом файле окончания строк вида CRLF конвертируются в окончания строк вида LF. Если при такой настройке мы извлекаем версию файла, хранящуюся в базе данных «Git» данного проекта, то все найденные в этой версии файла окончания строк вида LF конвертируются в окончания строк вида CRLF. Вот как это можно показать схематично:
  add, commit       База        checkout
-------------->  данных Git  -------------->
 (CRLF -> LF)       (LF)      (LF -> CRLF)
Подчеркну, что на этой схеме внесение в базу данных (коммит) и извлечение из нее (checkout) разнесены во времени. Если внесение в базу данных произошло при настройке «core.autocrlf» со значением «true», а извлечение из базы данных произошло при настройке «core.autocrlf» со значением «false», то конвертация при извлечении не произойдет и все четыре окончания строк в извлеченном файле окажутся вида LF (в том виде, в котором этот файл был помещен в базу данных и хранится там). Это замечание может быть сходным образом применено и к другим значениям настройки «core.autocrlf».
2. Параметр «core.autocrlf», значение «false»
Схема работы при такой настройке:
    add, commit            База             checkout
------------------->    данных Git     ------------------->
 (без конвертации)    (CRLF и/или LF)   (без конвертации)
При такой настройке в базе данных «Git» будет храниться именно то, что мы туда положили. И будет извлечено именно то, что хранится в базе данных, без изменений.
3. Параметр «core.autocrlf», значение «input»
Схема работы при такой настройке:
  add, commit       База          checkout
-------------->  данных Git  ------------------->
 (CRLF -> LF)       (LF)      (без конвертации)
Зачем нужны эти три настройки
Параметр «core.autocrlf» со значением «false» — это естественный режим работы программы «Git», который использовался бы, если б не было разницы в представлении окончаний строк в разных операционных системах.
Собственно, параметр «core.autocrlf» придумали для обеспечения работы над одним проектом программистов из разных операционных систем. Предполагается, что программист в операционной системе «Windows» будет работать с файлами, в которых окончания строк только вида CRLF. При этом предполагается, что он включит для проекта настройку «core.autocrlf» со значением «true». Тогда он будет работать в своей папке проекта с файлами, в которых окончания строк будут вида CRLF, при этом в базе данных «Git» эти же файлы будут сохранены с окончаниями вида LF. Программист в операционной системе «Windows» этого даже не заметит, ведь конвертация происходит автоматически, как было показано выше в пункте 1.
В тот же момент программист в Unix-подобной операционной системе будет работать с той же базой данных «Git», но у него для проекта будет включена настройка «core.autocrlf» со значением «input» (или со значением «false»). Он будет получать из базы данных файлы с окончаниями строк вида LF, как и принято в Unix-подобных операционных системах.
В принципе, программист в операционной системе «Windows» тоже может использовать параметр «core.autocrlf» со значением «false» в случае, если он работает со своей базой данных «Git» один и пишет код только для операционных систем Windows. Либо он работает вместе с другими программистами, но все участники проекта работают в операционных системах «Windows» и проект предназначен только для операционных систем «Windows». Либо, еще один вариант, в коде есть файлы с окончаниями строк разного вида (CRLF и/или LF) и программист хочет сам отслеживать виды окончаний строк в своих файлах, без вмешательства программ, без автоматической конвертации.
Полезные ссылки
-
В книге «Pro Git» (вторая редакция, вышла в 2014 году), авторы: Scott Chacon (Скотт Чакон) и Ben Straub (Бен Страуб), в главе 8 «Настройка Git», в подглаве 8.1 «Конфигурация Git» (статья большая, ищите в ее последней трети раздел «Форматирование и пробелы»).
-
Хороший, развернутый ответ на вопрос «Git replacing LF with CRLF» на известном сайте «Stack Overflow».
- -q
- —quiet
-
Quiet, suppress feedback messages.
- —progress
- —no-progress
-
Progress status is reported on the standard error stream
by default when it is attached to a terminal, unless--quiet
is specified. This flag enables progress reporting even if not
attached to a terminal, regardless of--quiet. - -f
- —force
-
When switching branches, proceed even if the index or the
working tree differs fromHEAD, and even if there are untracked
files in the way. This is used to throw away local changes and
any untracked files or directories that are in the way.When checking out paths from the index, do not fail upon unmerged
entries; instead, unmerged entries are ignored. - —ours
- —theirs
-
When checking out paths from the index, check out stage #2
(ours) or #3 (theirs) for unmerged paths.Note that during
git rebaseandgit pull --rebase, ours and
theirs may appear swapped;--oursgives the version from the
branch the changes are rebased onto, while--theirsgives the
version from the branch that holds your work that is being rebased.This is because
rebaseis used in a workflow that treats the
history at the remote as the shared canonical one, and treats the
work done on the branch you are rebasing as the third-party work to
be integrated, and you are temporarily assuming the role of the
keeper of the canonical history during the rebase. As the keeper of
the canonical history, you need to view the history from the remote
asours(i.e. «our shared canonical history»), while what you did
on your side branch astheirs(i.e. «one contributor’s work on top
of it»). - -b <new-branch>
-
Create a new branch named
<new-branch>, start it at
<start-point>, and check the resulting branch out;
see git-branch[1] for details. - -B <new-branch>
-
Creates the branch
<new-branch>, start it at<start-point>;
if it already exists, then reset it to<start-point>. And then
check the resulting branch out. This is equivalent to running
«git branch» with «-f» followed by «git checkout» of that branch;
see git-branch[1] for details. - -t
- —track[=(direct|inherit)]
-
When creating a new branch, set up «upstream» configuration. See
«—track» in git-branch[1] for details.If no
-boption is given, the name of the new branch will be
derived from the remote-tracking branch, by looking at the local part of
the refspec configured for the corresponding remote, and then stripping
the initial part up to the «*».
This would tell us to usehackas the local branch when branching
off oforigin/hack(orremotes/origin/hack, or even
refs/remotes/origin/hack). If the given name has no slash, or the above
guessing results in an empty name, the guessing is aborted. You can
explicitly give a name with-bin such a case. - —no-track
-
Do not set up «upstream» configuration, even if the
branch.autoSetupMergeconfiguration variable is true. - —guess
- —no-guess
-
If
<branch>is not found but there does exist a tracking
branch in exactly one remote (call it<remote>) with a
matching name, treat as equivalent to$ git checkout -b <branch> --track <remote>/<branch>
If the branch exists in multiple remotes and one of them is named by
thecheckout.defaultRemoteconfiguration variable, we’ll use that
one for the purposes of disambiguation, even if the<branch>isn’t
unique across all remotes. Set it to
e.g.checkout.defaultRemote=originto always checkout remote
branches from there if<branch>is ambiguous but exists on the
origin remote. See alsocheckout.defaultRemotein
git-config[1].--guessis the default behavior. Use--no-guessto disable it.The default behavior can be set via the
checkout.guessconfiguration
variable. - -l
-
Create the new branch’s reflog; see git-branch[1] for
details. - -d
- —detach
-
Rather than checking out a branch to work on it, check out a
commit for inspection and discardable experiments.
This is the default behavior ofgit checkout <commit>when
<commit>is not a branch name. See the «DETACHED HEAD» section
below for details. - —orphan <new-branch>
-
Create a new unborn branch, named
<new-branch>, started from
<start-point>and switch to it. The first commit made on this
new branch will have no parents and it will be the root of a new
history totally disconnected from all the other branches and
commits.The index and the working tree are adjusted as if you had previously run
git checkout <start-point>. This allows you to start a new history
that records a set of paths similar to<start-point>by easily running
git commit -ato make the root commit.This can be useful when you want to publish the tree from a commit
without exposing its full history. You might want to do this to publish
an open source branch of a project whose current tree is «clean», but
whose full history contains proprietary or otherwise encumbered bits of
code.If you want to start a disconnected history that records a set of paths
that is totally different from the one of<start-point>, then you should
clear the index and the working tree right after creating the orphan
branch by runninggit rm -rf .from the top level of the working tree.
Afterwards you will be ready to prepare your new files, repopulating the
working tree, by copying them from elsewhere, extracting a tarball, etc. - —ignore-skip-worktree-bits
-
In sparse checkout mode,
git checkout -- <paths>would
update only entries matched by<paths>and sparse patterns
in$GIT_DIR/info/sparse-checkout. This option ignores
the sparse patterns and adds back any files in<paths>. - -m
- —merge
-
When switching branches,
if you have local modifications to one or more files that
are different between the current branch and the branch to
which you are switching, the command refuses to switch
branches in order to preserve your modifications in context.
However, with this option, a three-way merge between the current
branch, your working tree contents, and the new branch
is done, and you will be on the new branch.When a merge conflict happens, the index entries for conflicting
paths are left unmerged, and you need to resolve the conflicts
and mark the resolved paths withgit add(orgit rmif the merge
should result in deletion of the path).When checking out paths from the index, this option lets you recreate
the conflicted merge in the specified paths. This option cannot be
used when checking out paths from a tree-ish.When switching branches with
--merge, staged changes may be lost. - —conflict=<style>
-
The same as
--mergeoption above, but changes the way the
conflicting hunks are presented, overriding the
merge.conflictStyleconfiguration variable. Possible values are
«merge» (default), «diff3», and «zdiff3». - -p
- —patch
-
Interactively select hunks in the difference between the
<tree-ish>(or the index, if unspecified) and the working
tree. The chosen hunks are then applied in reverse to the
working tree (and if a<tree-ish>was specified, the index).This means that you can use
git checkout -pto selectively discard
edits from your current working tree. See the “Interactive Mode”
section of git-add[1] to learn how to operate the--patchmode.Note that this option uses the no overlay mode by default (see also
--overlay), and currently doesn’t support overlay mode. - —ignore-other-worktrees
-
git checkoutrefuses when the wanted branch is already checked
out or otherwise in use by another worktree. This option makes
it check the branch out anyway. In other words, the branch can
be in use by more than one worktree. - —overwrite-ignore
- —no-overwrite-ignore
-
Silently overwrite ignored files when switching branches. This
is the default behavior. Use--no-overwrite-ignoreto abort
the operation when the new branch contains ignored files. - —recurse-submodules
- —no-recurse-submodules
-
Using
--recurse-submoduleswill update the content of all active
submodules according to the commit recorded in the superproject. If
local modifications in a submodule would be overwritten the checkout
will fail unless-fis used. If nothing (or--no-recurse-submodules)
is used, submodules working trees will not be updated.
Just like git-submodule[1], this will detachHEADof the
submodule. - —overlay
- —no-overlay
-
In the default overlay mode,
git checkoutnever
removes files from the index or the working tree. When
specifying--no-overlay, files that appear in the index and
working tree, but not in<tree-ish>are removed, to make them
match<tree-ish>exactly. - —pathspec-from-file=<file>
-
Pathspec is passed in
<file>instead of commandline args. If
<file>is exactly-then standard input is used. Pathspec
elements are separated by LF or CR/LF. Pathspec elements can be
quoted as explained for the configuration variablecore.quotePath
(see git-config[1]). See also--pathspec-file-nuland
global--literal-pathspecs. - —pathspec-file-nul
-
Only meaningful with
--pathspec-from-file. Pathspec elements are
separated with NUL character and all other characters are taken
literally (including newlines and quotes). - <branch>
-
Branch to checkout; if it refers to a branch (i.e., a name that,
when prepended with «refs/heads/», is a valid ref), then that
branch is checked out. Otherwise, if it refers to a valid
commit, yourHEADbecomes «detached» and you are no longer on
any branch (see below for details).You can use the
@{-N}syntax to refer to the N-th last
branch/commit checked out using «git checkout» operation. You may
also specify-which is synonymous to@{-1}.As a special case, you may use
A...Bas a shortcut for the
merge base ofAandBif there is exactly one merge base. You can
leave out at most one ofAandB, in which case it defaults toHEAD. - <new-branch>
-
Name for the new branch.
- <start-point>
-
The name of a commit at which to start the new branch; see
git-branch[1] for details. Defaults toHEAD.As a special case, you may use
"A...B"as a shortcut for the
merge base ofAandBif there is exactly one merge base. You can
leave out at most one ofAandB, in which case it defaults toHEAD. - <tree-ish>
-
Tree to checkout from (when paths are given). If not specified,
the index will be used.As a special case, you may use
"A...B"as a shortcut for the
merge base ofAandBif there is exactly one merge base. You can
leave out at most one ofAandB, in which case it defaults toHEAD. - —
-
Do not interpret any more arguments as options.
- <pathspec>…
-
Limits the paths affected by the operation.
For more details, see the pathspec entry in gitglossary[7].
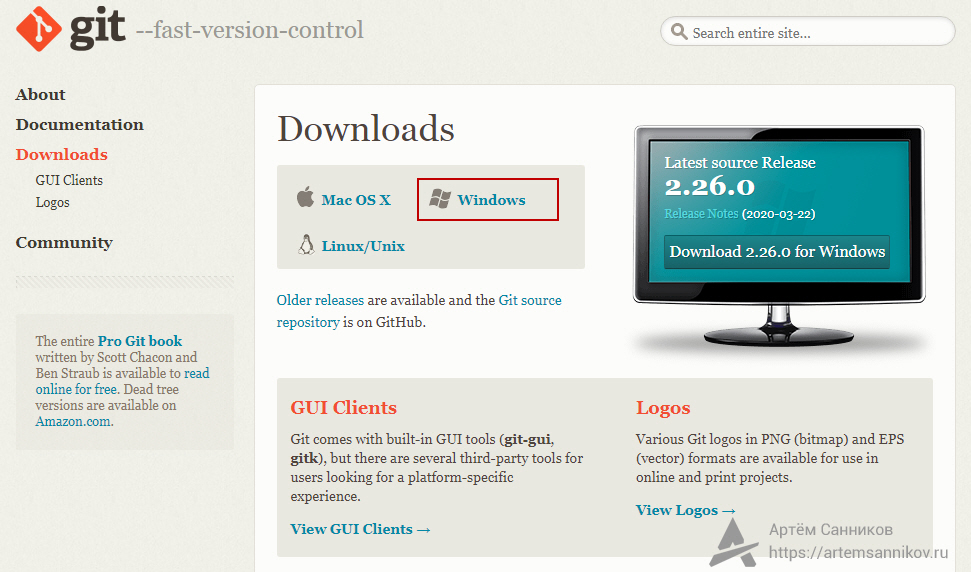
Открываем официальный сайт и загружаем стабильную версию версию Git.
https://git-scm.com/
Далее запускаем установочный файл и следуем инструкции
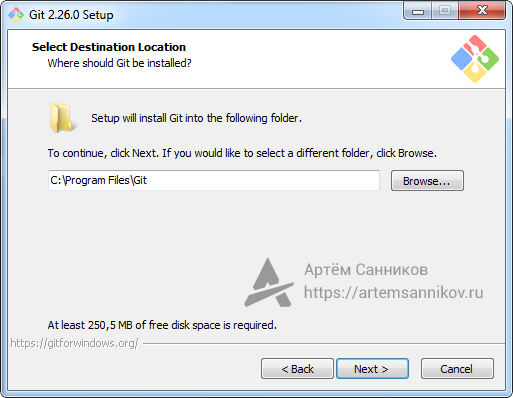
Указываем директорию для установки
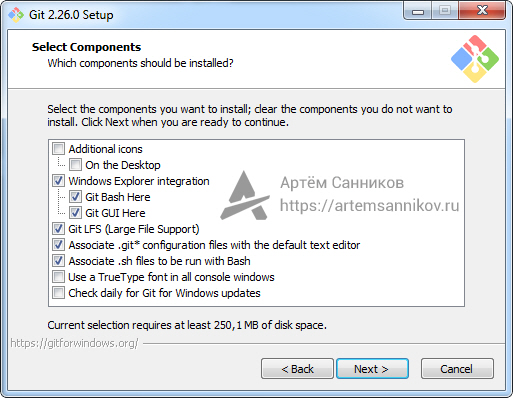
Отмечаем нужные пункты галочкой и идём дальше
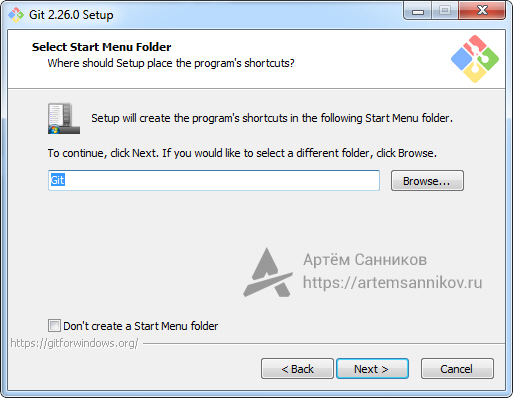
Задаём имя директории, которая будет отображаться в меню — Пуск
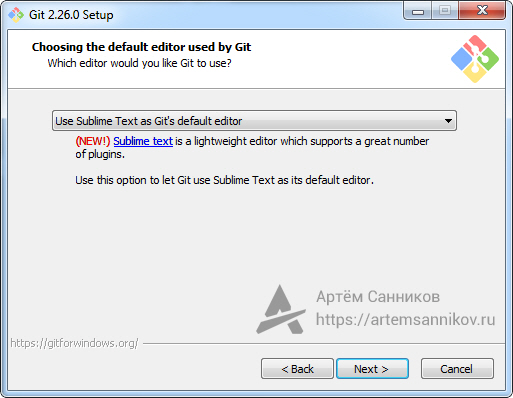
Указываем текстовый редактор, который будет задан по умолчанию при редактировании файлов
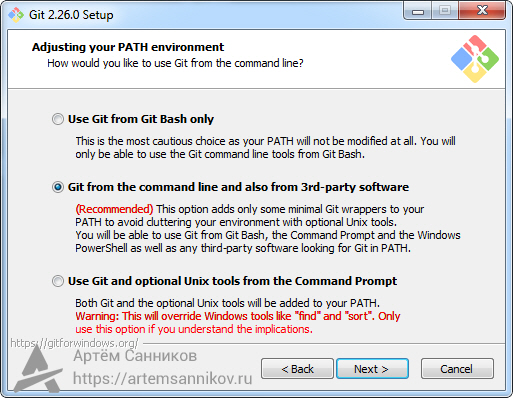
Выбираем вариант использования Git:
- Use Git from Git Bash only (использование только командной строки Bash);
- Git from the command line and also from 3rd-party software (использование Git из Git Bash или из командной строки Windows);
- Use Git and optional Unix tools from the Command Prompt (использование утилиты Unix из командной строки Windows).
Указываем какая библиотека будет использоваться при установке соединения HTTPS:
- Use the OpenSSL (сертификаты сервера будут проверяться с помощью ca-bundle.crt);
- Use the Windows Secure Channel library (проверка сертификатов сервера будет производиться библиотеками Windows).

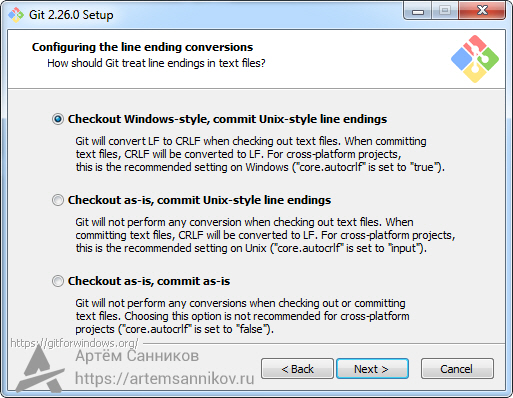
Выбираем вариант, как будут обрабатываться строки:
- Checkout Windows-style, commit Unix-style line endings (Git произведет замену всех окончаний строк в ваших файлах с Windows-стиля (\ r \ n) на Unix-стиль (\ r) непосредственно перед фиксацией в репозитории);
- Checkout as-is, commit Unix-style line endings (Git будет изменять все окончания строк в ваших файлах с Windows-стиля (\ r \ n) на Unix-стиль (\ r) непосредственно перед фиксацией в репозитории);
- Checkout as-is,commit as-is (Git не будет выполнять изменения по окончанию строк при фиксации или извлечении).
Выбираем эмулятор по умолчанию для Git Bash:
- Use MinTTY (терминал Unix);
- Use Windows default console window (использовать консоль Windows по умолчанию).

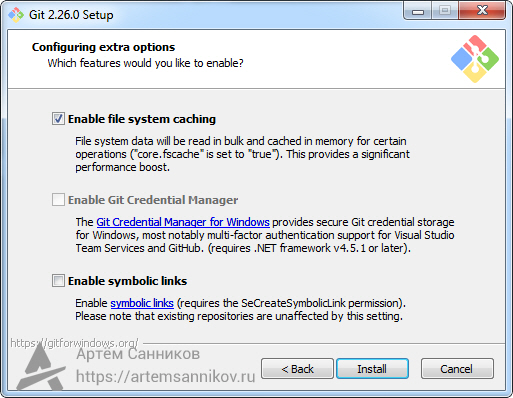
Если нужен дополнительный функционал, отмечаем галочкой нужный пункт
- Enable file system caching (кэширование файлов);
- Enable Git Credential Manager (доступ к некоторым Git-репозиториям, используя вашу учетную запись Microsoft вместо ключей HTTPS / SSH);
- Enable symbolic links (поддержка символических ссылок).
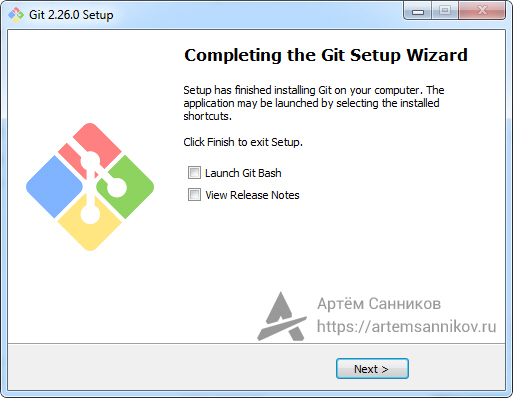
Git успешно установлен
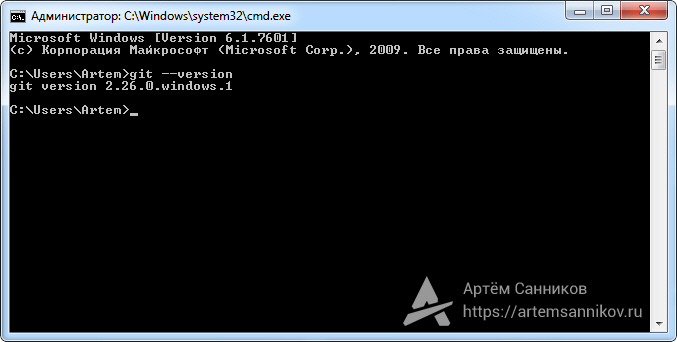
Теперь открываем командную строку и проверяем версию Git, при помощи команды:
git --version
Метки: Git.
Git and normalization of line-endings
A few months ago, I spent hours trying to decide about the best way to deal with line endings and how to switch a repo to using .gitattributes. I just found those comprehensive notes, and thought they’d be easier to find here than buried in my notes…
TL;DR
- line-ending normalization is about converting
LF<=>CR+LF, for cross-platform compatibility -
.gitattributesfile is the safestgitmechanism to manage line-endings normalization - updating normalization settings is tricky because
gitmay report changes on unmodified files, and it is totally not obvious what is happening - there are some tricks to help understand what is happening and to fix things
Line endings and Operating systems
When you press <Enter> in your text editor, the file is modified with invisible characters that represent the new line. This invisible thing is most commonly represented in two ways:
- ASCII character LF (aka Line Feed)
- ASCII character CR+LF (aka Carriage Return + Line Feed)
Historically, most systems used to require CR+LF, and Unix systems decided in the 1980s to remove the CR character to simplify things and save disk space.
In practice, Windows is the only modern operating systems that still uses CRLF line endings.
When developing in a team, you will end up with people working on Windows and other operating systems, and you will need to manage this difference in your source control system.
Git’s core.autocrlf
This settings is defined via git config. It applies globally or per repo. When enabled, it applies normalization on all files detected by git as text
-
Checkout Windows-style, commit Unix-style (
core.autocrlf=true)- Git will convert LF to CRLF when checking out text files.
- When committing text files, CRLF will be converted to LF.
- This is the default value pushed by the installer on Windows systems
-
Checkout as-is, commit Unix-style (
core.autocrlf=input)- Git will not perform any conversion when checking out text files.
- When committing text files, CRLF will be converted to LF.
- some people recommend using this when developing on Unix systems
-
Checkout as-is, commit as-is (
core.autocrlf=false)- Git will not perform any conversions when checking out or committing text files.
- This is default value if the setting is not defined.
Some people consider it is not git’s responsibility to do line-ending normalization. It could be tempting to go «checkout as-is commit as-is» in order to disable git’s normalization. But it cannot be commited to a repo, so it is dependent on developer workstation settings ====> fragile
Regardless of what is defined in people’s local core.autocrlf setting, individual repository maintainers can override the behavior via the .gitattributes file, which is the most robust way to go.
.gitattributes
.gitattributes assigns attributes to file types. The text and eol attributes are used to control the end-of-line normalization process
-
-text: disable normalization for this type of file. Should be used for any type of binary file. -
text: normalizes this type of file usingcore.eol, which defaults to OS native (core.eolshould not be touched in normal situations) -
eol=lf: forceslfon all systems, regardless of OS -
eol=crlf: forcescrlfon all systems, regardless of OS -
global wildcards
-
* text=auto- lets
gitdetect file type and apply normalization accordingly - similar to setting
core.autocrlf=true
- lets
-
* -text- people have tried to use this to emulate «checkout as-is commit as is»
- but they had various levels of success
- you can always use these wildcards in addition to more specific overrides
-
Beware, line-endings normalization must not be enabled on any binary file.
Updating the normalization settings
If you change the normalization settings (either core.autocrlf or .gitattributes), you will have some work to do on your local repository, on your remote repository, and on your colleagues workstations.
You can also just leave it be, but you expose yourself to weird git behaviors (untouched files reported as changed, among others) or other issues.
Your first reflex would be to look at the line endings in your code editor and play around with the different git commands you’ll find online, but it can very quickly become very confusing.
View the difference between Index and Workspace
You will find quantities of «solutions»/tutorials in stackoverflow or other websites that tell you what to do, but they always miss some edge cases.
Git normalization does not happen in the workspace, but during the transition into or out of the index, so you need a way to view line-endings in both the index and the workspace before acting.
Here is the thing that should be checked to understand what is happening, and most tutorials don’t talk about it:
git ls-files --eol
Enter fullscreen mode
Exit fullscreen mode
Which could result in this type of output:
i/lf    w/crlf  attr/                   Applications/K8S/versions.tf
i/lf    w/lf    attr/text eol=lf        .gitignore
i/-text w/-text attr/                   Services/SMB/hosts-2022-10-20.xlsx
i/lf    w/lf    attr/                   .gitattributes
i/crlf  w/crlf  attr/                   Applications/K8S/ci/backend.tfvars
i/lf    w/crlf  attr/text eol=lf        Legacy/Modules/Keyvault/.gitignore
Enter fullscreen mode
Exit fullscreen mode
- i/ tells you how the file is saved in the index
- w/ tells you how the file is presented in the workspace
- attr/ tells you how the .gitattributes file(s) is (are) hinting git to deal with this file
For a usual Windows developer using the core.autocrlf=true option (which is the default pushed by git installation on Windows), you should normally mostly get a mix of the first three types:
-
i/lf w/crlf attr/: the file is normalized by git and uses Windows standard line-endingscrlf -
i/lf w/lf attr/text eol=lf: the file is normalized by git and enforced to uself -
i/-text w/-text attr/: the file is autodetected as a binary and not normalized by git
If you ended up with a mix of any other ones, it may be because you or somebody made some changes in the .gitattributes file or the core.autocrlf option.
Repairing i/crlf w/crlf attr/
This file was most probably pushed by someone using core.autocrlf=false and working in Windows. This will typically make git complain about changes on untouched files.
Fix strategies:
-
in any case,
- make sure your have a clean repo before acting
- communicate on this change, because people will encounter real conflicts
-
option1: make a commit that will fix all the files in your repo with
git add . --renormalize- pb: will impede your capability to do a blame
- you could instruct blame to be more happy with option
-w - in practice, git GUIs will happily workaround this
- if necessary you could also use these blame options —ignore-rev, —ignore-revs-file
-
option2: rewrite your history
- pb: rewriting history is hard.
- need to synchronize all committers
- almost impossible in opensource projects
https://www.ofcodeandcolor.com/2013/08/29/normalizing-line-endings-in-git-repositories/
https://www.moxio.com/blog/43/ignoring-bulk-change-commits-with-git-blame
Repairing i/lf w/crlf attr/text eol=lf
In this case, the index is ok, but the workspace is «broken».
This file was probably checked out before attribute eol=lf was specified.
Git will not bother you with this. But maybe your code editor or tool will bug you if it requires crlf line-endings for some file types.
Examples:
- visual studio may complain or introduce incoherent line-endings if csproj have «wrong» line endings
- terraform will complain if
*.lock.hclfiles have wrong line-endings
The fix : delete the local file, and check it out again
Bulk fixing: pipe the output of this command to xargs rm, then do a git reset (with all the precautions needed!!!)
git ls-files --eol | grep "i/lf w/crlf attr/t" | cut -f2 -d$'\t'
Enter fullscreen mode
Exit fullscreen mode
Repairing i/lf w/lf attr/text eol=crlf
In this case, the index is ok, but the workspace is «broken».
This time, it may be a problem if your tooling or IDE requires lf line-endings.
The fix: same as the other «broken» workspace situation.
Have you ever worked on a team where people use other OS along with windows(with Git as
version-control system). In such case tesing or linting will give you errors about the line endings.
In this post I will walk you through some settings, which can solve these problems in your codebase.
Reason for this problem
This problem arises because of the default line endings in Windows, which is CRLF. While the
default line endings in macOS and all linux distros will be LF
All the below solutions are the modifications needed to be done on Windows PC, to make it compatible
with other OS.
CRLF means (\r\n) and LF means (\n)
Solutions
Solution #1
The key to dealing with line endings is to make sure your configuration is committed to the
repository, using .gitattributes. For most people, this is as simple as creating a file named
.gitattributes at the root of your repository that contains these 2 lines:
* text=auto
*.png -text
*.png -text is optional, but I use it as a best practice With this set, Windows users will have
text files converted from Windows style line endings (\r\n) to Unix style line endings (\n) when
they’re added to the repository.
For most developers — in most repositories — this will resolve all the issues with line endings.
Solution #2
You can change your editor settings to support line endings as LF. The procedure to set this up
vary based on your editor. In vscode it is "files.eol": "\n"
Solution #3
While installing Git, you can choose Checkout as-is/ Commit Unix-style.
If you do lot of cross-platform development this will help you.
Solution #4
You can use prettier or beautify or any other code formatter for your project. I usually use
prettier either as extension or a dependeny. It currently supports various
files, it’s worth a try. With a vscode extension, the configuration(settings.json) will be
"prettier.endOfLine": "lf"
Solution #5
Many tests depend on newlines being preserved as LF. On Windows, you can ensure this by cloning
with:
git -c core.autocrlf=false clone https://github.com/awsm-page/eol.gitSome other git commands that might be helpfult regarding this config:
# setting autocrlf=false for current repo
git config core.autocrlf false

# view current repo config file in editor(recommended)
git config --edit

# view current repo config in terminal
git config -l

# setting autocrlf=false globally
git config --global core.autocrlf false

# view current repo config file in editor
git config --global --edit
Explanation
It is a good idea to keep a .gitattributes file as we don’t know if everyone in our team will set
their config. This file should be kept in repo’s root path.
* text=autoThis will treat all files as text files and convert to OS’s line ending on checkout and back to LF
on commit automatically. If you want to set this explicitly, then use
* text eol=crlf
* text eol=lf
First one is for checkout and second one is for commit.
Frequently asked questions
What is CRLF?
CRLF stands for Carriage Return Line Feed. It’s used to note the termination of a line(EOF), however, dealt with differently in today’s popular Operating Systems.
What is OS?
OS stands for Operating System. Examples of OS are Windows 10, Windows XP, Mac, Ubuntu.
Last Updated on