
Minecraft — это мир безграничных возможностей, в котором легко разобраться. Но даже бывалых игроков могут подстерегать неожиданности, например, загадочная ошибка «Утопленник». В этой статье мы подробно разберем, что она означает и как с ней бороться.
Ошибка «Утопленник»

Источник: gamesqa.ru / Ошибка Утопленник
Ошибка «Утопленник» в Minecraft — это не конкретный, задокументированный код ошибки. Это скорее является народным названием ситуации, когда игроки сталкиваются с различными проблемами при входе в игру. По сути это местный «черный ящик» неисправностей. Такая ошибка говорит о том, что что-то пошло не так, и Minecraft не может установить соединение или завершить процесс авторизации.
Кроме того, к «Утопленнику» часто относят зависания на экране загрузки, появление сообщения об ошибке без конкретного кода или простого вылет игры. Эти вариации делают диагностику ситуации более затруднительной.
Код ошибки «Утопленник» в Майнкрафт — как исправить
При появлении этой ошибки не стоит поднимать панику. Для решения проблемы есть несколько способов. Рассмотрим их подробнее ниже.
Полностью закройте Майнкрафт. Обычным сворачиванием игры проблему не решить, поэтому необходимо завершить все игровые процессы. Для этого нужно открыть диспетчер задач и завершить активности Minecraft, включая лаунчеры и трейнеры (если они активны).

Источник: CQ.ru / Закрытие программы
Перезагрузите ваш ПК или смартфон (планшет). Пусть способ и является простым, но зачастую помогает в решении большинства проблем, так как освобождает оперативную память.

Источник: CQ.ru / Перезагрузка ПК
Убедитесь, что интернет работает стабильно. Следует также проверить показатели скорости и надежности, так как медленное или нестабильное подключение порой становится причиной появления ошибок при входе в игру.

Источник: CQ.ru / Проверяем интернет-соединение
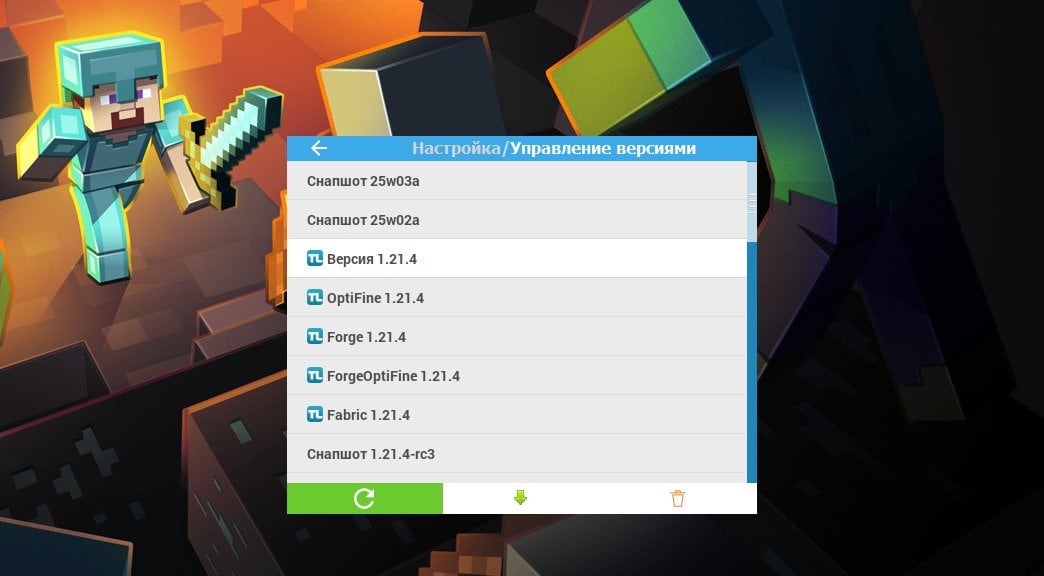
Также стоит удостовериться, что версия вашей игры обновлена до последней. Разрабы Майнкрафта часто выпускают обнову, способную исправить ошибки, поэтому проверьте установленную у вас версию и скачайте новый патч при необходимости.
Источник: CQ.ru / Обновление игры
Если ни одно из вышеперечисленных решений не принесло результата, возможно, стоит рассмотреть переустановку игры. Перед эти рекомендуем создать резервную копию во избежание потери игрового процесса, а также скопировать данные сохранений.
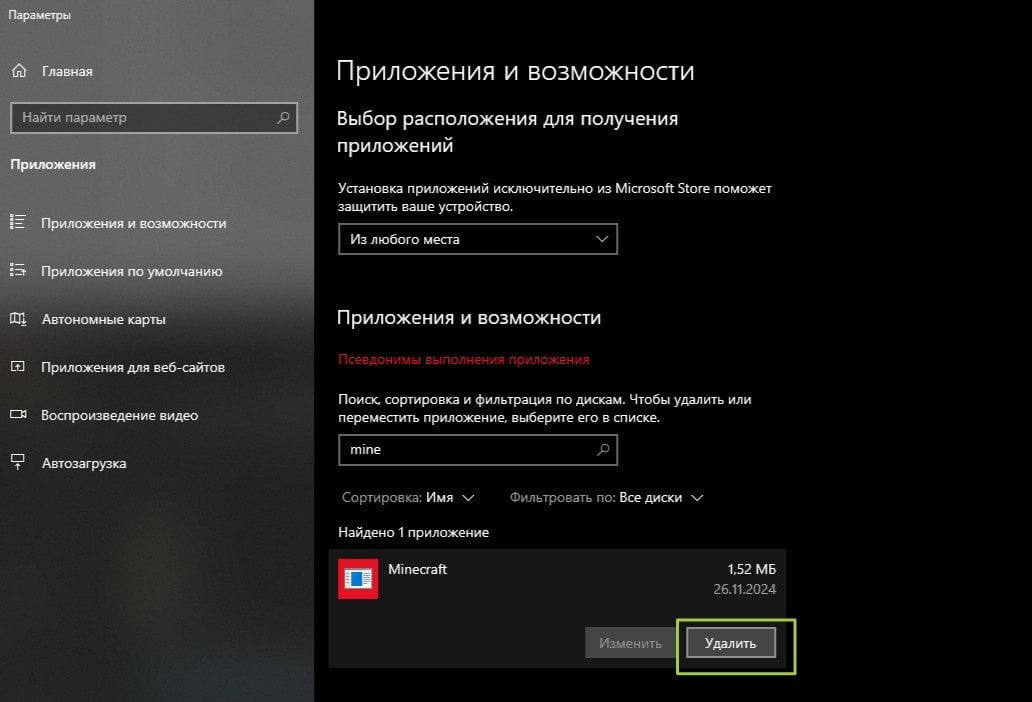
Источник: CQ.ru / Удаление Майнкрафт
При сохранении ошибок и вылетов стоит написать в поддержку. Специалисты предоставят детальную информацию и помогут решить возникшую проблему.

Источник: CQ.ru / Поддержка Mojang
«Утопленник» в Майнкрафт представляет собой таинственную, но обычно легко решаемую ошибка. Не забывайте, что профилактика — это наилучший способ избежать неприятностей. Проверяйте наличие выпускаемых обновлений для Майнкрафт и следите за состоянием интернета. Удачи в ваших приключениях!
Заглавное фото: youtube.com
Похожие статьи:
- 50 лучших дизайнов крыши в Minecraft
- Все виды брони в Minecraft
- Где найти цветущую вишню в Minecraft
- Как сделать обсидиан в Minecraft
- Все виды пушек в Minecraft
When you start your PC, you may come across this message, “Getting Windows Ready, Don’t Turn off Your Computer.” This message usually goes away in a matter of minutes as the PC resumes to normal functioning. In some instances, your PC can be stuck with this message for a very long time. Let’s explore different ways you can resolve the issue. You can apply them one by one, i.e., if the first method doesn’t work, then go to the next.
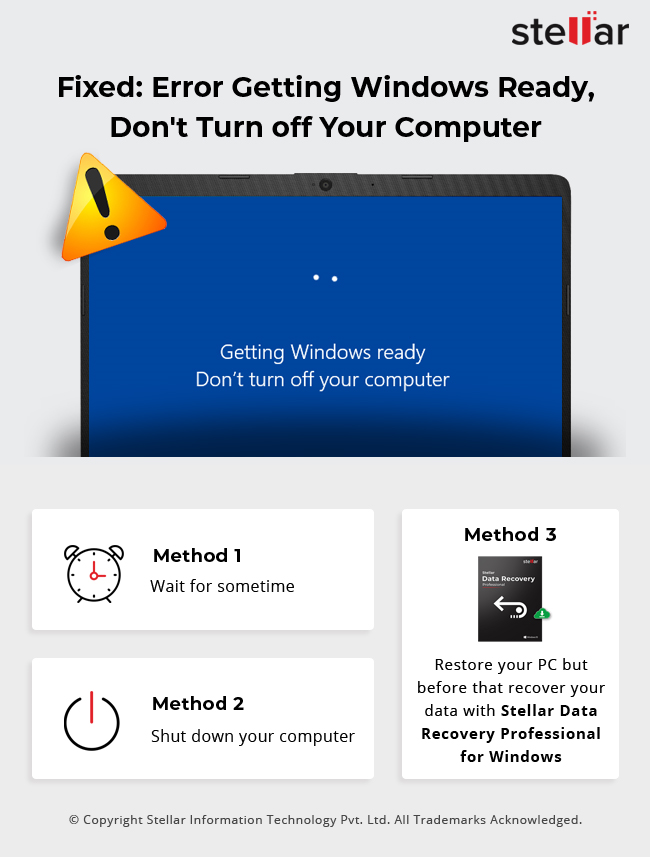
Method 1: Wait for some time
Microsoft’s support technicians recommend this method of waiting for some time. Usually, at the time when this message appears, your PC is downloading or installing files and programs in the background. In some cases, it can take a very long time (2-3 hours). If the message doesn’t disappear even after 2-3 hours, then go to the next method.
Method 2: Shut down your computer
You can press the Power button for 20-30 seconds to shut down your computer. Then restart your PC to see if the method works. In case your PC has a removable battery, take it out and insert the battery again. If this doesn’t work, then move to the next method.
Method 3: Restore your PC
In this method, you can reset your PC to an earlier restore point. This way, your PC can return to a time when it was working. However, with this method, you also stand to lose access to data added after that specific time period. Not to worry, you can recover all those data with data recovery software. Let us look at both of them one by one.
a. Restore your PC
Follow the below steps to restore your PC:
1. Press & hold the Shift key to restart your PC. The boot window will open.
2. In the Boot options menu, select Troubleshoot.
3. Next, click on Advanced option and then System Restore.
4. Follow the wizard and click Finish to complete the restoration.
b. Recover any lost data
After the system restore is completed, you can run a data recovery software like Stellar Data Recovery Professional for Windows to recover files that were lost due to system restore. Stellar Windows Data Recovery is a professional software designed to trace and restore files lost in any scenario. Here are the steps to restore your lost files with the software.
Recovering lost files with Stellar Data Recovery Professional for Windows
1. Download and install Stellar Data Recovery Professional for Windows rated Excellent on Trustpilot.
2. Next, select the type of data you wish to recover.
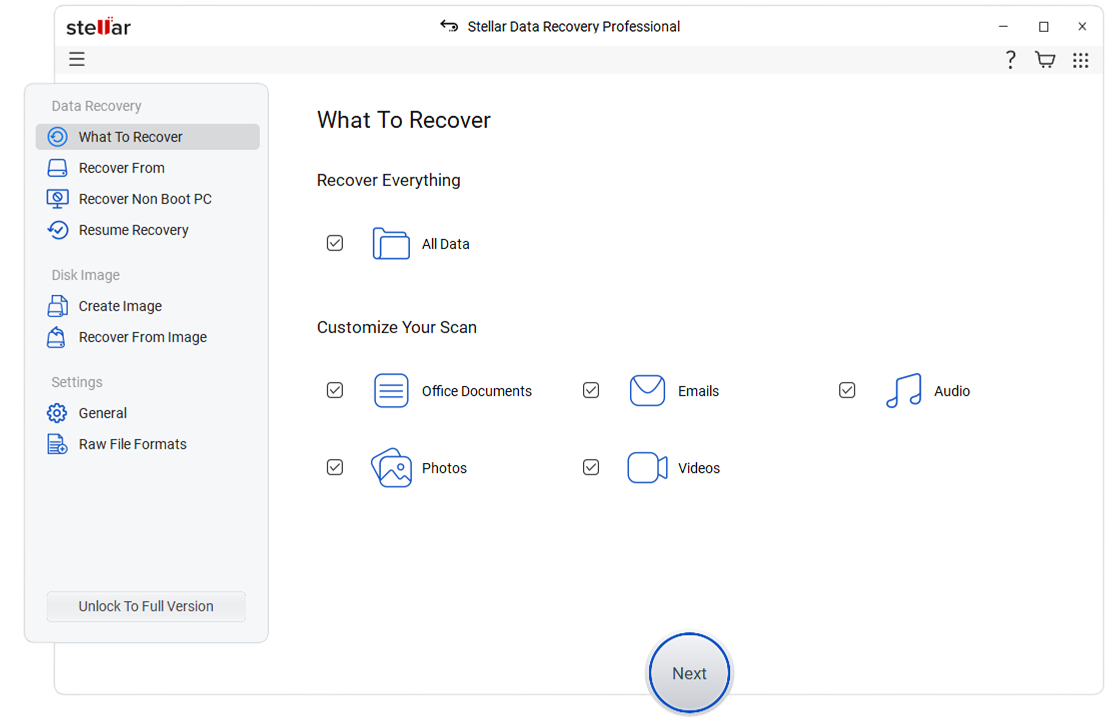
3. Choose the drive in your PC from where you want to recover the data.
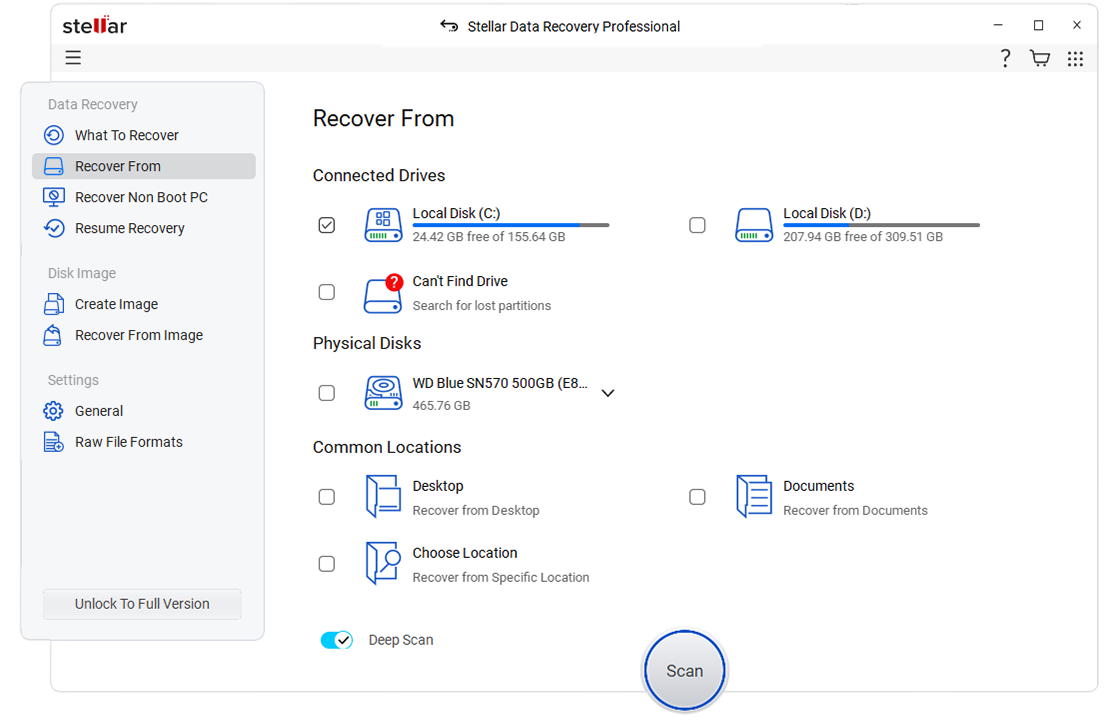
4. Once you have selected the drive, click Scan. During the scan process, you can also preview the files to be recovered.
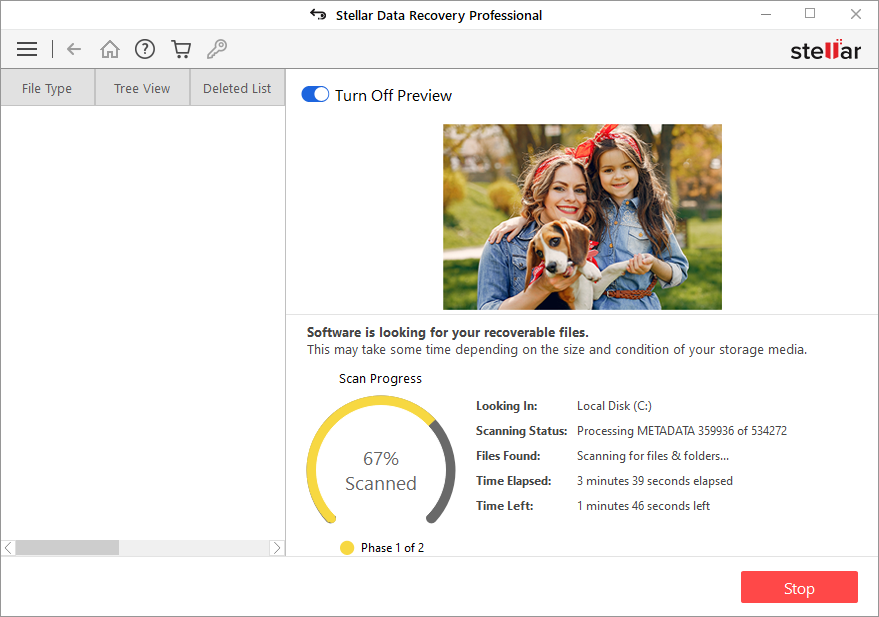
5. After scan completion, you can preview the recoverable files.

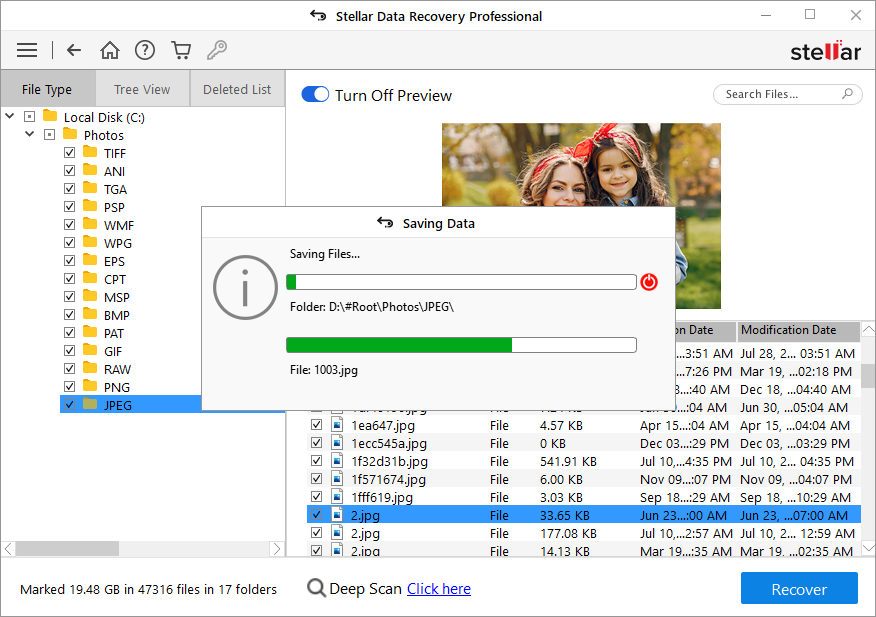
6. Select the Files and click Recover, then click Browse to choose a location to store the recovered files. (See Image 6)
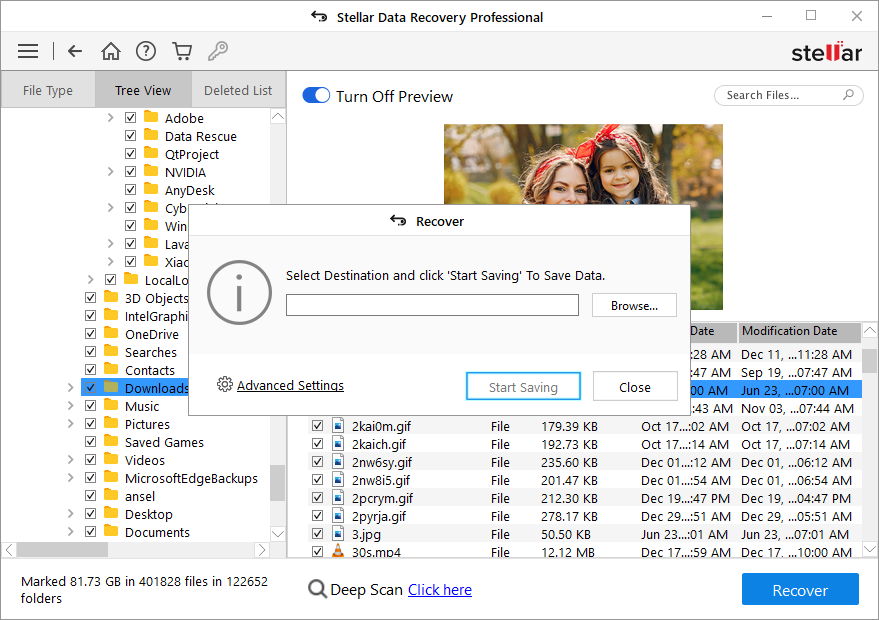
7. Finally, click ‘Start-Saving’ to save the data. (See Image 7)
Summing up
The message “Getting Windows Ready, Don’t Turn off Your Computer,” generally fades in seconds/minutes as the system starts. However, in some cases, the message might linger for hours. If that happens, then you can use the steps one-by-one described in the blog. The last method is to restore your PC to an earlier restore point, leading to loss of data. For that, you can use a data recovery software like Stellar Data Recovery Professional for Windows to recover any lost data.
Was this article helpful?
YES0
NO
,
One of the most annoying issues with Windows 10/11 is when it freezes for a long time at the «Getting Windows Ready – Don’t turn off your computer» screen.
The message «Getting Windows ready» appears during the installation of important updates, and in most cases after 4-5 minutes the message disappears, the computer restarts and you can continue your work. But in some cases the message stays for a long time and users do not know how long they have to wait until Windows is ready.

In this article, you will find detailed instructions to troubleshoot the «endless» issue of Getting Windows Ready in Windows 10/11. 
How to FIX: Getting Windows Ready, Don’t Turn off Your Computer in Windows 10/11,
- Wait longer.
- Force Shut down.
- Repair Startup.
- Uninstall Recent Updates.
- Restore PC to a Previous State.
- Reset Windows 10/11.
- Clean Install Windows 10/11.
Method 1. Wait for an Extended Period of Time.
If the computer has been stuck on the «Getting Windows Ready» screen for too long, don’t despair and keep waiting until the process is complete. Personally I have had to wait from 1 to 4 hours (yes you read that right) for an old computer to come out of the «Getting Windows Ready» screen.
Some users even reported that their computer was stalled on the «Getting Windows Ready» page for about 8 hours before it successfully booted into Windows. It is therefore recommended that you leave your computer for a longer period of time, especially if there are a large number of updates that need to be installed. Also in such a case I suggest to replace your hard disk with an SSD.
Method 2. Hard Shut Down.
If you have been waiting too long or if you are in a hurry to continue working and the message on the screen still appears, then forcibly shutting down your computer can solve the problem. To do that:
1. Press and hold down the power button for at least 10 seconds to completely turn off your computer.
2. Disconnect all USB peripherals [e.g. USB flash drives, USB printers, etc. (except of course the mouse and keyboard).
3. Disconnect the power cord from the computer and also disconnect the battery if it is a laptop and if it is removable.
4. After 5 minutes connect the power cable. (Reattach the battery first if you own a laptop).
5. Turn on your computer and check if it starts normally without getting stuck in the «Getting Windows Ready» message.
Method 3. Repair Startup Problems.
If the above methods failed to resolve the issue, the next step is to try to resolve it using the options in the Windows Recovery Environment (WinRE).
Step 1. Force Windows to Boot in Windows Recovery Environment (WinRE).
1. Press and hold down the power button for at least 10 seconds to completely turn off your PC.
2. Turn On your PC, and when the manufacturer’s logo appears (or when you see the spinning dots), hold down the power button for 10 seconds to turn off your computer again.
3. Repeat the above process 2 more times and then leave your PC to boot.
4. When the «Automatic Repair» screen appears, click Advanced Options, and continue to the next step. *

* Note: If your PC doesn’t start in WinRE, create a Windows 10/11 USB installation media from another functional PC and then start the affected computer from the installation media.** Then click Next at the first screen and then click Repair your Computer > Troubleshoot.
** To Start your computer from the installation media, turn on the computer and depending on the PC manufacturer, press one of these keys repeatedly (F9, F8, ESC, Del) to access the boot options and select the USB installation media as the boot device.
Step 2: Run Startup Repair.
1. From the Windows Recovery Environment, select Troubleshoot > Advanced options.
2. Click the Startup Repair option and then select the target OS (e.g. Windows 10)

3. Let Windows to repair the startup components and then to restart.
4. Boot to Windows normally and proceed to install updates again.
Method 4: Uninstall Recent Update.
Because this problem usually occurs during the unsuccessful installation of an update, proceed to remove the latest update from the WinRE.
1. Boot into WINRE using the instructions on step-1 on method 3 above.
2. in Advanced options choose Uninstall Updates.

3. Choose an account with administrative privileges, type in the password, and click Continue.

4. First choose Uninstall latest Quality update and follow the on-screen instructions to uninstall it. *
* Note. If the problem is not fixed after uninstalling the latest quality update, repeat the same steps but this time Uninstall latest feature update and see if that fixes the problem.

Method 5: Perform System Restore.
Your next option to prevent Windows to stuck at «Getting Windows Ready», is to restore your PC to a previous working state from the WinRE.
1. Boot into WINRE using the instructions on step-1 on method 3 above.
2. On WinRE Advanced options –> System Restore.

3. If prompted, select an account with administrative privileges, type a password for that account and click Continue.

4. At System Restore screen, click Next. *
* Note: If you receive the message that «no restore points have been created on your computer…» skip to next method.

5. Select Show more restore points and select a date that you know your computer was working correctly, and then click Next.

6. Click Finish and Yes again to start to restore process.
7. Now wait until the restore process is completed. During the restore process, your computer will restart several times and when it’s done, you should enter in Windows without problems.
Method 6. Reset Windows to Default State by keeping your files.
Another method to repair Windows 10, if your PC doesn’t start normally, is to reinstall Windows by using the Reset this PC option in WinRE. *
* Important: The ‘Reset this PC’ option, keeps your files, BUT removes all your programs and settings. Use this option only if the above methods do not solve the problem.
1. Follow the instructions on step-1 above to enter in WinRE.
2. Click Reset this PC in Troubleshoot screen. *
* Note: Keep in mind that the Reset this PC option is not available if you started from a USB Windows installation Media. At this case, skip to next method.

3. At the next screen choose Keep my files. *
* Please Note: All applications and settings will be removed if you continue and you will need to reinstall your programs when the process is complete.

4. If prompted, select an account with administrative privileges, type a password for that account and click Continue.
5. If you PC is connected to Internet, select Cloud download, otherwise choose Local reinstall. *
*Note: If your PC has a reliable internet connection, choose cloud download; otherwise, choose Local reinstall – which does not require an internet connection.

6. Finally, let the Reset this PC tool to reinstall Windows.
Method 7. Clean Install Windows 10 & Check Hardware.
If none of the above methods doesn’t resolve your problem, then your final option is to backup your files and to perform a clean installation of Windows 10.
That’s it! Which method worked for you?
Let me know if this guide has helped you by leaving your comment about your experience. Please like and share this guide to help others.
If this article was useful for you, please consider supporting us by making a donation. Even $1 can a make a huge difference for us in our effort to continue to help others while keeping this site free:
- Author
- Recent Posts
Konstantinos is the founder and administrator of Wintips.org. Since 1995 he works and provides IT support as a computer and network expert to individuals and large companies. He is specialized in solving problems related to Windows or other Microsoft products (Windows Server, Office, Microsoft 365, etc.).
«I just shut down my computer and now it’s on getting windows ready dont turn off your computer. It has been going for about 30 minutes now and i have no idea what to do, could somebody please help?»
-From Reddit
Over the years, Windows has made significant advancements and has become the preferred choice of millions of users worldwide. However, Windows 8, 10 and 11 users often encounter unexpected issues with their operating systems. One common problem they face is the appearance of the «Getting Windows Ready Don’t Turn Off your Computer» message on their screens. This issue has been reported by users on various platforms, and it frequently occurs when they turn on/off their computer or when they perform a system restart or reboot. In some cases, this process can take several hours to complete. If you are currently facing the issue of Windows 8/10/11 being stuck on the «Getting Windows Ready» screen, we have compiled a list of effective solutions to help you resolve it.

Part 1: Why is My Computer Stuck on Getting Windows Ready?
The «Getting Windows Ready Don’t Turn Off your Computer» error message typically indicates an issue during the Windows update process. There are several factors that can contribute to this problem, including:
- Network Issues: A poor internet connection or network interruptions can hinder the downloading and installation of updates, resulting in the error message appearing.
- Update Installation Issues: Sometimes, Windows updates may fail to install correctly or encounter errors during the installation process, causing the computer being stuck on the «Getting Windows Ready» screen.
- Software or Driver Conflicts: Incompatibilities between software applications, device drivers, and Windows updates can interrupt the update process, triggering the error message.
- File System Corruption: If the file system becomes corrupted, either due to sudden power outages or improper shutdowns, it can hinder the update process and lead to the system being stuck.
- Outdated Operating System: If your operating system has not been updated for a significant period, it may require multiple updates to be installed during the update process. This can lead to delays or complications.
Part 2: What Do I Do If My Computer is Stuck on Getting Windows Ready?
Encountering a situation where your computer gets stuck on the «Getting Windows Ready» screen during the update process is a common challenge that many users face. Fortunately, there are effective methods available to resolve this issue.
Fix 1: Just Wait for Some Time
Now and again, the best thing to do is to wait patiently if you have enough time and are not in a hurry. When there are multiple older version updates to be installed, updates can take a considerable amount of time. Additionally, if your internet connection is weak, the update process may be delayed further. So consider leaving your PC for at least an hour to allow the update process to complete. Assuming there is still no progress, it is likely that the issue lies elsewhere and requires further troubleshooting.
Fix 2: Check Internet Connection
As we’ve stated above, a stable and reliable internet connection is essential for a successful Windows update. If your internet connection is weak or unstable, it can cause the «Getting Windows Ready» screen to get stuck. In case you are utilizing a LAN connection, inspect the cables and switches and try connecting the cable to a different switch to determine if it is functioning properly. If you are using Wi-Fi, examine your router for any issues. Make sure it is working smoothly, and consider restarting it if necessary. If you suspect a problem with the router, you can troubleshoot it or try using an Ethernet cable instead.
Fix 3: Shut down Your PC and Power Reset It
If the «Getting Windows Ready» screen persists for an extended period, you can try shutting down your PC and performing a power reset. This can help resolve any temporary issues or glitches that may be causing the system to hang. Here’s what you can do:
- Disconnect any external devices or peripherals, such as USB drives, printers, or external hard drives, from your computer.
- Press and hold the power button on your computer until it completely shuts down. Once the computer is off, unplug the power cord from the back of the computer or the power outlet. If your computer has a removable battery, remove the battery as well.
- Leave your computer in this powered-off state for a couple of minutes. Then reinsert the battery and attach the power cord again to your device.
- Press the power button to turn on your computer and observe if it progresses past the «Getting Windows Ready» screen.
Fix 4: Use Windows Boot Up Solution Tool
When the above basic methods fail to resolve the issue where Windows 10 stuck on getting windows ready persists, your ultimate solution is to seek further assistance from a reliable Windows Boot Up Solution Tool like 4DDiG Windows Boot Genius. This tool is designed to automatically repair various Windows issues, including blue, black or white screen on Windows computer, Windows 10 won’t boot, Windows system crashes, and other boot-related problems such as computer stuck on getting Windows ready.
Let’s see how you can use 4DDiG Windows Boot Genius to resolve issues that prevent your computer from starting properly and boot your computer in minutes. Before proceeding with the following steps, make sure to back up all your important files and data to an external storage device or cloud storage.
-
Create a Bootable Disk
Download and launch 4DDiG Windows Boot Genius on another computer. Connect a USB drive or insert a blank CD/DVD into the working computer and then click «Create boot disk now» to start burning a repair disk.

Select the OS you want to fix and choose the drive with the bootable media. Then click «Next» to start downloading the repair environment ISO and wait for Windows Boot Genius to download the repair environment ISO and create a bootable disk.
-
Boot Windows System from USB/CD/DVD
Once the bootable disk is created, remove it from the working computer and insert it into the problematic computer. Restart the problematic computer and enter the boot menu by pressing the appropriate key during the startup process.
Select the bootable disk created by 4DDiG Windows Boot Genius from the boot menu.
-
Start Repairing Your Computer
When your problematic computer is booted successfully, 4DDiG Windows Boot Genius will be launched automatically. Click the «Automated repair» option to diagnose and fix any Windows issues causing the update process to stuck.
After the repair process is complete, remove the bootable disk and restart your computer.
Video Tutorial on How to Fix Getting Windows Ready Don’t Turn off Your Computer Windows
Fix 5: Run Windows Startup Repair
When your computer is stuck on the «Getting Windows Ready» screen, you can also try running the Windows Startup Repair tool. This tool is designed to diagnose and fix issues that may be preventing your computer from starting up properly. Follow the means beneath to get going:
- Restart your computer and press the necessary key (usually F8, F11, or Del) to access the boot menu. Select the option to boot into the Windows Recovery Environment.
- From the advanced startup options menu, select «Troubleshoot» and then choose «Advanced options.»
-
Now, select «Startup Repair» and wait for the tool to analyze your system and attempt to repair any detected issues.

- Follow the on-screen instructions provided by the Startup Repair tool.
- Once the repair process is complete, restart your computer and check if the «Getting Windows ready» stuck issue has been resolved.
Fix 6: Uninstall Recently Installed Update in Safe Mode
A faulty update may interrupt Windows functioning. If you suspect that a recently installed update is causing the «Getting Windows Ready» error, try uninstalling it in Safe Mode may help fix the issue. Safe Mode allows you to start your computer with minimal drivers and services, making it easier to troubleshoot and remove problematic updates. Here’s how to uninstall a recently installed update in Safe Mode:
-
Open the Advanced options page, then, at that point, click «Startup Settings» and press «F4» to get to the Safe Mode.

- In Windows 10 Safe Mode, right-click Start > Control Panel > Programs and Features.
-
From the left panel, select the recent updates and uninstall them to fix the laptop stuck on getting Windows ready issue. At last, restart Windows 10/11 to see if the problem resolves.
Fix 7: Perform a System Restore or Reset
Another method that may help address the persistent «Getting Windows Ready» error is performing a system restore or reset. This will revert your computer to a previous stable state or perform a clean installation of Windows. But remember to back up your important files before proceeding with this method to avoid data loss. Here’s how you can proceed after data backup:
- Restart your computer and repeatedly press the F8 key (or Shift + F8) during boot to access the Advanced Boot Options menu.
- From the Windows Boot Options menu, go to Troubleshoot > Advanced Options > System Restore.
- Choose a restore point that predates the occurrence of the «Getting Windows Ready» error. Follow the on-screen instructions to initiate the system restore process.
If this last technique comes up short, there isn’t anything that can fix the «Windows getting ready» issue other than reinstalling Windows 10 from scratch.
Tips:
Factory resetting will erased files on your hard drive, to recover lost or deleted data from computers, you can try hard drive data recovery tool. And you can move to Part 3 for the details.
Fix 8: Perform a Clean Windows Installation
In cases where the «Getting Windows Ready» error persists, chances are that the OS might have unfixable issues. In this case, performing a clean installation of Windows can be an effective solution. This process involves reinstalling the operating system from scratch, which helps eliminate any software conflicts or corrupted files causing the issue. However, it is crucial to back up your important data before proceeding, as this process will erase all data on the system drive.
Part 3: FAQs about Windows Getting Stuck
1. How do I fix a stuck loading computer?
If your PC is stuck at the loading screen, you can:
- Try Windows Safe Mode.
- Unplug your battery.
- Unplug all external devices.
- Try an antivirus scan.
- Make use of System Restore or Startup Repair.
2. What to do if Windows restart is stuck?
If Windows takes forever to restart, try unplugging all the external devices and battery (in the case of a laptop) from your computer. That will force shut down your PC.
3. How do I fix Windows 10/11 stuck when ready?
Turn it off and wait for 20 seconds. In the case of a laptop, remove the battery, unplug it from the Internet (turn off Wi-Fi). Now plug it once more to see if the PC starts.
4. How long should I wait for getting Windows Ready?
It is better to stand by persistently for around 2-3 hours. After the timeframe, if the problem persists, quit pausing and continue to investigate using the above fixes.
Conclusion:
Delaying out in a «getting Windows ready» is a troublesome issue without a doubt. However, by following the solutions provided, such as power resetting, running Windows Startup Repair, or utilizing professional tools like 4DDiG Windows Boot Genius, you can overcome this obstacle and ensure a smooth Windows startup.
William Bollson (senior editor)
William Bollson, the editor-in-chief of 4DDiG, devotes to providing the best solutions for Windows and Mac related issues, including data recovery, repair, error fixes.
Minecraft — это мир безграничных возможностей, но даже опытные игроки могут столкнуться с неожиданными проблемами. Одна из таких загадочных ошибок получила народное название «Утопленник». Что это за сбой и как с ним справиться? Давайте разберёмся!
❓ Что такое ошибка «Утопленник»?
На самом деле, официального кода ошибки с таким названием не существует. Этот термин появился в сообществе игроков и описывает сразу несколько проблем, связанных с запуском игры. Чаще всего «Утопленник» проявляется в виде:
🔹 зависания на экране загрузки;
🔹 ошибки входа без конкретного кода;
🔹 внезапных вылетов из игры.
Проще говоря, это что-то вроде «чёрного ящика» — Minecraft не может установить соединение или завершить авторизацию, но точно не объясняет, в чём проблема.

🛠 Как исправить ошибку «Утопленник»?
Не спешите паниковать! Вот несколько способов, которые помогут вернуть игру в строй:
1️⃣ Полностью закройте Minecraft
Обычное сворачивание не поможет. Откройте диспетчер задач и завершите все процессы, связанные с игрой, включая лаунчер.
2️⃣ Перезагрузите устройство 🔄
Банально, но это часто решает проблему, так как очищает оперативную память и перезапускает системные процессы.
3️⃣ Проверьте интернет-соединение 🌍
Медленный или нестабильный интернет — одна из частых причин ошибки. Попробуйте перезапустить роутер или подключиться к другой сети.
4️⃣ Убедитесь, что игра обновлена 🔄🎮
Разработчики регулярно выпускают патчи, которые исправляют баги. Проверьте версию Minecraft и при необходимости установите последнюю обнову.
5️⃣ Переустановите игру (в крайнем случае) 🗑
Если ничего не помогло, попробуйте удалить и заново установить Minecraft. Не забудьте сделать резервную копию миров, чтобы не потерять прогресс!
6️⃣ Обратитесь в поддержку 📩
Если проблема сохраняется, напишите в службу поддержки Mojang. Они могут подсказать более точное решение.
✨ Итог
Ошибка «Утопленник» звучит пугающе, но в большинстве случаев её можно легко устранить. Главное — не паниковать и проверить основные моменты: закрытие игры, перезапуск устройства, интернет-соединение и обновление. А чтобы избежать подобных проблем в будущем, следите за обновлениями и периодически проверяйте стабильность сети.
Удачи в ваших приключениях в мире Minecraft! 🚀🏡