
Applies ToWindows 11 Windows 10
Одной из Безопасность Windows функций приложения является журнал защиты, который содержит полный список действий, которые Microsoft Defender антивирусная программа выполнила от вашего имени, потенциально нежелательных приложений, которые были удалены, и основных служб, которые отключены.
Примечание: Журнал защиты хранит события только в течение двух недель, после чего они исчезают из списка.
В приложении «Безопасность Windows» на компьютере, выберите Журнал защиты или используйте следующую ссылку:
Журнал защиты

События отображаются в виде ряда карточек в журнале защиты. События, требующие внимания, задаются цветом:
-
Красный указывает на серьезный элемент, требующий немедленного внимания
-
Желтый цвет обозначает элемент, который не является срочным, но который следует проверить, когда вы можете
Выбрав карта, вы можете развернуть его и получить дополнительные сведения.
Важно: Для просмотра сведений об угрозах в журнале защиты на этом устройстве необходимо иметь права администратора.
В следующих разделах описаны наиболее распространенные события в журнале защиты. Разверните каждый раздел, чтобы узнать больше:
Если антивирусная программа Microsoft Defender обнаруживает вредоносные программы, она будет записана в журнал защиты.
|
Тип оповещения |
Описание |
|---|---|
|
Обнаружена угроза — требуется действие |
Microsoft Defender антивирусная программа обнаружила возможную угрозу и вам нужно принять решение о том, как с ней справиться. Выбрав раскрывающийся список Действия, вы можете поместить угрозу в карантин , сделать ее безвредной. Если вы уверены, что этот элемент был ложно идентифицирован как угроза, можно выбрать разрешить на устройстве. Внимание: Если вы не уверены, является ли элемент безопасным или нет, лучше выбрать Карантин. Если выбрать Разрешить на устройстве , файл будет продолжаться, и если он на самом деле представляет угрозу, ваши данные. личная информация или устройство теперь могут находиться под угрозой. Если вы выберете Разрешить и позже захотите отменить это действие, перейдите на страницу Разрешенные угрозы и вы можете удалить его из списка разрешенных. |
|
Угроза помещена в карантин |
Это означает, что угроза заблокирована и помещена в карантин. Он еще не удален, но в настоящее время не должен представлять угрозу для ваших данных или устройства. Можно выполнить два действия :
|
|
Угроза заблокирована |
Это означает, что Defender заблокировал и удалил угрозу на вашем устройстве. С вашей стороны не требуется никаких действий, хотя вы можете рассмотреть, как угроза достигла вашего компьютера, чтобы снизить риск повторения. Распространенные способы возникновения угрозы включают в себя небезопасное вложение в сообщении электронной почты, скачаное с небезопасного веб-сайта или через зараженное USB-устройство хранения. Если вы считаете, что это «ложноположительный результат» и что файл безопасен, можно выбрать Действия , а затем — Разрешить. Эта угроза уже удалена, поэтому разрешить применяется только к следующему просмотру этого файла. Если вы хотите его использовать, вам потребуется повторно скачать файл. |
|
Исправление не завершено |
Это означает, что антивирусная программа Microsoft Defender предприняла действия по устранению угрозы, но не смогла успешно завершить эту очистку. Выберите карта, чтобы развернуть его, и посмотрите, какие дополнительные действия необходимо выполнить. |
Потенциально нежелательные приложения (PUA) — это категория программного обеспечения, которое может снижать производительность компьютера, неожиданно отображать рекламные объявления или, в худшем случае, устанавливать другое программное обеспечение, которое может быть более опасным или назойливым. Он не опускается до уровня вредоносных программ, но он по-прежнему делает вещи, которые вы, вероятно, предпочли бы не делать.
Если вы хотите убедиться, что блокировка puA включена для вашего устройства, см. статью Защита компьютера от потенциально нежелательных приложений.
Microsoft Defender SmartScreen может блокировать потенциально нежелательные приложения до их установки, и в этом случае в журнале защиты появится событие блокировки.
Если вы считаете, что блок был ошибкой и хотите разрешить запуск файла, выберите Действия, а затем — Разрешить. На этом этапе вам потребуется повторно загрузить файл, чтобы использовать его.
Если вы выберете Разрешить и позже захотите отменить это действие, перейдите на страницу Разрешенные угрозы и вы можете удалить его из списка разрешенных.
Журнал защиты также может уведомлять вас о отключении важной службы, например SmartScreen для Microsoft Edge. Выберите карта для этого оповещения и в разделе Действия можно включить эту функцию.
Нужна дополнительная помощь?
Нужны дополнительные параметры?
Изучите преимущества подписки, просмотрите учебные курсы, узнайте, как защитить свое устройство и т. д.
(Image credit: Windows Central)
Microsoft Defender Antivirus is one of the best antivirus for Windows 10, which offers real-time protection against viruses, spyware, ransomware, and many other forms of malware. Although the security feature works in the background automatically and usually notifies you of any suspicious or unwanted activities, it also provides a protection history report to help you stay informed and take action on the device security as necessary.
The protection history is part of the Windows Security app, and it shows a list of recent malware detections with information that allows you to determine if the threat has been cleaned, removed, or quarantine until an update arrives to Windows 10 to resolve the problem.
If you’re using the anti-ransomware feature, the history will also show blocked actions, which you can review and allow if the default action was a false-positive.
In this Windows 10 guide, we’ll walk you through the easy steps to view the malware detection history by Microsoft Defender Antivirus using the Windows Security app and PowerShell commands.
- How to view malware protection history using Windows Security
- How to view malware protection history using PowerShell
How to view malware protection history using Windows Security
To see all the malware detections on your device, use these steps:
- Open Start.
- Search for Windows Security and click the top result to open the app.
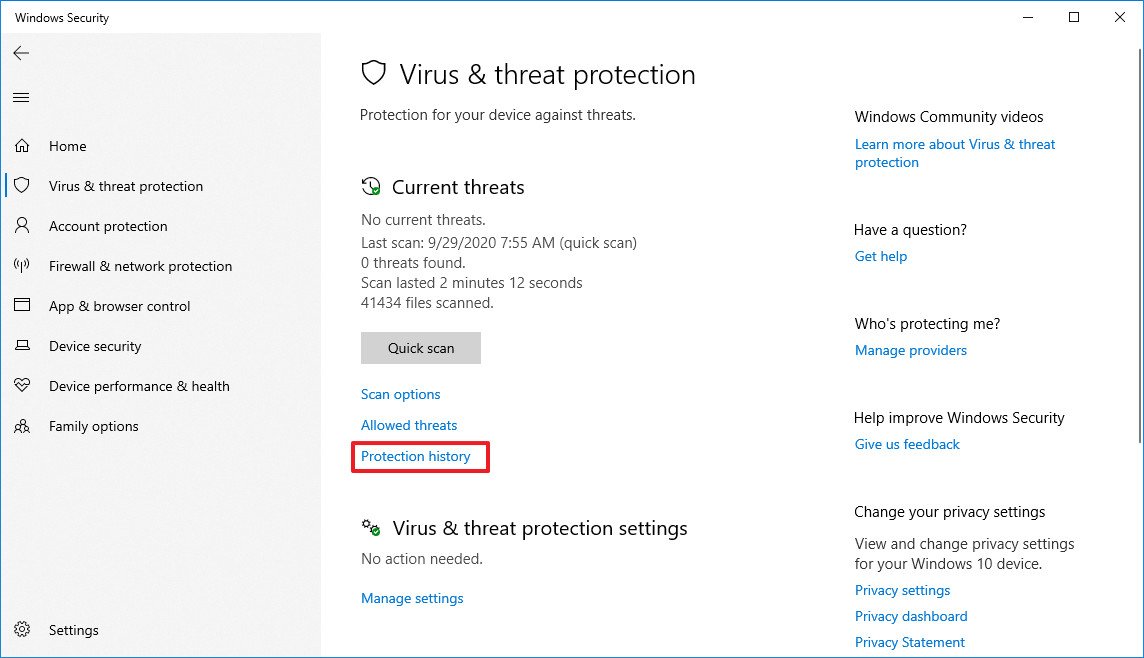
- Click on Virus & threat protection.
- Under the «Current threats» section, click the Protection history option.
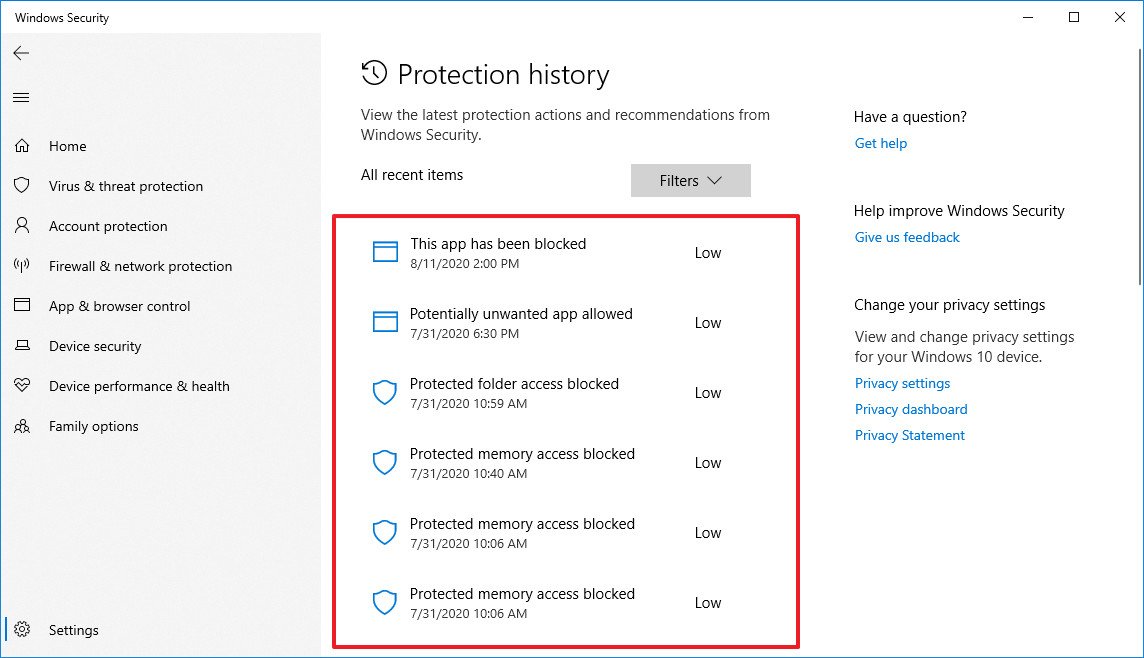
- Confirm the list of threats found by Microsoft Defender Antivirus.Quick note: If you don’t see any items listed, you can breathe a little easier since it indicates that Microsoft Defender hasn’t detected any malware. If you want to make entirely sure that the device isn’t infected, you can always run a full scan with these steps.
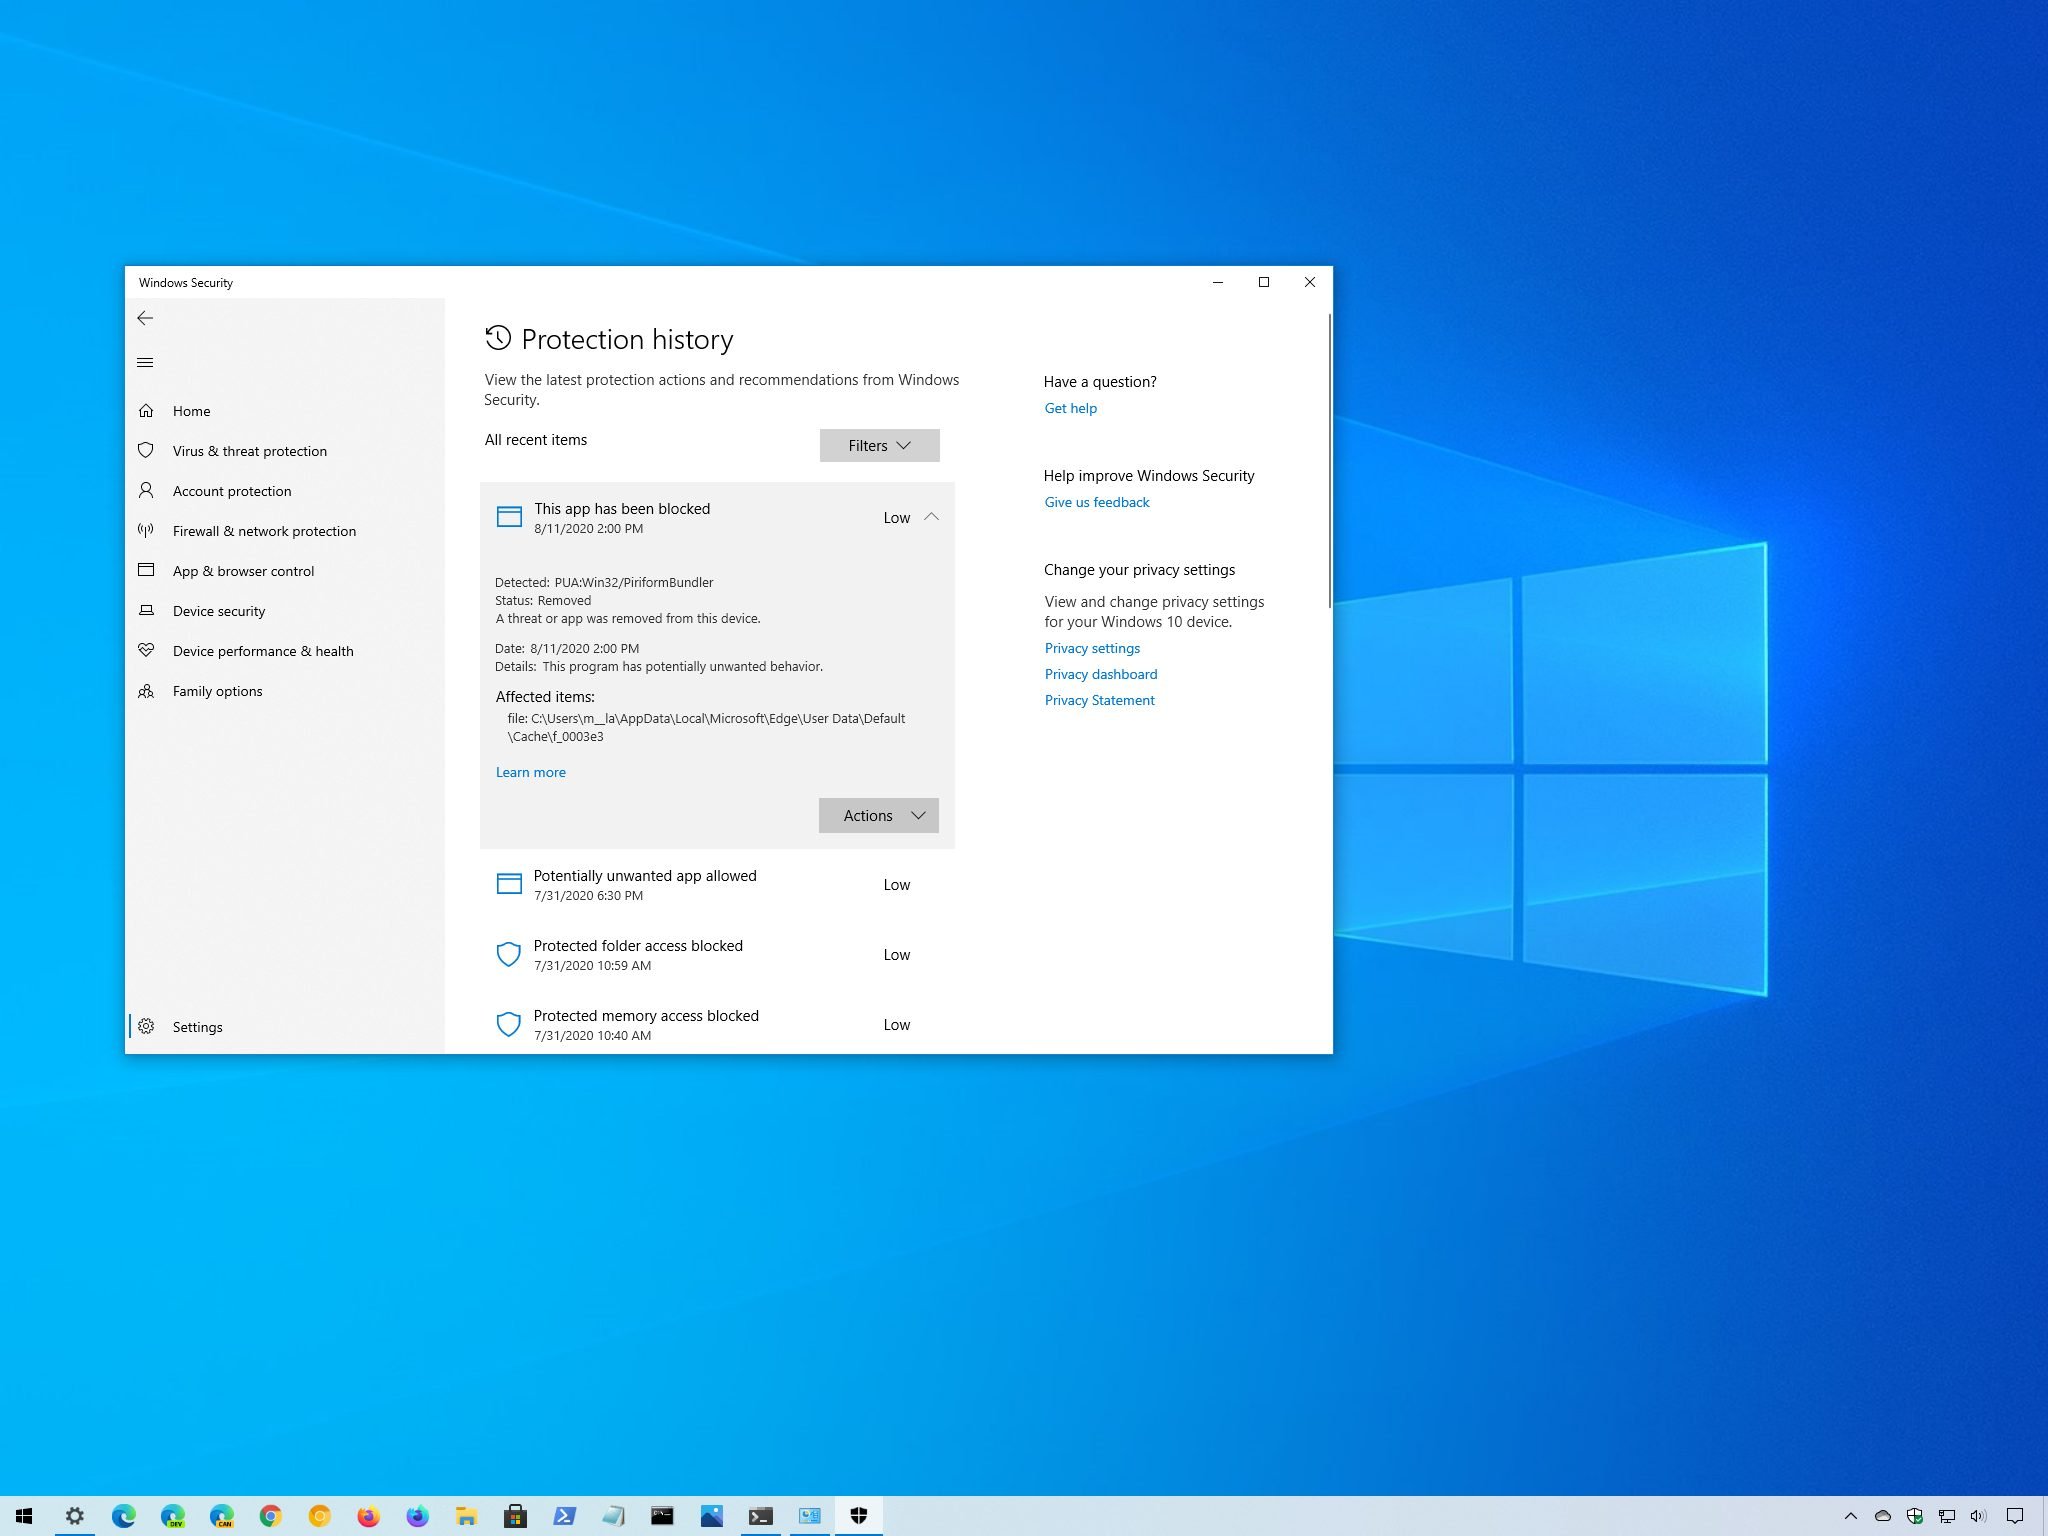
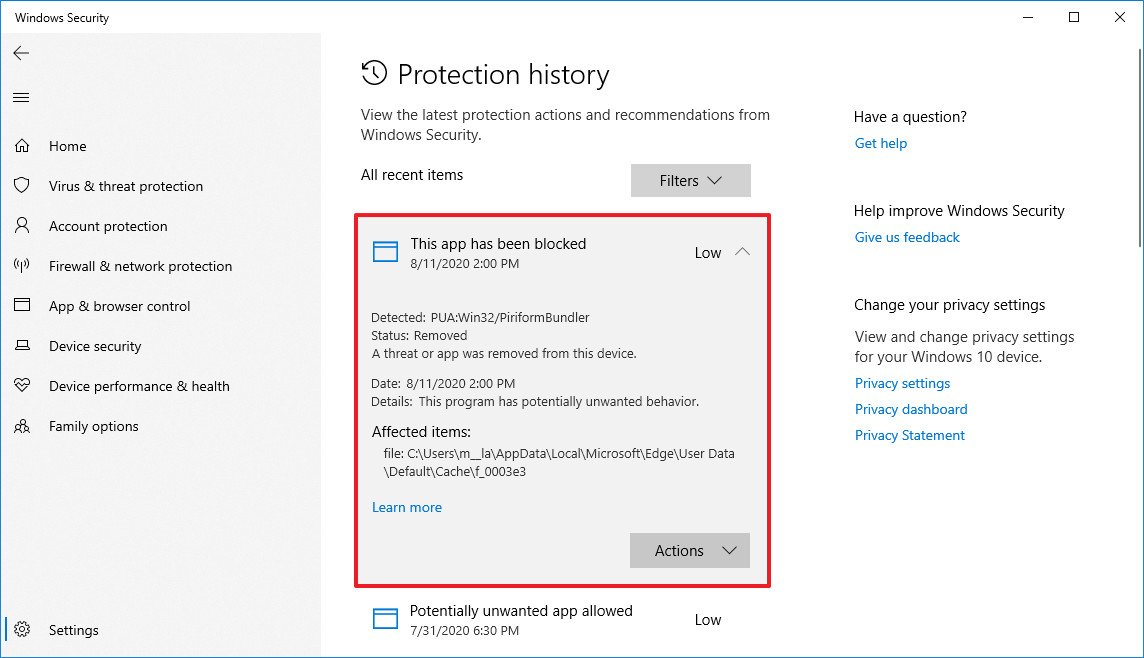
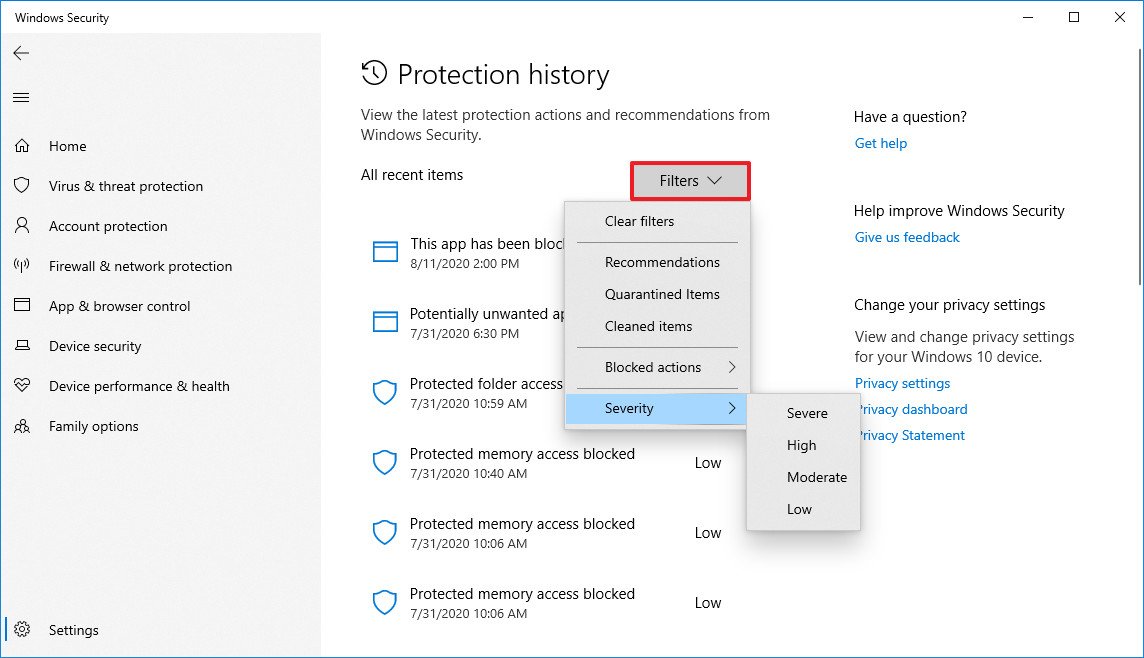
- Select the item to view more information, including malware type, severity level, detection date, category, and information about the item’s location.
- (Optional) If the list includes various items, you can also use the Filters option in the top-right corner to filter the view by:
- Recommendations.
- Quarantined items.
- Cleaned items.
- Blocked actions (Blocked folder access, Blocked items, and Rule-based block).
- Severity (Severe, High, Moderate, and Low).
Once you complete the steps, you’ll have a better understanding of your device’s current security.
How to view malware protection history using PowerShell
Alternatively, you can also get a history list of the malware that Microsoft Defender Antivirus has detected with PowerShell commands.
All the latest news, reviews, and guides for Windows and Xbox diehards.
To query a list of detected threats with PowerShell, use these steps:
- Open Start.
- Search for PowerShell, right-click the top result, and select the Run as administrator option.
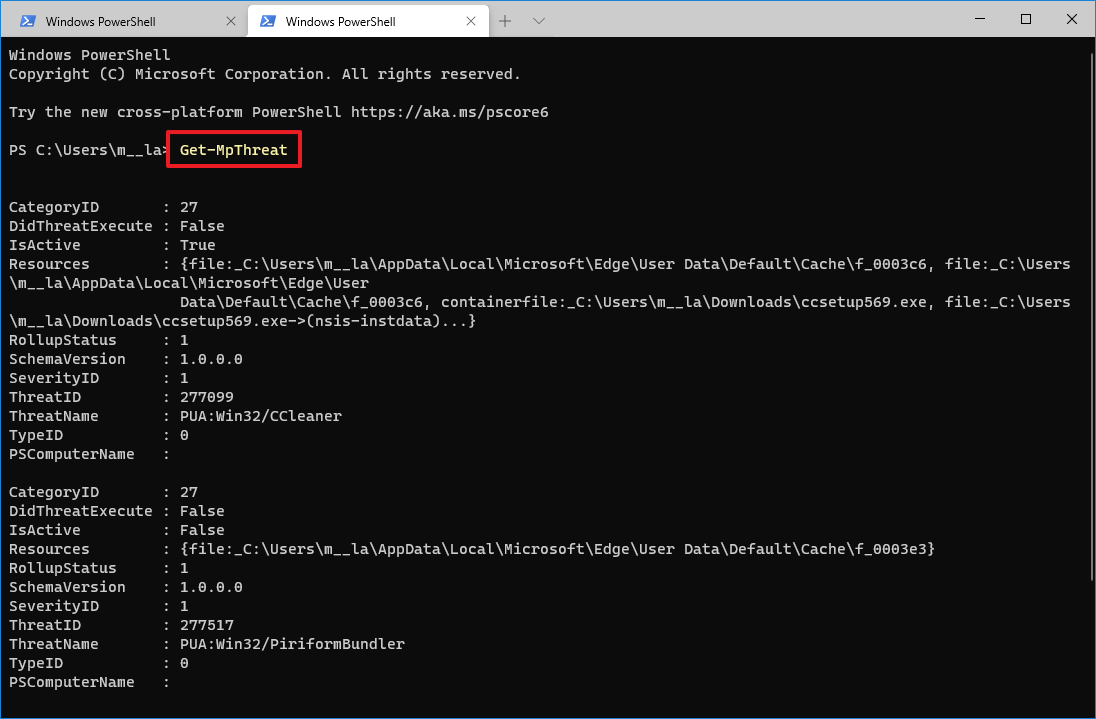
- Type the following command to view a history of threats and press Enter:
Get-MpThreat - See the list of threats found on your computer with information like threat execution, active status, and infected file location.
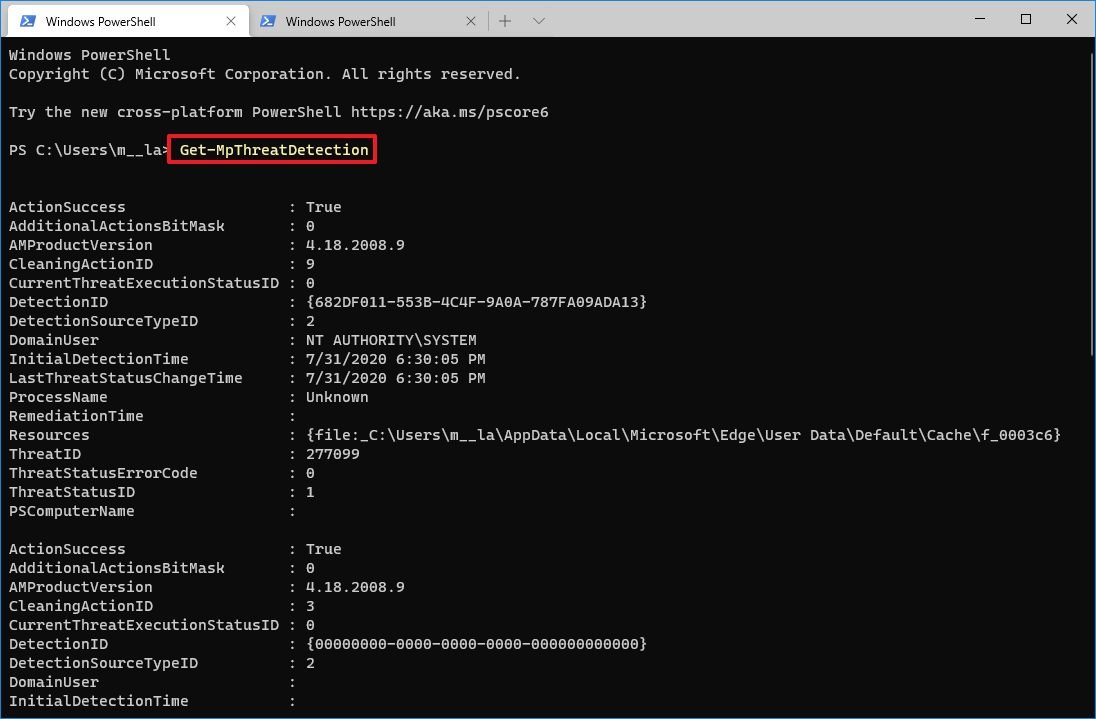
- (Optional) Type the following command to view a list of active and pass malware detections and press Enter:
Get-MpThreatDetection - See the list of malware detections with information like detection date, location of the infected file, action, and more
After you complete the steps, you’ll be able to determine the malware that Microsoft Defender was able to detect on Windows 10.
In the above steps, we’re mentioning to commands, and if you’re wondering the difference between the two. The
Get-MpThreatcommand is meant to show a history of threats, while the
Get-MpThreatDetectioncommand can list active and past malware detections by the antivirus.
You can learn more ways to manage the antivirus on Windows 10 using PowerShell with this comprehensive guide.
Mauro Huculak has been a Windows How-To Expert contributor for WindowsCentral.com for nearly a decade and has over 15 years of experience writing comprehensive guides. He also has an IT background and has achieved different professional certifications from Microsoft, Cisco, VMware, and CompTIA. He has been recognized as a Microsoft MVP for many years.
-
Home
-
News
- 5 Ways to Fix Protection History Not Showing Issue
5 Ways to Fix Protection History Not Showing Issue
By Shirley | Follow |
Last Updated
Have you ever encountered the “protection history not showing” issue? This post focuses on this problem and shows you several ways to help you fix it. And this post also introduces useful data recovery software to help you recover lost protection history.
Solution 1. Check for Windows Update
An up-to-date Windows system that fixes bugs and bugs in Windows and related software can protect your computer from malicious attacks. So, when your Windows Defender protection history is not showing, you should first follow the steps below to check whether Windows needs to be updated.
Step 1. Press Windows + I key combinations to open Windows Settings.
Step 2. Go to Update & Security > Windows Update.
Step 3. Now you will see if Windows is up to date in the right panel. If not, you need to click Check for updates to get its latest version.
Solution 2. Delete Detection History Files
According to the Internet, deleting the detection history files is also an effective way if you cannot see protection history in Windows Defender. Here you can see how to delete these files.
Step 1. Type cmd in the Windows search box and right-click Command Prompt to select Run as administrator under the best match result.
Step 2. In the pop-up user account control window, select Yes.
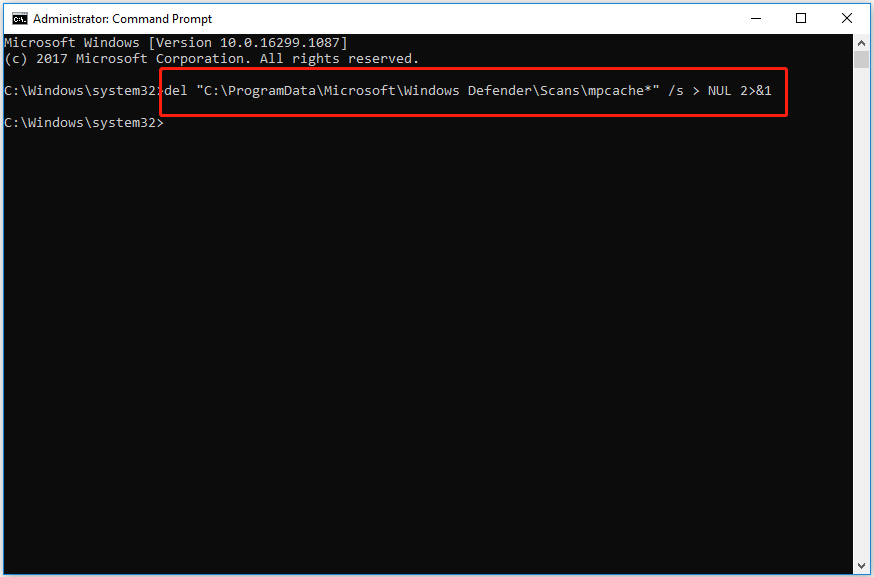
Step 3. Type del “C:\ProgramData\Microsoft\Windows Defender\Scans\mpcache*” /s > NUL 2>&1 in the new window. Then press Enter.
Step 4. Type del “C:\ProgramData\Microsoft\Windows Defender\Scans\History\Service\DetectionHistory\*” and press Enter.
Step 5. Input del “C:\ProgramData\Microsoft\Windows Defender\Scans\mpenginedb.db” and press Enter.
Step 6. Restart your computer to check whether the problem of “protection history not showing” has been fixed.
Solution 3. Run DISM and SFC Scan
If your protection history is missing, it is most likely due to corrupted system files. In this case, you need to perform a DISM and SFC scan. These two commands will scan all protected system files and replace corrupted files with correct cached copies.
Tips:
Tip: DISM/SFC only scan and repair system files without affecting your personal files.
For the detailed steps to run DISM and SFC scan, you can refer to this post: CHKDSK vs ScanDisk vs SFC vs DISM Windows 10.
Solution 4. Reset Windows Defender
If none of the above methods work. You can try to reset Windows Defender. Here you can see how to do that.
Step 1. Click the Start button and scroll down to find Windows Security.
Step 2. Right-click Windows Security and click More tools. Then select App settings.
Step 3. Scroll down to click Terminate. Then click Reset and wait for the process to complete.
Now you can check whether your protection history came back.
Solution 5. Check and Uninstall Other Apps
If there is another app installed for Windows security, the issue of “protection history not showing” may also occur. In this situation, you can follow the guide below to check and uninstall it.
Step 1. Open Control Panel using the Windows search box.
Step 2. Click on Security and Maintenance from the options.
Step 3. Expand Security by clicking the drop-down triangle on the right side.
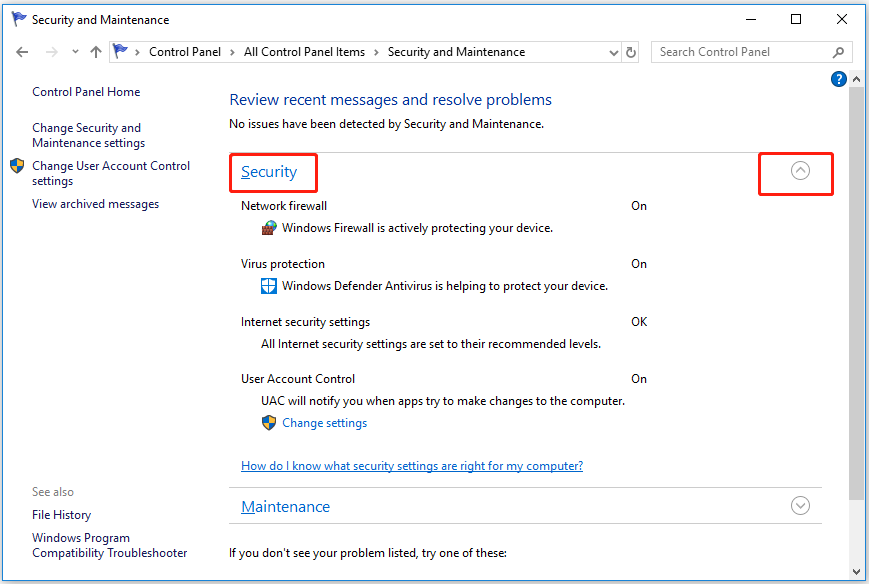
Step 4. If there is other security software here, you need to uninstall them.
Step 5. Reboot your computer to check your protection history again.
How to Recover Protection History
Some users reported that they want to recover lost protection history files but do not know how to do that. Here MiniTool Power Data Recovery, professional data recovery software is highly recommended. It is used for data recovery in Windows 11/10/8/7.
With just a few steps, you can get your deleted or lost data back with MiniTool Power Data Recovery.
For detailed steps to recover your files, please refer to this article: How to Recover Permanently Deleted Files in Windows.
Final Words
To sum up, this article introduces several ways to fix “protection history not showing”. Hope you can effectively solve your problem using the ways above.
If you have any questions about protection history or MiniTool Power Data Recovery, you can leave your comments in the comment area below or send an email to [email protected] directly.
About The Author
Position: Columnist
Shirley graduated from English major and is currently an editor of MiniTool Team. She likes browsing and writing IT-related articles, and is committed to becoming a professional IT problem solver. The topic of her articles are generally about data recovery, data backup, and computer disk management, as well as other IT issues. In spare time, she likes watching movies, hiking and fishing.
Protection history is a part of the Windows Security app that displays actions and recommendations about threats in Windows 11 and 10. The page includes Quarantined items, Cleaned items, Removed items, Allowed items, Removed items, Blocked actions, and severity of a threat. Blocked actions option has 3 sub-menus – Block folder access, Blocked items, and Ruled-base block, similarly Severity has 4 items – Severe High, Moderate, and Low. But sometimes people complain Protection History missing issue.
The Windows Defender Protection history is empty or blank and nothing can be seen on the page when the problem occurs. Immediately after running a “Quick Scan”, “Full Scan”, “Custom Scan” or “Microsoft Defender offline scan”, usually a user navigates to Protection history. But he gets disappointed and finds himself out of nowhere when finds unoccupied because he is unable to know the status of threats or clear them on his Windows 11 computer. Fortunately, there are solutions to this problem. See – Fix: Insider Program Settings Blank, Empty, or Missing in Windows 10.
Windows Defender Protection History missing
Here is how to fix Protection History missing in Windows 11 or 10 –
Way-1: Disable Windows Defender and reboot the PC
To normally access the concerned settings you can go through – How to See Protection History in Windows 10, but in this case, the content inside this page is missing. Turning off the Windows Defender and deleting the mpcache files work like wonder to fix the issue –
- Hit – Windows and R.
- Type – cmd.exe.
- Press Ctrl + Shift + Enter.
- Select Yes when the User account control setting popup opens.
- Type the following commands successively and press Enter.
del "C:\ProgramData\Microsoft\Windows Defender\Scans\History\Service\DetectionHistory\*"
del "C:\ProgramData\Microsoft\Windows Defender\Scans\mpenginedb.db"- Click on Search.
- Type Windows Security.
- Press Enter.
- Select – Virus & threat protection.
- Now click on the Manage settings link.
- From the next page, turn off Real-time protection and Cloud-delivered protection.
- Now open File Explorer (Win+E).
- Go to (C:) drive.
- Double-click on ProgramData.
- Open the Microsoft folder.
- Enter Windows Defender and the launch Scans folder.
- The path will be as follow –
C:\ProgramData\Microsoft\Windows Defender\Scans- Find all the files with prefix mpcache and delete them.
- On my computer, the Scans folder has the following files which I am deleting –
mpcache-8B71EC38EE6CA744C8B3D9719F943BEFDB9392A9.bin
mpcache-8B71EC38EE6CA744C8B3D9719F943BEFDB9392A9.bin.01
mpcache-8B71EC38EE6CA744C8B3D9719F943BEFDB9392A9.bin.6C
mpcache-8B71EC38EE6CA744C8B3D9719F943BEFDB9392A9.bin.7C
mpcache-8B71EC38EE6CA744C8B3D9719F943BEFDB9392A9.bin.7E
mpcache-8B71EC38EE6CA744C8B3D9719F943BEFDB9392A9.bin.67
mpcache-8B71EC38EE6CA744C8B3D9719F943BEFDB9392A9.bin.79
mpcache-8B71EC38EE6CA744C8B3D9719F943BEFDB9392A9.bin.80
mpcache-8B71EC38EE6CA744C8B3D9719F943BEFDB9392A9.bin.83
mpcache-8B71EC38EE6CA744C8B3D9719F943BEFDB9392A9.bin.87
mpcache-8B71EC38EE6CA744C8B3D9719F943BEFDB9392A9.bin.A0
mpcache-8B71EC38EE6CA744C8B3D9719F943BEFDB9392A9.bin.DB
mpcache-8B71EC38EE6CA744C8B3D9719F943BEFDB9392A9.bin.E6- Sometimes, you might not be able to delete mpcache files and get a message – “The action cannot be completed because the file is open in Microsoft Defender Antivirus Service”.
- In this case, press Ctrl+Shift+Esc.
- On the Task Manager, Find the processes related to Widows Security and Windows Defender.
- Right-click on each of them and select End task.
- Now try to delete mpcache files.
- Reboot the PC if you can get back the missing Protection history in Windows Defender.
Way-2: Delete mpcache files using cmd command to fix missing Windows security threat history
II you can not remove mpcache files even after turning off real-time protection and using End Task in Task Manager then a cmd command may help.
- Launch Command prompt as administrator (Steps are mentioned in the first method)
- Enter the following command –
del "C:\ProgramData\Microsoft\Windows Defender\Scans\mpcache*" /s > NUL 2>&1- Finally, restart your PC to see missing Protection History in Windows 11 or 10.
Methods:
Way-1: Disable Windows Defender and reboot the PC
Way-2: Delete mpcache files using cmd command
That’s all!!
Все способы:
- Просмотр событий в Виндовс 10
- Способ 1: «Панель управления»
- Способ 2: Окно «Выполнить»
- Способ 3: Поиск по системе
- Создание ярлыка для быстрого запуска
- Заключение
- Вопросы и ответы: 8
«Просмотр событий» — один из множества стандартных инструментов Виндовс, предоставляющий возможность просмотра всех событий, происходящих в среде операционной системы. В числе таковых всевозможные неполадки, ошибки, сбои и сообщения, связанные как непосредственно с ОС и ее компонентами, так и сторонними приложениями. О том, как в десятой версии Windows открыть журнал событий с целью его дальнейшего использования для изучения и устранения возможных проблем, пойдет речь в нашей сегодняшней статье.
Просмотр событий в Виндовс 10
Существует несколько вариантов открытия журнала событий на компьютере с Windows 10, но в целом все они сводятся к ручному запуску исполняемого файла или его самостоятельному поиску в среде операционной системы. Расскажем подробнее о каждом из них.
Способ 1: «Панель управления»
Как понятно из названия, «Панель» предназначена для того, чтобы управлять операционной системой и входящими в ее состав компонентами, а также быстрого вызова и настройки стандартных инструментов и средств. Неудивительно, что с помощью этого раздела ОС можно вызвать в том числе и журнал событий.
Читайте также: Как открыть «Панель управления» в Виндовс 10
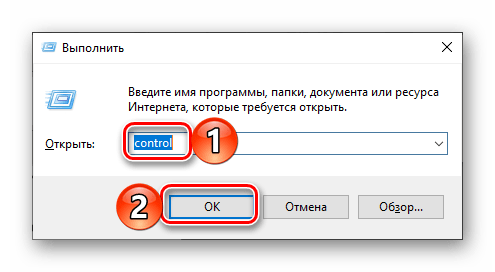
- Любым удобным способом откройте «Панель управления». Например, нажмите на клавиатуре «WIN+R», введите в строку открывшегося окна выполнить команду «control» без кавычек, нажмите «ОК» или «ENTER» для запуска.
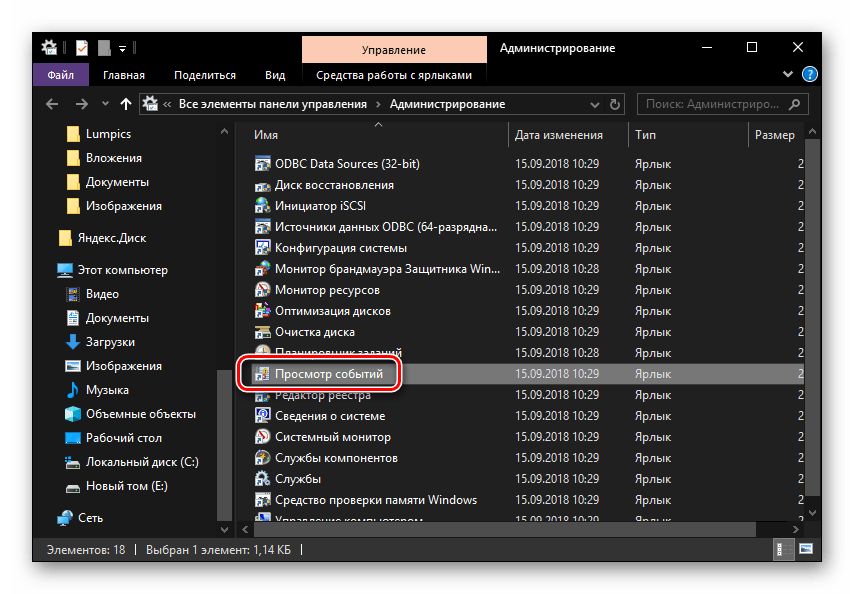
- Найдите раздел «Администрирование» и перейдите в него, кликнув левой кнопкой мышки (ЛКМ) по соответствующему наименованию. Если потребуется, предварительно измените режим просмотра «Панели» на «Мелкие значки».
- Отыщите в открывшейся директории приложение с наименованием «Просмотр событий» и запустите его двойным нажатием ЛКМ.

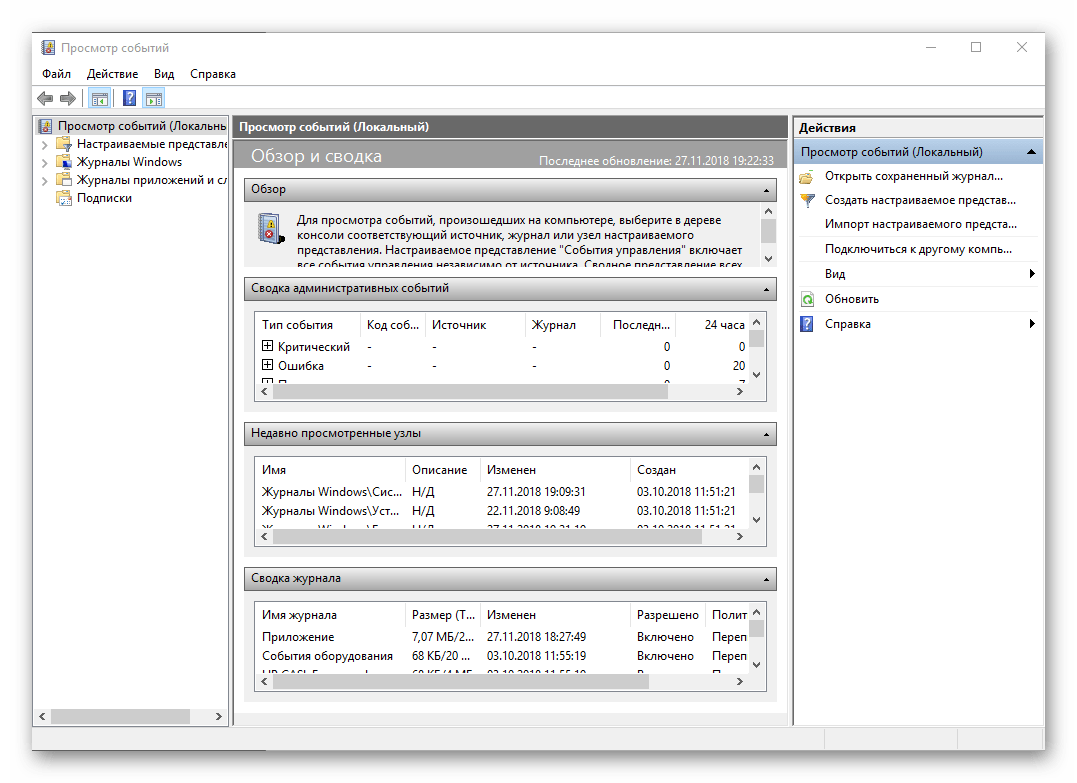
Журнал событий Windows будет открыт, а значит, вы сможете перейти к изучению его содержимого и использованию полученной информации для устранения потенциальных проблем в работе операционной системы либо же банальному изучению того, что происходит в ее среде.
Способ 2: Окно «Выполнить»
И без того простой и быстрый в своем выполнении вариант запуска «Просмотра событий», который нами был описан выше, при желании можно немного сократить и ускорить.
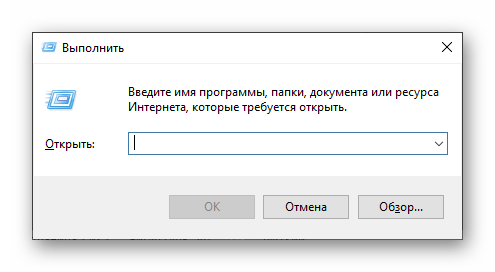
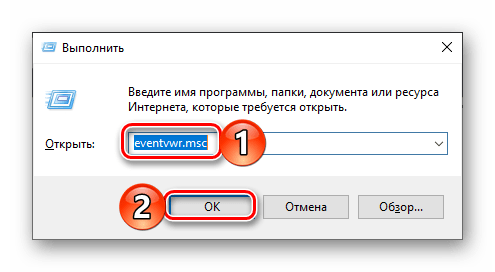
- Вызовите окно «Выполнить», нажав на клавиатуре клавиши «WIN+R».
- Введите команду «eventvwr.msc» без кавычек и нажмите «ENTER» или «ОК».
- Журнал событий будет открыт незамедлительно.
Способ 3: Поиск по системе
Функцию поиска, которая в десятой версии Виндовс работает особенно хорошо, тоже можно использовать для вызова различных системных компонентов, и не только их. Так, для решения нашей сегодняшней задачи необходимо выполнить следующее:
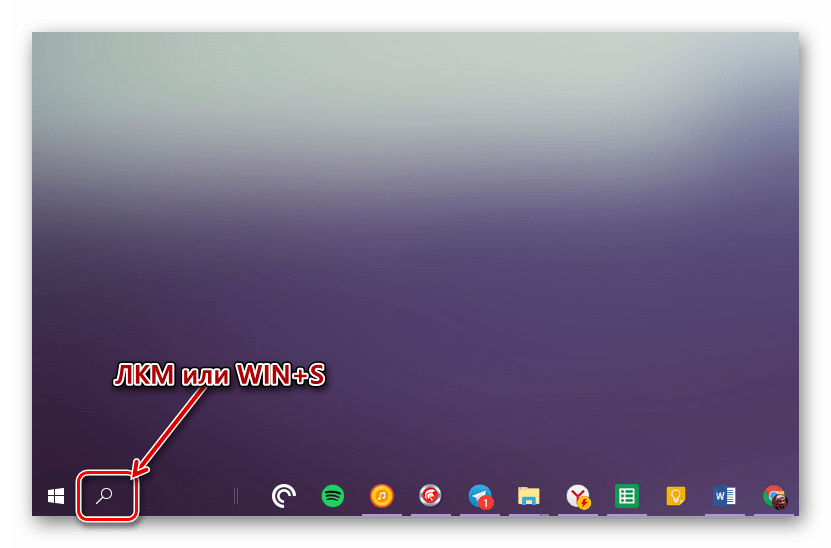
- Нажмите по значку поиска на панели задач левой кнопкой мышки или воспользуйтесь клавишами «WIN+S».
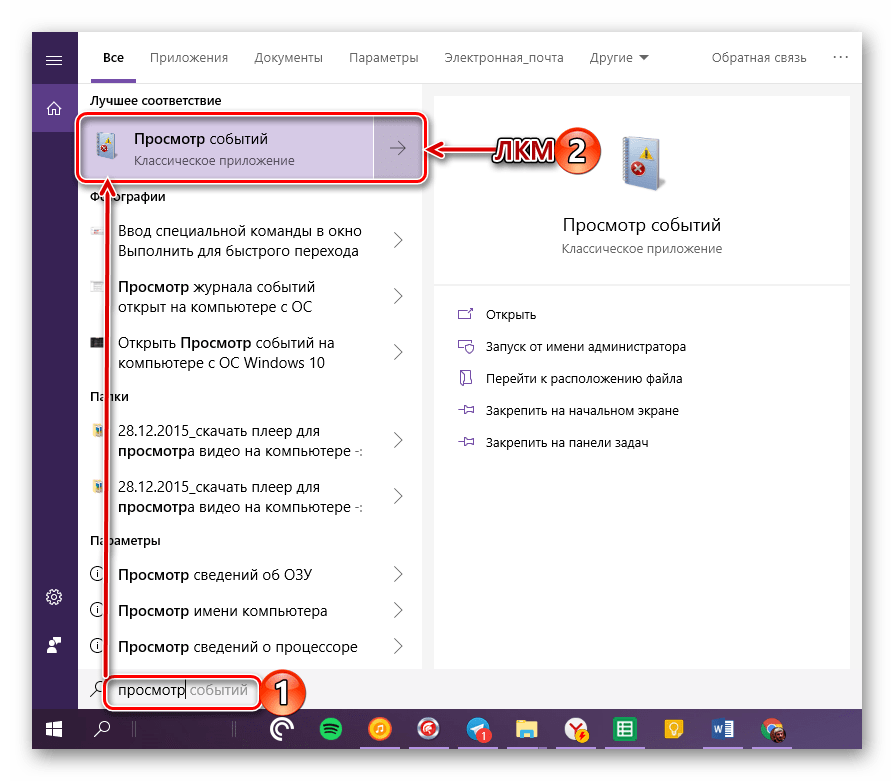
- Начните вводить в поисковую строку запрос «Просмотр событий» и, когда увидите в перечне результатов соответствующее приложение, кликните по нему ЛКМ для запуска.
- Это откроет журнал событий Windows.
Читайте также: Как сделать панель задач в Виндовс 10 прозрачной
Создание ярлыка для быстрого запуска
Если вы планируете часто или хотя бы время от времени обращаться к «Просмотру событий», рекомендуем создать на рабочем столе его ярлык – это поможет ощутимо ускорить запуск необходимого компонента ОС.
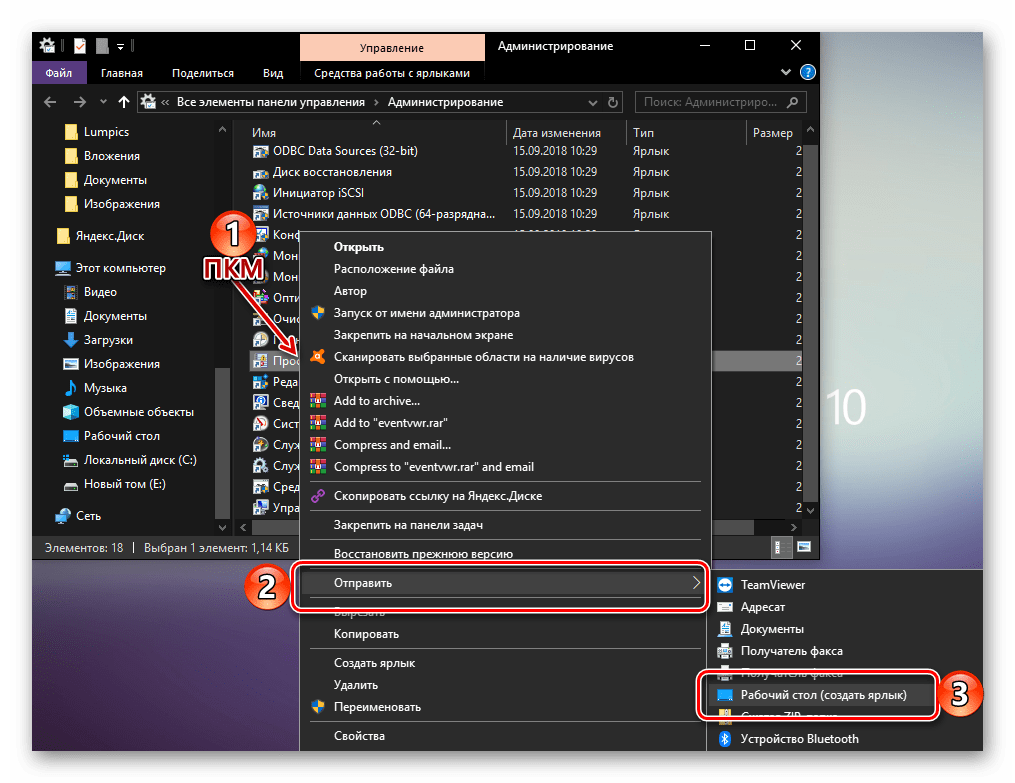
- Повторите шаги 1-2, описанные в «Способе 1» данной статьи.
- Отыскав в списке стандартных приложений «Просмотр событий», кликните по нему правой кнопкой мышки (ПКМ). В контекстном меню выберите поочередно пункты «Отправить» — «Рабочий стол (создать ярлык)».
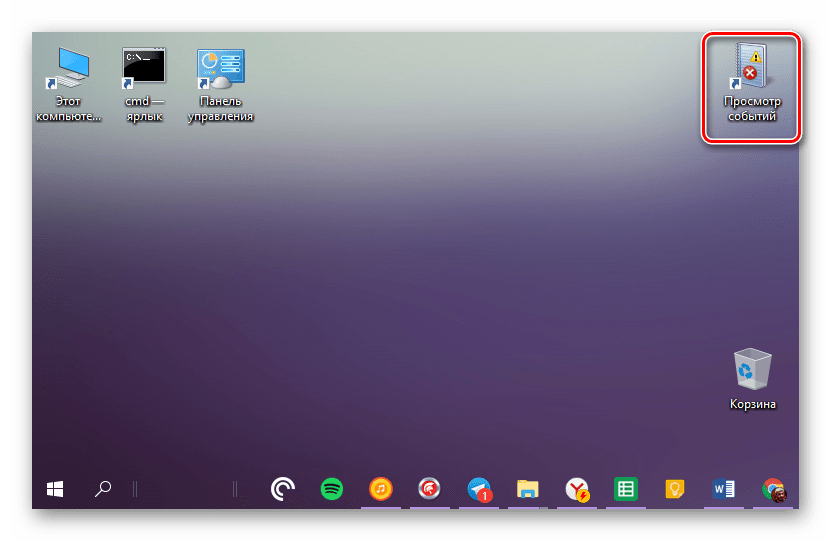
- Сразу же после выполнения этих простых действий на рабочем столе Windows 10 появится ярлык под названием «Просмотр событий», который и можно использовать для открытия соответствующего раздела операционной системы.
Читайте также: Как создать ярлык «Мой компьютер» на рабочем столе Виндовс 10
Заключение
Из этой небольшой статьи вы узнали о том, как на компьютере с Windows 10 можно посмотреть журнал событий. Сделать это можно с помощью одного из трех рассмотренных нами способов, но если к данному разделу ОС приходится обращаться довольно часто, рекомендуем создать ярлык на рабочем столе для его быстрого запуска. Надеемся, данный материал был полезен для вас.
Наша группа в TelegramПолезные советы и помощь