
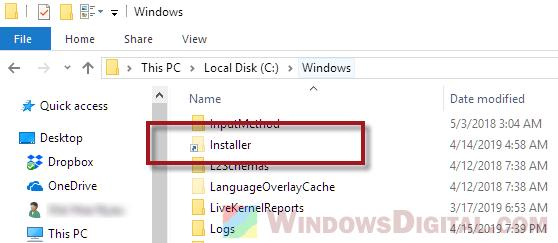
Всем привет! Сегодня поговорим о скрытом каталоге Installer, что лежит внутри Windows. Вот он:
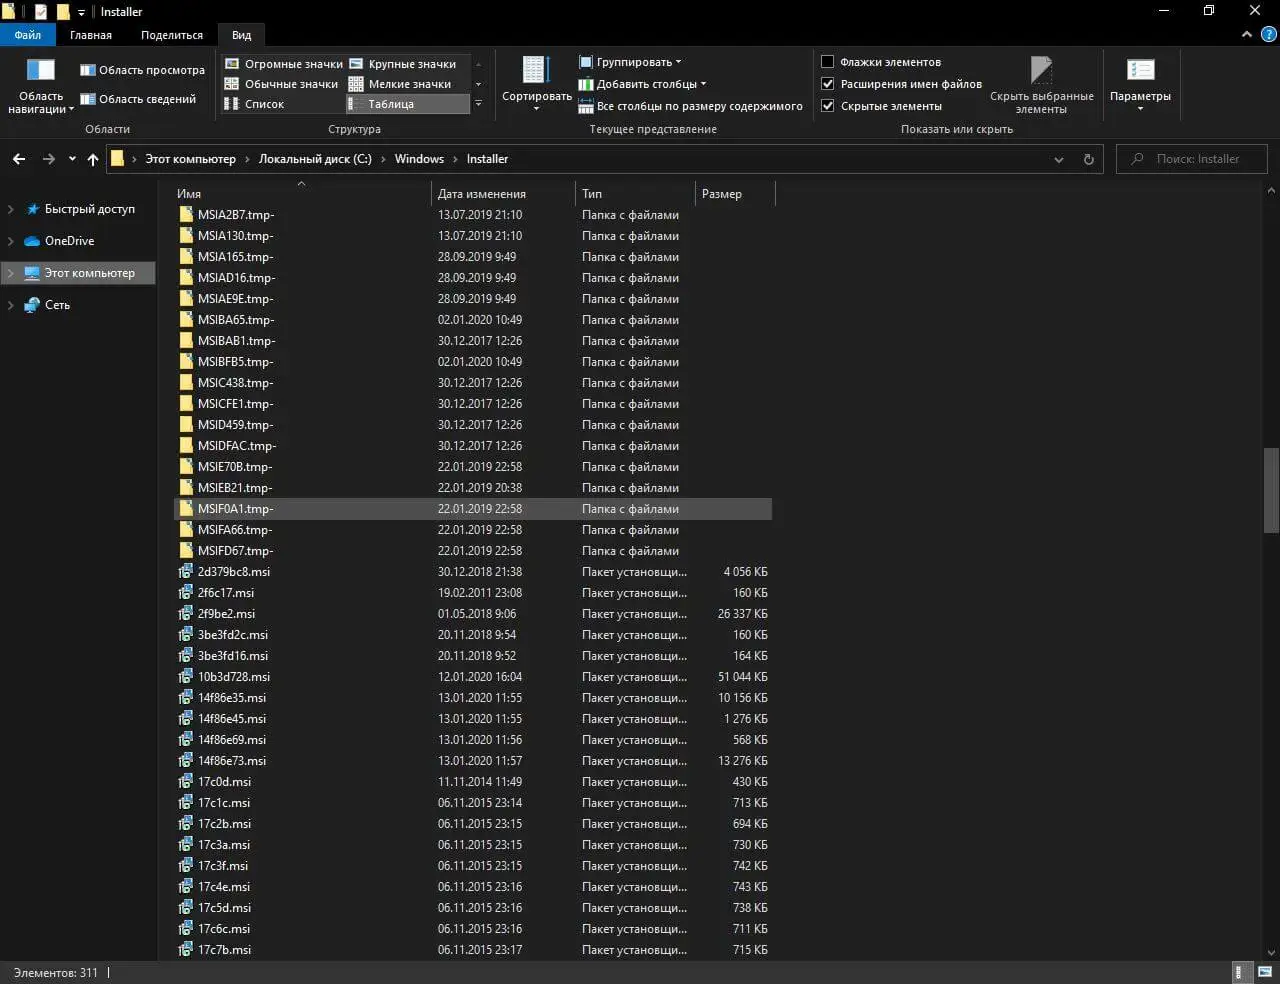
C:\Windows\Installer
Ни дома, ни на работе я проблем с этим каталогом не встречал. Однако недавно, забежав знакомым
на помощь, увидел комп, на котором из 120 гб SSD было свободно только 1,5 гб. Анализ занятого пространства средствами Windows 10 показал два слабых места: архивы Outlook и папку Windows, которая разрослась аж до 70 гб. Windows 10 обновиться нормально не могла и осталась на Windows 10 1903. При помощи WinDirStat, был найден виновник: каталог Installer.
Каталог Installer хранит MSI пакеты установщика Windows и MSP пакеты исправлений. Когда вы устанавливаете приложение, установщик сохраняется в системе для возможности удаления, исправления или изменения компонентов установленного приложения.
Нельзя просто так взять и удалить эти файлы. Вернее удалить можно, но полученные эффекты перевесят всякую экономию. Приложения, чьи файлы Вы удалите нельзя будет:
- Удалить
- Восстановить
- Изменить установленные компоненты
- Переустановить
Это всё случится с приложениями, использующими технологию Microsoft Installer. Согласитесь, не лучшая перспектива — таких программ большинство. О последствиях такого перемещения поднимался вопрос на OSZONE
.
Пути решения
Теперь о проблеме: каталог заполнен файлами, происхождение и назначение которых неизвестно. Удаление их грозит потенциальными проблемами и решений тут два:
- Переместить (или удалить) только неиспользуемые файлы
- Полностью переместить каталог Installer
Данное решение подходит тем, кому прошлый способ не помог. А не поможет он в том случае, если установлено много приложений или MSI этих приложений имеют значительный размер. Решение подойдёт для планшетов — каталог можно перенести на карту памяти. Если речь идет не о планшете и размер каталога Installer не превышает 5 гб, то задумайтесь, не слишком ли у вас маленький системный раздел?
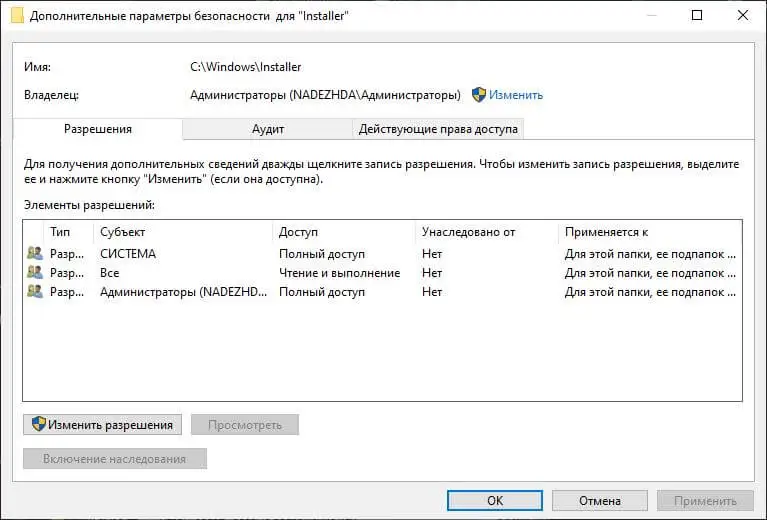
Носитель, куда мы переносим каталог должен быть отформатирован в NTFS. Создадим каталог и назначим на него права как на изображении:
Старый каталог переименовываем и создаем на его месте точку входа на новый созданный каталог. С этой целью можно использовать программу Link Shell Extention
, о ней я рассказывал ранее
. Но мы воспользуемся штатными средствами — оманду вводим от имени администратора команду:
mklink /j “c:\Windows\Installer” “d:\Installer”
Перенесите файлы вручную, старый каталог можно удалить.
Очистка каталога Installer
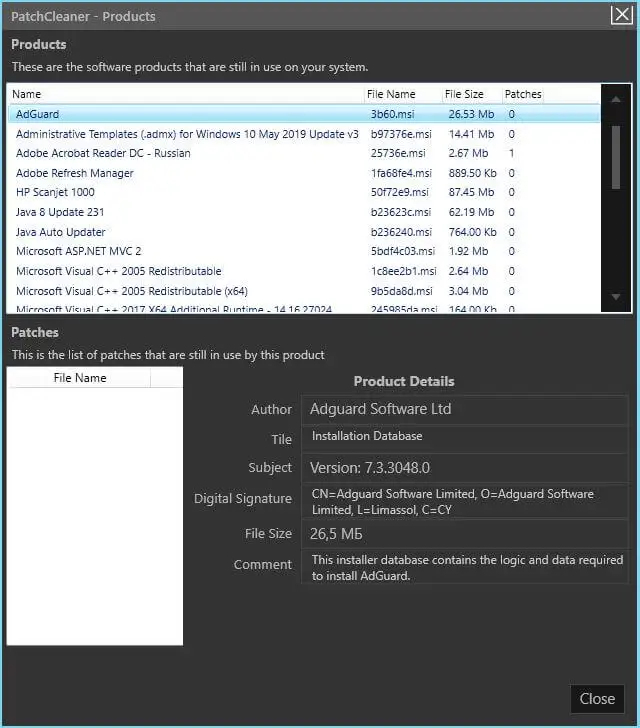
Есть на мой взгляд более правильное решение: выяснить какие файлы более не нужны и переместить их. Можно удалить, но я предпочитаю перемещать (ну а вдруг). Для этой цели хочу порекомендовать бесплатную утилиту PatchCleaner
. После запуска программа сразу начинает сканировать каталог Installer. Сканирование может занять продолжительное время: в моем случае почти 40 гб сканировались минут десять.
Информация с сайта разработчика о том, как работает программа:
HomeDev has had many queries about how PatchCleaner works and if it can be trusted to do the right thing.
Its pretty simple. The windows operating system holds a list of current installers and patches, that can be accessed via WMI calls, (Windows Management Instrumentation ).
PatchCleaner obtains this list of the known msi/msp files and compares that against all the msi/msp files that are found in the «c:\Windows\Installer» directory. Anything that is in the folder but not on the windows provided list is considered an orphaned file and is tagged to be moved or deleted.
HomeDev cannot warrant that PatchCleaner will not find a false positive and delete a required patch which is why we have added the filter feature to filter and recommend using the move function, that way you can always copy the patches back if required.
После сканирования программа выдаёт отчет, где можно просмотреть список найденных файлов и их принадлежность (скриншот выше), увидеть объём нужных и ненужных данных, принять решение о дальнейших действиях.
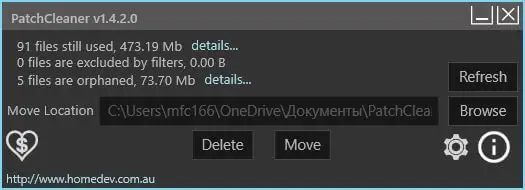
Файлы рекомендую переместить в другое расположение хотя-бы на первое время. В этом случае вы сможете вернуть файл на место при появлении проблем.
Как ещё очистить место я писал ранее
.
If you’ve been using your Windows computer for a long time without a reformat, you might have noticed that the “C:\Windows\Installer” folder has grown into a giant-sized folder, which keeps increasing in size over time. This can be quite a big issue if your Windows system is on a rather small-sized SSD hard drive. Users often reported that the folder can grow to a massive 50 GB or sometimes even more.
The question is, is it safe to delete or cleanup the Windows Installer folder? How should we deal with the huge sized Windows Installer folder in Windows 11 or Windows 10?
Also see: How to Delete a Ghost File or Folder in Windows 11/10
Delete or cleanup Windows “Installer” folder in Windows 10/11
Well, it is certainly not safe to just delete the entire Windows Installer folder because some of the files in it are used by your system for proper functioning of Windows 10 or Windows 11. Some guides suggest identifying and deleting the no longer needed MSI and MSP files in the “Installer” folder, which is kind of difficult and troublesome.
In this guide, instead of taking the risk to delete the Installer folder, we will show you how to create a symbolic link of the Installer folder on another drive to save a huge amount of disk space on your system drive.
Linked issue: Delete Windows.Old Folder in Windows 11/10, Access Denied?
Creating a Symbolic link for the Windows “Installer” folder to save space
Update: After recent Windows updates, it seems that creating symbolic link or directory junction for the Windows\Installer folder would cause installation issue such as “The system cannot open the device or file specified – Error 2755” error especially when you run a “.msi” installer. As a precaution, it’s recommended that you avoid creating symlinks for the installer folder until it is safe to do so. However, if you choose to proceed and encounter installation problems, you can reverse the changes by following the steps below.
If you have previously implemented a symlink or directory junction for the installer folder and are experiencing installation issues, you can reverse the changes by simply copying the Installer folder back to C:\Windows (temporarily renaming it to something like “Installer – Copied” since two folders with the same name can’t coexist). Then, run the command “rmdir /s /q C:\Windows\Installer” and rename your previously renamed “Installer – Copied” folder back to “Installer“.
If you insist on trying to create a symbolic link, follow the steps below and be sure to back up the Windows “Installer” folder (just make a copy of it elsewhere) before proceeding:
By creating a symbolic link for the Windows Installer folder, it means that we will first copy the Windows Installer folder to another drive (e.g., from C: to D:) where you can spare more space. We will then delete the original Installer folder from the Windows directory and create a symbolic link from the Windows directory to the Installer folder you’ve copied earlier on another drive.
It works like a shortcut to the folder, which means you can have the actual folder on another drive, but it will work as if the folder is there on the original system drive after creating the symlink. Please know that a Symbolic link is different from a shortcut. Simply creating a shortcut to the Installer folder will not work and will possibly cause serious issues.
If you still don’t understand how it works, don’t worry. We will show you a detailed step-by-step guide on how to do it below.
However, as we mentioned before, deleting the Installer folder may risk corrupting your Windows. Since deleting the folder is a procedure in this guide, if you did it wrong, your Windows may still be corrupted. Therefore, please proceed at your own risk.
Step 1: Unhide the Windows Installer folder
First off, the Installer folder is hidden by default, even with the “show hidden files and folders” option enabled. To unhide the folder in Windows 10 or Windows 11, open File Explorer and go to View from the top menu. Select Options, then Change folder and search options. Click on the View tab and then disable the “hide protected operating system files (recommended)” option. Also, make sure the “Show hidden files, folders and drives” option is enabled.
Step 2: Copy the Installer folder to another drive
Now that you can see the Installer folder in the Windows directory, copy the entire Windows Installer folder to another drive of your choice, such as from C:\Windows\Installer to D:\Important\Windows\Installer. This copy process may take quite a while, depending on how massive your Installer folder is.

It is recommended to make one more copy of the Installer folder on another place as a backup, just in case anything goes wrong.
Step 3: Creating the Symlink using CMD
After the copying is done, go to the start menu or Cortana, search for Command Prompt or CMD, and then run it as administrator. In the elevated command prompt, enter the following commands, each line at a time. Note that you have to replace the drive letter and/or folder path in the commands if your Windows folder is at a different path.
rmdir /s /q C:\Windows\Installer
The above command removes the C:\Windows\Installer directory and deletes the folder entirely.
mklink /D C:\Windows\Installer D:\Important\Windows\Installer
After the first command is successfully completed, execute the second command as shown above to create the Symbolic link from C:\Windows\Installer to D:\Important\Windows\Installer.
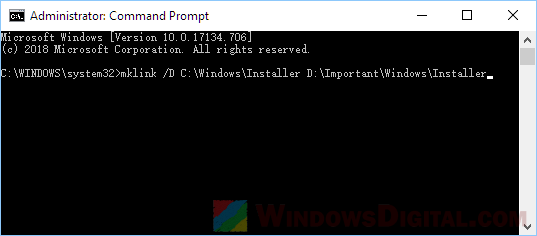
That’s it. The “shortcut” for the Windows Installer folder is now created, and a ton of disk space is freed up on your system drive. From now on, any request for files in the Installer folder will be diverted to those on the D: drive.
Download Windows Speedup Tool to fix errors and make PC run faster
While trying to update a program on your Windows 11/10 device, you may run into the error message Windows Installer Service could not be accessed or started because it may be installed incorrectly; and when you open Services console to troubleshoot, you may discover that the Windows Installer Service is missing. This post offers the most suitable solutions to this issue.

Windows Installer Service is missing or not available
If Windows Installer Service is missing or not available you can try our recommended solutions below in no particular order and see if that helps to resolve the issue.
- Enable Windows Installer Service
- Run DISM scan
- Reset Windows Installer Service settings
- Uninstall Update or Perform System Restore
- Cloud Reset or In-place Upgrade Repair Windows
Let’s look at the description of the process involved concerning each solution.
1] Enable Windows Installer Service
If you encounter this Windows Installer Service missing issue on your Windows PC, the Windows Installer Service may be disabled. In this case, you can try to enable msiserver, but since it’s not listed in Services Manager, you will need to enable Windows Installer Service via Command Prompt or Registry Editor.
2] Run DISM scan
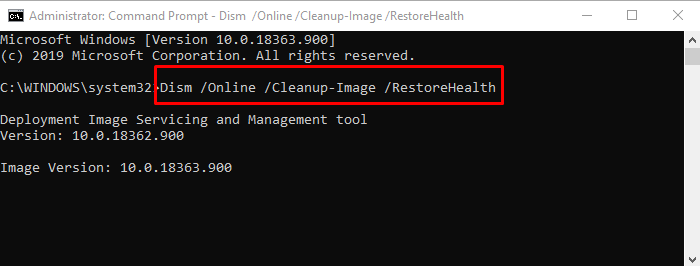
Deployment Image Servicing and Management (DISM) is a powerful utility in fixing the problematic Windows image files. Since corruption in these files can lead to this issue, you can run DISM scan and see if that helps.
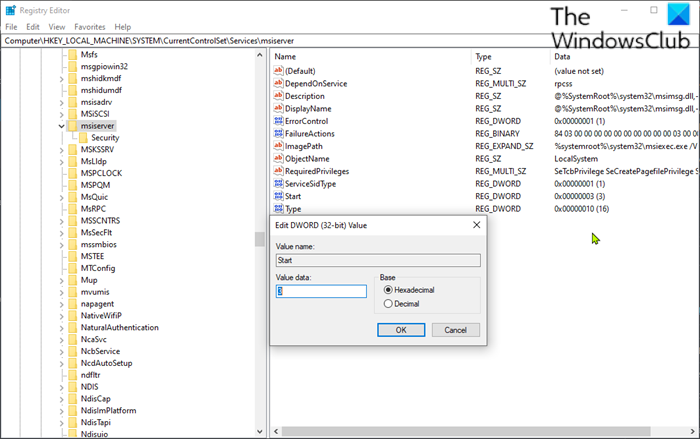
3] Reset Windows Installer Service settings
This solution requires you to reset the Windows Installer Service settings in the registry on your Windows PC.
Since this is a registry operation, it is recommended that you back up the registry or create a system restore point as necessary precautionary measures. Once done, you can proceed as follows:
- Download the Reset_msiserver zip file from our servers.
- Unzip the archive package.
- Double-click the Reset_msiserver.reg file to merge it to the Windows Registry.
- If prompted, click on Run > Yes (UAC) > Yes > OK to approve the merge.
- You can now delete the .reg file if you like.
4] Uninstall Update or Perform System Restore
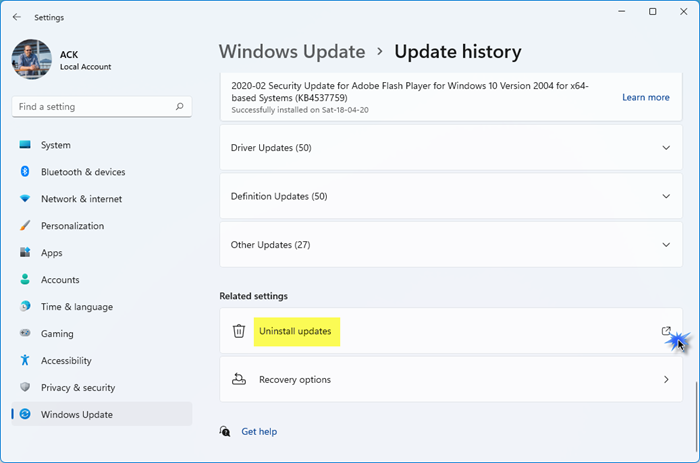
If you encountered this issue after installing a new Windows update, you can uninstall the update or you can restore your system to an earlier point prior to the issue, when the system was working correctly.
5] Cloud Reset or In-place Upgrade Repair Windows 11/10
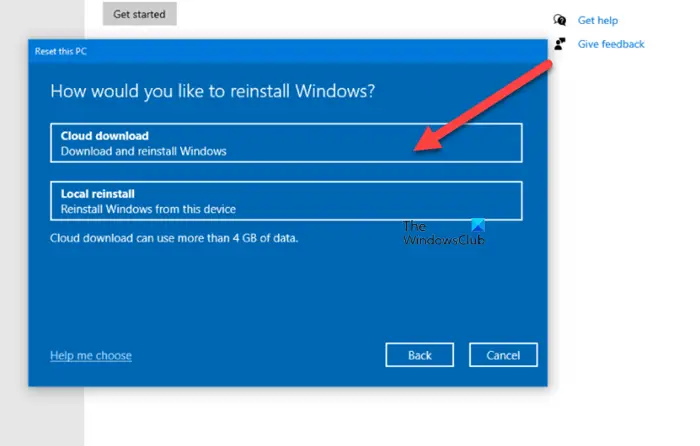
If none of the above solutions has worked so far, you can try Cloud Reset to reset every Windows component or perform an In-place Upgrade Repair and see if that helps. If both of these actions still don’t resolve the issue, you can clean install Windows.
I hope this helps!
Related post: Windows Installer not working properly.
How do I get Windows Installer service?
To get the Windows Installer service, press ‘Win + R,’ type ‘services.msc,’ and hit Enter. Locate ‘Windows Installer’ in the list, right-click and choose ‘Start’ or ‘Restart.’ Ensure it is set to ‘Manual’ or ‘Automatic’ for proper operation after reboot.
How to install missing Windows services?
To install missing Windows services on Windows 11/10, you can use four methods: Run System File Checker, use DISM tool, use Reset This PC or perform a Windows repair install. These steps help fix corrupted or deleted services.
Obinna has completed B.Tech in Information & Communication Technology. He has worked as a System Support Engineer, primarily on User Endpoint Administration, as well as a Technical Analyst, primarily on Server/System Administration. He also has experience as a Network and Communications Officer. He has been a Windows Insider MVP (2020) and currently owns and runs a Computer Clinic.
Reader Interactions
Эта инструкция должна помочь, если при установке какой-либо программы в Windows 7, Windows 10 или 8.1 вы видите одно из следующих сообщений об ошибке:
- Служба установщика Windows 7 недоступна
- Не удалось получить доступ к службе установщика Windows. Это может произойти, если неверно установлен установщик Windows
- Не удалось получить доступ к службе установщика Windows Installer
- Возможно, не установлен Windows Installer
По порядку разберем все шаги, которые помогут исправить эту ошибку в Windows. См. также: какие службы можно отключить для оптимизации работы.
1. Проверить, запущена ли служба установщика Windows и есть ли она вообще

Откройте список служб Windows 7, 8.1 или Windows 10, для этого, нажмите клавиши Win + R и в появившемся окне «Выполнить» введите команду services.msc

Найдите в списке службу Установщик Windows (Windows Installer), дважды кликните по ней. По умолчанию, параметры запуска службы должны выглядеть как на скриншотах ниже.


Обратите внимание, что в Windows 7 можно изменить тип запуска для установщика Windows — поставить «Автоматически», а в Windows 10 и 8.1 данное изменение заблокировано (решение — далее). Таким образом, если у вас Windows 7, попробуйте включить автоматический запуск службы установщика, перезагрузить компьютер и попробовать установить программу снова.
Важно: если у вас нет службы Установщик Windows или Windows Installer в services.msc, или если она есть, но вы не можете поменять тип запуска этой службы в Windows 10 и 8.1, решение для этих двух случаев описано в инструкции Не удалось получить доступ к службе установщика Windows Installer. Там же описаны пара дополнительных методов исправить рассматриваемую ошибку.
2. Исправление ошибки вручную
Еще один способ исправить ошибку, связанную с тем, что служба установщика Windows недоступна — заново зарегистрировать службу Windows Installer в системе.

Для этого запустите командную строку от имени администратора (в Windows 8 нажать Win + X и выбрать соответствующий пункт, в Windows 7 — найти командную строку в стандартных программах, кликнуть по ней правой кнопкой мыши, выбрать «Запуск от имени Администратора).
Если у вас 32-битная версия Windows, то введите по порядку следующие команды:
msiexec /unregister
msiexec /register
Это перерегистрирует службу установщика в системе, после выполнения команд, перезагрузите компьютер.
Если у вас 64-битная версия Windows, то выполните по порядку следующие команды:
%windir%\system32\msiexec.exe /unregister
%windir%\system32\msiexec.exe /regserver
%windir%\syswow64\msiexec.exe /unregister
%windir%\syswow64\msiexec.exe /regserver
И также перезагрузите компьютер. Ошибка должна исчезнуть. Если проблема сохраняется, попробуйте вручную запустить службу: откройте командную строку от имени администратора, а затем введите команду net start MSIServer и нажмите Enter.
3. Сброс параметров службы установщика Windows в реестре
Как правило, второго способа оказывается достаточно для исправления рассматриваемой ошибки установщика Windows. Однако, если проблему так и не удалось решить, рекомендую ознакомиться со способом сброса параметров службы в реестре, описанный на сайте Microsoft: http://support.microsoft.com/kb/2642495/ru
Обратите внимание, что способ с реестром может не подходить для Windows 8 (точной информации на этот счет дать, не могу.
Удачи!