
Applies ToWindows 11 Windows 10
Support for Windows 10 will end in October 2025
After October 14, 2025, Microsoft will no longer provide free software updates from Windows Update, technical assistance, or security fixes for Windows 10. Your PC will still work, but we recommend moving to Windows 11.
Learn more
Fonts play a crucial role in the overall aesthetics and readability of your documents and presentations. Whether you’re a designer looking to add a unique touch to your work or simply someone who wants to expand their creative toolkit, knowing how to manage fonts in Windows is essential.
This article guides you through the steps to view, install, and remove fonts on your Windows device. You’ll learn how to explore the fonts currently available on your computer, add new ones to enhance your projects, and remove those you no longer need to keep your system organized and efficient.
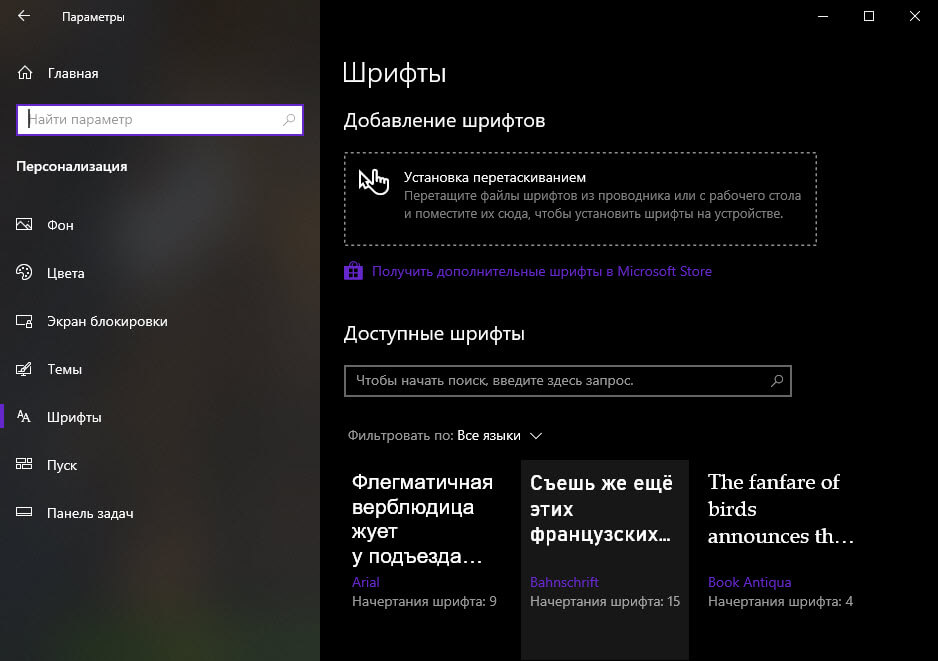
Check which fonts are available on your device
-
In the Settings app on your Windows device, select Personalization > Fonts or use the following shortcut:
Fonts
-
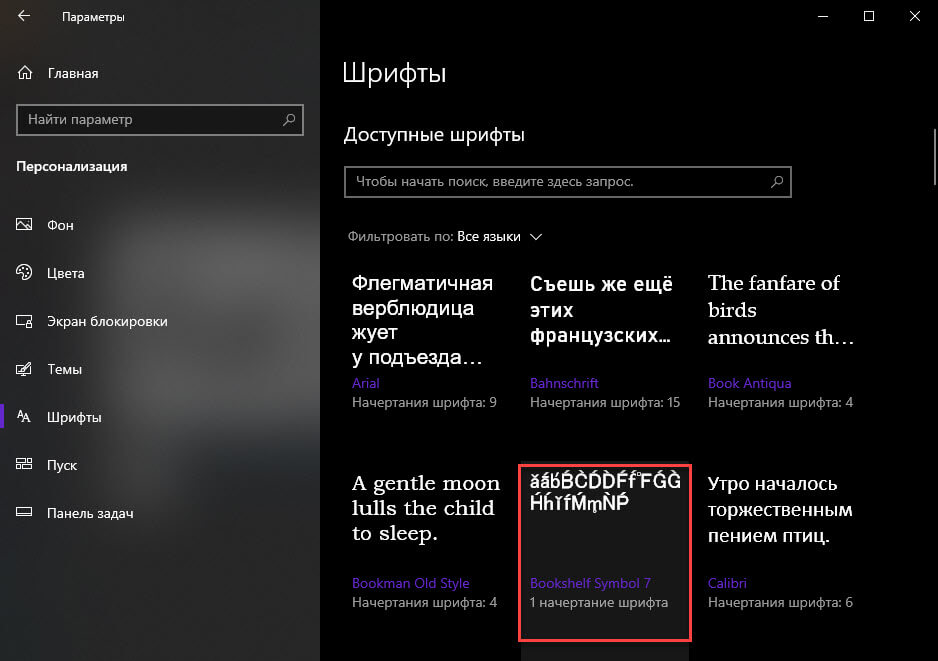
Fonts are listed under Available fonts
Note: Not all apps support custom fonts. If your font isn’t showing up in an app or program, try a different app to check and see if the font is installed and working properly.
The Available fonts section offers several options to help you manage your fonts effectively. Here are the key features available:
-
Search and filter: You can easily search for a specific font by typing its name in the search bar. This helps you quickly locate the font you need without scrolling through the entire list
-
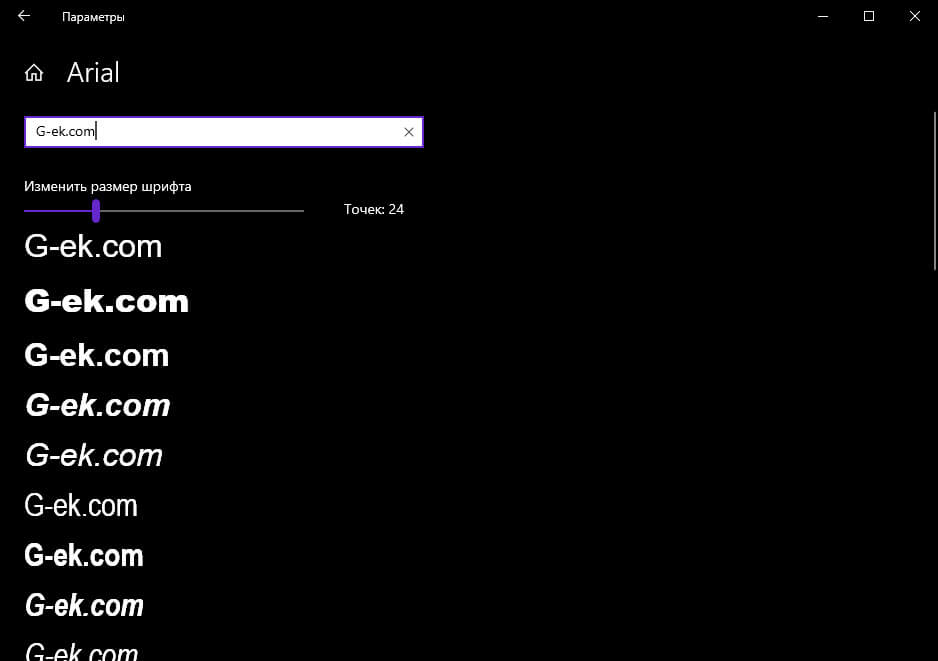
View a preview: You can view a preview of each font, which includes different sizes and faces. This allows you to see how the font will look in various styles and sizes before you use it
-
Hide: If you have fonts that you don’t use frequently but don’t want to uninstall, you can hide them. This keeps your font list organized without permanently removing the fonts
-
Uninstall: You can uninstall fonts that you no longer need. This helps free up space and keeps your system tidy by removing unnecessary fonts
Common operations
Expand the following sections to learn more about common operations with fonts in Windows:
-
In the Settings app on your Windows device, select Personalization > Fonts or use the following shortcut:
Fonts
-
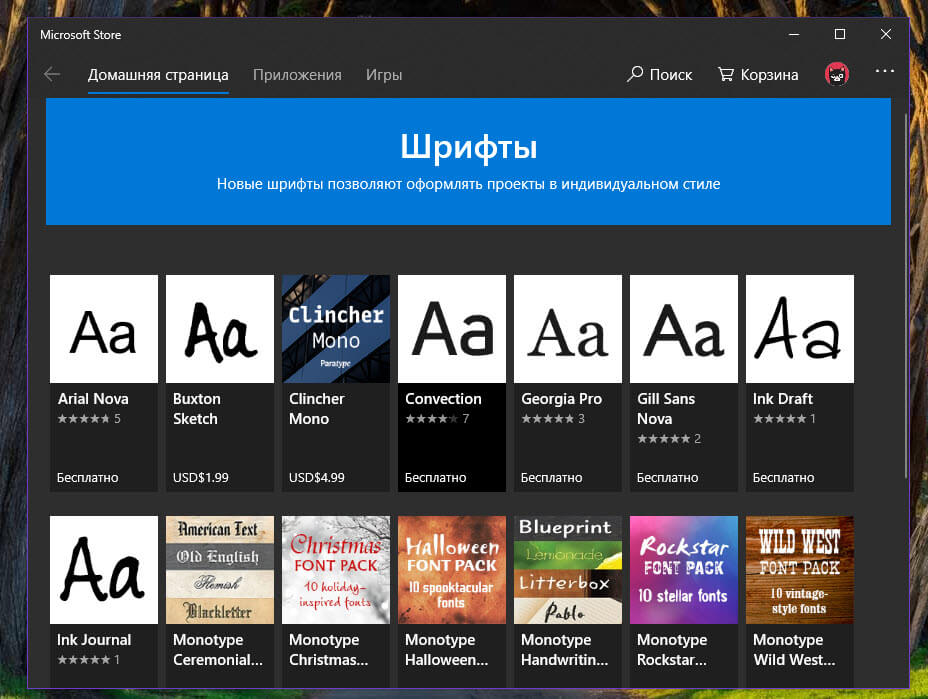
Select Get more fonts in Microsoft Store or use the following shortcut
Explore fonts in the Microsoft Store
-
Select the font you want to add, and then select Get or Buy. The font will download and install automatically
-
Obtain or download the font file, and make sure the file is a True Type (.ttf) or OpenType (.otf) file
-
If the file is compressed into a .zip file, right-click it and select Extract to extract the files
-
-
Right-click the font file, and then select Install. To install for all users on a computer, select Install for all users
-
If you’re asked to allow the program to make changes to your computer, make sure you trust the source of the downloaded file, and then select Yes
-
In the Settings app on your Windows device, select Personalization > Fonts or use the following shortcut:
Fonts
-
Select the font you want to remove
-
Select Uninstall
-
In the Settings app on your Windows device, select Personalization > Fonts or use the following shortcut:
Fonts
-
Under Related settings, select Download fornts for all languages and confirm by pressing OK
Need more help?
Want more options?
Explore subscription benefits, browse training courses, learn how to secure your device, and more.
Установить новый шрифт в Windows довольно просто — после этого вы получите новый красивый вариант для оформления текстов в разных программах. Это будет полезно при работе с документацией или верстке крупных графических проектов.
Расширение шрифта для Windows
Шрифты в Windows — это самые обычные файлы, которые содержат информацию об оформлении текста. Как правило, они имеют формат ttf или otf, что расшифровывается как TrueType и OpenType. Иногда встречается тип woff — его можно конвертировать в более популярный формат с помощью онлайн-конвертеров.
Оригинальные и пользовательские шрифты также могут иметь тип PostScript Type 1 — это набор файлов (до 4 штук) с расширениями pfm, p, afm и inf. Для установки такого комбинированного шрифта надо выбрать файл pfm. Однако встречается Type 1 очень редко — и скорее всего вы не будете с ним работать.
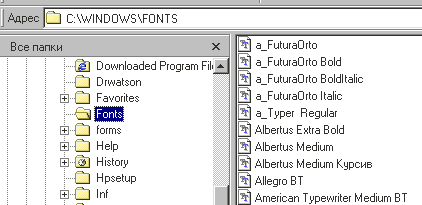
Папка со шрифтами Windows 10
Все установленные шрифты Windows 10 находятся в одноименной папке по адресу C:\Windows\Fonts. Можете скопировать его в адресную строку проводника или забить в поиске ключевое слово «Шрифты» — нужная папка будет первой в списке.
Где скачать новый шрифт для Windows
Перед установкой шрифт надо скачать. Для этого подходят как специализированные сайты, так и магазин Microsoft Store, доступный в Windows 10.
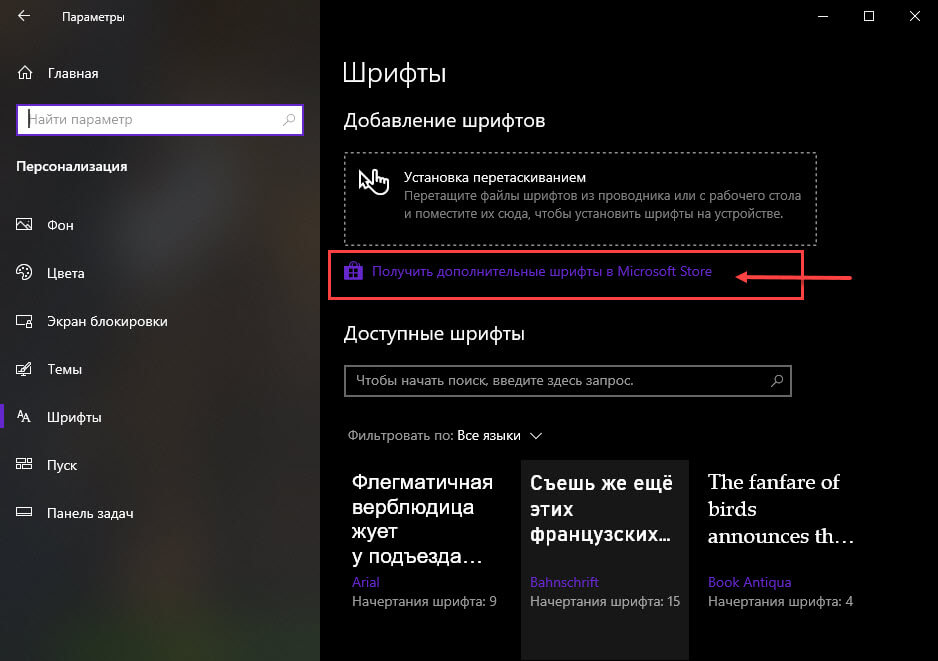
Чтобы загрузить шрифты из магазина, надо открыть «Пуск» и перейти к разделу «Параметры» — «Персонализация» — «Шрифты». Если нажать на кнопку «получить дополнительные шрифты в Microsoft Store», то попадете к списку доступных для загрузки вариантов.
Если хотите загрузить шрифт из интернета, загляните на сайт www.fonts-online.ru. У него понятный интерфейс, почти нет рекламы и большой выбор бесплатных и красивых шрифтов.
Как установить шрифт на компьютере Windows 10
Для примера мы скачали красивый шрифт Courier Prime. Его можно установить тремя способами.
Скачанный на компьютер шрифт легко установить прямо из папки с загрузками, не открывая файл. Достаточно кликнуть по нему правой кнопкой мыши и выбрать пункт «Установить».
Также это можно сделать, открыв шрифт. Он отобразится в виде отдельного окна с примерами фраз — можно сразу оценить, как они будут выглядеть в текстовом редакторе и при печати. В левом верхнем углу будет кнопка «Установить» — кликните на нее, и за пару секунд шрифт пропишется в системе.
Еще один способ установки — простой перенос файла шрифта в папку Fonts. Зацепите его мышкой и перетащите в раздел со шрифтами — и он установится автоматически.
После этого установленный шрифт появится во всех программах, которые позволяют работать с текстом: Word, Excel, Photoshop. Однако для отображения новых шрифтов их придется перезапустить.
Читайте также:
- Лайфхаки для Windows: создаем идеальную систему=«content_internal_link»>
- CCleaner удаляет данные Firefox — что делать? =«content_internal_link»>
Редактор направлений «Мобильные устройства» и «Техника для дома»
Windows 10 имеет множество встроенных шрифтов. Как и его предшественники, система также позволяет легко просматривать, устанавливать и удалять шрифты.
При использовании Windows 10 вам может потребоваться доступ к настройкам шрифтов для просмотра, установки и удаления. В этом руководстве мы узнаем, где система хранит шрифты и способы их установки и удаления в Windows 10.
Доступ к шрифтам и их настройка в Windows 10
Вы можете просмотреть все доступные шрифты, а также установить и удалить их, в приложении «Параметры» → «Персонализация» → «Шрифты». Вы можете получить доступ к настройкам определенного шрифта с этой же страницы. Используйте окно поиска в разделе «Доступные шрифты» чтобы найти нужный шрифт, к которому вы хотите получить доступ.
Все установленные шрифты сохраняются в папке C:\Windows\Fonts.
Предварительный просмотр шрифта в Windows 10
Шаг 1: Откройте страницу «Шрифты», перейдя в «Параметры» и выбрав группу настроек «Персонализация» → «Шрифты».
Шаг 2: Нажмите на шрифт, чтобы открыть детали. В поле «Введите данные для предварительного просмотра шрифтов» введите любое слово, чтобы увидеть, как оно будет выглядеть.
Установить новый шрифт из Магазина в Windows 10
В Windows 10 теперь есть возможность устанавливать шрифты из официального Магазина. Хотя в Магазине имеется ограниченное количество шрифтов, ожидается, что в будущем коллекция шрифтов увеличится.
Чтобы установить шрифт из Магазина:
В самом магазине Microsoft вы можете увидеть первые доступные шрифты, но уже с текущими версиями Windows 10. Вам просто нужно ввести в поиск магазина «шрифт». Затем вы увидите все шрифты, доступные на данный момент.
Шаг 1: Перейдите на страницу «Параметры» → «Персонализация» → «Шрифты».
Шаг 2: Нажмите ссылку «Получить дополнительные шрифты в Microsoft Store», чтобы открыть страницу шрифтов в приложении «Магазин». Кроме того, вы можете напрямую открыть приложение Store и выполнить поиск шрифтов.
Шаг 3: В галерее шрифтов дважды кликните на значок шрифта, чтобы открыть его страницу.
Шаг 4: Наконец, нажмите кнопку «Получить», чтобы загрузить и установить шрифт.
Установленный шрифт появится на странице «Шрифты» в приложении «Параметры». Если есть обновление для шрифта, его можно немедленно установить с помощью магазина Windows 10.
Шрифты доступные в настоящее время в магазине Microsoft:
- Arial Nova
- Convection
- Nina
- Rockwell Nova
- Gill Sans Nova
- Verdana Pro
- Georgia Pro
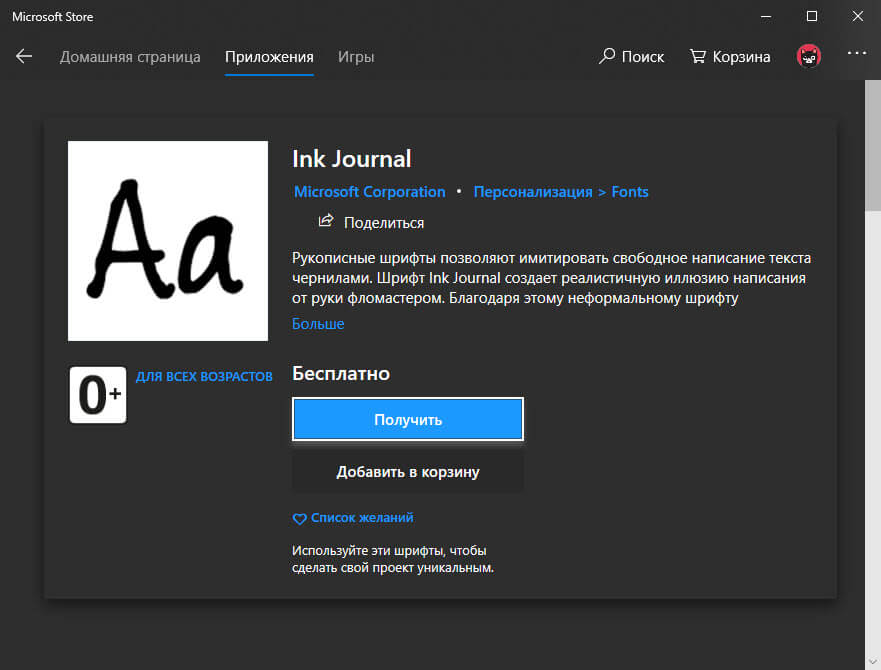
- Ink Draft
- Ink Journal
- Convection
- PT Root UI
Установка сторонних шрифтов вручную
Помимо шрифтов, доступных в Магазине, вы также можете установить сотни красивых шрифтов, доступных в Интернете. Например, вы можете загрузить и установить Google Fonts в Windows 10.
Чтобы установить сторонний шрифт:
Шаг 1: Загрузите шрифт на свой компьютер. Извлеките его, если он находится в ZIP-архиве.
Шаг 2: Перейдите на страницу «Параметры» → «Персонализация» → «Шрифты». Перетащите новый файл шрифта в область «Добавление шрифтов» → «Установка перетаскиванием», чтобы установить сторонний шрифт.
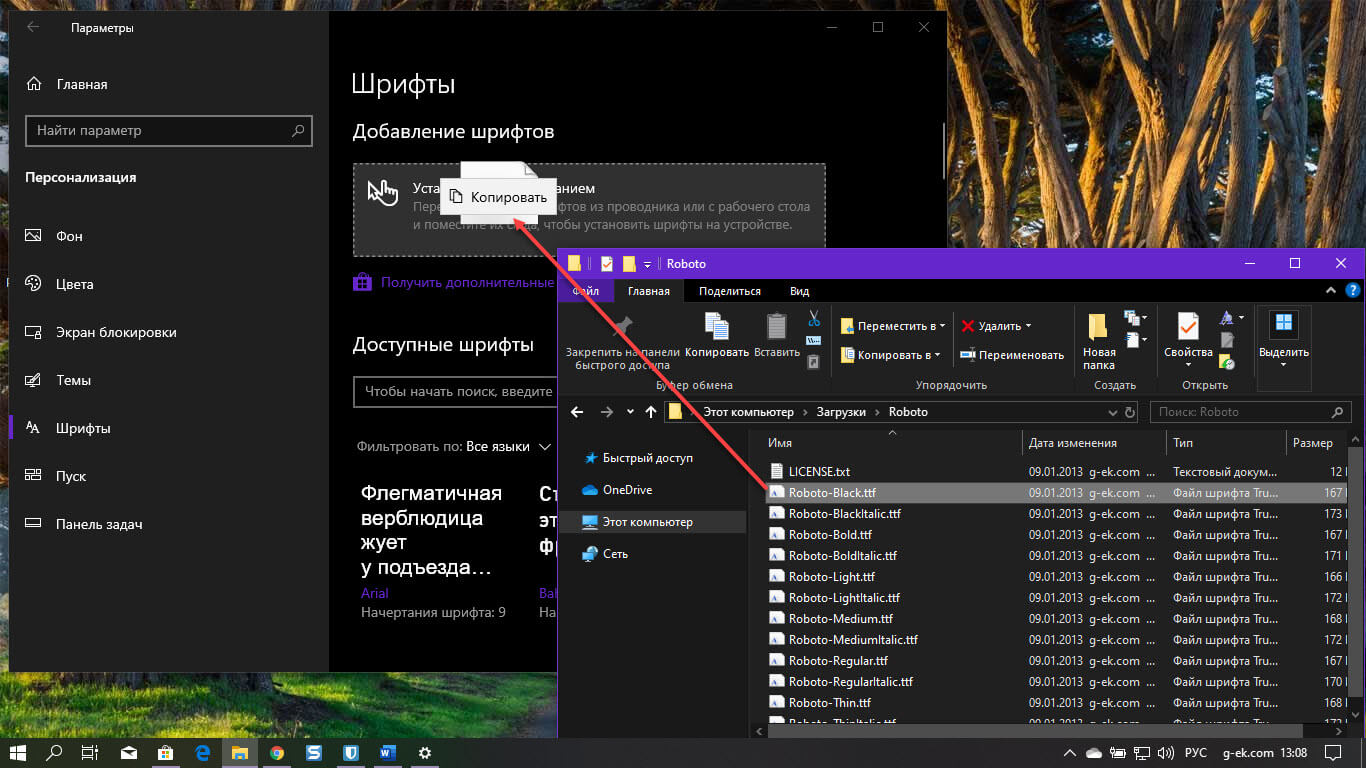
Кроме того, вы можете кликнуть правой кнопкой мыши в проводнике на файле шрифта и выбрать опцию «Установить».
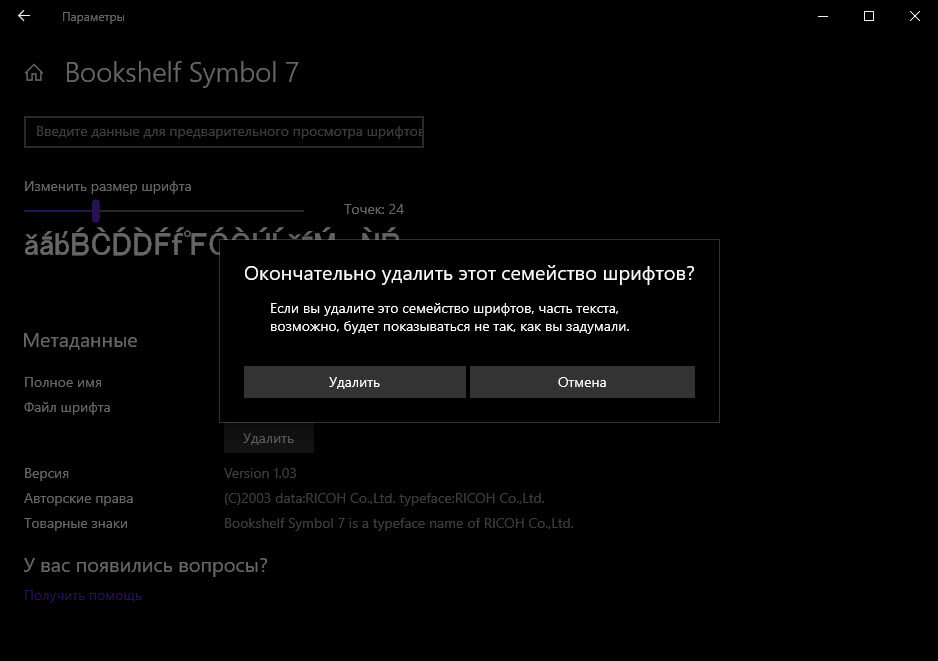
Удалить шрифт в Windows 10
Шаг 1: Прежде всего, перейдите на страницу «Параметры» → «Персонализация» → «Шрифты».
Шаг 2: Нажмите на шрифт, который вы хотите удалить, чтобы открыть страницу с информацией.
Шаг 3: Прокрутите страницу вниз, чтобы увидеть кнопку «Удалить». Нажмите на кнопку «Удалить». В диалоговом окне подтверждения, нажмите кнопку Удалить еще раз, чтобы удалить шрифт с вашего компьютера.
Все!
Шрифты в Windows должны храниться в специальной папке. То есть там хранятся сами файлы шрифтов. Это папка Windows\System.
Но то, что они лежат в этой папке не о чем не говорит. Windows пользуется информацией из реестра о том какие шрифты есть в системе. Шрифты TrueType хранятся по пути HKEY_LOCAL_MACHINE\Software\Microsoft\Windows\CurrentVersion\Fonts.
Все это говорит о том, что шрифты нужно устанавливать специальным способом. Для пользователя это довольно просто. Нужно пойти в панель управления а дальше шрифты. Появиться окно Fonts. В меню есть пункт установить шрифт:
Ну и дальше просто указать папку, в которой эти шрифты находятся. Они будут скопированы в нужную папку и информация о них занесена в реестр. Кстати местоположение шрифта может быть вообще то любое. Например, в каталоге Вашей программы. Только нужно правильно прописать путь в реестре.

Knowing where font files are in Windows 11 helps you manage them well. The main place for fonts is the C:WindowsFonts folder. Here, you can check out, add, or remove fonts. You can handle these fonts easily by going to the Control Panel. Then look under Appearance and Personalization and click Fonts.
You don’t need special permission to get to the font folder in Windows 11. Fonts just for you are in places like C:Users[Username]AppDataLocalMicrosoftWindowsFonts. This is great when many users need their own fonts. Windows 11 supports font types like .ttf and .otf. This means you can use a wide range of fonts as needed.
Introduction: Importance of Fonts in Windows 11
Fonts are very important in Windows 11. They make words easier to read in different sizes. The new system font, Segoe UI Variable, improves how we see text. Also, Windows 11 has Segoe Fluent Icons that match its design style. This makes the system aesthetics look better.
Customizing fonts lets you make your computer more you. It is important for both designers and everyday users. This customization creates a more personal and fun experience.
p>
Windows 11 has a lot of fonts to choose from, over 700. It keeps the fonts from Windows 10 and adds more. This includes ancient scripts and fonts that work well across all Windows.
Windows 11 updates many font families with newer versions. For example, Ariel, Calibri, and Cascadia Code all have new versions. It also has different styles for fonts like Microsoft JhengHei and Nirmala UI. This offers a wide range of looks for the system aesthetics.
Knowing how to manage and find fonts is key. It helps your system work better and makes you happier with how it looks. This is not just for personal use but also helps professionals like graphic designers and typographers. A good user interface depends on this knowledge.
Primary Location of Fonts in Windows 11
In Windows 11, fonts are vital for making everything look good and easy to read. They are mostly saved in a special folder to make the computer work well and keep its look consistent. It’s good to know where and how to get to these fonts if you want to change how your computer’s text looks.
Default Font Directory
The main place where Windows 11 keeps its fonts is the C:WindowsFonts folder. Here, you will find all kinds of fonts like TrueType, OpenType, PostScript, and web fonts. Keeping these fonts in one place makes sure they work right in different programs, keeping the computer’s look in harmony.
How to Access the Fonts Folder
Getting to the fonts folder in Windows 11 is easy. There are a few quick ways to do it:
- File Explorer: Just open File Explorer and go to C:WindowsFonts. You can see the fonts you have and even make new folders to organize them better.
- Windows Search: For a faster way, type “fonts” into the Windows Search bar and pick the search result. This opens the Fonts section in the Control Panel.
When you’re in the Fonts Control Panel, managing your fonts is simple. You can look at what fonts you have, add or remove fonts, and see how they look. This shows how key fonts are to making the computer useable and personal for you.
Alternative Font Storage Locations
The system directory is the usual spot for fonts in Windows 11. But, Windows 11 also lets you keep fonts in other places. This makes it easier to install and customize fonts. It’s great for users who need special fonts but don’t have admin rights.
User-Specific Font Directory
In Windows 11, there’s a special folder just for your fonts. You can find it at %USERPROFILE%AppDataLocalMicrosoftWindowsFonts. This lets each user have their own font collection. It means you can manage your fonts easily without needing admin rights.
Fonts Installed by Applications
Some apps need their own fonts to work right. They keep these fonts in the app’s folder. This keeps the app working well, making sure it has all the fonts it needs. For example, Adobe Illustrator has its own fonts for designing.
You can also make your own font folders. This is good for designers who need lots of different fonts handy. It helps keep the fonts organized without filling up the main font folder. This way, managing your fonts is easier and suits many needs.
In Windows 11, fonts live mostly in the C:WindowsFonts folder. Here, you’ll find important font types like TrueType (.ttf) and OpenType (.otf). These are key for your system’s Windows 11 design elements. But, knowing about other places where fonts can be kept lets you personalize your work even more.
Fonts might also be in user-specific spots or added by certain apps. These extra fonts storage pathways are great for those who need lots of font choices. You can get to these fonts easily. Just use [Windows + E] and type in shell:fonts or %WINDIR%/Fonts to find them.
Creating shortcuts makes getting to your fonts faster. Press the Windows logo key + D. Then right-click to make a new shortcut. Point it to your font folder. You can even set a keyboard shortcut to make things easier.
As you collect more fonts, keeping them organized is key. To remove a font in Windows 11, just pick it and press Ctrl for multiple selections. Always back up your important fonts. Copy them to a safe folder.
When exploring Windows 11 design elements, the Control Panel’s Fonts section is very useful. It lets you tweak ClearType text and search for special symbols. The Settings Fonts area goes even further. It allows you to see font details, alter previews, remove fonts you don’t want, and find new ones in the Microsoft Store.
How to Add New Fonts to Windows 11
If you want to make your Windows 11 look unique, adding new fonts is a great start. Windows 11 makes it easy to add fonts with methods to suit everyone. We’ll show you two main ways to do it: through direct download and install, and using the Fonts Control Panel.
Download and Install Method
First, get your font files from safe places like Google Fonts, DaFont, or the Microsoft Store. If the font comes in TrueType (.ttc) or OpenType (.otf) format, here’s what to do next:
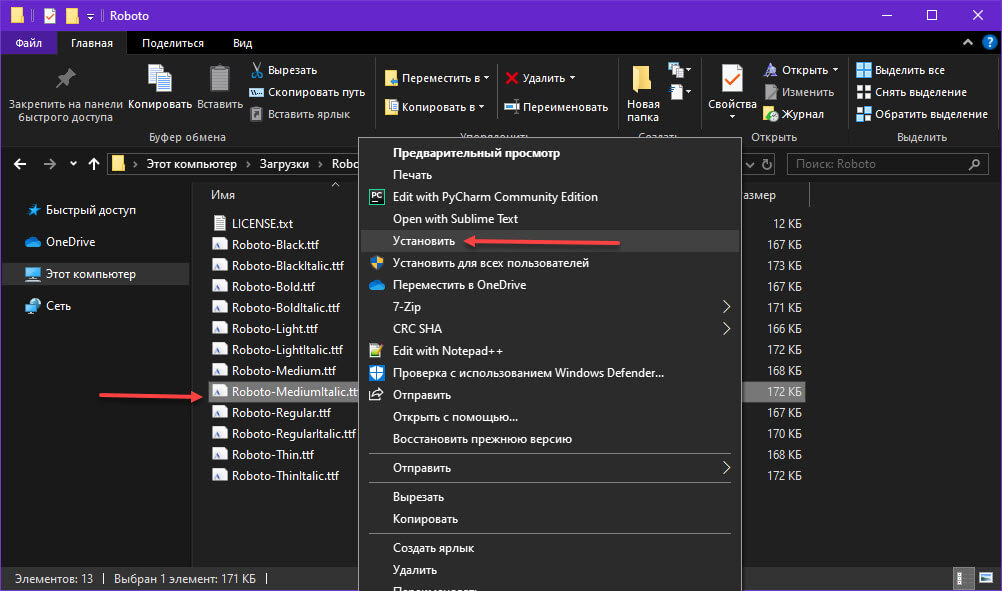
- Open File Explorer and find your downloaded font file.
- Right-click the font file and choose Install. You can also pick Install for all users to make it available for everyone on your computer, if you’re the admin.
- An easier way is to drag and drop the font file directly into the Settings > Personalization > Fonts window.
Follow these steps, and your new font will be ready to use in apps like Microsoft Word or Adobe Photoshop.
Using the Fonts Control Panel
If you like a more graphical approach, try the Fonts Control Panel. Here’s how:
- Open the Control Panel and go to Appearance and Personalization > Fonts.
- In the Fonts Control Panel, click the Font settings link. This is where you can adjust settings and see previews of installed fonts.
- To add a new font, find the Install New Font option. Then, just follow the prompts to pick your downloaded font file.
The Fonts Control Panel not only helps you install fonts but also makes it easy to manage and preview them. You get to see all your fonts in one place, ready for any tweaks or to check details like font size or type.
With these easy methods, adding new fonts to Windows 11 will enhance how your system looks and works. Dive into the world of fonts and see how they can change your experience.