
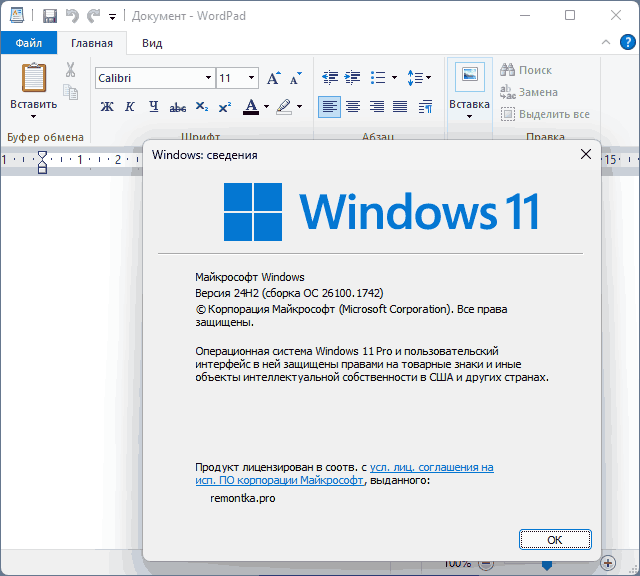
Как ранее предупреждала Майкрософт, WordPad окончательно исчез из Windows 11 — начиная с версии 24H2 приложение отсутствует в системе. Некоторые программы, которые удалялись из «стандартной поставки» ранее, всё ещё можно найти в дополнительных компонентах, но WordPad это не касается.
В случае, если вам по какой-либо причине необходим WordPad, и вы не желаете мириться с его удалением, в инструкции ниже о том, как восстановить его в Windows 11 последних версий — взять из папки Windows.old, другой установки Windows или скачать из Интернета.
Получение WordPad из файлов
Последнее обновление Windows 11 удалила следующие три файла, имеющие отношение к работе WordPad:
C:\Program Files\Windows NT\Accessories\Wordpad.exe
C:\Program Files\Windows NT\Accessories\wordpadfilter.dll
C:\Windows\write.exe
При этом файлы удаляются независимо от того, обновляли ли вы систему или выполняли чистую установку.
Первая возможность восстановления WordPad — самостоятельно вернуть эти файлы на свои места:
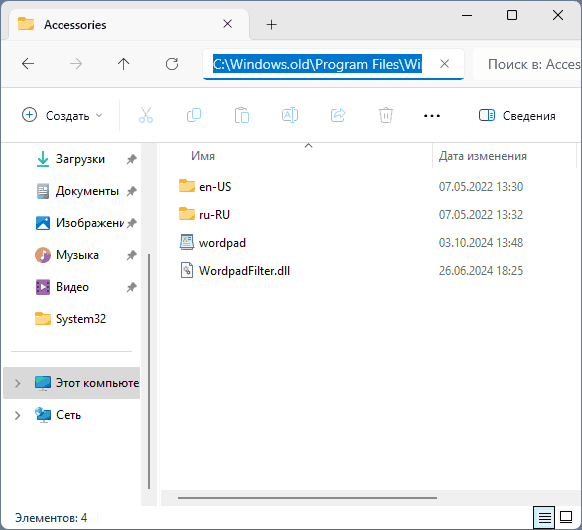
- Если вы выполняли обновление до Windows 11 новой версии (либо установку с флешки без форматирования диска) и на системном диске сохранилась папка Windows.old, вы можете восстановить из неё все указанные выше файлы в прежние расположения в системе. Сами файлы можно найти в
C:\Windows.old\путь_к_папке
После восстановления файлов создайте ярлык для
C:\Program Files\Windows NT\Accessories\Wordpad.exe
в удобном расположении.

- Взять указанные файлы из другой системы (в том числе предыдущих версий), где WordPad не был удалён и поместить их в нужные расположения в текущей установке Windows 11.
В результате вы получите исправно работающий текстовый редактор WordPad на вашем компьютере.
Где скачать WordPad
Если доступ к старым файлам WordPad отсутствует, вы можете скачать приложение из Интернета. Сразу после его удаления из Windows 11 в сети появилось множество источников для загрузки, я рекомендую использовать этот сайт который может быть известен вам по установщику стандартных игр для новых версий Windows и другим старым программам.

Загрузите архив с WordPad, распакуйте, запустите установщик, несколько раз нажмите кнопку «Next» (Далее) и оригинальный WordPad на текущем языке системы (включая русский) будет установлен на компьютере.
The WordPad program has been in Windows since the beginning, but many of us still don’t know how to use it at its best. We have always assumed that NotePad and WordPad share the same functions. But that’s not true. Like Notepad, WordPad is a text editor, but it has some advanced formatting options that let us create text documents like letters, reports, notes, etc.
It’s an upgraded version of NotePad and a simplified version of MS Word. Anyone who has used Microsoft Word can easily use WordPad without the need for any tutorial. But those who are new to Windows will need some guidance. Thus, in this guide, we’ve talked about every feature of WordPad in a detailed manner. So, you can learn WordPad properly and become better at using it.
What Is WordPad In Windows 11?
WordPad is a basic text editor in Windows that lets us create text documents, like reports, letters, notes, etc., using its formatting features. It allows us to change the text size, font, color, alignment, and more to make the document look good and professional. WordPad comes with all versions of Windows and can be found easily by following some easy steps.
How To Open WordPad in Windows 11
Here in this section, we’ve explained four ways to open the WordPad app in Windows 11. You can follow any of the mentioned methods to launch WordPad on your Windows 11 PC.
From the Windows Start Menu
The first way to open WordPad on Windows 11 is from the Windows Start Menu. Follow the below-mentioned steps to open WordPad from the Windows Start Menu:
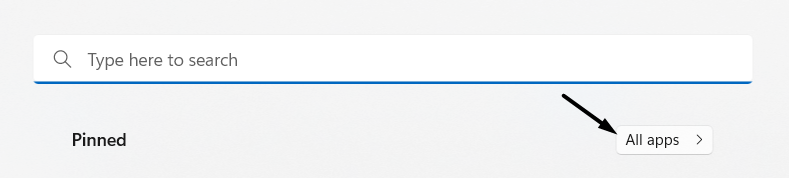
1. First, click on Start in the Windows taskbar to open the Windows Start Menu and click on All Apps on the top.
2. Now, search for the Windows Tools in the All Apps section and click on it to open the program on the system.
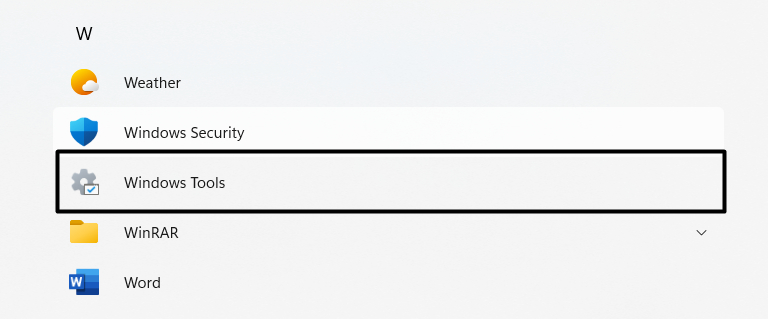
3. Next, look for WordPad in the Windows Tools section and click on it to open the WordPad program on the PC.

Using Windows Search Box
Another easy way to open the WordPad app on Windows 11 is using the Windows Search Box. So, follow the below-mentioned steps to open the WordPad program using the Search Box:
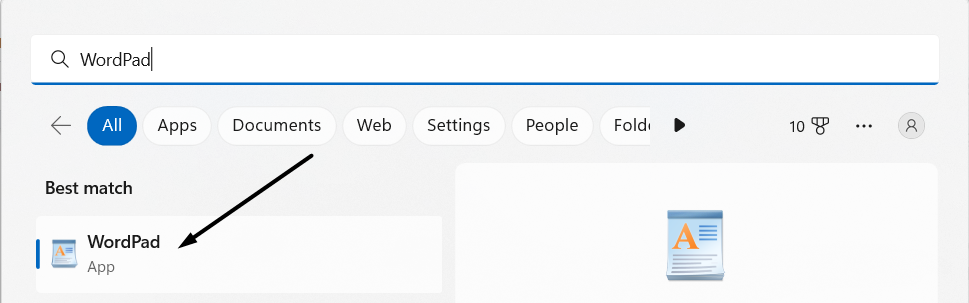
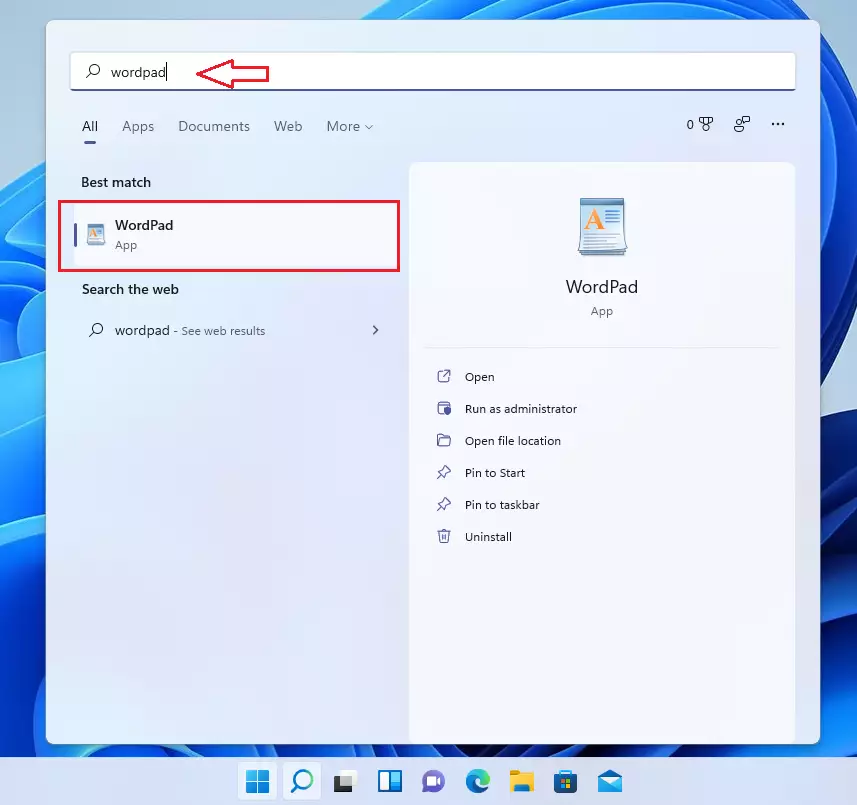
1. To start, click on Magnifying Glass in the Windows Taskbar to open the Windows Search Bar instantly.
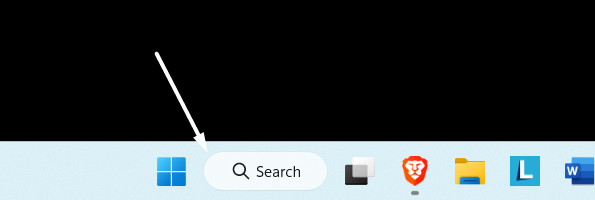
2. Now, type WordPad in the Search Box and select the WordPad app from the Best match section to launch it.
Via Run
You must be using Run to open programs like Windows Media Player, File Explorer, etc but you can also use the Run utility to open the WordPad app. Follow the below-mentioned steps to do so.
1. Open the Run utility on your Windows 11 PC with the Windows + R shortcut and type wordpad.exe in the Run Box.
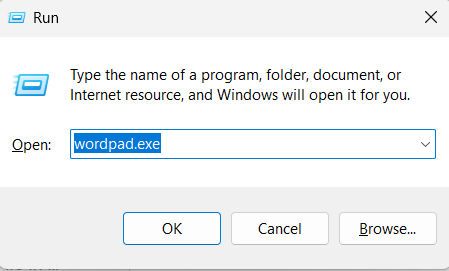
2. Next, press the Enter key to launch the WordPad app on the PC, and you can now use it to create documents.
From Contextual Menu
The last method to open the WordPad app on a Windows 11 PC is from the Contextual Menu that appears after right-clicking on the desktop. You can follow the below-mentioned steps to know the exact process to do the same:
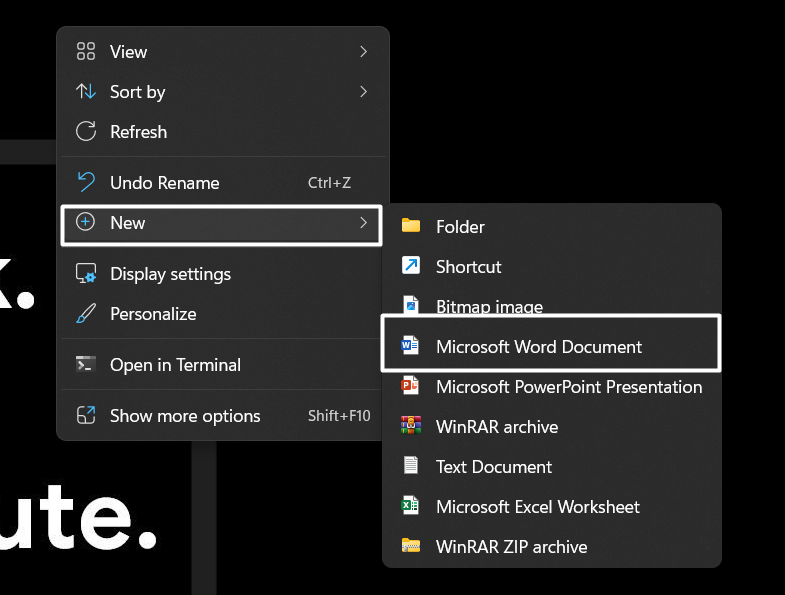
1. To start, right-click on the blank space on the desktop, hover the arrow on New, and select Microsoft Word Document from the contextual menu.
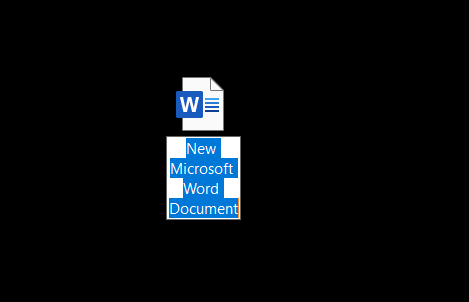
2. Now, enter a name for the new Microsoft Word document and press the Enter key on the keyboard to save the file.
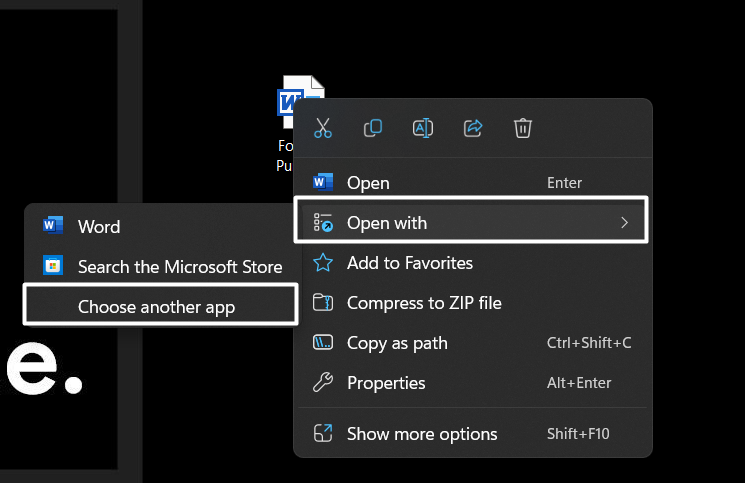
3. Next, right-click on the newly created Microsoft Word file, hover the arrow on Open with, and click on Choose another app.
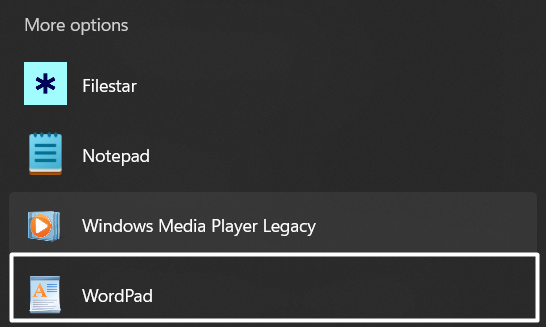
4. Lastly, choose the WordPad app from the More Options section and open the WordPad program.
How to Open Existing or Create New Files in WordPad
Before you move forward, you need to learn how to create a new document and open an existing document in the WordPad program. You can’t use other functions without opening a document in WordPad. Thus, in this section, we’ve explained how you can open an existing document or create a new document in WordPad.
How To Open an Existing File in WordPad
You can follow the below-mentioned steps to open an existing RTF, DOCX, and TXT document in the WordPad program:
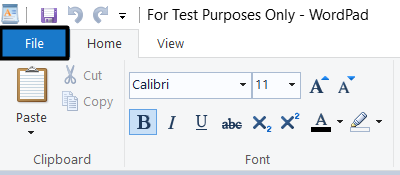
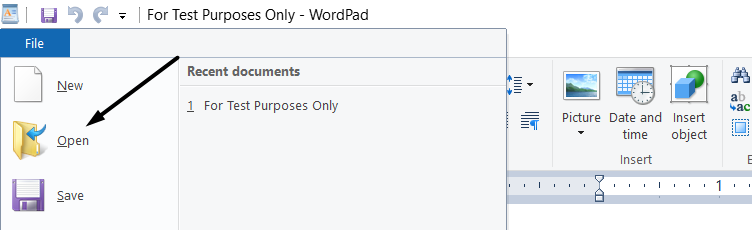
1. First, open the WordPad app on your Windows 11 PC, and click on File at the top of the WordPad program.
2. Now, click on Open in the dropdown menu and select the file that you want to open in the WordPad program.
Pro Tip: You can also open an existing RTF document in the WordPad program using the Ctrl + O keyboard shortcut.
How To Open a New File in WordPad
You can follow the below-mentioned steps to create or open a new RTF (Rich Text Format) document in the WordPad program:
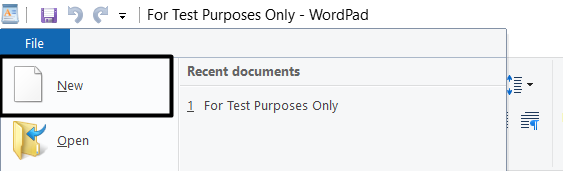
1. To start, open the WordPad program, and click on the File option at the top left corner of the WordPad program.
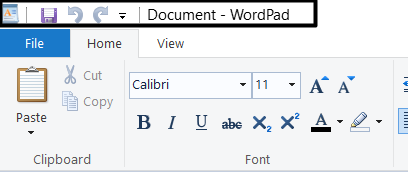
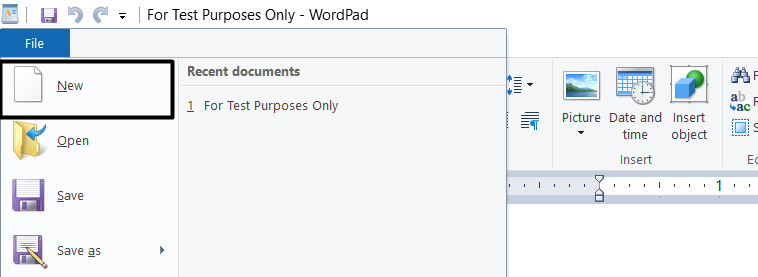
2. Lastly, click on the New option in the dropdown menu, and it’ll open a blank document on the current window.
Pro Tip: You can also open a new or blank document in the WordPad app by pressing the Ctrl + N keyboard combination.
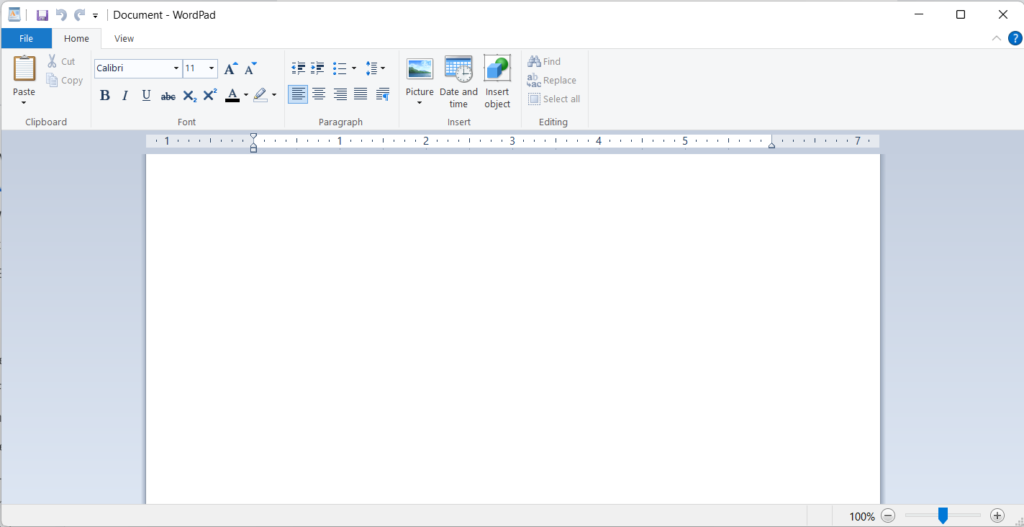
All WordPad Menus Explained
Once you open the WordPad program, you’ll see four menus at the top: Ribbon menu, File menu, Home menu, and View menu. All menus include multiple different options, and all have different purposes.
Some options in the menus are self-explanatory. Whereas some options require a detailed introduction to understand them in a proper manner. Here in this section, we’ve explained all the options present in all menus in detail.
WordPad Top Ribbon Menu Explained
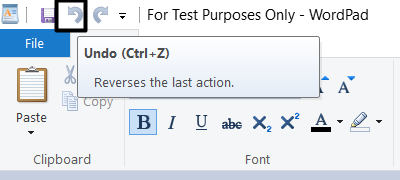
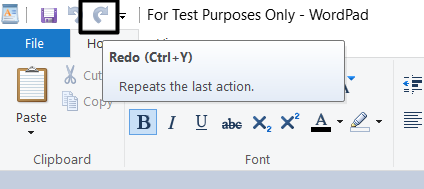
The first menu we see on the top of the WordPad program is the ribbon menu. The ribbon menu includes four options: Save, Undo, Redo, and Customize Quick Access Toolbar. All the options have different uses, and it’s necessary to know about them. You can read this section to know the use of each option in the ribbon menu.
Save: The Save option in the ribbon menu lets us save the active or opened document in WordPad. It’s one of the most important functions of the WordPad. You can also save a document by pressing the Ctrl + S keyboard shortcut.
Undo: The Undo option lets us reverse the last action in WordPad. You can also do the same by pressing the Ctrl + Z key combination.
Redo: The Redo option is quite the opposite of the Undo option. We use the Undo option to restore previously done actions. For instance, if you deleted a word in the document, you can use the Redo option to get it back. You can also use the Redo option by pressing the Ctrl + Y shortcut.
Quick Access Toolbar: You’ll also see the Customize Quick Access Toolbar next to the Redo option. This option will let you customize the top ribbon menu. You can select which option should be present in the ribbon menu and which not.
WordPad File Menu Explained
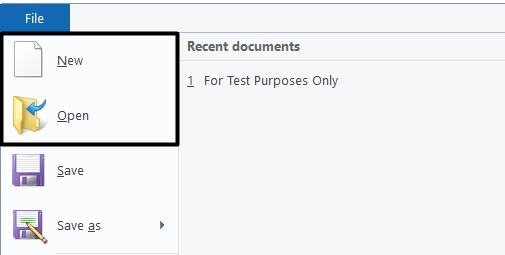
Underneath the top ribbon menu, you’ll see the File menu. The File menu includes nine options and the Recent documents section on the right side. The Recent documents section shows all the files you’ve opened in the WordPad app. You can also open documents from the Recent documents section for easy access. This was about the Recent documents section. Let’s now talk about the other nine options in the File menu.
New: The New option in the menu lets us create a new document, which we can edit and save on the PC. It simply opens a new blank document in the WordPad app. You can also create a new file using the Ctrl + N key combination.
Open: The Open option lets you open an existing RTF, DOCS, and TXT document in the program. Some users also use the Ctrl + O keyboard shortcut to open an existing file. You can also try the same shortcut.
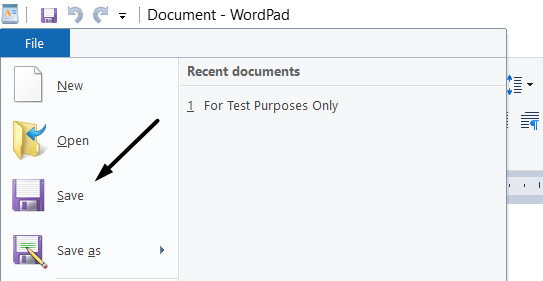
Save: The Save option is used to save the active file in the WordPad program. This way, you won’t lose the recent changes we made to the file. You can also use the Ctrl + S keyboard shortcut to save the document.
Save as: The Save As option comes in handy when replacing an existing document with a new one. However, it deletes the existing document because it overwrites it with a new one. It is also used to save the new document in a different format, like Rich Text, Open XML, Simple Text, etc.
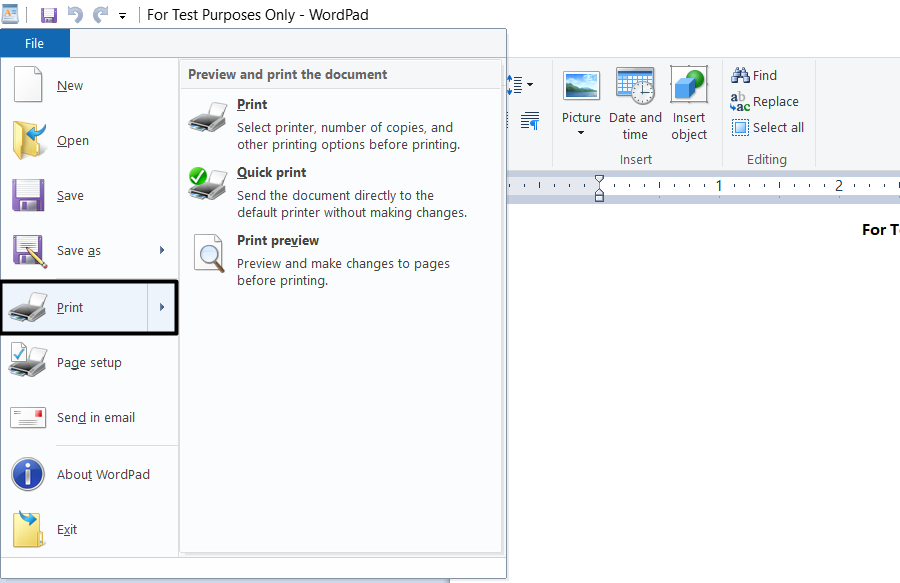
Print: You can understand the use of this option by its name itself. The Print option is used to print the active document using the default printer. When you hover the arrow on the Print option, it shows three options: Print, Quick Print, and Print Preview.
The Quick Print lets you quickly print the document without opening the preview pane. In the end, the Print Preview option allows us to preview the document before printing.
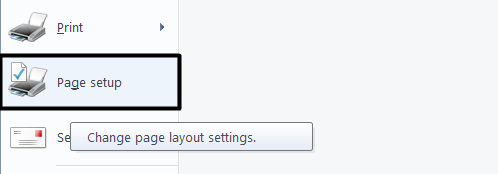
Page Setup: The Page Setup option in the menu lets you change the page size of the document. You can choose from various page sizes, such as A4, A3, Letter, Legal, Executive, etc. Besides this, you can adjust the page margin from the Page Setup section.
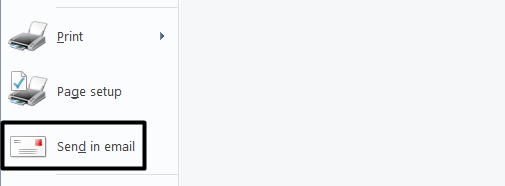
Send In Email: You can use the Send In Email option to send the document directly to the recipient via email. This way, you don’t need to download the document on the system. Simply click on the option and share it with anyone you want.
WordPad Home Menu Explained
The Home Menu will be divided into four sections: Clipboard, Font, Paragraph, Insert, and Editing. Each section includes different options, and most of them are formatting options, like italic, bold, fonts, indent, etc. Here in this section, we’ve explained all four sections and their options in detail. So, follow us to know more.
Clipboard
The Clipboard section features three options: Paste, Cut, and Copy. Since you use these functions daily while browsing or writing, you must be familiar with them. The Cut (Ctrl + X) option copies a particular text in the clipboard and removes it from the current location.
Whereas Copy (Ctrl + C) enables you to copy a specific text, it doesn’t remove the existing text. You can delete it manually using the Backspace or Delete keys on the keyboard. In the end, Paste (Ctrl + V) allows to paste the copied text to any document you want.
Font
The Font section includes some options that let us make the document’s text look more professional. It includes twelve options, and we’ve explained them in detail in this section.
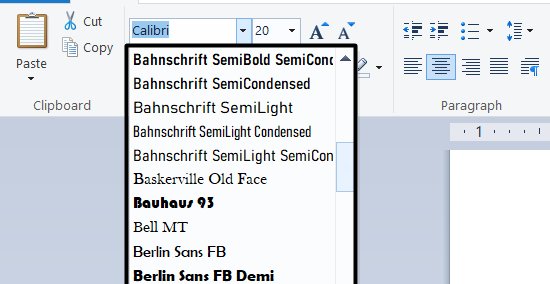
Font Picker: The first option you get in the Font section is the Font Selector, which lets you change the font style. You can click on the downward arrow next to the Font Picker to view all the available fonts. Surprisingly, you can choose from 150+ fonts. Also, you can upload our customized fonts from the Settings app. Head to the mentioned path to upload a custom font:
Settings > Personalization > Fonts > Browser & install fonts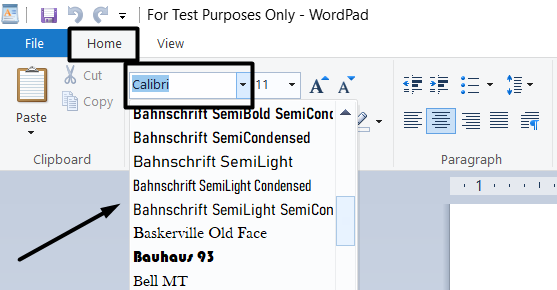
Font Size Picker: WordPad also allows to change the size of the text to make it easy to read and scan for readers. By default, the size would be set to 11. You can keep the font size as small as 8 and as large as 1638.4. Once you select the font size from the dropdown, the change will reflect immediately in the document.
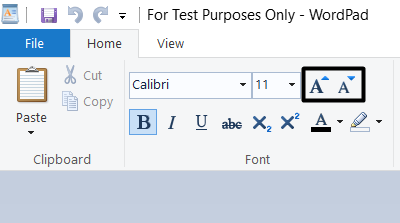
Grow Font & Shrink Font: As the name suggests, the Grow font option lets you increase the font size. On the other hand, the Shrink font option is used to reduce the font size.
These options come in use when you want to keep the font size either higher than 72 or lower than 8. This is because the Font Size Picker doesn’t allow to choose font sizes below and beyond the mentioned font size.
Change Typography: Here, typography refers to four options: Bold, Italic, Underline, and Strikethrough. All four options help make the text look better. The Bold option makes the text heavier. It adds a new layer to the text, which makes it look aggressive. The Italic option changes the text font to italic but it doesn’t change the font family. Underline and Strikethrough are the easiest to understand.
The Underline option draws a line below the selected text. At the same time, Strikethrough cuts the text from the middle with a horizontal line. You can also use these options with keyboard shortcuts. We’ve mentioned those shortcuts in the table below.

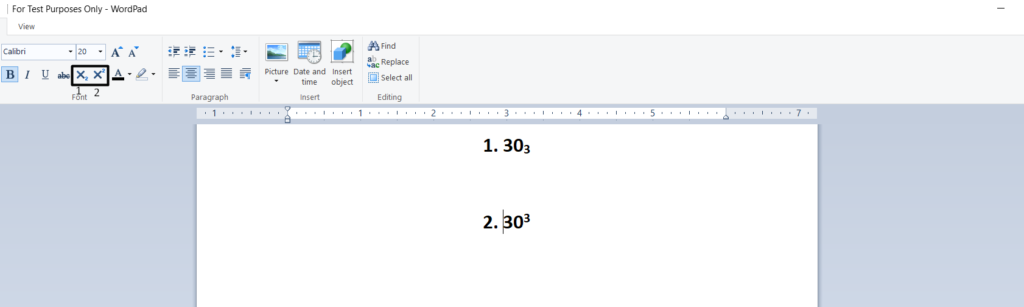
Subscript & Superscript: The Subscript and Superscript option might be new to you. Let us explain this to you in layman’s language. Subscript makes the text smaller and lower than the regular text.
Whereas the Superscript is the opposite of this. It draws the text smaller and higher than usual. These options mostly come in use at the time of writing values or powers to the numbers. Please check the mentioned image attached below for better clarification.
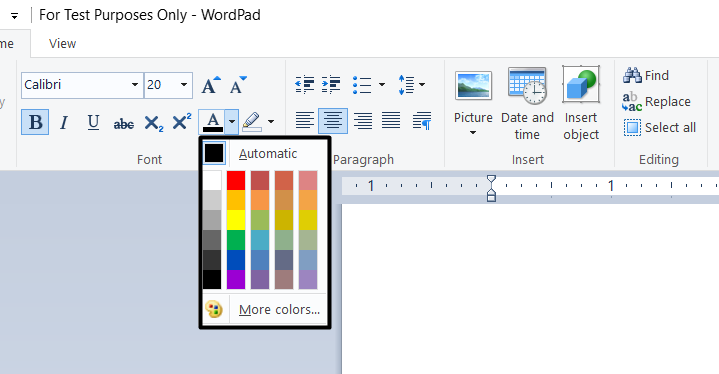
Text Color Picker: The Text Color Picker lets you choose the best color for the selected text to make it look pleasing. By default, the color would be set to Black but you can choose from a wide range of colors and also create your own color combinations.
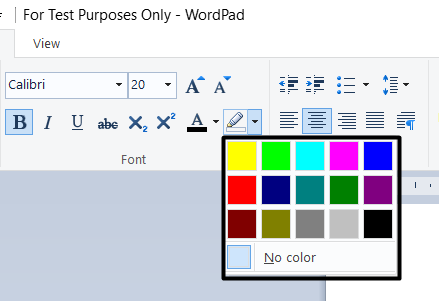
Text Highlighter: Thanks to technology, you can now highlight texts in WordPad as you do in books in real-life. You can highlight the text with fifteen color choices, including Yellow and Green. So, highlight the important part of the document to focus more on it.
Paragraph
The Paragraph section lets you work on the formatting of the text in the document. So the document looks well-organized and neat. The Paragraph section includes a lot of options. Let’s not wait anymore and learn more about all the options.
Increase Indent & Decrease Indent: Indentation refers to increasing/decreasing the distance between the text and the margin of the document. You can choose indentation values according to how your document should look.
The Increase indent option lets you increase the indent level of the paragraph. On the other hand, the Decrease indent option is the opposite of it.
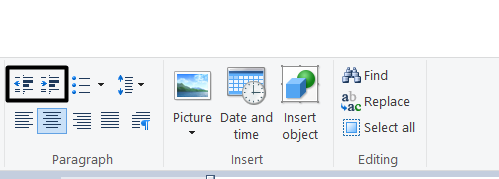
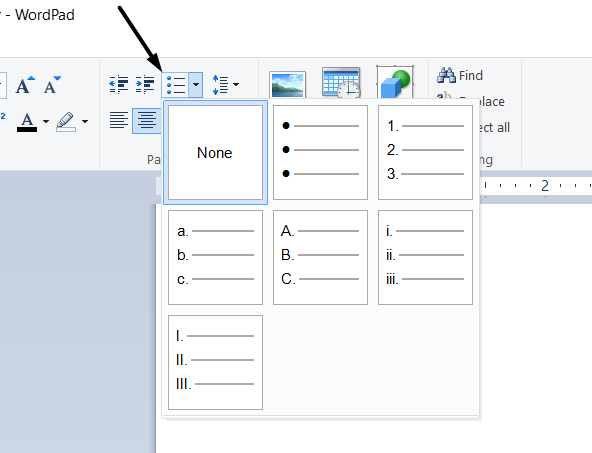
Start a list: When you click on the Start a list option, it automatically creates a new bullet list. You can choose the type of list you want to create by clicking on the downward arrow. It lets you choose from different types of list formats, such as Bullet List, Numbered List, Alphabet List, Roman Numeral List, and much more.
Line Spacing: To make the text look well formatted, WordPad lets you change the line spacing between the text. You can modify the vertical space between the lines of text in your document using the Line spacing option. This ensures that the text looks neat, which can make it easier to read for readers.

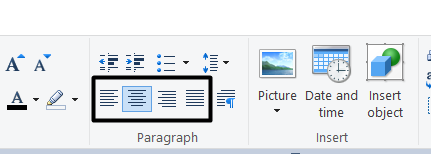
Text Alignment: The proper text alignment is necessary to make the document look professional and clean. WordPad offers some text customization and alignment options that let you align the text to the extreme left, bottom, right, and both left and right. You can also do all this with the help of shortcuts. Simply keep the arrow on any alignment option, and you’ll see the shortcut there.
Insert
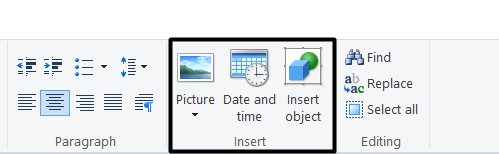
The Insert section allows to add extra elements to the documents. It includes three options: Picture, Date and time, and Insert object. All these can be understood by their name and barely need an introduction. In short, the Picture option lets you add an image to the document.
Whereas the Date and time option lets you show the date and time in the document. In the end, the Insert object option enables you to add different objects to the document, like Excel Sheet, Excel Chart, Worksheet, etc.
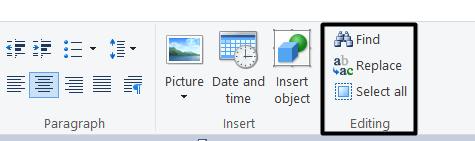
Editing
The Editing section is one of the most important sections of the View menu. It features three options: Find, Replace and Select all. Most of you know the use of these three options. Let’s recall once again. The Find option lets you find a particular word or sentence in the document. You can also open the Find dialog box using the Ctrl + F key combination.
The Replace option lets you replace a word or sentence in the document with another word or sentence. An easy way to open the Replace dialog box is by pressing the Ctrl and H keys simultaneously. At last, the Select all option lets you select all the content in the document in one go. You can access the Select all option using the Ctrl + A keyboard shortcut.
WordPad View Menu Explained
The last menu that remains out of all is the View menu. This menu lets you modify your WordPad user interface. For instance, you can enable/disable WordWrap, Status, Bar Ruler, etc. It’s divided into three different sections: Zoom, Show or hide, and Settings. All three sections have different options. It’s time to know about all the options in detail in this section.
Zoom
You’ll find three options in the Zoom section: Zoom in, Zoom out, and 100%. As you all know, the Zoom in option lets you take a close view of the document. Furthermore, the Zoom out option allows you to view the entire document at a reduced size.
When you use the Zoom out option, the text becomes smaller and difficult to read. Lastly, the 100% option in the Zoom section automatically adjusts the sheet size according to the monitor size.
Show Or Hide
In the Show or hide section, you’ll see two options: Ruler and Status Bar. Both are essential elements of the WordPad app. You can see the Ruler at the top of the page. It helps you change the document format and the text’s alignment.
On the other hand, the Status Bar can be found at the bottom of the document. It’s used to know the status of the document, word count, etc. The Show or hide section allows to enable/disable the Ruler and Status Bar in WordPad.
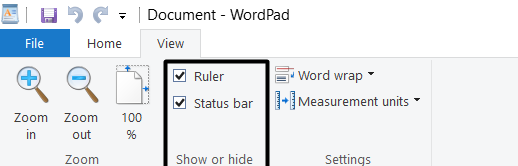
Settings
The Settings section will have two options: Word Wrap and Measurement units. Here’s a short introduction if you don’t know the use of WordWrap. WordWrap is a function that automatically moves the cursor to the next line once it reaches the end of the line. From this section, you can select whether you want to keep the Word Wrap enabled or disabled. This section also lets you change the measurement units of the Ruler.
So, these were the main menus of the WordPad app. We hope all the WordPad menus are clear to you now.
Basic WordPad Text Editing Functions
Here in this section, we’ve talked about everything you can do in WordPad. We suggest reading this section until the end to learn more about its other functions in detail.
How To Cut, Copy, Or Paste In WordPad
Most of you would know about these functions as you use them in daily life. We are still recalling them for you, so keep reading. The Cut option comes in handy when you want to copy a text from one document and paste it into another document. But it removes the text from the current document or location.
You can also cut text using the Ctrl + X keyboard combination. The Copy option works the same as the Cut option but doesn’t remove the text from the document. You can use the Copy function by simply pressing the Ctrl + C keyboard shortcut. On the other hand, Paste lets you paste the copied text into another document.
How To Change Fonts and Font Size In WordPad
Of course! You may want to make your document look appealing as well as easy to read and scan for readers. In that case, you can change the font and size to do the same. WordPad allows to choose from hundreds of font options. In this section, we’ve demonstrated how to change the text font and size.
1. First, open the WordPad app on your Windows 11 PC, and create a new or open an existing document.
2. Now, select the text, look for the Font Picker in the Font section and click on the dropdown arrow next to it to get the list of all available fonts.
3. After that, select the font you want to keep for the selected text. Once done, the changes will appear immediately.
4. Finally, click on the dropdown arrow next to Font Size Picker and select the font size that makes the document easy to scan.
How To Subscript and Superscript In WordPad
Previously in the article, we already explained the meaning and use of the Subscript and Superscript options. Here in this section, we’ve explained how to use the Subscript and Superscript options:
1. To start, open the WordPad program on your Windows 11 PC and create a new document or open an existing one.
2. Once the document is opened, select the text that you want to Subscript and move to the Font section of the Home menu.
3. Now, look for the Subscript option in the Font section, and click on it to Subscript the selected text instantly.
4. Or, you’ll find the Superscript option next to the Subscript option. Simply click on it to Superscript the text.
How To Change Text And Background Colors In WordPad
Many writers like to change the text color of their text while working to make it look appealing and highlighting. WordPad is a basic text editor that also allows to change the text color and background. Follow the below-mentioned steps to change the text color and text background color with ease:
1. First, launch the WordPad app on your Windows 11 PC, open an existing document, and select the text you want to customize.
2. Once the text is selected, search for the Color Picker in the Font section and click on the dropdown arrow next to it to open the color tray.
3. By default, the text color would be set to Black. You can choose the color you want from the color tray.
4. Lastly, to change the background color, click on the Text Highlight Color option in the Font section and choose the background color you want to set.
How To Increase or Decrease Indents In WordPad
In one of the previous sections, we already explained the use of the Indent feature. So, we won’t repeat the same thing. If you want to increase the indent, click on Increase indent in the Paragraph section.
On the other hand, if you want to decrease the indent level, click on Decrease indent. By default, the indent level would be set to Zero (0). You can change the indentation settings from the Paragraph dialog.
How To Add Spell Checker In WordPad
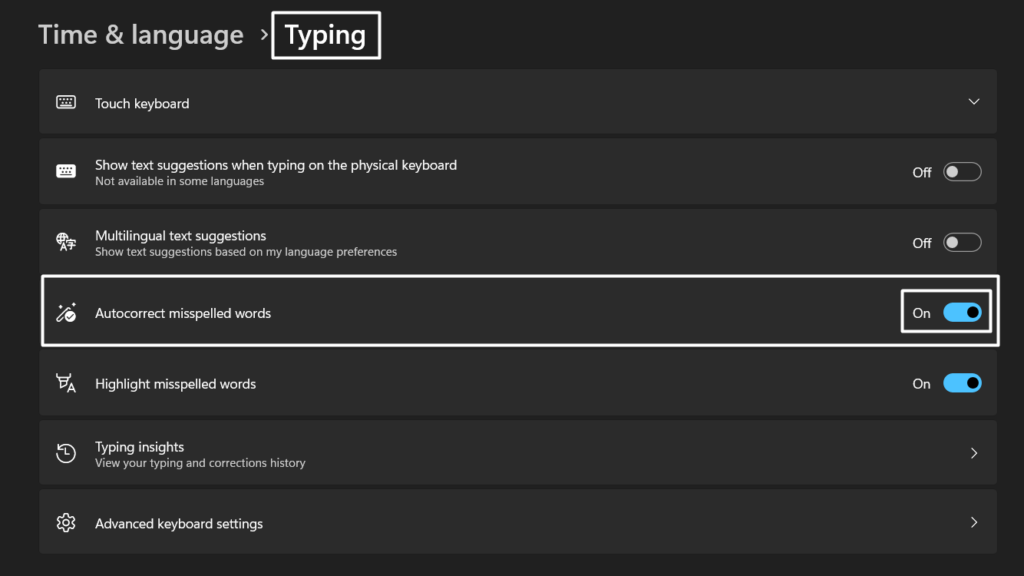
Sadly, WordPad doesn’t have a built-in auto spell checker, which can check spelling mistakes in your documents and highlight them. But Windows has an integrated spelling checker, which highlights the wrong spelling at the time of writing.
Sometimes, it also autocorrects them. You need to enable the Auto-correct misspelled words option in the Keyboard settings to allow the spell checker to work system-wide. So, follow us along to enable the Auto-correct misspelled words option in Windows 11:
1. First, open Settings on your Windows 11 PC using the Windows + I keyboard shortcut and move to the Time & language section from the left sidebar.

2. Now, click on Keyboard in the Time & language section to open all the keyboard-related settings. Lastly, enable the Auto-correct misspelled words toggle.
How To Save As A WordPad File
Once you’ve finished working on the document, it’s necessary to save it on the system. Otherwise, you’ll lose all the progress, and all your efforts will be drowned in the water. It’s simple to save a document in the WordPad app.
1. If you want to save a new file, open the File menu, and click on Save as.
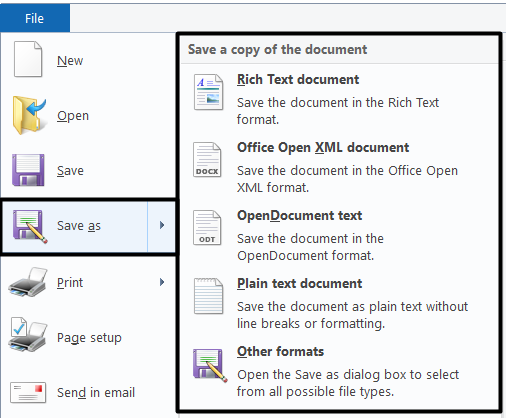
2. Now, type a new name for the file in the File name text box and click Save.
3. On the other hand, if you want to save an existing document, simply select the Save option from the File menu. The changes will save instantly. You can also do the same by pressing the Ctrl and S key combinations.
How To Print In WordPad
You can use WordPad to write scripts, letters, applications, reports, and more. If you’re using the WordPad app for creating scripts or reports, you might also want to get a printout of that. The best part is that you can easily print the document directly from the WordPad app. It’s too easy to do, and the below-mentioned steps explain the same with ease:
1. To start, open WordPad on your Windows 11 PC, and open the File menu by clicking on File in the top menu.
2. Next, click on the Print option in the dropdown menu and select the printer you want to use to take out the prints.
Tip: You can also open the Windows Operating System window by pressing the Ctrl + P keyboard combination.
3. Now, select whether the print should be in Portrait orientation or Landscape orientation from the Orientation dropdown.
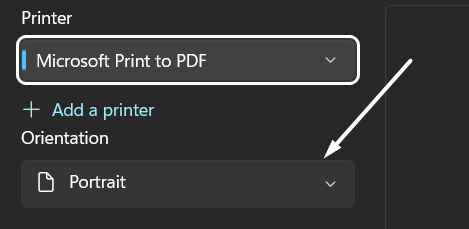
4. In the end, uncheck the Let the app change my printing preferences checkbox and click the Print button.

WordPad Keyboard Shortcuts
Using keyboard shortcuts is a great way to increase efficiency at work and complete tasks faster. You can also use keyboard shortcuts while using WordPad to execute some tasks in a few seconds. Thus, in this section, we’ve mentioned some keyboard shortcuts that you can use while using WordPad. Have a look at the shortcuts below:
| Keyboard Shortcut | Actions Performed |
| Ctrl + N | To open a new blank document on the current window. |
| Ctrl + O | To open the “Open” dialogue box to select a file |
| Ctrl + C | To copy a selected text in the clipboard |
| Ctrl + V | To paste a copied text into a document |
| Ctrl + S | To save the recent changes made in the document |
| Ctrl + Z | To reverse the last action |
| Ctrl + Y | To repeat the last action |
| Ctrl + X | To cut a selected text |
| Ctrl + P | To open the “Print” dialogue box |
| Ctrl + B | To make a selected text heavier |
| Alt + F4 | To close the WordPad program (Note: Only works when the document is saved.) |
| Ctrl + I | To italicize the selected text or word |
| Ctrl + A | To select the entire content present in the document |
| Ctrl + L | To align the selected text to the left |
| Ctrl + E | To align the selected text to the center |
| Ctrl + R | To align the selected text to the right |
| Ctrl + J | To justify the selected text |
| Ctrl + U | To underline the selected text |
| Ctrl + Shift + = | To make the selected text superscript |
| Ctrl + = | To make the selected text subscript |
| Ctrl + 1 | To set the document line spacing to 1 |
| Ctrl + 2 | To set the double-line spacing |
| Ctrl + 5 | To set the document line spacing to 1.5 |
| Ctrl + Shift +L | To create a bullet list |
| Shift + F10 | To display the shortcut menu on the current window |
| F1 | To open “help with WordPad in Windows 11” search results in Bing.com |
| Ctrl + Home | To move the cursor to the beginning of the file |
| Ctrl + End | To move the cursor to the end of the file |
| Ctrl + F | To open the “Find” dialogue box |
Frequently Asked Questions
How Do I Use WordPad?
You need to start by opening the WordPad app on your Windows 11 PC. Once the app is opened, click on the File option in the top menu and select New from the secondary menu. You’ll now see a blank document on the screen, which you can use to pen down ideas and thoughts, make letters, etc.
Why Is My WordPad Not Working?
There could be varied reasons for the ill-functioning of the WordPad app. Yet, the most common reason is the bugs within the app. In that case, we suggest updating the PC to the latest Windows build. You can also try restarting the PC.
How Do You Edit a WordPad Document?
You can start editing a document right after opening it in WordPad. To open an existing document in WordPad, click on File in the top menu and select the Open option from the dropdown. Lastly, choose an RTF, Docx, or TXT file that you want to open in WordPad and click Open. The selected file will now open in the WordPad app.
Can You Reinstall WordPad?
Windows allows you to uninstall the WordPad program from the system. But it doesn’t give the option to install the program back on the system.
WordPad Is Too Easy To Use, Even For Beginners
It’s so easy to use WordPad in Windows 11. Don’t you feel the same? In this guide, we explained every feature of WordPad in detail. Our main purpose for creating this guide was to make WordPad simple for you, and we hope we made it.
Do let us know which part of the guide helped you the most. Also, share the guide with your fellow mates who recently switched to Windows and are facing difficulties using the WordPad app.
Время на прочтение1 мин
Количество просмотров3K
В версии Windows 11 24H2 больше не работает WordPad, который решили заменить на «Блокнот». Также Microsoft удалила некоторые двоичные файлы, что может повлиять на сторонние приложения, использующие WordPad. Однако программу можно восстановить, используя обходной путь.

Обновление Windows 11 24H2 удаляет следующие двоичные файлы, связанные с WordPad: Wordpad.exe, wordpadfilter.dll и write.exe.
Тем, кто не обновил систему до Windows 11 2024 Update, можно создать резервную копию папки «Accessories» в C:\Program Files\Windows NT\Accessories. При добавлении этой папки в новую установку можно снова использовать WordPad.
Если же обновление уже установлено, то в Windows Latest предлагают использовать резервный архив с OneDrive. Архив (.zip) содержит следующие папки: en-US с wordpad.exe.mui, wordpad.exe и WordpadFilter.dll. Потребуется извлечь файл .zip и переместить содержимое в папку Accessories, как показано на снимке экрана ниже.

После этого WordPad будет снова доступен, но программа не будет отображаться в результатах поиска или в меню «Пуск». Её можно закрепить на панели задач или создать ярлык на рабочем столе.
Ранее установочные образы Windows 11 24H2 ISO стали доступны всем пользователям. Обновление предлагается в редакциях Home, Pro, Enterprise и Enterprise LTSC. Для начала работы с обновлением необходимо соответствовать минимальным требованиям к оборудованию: 4 ГБ ОЗУ, TPM 2.0 и 64-разрядный процессор.
WordPad is an application that comes installed with the Windows operating system and is a very simplified version of the Microsoft Word program that you can buy and install on your PC. You can use WordPad to create basic documents with basic formatting option and it’s a step above using the Notepad app.
Starting with version 24H2, Microsoft decided to remove WordPad from Windows 11 altogether. We are not sure why Microsoft would decide to do this unless they are just pushing for more people to buy a Microsoft Office 365 subscription. And if you don’t know, you can use the Microsoft Office online apps for free without a subscription. If you still want to use WordPad with Windows 11, you are in luck and in this article, we will be showing you 2 methods you can use to add WordPad back to Windows 11
Method 1 – Add WordPad Back Using Files from an Older Computer
The first method we will be discussing to add WordPad back to Windows 11 involves copying some files from a computer running an older version of Windows 11 or even Windows 10.
From this computer running an older version of Windows, navigate to the following directory in File Explorer.
C:\Program Files\Windows NT\Accessories
Within the Accessories folder, you should see two files named wordpad.exe and WordpadFilter.dll.

You may not see the file extensions if you do not have the setting to show file extensions enabled in the File Explorer options. To enable file extensions, you can simply click on the View menu then go to Show and select File name extensions.

There will also be a folder named en-US and within that folder a file named wordpad.exe.mui. You will need to copy the two files mentioned earlier plus the en-US folder with the wordpad.exe.mui file in it. Or you can just copy the wordpad.exe.mui file and place it in the en-US folder on your computer if it already has that folder. You can place them on a USB flash drive or external hard drive to transfer them over. Or you can simply download the required files from this link.
Once you have the WordPad files on your Windows 11 computer, simply place them in the same folder that you copied them from on the other computer. You can then make a shortcut to the wordpad.exe file on your desktop, start menu or taskbar as needed.
Method 2 – Add WordPad Back by Installing the WordPad for Windows 11 App
If you do not feel comfortable trying to copy the WordPad files to the proper folders on your computer, you can use the WordPad for Windows 11 app provided by Winaero. This version of WordPad gets installed on your computer just like any other software. Then once it’s installed, you will have a full functional version of WordPad just like you did before.
To begin, you will need to download the WordPad for Windows 11 installation file here. The file will be in a zip file format and once you extract the zip file, you can simply double click the wordpad-1.0-setup.exe file to start the installation.
The installation is very basic and the only thing you really need to decide on is if you want the WordPad app to be available to all the users on your computer (if you have any others), or just for your user account. If you want a desktop icon for WordPad, you can leave the Create a desktop icon box checked.

Once the installation is complete, you will have in icon for WordPad on your desktop as well as on your Start menu under the Apps section.
As you can see, it’s very easy to add WordPad back to Windows 11 using one of these methods.
For additional training resources, check out our online IT training courses.
Check out our extensive IT book series.
This post shows students and new users steps to find and use Microsoft WordPad in Windows 11. Microsoft Wordpad is a free, rich text editor app to create and edit files, include text with different fonts and colors, insert pictures, and add links to other files.
WordPad offers more features than Windows Notepad but is less advanced than Microsoft Word. You can use WordPad to open and save text files (.txt), rich text files (.rtf), Word documents (.docx), and OpenDocument text files (.odt).
Files in other formats will open as plain text files and might not appear as expected. You might get by with WordPad if you don’t have Microsoft Word installed.
Some features—like headers, footers, and annotations—aren’t supported in WordPad.
Below are steps to find and use Microsoft WordPad on Windows 11 computers.
How to open WordPad on Windows 11
As mentioned above, Microsoft WordPad offers more features than Windows Notepad but is less advanced than Microsoft Word. If you don’t have Microsoft Word installed, you may get by with WordPad for less advanced users.
To use the WordPad in Windows 11, click on the Start menu, then search Wordpad in the search box. Under Best Match, select the WordPad app to open.
That will open WordPad app.
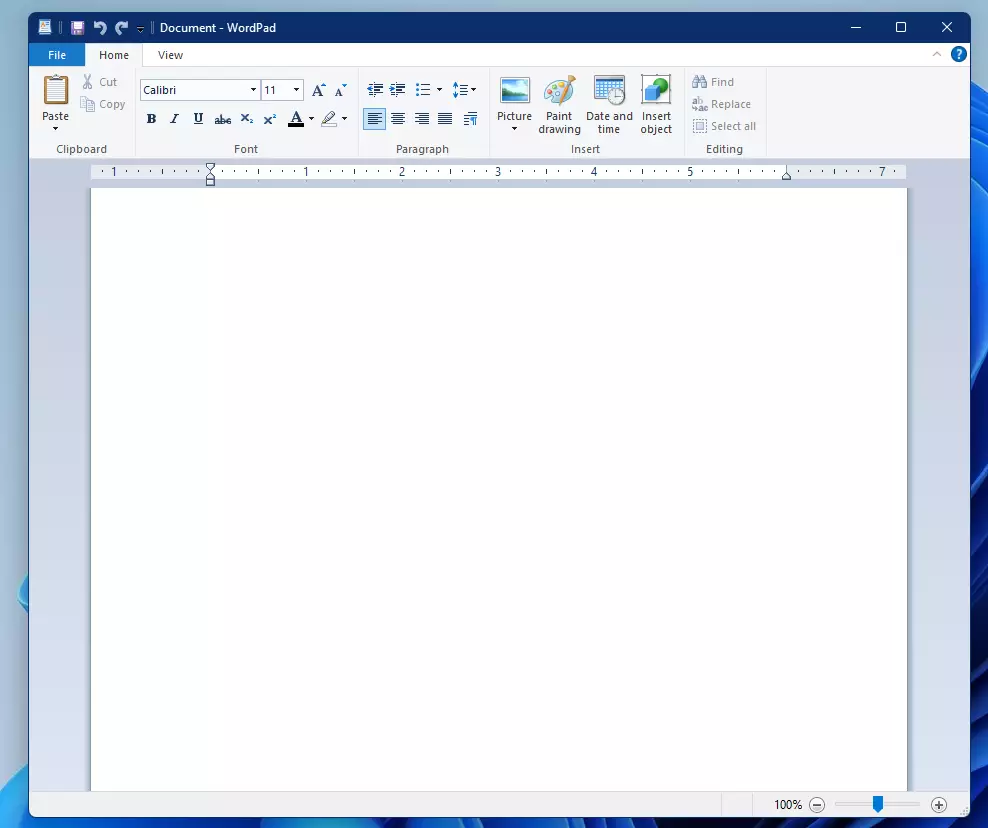
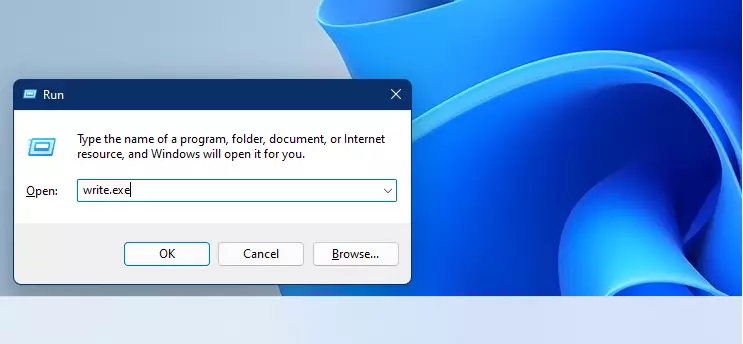
Alternatively, one can use the Run command box to open WordPad in Windows 11.
Press the Windows key + R on your keyboard, then type writes or Wordpad and press the ENTER key.
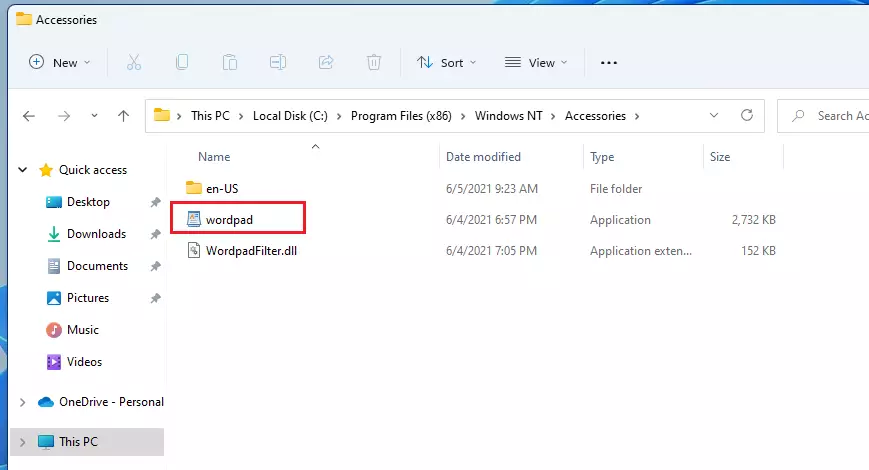
In File Explorer, browse the path below to find the WordPad application (wordpad.exe).
C:\Program Files\Windows NT\Accessories\wordpad
The shortcut is available at the path below:
C:\ProgramData\Microsoft\Windows\Start Menu\Programs\Accessories
Again, for basic usage, WordPad might be just enough. However, suppose you want to create advanced documents with mail merges, spellchecker, styles, tables, headers & footers, columns, margins, and more. In that case, Microsoft Word or an alternative productivity suite should be considered.
Below is a basic table on creating, opening, and saving files with WordPad.
| Create a new file | Tap or click File, and then tap or click New. |
| Open a file | Tap or click File, and then tap or click Open. |
| Save a file | Tap or click File, and then tap or click Save. |
| Save a file under a different name or format | Tap or click Save as. |
That should do it!
Conclusion:
This post shows you how to find and use WordPad in Windows 11. Please use the comment form below if you find any errors above or have something to add.