
Windows 11 makes capturing your screen easier than ever. Get to know these screenshot taking methods and save important information to your PC in a moment’s notice.
How to screen snip on Windows 11
Using the Snipping Tool is one of the easiest ways to take a screenshot. If you’ve taken screenshots using Windows before, you’re probably familiar with the Snipping Tool. This version of the tool combines the original Snipping Tool with the Snip & Sketch Tool. Follow these instructions to open the Snipping Tool and get started:
- Press Windows logo key+Shift+S to open the Snipping Tool directly.
- After entering the keyboard shortcut, you’ll see a box at the top of your computer.
- Choose between the following screenshot options: (from left to right) rectangular selection, freehand selection, window, or full-screen capture.
- Pick the rectangular selection or use freehand selection to highlight a designated screenshot area for an active window or your full screen.
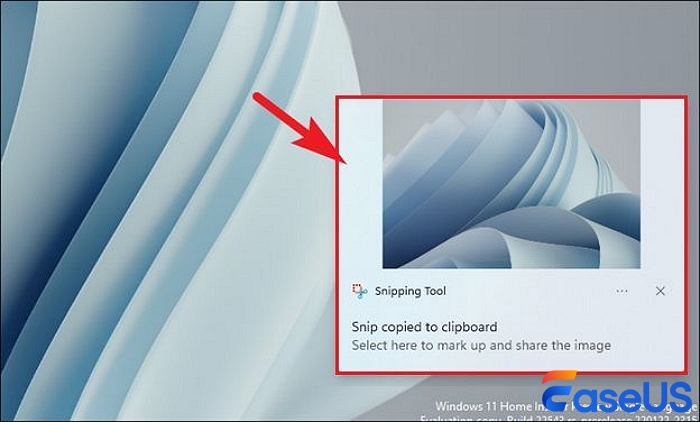
- Look for a thumbnail image of your selection at the lower-right-hand corner of your screen after capturing your screenshot.
- The Snipping Tool copies your screenshot directly to your clipboard, so you can paste (CTRL+V) your image into another app if needed.
How do I edit with the Snipping Tool?
Personalize your screenshot with the Snipping Tool’s user-friendly interface. Simply open the thumbnail at the bottom of your screen and select from the variety of tools available. Highlight, crop, color, and write on your screenshot using various shapes and fonts. If you’re working with a touchscreen, draw on your screenshot directly using your finger or a stylus. When you’re done, you can:
- Save your screenshot and any edits by selecting the floppy disk icon.
- Send your image to friends, family, or colleagues using the share option.
- Print your image.
- Open your image in another app via the menu options.
How to take a screenshot using the Print Screen key
Take a screenshot the old-fashioned way with the Print Screen key. The Print Screen key is at the top-right corner of most keyboards, and usually says Print Screen, PrtSc, PrtScn, or PrntScrn.
How to capture your working screen
Capture a screenshot from an active window, or the window you’re currently working in, by following these steps:
- Select the window you want to screenshot.
- Press ALT+Print Screen.
- Paste (CTRL+V) into an Office program or app of your choice.

How to capture your entire screen
Follow these steps to copy the entire image on your screen:
- Position everything you want to copy to your liking.
- Press Print Screen.
- Paste (CTRL+V) into an Office program or app of your choice.
How to save your screenshot as an image file
Take these steps to save your screenshot directly to your desktop as an image file in Windows 11:
- Press Windows+Print Screen.
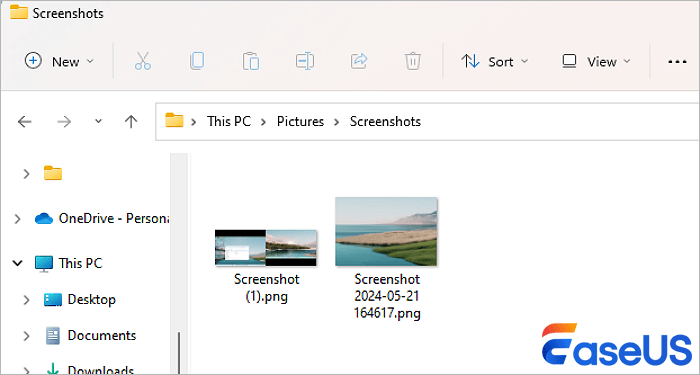
- Find your screenshot in a PNG format by navigating to Pictures > Screenshots in your directory.
Looking for the perfect Windows 11 device? Explore all our Windows computers to find the best option for you.
Куда сохраняются скриншоты на компьютере
Вопрос о том, куда сохраняются скриншоты, сделанные различными способами средствами Windows 11 и Windows 10 или в сторонних программах может показаться элементарным для большинства пользователей, но задают его очень часто.
В этой простой инструкции для начинающих подробно о том, где найти скриншоты на компьютере, сделанные различными способами.
Место сохранения скриншотов при нажатии клавиши Print Screen
В Windows доступны многие сочетания клавиш и дополнительные способы сделать скриншот. Самый часто используемый — простое нажатие клавиши Print Screen (PrtScn) на клавиатуре.
Если вы нажимаете клавишу Print Screen для создания снимка всего экрана, либо сочетание клавиш Alt + Print Screen для создания скриншота активного окна в Windows, место сохранения скриншотов может отличаться:
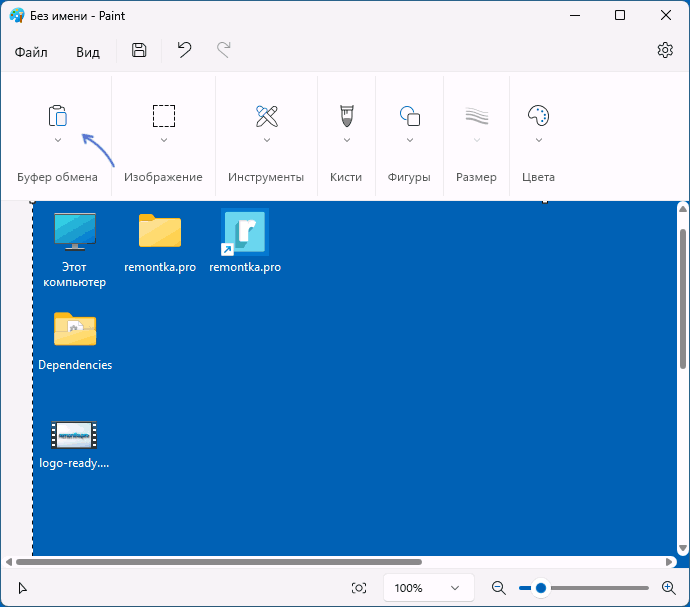
- Стандартным «расположением» скриншотов для этого метода является буфер обмена: то есть изображение хранится в оперативной памяти компьютера, и вы можете использовать опцию «Вставить» в любом графическом редакторе (в том числе Paint), некоторых редакторах документов и некоторых мессенджерах, чтобы вставить скриншот в текущий документ или сообщение.

- Последние версии Windows 11 и 10 при нажатии клавиши Print Screen по умолчанию открывают встроенное приложение «Ножницы» и для них будет актуальным место сохранения из следующего раздела инструкции. При желании вы можете сделать так, чтобы Ножницы при нажатии Print Screen не открывались, а скриншот сохранялся в буфере обмена.
Более подробно о том, какими способами можно сделать скриншоты с помощью клавиши Print Screen и её сочетаний вы можете в отдельных инструкциях:
- Как сделать скриншот в Windows 11
- Как сделать скриншот в Windows 10
Клавиши Win+Shift+S или приложение Ножницы
При использовании сочетания клавиш Win+Shift+S (в этом случае будет использовано приложение «Ножницы») для создания снимка экрана или приложения «Ножницы», запущенного вручную, скриншот автоматически сохраняется в папку текущего пользователя
C:\Пользователи\Имя_пользователя\Изображения\Снимки экрана
которую вы можете найти в Проводнике, просто зайдя в папку «Изображения»:
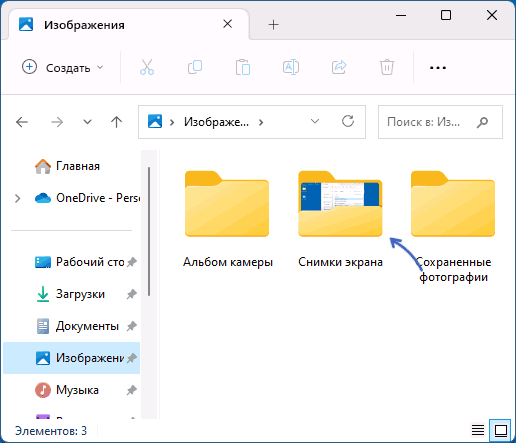
Одновременно, скриншот сохраняется и в буфере обмена, откуда его можно вставить в нужном приложении.
Несмотря на то, что в Проводнике в русскоязычной версии Windows папка отображается по-русски, реальный путь к папке (например, для доступа из командной строки) выглядит следующим образом:
C:\Users\Имя_пользователя\Pictures\Screenshots
Учитывайте: если вы меняли пути к пользовательским папкам (сделать это можно в их свойствах на вкладке «Расположение»), путь будет другим. Подробнее на эту тему: Как изменить папку скриншотов в Windows.
Сочетание клавиш Windows + Print Screen
Сочетание клавиш Windows + Print Screen автоматически сохраняет скриншот в виде файла в папке текущего пользователя
C:\Пользователи\Имя_пользователя\Изображения\Снимки экрана
Место сохранения снимка экрана аналогично предыдущему случаю, но приложение «Ножницы» не используется.
Xbox Game Bar
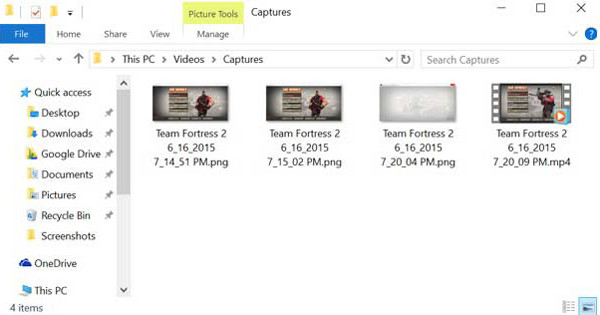
Если вы используете Xbox Game Bar для создания скриншотов в играх и других расположениях (сочетание клавиш по умолчанию — Windows + Alt + Print Screen), файл скриншота будет сохранен в пользовательскую папку
C:\Пользователи\Имя_пользователя\Видео\Запись
или, реальный путь —
C:\Users\Имя_пользователя\Videos\Captures
То есть Xbox Game Bar сохраняет и записи экрана (видео), и скриншоты (изображения) в одном расположении. Подробнее про функции записи в этом приложении в статье: Запись видео с экрана встроенными средствами Windows.
Сторонние программы
В зависимости от конкретной сторонней программы, используемой для создания скриншотов, расположение сохраняемых файлов может отличаться. Следующая информация может пригодиться, чтобы их найти:
- Помимо сохранения файла, большинство программ помещают скриншот в буфер обмена, откуда его можно вставить в нужном приложении.
- Современные программы создания скриншотов обычно выполняют сохранение либо в собственную папку в пользовательской папке «Документы», либо в папку «Изображения» (иногда — в какой-либо вложенной папке).
- Почти в любой программе для создания скриншотов место их сохранения можно настроить и в тех же настройках посмотреть текущее расположение папки скриншотов.
Сохранение скриншотов в Яндекс.Браузере
Так как значительная часть вопросов на тему «куда сохраняются скриншоты» имеет отношение к браузеру от Яндекс, вынесу информацию про присутствующий в нём инструмент для создания скриншотов отдельным разделом.

Когда вы, после создания снимка страницы или экрана средствами Яндекс.Браузере, нажимаете кнопку «Сохранить», скриншот сохраняется в виде файла PNG в вашу пользовательскую папку «Загрузки»:
C:\Пользователи\Имя_пользователя\Загрузки
или, что то же самое
C:\Users\Имя_пользователя\Downloads

Одновременно, снимок экрана помещается в буфер обмена.
Если вы так и не нашли, куда сохранились сделанные вами скриншоты, можно использовать поиск на компьютере по типу файла (быстрее всего — в поиске Everything) или поиск по дате создания файла, чтобы найти все файлы, которые были созданы в то время, когда вы делали скриншот и определить их расположение.
Are you concerned about the location of your Windows 11 screenshots? In addition to a fast keyboard shortcut for a rapid photo, the system provides several easy options to take a screenshot. Depending on which technique you select, a screenshot’s stored location will change.
It’s crucial to remember that the place in which your screenshots are stored will change based on the technique you choose. Let’s examine the storage places where screenshots are saved on Windows 11 utilizing various native approaches that will assist you in keeping track of your collected snapshots.
Where Are Screenshots Saved Windows 11 | PrtScrn Screenshots
The «screenshots» directory on your computer is where you may easily keep snapshots that you take by hitting the Prt sc key or Windows + Prt sc keys. The following easy procedures can help you find your captured screenshots in Windows 11:
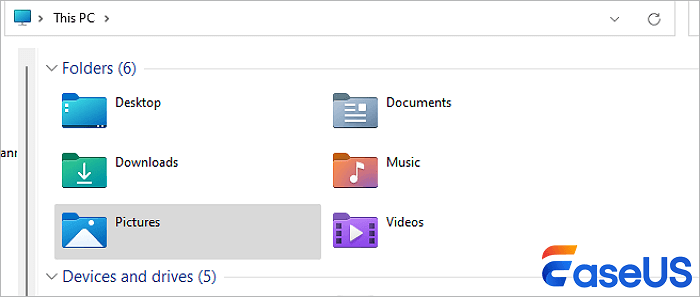
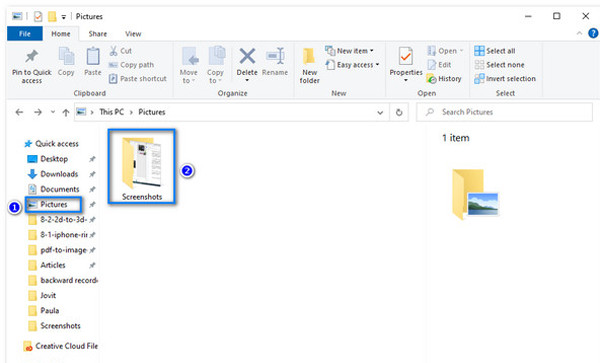
Step 1. You need to double-click on the «This PC» symbol on your Windows 11 PC to launch «File Explorer.» On the other hand, you may hit the «Windows + E» keys together.
Step 2. Select the «Pictures» folder beneath the «Folder» section on the «File Explorer» window to move next. If the Pictures folder is missing in Windows 11, you may need to locate it with the shell: My Pictures command.
Step 3. Spot and double-click on the «Screenshots» folder on the next screen to proceed.
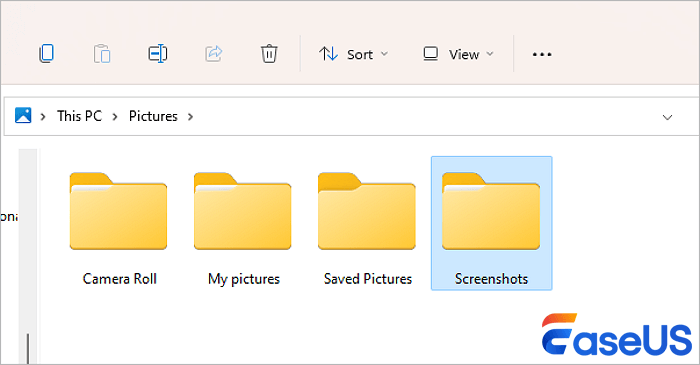
Step 4. Here, you will notice every screenshot you captured using the «Prt sc / Windows + PrtScr» keyboard shortcut.
If you like the steps mentioned above, kindly share the information with your friends on social media. If the screenshots are deleted by accident, you should apply EaseUS Data Recovery Wizard to restore the screenshots immediately.
How to Find Screenshots in Windows 11 | Windows Snip Tool
When screenshots are captured by another original method on Windows 11, they are saved directly on disk. If you use the snipping tool, the screenshots are copied to your clipboard, which can be directly inserted into a space that lets you insert pictures or pasted on Paint.
Capturing screenshots using the Windows Snipping Tool is relatively effortless. Therefore, below are the best ways to click a screenshot and the method of using it once it’s available on your clipboard. Go through the steps below to find screenshots in Windows 11:
Step 1. Press the «Windows + Shift + S» keys to bring up the snipping tool. Once it appears, your screen will dim a bit, and you will notice the «Snipping Tool» bar at the top.
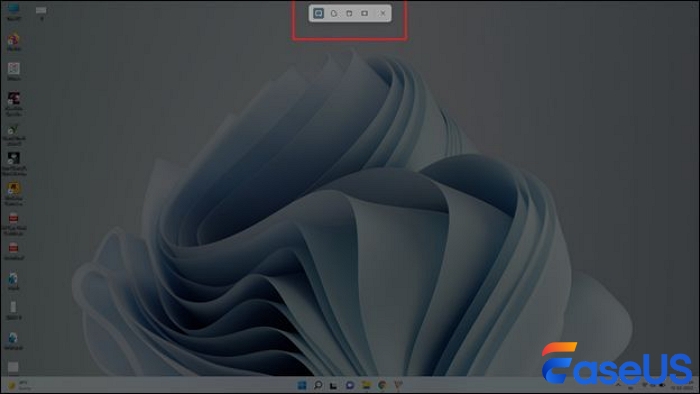
Step 2. You may now hit the buttons shown below to click a rectangular screenshot, a screenshot of a specific window, a free-form one, or a full-screen screenshot of the display.
Step 3. While using a square or free structure and the mode chosen from the toolbar, you will need to click and hold the left mouse button and drag the cursor throughout the display to select the portion you want to take a screenshot of. Once the selected region is covered, release the mouse button to capture the screenshot.
Step 4. Once you have captured the screenshot using your chosen option, you will notice a notification at the bottom right portion of the screen with the thumbnail of the screenshot showing it has been copied to the clipboard. You may now hit the notification tile to access the screenshot in a Snipping Tool window.
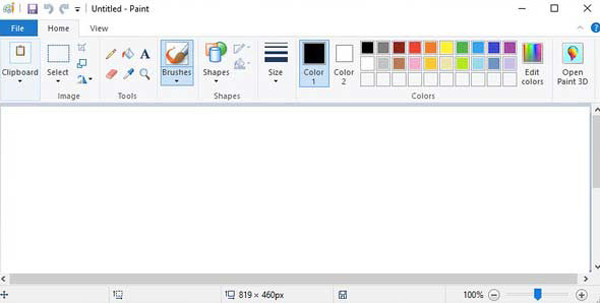
Step 5. You may now access the «Paint» application by looking for it from the «Start» option on your Windows PC and paste the screenshot by hitting the «Ctrl + V» keys together.
Step 6. You may also insert the screenshot in a chatbox, document, or in any other location upholding the insertion of an image by hitting the «Ctrl + V» keys
Do you find these steps useful? If so, kindly share the information with your friends on social media.
Where Are Screenshots Saved Windows 11 | Xbox Game Bar
Like the Prt Sc shortcut for taking screenshots, the Xbox game bar application saves the SSs on your secondary storage option. Nevertheless, the directory for the stored SS is distinct because both applications are different.
However, it might be helpful to get a quick refresher regarding how to use the Xbox Game Bar application to take screenshots in order to improve your memory. Go through the steps below to save the screenshots:
Step 1. Hit the «Windows + G» keys together to let the PC bring up the Game bar.
Step 2. Detect the «Capture» window on your screen, and hit the «Camera» symbol on the overlay window to capture a screenshot. On the other hand, you may also hit the «Windows + Alt + G» together to take a full-screen screenshot quickly.
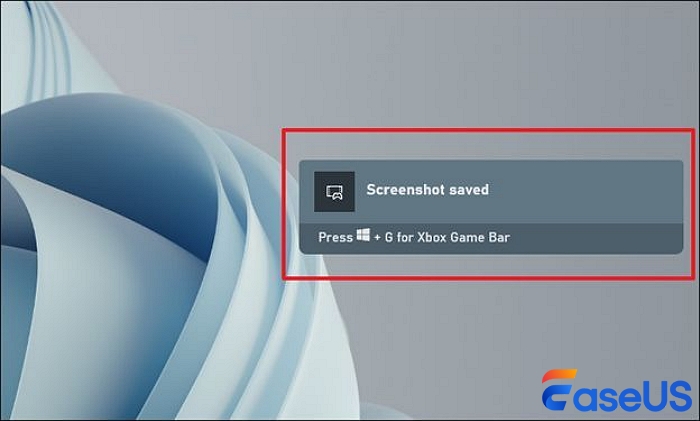
Step 3. A notification bar will pop up from the right edge of the screen once you capture a screenshot to inform you of the same.
Step 4. You need to double-click on the «This PC» symbol present on your desktop to launch File Explorer. On the other hand, you may hit the «Windows + E» keys to access it.
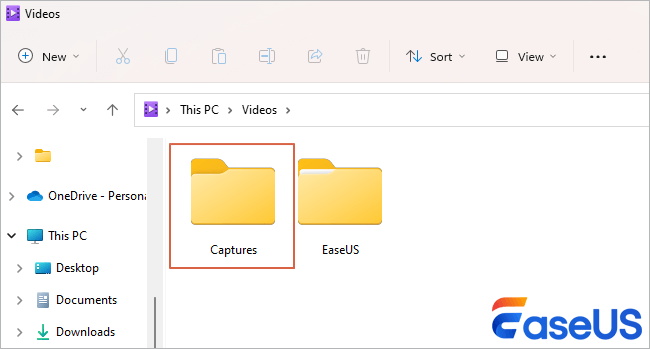
Step 5. From the Explorer window, you need to find and double-click on the «Videos» folder to proceed.
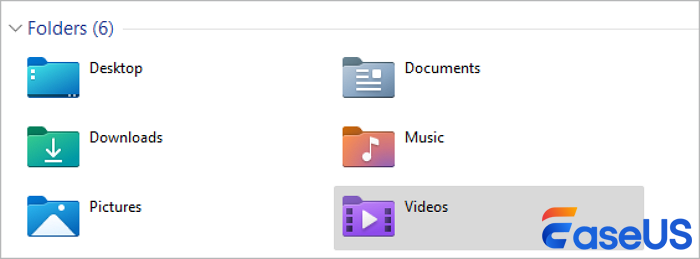
Step 6. Spot and double-click on the «Captures» folder to continue.
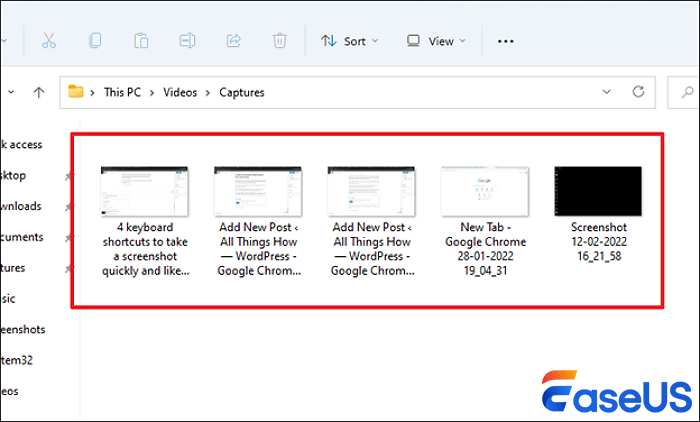
Step 7. You may now see the collections of screenshots you captured using the Xbox Game Bar application on your device.
Find Screenshots in Windows 11 with Photo Recovery Software
Have you lost one of the most vital screenshots in Windows 11? If yes, you can recover deleted screenshots in Windows with professional recovery software.
EaseUS Data Recovery Wizard is a leading tool fully devoted to retrieving files that you thought were misplaced to the most inaccessible depths of your PC.
Therefore, it’s crucial to remember that the less time that passes between the file deletion and the time you try to restore it, the higher your chances of success in recovering deleted photos.
It can be installed on your Windows 11 PC, and it helps recover the deleted screenshots, along with helping scan both existing and deleted screenshots! The main features of this recovery software are the following:
- ✅Retrieve deleted screenshots from SSD, HDD, Recycle Bin, SD card, and USB.
- ✅Restore misplaced data because of deleting, formatting, virus infestation, and OS crash.
- ✅Restore different types of screenshots, including JPG, JPEG, PNG, GIF, CR2, CR3, etc.
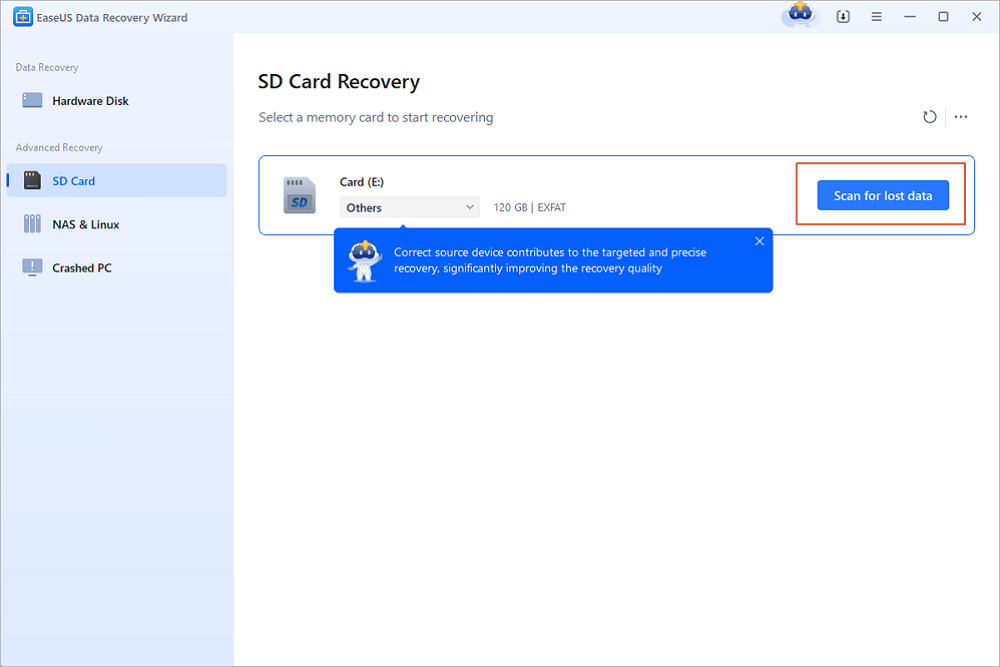
Step 1. Open EaseUS Data Recovery Wizard. Find your SD card, camera, or hard drive partition where you deleted or lost pictures, then click «Scan for Lost Data».
Step 2. After the scanning finishes, choose «Pictures» in the left panel to quickly filter photos.
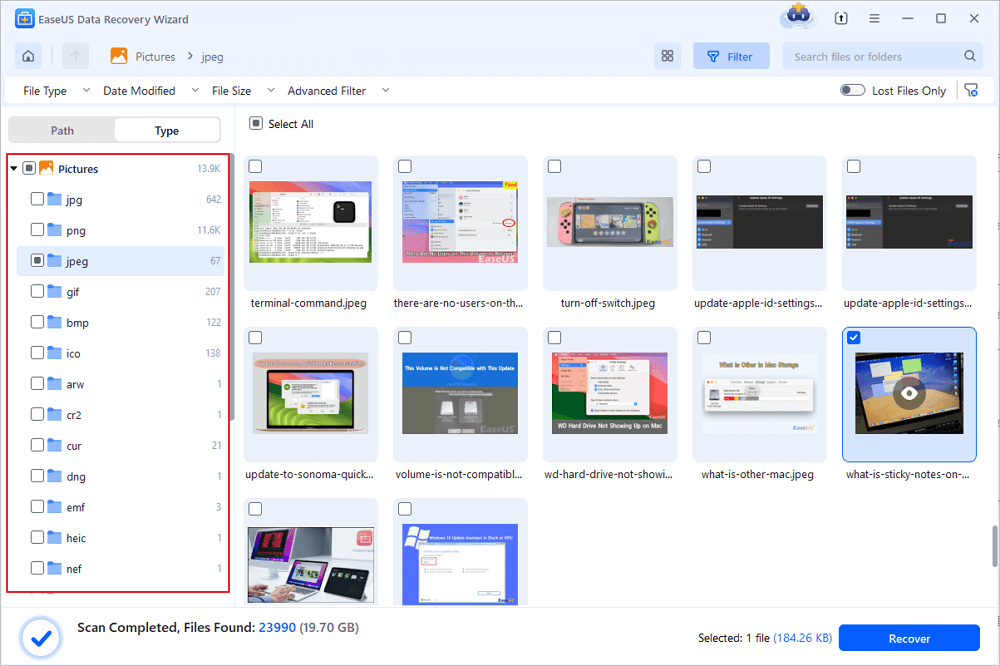
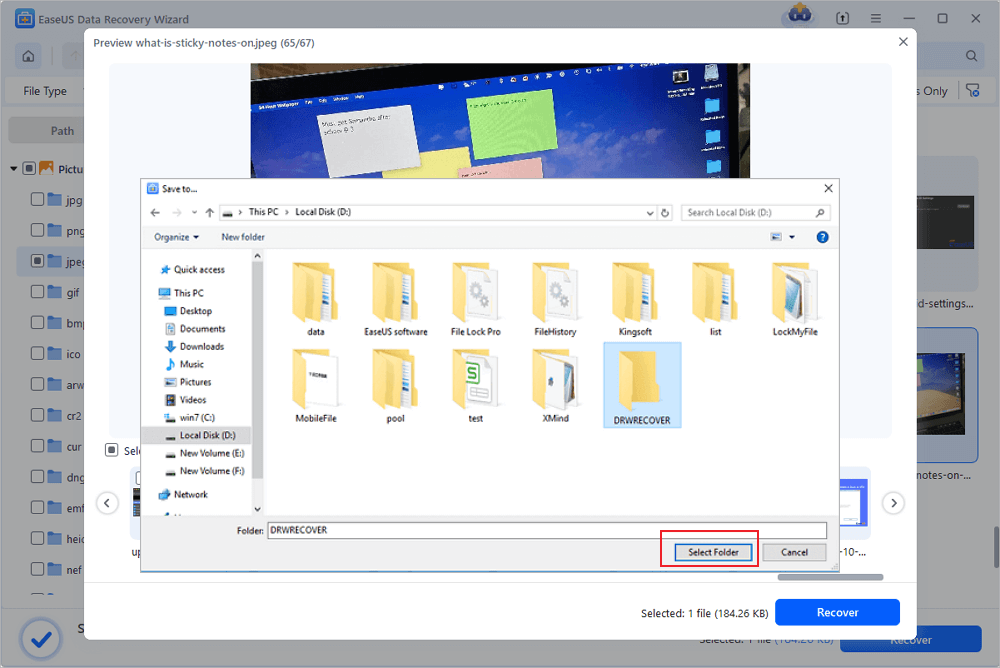
Step 3. You can preview the pictures you want to recover. Then, click «Recover» and choose another location to save the recovered data. The save location can either be your local drive or cloud storage like OneDrive, Google Drive ot Dropbox.
Download this professional data retrieval software now! If you like the information about this tool, please let the word out by sharing this with your friends on social media.
Summary
These are the top 3 locations where the screenshots remain saved in your Windows 11 PC. Go through each step carefully to find the locations. If the screenshots have been lost, you may recover them from the EaseUS Data Recovery Wizard.
Screenshot Save Location in Windows 11 FAQs
Consider the below-mentioned FAQs to understand the topic better:
1. Where are screenshots saved in Windows 11?
While taking a screenshot in Windows 11 employing the keyboard shortcut «Windows + Prt sc,» the captured image is saved as a PNG file in the Pictures > Screenshots folder. This is where you may locate it: C:\Users\[User Name]\Pictures\Screenshots.
2. How do I change where screenshots are stored in Windows 11?
These are the major steps to change the default directory for storing screenshots in Windows 11:
- Open «File Explorer.»
- Select «Pictures» from the Home page.
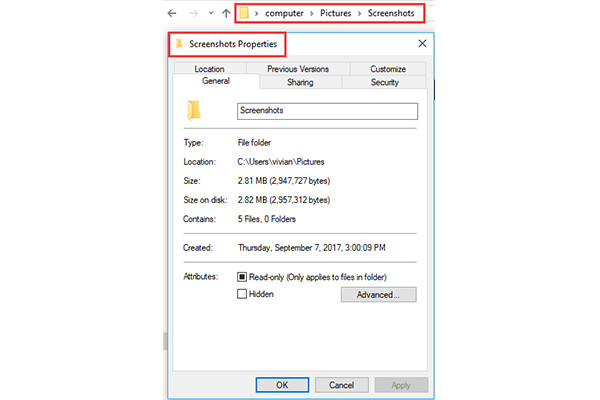
- The screenshots folder should be right-clicked on.
- Select «Properties.»
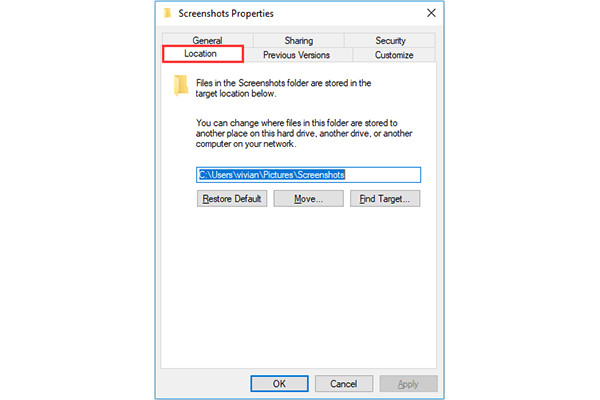
- Hit the «Location» tab.
- Select «Move to browse» for a fresh screenshot location and opt for the folder you desire.
3. Can I restore missing screenshots in Windows 11?
All you need to do is opt for «Properties»> Navigate to the «Location» tab > Select «Restore Default.» Now, Windows 11 will fill in the default route for the screenshots folder automatically.
Различные инструменты создания снимков экрана имеют разные места для их сохранения в Windows, и вот три обычных места:
- 1. PrtSn+Win: Перейдите в «Этот компьютер» > «Изображения» > «Снимки экрана».
- 2. PrtSn: скриншоты будут сохранены в буфере обмена, и вы сможете скопировать их в «Paint» или других инструментах.
- 3. Игровая панель: Найдите скриншоты в разделе «Этот компьютер» > «Видео» > «Клипы».
Куда идут скриншоты в Windows 11/10/8/7? Использование встроенных инструментов для создания снимков экрана очень помогло отслеживать ваши действия, чтобы делиться ими с друзьями или делать заметки. Это очень просто, и скриншоты будут сохранены автоматически. Но где найти скриншоты на вашей Windows? В этой статье представлено полное руководство по расположению снимков экрана в Windows. Более того, вы можете научиться менять локацию по своему усмотрению.
Куда хранятся снимки экрана Windows в Windows 11/10/8/7
Обычно в Windows есть три способа сделать снимок экрана, и расположение снимков экрана Windows различно. Итак, для этого прочитайте следующие способы делать снимки экрана и узнайте, куда попадают снимки экрана в Windows 11/10/8/7.
1. Папка по умолчанию — Скриншоты
Обычно при нажатии кнопки «PrtScnКлавиши «» и «Windows» одновременно, все ваши снимки экрана по умолчанию будут сохраняться в папке «Снимки экрана». Чтобы найти папку, вы можете открыть папку «Пользователи диска C». Щелкните свое имя пользователя и затем найдите папку «Изображения». Затем откройте папку «Скриншоты». Здесь хранятся все ваши скриншоты.
Вы также можете найти снимки экрана, сохраненные в вашей Windows, в приложении «Фотографии», просто открыв приложение «Альбом», чтобы легко получить к ним доступ.
2. Буфер обмена для сохранения скриншотов в любом месте
Нажатие кнопки «PrtSc» на клавиатуре — это способ создания снимков экрана по умолчанию в Windows 10/8/7. И скриншот попадет в буфер обмена, затем вам придется вставить его в программу редактирования изображений, например «Paint», прежде чем сохранить. После этого вы можете экспортировать и сохранять снимки экрана в любом месте Windows по своему усмотрению.
3. Расположение скриншотов игровой панели в Windows — Capture
Игровая панель в Windows 10 — еще один удобный способ сделать снимок экрана в Windows. Чтобы получить к нему доступ, просто нажмите клавиши «Windows + G» и нажмите кнопку «Захватить». Затем скриншоты автоматически сохраняются. Куда эти скриншоты попадают в Windows? Перейдите в «Этот компьютер» и нажмите панель «Видео», а затем откройте папку «Захваты», чтобы просмотреть все снимки экрана.
Как найти и изменить расположение снимков экрана Windows
Время, необходимое для поиска снимков экрана, можно сократить, если изменить папку по умолчанию, в которую попадают снимки экрана. Кроме того, поскольку снимки экрана сохраняются в разных местах в зависимости от метода, который вы используете для создания снимка экрана, выполните следующие шаги, чтобы изменить расположение снимков экрана Windows и управлять им.
Шаг 1.Во-первых, вам нужно создать новую папку для сохранения снимков экрана в Windows 11/10/8/7. Затем вы можете переименовать его и переместить в нужное место по своему усмотрению.
Шаг 2.После этого вы должны найти папку «Скриншоты» по умолчанию для сохранения снимков экрана Windows в папке «Изображения («C:/Users/your_name/Pictures/Screenshots»)». Щелкните по нему правой кнопкой мыши и нажмите кнопку «Свойства».
Шаг 3.Перейдите на вкладку «Местоположение» и нажмите кнопку «Переместить», чтобы изменить место расположения ваших снимков экрана. Просто сохраните изменения, нажав кнопку «Выбрать папку».
Шаг 4.Вернитесь в Свойства и вы увидите, что место для сохранения снимков экрана в Windows изменено, нажмите кнопку «Применить» или «ОК». Нажмите кнопку «Да», чтобы переместить и сохранить все ваши файлы в новую папку.

Примечание
Примечание: Перемещение может занять некоторое время в зависимости от количества снимков экрана из старого места. После завершения перемещения старая папка снимков экрана исчезнет, а новая папка для снимков экрана станет местом по умолчанию для снимков экрана Windows. Если на вашем компьютере есть другие учетные записи, вам необходимо повторить процедуру для других учетных записей, если вы хотите переместить свои файлы и управлять ими.
Лучшая альтернатива для создания снимков экрана Windows и управления файлами
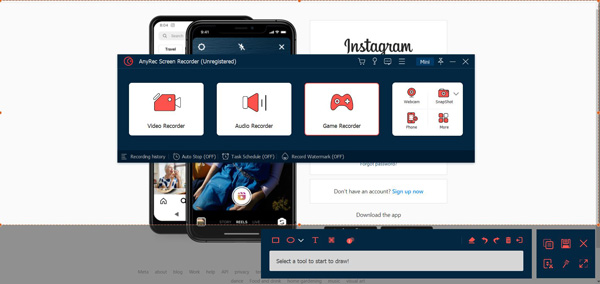
Не нужно искать, куда помещаются снимки экрана в Windows, просто положитесь на лучшую альтернативу — AnyRec Screen Recorder легко делать снимки экрана и управлять ими. Это мощный инструмент, имеющий множество встроенных функций, которые помогут вам быстро сделать снимок экрана с нужной областью, добавить аннотации к снимкам экрана и многое другое. Вы также можете изменить выходной формат на JPG, PNG и даже GIF.

AnyRec Screen Recorder
Сделайте снимок экрана с полноэкранным режимом или выбранными областями.
Имейте набор инструментов для рисования, чтобы редактировать снимки экрана с помощью фигур, линий и т. д.
Позволяет вам изменить папку расположения перед сохранением снимков экрана.
Индивидуальные горячие клавиши для легкого захвата скриншотов в любое время.
Шаг 1.После загрузки нажмите кнопку «Снимок» в главном интерфейсе. Вы можете настроить способ захвата экрана, включая щелчок по окну или перемещение курсора по экрану.
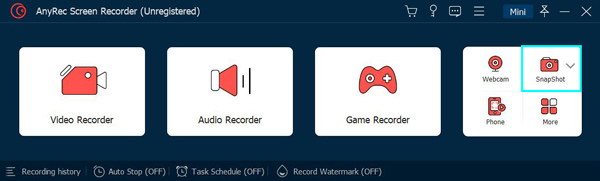
Шаг 2.Если вы переместите курсор, просто щелкните левой кнопкой мыши, чтобы подтвердить снимок экрана. После того, как вы сделали снимок экрана, отредактируйте его с помощью меню виджетов, в котором есть инструменты рисования. Изменение цвета и добавление форм и линий доступны здесь.
Шаг 3.Затем нажмите кнопку «Сохранить» и выберите нужную папку для хранения снимков экрана в Windows. Таким образом, вы сможете каждый раз менять расположение снимков экрана Windows.

Примечание
AnyRec Screen Recorder будет обрезать скриншоты в Windows и сохраните их в выбранной папке в качестве местоположения по умолчанию. Однако вы можете изменить его всякий раз, когда сохраняете другой снимок экрана.
Часто задаваемые вопросы о расположении снимков экрана Windows
-
1. Что делать, если ключ PrtScn не работает?
Во-первых, вам необходимо остановить OneDrive и другие программы, поскольку они могут захватить управление PrtScn, не спрашивая вашего разрешения. Или, если нет возможности сохранить клавишу PrtScn, вы можете нажать «Windows + G» в качестве альтернативы для создания снимков экрана.
-
2. Могу ли я изменить папку скриншотов по умолчанию в Windows?
Конечно да, вы можете сделать это, открыв приложение Paint, и вы сможете сохранить свой снимок экрана в любом месте вашего локального файла. В противном случае вы также можете изменить местоположение по умолчанию, щелкнув правой кнопкой мыши и перейдя на вкладку «Свойства и местоположение». Изменение способа сохранения файла не ограничено.
-
3. Как делать скриншоты через Game Bar?
Нажмите кнопки Windows + G на клавиатуре, и откроется игровая панель. Нажмите кнопку «Захват», чтобы легко захватить весь экран. Расположение снимков экрана Windows можно найти в папке «Захваты».
Заключение
Вы никогда не ожидали, что даже найти снимок экрана и управлять файлами окажется непростой задачей. Таким образом, если вы не можете найти местоположение снимка экрана в Windows 10/8/7, эта статья помогла вам найти, где найти снимки экрана Windows, и разобраться в ваших снимках экрана. В этой статье также представлено лучшее программное обеспечение AnyRec Screen Recorder сделать и сохранить скриншоты в нужную папку в Windows (а также Планшеты Surface Pro). У вас есть вопросы или предложения? Свяжитесь с нами сейчас!
Связанная статья
Where Are Screenshots Saved on Windows 10 and Windows 11?
Screenshots are one of the most fundamental and popular forms of capturing moments on screens, be it for work, tutorials, gaming experiences, or capturing important visual information. Both Windows 10 and Windows 11 offer a variety of ways to take screenshots, each providing distinct functionalities and saving mechanisms. Understanding where these screenshots are saved can significantly enhance your workflow and help keep your digital workspace organized. In this deep dive, we will explore the different methods for capturing screenshots, as well as where each method saves the captured images.
Capturing Screenshots on Windows 10 and Windows 11
Before diving into the specifics of where screenshots are saved, it’s important to understand the various methods available for taking screenshots in both Windows 10 and Windows 11.
1. Using Print Screen (PrtScn) Button
The most common way to take a screenshot is by using the Print Screen button on your keyboard. It works like this:
- Full-Screen Screenshot: Press the
PrtScnbutton. This captures the entire screen and copies it to your clipboard. - Active Window Screenshot: Press
Alt + PrtScn. This captures only the active window. - Directly Save Full-Screen Screenshot: Press
Windows + PrtScn. This captures the entire screen and saves it directly as a file.
2. Using Snipping Tool
The Snipping Tool is an in-built application in Windows that allows for more control over your screenshots. You can select the area you want to capture and save it afterward. Here’s how to use it:
- Open the Snipping Tool from the Start menu.
- Click on «New» to initiate a snip.
- You can choose different modes: Free-form, Rectangular, Window, or Full-screen.
- Once you’ve captured your desired snip, you can save it directly to your device.
3. Using Snip & Sketch
In Windows 10 and 11, Snip & Sketch offers a more refined way of taking screenshots with added editing features. To use:
- Press
Windows + Shift + S. This brings up a snipping toolbar. - Select the area you want to capture.
- The screenshot goes to your clipboard, and a notification appears, allowing you to open it within Snip & Sketch for editing.
4. Using Windows Game Bar
For those interested in gaming, the Windows Game Bar offers an effective way to take screenshots.
- Start the Game Bar by pressing
Windows + G. - Click on the camera icon to take a screenshot, or use the shortcut
Windows + Alt + PrtScn.
Where Are Screenshots Saved?
Now that we’ve covered how to take screenshots, let’s dive into where these screenshots are saved in both Windows 10 and Windows 11.
1. Screenshots Taken with PrtScn Button
-
Using
PrtScnorAlt + PrtScn: These combinations do not save the screenshot as a file. Instead, the images are copied to your clipboard. To save them, you’ll need to paste them into an image editing program like Paint or Word and then save them manually. -
Using
Windows + PrtScn: When you use this combination, the screenshot is automatically saved in the Pictures folder. More specifically:- Navigate to this path:
C:Users[Your Username]PicturesScreenshots - Every time you use this method, a new file will be created, typically named «Screenshot (X).png,» where X is an incrementing number starting from 1.
- Navigate to this path:
2. Screenshots Taken with Snipping Tool
When using the Snipping Tool:
- Once you take a screenshot, you must manually save the snip.
- You can click on
File > Save As, and then choose the location where you wish to save the screenshot, including your desktop or any folder within your file system.
3. Screenshots Taken with Snip & Sketch
Similar to the Snipping Tool, Snip & Sketch requires that you save the screenshot manually:
- Click on the notification that appears after your screenshot is taken.
- Once in the Snip & Sketch window, click on the disk icon or
File > Save Asto choose the destination folder.
4. Screenshots Taken with Windows Game Bar
Screenshots taken via the Windows Game Bar are saved automatically:
- You can find them in the Videos folder, specifically in a sub-folder titled Captures.
- Navigate to:
C:Users[Your Username]VideosCaptures
- Navigate to:
- The files saved here will be in PNG format.
Managing Your Screenshots
With different methods of taking screenshots saved in various locations, it’s essential to maintain an organized system to manage these files effectively. Here are a few tips to streamline your screenshot management:
-
Create a Dedicated Folder: Consider creating a dedicated folder to store all your screenshots. You can periodically move the files from their default locations into this new folder.
-
Name Your Files: After saving screenshots, rename them to reflect their contents. This makes them easier to find later.
-
Regularly Organize and Delete: Set a routine to manage your screenshot folder. Periodically delete unneeded images to free up space and keep only the most important screenshots.
Additional Tips for Effective Screenshot Management
In addition to managing where your screenshots are saved, there are various tools and applications available that can enhance your screenshot workflow.
1. Utilize File Organization Tools
Consider using apps like OneDrive or Google Drive for cloud backups. They not only save space but also keep your files secure and accessible across different devices.
2. Use Third-party Applications
If you find the built-in tools inadequate, there are various third-party applications available, such as Snagit and Greenshot. These tools often provide advanced features such as:
- Direct uploading to cloud storage
- Advanced editing capabilities
- Screenshot management systems
3. Shortcuts and Automation
You may want to create keyboard shortcuts or utilize automation tools that can automatically rename, compress, or upload screenshots to your preferred location. Software such as AutoHotkey allows for creating custom scripts to handle repetitive tasks.
Conclusion
Understanding where screenshots are saved on Windows 10 and Windows 11, along with taking advantage of the various capturing methods available, can significantly enhance your productivity. Whether you’re taking full-screen shots, active window captures, or using in-built snipping tools, knowing exactly where to find and how to manage these screenshots is crucial for a seamless workflow.
Investing a bit of time in organization, exploration of tools, and automation can lead to a more efficient experience when dealing with screenshots. Ultimately, it’s about finding what works best for your personal workflow and making sure that important visual information is readily available when needed. So the next time you need to capture a moment on your screen, you’ll be well-equipped to handle the task efficiently!