
Like its predecessors, Windows 11 and Windows 10 also ship with a bunch of screensavers. 3D Text, Blank, Bubbles, Mystify, Photos, and Ribbons are the screensavers offered with Windows 10.
All screensavers offered with Windows 10/10 were part of Windows 7 and Windows 8/8.1 as well. That is, Windows 11/10 doesn’t come with new screensavers. Besides that, screensavers are turned off by default in Windows 11/10, and accessing screensaver settings is not a straight-forward task as well.

If you have installed one or more third-party screensavers in Windows 10, you might want to back up screensaver files while reinstalling Windows 11/10.
NOTE: These directions can also be used on Windows 7 and Windows 8/8.1 PCs.
Step 1: Open the drive where Windows 11/10 is installed and then navigate to the Windows > System32 folder. That is, for instance, if Windows 11/10 is installed on the “C” drive, then you need to navigate to the C:\Windows\System32 folder.
Step 2: Here, you will find Bubbles.scr, Mystify.scr, Ribbons.scr, ssText3d.scr (3D Text screensaver), and PhotoScreensaver.scr files. You can also use the File Explorer search functionality to find screensaver files quickly.

Most of the third-party screensavers show up in the System32 folder. If you cannot find a third-party or OEM screensaver, search in the Program Files and Program Files (x86) folders by using the screensaver name as the keyword.
Note that you need to configure the File Explorer to show file extensions to view the screensaver file extension. To do that, click the View tab and then select the File name extensions option.
You can double-click on any of them (.scr files) to launch that screensaver. You can also create a desktop shortcut for a screensaver to quickly start a screensaver. To do that, right-click on a screensaver file, click the Send to option, and then click the Desktop (create shortcut) option.
To change screensaver settings, refer to our how to change screensaver settings in Windows 10 guide.
После того, как несколько человек в комментариях к разным статьям на сайте написали о том, что делают скриншоты понравившихся обоев рабочего стола из тех, что доступны в Windows 10 по умолчанию, а также посетовали на то, что нельзя сделать скриншот экрана блокировки, решено было рассказать, где хранятся обои рабочего стола по умолчанию, обои экрана блокировки и текущие обои в Windows 10.
Все файлы фотографий и изображений, использующиеся в качестве обоев Windows 10, всегда можно достать из соответствующих папок на системном диске вашего компьютера или ноутбука. Таких папок несколько и именно о том, где их найти и пойдет речь в этой короткой инструкции.
Папка с обоями рабочего стола по умолчанию и с текущими обоями рабочего стола
В Windows 10 присутствует сразу несколько различных папок, в которых находятся фотографии и изображения, которые устанавливаются на рабочий стол как обои.
Далее — расположение этих папок (пути, начинающиеся с указания папок наподобие %LocalAppData% достаточно просто скопировать и вставить в адресную строку проводника, чтобы попасть в нужное расположение):
Где хранятся фоновые фотографии экрана блокировки
Если вас интересуют обои (фоновые изображения) экрана блокировки Windows 10, вы также легко их можете найти. Стандартные обои, присутствующие сразу после установки, расположены в папке C:\Windows\Web\Screen\.
Однако, мало кого интересуют обои по умолчанию, чаще бывают интересны те, что ОС загружает из Интернета. Их вы можете обнаружить в папке
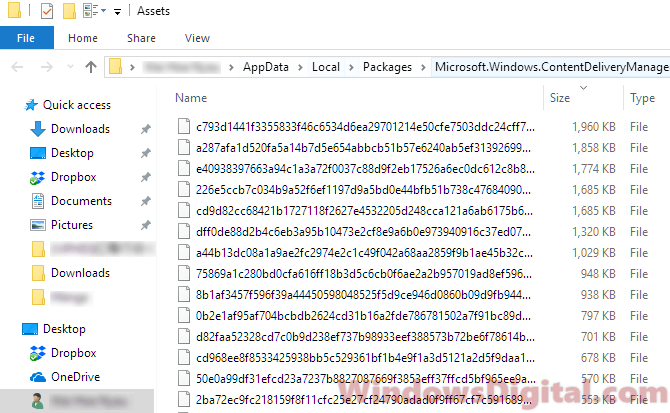
%LocalAppData%\Packages\Microsoft.Windows.ContentDeliveryManager_cw5n1h2txyewy\LocalState\Assets

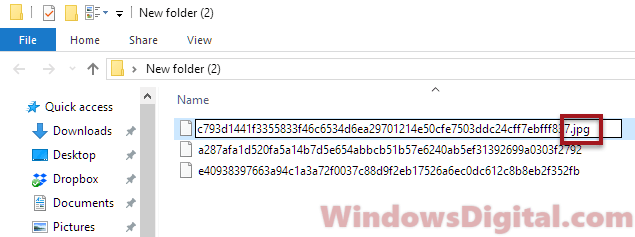
Просто скопируйте и введите указанный путь в адресную строку проводника, откроется папка, содержащая множество файлов без расширения. Вы можете скопировать их куда-либо и установить для этих файлов расширение .jpg, либо просто открыть с помощью какого-либо графического редактора или программы для просмотра фото.
В указанной папке обычно хранится множество файлов обоев, но, одновременно, там есть и другие, ненужные изображения, не являющиеся фонами экрана блокировки. Если вы хотите добавить расширение .jpg сразу для всех из них и скопировать в папку «Изображения\LockScreen», можно создать и использовать следующий bat файл (см. Как создать bat-файл):
cd /D %userprofile%\AppData\Local\Packages\Microsoft.Windows.ContentDeliveryManager_cw5n1h2txyewy\LocalState\Assets
mkdir "%userprofile%\Pictures\LockScreen\" 1>nul 2>&1
copy * "%userprofile%\Pictures\LockScreen\*.jpg"
The Windows lock screen is the first thing you see when you turn on your PC or wake it up from sleep mode. It displays stunning images from around the world and useful information like the date, time, and notifications. If you want to use these images as wallpaper or admire them in all their glory, this guide will show you how to find the Windows 10 or 11 lock screen images folder location and the actual location of the images in the world.
Also see: How to Find Current Wallpaper Location in Windows 11
Finding the Windows 11 or 10 lock screen images folder location
If you want to extract or copy the lock screen images and use them somewhere else, here’s where you can find them:
- Press the Windows + R to open the Run dialog box.
- Type in the following command and press Enter:
C:\Users\yourusername\AppData\Local\Packages\Microsoft.Windows.ContentDeliveryManager_cw5n1h2txyewy\LocalState\Assets
Replace “yourusername” with your actual username in Windows 11 or 10.
- In the folder, you should see a list of files with random characters and no extensions.

- Sort the list of files by size. Copy files that are at least 500KB in size to any folder you like.
- Right-click each file and select Rename. Add .jpg extension to their names.

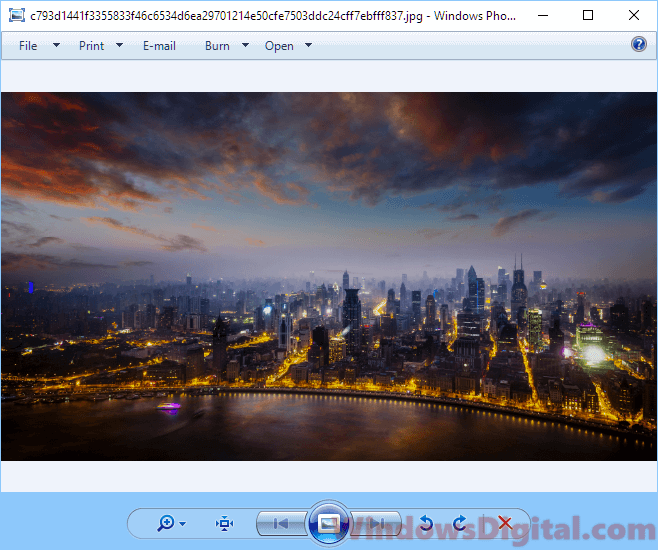
- After adding the JPG extension, you should be able to view the images in any photo app.
Note: Before being able to add any extension to any file, make sure you’ve enabled the option to view file extensions by going to File Explorer > View > Options > Change folder and search options > View > uncheck “Hide extensions for known file types“.
The Windows 10 or 11 lock screen images folder location contains only spotlight images that have already been downloaded and viewed at least once on your PC. Any new spotlight photos you see in the Windows lock screen will be added to this folder. Alternatively, you can find the Windows 10 or 11 spotlight images collection online and add them to the folder to allow them to also appear in your lock screen.
Finding the actual location of the Windows 10 or 11 lock screen images in the world
If you are astounded by the stunning photos that appear in the Windows 10 or 11 lock screen and want to find out the actual location of where these photos were taken in the world, here are a few methods to do so:
View image location info from Windows lock screen
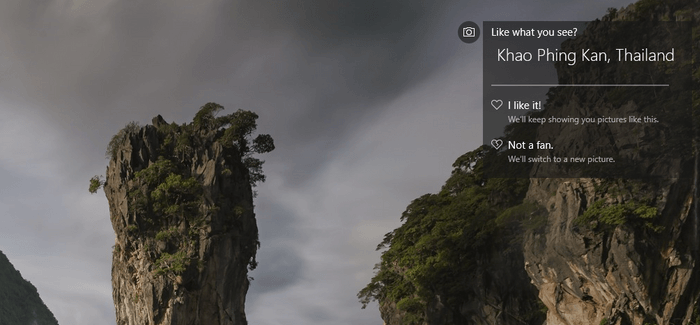
When you’re on the Windows 10 or 11 lock screen, on the top right corner of the screen, there should be actual location info of the current photo with a Like what you see title and options of either I like it or Not a fan. This feature becomes available since Windows 10 v1607 update. If you don’t see the info panel, you may want to run Windows Update to update your Windows 11 or 10.
Check the image file properties
Another method to view the actual location of the lock screen images taken is by viewing the file properties. Locate the image files and change the extension to JPG. Right-click the image you want to check the actual location of, select Properties, and then go to the Details tab. You should be able to see the actual location info about the photo under Description.
However, not all images have the location info in the description properties. Some will show an empty description in the Details tab.
Use Google Reverse Image Search
If none of the methods above work to show the location info of the image, you can try to use Google Reverse Image search. Using Google reverse image search can help to find related photos from all around the web and extract the info from relevant websites where the photo was hosted. It works most of the time. To do a reverse search, follow the steps below:

- Locate the image you want to search and add the JPG extension to the image file.
- Go to images.google.com (or see: How to Google Reverse Image Search on Windows 11).
- Upload the image.
- Click on Show matches.
- It should then show relevant info of the uploaded image in a search result.
There are also other reverse image search engines available, such as TinEye and Bing Visual Search, which you can try if Google doesn’t yield the desired results.
One last thing
Keep in mind that while these methods usually give accurate location info about lock screen images, there might be exceptions. Some images are artistically enhanced or might blend elements from different places. So, the data you get might sometimes be more about general inspiration than an exact location. Always double-check the information if you really need to know the precise spot.
-
Home
-
Partition Magic
- Where to Find the Windows 10 Wallpaper Location on Your PC
Where to Find the Windows 10 Wallpaper Location on Your PC
By Ariel | Follow |
Last Updated
There is a library of wallpaper images for Windows 10 users to put on the desktop. Some of them still don’t know where to find the Windows 10 wallpaper location. Don’t worry. MiniTool will walk you through detailed steps to find the Windows 10 default wallpaper.
As you might know, every version of Windows comes with many default wallpaper images for users. You can set these images as your background for your desktop. Although there are a variety of wallpapers that you can download from websites, still many people want to use the Windows 10 wallpaper.
Where to find Windows 10 wallpaper location? A great many people are searching for this instruction online. Now, let’s see the following guides. You can choose a method that’s suitable for you.
Method 1. Find Windows 10 Wallpaper Location in the Default Directory
If you want to use the Windows 10 default wallpaper as a background on an older version of Windows or on another computer, you need to find the actual location of these files. Windows 10 usually stores the background picture in the C:/Windows/Web folder by default. Here is a quick guide for you.
Step 1. Press the Win + E keys to open the File Explorer window.
Step 2. Navigate to the C:/Windows/Web location path and then you will find the Windows wallpaper location inside the Web folder.
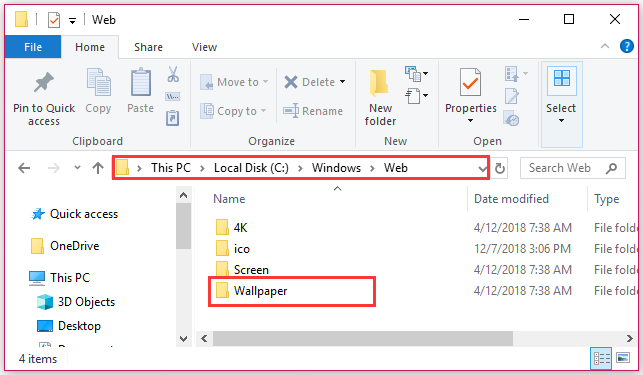
Alternatively, you can find the Windows 10 default wallpaper by typing C:/Windows/Web in the search bar and hit Enter.
Method 2. Find Windows 10 Wallpaper Location in Your Themes Folder
Some Windows 10 users want to use the Windows 10 Themes instead of the standard background pictures. Then you can find the Windows background picture location in the Themes folder.
Microsoft often releases the Windows 10 theme pictures via the Microsoft Store. These themes include your favorite game, outdoor views, etc. The themes that you downloaded are located in the local user directory if you haven’t changed it.
To find the Windows 10 themes location, please the steps below:
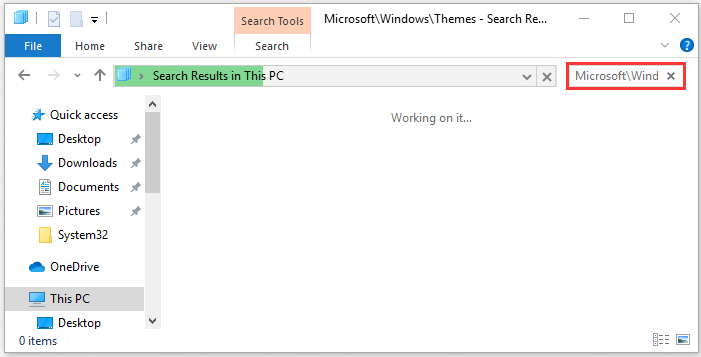
Step 1. Press the Win + E keys to open the File Explorer window.
Step 2. Type the %localappdata%/Microsoft/Windows/Themes text in the search bar and hit Enter. After a moment, the themes files or folder will be shown in the subdirectory and you can open the folders to find your desired themes.
Method 3. Find Current Windows 10 Wallpaper Location via Registry Editor
In addition to the above 2 methods, you can find the current Windows 10 wallpaper location via Registry Editor. Here’s how to do that:
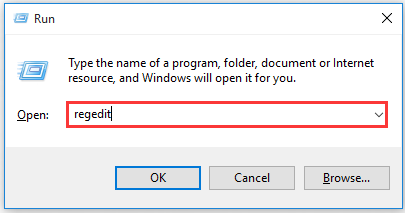
Step 1. Press the Win + R keys to open the Run dialog box, and then type regedit in the box and hit Enter.
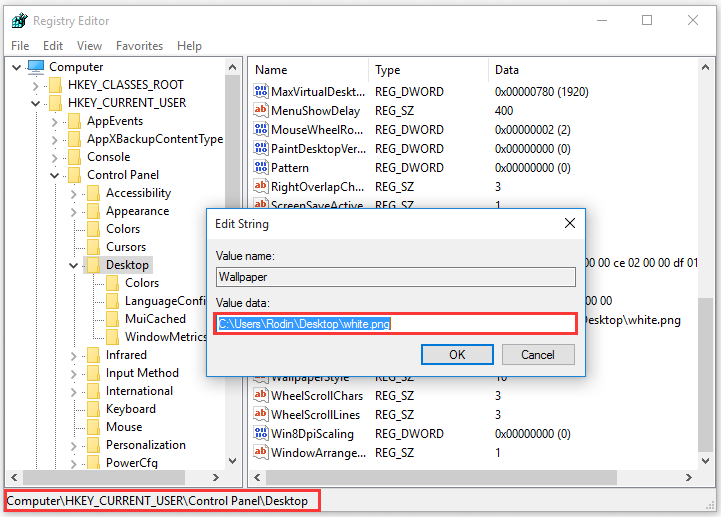
Step 2. In the Registry Editor window, navigate to the following path from the left sidebar.
HKEY_CURRENT_USERControl PanelDesktop
Tip: If you want to find the Windows background picture history, you can go to the registry key HKEY_CURRENT_USER/Software/Microsof/Windows/CurrentVersion/Explorer/Wallpapers.
Step 3. Find the value name Wallpaper and TranscodedImageCache from the right pane. Double click the 2 value key file, and then you will find the file path of your Windows wallpaper location and copy the Value data.
Step 4. Open your File Explorer, and then paste the location path that you copied in the search bar and hit Enter.
Now, you should find the current Windows background picture location via the Registry Editor.
About The Author
Position: Columnist
Ariel has been working as a highly professional computer-relevant technology editor at MiniTool for many years. She has a strong passion for researching all knowledge related to the computer’s disk, partition, and Windows OS. Up till now, she has finished thousands of articles covering a broad range of topics and helped lots of users fix various problems. She focuses on the fields of disk management, OS backup, and PDF editing and provides her readers with insightful and informative content.