
On Windows 10, the Windows Defender Firewall is a security feature that checks incoming and outgoing network traffic and allows or blocks specific traffic depending on predefined rules.
Although every installation of Windows 10 comes with the same set of default rules, you can always create new custom rules to allow or block apps from accessing the network. If you have created multiple firewall rules, and you don’t want to lose you settings after a clean installation, or you want configure other devices with the same policy, you can export and import the Windows Defender Firewall rules using the advanced settings console and Command Prompt.
In this guide, you’ll learn the steps to export the current list of firewall rules as well as the steps to import the rules to a new installation of Windows 10.
- How to export and import firewall rules using Windows Security
- How to export and import firewall rules using Command Prompt
If you want to backup all the Windows 10 firewall rules, so you can then restore to another installation, you can use the Windows Security app.
Backing up firewall rules
To export firewall rules using Windows Security, use these steps:
-
Open Windows Security.
-
Click on Firewall & network protection.
-
Click the Advanced settings option.

Windows Security firewall advanced settings option -
Right-click the Windows Defender Firewall with Advanced Security on Local Computer item and select the Export Policy option.

Windows 10 firewall export rules option -
Select a location to store the list.
-
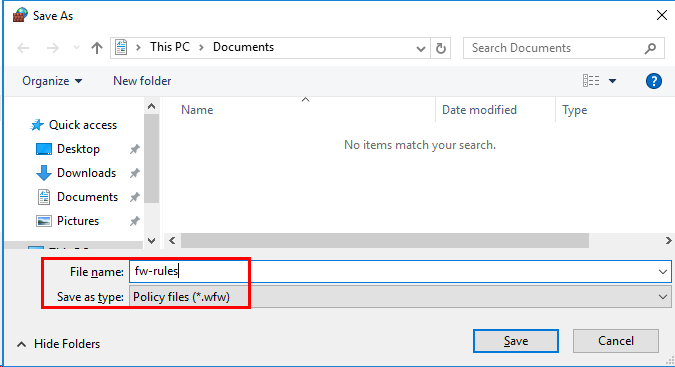
Type a descriptive name for the list – for example, firewall-rules.

Export firewall rules to wfw file -
Click the Save button.
-
Click the OK button.


Once you complete the steps, the firewall rules will export in the wfw file that you can easily import to the same or different computer.
Restoring firewall rules
To import firewall rules from an exported file, use these steps:
-
Open Windows Security.
-
Click on Firewall & network protection.
-
Click the Advanced settings option.
Windows Security firewall advanced settings option -
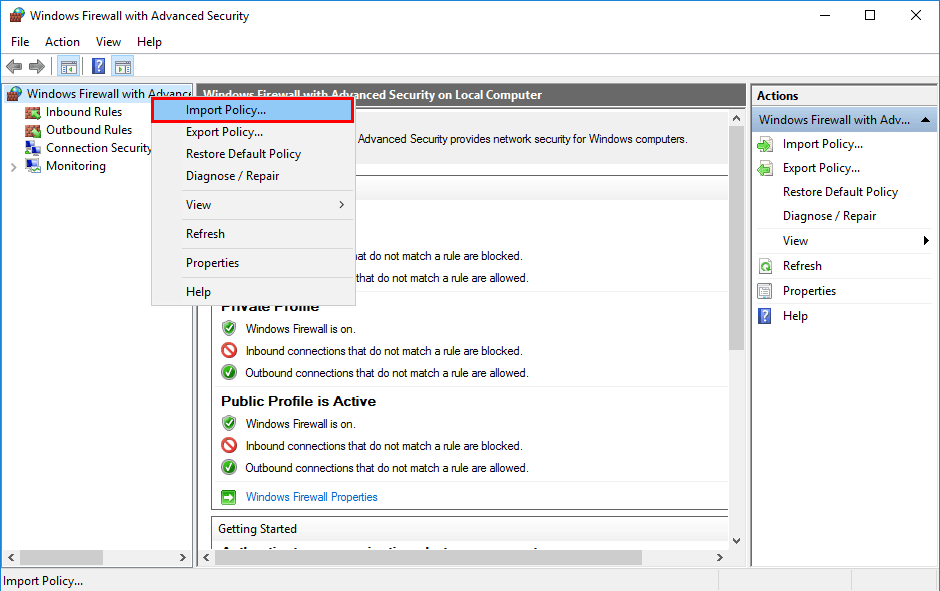
Right-click the Windows Defender Firewall with Advanced Security on Local Computer item and select the Import Policy option.
Windows 10 firewall import rules option -
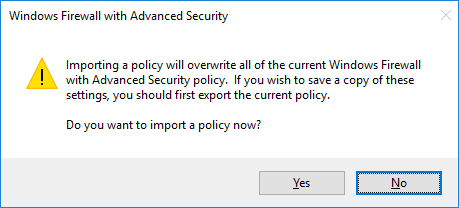
Click the Yes button to confirm that importing a policy will overwrite all the current rules.
-
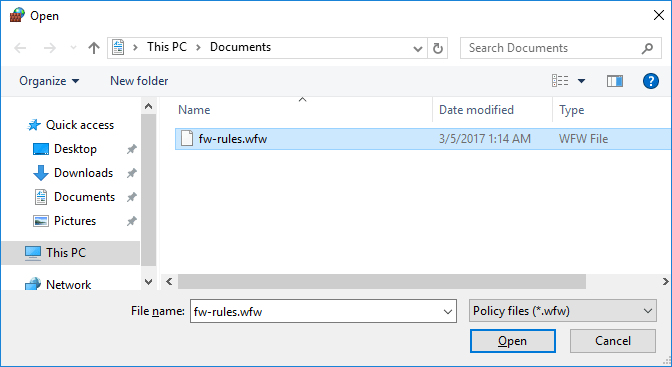
Select the .wfw file.

Import firewall rules to wfw file -
Click the Open button.
-
Click the OK button.


After you complete the steps, the policy will overwrite the current rules with the ones in the .wfw file.
How to export and import firewall rules using Command Prompt
Alternatively, you can also export and import firewall rules on Windows 10 using Command Prompt.
Exporting firewall rules
To export the current firewall policy using Command Prompt, use these steps:
-
Open Start.
-
Search for Command Prompt, right-click the top result, and select the Run as administrator option.
-
Type the following command to export the Windows Defender Firewall rules and press Enter:
netsh advfirewall export "C:\firewall-rules.wfw"

Export firewall rules using netsh command

Once you complete the steps, all the firewall rules will be exported to a .wfw, which you can then import on another installation of Windows 10.
Importing firewall rules
To import firewall rules on Windows 10 with Command Prompt, use these steps:
-
Open Start.
-
Search for Command Prompt, right-click the top result, and select the Run as administrator option.
-
Type the following command to export the Windows Defender Firewall rules and press Enter:
netsh advfirewall import "C:\firewall-rules.wfw"
Import firewall rules using netsh command

After you complete the steps, the firewall rules will import overwriting the device current policy settings.
We’re using Command Prompt, but you can also use the commands on PowerShell.
Why You Can Trust Pureinfotech
The author combines expert insights with user-centric guidance, rigorously researching and testing to ensure you receive trustworthy, easy-to-follow tech guides. Review the publishing process.
We have already discussed some of the features of Windows Firewall. It basically acts as a wall between your system and the internet. It filters the incoming and outgoing traffic to your system and protects it from the outside malware attacks. Today we will take you through the steps which will show you how to import and export Firewall Settings in Windows 10.
You can take a backup of the advanced settings, notification settings, and many more settings of Windows Firewall in Windows 10. But before going to the steps just make sure that you are logged into the system as an Administrator. There are two methods through which you can perform the backup and restore act. One can be done by getting into the Windows Firewall window and the other method can be through the Command Prompt.
How to Import and Export Firewall Settings in Windows 10
- First, you need to expand Control Panel on your screen and make its icons view either in small or large and click Windows Firewall.
- Windows Firewall window will become visible on the screen. Click Advanced Settings link on the left sidebar of the window.
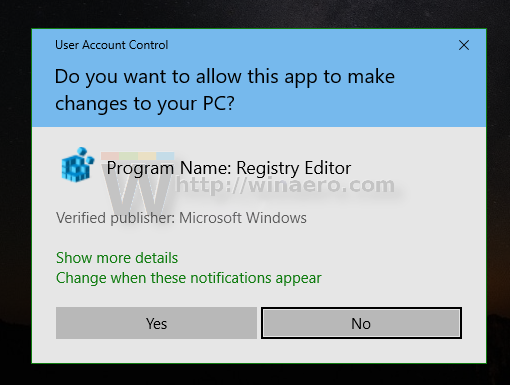
- If a User Account Control (UAC) prompts up, respond to it positively by clicking Yes.
- Click the Action option on the menu bar.
- Click on the Export Policy option from the sub-menu.
- Navigate the location where you want to store the backup of Windows Firewall Settings.
- Give a name and save it in the .wfw file type.
- Click on the Save option to save the exported settings.
- You will get a notification in a small window displaying the success of the backup.
Import Windows Firewall Settings on Windows 10
- Go to the Advanced Settings window of Windows Firewall by repeating the above steps.
- Click Action on the menu bar.
- Choose Import Policy.
- You will get one confirmation window seeking your permission to proceed further.
- Click Yes and confirm the process.
- Take yourself to the location where you have saved the .wfw file and click Open.
- Again you will get the confirmation message in a little window.
- Take yourself out of the Windows Firewall Settings window.
Export Firewall Settings on Windows 10 through Command Prompt (Admin)
- Right click on the Power Menu and select the Command Prompt (Admin).
- Administrator Command Prompt window will occur on your screen.
- Now type the following command to export the Windows Firewall settings.
netsh advfirewall export “%userprofile%\Desktop\WindowsFirewallSettingsBackup.wfw”
- Now save the WindowsFirewallSettings Backup.wfw file will be saved to your desktop. Change it to the other folder later on if you wish to.
Import Firewall Settings on Windows 10 through Command Prompt
- Open the Command Prompt (Admin).
- Type the below command –
netsh advfirewall import "Full path of .wfw file"
- Instead of typing “full path of .wfw file” enter the original full path of where you have stored it. For instance, my command is –
netsh advfirewall import "%userprofile%\Desktop\WindowsFirewallSettingsBackup.wfw"
- Close the Command Prompt window once you are done.
Final Thought
Windows Firewall works as the armor for the Windows 10 PC and users should set it with the highest priority. Importing the settings of Firewall on your System will be the practices for maintaining the security level of your PC. So I always recommend import your Windows 10 Firewall settings.
How to Export and Import a Specific Firewall Rule in Windows 10
In Windows 10, you can configure Windows Firewall to have custom rules for a specific address, port or protocol. You can allow or block an app from accessing the Internet. Once you do this, it is a good idea to backup your Firewall configuration.However, Windows 10 allows only exporting and importing the entire rule set. Here’s a trick that we can use to export and import a specific rule only.
Having a backup of firewall rules is very useful. If you reinstall Windows 10, you will be able to restore your custom rules quickly. Or, if you need to reset the Windows Firewall configuration, then having the ability to restore the custom configuration is very time saving.
Before you continue, see how to block any app from accessing Internet with one click in Windows 10, Windows 8 and Windows 7.
Backup and Restore Firewall Rules
In Windows 10, there are several ways to create a backup of Firewall rules. You can use Windows Firewall with Advanced Security snap-in to create or restore rules, or you can do it with the built-in console command netsh. Both methods reviewed in the post
How to Backup and Restore Firewall Rules in Windows 10
Unfortunately, Windows 10 doesn’t offer an option to backup and restore individual Firewall rules. However, it is still possible with either PowerShell, or Registry Editor.
- Open PowerShell as Administrator.
- Change PowerShell Execution policy to Unrestricted.
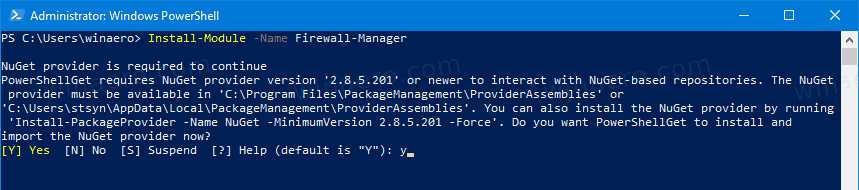
- Type the following command:
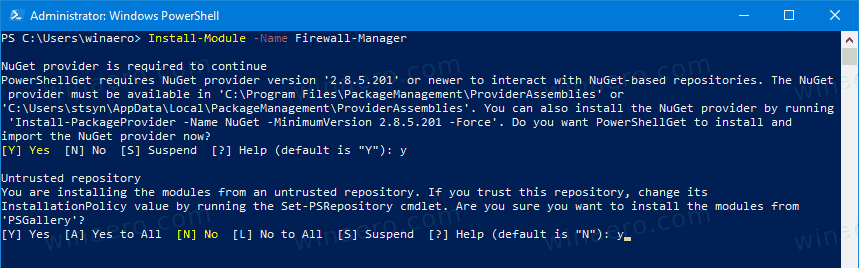
Install-Module -Name Firewall-Manager, and hit the Enter key. - Answer [Y] to proceed.

- Answer [Y] to install the module from PSGallery.

- Type the following command and hit the Enter key:
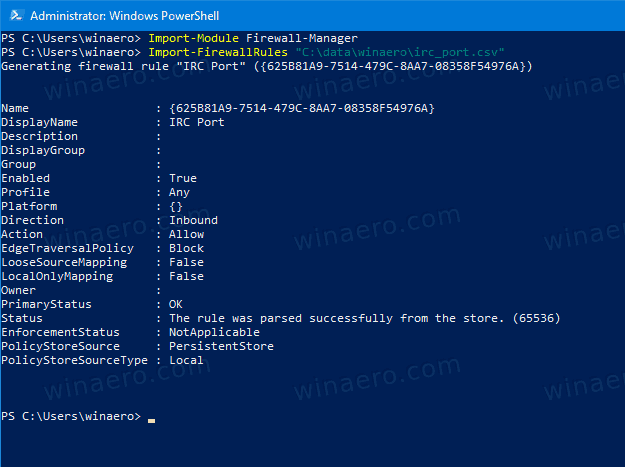
Import-Module Firewall-Manager.
- To export a specific firewall rule, type
Export-FirewallRules -Name "<Rule name>" -CSVFile "<Path to the CSV>" file. Specify the rule name you want to export, and provide the path to the CSV file the rule will be saved to. For example,Export-FirewallRules -Name "IRC Port" -CSVFile c:\data\winaero\irc_port.csv".
- To import a firewall rule, type
Import-FirewallRules <path to csv file>. Provide the full path the CSV file that stores a previously exported rule. For example,Import-FirewallRules "C:\data\winaero\irc_port.csv".


You are done.
Note the Export-FirewallRules and Import-FirewallRules cmdlets support exporting/importing of multiple rules at once, and also can work with JSON files.
To learn more about them, execute Get-Help Export-FirewallRules:

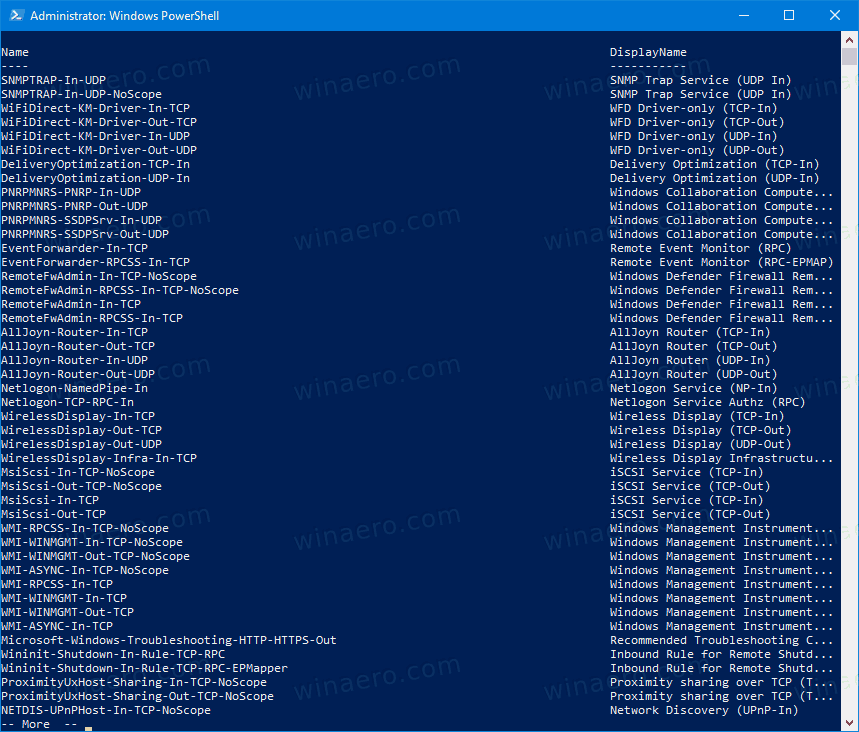
Tip: In PowerShell, you can list existing Firewall rules as follows: Get-NetFirewallRule |Format-Table|more.
If you are not a fan of PowerShell, you can export and import a firewall rule using the Registry Editor.
Export and Import a Specific Firewall Rule with Registry Editor
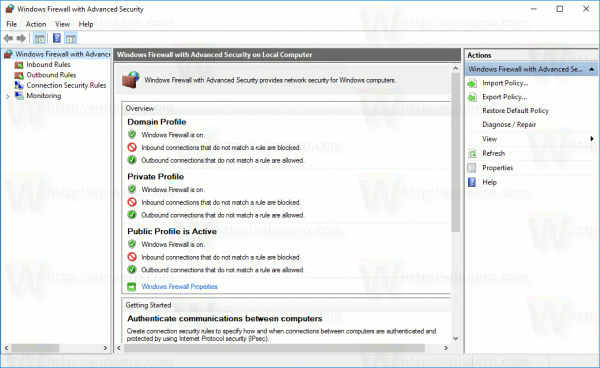
First of all, you need to export all available firewall rules to a single file. You can find names for Firewall rules in PowerShell, as mentioned above, or with Windows Firewall with Advanced Security. Press Win + R and type wf.msc in the Run box to open it.
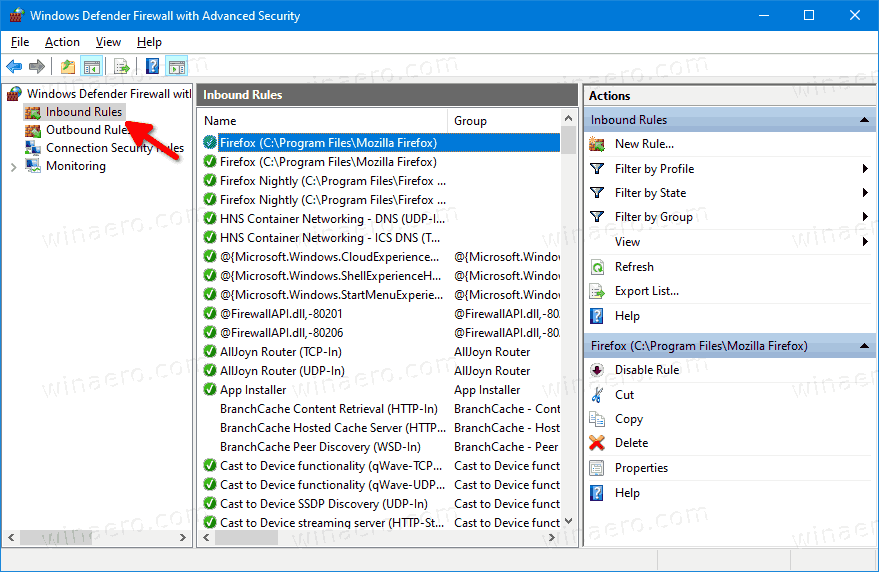
Click on Inbound Rules/Outbound rules on the left to see the list of rules.
To export all firewall rules using Registry Editor,
- Open the Registry Editor app.
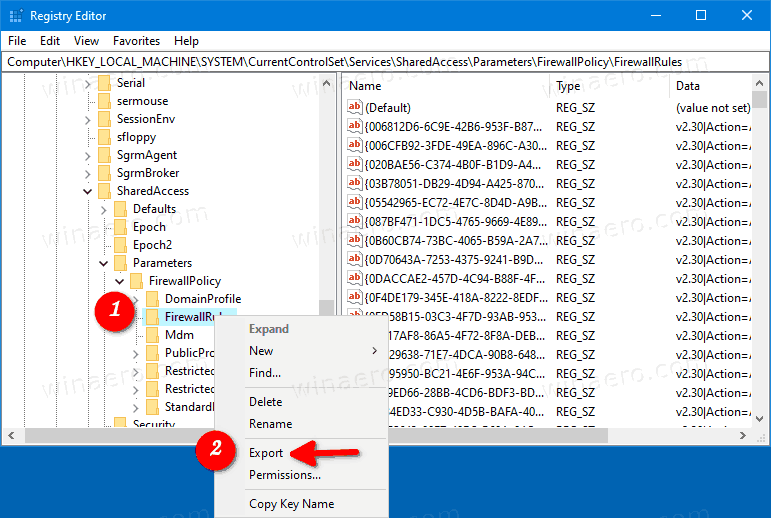
- Go to the following Registry key:
HKEY_LOCAL_MACHINE\SYSTEM\CurrentControlSet\Services\SharedAccess\Parameters\FirewallPolicy. See how to go to a Registry key with one click. - Right-click on the FirewallRules folder on the left and select Export… from the context menu.

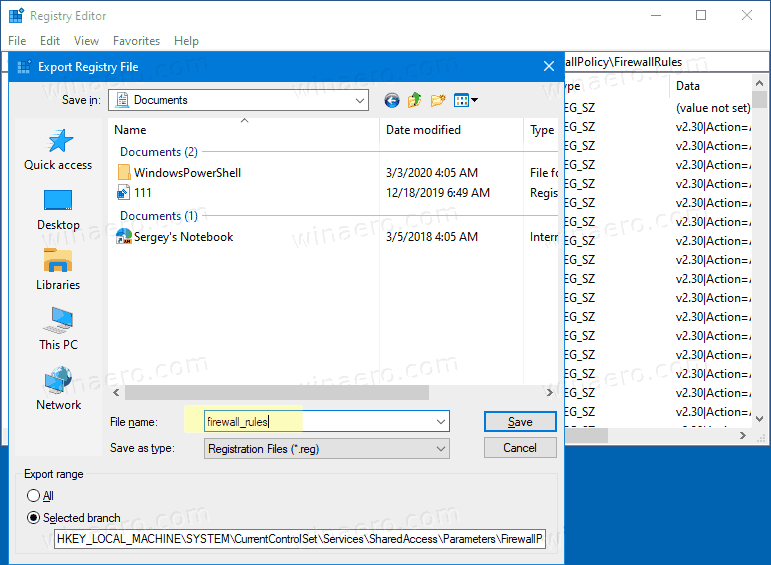
- Type in the file name for the *.reg file.

- Click on the Save button.
Now, the Registry file contains the entire set of your Firewall rules. You need to leave there only the rules you want to export, and delete all other lines.
Export Only Specific Rules to Registry File
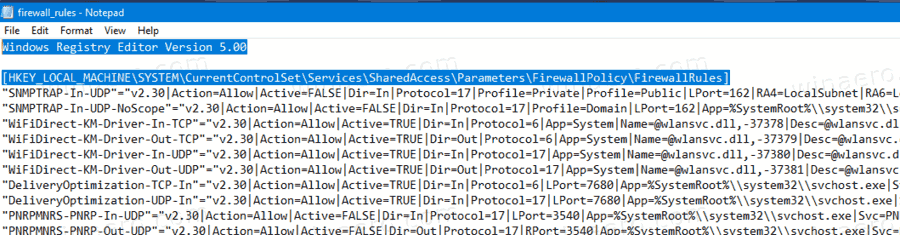
- Right-click your *.reg file in File Explorer and select Edit from the context menu to open it in Notepad.
- Below the line
[HKEY_LOCAL_MACHINE\SYSTEM\CurrentControlSet\Services\SharedAccess\Parameters\FirewallPolicy\FirewallRules], you will see all the rules listed.
- Remove all of them except those you want to export. The following screenshot demonstrates how to keep only one rule in the file.

- Save the changes you made (Press Ctrl + S).

This way, you can make the reg file store only the specific rules you want to export. You can search for the rule name with Ctrl + F in Notepad to save your time.
Import Windows Firewall Rules from Registry File
- Locate the *.reg file that contains your Firewall rules in File Explorer.
- Double-click on it to merge it. Confirm the UAC prompt.

- Restart Windows 10 to ensure that the rules are properly applied.
You are done.
Support us
Winaero greatly relies on your support. You can help the site keep bringing you interesting and useful content and software by using these options:
If you like this article, please share it using the buttons below. It won’t take a lot from you, but it will help us grow. Thanks for your support!
Posted by
on May 22, 2017
Instead of manually configuring the same Windows Firewall rules on many different servers, we can import and export Windows firewall settings to transfer them between different servers.
We can also import the firewall rule policy file into a Group Policy Object (GPO) to apply it automatically throughout a whole domain.
This post is part of our Microsoft 70-744 Securing Windows Server 2016 exam study guide series. For more related posts and information check out our full 70-744 study guide.
Export Windows Firewall Settings
We can export windows firewall rules with both the graphical user interface (GUI) and command line interface (CLI). First we’ll start with the GUI then cover the CLI.
Graphical User Interface
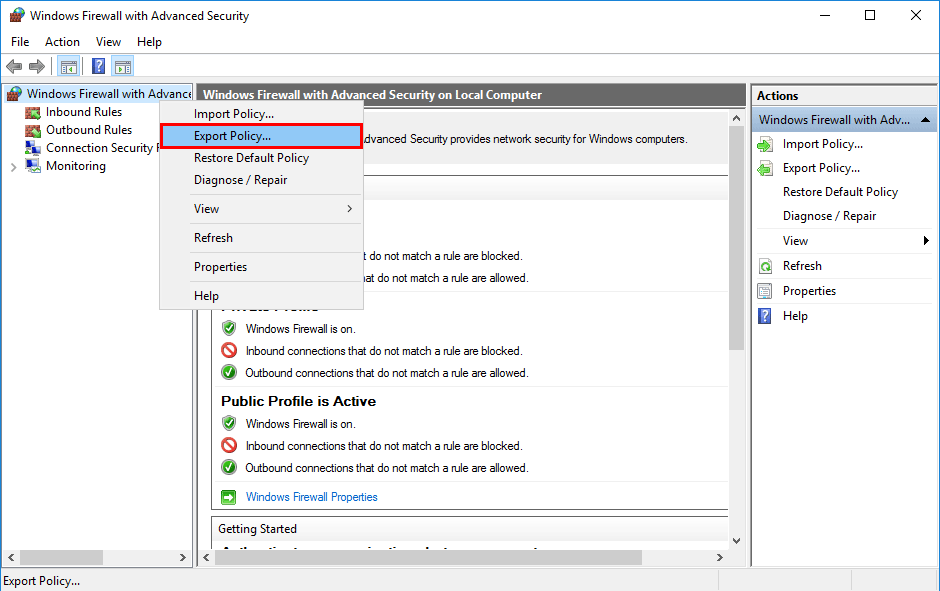
Open Windows Firewall with Advanced Security, right click the top node and select “Export Policy…”
Save the file as a .wfw policy file.
You’ll be advised that the policy successfully exported with a pop up message.
Command Line Interface
This can also be done through the PowerShell or Command Prompt CLI instead with the netsh command, as shown below.
netsh advfirewall export "C:\fw-rules.wfw"
Import Windows Firewall Settings
We can import this file that we have exported to another server where we wish to also have the same set of firewall rules. Again we’ll first start with the GUI solution followed by how to do it in CLI.
Note that importing firewall rules will overwrite all existing firewall configuration and replace it with the exported contents of the .wfw file, you will be advised of this before proceeding in the GUI but not through CLI.
Graphical User Interface
open up Windows Firewall with Advanced Security, right click the top node as before, but this time select “Import Policy…”
You’ll be warned that importing the policy will overwrite all current rules, select yes to proceed.
Next select the .wfw file that was exported previously.
Once the import has completed you’ll be advised by a pop up message.
Command Line Interface
This can also be done through the CLI instead with the netsh command, as shown below.
netsh advfirewall import "C:\fw-rules.wfw"
Note that if you import with the netsh command you will not be warned about overwriting all existing rules like you would be with the GUI.
Summary
As shown we can use either the GUI or CLI to import and export Windows Firewall settings in Windows Server 2016. This allows us to create a set of rules on a single server that we want to deploy elsewhere which is more efficient than implementing the same rules again and again on each server. We can also take this a step further and use group policy to deploy the exported firewall policy files in a domain.
This post is part of our Microsoft 70-744 Securing Windows Server 2016 exam study guide series. For more related posts and information check out our full 70-744 study guide.