
Важной частью обеспечения безопасности Windows Hello является то, что распознавание лиц должно быть уверенным в том, что лицо является живым человеком, а не фотографией или другим изображением. Распознавание лиц должно иметь четкое представление о вашем лице. Если распознавание лиц пытается распознать вас, вы получите сообщение об ошибке Не удалось вас распознать. при попытке подписать. Если вы не можете выполнить вход с помощью распознавания лиц, войдите с помощью ПИН-кода или пароля, а затем улучшите распознавание лиц.
Советы
-
Убедитесь, что камера чиста и беспрепятственно
-
Проверьте освещение. Если с одной или другой стороны исходит резкий или особенно яркий свет, Windows Hello может быть труднее распознать вас
-
Некоторые необычные виды макияжа видны в инфракрасном диапазоне, и это может сделать его более трудным для распознавания лиц, чтобы узнать вас
-
Попробуйте удалить шляпы или другие аксессуары вокруг вашего лица. Очки обычно не являются проблемой, особенно если вы носили их, когда вы впервые настроили распознавание лиц, но некоторые типы шляп или других аксессуаров, которые обрамляют ваше лицо может быть
-
Настройка распознавания лиц, чтобы распознавать вас с очками и без них, если вы носите их
Примечание: Если компьютер управляется вашей работой или учебным заведением, ИТ-администратор, возможно, включил расширенный анти-спуфингов для Windows Hello. Это задает еще более высокий стандарт для распознавания и может особенно вызвать проблемы в затемненных комнатах.
Чтобы улучшить распознавание, перейдите в раздел Параметры > Учетные записи > параметры входа > распознавание лиц (Windows Hello) и выберите Улучшить распознавание.
Если у вас по-прежнему возникают проблемы с распознаванием лиц Windows Hello, попробуйте запустить средство устранения неполадок, которое может устранить проблему.
Запуск средства устранения неполадок Windows Hello
Все способы:
- Способ 1: Проверка поддержки функции
- Способ 2: Включение разрешения входа по «Windows Hello»
- Способ 3: Настройка параметров конфиденциальности камеры
- Способ 4: Проверка системных обновлений
- Способ 5: Обновление драйвера устройства
- Способ 6: Удаление других методов входа
- Способ 7: Создание нового локального пользователя
- Способ 8: Проверка целостности системных файлов
- Способ 9: Сброс Windows 11 до заводских настроек
- Вопросы и ответы: 0
Способ 1: Проверка поддержки функции
Встроенная в Windows 11 функция разблокировки «Windows Hello» имеет несколько режимов защиты, почти все из которых требуют от устройства поддержки соответствующих устройств. Это может быть камера с распознаванием лица или сканер отпечатка пальца. Только PIN-код можно задать на всех компьютерах без исключения. Поэтому если вы собираетесь использовать разблокировку по лицу или отпечатку, убедитесь в том, что эти типы защиты поддерживаются на вашем лэптопе или ПК.
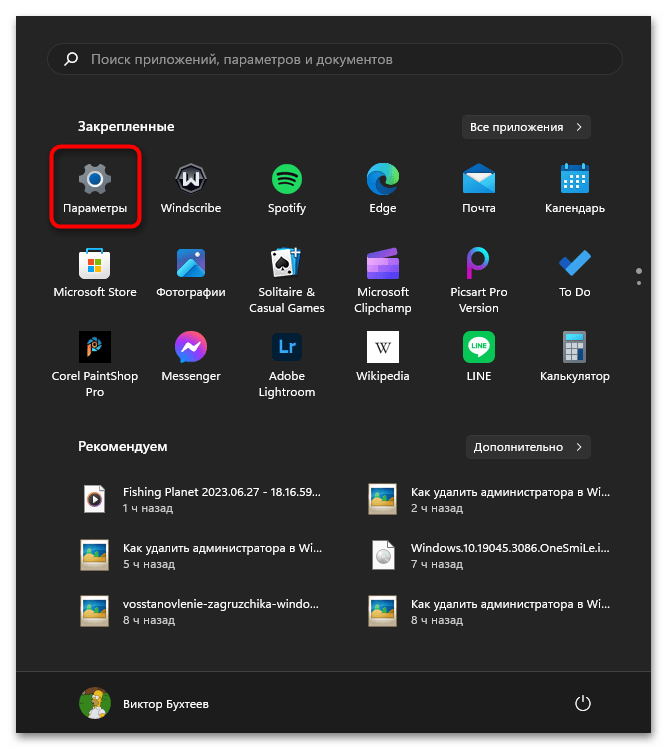
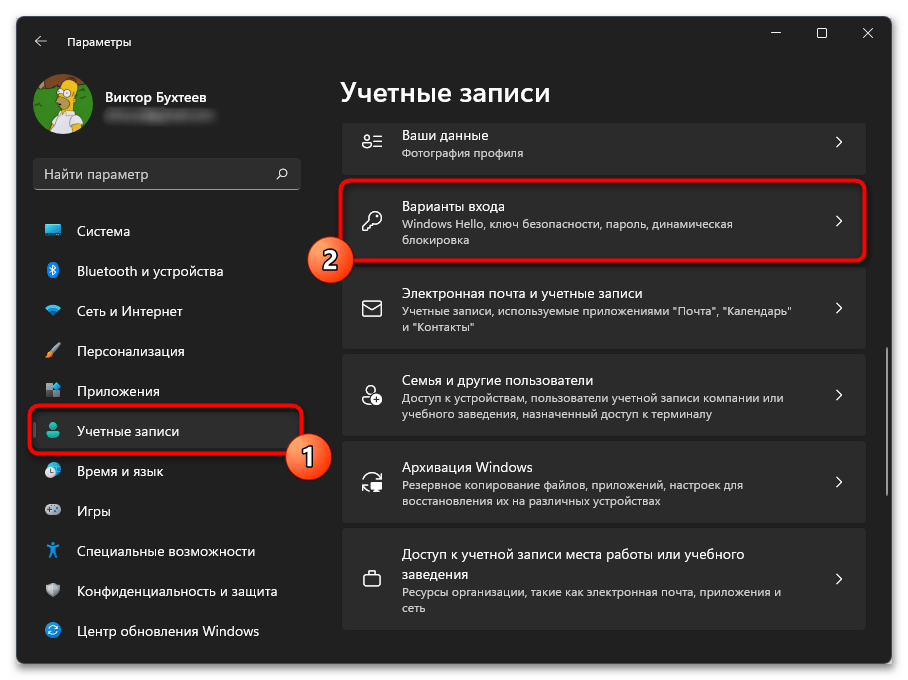
- Откройте «Пуск» и перейдите в «Параметры», кликнув по иконке с шестеренкой из списка закрепленных.
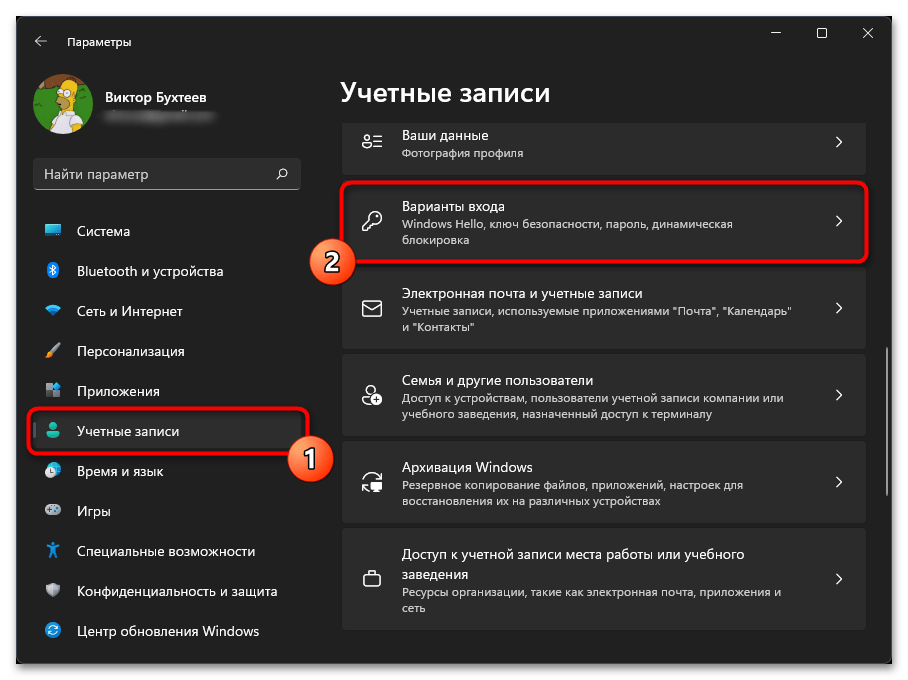
- На панели слева выберите раздел «Учетные записи», затем откройте категорию «Варианты входа».
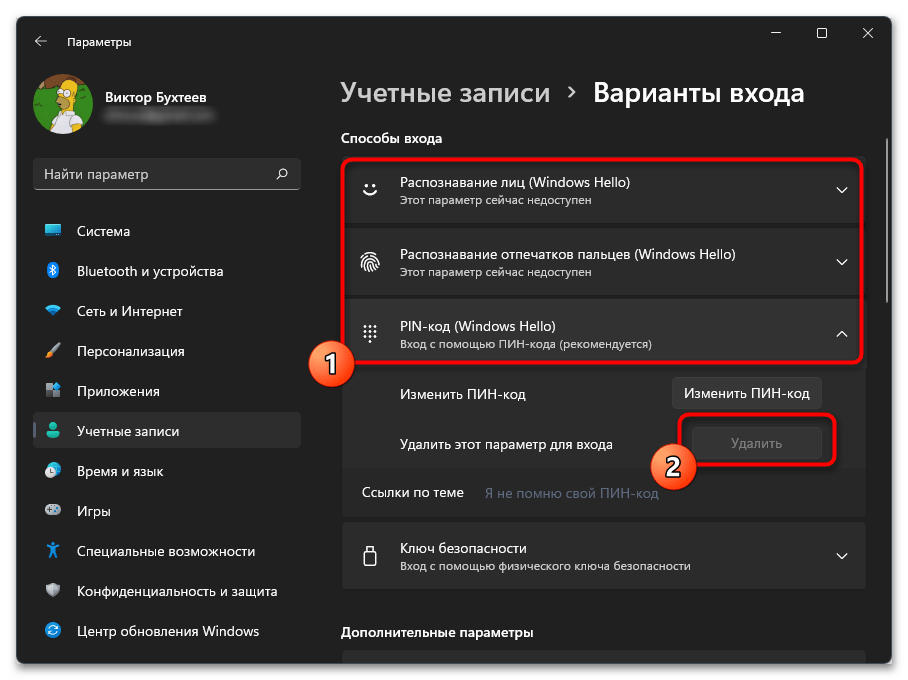
- Найдите блок «Способы входа» и ознакомьтесь со всеми доступными вариантами авторизации «Windows Hello». Если вы видите информацию «Этот параметр сейчас недоступен», значит, либо ваше устройство не обладает поддержкой соответствующих технологий, либо отсутствуют нужные драйверы. Дополнительно можете проверить, доступна ли кнопка «Настройка» для конкретного способа входа. Если она активна и позволяет перейти к редактированию параметров данного метода авторизации, с поддержкой никаких проблем возникнуть не должно.
- Как уже было сказано выше, есть несколько разных вариантов входа по «Windows Hello», поэтому проверьте каждый на поддержку или сделайте это только для интересующего вас типа защиты учетной записи.


Способ 2: Включение разрешения входа по «Windows Hello»
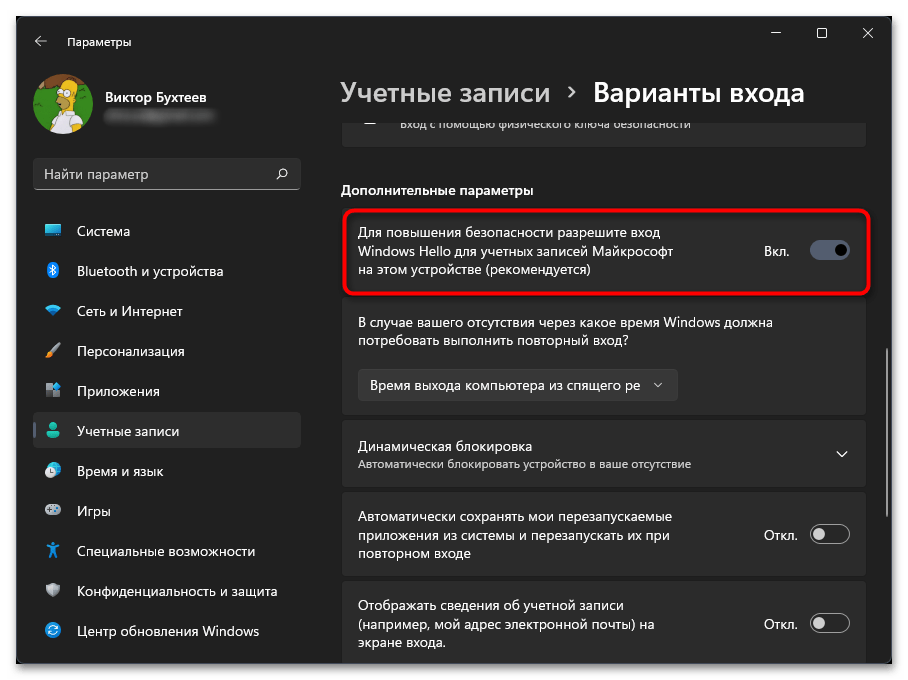
Если при попытке входа в учетную запись вы сразу попадаете в операционную систему без подтверждений или видите только форму ввода пароля без возможности переключиться на сканирование лица или отпечатка пальца, возможно, непосредственно в Windows 11 отключена функция повышения безопасности с использованием «Windows Hello». Вам предстоит найти ее через «Параметры» в том же разделе, о котором шла речь выше, и активировать соответствующую настройку. Она расположена в блоке «Дополнительные параметры» и имеет название «Для повышения безопасности разрешите вход Windows Hello для учетных записей Майкрософт на этом устройстве (рекомендуется)». Передвиньте переключатель в состояние «Вкл.», затем перезагрузите компьютер и проверьте доступность нужного метода авторизации.
Способ 3: Настройка параметров конфиденциальности камеры
Следующий вариант подразумевает проверку доступа приложений, включая стандартные, к вашей веб-камере. Соответственно, метод актуален для тех случаев, когда у вас возникают проблемы с использованием «Windows Hello» при попытке разблокировать операционную систему по сканеру лица, а ваша камера точно должна поддерживать данную технологию.
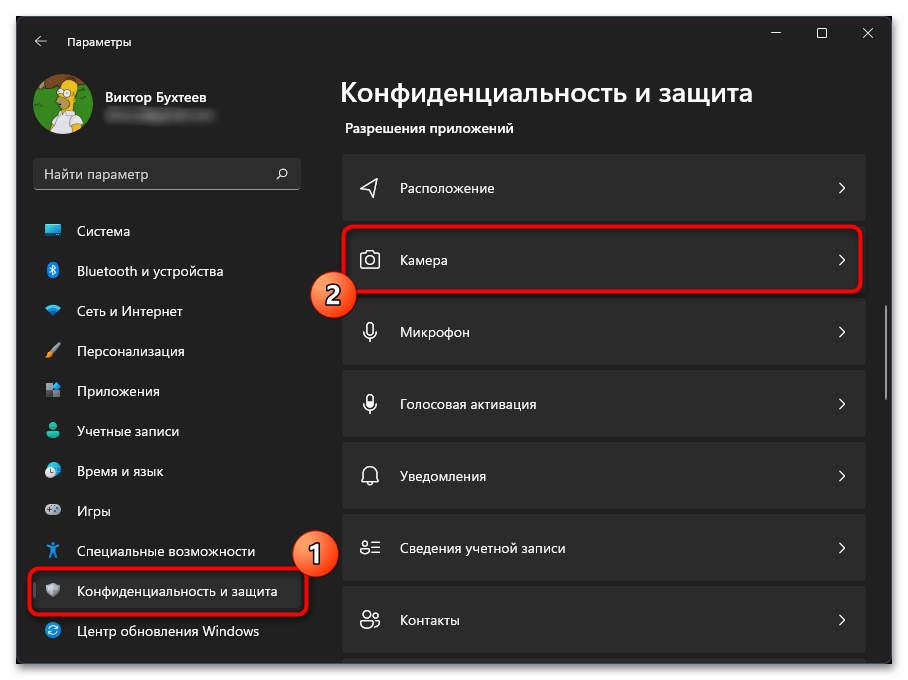
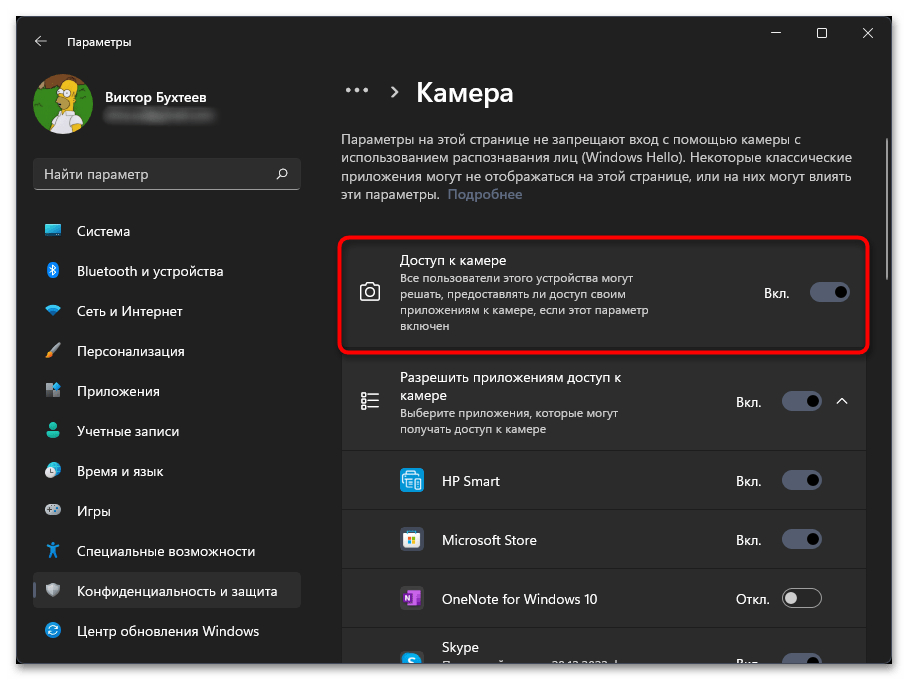
- Понадобится только проверить, включено ли разрешение на использование камеры в операционной системе. Для этого в «Параметрах» слева переключитесь в «Конфиденциальность и защита», затем в блоке «Разрешения приложений» выберите «Камера».
- Включите основной параметр с названием «Доступ к камере». Это позволит всем пользователям предоставлять доступ к камере любому приложению или системному средству.
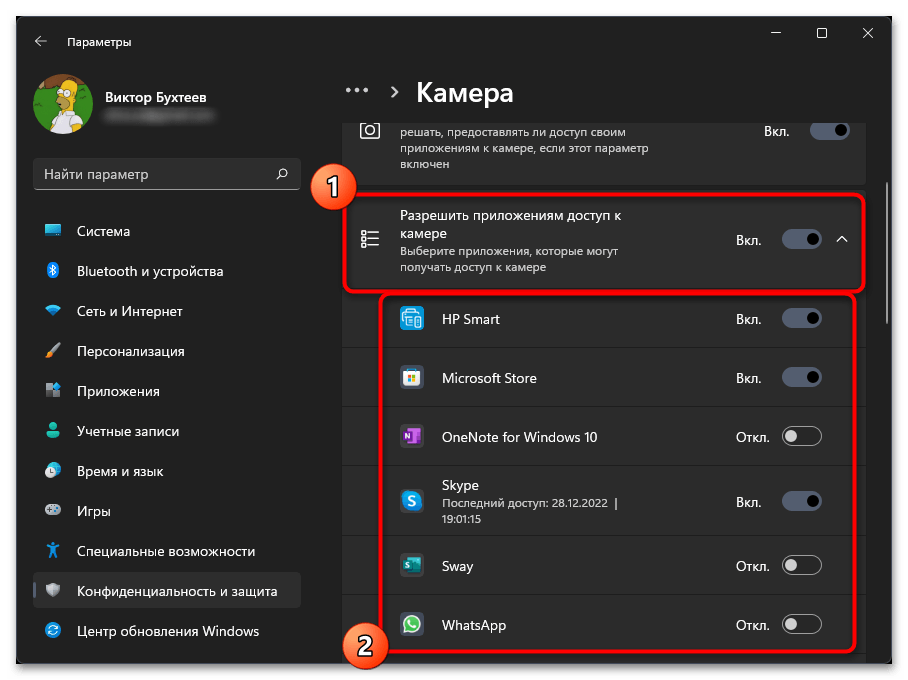
- Дополнительно разрешите по умолчанию и всем приложениям доступ к камере. Пролистайте список с программами и посмотрите, есть ли среди них «Windows Hello». Если да, то вам нужно тоже включить дополнительно доступ для этого приложения.
Способ 4: Проверка системных обновлений
Нередко разные проблемы с работой стандартных функций в Windows 11 появляются из-за отсутствия важных системных обновлений. К «Windows Hello» это особенно относится, поскольку чаще всего Майкрософт выпускают именно апдейты безопасности, повышающие защиту пользовательских данных и улучшающие работу связанных функций. Вам понадобится вручную запустить проверку наличия обновлений и установить все найденные. Иногда это и будет быстрым решением возникшей ситуации с использованием технологии.
Подробнее: Обновление Windows 11 до последней версии

Способ 5: Обновление драйвера устройства
Проблемы с авторизацией через «Windows Hello» в основном возникают при использовании веб-камеры для сканирования лица, поскольку остальные режимы, в основном, не требуют никаких дополнительных файлов и по умолчанию функционируют нормально. Если говорить о сканере отпечатка пальца, то только изредка разработчики добавляют специальный драйвер для этого встроенного устройства. Поэтому мы рекомендуем проверить обновления драйверов того оборудования, с которым у вас возникают проблемы при попытке входа через «Windows Hello». Для этого подойдет общая инструкция на нашем сайте по следующей ссылке.
Подробнее: Установка драйверов в Windows 11
Отдельно рассмотрим тему обновления драйвера для веб-камеры. Это можно сделать в автоматическом режиме при помощи штатного средства операционной системы. В первую очередь это будет актуально для владельцев ноутбуков Microsoft Surface, поскольку многие модели оснащены поддержкой распознавания по лицу, а большинство нужных драйверов инсталлируются как раз через стандартный инструмент ОС.
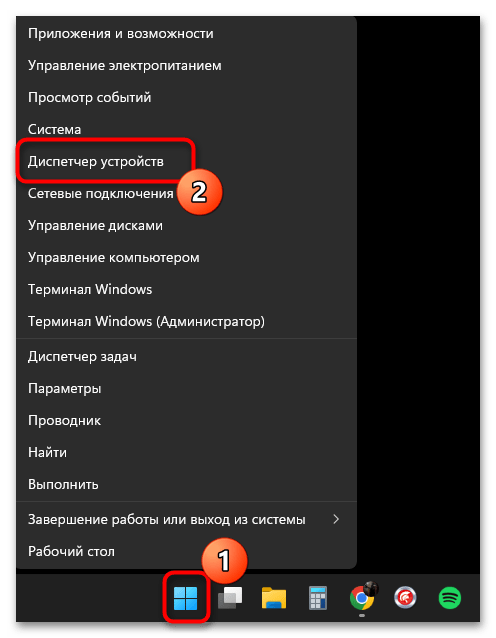
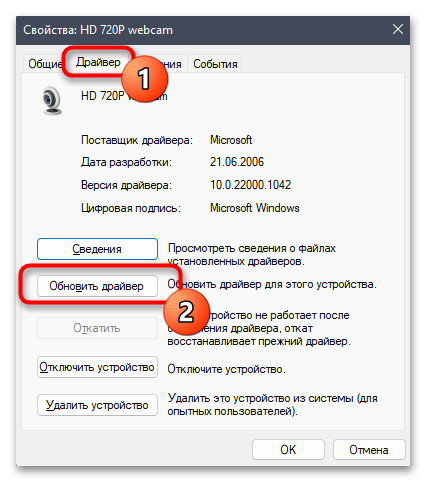
- Для перехода к нужному меню щелкните правой кнопкой мыши по «Пуску» и из появившегося контекстного меню выберите пункт «Диспетчер устройств».
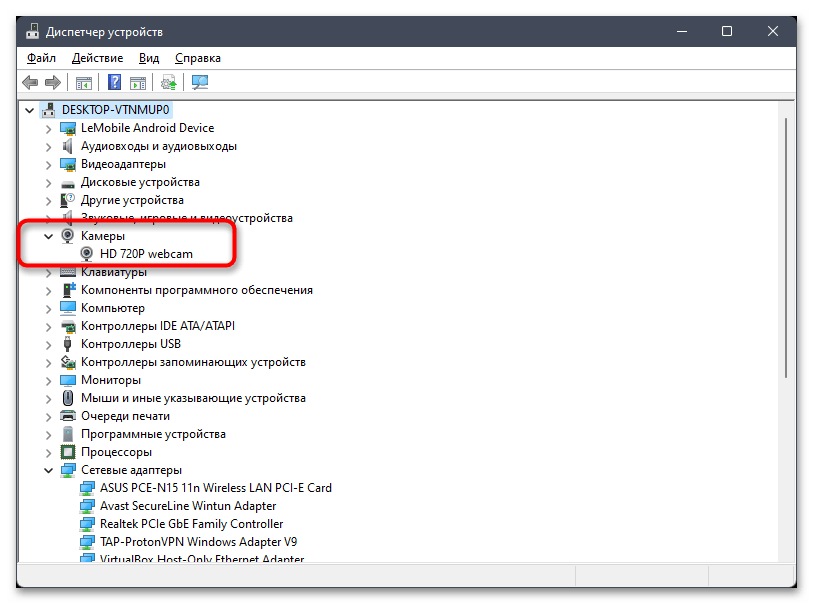
- Разверните список «Камеры» и дважды щелкните левой кнопкой мыши по своей веб-камере.
- Перейдите на вкладку «Драйвер», нажмите кнопку «Обновить драйвер» и в следующем окне выберите автоматический метод поиска обновлений. Дождитесь результатов и подтвердите установку, если апдейты будут найдены.
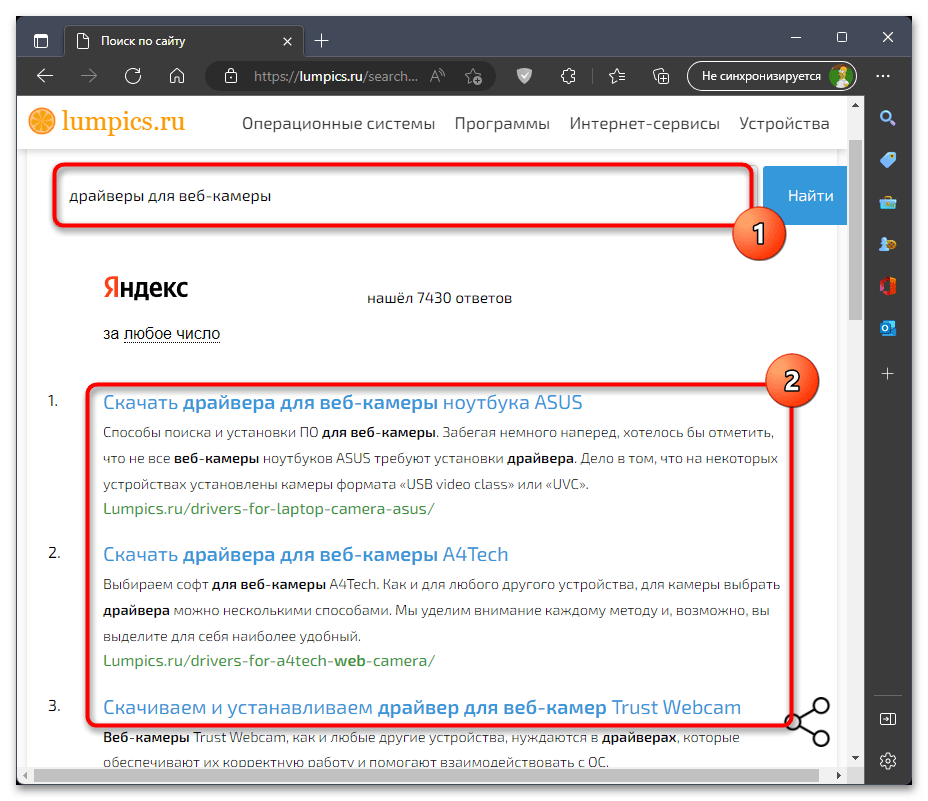
Если же инструкция не принесла должного результата, всегда можно скачать драйвер для веб-камеры с официального сайта производителя или использовать сканирование обновлений через сторонние программы. Иногда оптимальные методы отличаются, что зависит непосредственно от модели оборудования. Мы рекомендуем ввести название вашей камеры в поиске на нашем сайте, чтобы найти инструкцию, посвященную именно ей.
Способ 6: Удаление других методов входа
В некоторых случаях проблемы в работе «Windows Hello» связаны с конфликтами используемых методов входа, особенно если они подключены все (или практически все). Мы бы рекомендовали отключить те варианты, которые вы не используете на постоянной основе, а затем проверить авторизацию при помощи нужного вам «Windows Hello».
- Для этого в «Параметрах» выберите «Учетные записи» и перейдите в категорию «Варианты входа».
- Разверните списки с настройками доступных методов авторизации и удалите ненужные при помощи кнопки с соответствующим названием. Выйдите из профиля и попробуйте снова авторизоваться уже через «Windows Hello».
Способ 7: Создание нового локального пользователя
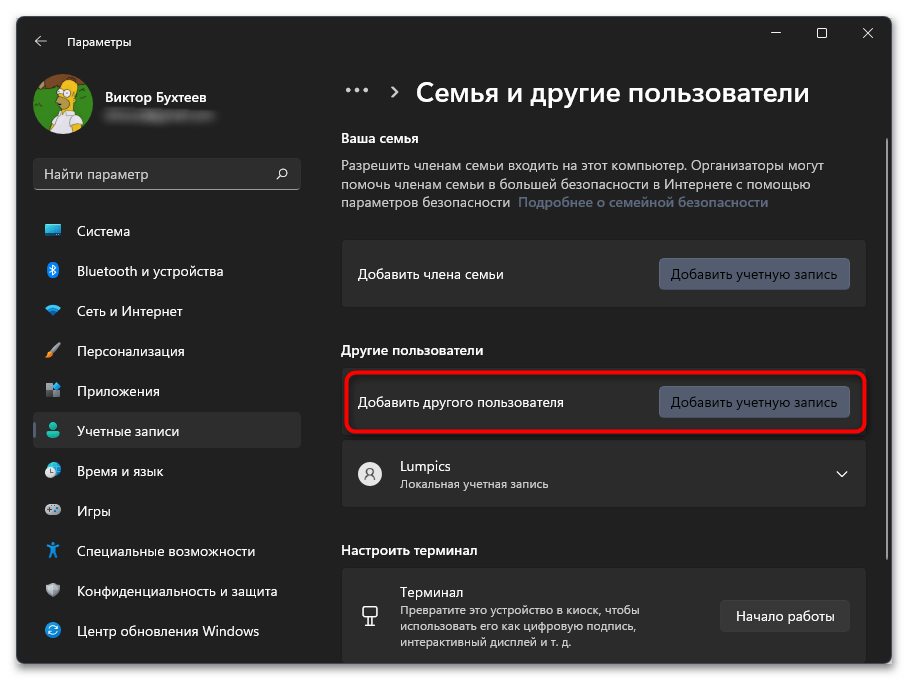
Проблемы с использованием «Windows Hello» в Виндовс 11 могут быть связаны со сбоями в работе конкретной учетной записи. Восстанавливать ее или менять параметры вручную вряд ли получится, поскольку достоверно не может быть известно, в чем именно возникли проблемы. Поэтому лучшим вариантом проверки данной теории станет создание новой учетной записи и подключение к ней «Windows Hello», чтобы проверить, заработает ли данный метод входа. Об этом более детально читайте в другом материале на нашем сайте, щелкнув по следующему заголовку.
Подробнее: Добавление локальной учетной записи в Windows 11
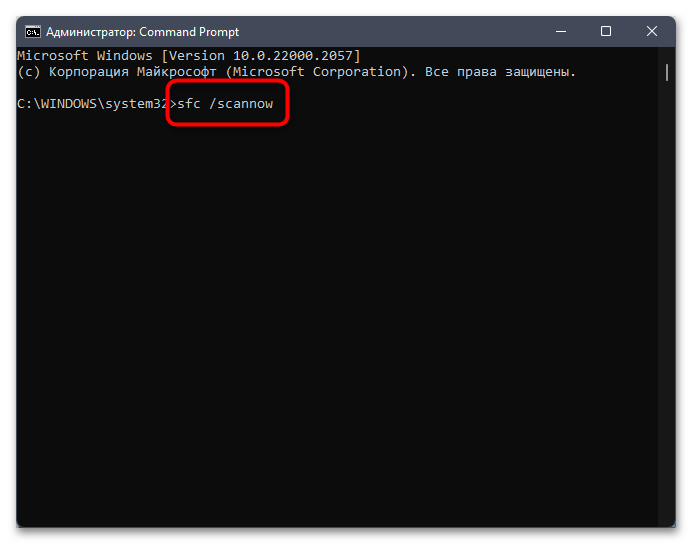
Способ 8: Проверка целостности системных файлов
Все предыдущие рекомендации подразумевали исправление небольших ошибок и изменение настроек для восстановления работы нужной функции защиты учетной записи. Если ни один из них не помог, стоит перейти к более радикальным вариантам, связанным со взаимодействием с системными файлами. Для начала нужно проверить, есть ли какие-то повреждения и можно ли восстановить системные компоненты. Для этого подходят встроенные консольные утилиты, работающие в автоматическом режиме. От вас требуется только запустить их через «Командную строку» и ждать окончания сканирования.
Подробнее: Использование и восстановление проверки целостности системных файлов в Windows
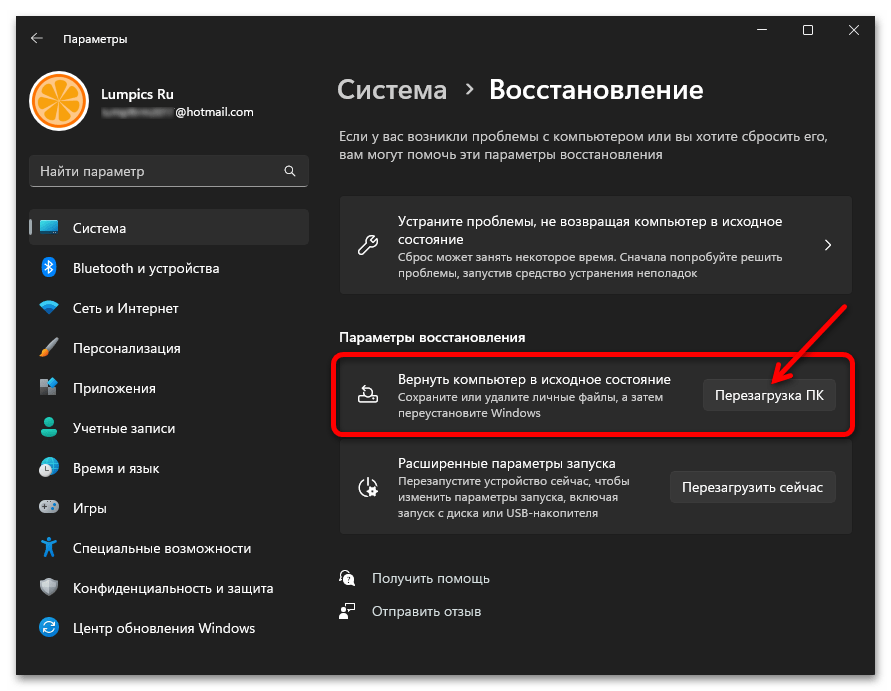
Способ 9: Сброс Windows 11 до заводских настроек
В последнюю очередь можно обратиться к самому трудному и затратному по времени способу. Он подразумевает возвращение операционной системы к исходному состоянию. Все внесенные изменения будут сброшены, а проблемные файлы восстановлены, если такие присутствуют. Процесс похож на переустановку, но выполняется немного быстрее и позволяет сохранить некоторые пользовательские файлы. После сброса понадобится заново настроить «Windows Hello» и проверить, заработает ли нужный метод авторизации на этот раз.
Подробнее: Сброс Windows 11 к заводским настройкам
Наша группа в TelegramПолезные советы и помощь
Windows 7 and later versions supported biometric sign-in. On Windows 10, the biometric sign-in option exists as an official feature known as Windows Hello.
Windows Hello is, essentially biometric sign-in however, it is divided into different types depending on the device used to sign in. Windows Hello Face uses the camera on your system to sign you in via facial recognition. If you use a fingerprint scanner, it will be set up as Windows Hello Fingerprint. And if you use a PIN, you will set up a Windows Hello PIN.
Windows Hello can be set up in different ways but by far the most selective method is Windows Hello Face. This option doesn’t work with all webcams. Instead, there is a very small list of webcams that can be used to set this feature up.
For Windows Hello Fingerprint, you will find that most fingerprint scanners, even no-name brands will work just fine if the device has been set up correctly.
If you’re trying to use Windows Hello but Windows 10 tells you the feature isn’t available, here are a few things you can do.
1. Check device compatibility
If you’re trying to set up Windows Hello either with a webcam or a fingerprint scanner, you should check if the device is supported.
Use this helpful tool provided by Microsoft to narrow down compatible devices/computers.
2. Install Windows Hello Face
Windows Hello Face is a service that needs to be installed in order for the feature to work. This is an optional feature so there’s a chance it isn’t installed.
- Open the Settings app (Win+I keyboard shortcut).
- Go to Apps.
- Click Optional Features.
- Go through the list of installed features and see if Windows Hello Face is listed.
- If Windows Hello Face is not listed, click Add a feature.
- Enter Windows Hello Face in the search bar.
- Select the feature from the results and click Install.
- Restart the system.
3. Enable Windows Hello from Windows Registry
Windows Hello relies on biometric devices to work and these devices can be disabled from the registry. If they’ve been disabled, you will not be able to set up Windows Hello on your system.
- Tap the Win+R keyboard shortcut to open the run box.
- Enter
regeditand tap the Enter key. - Go to the following key.
HKEY_LOCAL_MACHINE\SOFTWARE\Policies\Microsoft\Windows\System
- Right-click the System key and select New>DWORD (32-bit) Value.
- Name it AllowDomainPINLogon.
- Set its value to 1
- Restart the system.
4. Enable Windows Hello from Group Policy
If you’re using Windows 10 Pro and are connected to a domain, you need to enable Windows Hello from the group policy.
- Tap the Win+R keyboard shortcut to open the run box.
- Enter
gpedit.mscand tap the Enter key. - In the column on the left, go to Computer Configuration>Administrative Templates>Windows Components.
- Look for the Allow the use of biometrics policy and enable it.
5. Update drivers
Updating drivers may fix the problem with Windows Hello.
- Open Device Manager.
- For a fingerprint scanner: expand Biometric devices.
- For a webcam: expand Cameras.
- Right-click the device and select Update Driver.
- Select Search Automatically for driver.
- Install all available driver updates and restart the system.
6. Update Windows 10
Check if a Windows update is available and install it.
- Open the Settings app (Win+I keyboard shortcut).
- Go to Update and security.
- Select the Windows Update tab.
- Click Check for Updates.
- Install available updates.
7. Uninstall Windows update
If Windows Hello was working on your system, and it stopped after installing an update, uninstall it.
- Open the Settings app (Win+I keyboard shortcut).
- Go to Update and security>Windows Update.
- Click View Update History.
- Click Uninstall Updates.
- Select the recently installed update that you think is causing problems and uninstall it.
Conclusion
Windows Hello works with select few devices if you’re trying to set up Windows Hello Face but, for Windows Hello Fingerprint, most biometric devices will do the job. You can also use a PIN which is also a Windows Hello sign-in method and Windows 10 prefers it over a password. All you need to set up a PIN is a keyboard.

Fatima Wahab
Fatima has been writing for AddictiveTips for six years. She began as a junior writer and has been working as the Editor in Chief since 2014.
Fatima gets an adrenaline rush from figuring out how technology works, and how to manipulate it. A well-designed app, something that solves a common everyday problem and looks
Windows Hello is a convenient and secure tool that allows you to set up your computer with biometric and PIN authentication. However, progressive biometric authentication offers a seamless and secure way to gain access to your Windows 11 PC. Sometimes, the Hello feature might not work on the latest Windows 11 operating system.
It can be frustrating, especially when you’re trying to unlock your device. In this guide, we’ll walk you through the most effective methods that you can use to troubleshoot and solve the problem. However, if you’re unsure how to set up Windows Hello, refer to our guide on setting up Windows Hello in Windows 11.
Windows Hello might not work on your Windows 11 PC due to various reasons, such as the absence of a configured Microsoft account, a corrupted biometric driver, or running an outdated Windows version.
Here, we have discussed all the possible ways to resolve the issue of Windows Hello not functioning on Windows 11. So, let’s discuss them one by one.
1. Sign Into Your Microsoft Account Again
There’s a possibility that Windows Hello on your Windows 11 operating system isn’t working due to a temporary glitch in your Microsoft account. In that case, you should try signing out and then signing back into your Microsoft account. This will help you resolve the unknown bugs and glitches that are preventing Windows Hello from functioning correctly.
To sign back into your Microsoft account on your Windows 11 PC, follow these steps:
1. Press the Windows Key on the keyboard to open the Start Menu.
2. Click on your Profile icon.
3. Then, click on the Sign out option on the pop-up menu.

3. Once you click the Sign out option, you will be directed to the Windows lock screen.
4. Here, enter your Windows PIN or password by clicking on the Sign-in options.
5. Finally, check if Windows Hello is working on your Windows 11 PC.
2. Enable Windows Hello
To access Windows Hello, you must enable it on your Windows 11 operating system. It is possible that the Windows Hello feature is not working because you haven’t set it up correctly. Double-check the Windows Hello feature on your computer and set it up correctly.
To enable Windows Hello, follow these steps:
1. Press the Windows + I keys to open Settings.
2. Click on the Accounts tab on the left pane.
3. Next, click the Sign-in options on the right side.

4. Under the Sign-in options window, click PIN (Windows Hello) and then click on the Set up button on the right side.
5. Here, you will need to create a Windows Hello PIN. For that, follow the on-screen instructions to set up a Windows Hello PIN.

3. Reset Windows Hello
If you have enabled Windows Hello on your computer and it doesn’t work, you should reset Windows Hello on your Windows 11. It’s possible that the facial or fingerprint recognition you previously configured wasn’t set up properly. In that case, you should reset Windows Hello and configure it again.
Here’s how you can reset Windows Hello:
1. Open Settings and click on the Accounts tab on the left pane.
2. Then, click the Sign-in options on the right side.
3. Under the Ways to sign in section, click the Fingerprint recognition (Windows Hello) option.
4. Click the Remove button next to Remove this sign-in option.

5. Then, click on the Set up button on the right side.

6. After that, you will get the Windows Hello setup window for fingerprint recognition.
7. Here, click the Get Started button.
8. Enter the Windows PIN and follow the on-screen instructions to complete the process.

If you want to reset Facial recognition (Windows Hello) on your Windows 11, then follow the same procedure to reset and set up facial recognition. This will Reset Windows Hello
4. Change the TPM Settings
TPM stands for Trusted Platform Module, which is a hardware-based security system for a secure cryptoprocessor. The primary purpose of this technology is to provide additional layers of security by preventing unauthorized access to sensitive information.
TPM (Trusted Platform Module) plays a major role in the Windows operating system. However, if the hardware layer encryption of TPM is disabled, then Windows Hello won’t work correctly. Make sure to check the TPM settings on your Windows 11 computer.
Here’s how to do it.
1. Press the Windows Key on the keyboard to open the Start Menu.
2. In the Search bar, type Run and click Open.

3. In the Run dialog box, type tpm.msc and click on the OK button.

4. Under the Trusted Platform Module (TPM) Management on Local Computer, click the Action tab at the top bar.
5. From the pop-up menu, click Prepare the TPM option and enable it.
6. After that, restart your system to apply changes.

If the Prepare the TPM option is greyed out, it means the option is already enabled on your computer. In that situation, don’t make any changes. However, if you are still not able to enable TPM on your system, then you can check our guide on enabling TPM on Windows 11.
5. Update Biometric Devices Driver
Most of the time, the Windows Hello feature is not working due to an outdated biometric driver. Make sure to check the biometric device driver on your Windows 11 operating system. If it’s running on an outdated version, make sure to update it.
To update the biometric device driver, follow these steps:
1. Click on the Window icon.
2. In the Search bar, type Device Manager and click Open.

3. Under the Device Manager window, double-click on the Biometric devices.
4. Here, you will find Biometric devices. Select the device, right-click on it, and choose Update driver.
For facial recognition, right-click on the installed camera and choose Update driver.

5. An Update Drivers window will prompt. Here, click on the Search automatically for drivers option.

6. Now, Windows will automatically check for the latest driver updates, and download and install the update if available.
7. Once you have successfully updated the biometric device driver on your Windows 11, restart your computer to apply the changes.
6. Reinstall Biometric Devices
If updating the biometric device driver doesn’t work to solve the Windows Hello issue, you should uninstall and reinstall the biometric device driver on your Windows 11.
To uninstall and reinstall the biometric device driver, follow these steps:
1. Open the Device Manager.
2. Under the Device Manager window, double-click on the Biometric devices.
3. Right-click on it and choose the Uninstall device option.

4. Finally, click on the Uninstall button to confirm it.

5. After uninstalling the biometric driver on your Windows 11, restart your computer, and the driver will automatically be installed on the system.
6. Afterwards, try checking if Windows Hello is working. If the issue persists, follow the next solution.
7. Update Windows 11
If you have followed all the troubleshooting methods mentioned above and Windows Hello is still not working on your Windows 11 operating system, the outdated version of Windows is likely the root cause.
An outdated version of Windows can create several issues with both applications and system settings. To resolve the problem, you can check for a system update.
For that, you can follow these steps:
1. Press the Windows + I keys together on the keyboard to open Settings.
2. Click on the Windows Update tab on the left pane and then click on Check for updates.
3. Now, your system will automatically check for pending updates.
4. Click on the Download and Install button to install the pending updates if available.
5. Once it is finished, restart your computer.

Conclusion
By following the above-mentioned methods, you should be able to fix the issues you are facing with Windows Hello in Windows 11. However, sometimes the face recognition feature might also cause issues, so to fix it, you can check out our guide on fixing Windows Hello face recognition not working.
Windows Hello is such a feature that lets users log in to Windows 10 without making efforts to remember the password. This biometric authentication is pretty straightforward to access the PC through facial or fingerprint recognition. Though this service sounds great, some users experience Windows Hello Fingerprint Option Currently Unavailable message.
The Sign-in options in Windows Settings display the aforementioned error which does not allow us to proceed further with the feature. So experts suggest uninstalling the fingerprint driver and upon reboot, this method will start working.
Windows Hello Fingerprint Option Currently Unavailable
Here is How to Fix Windows Hello Fingerprint Option Currently Unavailable in Windows 10 –
1] Uninstall Fingerprint Driver
One of the first solutions that would fix this Windows Hello problem is to uninstall the fingerprint driver. The drivers might get corrupted at some point either by some process or through updates. This eventually leads to the malfunction of this biometric service in Windows 10. Hence uninstall the buggy driver and restart the device to check for the issue.
- Press Win+S to access taskbar search, type in devmgmt.msc. Hit Enter to open Device Manager.
- Once the console is visible, locate and expand Biometric devices.
- Right-click on the fingerprint device name and select Uninstall device. Confirm the removal process and finally, Restart Windows 10 PC.
2] Turn Off Fast Startup
Fast Startup is one of the common reasons for various issues including Windows Hello Fingerprint Option Currently Unavailable as well. Computer fails to perform a complete shutdown when this feature is turned on. Moreover, a few users resolved this biometric problem by simply disabling Fast Startup. Go through the below guidelines to carry out the workaround –
- Open Windows Settings app using Winlogo+I hotkey.
- Select System.
- Go to Power & sleep subsection on the left sidebar.
- Switch to the right and click Additional power settings.
- On the top left of the following page click What the power button does.
- Moving ahead, hit Change Settings that are unavailable followed by deselecting the option next to Turn on fast startup (recommended).
- Finally, to apply the modifications, click Apply changes button.
3] Reset Facial Recognition to Fix Windows Hello Fingerprint Option Currently Unavailable
Sometimes to deal with biometric problems, all it is required is a reset. Fundamentally, it is just the deletion of existing files and then re-register biometric (facial or fingerprint). Doing so will reset all the biometric entries like face scan, iris scan, and fingerprint. Just stop the Biometric service, delete all the existing files from system drive and the service followed by re-registering the entries. Follow the below instructions and deploy the workaround –
- Right-click on Start icon and choose Run. Once you open Run dialog box, insert services.msc and click OK.
- On the Services console, scroll and right-click Windows Biometric Service. Choose Stop to put an end to the service.
- Next, create a backup of the biometric data files. To do so, first open File Explorer and navigate to the below location –
C:\Windows\System32\WinBioDatabase
- Copy the items of WinBioDatabase and save them to a separate folder on a safe location. Name that new folder as WinBioBackup.
- After creating the backup, delete the files from original folder.
- Now, head back to the Services manager again, right-click on Windows Biometric Service and select Restart.
- Once the above steps are done, fire up Settings => Accounts => Sign -in options => and go through the registration procedure again to re-register the biometric.
- If the device has multiple users, each of them has to re-register.
4] Modify Group Policy Settings (For Pro version only)
There is a possibility that the installation of Creators Update has altered certain Biometric settings in Group Policy. Therefore, experts advise to check and edit the setting of Windows Hello and make sure everything is perfect. So, observe the below group policy settings and edit if it requires –
- Type “gpedit” on taskbar search and hit Enter to open Group Policy Editor.
- Go to Computer Configuration=>Administrative Templates => Windows Components => Biometrics => Facial Features.
- On the adjacent right side, double-click the policy Configured enhanced anti-spoofing.
- Choose Disabled radio button, click Apply and OK. Reboot the device to make the changes effective.
5] Uninstall Buggy Update
For many users, Windows Hello Fingerprint Option Currently Unavailable occurs after installing May 2019 update. If that is the case then it is best to uninstall that buggy update file. Sometimes an update gets interrupted due to poor internet connection or low disk space. Hence, the installation of such files also becomes corrupt which eventually disturbs various areas of the OS. Therefore, if the issue occurs especially after installing an update, get rid of it right away. So walk through the below steps and perform the solution –
- Fire up Start Menu and select the tiny cog icon.
- Select Update & Security category.
- Click View update history on the right side of the following page.
- Make a hit on Uninstall updates link.
- A new window will open displaying the installed updates. Right-click on the latest installed one and select Uninstall.
- Restart the device and see for the message Windows Hello Fingerprint Option Currently Unavailable.
Methods:
11] Uninstall Fingerprint Driver
2] Turn Off Fast Startup
3] Reset Facial Recognition
4] Modify Group Policy Settings
5] Uninstall Buggy Update
That’s all!!