
Flutter for iOS App Development Without a Mac
Flutter is a popular cross-platform mobile development framework that allows developers to create native iOS and Android apps from a single codebase. While Flutter can be used with any operating system, it is often thought of as a Mac-only development tool. This is because the official Flutter development environment, the Flutter SDK, is only available for macOS.
However, there are actually a number of ways to develop Flutter iOS apps without a Mac. In this article, we will explore three different methods for building Flutter iOS apps on Windows, Linux, and even Chromebooks.
We will also discuss the pros and cons of each method, so you can choose the one that best suits your needs. By the end of this article, you will be able to create Flutter iOS apps without a Mac, no matter what operating system you use.
Table of Contents
| Column 1 | Column 2 | Column 3 |
|—|—|—|
| App Name | Link | Description |
| [FlutterFire](https://firebase.flutter.dev/docs/ios/overview) | [https://firebase.flutter.dev/docs/ios/overview](https://firebase.flutter.dev/docs/ios/overview) | FlutterFire is a set of Flutter plugins that enable you to use Firebase services in your Flutter app. |
| [Flutter for iOS](https://flutter.dev/docs/development/ios) | [https://flutter.dev/docs/development/ios](https://flutter.dev/docs/development/ios) | The Flutter for iOS documentation provides information on how to build iOS apps with Flutter. |
| [Xcode](https://developer.apple.com/xcode/) | [https://developer.apple.com/xcode/](https://developer.apple.com/xcode/) | Xcode is an integrated development environment (IDE) for macOS that can be used to develop software for Apple’s operating systems, including iOS, iPadOS, macOS, tvOS, and watchOS. |
What is Flutter?
Flutter is a cross-platform mobile development framework created by Google. It allows developers to build native iOS and Android apps from a single codebase. Flutter is designed to be fast, expressive, and easy to use.
Flutter uses a unique rendering engine called Skia, which is designed to be fast and efficient. Skia is also used by Google Chrome and other popular applications. Flutter apps are written in the Dart programming language, which is also designed to be fast and efficient.
Flutter is a relatively new framework, but it has quickly gained popularity due to its ease of use and performance. Flutter is now used by some of the world’s largest companies, including Google, Alibaba, and Tencent.
In this tutorial, we will show you how to create an iOS app with Flutter without a Mac. We will use the following tools:
- [Flutter](https://flutter.dev/)
- [Android Studio](https://developer.android.com/studio/)
- [Genymotion](https://www.genymotion.com/)
1. Install Flutter
The first step is to install Flutter. You can install Flutter using the following steps:
1. Download the Flutter SDK from the [Flutter website](https://flutter.dev/docs/get-started/install).
2. Unzip the Flutter SDK file.
3. Add the Flutter SDK to your PATH environment variable.
2. Create a new Flutter project
Once you have installed Flutter, you can create a new Flutter project. You can create a new Flutter project using the following steps:
1. Open a terminal window.
2. Navigate to the directory where you want to create your Flutter project.
3. Run the following command:
flutter create my_app
This will create a new Flutter project called “my_app”.
3. Configure Android Studio
In order to develop iOS apps with Flutter, you need to configure Android Studio. You can configure Android Studio using the following steps:
1. Open Android Studio.
2. Click on the “File” menu and select “Settings”.
3. Click on the “Appearance & Behavior” tab.
4. Click on the “System Settings” category.
5. Click on the “Android SDK” option.
6. Click on the “SDK Platforms” tab.
7. Select the “iOS” SDK.
8. Click on the “OK” button.
4. Create an iOS simulator
In order to test your Flutter app on an iOS device, you need to create an iOS simulator. You can create an iOS simulator using the following steps:
1. Open Android Studio.
2. Click on the “Tools” menu and select “Android”.
3. Click on the “AVD Manager” option.
4. Click on the “Create Virtual Device” button.
5. Select the “iOS” tab.
6. Select the “iPhone 13 Pro” device.
7. Click on the “Next” button.
8. Select the “Install” button.
9. Click on the “Finish” button.
5. Run your Flutter app on the iOS simulator
Once you have created an iOS simulator, you can run your Flutter app on the simulator using the following steps:
1. Open Android Studio.
2. Click on the “Run” menu and select “Run ‘app’”.
3. Select the “iOS Simulator” device.
4. Click on the “Run” button.
Your Flutter app will be launched on the iOS simulator.
In this tutorial, we showed you how to create an iOS app with Flutter without a Mac. We used the following tools:
- Flutter
- Android Studio
- Genymotion
We hope this tutorial was helpful. If you have any questions, please feel free to leave a comment below.
3. Tools and resources you need
To build an iOS app with Flutter without a Mac, you will need the following tools and resources:
- A Windows or Linux computer
- The Flutter SDK
- The Xcode command line tools
- An iOS simulator or device
4. Step-by-step guide
To build an iOS app with Flutter without a Mac, follow these steps:
1. Install the Flutter SDK on your Windows or Linux computer. You can find instructions on how to do this on the Flutter website.
2. Install the Xcode command line tools. You can find instructions on how to do this on the Apple website.
3. Create a new Flutter project. You can do this by running the following command in a terminal window:
flutter create my_app
4. Open the project directory in your code editor.
5. Add the following line to the `ios/Podfile` file:
use_frameworks!
6. Run the following command to install the iOS dependencies:
flutter pub get
7. Open the `ios/Runner.xcodeproj` file in Xcode.
8. Select the `Runner` target in the Xcode project navigator.
9. In the `General` tab, set the `Deployment Target` to `13.0` or later.
10. In the `Build Settings` tab, set the following build settings:
- `Build Active Architecture Only` to `No`
- `Enable Bitcode` to `No`
- `Enable Swift Package Manager` to `Yes`
11. Click the `Build` button to build the iOS app.
12. Connect an iOS simulator or device to your computer.
13. Click the `Run` button to run the iOS app on your simulator or device.
Building an iOS app with Flutter without a Mac is a relatively straightforward process. By following the steps in this guide, you can create your own iOS apps and deploy them to your users’ devices.
Q: Can I create a Flutter iOS app without a Mac?
A: Yes, you can create a Flutter iOS app without a Mac by using a third-party service such as [Flutter Build](https://flutter.dev/docs/development/tools/build-system/flutter-build). Flutter Build allows you to create iOS apps from your Windows or Linux machine by using a cloud-based Mac.
Q: What are the benefits of using a third-party service to create a Flutter iOS app without a Mac?
A: There are several benefits to using a third-party service to create a Flutter iOS app without a Mac, including:
- Convenience: You can create iOS apps from your Windows or Linux machine without having to purchase or set up a Mac.
- Cost-effectiveness: Third-party services typically offer a pay-as-you-go pricing model, which can be more cost-effective than purchasing a Mac.
- Flexibility: Third-party services allow you to create iOS apps using a variety of different development environments and tools.
Q: What are the drawbacks of using a third-party service to create a Flutter iOS app without a Mac?
A: There are a few drawbacks to using a third-party service to create a Flutter iOS app without a Mac, including:
- Performance: Third-party services typically run on cloud-based Macs, which can have a negative impact on performance.
- Security: Third-party services may have different security policies than your own company or organization.
- Reliability: Third-party services may experience downtime or other disruptions, which could impact your ability to create iOS apps.
Q: What is the best third-party service for creating a Flutter iOS app without a Mac?
A: The best third-party service for creating a Flutter iOS app without a Mac will vary depending on your specific needs and requirements. Some of the most popular options include:
- [Flutter Build](https://flutter.dev/docs/development/tools/build-system/flutter-build)
- [Appetize](https://appetize.io/)
- [Codemagic](https://codemagic.io/)
- [Flutter Cloud](https://flutter.dev/docs/development/tools/cloud-build)
Q: How do I use a third-party service to create a Flutter iOS app without a Mac?
A: The steps for using a third-party service to create a Flutter iOS app without a Mac will vary depending on the specific service you are using. However, the following general steps will provide you with a good starting point:
1. Sign up for a third-party service.
2. Install the third-party service’s software on your Windows or Linux machine.
3. Create a new Flutter project.
4. Add the third-party service’s plugin to your Flutter project.
5. Follow the third-party service’s instructions to build and deploy your iOS app.
Q: I have a Mac, but I don’t want to use it to create Flutter iOS apps. Can I use a third-party service instead?
A: Yes, you can use a third-party service to create Flutter iOS apps even if you have a Mac. This can be a convenient option if you don’t want to deal with the hassle of setting up and maintaining a Mac.
Q: I’m not sure if I should use a third-party service to create Flutter iOS apps without a Mac. What should I do?
A: If you’re not sure whether or not you should use a third-party service to create Flutter iOS apps without a Mac, there are a few things you can consider:
- The benefits and drawbacks of using a third-party service
- Your specific needs and requirements
- The cost of using a third-party service
Once you’ve considered these factors, you should be able to make an informed decision about whether or not to use a third-party service to create Flutter iOS apps without a Mac.
Flutter is a powerful cross-platform mobile development framework that can be used to create iOS apps without a Mac. It is an excellent choice for developers who want to create high-quality, native iOS apps without having to learn a new programming language or platform.
The key takeaways from this article are:
- Flutter is a free and open-source framework.
- Flutter is used by Google for its own mobile apps.
- Flutter is compatible with both Android and iOS.
- Flutter can be used to create beautiful, high-quality mobile apps.
- Flutter is easy to learn and use.
- Flutter is a great choice for developers who want to create cross-platform mobile apps.
Author Profile
-
Hatch, established in 2011 by Marcus Greenwood, has evolved significantly over the years. Marcus, a seasoned developer, brought a rich background in developing both B2B and consumer software for a diverse range of organizations, including hedge funds and web agencies.
Originally, Hatch was designed to seamlessly merge content management with social networking. We observed that social functionalities were often an afterthought in CMS-driven websites and set out to change that. Hatch was built to be inherently social, ensuring a fully integrated experience for users.
Now, Hatch embarks on a new chapter. While our past was rooted in bridging technical gaps and fostering open-source collaboration, our present and future are focused on unraveling mysteries and answering a myriad of questions. We have expanded our horizons to cover an extensive array of topics and inquiries, delving into the unknown and the unexplored.
Latest entries

|
| IOS Build with Windows |
If you are a windows user and doing your flutter development with windows but still want to build & run your flutter project on an ios devices then read this article carefully. You can see your flutter app on an ios device after
reading this article without any cost.
Requirements
You don’t need any extra software or tools. Just need internet connections.
Steps to Follow
Build Project
First, go to
FlatLab.io and register a new account by giving your email address and password. Then Go to your profile by clicking on this link. You will see a page like this.

|
| Profile Page in flutlab.io |
For your better understand I’m going to upload my project which is the pokemon_app project. Just follow my steps carefully. At first, I’m going to open my
project in VS Code or any of your favourite ide to run a command in the terminal to clean my project which is required. the command is:
flutter clean
Then we have to zip the full project folder. Then upload by click on Upload zip which is marked in the screenshot to upload our project and also don’t
forget to run flutter clean before you convert your project to a zip
file.
after the upload is done click on your project to be opened on a new page. You
will see a window like this.

|
| Project Page in flutlab.io |
Then click on the debug icon button which is marked in the
screenshot and select your build type to ios-build. Then click on the
debug icon again to start building your project. It will take some
time. Wait for your build to be finished. The waiting page will look like
that.

|
| IOS Build is Running |
After some time your building will be finished and will find a page like that.

|
| IOS Build Finished |
Now your IOS project build is ready to be downloaded !! Just simply click on the link marked in the screenshot. A zip file will download soon.
Run the IOS Project
Now go to
Appetize.io and
choose your zipped file which we have downloaded from FlutLab.io and upload the file to the website. Here you will find a field to submit your email address. Just simply give any valid email and tap on the
Generate button.

|
| Appetize file upload Page |
After that, check the email you’ve submitted before. You will get an email
having a link like that.

|
| Appetize Email |
Just simply click on the link. Here you will see an ios device which is the
iPhone 6s with a button of Tap to Play. Just simply tap the button and see the magic. Your flutter app is showing live on the ios device.

|
| Appetize App Running |
You can use this device as a virtual emulator. You can also change the ios device as you will.

|
| Appetize Changing Screen Ratio |
That’s all from my side. Hope you enjoy this article. If you face any kind of
difficulties feel free to contact me or comment below. Keep doing development.
Thank you so much.

C💙demagic
Posted on
• Edited on
Learn from this post how to build and publish iOS apps if you’re working on Linux or Windows. We are going to show how this is possible with Flutter and Codemagic.
NB! there is a difference between developing iOS apps and building and publishing them with Codemagic.
It’s hard to imagine developing apps for iOS without a Mac computer. There is no sign of this changing any time soon, but there are still ways to build the app for iOS and release it to the App Store even if you don’t have a Mac. With Flutter and Codemagic, you can build and distribute iOS apps without buying a Mac computer yourself.
In this post, we will walk you through how you can create a Flutter app on Linux or Windows and use Codemagic CI/CD to set up code signing for your iOS project and release the application to the App Store. We will be using the Flutter iOS app from Codemagic sample projects in this example.
REQUIREMENTS
- You need to buy the Apple Developer Program licence to code sign and publish the app
- You should also have an iOS device to smoke test the application
Build and distribute iOS apps without Mac with Flutter & Codemagic Get started
Before getting started, it’s important to articulate which problem are we going to solve. You cannot develop iOS apps without a Mac computer. This article is about how to build an iOS app and release it to your users. But what’s the difference?
Let’s take a closer look at the problem statement and example use cases before going into the possible solution. Consider this a user story to understand the context before starting feature development.
When can you not use Linux or Windows machine to develop iOS applications?
As you probably may have guessed, having an iOS simulator or debugging iOS specific issues on macOS is invaluable. Moreover, when a user logs a bug, you need to be able to reproduce the issue and it is likely that the problems that are reported are platform-specific.
I would say one of the most notorious features that is ubiquitious across all apps that you will have to deal with is push notifications. While iOS simulator will be enough in most cases, there are some scenarios where you should also test your application on a real device and push notifications are one of them.
When can you build and publish iOS applications without a Mac computer?
One big advantage of Flutter is not having to build a whole new application for just iOS or any other OS for that matter, but using the existing project to ship for all platforms.
You can buy a second-hand Mac and set up your development environment or you can use a free service like Codemagic to build the iOS binary that you can smoke test on an iOS device or share with your first users. This is a great way to move quickly and get your app out.
Try to turn the tables if you are a macOS user and considering releasing a desktop version of your app to Microsoft Partner Center. You could go out and buy a Windows machine to build the application or you can use your existing CI/CD tool and switch the instance type to Windows.
The second most common case I have seen is when you are working in a team and some team members have Mac computers and others have Linux or Windows machines. It would be great once you are ready to merge a PR that the CI will build for all platforms and automatically share the binaries with the QA team rather than asking others to build the binaries or having QA do it.
Developing Flutter apps on Linux or Windows
Flutter is a multi-platform application development framework that enables you, among other platforms, to develop iOS and Android apps from the same source code. However, you need to use Xcode to build an iOS app and Xcode will only work on macOS. You cannot get away with Linux or Windows. We can, however, build and distribute the apps to Google Play Store or Apple App Store using a CI/CD product like Codemagic.
Flutter together with Codemagic makes it possible to release iOS apps for developers using Linux or Windows.
Setting up development environment for Flutter
Let’s get started by installing Android SDK and Flutter. After that you can clone the Codemagic sample projects repository from GitHub and we can start working on it right away. We will be using the Flutter Android and iOS demo project. Getting started with Flutter guides are also available on the official website of Flutter docs.
Keep in mind that we can use Linux or Windows to only develop for Android not iOS. We will still get an iOS app by the end of this article that can be deployed to the App Store, but we will use Codemagic CI/CD with a macOS environment to achieve this.
Adding application to Codemagic
After signup, you can connect your repository by clicking Add application button.
Documentation link. If the repositroy is self-hosted or behind a firewall see the documentation here.
Run your first build
Let’s try to run a build and print «My first green build!»

- Open the Flutter workflow editor and select Run tests only.
- Make sure tests are disabled in the Tests section.
- Open the + button after the Distribution section and write
#!/bin/sh

echo "My first green build!"
Enter fullscreen mode
Exit fullscreen mode
- Save changes.
- Start the build.
Alas… the build has failed. The error message is saying that there is no pubspec.yaml file in the root of the cloned repository. This is true, because it is a monorepo. How do we tell Codemagic which path to use for the working directory?
- Open the workflow editor.
- Go to the Build section and select the Flutter demo project in the Project path field.

- Save changes.
- Start the build.

Success!
Building the iOS project
Now that you have made your first green build, let’s try to build the iOS project.
- Open the workflow editor.
- Choose iOS as the build platform.
- In the Build section, choose the Xcode version, CocoaPods and Flutter version you would like to use.
- Save settings.
- Start the build.
- Cross your fingers.

At the time of writing this article (Feb 3 2022), we used Xcode 13.2.1 and Flutter 2.8.1
If you are following this guide on your own application, then you may experience another failed build.
One common issue that we have seen is if you have never built the iOS project before is generating the Podfile or making a small change in Xcode graphical user interface (GUI). You can remote access the Codemagic macOS virtual machine and initialize a new file and push the changes to your repository. Once you are connected, run these commands from the terminal. This is how you could initialize pods for example.
cd iOS
pod init
gh auth login --with-token YOUR_GITHUB_PAT_TOKEN
git add .
git commit -m "Added Podfile"
git push
Enter fullscreen mode
Exit fullscreen mode
Please refer to the docs to see how to use remote access here
In order to push the changes to your repo, you need to authenticate yourself in your git provider. This is necessary because Codemagic VM only has read access to the GitHub repo. In order to authenticate with GitHub, you need to use your GitHub personal access token. See how to generate the token from https://github.com/settings/tokens.
You are now one step closer to getting the .ipa file!
.ipa file
The .ipa is a binary that you can run on a physical device similar to an .apk for Android. We cannot produce an .ipa binary on anything other than macOS. The way to overcome the obstacle will be to use a continuous integration and delivery service with macOS environment. We will need to set up our Codemagic CI/CD to be able to do code signing with Xcode and build the .ipa binary and later publish it to App Store Connect.
Preparing your iOS project for code signing on your local machine
Much like how you need to configure Gradle to use relative paths instead of absolute paths in order to function in a CI/CD environment, we need to make some changes to our iOS project as well.
-
Register your bundle id in Apple Developer Portal by going to https://developer.apple.com/account/resources/identifiers/list.
-
Create an app record in https://appstoreconnect.apple.com/apps and use the bundle id you had just created.
-
Open your iOS project in an editor and open the
project.pbxprojfile and set the applicationPRODUCT_BUNDLE_IDENTIFIERto the bundle id you had just created. This is mentioned in multiple places in the project, so make sure to change it everywhere. You can edit the file without a Mac. -
Bonus points: set up webhooks for automatic build triggering in Codemagic. by opening the workflow editor and setting the build trigger to build on push to master.
-
From your local machine terminal, save changes you had made to the
project.pbxprojfile and push changes to master in your repository. If you had already configured webhooks, you should also see a Codemagic build fire off from this push.
If you are using flavors, we have covered this case in a separate post here and a sample project is available on GitHub here
If you are using some Google services like Firebase, then you will need to access the virtual machine remotely via VNC and add the GoogleService-info.plist file to the iOS project via Xcode. There is an article about adding Firebase to your iOS project available on our blog here.
Getting started with iOS code signing
Judging by the number of questions related to iOS code signing on Stackoverflow, many developers struggle with iOS code signing. We understand that setting up code signing can be a headache, especially when you’re trying to get it to work in a CI/CD environment without a Mac.
In order to code sign iOS apps, you need an Apple developer account (one of the requirements mentioned in the beginning), a development and a distribution certificate, your app ID and the matching provisioning profiles.
After WWDC 2019, it became possible to use the App Store Connect API in order to generate these signing files. We have built our own CLI tools on top of the API and Codemagic uses these under the hood to make code signing and publishing easier. The CLI tools are open source on GitHub.
Setting up App Store Connect integration on Codemagic
Now that you have successfully built the iOS project and set up your iOS project for code signing, let’s enable iOS code signing on Codemagic as well.
We are going to be using the App Store Connect integration in order to do this. This means you need to create an API key on Apple Developer Portal.
- Open the workflow editor and go to Distribution > iOS code signing.
- Follow the prompt to set up App Store Connect integration.
- Go to Apple Developer portal > Users and Access.
- Go to the Keys section and create an App Store Connect API key, then upload it to Codemagic to authenticate with the Apple Developer portal.
- Complete Codemagic App Store Connect integration.
We recommend creating a dedicated key for use in Codemagic. For automatic code signing, create the key with Developer role. To use the integration also for publishing to App Store Connect, the App Manager role is required. In this example we will be publishing to App Store Connect and will create the key with App Manager role.
- App Store Connect API key name is a name that helps you to distinguish the key in Codemagic.
- Issuer ID is an alphanumeric value above the table of API keys and identifies who created the authentication token.
- You can find the Key ID from the table of API keys.
- API key is the .p8 key file that can be downloaded from App Store Connect. Note that the key can be downloaded only once.
Link to documentation
Building the .ipa file and publishing to App Store Connect
Now that you have enabled the App Store Connect integration, you can use Codemagic to generate your code signing files (certificate and provisioning profile) and produce an .ipa.
- Open the workflow editor.
- Navigate to Distribution > iOS code signing.
- Select automatic code signing.
- Select your API key.
- Select the provisioning profile type as App Store.
- Select your bundle identifier.
- Save changes.
- Open the App Store Connect section and enable App Store Connect publishing; make sure to select the API key that we just created.
Kick off your new build.

You may face additional errors as well.

If the build fails because of an error message like this, it means you have too many existing distribution certificates on your account. You can remove the ones that are not used or choose manual code signing and upload your existing profiles and distribution certificates following the docs here
If you opt to use .yaml file configuration as opposed to the GUI workflow editor you can also specify the private key of the distribution certificate you are using. Link to documentation
Conclusion
You can use an SDK like Flutter to develop applications on many platforms. Codemagic CI/CD allows you to collaborate with your team and move quickly by building and releasing the applications automatically for all target platforms — either to the stores or for sharing in your team.
Make sure that you test the apps before release and that you have access to the native operating systems you are building for.
The native iOS components require a macOS or Darwin for developing and distributing iOS apps. However, technologies like Flutter allow us to develop cross-platform apps on Linux or Windows and we can then distribute the apps to Google Play Store or Apple App Store using the Codemagic CI/CD solution.
Can iOS apps be developed on Windows?
Microsoft now lets iOS developers deploy, run and test their apps directly from Windows. If you’re an iOS developer, then Microsoft’s Xamarin already allowed you to develop your iOS applications in C# with the help of tools like Xamarin.iOS for Visual Studio.
Flutter is an open-source, multi-platform mobile SDK from Google which can be used to build iOS and Android apps from the same source code. Flutter uses the Dart programming language for developing both iOS and Android apps and also has great documentation available.
Why can’t you develop iOS apps on Windows?
The main reason why you can’t is that Windows is not compatible with Xcode, which is the Integrated Development Environment (IDE) used to design, develop, and publish iOS apps. Because Apple does not license its operating system outside of its own hardware, you cannot buy a PC with macOS on it.
Is it legal to Hackintosh?
According to Apple, Hackintosh computers are illegal, per the Digital Millennium Copyright Act. In addition, creating a Hackintosh computer violates Apple’s end-user license agreement (EULA) for any operating system in the OS X family. A Hackintosh computer is a non-Apple PC running Apple’s OS X.
Is Flutter a frontend or backend?
Flutter is a framework specifically designed for the frontend. As such, there is no “default” backend for a Flutter application. Backendless was among the first no-code/low-code backend services to support a Flutter frontend.
Is Flutter only for UI?
Flutter is a framework for developing native like mobile apps for both android and ios simultaneously with single codebase. Flutter uses dart as its language. Yes, flutter can develop an awesome looking app but it can also be used as to develop a complete app with the help of any state management technique.
Is Flutter better than Swift?
Theoretically, being native technology, Swift should be more stable and reliable on iOS than Flutter does. However, that’s the case only if you find and hire a top-notch Swift developer who is capable of getting the most out of Apple’s solutions.
How can I develop iphone apps on Windows?
How to Develop iOS Apps on Windows Install VirtualBox or VMware and create a virtual machine on your computer. Install Mac OS in your virtual machine. Install Xcode on macOS (choose the desired outcome in “System Preferences”) Start building iOS apps.
Can you run iOS apps on Windows 10?
The simple fact is that there is no emulator for iOS that you can run in Windows, and that’s why you can’t have your favourite use the likes of iMessage or FaceTime on your PC or laptop. It just isn’t possible.
How can I test my Iphone apps on Windows?
Another popular option to test iOS applications on your Windows PC is Remoted iOS Simulator for Windows. It’s a developer-focused tool that comes pre-loaded as a part of Xamarin in Visual Studio.
Is it worth making a Hackintosh?
Building a hackintosh will undoubtedly save you money vs buying a comparably powered Mac. It will run completely stable as a PC, and probably mostly stable (eventually) as a Mac. tl;dr; The best, economically, is to just build a regular PC.
Does Apple support Hackintosh?
A Hackintosh (a portmanteau of “Hack” and “Macintosh”) is a computer that runs Apple’s Macintosh operating system macOS (formerly named “Mac OS X” or “OS X”) on computer hardware not authorized for the purpose by Apple. Hackintosh laptops are sometimes referred to as “Hackbooks”.
Can you run iOS on a PC?
Despite the fact that it’s impossible to install iOS on a PC, there are many ways to go around it. You will be able to play your favorite iOS games, develop and test apps, and shoot YouTube tutorials using one of these great emulators and simulators.
Is Flutter only for frontend?
Yes, Flutter alone is a framework that is only used for getting the UI or Frontend part done! Then how are people creating Flutter apps? Here’s the thing, Flutter is powered with Dart language. Meaning, every function you code for getting API response or getting data from database will be written in Dart.
Can I use Python in Flutter?
A new flutter plugin project, which supports flutter to interact with other scripting languages such as python, java, ruby, golang, rust, etc. It is easy to use, supports android and ios platform.
Is Flutter good for app development?
In our opinion, Flutter has many more advantages for business and development teams than risks. It’s a great chance to build beautiful, high-performance, and outstanding mobile apps that fit your custom needs and requirements. It’s worth considering Flutter, especially if you want an app both for iOS and Android.
What is similar to flutter?
Top Alternatives to Flutter React Native. React Native enables you to build world-class application experiences on native. Xamarin. Xamarin’s Mono-based products enable . Android SDK. Java. Kotlin. React. Swift. Ionic.
Which is better flutter or react?
Flutter, the last one is better in terms of performance, compatibility & app features, engineering cost, and further market trends. However, React Native is distinctively better when it comes to finding software developers.
Is flutter better than Java?
Flutter is a cross-platform mobile framework from Google. Flutter help developer and designer to build modern mobile application for Android and iOS. Java is one of the widely used object-oriented and class-based programming languages for mobile, web and desktop applications.
Is Flutter worth learning?
Again, Flutter has this fantastic documentation, and it has excellent support for these IDs like Visual Studio Code or Android studio. Also, the Flutter team has built out some great tooling that will help you speed up your development process. Furthermore, Flutter apps have an excellent hot reload that works right.
Is Flutter faster than native?
As for native technologies, developers have to write two codes for Android and iOS, which inevitably takes more time. According to Surf experts, Flutter development is 20-50% faster compared to the creation of two native apps.
How long will it take me to learn Flutter?
It’d take you approximately two weeks to get through it (or two days if you’re really passionate about Flutter). You’ll come out with a much better understanding of how Flutter works and the best practices for coding Flutter apps.
Last Updated :
09 Jan, 2024
Flutter is an open-source UI software development kit created by Google. It is used to develop cross-platform applications from a single codebase for any web browser,[4] Fuchsia, Android, iOS, Linux, macOS, and Windows. Flutter apps are written in the Dart language and make use of many of the language’s more advanced features. If you want to learn more about it you can visit this page.
In Flutter it’s not common to install CocoaPods. Flutter has its package manager. You interact with it using the `pub` command. However, in cases where you’re dealing with native iOS code or plugins that rely on CocoaPods you may need to interact with it.
Prerequisites needed
- Ensure you have Flutter installed on your macOS.
- Make sure you have CocoaPods installed on your macOS.
Steps to Install POD in macOS
1. Navigate to the iOS Directory
Navigate to the `ios` directory of your Flutter project in the terminal by using the below command
cd your_flutter_project/ios
2. Check for Podfile
Check if you already have a `Podfile` in the `ios` directory. If you don’t have it, just run the following command in the terminal. This command will initialize a Podfile for your project.
pod init
3. Edit Podfile
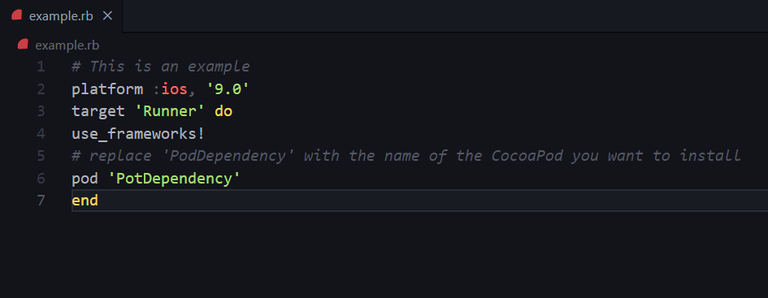
Open the generated `Podfile` in a text editor of your choice and add your dependencies inside the target block.
# This is an example
platform :ios, '9.0'
target 'Runner' do
use_frameworks!
# replace 'PodDependency' with the name of the CocoaPod you want to install
pod 'PotDependency'
end
4. Install Pods
Save the `Podfile` and run the following command. This command will install the specified CocoaPods and sets up the necessary Xcode workspace.
pod install
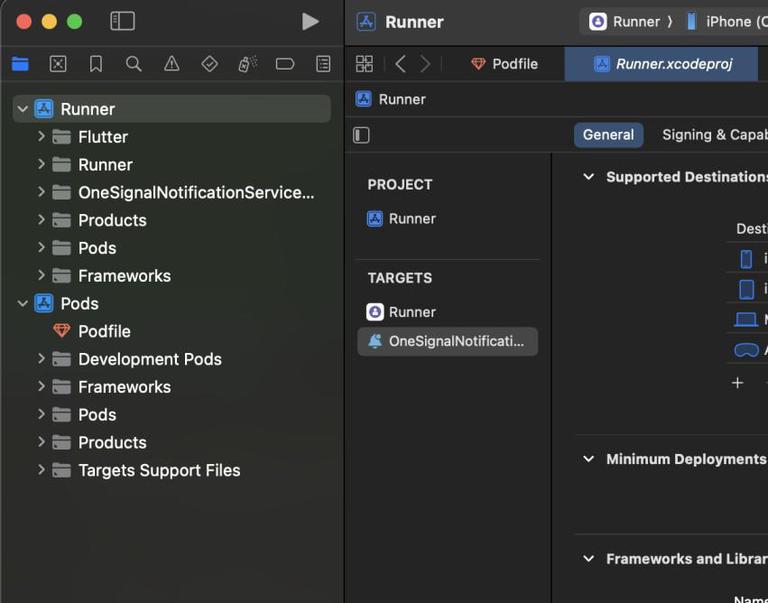
5. Open Xcode Workspace
Open the `.xcworkspace` file in the `ios` dir.
open Runner.xcworkspace
Note: From now on, always open the `.xcworkspace` instead of `.xcproj` when working on any Flutter project.
Steps to Install POD in Windows
Note: In order to run “pod install”, you need an actual Xcode project. Since Xcode does not run on Windows, use a macOS machine with Xcode to generate an Xcode project.
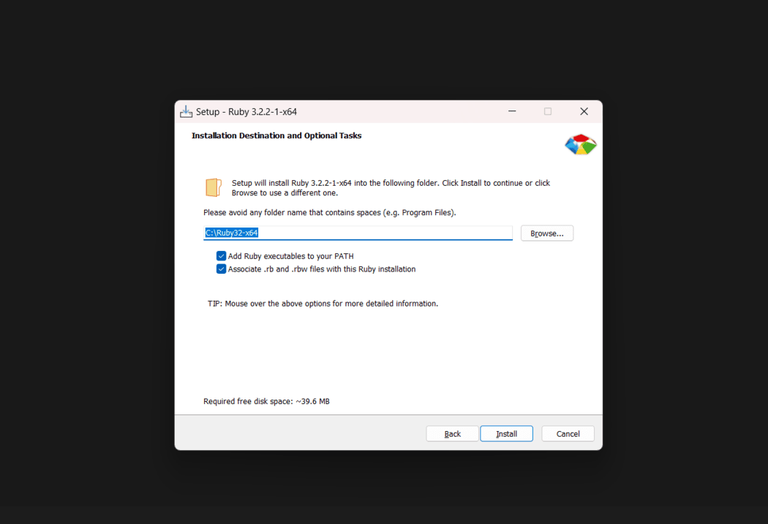
1. Install Ruby in your system
Link to download Ruby : https://rubyinstaller.org/
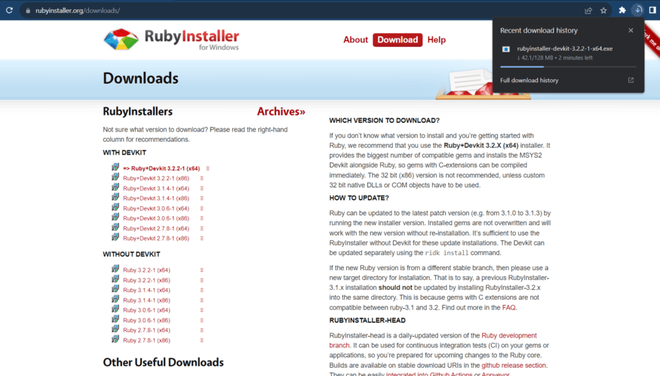
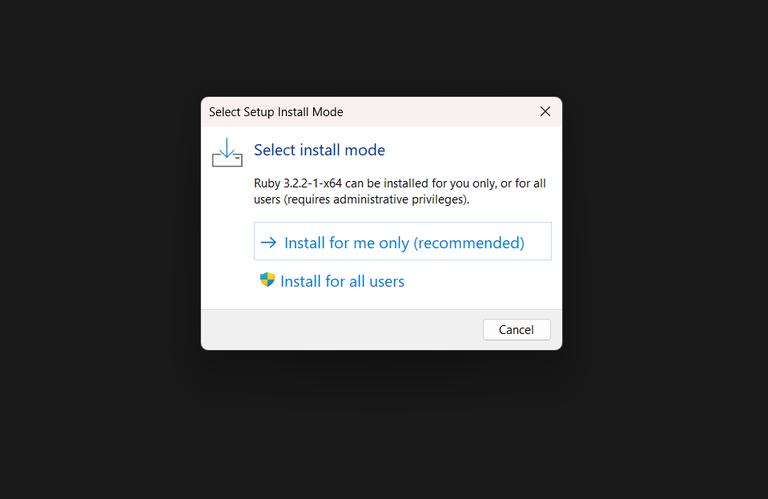
Run the installer
Check the box that says «Add Ruby executables to your PATH» during installation process.
2. Install CocoaPods
Run to install CocoaPods as administrator
gem install cocoapods
3. Set up Flutter Project
Create a new Flutter project .
4. Navigate to the iOS folder
Open cmd and navigate to the «ios» folder.
Note: Replace <path to your flutter project> with your path.
cd <path to your flutter project>/ios
5. Initialize CocoaPods
Run the command to initialize CocoaPods in the iOS folder:
pod init
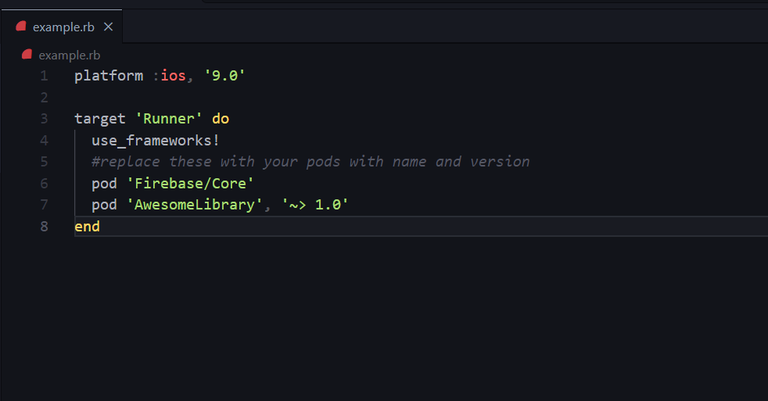
6. Edit Podfile usinf text editor
Open the Podfile and the necessary pods for your project.
platform :ios, '9.0'

target 'Runner' do
  use_frameworks!
  #replace these with your pods with name and version
  pod 'Firebase/Core'
  pod 'AwesomeLibrary', '~> 1.0'
end
7. Install Pods
Save the «Podfile» which you just updated and run the command mentioned below
pod install
8. Open the Project
After the installation is complete, open the project using Xcode:
open Runner.xcworkspace
Note: Keep in mind that while you can set up CocoaPods on Windows, but the actual running of the iOS part might require a macOS or a virtual machine.