
Здравствуйте админ! На моём ноутбуке установлена Windows 10 и она не загружается. Ошибки при загрузке всегда разные:
An operating system was not found
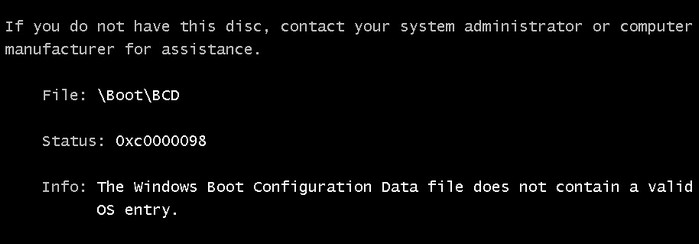
File: \Boot\BCD
Status 0xc0000098
error 0xc000000f
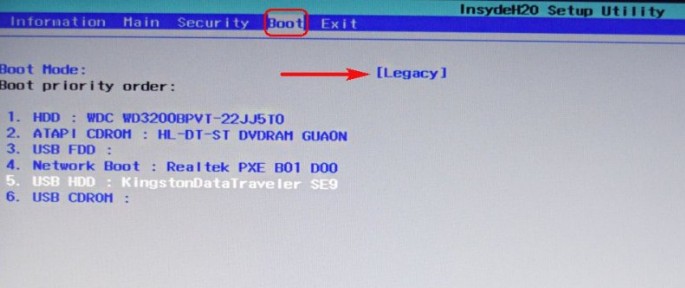
По вашему методу хочу попробовать загрузить операционную систему с повреждённым загрузчиком с помощью Live-диск by Sergei Strelec, но этот диск не работает с UEFI, а в моём ноуте в БИОСе включен интерфейс UEFI. Если я отключу UEFI, то ноутбук однозначно не загрузится! Стоит мне пробовать или ничего не получится?
Привет друзья! Однозначно стоит попробовать и у вас всё получится, сейчас поймёте почему.
Итак, имеем такой же ноутбук с Win 10, как и у нашего читателя и на нём тоже проблемы с загрузкой ОС.
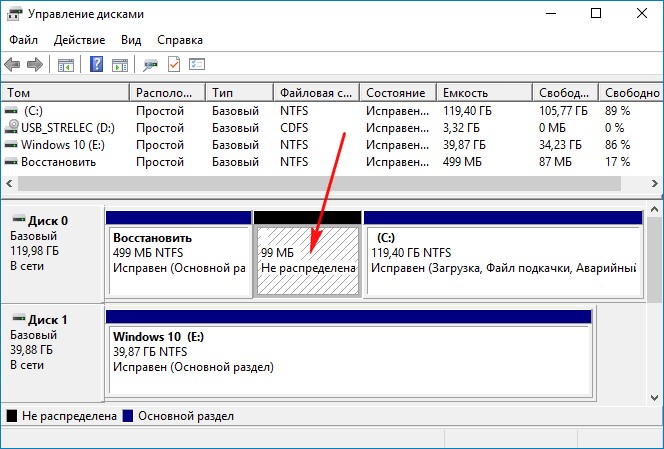
Специально замечу, что находящееся на Live-диск by Sergei Strelec средство запуска Windows в обход её неисправного загрузчика срабатывает при любой неисправности загрузчика. Средство сработает даже при отсутствии раздела с загрузчиком (шифрованный (EFI) системный раздел 100-300 Мб).
Почему? Потому что инструмент запускает непосредственно сам файл winload.exe, отвечающий за запуск операционной системы. Находится данный файл в папке C:\Windows\System32.
Создаём загрузочную флешку и загружаем с неё ноутбук (предварительно отключив в БИОСе интерфейс UEFI).
В загрузочном меню флешки выбираем пункт «Search & Start Windows 7/8»

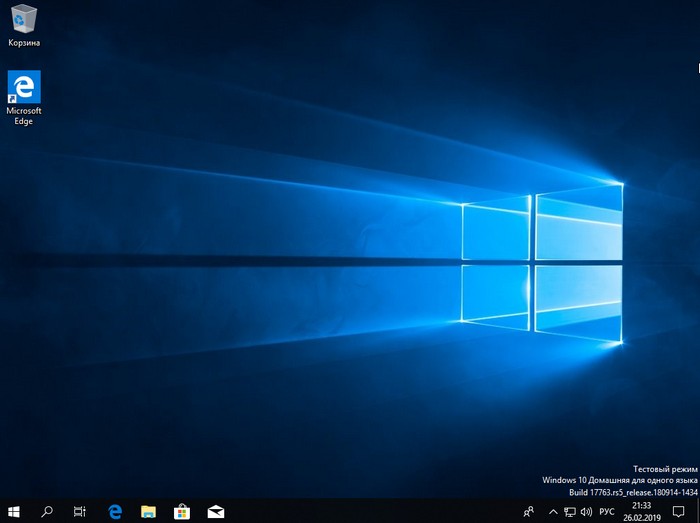
Далее загрузится наша Win 10 с отсутствующим или повреждённым загрузчиком.
К сожалению, средство запуска Windows на диске Стрельца не восстанавливает сам загрузчик, а лишь производит запуск Windows с повреждённым загрузчиком. Для восстановления загрузчика ОС воспользуйтесь этой статьёй.
-
Home
-
Knowledge Base
- What Is Winload.exe & Some Additional Information About It
By Amy | Follow |
Last Updated
Do you know what winload.exe is? Where it is applied? You can find the answers to these questions in this post. After reading this post, you will have a clear understanding of it.
What Is Winload.exe
Winload.exe (Windows Boot Loader), a small piece of software, is called a system loader, which is booted by BOOTMGR. Actually, it is a built-in utility in Windows 10. The main task of winload.exe is to load necessary device drivers and the core part in Windows – ntoskrnl.exe.
While in old Windows operating systems such as Windows XP, the load of ntoskrnl.exe is completed by NTLDR that serves as the boot manager too. Therefore, if winload.exe is damaged or missing, you will not be able to use a Windows 10 based tablet, laptop or desktop.
The above description is a brief introduction of winload.exe. To get more details about winload exe, please continue reading this post of MiniTool.
Is winload.exe a virus? This is a question asked by plenty of people. Given to that phenomenon, the following part will analyze it further and show you the answer.
Is Windows.exe a Virus
As mentioned earlier, winload.exe is a small piece of software. However, some antivirus websites and other file information sites will mark winload.exe as a kind of malware. Sometimes, it is even regarded as unnecessary and can be deleted. But this is partly true.
Though a winload.exe file that is infected by virus has malicious content, the key point is to find the exact location of the file in the computer. By doing so, you can distinct the true file and possible malicious file copy.
The winload.exe file is located in C:\Windows\System32\ folder. No matter what version of Windows you are suing, its location will never change. Hence, if you find a winload.exe file in any other locations and it marked as malicious file by antivirus programs, it is very likely a malicious file. In this case, you can delete it entirely.
In one word, the winload.exe itself is not a virus, but it can be infected by other malicious content and do harmful to your computer.
You may encounter some errors related to winload.exe due to winload exe file damage and deletion. Here are some common winload.exe error messages.
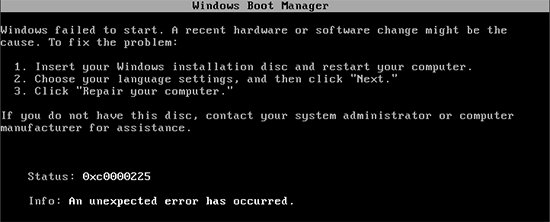
- Windows failed to start. A recent hardware or software change might be the cause.
- exe is missing or corrupt.
- “\Windows\System32\winload.exe” cannot be trusted because of its digital signature.
- Status 0xc0000428
Tip: Don’t attempt to solve a missing or corrupt winload.exe file via downloading a copy from the Internet! The copy could be malware and pretend the file that you are looking for. Besides, the original winload.exe file in C:\Windows\System32\ is write-protected, so it is not easy to be replaced.
The first thing you need to do is to check your computer for malware after receiving the above error messages. You’d better use a free bootable antivirus tool rather than a traditional antivirus program that runs from inside Windows. If this method fails to work, you can try writing a new partition boot sector and rebuilding BCD.
Both the two methods can help you fix any corrupt entries that contain winload.exe. You can also run sfc /scannow to replace the missing or corrupted system file.
There is another winload.exe Windows 10 error can be displayed as below.
A component of the operating system has expired. File: \Windows\system32\winload.exe
If a Windows preview version has reached its license expiration date, you might receive such message. Besides, your computer will restart every few hours. For such kind of error type, it is no use running virus scan and file repair. You need to install a full and valid version of Windows with a working product key to activate PC.
Here is some extra information that you should know about Window system32 windload exe. If the computer is in hibernation mode, BOOTMGR will boot winresume.exe instead of winload.exe. You need to pay attention to the fact that winresume.exe and winload.exe are located in the same folder.
Copies of winload.exe, Boot and WinSxS can be found in the subfolders of C:\Windows. Winload.exe is called winload.efi under UEFI based system. The EFI extension is executable only for the boot manager that is located in the UEFI firmware.
Final Words
As an important component in operating system, winload.exe plays a role in loading device drivers. To sum up, this post mainly discusses the definition, properties of winload.exe Windows 10, some errors related to winload.exe and solutions to the errors. Read here, you may have a comprehensive understanding of winload.exe (Windows Boot Loader).
About The Author
Position: Columnist
Having writing articles about computer tech for a long time, I am rather experienced especially on the aspect of computer optimization, PC enhancement, as well as tech terms explanation. The habit of looking through tech forums makes me a great computer issues collector. And then, many articles related to these issues are released, which benefit plenty of users. Professional, effective, and innovative are always the pursuit of an editing worker.
«I am getting the winload.exe missing or corrupt error, and I can’t seem to find a fix for it, and thus no installation disk. I cannot go to the startup repair option. Is there any fix?»
When winload.exe is missing or corrupt, you may get these following error messages:
- 1. File : \windows\system32\winload.exe Status:0xc00000e9 about boot error
- 2. File : \windows\system32\winload.exe Status : 0xc0000001 about failure to be loaded
- 3. File : \windows\system32\winload.exe Status:0xc0000428 about digital signature failure
- 4. File : /windows/system32/winload.exe Status:0xc0000221 about black screen
This is pretty annoying, because you fail to boot up, suffer system crash and freeze, fail to start CPU, and you can’t do anything about your computer. Here we will give you more details about this winload.exe error, and how to fix it.
Buy Now
When receiving an error about a missing winload.exe, you may think the only choice is to reinstall Windows. Actually, you don’t have to. A reliable and versatile Windows repair tool is enough to help you out. This is why I highly suggest Windows Boot Genius here. If you are not a computer expert, it doesn’t matter, since this tool is easy to use.
Preparation: a workable computer (Windows 10/8.1/8/7/XP/Vista); a blank CD/DVD or USB flash drive
Steps:
- Download Windows Boot Genius and install it on the workable computer you’ve prepared.
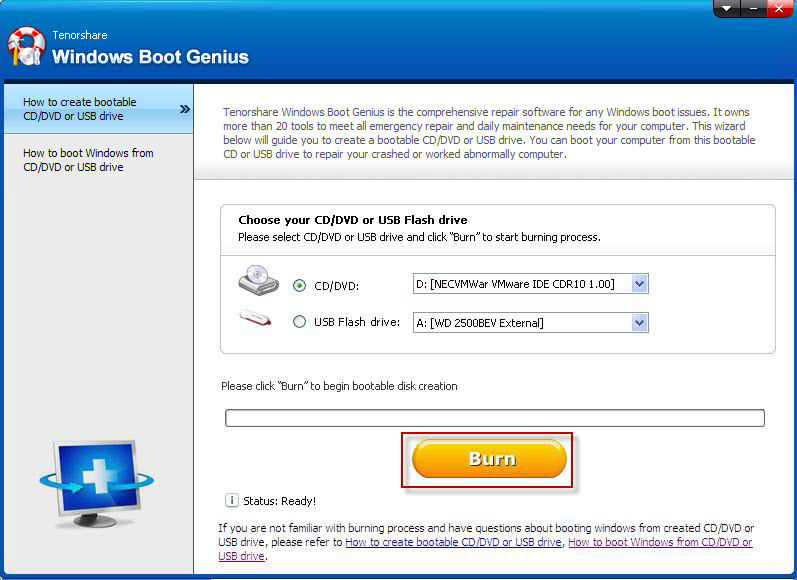
- Insert a blank CD/DVD or USB flash drive into the computer and launch the software.
- Select CD/DVD or USB and click «Burn» to create a bootable disk.

- Insert the bootable disk into the «winload.exe is missing or corrupt» computer and set BIOS to boot computer from bootable disk.
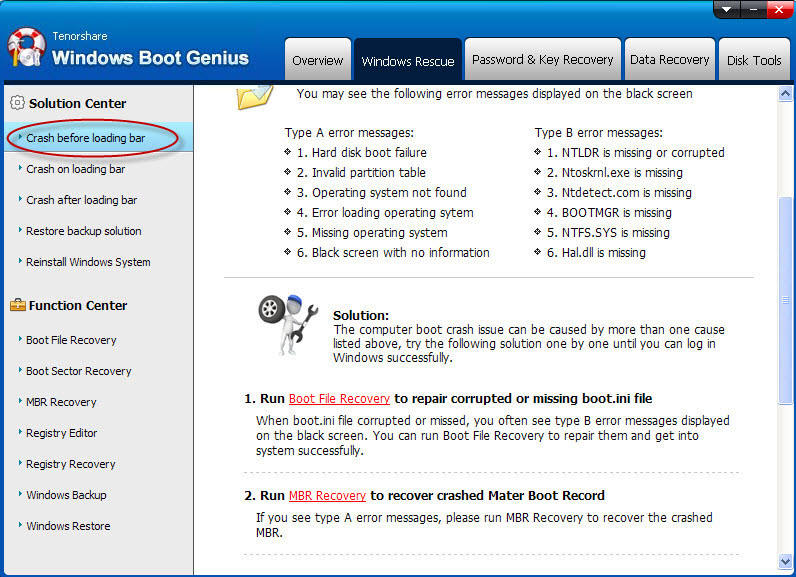
- When the computer boots, you will see the main interface of Windows Boot Genius. Head into Windows Rescue bar and backup your Windows first in case of any data loss. Then choose an appropriate situation in the solution center and follow the instructions on the interface to fix this winload.exe error.
After the above-mentioned steps, you can reboot your computer normally.
Bonus: What is winload.exe?
Winload.exe, known as Windows Boot Loader, is a small piece of software started by Windows Boot Manager (Bootmgr.exe). It is used in Windows 8, Windows 7, and Windows Vista operating system. The default location is \windows\system32\winload.exe.
The job of winload.exe is to load ntoskrnl.exe, a core part of Windows. It is first introduced in Windows Vista. In older versions of Windows system, such as Windows XP, the loading of ntoskrnl.exe is done by NTLDR, which also serves as the boot manager.
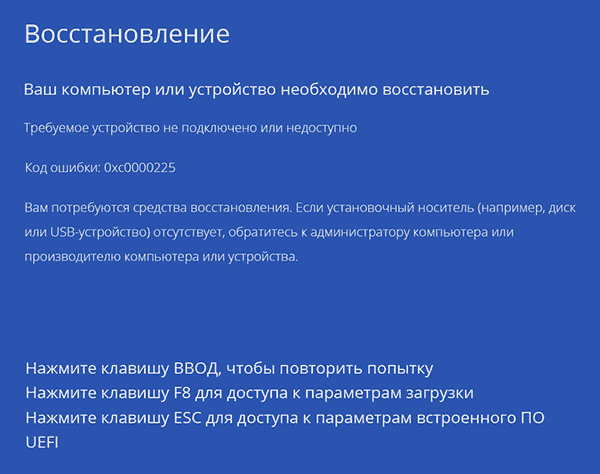
Одна из ошибок загрузки Windows 10, 8.1 и Windows 7 с которыми пользователь может столкнуться — ошибка 0xc0000225 «Ваш компьютер или устройство необходимо восстановить. Требуемое устройство не подключено или недоступно». В некоторых случаях в сообщении об ошибке также указывается проблемный файл — \windows\system32\winload.efi, \windows\system32\winload.exe или \Boot\Bcd.
В этой инструкции подробно о том, как исправить ошибку с кодом 0xc000025 при загрузке компьютера или ноутбука и восстановить нормальную загрузку Windows, а также некоторая дополнительная информация, которая может оказаться полезной при восстановлении работоспособности системы. Обычно, переустановка Windows для решения проблемы не требуется.
Примечание: если ошибка возникла после подключения и отключения жестких дисков или после изменения порядка загрузки в БИОС (UEFI), убедитесь, что в качестве устройства загрузки выставлен нужный диск (а для UEFI-систем — Windows Boot Manager при наличии такого пункта), а также не изменился номер этого диска (в некоторых БИОС есть отдельный от порядка загрузки раздел для изменения порядка жестких дисков). Также следует убедиться, что диск с системой в принципе «виден» в БИОС (в противном случае речь может идти об аппаратной неисправности).
Как исправить ошибку 0xc0000225 в Windows 10
В большинстве случаев ошибка 0xc0000225 при загрузке Windows 10 бывает вызвана проблемами с загрузчиком ОС, при этом восстановить правильную загрузку сравнительно просто, если речь не идет о неисправности жесткого диска.
- Если на экране с сообщение об ошибке есть предложение нажать клавишу F8 для доступа к параметрам загрузки, нажмите её. Если при этом вы окажетесь на экране, который показан в шаге 4, перейдите к нему. Если же нет, перейдите к шагу 2 (для него придется воспользоваться каким-то другим, работающим ПК).
- Создайте загрузочную флешку Windows 10, обязательно в той же разрядности, что и установленная на вашем компьютере (см. Загрузочная флешка Windows 10) и загрузитесь с этой флешки.
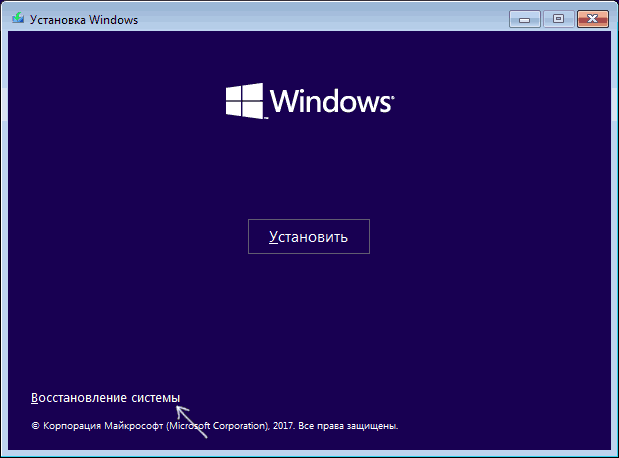
- После загрузки и выбора языка на первом экране программы установки, на следующем экране нажмите по пункту «Восстановление системы».

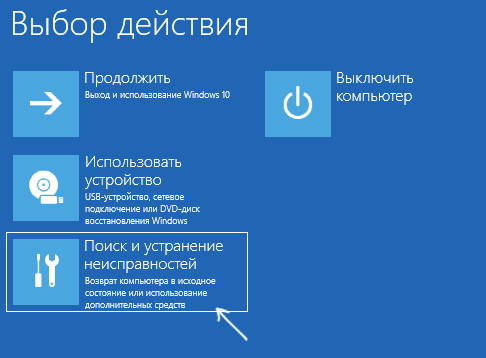
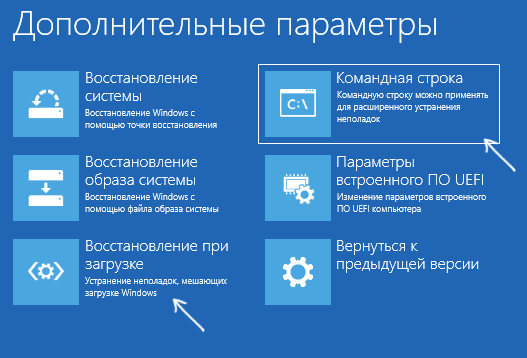
- В открывшейся консоли восстановление выберите пункт «Поиск и устранение неисправностей», а затем — «Дополнительные параметры» (при наличии пункта).

- Попробуйте использовать пункт «Восстановление при загрузке», который с немалой вероятностью исправит проблемы автоматически. Если он не сработал и после его применения нормальная загрузка Windows 10 всё так же не происходит, то откройте пункт «Командная строка», в которой по порядку используйте следующие команды (нажимаем Enter после каждой).

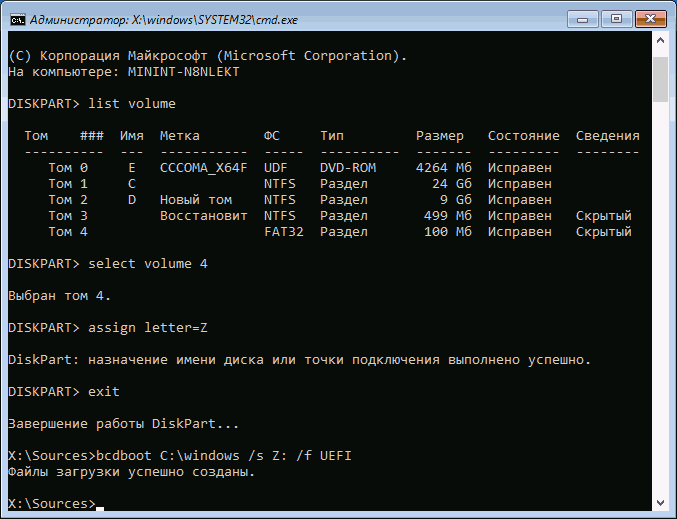
- diskpart
- list volume (в результате выполнения этой команды вы увидите список томов. Обратите внимание на номер тома размером 100-500 Мб в файловой системе FAT32, если таковой имеется. Если отсутствует — перейдите к шагу 10. Также посмотрите на букву системного раздела диска с Windows, так как она может отличаться от C).

- select volume N (где N — номер тома в FAT32).
- assign letter=Z
- exit
- Если том FAT32 присутствовал и у вас EFI-система на GPT диске, используйте команду (при необходимости поменяв букву C — системного раздела диска):
bcdboot C:\windows /s Z: /f UEFI
- Если том FAT32 отсутствовал, используйте команду bcdboot C:\windows
- Если предыдущая команда была выполнена с ошибками, попробуйте использовать команду bootrec.exe /RebuildBcd
- Если предложенные способы не помогли, попробуйте также методы, описанные в этой инструкции.

По окончании этих действий закройте командную строку и перезапустите компьютер, выставив загрузку с жесткого диска или установив Windows Boot Manager в качестве первого пункта загрузки в UEFI.
Подробнее на тему: Восстановление загрузчика Windows 10.
Исправление ошибки в Windows 7
Для того, чтобы исправить ошибку 0xc0000225 в Windows 7, по сути следует использовать тот же метод, за исключением того, что на большинстве компьютеров и ноутбуков 7-ка установлена не в режиме UEFI.
Подробные инструкции по восстановлению загрузки — Восстановление загрузчика Windows 7, Использование bootrec.exe для восстановления загрузки.
Дополнительная информация
Некоторая дополнительная информация, которая может оказаться полезной в контексте исправления рассматриваемой ошибки:
- В редких случаях причиной проблемы могут быть неисправности жесткого диска, см. Как проверить жесткий диск на ошибки.
- Иногда причина — самостоятельные действия по изменении структуры разделов с помощью сторонних программ, таких как Acronis, Aomei Partition Assistant и других. В данной ситуации четкого совета (кроме переустановки) дать не получится: важно знать, что именно было сделано с разделами.
- Некоторые сообщают, о том, что с проблемой помогает справиться восстановление реестра (хотя такой вариант при этой ошибке лично мне кажется сомнительным), тем не менее — Восстановление реестра Windows 10 (для 8 и 7 шаги будут теми же). Также, загрузившись с загрузочной флешки или диска с Windows и запустив восстановление системы, как это было описано в начале инструкции, вы можете использовать точки восстановления при их наличии. Они, в том числе, восстанавливают и реестр.
Readers help support Windows Report. We may get a commission if you buy through our links.
Read our disclosure page to find out how can you help Windows Report sustain the editorial team. Read more
If you see the error message saying the Winload.efi is missing or corrupted, your computer cannot boot into Windows, and you may encounter a Blue Screen of Death screen.
In this guide, we will discuss some expert-recommended methods to fix the winload error on Windows 11 right after explaining the potential causes behind the problem.
What is the Winload.efi file?
The Winload.efi is an Extensible Firmware Interface file that is an integral component of the Windows Boot Manager, which uses the file to load the Windows kernel & other essential system files into memory.
Generally, the file is used for tasks such as restarting the computer, installing Windows, resetting your PC settings, and more. The file is located at C:\windows\System32\Boot\winload.efi
What causes the Windows 11 Winload error?
There could be various reasons for the Winload.efi is missing error; some of the common ones are mentioned here:
- Corrupted BCD – The Boot Configuration Data (BCD) store is misconfigured or damaged; you may encounter the error. Try rebuilding the BCD.
- UEFI firmware issues – If there is an issue with UEFI firmware settings, you could see this error during the boot process.
- Bad sectors – The bad sectors or system file corruption may result in this BSoD error. You need to scan your computer for bad sectors and repair system files using an SFC scan.
- Interrupted Windows update – If the Windows updates were interrupted or unsuccessful, it could corrupt system files, causing the problem.
- Damaged Winload.efi file – The disk errors, malware infection, or power failures during updates can corrupt the file, hindering the Windows booting process and causing the blue screen error.
Now that you know the causes of the issue, let us move quickly to learn the solutions to eliminate it.
How do I fix the Winload error in Windows 11?
Before engaging in advanced troubleshooting steps, you should consider performing the following checks:
- Try rebooting your PC.
- Ensure your BIOS firmware is updated.
- Remove all the external peripherals.
Once you are through these checks, check out the detailed methods to fix the problem.
1. Disable Secure Boot
- Restart your computer. During startup, you need to press a key designated by the OEM or computer manufacturer to access the UEFI settings. For HP, it is F10; for Dell, it is F2.
- You will enter the UEFI settings. Locate the Security or System Configuration section.
- Now look for Secure Boot or UEFI Secure Boot, select it, and change the status to Disabled.

- Depending upon your machine, you might also have to change the UEFI mode to Legacy mode to disable Secure Boot.

- Once done, Save & Exit to save the changes.
- Restart your computer.


Turning off Secure Boot allows you to boot non-signed OS or bootable tools, which can help you fix the issue. If, after reboot, you can’t get past the BSoD screen and get the Automatic Repair screen, move to the following method.
2. Run the Startup Repair tool
2.1 Prepare an installation media file & change the boot order
- On another device or PC, go to Windows 11 website, locate Windows 11 Installation Media, and click Download Now.

- The mediacreation.exe file will be downloaded; double-click to open it.
- Click Accept.

- For Select language and edition, choose Language and Edition and click Next.
- Select the USB flash drive option. Plug in the USB drive with a minimum of 8 GB storage.
- The Windows 11 Setup will detect and show the drive; click Next.
- Once ready, click Finish.
- Plug in the flash drive to the affected computer and turn it on. Press the key designated by the manufacturer to enter Boot options.
- Go to Boot and locate the USB flash drive, use the arrow keys to move it up in the list, and save the changes & restart.


2.2 Initiate Startup Repair
- After restart, you will see the Windows Setup screen, select Language to install, Time and currency format, and Keyboard or input method.

- Click the Repair your computer option from the next page.

- On the Choose an option screen, select Troubleshoot.

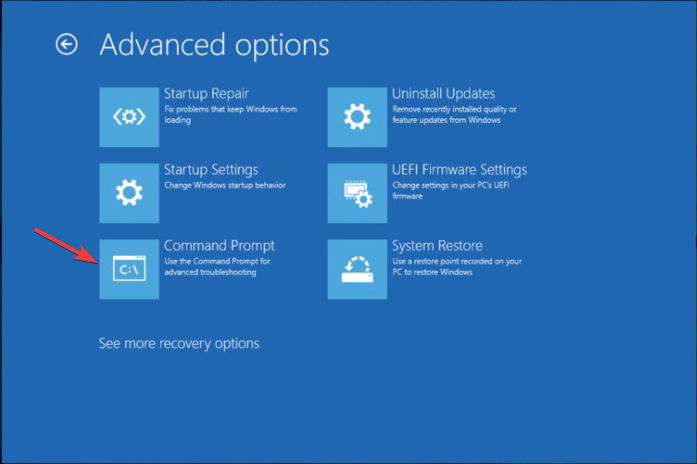
- Choose Advanced options from the next page.

- Select the Startup Repair option.

- Follow the onscreen prompts and wait for the process to complete, then restart your computer.


The Startup Repair tool diagnoses and repairs complex startup problems; that’s why it should be the first thing to do if the computer doesn’t boot up.
3. Repair the BCD files
- Boot your computer using Windows installation media via a USB flash drive created in Step 2.1. On the Windows Setup screen, input the details, and click Next.
- Select Repair your computer on the next page.
- On Choose an option screen, click Troubleshoot.
- Next, select Advanced options.
- On the Advanced options screen, choose Command Prompt. Your PC will restart and input the user account credentials when prompted.
- On the Command Prompt window, copy & paste the following commands one by one to fix Boot Record, Boot Sector, and BCD store, and press Enter after every command:
bootrec /fixmbr
bootrec /fixboot
bootrec /scanos
bootrec /rebuildbcd
- Restart your computer to see if you can now access Windows.
If you are facing booting issues on Windows 10, we have a great guide with solutions to fix it
4. Run the DiskPart command
- Boot your computer using Windows installation media via a USB flash drive created in Step 2.1. Fill in the details on the Windows Setup screen, and click Next.
- On the next page, click Repair your computer.
- From Choose an option screen, click Troubleshoot.
- Next, select Advanced options.
- Now choose Command Prompt. Your computer will reboot, and input the user account credentials if asked.
- Type the following commands one by one and hit Enter after every command:
diskpart
list volume
select volume=n
assign letter=m
- Copy & paste the command after replacing the c with the letter of your system drive and press Enter:
bcdboot c:\Windows /s m: /f uefi - Reboot your computer to check if the issue is fixed.
- Recent Windows 11 update lets you disable profanity filter in voice typing
- Microsoft wants Windows 10 users to upgrade to Windows 11 or Copilot + PCs
- Windows 11 KB5055627 update makes File Explorer more fluid
5. Use an SFC scan to repair system files
- Restart your computer using the Windows installation media created in Step 2.1. On the Windows Setup screen, enter the details, and click Next.
- Select Repair your computer on the next screen.
- On Choose an option screen, select Troubleshoot.
- Choose Advanced options from the next screen to proceed.
- Select Command Prompt from the Advanced options window. The system will restart and enter credentials when prompted.
- On the Command Prompt window, type the following command to restore the system files and hit Enter:
sfc /scannow
- The command will take some time to complete; wait till you see a successfully completed message, then restart your PC.

6. Repair disk errors
- Reboot your PC using the Windows installation media created in Step 2.1. On the Windows Setup screen, fill in the details, and click Next.
- Click the Repair your computer option on the next screen.
- On Choose an option screen, select Troubleshoot.
- Next, click Advanced options.
- Select Command Prompt from the Advanced options window. Your PC will reboot and prompt you for a user account password; enter it to proceed.
- Type the following command to check and repair the disk errors after replacing C with the letter of the system drive and press Enter:
chkdsk c: /f /r /x - When prompted, press Y, then wait for the command to get executed.
If your computer is not able to boot up, you might want to check our guide on the subject to fix the issue on Windows 11.
7. Perform System Restore
- Restart your PC using the Windows installation media created in Step 2.1. On the Windows Setup screen, fill in the details, and click Next.
- Click the Repair your computer option on the next screen.
- On Choose an option screen, select Troubleshoot.
- Choose Advanced options.
- From the Advanced options window, choose System Restore. Your computer will reboot, and enter the user name and password to proceed.
- On the System Restore window, click Next.

- Select the Restore point and click Next.
- Click Finish and wait while the system returns to the last known good configuration.


8. Reinstall the operating system
- Restart your PC using the Windows installation media created in Step 2.1. Enter information for the Language to install, Time and currency format, & Keyboard or input method options, and click Next.
- Click Install Now.
- Enter the product key or choose I don’t have a product key.
- Choose the Windows version and click Next.

- Follow the onscreen prompts to complete the installation process.


So, these are methods you can use to fix the Winload error on Windows 11 and regain access to your computer.
If you are encountering missing Winload.efi error on Windows 10, feel free to check this informative guide to resolve the issue.
Please let us know of any additional solutions or thoughts you may have on this topic in the comment section below.
Claire Moraa
Windows Software Expert
Claire has a knack for solving problems and improving the quality of life for those around her. She’s driven by rationality, curiosity, and simplicity, and always eager to learn more about Microsoft’s products.
With a background in teaching and reviewing, she breaks down complex topics into easily understandable articles, focusing mostly on Windows 11, errors, and software.