
In this guide, we will show you the steps to check your Windows 11 PC’s battery health and subsequently generate its report. Ever since I upgraded my PC to the latest iteration of the OS, I had witnessed a considerable rise in battery consumption. The usage case scenario is similar to the one as it was before in Windows 10, with no resource-hogging applications running in the background. To find the culprit, I tried all the basic troubleshooting steps.

These included running the Windows Defender Scan, using the CheckDisk and System File Checker command, among others. However, none of them manage to spell out success. So upon further digging around, I got hold of a nifty method that proved to be of great help in diagnosing the battery life. And in this guide, we will help you with just that. Given here are the detailed steps to check your Windows 11 PC’s battery health and then generate its report.
Table of Contents
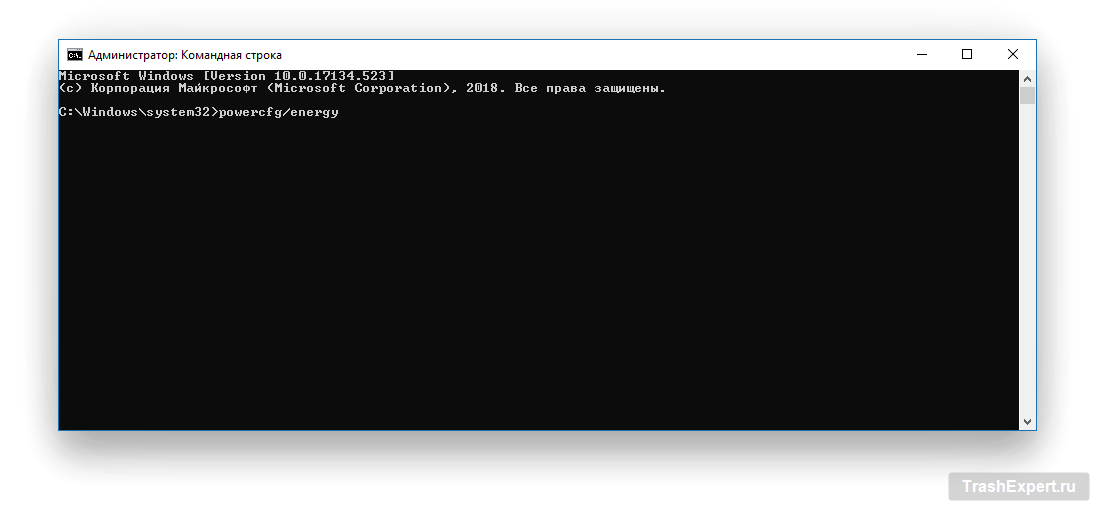
- To begin with, head over to the Start Menu, search CMD, and launch Command Prompt as an administrator.
- Then execute the below command:
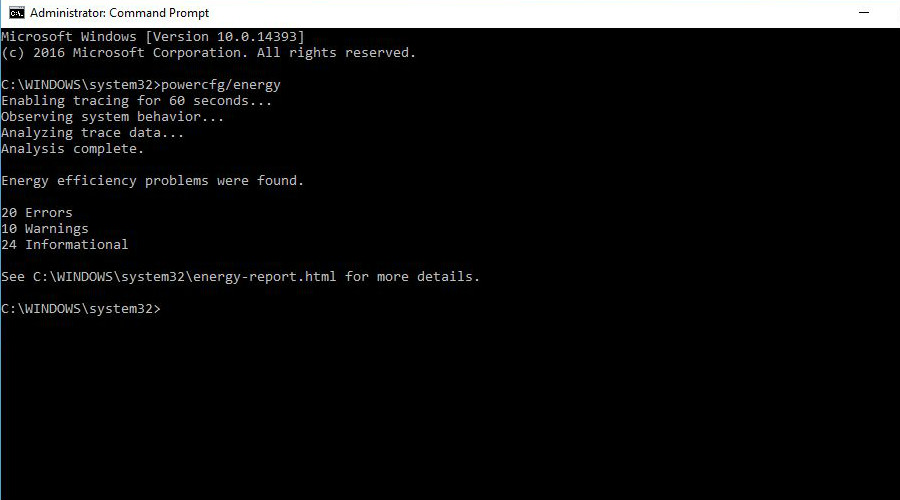
powercfg/energy

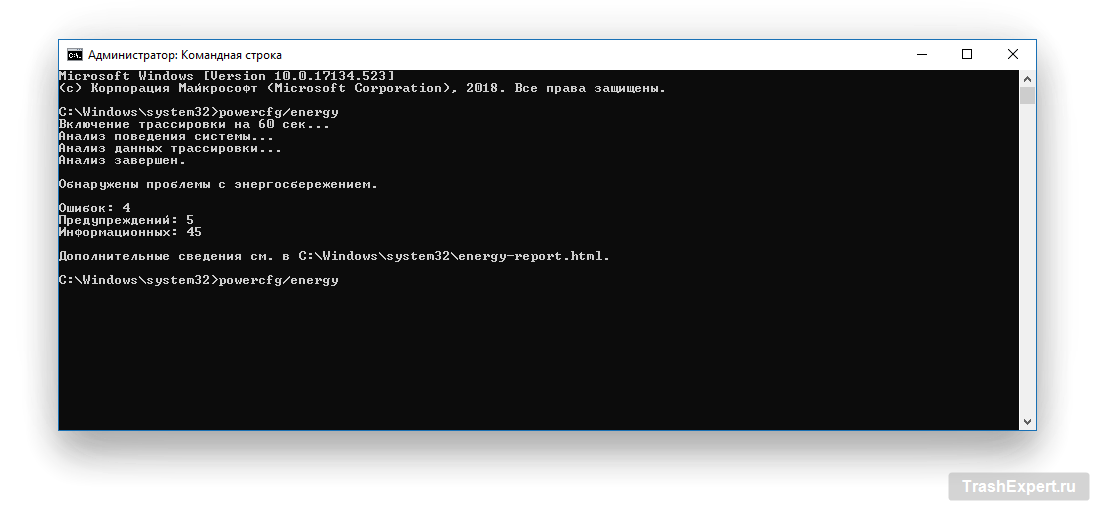
- It will now analyze the system behavior and diagnose the battery’s working status for a minute.
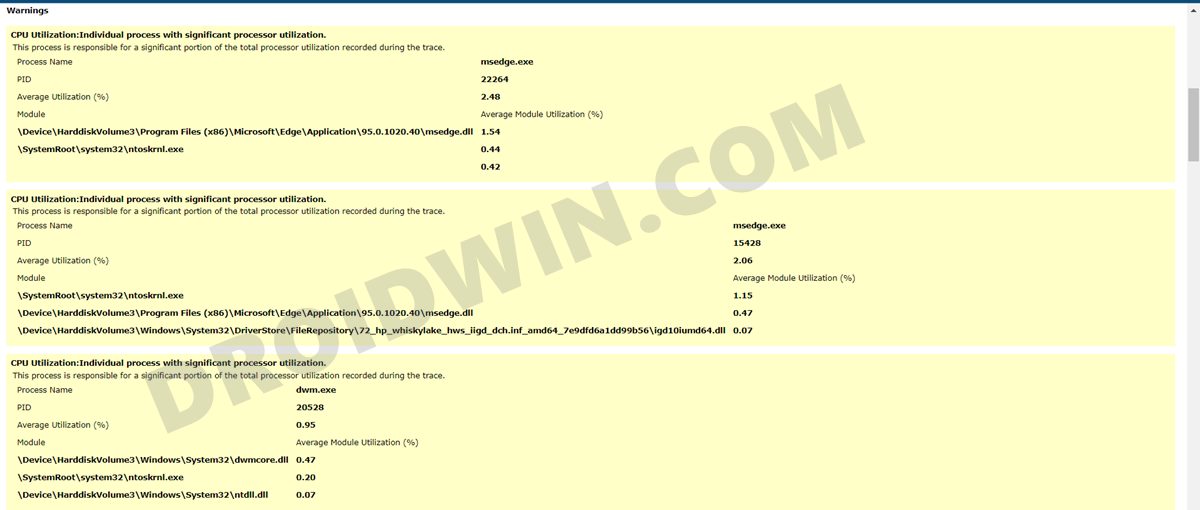
- Once the analysis is complete, it shall list out all the errors, warnings, and some additional information related to your battery.

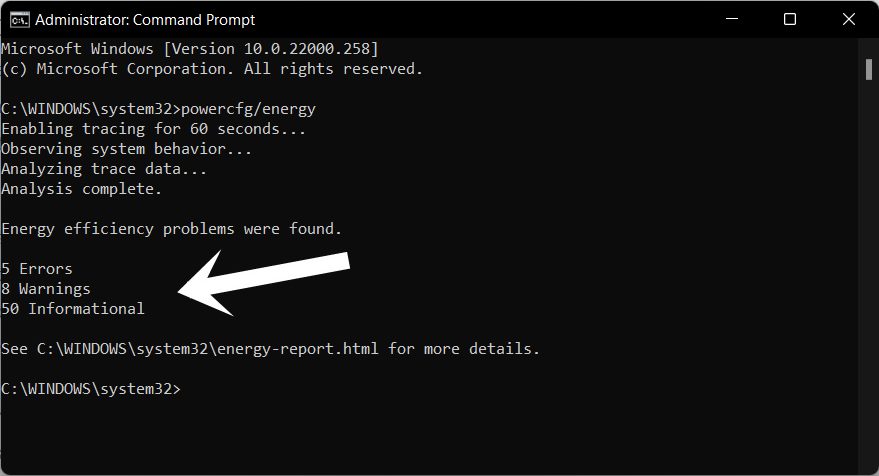
All these details are saved in an HTML Report. So let’s start analyzing this report and fix all the underlying battery issues.
How to Access My Windows 11 PC Battery Health Report
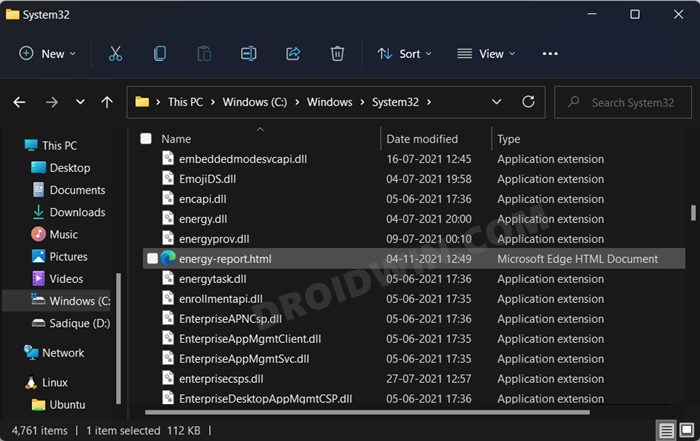
- Launch File Explorer via Windows+E shortcut keys.
- Then copy-paste the below location in the address bar:
C:\WINDOWS\system32\

- There you should find the Energy Report file, double click to open it.

- You could also copy-paste the following location to directly open the report:
C:\WINDOWS\system32\energy-report.html
How to Analyze the Windows 11 Battery Report
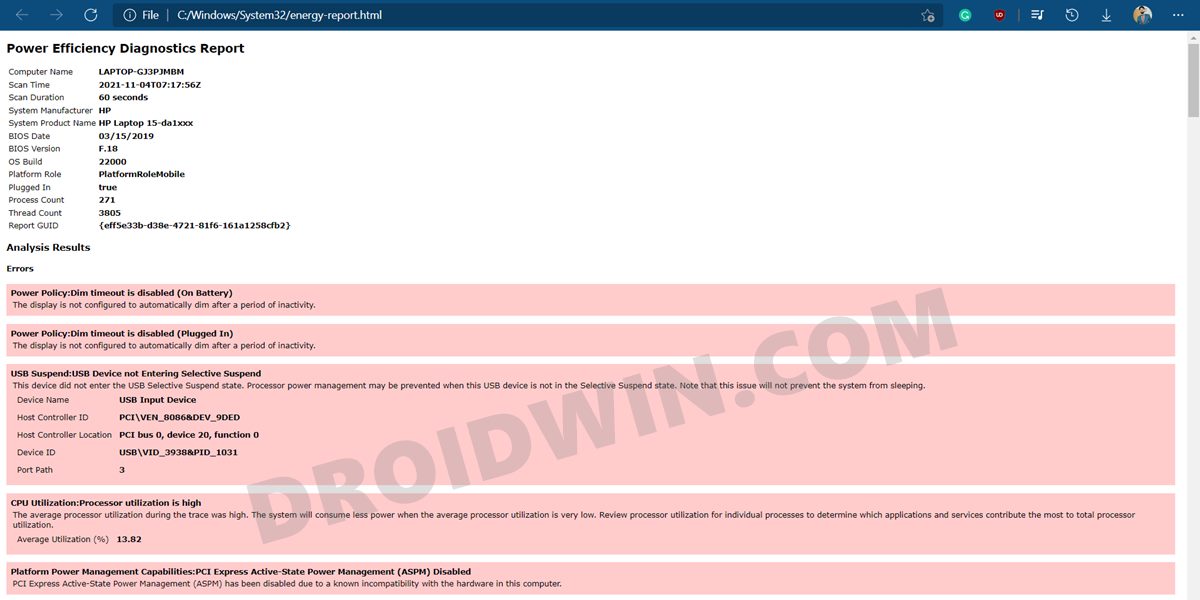
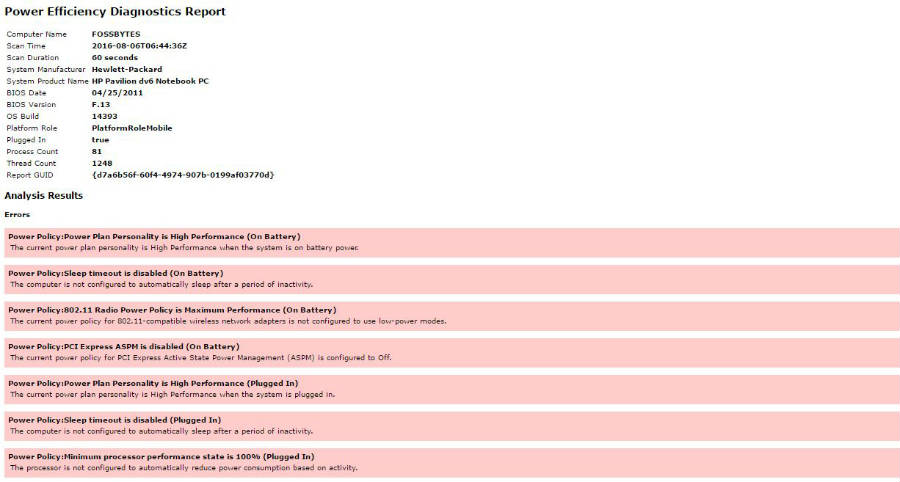
After you open the report, you should see some system-related information. Scroll down a little and go to the Analysis Results. It will be broken down into three different sections- Errors (highlighted in red), Warnings (highlighted in yellow), and then a few informational data related to the battery. When it comes to fixing these issues, near about all of them could be rectified from the Power Options themselves.
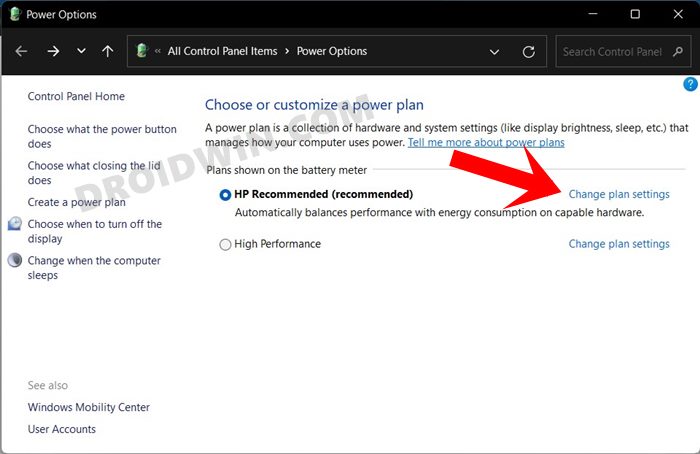
- So head over to the Start Menu, search Power Plan, and click on Choose a Power Plan.
- After that, click on Change Plan Settings next to your current plan.

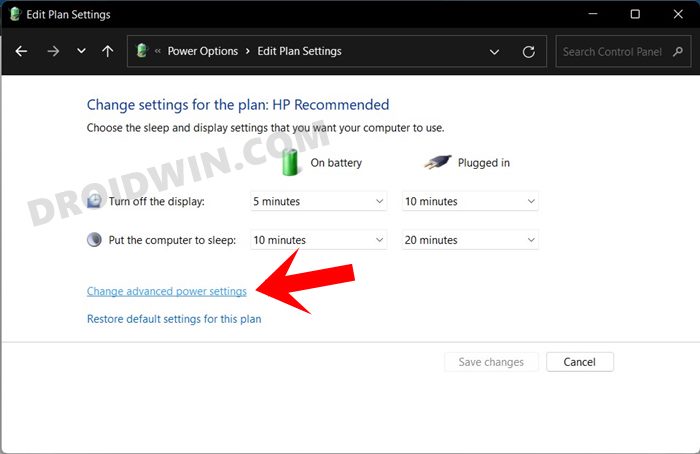
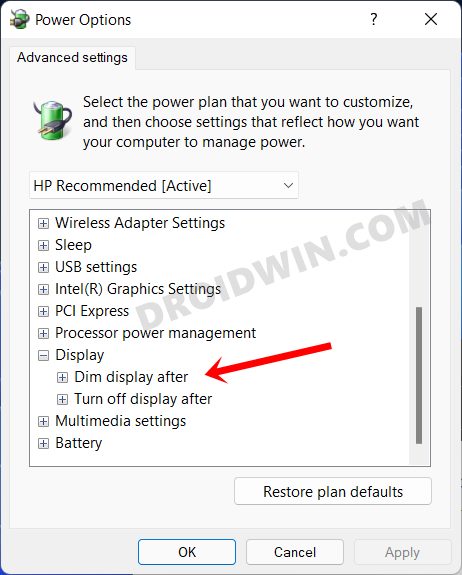
- Then click on Change Advanced Power Settings. It shall now open the Power Options dialog box.
- Now refer to the errors mentioned in the report and carry out the associated tweak in this Power Options menu to rectify them.
One of the errors that caught my attention was the “Power Policy:Dim timeout is disabled”. To fix it, all that was needed to do is to expand the Display tab under Power Options and then enable Power Policy:Dim timeout, both for On Battery and Plugged In State. However, it was easier said than done, as the option was nowhere to be found. But there’s a fix for this issue and you could easily enable it. Here’s how:
Where is the Power Policy:Dim timeout Feature
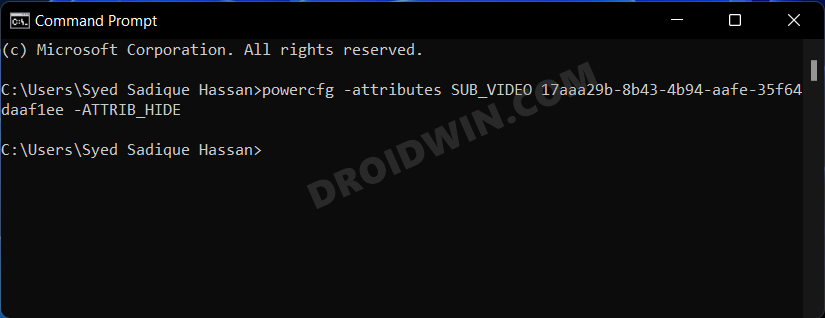
- Head over to the Start menu, search CMD, and launch Command Prompt as an administrator.
- Then copy-paste the below command and hit Enter:
powercfg -attributes SUB_VIDEO 17aaa29b-8b43-4b94-aafe-35f64daaf1ee -ATTRIB_HIDE

- The Power Policy:Dim timeout option should now be enabled.
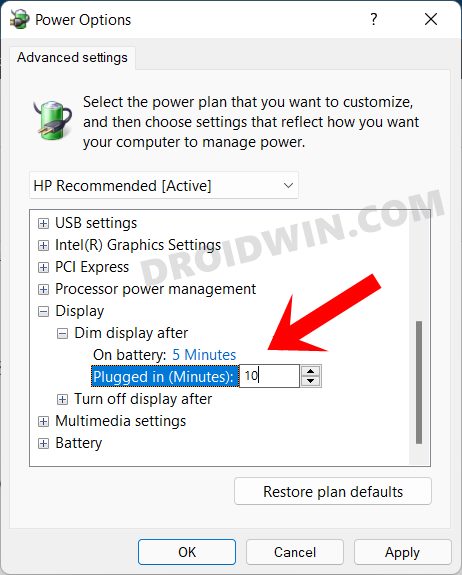
- To access it, open the Power Options dialog box as before and then expand the Display section.

- This time you shall see the Dim Display After option. Expand it and assign it the desired time frame under the On Battery and Plugged in states.
- Finally, hit OK to save the changes. With this, you should have successfully fixed the “Power Policy:Dim timeout is disabled” error.
- However, if at any point in time, you wish to revert the changes and remove the Power Policy:Dim timeout option, then just execute the below command:
powercfg -attributes SUB_VIDEO 17aaa29b-8b43-4b94-aafe-35f64daaf1ee +ATTRIB_HIDE
Verify if Battery Errors Has been Fixed or not
Let’s now check if we were able to successfully rectify Windows 11 Battery related issue or not.
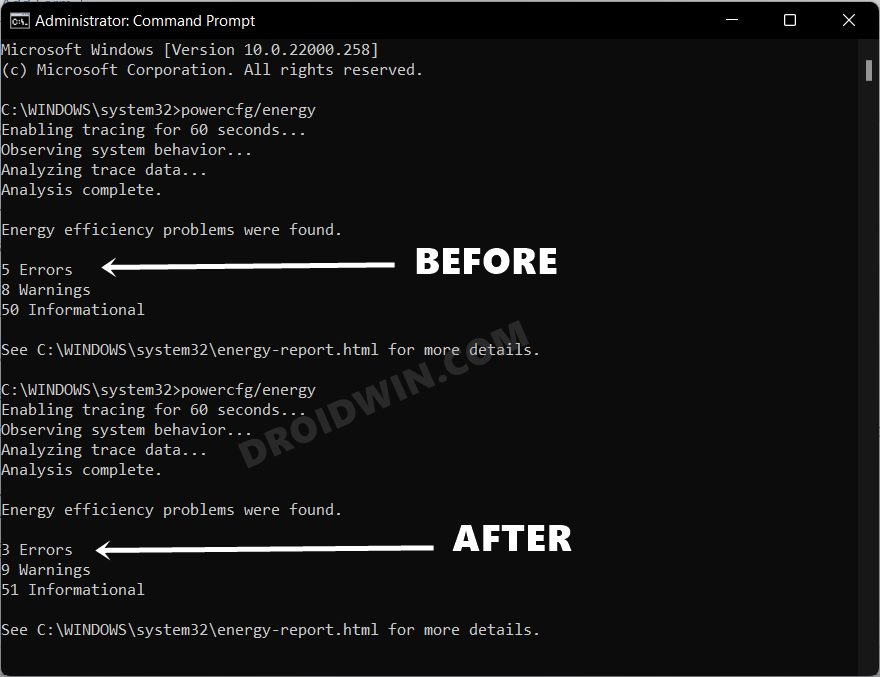
- Launch CMD and re-run the Battery Test via the following command (as explained in the first section above)
powercfg/energy

- The first hint is right in front of us, we did manage to lower down the errors from 5 to 3. Let’s check it inside the battery report as well.
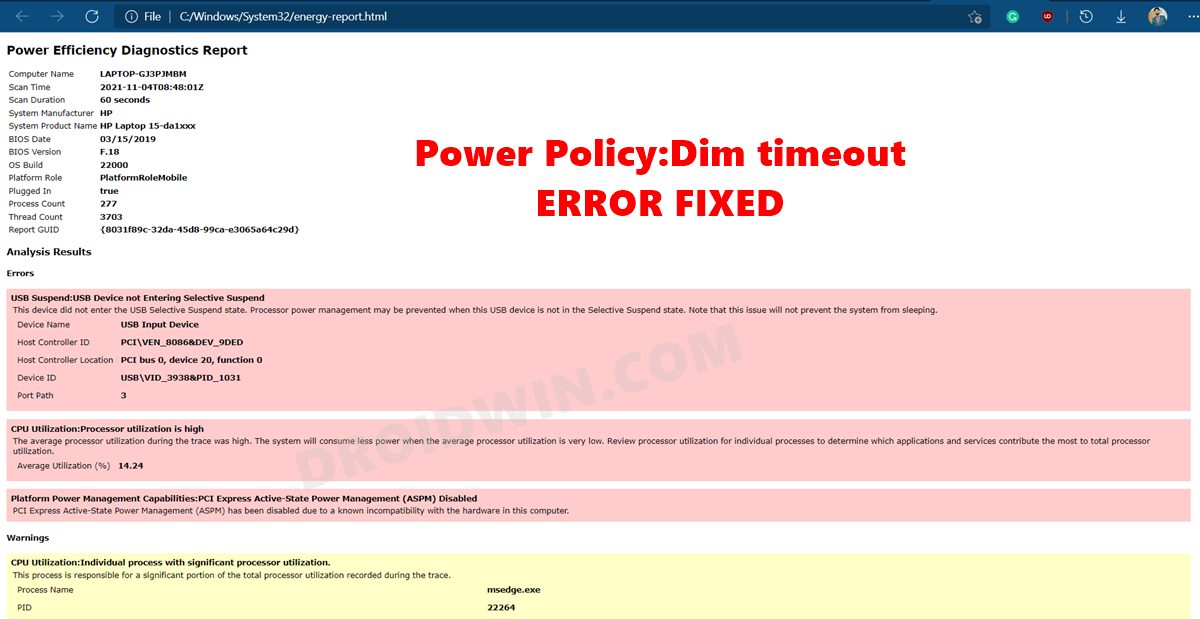
- So copy-paste the below location in the address bar and it shall open the newly generated battery report
C:\WINDOWS\system32\energy-report.html

- You could now verify from the reports as well that the “Power Policy:Dim timeout is disabled” error has been rectified as well.
So with this, we round off the guide on how you could check your Windows 11 PC’s battery health, generate its report, and fix the “Power Policy:Dim timeout is disabled” error. Along the same lines, you could rectify other battery-related issues listed in the report from the Power Options dialog box. And if you have any queries regarding the same, do let us know in the comments section below.
- Snipping Tool Not Working in Windows 11: How to Fix
- How to Turn off/Disable Windows 11 Defender
- Install Google Play Store in Windows 11 via Windows Subsystem for Android
- How to Manually Download a Particular/Specific Windows 11 Update
В Windows 10 (впрочем, в 8-ке эта возможность тоже присутствует) есть способ получить отчет с информацией о состоянии и использовании аккумулятора ноутбука или планшета — тип аккумулятора, проектная и фактическая емкость при полной зарядке, количество циклов зарядки, а также посмотреть графики и таблицы использования устройства от батареи и от сети, изменение емкости в течение последнего месяца.
В этой короткой инструкции — о том, как это сделать, и о том, что представляют собой данные в отчете о батарее (так как даже в русскоязычной версии Windows 10 информация представлена на английском). См. также: Что делать, если ноутбук не заряжается.
Стоит учесть, что полноценную информацию удастся увидеть только на ноутбуках и планшетах с поддерживаемым оборудованием и установленными оригинальными драйверами чипсета. Для устройств, изначально выпущенных с Windows 7, а также без необходимых драйверов, способ может не сработать или выдать неполную информацию (как и произошло у меня — неполная информация на одном и отсутствие информации на втором старом ноутбуке).
Создание отчета о состоянии аккумулятора
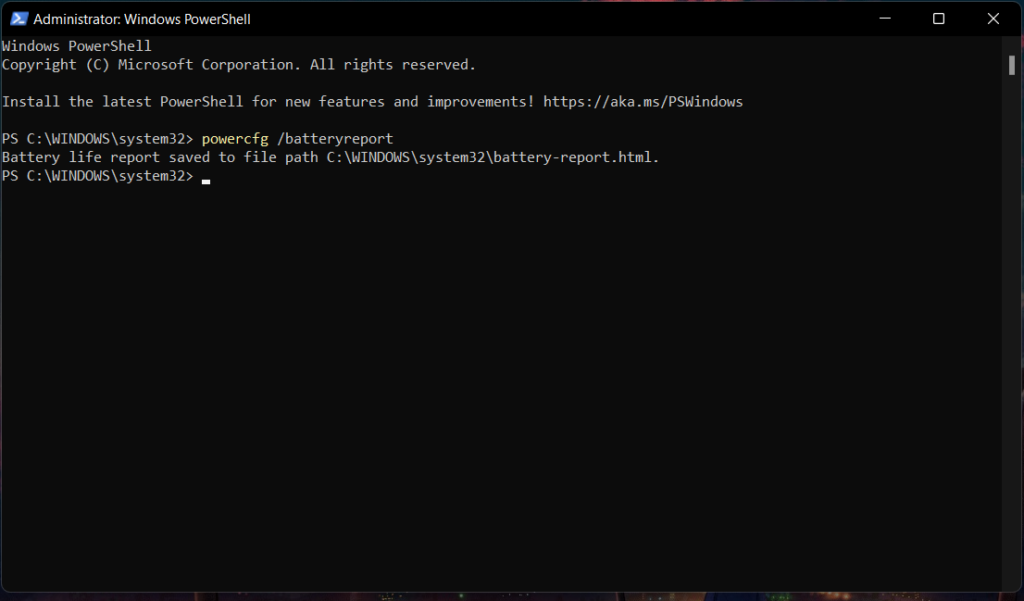
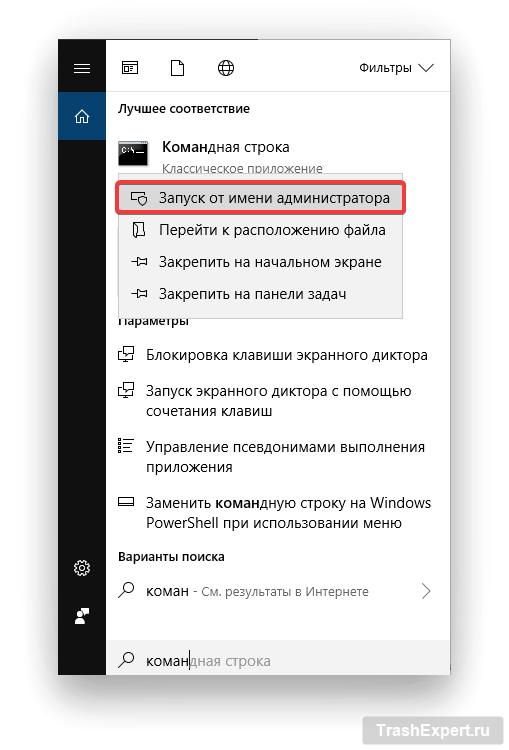
Для того, чтобы создать отчет об аккумуляторе компьютера или ноутбука, запустите командную строку от имени администратора (в Windows 10 для этого проще всего использовать меню правого клика по кнопке «Пуск»).
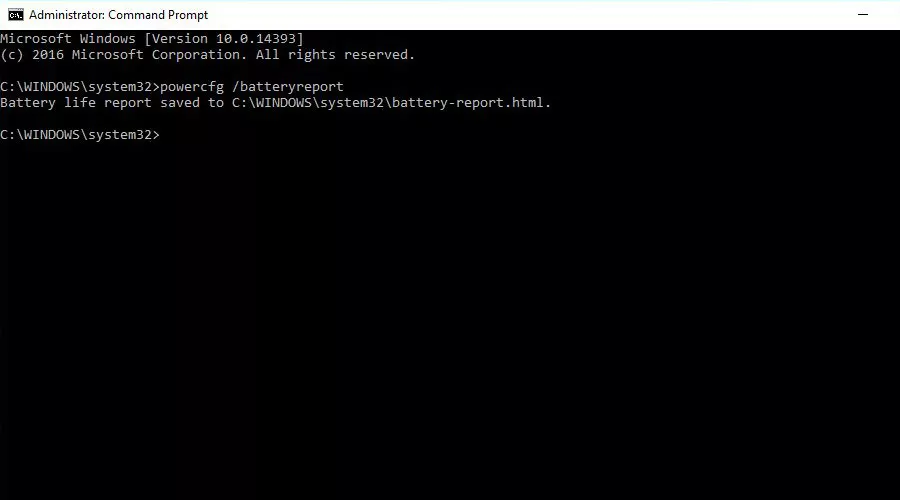
После этого введите команду powercfg -batteryreport (возможно написание powercfg /batteryreport) и нажмите Enter. Для Windows 7 можно использовать команду powercfg /energy (более того, её же можно использовать и в Windows 10, 8, если battery report не дает нужной информации).

Если все прошло успешно, то вы увидите сообщение о том, что «Отчет о времени работы батареи сохранен в папке C:\ Windows\ system32\ battery-report.html».
Перейдите в папку C:\ Windows\ system32\ и откройте файл battery-report.html любым браузером (правда, у меня на одном из компьютеров файл по какой-то причине отказался открываться в Chrome, пришлось использовать Microsoft Edge, а на другом — без проблем).
Просмотр отчета о батарее ноутбука или планшета с Windows 10 и 8
Примечание: как было отмечено выше, на моем ноутбуке информация не полная. Если у вас более новое «железо» и есть все драйвера, вы увидите и те сведения, которые отсутствуют на приведенных скриншотах.

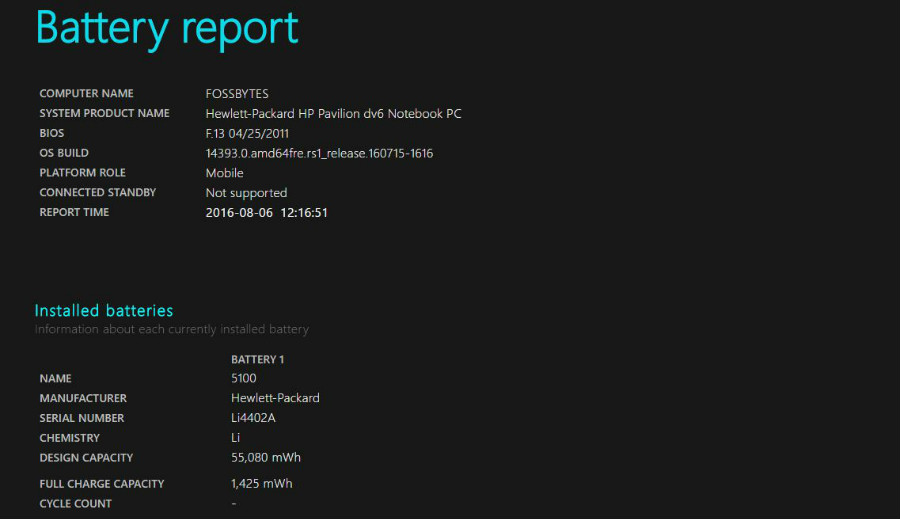
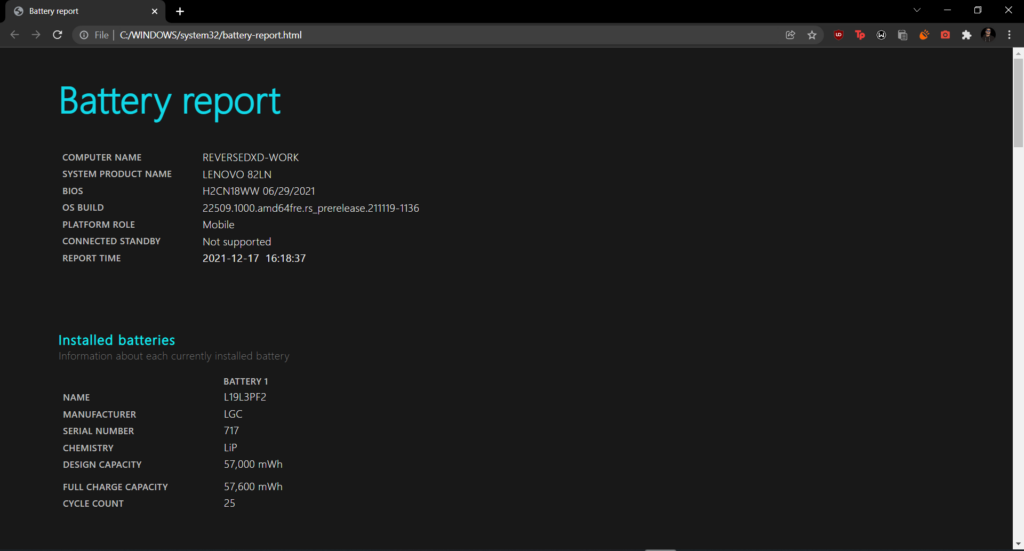
В верхней части отчета, после информации о ноутбуке или планшете, установленной системе и версии БИОС, в разделе Installed Battery, вы увидите следующую важную информацию:
- Manufacturer — производитель батареи.
- Chemistry — тип аккумулятора.
- Design Capacity — исходная емкость.
- Full Charge Capacity — текущая емкость при полном заряде.
- Cycle Count — количество циклов перезарядки.
Разделы Recent Usage и Battery Usage представляют данные об использовании батареи в течение последних трех дней, включая остаточную емкость и график расхода.

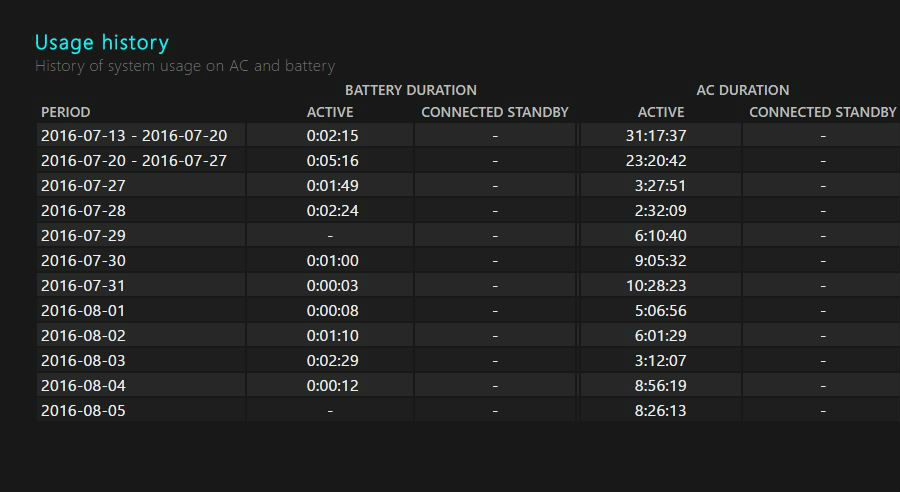
Раздел Usage History в табличном виде отображает данные по времени использования устройства от батареи (Battery Duration) и электросети (AC Duration).
В разделе Battery Capacity History представлена информация об изменении емкости батареи за последний месяц. Данные могут быть не совсем точными (например, в некоторые дни, текущая емкость может «увеличиваться»).

Раздел Battery Life Estimates отображает информацию о предполагаемом времени работы устройства при полной зарядке в активном состоянии и в режиме connected standby (а также информацию о таком времени при исходной емкости батареи в колонке At Design Capacity).
Последний пункт в отчете — Since OS Install отображает информацию об ожидаемом времени работы системы от аккумулятора, вычисленный на основании использования ноутбука или планшета с момента установки Windows 10 или 8 (а не за последние 30 дней).
Для чего это может потребоваться? Например, для анализа ситуации и емкости, если ноутбук вдруг стал быстро разряжаться. Или же для того, чтобы узнать, насколько «заезжен» аккумулятор при покупке б/у ноутбука или планшета (или устройства с витрины). Надеюсь, для кого-то из читателей информация окажется полезной.
The laptops and netbooks we see today in the market would have been possible, or at least portable, without the existence of batteries. You can’t stop the battery decay process because it’s a natural phenomenon, but you can check battery health on your laptop from time to time. Thus, you can purchase a new battery at the right time before the current one becomes unusable.
If we set aside MacBooks, a standard Windows notebook comes with a battery backup of around 6 to 7 hours on average. You may get up to 10 hours of backup on some higher-priced portable computers.
However, these batteries, mostly lithium-ion type, decrease in charging capacity over time. It is entirely possible that a new laptop that can run for 6 hours on battery power may provide only 2 hours of juice after a couple of years of usage.
Laptop battery test in Windows 11, 10, 8.1, 8, 7
On Windows 11/10 (and older versions), you can get a detailed view of battery-related data like its original specifications, designed capacity, current capacity, etc. It also maintains updated information about battery usage sessions. A command-line utility known as POWERCFG allows you to access this data in a well-organized manner.
So, here is a method that involves using Windows CMD to check battery health and generate an Energy Report. You can also generate the Battery Health Report, which shows your battery’s charging cycles and performance over the course of time.
The energy report in Windows 10 can explain how much its capacity has reduced over time and any errors or wrongly configured settings that hurt the battery life. You can follow these steps to perform a laptop battery life test:
- Right-click the Start button. Click Command Prompt (Admin).
Note: In later versions of Windows 10, the command prompt option is replaced by Windows Terminal or PowerShell in the Start button’s context menu. You can search for CMD in the Start Menu. Next, right-click Command Prompt and click Run As Administrator. - Type the command:
It’ll take 60 seconds to generate an energy report of your battery.

- To access the energy report, press Windows key + R and type the location:
C:\WINDOWS\system32\energy-report.html
Click Ok. This file will open in your web browser.
- Battery Capacity:
Recommended: How To Find Wi-Fi Password Using CMD Of All Connected Networks
How to check battery health report using CMD
The battery report looks less geeky and includes information about day-to-day battery usage. It displays the recent usage stats and graph for the past three days, battery usage history of how many hours the system was active per week, and per week battery capacity history to give an idea of how much it has depleted in comparison to the original capacity.
On the basis of observed drains, the laptop battery test report also includes estimated numbers on how long the battery will last. Follow the steps mentioned below to generate your Windows 11/10 battery report:
- Open CMD in Admin Mode as above.
- Type the command:
Press Enter.
- To view the Battery Report, press Windows key + R and type the following location:
C:\WINDOWS\system32\battery-report.html
Click Ok. This file will open in your web browser.

How to check battery health report using PoweShell
1. Firstly, open the Start Menu and search for PowerShell. Right-click on the Windows PowerShell option and select “Run as administrator.”
2. When the terminal appears, type the following command
powercfg /batteryreport3. Press Enter.
4. Now, PowerShell will generate a battery report for your PC. Press Windows key + R and type paste the following path:
C:\WINDOWS\system32\battery-report.html
5. Finally, Press OK.
The generated battery report will open in your browser.
This data will refresh every time you type the POWERCFG commands to check battery health, including the existing versions of the energy report and battery report.
You can regularly monitor your Windows battery health using the above powercfg command. For instance, it lets you keep an eye on the recent as well as long-term usage history of your battery. Among other things, the Windows 10 battery report gives battery life estimates that you can get after a full charge. This can be pretty helpful at times when you have a crunch of power supply.
Frequently Asked Questions (FAQ)
How to enable battery saver on Windows 10?
Using simple steps, you can turn on the battery saver feature on Windows 10. Just click on the battery icon in the Notifications area. Then drag the slider to the extreme left to enable battery saver.
How to generate a battery report on Windows 7?
Powercfg is a command line-based utility, and it works on older versions, including Windows 7. So, whenever you want to use it, just fire up the Command Prompt, and you’d be good to go.
Windows 10 является повсеместно распространённой операционной системой, которая умеет обеспечивать стабильную продолжительность работы ноутбуков. Несмотря на это, некоторые пользователи время от времени жалуются, что батарея разряжается слишком быстро. На это могут влиять несколько факторов, которые необходимо обнаружить и исправить. Отчёт Powercfg по уровню заряда батареи и по расходу энергии способен показать проблемы и устранить их.
Отчёт powercfg представляет собой анализ состояния батареи. Энергетический отчёт powercfg тестирует факторы автономности и сообщает об обнаруженных ошибках аппаратного и программного обеспечения, которые могут сократить продолжительность работы. В этой статье даны пошаговые инструкции относительно того, как проверить продолжительность работы ноутбука на Windows 10 при помощи отчёта powercfg.
Создание отчёта в командной строке
- Закройте все запущенные на компьютере программы.
- Нажмите на кнопку «Пуск», введите в поиск cmd, запустите приложение «Командная строка» от имени администратора.

- В появившемся окне нажмите «Да».
- Наберите powercfg/energy и нажмите на ввод.

Данная команда запускает сканирование на 60 секунд и указывает на проблемы при их наличии. Это могут быть ошибки, предупреждения, информация. Быть может, никаких проблем найдено не будет, проблема может быть в самой батарее. Вот как выглядит окно командной строки в случае наличия неисправностей:
Если вы не удовлетворены отчётом, можно запустить энергетическое сканирование на более длительный срок.
Необязательный шаг. Наберите powercfg /energy /duration 120 и нажмите на ввод.
Чтобы выполнить команду правильно, скопируйте её и вставьте в окно командной строки. При наборе вручную убедитесь, что все пробелы стоят в нужных местах.
120 означает продолжительность сканирования в секундах. Это число можно увеличивать или уменьшать. Если запускать сканирование на слишком длительное время, результаты могут быть неточными.
Просмотр отчёта
Отчёт содержит немало технической информации, которую не всегда можно понять. Давайте узнаем, на что нужно обращать внимание, чтобы убедиться в нормальной работе батареи ноутбука.
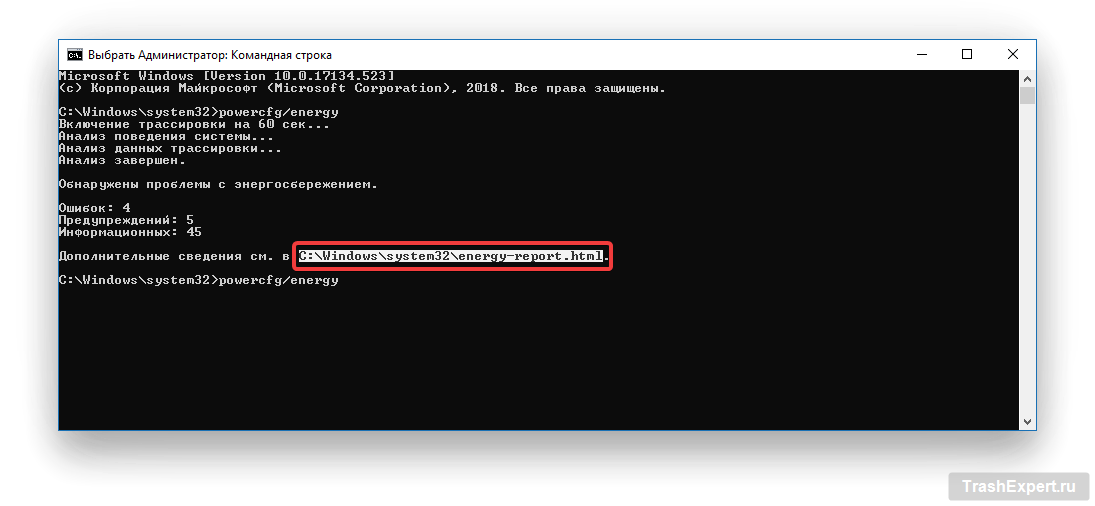
- Когда вы запускаете команду, вы можете заметить, что командная строка указывает местоположение отчёта. Можно скопировать это местоположение и вставить в браузер.
C:\Windows\system32\energy-report.html
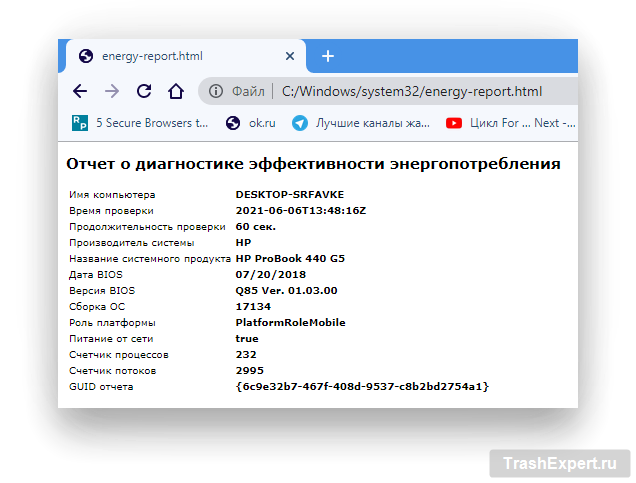
- Первая часть отчёта показывает название ноутбука, продолжительность сканирования, сведения о производителе, версию BIOS, номер сборки операционной системы и т.д. Можно проверить, последняя версия BIOS у вас или нет, сравнив с версией на сайте производителя. Можно обновить версию Windows, если существует более современная.

- Первая секция анализа сообщает о найденных ошибках. Ищите одну из трёх вещей:
- Драйверы устройств.
- Нагрузка центрального процессора.
- Выводящие компьютер из спящего режима приложения.
На изображении ниже видно, что проблемы с драйверами и приложениями отсутствуют.
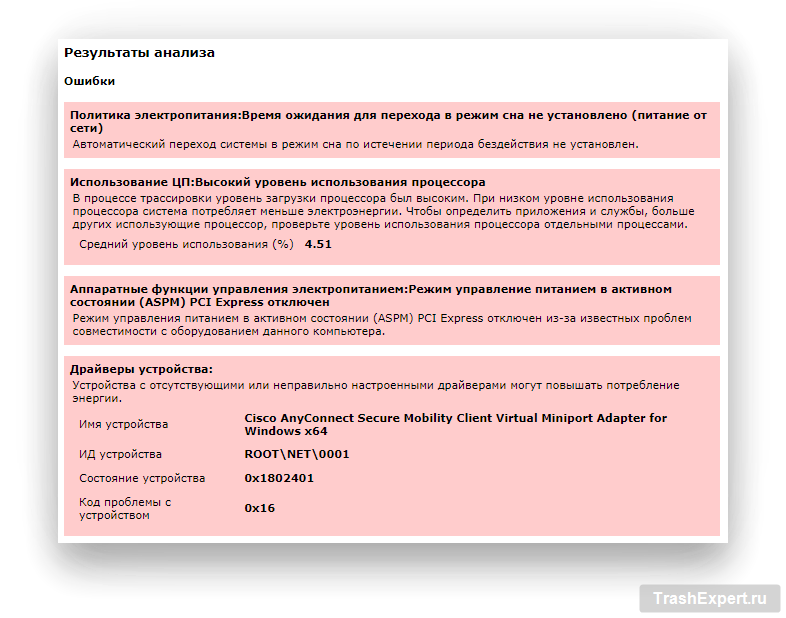
Каждую проблему нужно решать по-своему. Если драйверы устарели, нужно обновить их. Бывает, что необходимо изменить настройку драйверов.
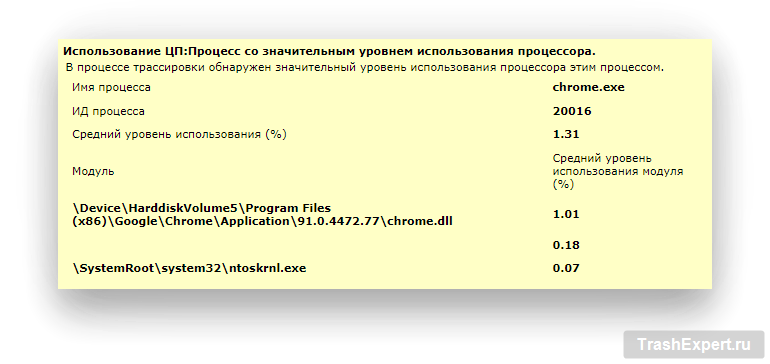
Что касается нагрузки процессора, можно проверить приложения в автозапуске, фоновые приложения и другие сервисы, которые расходуют энергию батареи.
- Следующий раздел называется «Предупреждения». Тут указывается функциональность, где не применяются рекомендованные настройки батареи Windows 10. Если вы закрыли все программы перед началом сканирования, но какие-то приложения всё же продолжают работать, это могут быть вирусы и вредоносные программы. Следует запустить антивирусное сканирование. На изображении ниже показаны предупреждения, поскольку перед началом сканирования много программ не были закрыты.

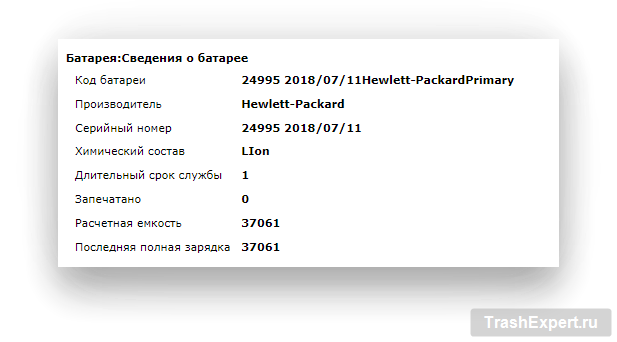
- Последний раздел называется «Сведения». Тут есть информация относительно батареи, ёмкости, настроек электропитания, политик и т.д.
Раздел «Политика электропитания» описывает настройки электропитания при работе от сети и от батареи. Можно поменять настройки по своему усмотрению.

Затем вы увидите раздел «Информация о батарее», где показывается ёмкость. Также показывается ёмкость во время последней подзарядки. Если два этих числа отличаются, следует запустить отчёт о состоянии батареи.
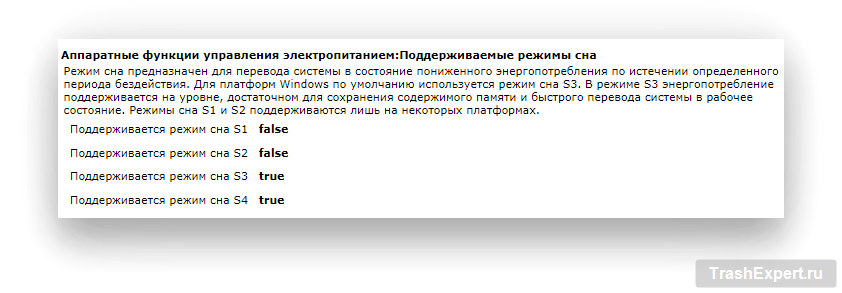
Ещё один раздел называется «Аппаратные функции управления электропитанием». Тут показано, что делает ваша система, чтобы обеспечить оптимальную автономность.
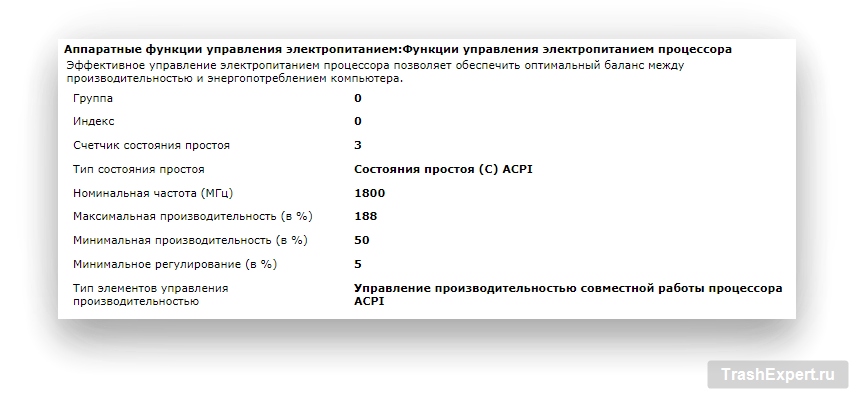
Также в этом разделе упомянуты поддерживаемые режимы сна на устройстве.
Можно запустить отчёт и посмотреть на все ошибки, предупреждения и информацию, чтобы поверхностно проанализировать продолжительность работы вашего устройства. Если текущие настройки вам не нравятся, можно поменять их. Если отсутствуют драйверы, можно установить их, а также закрыть фоновые приложения и сервисы, которые расходуют энергию. Этот отчёт поможет исправить проблемы, которые вы могли не замечать на ноутбуке под управлением Windows 10.
TrashExpert Staff
Над статьей работал не только один автор, но и другие члены команды TrashExpert: администратор, редакторы или коллектив авторов.
Download Windows Speedup Tool to fix errors and make PC run faster
Windows includes a powerful command-line tool called PowerCFG that is very useful in troubleshooting Power Plans. Moreover, this tool, Power Efficiency Diagnostic Report Tool, will also allow you to enable and disable devices. In this article, we will learn how to use PowerCGF to find out the health of your laptop battery.
The OS includes a “hidden” tool that examines your laptop’s power usage and gives you a report and suggestions on how you can improve battery efficiency. In this post, we will see how you can generate a Battery Health or Energy Report with Power Efficiency Diagnostic Report Tool in Windows 11/10/8/7.
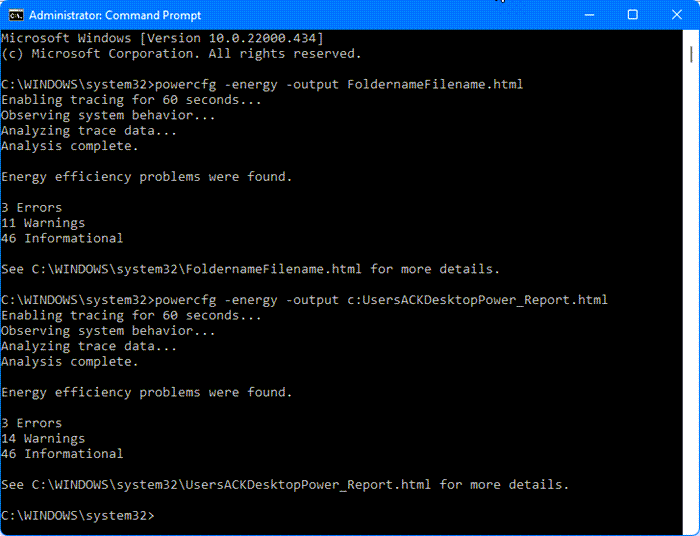
To run the Power Efficiency Diagnostic Report Tool, Run cmd as an Administrator.
At the command line, type in the following:
powercfg -energy -output FoldernameFilename.html
For instance, I saved mine on the Desktop as Power_Report.html.
powercfg -energy -output c:UsersACKDesktopPower_Report.html
For around 60 seconds, Windows will trace, observe & analyze your laptop and generate a report in HTML format, in the location specified by you.
The default duration for the report is 60 seconds, but you can change this to run for longer using the /duration command.
To change the duration, add the time in seconds to the command line.
For instance – powercfg /energy /duration 120. This will run the energy report for 2 minutes.
If you simply type powercfg -energy and hit Enter, the report will be saved in your System32 folder.
How to open and read the Energy Report in Windows?

The Energy Report contains information about the health of your battery, and you can open it in your browser. You will see it saved here by default:
C:\Windows\System32/energy-report.html
Click on it to read it in your browser. The Errors will be shown in Pink and the Warnings in Yellow.
Read: How to run System Diagnostics using System Information Tool?
Generate Battery Health Report in Windows
The Power Efficiency Diagnostic Report could be quite detailed and may overwhelm a normal user. This report will analyze and show the status of your battery’s health and point out warnings, errors and other information relating to your battery.
In this battery’s case, you can see that the Design Capacity is 5200 whereas the Last Full Charge shows 4041 – which is almost 22% lower than the originally designed charge. If your battery shows a figure of around 50%, you may expect it to just last for a few more months only.
Check the health of laptop battery in Windows
There are also some freeware tools that will help you benchmark or monitors your Windows laptop battery. BatteryEater is a testing tool intended to reveal the potential of a notebook battery pack.

BatteryCare is another freeware that will optimize the usage and performance of the laptop’s battery. It monitors the battery’s discharge cycles and helps increase its autonomy and improve its lifetime. BatteryInfoView will display information about your battery.
Related: BatteryReport not working, fails with unexpected errors 0x422, 0xb7 or 0x10d2.
Anand Khanse is the Admin of TheWindowsClub.com, a 10-year Microsoft MVP (2006-16) & a Windows Insider MVP (2016-2022). Please read the entire post & the comments first, create a System Restore Point before making any changes to your system & be careful about any 3rd-party offers while installing freeware.