
-
Board index
Contributions
Tools
Multiplayer / Dedicated Server
-
Search
-
skalibran
- Burner Inserter
- Posts: 6
- Joined: Sun Jul 05, 2015 1:34 pm
- Contact:
Dedicated Server Guide on Windows
Note: Some of the information in this thread is a little bit outdated, see the Wiki — Multiplayer for more up-to-date info on servers and multiplayer in general.
— daniel34
Hey there,
I’ve seen some players wondering on how to set up a headless/dedicated server on Windows. For Unix, see this topic.
Setting up a Factorio server using Windows is very easy.
Important: There is no feedback that the server is running except the factorio.exe in the task manager. That means you won’t see a window or a console!
This can be changed by adding /wait to the .bat-file, for example:
start /wait Factorio.exe —start-server YOUR_SAVE.zip
Thanks to posila for this information!
If a topic like this already exists, I’m sorry. Just want to help!
Last edited by skalibran on Tue Jul 21, 2015 12:51 pm, edited 1 time in total.
-
ssilk
- Global Moderator
- Posts: 12889
- Joined: Tue Apr 16, 2013 10:35 pm
- Contact:
Re: Dedicated Server Guide on Windows
Post
by ssilk »
I made this sticky, due to authors request, but to be honest, this doesn’t make sense for me.
The wiki should be used for that kind of information, cause — as you already see — the old docs are not actual anymore. Or you don’t see, if they are actual, cause they don’t have a history and a date of last change.
So, if you want to do this board a good, please move such infos into the wiki. The right place seems to be below https://forums.factorio.com/wiki/inde … ultiplayer
Cool suggestion: Eatable MOUSE-pointers.
Have you used the Advanced Search today?
Need help, question? FAQ — Wiki — Forum help
I still like small signatures…
-
skalibran
- Burner Inserter
- Posts: 6
- Joined: Sun Jul 05, 2015 1:34 pm
- Contact:
Re: Dedicated Server Guide on Windows
Post
by skalibran »
Hey there,
thanks for making it sticky. I think it does make sense, because people can ask questions specifically for windows servers
I requested a wiki account and will — if accepted — add the server guide later this day.
Regards,
skalibran
-
Boogalo
- Inserter
- Posts: 24
- Joined: Thu Dec 04, 2014 12:42 pm
- Contact:
Re: Dedicated Server Guide on Windows
Post
by Boogalo »
I thought I tried that combination of command lines last night, but must not have had it quite right. Seems to be working.
One issue I have might be rare, but affects my setup. I have a server I run a few games on from my house, sharing a single external IP. Ports forwarded to the box running the server. External people can connect just fine, but I can’t connect from another machine on my local network. I believe this is due to everything still working peer to peer. I had to set up a port forward on my router so external folks can connect, but then all traffic on that port goes to the server, and none to my client, and thus it can’t talk to other players. I can’t see a way around this other than a server working on one port, and clients talking port+1 or something (would need to be coded for it). I understand this is a limitation how the multiplayer works in that a headless server is just a characterless client with no GUI.
-
skalibran
- Burner Inserter
- Posts: 6
- Joined: Sun Jul 05, 2015 1:34 pm
- Contact:
-
Detnom
- Manual Inserter
- Posts: 1
- Joined: Sat Jul 18, 2015 8:46 pm
- Contact:
Re: Dedicated Server Guide on Windows
Post
by Detnom »
Boogalo wrote:I thought I tried that combination of command lines last night, but must not have had it quite right. Seems to be working.
One issue I have might be rare, but affects my setup. I have a server I run a few games on from my house, sharing a single external IP. Ports forwarded to the box running the server. External people can connect just fine, but I can’t connect from another machine on my local network. I believe this is due to everything still working peer to peer. I had to set up a port forward on my router so external folks can connect, but then all traffic on that port goes to the server, and none to my client, and thus it can’t talk to other players. I can’t see a way around this other than a server working on one port, and clients talking port+1 or something (would need to be coded for it). I understand this is a limitation how the multiplayer works in that a headless server is just a characterless client with no GUI.
I’m having a similar issue as you, except I can connect just fine if nobody else is on the server. However when I’m on the server, nobody else can connect. If I logout, my friend can connect, but then I can’t. It’s quite a puzzler.
-
Boogalo
- Inserter
- Posts: 24
- Joined: Thu Dec 04, 2014 12:42 pm
- Contact:
Re: Dedicated Server Guide on Windows
Post
by Boogalo »
Detnom wrote:
I’m having a similar issue as you, except I can connect just fine if nobody else is on the server. However when I’m on the server, nobody else can connect. If I logout, my friend can connect, but then I can’t. It’s quite a puzzler.
It makes sense that it behaves this way, since the server is just a client and everything still works peer to peer still, you get the conflicts when data through a port needs to go to both machines behind NAT, but port forwarding router can only send to one. I assume it will take a modification of the netcode to fix, which might not be feasible.
Bug report: https://forums.factorio.com/forum/vie … =7&t=13634
There seem to be a couple duplicate threads as well.
-
Teck1015
- Manual Inserter
- Posts: 3
- Joined: Sun Jul 19, 2015 12:00 am
- Contact:
Re: Dedicated Server Guide on Windows
Post
by Teck1015 »
Perhaps you guys can help me, I managed to get the «server» running, but how do I go about running two instances of Factorio.exe (ON THE SAME MACHINE!) so I can actually test the server??
Thanks in Advance
~Tempus Fugit
-
Boogalo
- Inserter
- Posts: 24
- Joined: Thu Dec 04, 2014 12:42 pm
- Contact:
Re: Dedicated Server Guide on Windows
Post
by Boogalo »
Teck1015 wrote:Perhaps you guys can help me, I managed to get the «server» running, but how do I go about running two instances of Factorio.exe (ON THE SAME MACHINE!) so I can actually test the server??
Thanks in Advance
At the moment, you can’t from the same machine. Headless only seems to work in the situation where it is on a network or computer you’re not trying to play from in addition to other people not on your network.
-
gr0mpel
- Fast Inserter
- Posts: 110
- Joined: Fri May 03, 2013 6:23 pm
- Contact:
Re: Dedicated Server Guide on Windows
Post
by gr0mpel »
runnings to instances is possible with software like «sandboxie».
start the server, and then the normal game with this software. however it isnt possible to join the server.
there is a error message » local port xxxx is already used by another instance of factorio».
EDIT:
disclaimer: not tested with multiple people!
i didnt give up on this, and with a hint in another topic i found a solution.
change the port manually in the config.ini
start the server.bat in the sandbox
start factorio and join your server (with the home-ip adress)
-
Codec
- Burner Inserter
- Posts: 16
- Joined: Sun Jul 19, 2015 7:50 pm
- Contact:
Re: Dedicated Server Guide on Windows
Post
by Codec »
Does anyone know how to set the auto-save interval or the latency setting? My server seems to be auto-saving every 2 mins and any one with a ping higher than about 100 just cant be on the server.
-
Oxyd
- Former Staff
- Posts: 1428
- Joined: Thu May 07, 2015 8:42 am
- Contact:
Re: Dedicated Server Guide on Windows
Post
by Oxyd »
You can use the —autosave-interval and —latency parameters on the command line.
E.g.
Code: Select all
factorio.exe --start-server map --autosave-interval 10 --latency 12This will set autosave interval to 10 minutes and latency to 200 ms. The —latency parameter is in ticks, so that’s how you go from 12 to 200 ms. (There’s 60 ticks in a second.)
-
posila
- Former Staff
- Posts: 5448
- Joined: Thu Jun 11, 2015 1:35 pm
- Contact:
Re: Dedicated Server Guide on Windows
Post
by posila »
Dev tip: if you change the command in start.bat to
Code: Select all
start /wait Factorio.exe --start-server YOUR_SAVE.zipthere will be console window and you will see some output from Factorio running (or errors if it didn’t like parameters you passed in). Also I recommand to add command «pause» on the second line of the bat file, in order to keep console open even after Factorio exits. That way you will be able to see errors in console and won’t need to hunt them down in log files.
-
kagurazaki
- Burner Inserter
- Posts: 15
- Joined: Thu May 29, 2014 6:11 pm
- Contact:
Re: Dedicated Server Guide on Windows
Post
by kagurazaki »
i am having a problem with my server not saveing anything, i have set the auto save interval to 5, i make a few changes and wait for over 5 min then close and start the server, but nothing saved. can anyone help me?
-
Bisa
- Filter Inserter
- Posts: 450
- Joined: Fri Jul 17, 2015 3:22 pm
- Contact:
Re: Dedicated Server Guide on Windows
Post
by Bisa »
In that case, just edit the first post and point readers to the wiki? Else I suspect many will simply read the first post — and skip to the «reply» button whenever they ave a problem rather than first checking the updated source. I fully agree that keeping the topic to discuss/get help is a nice approach but then the first look on the topic kinda needs to also ensure people read the updated source.
Hosting a factorio server? Take a look at this || init script ||.
-
kotoroshinoto
- Manual Inserter
- Posts: 1
- Joined: Tue Sep 29, 2015 9:34 pm
- Contact:
Re: Dedicated Server Guide on Windows
Post
by kotoroshinoto »
I tried to follow these instructions, but when I go to start the server, the console window opens and immediately closes. When I run the same command from the command prompt, nothing happens, no error message, no console logs, just nothing.
I’m in win10 PRO x64
(it is also not listing factorio.exe as an active process)
I have tried it without using the start command as well. I know my way around a console.
-
maisel16
- Burner Inserter
- Posts: 14
- Joined: Sun Sep 06, 2015 4:52 pm
- Contact:
Re: Dedicated Server Guide on Windows
Post
by maisel16 »
Thanks it works FINE on 0.12.15 Windows Server 2012 R2.
Anybody a idea how task Scheduler for restart setting? Factorio is not stable 24/7 it need restart all 6-12 Houers.
I try it now :S
Thanks bro.
Goldener_WolF
-
maisel16
- Burner Inserter
- Posts: 14
- Joined: Sun Sep 06, 2015 4:52 pm
- Contact:
Re: Dedicated Server Guide on Windows
Post
by maisel16 »
kotoroshinoto wrote:I tried to follow these instructions, but when I go to start the server, the console window opens and immediately closes. When I run the same command from the command prompt, nothing happens, no error message, no console logs, just nothing.
I’m in win10 PRO x64
(it is also not listing factorio.exe as an active process)
I have tried it without using the start command as well. I know my way around a console.
Have you in the right ordner? the Batch file by Factorio.exe?
and create a new savegame? For start a server?
-
Zimme2579
- Burner Inserter
- Posts: 12
- Joined: Wed Apr 15, 2015 2:05 am
- Contact:
Re: Dedicated Server Guide on Windows
Post
by Zimme2579 »
maisel16 wrote:
kotoroshinoto wrote:I tried to follow these instructions, but when I go to start the server, the console window opens and immediately closes. When I run the same command from the command prompt, nothing happens, no error message, no console logs, just nothing.
I’m in win10 PRO x64
(it is also not listing factorio.exe as an active process)
I have tried it without using the start command as well. I know my way around a console.
Have you in the right ordner? the Batch file by Factorio.exe?
and create a new savegame? For start a server?
I am having the same problem but I don’t know my way around a console and was wondering if you could help.
I have fixed this problem but encountered another. How do i host a game and play a game on the same machine?
-
Bisa
- Filter Inserter
- Posts: 450
- Joined: Fri Jul 17, 2015 3:22 pm
- Contact:
Re: Dedicated Server Guide on Windows
Post
by Bisa »
Zimme2579 wrote:I have fixed this problem but encountered another. How do i host a game and play a game on the same machine?
Depends
— if you are hosting and running within the same environment you have to change the port on either one of the factorio instances
— if you want to also allow others on your lan to connect it should be fine, ie if you can set up a vm to run factorio you could run of the vms ip and not your local… but thats a bit overkill, just change the port =P
Hosting a factorio server? Take a look at this || init script ||.
Factorio is a construction and management simulation game developed by the Czech studio Wube Software. This game allows you to build and maintain factories. You will be mining resources, researching technologies, building infrastructure, automating production, and fighting enemies. Factorio also supports multiplayer, allowing many players to cooperate and assist each other or work against each other.
In the following article, we will see how to deploy Factorio on a Windows 2019 Server Edition dedicated server.
- System requirement
- Important Note
- Download setup
- Starting the server
- Map settings
- Joining Server
The Minimum system requirements for running the game
— 4GB RAM
— DirectX 10.1 capable GPU with 512 MB VRAM — GeForce GTX 260, Radeon HD 4850 or Intel HD Graphics 5500
— Dual core 3GHz+ processor
— 1920×1080 screen resolution
— 3 GB of disk space
— A 64-bit operating system
Important Notes
— You need to purchase a license to download and install Factorio. You can always download the demo version of the game and buy the license later.
— All game instances need the installation of the same game-versions and mods.
— Factorio servers use port 34197. The port can be changed in the config file.
— Factorio uses UDP only. Make sure no firewall or anti-virus is blocking the UDP-packets.
Download the setup
We are downloading and setting up Factorio version 1.1.30 on a dedicated server which can be started using the —start-server command line option. You can run Factorio —help to get a list of all command-line arguments that Factorio accepts.
You can download the latest version of Factorio from the source website. Refer to the following link https://www.factorio.com/download
Run the installation file and complete the setup. By default, the game is installed at the following location C:\Program Files\Factorio.
Starting the server
Multiplayer games can be joined, hosted while playing, or hosted by a dedicated server. Multiplayer games can be advertised to other players on the same LAN or worldwide.
You will need to create your save file before you start the server, as the dedicated server needs a save file to be provided. This can easily be done using the —create command-line argument. For example:
./bin/x64/factorio —create ./saves/my-save.zip
This creates a new save, as if by clicking the New Game button in the GUI.
./bin/x64/factorio —start-server ./saves/my-save.zip
This starts with a server that will host the file created on the previous line.
Changing Map settings
There are several JSON configuration files that Factorio can make use of to change the server and map settings:
map-gen-settings to set parameters used by the map generator such as width and height, ore patch frequency and size, etc.
map-settings to control pollution spread, better expansion and evolution, and more
server-settings which consolidated several command-line options into a single file
Example files for each of these parameters are included in the data subdirectory.
The —map-gen-settings and —map-settings options must be used with the —create option when you create a new map. For example:
./bin/x64/factorio —create saves/my-save.zip —map-gen-settings my-map-gen-settings.json —map-settings my-map-settings.json
Starting the Factorio server requires you to specify the location of the server-settings.json file. By default, this is in the Factorio data folder. For example, to start Factorio using the most recent saved map, you would run:
./bin/x64/factorio —start-server-load-latest —server-settings ./data/server-settings.json
On windows, it may be useful to start the server with a .bat file. The bat file should have the following content:
start /wait .\bin\x64\factorio.exe —start-server-load-latest —server-settings .\data\server-settings.json
Use the Multiplayer button in the Play menu to start playing a multiplayer game, choose New or Load or Scenarios to host and play, or Browse or Play on LAN to connect to an already-running game. The host can also choose not to advertise the game at all, in which case you’ll need the server’s (public or otherwise reachable) IP address; you can then Connect directly to that to join the game.
Joining the server
Joining by IP
To join a multiplayer game by IP, you will need to know a valid server’s public IP. You can find this through social media, websites, or by word of mouth. After acquiring the IP and port, go to play -> Multiplayer -> Connect to the server and provide all the information it asks for.
If the server has been set up correctly to accept public connections, you should join the game.
Joining via server list
Factorio’s devs keep a list of all public servers that declare themselves to the service, allowing players to join directly through Factorio. Most of these servers will be password-requiring, but many completely public servers can be connected to. To participate via server list:
- Go to Play -> Multiplayer -> Browse public games.
- Provide your Factorio.com login if asked, and a list of public servers will appear.
- Select one.
Congratulations!! You have successfully installed and launched Factorio on your Windows server. You can invite your friends or other online players by sharing your public IP address so they can look up your server online and join the game. A Factorio server can be joined by selecting the Multiplayer option on the main menu, selecting a character, and entering the server’s IP and port.
We hope you have found this guide helpful and could successfully deploy Factorio on your Windows server. Please click on the up-vote button to show your appreciation.
Время на прочтение7 мин
Количество просмотров17K

Игроки Factorio делятся на две группы. Одни отвергают игру в первые часы, а другие «залипают» на несколько суток и строят масштабные производственные линии. Несмотря на отличную оптимизацию игры, некоторые базы настолько велики, что даже самый мощный компьютер перестает справляться. Это, конечно, не устраивает тех, кто намерен продолжать играть.
Привет, Хабр! В этой статье покажу, как поднять выделенный игровой сервер Factorio. А также также поведаю о проекте, который соединяет отдельные серверы в один большой мир. Подробности под катом!
Возможно, эти тексты тоже вас заинтересуют:
→ Что такое Factorio и зачем нужен сервер
→ Как запустить сервер
→ Как запустить кластер
→ Заключение
Что такое Factorio и зачем нужен сервер
Factorio — специфичная игра про выживание на неизвестной планете. Впрочем, она объединяет большинство привычных механик и сценариев для подобного жанра.
- Герой может спастись. Для этого ему нужно добывать ресурсы и «поднимать науку». Только тогда получится построить ракету и отправиться домой.
- Количество ресурсов ограничено. Мир велик, но не бесконечен, как в том же Minecraft.
- На планете встречаются противники научно-технического прогресса: плеваки и кусаки.

Factorio не предлагает заниматься ручным собирательством (гриндом), как может показаться на первый взгляд. Наоборот, игра может дать пользователю бур, плавильню, конвейеры и манипуляторы, а он — автоматизировать добычу ресурсов и научно-технический прогресс.
Автоматизация в Factorio возведена в абсолют. Для построения гибкого производства в игре есть поезда и логистическая сеть. Например, вы можете построить железную дорогу, которая соединяет нефтеперерабатывающий завод с четырьмя месторождениями. Затем — объединить месторождение и станцию в общую логистическую сеть и указать, что поезд может останавливаться на станции только при условии, если в хранилище более 50 тонн нефти. Вот и все, теперь поезд не будет «прохлаждаться» на станциях, которые не могут заполнить цистерну до краев.
Логистическая сеть — это множество сигналов, к которым применимы логические и арифметические операции для управления производством. Естественно, это привлекло энтузиастов, которые запустили что-то похожее на DOOM в Factorio. Несмотря на мощь логистической системы, есть проект по проектированию процессора на конвейерах.
Кто-то считает, что совместная игра в Factorio — лучшая замена техническому собеседованию, а кто-то проверяет архитектурные стили или объясняет принципы работы Apache Kafka. Если у вас достаточно свободного времени и есть желание все автоматизировать, то Factorio для вас.
Гораздо веселее проходить игру с друзьями. Для этого потребуется выделенный игровой сервер.

Как запустить сервер
Выбор подходящей конфигурацию
Игровой сервер Factorio, как и любой другой сервер, можно поднять на базе физической или виртуальной машины. Однако для выбора подходящей конфигурации нужно знать немного технической информации об игре.
- Игровой сервер обновляется 60 раз в секунду и большинство действий выполняется в одном потоке. Это значит, что нужен сервер с высокой тактовой частотой, а не с большим количеством ядер.
- Для прохождения базовой игры подойдет любой облачный сервер с двумя ядрами, но с модами может быть по-разному. Для Krastorio 2 облачного сервера хватит, а вот для Sea Block придется переехать на выделенный сервер CL23-SSD с процессором i3-12300. Спустя 900 часов игры мой компьютер уже тормозит от количества объектов на карте, а выделенный сервер пока справляется и выдает стабильные 60 тактов в секунду.
Любите детективы? Пройдите квест «В поисках пропавших ссылок»! Регистрируйтесь на сайте и попробуйте себя в роли сыщика: найдите на страницах Selectel спрятанные ссылки и первыми дойдите до финала. Выиграйте эксклюзивный мерч и промокод на сервисы Selectel.
Аренда сервера
В качестве примера развернем выделенный сервер CL23-SSD — этой конфигурации хватит с запасом.
1. Открываем панель управления и переходим в раздел Серверы и оборудование → Серверы. В пункте Готовые серверы выбираем интересующую нас конфигурацию.

2. Настраиваем сервер: выбираем операционную систему и модель потребления трафика. Выбираем Ubuntu и нажимаем кнопку Оплатить.
3. Подключаемся к серверу по SSH, используя его публичный IP-адрес и пароль из панели управления.
ssh root@<ip-adr>
Установка игрового сервера
Игровой сервер распространяется бесплатно на официальном сайте игры, но headless-версия есть только для Linux.
1. Скачиваем и распаковываем игровой сервер:
wget https://factorio.com/get-download/stable/headless/linux64 -O factorio.tar.xz
unxz factorio.tar.xz
tar xvf factorio.tar
В каталоге игрового сервера есть следующие точки интереса:
- bin/x64/factorio — исполняемый файл игрового сервера,
- mods/ — каталог для модов,
- data/server-settings.example.json — конфигурационный файл сервера,
- factorio-current.log и factorio-previous.log — логи последнего и предпоследнего запуска,
- saves/ — каталог для промежуточных автосохранений.
Конфигурационный файл снабжен комментариями, однако я акцентирую внимание на некоторых параметрах.
- Параметр game_password — пароль для входа на сервер.
- Параметр auto_pause — булево значение. Если auto_pause=true, то при отсутствии игроков время на сервере останавливается. Обратите внимание, что через 19 840 часов (примерно 2,26 года) произойдет переполнение внутреннего счетчика времени и сохранение поломается.
2. Запускаем игровой сервер с помощью следующей команды:
./bin/x64/factorio --start-server /путь/до/карты.zip --server-settings server-settings.json
Может возникнуть вопрос, где взять карту игры. Но на деле все просто: ее нужно сгенерировать. Самый оптимальный вариант — сделать это в одиночной игре через интерфейс.

Интерфейс генерации карты.
Сохранения можно найти по одному из путей:
- Windows: %APPDATA%\Factorio\saves;
- macOS: ~/Library/Application Support/factorio/saves;
- Linux: ~/.factorio/saves.
Загружаем сохранение на сервер, запускаем — и готово!
Сервер можно запустить в tmux/screen или написать systemd-юнит. Также можно использовать скрипты Linux Game Server Manager (LinuxGSM).
Как запустить кластер
Зачем нужен кластер
Мощный выделенный сервер может справиться даже с тяжелыми модами. Но однажды его ресурсов может не хватить.
Для сравнения производственных линий в игре используется метрика «наука в секунду» (Science Per Minute, SPM). «Наука» — это предметы в виде колб, которые изготавливаются из множества различных ресурсов и тратятся на изучение новых технологий.
Недавно был поставлен рекорд в миллион науки за минуту. Для сравнения: компьютер с процессором Intel i3-10500 лагает, когда на карте миллион сущностей. А тут миллион — это производимый ресурс без учета фабрик, манипуляторов и конвейеров. Как такое можно сделать на одном сервере? Никак — нужен кластер.
Для постановки рекорда энтузиасты использовали 175 игровых инстансов, расположенных на 53 серверах. Самая большая локация, ферма солнечных батарей, занимает сохранение размером в 1,5 ГБ и использует 70 ГБ оперативной памяти. Посмотреть на безумные цифры вы можете в мониторинге проекта.
Я заглянул на один из крупнейших серверов кластера. Энтузиазм авторов впечатляет. Маленькие познавательные тексты и рассуждения по темам будущих статей — в моем Telegram-канале.
Модификации для создания кластеров
Вроде все понятно: для увеличения мощности нужно создать несколько серверов, которые будут общими усилиями поддерживать большой мир Factorio. Но как объединить их в кластер и научить общаться между собой? Так, чтобы часть мира, расположенная на сервере A могла отправить ресурсы на фабрики сервера B?
Объединением игровых серверов в один мир занимается проект Clusterio. У него есть две версии.
- Устаревшая «альфа» 1.2. Это внутриигровой мод, который реализует «телепортирующие сундуки». Они «поглощают» ресурсы на одном сервере и «материализуют» на другом.
- Актуальная «альфа» 2.0. Это целый комбайн. Далее мы рассмотрим именно эту версию.
Создание кластера, или начало работы с Clusterio 2.0
Терминология оркестратора
- Controller — управляющее звено. На нем находится веб-интерфейс.
- Instance — игровой сервер Factorio.
- Host — физический или облачный сервер, на котором запускаются игровые серверы.
1. Для работы Clusterio нужен пакетный менеджер Node.js (NPM) — устанавливаем его с помощью нескольких команд:
mkdir clusterio
cd clusterio
npm init "@clusterio"
Процесс установки интерактивный, поэтому можно выбрать необходимые компоненты и плагины, а также разделить хосты и контроллер.
2. Если вы устанавливаете хост отдельно, то необходимо указать URL контроллера:
npx clusteriohost config set host.controller_url http://192.168.1.1:1234/
Скрипт установки выведет в конце токен для входа в контроллер — его нужно сохранить. По готовности можно запустить контроллер и хост.
В текущем каталоге появится каталог systemd — внутри него лежат сгенерированные юниты, которые можно положить в /etc/systemd/system и запускать в качестве демонов. Кроме того, в этой же директрии есть скрипты run-controller.sh и run-host.sh. С помощью них можно запустить хост или контроллер в текущей сессии.

Если все сделано верно, то после входа по токену вы увидите все хосты и информацию о сервере с контроллером.
3. Далее заходим на вкладку Mods и в разделе Stored Mods загружаем zip-архивы модов Subspace Storage и Clusterio Library. Архивы можно скачать с сайта или через главное меню игры. Во втором случае архивы модов будут лежать в каталоге mods, рядом с saves.

4. Затем создаем набор модов (Mod Pack). Назвать его можно как угодно, главное — прописать версию игры. Далее в списке модов нужно включить загруженные модификации и сохранить получившийся набор. Без него по умолчанию ни один игровой сервер запустить не получится.

5. Теперь можно создать игровой сервер во вкладке Instances. В карточке игрового сервера нужно назначить игровой сервер на хост и загрузить мир (сохранение). Если последнего не сделать, сервер при первом запуске сгенерирует случайный мир.
Готово — игровой сервер можно запускать.
Запуск игрового сервера
В Factorio можно заходить по адресу любого инстанса из кластера. Если вы устанавливали Server Select, то в левом верхнем углу игры будет кнопка, вызывающая список всех серверов кластера. Плагин Inventory Sync сохранит ваш инвентарь, а Research Sync — синхронизирует научный прогресс между всеми серверами.
Плагин Subspace Storage и одноименный мод добавляют в игру три пары объектов:
- Item Injector + Item Extractor,
- Fluid Injector + Fluid Extractor,
- Electricity Injector + Electricity Extractor.
Объекты Injector — это «черные дыры», которые потребляют ресурсы, жидкости и электричество. Объекты Extractor — это «волшебные сундуки», которые извлекают запрошенные ресурсы и пробрасывают между серверами в кластере.
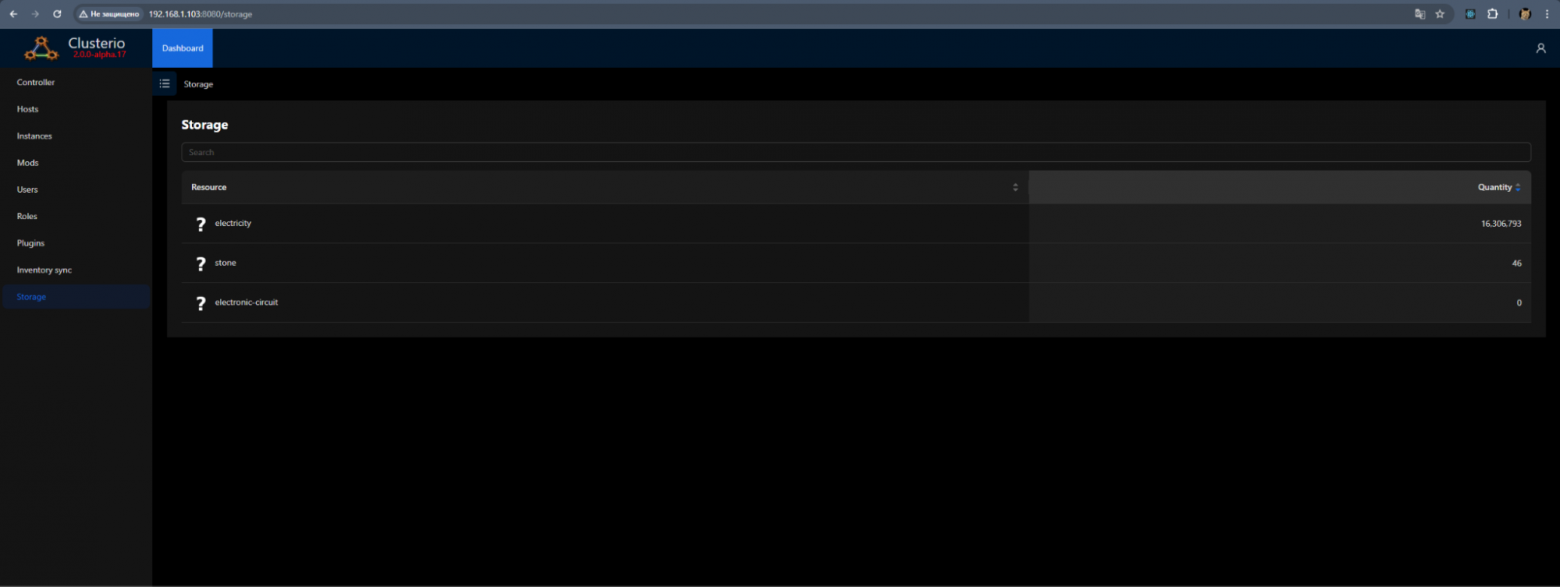
Вкладка Storages, «съеденные» объекты.
Заключение
Если вы настроили кластер для Factorio, то вам действительно нравится игра. Ведь этот процесс — настоящее искусство администрирования, в котором каждый может добавить свои средства для автоматизации и развертывания. Главное — чтобы под рукой был надежный и мощный сервер, который поможет реализовать проект.
Factorio — это популярная компьютерная игра в жанре симулятора автоматизации, где игроки строят и управляют сложными производственными цепочками. Основная цель игры — создать максимально эффективное производство, начиная с простейших процессов и постепенно переходя к автоматизации крупных систем. Благодаря сложной механике, множеству доступных модификаций и возможности кооперативной игры, Factorio завоевала огромную аудиторию как среди новичков, так и среди опытных игроков.
Одной из ключевых особенностей Factorio является многопользовательский режим. Он позволяет группе игроков работать вместе или конкурировать в создании производственных линий, что делает игровой процесс более увлекательным и сложным. Для многопользовательской игры требуется сервер, на котором будет происходить взаимодействие игроков. Собственный сервер открывает перед игроками множество возможностей:
-
Контроль над игровым процессом. Администратор сервера может устанавливать параметры игры, такие как количество игроков, сложность, наличие модов и даже правила поведения.
-
Стабильность и производительность. Использование выделенного сервера исключает влияние локального оборудования на игру, обеспечивая плавный процесс даже при высокой нагрузке.
-
Доступность. Сервер работает круглосуточно, что позволяет игрокам подключаться в любое время, независимо от времени суток или доступности хоста.
-
Расширенные настройки. Администратор может интегрировать моды, автоматизировать резервное копирование и масштабировать производственные мощности за счет подключения дополнительных серверов.
Почему Timeweb Cloud — лучший выбор для Factorio
Timeweb Cloud предоставляет облачные серверы, которые идеально подходят для размещения игровых серверов, включая Factorio. Вот несколько причин, почему стоит выбрать именно это решение:
-
Простота использования. Для запуска сервера Factorio не нужно быть экспертом в системном администрировании. Timeweb Cloud предлагает готовые VDS, которые позволяют настроить сервер в несколько кликов.
-
Высокая производительность. Облачные серверы Timeweb Cloud обеспечивают стабильную работу благодаря мощным процессорам, высокоскоростной оперативной памяти и быстрому SSD-хранилищу. Это особенно важно для Factorio, где большое количество объектов и сложных расчетов может создавать нагрузку.
-
Масштабируемость. В любой момент можно увеличить ресурсы сервера, чтобы справиться с ростом числа игроков или усложнением игрового мира.
-
Доступность из любой точки мира. Игроки смогут подключаться к серверу без задержек, благодаря распределенной инфраструктуре Timeweb Cloud и высоким стандартам сетевого подключения.
-
Поддержка и документация. Timeweb Cloud предлагает профессиональную техническую поддержку, которая поможет решить любые вопросы, связанные с настройкой и эксплуатацией сервера. Кроме того, платформа предоставляет подробные руководства и документацию для работы с их решениями.
-
Экономическая выгода. Использование облачного сервера позволяет избежать затрат на покупку и обслуживание физического оборудования. Клиенты платят только за те ресурсы, которые реально используют.
В условиях современной игровой индустрии наличие собственного сервера становится не просто удобным, но зачастую необходимым инструментом. Timeweb Cloud предлагает уникальное сочетание простоты, производительности и гибкости, что делает нашу платформу оптимальным выбором для хостинга сервера Factorio.
cloud
Подготовка к установке
Перед тем как приступить к установке игрового сервера Factorio, необходимо выполнить несколько предварительных шагов. Они включают регистрацию в облачном сервисе Timeweb Cloud, выбор подходящего тарифа для сервера и настройку инфраструктуры. Этот процесс позволяет подготовить серверную платформу, которая будет обеспечивать стабильную и эффективную работу игры.
Регистрация в Timeweb Cloud и вход в панель управления
Первый шаг — создание учетной записи в Timeweb Cloud. Это обеспечит доступ к панели управления, где вы сможете управлять серверами и их конфигурацией.
-
Переход на сайт Timeweb Cloud. Откройте официальный сайт TimeWeb Cloud и нажмите кнопку «Создать аккаунт».

-
Создание учетной записи. Введите свои данные: ФИО, адрес электронной почты и телефон. На следующем экране укажите пароль или сгенерируйте его
-
Подтверждение регистрации. После отправки формы проверьте почту — вы получите письмо с подтверждением регистрации. Перейдите по ссылке из письма, чтобы активировать аккаунт.
-
Вход в панель управления. После активации учетной записи выполните вход на платформу, используя указанные при регистрации данные.
Интерфейс Timeweb Cloud интуитивно понятен даже для новичков. Панель управления предоставляет доступ к созданию серверов, настройке параметров и мониторингу их состояния.
Выбор тарифа и создание инфраструктуры
После регистрации нужно выбрать подходящий тариф, соответствующий требованиям вашего игрового сервера.
-
Оценка нагрузки. Прежде чем выбрать тариф, важно понимать, какие ресурсы потребуются вашему серверу. Требования зависят от:
-
Количества игроков. Чем больше игроков одновременно подключается к серверу, тем выше нагрузка.
-
Сложности игрового мира. Чем больше объектов, производственных линий и модификаций, тем больше ресурсов потребуется.
-
Выбор тарифа. Timeweb Cloud предлагает несколько тарифных планов, выбирайте мощности согласно рекомендациям на официальных ресурсах Factorio. Подробнее о производительности мы поговорим в следующей главе.
Factorio — это легковесная игра, но ее производительность зависит от сложности мира и активности игроков. Вот минимальные и рекомендуемые требования:
-
Операционная система: Linux (предпочтительно Ubuntu/Debian), но сервер также поддерживает Windows.
-
Процессор: Двухъядерный процессор с частотой 2 ГГц или выше. Для больших серверов — четырехъядерный.
-
Оперативная память:
-
Минимум: 2 ГБ для серверов с небольшим количеством игроков.
-
Рекомендуется: 4–8 ГБ для серверов с модами и 10–20 игроками.
-
Дисковое пространство: 5–10 ГБ для базовой установки. Если используются модификации или ведутся резервные копии, желательно выделить 20 ГБ или больше.
-
Сетевое соединение: Высокая пропускная способность и низкая задержка. Минимально рекомендуется 10 Мбит/с для исходящего и входящего трафика.
Правильная подготовка к установке сервера Factorio — это залог стабильной и бесперебойной работы. Выполнив регистрацию, выбрав подходящий тариф и настроив сервер в Timeweb Cloud, вы получите платформу, которая идеально подходит для хостинга игрового мира Factorio:
-
В панели управления перейдите в раздел «Облачные серверы».
-
Укажите операционную систему, например Ubuntu, регион и параметры конфигурации и сети, согласно рекомендациям выше.
-
Нажмите «Заказать» в меню справа.
-
После успешной покупки сервер сразу же начнет настраиваться под ваш запрос. Процесс может занять до 10 минут.
После развертывания сервера у вас появится Дашборд с информацией о подключении, статистикой нагрузки на железо и графики исходящего и входящего трафика. Теперь можно переходить к установке Factorio.
Установка сервера Factorio с использованием Dockerfile
Использование Docker для развертывания игрового сервера Factorio — это современный и гибкий подход, который позволяет автоматизировать процесс настройки и обеспечить стабильность работы сервера. Docker изолирует серверное ПО в контейнере, что делает процесс установки более управляемым и независимым от операционной системы сервера. Этот способ похож на предыдущий, однако здесь вы полностью настроите docker под будущий сервер Factorio.
Когда и почему стоит использовать этот подход:
-
Упрощенная установка и управление. Docker упрощает процесс настройки сервера, избавляя от необходимости вручную устанавливать зависимости и выполнять сложную конфигурацию.
-
Портативность. Контейнеры Docker работают одинаково независимо от операционной системы и серверного окружения, что позволяет переносить сервер между машинами без изменений.
-
Изоляция. Все компоненты сервера находятся внутри контейнера, изолированного от основной системы. Это снижает риск конфликтов между программами.
-
Гибкость и масштабируемость. С Docker легко запускать несколько серверов Factorio на одном хосте, а также настраивать серверы под разные задачи, например, для тестирования модов или создания кластеров.
-
Поддержка и обновления. Репозиторий factoriotools/factorio-docker активно поддерживается, что обеспечивает своевременные обновления и исправления.
Установка Docker
Docker — это программное обеспечение для контейнеризации, которое необходимо установить на ваш сервер перед настройкой Factorio.
-
Обновите пакеты системы. На серверах Linux выполните:
sudo apt update && sudo apt upgrade -y-
Установите Docker. На Ubuntu выполните:
sudo apt install docker.io -y-
Убедитесь, что Docker установлен и работает. Выполните команду:
docker --version-
Установите Docker Compose (если не установлен). Docker Compose используется для управления многоконтейнерными приложениями. Установите его, выполнив:
sudo apt install docker-compose -yКлонирование репозитория
Для работы с контейнером Factorio потребуется репозиторий с готовым Dockerfile и шаблонами конфигурации.
-
Установите Git (если не установлен):
sudo apt install git -y-
Клонируйте репозиторий. Выполните команду:
git clone https://github.com/factoriotools/factorio-docker.git-
Перейдите в каталог репозитория:
cd factorio-dockerКонфигурация сервера через docker-compose.yml
Файл docker-compose.yml определяет параметры работы сервера. Его настройка — важный шаг для персонализации вашего игрового сервера.
-
Создайте копию файла конфигурации. В каталоге репозитория создайте или измените
docker-compose.yml, если он уже существует. Пример базовой конфигурации:
version: '3.3'
services:
  factorio:
    image: factoriotools/factorio
    ports:
      - "34197:34197/udp"
    volumes:
      - ./data:/factorio
    environment:
      - FACTORIO_SERVER_SETTINGS=./data/server-settings.json
- TOKEN=FactorioToken-
Настройте параметры.
-
Порт сервера. Убедитесь, что порт
34197открыт в вашей системе. -
Хранилище данных. Директория
./dataиспользуется для хранения файлов сервера, включая сохранения и модификации. -
Файл настроек. Обновите
server-settings.json, чтобы задать параметры игры (например, название сервера, пароль и количество игроков). -
Добавьте токен, полученный на сайте
https://factorio.com/profile.
Запуск сервера
-
Запустите сервер. Выполните команду:
docker-compose up -d-
Проверьте статус контейнера. Выполните:
docker psПроверка подключения
Подключитесь к серверу через игру Factorio, используя IP-адрес вашего сервера и порт 34197.
Дополнительные советы
-
Обновление сервера. Чтобы обновить сервер до последней версии, выполните:
docker-compose pull
docker-compose up -d-
Управление сервером. Остановить сервер:
docker-compose down-
Просмотреть логи:
docker logs <container_id> -
Добавление модов. Загружайте моды в папку
./data/modsи перезапустите контейнер.
Установка сервера Factorio с использованием Docker — это мощное решение, позволяющее быстро развернуть сервер с минимальными усилиями. Этот подход идеально подходит для пользователей, которые ценят гибкость и хотят иметь полный контроль над сервером, при этом избегая сложной ручной настройки.
Установка Factorio вручную на выделенный сервер — это сценарий для пользователей, которые хотят иметь полный контроль над настройкой и эксплуатацией сервера. Этот подход требует базовых навыков работы с командной строкой и понимания серверной инфраструктуры. Он особенно полезен, если вы планируете настраивать сервер с уникальными параметрами или интегрировать его в сложную инфраструктуру.
Подготовка выделенного сервера
-
Выбор операционной системы. Factorio Server официально поддерживает Windows и Linux. Рекомендуется использовать Linux-дистрибутив, такой как Ubuntu или Debian, из-за его стабильности, низкой ресурсоемкости и широких возможностей для автоматизации.
-
Обновление системы. Прежде чем приступить к установке, обновите все пакеты:
sudo apt update && sudo apt upgrade -y-
Установка необходимых инструментов. Для работы потребуется:
-
wgetилиcurlдля загрузки серверных файлов. -
screenдля управления сервером в фоновом режиме.
sudo apt install wget curl screen -y-
Создание отдельного пользователя для сервера. Для повышения безопасности создайте нового пользователя, который будет запускать сервер:
sudo adduser factorio
sudo su - factorio
Скачивание и установка Factorio Server
-
Скачивание файлов сервера. Зайдите на официальный сайт Factorio в раздел Headless Server, чтобы получить ссылку на последнюю версию сервера. Скопируйте ссылку для Linux и выполните команду:
wget https://factorio.com/get-download/stable/headless/linux64 -O factorio.tar.xz-
Распаковка файлов. Распакуйте архив с помощью команды:
tar -xf factorio_headless_x64.tar.xz-
Организация структуры:
mkdir -p ~/factorio/saves ~/factorio/modsКонфигурация файла server-settings.json
-
Создайте или отредактируйте файл настроек. Файл
server-settings.jsonопределяет ключевые параметры сервера, такие как его название, пароль, максимальное количество игроков и другие настройки. Пример содержимого:
{
  "name": "My Factorio Server",
  "description": "A friendly server for everyone.",
  "tags": ["game", "fun"],
  "max_players": 10,
  "visibility": {
    "public": true,
    "lan": true
  },
  "username": “your_username",
  "password": "your_password",
  "game_password": "game_password",
  "require_user_verification": true,
  "max_upload_in_kilobytes_per_second": 0,
  "minimum_latency_in_ticks": 0
}
-
Обязательно введите
usernameиpasswordот вашего аккаунта, которые можно найти на официальном сайте. К аккаунту обязательно должна быть привязана лицензионная версия игры. Если вы все-таки не хотите использовать свои аутентификационные данные, можете добавить поле «Token» и взять его отсюда:

-
Сохраните
server-settings.jsonв корневой папке сервера (например,~/factorio). -
Дополнительные настройки.
-
Моды. Скачивайте модификации из Factorio Mod Portal и размещайте их в папке
~/factorio/mods.
-
-
Сохранение. Подготовьте сохранение с помощью локального клиента игры и загрузите его в папку
~/factorio/save. Вы также можете сгенерировать его сами, с помощью команды:
./bin/x64/factorio --create saves/new_game.zipЗапуск сервера
-
Запуск сервера с параметрами. Перейдите в папку сервера и выполните команду:
./bin/x64/factorio --start-server ~/factorio/saves/new_game.zip --server-settings ~/factorio/server-settings.json
-
Использование
screenдля фонового запуска. Чтобы сервер продолжал работать после закрытия терминала, используйтеscreen:
screen -S factorio_server
./bin/x64/factorio --start-server ~/factorio/saves/savefile.zip --server-settings ~/factorio/server-settings.json
Для возврата к сессии введите:
screen -r factorio_server-
Проверка работы. После запуска проверьте, доступен ли сервер, попытавшись подключиться через клиент Factorio. Используйте IP-адрес и порт (по умолчанию
34197). При подключении нового пользователя вы увидите изменение в логах сервера:

Дополнительные советы
- Автоматизация запуска. Чтобы сервер запускался автоматически после перезагрузки системы, создайте systemd-сервис. Пример:
sudo nano /etc/systemd/system/factorio.serviceСодержимое:
[Unit]
Description=Factorio Server
After=network.target

[Service]
Type=simple
User=factorio
WorkingDirectory=/home/factorio/factorio
ExecStart=/home/factorio/factorio/bin/x64/factorio --start-server /home/factorio/factorio/saves/savefile.zip --server-settings /home/factorio/factorio/server-settings.json
Restart=always

[Install]
WantedBy=multi-user.target
После сохранения активируйте и запустите сервис:
sudo systemctl enable factorio.service
sudo systemctl start factorio.service- Обновление сервера. Для обновления скачайте новую версию и замените старые файлы, сохранив директории
savesиmods.
Ручная установка сервера Factorio предоставляет максимальную гибкость в настройке и управлении, что делает её предпочтительным выбором для опытных пользователей. Несмотря на требуемые усилия, этот подход позволяет адаптировать сервер под любые игровые сценарии и гарантирует его надежную работу.
Настройка сервера
Настройка игрового сервера Factorio — важный этап, который позволяет не только адаптировать игровой процесс под конкретные потребности, но и обеспечить стабильную работу при увеличении нагрузки. В этом разделе рассмотрим, как установить моды, настроить автоматическое сохранение и резервное копирование, а также оптимизировать сервер для больших нагрузок.
Установка модов
Модификации (моды) позволяют разнообразить игровой процесс, добавляя новые элементы, механики и сценарии. Factorio имеет официальную поддержку модов, что значительно упрощает их установку и управление.
Factorio Mod Portal — это официальный каталог модов. Вы можете искать моды по ключевым словам или категориям, а также просматривать их популярность и отзывы.
После выбора мода скачайте его архив (.zip) и разместите в директории mods вашего сервера. Путь к этой директории зависит от структуры сервера, но обычно это: <папка_сервера>/mods, если вы запускали из докера, путь будет ~/factorio-docker/data/mods.
Если сервер имеет доступ к сети, вы можете автоматизировать загрузку модов с помощью API-токена. Для этого:
-
Зайдите в настройки своего аккаунта на сайте factorio.com
-
Скопируйте токен и укажите его в файле
player-data.json, находящемся в папке сервера.
Активация модов
Включите необходимые моды, указав их в файле mod-list.json. Пример файла:
{
  "mods": [
    {"name": "base", "enabled": true},
    {"name": "bobmods", "enabled": true},
    {"name": "angelsmods", "enabled": true}
  ]
}
После добавления или изменения модов перезапустите сервер, чтобы изменения вступили в силу.
Настройка автоматического сохранения и резервного копирования
Автоматическое сохранение и резервное копирование данных — критически важные процессы, которые предотвращают потерю прогресса в случае сбоя сервера или ошибки игрока.
Автоматическое сохранение
В файле server-settings.json укажите частоту сохранений:
{
  "autosave_interval": 5,
  "autosave_slots": 10
}
Здесь:
-
autosave_interval— интервал между сохранениями в минутах. -
autosave_slots— количество слотов для сохранений (старые сохранения будут перезаписываться).
Убедитесь, что сервер сохраняет прогресс, проверив наличие файлов в папке saves.
Резервное копирование
Настройте скрипт, который будет регулярно копировать сохранения на другой сервер или в облачное хранилище. Пример на bash:
#!/bin/bash
SOURCE="/path/to/factorio/saves"
DEST="/path/to/backup/location"
TIMESTAMP=$(date +"%Y%m%d%H%M%S")
tar -czf "$DEST/factorio_backup_$TIMESTAMP.tar.gz" "$SOURCE"
Используйте cron для регулярного выполнения скрипта:
crontab -eДобавьте строку для запуска скрипта, например, ежедневно в 3:00:
0 3 * * * /path/to/backup_script.shОптимизация сервера под большую нагрузку
Когда на сервере играет большое количество игроков или используются ресурсоемкие моды, важно минимизировать лаги и поддерживать стабильную работу.
Выделение ресурсов
Убедитесь, что сервер отвечает минимальным и рекомендованным требованиям:
- CPU: высокая тактовая частота (>3 ГГц), предпочтительно с многоядерностью.
- RAM: минимум 2 ГБ для базовой игры, +1 ГБ на каждые 10 игроков.
- Дисковая подсистема: SSD для быстрого доступа к сохранениям и модам.
Настройка лимитов
В файле server-settings.json ограничьте количество игроков, чтобы избежать перегрузки:
{
  "max_players": 20
}
Снижение нагрузки
Выбирайте моды, оптимизированные для многопользовательской игры. Некоторые моды могут значительно увеличивать нагрузку на процессор и сеть.
Увеличение интервала тиков. Увеличение параметра minimum_latency_in_ticks в настройках сервера помогает снизить нагрузку на сеть:
{
  "minimum_latency_in_ticks": 2
}
Логи сервера
Регулярно проверяйте логи на наличие ошибок или предупреждений. Логи находятся в папке с сервером (factorio-current.log).
Использование мониторинга
Настройте инструменты мониторинга, такие как htop или Prometheus, чтобы отслеживать использование ресурсов в реальном времени.
Обновление игры
Убедитесь, что сервер и клиенты используют последнюю версию Factorio. Разработчики часто выпускают обновления, улучшающие производительность.
Правильная настройка модов, автоматизация сохранений и резервного копирования, а также оптимизация ресурсов сервера являются основой для обеспечения стабильной и комфортной игры. Эти шаги позволят избежать технических проблем и создать условия для долгосрочной работы сервера Factorio.
Тестирование сервера
Тестирование игрового сервера Factorio — это финальный этап настройки, который позволяет убедиться в его работоспособности и стабильности. На этом этапе важно проверить корректность подключения игроков, стабильность работы сервера под нагрузкой, а также устранить возможные ошибки и проблемы.
Проверка подключения
После запуска сервера убедитесь, что он доступен для подключения. Это можно сделать с помощью следующих шагов:
- Получение IP-адреса сервера. Если сервер размещен локально или в облаке, узнайте его IP-адрес. Для выделенного сервера или облачного решения Timeweb Cloud это можно сделать через панель управления.
- Проверка открытых портов. Убедитесь, что порт сервера (
34197) открыт для внешних подключений. Если порт закрыт, откройте его:
sudo ufw allow 34197 -
Запуск игры и подключение.
-
Откройте Factorio и выберите «Мультиплеер».
-
Нажмите «Присоединиться к игре» (Join game).
-
Введите IP-адрес сервера и порт (по умолчанию
34197). Пример:192.168.1.100:34197. -
Нажмите «Подключиться».
-
Тестирование игровой сессии. После успешного подключения проверьте:
-
Возможность взаимодействия с миром (добыча ресурсов, строительство).
-
Синхронизацию между сервером и клиентом (например, изменение времени суток должно быть одинаковым для всех).
-
Тестирование с другой машины. Попросите другого игрока подключиться к вашему серверу. Убедитесь, что сервер доступен по внешнему IP-адресу.
-
Проверка через мастер-сервер Factorio. Если вы указали параметр
game_visibilityв настройках сервера, ваш сервер будет виден в общем списке серверов Factorio. Проверьте, отображается ли он в списке и доступен ли для подключения.
Решение типичных ошибок и проблем
В этом разделе мы разберем наиболее распространенные ошибки и проблемы, которые могут возникнуть, а также предложим способы их решения.
Проблемы с подключением
- Ошибка: «Couldn’t establish network communication» (Невозможно установить соединение).
-
- Причина: Порт сервера закрыт или недоступен.
- Решение: Убедитесь, что порт
34197открыт в файрволе и на роутере. Для NAT-роутера настройте переадресацию портов (port forwarding).
- Ошибка: «Failed to connect to server» (Не удалось подключиться к серверу).
-
- Причина: Неправильный IP-адрес или порт.
- Решение: Проверьте, что вы используете правильный адрес и порт. Если используется доменное имя, убедитесь, что оно корректно разрешается в IP.
- Ошибка: «Server not responding» (Сервер не отвечает).
-
- Причина: Сервер не работает или завис.
- Решение: Проверьте, запущен ли сервер. При необходимости перезапустите его.
Проблемы с производительностью
- Ошибка: Лаги при большом количестве игроков.
-
- Причина: Сервер не справляется с нагрузкой.
- Решение:
- Уменьшите количество игроков (
max_playersвserver-settings.json). - Обновите серверное оборудование.
- Проверьте использование процессора и памяти с помощью системных утилит (
htop,top).
- Уменьшите количество игроков (
- Ошибка: Задержки в передаче данных.
-
- Причина: Высокая задержка в сети.
- Решение:
- Переключите сервер на более быстрый канал связи.
- Проверьте скорость соединения с помощью утилит типа
pingилиiperf.
Проблемы с модами
- Ошибка: «Mod mismatch» (Несоответствие модов).
-
- Причина: Версии модов на клиенте и сервере отличаются.
- Решение: Убедитесь, что все игроки используют те же версии модов, что и сервер.
- Ошибка: «Missing mod dependencies» (Отсутствуют зависимости мода).
-
- Причина: Не установлены необходимые моды.
- Решение: Проверьте требования мода на Factorio Mod Portal и установите отсутствующие зависимости.
Ошибки сохранения и загрузки
- Ошибка: «Corrupted save file» (Поврежденный файл сохранения).
-
- Причина: Файл сохранения поврежден из-за сбоя системы.
- Решение: Используйте последнюю резервную копию. Регулярное резервное копирование поможет избежать потери прогресса.
- Ошибка: «Cannot load map version» (Невозможно загрузить карту).
-
- Причина: Версия карты несовместима с текущей версией игры.
- Решение: Обновите сервер и клиент до последней версии Factorio.
Общие сбои сервера
- Ошибка: «Out of memory» (Недостаточно памяти).
-
- Причина: Нехватка оперативной памяти для обработки игрового процесса.
- Решение:
- Увеличьте объем оперативной памяти на сервере.
- Закройте ненужные процессы.
- Ошибка: Неожиданный сбой сервера.
-
- Причина: Ошибка в настройках или конфликт модов.
- Решение:
- Проверьте логи сервера (
factorio-current.log). - Отключите недавно добавленные моды.
- Проверьте логи сервера (
Тестирование игрового сервера — это важный процесс, который помогает выявить и устранить возможные проблемы до того, как игроки начнут использовать сервер. Внимательное отношение к деталям на этом этапе позволит вам обеспечить бесперебойную работу и комфортный игровой опыт для всех участников. Настройка подключения, управление модами и оптимизация производительности являются ключевыми шагами для создания качественного сервера Factorio.
Заключение
Создание игрового сервера Factorio — задача, которая может быть решена несколькими способами, в зависимости от уровня подготовки и потребностей пользователя. В данной статье мы подробно рассмотрели два подхода к установке и настройке сервера: с использованием Dockerfile, а также ручную установку на выделенный сервер. Каждый из них обладает своими особенностями, преимуществами и требует разного уровня технической подготовки.
Подведение итога о различных подходах
- С использованием Dockerfile. Использование Docker подходит для тех, кто знаком с контейнеризацией и хочет гибко управлять сервером. Этот метод предоставляет высокую степень контроля, позволяя легко обновлять, переносить или масштабировать сервер. Он особенно полезен, если сервер размещается на платформе с ограниченными ресурсами или если требуется частая модификация конфигурации.
- Ручная установка на выделенный сервер. Этот способ — выбор опытных пользователей, которым требуется полная свобода настройки и управления. Ручная установка позволяет тонко настроить сервер под специфические задачи и оптимизировать его под высокую нагрузку. Однако данный подход требует знаний администрирования серверов и больше времени на настройку.
Преимущества Timeweb Cloud
Timeweb Cloud предоставляет пользователям гибкий и мощный инструмент для управления игровыми серверами. Его преимущества включают:
- Удобный интерфейс: Возможность управления сервером через интуитивно понятную панель.
- Масштабируемость: Легкое увеличение ресурсов по мере роста нагрузки или добавления новых игроков.
- Надежность: Современная облачная инфраструктура обеспечивает высокую доступность и минимизирует риск простоев.
- Поддержка: Круглосуточная техническая помощь, готовая ответить на вопросы и помочь в сложных ситуациях.
Timeweb Cloud предоставляет все необходимые инструменты для создания и управления игровыми серверами Factorio. Независимо от вашего уровня подготовки, платформа позволит вам быстро запустить сервер, настроить его под ваши нужды и обеспечить комфортный игровой процесс.
Если вы ищете надежное решение для размещения игровых серверов, Timeweb Cloud станет вашим верным выбором. Присоединяйтесь уже сегодня и ощутите все преимущества современной облачной инфраструктуры!
Factorio is a popular computer game in the automation simulation genre, where players build and manage complex production chains. The game’s main goal is to create the most efficient production possible, starting with basic processes and gradually progressing to large-scale automation systems. Thanks to its intricate mechanics, numerous available modifications, and cooperative gameplay options, Factorio has gained a massive following among both beginners and experienced players.
One of Factorio’s key features is its multiplayer mode. It allows a group of players to collaborate or compete in building production lines, making the gameplay more engaging and challenging. Multiplayer requires a server to host player interactions. Having your own server offers many advantages:
- Control over Gameplay: The server administrator can set game parameters such as player limits, difficulty, mod usage, and even behavioral rules.
- Stability and Performance: A dedicated server eliminates the influence of local hardware on the game, ensuring a smooth experience even under heavy loads.
- Availability: The server runs 24/7, allowing players to connect anytime, regardless of the host’s schedule or availability.
- Advanced Settings: Administrators can integrate mods, automate backups, and scale production capabilities by connecting additional servers.
Why Hostman is the Best Choice for Factorio
Hostman provides cloud servers that are perfect for hosting game servers, including Factorio. Here are some reasons to choose this solution:
- Ease of Use: You don’t need to be an expert in system administration to host a Factorio server. Hostman offers ready-to-use VDS solutions that allow you to set up a server with just a few clicks.
- High Performance: Hostman’s cloud servers ensure stable operation thanks to powerful processors, high-speed RAM, and fast SSD storage. This is especially important for Factorio, where a large number of objects and complex calculations can create a significant load.
- Scalability: You can increase server resources at any time to accommodate more players or handle a more complex game world.
- Global Accessibility: Thanks to Hostman’s distributed infrastructure and high network connectivity standards, players can connect to the server without delays.
- Support and Documentation: Hostman offers professional technical support to help resolve any issues related to server setup and operation. Additionally, the platform provides detailed guides and documentation for working with its solutions.
- Cost Efficiency: Using a cloud server helps avoid purchasing and maintaining physical equipment expenses. Clients only pay for the resources they actually use.
In today’s gaming industry, having your own server is not just convenient but often essential. Hostman offers a unique combination of simplicity, performance, and flexibility, making it the optimal choice for hosting a Factorio server.
Preparation for Installation
Before installing a Factorio game server, several preparatory steps are necessary. These include registering with the Hostman cloud service, selecting an appropriate server plan, and setting up the infrastructure. This process ensures a stable and efficient server platform for smooth gameplay.
Registering with Hostman and Accessing the Control Panel
The first step is creating an account on Hostman. This will provide access to the control panel to manage servers and configurations.
1. Open the official Hostman website and click the «Sign Up» button.

2. Enter your email address or sign up using your Google or GitHub accounts.
The Hostman interface is intuitive even for beginners. The control panel provides access to server creation, parameter configuration, and monitoring tools.
Selecting a Plan and Setting Up the Infrastructure
After registering, you need to select an appropriate plan that meets the requirements of your game server.
1. Evaluate the Server Load. Before choosing a plan, assess the resources your server will need. This depends on:
- Number of Players: The more players connect simultaneously, the higher the load.
- Game World Complexity: More objects, production lines, and modifications require greater resources.
2. Choose a Plan. Hostman offers several pricing plans. Choose server specifications based on recommendations from Factorio’s official resources. We will discuss performance requirements further in the next section.
Although Factorio is a lightweight game, its performance depends on the complexity of the world and player activity. Below are the minimum and recommended requirements:
- Operating System: Linux (preferably Ubuntu or Debian).
- Processor: Dual-core processor at 2 GHz or higher. For larger servers, a quad-core processor is recommended.
- RAM:
- Minimum: 2 GB for servers with a small number of players.
- Recommended: 4–8 GB for servers with mods and 10–20 players.
- Disk Space:
- 5–10 GB for the basic installation.
- Allocate 20 GB or more if using mods or maintaining backups.
- Network Connection:
- High bandwidth and low latency.
- A minimum of 10 Mbps for both inbound and outbound traffic.
Setting Up the Server on Hostman
Proper preparation is key to ensuring the stable and uninterrupted operation of the Factorio server. By completing registration, selecting the right plan, and configuring the server on Hostman, you will have an ideal platform for hosting a Factorio game world:
- Go to the «Cloud Servers» section in the control panel.
- Specify the operating system (e.g., Ubuntu), region, configuration, and network parameters based on the recommendations above.
- Click «Order» on the right menu.
Once the purchase is completed, the server setup process will begin automatically, which may take up to 10 minutes.
After deployment, a dashboard with connection information, hardware load statistics, and traffic graphs will appear. Now you’re ready to proceed with installing Factorio.
Installing a Factorio Server Using Dockerfile
Using Docker to deploy a Factorio game server is a modern and flexible approach that automates the setup process and ensures server stability. Docker isolates the server software within a container, making the installation process more manageable and independent of the server’s operating system. This method is similar to traditional setups but involves fully configuring Docker for the future Factorio server.
- Simplified Setup and Management: Docker simplifies server configuration, eliminating the need for manual dependency installations and complex configurations.
- Portability: Docker containers work consistently across different operating systems and server environments, enabling seamless server migration between machines.
- Isolation: All server components reside inside the container and are isolated from the host system, reducing the risk of software conflicts.
- Flexibility and Scalability: Easily run multiple Factorio servers on one host and configure them for various purposes, such as mod testing or cluster creation.
- Support and Updates: The
factoriotools/factorio-dockerrepository is actively maintained, ensuring timely updates and fixes.
Installing Docker
Docker is a containerization software that must be installed on your server before configuring Factorio.
-
Update system packages:
sudo apt update && sudo apt upgrade -y-
Install Docker:
sudo apt install docker.io -y-
Verify Docker installation:
docker --version-
Install Docker Compose (if not installed). Docker Compose is used to manage multi-container applications. Install it with:
sudo apt install docker-compose -yCloning the Repository
You need a repository with a ready-to-use Dockerfile and configuration templates.
-
Install Git (if not installed):
sudo apt install git -y-
Clone the repository:
git clone https://github.com/factoriotools/factorio-docker.git-
Navigate to the repository directory:
cd factorio-dockerServer Configuration via docker-compose.yml
The docker-compose.yml file defines server parameters. Configuring this file is crucial for personalizing your game server.
-
In the repository directory, create or edit the
docker-compose.ymlfile. Here’s a basic example:
version: '3.3'
services:
  factorio:
    image: factoriotools/factorio
    ports:
      - "34197:34197/udp"
    volumes:
      - ./data:/factorio
    environment:
      - FACTORIO_SERVER_SETTINGS=./data/server-settings.json
      - TOKEN=FactorioToken
-
Configure the settings:
-
Server Port: Ensure port
34197is open on your system. -
Data Storage: The
./datadirectory stores server files, including saves and mods. -
Settings File: Update
server-settings.jsonto specify game parameters (e.g., server name, password, and player count). -
Token: Add a token obtained from Factorio’s website.
Starting the Server
-
Start the server:
docker-compose up -d
-
Check the container status:
docker psConnecting to the Server
Connect to the server in the Factorio game using your server’s IP address and port 34197.
Additional Tips
Updating the Server:
docker-compose pull
docker-compose up -d
Stopping the server:
docker-compose downViewing logs:
docker logs <container_id>Adding Mods:
Upload mods to the ./data/mods folder and restart the container.
Installing a Factorio server using Docker is a powerful solution that allows you to deploy a server quickly with minimal effort. This approach is ideal for users who value flexibility and want full control over the server while avoiding complex manual configurations.
Manual Installation of a Factorio Server on a Dedicated Server
Installing Factorio manually on a dedicated server is ideal for users who want full control over the server’s setup and management. This approach requires basic command-line skills and an understanding of server infrastructure. It’s particularly useful if you plan to customize the server with unique settings or integrate it into a complex environment.
Preparing the Dedicated Server
-
Choose the Operating System. Factorio Server officially supports Windows and Linux. A Linux distribution like Ubuntu or Debian is recommended for its stability, low resource consumption, and extensive automation capabilities.
-
Before starting the installation, update all packages:
sudo apt update && sudo apt upgrade -y-
Install the necessary utilities for server setup:
sudo apt install wget curl screen -y-
Create a separate user to run the server, for better security:
sudo adduser factorio
sudo su - factorio
Downloading and Installing Factorio Server
-
Visit the Factorio Headless Server page to get the latest Linux version link. Then execute:
wget https://factorio.com/get-download/stable/headless/linux64 -O factorio.tar.xz-
Extract the files:
tar -xf factorio.tar.xz-
Organize the file structure:
mkdir -p ~/factorio/saves ~/factorio/modsConfiguring server-settings.json
Create or edit the server settings file to define key parameters, such as server name, password, and player limits. Example configuration:
{
  "name": "My Factorio Server",
  "description": "A friendly server for everyone.",
  "tags": ["game", "fun"],
  "max_players": 10,
  "visibility": {
    "public": true,
    "lan": true
  },
  "username": "your_username",
  "password": "your_password",
  "game_password": "game_password",
  "require_user_verification": true,
  "max_upload_in_kilobytes_per_second": 0,
  "minimum_latency_in_ticks": 0
}
Important:
-
Enter your Factorio account username and password, available on the official website. Ensure your account has a valid game license.
-
Alternatively, if you prefer not to use login credentials, you can provide a token from your profile on the same site.
Save server-settings.json in the server’s root folder (e.g., ~/factorio).
Additional Settings
- Mods: Download modifications from the Factorio Mod Portal and place them in the
~/factorio/modsfolder. - Save Files: Prepare a save file using the local game client and upload it to the
~/factorio/savesfolder.
Alternatively, generate it yourself using:
./bin/x64/factorio --create saves/new_game.zipStarting the Factorio Server
-
Navigate to the server directory and run:
./bin/x64/factorio --start-server ~/factorio/saves/new_game.zip --server-settings ~/factorio/server-settings.json-
Use screen to keep the server running after closing the terminal:
screen -S factorio_server
./bin/x64/factorio --start-server ~/factorio/saves/new_game.zip --server-settings ~/factorio/server-settings.json
To return to the session:
screen -r factorio_server
After launching, check if the server is accessible by connecting via the Factorio client using the server’s IP address and port (default: 34197).
New player connections will appear in the server logs.
Tips
-
Automating Server Startup: Create a systemd service to automatically start the server after system reboot:
sudo nano /etc/systemd/system/factorio.serviceExample content:
[Unit]
Description=Factorio Server
After=network.target

[Service]
Type=simple
User=factorio
WorkingDirectory=/home/factorio/factorio
ExecStart=/home/factorio/factorio/bin/x64/factorio --start-server /home/factorio/factorio/saves/savefile.zip --server-settings /home/factorio/factorio/server-settings.json
Restart=always

[Install]
WantedBy=multi-user.target
Save the file, then enable and start the service:
sudo systemctl enable factorio.service
sudo systemctl start factorio.service
-
Updating the Server: Download the new version and replace old files, preserving the saves and mods directories.
Manual installation of a Factorio server provides maximum flexibility in setup and management, making it a preferred choice for experienced users. Despite the required effort, this approach allows you to adapt the server to any game scenario and ensures its reliable operation.
Server Configuration
Configuring a Factorio game server is a crucial step that not only allows customization of the gameplay but also ensures stable operation under increasing loads. This section covers installing mods, setting up automatic saves and backups, and optimizing the server for higher loads.
Adding Mods
Mods enhance gameplay by adding new elements, mechanics, and scenarios. Factorio has official mod support, making installation and management straightforward.
-
Factorio Mod Portal: The official catalog for mods allows you to search by keywords or categories and review popularity and user feedback.
-
Manual Installation: After selecting a mod, download its archive (
.zip) and place it in the server’s mods directory.
The path to this directory depends on the server structure: -
For a manually configured server:
<server_folder>/mods. -
For a Docker setup:
~/factorio-docker/data/mods. -
Automated Mod Download with API Token: You can automate mod downloads using an API token if your server has network access.
-
Go to your account settings on the Factorio website.
-
Copy the token.
-
Specify it in the
player-data.jsonfile located in the server directory.
Activating Mods
Enable the required mods by listing them in the mod-list.json file. Example configuration:
{
  "mods": [
    {"name": "base", "enabled": true},
    {"name": "bobmods", "enabled": true},
    {"name": "angelsmods", "enabled": true}
  ]
}
After adding or modifying mods, restart the server to apply the changes.
Configuring Automatic Saves and Backups
Automatic saving and data backups are critical processes that prevent progress loss in case of server failure or player error.
Automatic Saves
Specify the save frequency in the server-settings.json file:
{
  "autosave_interval": 5,
  "autosave_slots": 10
}
-
autosave_interval: The interval between saves, in minutes.
-
autosave_slots: The number of save slots (older saves will be overwritten).
Ensure the server is saving progress by checking for save files in the saves folder.
Backup Configuration
Set up a script to regularly copy save files to another server or cloud storage. Below is an example using a Bash script:
#!/bin/bash
SOURCE="/path/to/factorio/saves"
DEST="/path/to/backup/location"
TIMESTAMP=$(date +"%Y%m%d%H%M%S")
tar -czf "$DEST/factorio_backup_$TIMESTAMP.tar.gz" "$SOURCE"
Use cron to schedule regular script execution:
-
Open the cron editor:
crontab -e-
Add a line to run the script daily at 3:00 AM:
0 3 * * * /path/to/backup_script.shThis setup ensures secure data storage and prevents game progress loss.
Optimizing the Server for High Load
When the server has a large number of players or uses resource-intensive mods, it’s essential to minimize lag and ensure stable performance.
Resource Allocation
Make sure the server meets the minimum and recommended requirements:
-
CPU: High clock speed (>3 GHz), preferably multi-core.
-
RAM: At least 2 GB for the base game, with an additional 1 GB for every 10 players.
-
Disk Subsystem: SSD for fast access to saves and mods.
Configuring Limits
In the server-settings.json file, limit the number of players to avoid overload:
{
  "max_players": 20
}
Reducing Load
Choose mods optimized for multiplayer. Some mods can significantly increase CPU and network load.
Increase tick interval. Setting a higher value for minimum_latency_in_ticks helps reduce network load:
{
  "minimum_latency_in_ticks": 2
}
Server Logs
Regularly check the logs for errors or warnings. Logs are located in the server folder (factorio-current.log).
Using Monitoring Tools
Set up monitoring tools like htop or Prometheus to track resource usage in real-time.
Game Updates
Ensure the server and clients are using the latest version of Factorio. Developers frequently release updates that improve performance.
Proper mod configuration, automation of saves and backups, and server resource optimization are the foundation for ensuring a stable and enjoyable gaming experience. These steps will help avoid technical issues and create an environment for the long-term operation of your Factorio server.
Server Testing
Testing the Factorio game server is the final stage of setup, ensuring its functionality and stability. At this point, it’s essential to check connection, server performance under load, and address any potential issues.
After starting the server, ensure it is accessible for connections. Follow these steps:
-
Obtain the server IP address. For cloud solutions like Hostman, you can find the IP in the control panel.
-
Ensure the server’s port (
34197) is open for external connections. If the port is closed, open it with:
sudo ufw allow 34197-
Start the game and connect:
-
Open Factorio and select «Multiplayer.»
-
Click «Join Game.»
-
Enter the server’s IP address and port (default is
34197). Example:192.168.1.100:34197. -
Click «Connect.»
Once connected successfully, verify the following:
-
World Interaction: Ensure you can interact with the world (mining resources, building).
-
Server-Client Synchronization: For example, the time of day should be the same for everyone.
Ask another player to connect to your server. Ensure the server is accessible via the external IP address.
If you’ve set the game_visibility parameter in the server’s settings, your server will appear in the public server list of Factorio. Check if it’s listed and available for connection.
Resolving Common Errors and Issues
In this section, we’ll review some of the most common errors and issues that might arise and offer solutions to fix them.
Connection Issues
-
Error: «Couldn’t establish network communication.»
-
Cause: Server port is closed or inaccessible.
-
Solution: Make sure port
34197is open in the firewall and router. For NAT routers, set up port forwarding. -
Error: «Failed to connect to server.»
-
Cause: Incorrect IP address or port.
-
Solution: Check that you’re using the correct address and port. If using a domain name, verify it resolves correctly to the IP.
-
Error: «Server not responding.»
-
Cause: The server is not running or has crashed.
-
Solution: Check if the server is running. Restart it if necessary.
Performance Issues
-
Error: Lag with many players.
-
Cause: The server can’t handle the load.
-
Solution:
-
Reduce the number of players (
adjust the max_playerssetting inserver-settings.json). -
Upgrade server hardware.
-
Monitor CPU and memory usage with system tools like
htoportop. -
Error: Data transmission delays.
-
Cause: High network latency.
-
Solution:
-
Switch to a faster network connection.
-
Check the connection speed with tools like
pingoriperf.
Mod Issues
-
Error: «Mod mismatch.»
-
Cause: Different mod versions between client and server.
-
Solution: Ensure all players are using the same mod versions as the server.
-
Error: «Missing mod dependencies.»
-
Cause: Required mods are not installed.
-
Solution: Check mod requirements on the Factorio Mod Portal and install missing dependencies.
Save and Load Errors
-
Error: «Corrupted save file.»
-
Cause: Save file is damaged due to a system crash.
-
Solution: Use the most recent backup. Regular backups help prevent data loss.
-
Error: «Cannot load map version.»
-
Cause: The map version is incompatible with the current game version.
-
Solution: Update the server and client to the latest Factorio version.
General Server Failures
-
Error: «Out of memory.»
-
Cause: Insufficient RAM to handle the game process.
-
Solution:
-
Increase the amount of RAM on the server.
-
Kill unnecessary processes.
-
Error: Unexpected server crash.
-
Cause: Configuration errors or mod conflicts.
-
Solution:
-
Check the server logs (
factorio-current.log). -
Disable recently added mods.
Game Server Testing is an essential process that helps identify and resolve potential issues before players start using the server. A careful approach at this stage ensures smooth operation and a comfortable gaming experience for all participants. Connection setup, mod management, and performance optimization are key steps to creating a quality Factorio server.
Conclusion
Setting up a Factorio game server can be accomplished in several ways, depending on the user’s experience and needs. In this article, we’ve detailed two installation and configuration approaches: Dockerfile and manual installation on a dedicated server. Each method has its features, advantages, and varying levels of technical expertise required.
-
Using Dockerfile: Docker is ideal for those familiar with containerization and seeking flexible server management. It provides high control, enabling easy updates, migrations, or scaling of the server. This approach is especially useful if hosting the server on a platform with limited resources or needing frequent configuration changes.
-
Manual Installation on a Dedicated Server: This method is preferred by experienced users who need full control over the server configuration and management. It allows fine-tuning the server for specific tasks and optimizing it for heavy loads. However, this approach requires server administration knowledge and more time for setup.
Hostman offers all the necessary tools to create and manage Factorio game servers. Regardless of your skill level, the platform enables quick server setup, customization, and a smooth gaming experience.