
In general, there are two ways to get started with React Native — using Expo CLI or React Native CLI. Both ways have their own strengths and weaknesses but even React Native’s official documentation is suggesting to get started with Expo CLI if you are new to mobile development. Therefore, in this guide we will go through all the steps needed to setup Expo development environment for your first React Native project using Windows.
Installing Windows Terminal
First and foremost we need to install Windows Terminal (later: terminal) if you don’t have one as it is going to be used quite often. To do this you can use Microsoft Store by searching «Windows Terminal» and installing it.
After installing and launching it, you can test if everything works by typing ls in the terminal, which should display the list of files and folders in that path.
Installing Git
Git is going to be used for source control management, which will help us to track changes in the code and make development easier. Also, Git comes with Git Bash that we will make use of.
To download the latest version of Git you can go to their website and select Windows OS. Once the download is complete, we can start the installation process.
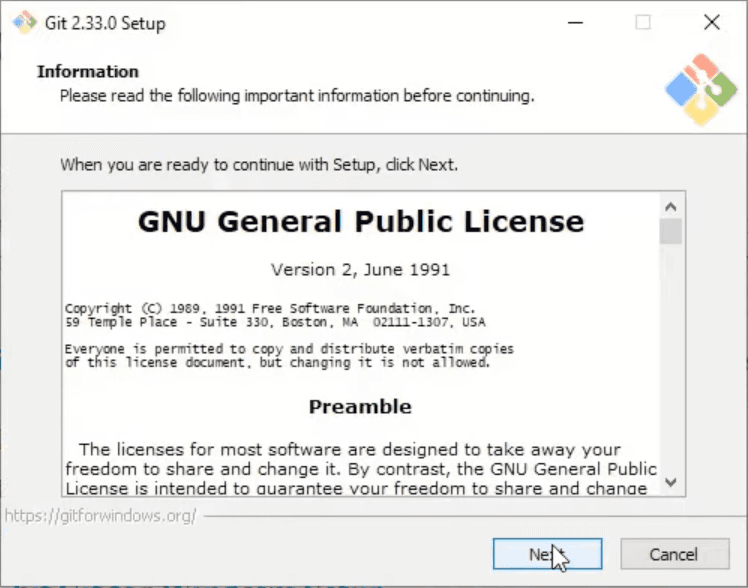
On the first window we can read GNU General Public License and click Next button. But let’s be honest, nobody reads that, so you can click Next right away.
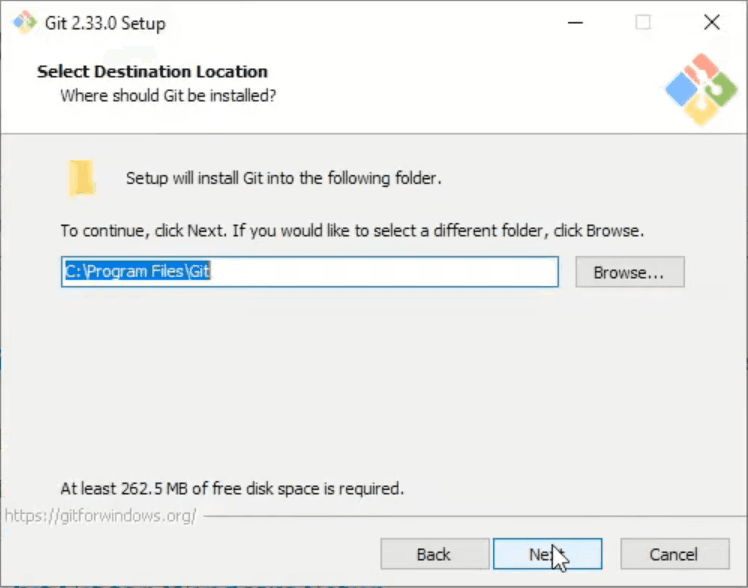
In the next window you should select the path that you want Git to be installed in and click Next.
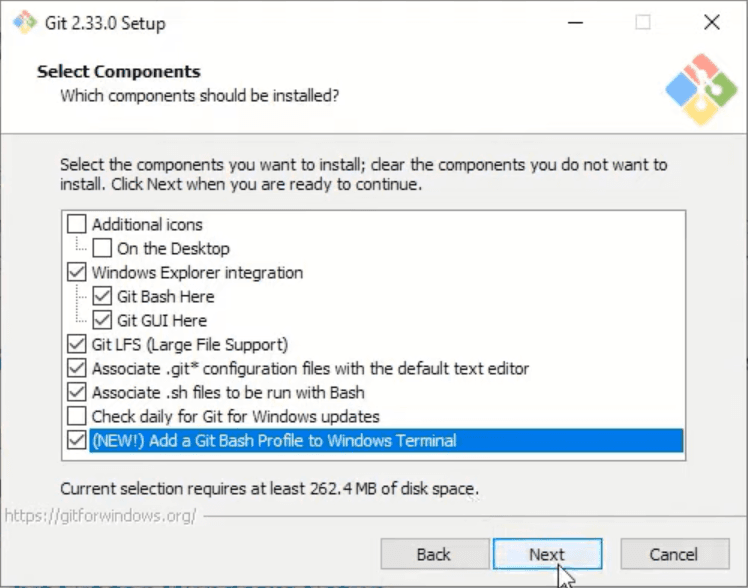
Now in this window I would suggest checking ‘Add a Git Bash Profile to Windows Terminal’ box and then clicking Next.
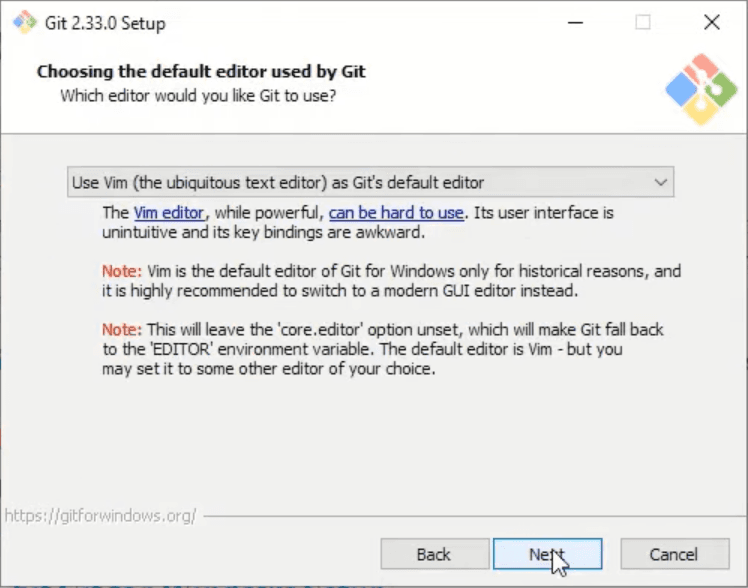
In the next two windows you can make changes if you want but I would suggest leaving everything like it is and clicking Next.

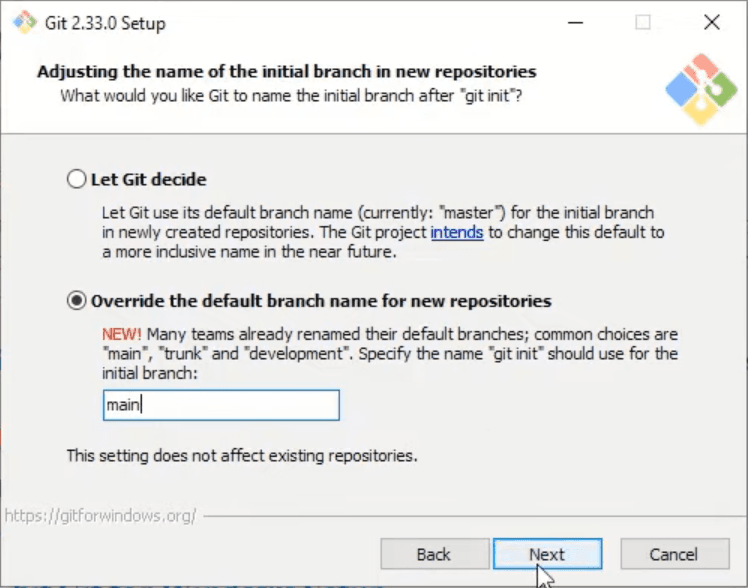
In this window select ‘Override the default branch name for new repositories‘ and type ‘main’ in the input box. We do that because this is the new naming convention and everybody is encouraged to follow it. After making changes click Next.
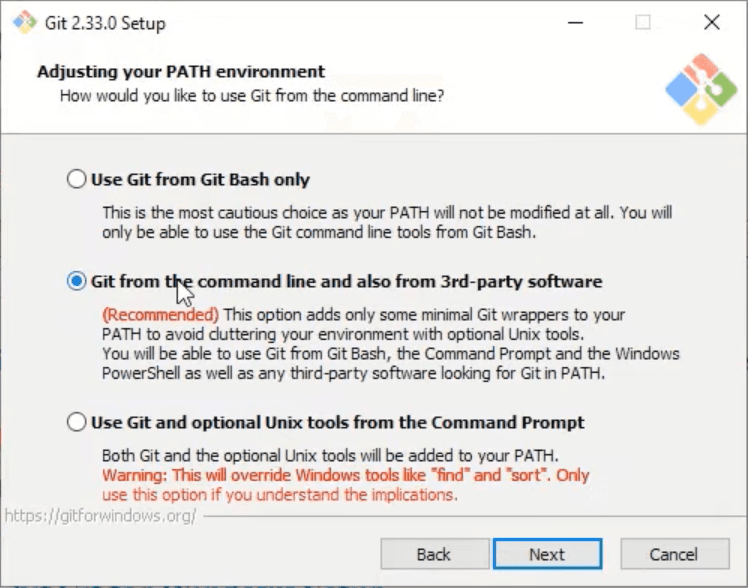
Next step is based solely on your preference, if you know what you are doing, then select whichever option you would like to, otherwise keep the default one and click Next.
For the next few windows leave everything on default unless you know what you are doing.
Once the installation is finished, let’s make Git Bash our default choice.
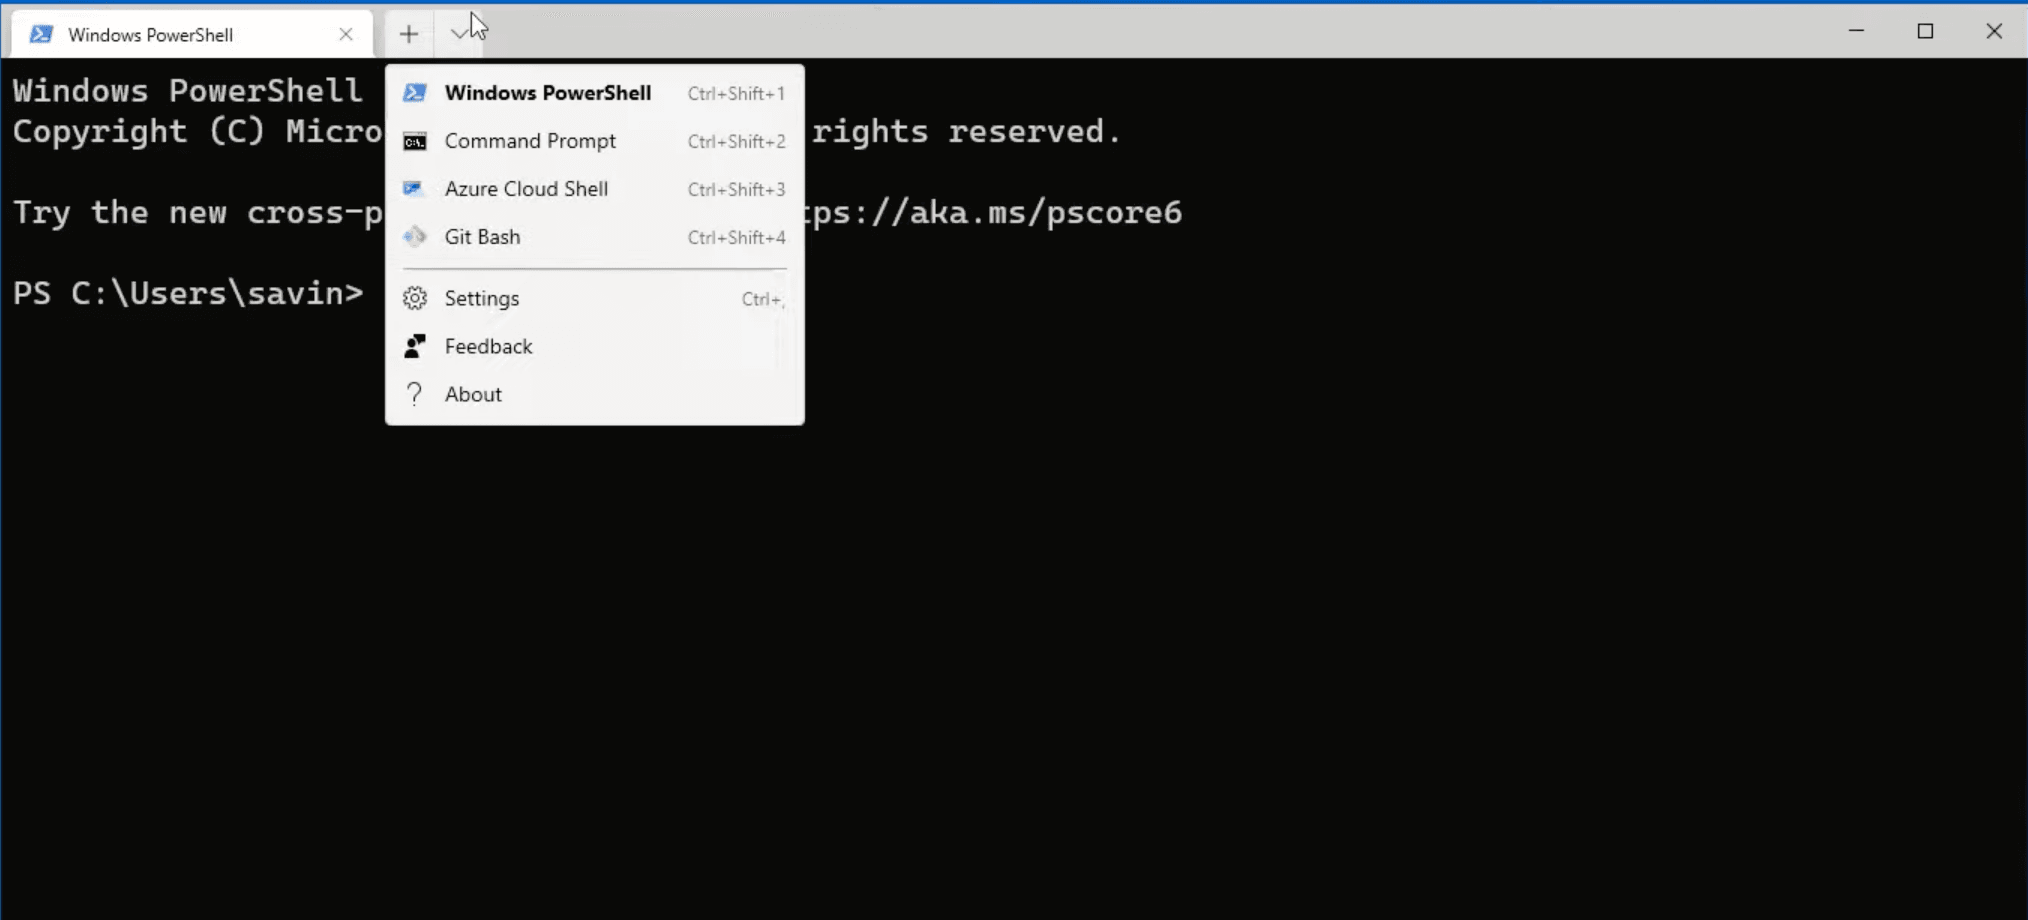
To do that open terminal, click on the arrow icon in the top bar and select Settings.
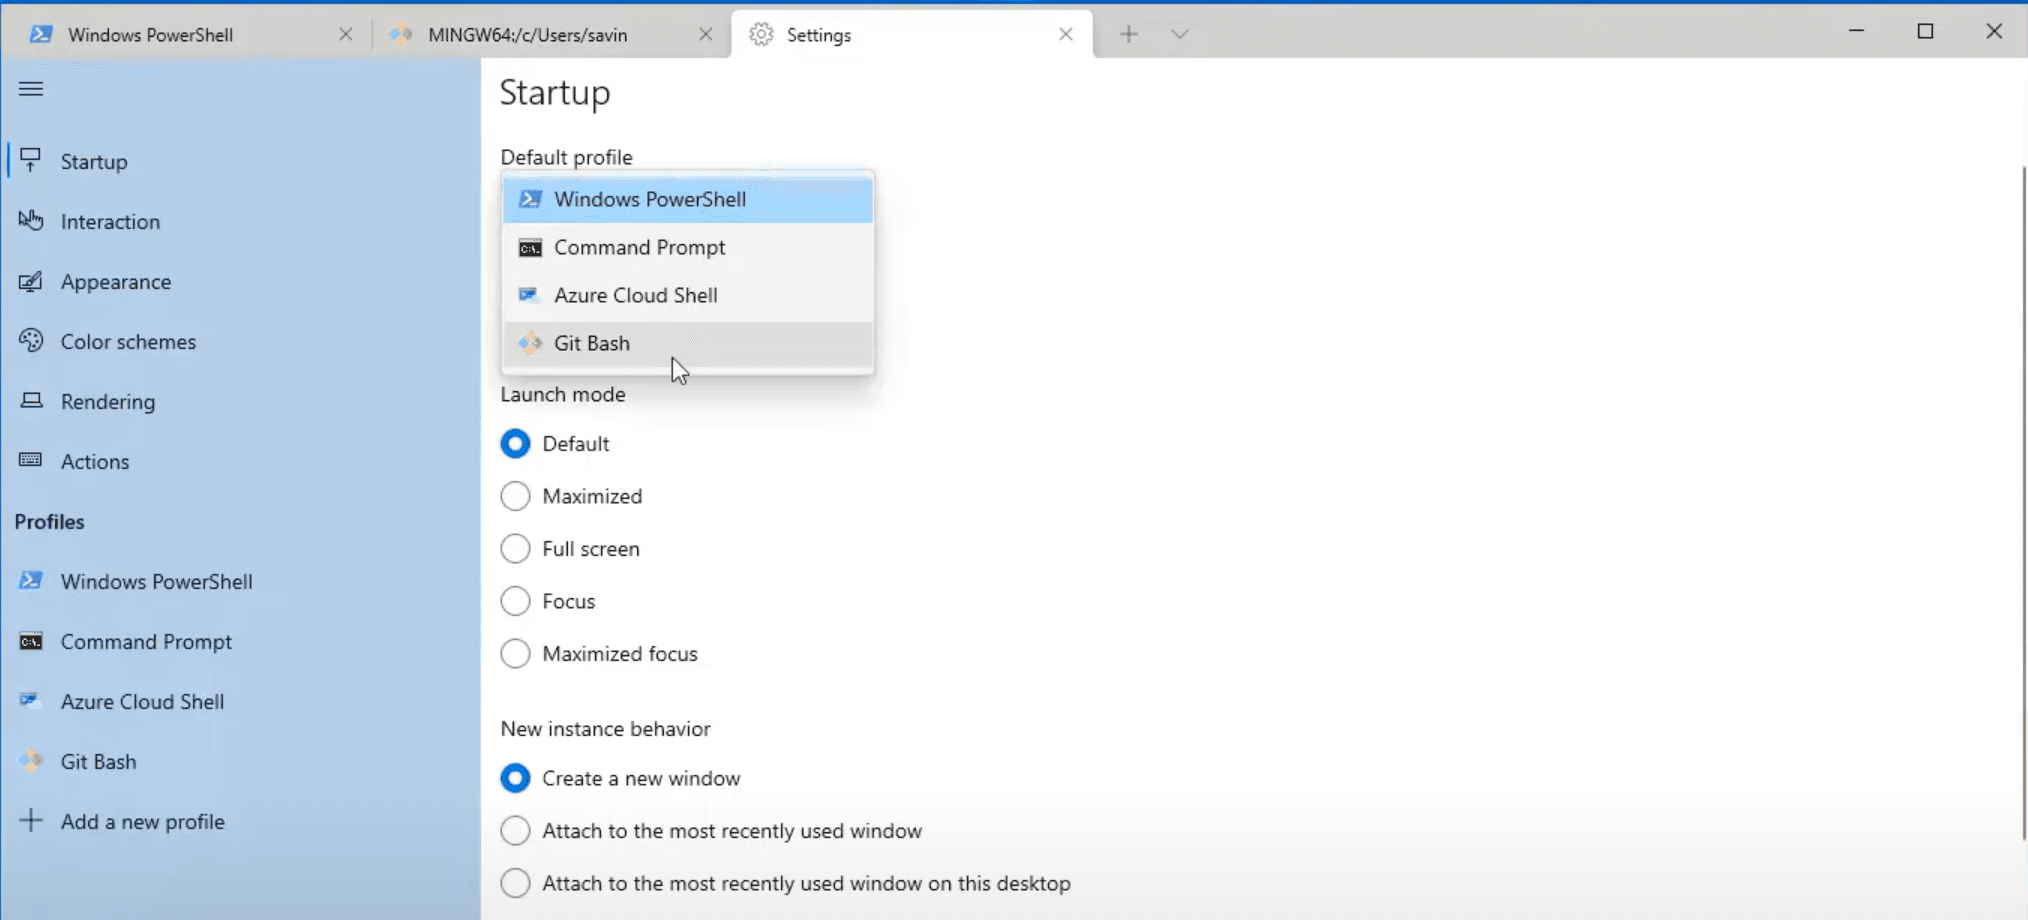
In the settings screen click on Default profile dropdown, select Git Bash and save it.
After that, re-open the terminal and it should open Git Bash now.
Last but not least, let’s test if Git is installed correctly. In the terminal write git —version, which should display the version of Git that is installed. If it did, then you have installed Git successfully.

Installing NodeJS
NodeJS is an open-source Javascript runtime environment that will help us run React Native applications. It also comes with npm which is a package manager that helps to install various packages in our applications.
To download NodeJS go to their website and select the LTS (long term support) version.
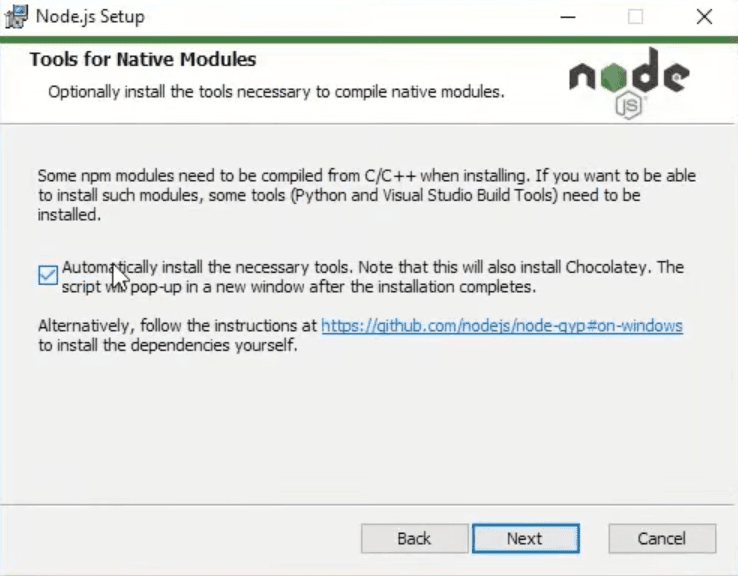
During the installation leave everything on default except for the window below. It is very important to tick this box in order to install necessary tools automatically, otherwise you will have to do that manually.
Once the installation is finished click Finish. That should automatically open terminal if you ticked the mentioned box above. In that terminal press any key to start the installation. Keep in mind that terminal will close automatically after installing everything. This step will take some time, so you can take a well deserved break and refill your coffee cup ☕.
To test if node was installed correctly open the terminal and type node —version, which should display the version that was installed. To test if npm was installed correctly type npm —version, which accordingly will display the npm version.
Installing Expo CLI
By this step we have already installed all of the dependencies that Expo needs. Now it’s time to install Expo CLI itself!
To install Expo CLI, you simply have to open the terminal and type npm install —global expo—cli. That’s it, it’s that easy! On a side note, we need to add —global in order to install Expo CLI globally.
Now we can create our first React Native project!
Initialise Your First Project
In order to create a new Expo project, in the terminal we can simply type expo init. You will be asked a few questions in order to finalise the initialisation.
First of all, you will need to provide the name of your application. As it is our first application, let’s name it ‘my-first-app’.

After that, you will have to choose a template that you would like to use for your application. In this step you can choose whatever you like, but for demonstration purposes we chose blank template.
After answering these two simple questions Expo will install all dependencies and prepare your project.
To run the application you will have to type cd my—first—app in the terminal, which will go to your project’s folder and then type npm start to start the development server.
You might be asked to allow access to NodeJS, allow it.
After allowing access, Expo will automatically open new browser window called Expo Developer Tools like in the image below. If it does, that means everything is installed correctly.
Running The Application
Now it’s time to run the application on your device. But in order to do that, we still need a little bit of setting up.
First things first, if you don’t have an Expo account yet, we should create one on their website.
After creating an Expo account, you should be able to login by typing expo login in the terminal and providing your username or email as well as password. If provided credentials were correct, you should see a success message.
You can also test if you have logged in successfully by typing expo whoami, which will display your username.
Setting Up Expo Go Mobile Client
Okay, now it will get a little bit more exciting. Grab your phone and install Expo Go application from the App Store or Google Play Store.
After installing the application, launch it, login with the account you have just created and launch the application that’s located under RECENTLY IN DEVELOPMENT tab.
Side note, if you don’t see your application under RECENTLY IN DEVELOPMENT tab, just restart your server by pressing CTRL + C in the terminal that’s running your development server and type npm startagain.
Now you should see in your Expo Developer Tools browser tab that it’s building the Javascript bundle. After that, Expo Go will automatically launch your application on the device!!
You can also run the application on your phone by scanning the QR code in the terminal or Expo Developer Tools. On android phones you can scan the QR code directly from the Expo application. On the iOS however, you have to do that from the Camera app. This is especially useful when you are trying to run someone else’s application.
Installing Visual Studio Code
There are plenty of IDE’s to choose from and if you have one already, then you can skip this step and start writing your code there. But in our humble opinion, we think Visual Studio Code fits our needs the best.
If you decided to go with Visual Studio Code as well, then you can download it from their website.
During the installation, you can make changes if you know what you are doing, otherwise I suggest leaving everything on default except for the window below. In here, tick all of the boxes under Other tab.
Now we can open our application on Visual Studio Code by navigating to the folder where you have created your ‘my-first-app’ project, then clicking right mouse button anywhere on the white space and clicking Open with Code.
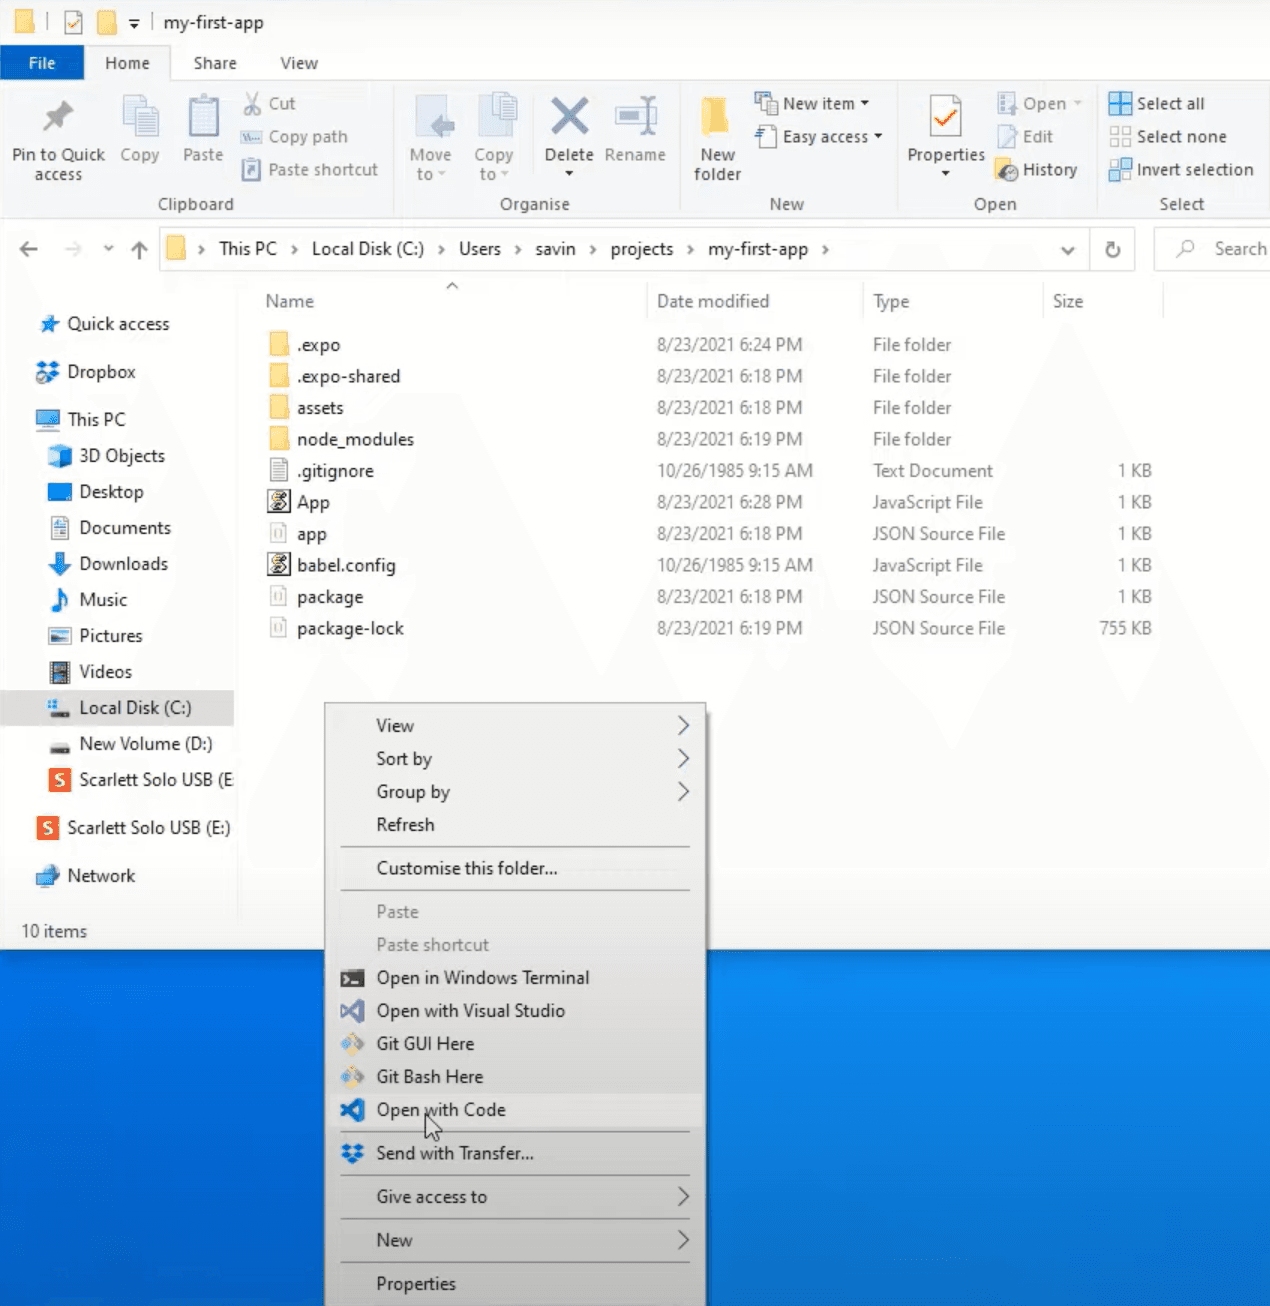
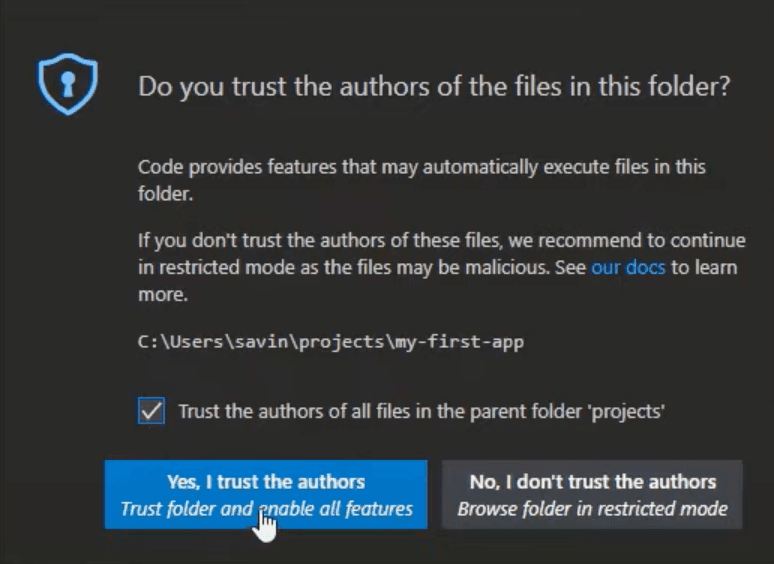
You might be asked to verify that you trust the authors of the files in this folder. Check the box ‘Trust the authors of all files in the parent folder‘ and click Yes, I trust the authors button.
Now you can select the theme of Visual Studio Code that you prefer and run the project. Visual Studio Code has a lot of very useful extensions for React Native developers that will make you code faster, cleaner, prevent bugs and in general make coding a lot more enjoyable. If you want to see what are those extensions and learn how to add them to your Visual Studio Code I recommend watching TOP 10 VSCode Extensions for React/React Native Developers (2021).
To run the project, just open the terminal in Visual Studio Code by clicking CTRL + \(that little button in the top left of your keyboard below the ‘esc’ button, you are welcome 😉) and just type npm start which will start the project and open Expo Developer Tools window in the browser.
Now you can start coding!!! 🥳
But in order to start learning React Native the right way, I highly encourage you to visit notJust.dev Youtube Channel where you will find plenty of free projects and tutorials to follow, which will most certainly increase your React Native knowledge and skill!
I would recommend you to start with the Tesla Clone, which is a beginner friendly tutorial that will cover all the basics and get you up and running with your first React Native project.
I hope this guide was clear, comprehensive, and helped you to easily install as well as setup everything that you need in order to start working on your first React Native application.
Good luck on your software engineer journey!!
One of the big advantages of Expo is that you can build a mobile app for iOS on Windows. However, the answer to the question ‘how to build an expo app on Windows‘ whilst well documented here, also contained lots of info I didn’t need. I was already set up with certificates in my Apple developer account, and was only publishing for iOS. So this is a more condensed overview for anyone busy searching ‘expo build ios‘ in an effort to build an Expo iOS app using a PC.
Table of contents
- Prerequisites – getting started
- Use Powershell to prepare Windows to build the app
- Build your Expo App on Windows PC
- Expo credentials manager
- Uploading the IPA file to TestFlight and the App Store
- Build your Expo app on a Mac
- Summary
- Related:
Prerequisites – getting started
Before you follow these steps I have presumed that as a Windows user you’ve already installed the WSL as outlined here. I’m also presuming that you’ve installed the Expo CLI, created an Expo app, and that you have an Apple Developer account. Once you have, then you’re ready to build an Expo app.
Use Powershell to prepare Windows to build the app
- Open Powershell as administrator by right-clicking the Powershell icon and selecting ‘run as administrator’
- Type – Enable-WindowsOptionalFeature -Online -FeatureName Microsoft-Windows-Subsystem-Linux
Restart PC (I’m not totally sure this is necessary, do your own tests!) - Open git bash at the project root
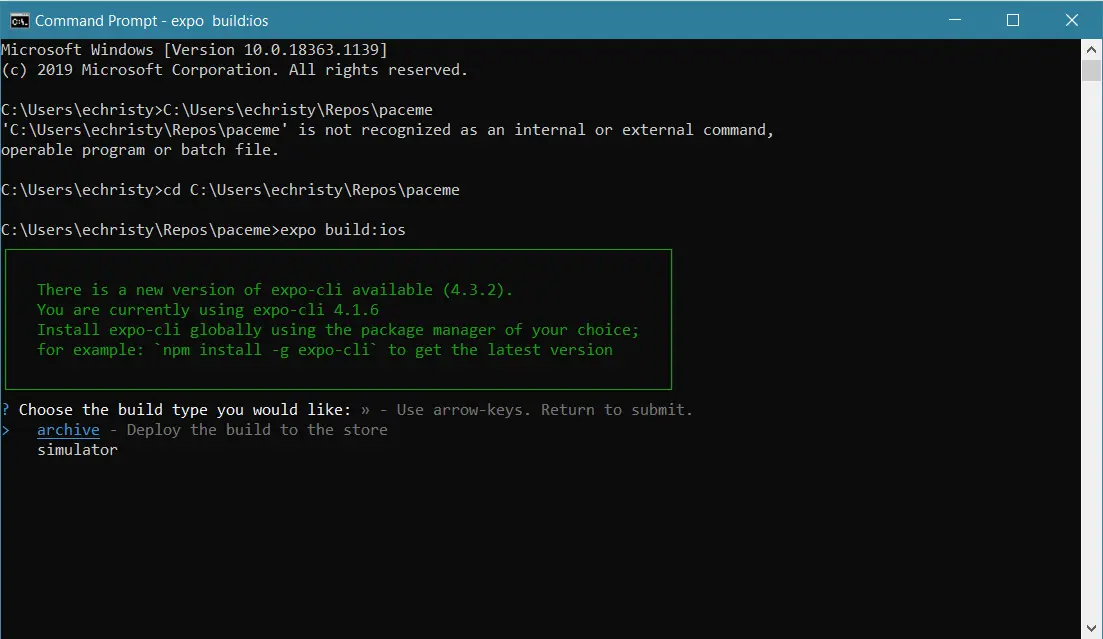
- Type expo build:ios
Please note if you see a message saying “Additional information needed to setup credentials in non-interactive mode.” use CMD instead. I have seen lots of info saying don’t use Git Bash for this, but honestly on my PC it seems a bit hit or miss. Rule of thumb is try both!
Open CMD or Git Bash, navigate to project folder, and use this command:
expo:build:iosLet Expo manage the process for you and as long as you had all your profiles and certificates set up ok in your Apple Developer account then Expo should be able to put it all together.
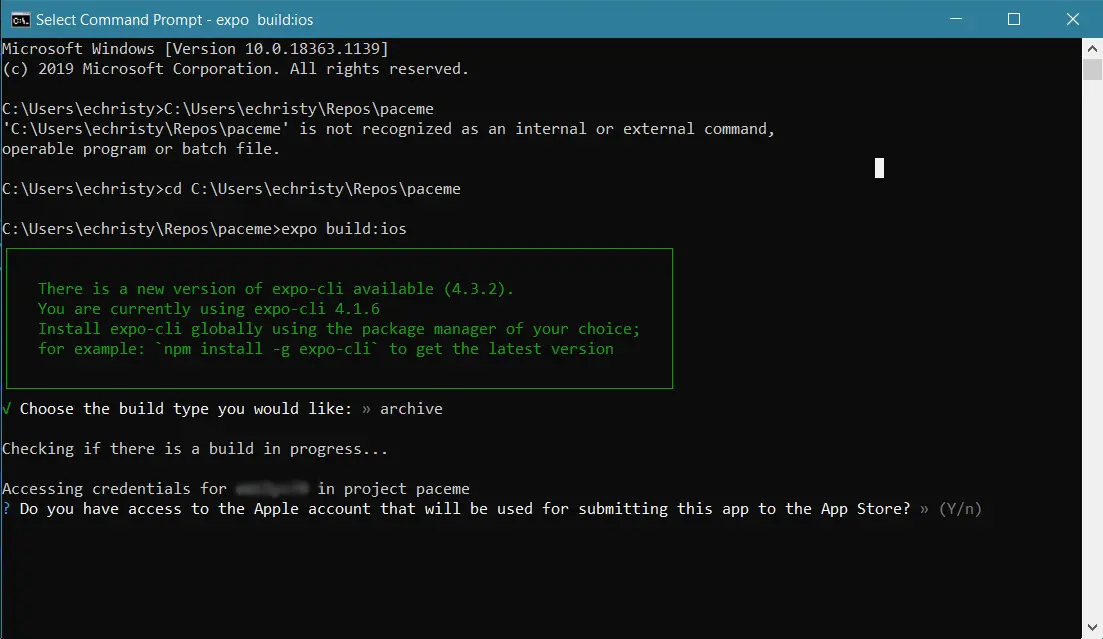
Once the Expo build process starts, it will ask you a series of questions. The first one asks you what kind of build you want – choose Archive if you want to upload this to TestFlight and run this on a device.
Next, the Expo build process will ask you for your Apple account credentials:
Once it’s complete, you’ll see a message saying that your build is queued. There’s a link provided in the output which will let you both see the progress of your Expo build and download the IPA file once it’s finished, from the Expo website.
Expo credentials manager
If there are any issues with any stage of this and you need to take a look at the certificates and provisioning profiles that Expo is trying to use, then type this command:
expo credentials:manager …. and follow the on-screen prompts. You can remove the certificates it’s trying to use and start the whole process again. This Expo page is really useful as it clearly explains what each bit is for.
Uploading the IPA file to TestFlight and the App Store
Now that you’ve downloaded your IPA file you are ready to submit it to the app store and / or TestFlight. And here’s where the wheels fall off a bit if you are trying to build your iOS Expo app using a Windows PC. You can get this far but to upload the IPA file you HAVE to use Transporter, and that only runs on a Mac. I find it a huge shame that you can’t do this any other way, but for now you’ll have to find a friend with a MAC to get your IPA file to Apple. Or you’ll have to buy a Mac…..
Build your Expo app on a Mac
If you can’t borrow a Mac then you’ll have to buy one, and the most cost effective way to do this is to buy a Mac Mini. They are small enough to be portable too, should you ever need it to be but a great machine that will enable you to develop, build and deploy Expo iOS apps for the app store.
Summary
In this post you’ve learned how to set up your PC to build Expo apps, how to kick off the build process and use your Apple credentials, and how to upload the IPA file to TestFlight and the app store.
Please note some links on this page are affiliate links. As an Amazon Associate I earn from qualifying purchases.
I recently needed to get a new React Native + Expo project up and running on my Windows machine and found that the documentation was a little scattered, especially in terms of setting up Watchman and Android Studio to run an Android emulator. I wanted to walk through my process to hopefully make life easier for other Windows users that run into this issue. Unfortunately, iOS development on Windows is not possible (boo!).
I would also like to take a moment to urge open source developers to give Windows a little love when possible. Not everyone is on a Mac, for personal preference or financial reasons, especially outside of the United States.
Please note that I am going to assume that you have Node 8.3 or newer installed. If you don’t, I would recommend using an NVM alternative for Windows for better management of Node versions. Check out this article for help getting this set up (I use the first option covered in the article).
1. Install React Native CLI
Installing React Native CLI on Windows is the same as on macOS:
npm install -g react-native-cli
2. Install Expo CLI
Installing Expo CLI on Windows is the same as on macOS:
3. Install Watchman
Watchman allows you to see changes in Expo when you make a code change in your React Native app without having start everything up again. In macOS, you can use Homebrew to install Watchman, but unfortunately on Windows it’s not even available on chocolatey so it’s a bit more involved than that. You will need to follow the instructions on this page to get the binary download, extract the ZIP file, and add the windows\bin directory to your PATH environment variable.
4. Install Python2
You will need to install Python2 if you don’t already have it. If you have chocolatey on your Windows machine, you will need to open an administrator command prompt (right click Command Prompt and select «Run as Administrator», then run the following command:
5. Install JDK
You will need to install the latest JDK (Java Development Kit), found here, or with chocolatey, open an administrator command prompt as above and run:
6. Install Android SDK and Android Studio
The Android SDK comes bundled in Android Studio, the official IDE for native Android Development and what we will be using for running Android emulators. Android Studio can be downloaded here. Choose a «Custom» setup and ensure that the following components are checked:
- Android SDK
- Android SDK Platform
- Performance (Intel ® HAXM)
- Android Virtual Device
These components can be installed later if needed.
For React Native, you need the Android 9 (Pie) SDK installed. Refer to the React Native CLI Quickstart tab on the React Native Get Started docs under «Android development environment» for excellent instructions on installing the Android SDK, configuring the ANDROID_HOME environment variable, and adding the platform-tools to Path.
7. Preparing an Android Virtual Device (AVD)
On the Android Studio welcome screen, select «AVD Manager» or «Configure» and then «AVD Manager». This is where you will create new AVDs as well as manage and launch AVDs you have already created.
Per the React Native docs:
Select «Create Virtual Device…», then pick any Phone from the list and click «Next», then select the Pie API Level 28 image.
Click «Next» then «Finish» to create your AVD. At this point you should be able to click on the green triangle button next to your AVD to launch it, then proceed to the next step.
8. Create and Run a React Native + Expo Project
You can create a React Native project with the following command in the directory you want it to be created in:
expo init projectname
cd projectname
npm run start
Then, select a to launch your app with Expo on your launched AVD.
Note that you can also launch the app on your phone by installing Expo on your phone and using the QR code that Expo should give you on your Windows machine.
Helpful Resources
Here are the resources I found useful when figuring this out for my own machine.
- Binary Downloads for Linux, macOS and Windows (Beta)
- Quick Tip: Installing React Native
- React Native Getting Started Docs
Conclusion
I hope this is helpful to Windows users out there who may be a little lost in setting up all the tools needed for React Native, Expo, and Android development on Windows. I know I was when I first started out, especially Android Studio as it is a beast of an IDE if you aren’t familiar with it! Have fun building! 💖
In general, there are two ways to get started with React Native — using Expo CLI or React Native CLI. Both ways have their own strengths and weaknesses but even React Native’s official documentation is suggesting to get started with Expo CLI if you are new to mobile development. Therefore, in this guide we will go through all the steps needed to setup Expo development environment for your first React Native project using Windows.
If you chose to follow the guide, then let’s roll!
Installing Windows Terminal
First and foremost we need to install Windows Terminal (later: terminal) if you don’t have one as it is going to be used quite often. To do this you can use Microsoft Store by searching «Windows Terminal» and installing it.
After installing and launching it, you can test if everything works by typing ls in the terminal, which should display the list of files and folders in that path.
Installing Git
Git is going to be used for source control management, which will help us to track changes in the code and make development easier. Also, Git comes with Git Bash that we will make use of.
To download the latest version of Git you can go to their website and select Windows OS. Once the download is complete, we can start the installation process.
On the first window we can read GNU General Public License and click Next button. But let’s be honest, nobody reads that, so you can click Next right away.

In the next window you should select the path that you want Git to be installed in and click Next.

Now in this window I would suggest checking ‘Add a Git Bash Profile to Windows Terminal’ box and then clicking Next.

In the next two windows you can make changes if you want but I would suggest leaving everything like it is and clicking Next.


In this window select ‘Override the default branch name for new repositories‘ and type ‘main’ in the input box. We do that because this is the new naming convention and everybody is encouraged to follow it. After making changes click Next.

Next step is based solely on your preference, if you know what you are doing, then select whichever option you would like to, otherwise keep the default one and click Next.

For the next few windows leave everything on default unless you know what you are doing.
Once the installation is finished, let’s make Git Bash our default choice.
To do that open terminal, click on the arrow icon in the top bar and select Settings.

In the settings screen click on Default profile dropdown, select Git Bash and save it.

After that, re-open the terminal and it should open Git Bash now.
Last but not least, let’s test if Git is installed correctly. In the terminal write git —version, which should display the version of Git that is installed. If it did, then you have installed Git successfully.

Installing NodeJS
NodeJS is an open-source Javascript runtime environment that will help us run React Native applications. It also comes with npm which is a package manager that helps to install various packages in our applications.
To download NodeJS go to their website and select the LTS (long term support) version.
During the installation leave everything on default except for the window below. It is very important to tick this box in order to install necessary tools automatically, otherwise you will have to do that manually.

Once the installation is finished click Finish. That should automatically open terminal if you ticked the mentioned box above. In that terminal press any key to start the installation. Keep in mind that terminal will close automatically after installing everything. This step will take some time, so you can take a well deserved break and refill your coffee cup ☕.
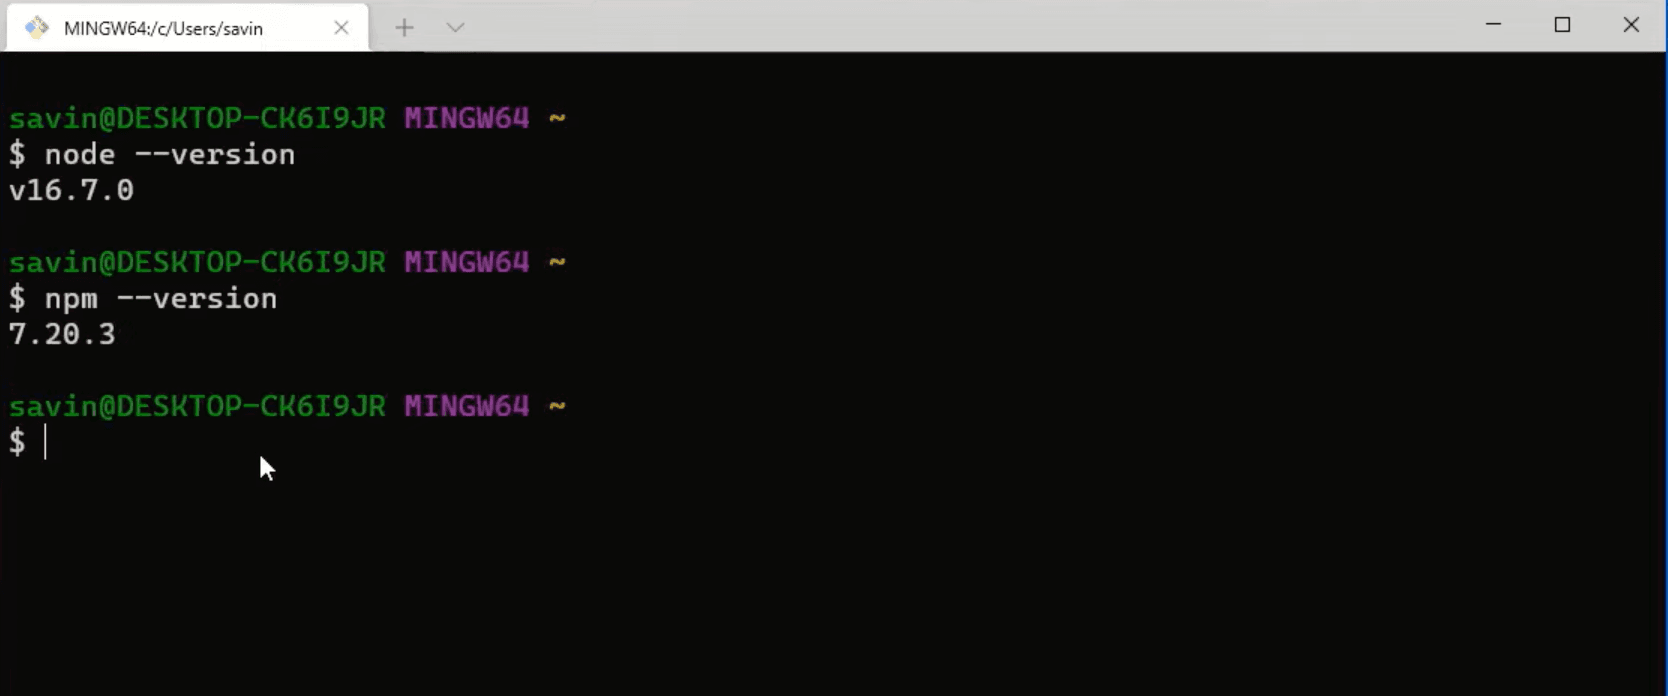
To test if node was installed correctly open the terminal and type node —version, which should display the version that was installed. To test if npm was installed correctly type npm —version, which accordingly will display the npm version.

Installing Expo CLI
By this step we have already installed all of the dependencies that Expo needs. Now it’s time to install Expo CLI itself!
To install Expo CLI, you simply have to open the terminal and type npm install —global expo—cli. That’s it, it’s that easy! On a side note, we need to add —global in order to install Expo CLI globally.
Now we can create our first React Native project!
Initialise Your First Project
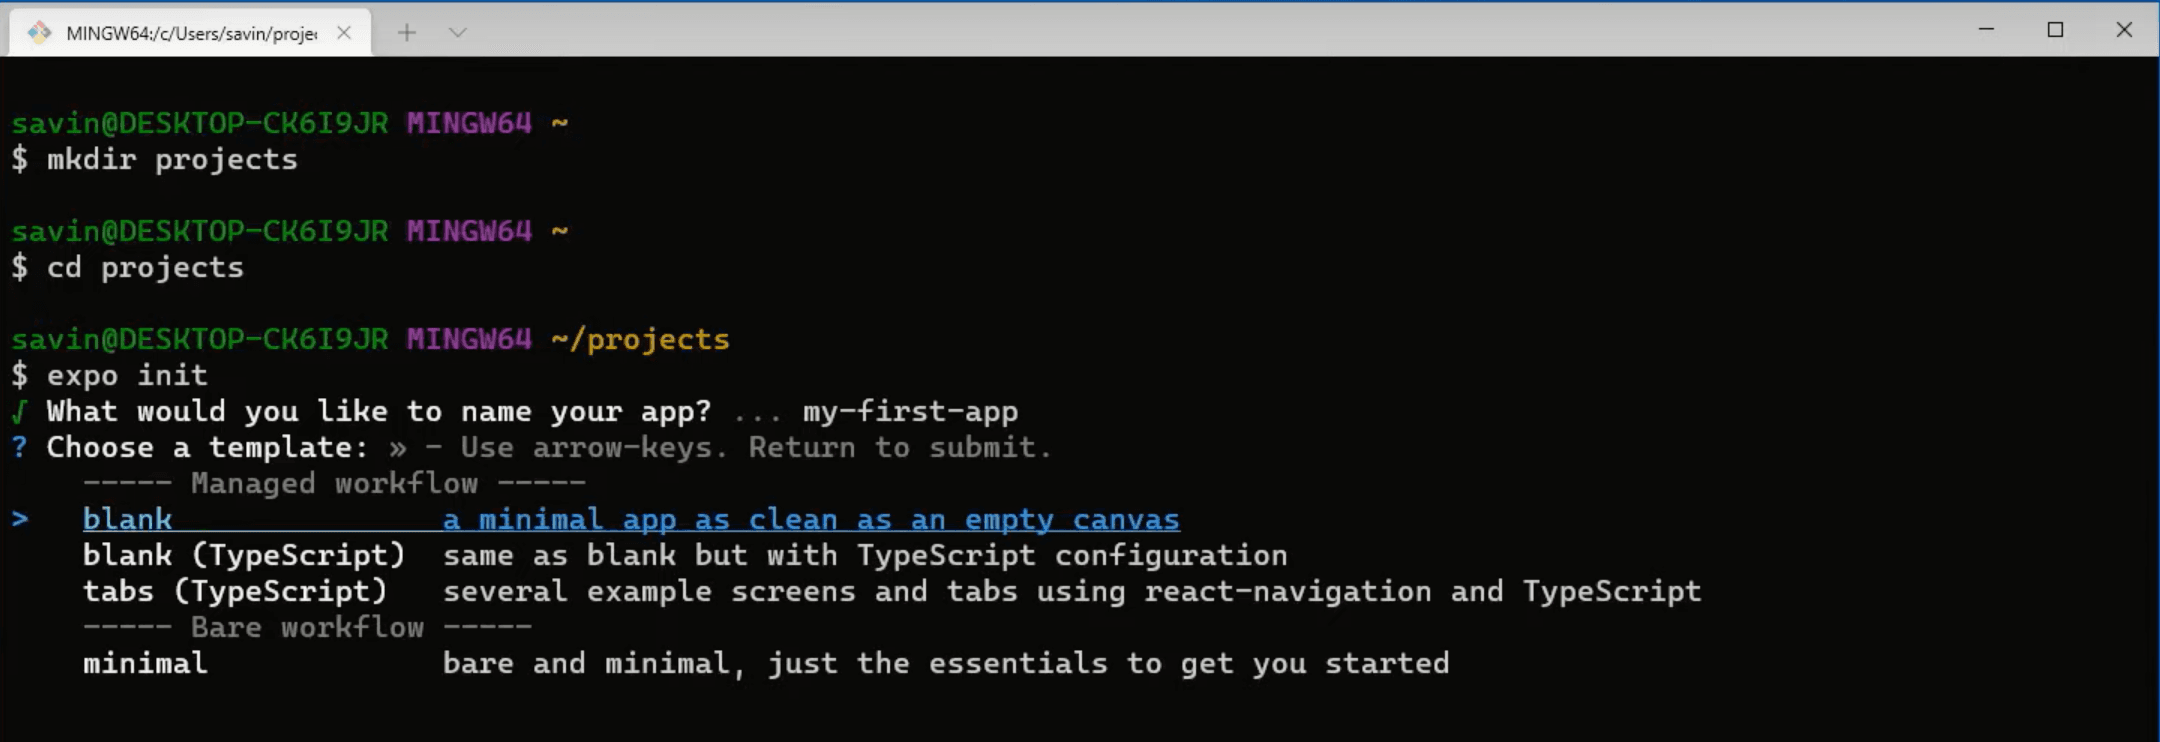
In order to create a new Expo project, in the terminal we can simply type expo init. You will be asked a few questions in order to finalise the initialisation.
First of all, you will need to provide the name of your application. As it is our first application, let’s name it ‘my-first-app’.

After that, you will have to choose a template that you would like to use for your application. In this step you can choose whatever you like, but for demonstration purposes we chose blank template.

After answering these two simple questions Expo will install all dependencies and prepare your project.
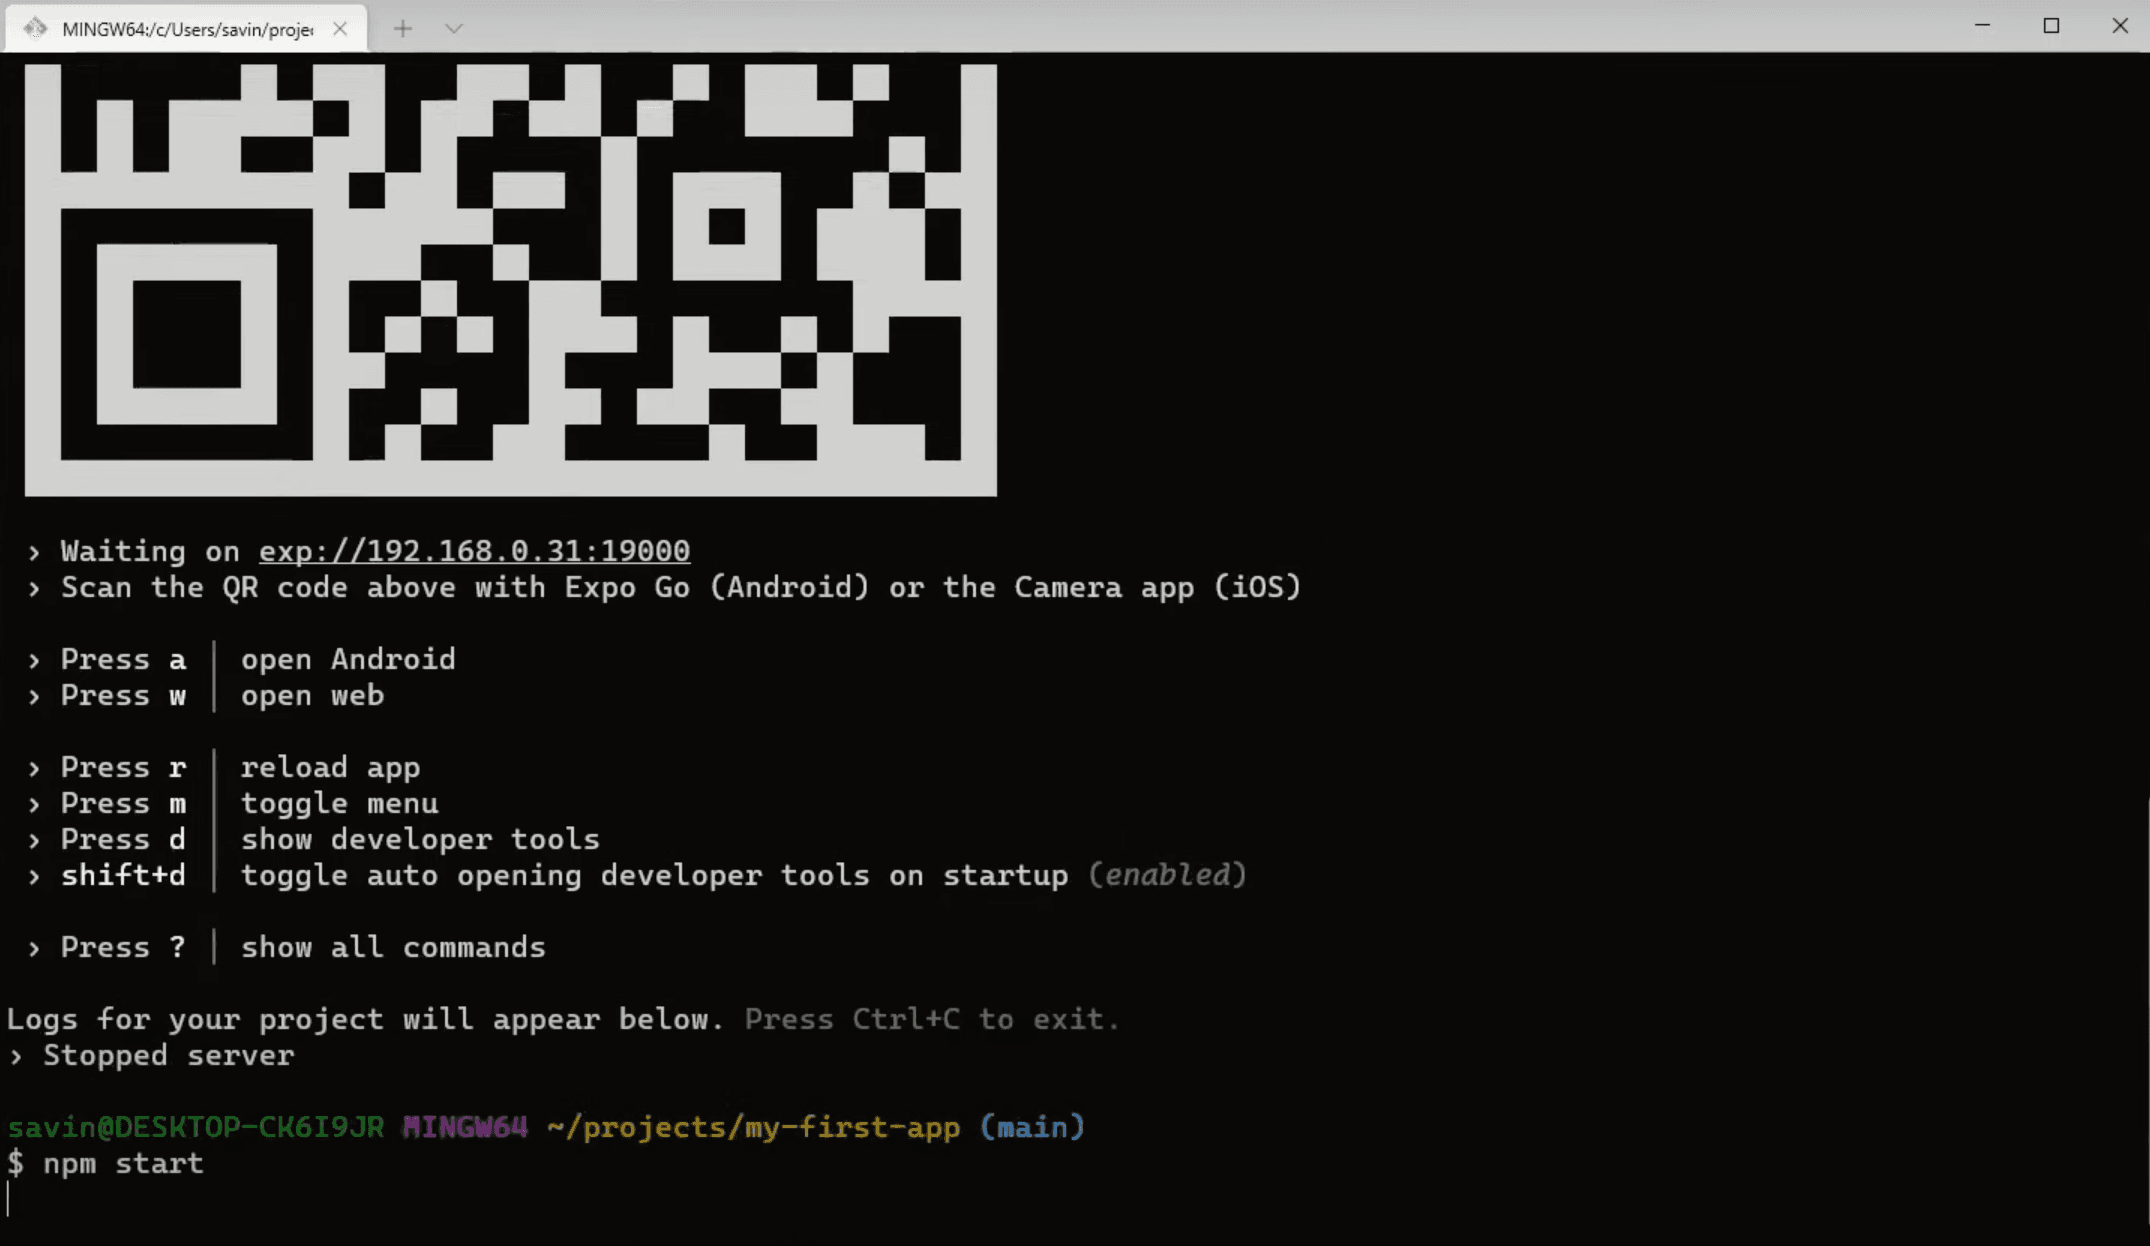
To run the application you will have to type cd my—first—app in the terminal, which will go to your project’s folder and then type npm start to start the development server.
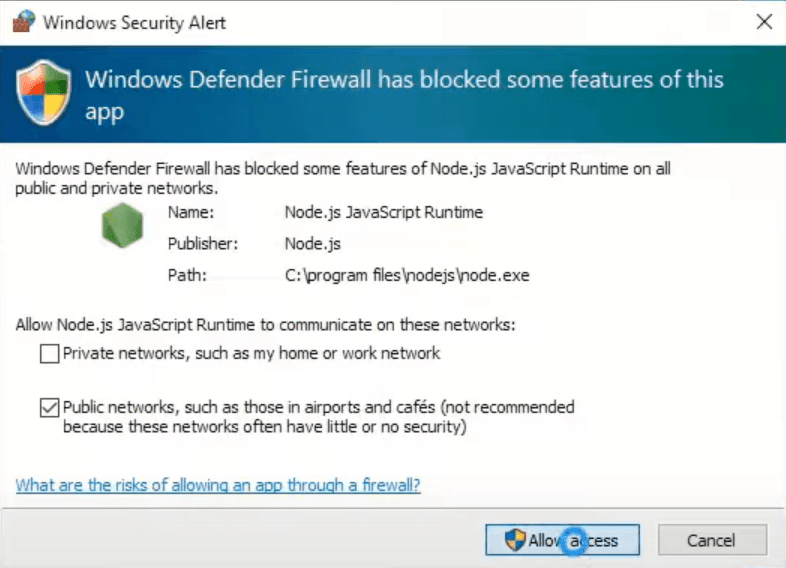
You might be asked to allow access to NodeJS, allow it.

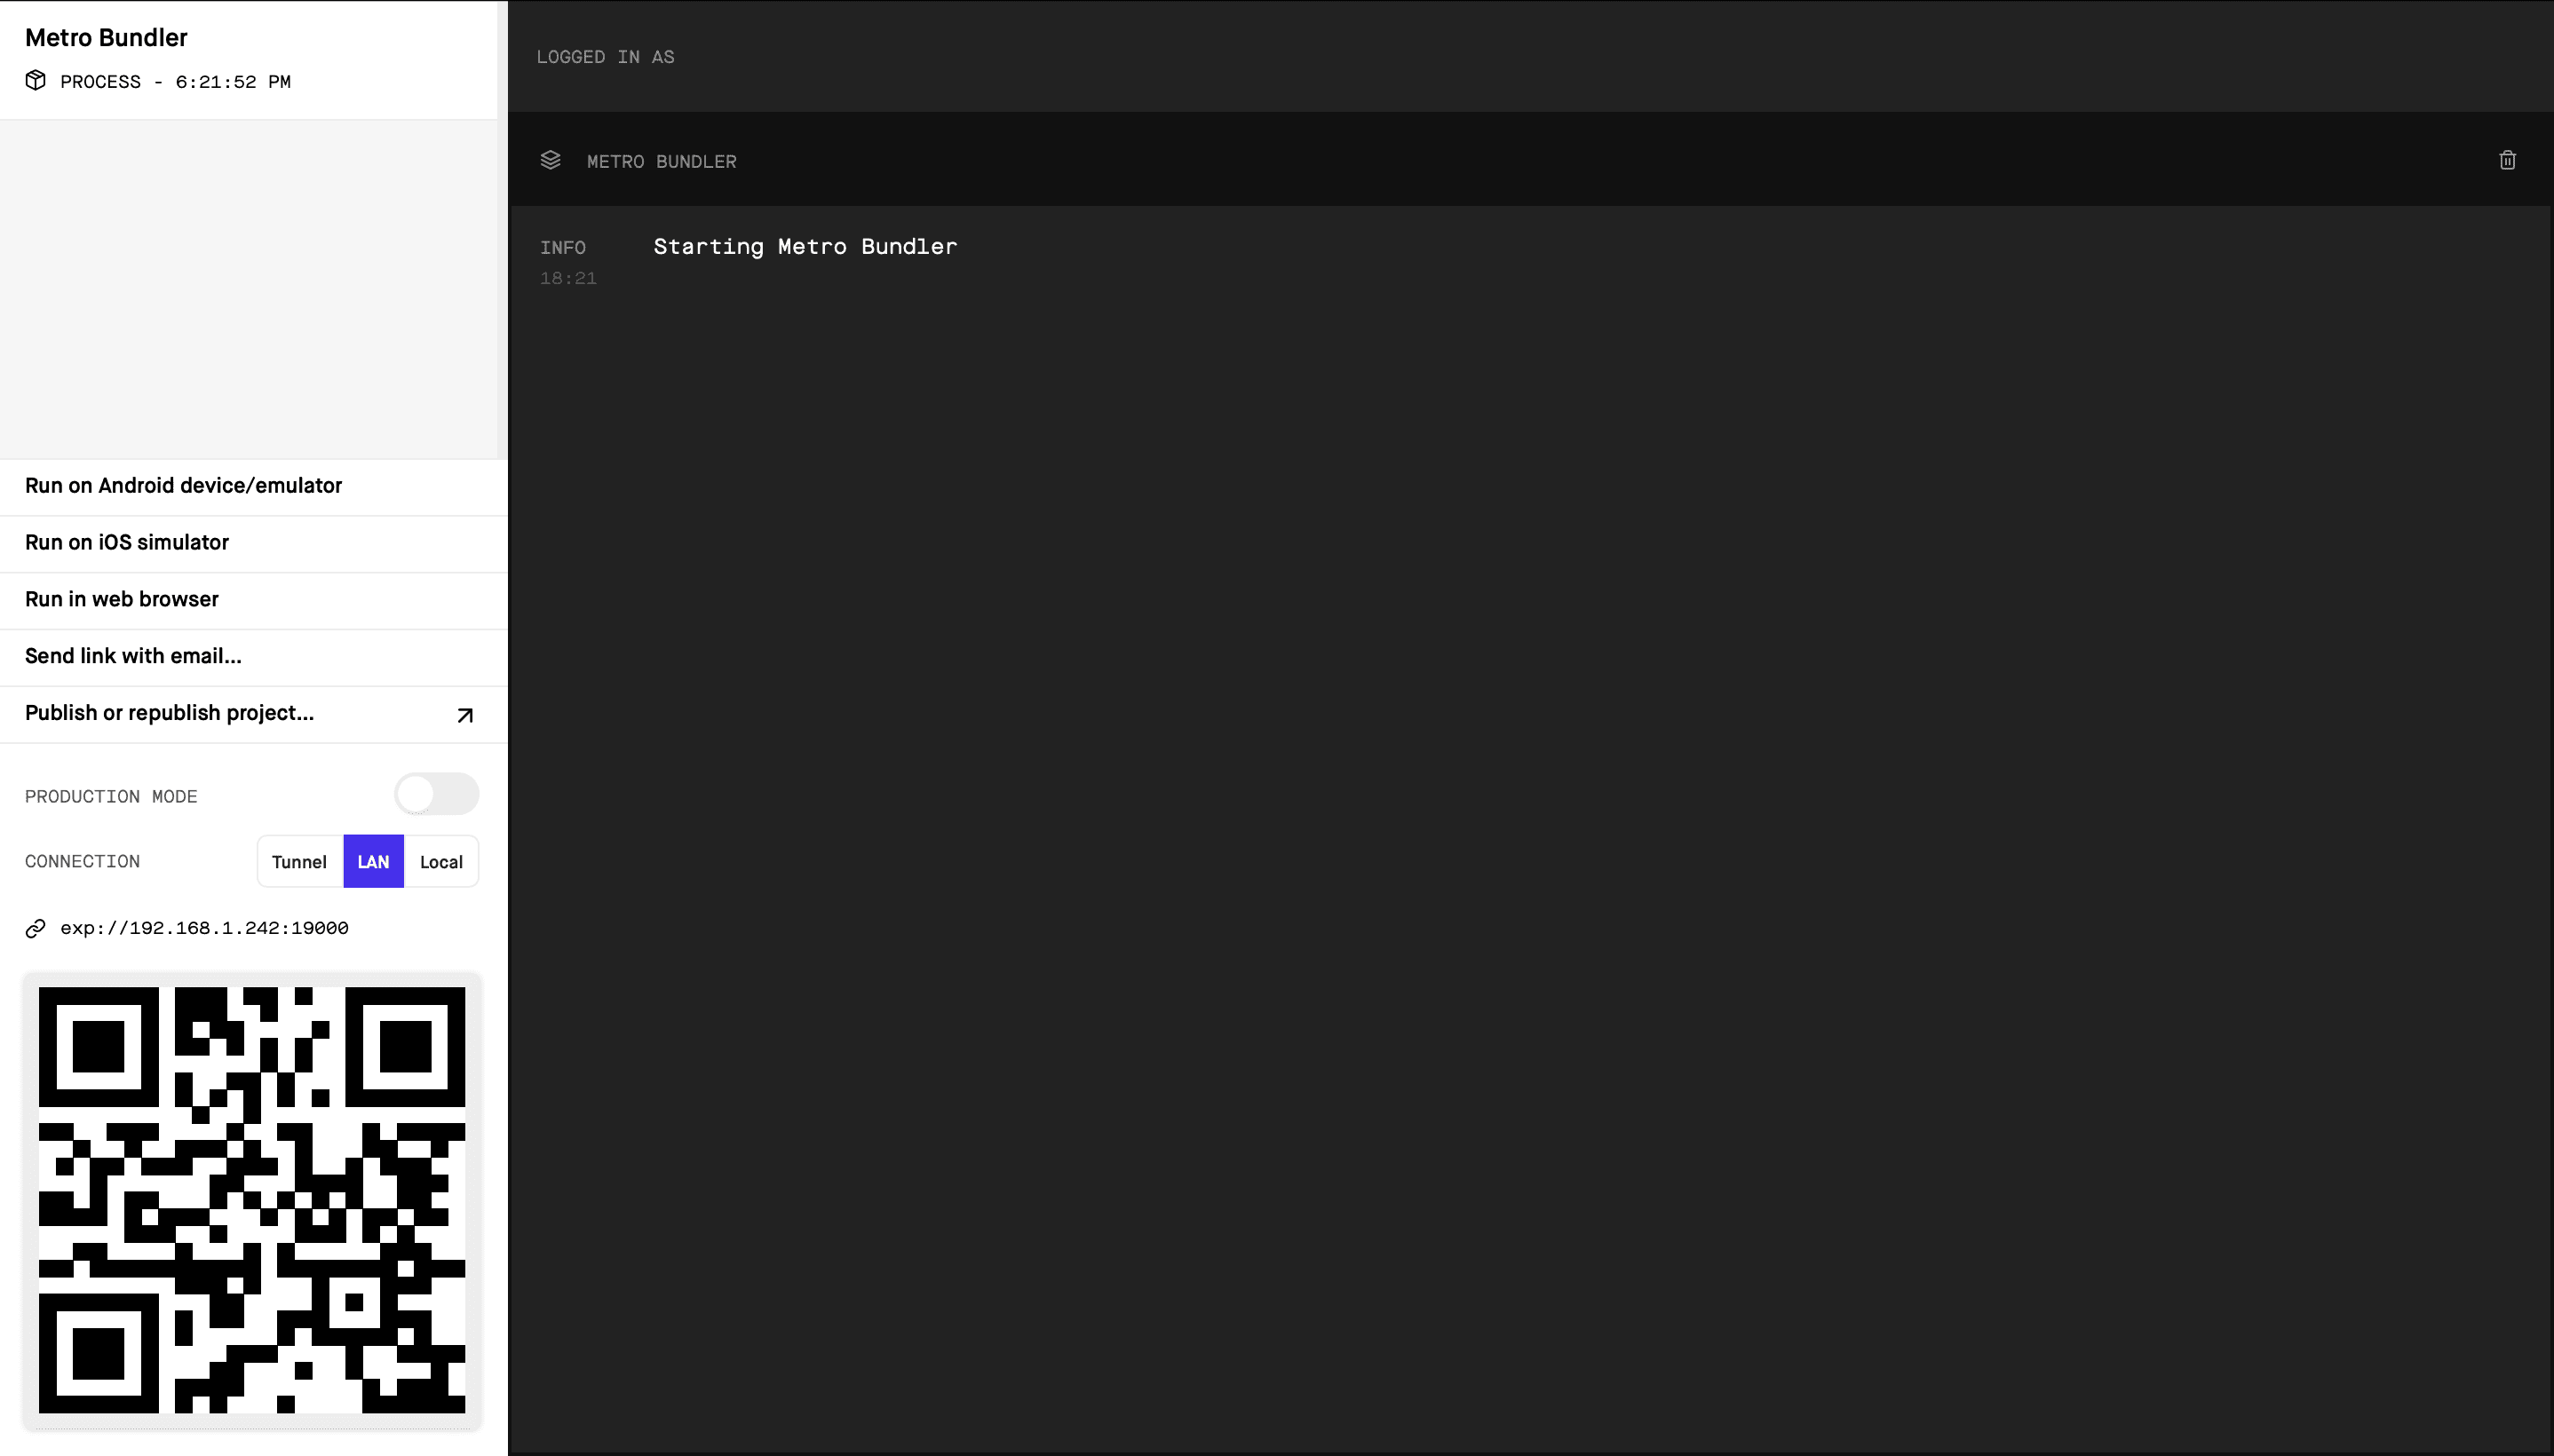
After allowing access, Expo will automatically open new browser window called Expo Developer Tools like in the image below. If it does, that means everything is installed correctly.

Running The Application
Now it’s time to run the application on your device. But in order to do that, we still need a little bit of setting up.
First things first, if you don’t have an Expo account yet, we should create one on their website.
After creating an Expo account, you should be able to login by typing expo login in the terminal and providing your username or email as well as password. If provided credentials were correct, you should see a success message.
You can also test if you have logged in successfully by typing expo whoami, which will display your username.
Setting Up Expo Go Mobile Client
Okay, now it will get a little bit more exciting. Grab your phone and install Expo Go application from the App Store or Google Play Store.
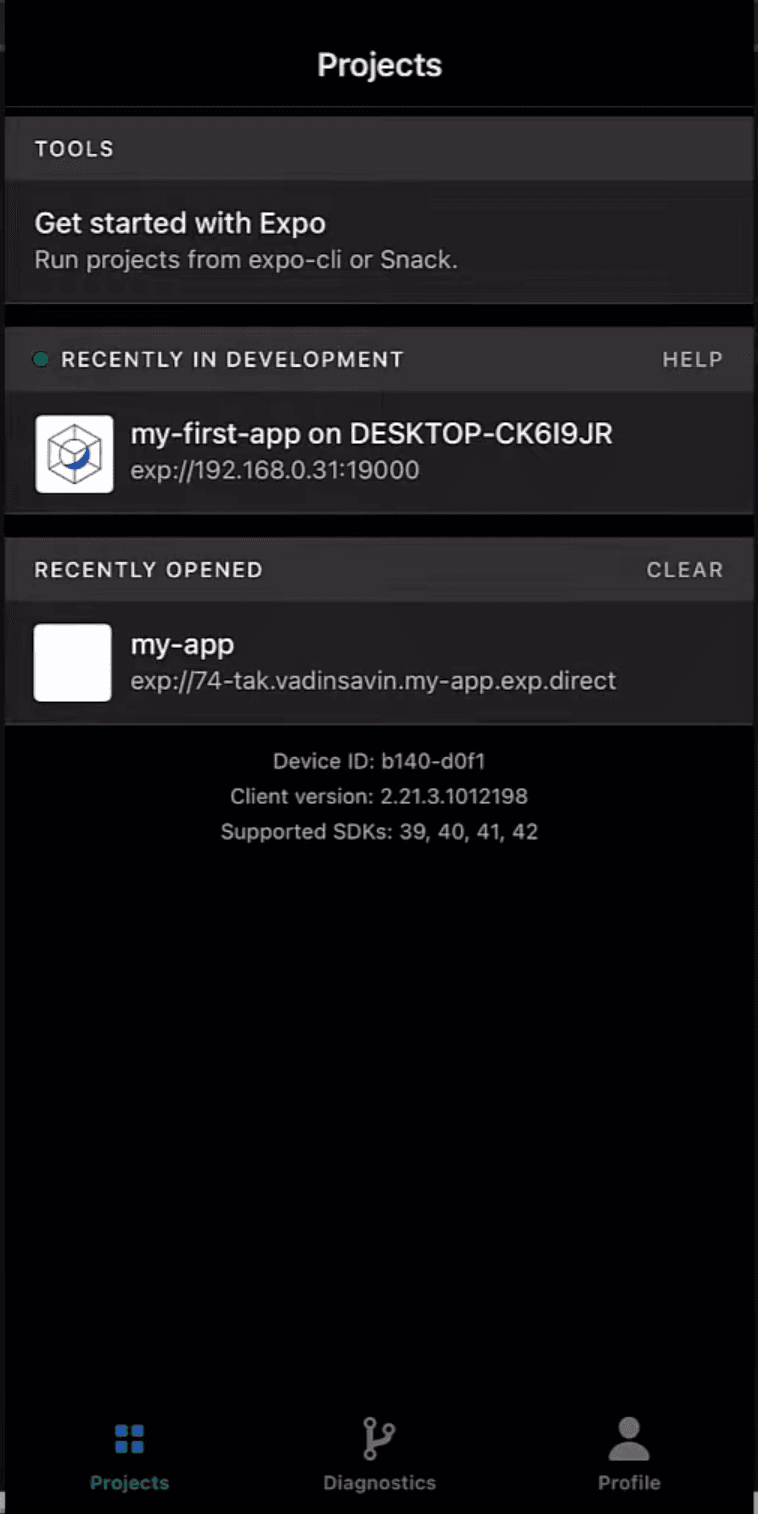
After installing the application, launch it, login with the account you have just created and launch the application that’s located under RECENTLY IN DEVELOPMENT tab.

Side note, if you don’t see your application under RECENTLY IN DEVELOPMENT tab, just restart your server by pressing CTRL + C in the terminal that’s running your development server and type npm start again.

Now you should see in your Expo Developer Tools browser tab that it’s building the Javascript bundle. After that, Expo Go will automatically launch your application on the device!!
You can also run the application on your phone by scanning the QR code in the terminal or Expo Developer Tools. On android phones you can scan the QR code directly from the Expo application. On the iOS however, you have to do that from the Camera app. This is especially useful when you are trying to run someone else’s application.
Installing Visual Studio Code
There are plenty of IDE’s to choose from and if you have one already, then you can skip this step and start writing your code there. But in our humble opinion, we think Visual Studio Code fits our needs the best.
If you decided to go with Visual Studio Code as well, then you can download it from their website.
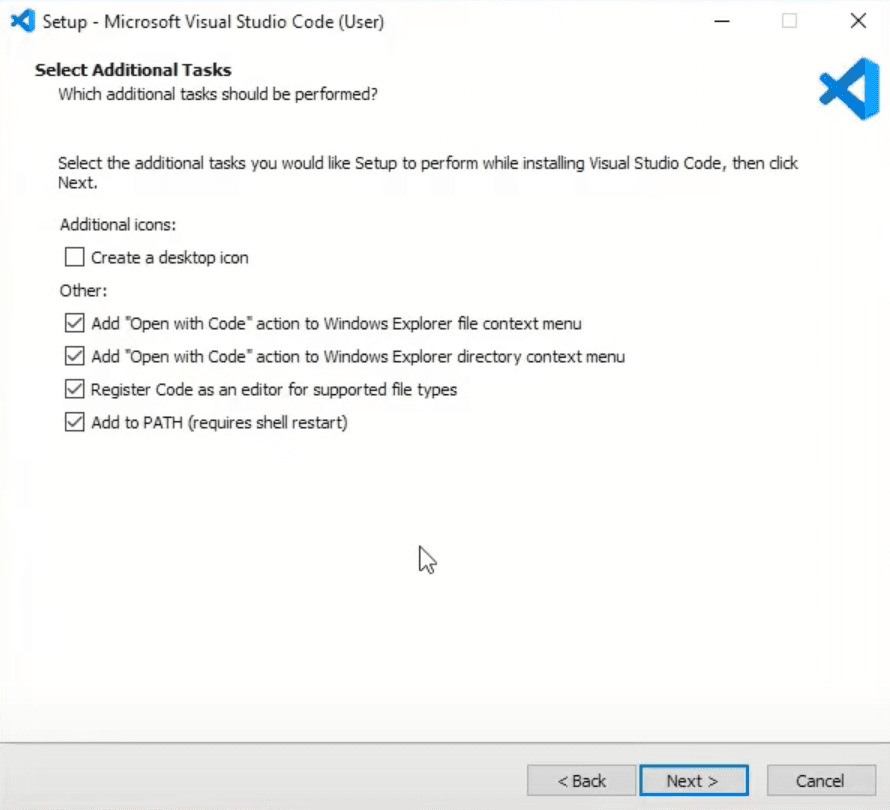
During the installation, you can make changes if you know what you are doing, otherwise I suggest leaving everything on default except for the window below. In here, tick all of the boxes under Other tab.

Now we can open our application on Visual Studio Code by navigating to the folder where you have created your ‘my-first-app’ project, then clicking right mouse button anywhere on the white space and clicking Open with Code.

You might be asked to verify that you trust the authors of the files in this folder. Check the box ‘Trust the authors of all files in the parent folder‘ and click Yes, I trust the authors button.

Now you can select the theme of Visual Studio Code that you prefer and run the project. Visual Studio Code has a lot of very useful extensions for React Native developers that will make you code faster, cleaner, prevent bugs and in general make coding a lot more enjoyable. If you want to see what are those extensions and learn how to add them to your Visual Studio Code I recommend watching TOP 10 VSCode Extensions for React/React Native Developers (2021).
To run the project, just open the terminal in Visual Studio Code by clicking CTRL + ` (that little button in the top left of your keyboard below the ‘esc’ button, you are welcome 😉) and just type npm start which will start the project and open Expo Developer Tools window in the browser.
Now you can start coding!!! 🥳
But in order to start learning React Native the right way, I highly encourage you to visit notJust.dev Youtube Channel where you will find plenty of free projects and tutorials to follow, which will most certainly increase your React Native knowledge and skill!
I would recommend you to start with the Tesla Clone, which is a beginner friendly tutorial that will cover all the basics and get you up and running with your first React Native project.
I hope this guide was clear, comprehensive, and helped you to easily install as well as setup everything that you need in order to start working on your first React Native application.
Good luck on your software engineer journey!!
To run your React Native app on Windows, you need to ensure that your development environment is properly set up. This includes having Node.js, the React Native CLI, and the necessary dependencies installed. Once your environment is ready, you can create a React Native Windows app by following these steps:
Setting Up Your Environment
- Install Node.js: Make sure you have Node.js installed on your machine. You can download it from nodejs.org.
- Install React Native CLI: Open your terminal and run the following command:
npm install -g react-native-cli - Install Visual Studio: Download and install Visual Studio 2019 or later with the «Desktop development with C++» workload.
Creating a New React Native Windows App
To create a new React Native Windows app, follow these commands:
npx react-native init MyWindowsApp --template react-native-template-typescript
cd MyWindowsApp
npx react-native-windows-init --overwrite
This will set up a new React Native project with Windows support. Make sure to replace MyWindowsApp with your desired project name.
Running the App
Once your project is set up, you can run your app on Windows by executing the following command in your project directory:
npx react-native run-windows
This command will build the app and launch it in the Windows environment. If everything is configured correctly, you should see your app running in a new window.
Troubleshooting Common Issues
- Build Failures: If you encounter build failures, ensure that all dependencies are correctly installed and that your Visual Studio installation includes the necessary components.
- Emulator Issues: If you are using an emulator, make sure it is properly configured and running before executing the run command.
Conclusion
By following these steps, you can successfully create and run a React Native Windows app. This setup allows you to leverage the power of React Native while targeting the Windows platform effectively.