How to Check Shutdown Logs in Event Viewer on Windows Server 2022
Monitoring server shutdowns is critical for administrators to maintain the stability and reliability of their systems. Understanding the reasons behind shutdowns or restarts can help troubleshoot unexpected outages and ensure better management of the Windows Server environment.
Windows Server 2022 provides an effective way to monitor shutdown events through the Event Viewer, which logs details of system activities, including shutdowns and restarts. In this guide, we’ll walk through the process of checking shutdown logs in the Event Viewer on Windows Server 2022.
Step-by-Step Guide to Checking Shutdown Logs
1. Open Event Viewer
Event Viewer is a built-in tool that tracks various system logs, including shutdown and startup events. Here’s how to access it:
- Press
Windows + Rto open the Run dialog. - Type
eventvwrand press Enter. This will launch the Event Viewer.
2. Navigate to System Logs
Once the Event Viewer is open, you need to locate the System logs, where shutdown events are recorded.
- In the left pane, expand Windows Logs.
- Click on System. This will display a list of all system-related events, including shutdowns.
3. Filter Shutdown Events
The System log contains thousands of events, making it difficult to find specific shutdown logs. To narrow down the search, you can use Event IDs. Shutdown events are usually recorded under specific Event IDs:
- Event ID 1074: This event indicates that the system was shut down by a user or an application.
- Event ID 6006: This event shows that the system was shut down properly (also known as “clean shutdown”).
- Event ID 6008: This event indicates an unexpected shutdown.
- Event ID 41: If the system rebooted without a clean shutdown, this event will log the incident.
To filter the log and only show relevant shutdown events:
- In the right pane of the Event Viewer, click on Filter Current Log.
- In the filter dialog box, enter the relevant Event IDs (
1074,6006,6008,41) in the <All Event IDs> field. - Click OK to apply the filter.
4. Review the Shutdown Logs
Once filtered, you’ll see a list of shutdown events. Here’s what each Event ID signifies:
- Event ID 1074:
This event shows that a user or process initiated a shutdown or restart. The log will include details such as:- The user who triggered the shutdown.
- The reason for the shutdown (e.g., software installation, planned maintenance).
- The time of shutdown.
Example of Event ID 1074 message:
- Event ID 6006:
This is the clean shutdown event, often referred to as “Event Log Stopped.” It indicates that Windows shut down successfully.Example message:
- Event ID 6008:
This indicates that the system was shut down unexpectedly. This event is often logged when the server experiences a crash or power failure.Example message:
- Event ID 41:
This logs a kernel power issue, which is typically associated with a reboot without a clean shutdown (e.g., a power failure or hardware crash).Example message:
5. Analyze the Logs
By reviewing these logs, you can identify patterns, such as frequent unexpected shutdowns, and take action to prevent future incidents. Understanding who initiated shutdowns and why can also provide insight into server management practices.
Common Troubleshooting Tips
- Unexpected Shutdowns: If you see multiple Event ID 6008 logs, check for hardware issues or external power supply problems. If the issue persists, consider updating your drivers or BIOS.
- User-Triggered Shutdowns: Event ID 1074 logs provide detailed information about user-initiated shutdowns. If unauthorized shutdowns are detected, review user permissions and administrative policies.
- Kernel-Power Issues: Event ID 41 logs can indicate power-related issues. Ensure that your server has a reliable power source and that you’re using an Uninterruptible Power Supply (UPS) if needed.
Conclusion
Monitoring shutdown events is a crucial part of maintaining the health and uptime of your Windows Server 2022 environment. The Event Viewer provides detailed insights into why and when your server shuts down, helping you troubleshoot potential issues and ensure that your server remains stable and secure.
By following this guide, you can efficiently check shutdown logs and take action to mitigate any related problems.
This article describes the Microsoft® Windows® Event Viewer.
The Windows Event Viewer is an interface that enables you to view, navigate, and search event logs. Windows logs each event that occurs so you can troubleshoot and keep track of system issues. Either an application or a person can cause these events.
By default, Windows logs include the following categories:
- Application: Information from the applications installed.
- Security: Information related to login attempts, privilege requests, and audits.
- Setup: Messages generated during application installation and Windows operating system updates.
- System: Messages generated by the operating system.
- Forwarded Events: Events from other computers. You must set up your computer as a central subscriber.
Each event has one of the following severity levels:
- Information: Messages that indicate a successful action.
- Warning: Messages that indicate this might become a problem.
- Error: Messages that indicate a significant problem occurred.
Security audit logs log either a success or failure.
Note: You often see Warning and Error logs. These do not necessarily mean that there is a problem.
The operating system has built-in checks. Most applications automatically solve these issues and bring your normal services back online. You only need to focus on alerts related to the issues you are investigating.
The following sections provide instructions for accessing the Event Viewer in different versions of Windows Server®.
- Click Start -> Control Panel -> System and Security -> Administrative Tools.
- Double-click Event Viewer.
- Click the Start button.
- Right-click Start, select Control Panel -> System Security, and double-click Administrative Tools.
- Double-click Event Viewer.
- Right-click Start, select Control Panel -> System & Security, and double-click Administrative Tools.
- Double-click Event Viewer.
Note: While you can review most logs in Windows Event Viewer, some applications have their own application logs. These exceptions include the following applications or functions:
- DNS Manager
- Failover Cluster Manager
- Internet Information Services (IIS) access
- Task Scheduler History
- Windows Component Service
Updated over 1 year ago
In this post I will show how to find the user who restarted Windows Server Core. With Server Core it’s going to be little tricky to find out who restarted it. But I will make it easy it for you.
Some organizations prefer to use Windows Server Core OS because it eliminates services and features that are not essential for the support of certain commonly used server roles. There are numerous advantages that a Windows Server core offers. Also, there are many differences between a Server with desktop experience and Server Core.
Coming to the part where you want to find the user who restarted Windows Server core, you have to find a way to read the logs from event viewer. The Windows server core logs all the events like a normal server does but you cannot launch event viewer on server core.

There is something called as Shutdown event tracker. It allows the admins to track why a user initiated shutdown or a restart. However with Windows Server core, you don’t get the shutdown event tracker when you restart the server.
From the list of SCONFIG options, the 13 option allows Windows Server core restart. Clicking Yes restarts the Server without displaying any shutdown event tracker.

So how do you read the event viewer logs from Windows Server core ?. The answer is using PowerShell. In one of my post I covered how to find who restarted Windows Server. In that post I used the event ID 1074 to find the user who restarted windows server. We will use the same event ID 1074 to find who restarted Windows server core.
On your Server Core, by default you see a command prompt. Type the command PowerShell and with this you can now enter PowerShell commands.
We will first use a simple command to get the list of logs in Event Viewer.
Get-EventLog -list

Find Who Restarted Windows Server Core
To find who restarted Windows Server core, we will filter the system logs with event ID 1074 or filter the logs with Source as User32. Both should result in same output and you can choose either of them.
Run the following command to filter the System Logs with Source as User32.
Get-EventLog -LogName System | Where Source -eq User32

You may also filter the system logs with Event ID 1074 with the following command.
Get-EventLog -LogName System | Where EventID -eq 1074

Although we now see there are 4 logs that are filtered using event ID 1074 or source as User32 but they cannot be read because the message text is truncated. The Format-List Message comes to help here.
If you want to find the user who restarted the Windows Server core, here is the final command.
Get-EventLog -LogName System | Where EventID -eq 1074 | Format-List Message

Connect to Event Viewer on Windows Server Core
How about launching the event viewer and connecting it to remote computer i.e. the Windows Server core ?. Yes, that will also work and then you can filter the event logs with event ID 1074 and find the user who restarted the Server Core.
One thing that you need to keep in mind is by default the firewall on Server core is ON. So it won’t allow you to connect to the event viewer. So you must take care of that first.
To connect to Event Viewer on Windows Server Core, launch the event viewer on a member server. Right click Event Viewer (Local) and select Connect to Another computer.

On the Select Computer box, enter the Server Core computer name and click OK.

Now you have successfully connected to event viewer on server core. Select the System Logs and filter the current log with event ID 1074. Now you can find the user who restarted your Windows Server core.

Still Need Help?
If you need further assistance on the above article or want to discuss other technical issues, check out some of these options.

Prajwal Desai
Prajwal Desai is a technology expert and 10 time Dual Microsoft MVP (Most Valuable Professional) with a strong focus on Microsoft Intune, SCCM, Windows 365, Enterprise Mobility, and Windows. He is a renowned author, speaker, & community leader, known for sharing his expertise & knowledge through his blog, YouTube, conferences, webinars etc.
Login events play a crucial role in maintaining the security of a Windows Server. They provide valuable information about who accessed the server, when they accessed it, and whether any suspicious activity occurred. By reviewing login events, you can identify potential security threats, ensure that user accounts are being used appropriately, and maintain a secure server environment.
In this blog post, we will guide you through the steps of enabling logon event auditing, viewing and filtering login events, and interpreting and taking action on login events. By following these steps, you can strengthen your server’s security and protect your organization from cyber threats.
Enable Logon Event Auditing
Enabling logon event auditing is the first step in reviewing login events in a Windows Server. Windows Server includes a built-in feature called Event Auditing, which records security-related events, such as logon events, in a log file. However, by default, Windows Server does not audit logon events, so you need to enable it manually.
To enable logon event auditing, follow these simple steps:
- Open the Local Group Policy Editor by typing “gpedit.msc” in the search bar and pressing Enter.
- Navigate to Computer Configuration > Windows Settings > Security Settings > Local Policies > Audit Policy.
- Double-click the Audit logon events policy.
- Click OK after Selecting the Success and Failure check boxes.
- Close the Local Group Policy Editor.
Once you have enabled logon event auditing, Windows Server will start recording logon events in the Security log. You can access the Security log through the Windows Event Viewer. With this feature enabled, you can now review login events and identify potential security threats on your server.
Windows Event Viewer
The Windows Event Viewer is a powerful tool that enables you to view and manage event logs on your Windows Server. It is a built-in feature and can be accessed through the Control Panel or the Start menu.
To access the Windows Event Viewer, follow these simple steps:
- Click on the Start menu. In the search bar, type “Event Viewer”.
- In the search results, click on “Event Viewer”.
- Expand the “Windows Logs” folder.
- Click on the “Security” log.
By following these steps, you can access the Security log, which contains important information about login events on your Windows Server. The Windows Event Viewer provides an easy-to-use interface for reviewing login events, enabling you to quickly identify any suspicious activity and take action to prevent potential security threats.
Viewing Logon Events
Once you have enabled logon event auditing and accessed the Security log in the Windows Event Viewer, you can start reviewing the logon events that have been recorded. By default, the Security log displays all events, not just logon events. To filter the log and show only logon events, you need to follow these steps:
- In the Security log, click on the “Filter Current Log” button in the “Actions” pane on the right-hand side of the screen.
- In the “Filter Current Log” dialog box, click on the “Event sources” drop-down list, and choose “”.
- Select both the “Audit Success” and “Audit Failure” checkboxes in the “Keywords” field
- In the “User” field, enter the name of the user whose logon events you want to view, or leave it blank to view all users.
- Click “OK” to apply the filter.
Once you have applied the filter, the Security log will display only logon events that match your criteria. This makes it easier to review and analyze login activity on your Windows Server and identify any potential security threats. By regularly reviewing logon events and filtering the Security log, you can stay on top of your server’s security and prevent unauthorized access to your system.
Filter Only Logon Events
To filter the Security log to show only successful or failed logon events, you can use the Event IDs that are associated with these events. The Event ID for a successful logon event is 4624, and the Event ID for a failed logon event is 4625. Here are the steps to filter the log and view only successful logon events:
- Open the Security log in the Windows Event Viewer.
- Click the “Filter Current Log” button in the “Actions” pane on the right-hand side of the screen.
- Choose “Microsoft Windows security auditing” from the “Event sources” drop-down list in the “Filter Current Log” dialog box.
- In the “Keywords” field, select the “Audit Success” check box.
- In the “Event IDs” field, enter 4624.
- In the “User” field, enter the name of the user whose logon events you want to view, or leave it blank to view all users.
- Click “OK” to apply the filter.
To filter the log and view only failed logon events, follow the same steps as above, but in step 4, select the “Audit Failure” check box, and in step 5, enter 4625 in the “Event IDs” field. By filtering the log to show only successful or failed logon events, you can quickly identify any suspicious activity and take appropriate action.
Interpreting and Taking Action on Login Events
After filtering the log to show only the logon events that you want to investigate, you can interpret and take action on the information provided in the event log. There are several key pieces of information that are important to review when analyzing logon events:
- Event ID: The Event ID indicates whether the logon event was successful or failed. As noted earlier, Event ID 4624 is for a successful logon event, and Event ID 4625 is for a failed logon event.
- Date and Time: The date and time of the logon event can help you identify when the event occurred and whether it coincides with any other events or activities.
- User Account: The user account associated with the logon event can help you identify who accessed the server. This information can be used to determine whether the logon event is expected or not.
- Logon Type: The logon type indicates how the user logged on to the server. There are various logon types, such as interactive, remote, and service logons.
- Source Network Address: The source network address helps you identify where the user was when they accessed the server. This information can be used to determine whether the logon event is suspicious or not.
If you find a suspicious logon event, it’s essential to take immediate action. Depending on the severity of the event, you may need to disable the associated user account, change passwords, or investigate further. Additionally, it’s always a good idea to review your security policies and procedures to ensure that you’re taking all necessary precautions to prevent similar events in the future.
Conclusion
Monitoring login events in a Windows Server is crucial for maintaining a secure and protected server environment. By enabling logon event auditing, accessing the Security log in the Windows Event Viewer, filtering the log to show only logon events, and understanding and responding to the important information provided by these events, you can quickly identify potential security threats and take appropriate action. Additionally, it is important to regularly review and update your security policies and procedures to ensure that you are employing the best practices to safeguard your sensitive data and prevent cyberattacks.
Definition of Event Viewer in the Network Encyclopedia.
In this article
- What is the Event Viewer
- View Events from Multiple Event Logs
- Create a Custom View
- Event Viewer on Remote Computers
- Schedule a Task
- Manage Event Subscriptions
- Creating a new subscription
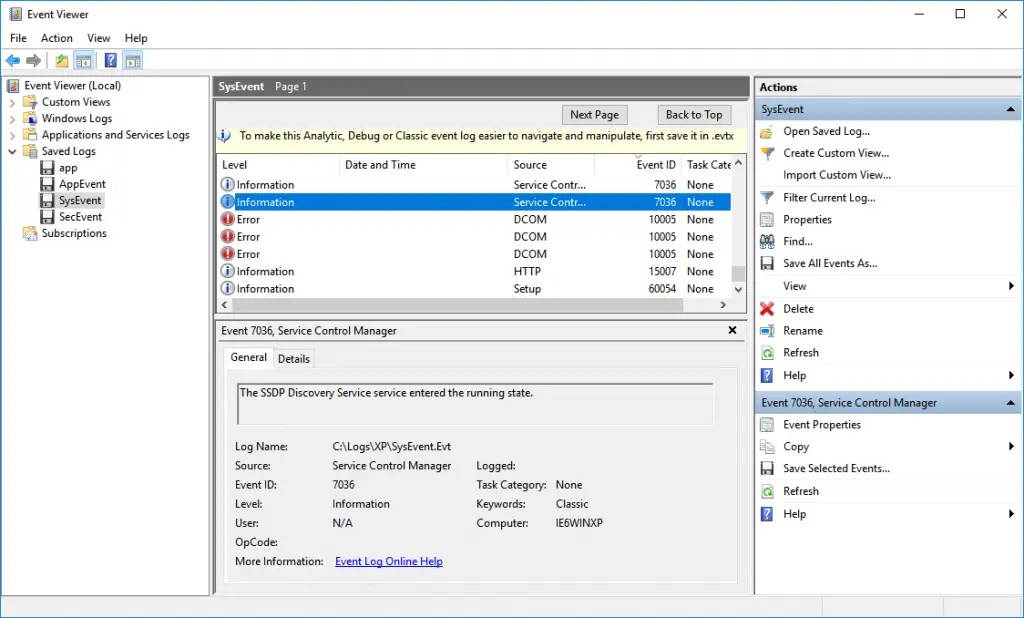
What is the Event Viewer?
The Event Viewer is a Microsoft Management Console (MMC) snap-in that enables you to browse and manage event logs. It is an indispensable tool for monitoring the health of systems and troubleshooting issues when they arise.
Event Viewer enables you to perform the following tasks:
- View events from multiple event logs.
- Save useful event filters as custom views that can be reused.
- Work with event logs on remote computers.
- Schedule a task to run in response to an event.
- Create and manage event subscriptions.
Events are significant actions that take on a server or computer and include the following:
- A process has been completed, such as the defragmentation of a database.
- A service has been started, stopped, or paused.
- A service has issued an unexpected response to a client.
- A service was unable to start.
- A memory violation has occurred, resulting in an application being terminated.
Event Viewer records events in many different logs such as:
- System log: Records warnings, errors, and information events about Windows NT services and devices
- Security log: Records success and failure events for objects being audited
- Application log: Records warnings, errors, and information events about applications running on the server
The system and application logs should be monitored regularly for signs of problems with devices, services, or applications running on the server. When a problem occurs, Event Viewer is the first place you should check. If auditing is configured on the server, you can monitor the security log for signs of attempted unauthorized access (failure audits) or for an indication of resource usage (success audits).
View Events from Multiple Event Logs
When you use Event Viewer to troubleshoot a problem, you need to locate events related to the problem, regardless of which event log they appear in. Event Viewer enables you to filter for specific events across multiple logs, making it easy to display all events that are potentially related to an issue that you are investigating. To specify a filter that spans multiple logs, you need to create a custom view.
Create a Custom View
You can create a filter that includes events from multiple event logs that satisfy specified criteria. You can then name and save that filter as a custom view. To apply the filter associated with a saved custom view, you navigate to the custom view in the console tree and click on its name.
To create a custom view:
- Start Event Viewer.
- On the Action menu, click Create Custom View.
- To filter events based upon when they occurred, select the corresponding time period from the Logged drop-down list.
- In Event level, select the check boxes next to the event levels that you want included in the custom view.
- You can either specify the event logs or the event sources of the events that will appear in the custom view.
- To specify the event logs: Select the Event Log option and, in the Event log drop-down list, select the check boxes next to the event logs from which you want to include events.
- To specify the event sources: Select the Event Source option and, in the Event source drop-down list, select the check boxes next to the event sources in the drop-down list that you want to include in the custom view.
- In Event IDs, type the event IDs that you want your custom view to display. Separate multiple event IDs by commas. If you want to include a range of IDs, say 4624 through 4634 inclusive, type 4624-4634. If you want your filter to display events with all IDs except certain ones, type the IDs of those exceptions, preceded by a minus sign. For example, to include all IDs between 4624 and 4634 except for 4630, type 4624-4634,-4630.
- In User, enter the name of the user accounts you want to display. Enter multiple users by separating them with a comma (,).
- In Computer(s), enter the name of the computers that you want your custom view to display. Enter multiple computers by separating them with a comma (,) and click OK.
- On the Save Filter to Custom View dialog box, in Name, type a name for the custom view.
- In Description, type an optional description of the custom view and then select the folder in which you want to store the custom view.
- You can make the Custom View accessible to anyone using the computer or only to someone logged on to your current account.
- To save the custom view and make it accessible to anyone using the computer: Ensure the All Users check box is selected and click OK.
- To save the custom view and make it accessible only to someone logged on to your current account: Ensure that the All Users check box is not selected and click OK.
Note: Leaving a field in the Create Custom View dialog box blank specifies that you want your filter to display entries with any value of the corresponding property.
Event Viewer on Remote Computers
You can use the Event Viewer or the wevtutil command at a command prompt to manage event logs on a remote computer.
To use Event Viewer to manage event logs on a remote computer
- Start Event Viewer.
- Click the root node, for example Event Viewer (Local), in the console tree.
- On the Action menu, click Connect to Another Computer.
- In the Another computer box, type the name or IP address of the remote computer.
- (Optional) Select Connect as another user, click Set User, enter the User name and Password, end then click OK.
- Click OK.
To use wevtutil to manage event logs on a remote computer
- To open a Command Prompt window, click Start, in the Start Search box, type cmd, and then press Enter.
- Type the following command in the Command Prompt window:
wevtutil <command> /r:<remote_computer_name>
Enable Remote Event Log Management in the Firewall
You must enable the Remote Event Log Management exception in the Windows Firewall Settings on the remote computer to which you want to connect.
You can type **eventvwr<remote_computer_name>** in a Command Prompt window to start Event Viewer and connect to a remote computer. You can also include options that enable Event Viewer to start with a specified Custom View or with a particular log selected. To learn more about the eventvwr command, type eventvwr /? in a Command Prompt window. Although you can use the eventvwr command to start Event Viewer and connect to computers running previous versions of Windows, any options specified will be ignored.
When connected to a remote computer, Custom Views displayed by the Event Viewer are the Custom Views stored on the local computer. If you click one of those local Custom Views, the underlying query will be run against the event logs on the remote computer.
Schedule a Task
By using Event Viewer, you can easily automate responses to events. Event Viewer is integrated with Task Scheduler, enabling you to right-click most events to start scheduling a task to run when that event is logged in the future.
To Run a Task in Response to a Given Event
- Start Event Viewer.
- In the console tree, navigate to the log that contains the event you want to associate with a task.
- Right-click the event and select Attach Task to This Event.
- Perform each step presented by the Create Basic Task Wizard.
Manage Event Subscriptions
Event Viewer enables you to view events on a single remote computer. However, troubleshooting an issue might require you to examine a set of events stored in multiple logs on multiple computers.
To specify which events to collect, you can create an event subscription. The subscription specifies exactly which events will be collected and in which log they will be stored locally. Once a subscription is active and events are being collected, you can view and manipulate these forwarded events as you would any other locally stored events.
Using the event collecting feature requires that you configure both the forwarding and the collecting computers. The functionality depends on the Windows Remote Management (WinRM) service and the Windows Event Collector (Wecsvc) service. Both of these services must be running on computers participating in the forwarding and collecting process. To learn about the steps required to configure event collecting and forwarding computers, see Configure Computers to Forward and Collect Events.
Creating a new subscription
Once you have configured the computers, you can create a subscription to specify which events to collect.
- On the collector computer, run Event Viewer as an administrator.
- Click Subscriptions in the console tree.
- On the Actions menu, click Create Subscription.
- In the Subscription Name box, type a name for the subscription.
- In the Description box, enter an optional description.
- In the Destination Log box, select the log file where collected events are to be stored. By default, collected events are stored in the ForwardedEvents log.
- Click Add and select the computers from which events are to be collected.
- Click Select Events to display the Query Filter dialog box. Use the controls in the Query Filter dialog box to specify the criteria that events must meet to be collected.
- Click OK on the Subscription Properties dialog box. The subscription will be added to the Subscriptions pane and, if the operation was successful, the Status of the subscription will be Active.
Events raised on the forwarder computers that meet the criteria of the subscription will be copied to the collector computer log specified in step 6.
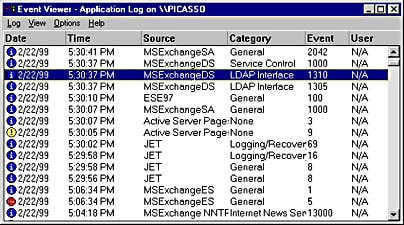
Event Viewer is around since Windows NT