
Download Links and info for EVE-NG
EVE-NG Professional Free EVE Community Edition Windows Client Side Apple OSX Client Side Linux Client Side Resource Calculator
| EVE-NG Professional/Learning Center Version 6.2.0-20 This edition requires to buy license. To buy a license please go to our Buy Section |
| Free EVE Community Edition Version 6.2.0-4 |
| Windows Client Side |
| Below one can find a Windows client side pack that will install everything necessary for running telnet, vnc, wireshark, rdp applications when working on/building labs on EVE-NGIt includes:
Download links:
|
| Apple OSX Client Side Intel / Silicon (M1) |
|---|
| Below one can find a Apple OSX client side pack that will install everything necessary for running telnet, vnc, wireshark when working on/building labs on EVE-NG It includes:
Note for RDP:Rdp protocol consoles require downloading Microsoft Remote Desktop ( Free ) on App Store Note for community users using capture:On the first usage of capture, you will have to confirm host key and to enter eve root password to create and store rsa key for further authentication. Download Link:
|
| Linux Client Side |
| EVE Resource Calculator |
|---|
|
Below you will find EVE Server resource .xlsx calculator. You can calculate approximate CPU and RAM usage per lab. NOTE: Running multi labs in the EVE, resources are summarizing. Download EVE Calculator |
Pro
Community
Integration packs
Windows
Linux
MacOS
Сайт летает на VPS от Inferno Solutions
Go to Top
Сегодня мы с вами поговорим о том, как добавляются образы устройств в эмулятор Eve-NG, рассмотрим это на примере Cisco L2, L3 и mikrotik. Напомню, что в предыдущей статья я рассказывал, как установить эмулятор eve.
Содержание
- Добавление образов Cisco
- Добавление CHR MikroTik
- Ну и на вкусное, windows в eve-ng
Первым делом подключаемся через WinSCP к нашей VM c eve, вводим ip логин и пароль. Далее переходим в каталог /opt/unetlab/addons/qemu/.
В нем создаем две папки с названием:
- viosl2-15 – это для L2 образа 15 версии;
- vios-15 – это для L3 образа 15 версии.

Сами образы внутри папок нужно назвать virtioa.qcow2 – как на рисунке ниже.

Далее для удобной работы можно также скачать и установить утилиты (если они еще у вас не стоят) которые предлагают разработчики там, putty, vnc, wireshark и тд.

После заходим по ssh на нашу виртуальную машину и вводим команду «/opt/unetlab/wrappers/unl_wrapper -a fixpermissions» для того чтобы система увидела наши добавленные образа.

Теперь можно идти в web-интерфейс EVE-NG и в нодах выбирать cisco роутер и свитч.

Соединять между собой устройства можно только выключенными, при наведении появляется маленькая вилочка, которую нужно дотянуть до другого устройства, выбрать порт которому будет подсоединено.


Зайти на устройство можно кликнув на него мышкой. Проверим командой «show cdp neighbor» видят ли устройства друг друга.

Как видим все отлично работает, образ cisco успешно добавлены в эмулятор eve.
Добавление CHR MikroTik
Добавления микротика происходит почти аналогичным образом. Заходим также на виртуалку через winscp, переходим в каталог /opt/unetlab/addons/qemu/ и создаем там папку с именем mikrotik-X где X можно писать что угодно, главное, чтобы все что до него было так.

Далее идем на mikrotik.com/download и качаем образ mikrotik CHR (Cloud Hosted Router). Скаченный файл переименовываем в «hda.qcow2» и закидываем в созданную папку.

Не забываем в консоли выполнить команду «/opt/unetlab/wrappers/unl_wrapper -a fixpermissions». Добавляем нашу виртуальную os микротика в эмулятор соединяем с реальной сетью (перед этим назначив ip интерфейсу CHR). Теперь можем зайти на него через winbox и проверить.

Ну и на вкусное, windows в eve-ng
Также в eve-ng можно добавить ос windows для этого нужно провести несколько манипуляций таких как установка, конвертация виртуалки и тд. Я это уже все сделал и предоставлю вам готовый образ windows 7×32 который нужно:
- Скачать здесь (ссылка удалена по авторским правам) и переименовать в hda.qcow2
- Создать и скопировать в папку /opt/unetlab/addons/qemu/win-7
- В терминале выполнить команду «/opt/unetlab/wrappers/unl_wrapper -a fixpermissions».
Все, спокойно добавляйте win7 как обычную ноду и стройте топологии.

Всем спасибо за внимание! Если есть вопросы пишите в комментариях.
Вы хорошо разбираетесь в Микротиках? Или впервые недавно столкнулись с этим оборудованием и не знаете, с какой стороны к нему подступиться? В обоих случаях вы найдете для себя полезную информацию в углубленном курсе «Администрирование сетевых устройств MikroTik». В курсе много практических лабораторных работ по результату выполнения которых вы получите обратную связь. После окончания обучения вы получите диплом гос. образца РФ. Подробности и доступ к началу курса бесплатно тут.
Are you new to EVE-NG? Don’t worry! This tutorial is designed for beginners and aims to guide you through installing and configuring EVE-NG on your computer. Whether you have prior experience, this tutorial will provide the essential steps to ensure a successful installation and setup.
We’ll be with you every step of the way, providing clear instructions to help you successfully install EVE-NG. From installing VMware Player to creating your first lab, we’ll ensure you have everything you need. We’ll even guide you through configuring your first EVE-NG lab.
So don’t worry; by the end of this tutorial, you’ll feel confident and accomplished in setting up your EVE-Ng environment. Ready? Let’s go!
(NOTE: The Ultimate Free EVE-NG Course – Master network simulation with our step-by-step guide and elevate your skills from beginner to pro. Start your free course now!)
Table of contents
- What is EVE-NG?
- Getting Started with EVE-NG
- Exploring the Three Versions of EVE-NG Licenses
- Before You Begin, Here’s What You Need
- Minimum System Requirements
- VMware Workstation Player
- EVE-NG Community Edition
- WinSCP
- EVE-NG Windows Client Side
- vIOS Router Image (I will provide you the download link )
- Step 1. VMware Workstation Player Installation
- Step 2. How to Download and Install EVE-NG
- Step 3. Creating Your First Lab in EVE-NG
- Step 4. How to Start Building Your First EVE-NG Lab
- Step 5. How to Configure Static Routing on a Cisco Router
- Wrapping Up Your EVE-NG Journey
- Where to Go From Here
What is EVE-NG?
EVE-NG is a popular network emulation software that allows individuals and organizations to design, configure, and test various network scenarios. It’s designed for both educational purposes and real-world network testing and development. EVE-NG provides a flexible and scalable environment for emulating complex network topologies, including routers, switches, firewalls, and more, all within a virtualized environment. There are three versions of EVE-NG licenses. The community version is free, the pro version is paid, and the learning center is ideal for IT learning centers or universities.
Getting Started with EVE-NG
You might be wondering, Which version of EVE-NG should I install? Great question! If you’re unsure which version of EVE-NG to install, don’t worry—I’ll help! We’ll go through each version step by step to ensure you choose the right one for your needs. Let’s examine each version of EVE-NG and see what sets them apart.
Exploring the Three Versions of EVE-NG Licenses
EVE-NG offers three main licensing options: the Free Community Edition, the Paid Pro Version, and the Ideal Learning Center Option.
- EVE-NG Community: The Free Community Edition of EVE-NG allows users to explore and experiment with the software without financial commitment. This version provides basic functionalities and features that allow users to set up and manage virtual networks. While it may have limitations, such as restricted access to some advanced features or restricted usage of commercial images, the Free Community Version is still a valuable resource for network enthusiasts, students, or professionals on a budget.
- EVE-NG Professional or Pro: On the other hand, the Paid Pro Version of EVE-NG offers an enhanced experience with additional features and advanced functionalities. By subscribing to the Pro Version, users can access a wider range of network appliances and images, allowing for more comprehensive network simulations. This license also provides priority support from the EVE-NG team, ensuring prompt assistance whenever needed. The Paid Pro Version caters to individuals and organizations requiring a more extensive network environment for testing, research, or training purposes and is willing to invest in a premium experience.
- EVE-NG Learning Center: Lastly, the Ideal Learning Center Option is explicitly designed for educational institutions or training centers that aim to incorporate EVE-NG into their networking curriculum. This option provides extensive benefits for instructors and students alike. It offers seamless integration with learning management systems (LMS), simplifying virtual labs’ setup and management for large-scale deployments. Furthermore, the Ideal Learning Center Option includes dedicated technical support and ongoing updates to ensure a smooth and uninterrupted learning experience. Educational institutions can optimize their network training programs and empower their students with practical, hands-on experience by choosing this option.
In conclusion, EVE-NG offers a range of licensing options tailored to different needs and requirements. A suitable EVE-NG license is available whether you are an individual looking to learn and experiment with network configurations, a professional needing advanced functionalities, or an educational institution or training center seeking an ideal networking education platform. So, explore the licensing options to find the perfect fit for your networking endeavors.
Before You Begin, Here’s What You Need
Before installing your EVE-NG, you’ll need a few essential things. Let’s break down each of these so you know exactly what to look for and how to get started.
Minimum System Requirements
Knowing the minimum system requirements is essential to ensure a smooth installation process. According to the EVE-NG team, you will need at least a 64-bit operating system, 8GB of RAM,10 GB of free space, and a quad-core CPU. An SSD is also recommended for better performance. Meeting these requirements allows you to enjoy a seamless experience while exploring various networking scenarios on EVE-NG.
VMware Workstation Player
VMware Workstation Player is a handy program that offers a great solution for running a virtual computer on your own physical computer. It’s completely free and serves as a necessary tool for installing EVE-NG. To get it, click the link below and download the free version of VMware Workstation Player.
→ Get your free copy of VMware Workstation Player
In this tutorial, we will use the free EVE-NG Community Edition. This makes it a perfect choice for beginners seeking hands-on experience or individuals who want to practice specifically for the Cisco exam. Later in the tutorial, we will cover the installation process of EVE-NG.
WinSCP
For Windows Secure Copy, WinSCP is a file management software designed for the Windows operating system. It provides a secure and reliable way to transfer files through SSH (Secure Shell) and SFTP (Secure File Transfer Protocol). If we want to use image files in eve-ng, we must upload and install them. We need images to upload the file.
→ Get your free copy of WinSCP
EVE-NG Windows Client Side
The EVE-NG Windows Client Side is a handy tool that enables us to connect conveniently to network nodes within EVE-NG labs. Using the EVE-NG Client pack, we can seamlessly interact with network nodes and carry out various tasks. This tool supports telnet/ssh and vnc protocols, which provide secure and efficient connectivity options.
vIOS Router Image (I will provide you the download link )
IOSv is a virtual version of Cisco IOS that operates as a complete virtual machine on a hypervisor. This allows users to simulate the functionality and features of Cisco IOS without having to install it on hardware physically, and running it as a virtual machine offers network administrators and professionals greater flexibility, scalability, and convenience. It is a valuable tool for testing, learning, and experimentation in a virtual environment.
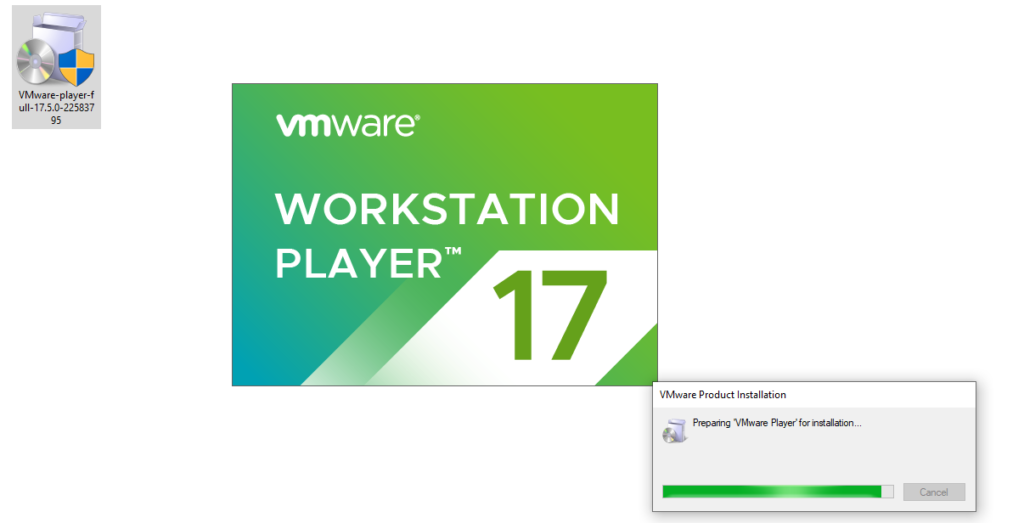
Step 1. VMware Workstation Player Installation
For EVE-NG installation, the easiest way is to install it over VMware Player or Workstation. As VMware Player is the free version and there is no need to pay for a license, we will install EVE-NG over VMware Player, making it easy for you to elaborate on the installation.
1. Once you download the Setup file, you should see the downloaded file like the below screenshot.
2. Then it would be best if you double-click on the VMware Player Setup file to install it on you’re PC.
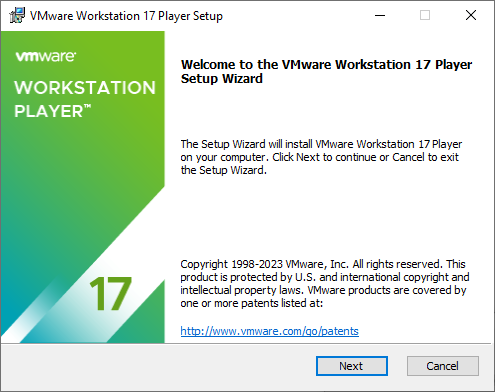
3. Once the wizard is ready for installation, click on → Next to initiate the installation.
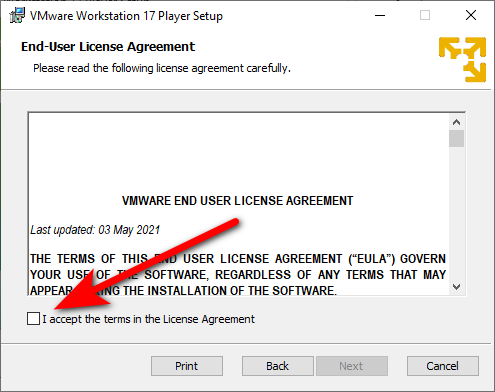
4. We need to accept the license agreements.
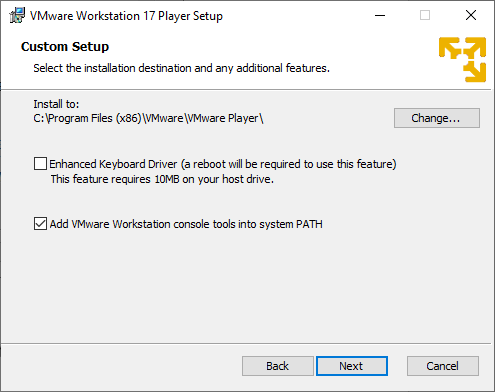
5. In this stage, we can select the Enhance Keyword Driver option or leave it unchecked.
Click on → Next.
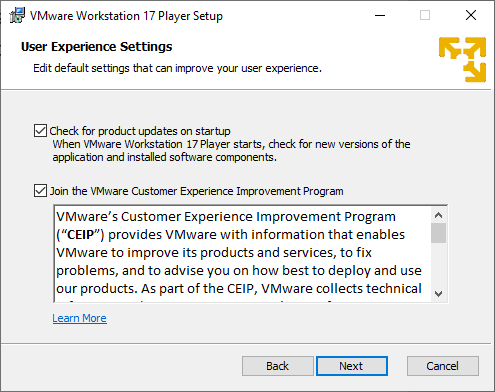
6. Next, you must decide whether to get a new product update or join the VMware Customers Experience Improvement Program, which we are leaving to the default and will click → Next.
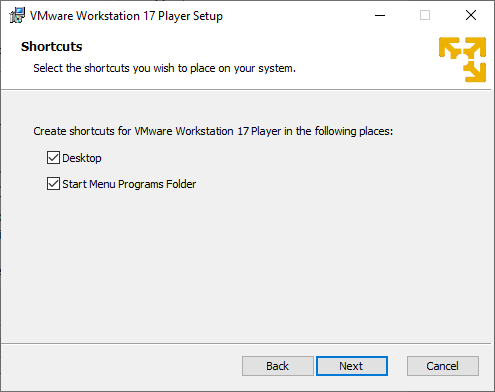
7. We can create an icon on the Desktop or Start Menu and click → Next.
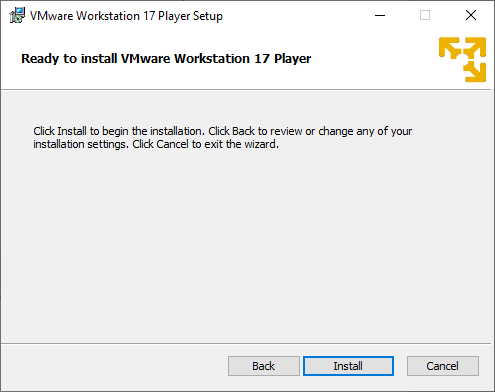
8. Now is the time to install a VMware workstation on your Windows PC. Click → Install.
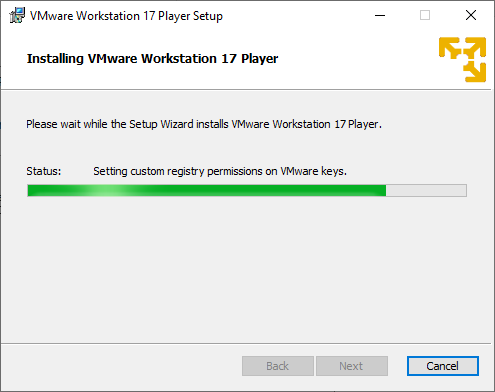
9. Please Wait!…
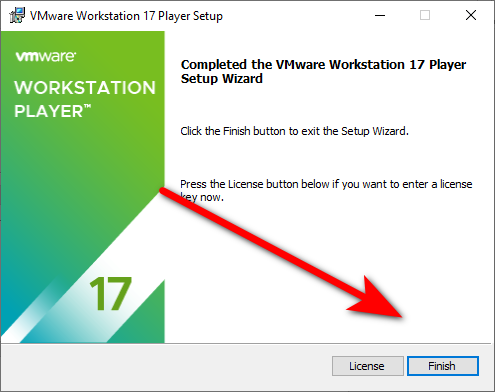
10. Great, the VMware Workstation Player is ready. To install EVE-NG in our system, Click on and click → Finish.
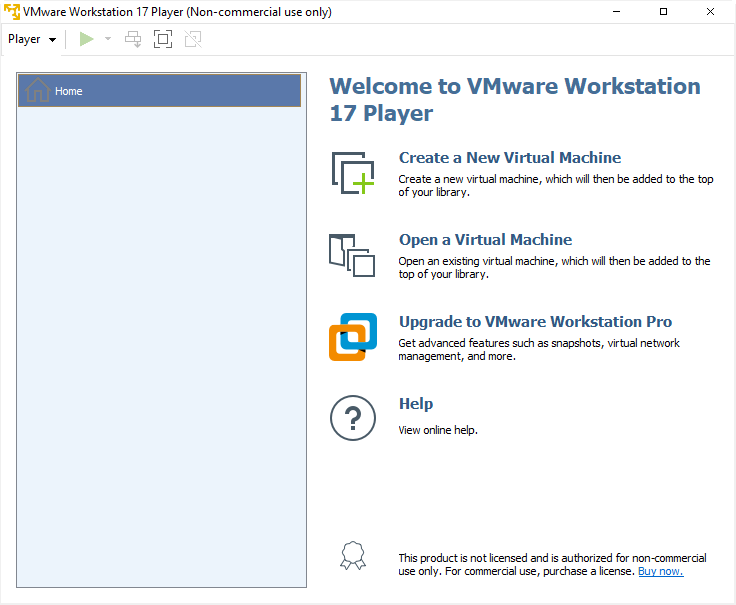
11. The VMware Player icon is on the desktop. It would be best to double-click on it.
12. We have two choices. We can select the free, non-commercial version by clicking the option below and then Clicking on it and clicking → Continue.
13. Lastly, click on →Finish.
14. Now, the VMware Workstation Player is ready for you.
Step 2. How to Download and Install EVE-NG
Now is the time to download the latest EVE-NG OVA file. Don’t worry if you’re looking for the EVE-NG OVA file; we’ve covered you. You can directly download it by visiting this link. Additionally, if you prefer to download the iso file, you can visit the EVE-NG website and obtain it through the provided link.
Note — The OVA version of EVE-NG has been removed from their website, and only the ISO version is currently available. We recognize that using the OVA is the simplest method for installation on a virtualizer. Therefore, we have produced an OVA version from the ISO for your convenience. To access the download link, please Download EVE-NG community OVA.
(NOTE: The Ultimate Free EVE-NG Course – Master network simulation with our step-by-step guide and elevate your skills from beginner to pro. Start your free course now!)
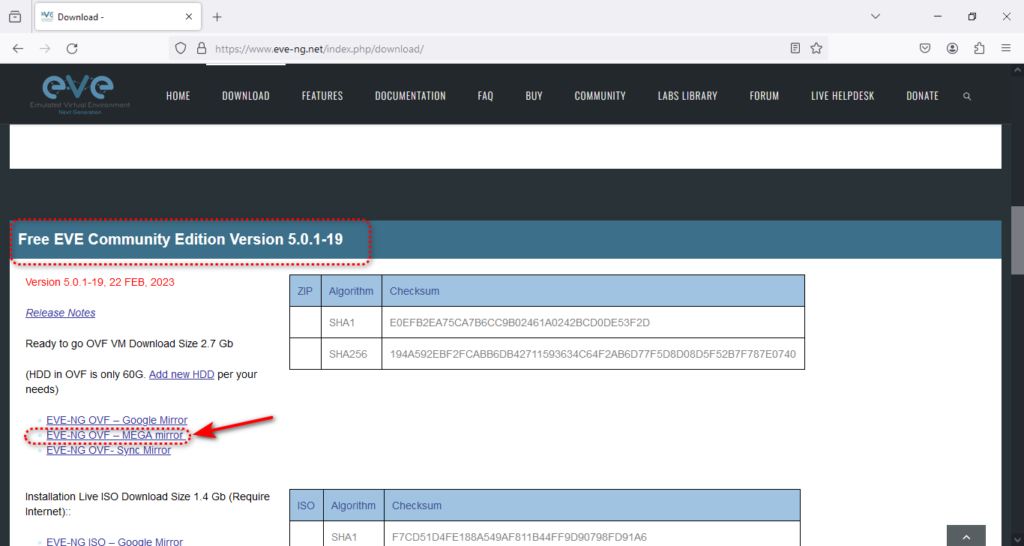
Now is the time to download the eve-ng ovf the file, like the screenshot below.
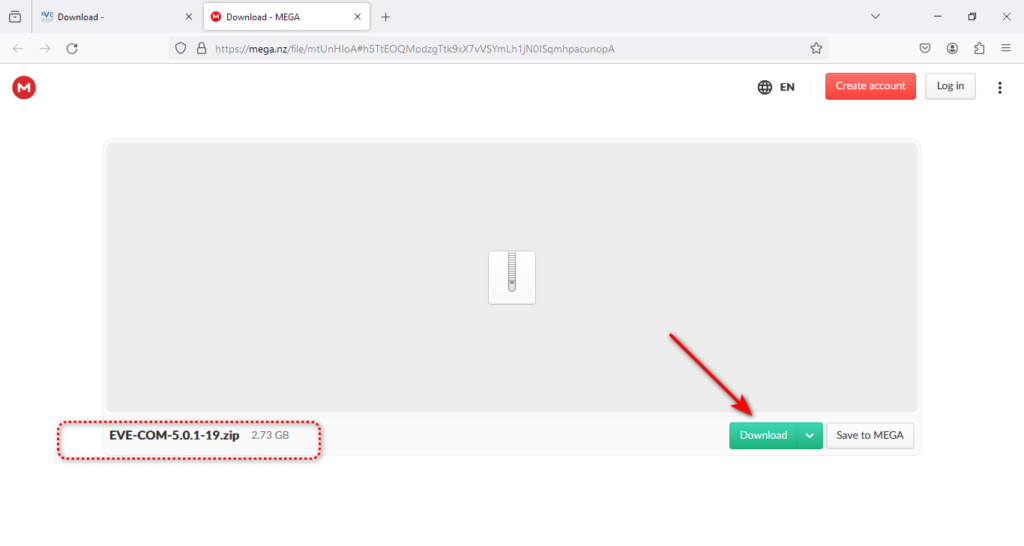
Then, you should see the downloaded file like this.
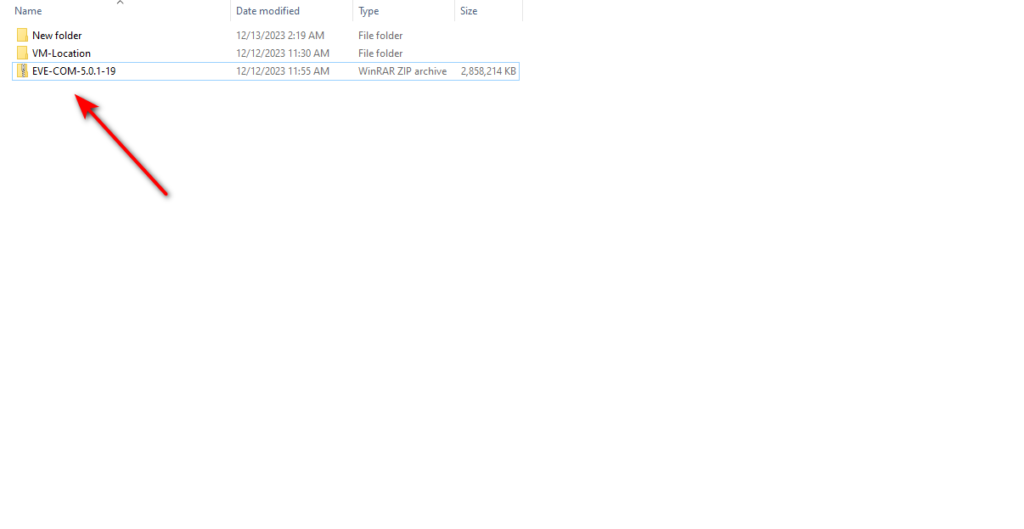
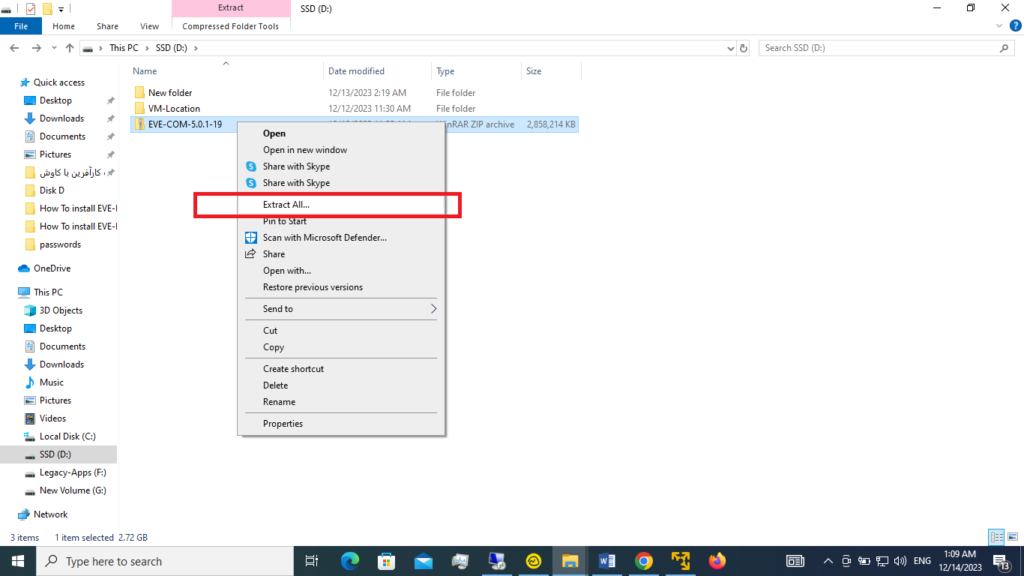
The downloaded file is a zip file. You must extract it to get the off format and install it on your VMware Player. To do that, right-click on the downloaded file and select the “Extract All” option.
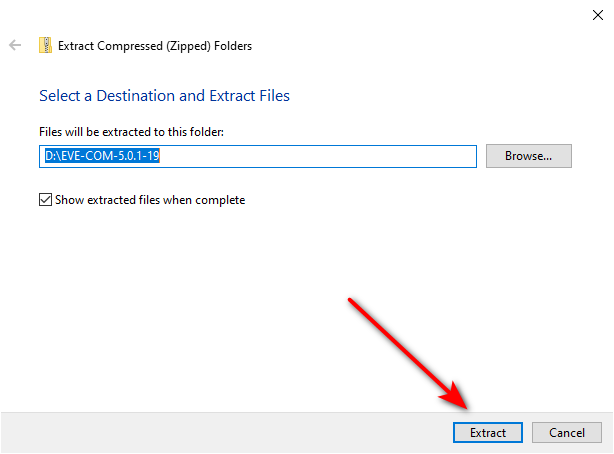
Then, you need to click on the extract option.
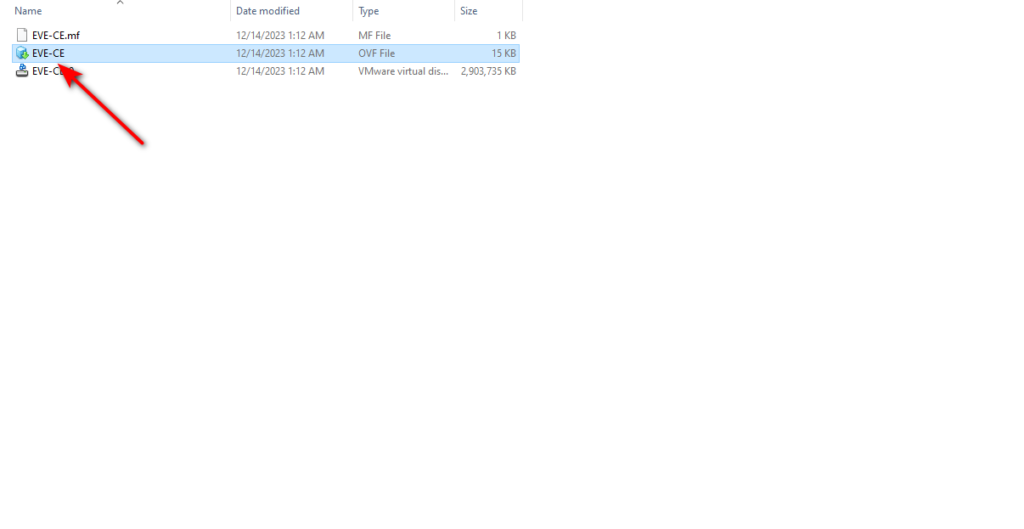
Now you need to go to the extracted folder to see the Ovf format of eve-ng.

In the extracted folder, you can see the off file. At this stage, you need to double-click on the file and install the eve-ng of the file in Vmware Player.
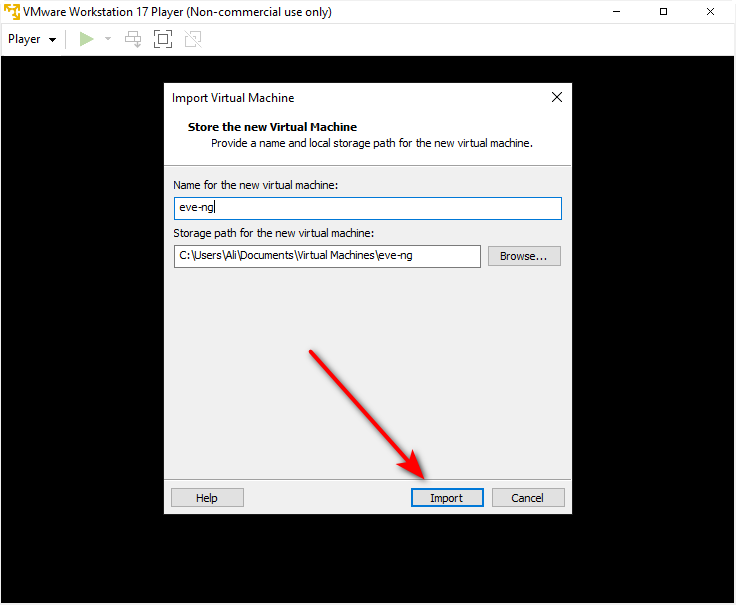
Then, you need to give the VM a name, specify its storage path, and click on import.
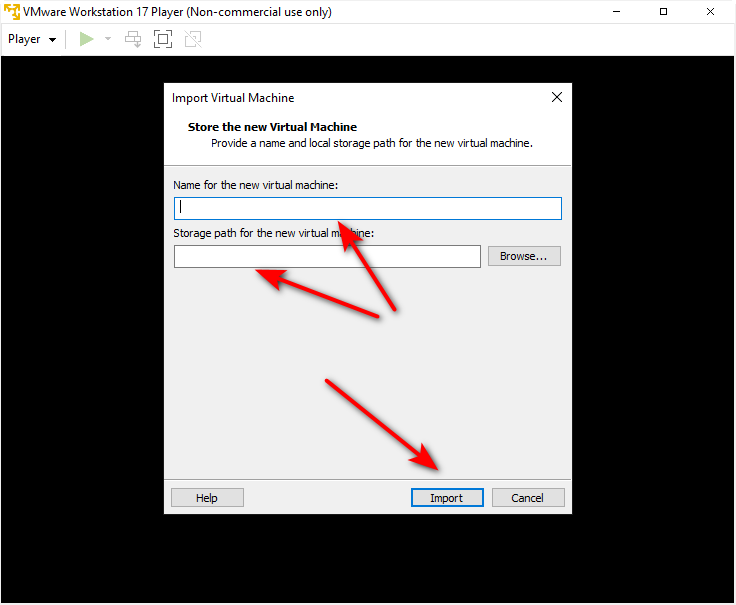
Like the screenshot below.
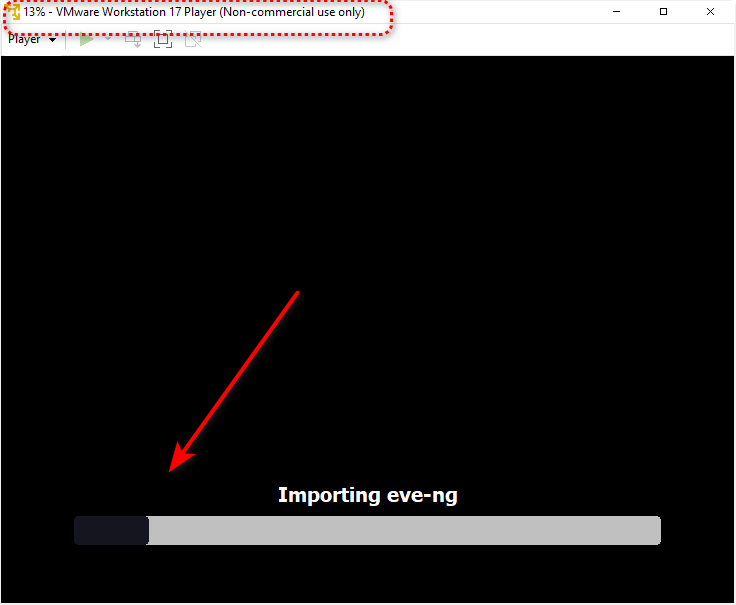
You can see the installation process at this stage, which might take 5 to 10 minutes.
When the installation is finished, the eve-ng VM will start booting automatically. It would be best to wait to see if the installation is completed, and you should see the eve-ng VM IP.
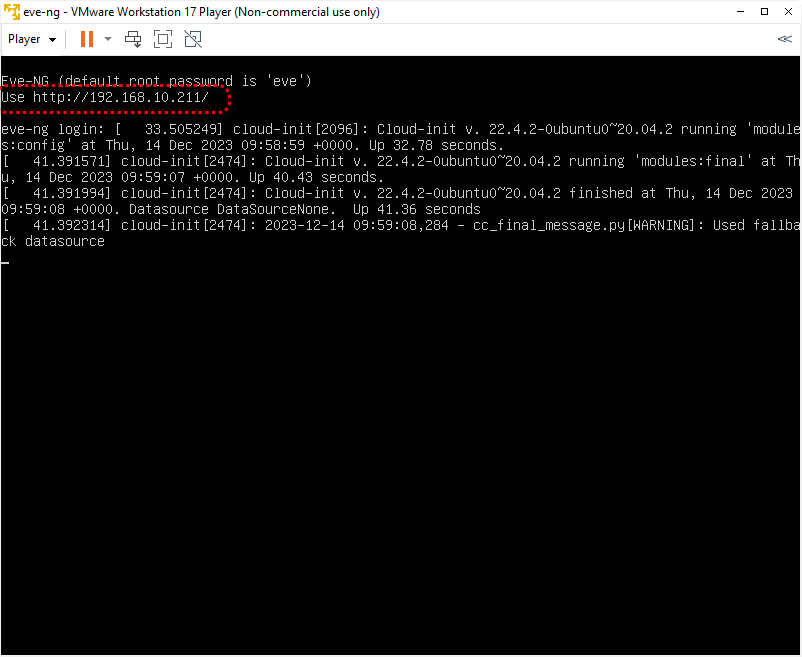
Now is the time to connect to the EVE-NG web console. The default credentials for the web are admin/eve, and for cli, they are root/eve. And make sure you have selected the native console option.
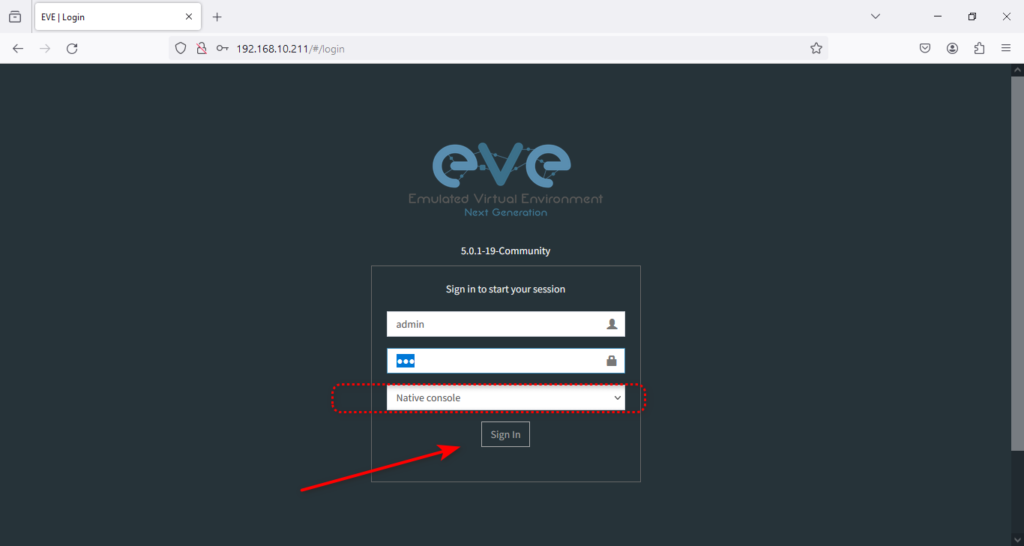
Congratulations, you have successfully installed EVE-NG on VMware Player.
Step 3. Creating Your First Lab in EVE-NG
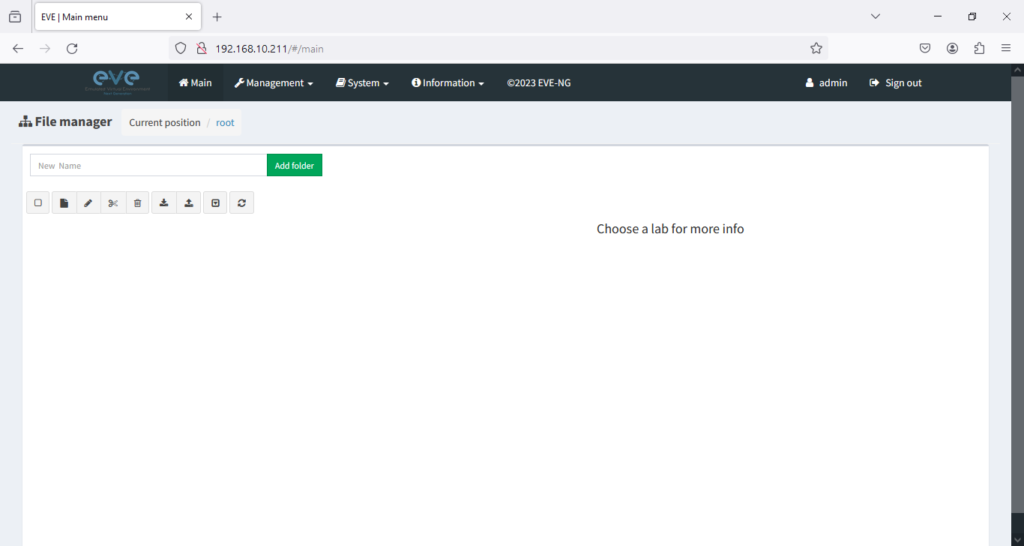
Creating your first lab in EVE-NG is quite simple. To begin, open the EVE-NG web interface and login to your account.
After logging in, you will be greeted by a screen that resembles the image below.
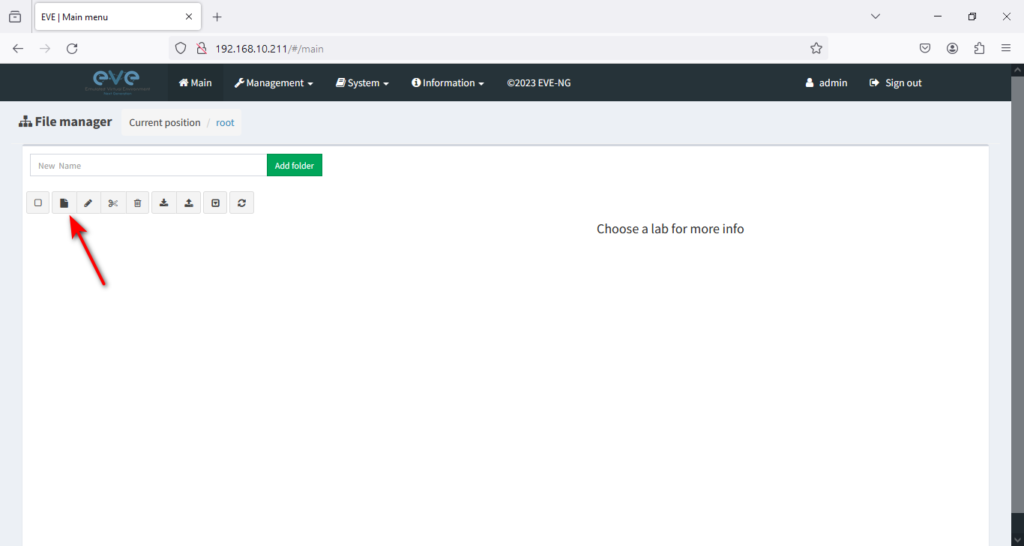
Next, click on the New Lab icon to create a new lab.
This will open a window. You need to give the lab a name, author, description, and task and click on → Save.
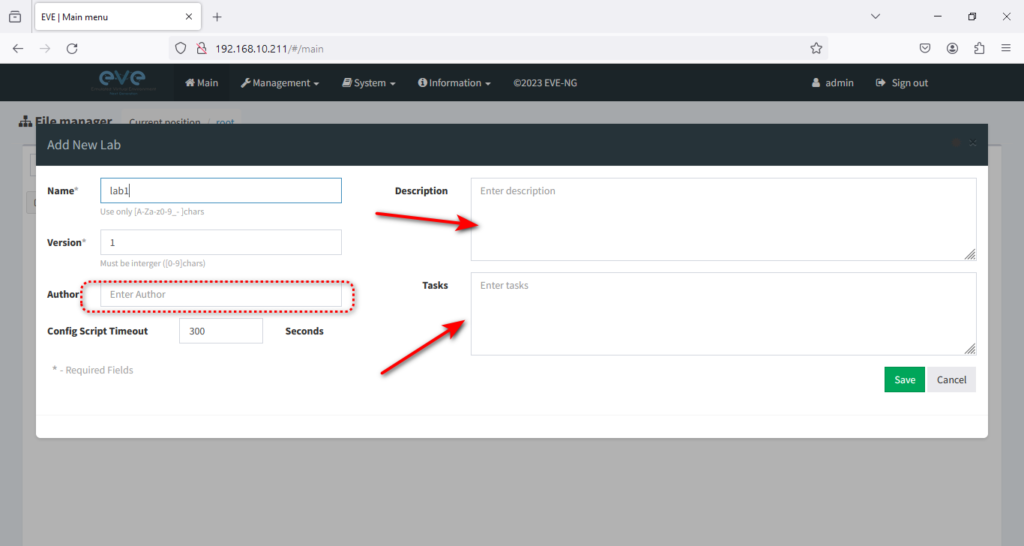
Once you have saved the new lab information, a redirect will take you to a new page. This page will allow you to begin crafting your desired scenario.
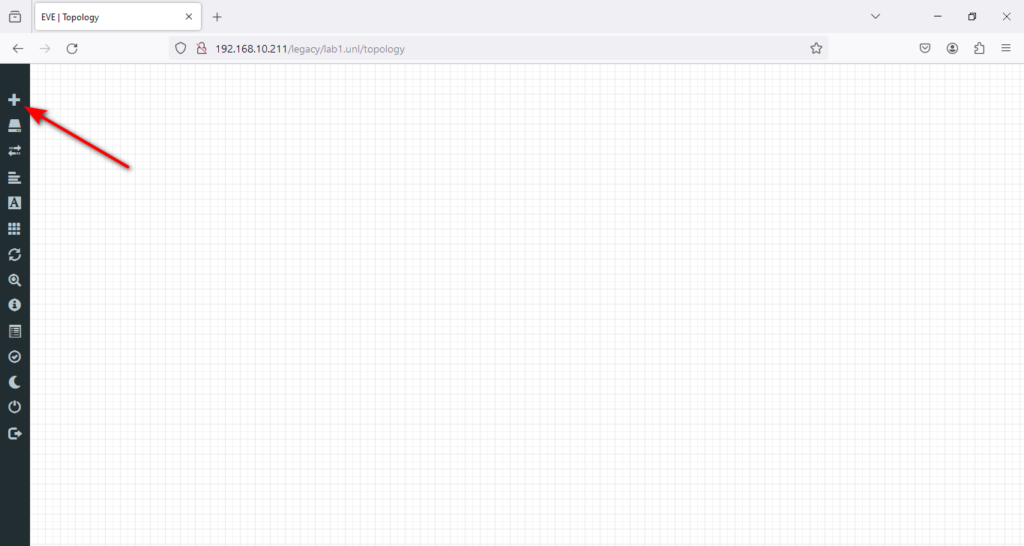
To begin, you only have to click on the + icon. This will allow you to add a node and start with whatever task you have. It’s a straightforward process that doesn’t require much explanation. So, click on that + icon to begin your journey!
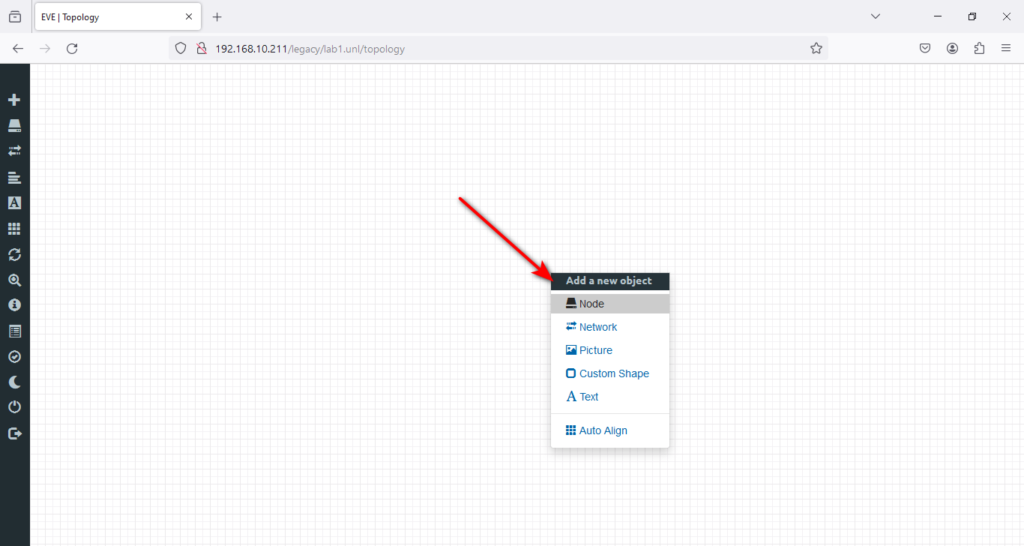
Or right-click on the lab and select Node.
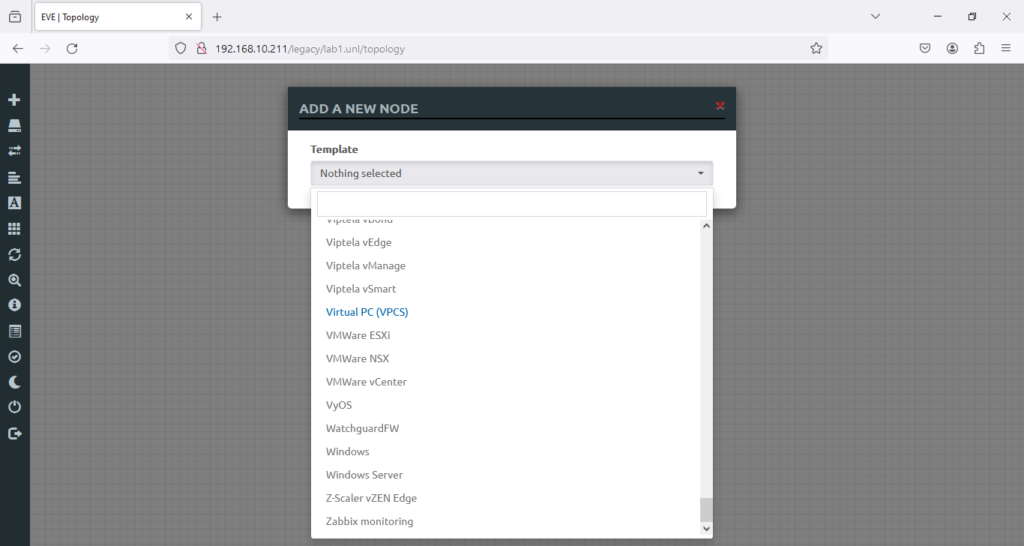
As you can see, no image is installed, and you need to install a new image to start your first lab. The only image available is the VPCs node, which is great for a client node. I will install the Cisco IOSv Router as it’s a standard router that we can use to start creating a lab and practice static routing in the lab.
Free Download — Cisco IOSv Router for EVE-NG
To receive the link, all you need to do is enter your best email address in the form provided below, and I’ll send it right away.
I’m going to install this version of vIOS router vios-adventerprisek9-m.spa.158-3.m2 (which you might have downloaded it from the above link)
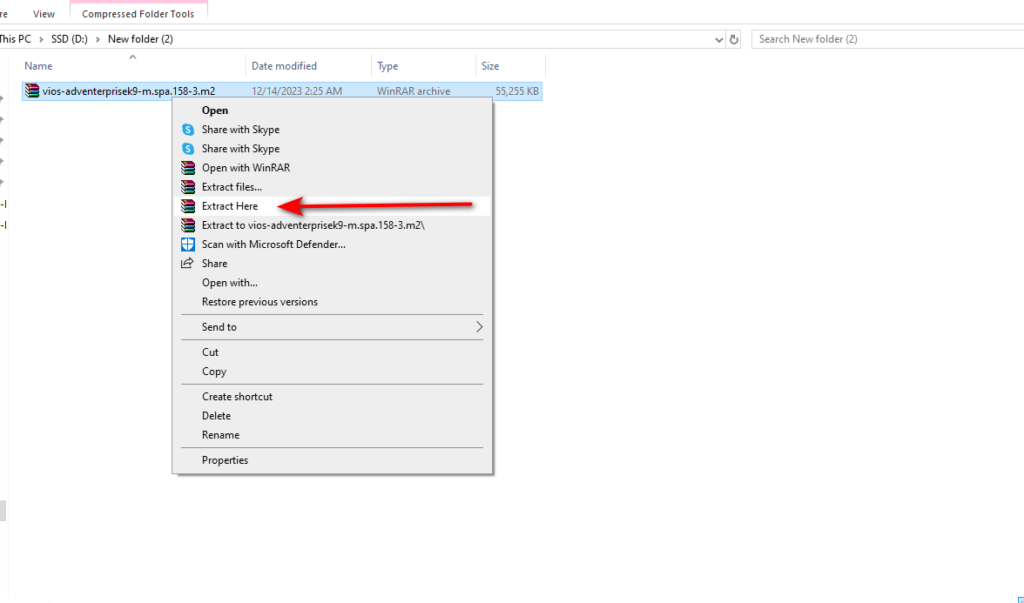
Note that the image format is in qcow2 format and compressed in zip format; you must unzip it first. Like the screenshot below, choose → Extract here or → Extract all.
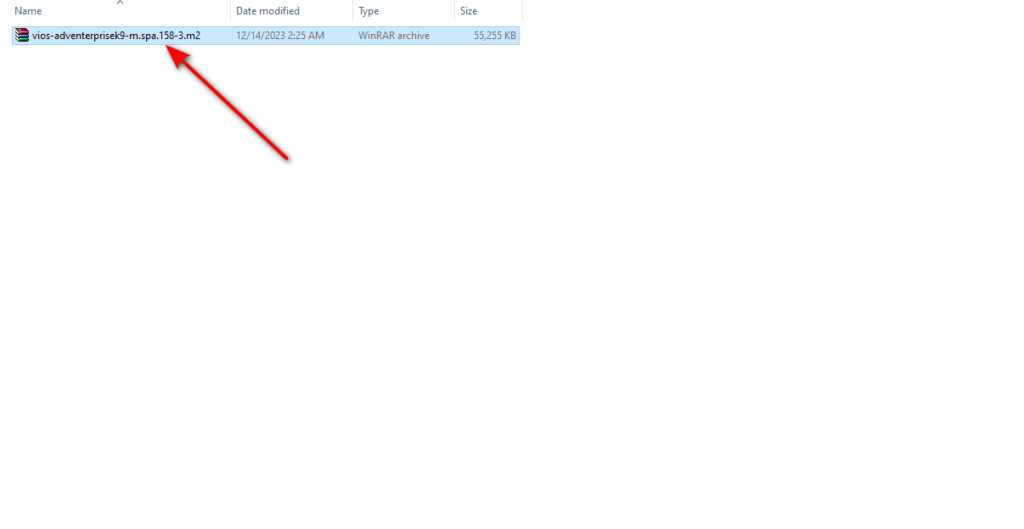
Right-click the image and select the Extract Here option in WinRAR or 7zip.
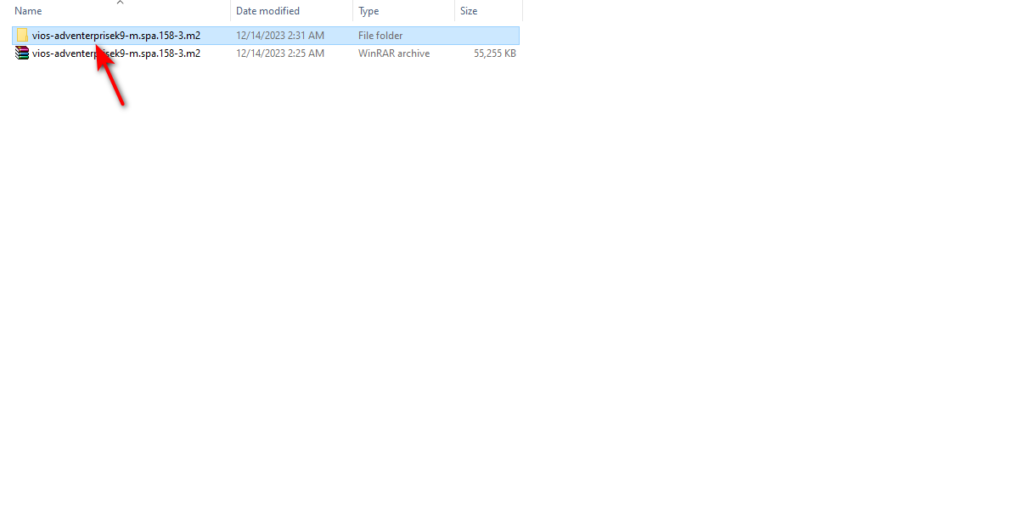
After extraction, you will see the image folder name and qemu image name, which we have prepared for you. You only need to upload it to your eve-ng.
Tip — Please do not change the folder and image file name.
We need to download WinSCP or FileZilla to upload this image to the desired directory on our EVE-NG.
Here is the directory path: →/opt/unetlab/addons/qemu
To upload the necessary image in EVE-NG, you must install WinSCP. If you are unsure how to install WinSCP, refer to the video tutorial below. It will guide you through the process with easy-to-follow instructions.
If you’d like to try WinScp, you can easily download it by visiting its official website at WinScp. Alternatively, you can also download it from the right → Get WinScp.
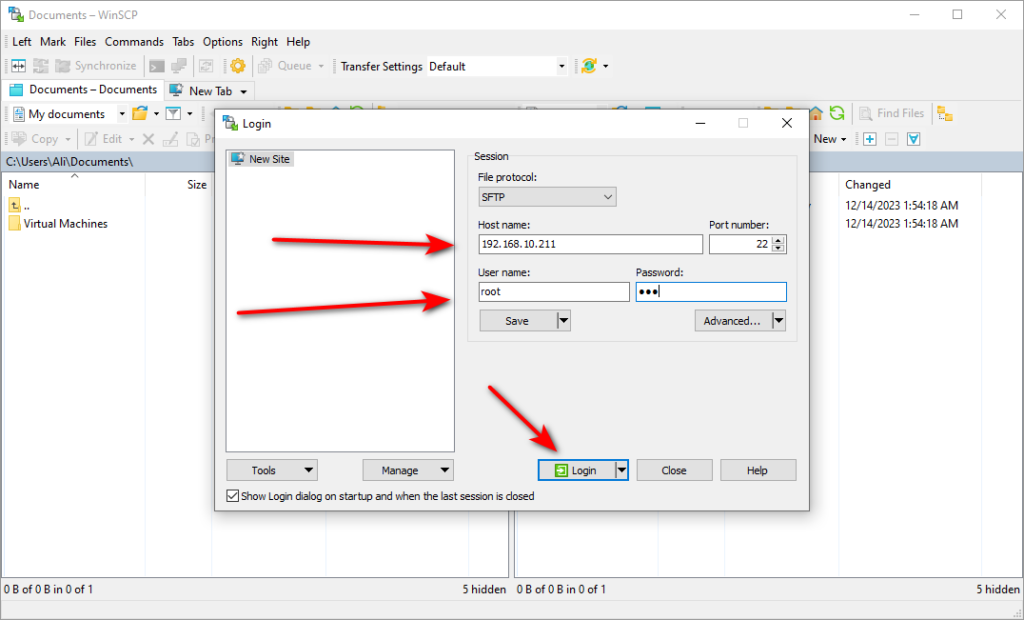
Now, we need to connect to EVE-NG with Winscp.
We need the EVE-NG IP and CLI username, which is the root. The password is eve, and the port is 22. Then, we will hit log in.
Tip—If you recall from the screenshot below, you can find your EVE-NG IP address and connect to it with Winscp.
Now is the time to connect to EVE-NG VM with IP and credential, which is default {root/eve}
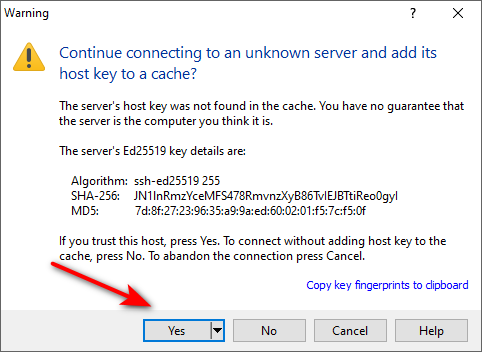
At first login, we need to accept the warning below.
As shown in the screenshot below, the red area is your EVE-NG server, and the blue area is your PC. We need to upload the image from your computer to this EVE-NG directory.
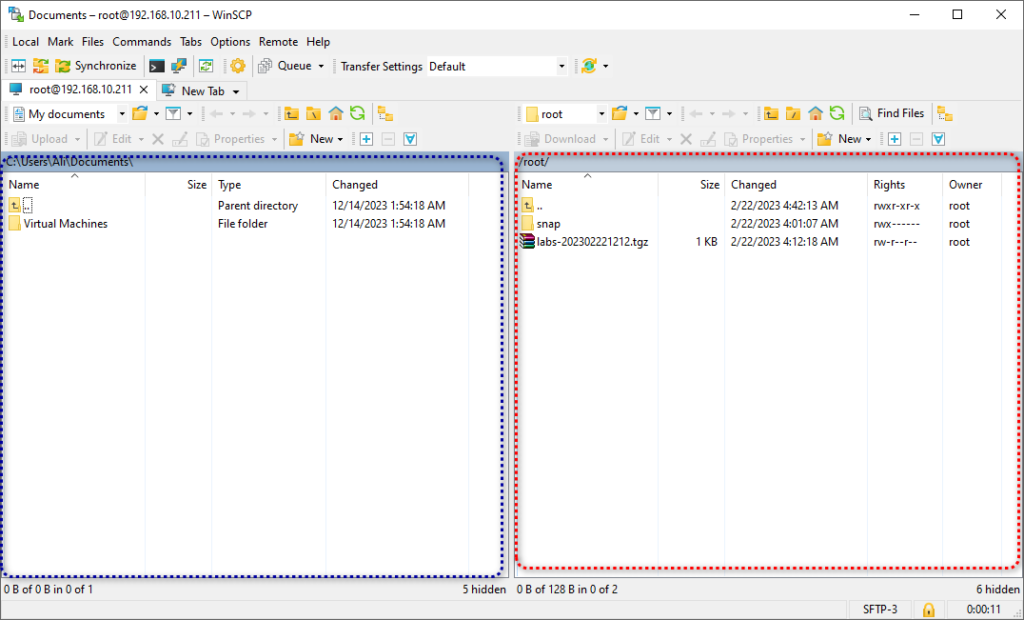
To upload the image from your computer to the EVE-NG directory, refer to the video below. It will guide you through the process step by step.
After successfully uploading the vIOS router, we can return to the eve-ng dashboard and continue with our work.
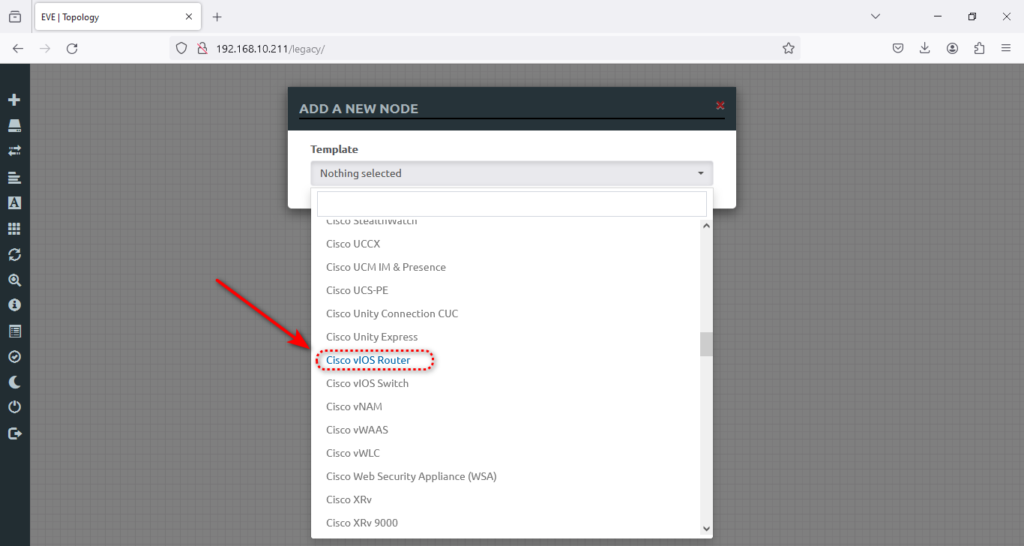
Will click on the router and accept the default settings.
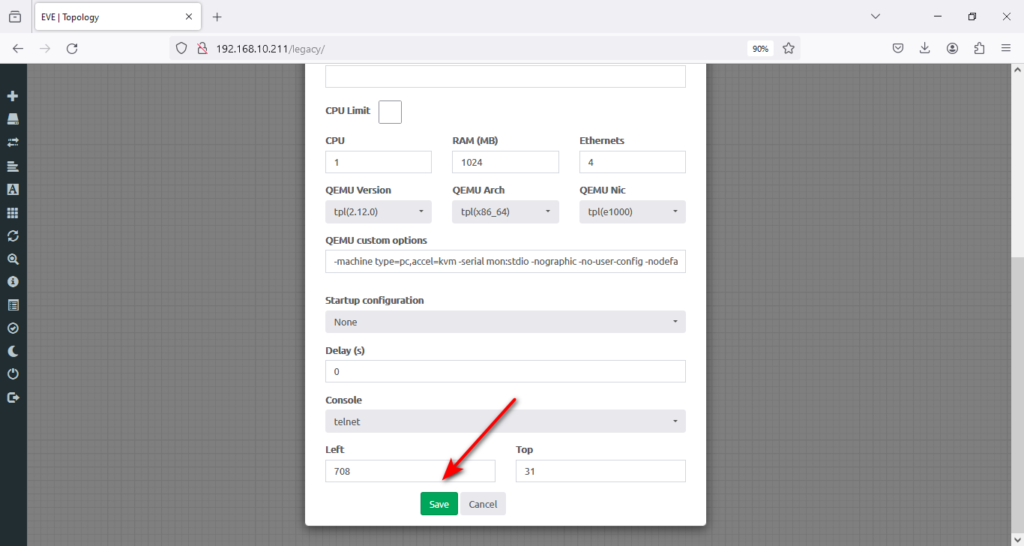
Finish.
Step 4. How to Start Building Your First EVE-NG Lab
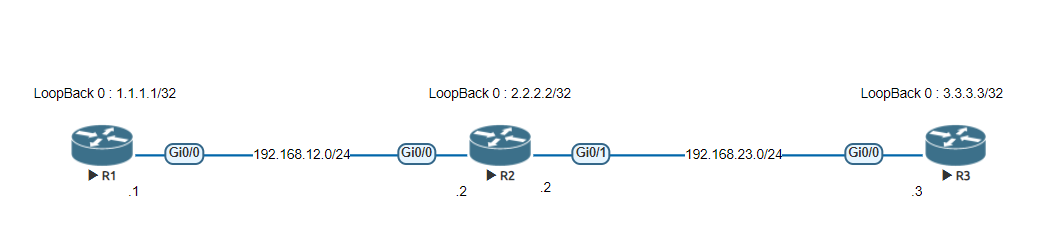
Now is the time to build an EVE-NG lab for static routing, one of the crucial majors in Cisco technology. We need to add two more Vios routers to connect them and start practicing static routing. The scenario should be like this (I will upload the lab .unl file, too, where you can easily import it and you don’t need to create this lab from scratch)
To create this scenario, we need to give each router a name. Which are R1, R2, and R3.
1. To do that, right-click the first router and select the Edit option.
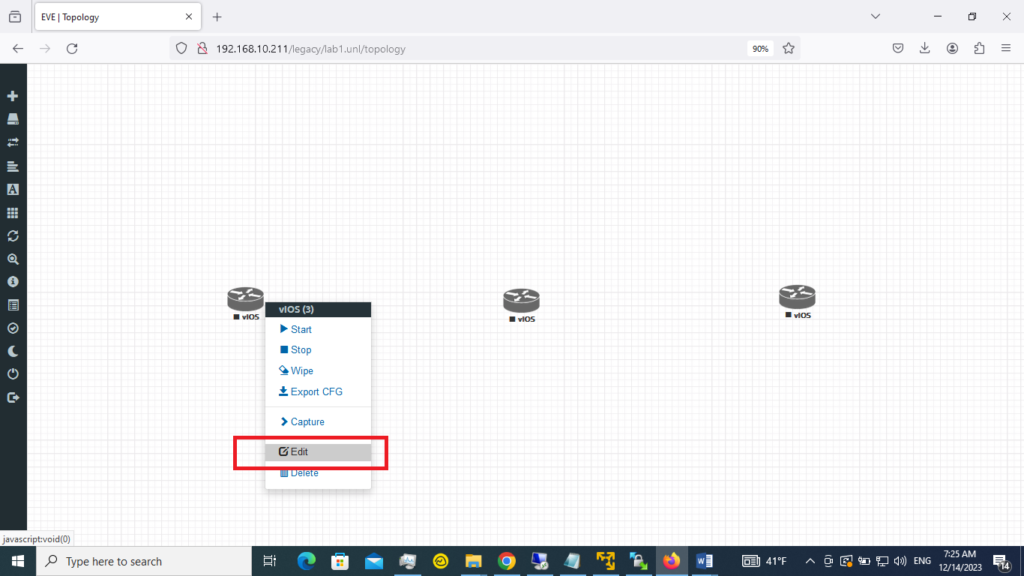
2. Then, I will type a name in Name/prefix, R1.
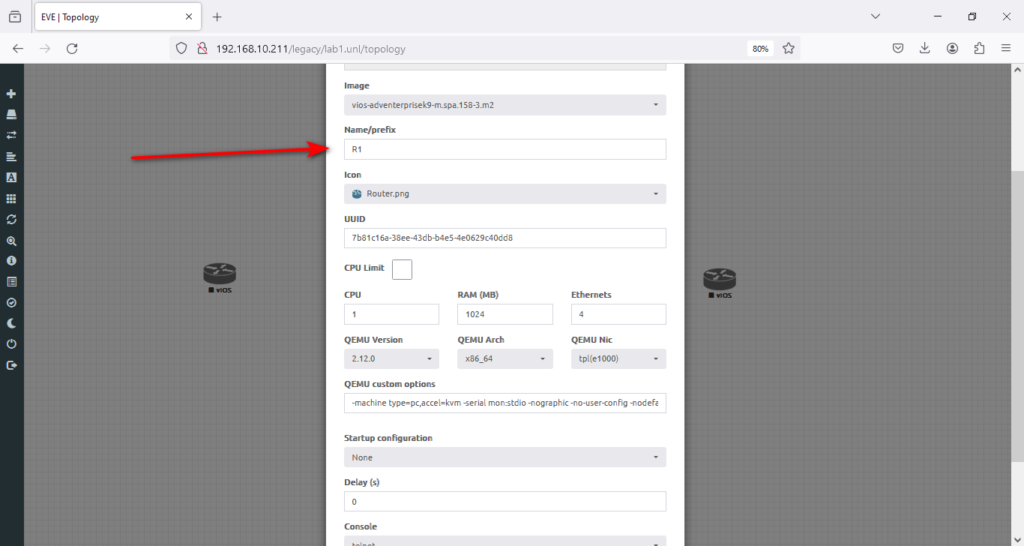
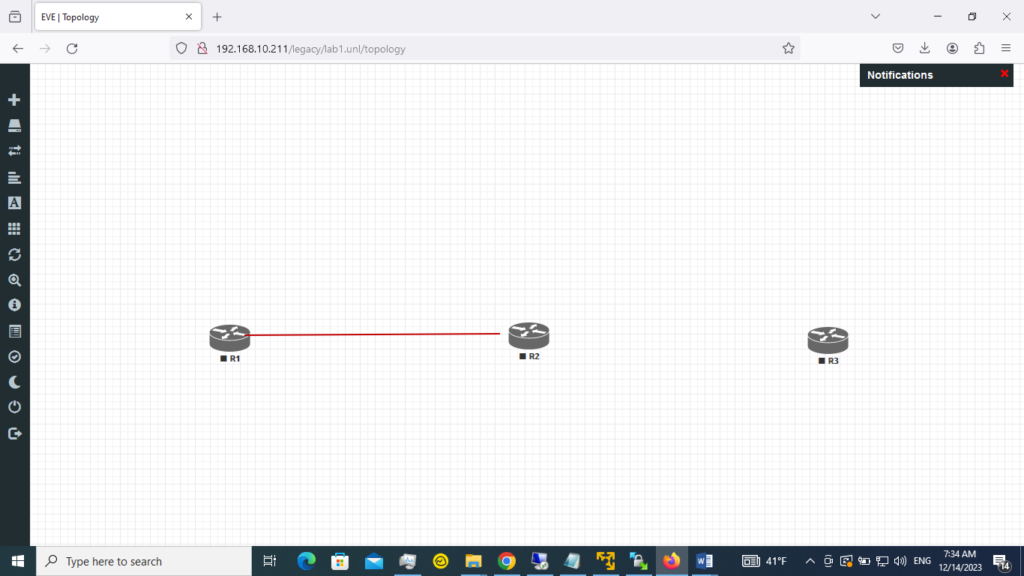
3. Then, I will hit save. Now, assign all images a desired name, R2 and R3. Once finished, you must see R1, R2, and R3 in the lab. You should see the plug button by hovering the cursor over the router. What we need here is to connect the routers.

4. Select R1 and connect it to R2; drag the mouse from R1 to R2 by choosing the plug button.
5. Here, we will accept the default connections for both routers in the G0/0 interface.
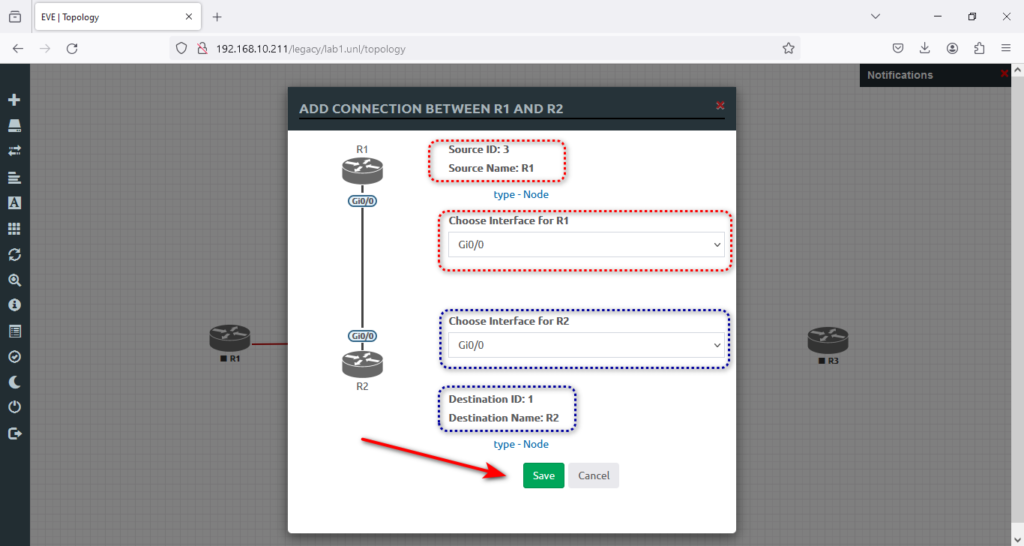
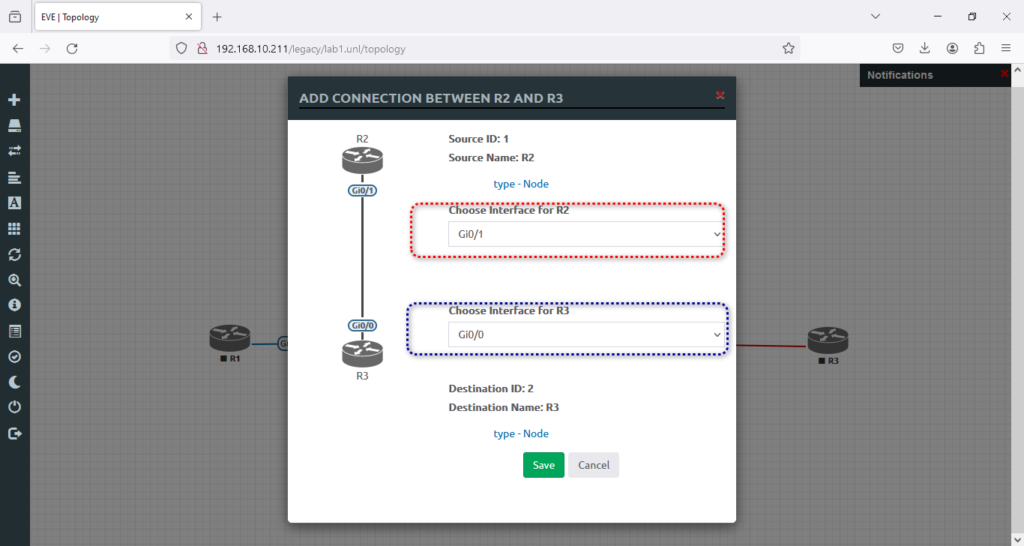
6. And now is the time to connect R2 to R3, like the screenshot below, and will hit → Save.
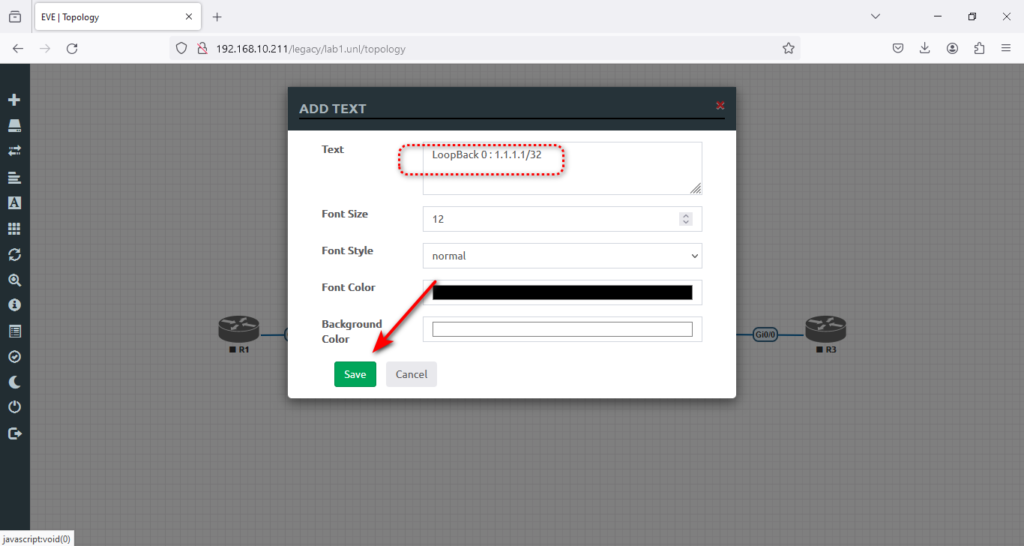
7. Now, we need text notes to understand the topology much better. This will help you focus while practicing in the lab. To do that, click and select text at the top of the R1. Then type LoopBack 0: 1.1.1.1/32 and hit → Save.
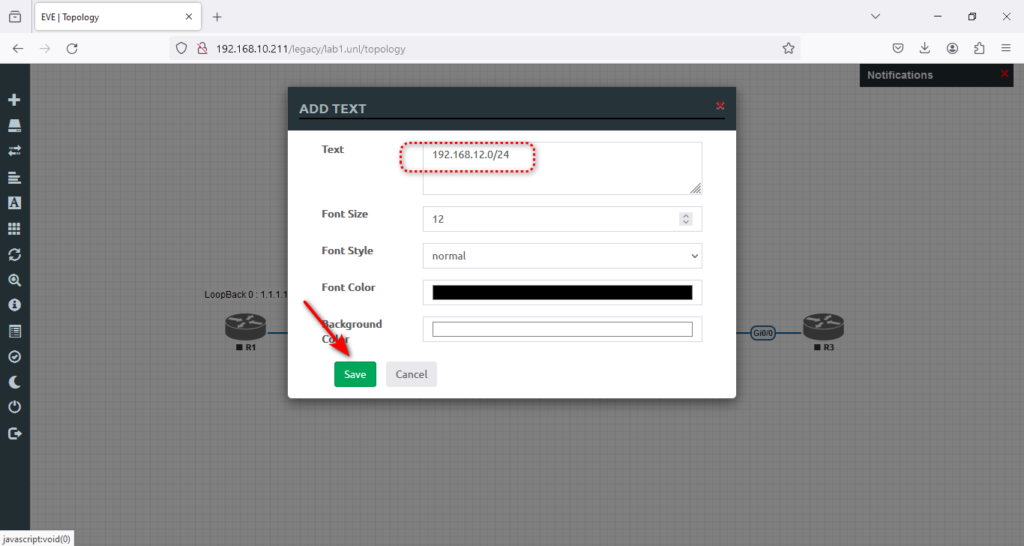
8. We need to add the IP range between routers R1 and R2 and then between R2 and R3. Again, we must right-click the area between R1 and R2 to add a text note.
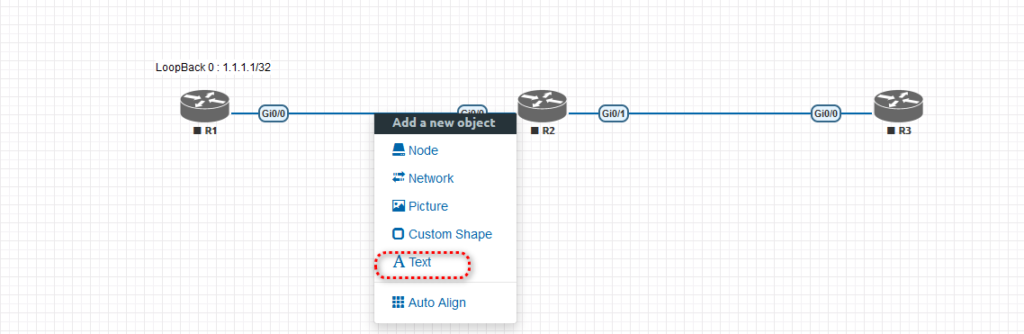
9. You may need to set the text position in the middle of two routers, R1 and R2.

10. So now I need you to add the rest of the text, like the screenshot below, to finish the lab creation.
Great job. Now, here are the lab details.
NOTE — The Ultimate Free EVE-NG Course – Master network simulation with our step-by-step guide and elevate your skills from beginner to pro. Start your free course now!
Step 5. How to Configure Static Routing on a Cisco Router
Static route configuration is a fundamental skill. There are several methods to configure static routes on a Cisco router, each with pros and cons. As a Cisco engineer and in the Cisco CCNA exam, you will be expected to know how to configure static routes via any of the methods available in Cisco IOS.
Lab Objective
This lab exercise aims to configure static routes via Ethernet interfaces between 3 routers. This lab also validates the configured static routes.
LAB: Static Route v1.0
Level: CCNA / Basic
Approximate time: 20 minutes
Preferred image: vios-adventerprisek9-m.SPA.159-3.M6
This LAB will cover topics of
Chapter 16: Configuring IPv4 Addresses and Static Routes
For more information, we suggest “CCNA 200-301, Volume 1 Official Cert Guide.”


Commands Guide:
All commands in this document have this style:
 # Interface gig 0/0
If any option specified with italic letters means that you must replace the keyword with a desired value, for example:
 # ip address ip_address  subnet_mask
 # ip address 192.168.10.1 255.255.255.0
And finally, if we mention something in {}, it means that you must use one of the options
# Show ip route| Router | LoopBack 0 | Gi 0/0 | Gi 0/1 |
|---|---|---|---|
| R1 | 1.1.1.1/32 | 192.168.12.1/24 | – |
| R2 | 2.2.2.2/32 | 192.168.12.2/24 | 192.168.23.2/24 |
| R3 | 3.3.3.3/32 | 192.168.23.3/24 | – |
In order to access the router in our lab, we need to install the Windows integration Client pack on our Windows system. Otherwise, we won’t be able to console any nodes in the lab. Below is how to download and initiate the installation.
You should see the downloaded file like this, and you need to double-click and install it.
Tip — You need to accept all the prerequisite files during installation. The wizard will install Putty, VNC client, and Wireshark, and you must take all of that as they are prerequisites and mandatory and must be installed on your system. Below, you can see step-by-step instructions. What I need is to install it like the screenshots below.
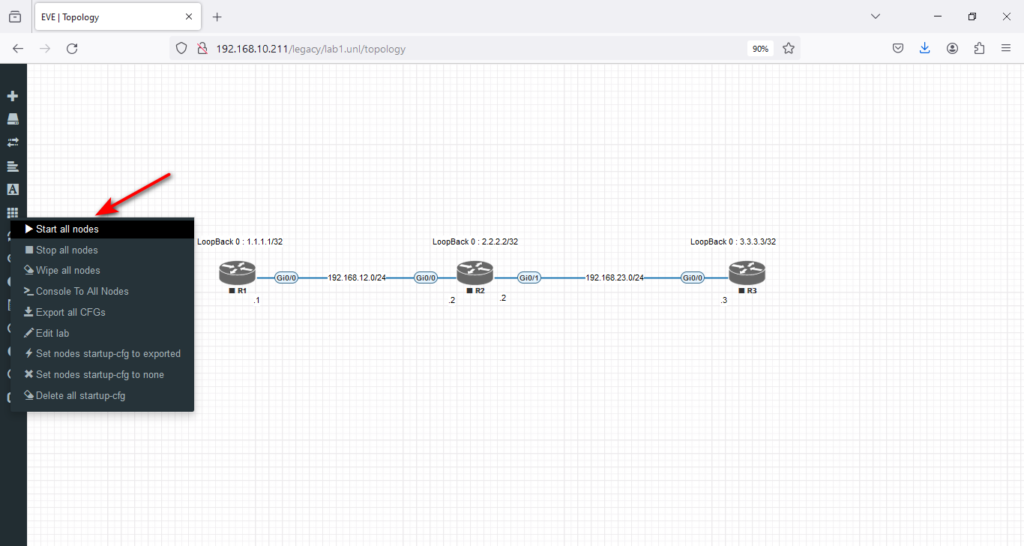
Great Job. Now is the time to click on the left menu, select → More actions,

and → Start all nodes.
Now is the time to start the lab configuration. I have added tasks, an IP table, and step-by-step instructions (workbook) to help you understand how to start from scratch and finish your lab successfully.
Task 1
Configure the hostnames on routers R1, R2, and R3, as the topology illustrates. Assign addresses as mentioned in Table 1.
| Router | LoopBack 0 | Gi 0/0 | Gi 0/1 |
|---|---|---|---|
| R1 | 1.1.1.1/32 | 192.168.12.1/24 | – |
| R2 | 2.2.2.2/32 | 192.168.12.2/24 | 192.168.23.2/24 |
| R3 | 3.3.3.3/32 | 192.168.23.3/24 | – |
Go to R1, double on the router, and set the basic configuration as instructed.
Router>en
Router#conf ter
Enter configuration commands, one per line.  End with CNTL/Z.
Router(config)#hostname R1
R1(config)#interface gig 0/0
R1(config-if)#ip add 192.168.12.1 255.255.255.0
R1(config-if)#no shut
R1(config-if)#exit
R1(config)#interface loopback 0
R1(config-if)#ip address 1.1.1.1 255.255.255.255
R1(config-if)#end
R1#show ip interface brief
Interface                  IP-Address      OK? Method Status                Protocol
GigabitEthernet0/0         192.168.12.1    YES manual up               up
GigabitEthernet0/1         unassigned      YES unset  administratively down down
GigabitEthernet0/2         unassigned      YES unset  administratively down down
GigabitEthernet0/3         unassigned      YES unset  administratively down down
Loopback0                  1.1.1.1         YES manual up               up
R1#
Go to R2 and set the basic configuration as this instruction
Router>en
Router#conf ter
Enter configuration commands, one per line.  End with CNTL/Z.
Router(config)#hostname R2
R2(config)#interface gi 0/0
R2(config-if)#ip address 192.168.12.2 255.255.255.0
R2(config-if)#no shut
R2(config-if)#exit
R2(config)#interface loopback 0
R2(config-if)#ip address 2.2.2.2 255.255.255.255
R2(config-if)#no shut
R2(config-if)#exit
R2(config)#interface gi 0/1
R2(config-if)#ip address 192.168.23.2 255.255.255.0
R2(config-if)#no shut
R2(config)#end
R2#show ip interface brief
Interface                  IP-Address      OK? Method Status                Protocol
GigabitEthernet0/0         192.168.12.2    YES manual up                    up
GigabitEthernet0/1         192.168.23.2    YES manual up                    up
GigabitEthernet0/2         unassigned      YES unset  administratively down down
GigabitEthernet0/3         unassigned      YES unset  administratively down down
Loopback0                  2.2.2.2         YES manual up                    up
Go to R3 and set the basic configuration as this instruction
Router>en
Router#conf ter
Enter configuration commands, one per line.  End with CNTL/Z.
Router(config)#hostname R3
R3(config)#interface gi 0/0
R3(config-if)#ip address 192.168.23.3 255.255.255.0
R3(config-if)#no shut
R3(config-if)#
*Sep 26 13:57:39.161: %LINK-3-UPDOWN: Interface GigabitEthernet0/0, changed state to up
*Sep 26 13:57:40.162: %LINEPROTO-5-UPDOWN: Line protocol on Interface GigabitEthernet0/0, changed state to up
R3(config-if)#exit
R3(config)#interface loopback 0
R3(config-if)#ip address 3.3.3.3 255.255.255.255
R3(config-if)#no shut
R3(config-if)#exit
R3(config)#exit
R3#
*Sep 26 13:58:15.458: %SYS-5-CONFIG_I: Configured from console by console

R3#show ip interface brief
Interface                  IP-Address      OK? Method Status                Protocol
GigabitEthernet0/0         192.168.23.3    YES manual up                    up
GigabitEthernet0/1         unassigned      YES unset  administratively down down
GigabitEthernet0/2         unassigned      YES unset  administratively down down
GigabitEthernet0/3         unassigned      YES unset  administratively down down
Loopback0                  3.3.3.3         YES manual up                    up
R3#
Task 2
Configure static routes on routers.
R1 Configuration: Due to the diagram, R1 needs to reach 2.2.2.2/32 and 3.3.3.3/32 and 192.168.23.0/24 networks; all these networks are reachable via R2. So, we have to configure 3 static routes for R1 to make this possible. Maybe you guessed we can do that by adding one default route to R2 in this example. For now, we prefer to define 3 separate routes. Look at the example:
R1>en
R1#conf ter
Enter configuration commands, one per line.  End with CNTL/Z.
R1(config)#ip route 192.168.23.0 255.255.255.0 192.168.12.2
R1(config)#ip route 2.2.2.2 255.255.255.255 192.168.12.2
R1(config)#ip route 3.3.3.3 255.255.255.255 192.168.12.2
R1(config)#
With these commands, R1 can reach, for example, R3, but R3 has no idea where it is, for instance, 1.1.1.1/32 and how it can reach it. So, we need to configure R2 and R3, too.
Go to the R2 router, and for the first step, check the routing table. As you can see, R2 has two connected routes for 192.168.12.0/24 and 192.168.23.0/24. So, we need to configure two routes for 1.1.1.1/32 and 3.3.3.3/32
R2>en
R2 #show ip route
Codes: L - local, C - connected, S - static, R - RIP, M - mobile, B - BGP
       D - EIGRP, EX - EIGRP external, O - OSPF, IA - OSPF inter area
       N1 - OSPF NSSA external type 1, N2 - OSPF NSSA external type 2
       E1 - OSPF external type 1, E2 - OSPF external type 2
       i - IS-IS, su - IS-IS summary, L1 - IS-IS level-1, L2 - IS-IS level-2
       ia - IS-IS inter area, * - candidate default, U - per-user static route
       o - ODR, P - periodic downloaded static route, H - NHRP, l - LISP
       a - application route
       + - replicated route, % - next hop override, p - overrides from PfR


Gateway of last resort is not set


      2.0.0.0/32 is subnetted, 1 subnets
C        2.2.2.2 is directly connected, Loopback0
      192.168.12.0/24 is variably subnetted, 2 subnets, 2 masks
C        192.168.12.0/24 is directly connected, GigabitEthernet0/0
L        192.168.12.2/32 is directly connected, GigabitEthernet0/0
      192.168.23.0/24 is variably subnetted, 2 subnets, 2 masks
C        192.168.23.0/24 is directly connected, GigabitEthernet0/1
L        192.168.23.2/32 is directly connected, GigabitEthernet0/1
R2#conf ter
Enter configuration commands, one per line.  End with CNTL/Z.
R2(config)#ip route 1.1.1.1 255.255.255.255 192.168.12.1
R2(config)#ip route 3.3.3.3 255.255.255.255 192.168.23.3
R2(config)#
The R3 configuration is almost the same as the R1. We need 3 routes for 1.1.1.1/32, 2.2.2.2/32, and 192.168.12.0/24. But this time, let’s use a default gateway instead!
R3>en
R3#conf ter
Enter configuration commands, one per line.  End with CNTL/Z.
R3(config)#ip route 0.0.0.0 0.0.0.0 192.168.23.2
R3(config)#exit
Task 3
After completing our configuration, let’s check it with → ping and → traceroute commands.
We did the test from R3, but you can do the same thing from the others.
R3#ping 1.1.1.1 source 3.3.3.3
Type escape sequence to abort.
Sending 5, 100-byte ICMP Echos to 1.1.1.1, timeout is 2 seconds:
Packet sent with a source address of 3.3.3.3
!!!!!
Success rate is 100 percent (5/5), round-trip min/avg/max = 4/5/7 ms
R3#traceroute 1.1.1.1 source 3.3.3.3
Type escape sequence to abort.
Tracing the route to 1.1.1.1
VRF info: (vrf in name/id, vrf out name/id)
  1 192.168.23.2 3 msec 3 msec 3 msec
  2 192.168.12.1 8 msec 12 msec *
R3#
Wrapping Up Your EVE-NG Journey
We’ve come a long way in installing EVE-NG from scratch, designed to suit your needs as a beginner. During this journey, you learned what EVE-NG is, what each of its versions does, and what the minimum system requirements are. It has been an enlightening experience, and I am excited to share my newfound knowledge with you. With EVE-NG, you can create virtual labs and practice networking concepts in a virtual environment. So, EVE-NG can be a great choice if you’re a beginner looking for a platform to experiment and learn.
Where to Go From Here
Now that you’ve successfully installed EVE-NG, it’s crucial to understand that the process doesn’t end here. To truly succeed in network technologies and excel in Cisco exams, it’s essential to dedicate yourself to practice and perseverance. Merely installing the software is just the first step towards accomplishing your goals. Through continuous learning, practical application, and determination, you can effectively answer these exams and successfully execute the required tasks. So, keep pushing forward and never lose sight of your ambitions.
We recommend opting for the EVE-NG LABs Full Pack images to take your journey forward. With this package, you can access a comprehensive collection of 300 scenarios & labs accompanied by clear step-by-step instructions (workbook). You will also have access to 61 useful images that can be effortlessly installed. This Full Pack package will give you invaluable resources to enhance your experience and further excel in your endeavors.
Good luck!
Время на прочтение9 мин
Количество просмотров164K

В данной статье приведен опыт инженера-сетевика по развертыванию виртуальной лаборатории EVE-NG в домашних условиях, для целей подготовки к экспертным экзаменам Cisco.
Я постарался собрать все основные вехи настройки, разбросанные по статьям в интернете и попытался добавить в топологию, попутно изучая, ansible — систему управления конфигурациями. Черновик статьи появился случайно, поскольку мне стало жаль терять накопленный опыт и решил сохранять его в отдельный файл. Вот его я и представляю на ваш суд.
Все решения, приведенные в статье, не претендуют на оптимальность, но абсолютно точно работают.
Установка EVE-NG
Подготовка хоста
В качестве хостовой я использую следующую систему: Intel Xeon X3240, 32Gb RAM под управлением Gentoo. Настройка KVM на Gentoo дело достаточно тривиальное и, по правде сказать, я не помню с какими подводными камнями мне пришлось столкнуться при её развертывании. Дело было давно.
Основное, что катастрофически сказывается на производительности лабораторного стенда типа EVE-NG, — это параметр ядра, который запускает возможность использования nested virtualization (вложенную виртуальзацию).
Для процессоров Intel:
kvm-intel.nested=1Подробнее можно прочесть по ссылке.
Подключение образов сетевых устройств
Образы сетевых устройств для подключения находятся в свободном доступе на самом cisco.com, для скачивания достаточно иметь учётную запись начального уровня. Нам понадобятся XRv и CSR.
Скачиваем по указанными ссылкам и следуем рекомендациям в how-to.
Проблема, с которой я столкнулся при добавлении образов — как называть директории, куда нужно складывать файлы hda.qcow2. Решение, как всегда, — реверс-инжиниринг. Список заголовков, обрабатываемых EVE-NG зашит в файле:
/opt/unetlab/html/includes/init.phpПриведу его здесь:
$node_templates = Array(
        'a10'           =>  'A10 vThunder',
        'clearpass'     =>  'Aruba ClearPass',
        'timos'         =>  'Alcatel 7750 SR',
        'veos'          =>  'Arista vEOS',
        'barracuda'     =>  'Barraccuda NGIPS',
        'brocadevadx'   =>  'Brocade vADX',
        'cpsg'          =>  'CheckPoint Security Gateway VE',
        'docker'        =>  'Docker.io',
        'acs'           =>  'Cisco ACS',
        'asa'           =>  'Cisco ASA',
        'asav'          =>  'Cisco ASAv',
        'cda'           =>  'Cisco Context Directory Agent',
        'csr1000v'      =>  'Cisco CSR 1000V',
        'csr1000vng'    =>  'Cisco CSR 1000V (Denali and Everest)',
        'cips'          =>  'Cisco IPS',
        'cucm'          =>  'Cisco CUCM',
        'ise'           =>  'Cisco ISE',
        'c1710'         =>  'Cisco IOS 1710 (Dynamips)',
        'c3725'         =>  'Cisco IOS 3725 (Dynamips)',
        'c7200'         =>  'Cisco IOS 7206VXR (Dynamips)',
        'iol'           =>  'Cisco IOL',
        'titanium'      =>  'Cisco NX-OSv (Titanium)',
        'nxosv9k'       =>  'Cisco NX-OSv 9K',
        'firepower'     =>  'Cisco FirePower',
        'firepower6'    =>  'Cisco FirePower 6',
        'ucspe'         =>  'Cisco UCS-PE',
        'vios'          =>  'Cisco vIOS',
        'viosl2'        =>  'Cisco vIOS L2',
        'vnam'          =>  'Cisco vNAM',
        'vwlc'          =>  'Cisco vWLC',
        'vwaas'         =>  'Cisco vWAAS',
        'phoebe'        =>  'Cisco Email Security Appliance (ESA)',
        'coeus'         =>  'Cisco Web Security Appliance (WSA)',
        'xrv'           =>  'Cisco XRv',
        'xrv9k'         =>  'Cisco XRv 9000',
        'nsvpx'         =>  'Citrix Netscaler',
        'sonicwall'     =>  'Dell SonicWall',
        'cumulus'       =>  'Cumulus VX',
        'extremexos'    =>  'ExtremeXOS',
        'bigip'         =>  'F5 BIG-IP LTM VE',
        'fortinet'      =>  'Fortinet FortiGate',
        //'radware'     =>  'Radware Alteon',
        'hpvsr'         =>  'HP VSR1000',
        'olive'         =>  'Juniper Olive',
        'vmx'           =>  'Juniper vMX',
        'vmxvcp'        =>  'Juniper vMX VCP',
        'vmxvfp'        =>  'Juniper vMX VFP',
                'vsrx'          =>  'Juniper vSRX',
        'vsrxng'        =>  'Juniper vSRX NextGen',
        'vqfxre'        =>  'Juniper vQFX RE',
        'vqfxpfe'       =>  'Juniper vQFX PFE',
        'linux'         =>  'Linux',
        'mikrotik'      =>  'MikroTik RouterOS',
        'ostinato'      =>  'Ostinato',
        'paloalto'      =>  'Palo Alto VM-100 Firewall',
        'pfsense'       =>  'pfSense Firewall',
        'riverbed'      =>  'Riverbed',
        'sterra'        =>  'S-Terra',
        'vyos'          =>  'VyOS',
        'win'           =>  'Windows (Legacy template)',
        'winstation'            =>  'Windows Workstation',
        'winserver'         =>  'Windows Server',
        'vpcs'          =>  'Virtual PC (VPCS)'
    );
То есть, если нам необходимо добавить образ с любым Linux, как мы будем делать ниже, то достаточно создать директорию /opt/unetlab/addons/qemu/linux-что-то-там/ и положить в неё файл образа hda.qcow2.
Настройка окружения
Под окружением будем понимать всё, что делает нашу жизнь удобнее.
Доступ к консоли маршрутизаторов
Несмотря на то, что в EVE-NG разработчики внедрили возможность доступа к консолям сетевых устройств по web с использованием HTML5, доступ со сторонних клиентов удобнее и привычнее. Основное удобство, которое предоставляется putty в моём случае, — это возможность использования буфера обмена. Не работает copy/paste в web-консоли.
Итак, процесс выглядит следующим образом:
Установка putty на машине, откуда будет осуществляться доступ. Я работаю на ПК c ubuntu, поэтому:
sudo apt-get install puttyНо этого мало, нужно еще рассказать браузеру, в моём случае это chrome, как реагировать на ссылки вида telnet://. Для этого необходимо создать файл ~/.local/share/applications/telnet.desktop следующего содержания:
[Desktop Entry]
Version=1.0
Name=Telnet
GenericName=Telnet
Comment=Telnet Client
Exec=/usr/bin/putty %U
TryExec=/usr/bin/putty
Terminal=false
Type=Application
Categories=TerminalEmulator;Network;Telnet;Internet;BBS;
MimeType=x-scheme/telnet
X-KDE-Protocols=telnet
Keywords=Terminal;Emulator;Network;Internet;BBS;Telnet;Client;
Регистрируем обработчик:
xdg-mime default telnet.desktop x-scheme-handler/telnetПосле этого консоли будут отлично открываться в putty. Задачу перехода на gnome-terminal с вкладками или его аналог оставлю на потом.
Запуск сниффера трафика
Wireshark — насущная необходимость при изучении сетевых технологий. Очень много написано про его использование. Не стану повторяться. Опишу процесс его настройки.
Установка на клиенте:
sudo apt-get install wiresharkНо снова браузер не понимает как обработать ссылку capture://
Объяснять ему это придется в три этапа:
Этап 1:
Как и в случае с консолями, файл ~/.local/share/applications/wireshark.desktop вида:
[Desktop Entry]
Name=Wireshark
Exec=capture_chrom.sh %u
MimeType=x-scheme-handler/capture;
Type=Application
Регистрация обработчика:
xdg-mime default wireshark.desktop x-scheme-handler/captureЭтап 2:
Обработчик в виде скрипта на bash на клиентской машине в любой директории из списка PATH:
#!/bin/bash
ip=`echo $@ | sed 's/.*\/\/\(.*\)\/\(.*\)/\1/g'`
interface=`echo $@ | sed 's/.*\/\/\(.*\)\/\(.*\)/\2/g'`
ssh root@$ip tcpdump -i $interface -U -w - | wireshark -k -i -
Этап 3:
Ключевой ssh-доступ между клиентской машиной и EVE-NG.
На клиентской машине (вместо ip_eve поставить адрес EVE-NG):
ssh-keygen -t rsa
ssh root@_ip_eve_ mkdir -p .ssh
cat ~/.ssh/id_eve_ng.pub | ssh root@ip_eve 'cat >> .ssh/authorized_keys2'
После этого будет работать захват трафика в wireshark на стороне клиента. Что нам и требовалось.
На этом непритязательный пользователь может остановиться, но нет предела совершенству и мы продолжаем…
Настройка инстанса сервера ansible
Необходимость ansible для виртуальных лабораторных топологий в начале пути была для меня неочевидна. Но со временем, на втором десятке лабораторных часов, приходит мысль — а не автоматизировать ли загрузку стартовых топологий в устройства, не перегружая их, тем самым экономя время?
Итак, с чего начать? С ограничений ansible! Да, они действительно есть. Для меня, как достаточно далекого от программирования, слишком жестоким оказалось предложение на одном из форумов — дописать обработчик телнета самому. Телнет нужен был для решения в лоб — настроить ansible на виртуальной машине EVE-NG и телнетится на консольные порты виртуальных маршрутизаторов. Но не тут-то было — работает только ssh.
Но мы старые инженеры и не привыкли отступать! Если гора не идёт к Магомету, то двинем мы к ней — настроим отдельный инстанс с ububtu в самой топологии, благо для этого есть возможность.
Как разворачивать в KVM образ скаченный с ubuntu.com я приводить не буду. Делал я это на отдельной машине, настраивал и заливал в EVE-NG. После установки нам понадобятся пакеты с telnet-сервером и настройка статического IP-адреса.
Настройка telnet-сервера
У меня не вышло заставить EVE-NG показать мне консоль сервера стандартным способом через клик по девайсу. Чтобы не закапываться глубоко, я пошел в обход — настроил telnet-сервер. SSH v2, конечно, тоже имеется и работает с CSR, но уж очень медленно для интерактивной работы, да и бесполезно — у нас лабораторный стенд, а не продакшн.
Потом необходимость в сервере отпала, но запись в шпаргалке осталась, поэтому приведу и её.
Итак, приступим:
sudo apt-get install xinetd telnetdПосле автоматического запуска xinetd, конечно, ничего не произошло, как нам обещали в интернете.
Нужно добавить в /etc/xinetd.d файл telnet следующего содержания:
service telnet
  {
        disable         = no
        flags           = REUSE
        socket_type     = stream
        wait            = no
        user            = root
        server          = /usr/sbin/in.telnetd
  }
и перезапустить сервер xinetd:
sudo service xinetd restartПроверяем телнет локально:
@ansible-server:~$ telnet 127.0.0.1
  Trying 127.0.0.1...
  Connected to 127.0.0.1.
  Escape character is '^]'.
  Ubuntu 16.04.2 LTS
  ansible-server login:
Работает!
Закачиваем полученный образ в виртуальную машину EVE-NG и пробуем собрать топологию.
Теперь мы можем, настроив на соседней цыске в топологии адрес из подсети сервера, до него достучаться по telnet. Всё работает быстро, не в пример SSH.
Сбор топологии
Здесь всё чрезвычайно просто. Моя топология выглядит следующим образом:

Развёртывание подсистемы аnsible
Настройка CSR для работы с ansible
Выделим на каждом маршрутизаторe отдельный порт для управления и подключим к общему хабу с сервером ansible портами Gi2. Выберем подсеть для управления, у меня это 192.168.0.0/24. И назначим IP-адреса на портах в соответствии с номером маршрутизатора.
Эту же информацию занесем в /etc/hosts сервера:
192.168.0.1 R1
192.168.0.2 R2
192.168.0.3 R3
192.168.0.4 R4
192.168.0.5 R5
192.168.0.6 R6
192.168.0.7 R7
192.168.0.8 R8
192.168.0.9 R9
192.168.0.10 R10
192.168.0.11    XR1
192.168.0.12    XR2
192.168.0.20    SW1
На каждом маршрутизаторе настроим SSH v2 согласно ссылки. Всё тривиально, скажу лишь то, что для запуска требумеого нам SSHv2 нужно генерировать ключ более 768 бит, я выбрал размер 2048.
Проверяем доступ с сервера до маршрутизаторов по SSH, заодно собирая в хранилище ключи.
Сохраняем конфигурацию на маршрутизаторе:
R1#wr
Building configuration...
[OK]
И экспортируем в EVE-NG конфигурацию для того, чтобы заново не настраивать при перезагрузках девайсы:
Эта фича в EVE-NG, как и Unetlab до неё, работает с переменным успехом. Но будем надеяться.
Создание первого воркбука
Как мы помним, структура ansible состоит из двух основных частей — описания девайсов (inventory), и воркбука, собственно с логикой работы системы.
В нашем случае inventory достаточно примитивен и файл его содержащий (/etc/ansible/hosts) принимает вид:
[ios]
R[1:10]
Что раскрывается списком хостнеймов от R1 до R10 (помним, что мы уже прописали /etc/hosts для разрешения имён).
А вот с ворбуком придется повозиться.
Первым этапом, для того, чтобы залить конфигурацию, представляющую для нас лабораторный интерес, на виртуальный маршрутизатор IOS, нам необходимо сделать откат на начальную нулевую, содержащую только IP управления и настройки VTY.
Для этого мы попытаемся использовать модуль ios_command.
Основой всей работы по смене конфигураций в устройствах IOS для нас будет служить функционал команды привилегированного режима маршрутизатора:
configure replace scp://[PATH] forceНулевые конфигурации будем хранить на сервере в домашнем каталоге нового пользователя под именем router в директории /home/router/default_configs/. Забегая вперед, скажу, что файлы будут иметь имена такие же, как и в inventory, т.е. в нашем случае это R1, R2 и т.д.
Создадим в /opt/ansible файл rollback.yml вида:
- name: rollback
  hosts: ios
  serial: 1
  connection: local
  gather_facts: false
  remote_user: cisco
  tasks:
    - name: Performing rollback to default configuration.
      ios_command:
        commands: configure replace scp://router:cisco@192.168.0.101:~/default_configs/{{ inventory_hostname }} force
        timeout: 30
Итак, по порядку:
Название плейбука:
- name: rollbackНазвание используемого инвентори:
hosts: iosКоличество параллельно конфигурируемых устройств из инвентори. Важная часть последующей оптимизации производительности.
serial: 1Как я понял, это говорит о соединении с локальным обработчиком заданий. Могу ошибаться.
connection: localОтключение сбора информации о хостах:
gather_facts: falseИмя пользователя для соединения с устройствами:
remote_user: ciscoВызов модуля:
ios_command:Передача команды в устройство из инвентори:
commands: configure replace scp://router:cisco@192.168.0.101:~/default_configs/{{ inventory_hostname }} forceВремя ожидания отклика в секундах:
timeout: 30Ничего особо сложного, как мы видим, но есть одно но!
Попытаемся запустить…
ansible-playbook ./rollover.yml -k -vvvvПолучаем ошибку!
"msg": "ios_command does not support running config mode commands. Please use ios_config instead"Гугл нам об этом не особо много расскажет, поэтому вооружаемся смекалкой и пытаемся найти кто же нам это заявил. И находим файл самого используемого нами модуля: /usr/local/lib/python2.7/dist-packages/ansible-2.3.0-py2.7.egg/ansible/modules/network/ios/ios_command.py, содержащий вот такой код:
        if module.check_mode and not item['command'].startswith('show'):
            warnings.append(
                'only show commands are supported when using check mode, not '
                'executing `%s`' % item['command']
            )
        elif item['command'].startswith('conf'):
            module.fail_json(
                msg='ios_command does not support running config mode '
                    'commands.  Please use ios_config instead'
            )
Явно, что разработчики немного перегнули палку, отнеся все параметры configure к конфигурационному режиму, поэтому дописываем в соответсвующую строку:
elif item['command'].startswith('configure terminal'):Заработало!
root@ansible-server:/opt/ansible# ansible-playbook ./rollback.yml -k
SSH password:
PLAY RECAP ******************************************************
R1                         : ok=1    changed=0    unreachable=0    failed=0
R10                        : ok=1    changed=0    unreachable=0    failed=0
R2                         : ok=1    changed=0    unreachable=0    failed=0
R3                         : ok=1    changed=0    unreachable=0    failed=0
R4                         : ok=1    changed=0    unreachable=0    failed=0
R5                         : ok=1    changed=0    unreachable=0    failed=0
R6                         : ok=1    changed=0    unreachable=0    failed=0
R7                         : ok=1    changed=0    unreachable=0    failed=0
R8                         : ok=1    changed=0    unreachable=0    failed=0
R9                         : ok=1    changed=0    unreachable=0    failed=
Создание второго воркбука
Не стану описывать так же подробно, как на предыдущем этапе, просто приведу пример воркбука, который заливает тематическую начальную конфигурацию лабораторных работ одного известного бренда с тремя буквами в названии:
/etc/ansible/hosts
[ios]
R[1:10]

[ios.base.ipv4]
R[1:6]
/opt/ansible/base.ipv4.yml
- name: base.ipv4
  hosts: ios.base.ipv4
  connection: local
  gather_facts: false
  remote_user: cisco
  serial: 1
  tasks:
    - name: base.ipv4 configuration load
      ios_config:
        src: ./IOS-XE-initials/base.ipv4/{{ inventory_hostname }}
Файлы начальных конфигурации лежат в /opt/ansible/IOS-XE-initials/base.ipv4, соответственно. Основное отличие данного сценария — это использование функционала модуля ios_config и передача права ему интерпретировать те команды, которые необходимо выполнить на устройствах.
На этом всё, спасибо за внимание. Если статья достойна продолжения, то следующей темой станет настройка взаимодействия IOS XR и ansible.