
В данной статье мы рассмотрим процесс установки (как установить) Windows Server 2016 с нуля от самого начала до конца, и немного затронем первичную подготовку к непосредственной настройке Windows Server 2016. А саму настройку, уже после установки Windows Server 2016 мы рассмотрим в следующей статье.
1) Первое, что нужно сделать — это скачать сам дистрибутив. Скачать его можете на нашем сайте по этой ссылке. Дистрибутив содержит в себе две редакции Standard и Datacenter на русском и английском языке. При установке у Вас будет выбор что именно нужно Вам установить.
2) Второе, что нужно сделать — это записать дистрибутив на флешку, сделав ее загрузочной. Это нужно для того, что бы Вы смогли загрузиться на флешку из под биоса для инсталляции системы. Подробная инструкция как записать дистрибутив на флешку по следующей ссылке.
3) Соответственно следующий шаг — это нужно загрузиться с загрузочной флешки из под биоса. Если Вы не знаете как это сделать, ознакомиться с инструкцией можете так же в нашем блоге на следующей странице.
4) Итак, мы уже загрузились с флешки и приступаем к непосредственной установке системы Windows Server 2016.

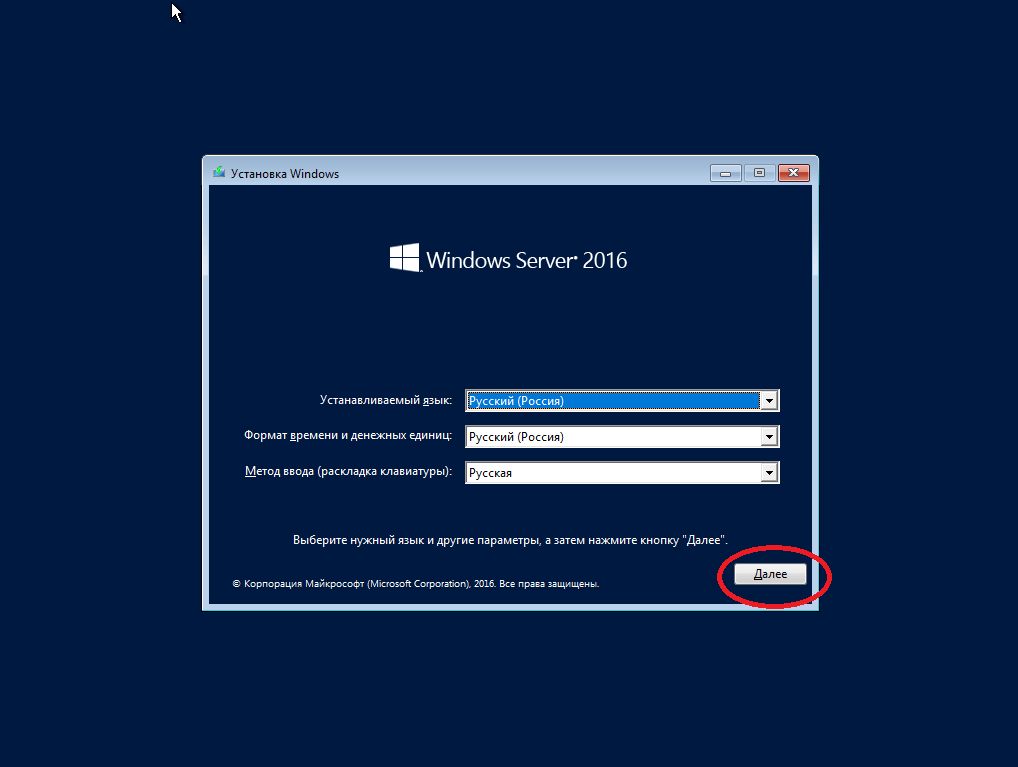
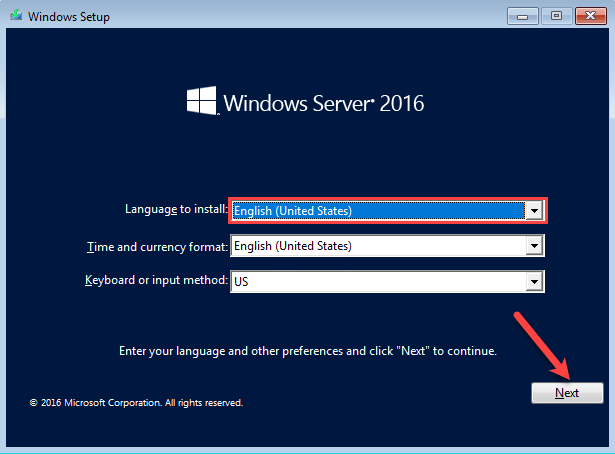
Выбираем нужный язык дистрибутива.

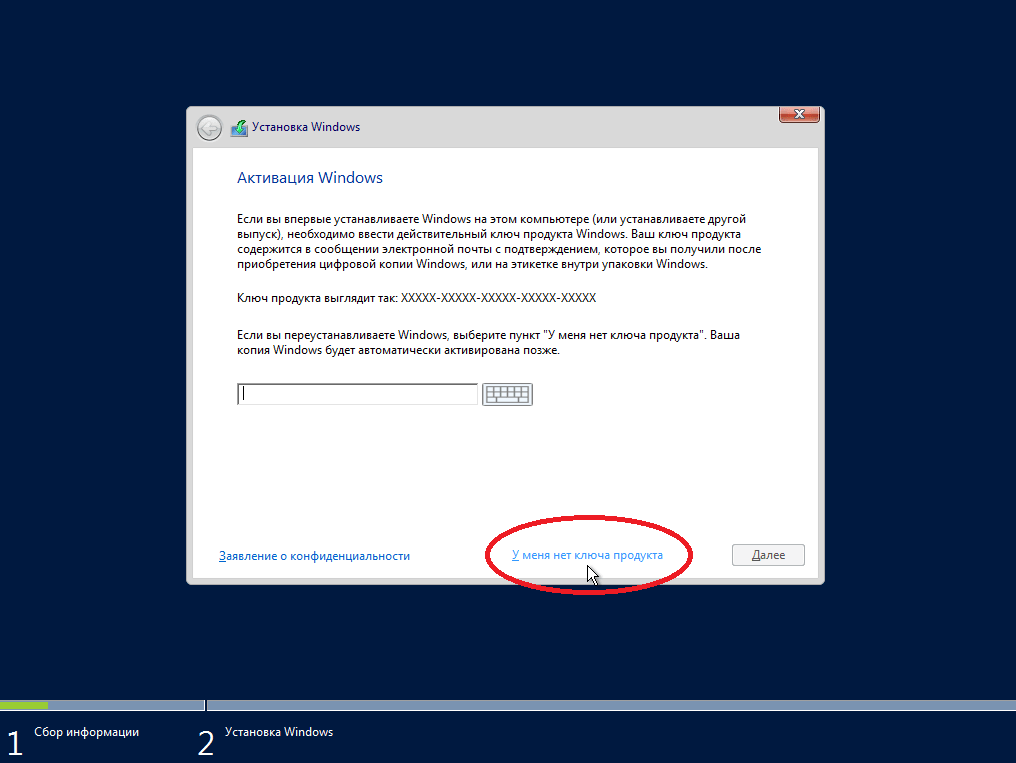
На следующем этапе у Вас запросят ключ активации для Windows Server 2016, мы его введем позже, уже в самой системе. А при установке выбираем «У меня нет ключа продукта».
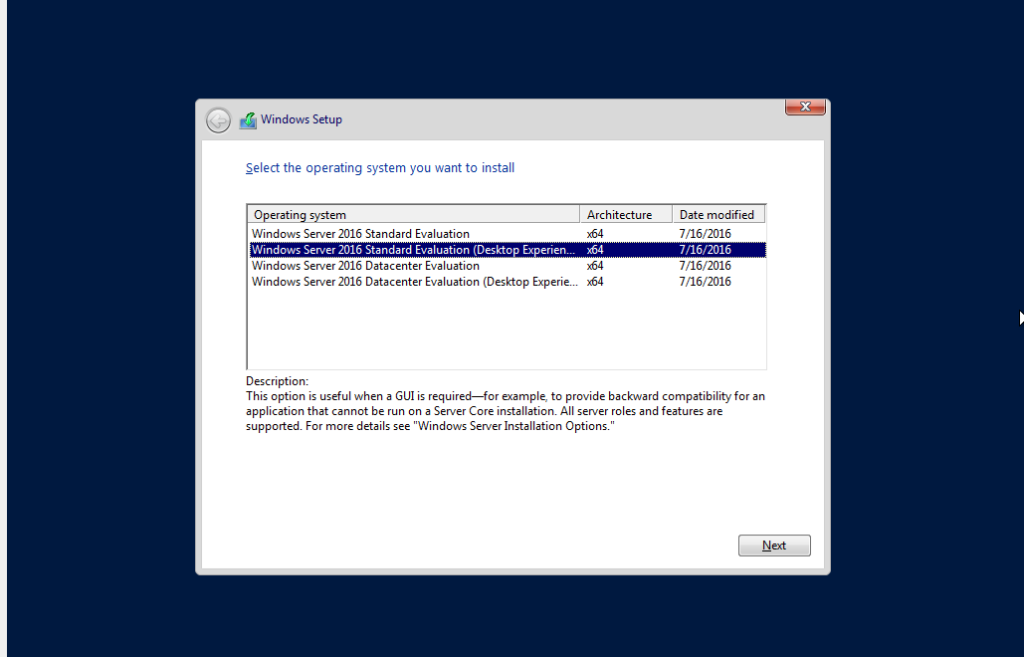
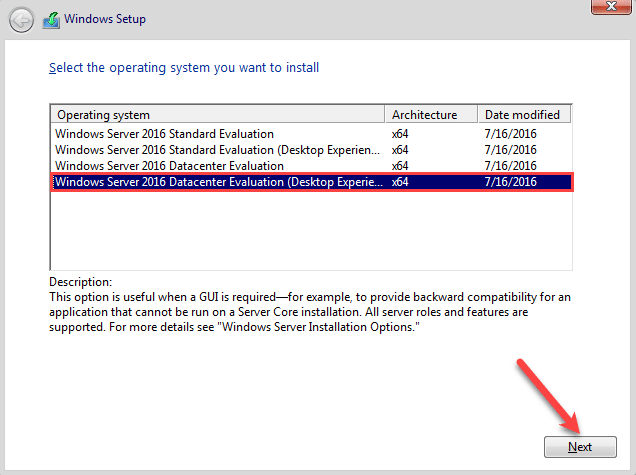
Далее Вас попросят выбрать какой именно версии дистрибутив Вы хотите установить Standard или Datacenter (на примере мы будем устанавливать Standard, но установка Datacenter ничем не отличается), а так же обязательно выбираем «Возможности рабочего стола», иначе система у Вас установится без графической оболочки и управление Windows Server будет доступна только из консоли.

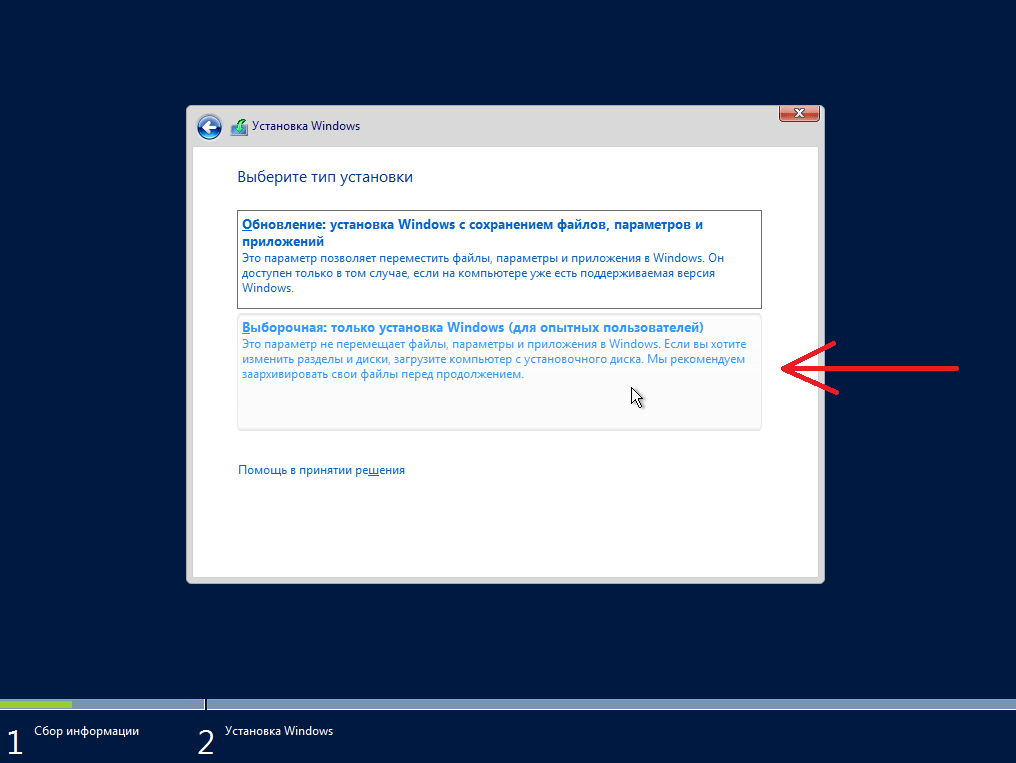
На следующем пункте выбираем «Выборочную установку», т.к мы устанавливаем систему с нуля.
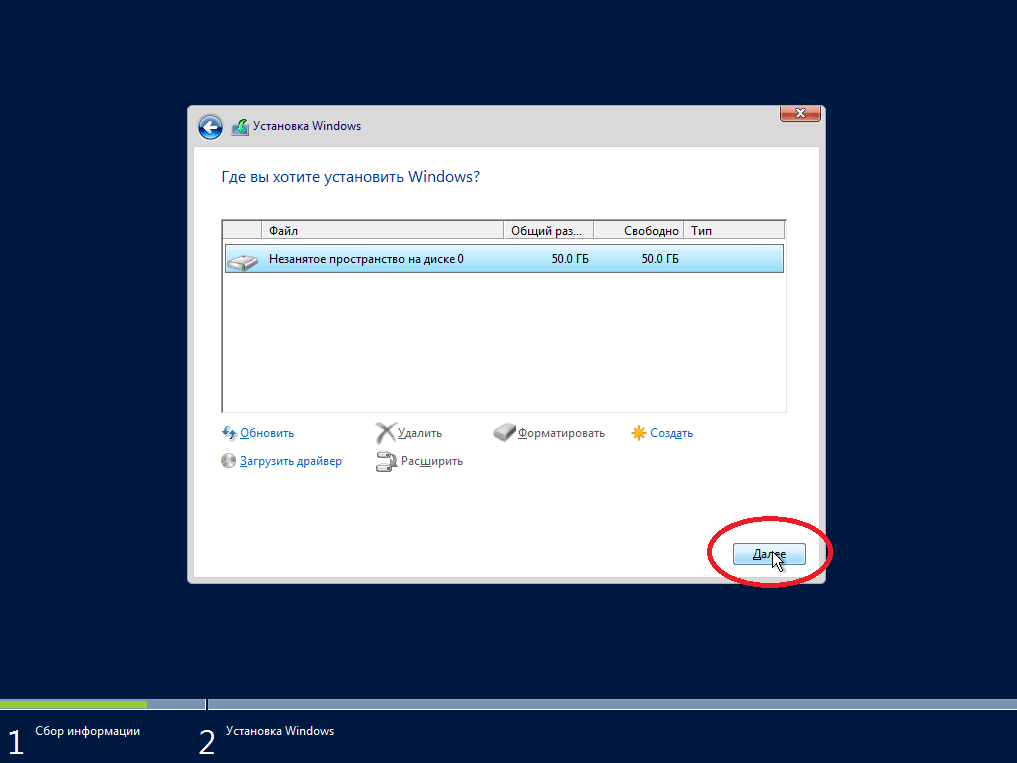
Далее Вам нужно будет выбрать диск, на который Вы хотите установить систему, у Вас их может быть несколько, к примеру SSD для системы, и HDD для хранения файлов, или что-то другое. В нашем случае на примере диск один.
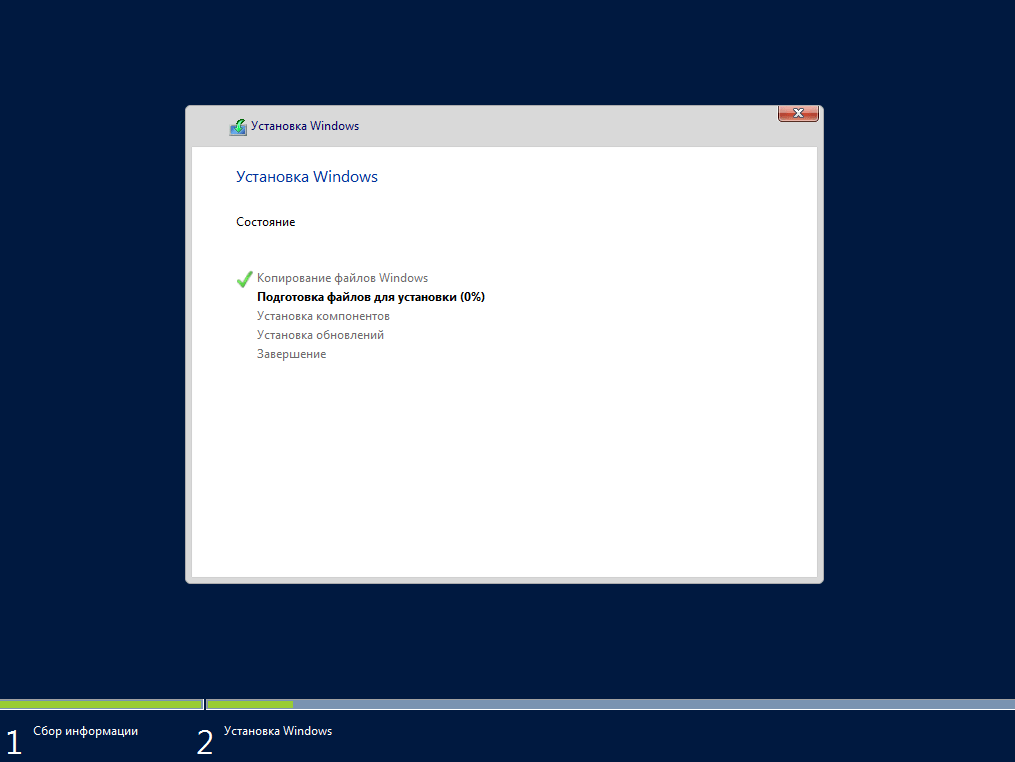
После начинается непосредственно сама установка Winodws Server 2016.
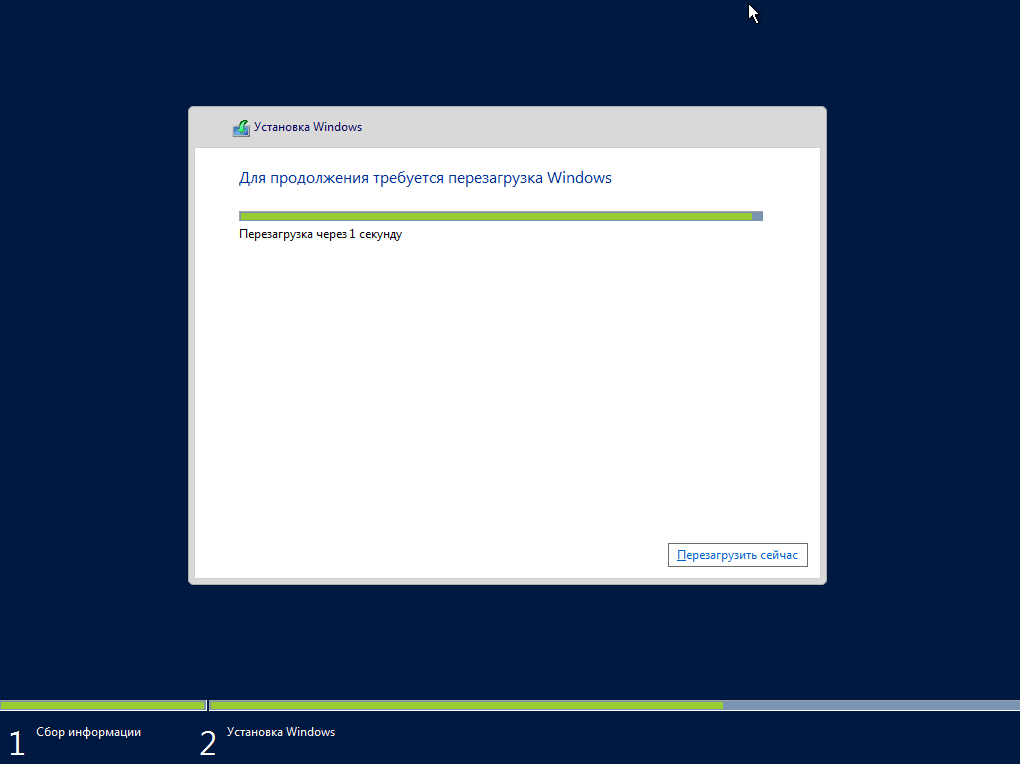
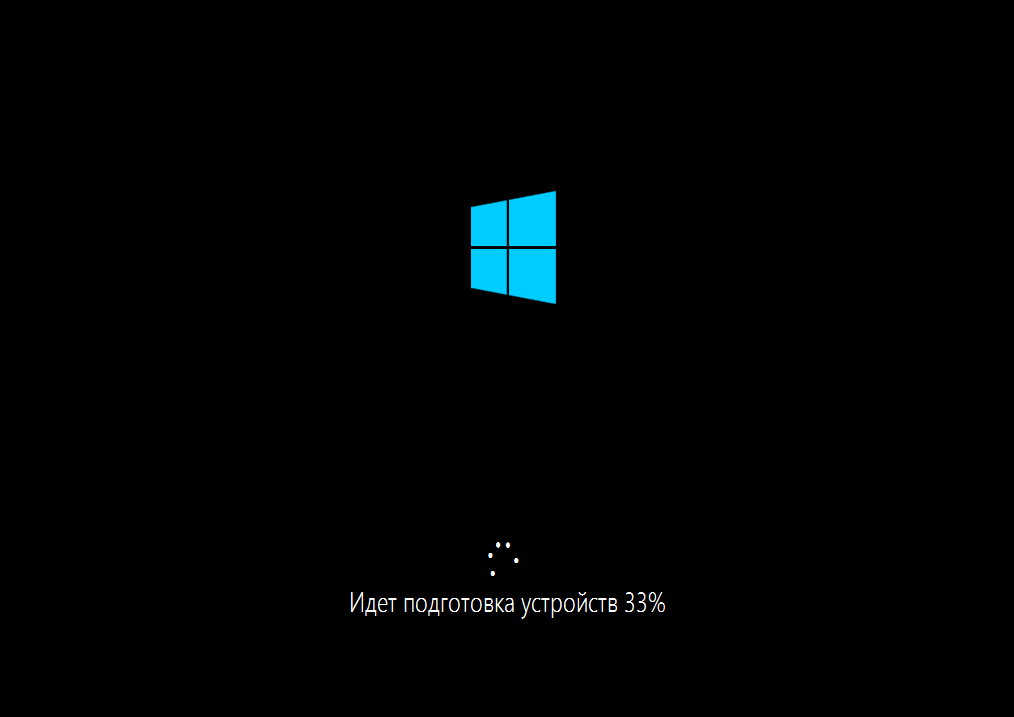
После завершения установки и обновлений компьютер пару раз может перезагрузиться.
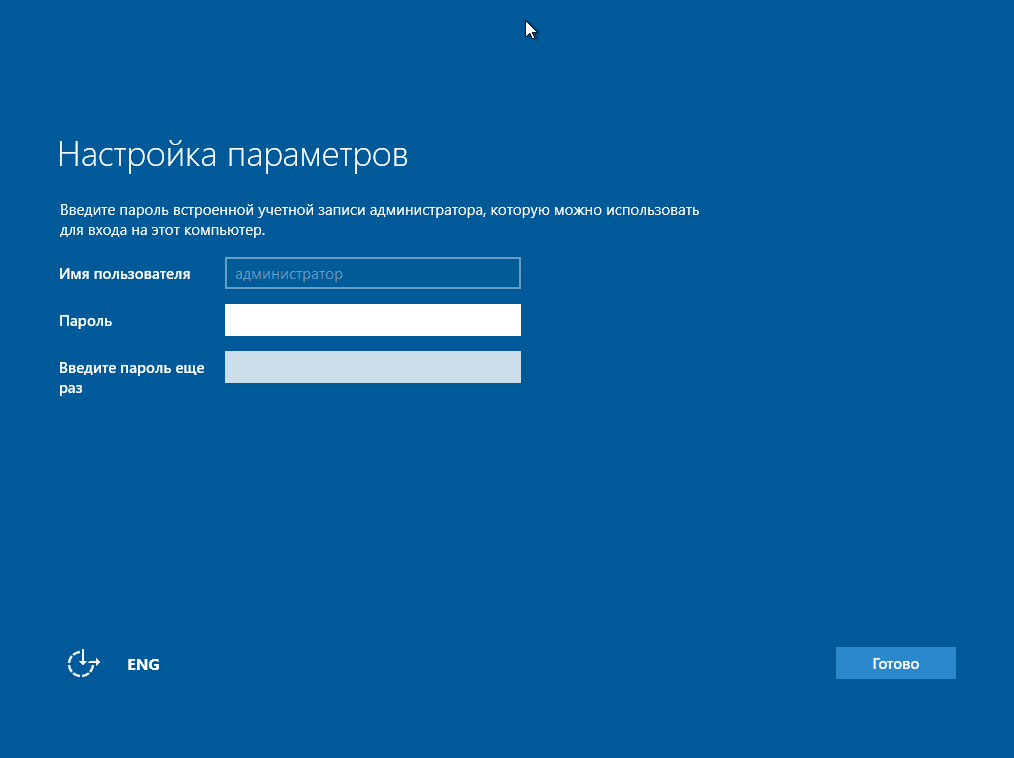
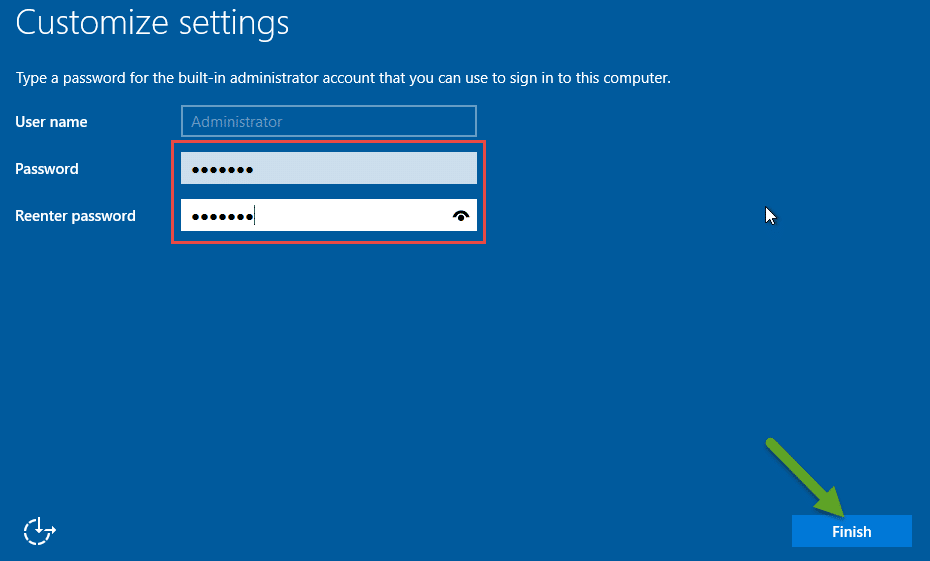
Далее Вам нужно придумать пароль администратора, он будет запрашиваться при входе в систему. Используйте латинские символы, пароль так же должен содержать как минимум одну большую букву и цифру.
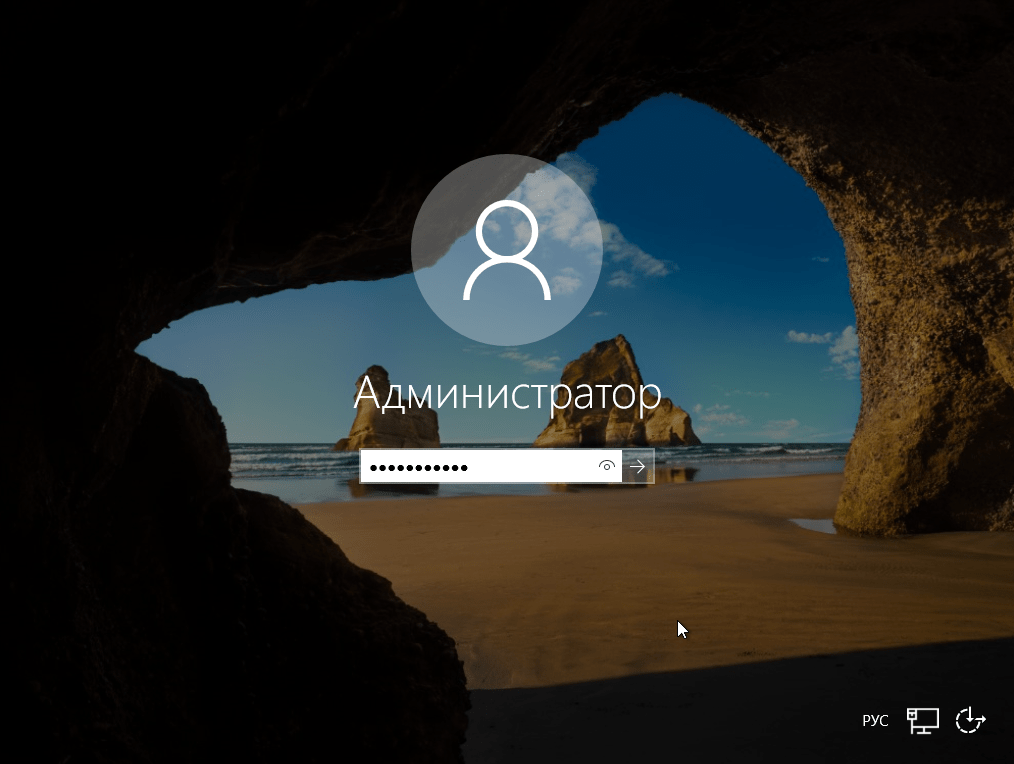
После установки пароля входим в систему.
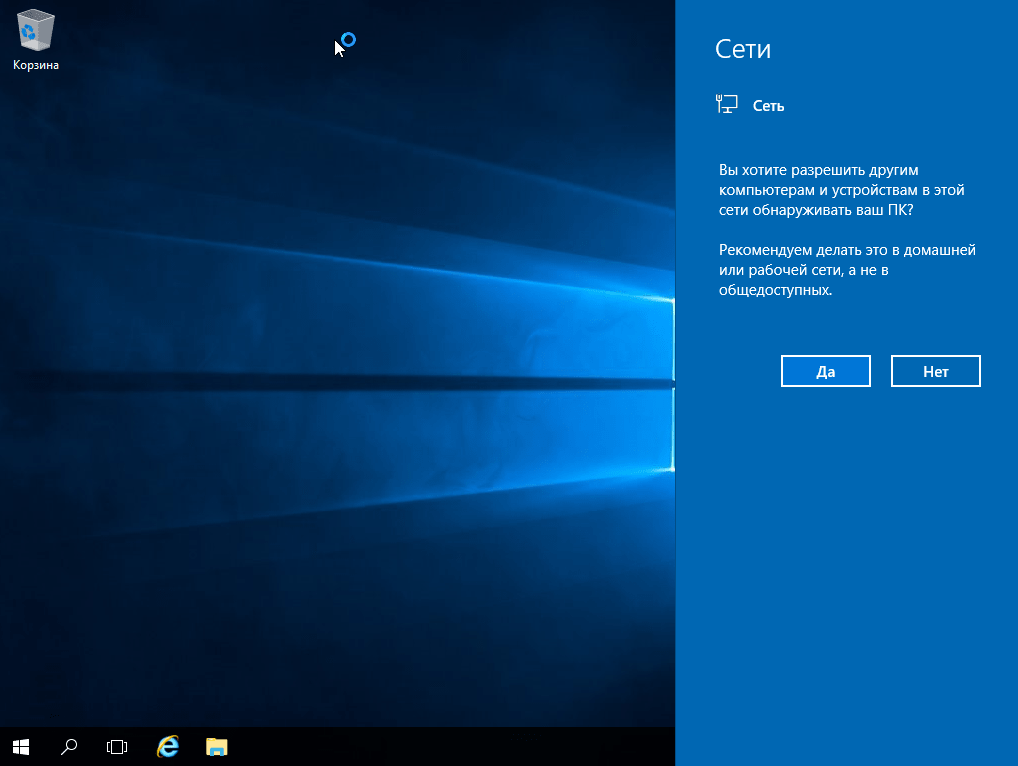
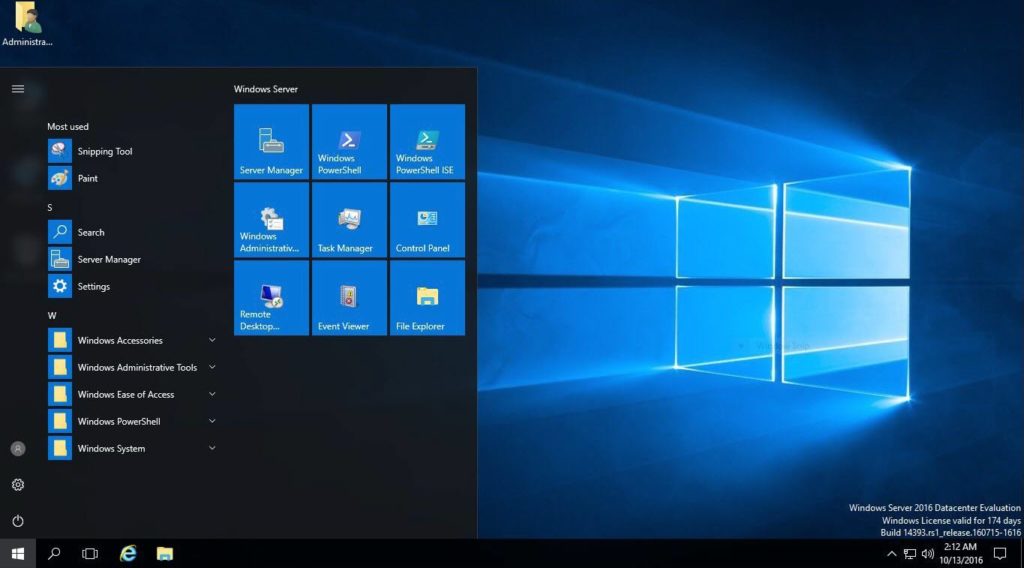
Вот мы и зашли на рабочий стол Windows Server 2016. Нажимаем «Да», если у Вас проводное соединение, для получения доступа в интернет.
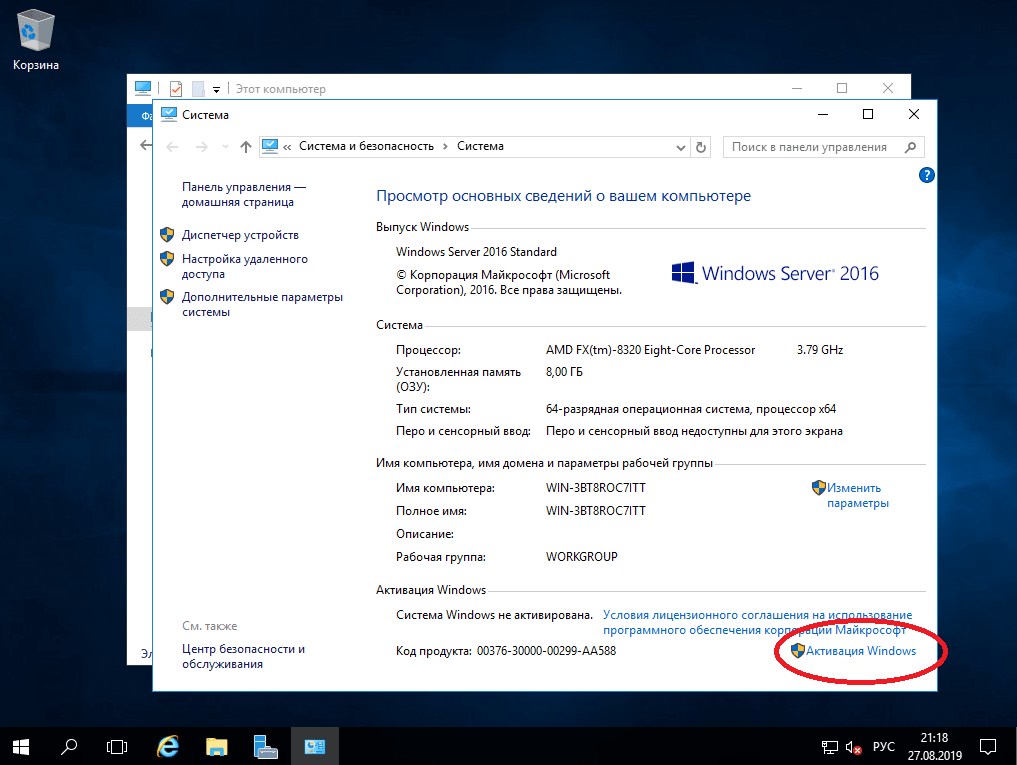
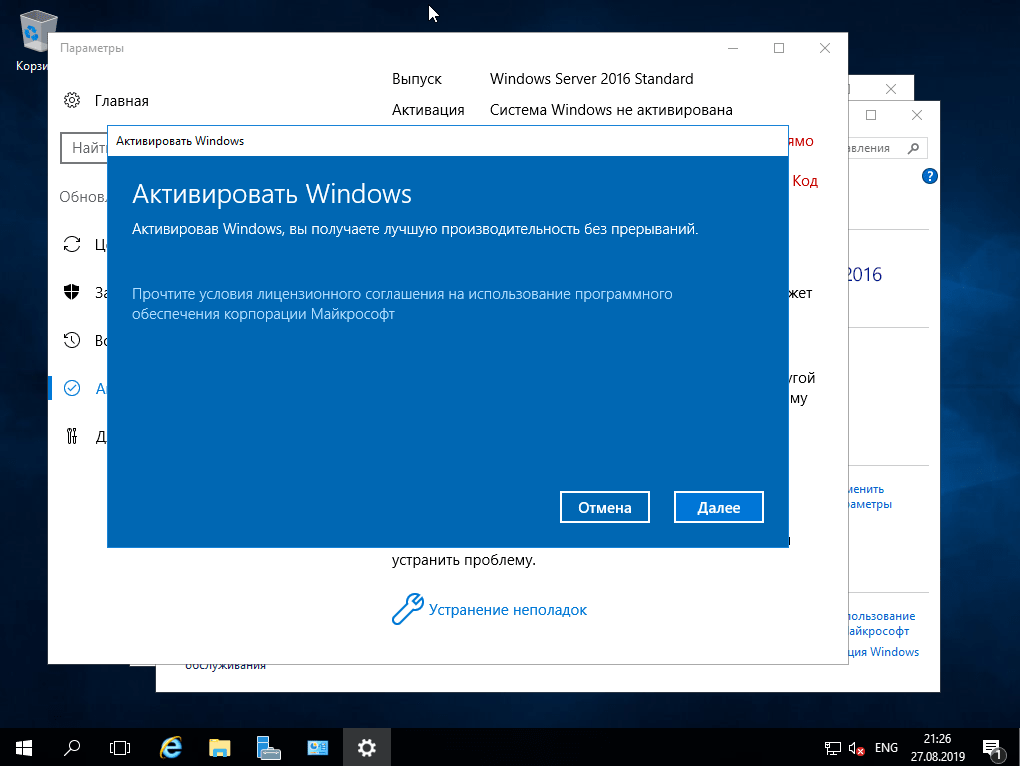
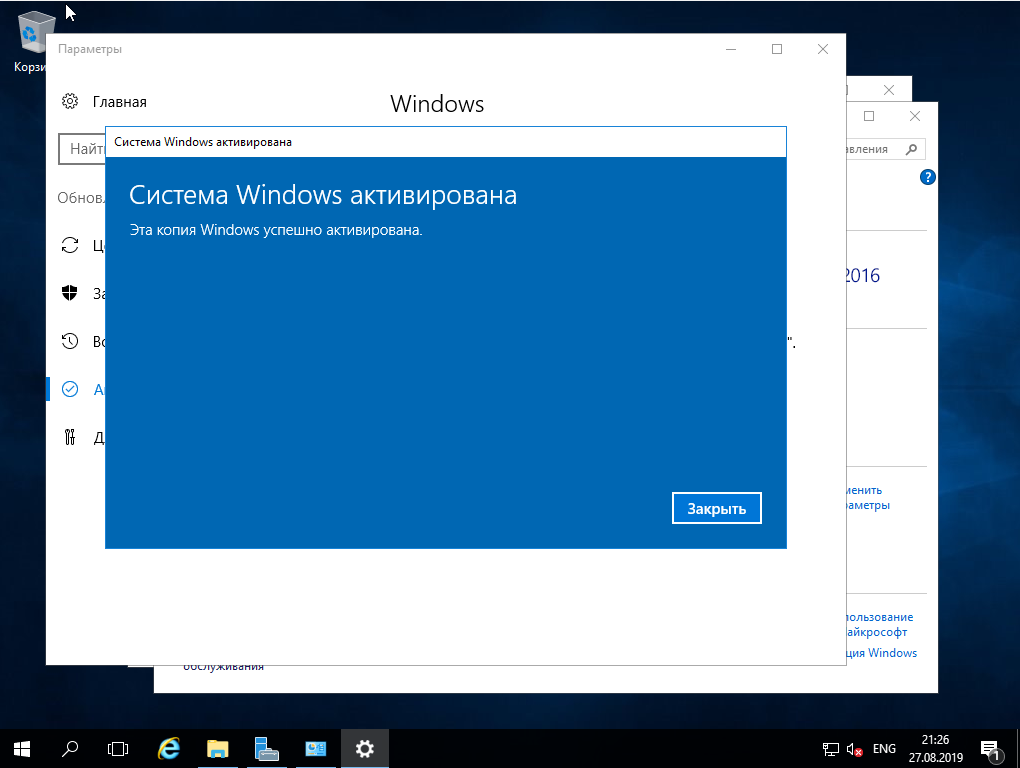
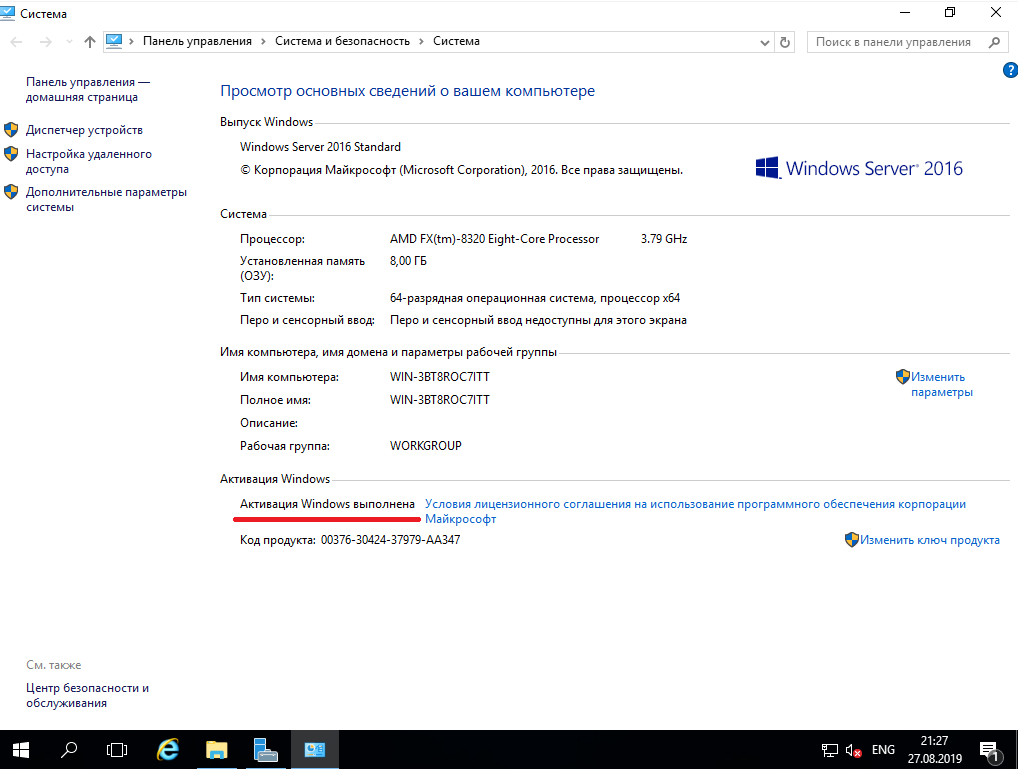
5) Приступим к первичной настройке, не углубляясь в сложности настройки серверной системы. Для начала активируем саму систему. Заходим в свойства компьютера => Активация Windows. Там Вам нужно будет ввести ключ активации.
Приобрести его можете в нашем интернет-магазине по низкой цене. Быстрая доставка ключа на Ваш Email в течении одного часа, так что настройка системы не заставит Вас долго ждать. Приобрести ключ активации на Windows Server 2016 можете в нашем каталоге на следующей странице.
6) Далее приступим к обновлению системы. Чтобы у нас изначально были все актуальные пакеты обновлений и безопасности, для Windows Server — это как никогда очень важно.
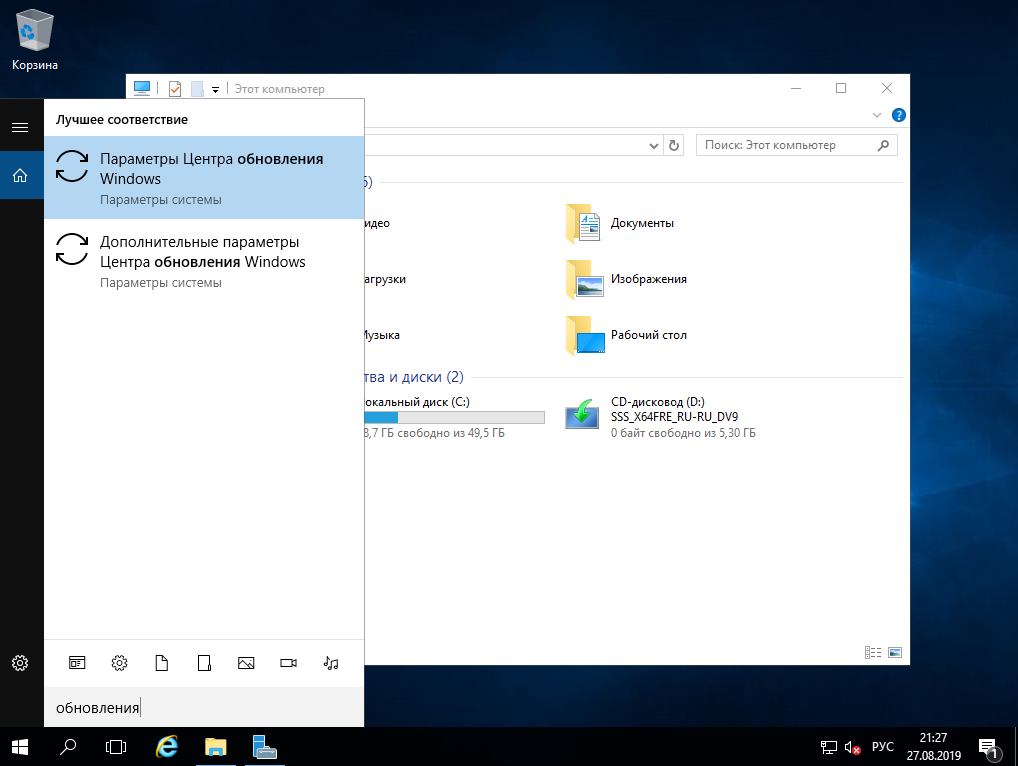
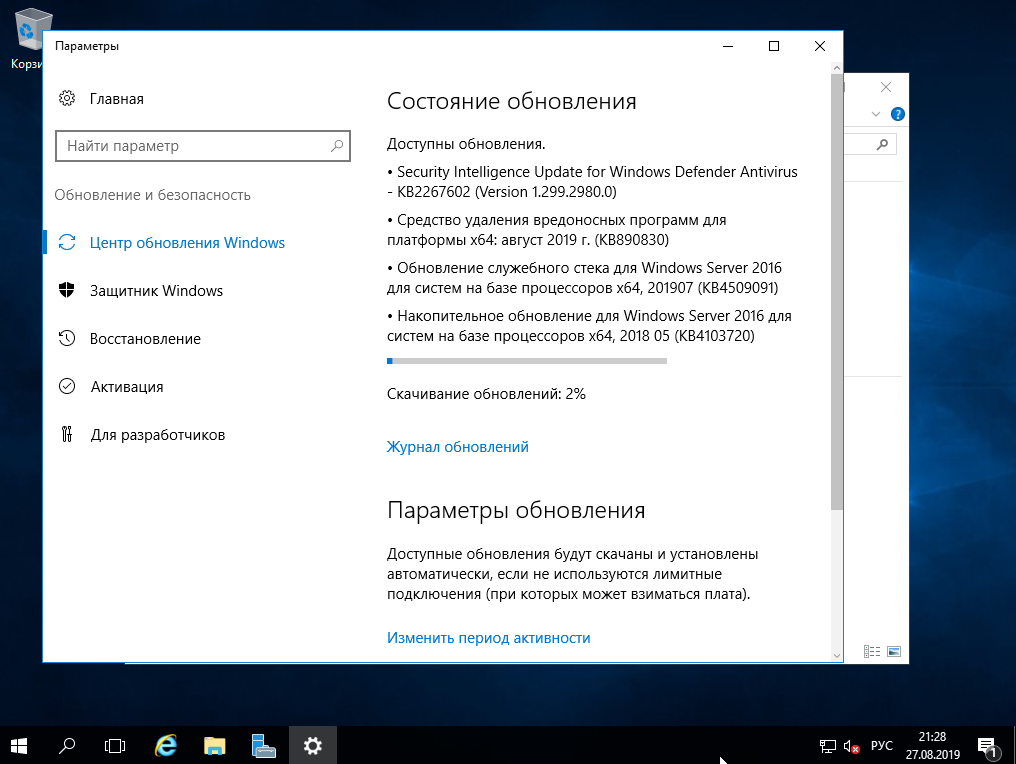
В поиске вводим слово «Обновления» и заходим в «Параметры центра обновлений Windows». Проверяете наличие обновлений, скачиваете и устанавливаете. После установки всех пакетов обновлений перезагрузите систему.
В следующей статье мы расскажем как настроить Windows Server.
Лицензионный ключ активации Windows Server 2016 от
,
This tutorial contains detailed instructions on how to install Windows Server 2016 Standard. Windows Server 2016 comes in 3 Editions: Essentials, Standard & Datacenter.
- Windows Server 2016 Essentials is ideal for small businesses with 25 users and up to 50 devices and does not support virtualization.
- Windows Server 2016 Standard is ideal for companies that require advanced features and virtualization (up to 2 virtual machines).
- Windows Server 2016 Datacenter is for companies that require advanced features and needs more that 2 virtual machines (unlimited).
Suggestion: Before buying (installing) the new server, choose the appropriate Windows Server 2016 edition according to your needs. View the detailed comparison of Windows Server 2016 Standard and Windows Server 2016 Datacenter.
Minimal System Requirements for Windows Server 2016.
| CPU: | 1.4 GHz 64-bit processor |
| RAM: | 512 MB ECC (Error Correcting Code) without Desktop Experience installation & 2GB with Desktop Experience installation. |
| Disk space: | 32 GB (Computers with more than 16 GB of RAM will require more disk space for paging, hibernation, and dump files). *
* Ideally use a disk with at least 80-100GB disk space. |
| Network adapter: | 1x Ethernet capable of at least gigabit throughput. |
| Other requirements: | UEFI 2.3.1c-based system & Firmware that supports secure boot. Trusted Platform Module if you want to use the BitLocker Drive Encryption. Internet access. |
How to Install Windows Server 2016 Step by Step.
1. Place the Windows Server 2016 DVD (or the USB) installation media and boot from it.
* Notes:
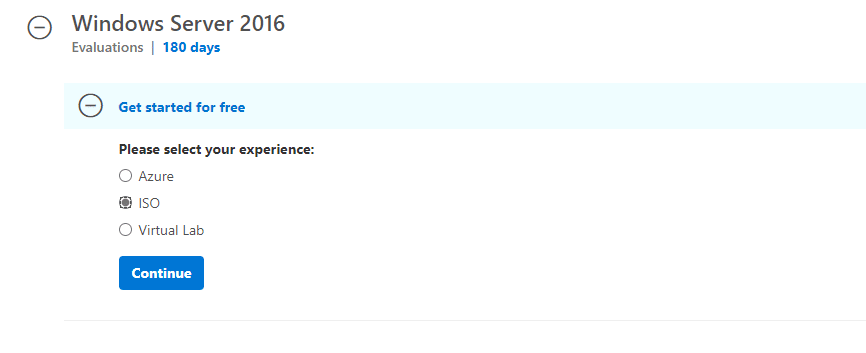
1. You can download an evaluation version of Windows Server 2016 in ISO format, from here.
2. To create a USB installation media, you can use Rufus USB creator utility.
2. At the first screen, choose your Language, Time & currency format and the Keyboard or input method and click Next.

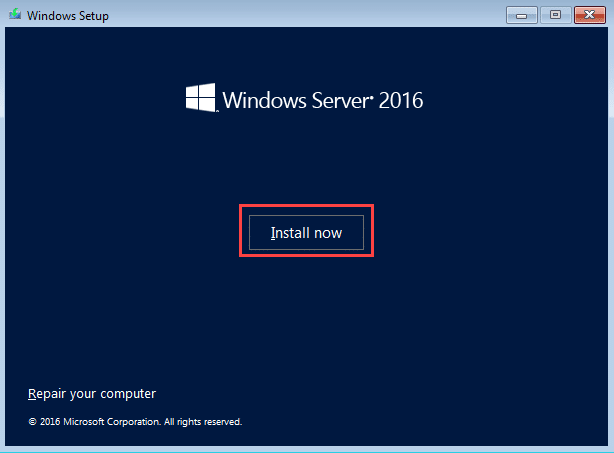
3. Then press Install now.

4. Choose the appropriate Server 2016 version,* according to your needs and click Next.
* Note:
The Windows Server 2016 (Desktop Experience) installation includes the Windows 10 GUI and the Server Manager.
The Windows Server 2016 without the Desktop Experience, is what we have known to be the Core installation and doesn’t include a GUI interface and the Server manager.
Important: Unlike some previous releases of Windows Server, you cannot convert between Server Core and Server with Desktop Experience after installation. For example, if you install Server Core and later decide to user Server with Desktop Experience, you should do a fresh installation (and vice versa).
In this tutorial, we choose to install the Windows Server 2016 Standard with the Desktop Experience. I prefer this option, because many companies have server based applications and needs the full GUI to operate well.

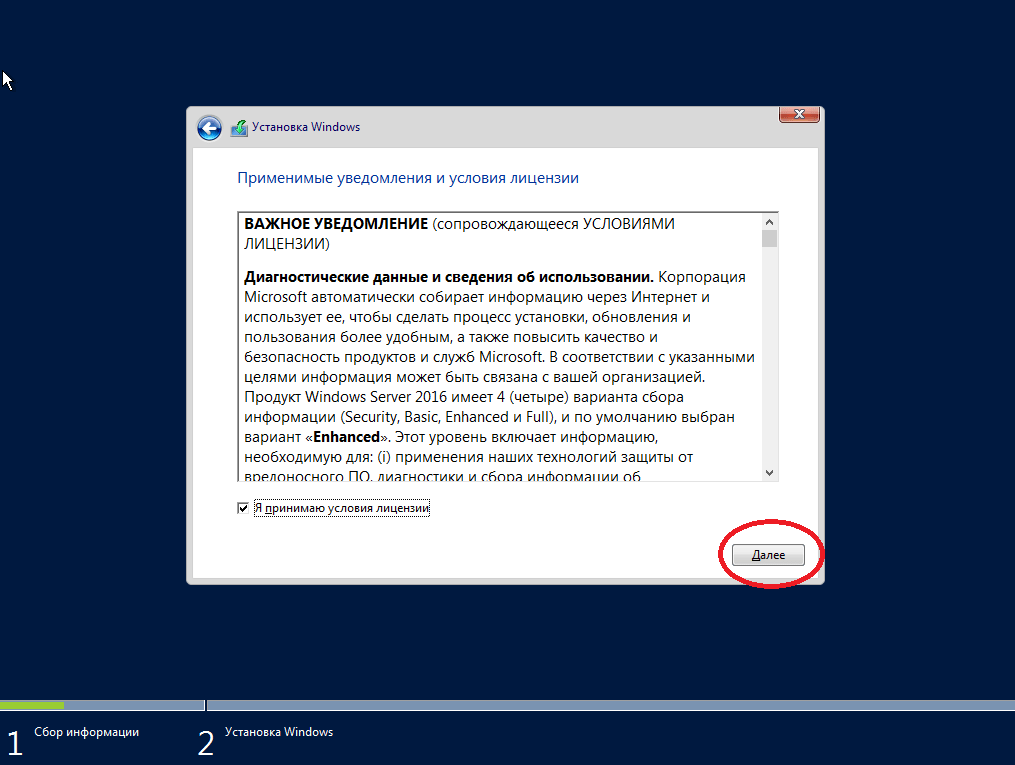
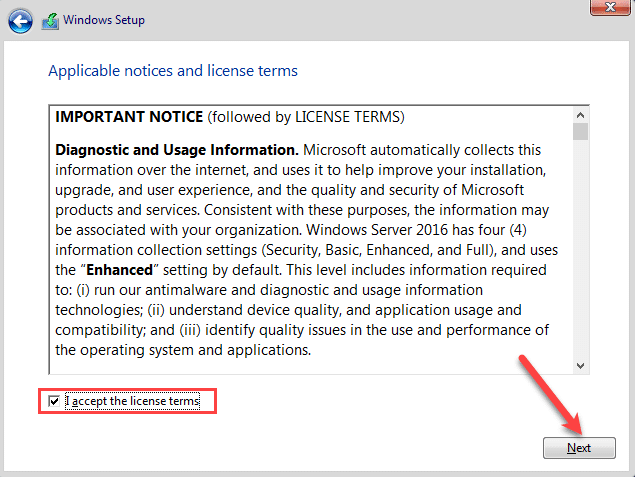
5. Accept the License terms and click Next.

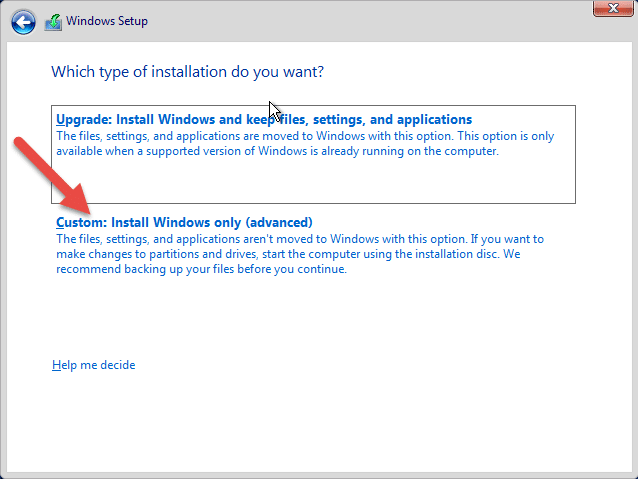
7. Provided that it is a new installation, choose Custom: Install Windows.

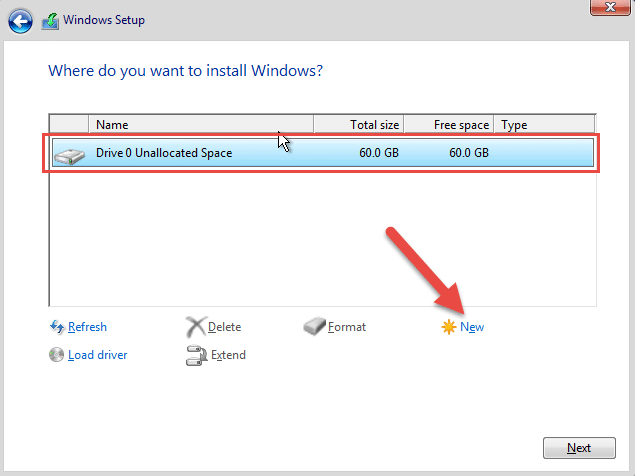
8. Then select the disk to install the OS and click Next. *
* At this point you can press the New button, in order to give a specific disk space in GB for the OS.

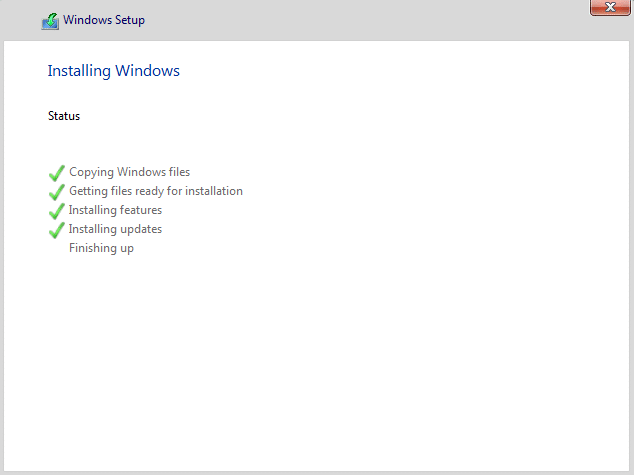
9. Let Windows setup to copy the required files and to finish the installation.

10. After a few restarts you ‘ll be prompted to specify a password for the (standard) Administrator account. Type a complicated password (composed of uppercase, lowercase, symbol and numbers) and click Next.

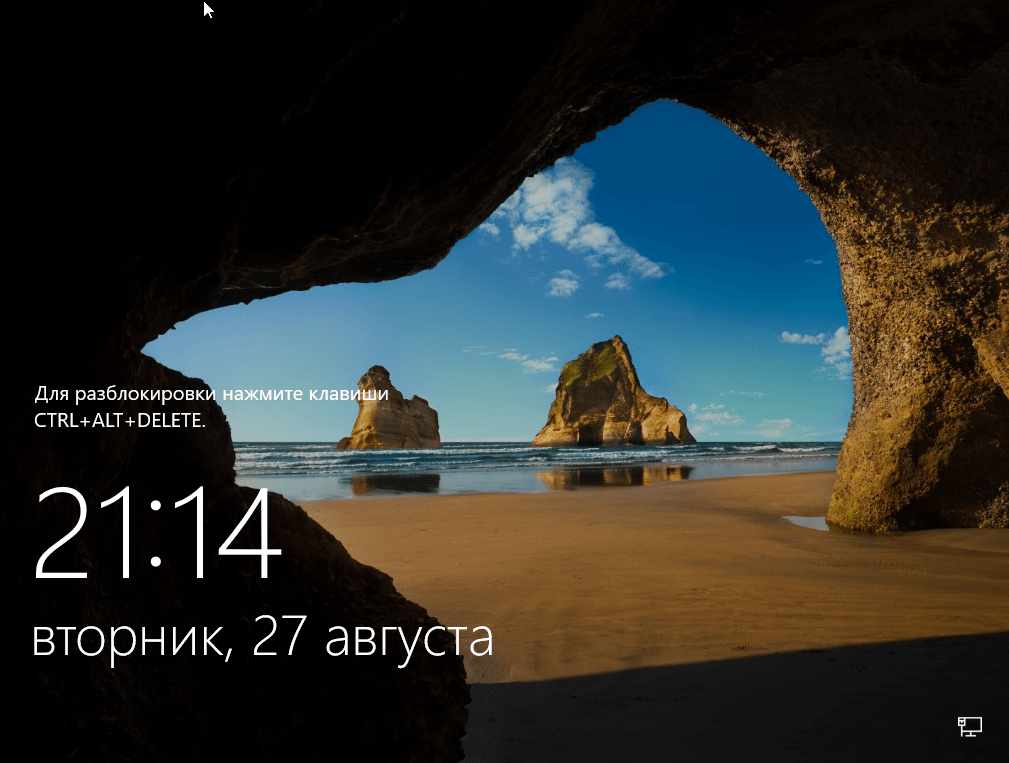
11. When prompted, press Ctrl + Alt + Delete, type the Administrator password and press Enter to login to your new server.

12. After login, Server Manager will start automatically. Proceed to configure your new server.

That’s it! Let me know if this guide has helped you by leaving your comment about your experience. Please like and share this guide to help others.
If this article was useful for you, please consider supporting us by making a donation. Even $1 can a make a huge difference for us in our effort to continue to help others while keeping this site free:
- Author
- Recent Posts
Konstantinos is the founder and administrator of Wintips.org. Since 1995 he works and provides IT support as a computer and network expert to individuals and large companies. He is specialized in solving problems related to Windows or other Microsoft products (Windows Server, Office, Microsoft 365, etc.).
how to install windows server 2016 from iso file In This Tutorial, We Learn About how to install windows server 2016 from iso file. Installation of Windows Windows Server 2016 is one of the major functions of the network. As an administrator, you should know how to install and configure Windows Server. To begin administering your network, of course you first need to install a Windows Server and configure it. Make a plan for installation before installing Windows Server. Of course, you can plug the installation media (DVD, USB flash, etc.) into the server.
Choose an appropriate version of Windows Server. One version of Windows Server supports specific roles / roles that others do not support. Think about your current needs and what your needs may be in the future. How many virtual machines may you need in the future? Does your network now require a web server? How many users work in your network? Those are all things you should pay attention to when making a good plan for a Windows Server installation.
download windows server 2016 ISO Image
First download windows Server 2016 ISO Image from Bellow Links.
download ISO Image from Microsoft official website
On windows server 2016, you can download the image by fill some required information from Microsoft’s Evaluation Center site. The downloaded ISO image has a trial validity of by default 180 days. Which can be registered and taken for a license for a lifetime.

Hardware Requirement to Install windows server 2016
- Processor: 1.4Ghz 64-bit processor
- 512 MB (2 GB for Server with Desktop Experience installation option)
- Disk Space: 32 GB
- Network: Gigabit (10/100/1000baseT) Ethernet adapter
- Optical Storage: DVD drive (if installing the OS from DVD media)
- Video: Super VGA (1024 x 768) or higher-resolution (optional)
- Input Devices: Keyboard and mouse (optional)
- DVD drive (if you intend to install the operating system from DVD media)
Feature of Windows Server 2016
- Shielded Virtual Machines
- Nano Server
- Containers Windows Server Container, Hyper-V Container.
- Linux Secure Boot
- The Resilient File System (ReFS) stable version
- Faster Hyper-V storage with ReFS.
- Hyper-V hot add NICs and memory
- Nested Virtualization
- Shielded VMs
installing windows server 2016
The downloaded ISO image (which was downloaded earlier) will have to be bootable before window server 2016 is put into the system. To make the image bootable, you have to use source USB or DVD. If you want to install Windows Server 2016 from DVD, you can burn iso image to DVD with DVD burning software (Nero, ASHAMPOO BURNING STUDIO, and a DVD burner, etc.).
Creating a bootable USB device for Windows server 2016
when you want to install windows server 2016 through USB Pen Drive use bellow software to make bootable Pendrive
dda command to write the ISO image directly to the USB device. (Linux)- Rufus (Windows)
- Windows USB/DVD Tool (Windows)
- UnDiskMaker X (Mac)
- diversal USB Installer (Windows)
- EaseUS (Windows/Mac)
windows server 2016 installation and configuration
To install Windows Server 2016, first go to the system’s BIOS (to go into the system’s bios can be a different key according to the system, such as changing the boot priority of the system by going to F2, F11 or F12.) Have to set the first priority through which you want to install the server.
Plug the Windows Server 2016 boot drive (DVD, USB) into the computer and boot your computer. When the Windows Setup page appears, select your language, time format, and keyboard then click on the Next button.

Click On Install Now Butten to start the installation process.

Select the appropriate version of Windows Server that meets the needs of your organization. In this installation, we have selected the windows server 2016 standard evaluation Desktop Experince and then click on Next. Make sure that you have chosen the appropriate version of Windows Server.
Accept the License Terms
Put a checkmark in the box next to the accepted license conditions (before applying the checkmark, carefully read the complete Microsoft’s terms and conditions) and click on the Next button. The term license is the way you want to purchase a license for your server from Microsoft.

On this, you will see two options upgrade and custom. Upgrades option is selected in the condition when a Windows operating system is already installed in our system such as windows 2012 or etc. And want to use all the files, settings, and applications in this new windows server 2016.
When we choose custom when we want to install the Fresh Operating System
In this article, we will proceed by clicking Custom: Install Windows only advance.

Create Drive In Windows server 2016
Select the hard drive that you want to install the windows server on, then click on the New button to do the partitions.
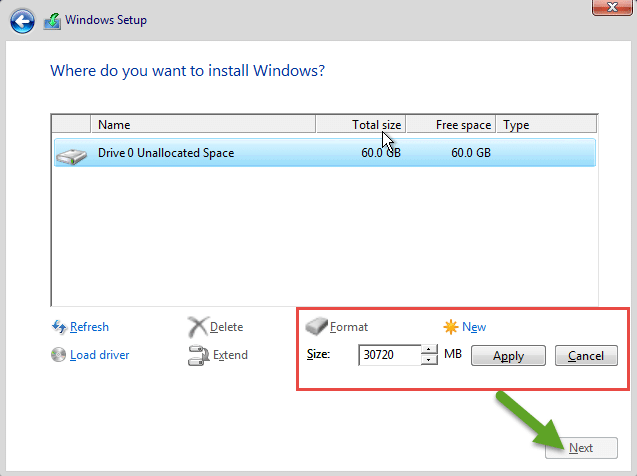
Here you can decide the size of the partition where you want to install windows server 2016. after gives the partition size click on Apply Butten

An alert appears in the Bellow Screen that allows the system to create a drive for the system file. Click on the OK button, if you want to add more drives then do this process again and Click On Next Button to Procced

here you can see the all created Drive size and Drive Name in the system if you want to edit the Drive Size double click on that partition and edit it , if drive size are ok click on next to procced

After clicking Next the System starts copying all the files from the external drive to the internal hard drive. Below Screen you can see the Windows Server 2016 Installation Process during the installation system restarted several times.

After the installation of Windows Server 2016 is completed, finalize your work by entering the required details. Type the complex password example SimiTECH@123 (made up of uppercase, lowercase, symbol, and number) twice in the box and click the finish button. The username will remain administrator by default.

Press Ctrl+Alt+Del buttons from Your Keyboard to start the screen to a login page and inside the box below the administrator user name, enter the password and press Enter button from the keyboard to sign in the Windows.

Change computer name in Windows Server 2016
To change the computer name, first open the server manager. After that click on local server, after that you will see the computer name by default was set during OS Installation , click on the computer name

Click On Manage option the one windows open here you put the your computer name according to your organization requirement click on Next button to procced .

system asking for restart he system to apply the change setting click n restart now button

now you successfully change the system computer name

Conclusion
In this Tutorials, we Learn how how to install windows server 2016 from iso file step by step with screenshots, and is ready to work. When Windows installed you can’t go back and for example, change the edition. If so, do the clean installation again. For any question leave a comment below.
Basic Monitoring Tools
How to Install MySQL Ubuntu 20.04
How to Install Windows 10 From a Bootable USB Drive.
Windows Server 2016 installation is one of the key tasks in the network. As an administrator, you should know how to install and configure Windows Server. To start administrating your network, you need first to install Windows Server.
Planning your installation before you start is a good idea. You should make sure you have the installation media, backup plan, and any other resources needed for installation. There are steps to follow when installing a Windows server, including downloading/installing the Remote Server Administration Toolkit.
Below, we will discuss a detailed guide on How to Install Windows Server 2016:
Preparation
Windows Server editions provide specific sets of features, and to the best of our knowledge, we believe you should purchase the edition that best suits your needs. For instance, if you need a system with high availability and clustering capabilities and customized connections for web-based applications, we recommend Windows Server 2016 Datacenter Edition.
There are many aspects you should take into consideration when determining how many virtual machines you need for your network. You can’t predict what will happen in the future, so consider these considerations while setting up your Windows server.
Preparing the installation medium (DVD, USB flash drive, etc.) and starting the installation process can help you download and install Windows Server 2016. If you don’t have the software, here’s a link to download it from the Microsoft website.
Now you create a bootable drive. Here is a complete guide: Create a Bootable USB Flash Drive | Microsoft Docs
Step 1: Insert your Windows Server 2016 media and boot from it (that you created above). When the Setup page appears, choose your language, time format, and keyboard before clicking Next.
Step 2: Now, click the Install Now button to start the installation process. Check the below screenshot for reference.
Step 3: Select the appropriate Windows Server version that meets your organization’s needs, then click Next. Make sure to choose an appropriate edition of Windows Server.
Step 4: Accept the terms and conditions and click Continue.
Step 5: Select the Custom: Install Windows only (advanced) option for a clean installation. A clean installation is often used as a term to denote an upgrade. You might have retained settings and apps from the previous Windows version when upgrading your Windows server on the new installation. On the other hand, a clean installation will not retain anything from the old version of Windows, which means it will be freshly installed.
Step 6: Please select the hard drive you want to install the Windows server on. You can then click on “New” to give it partitions.
Step 7: Specify the size of the drive in MB and press the Apply button. A warning appears which asks you to give permission to system software to create a drive for System files. Click on the OK button. If you want to add more drives, do this process again.
Step 8: Clicking Next will initiate copying all your files from an external drive to the internal drive. Please be patient, as this may take a bit of time. Note that your computer may need to be restarted several times to complete the copy.
Step 9: When you finish copying all of the files from one place to another, it’s a good idea to make sure everything went saved. To do this, finalize your task by entering two versions of a strong password in the box and then clicking on ‘Finish.’ Be sure that your user name is administrator.
Step 10: Press Ctrl+Alt+Delete to make the login screen accessible and type in the administrator name in the box below, followed by your password. Press Enter on your keyboard when you’ve finished.

Step 11: After logging in, you will see the following screen. Windows Server 2016 is ready to use.
Conclusion
I hope this guide on How to Install Windows Server 2016 was easy. Now that we’ve configured the Windows Server 2016, it’s ready for business. While installing Windows Server, you won’t be able to change editions, for example. If you want to do a clean install again, just leave a comment below, and I’ll get back to you promptly!
Подробное и понятное руководство о том, как установить Windows Server 2016.
Настоятельно рекомендую никогда не использовать никаких сторонних сборок Windows. Используйте только оригинальные установочные образы.
Рекомендую всегда использовать англоязычные издания Windows Server. Оригинальные (английские) версии Windows работают стабильнее.
Требования к компьютеру:
процессор: — 1.4 GHz 64-bit;
совместимость с набором команд x64;
поддержка NX и DEP;
поддержка CMPXCHG16b, LAHF/SAHF и PrefetchW;
поддержка Second Level Address Translation (EPT или NPT).
объём оперативной памяти:
минимум 512 MB (2 GB для Server с вариантом установки Desktop Experience);
ECC (Error Correcting Code) type или аналогичная технология.
Дополнительные требования:
Требования к контроллерам внешнего ЗУ и дисковому пространству:
Компьютеры, на которых работает Windows Server 2016, должны включать адаптер с памятью, совместимый со спецификацией архитектуры PCI Express. Устойчивые устройства хранения данных на серверах, которые классифицируются как жесткие диски, должны быть не PATA. Windows Server 2016 не работает с ATA/PATA/IDE/EIDE для загрузки, страниц и как с накопителями данных.
Предположительные минимальные требования к свободному пространству на жёстком диске для системных разделов: 32 GB.
Сетевой адаптер:
Минимальные требования:
адаптер Ethernet с пропускной способностью от gigabit;
совместимость со спецификациями архитектуры PCI Express;
поддержка Pre-boot Execution Environment (PXE).
Сетевой адаптер с поддержкой отладки сети (KDNet) может быть полезен, но не является минимальным необходимым условием.
Другие требования:
DVD-привод (для установки с диска).
Следующие пункты не являются жёсткими требованиями, но нужны для определённых функций:
система на базе UEFI 2.3.1c и прошивка, поддерживающая безопасную загрузку;
надёжный платформенный модуль;
графическое устройство и монитор с разрешением Super VGA (1024 x 768) и выше;
клавиатура и мышь Microsoft® (или другое совместимое указующее устройство);
подключение к Интернет.
Как создать загрузучную флешку. После успешной загрузки с установочной флешки или DVD-диска Windows Server 2016, первым делом необходимо выбрать языковые параметры.
В данном руководстве рассматривается установка Windows Server 2016 на английском языке.
После выбора языка нажимаем на кнопку “Next”.

Нажимаем на кнопку “Install now”.

Обратите внимание, если вам необходимо установить Windows Server 2016 в режиме Server Core (без GUI), то вам нужно выбрать “Windows Server 2016 Standard Evaluation” или “Windows Server 2016 Datacenter Evaluation”.
В данном примере рассматривается установка Windows Server 2016 Datacenter Evaluation (Desktop Experience).
Выбираем “Windows Server 2016 Datacenter Evaluation (Desktop Experience)” и нажимаем “Next”.

Теперь необходимо принять условия лицензии.

На этом шаге предлагается два варианта установки:
“Upgrade”. Это не самый лучший вариант. Как показывает практика, многочисленные программы могут быть не совместимы с новой операционной системой, и после обновления вы не сможете с ними работать, кроме того есть вероятность перетащить проблемы со старой операционной системы в новую, таким, образом потеряв всякую стабильность.
“Custom”. Самый лучший и рекомендуемый вариант для установки любой версии операционной системы Windows. Он позволяет начать работу с системой “с чистого листа”, таким образом, после установки вы получите максимальное быстродействие и стабильность. Останется только установить драйвера и привычное для работы программное обеспечение.

Теперь необходимо выбрать на какой диск будет установлена новая операционная система и выделить место для установки.
В случае если у вас установлено более одного диска или на диске уже имеется несколько разделов, все это будет отображаться на данном этапе. Необходимо соблюдать осторожность и заранее понимать, на какой раздел вы хотите установить операционную систему.
В данном примере установлен один диск объемом 60 GB.
Нажимаем на кнопку “New”.

В данном случае под систему будет выделено все свободное место на диске, поэтому оставляем значение в разделе “Size” по умолчанию.
Нажимаем на кнопку “Apply”.

Операционная система уведомляет о том, что ей может понадобиться создать дополнительные разделы на диске для хранения системных файлов.
Нажимаем на кнопку “OK”.

Таким образом, под операционную систему было выделено все свободное место на диске, но в то же время система зарезервировала для себя небольшой раздел.
Теперь необходимо выбрать раздел, на который предполагается установить операционную систему, и нажать на кнопку “Next”.

Начался процесс установки операционной системы.

Компьютер автоматически перезагрузится.

Теперь нужно указать надежный пароль для учетной записи “Administrator”.
Нажимаем на кнопку “Finish”.

После завершения настроек, вас встретит экран блокировки Windows Server 2016.
Нажимаем “Ctrl+Alt+Delete”.

Далее необходимо войти в систему под учетной записью “Administrator”.

Далее будет возможность включить сетевое обнаружение, чтобы сервер был виден другим компьютерам в сети.
Обратите внимание, сетевое обнаружение не рекомендуется включать в публичных сетях.
Нажимаем на кнопку “Yes”.

Установка Windows Server 2016 завершена.

В русской редакции все аналогично и интуитивно понятно.