Version 4.8.1
Version 4.8.0
New Features
- ESP32-C5: Added full support
- ESP32-C61: Added full support
- ESP32-P4: Enabled USB-Serial/JTAG in flasher stub
- ESP32-P4: Updated eFuse table
- ESP32-P4: Added ECO1 magic number
- ESP32-P4: Added external spi flash connection restriction checks
- ESP32-P4: Added
waferandpkg_versionfields - ESP32-C5-beta3: Added preview support
- ESP32-S3: Clear boot control register on hard reset to avoid going back to download mode
- Added a new
read_flash_sfdpcommand to read the flash chip SFDP register - Added serial port filtering and selection by VID/PID/Name
- Added advisory port locking
- Added new ROM bootloader flash error definitions
- Added an option to retry connecting to the chip in a loop
- Automatically reconnect if a serial port disconnects during reset
- write_flash: Retry flashing if the chip disconnects during writing data
- write_flash: Added image binary SHA digest recalculation if fields change
- flash_id: Print flash voltage
- get_security_info: Print
key_purposefields - loader: Enabled usage of context managers for
espinstances - espefuse: Added support to extend eFuse table by user CSV file
- espefuse: Added eFuse dump formats: joint(default) and split(new)
- espefuse: Added incompatible eFuse settings check for ESP32-S3
- espefuse: Allow eFuse filtering based on command line arguments
- espefuse: Added a check for correctness of written data
- espefuse: Updated
adc_infocommand for all chips - espefuse: Enabled operation with
coding scheme == 3 - espefuse: Updated eFuses of ESP32-C6 and ESP32-H2
- espefuse: Postpone burning of some eFuses to the very end
- espefuse: Improved help for
burn_efusecmd - espefuse:
check_error --recoverchip even if there are errors - espsecure: Added support for secure boot v2 using ECDSA-P384 signatures
- cli: Added support for autocompletions
Bug Fixes
- ESP32: Fixed ROM not attaching in-package flash chips
- ESP32-D0WDR2-V3: Print correct chip name
- write_flash: Verify if files will fit against the real flash size to prevent writing past flash end
- write_flash: Erase non-aligned bytes with —no-stub
- bin_image: Added a check for ELF file segment when saving RAM segments
- elf2image: Added ELF flags to merge condition
- merge_bin: Treat files starting with a colon as raw files
- image_info: Index image segments from 0 instead of 1
- read_flash: Added flash size arg to enable reading past 2MB without stub
- read_flash: Flush transmit buffer less often to increase throughput
- remote_ports: Disabled the reset sequence when a socket is used
- bitstring: Restricted bitstring dependency to fix 32-bit compatibility
- USB-OTG: Pass error message to an exception if a reset cannot be performed
- espefuse: Use stub class if stub flasher is running
- espefuse: Fix pem file reading in
burn_keyofECDSA_KEY - ram_only_header: Do not append SHA256
- ram_only_header: Pad flash segments to the next boundary
- ram_only_header: Sort segments
- secure_download_mode: Disable secure boot detection and print more info
- intelhex: Catch unicode decode errors when converting hex to binary
- Fixed glitches on RTS line in
no_resetmode on Windows - Disable resetting on unsupported serial ports
Code Refactoring
- Migrated
esp_rfc2217_serverinto a standalone subpackage
Thanks to @befeleme, @klondi, @gnought, @greendoescode, @BoryaGames, @andrewleech, @bryghtlabs-richard, @2opremio, and others for contributing to this release!
Results of checking the release against common anti-virus SW
- esptool-v4.8.0-win64.zip
- esptool-v4.8.0-macos.zip
- esptool-v4.8.0-linux-arm64.zip
- esptool-v4.8.0-linux-arm32.zip
- esptool-v4.8.0-linux-amd64.zip
The failures are probably false positives. You can mark esptool as safe in your anti-virus SW, or install esptool from source.
Version 4.7
New Features
- spi_connection: Support —spi-connection on all chips, allowing connection of an external flash
- esp32-s3: Support >16MB quad flash chips
- bin_images: add support for intel hex format images
- merge_bin: add support for uf2 format
- esptool: added esp32p4 target
- esp32p4: Stub flasher support
- espefuse: Support XTS_AES_256_KEY key_purpose for ESP32P4
- xip_psram: support xip psram feature on esp32p4
- elf2image: add ram-only-header argument
- rfc2217_server: Add hard reset sequence
- espefuse: Adds efuse ADC calibration data for ESP32H2
- espefuse: Update the way to complete the operation
- add support for get_security_info on esp32c3 ECO7
- loader: Added hints for some serial port issues when rising port error
- Add support for Python 3.12
- esp32c3: Support ECO6 and ECO7 magic numbers
- efuse: Update key purpose table and tests
- efuse: ESP32P4 adds ecdsa_key support
- espefuse: Add support for esp32p4 chip
- espsecure: Allow prompting for HSM PIN in read_hsm_config
- esptool: Add new packages for ESP32C3 and flash efuses
- esptool: Add tests for get_chip_features
- esptool: Add PICO package for ESP32S3 and flash/psram efuses
- get_security_info: Improved the output format and added more details
Bug Fixes
- flasher_stub: fix usb-serial-jtag enabled non-related intr source, improved stability
- esp32c2: Added get_flash_cap and get_flash_vendor
- testloadram: Windows assertion error
- fixed exit() to be used from the correct module
- esp32c2: Recommend using higher baud rate if connection fails
- test_esptool: Fixed connection issues on Windows
- esptool: Rephrase the —ram-only-header command message
- load_ram: check for overlaps in bss section
- tests/intelhex: make sure file is closed on Windows
- spi_connection: Unattach previously attached SPI flash
- espefuse: Fix ECDSA_FORCE_USE_HARDWARE_K for ECDSA key (esp32h2)
- loader: Could not open serial port message adjusted
- bin_image: Check only ELF sections when searching for .flash.appdesc
- Fix redirection of STDOUT
- autodetection: Remove the ESP32-S2 ROM class from get_security_info autodetection
- elf2image: fix text/rodata mapping overlap issue on uni-idrom bus chips
- expand file args: Correctly print the expanded command
- esp32-c2: Enable flashing in secure download mode
Code Refactoring
- stub_flasher: Cleanup, make adding new targets easier
Thanks to @20162026, @rretanubun, and others for contributing to this release!
Version 4.6.2
Bug Fixes
ESP32-H2, ESP32-C6: Fixed byte order in MAC address.C900: Too much data: Fixed occasional compressed upload failures.CH9102F USB-to-UART: Suggest installing new serial drivers if writing to RAM fails on MacOS.
Miscellaneous Changes
- Documentation: Added docs for
ESP32-C2,ESP32-H2, andESP32-C6.
Version 4.6.1
Bug Fixes
ESP32-S3 USB-Serial/JTAG: Fix incorrect RTC WDT registers to avoid resets during flashing.
Version 4.6
New Features
- Added the option to specify
ALLas a size argument inread_flashanderase_regionto perform said operation until the end of the flash memory. (#461) image_info: Display the WP pin state in human-readable form. (#874)image_info: Display chip type based on Chip ID, if available. (#874)ESP32-C6andESP32-H2: Added support for reading 64-bit MAC address.
espefuse.py
- Added efuse description YAML files for all chips.
ECDSA_KEY: Added support for burning from PEM file.burn_keyandburn_key_digest: Hide sensitive info during burning by default.- Added support for external
espinstance. (#873) - Improved efuse error viewing.
ESP32-H2: Added RF Calibration Information.
Bug Fixes
- Fixed
01060000: Operation or feature not supportederror by setting flash parameters even with--flash_size keep. USB-Serial/JTAG: Autofeed super watchdog (SWD) to avoid resets during flashing.USB-Serial/JTAG: Fixed failing reset sequence on COM ports >= 10 due to PID detection error. (#880)ESP32-C6: Fixedget_pkg_versionandget_{major,minor}_chip_version. (#867)image_info: Removed check that reserved bytes in the image header are zero, which would break chip type autodetection.- Moved bootloader description header
bootdescto the top of the RAM segment. - Refactored to support
cryptography>=40. - Refactored to support recent
reedsolopackage versions.
espefuse.py
ESP32-C2: FixedBLOCK_KEY0summary view when SB + FE keys are burnt.ESP32-C3,ESP32-C6,ESP32-S3,ESP32-H2: Prevent burningXTS_AESandECDSAkeys intoBLOCK9(BLOCK_KEY5).
espsecure.py
- Improved error message for incorrect PEM format. (#881)
- Added a clear error message if an incompatible OpenSSL backend is used. (#878)
Miscellaneous Changes
- flasher stub: Makefile changes for clarity and modularity. (#858)
- Build workflow: Added binaries for
ARMandARM64. - tests: Refactored the test suite to be Windows-compatible.
- Fixed inconsistent usage of directory separators. (#884)
Thanks to @paravoid, @xingrz, @hasheddan, @fuzeman, @Massimiliano-solutiontech, and others for contributing to this release!
Version 3.3.3
This bugfix release of an older esptool.py version is intended only for purposes when v3.3 needs to be used. The latest v4 release is recommended and under active development.
New Features
- Added a new option
--pad-to-size <size>. - Added support for major and minor chip revisions.
Bug Fixes
espefuse: Fixed compatibility with Bitstring>=4 (#797)
Thanks to everyone who contributed to this release!
Version 4.5.1
Bug Fixes
ESP32-S3: Temporarily disabled increasing CPU frequency in the stub flasher (#832, #848, #842).- Fixed error messages when esptool is used with an unknown chip.
esp_rfc2217_server: Updated reset sequences.esp_rfc2217_server: Registered as a script (#846).pyinstaller: Fixedglibcdependency on gnu/linux (#843).
Miscellaneous Changes
- Added target tests for ESP32-H2.
- Reduced size of test images.
- Added a custom
host_testmarker for the test suite to allow running tests without real hardware (#838).
Thanks to @DCSBL and others for contributing to this release!
Version 4.5
This release aims to fix most of the major issues with resetting into the download mode, flashing in the USB-Serial/JTAG mode, and working with large-capacity flash memory chips.
New Features
Configuration file: Added the option to configure internal variables (such as timeouts and delays) and to implement a custom reset sequence (see the related documentation).Bootloader reset: Added a new reset strategy to make resetting into the download mode more reliable on MacOS and Linux systems (#712).ESP32-S3: Added support for >32MB octal flash chips (#795, #745).ESP32-H2: Added full esptool and flasher stub support.ESP32-C6: Added full flasher stub support.flash_id: Print the flash memory chip type (quad vs. octal) if available (#730).elf2image: Added--pad-to-size <size>option to specify a size to which the generated binary image must be aligned.write_flash: Added a security check to prevent bricking the device when flash encryption is active.- Optimized to reduce the number of steps when a chip is being interrogated.
espsecure.py
- Added an external HSM signing interface.
- Added support for pre-calculated signatures.
- Added PKCS#8 identifier support (#819).
Bug Fixes
USB-Serial/JTAG: Fixed randomly failing transfers when writing/reading large binaries.ESP32-S3: Fixed crashing stub flasher when using in USB-Serial/JTAG mode (#808)ESP32: Recalculate the crystal clock to compensate for the chips baud rate setting as a workaround to avoid ESP32 CK_8M frequency drift.ESP32-S3: Fixedv0.0chip being detected asvX.8.StopIteration: Fixed several possible errors when stub flasher is being uploaded and added better error messages for other cases (#824).- Fixed chip autodetection and operations in the secure download mode on ESP32-S2 and S3 (#813).
write_flash: Fixed the--erase-alloption corrupting flash (#805).write_flash: Fixed security checks whenmin_revandmax_rev_fullare specified in the image.- Fixed compatibility with
bitstring>=4package. - Fixed compatibility with
reedsolowhen using Python 3.10 and Cython (#711).
espefuse.py
- The serial port now gets closed when
espefusefails (#803).
Miscellaneous Changes
- Refactored to make adding new targets easier, reduce code repetition, and comply with the Black 23.1 style.
- Added target tests for all of the newly supported chips.
- Updated the toolchains for stub flasher builds.
Thanks to @256dpi, @StevenMacias, @fennecbutt, and others for contributing to this release!
Version 4.4
New Features
flasher_stub: Increased read/write speeds overUSB-JTAG/SerialorUSB-OTGmodes, making some operations nearly twice as fast.- Added detection for guru meditation errors induced by the flasher stub or ROM bootloader.
- Added a readable error message for serial-related failures, giving more information about possible HW issues.
espsecure.py: Improved AES-XTS encryption speed. (#783)
Bug Fixes
ESP32-S3 v0.0: Fixed chip revision detection.bitstring: Added a workaround for breaking changes ofbitstring==4get_default_connected_device: Fixed to close unused serial ports.flash_freq: Fall back to a chip-specific default flash frequency when noflash_freqarg is specified.ESP32-C6: Fixed chip type detection and SPI flash communication.
Thanks to @Emill and others for contributing to this release!
How to setup and configure Esptool for Tasmota upload on an esp8266
The information below is for the Python version of esptool — If you want to use the Windows/Linux/OSX(MAC) executable version of esptool (as would be included in Arduino ESP8266 cores) then please go to the esptool executable (Windows, MacOs and Linux) section at the bottom.
If you do not have an installed copy of Python download and install it from https://www.python.org/.
Download Esptool Source code from https://github.com/espressif/esptool/releases to a known folder.
Go to the known folder and install Esptool with command python setup.py install.
Packages for Esptool are maintained for Debian and Ubuntu and can be installed with sudo apt install esptool.
Download Tasmota~
Download the latest Tasmota release firmware file tasmota.bin to a known folder.
Upload Tasmota~
Put device in firmware upload mode~
When performing a firmware upload do not connect the device to AC but use the power supply provided by your (FTDI type) serial interface.
Put the device in firmware upload mode by grounding pin GPIO00 while applying power.
Grounding pin GPIO00 can often be achieved by pressing button 1 on the Sonoff device or using a wire between GPIO00 and Gnd if the button is not available. Deviations may apply.
Connect the serial interface of your PC to the device while GPIO00 to Gnd.
Esptool uses the serial interface to communicate with your device. On Windows these interfaces are named COM1, COM2 etc. On Linux these interfaces are called /dev/ttyUSB0, /dev/ttyUSB1 etc.
Before using Esptool make sure you know to which serial interface name your device is connected to.
In the following commands I use COM5 as an example.
Optional: Backup firmware~
Ensure the device is in firmware upload mode.
Backup the current firmware with the following command:
esptool.py --port COM5 read_flash 0x00000 0x100000 image1M.bin
NOTE: When the command completes the device is out of firmware upload mode!
Erase firmware~
Ensure the device is in firmware upload mode.
Erase the complete flash memory holding the firmware with the following command:
esptool.py --port COM5 erase_flash
NOTE1: When the command completes the device is out of firmware upload mode!
NOTE2: It only takes a few seconds to erase 1M of flash.
Upload firmware~
Ensure the device is in firmware upload mode.
Load the downloaded Tasmota firmware file tasmota.bin with the following command:
esptool.py --port COM5 write_flash -fs 1MB -fm dout 0x0 tasmota.bin
NOTE1: When the command completes the device is out of firmware upload mode!
NOTE2: For a proper device initialization after first firmware upload power down and power up the device.
ESPTOOL Executable (Windows, MacOs and Linux)~
The executable version of esptool can be downloaded from https://github.com/espressif/esptool/releases
Download and Install~
For the purpose of simplicity only the Windows version will be explained here, but the command and parameters are the same for Windows, Linux and MAC/OSX.
Download the latest release from https://github.com/espressif/esptool/releases and extract the compressed file to a known location.
Download Tasmota~
Download the latest Tasmota release firmware file tasmota.bin to a known folder (The same folder as where you have the esptool executable will work well for this process to be simpler)
If you want features from the current development codebase which has not been included in the last release please download this tasmota.bin to a known folder (The same folder as where you have the esptool executable will work well for this process to be simpler)
The information posted further up in this Wiki for placing the device into bootload / firmware upgrade mode may be followed as this process does not change irrespective whether you use the Python or executable version of esptool.
Once the device is in firmware upload mode the following commands are recommended for completion of the firmware flashing.
Erase the flash completely with the following command (substituting the COM port for the one which was used on your computer)
esptool.exe --port COM5 erase_flash
Once the erase is complete, reset your device back into programming mode and then upload the firmware using the following command
esptool.exe --port COM5 write_flash -fs 1MB -fm dout 0x0 tasmota.bin
Содержание
Утилита Esptool поможет считать и записать на платформу с чипом ESP8266EX прошивку в формате .bin.

Подготовка железа
Подключите управляющую платформу в режиме прошивки.
-
Подключение WiFi Slot: просто подключите платформу к ПК через micro-USB разъём;
Установка ПО
-
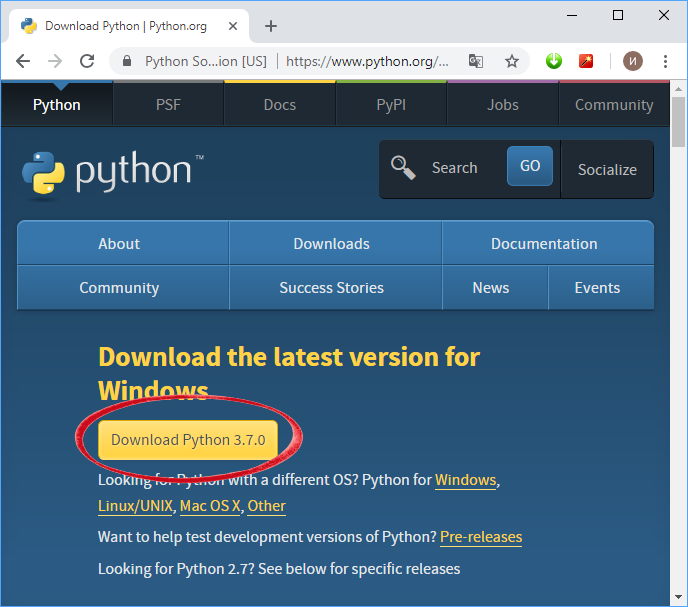
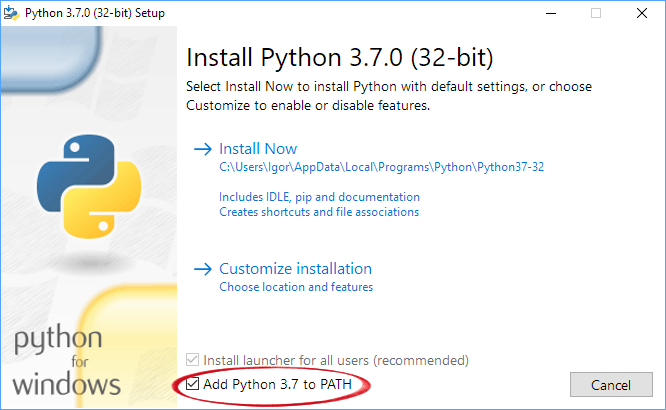
Скачайте и установите последнюю версию интерпретатора с официального сайта Python.

При установке поставьте галочку в пункте «Add python.exe to PTH».
-
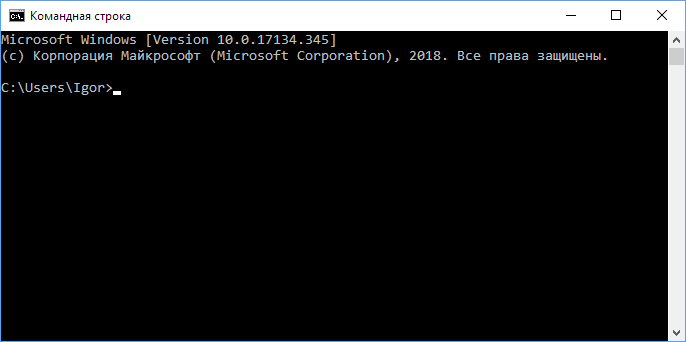
Зайдите в командную строку: :
-
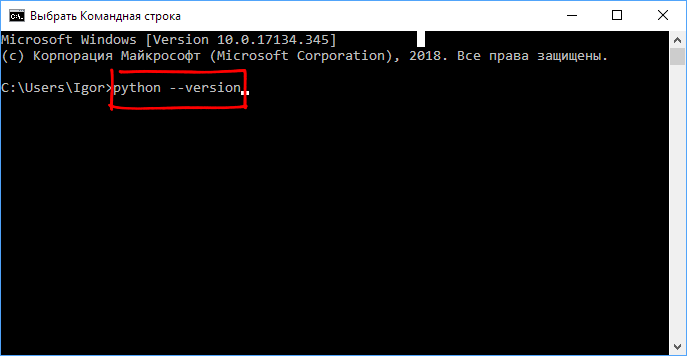
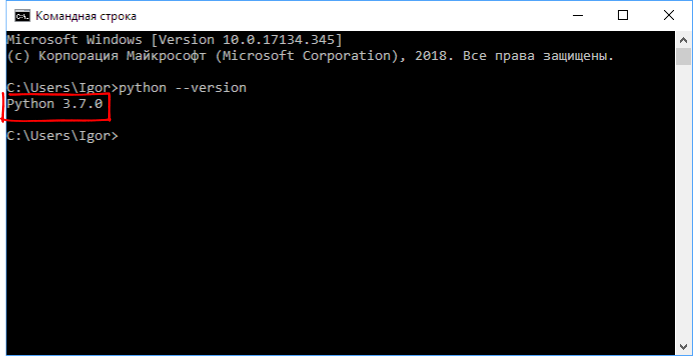
Проверьте установленную версию Python. Введите в командной строке:
python --version
В ответ консоль выдаст строку с версией Python.
-
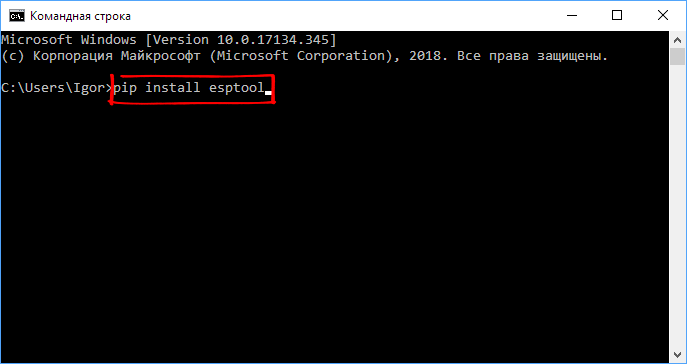
Установите через менеджер пакетов pip утилиту esptool.
pip install esptool
-
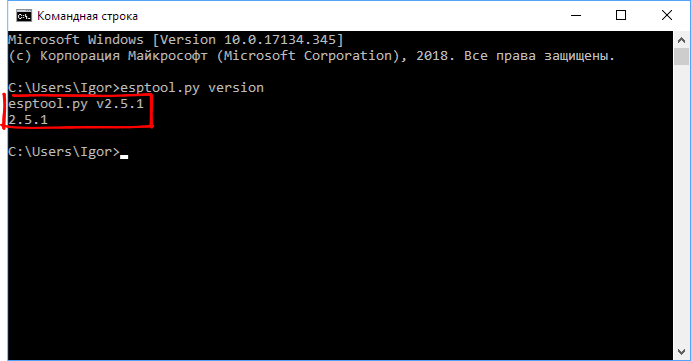
Узнайте установленную версию Esptool.
esptool.py version
В ответ командная строка выдаст ответ с текущей версией утилиты.
Это значит, что утилита установилась и можно переходить к чтению или записи прошивки.

Чтение прошивки
-
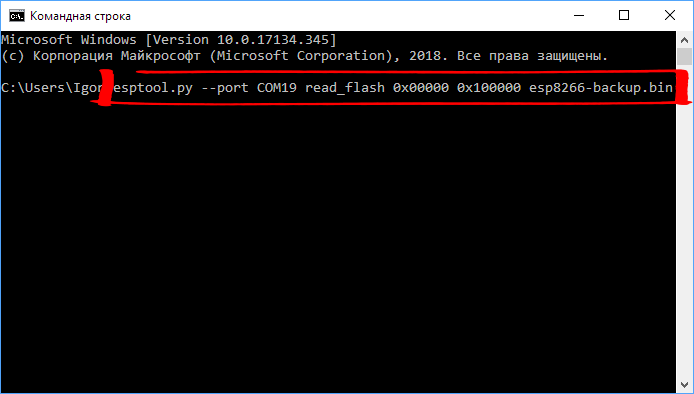
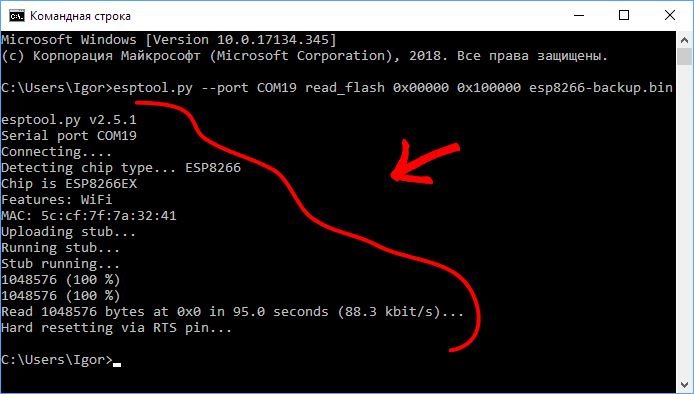
Для чтение прошивки необходимо вбить в консоль строку с определёнными параметрами. В зависимости от модуля и других факторов параметры команды отличаются. Рассмотрим на примере строки:
esptool.py --port COM19 read_flash 0x00000 0x100000 esp8266-backup.bin
-
esptool.py— запуск утилиты; -
–port COM19— номер COM-порта устройства. Узнайте ваш номер в диспетчере задач; -
read_flash— команда считывания данных из флэш-памяти; -
0x00000— адрес начала считывания флэш-памяти; -
0x10000— адрес конца считывания флэш-памяти; -
esp8266-backup.bin— имя файла для считываемой прошивки.
-
-
Со строкой разобрались. Пора считывать.
В ответ начнётся считывание прошивки с модуля с индикацией состояния в консоле.
-
Дождитесь окончания прошивки.
-
Файл прошивки вы найдёте в директории из которой работали в командной строке. Теперь можно прошивать модули на чипе ESP8266 любой кастомной прошивкой.
Для возврата к заводской прошивки воспользуйтесь утилитой esptool.
Project description
A Python-based, open-source, platform-independent utility to communicate with the ROM bootloader in Espressif chips.
Documentation
Visit the documentation or run esptool.py -h.
Contribute
If you’re interested in contributing to esptool.py, please check the contributions guide.
About
esptool.py was initially created by Fredrik Ahlberg (@themadinventor), and later maintained by Angus Gratton (@projectgus). It is now supported by Espressif Systems. It has also received improvements from many members of the community.
License
This document and the attached source code are released as Free Software under GNU General Public License Version 2 or later. See the accompanying LICENSE file for a copy.
Download files
Download the file for your platform. If you’re not sure which to choose, learn more about installing packages.
Source Distribution
File details
Details for the file esptool-4.8.1.tar.gz.
File metadata
-
Download URL:
esptool-4.8.1.tar.gz - Upload date:
- Size: 409.5 kB
- Tags: Source
- Uploaded using Trusted Publishing? No
- Uploaded via: twine/4.0.2 CPython/3.7.17
File hashes
Hashes for esptool-4.8.1.tar.gz
| Algorithm | Hash digest | |
|---|---|---|
| SHA256 | dc4ef26b659e1a8dcb019147c0ea6d94980b34de99fbe09121c7941c8b254531 |
|
| MD5 | c7d41d4c89ffa0fa0a9d490439358b27 |
|
| BLAKE2b-256 | 5c6b3ce9bb7f36bdef3d6ae71646a1d3b7d59826a478f3ed8a783a93a2f8f537 |
See more details on using hashes here.
Esptool is a versatile and powerful utility that has gained popularity in the world of IoT (Internet of Things) and embedded systems. Developed by Espressif Systems, a company renowned for its contributions to the ESP8266 and ESP32 microcontroller platforms, esptool is an indispensable tool for flashing firmware, managing memory, and debugging ESP-based devices. In this blog post, we’ll delve into the world of esptool, discussing what it is, its key features, and how to use it effectively.

Esptool is an open-source Python-based utility designed to interact with Espressif’s range of microcontrollers, particularly the ESP8266 and ESP32. These microcontrollers are widely used in various IoT and embedded systems applications, owing to their affordability and robust capabilities.
Esptool serves as a bridge between your computer and the ESP microcontroller, enabling you to perform a range of tasks, such as:
- Flashing Firmware: You can use esptool to write firmware onto the ESP8266 or ESP32. This is especially useful when you’re working on custom projects or updating your device’s software.
- Erasing Flash Memory: Sometimes, you need to wipe the flash memory on your microcontroller. Esptool allows you to do this efficiently.
- Managing Partitions: ESP microcontrollers often use a partition table to organize their storage. Esptool can assist in creating, updating, or modifying these partitions.
- Checking Chip Information: You can use esptool to retrieve critical information about your microcontroller, like its MAC address, chip ID, and flash size.
- Debugging: Esptool also facilitates debugging by allowing you to communicate with your microcontroller and read/write memory, making it a valuable tool for developers.
Key Features of Esptool
Now that you have a basic understanding of what esptool does, let’s explore some of its key features that make it an essential utility in the IoT development ecosystem.
- Cross-Platform Compatibility: Esptool is compatible with multiple operating systems, including Windows, macOS, and Linux. This makes it accessible to a wide range of developers.
- Simple Command Line Interface: Esptool offers a straightforward command-line interface (CLI) that makes it easy to integrate into build and deployment scripts. You can perform tasks with a single command, simplifying the flashing process.
- Flexible Firmware Flashing: It supports various firmware formats, such as binary files, ELF, and even .zip archives. This flexibility allows you to work with a wide range of firmware files.
- Speed and Efficiency: Esptool is known for its speed and efficiency when flashing firmware. It optimizes the writing process to reduce the time required to program an ESP device.

Installation and Dependencies
You will need Python 3.7 or newer installed on your system to use the latest version of esptool.py. If your use case requires Python 2.7, 3.4, 3.5, or 3.6, please use esptool.py v3.3.* instead.
While OS X comes with many Unix utilities, those familiar with Linux systems will notice one key component missing: a package manager. Homebrew fills this void.
To install Homebrew, open Terminal or your favourite OS X terminal emulator and run
/bin/bash -c "$(curl -fsSL https://raw.githubusercontent.com/Homebrew/install/master/install.sh)"
Now, we can install Python 3:
brew install python
This will take a minute or two.
python3 -m pip install –upgrade pip
- If the latest version is already installed, you will see a message saying, ‘requirement already satisfied.’
- If it’s not, you will see the version of pip that was just installed.

The latest stable esptool release can be installed from PyPI via pip:
pip install esptool
With some Python installations this may not work, and you’ll receive an error, try:
python -m pipinstall esptool or
pip3 install esptoolOr consult your Python installation manual for information about how to access pip.
Setuptools is also a requirement, which is not avapip is a package management system for Python, and if you’ve installed Python on your Mac, you probably already have pip. However, if not, it’s very easy to install, as long as you’re comfortable with Terminal — using either Ensurepip or Homebrew. And once you have downloaded and installed it, you can start downloading Python software packages.ilable on all systems by default. You can install it by a package manager of your operating system, or by pip install setuptools.
After installing, you will have esptool.py installed into the default Python executables directory, and you should be able to run it with the command esptool.py or python -m esptool. Please note that probably only python -m esptool will work for Pythons installed from Windows Store.
How to fix ‘zsh: command not found: python’
When trying to run python from terminal, it is possible to run into the following issue:
zsh: command not found: pythonThis can happen on any system, but does occur slightly more commonly on macOS since they removed native python support in macOS 12.3. Fortunately, this issue is easy to fix.

Step 1: make sure Python is installed
The first thing you should check is that python is installed. You can install python from terminal if you have brew installed by simply typing:
brew install pythonYou can also download the executable directly from the Python website to install it. Once python is installed, try running python from terminal again. If you still face the same issue, move to step 2.
Step 2: add python to zsh
The next step is to add python to zsh so that it will run upon typing the python command. You can do this by running the following in terminal:
echo "alias python=/usr/bin/python3" >> ~/.zshrcThis will configure your zsh profile to run /usr/bin/python3 when python is run. If you are still facing issues, ensure that python=$ where the $ sign should equal, the path python is installed on.
Step 3: restart terminal
Now that you’ve done that, simply restart your terminal. When you open it again, your python command should work successfully.
Using Esptool
After installation, you can use esptool with the following basic commands:
- Erasing Flash Memory:
esptool.py erase_flash- Flashing Firmware:
esptool.py write_flash -z 0x1000 firmware.bin- Checking Chip Information:
esptool.py chip_id- Managing Partitions:
Esptool can work with partition tables, but this is more advanced and requires knowledge of the ESP-IDF (ESP IoT Development Framework). You can explore this further in the official Espressif documentation.
Conclusion
Esptool is an invaluable tool for anyone working with Espressif’s ESP8266 and ESP32 microcontrollers. Its cross-platform compatibility, ease of use, and support for various tasks, including flashing firmware and managing memory, make it a must-have utility in the world of IoT and embedded systems development. Whether you are a hobbyist or a professional developer, esptool can simplify the development and deployment process for your ESP-based projects.